TG-3269 Gigabit PCI Network Adapter - TP-Link
TG-3269 Gigabit PCI Network Adapter - TP-Link
TG-3269 Gigabit PCI Network Adapter - TP-Link

Create successful ePaper yourself
Turn your PDF publications into a flip-book with our unique Google optimized e-Paper software.
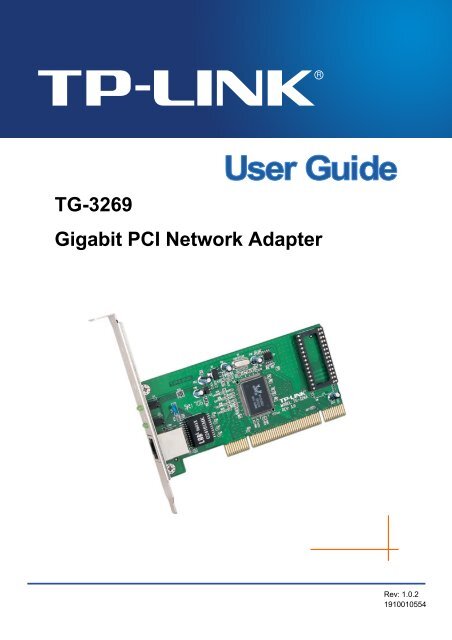
<strong>TG</strong>-<strong>3269</strong><br />
<strong>Gigabit</strong> <strong>PCI</strong> <strong>Network</strong> <strong>Adapter</strong><br />
Rev: 1.0.2<br />
1910010554
COPYRIGHT & TRADEMARKS<br />
Specifications are subject to change without notice.<br />
is a registered trademark<br />
of <strong>TP</strong>-LINK TECHNOLOGIES CO., LTD. Other brands and product names are trademarks or<br />
registered trademarks of their respective holders.<br />
No part of the specifications may be reproduced in any form or by any means or used to make any<br />
derivative such as translation, transformation, or adaptation without permission from <strong>TP</strong>-LINK<br />
TECHNOLOGIES CO., LTD. Copyright © 2012 <strong>TP</strong>-LINK TECHNOLOGIES CO., LTD. All rights<br />
reserved.<br />
http://www.tp-link.com
FCC STATEMENT<br />
This equipment has been tested and found to comply with the limits for a Class B digital device,<br />
pursuant to part 15 of the FCC Rules. These limits are designed to provide reasonable protection<br />
against harmful interference in a residential installation. This equipment generates, uses and can<br />
radiate radio frequency energy and, if not installed and used in accordance with the instructions,<br />
may cause harmful interference to radio communications. However, there is no guarantee that<br />
interference will not occur in a particular installation. If this equipment does cause harmful<br />
interference to radio or television reception, which can be determined by turning the equipment off<br />
and on, the user is encouraged to try to correct the interference by one or more of the following<br />
measures:<br />
• Reorient or relocate the receiving antenna.<br />
• Increase the separation between the equipment and receiver.<br />
• Connect the equipment into an outlet on a circuit different from that to which the receiver<br />
is connected.<br />
• Consult the dealer or an experienced radio/ TV technician for help.<br />
This device complies with part 15 of the FCC Rules. Operation is subject to the following two<br />
conditions:<br />
1) This device may not cause harmful interference.<br />
2) This device must accept any interference received, including interference that may<br />
cause undesired operation.<br />
Any changes or modifications not Expressly approved by the party responsible for compliance<br />
could void the user’s authority to operate the equipment.<br />
CE Mark Warning<br />
This is a class B product. In a domestic environment, this product may cause radio interference, in<br />
which case the user may be required to take adequate measures.
<strong>TP</strong>-LINK TECHNOLOGIES CO., LTD<br />
DECLARATION OF CONFORMITY<br />
For the following equipment:<br />
Product Description: <strong>Gigabit</strong> <strong>PCI</strong> <strong>Network</strong> <strong>Adapter</strong><br />
Model No.: <strong>TG</strong>-<strong>3269</strong><br />
Trademark: <strong>TP</strong>-LINK<br />
We declare under our own responsibility that the above products satisfy all the technical<br />
regulations applicable to the product within the scope of Council Directives:<br />
Directives 2004 / 108 / EC, Directives 2006 / 95 / EC<br />
The above product is in conformity with the following standards or other normative documents<br />
EN 55022:2006+A1:2007<br />
EN 55024:1998+A1:2001+A2:2003<br />
EN 61000-3-2:2006+A1:2009+A2:2009<br />
EN 61000-3-3:2008<br />
EN 60950-1:2006+A11:2009+A1:2010<br />
The product carries the CE Mark<br />
Person is responsible for marking this declaration:<br />
Yang Hongliang<br />
Product Manager of International Business<br />
Date of Issue: 2012<br />
<strong>TP</strong>-LINK TECHNOLOGIES CO., LTD.<br />
Building 24 (floors 1, 3, 4, 5), and 28 (floors 1-4) Central Science and Technology Park,<br />
Shennan Rd, Nanshan, Shenzhen, China
CONTENTS<br />
Package Contents .................................................................................................... 1<br />
Chapter 1. Introduction ........................................................................................ 2<br />
1.1 Overview of the product...................................................................................................... 2<br />
1.2 Features ............................................................................................................................. 2<br />
1.3 LED Status ......................................................................................................................... 3<br />
Chapter 2. Installation Guide ............................................................................... 4<br />
2.1 Hardware Installation.......................................................................................................... 4<br />
2.2 Software Installation ........................................................................................................... 5<br />
2.2.1 For Windows XP.......................................................................................................... 5<br />
2.2.2 For Windows 7 .......................................................................................................... 12<br />
2.2.3 For Windows Vista .................................................................................................... 18<br />
Appendix A: Specifications................................................................................... 26<br />
Appendix B: Troubleshooting............................................................................... 27
<strong>TG</strong>-<strong>3269</strong><br />
<strong>Gigabit</strong> <strong>PCI</strong> <strong>Network</strong> <strong>Adapter</strong><br />
Package Contents<br />
The following contents should be found in your box:<br />
‣ One <strong>TG</strong>-<strong>3269</strong> <strong>Gigabit</strong> <strong>PCI</strong> <strong>Network</strong> <strong>Adapter</strong><br />
‣ Quick Installation Guide<br />
‣ One Resource CD for <strong>TG</strong>-<strong>3269</strong>, including:<br />
• Drivers<br />
• User Guide<br />
• Other Helpful Information<br />
Note:<br />
Make sure that the package contains the above items. If any of the listed items is damaged or<br />
missing, please contact your distributor.<br />
Conventions<br />
The “<strong>Adapter</strong>” mentioned in this user guide stands for <strong>TG</strong>-<strong>3269</strong> <strong>Gigabit</strong> <strong>PCI</strong> <strong>Network</strong> <strong>Adapter</strong><br />
without any explanations.<br />
1
<strong>TG</strong>-<strong>3269</strong><br />
<strong>Gigabit</strong> <strong>PCI</strong> <strong>Network</strong> <strong>Adapter</strong><br />
Chapter 1. Introduction<br />
1.1 Overview of the product<br />
<strong>TG</strong>-<strong>3269</strong> is a highly integrated and cost-effective single-chip <strong>Gigabit</strong> Ethernet <strong>Adapter</strong> that<br />
provides 32-bit performance, <strong>PCI</strong> bus master capability, and full compliance with IEEE 802.3<br />
10Base-T, IEEE802.3u 100Base-TX and IEEE 802.3ab 1000Base-T specifications. It also<br />
supports ACPI, <strong>PCI</strong> power management for modern operating systems that are capable of<br />
Operating System Directed Power Management (OSPM) to achieve the most efficient power<br />
management.<br />
Through the aid of a VLAN membership, <strong>TG</strong>-<strong>3269</strong> adheres to the 802.1Q for multiple VLAN<br />
support, and 802.1P for packet prioritization. With 802.1Q support, server resources can be<br />
shared with multiple VLANs when used in conjunction with any 802.1Q-enabled Switch. With the<br />
802.1p support, <strong>TG</strong>-<strong>3269</strong> allows a range of Ethernet packets to be prioritized from a critical to a<br />
non-critical designation through a priority tag.<br />
<strong>TG</strong>-<strong>3269</strong> supports Full Duplex operations at 10/100/1000 Mbps data speeds used in conjunction<br />
with 802.3x flow control support. With 802.3x flow control <strong>TG</strong>-<strong>3269</strong> uses both asymmetric and<br />
symmetric functions via the MAC control pause function. Any participating 802.3x flow control<br />
node can be controlled by initiating a pause control to stop incoming network traffic, to further<br />
reduce network congestion.<br />
By default <strong>TG</strong>-<strong>3269</strong> supports the standard 1518 Byte frame size. In addition, <strong>TG</strong>-<strong>3269</strong> can also be<br />
configured to use a maximum Jumbo Frame size of up to 7680 Bytes.<br />
It includes an interface for a boot ROM and can be used in diskless workstations, providing<br />
maximum network security and ease of management.<br />
Also, being <strong>PCI</strong> 2.2 and 2.3 compliant, <strong>TG</strong>-<strong>3269</strong> works with 32-bit 33/66MHz <strong>PCI</strong> busses. This<br />
compatibility provides users with an easy migration path to increase performance between<br />
servers and workstations for large file transfer, video editing and server clustering for data<br />
intensive applications.<br />
1.2 Features<br />
‣ Integrated Ethernet MAC, Physical chip and transceiver in one chip<br />
‣ Complies with the IEEE802.1P, IEEE802.1Q, IEEE802.3 10Base-T, IEEE802.3u<br />
100Base-TX and IEEE802.3ab 1000Base-T standard<br />
‣ Compliant to <strong>PCI</strong> Revision 2.1/2.2/2.3<br />
‣ Supports Full Duplex Flow Control (IEEE 802.3x)<br />
2
<strong>TG</strong>-<strong>3269</strong><br />
<strong>Gigabit</strong> <strong>PCI</strong> <strong>Network</strong> <strong>Adapter</strong><br />
‣ <strong>PCI</strong> local bus single-chip Ethernet controller<br />
‣ Supports ACPI, <strong>PCI</strong> power management<br />
‣ Supports Auto-Negotiation function, Auto-detects network speed<br />
‣ Contains two large independent receive and transmit FIFOs<br />
‣ One S<strong>TP</strong>/U<strong>TP</strong> connector<br />
‣ Provides LEDs to indicate network <strong>Link</strong>/Activity/Speed/ Duplex<br />
‣ Supports smart remote boot ROM<br />
‣ Supports Drivers for Linux-2.4.x, Linux-2.6.x, Windows 7 (32bit/ 64bit), Windows XP,<br />
Windows 2000, and Windows Vista (32bit/ 64bit)<br />
1.3 LED Status<br />
‣ 10 LED, 100 LED, 1000 LED<br />
They all indicate <strong>Link</strong>/Active/Speed status. When the 1000 LED is lit, it indicates adapter has been<br />
linked to network with the right speed of 1000Mbps. The flash 1000 LED indicates data<br />
transmission at the responding port. The 10 LED and 100 LED are similar to the 1000 LED.<br />
‣ FDX LED<br />
It indicates the status that whether or not the adapter works at full duplex mode. When the LED is<br />
lit the adapter works at full duplex mode. Otherwise the adapter works at half duplex mode.<br />
3
<strong>TG</strong>-<strong>3269</strong><br />
<strong>Gigabit</strong> <strong>PCI</strong> <strong>Network</strong> <strong>Adapter</strong><br />
Chapter 2. Installation Guide<br />
2.1 Hardware Installation<br />
To install the adapter, please follow these steps listed below:<br />
1. Turn off your computer and unplug the power cord and all cables.<br />
2. Remove your computer’s case cover.<br />
3. Locate an available <strong>PCI</strong> slot.<br />
4. Remove the screw that secures the back plate (the small piece of metal that covers the<br />
opening for <strong>PCI</strong> card on the back panel of your computer), then remove the back plate.<br />
5. Carefully insert the adapter into the <strong>PCI</strong> slot. Do not touch the metal connector on the<br />
adapter.<br />
6. Secure the adapter to the case using the screw you removed from the back plate.<br />
7. Reinstall your computer’s case cover.<br />
8. Plug in the power cord and other cables, and then turn on your computer.<br />
Note:<br />
When the hardware has been successfully installed on your computer, you will be prompted<br />
'Found New Hardware Wizard' (as shown in Figure 2-1 and Figure 2-2); please click Cancel,<br />
and then follow the Software Installation steps to install driver for your adapter.<br />
Figure 2-1 Found New Hardware Wizard in Windows XP<br />
4
<strong>TG</strong>-<strong>3269</strong><br />
<strong>Gigabit</strong> <strong>PCI</strong> <strong>Network</strong> <strong>Adapter</strong><br />
2.2 Software Installation<br />
Figure 2-2 Found New Hardware Wizard in Windows Vista<br />
The section will guide you through the installation procedures for Windows XP, Windows 7, and<br />
Windows Vista. Please carefully follow the steps.<br />
2.2.1 For Windows XP<br />
1. Insert the <strong>TP</strong>-LINK Resource CD into the CD-ROM drive.<br />
2. Right-click the icon My Computer on the desktop, and then click Manage.<br />
5
<strong>TG</strong>-<strong>3269</strong><br />
<strong>Gigabit</strong> <strong>PCI</strong> <strong>Network</strong> <strong>Adapter</strong><br />
Figure 2-3<br />
3. The Computer Management screen will appear as shown in Figure 2-4. Click Device<br />
Manager, and then you will see the various options on the right. Click <strong>Network</strong> adapters,<br />
and then from the drop-down list please find the new network adapter Realtek RTL<br />
8169/8110 Family <strong>PCI</strong> <strong>Gigabit</strong> Ethernet NIC (NDIS 6.20) you have installed. Right-click it,<br />
and then select Update Driver….<br />
Figure 2-4<br />
4. The Hardware Update Wizard window will show up as shown in Figure 2-5. Select Install<br />
from a list or specific location [Advanced],and then click Next.<br />
6
<strong>TG</strong>-<strong>3269</strong><br />
<strong>Gigabit</strong> <strong>PCI</strong> <strong>Network</strong> <strong>Adapter</strong><br />
Figure 2-5<br />
5. Select Don’t search. I will choose the driver to install, and then click Next.<br />
Figure 2-6<br />
7
<strong>TG</strong>-<strong>3269</strong><br />
<strong>Gigabit</strong> <strong>PCI</strong> <strong>Network</strong> <strong>Adapter</strong><br />
6. Click Have Disk….<br />
Figure 2-7<br />
7. Click Browse….<br />
Figure 2-8<br />
8
<strong>TG</strong>-<strong>3269</strong><br />
<strong>Gigabit</strong> <strong>PCI</strong> <strong>Network</strong> <strong>Adapter</strong><br />
8. Find the right product model (<strong>TG</strong>-<strong>3269</strong>)and operation system (Windows XP) in the<br />
resource CD directory and choose the .inf file, and then click Open.<br />
Figure 2-9<br />
9. Back to the Install From Disk screen, click OK.<br />
Figure 2-10<br />
9
<strong>TG</strong>-<strong>3269</strong><br />
<strong>Gigabit</strong> <strong>PCI</strong> <strong>Network</strong> <strong>Adapter</strong><br />
10. Click Next.<br />
Figure 2-11<br />
11. The Hardware Installation screen will pop up as shown in Figure 2-12; select Continue<br />
Anyway.<br />
Figure 2-12<br />
10
<strong>TG</strong>-<strong>3269</strong><br />
<strong>Gigabit</strong> <strong>PCI</strong> <strong>Network</strong> <strong>Adapter</strong><br />
12. Wait a few seconds for the installation.<br />
13. Click Finish to complete the installation.<br />
Figure 2-13<br />
Figure 2-14<br />
11
<strong>TG</strong>-<strong>3269</strong><br />
<strong>Gigabit</strong> <strong>PCI</strong> <strong>Network</strong> <strong>Adapter</strong><br />
2.2.2 For Windows 7<br />
1. Insert the <strong>TP</strong>-LINK Resource CD into the CD-ROM drive.<br />
2. Right-click the icon Computer on the desktop, and then click Manage.<br />
Figure 2-15<br />
3. The Computer Management screen will appear as shown in Figure 2-16. Click Device<br />
Manager, and then you will see the various options on the right. Click <strong>Network</strong> adapters,<br />
and then from the drop-down list please find the new network adapter Realtek RTL<br />
8169/8110 Family <strong>PCI</strong> <strong>Gigabit</strong> Ethernet NIC (NDIS 6.20) you have installed. Right-click it,<br />
and then select Update Driver Software….<br />
Figure 2-16<br />
4. The next screen will appear as shown in Figure 2-17. Select Browse my computer for<br />
driver software.<br />
12
<strong>TG</strong>-<strong>3269</strong><br />
<strong>Gigabit</strong> <strong>PCI</strong> <strong>Network</strong> <strong>Adapter</strong><br />
Figure 2-17<br />
5. Select Let me pick from a list of device drivers on my computer, and then click Next.<br />
Figure 2-18<br />
6. Click Have Disk… in the screen as shown in Figure 2-19.<br />
13
<strong>TG</strong>-<strong>3269</strong><br />
<strong>Gigabit</strong> <strong>PCI</strong> <strong>Network</strong> <strong>Adapter</strong><br />
Figure 2-19<br />
7. Click Browse… in the Install From Disk window as shown in Figure 2-20.<br />
Figure 2-20<br />
8. Find the right product model (<strong>TG</strong>-<strong>3269</strong>) and operation system (Windows 7) in the resource<br />
CD directory and choose the .inf file, and then click Open.<br />
14
<strong>TG</strong>-<strong>3269</strong><br />
<strong>Gigabit</strong> <strong>PCI</strong> <strong>Network</strong> <strong>Adapter</strong><br />
Figure 2-21<br />
9. Back to the Install From Disk window as shown in Figure 2-22, click OK.<br />
Figure 2-22<br />
10. Click Yes in the Update Driver Warning window to continue the installation.<br />
Figure 2-23<br />
15
<strong>TG</strong>-<strong>3269</strong><br />
<strong>Gigabit</strong> <strong>PCI</strong> <strong>Network</strong> <strong>Adapter</strong><br />
11. Click Next in the next screen as shown in Figure 2-24.<br />
Figure 2-24<br />
12. Select Install this driver software anyway in the Windows Security window as shown in<br />
Figure 2-25.<br />
Figure 2-25<br />
16
<strong>TG</strong>-<strong>3269</strong><br />
<strong>Gigabit</strong> <strong>PCI</strong> <strong>Network</strong> <strong>Adapter</strong><br />
13. Wait a few seconds for the installation.<br />
14. Click Close to complete the installation.<br />
Figure 2-26<br />
Figure 2-27<br />
17
<strong>TG</strong>-<strong>3269</strong><br />
<strong>Gigabit</strong> <strong>PCI</strong> <strong>Network</strong> <strong>Adapter</strong><br />
15. Click Yes in the System Settings Change window (as shown in Figure 2-28) to restart the<br />
computer, so that the installation will take effect.<br />
Figure 2-28<br />
2.2.3 For Windows Vista<br />
1. Insert the <strong>TP</strong>-LINK Resource CD into the CD-ROM drive.<br />
2. Right-click the icon Computer on the desktop, and then click Manage.<br />
Figure 2-29<br />
3. The Computer Management screen will appear as shown in Figure 2-30. Click Device<br />
Manager, and then you will see the various options on the right. Click <strong>Network</strong> adapters,<br />
and then from the drop-down list please find the new network adapter Realtek RTL<br />
8169/8110 Family <strong>PCI</strong> <strong>Gigabit</strong> Ethernet NIC (NDIS 6.20) you have installed. Right-click it,<br />
and then select Update Driver Software….<br />
18
<strong>TG</strong>-<strong>3269</strong><br />
<strong>Gigabit</strong> <strong>PCI</strong> <strong>Network</strong> <strong>Adapter</strong><br />
Figure 2-30<br />
4. The next screen will appear as shown in Figure 2-31. Select Browse my computer for<br />
driver software.<br />
Figure 2-31<br />
5. Select Let me pick from a list of device drivers on my computer, and then click Next.<br />
19
<strong>TG</strong>-<strong>3269</strong><br />
<strong>Gigabit</strong> <strong>PCI</strong> <strong>Network</strong> <strong>Adapter</strong><br />
Figure 2-32<br />
6. Click Have Disk… in the screen as shown in Figure 2-33.<br />
Figure 2-33<br />
20
<strong>TG</strong>-<strong>3269</strong><br />
<strong>Gigabit</strong> <strong>PCI</strong> <strong>Network</strong> <strong>Adapter</strong><br />
7. Click Browse… in the Install From Disk window as shown in Figure 2-34.<br />
Figure 2-34<br />
8. Find the right product model (<strong>TG</strong>-<strong>3269</strong>) and operation system (Window Vista) in the<br />
resource CD directory and choose the .inf file, and then click Open.<br />
Figure 2-35<br />
21
<strong>TG</strong>-<strong>3269</strong><br />
<strong>Gigabit</strong> <strong>PCI</strong> <strong>Network</strong> <strong>Adapter</strong><br />
9. Back to the Install From Disk window as shown in Figure 2-36, click OK.<br />
Figure 2-36<br />
10. Click Yes in the Update Driver Warning window to continue the installation.<br />
Figure 2-37<br />
22
<strong>TG</strong>-<strong>3269</strong><br />
<strong>Gigabit</strong> <strong>PCI</strong> <strong>Network</strong> <strong>Adapter</strong><br />
11. Click Next in the next screen as shown in Figure 2-24.<br />
Figure 2-38<br />
12. Select Install this driver software anyway in the Windows Security window as shown in<br />
Figure 2-39.<br />
Figure 2-39<br />
23
<strong>TG</strong>-<strong>3269</strong><br />
<strong>Gigabit</strong> <strong>PCI</strong> <strong>Network</strong> <strong>Adapter</strong><br />
13. Wait a few seconds for the installation.<br />
Figure 2-40<br />
24
<strong>TG</strong>-<strong>3269</strong><br />
<strong>Gigabit</strong> <strong>PCI</strong> <strong>Network</strong> <strong>Adapter</strong><br />
14. Click Close to complete the installation.<br />
Figure 2-41<br />
15. Click Yes in the System Settings Change window (as shown in Figure 2-42) to restart the<br />
computer, so that the installation will take effect.<br />
Figure 2-42<br />
25
<strong>TG</strong>-<strong>3269</strong><br />
<strong>Gigabit</strong> <strong>PCI</strong> <strong>Network</strong> <strong>Adapter</strong><br />
Appendix A: Specifications<br />
Normal<br />
Interface<br />
32-bit <strong>PCI</strong> interface<br />
Standards IEEE802.1P, IEEE802.1Q , IEEE802.3 10Base-T,<br />
IEEE802.3u 100Base-TX , IEEE 802.3ab 1000Base-T<br />
Software<br />
Transmission Rate<br />
Hardware<br />
Connector Supported<br />
IRQ Line<br />
I/O Address<br />
Drivers for Linux-2.4.x, Linux-2.6.x, Windows 7 (32bit / 64bit),<br />
Windows Vista (32bit / 64bit), Windows XP, Windows 2000<br />
10/100/1000Mbps<br />
IBM PC compatibles(it must have <strong>PCI</strong> slot)<br />
RJ45<br />
Assigned by system<br />
Assigned by system<br />
Environmental and Physical<br />
Temperature<br />
Humidity<br />
Power consumption<br />
0℃ ~ 40℃ (Operating)<br />
10% ~ 90%, Non-condensing<br />
4W (Max)<br />
26
<strong>TG</strong>-<strong>3269</strong><br />
<strong>Gigabit</strong> <strong>PCI</strong> <strong>Network</strong> <strong>Adapter</strong><br />
Appendix B: Troubleshooting<br />
1. What should I do if PC cannot find the new hardware?<br />
Check to see if the network adapter is inserted in the <strong>PCI</strong> slot properly; otherwise, please reinsert<br />
the adapter.<br />
If the problem remains, please try to change another <strong>PCI</strong> slot.<br />
2. What should I do if PC cannot identify the new hardware?<br />
If you couldn’t find the network adapter you’ve installed by going to “(My) Computer > Manager<br />
> Device Manager > <strong>Network</strong> <strong>Adapter</strong> >...”; please go to “(My) Computer > Manager ><br />
Device Manager > Other devices > Ethernet Controller”,and then follow the rest steps of<br />
software installation to update driver.<br />
27