FTP Server Application Guide for USB function - TP-Link
FTP Server Application Guide for USB function - TP-Link
FTP Server Application Guide for USB function - TP-Link
Create successful ePaper yourself
Turn your PDF publications into a flip-book with our unique Google optimized e-Paper software.
<strong>F<strong>TP</strong></strong> <strong>Server</strong> <strong>Application</strong> <strong>Guide</strong><br />
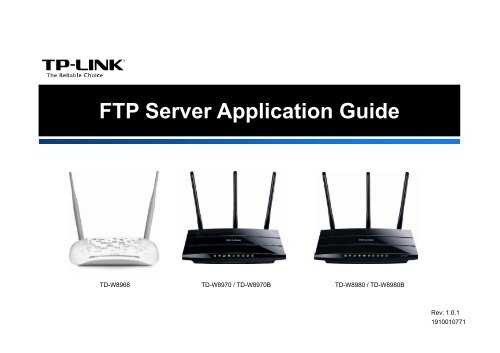
TD-W8968 TD-W8970 / TD-W8970B TD-W8980 / TD-W8980B<br />
Rev: 1.0.1<br />
1910010771
Contents<br />
Overview ......................................................................................... 1<br />
How to access <strong>F<strong>TP</strong></strong> <strong>Server</strong> ................................................................ 2<br />
LAN Access ........................................................................................................................ 2<br />
WAN Access....................................................................................................................... 7<br />
Extended <strong>Application</strong> ..................................................................... 13<br />
How to create a user account........................................................................................... 13<br />
How to add a shared folder .............................................................................................. 15<br />
‣ Set Access Authorization.............................................................................. 20<br />
Troubleshooting .............................................................................. 22
Overview<br />
<strong>F<strong>TP</strong></strong> (File Transfer Protocol) server feature allows you to share a <strong>USB</strong> storage device that’s connected to the modem router, to<br />
users in the local or public network.<br />
Typical Topology<br />
Here in this guide, we take the configuration procedures of TD-W8968 <strong>for</strong> example.<br />
Be<strong>for</strong>e setting up the <strong>F<strong>TP</strong></strong> <strong>Server</strong>, make sure you have the following devices:<br />
Computer with Windows 2000/ XP/ Vista/ 7/ 8/ Mac OS X/ Linux<br />
Storage devices with <strong>USB</strong> 2.0/3.0 port<br />
Note:<br />
(1) <strong>USB</strong> Storage Device stands <strong>for</strong> <strong>F<strong>TP</strong></strong> <strong>Server</strong> in this topology. Some <strong>USB</strong> storage devices may require using the external power.<br />
(2) Local PC here means the PC that is in the same subnet with the <strong>F<strong>TP</strong></strong> <strong>Server</strong> (TD-W8968). Local PC can access the <strong>F<strong>TP</strong></strong> <strong>Server</strong><br />
by LAN (Local Area Network), which is called LAN Access.<br />
(3) Remote PC here means the PC that is not in the same subnet with the <strong>F<strong>TP</strong></strong> Sever. Remote PC needs to go through the Internet<br />
if needed to access the <strong>F<strong>TP</strong></strong> server, which is called WAN Access.<br />
-1-
How to access <strong>F<strong>TP</strong></strong> <strong>Server</strong><br />
LAN Access<br />
The modem router’s <strong>F<strong>TP</strong></strong> <strong>Server</strong> <strong>function</strong> <strong>for</strong> Local PC is enabled by default, when the storage device is plugged into its <strong>USB</strong> port.<br />
Please follow the steps to access the <strong>F<strong>TP</strong></strong> server.<br />
• For Windows Users:<br />
Windows XP:<br />
• Go to Start > My Computer<br />
• Input ftp://192.168.1.1 in the address field<br />
• Press Enter<br />
Windows Vista/7:<br />
• Go to Start > Computer<br />
• Input ftp://192.168.1.1 in the address field<br />
• Click Go or press Enter<br />
Windows 8:<br />
• Move your mouse to the lower right corner and you<br />
will see Search icon in the Popups. Click it and<br />
search computer<br />
• Go to computer page, and input ftp://192.168.1.1<br />
in the address field<br />
• Click Go or press Enter<br />
-2-
• Input the default username and password: admin,<br />
admin<br />
• Click Log On<br />
-3-
• For Mac OS X Users:<br />
• On the top tray, go to Go > Connect to <strong>Server</strong><br />
• Input <strong>Server</strong> Address ftp://192.168.1.1<br />
• Click Connect<br />
• Select Registered User<br />
• Input the default username and password: admin,<br />
admin<br />
• Click Connect<br />
-4-
• For Linux Users:<br />
• On the top tray, go to Places > Connect to <strong>Server</strong><br />
• Choose Service type <strong>F<strong>TP</strong></strong>(with login)<br />
• Input <strong>Server</strong> 192.168.1.1<br />
• Click Connect<br />
• Select Connect as user<br />
• Input the default username and password: admin,<br />
admin<br />
• Click OK<br />
-5-
• For third party <strong>F<strong>TP</strong></strong> client software users (Here we take Cute<strong>F<strong>TP</strong></strong> Professional 8 <strong>for</strong> example.)<br />
• Open the Cute<strong>F<strong>TP</strong></strong><br />
• Go to File >New ><strong>F<strong>TP</strong></strong> Site or press Ctrl+N to<br />
open a new Site properties.<br />
• Set the dialog box as shown in the figure and click<br />
Connect.<br />
Note: The default user name/password of the Super<br />
User is admin/admin.<br />
Note:<br />
To set up different accounts with their own access rights, please log onto the web-based management page and set it on <strong>USB</strong><br />
Settings > <strong>F<strong>TP</strong></strong> <strong>Server</strong> and <strong>USB</strong> Settings > User Accounts.<br />
Now you have accessed the <strong>F<strong>TP</strong></strong> server, and you can read, write, and download the files on the <strong>F<strong>TP</strong></strong> server.<br />
-6-
WAN Access<br />
For WAN access to <strong>F<strong>TP</strong></strong> server, please configure the modem router first. Log onto the web-based management page, then go to<br />
<strong>USB</strong> Settings > <strong>F<strong>TP</strong></strong> <strong>Server</strong> and follow the steps in the figure below.<br />
Now your modem router has been configured. The IP behind Internet Address would be used to access the <strong>F<strong>TP</strong></strong> server. Here we<br />
take 218.18.0.163 as an example. Please follow the steps below to access the <strong>F<strong>TP</strong></strong> server.<br />
-7-
• For Windows Users:<br />
Windows XP:<br />
• Go to Start > My Computer<br />
• Input ftp://218.18.0.163 in the address field<br />
• Press Enter<br />
Windows Vista/7:<br />
• Go to Start > Computer<br />
• Input ftp://218.18.0.163 in the address field<br />
• Click Go or press Enter<br />
Windows 8:<br />
• Move your mouse to the lower right corner and you<br />
will see Search icon in the Popups. Click it and<br />
search computer<br />
• Go to computer page, and input ftp://218.18.0.163<br />
in the address field<br />
• Click Go or press Enter<br />
-8-
• Input the default username and password: admin,<br />
admin<br />
• Click Log On<br />
-9-
• For Mac OS X Users:<br />
• On the top tray, go to Go > Connect to <strong>Server</strong><br />
• Input <strong>Server</strong> Address ftp://218.18.0.163<br />
• Click Connect<br />
• Select Registered User<br />
• Input the default username and password: admin,<br />
admin<br />
• Click Connect<br />
-10-
• For Linux Users:<br />
• On the top tray, go to Places > Connect to <strong>Server</strong><br />
• Choose Service type <strong>F<strong>TP</strong></strong>(with login)<br />
• Input <strong>Server</strong> 218.18.0.163<br />
• Click Connect<br />
• Select Connect as user<br />
• Input the default username and password: admin,<br />
admin<br />
• Click OK<br />
-11-
• For third party <strong>F<strong>TP</strong></strong> client software users (Here we take Cute<strong>F<strong>TP</strong></strong> Professional 8 <strong>for</strong> example.)<br />
• Open the Cute<strong>F<strong>TP</strong></strong><br />
• Go to File >New ><strong>F<strong>TP</strong></strong> Site or press Ctrl+N to<br />
open a new Site properties.<br />
• Set the dialog box as shown in the figure and click<br />
Connect.<br />
Note: The default user name/password of the Super<br />
User is admin/admin.<br />
Note:<br />
To set up different user accounts with their own access rights to different folders, please log onto the web-based management page<br />
and set it on <strong>USB</strong> Settings > <strong>F<strong>TP</strong></strong> <strong>Server</strong> and <strong>USB</strong> Settings > User Accounts.<br />
Now you have accessed the <strong>F<strong>TP</strong></strong> server, and you can read, write, and download the files on the <strong>F<strong>TP</strong></strong> server.<br />
-12-
Extended <strong>Application</strong><br />
How to create a user account<br />
Log onto the web-based management page, then go to <strong>USB</strong> Settings > User Accounts and follow the steps in the figure below.<br />
Note:<br />
(1) The status of the new user is disabled by default. You need to click Enable in the Action column of user account table to enable<br />
-13-
folders access.<br />
(2) User name “admin*” is a “Super User” with full-access permission. Its action that could access all active volumes and shared<br />
folders is enabled by default.<br />
(3) The default user name/password of the Super User is admin/admin.<br />
(4) Currently, there is quantitative restriction of <strong>F<strong>TP</strong></strong> <strong>Server</strong> user. The modem router allows up to 5 users to log in to <strong>F<strong>TP</strong></strong> <strong>Server</strong> at<br />
the same time. There<strong>for</strong>e, if you want to log in, make sure that the number of login-user is less than the maximum quantity. Once<br />
the number of users had reached the maximum quantity, the following users would fail to log in even if they have input the<br />
correct username and password.<br />
(5) Different users can be assigned different access restrictions to the shared folder. For details, please refer to Set Access<br />
Authorization.<br />
-14-
How to add a shared folder<br />
Log onto the web-based management page, then go to <strong>USB</strong> Settings -><strong>F<strong>TP</strong></strong> <strong>Server</strong> and follow the steps in the<br />
figures below.<br />
-15-
-16-
-17-
-18-
Note:<br />
(1) The default shared folder volume share entire partition of the storage device plugged into the <strong>USB</strong> port.<br />
(2) You can share up to 10 folders simultaneously. If you want to share a new folder when the number has reached 10, you can<br />
delete an existing share folder and then add a new one.<br />
-19-
‣ Set Access Authorization<br />
There are three access authorization levels: full-access, read-only and no-access. The full-access user (i.e.<br />
super user) has full-access permission to add, delete and modify files on the <strong>F<strong>TP</strong></strong> server. The read-only user just<br />
has file-reading permission. And the no-access user is unable to access the <strong>F<strong>TP</strong></strong> server.<br />
If you want to set access authorization <strong>for</strong> a user (e.g. user1), please follow the steps illustrated in the figures<br />
below.<br />
-20-
-21-
Troubleshooting<br />
What can I do if I <strong>for</strong>get the password to access the <strong>F<strong>TP</strong></strong> server?<br />
Log onto the web-based management page, and then go to <strong>USB</strong> Settings ->User Accounts, please configure it<br />
according to the steps in the following figure.<br />
-22-


