Manual - BBQ Grills, Gas Grills Singapore
Manual - BBQ Grills, Gas Grills Singapore
Manual - BBQ Grills, Gas Grills Singapore

Create successful ePaper yourself
Turn your PDF publications into a flip-book with our unique Google optimized e-Paper software.
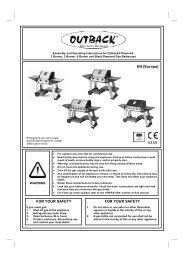
H.3 Fixing a <strong>Gas</strong> Hose to the Barbecue<br />
Connect the gas hose to the gas rail inlet on<br />
the left hand side of the barbecue. Do not<br />
overtighten. Do not use any sealing tape or<br />
liquid on the connection.<br />
H4. Fixing a Regulator to the <strong>Gas</strong> Bottle<br />
Confirm all barbecue control knobs are in the<br />
off position. Connect the regulator to the gas<br />
bottle according to your regulator and bottle<br />
dealer’s instructions.<br />
H5. Leak Testing (To be performed in a<br />
well-ventilated area.)<br />
Confirm all control knobs are in the off position.<br />
Open the gas control valve on the bottle or<br />
regulator. Check for leaks by brushing a<br />
solution of ½ water and ½ soap over all gas<br />
system joints, including all valve connections,<br />
hose connections and regulator connections.<br />
NEVER USE AN OPEN FLAME to test for<br />
leaks at anytime. If bubbles form over any of<br />
the joints, there is a leak. Turn off the gas<br />
supply and retighten all joints. Repeat test. If<br />
bubbles form again, do not use the barbecue.<br />
Please contact your local dealer for<br />
assistance. Leak test annually, and whenever<br />
the gas bottle is removed or replaced.<br />
I. Operation<br />
I1. Warning<br />
• Before proceeding, make certain that you<br />
understand the IMPORTANT<br />
INFORMATION section of this manual.<br />
I2. Preparation Before Cooking<br />
To prevent foods from sticking to the cooking<br />
grill, please use a long handled brush to apply<br />
a light coat of cooking or vegetable oil before<br />
each barbecuing session. (Note: When<br />
cooking for the first time, paint colours may<br />
change slightly as a result. This is normal<br />
and should be expected.)<br />
I3. Lighting the Barbecue<br />
• Open the barbecue hood.<br />
• Ensure all knobs are in the off position.<br />
Open the gas control valve on the gas<br />
bottle or regulator.<br />
• Push and turn the leftmost control knob to<br />
the high position. Press the ignition button<br />
rapidly several times until left portion of the<br />
burner is lit. If burner fails to ignite, turn<br />
control knob to the off position and turn gas<br />
off at the bottle or regulator. Wait five<br />
minutes, then repeat the above steps. After<br />
successful lighting of the left side, ignite the<br />
remaining portion of the burner. If the<br />
burner fails to ignite after following above<br />
procedure, turn all the knobs to the off<br />
position. Close the gas valve on the gas<br />
bottle. Wait 5 minutes, then repeat the<br />
above steps. If the barbecue still fails to<br />
light, please refer to the manual ignition<br />
instructions in section below.<br />
• After ignition, the burner should be burned<br />
at the high position for 3-5 minutes in order<br />
to preheat the barbecue. This process<br />
should be done before every cooking<br />
session. The hood (where applicable)<br />
should be open during preheating.<br />
• After completion of preheating, turn the<br />
burner to the low position for best cooking<br />
results.<br />
I4. <strong>Manual</strong> Ignition Instructions<br />
• Open the barbecue hood.<br />
• Insert lit match through the match-lighting<br />
hole on the right side of the barbecue.<br />
• Push and turn the rightmost control knob<br />
anti-clockwise to the high position.<br />
• After the right portion of the burner is lit,<br />
light the remaining portion of the burner.<br />
• If burner fails to ignite, contact your local<br />
dealer for assistance.<br />
• After ignition, the burner should be burned<br />
at the high position for 3-5 minutes in order<br />
to preheat the barbecue. This process<br />
should be done before every cooking<br />
session. The hood (where applicable)<br />
should be open during preheating.<br />
• After completion of preheating, turn the<br />
burner to the low position for best cooking<br />
results<br />
I5. Grill Cooking<br />
The burner heats up the flame tamer<br />
underneath the grill, which in turn heats the<br />
food on the grill. The natural food juices<br />
produced during cooking fall onto the hot flame<br />
tamer below and vaporise. The subsequent<br />
rising smoke bastes the food, as it travels<br />
upwards, imparting that unique barbecued<br />
flavour. More even cooking of food will be<br />
achieved by using the <strong>BBQ</strong> with the hood<br />
down. This should only be done with the<br />
burners on low.<br />
19