CALIBRATING THE NI 4350/4351 WITH CALIBRATION EXECUTIVE
CALIBRATING THE NI 4350/4351 WITH CALIBRATION EXECUTIVE
CALIBRATING THE NI 4350/4351 WITH CALIBRATION EXECUTIVE
You also want an ePaper? Increase the reach of your titles
YUMPU automatically turns print PDFs into web optimized ePapers that Google loves.
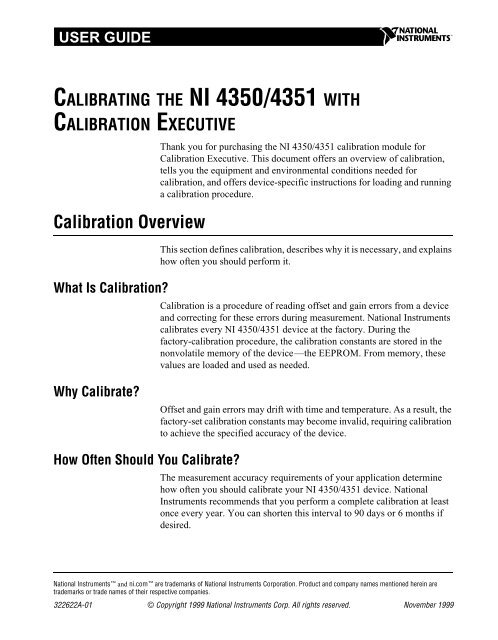
USER GUIDE<br />
<strong>CALIBRATING</strong> <strong>THE</strong> <strong>NI</strong> <strong>4350</strong>/<strong>4351</strong> <strong>WITH</strong><br />
<strong>CALIBRATION</strong> <strong>EXECUTIVE</strong><br />
Calibration Overview<br />
What Is Calibration?<br />
Thank you for purchasing the <strong>NI</strong> <strong>4350</strong>/<strong>4351</strong> calibration module for<br />
Calibration Executive. This document offers an overview of calibration,<br />
tells you the equipment and environmental conditions needed for<br />
calibration, and offers device-specific instructions for loading and running<br />
a calibration procedure.<br />
This section defines calibration, describes why it is necessary, and explains<br />
how often you should perform it.<br />
Calibration is a procedure of reading offset and gain errors from a device<br />
and correcting for these errors during measurement. National Instruments<br />
calibrates every <strong>NI</strong> <strong>4350</strong>/<strong>4351</strong> device at the factory. During the<br />
factory-calibration procedure, the calibration constants are stored in the<br />
nonvolatile memory of the device—the EEPROM. From memory, these<br />
values are loaded and used as needed.<br />
Why Calibrate?<br />
Offset and gain errors may drift with time and temperature. As a result, the<br />
factory-set calibration constants may become invalid, requiring calibration<br />
to achieve the specified accuracy of the device.<br />
How Often Should You Calibrate?<br />
The measurement accuracy requirements of your application determine<br />
how often you should calibrate your <strong>NI</strong> <strong>4350</strong>/<strong>4351</strong> device. National<br />
Instruments recommends that you perform a complete calibration at least<br />
once every year. You can shorten this interval to 90 days or 6 months if<br />
desired.<br />
National Instruments and ni.com are trademarks of National Instruments Corporation. Product and company names mentioned herein are<br />
trademarks or trade names of their respective companies.<br />
322622A-01 © Copyright 1999 National Instruments Corp. All rights reserved. November 1999
Equipment and Other Test Requirements<br />
This section describes the equipment and environmental conditions needed<br />
for calibration.<br />
Test Equipment<br />
To calibrate an <strong>NI</strong> <strong>4350</strong>/<strong>4351</strong>, you need a calibrator and a digital<br />
multimeter (DMM). The calibration procedure runs in automated mode if<br />
you use <strong>NI</strong>-IVI-supported calibrators and DMMs. National Instruments<br />
recommends you use the following standards:<br />
• Calibrator—Fluke 5700A<br />
• DMM—HP 3458A<br />
Note For an explanation of automated versus manual calibration, refer to the Automated<br />
Versus Manual Calibration section in Chapter 2, Calibration Executive System Overview,<br />
of your Calibration Executive Software User Manual.<br />
If you do not have this instrument, use the following accuracy requirements<br />
to select a substitute calibration standard:<br />
• A calibrator that is more accurate than the A/D converter (ADC) on the<br />
device—at least 10 ppm (0.001%) accurate.<br />
• A multiranging 5 1/2 digit DMM with an accuracy of 15 ppm.<br />
Connectors<br />
Although you can perform the calibration procedure without any special<br />
connectors, connecting and disconnecting can be easier with the correct<br />
equipment. The automated calibration procedure for <strong>NI</strong> <strong>4350</strong>/<strong>4351</strong> devices<br />
is designed to only work with the following equipment:<br />
• 68-to-68-pin shielded cable<br />
• <strong>NI</strong> <strong>4350</strong>/<strong>4351</strong> calibration fixture<br />
Calibrating the <strong>NI</strong> <strong>4350</strong>/<strong>4351</strong> 2 www.ni.com
Connection and Environmental Considerations<br />
You need to be aware of several connection and environmental concerns<br />
during calibration:<br />
• Keep connections to the device as short as possible. Long cables and<br />
wires can act as antennae, which could pick up extra noise that would<br />
affect measurements.<br />
• Use shielded copper wire for all cable connections to the device. It is<br />
often advisable to use twisted-pair wire to eliminate noise and thermal<br />
offsets.<br />
• Maintain a temperature of 18–28 °C.<br />
• Keep relative humidity below 80%.<br />
• Allow a warm-up time of at least 30 minutes for the device to ensure<br />
that the measurement circuitry is at a stable operating temperature.<br />
Calibration Temperature Considerations<br />
Temperature change affects an instrument’s measurement characteristics.<br />
To take these changes into account, the tested specifications include the<br />
effects of temperature drift. For the <strong>NI</strong> <strong>4350</strong>/<strong>4351</strong>, valid temperature drift<br />
is ±10 °C.<br />
Running the <strong>NI</strong> <strong>4350</strong>/<strong>4351</strong> Calibration Procedure<br />
Setting Up Your Device<br />
This section will help you set up and run your the calibration procedure. In<br />
automated mode, the calibration procedure should take approximately<br />
45 minutes. In manual mode, the calibration procedure can take as long<br />
as 1.5 hours.<br />
Make sure your device is ready for calibration by following these steps:<br />
1. Install the <strong>NI</strong> <strong>4350</strong>/<strong>4351</strong> device in your host computer.<br />
2. Connect the device to the <strong>NI</strong> <strong>4350</strong>/<strong>4351</strong> calibration fixture with a<br />
SH68-68 shielded cable.<br />
3. Configure the hardware with Measurement & Automation Explorer.<br />
Note Refer to the DAQ Quick Start Guide that you received with this procedure for<br />
additional configuration information.<br />
The calibration procedure will step you through any remaining<br />
connections.<br />
© National Instruments Corporation 3 Calibrating the <strong>NI</strong> <strong>4350</strong>/<strong>4351</strong>
Loading Calibration Procedures<br />
Start Calibration Executive, and follow the steps listed in the Calibration<br />
Configuration Wizard to load the <strong>NI</strong> <strong>4350</strong>/<strong>4351</strong> calibration procedure.<br />
Refer to Chapter 1, Introduction to Calibration Executive, in the<br />
Calibration Executive Software User Manual for more information on<br />
configuring and loading a calibration procedure.<br />
To calibrate your device, the Calibration Configuration Wizard requires<br />
you to enter the following device number assigned by Measurement &<br />
Automation Explorer when you configure your hardware.<br />
When the procedure is loaded, click Run Procedure to start the procedure.<br />
For more information on running a calibration procedure, refer to Chapter<br />
2, Calibration Executive System Overview, in your Calibration Executive<br />
Software User Manual.



![[270].pdf 37407KB Sep 02 2010 09:55:57 AM - ElectronicsAndBooks](https://img.yumpu.com/50350834/1/185x260/270pdf-37407kb-sep-02-2010-095557-am-electronicsandbooks.jpg?quality=85)
![draaien, A Viruly 1935 OCR c20130324 [320]. - ElectronicsAndBooks](https://img.yumpu.com/49957773/1/190x252/draaien-a-viruly-1935-ocr-c20130324-320-electronicsandbooks.jpg?quality=85)



![20051110 c20051031 [105].pdf 35001KB Feb 18 2009 08:46:32 PM](https://img.yumpu.com/48687202/1/190x253/20051110-c20051031-105pdf-35001kb-feb-18-2009-084632-pm.jpg?quality=85)
