Operation Olympic - Learning SPI's Great Battles of the American ...
Operation Olympic - Learning SPI's Great Battles of the American ...
Operation Olympic - Learning SPI's Great Battles of the American ...

You also want an ePaper? Increase the reach of your titles
YUMPU automatically turns print PDFs into web optimized ePapers that Google loves.
19<br />
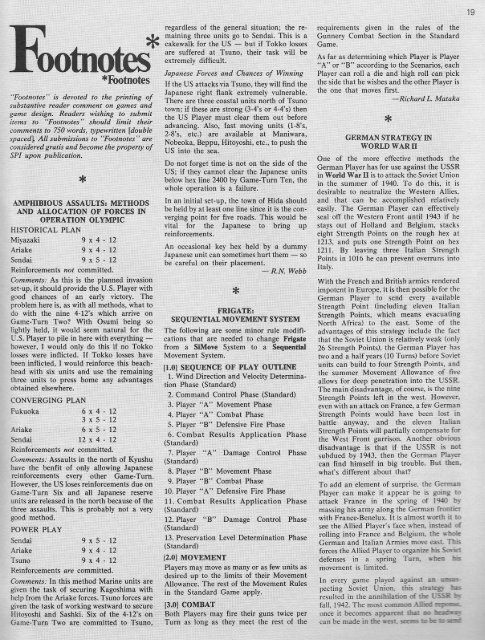
Eotnotes*<br />
*Footnotes<br />
"Footnotes" is devoted to <strong>the</strong> printing <strong>of</strong><br />
substantive reader comment on games and<br />
game design. Readers wishing to submit<br />
items to "Footnotes" should limit <strong>the</strong>ir<br />
comments to 750 words, typewritten [double<br />
spaced). All submissions to "Footnotes" are<br />
considered gratis and become <strong>the</strong> property <strong>of</strong><br />
SPI upon publication.<br />
*<br />
AMPIDBIOUS ASSAULTS: METHODS<br />
AND ALLOCATION OF FORCES IN<br />
OPERATION OLYMPIC<br />
HISTORICAL PLAN<br />
Miyazaki 9 x 4 - 12<br />
Ariake 9 x 4 - 12<br />
Sendai 9 x 5 - 12<br />
Reinforcements not committed.<br />
Comments: As this is <strong>the</strong> planned invasion<br />
set-up, it should provide <strong>the</strong> U.S. Player with<br />
good chances <strong>of</strong> an early victory. The<br />
problem here is, as with all methods, what to<br />
do with <strong>the</strong> nine 4-12's which arrive on<br />
Game-Turn Two? With Osumi being so<br />
lightly, held, it would seem natural for <strong>the</strong><br />
U.S. Player to pile in here with everything -<br />
however, I would only do this if no Tokko<br />
losses were inflicted. If Tokko losses have<br />
been inflicted, Iwould reinforce this beachhead<br />
with six units and use <strong>the</strong> remaining<br />
three units to press home any advantages<br />
obtained elsewhere.<br />
CONVERGING PLAN<br />
Fukuoka 6 x 4 - 12<br />
3xS-12<br />
Ariake 6 x 5 - 12<br />
Sendai 12 x 4 - 12<br />
Reinforcements not committed.<br />
Comments: Assaults in <strong>the</strong> north <strong>of</strong> Kyushu<br />
have <strong>the</strong> benfit <strong>of</strong> only allowing Japanese<br />
reinforcements every o<strong>the</strong>r Game-Turn.<br />
However, <strong>the</strong> US loses reinforcements due on<br />
Game-Turn Six and all Japanese reserve<br />
units are released in <strong>the</strong> north because <strong>of</strong> <strong>the</strong><br />
three assaults: This is probably not a very<br />
good method.<br />
POWER PLAY<br />
Sendai 9 x 5 - 12<br />
Ariake 9 x 4 - 12<br />
Tsuno 9 x 4 - 12<br />
Reinforcements are committed.<br />
Comments,' In this method Marine units are<br />
given <strong>the</strong> task <strong>of</strong> securing Kagoshima with<br />
help from <strong>the</strong> Ariake forces. Tsuno forces are<br />
given <strong>the</strong> task <strong>of</strong> working westward to secure<br />
Hitoyoshi and Sashki. Six <strong>of</strong> <strong>the</strong> 4-12'5 on<br />
Game-Turn Two are commitied/to Tsuno,<br />
regardless <strong>of</strong> <strong>the</strong> general situation; <strong>the</strong> remaining<br />
three units go to Sendai. This is a<br />
cakewalk for <strong>the</strong> US - but if Tokko losses<br />
are suffered at Tsuno, <strong>the</strong>ir task will be<br />
extremely difficult.<br />
Japanese Forces and Chances <strong>of</strong> Winning<br />
If <strong>the</strong> US attacks via Tsuno, <strong>the</strong>y will find <strong>the</strong><br />
Japanese right flank extremely vulnerable.<br />
There are three coastal units north <strong>of</strong> Tsuno<br />
town; if <strong>the</strong>se are strong (3-4's or 4-4's) <strong>the</strong>n<br />
<strong>the</strong> US Player must clear <strong>the</strong>m out before<br />
advancing. Also, fast moving units (1-8's,<br />
2-8's, etc.) are available at Maniwara,<br />
Nobeoka, Beppu, Hitoyoshi, etc., to push <strong>the</strong><br />
US into <strong>the</strong> sea.<br />
Do not forget time is not on <strong>the</strong> side <strong>of</strong> <strong>the</strong><br />
US; if <strong>the</strong>y cannot clear <strong>the</strong> Japanese units<br />
below hex line 2400 by Game-Turn Ten, <strong>the</strong><br />
whole operation is a failure.<br />
In an initial set-up, <strong>the</strong> town <strong>of</strong> Hida should<br />
be held by at least one.line since it is <strong>the</strong> converging<br />
point for five roads. This would be<br />
vital for <strong>the</strong> Japanese to bring up<br />
reinforcements.<br />
An occasional key hex held by a dummy<br />
Japanese unit can sometimes hurt <strong>the</strong>m - so<br />
be careful on <strong>the</strong>ir placement.<br />
-R.N. Webb<br />
*<br />
FRIGATE:<br />
SEQUENTIAL MOVEMENT SYSTEM<br />
The following are some minor rule modifications<br />
that are needed to change Frigate<br />
from a SiMove System to a Sequential<br />
Movement System.<br />
[1.0] SEQUENCE OF PLAY OUTLINE<br />
1. Wind Direction and Velocity Determination<br />
Phase (Standard)<br />
2. Command Control Phase (Standard)<br />
3. Player "A" Movement Phase<br />
4. Player "A" Combat Phase<br />
S. Player "B" Defensive Fire Phase<br />
6. Combat Results Application Phase<br />
(Standard)<br />
7. Player "A" Damage Control Phase<br />
(Standard)<br />
8. Player "B" Movement Phase<br />
9. Player "B" Combat Phase<br />
10. Player "A" Defensive Fire Phase<br />
11. Combat Results Application Phase<br />
(Standard)<br />
12. Player "B" Damage Control Phase<br />
(Standard)<br />
13. Preservation Level Determination Phase<br />
(Standard)<br />
(2.0) MOVEMENT<br />
Players may move as many or as few units as<br />
desired up. to <strong>the</strong> limits <strong>of</strong> <strong>the</strong>ir Movement<br />
Allowance. The rest <strong>of</strong> <strong>the</strong> Movement Rules<br />
in <strong>the</strong> Standard Game apply.<br />
[3.0J COMBAT<br />
Both Players may fire <strong>the</strong>ir guns twice per<br />
Turn as long as '<strong>the</strong>y meet <strong>the</strong> rest <strong>of</strong> <strong>the</strong><br />
requirements given in <strong>the</strong> rules <strong>of</strong> <strong>the</strong><br />
Gunnery Combat Section in <strong>the</strong> Standard<br />
Game.<br />
As far as determining which Player is Player<br />
"A" or "B" according to <strong>the</strong> Scenarios, each<br />
Player can roll a die and high roll can pick<br />
<strong>the</strong> side that he wishes and <strong>the</strong> o<strong>the</strong>r Player is<br />
<strong>the</strong> one that moves first.<br />
+Richard L. Mataka<br />
*<br />
GERMAN STRATEGY IN<br />
WORLD WAR II<br />
One <strong>of</strong> <strong>the</strong> more effective methods <strong>the</strong><br />
German Player has for use against <strong>the</strong> USSR<br />
in World War II is to attack <strong>the</strong> Soviet Union<br />
in <strong>the</strong> summer <strong>of</strong> 1940. To do this, it is<br />
desirable to neutralize <strong>the</strong> Western Allies,<br />
and that can be accomplished relatively<br />
easily. The German Player can effectively<br />
seal <strong>of</strong>f <strong>the</strong> Western Front until 1943 if he<br />
stays out <strong>of</strong> Holland and Belgium, stacks<br />
eight Strength Points on. <strong>the</strong> rough hex at<br />
1213, and puts one Strength Point on hex<br />
1211. By leaving three Italian Strength<br />
Points in 1016 he can prevent overruns into<br />
Italy.<br />
With <strong>the</strong> French and British armies rendered<br />
impotent in Europe, it is<strong>the</strong>n possible for <strong>the</strong><br />
German Player to send every available<br />
Strength Point (including eleven Italian<br />
Strength Points, which means evacuating<br />
North Africa) to <strong>the</strong> east. Some <strong>of</strong> <strong>the</strong><br />
advantages <strong>of</strong> this strategy include <strong>the</strong> fact<br />
that <strong>the</strong> Soviet Union is relatively weak (only<br />
26 Strength Points), <strong>the</strong> German Player has<br />
two and a half years (10 Turns) before Soviet<br />
units can build to four Strength Points, and<br />
<strong>the</strong> summer Movement Allowance <strong>of</strong> five<br />
allows for deep penetration into <strong>the</strong> USSR.<br />
The main disadvantage, <strong>of</strong> course, is <strong>the</strong> nine<br />
Strength Points left in <strong>the</strong> west. However,<br />
even with an attack on France, a few German<br />
Strength Points would have been lost in<br />
battle anyway, and <strong>the</strong> eleven Italian<br />
Strength Points will partially compensate f '"<br />
<strong>the</strong> West Front garrison. Ano<strong>the</strong>r obvious<br />
disadvantage is that if <strong>the</strong> USSR is nosubdued<br />
by 1943, <strong>the</strong>n <strong>the</strong> German Player<br />
can find himself in big trouble. But <strong>the</strong>n..<br />
what's different about that?<br />
To add an element <strong>of</strong> surprise, <strong>the</strong> German<br />
Player can make it appear he is going to<br />
attack France in <strong>the</strong> spring <strong>of</strong> 1940 b;<br />
massing his army along <strong>the</strong> German fronti<br />
with France-Benelux. It is almost worth IT to<br />
see <strong>the</strong> Allied Player's face when, instead<br />
rolling into France and Belgium. <strong>the</strong><br />
German and Italian Armies move east. r:;-<br />
forces <strong>the</strong> Allied Player to organize his -<br />
defenses in a spring Turn. h<br />
movement is limited,<br />
In every game played against<br />
pecting Soviet nion, this<br />
resulted in <strong>the</strong> annihilation<br />
fall, 1942, The most comm<br />
once it becomes appare<br />
can be made in <strong>the</strong> est,
20<br />
British and French Strength Points to <strong>the</strong><br />
USSR. As many as 24 British and French<br />
Strength Points in <strong>the</strong> USSR have been<br />
insufficient to prevent a German victory.<br />
Once <strong>the</strong> Soviet Union is secured, Germany<br />
can run over everything else in sight. Even if<br />
France is full <strong>of</strong> British and French units, <strong>the</strong><br />
German Player can easily win a war <strong>of</strong><br />
attrition because <strong>of</strong> his superior reinforcement<br />
and replacement rate.<br />
There is at least one Soviet strategy which<br />
will successfully counter a summer 1940<br />
<strong>of</strong>fensive. probably many Players already use<br />
it as a general Soviet strategy. It would be<br />
interesting to see what techniques MOVES<br />
readers can uncover to save <strong>the</strong> Soviet Union.<br />
-John and David Tate<br />
*<br />
TWO ADDITIONAL SCENARIOS<br />
FORSTARFORCE<br />
A.IntersteUar Readiness Maneuvers<br />
[1.0] There can be from two to five Players.<br />
Each deploys twelve StarForces on eight<br />
Gates placed on tertiary systems.<br />
[2.0] Each <strong>of</strong> <strong>the</strong> Gates <strong>of</strong> a Player may shift<br />
as many <strong>of</strong> his units per Turn as <strong>the</strong>re are<br />
Players in <strong>the</strong> Game. (Or twice that many if<br />
all are coming and going from/to <strong>the</strong> same<br />
place.)<br />
[3.0] A "unit" means one StarForce or four<br />
FakerForces.<br />
[4.0] Each uncontrolled system is able to<br />
enhance <strong>the</strong> shift <strong>of</strong> one unit <strong>of</strong> each Player's<br />
per Turn.<br />
[4.1] In all o<strong>the</strong>r respects, uncontrolled<br />
systems are neutral, are non-active,<br />
non-capturable Gates.<br />
[4.2] The enhancement factor <strong>of</strong> neutral<br />
systems is transferrable on a Turn- to-Turn<br />
basis between allies, providing consent is<br />
obtained.<br />
[4.3] Forces in <strong>the</strong> LZ <strong>of</strong> a neutral system<br />
must reveal <strong>the</strong>ir exact composition and<br />
must be represented on <strong>the</strong> Display.<br />
[4.4] A neutral system can never be used as<br />
an active Gate, but it may be broken-<strong>of</strong>f to.<br />
[5.0] Permanent neutralization <strong>of</strong> an<br />
opponent's Gate changes it into a neutral<br />
system.<br />
[6.0] When fighting tactically in a neutral<br />
system, a Gate is put on <strong>the</strong> Tacboard.<br />
Anyone who moves into <strong>the</strong> Gate's MLZ is<br />
immediately subject to a full strength attack<br />
by <strong>the</strong> Gate until he vacates. In addition:<br />
Anyone who a) attacks into <strong>the</strong> MLZ (and<br />
thus <strong>the</strong> Gate), b) attacks out <strong>of</strong> <strong>the</strong> MLZ<br />
is banned from using <strong>the</strong> enhancement <strong>of</strong><br />
that system for any <strong>of</strong> his ships for <strong>the</strong> rest <strong>of</strong><br />
<strong>the</strong> game.<br />
Anyone who, in addition, disrupts <strong>the</strong> Gate<br />
or neutralizes <strong>the</strong> Gate is also subject to<br />
attack by that Gate if any <strong>of</strong> his ships come<br />
into that LZ for <strong>the</strong> rest <strong>of</strong> <strong>the</strong> game.<br />
[6.1] In <strong>the</strong> Basic Game, at <strong>the</strong> start <strong>of</strong> any<br />
Tac'Turn, a Player can declare that some or<br />
all <strong>of</strong> his ships have gone into <strong>the</strong> Gate at<br />
which point similar rules apply. The o<strong>the</strong>r<br />
Playerfs) have <strong>the</strong> option <strong>of</strong> aborting any<br />
attacks against those ships.<br />
[6.2] While a Gate is engaged in attacking<br />
ships in its MLZ, it cannot enhance. Attacks<br />
against barbarian neutral attackers only take<br />
place if <strong>the</strong> Gate is doing nothing else. If a<br />
Gate is neutralized, it remains neutralized<br />
until no ships remain in its MLZ; i.e., on <strong>the</strong><br />
Turn after it is vacated it comes back. This<br />
simulates a voluntary shutting down <strong>of</strong> <strong>the</strong><br />
Gate in disgust at barbarians and not an<br />
actual stunning <strong>of</strong> its Teles<strong>the</strong>tics.<br />
[7.0] If, because <strong>of</strong> randomization, a<br />
'DESTR' chit comes up, remove <strong>the</strong> unit<br />
from play. This simulates a simulation <strong>of</strong> <strong>the</strong><br />
units destruction which would never take<br />
place in maneuvers.<br />
[8.0]The winner is determined on <strong>the</strong> basis <strong>of</strong><br />
a) whoever is left, and b) whoever has more <strong>of</strong><br />
his eight original Gates.<br />
[9.0] If a Player capitulates/surrenders/<br />
drops-out, try to divide his holdings<br />
equitably, discarding fractions. No one can<br />
hold more than eight Gates and twelve<br />
StarForces. Incidentally, capitulated Gates<br />
do not count towards determining how many<br />
<strong>of</strong> your eight original Gates you have left.<br />
[10.0] Use any or all optional rules; you<br />
might have some trouble finding enough<br />
counters to use Fakers, but perhaps that<br />
simulates an operational limitation.<br />
B. The Arrival <strong>of</strong> <strong>the</strong> Odons: 2836. A<br />
Solitaire Scenario.<br />
Rationale: After <strong>the</strong> conclusion <strong>of</strong> <strong>the</strong><br />
Xenophobe campaigns in 2787, <strong>the</strong> PSL<br />
instituted a program <strong>of</strong> sensors and military<br />
call-ups to avoid ever again being taken by<br />
surprise. In 2836, <strong>the</strong>y were, by five forces <strong>of</strong><br />
inshifting StarForces; <strong>the</strong>se would prove to<br />
be <strong>the</strong> Orions.<br />
The Xenophobe incursion into PSL space<br />
was part <strong>of</strong> a massive expansion by <strong>the</strong><br />
Xenophobe race, which was directed<br />
outwards against all neighboring sentient<br />
races. The Orions had finally come to <strong>the</strong><br />
conclusion <strong>the</strong> PSL had - <strong>the</strong> Xenophobe<br />
race had to be bottled up. Upon arriving at<br />
<strong>the</strong> Xeno system, <strong>the</strong>y found <strong>the</strong> LID, and<br />
<strong>the</strong>ir .comrnander was faced with deciding<br />
whe<strong>the</strong>r or not this was <strong>the</strong> work <strong>of</strong> ano<strong>the</strong>r<br />
race in self-defense, or one <strong>of</strong> <strong>the</strong> many rival<br />
Xenophobe families in self-agrandisment. He<br />
traced <strong>the</strong> trail <strong>of</strong> war-related debris back to<br />
<strong>the</strong> PSL. The Admirals <strong>the</strong>re had <strong>the</strong> same<br />
decision; friend or foe? Eventually, <strong>of</strong><br />
course, war was averted, but what if...<br />
[1.0] Orion deployment. Use one set <strong>of</strong> <strong>the</strong><br />
decimal chits. Pick a chit; if odd, <strong>the</strong> Orions<br />
enter from <strong>the</strong> positive side <strong>of</strong> <strong>the</strong> Display; if<br />
even, from <strong>the</strong> negative side. Replace <strong>the</strong> chit<br />
and draw five more. These represent <strong>the</strong> five<br />
Orion forces, <strong>the</strong> size <strong>of</strong> each being shown by<br />
<strong>the</strong> number on it. But randomize <strong>the</strong>m<br />
without looking; turn <strong>the</strong>m over. Draw one<br />
last chit and lay it aside unseen. This wiJIbe<br />
used to determine what decision <strong>the</strong> Orions<br />
came to.<br />
[1.1]Plot a course for each <strong>of</strong> <strong>the</strong> five chits to<br />
<strong>the</strong> nearest (to each) PSL home system. Each<br />
Turn, except as explained below, each force<br />
will shift one Lite along this course.<br />
[1.2] Take ano<strong>the</strong>r set <strong>of</strong> decimal chits and<br />
add sight unseen <strong>the</strong> four chits remaining<br />
from <strong>the</strong> first. Each Turn, this will be used<br />
according to <strong>the</strong> procedure outlined in<br />
section (38.3). When <strong>the</strong> second zero is<br />
drawn, <strong>the</strong> status <strong>of</strong> <strong>the</strong> Orions is revealed by<br />
turning over <strong>the</strong> set-aside chit. If it is odd,<br />
<strong>the</strong> Orions are hostile. If it is even, <strong>the</strong>y are<br />
peaceful (and <strong>the</strong> game is over).<br />
[2.0] PSL deployment: practicaIly nonexistant.<br />
At each tertiary system is based one<br />
StarShip. At each Secondary system, four<br />
ships are based. At each home system, <strong>the</strong>re<br />
is one StarForce based. The problem is<br />
thusly how to get it toge<strong>the</strong>r, and where to<br />
put it once assembled. StarS hips, unlike<br />
FakerForces, may not operate independently.<br />
[3.0]When a StarForce is created out <strong>of</strong> four<br />
StarS hips as per FakerForces rules, <strong>the</strong><br />
Player returns one <strong>of</strong> <strong>the</strong> previously drawn<br />
chits to <strong>the</strong> set <strong>of</strong> fuse-chits and draws again;<br />
this only happens once each Turn in which<br />
StarForces are created, no matter how many<br />
are formed. In addition, <strong>the</strong> shift <strong>of</strong> all Orion<br />
forces is increased that Turn by <strong>the</strong> number<br />
<strong>of</strong> StarForces created, to a maximum <strong>of</strong> five<br />
Lites total.<br />
[4.0] If <strong>the</strong> Orions should enter a LZ<br />
containing PSL forces, <strong>the</strong>ir status is<br />
immediately revealed, as is <strong>the</strong> composition<br />
<strong>of</strong> that force, and <strong>the</strong> Movement AIlowance<br />
for all Orion forces in <strong>the</strong> next Turn and for<br />
<strong>the</strong> rest <strong>of</strong> <strong>the</strong> game is five Lites. Of course,<br />
<strong>the</strong> Player may wish to send PSL forces into<br />
an Orion occupied LZ to investigate, or he<br />
may wish to pre-empt <strong>the</strong> fuse and attack <strong>the</strong><br />
Orions (in which case <strong>the</strong> Or ions are automaticaIly<br />
considered hostile for <strong>the</strong> rest <strong>of</strong><br />
<strong>the</strong> game). If <strong>the</strong> Orions should enter a home<br />
system before any <strong>of</strong> <strong>the</strong>se and before <strong>the</strong><br />
clock runs out, <strong>the</strong> same things apply.<br />
[5.0] The Orions, being in unfriendly if not<br />
unknown space, may never overshift, and<br />
may only enhance to satisfy (6.0).<br />
[6.0] If any combat occurs, use <strong>the</strong> strategictactical<br />
system. Draw a decimal chit for <strong>the</strong><br />
Orion forces to indicate what percentage<br />
(rounding up) <strong>of</strong> <strong>the</strong> available Strength<br />
Points will be aIlocated to <strong>the</strong> attack, after<br />
you have decided how many you are going to<br />
allocate. Each Orion StarForce always has a<br />
combat strength <strong>of</strong> three. The PSL Player<br />
may use reserves, <strong>the</strong> Orion never does; but<br />
use situational continuity rules. If any Orion<br />
forces are randomized, split <strong>the</strong>m up. If any<br />
are randomized outside known space<br />
{according to <strong>the</strong> chits) let <strong>the</strong>m be, and let<br />
<strong>the</strong>m stay <strong>the</strong>re. After suffering an in-space<br />
neutralization, <strong>the</strong>y head towards <strong>the</strong> nearest<br />
PSL home system to <strong>the</strong>ir new location.<br />
Single or separated Orion forces must be
21<br />
plotted to take advantage <strong>of</strong> every<br />
opportunity to regroup that would not delay<br />
<strong>the</strong>ir progress (that <strong>of</strong> <strong>the</strong> unit being joined<br />
or <strong>the</strong> group enhancing) more than one Turn.<br />
Units may never sit still in space for two<br />
Turns in a row in an un-neutralized state,<br />
unless <strong>the</strong>y're fighting. Also, regrouping may<br />
not take place if it increases <strong>the</strong> distance<br />
between any Orion unit and <strong>the</strong> system he's<br />
heading for.<br />
[7.0] The eventual objective <strong>of</strong> <strong>the</strong> Orions is<br />
<strong>the</strong> destruction <strong>of</strong> <strong>the</strong> PSL home systems<br />
along Xenophobe lines. Actually, if war does<br />
break out, it represents a strategic defeat for<br />
both sides. The PSL has to try and prevent it<br />
from becoming an overwhelming one.<br />
[8.0] Sequence <strong>of</strong> Play<br />
1. Pick from status-chit set.<br />
2. PSL move; pick again if any StarForces<br />
are formed.<br />
3. Orion move.<br />
4. Combat actions, if any.<br />
=Richard Outerbridge<br />
*<br />
SEQUENCE OF PLAY FLOWCHART<br />
FOR GLOBAL WAR<br />
With <strong>the</strong> advent <strong>of</strong> <strong>SPI's</strong> "monster" games,<br />
i.e., Global War and World War III, many<br />
Players find it difficult to get into <strong>the</strong> flow <strong>of</strong><br />
<strong>the</strong> game because <strong>of</strong> <strong>the</strong> many rules and <strong>the</strong><br />
fact that <strong>the</strong> game environment includes sea,<br />
air and land movement and combat. In order<br />
o make <strong>the</strong>se games easier to play, I<br />
normally will make a flow chart, using boxes<br />
that contain what is to be done at particular<br />
times during <strong>the</strong> Game-Turn, with arrows<br />
pointing to <strong>the</strong> next box which contains <strong>the</strong><br />
ext action that is to be taken that Turn.<br />
However, some games require a somewhat<br />
different approach. Some are better suited<br />
for an outline approach. USN and Third<br />
Reich were games in which I used <strong>the</strong> former<br />
technique, while World War III and Global<br />
War used <strong>the</strong> latter. Below is <strong>the</strong> outline that<br />
I am using for Global War. .In addition to<br />
hat is shown I have included next to each<br />
step <strong>of</strong> <strong>the</strong> outline <strong>the</strong> rule reference for that<br />
particular action, so that if fur<strong>the</strong>r clarificaion<br />
<strong>of</strong> a particular rule is desired, <strong>the</strong> Player<br />
can quickly. turn to <strong>the</strong> appropriate rules<br />
section.<br />
A. NAVAL STAGE<br />
. 1st Axis Naval Movement & Combat Phase<br />
Determine German SS Mode (l st 1944 turn<br />
onward) (12.21)<br />
Move MS (1204) (25 MP)<br />
Move Amphibious Units 02.51) (25 MP)<br />
Move ASW Units (3XZOC) (12.3)<br />
Movement & Combat <strong>of</strong> Surface A & B (30 MP)<br />
& SS (20 or 8 MP)<br />
Opponents Transit Attack (13.0)<br />
vs. SS in coastal hex by Surf A, SS, ASW<br />
(13.0)<br />
vs. Surf A & B by Surf A, SS, ASW (13.11)<br />
Combat Declared<br />
Retreat before Combat (except MS & ASW)<br />
(15.8)<br />
Transit Attacks by Surf A & ASW (15.8)<br />
Combat Resolution<br />
Counterattacks 05.7)<br />
<strong>American</strong> & Japanese advance after combat<br />
(12.14)<br />
Non-escorting Surface Units (except Jap. &<br />
Amer.) rtn. to port (12.0)<br />
Determination <strong>of</strong> Supply Status (16.0<br />
Remove Unsupplied Naval Units<br />
2. 1st Allied Naval Movement & Combat Phase<br />
3. 2nd Axis Naval Movement & Combat Phase<br />
(No German SS mode determination or supply<br />
determination)<br />
4. 2nd Allied Naval Movement & Combat Phase<br />
(No supply determination)<br />
5. Jrd Axis Naval Movement & Combat Phase (all<br />
Naval Units, except Amph, MS & Escorts must<br />
return to port at <strong>the</strong> end <strong>of</strong> <strong>the</strong> phase. No German<br />
SS mode determination)<br />
6. Jrd Allied Naval Movement & Combat Phase<br />
(all Naval Units, except Amph, MS & Escorts must<br />
return to port at <strong>the</strong> end <strong>of</strong> <strong>the</strong> phase)<br />
B. AIR STAGE<br />
1. Axis Air Movement Phase (17.1)<br />
Determination <strong>of</strong> Supply Status (1704)<br />
Remove Unsupplied Air Units<br />
AD Unit Movement 07.12)<br />
LRB Base Change (3xMovement Allowance)<br />
07.13)<br />
LRB Movement to target Industrial Hex<br />
(17.15, 17.16)<br />
2. Axis Air Combat Phase<br />
Target Hex AD Units Fire (17.31)<br />
Surviving LRB's attack target hex (17.31)<br />
Surviving LRB's return to original bases (17.17)<br />
3. Allied Air Movement Phase<br />
4. Allied Air Combat Phase<br />
C. LAND STAGE<br />
I. Axis Land Movement Phase<br />
Perform Overruns (5.6)<br />
Amphibious Assaults (13 hexes) (5.5)<br />
Opponent's Transit Attacks (13.0)<br />
2. Axis Land Combat Phase (8.0)<br />
Combat Resolution (8.6)<br />
Advance after Combat by Mech. Units (8.5)<br />
3. Axis Strategic Movement Phase<br />
Land Movement in Comrnun. Area (2 pts. to<br />
16 hexes) (SA)<br />
Sea Movement over MS Pipeline (25 hexes) (SA)<br />
Opponent's Transit Attacks (12042, 13.0)<br />
4. Allied Land Movement Phase<br />
5. Allied Land Combat Phase<br />
6. Allied Strategic Movement Phase<br />
D. PRODUCTION STAGE<br />
1. Reinforcement Phase<br />
Land & Air Units on Indus. Hexes (18.12)<br />
Naval Units on Indus.lPort Hexes (18.14)<br />
Fortifications on Friendly Hexes (18.16)<br />
Placement <strong>of</strong> destroyed Chinese unit (if applicable)<br />
(l9.51)<br />
Removal <strong>of</strong> Depleted Surf. A & ASW Units for<br />
Undepletion (18.3)<br />
2. Production Preparation Phase<br />
Lend Lease <strong>of</strong> Production Points (J 8.8)<br />
Determination <strong>of</strong> Prod. Points (18.0, 18.7)<br />
Production <strong>of</strong> Units (l8.1)<br />
3. Axis Declaration <strong>of</strong> Vichy France (when<br />
applicable) (20.12)<br />
French Navy Control Determination (20.13)<br />
A Player can modify <strong>the</strong> outline to suit his own<br />
preferences and tastes. Using an outline such<br />
as this makes <strong>the</strong> game flow more smoothly<br />
and helps prevent a Player from forgetting<br />
what action he must take next. It will also<br />
enable a Player that is unfamiliar with <strong>the</strong><br />
game to "get into" <strong>the</strong> game a lot faster.<br />
+John R. Heydt<br />
*<br />
OLYMPIC VICTORY<br />
Reading through <strong>the</strong> rules and setting up<br />
<strong>Operation</strong> <strong>Olympic</strong> <strong>the</strong> first time, I began to<br />
become aware <strong>of</strong> <strong>the</strong> potentially devastating<br />
effect <strong>of</strong> an all-out <strong>American</strong> attack using <strong>the</strong><br />
two nor<strong>the</strong>rn invasion' beaches. If <strong>the</strong><br />
<strong>American</strong> Player raises, to <strong>the</strong> maximum<br />
allowed, <strong>the</strong> forces deployed on Imari and<br />
Fukuoka invasion zones and uses two nor<strong>the</strong>rn<br />
invasion hexes <strong>of</strong> <strong>the</strong> Tsuno zone, he has<br />
an almost automatic solitaire version victory<br />
or a better than SO-SO chance <strong>of</strong> a two-Player<br />
victory. The three Marine counter stacks <strong>of</strong><br />
5-12's should be deployed in <strong>the</strong> lower<br />
identity number hexes <strong>of</strong> <strong>the</strong> Imari and<br />
Fukuoka zones to prevent <strong>the</strong>ir becoming<br />
Tokko losses. The two stacks in <strong>the</strong> Tsuno<br />
zone should move into hexes 2425 and 2526<br />
and should convert <strong>the</strong>ir supply counters to<br />
fortified supply counters as quickly as possible<br />
as <strong>the</strong>ir purpose is to draw Japanese<br />
units and to take as few casualties as<br />
possible.<br />
Solitaire Version: The <strong>American</strong> units on <strong>the</strong><br />
nor<strong>the</strong>rn beaches should press inland<br />
destroying strong Japanese units and shoving<br />
back weak units that will eventually form a<br />
protective barrier between <strong>the</strong> stronger<br />
Japanese units and <strong>the</strong> <strong>American</strong> units. The<br />
aim is to take <strong>the</strong> city <strong>of</strong> Fukuoka as well as<br />
isolate <strong>the</strong> peninsula Nagasaki lies on. With<br />
<strong>the</strong> invasions in <strong>the</strong> center and north, <strong>the</strong><br />
Japanese forces in <strong>the</strong> south will be automatically<br />
drawn north, giving you ei<strong>the</strong>r 440 or<br />
460 <strong>of</strong> <strong>the</strong> possible 500 points associated with<br />
<strong>the</strong> <strong>American</strong> objective line. The US Player's<br />
advantage is so great in this solitaire<br />
deployment that even after a 300 point<br />
Tokko loss, he still has a better than even<br />
chance <strong>of</strong> winning.<br />
Two Player Version: With a thinking<br />
Japanese Player, <strong>the</strong> <strong>American</strong> Victory Poin<br />
advantage in a nor<strong>the</strong>rn invasion is cut significantly<br />
due to <strong>the</strong> fact that <strong>the</strong> Japanese<br />
obviously leave a few units at <strong>the</strong> south end <strong>of</strong><br />
<strong>the</strong> map to prevent <strong>the</strong> 500 points associated<br />
with <strong>the</strong> <strong>American</strong> objective line. Howerer,<br />
<strong>the</strong> <strong>American</strong> Player will replace 175 <strong>of</strong> e<br />
missing 460 points by taking <strong>the</strong> Japanese<br />
twin cities <strong>of</strong> Kokuro and Yawata. Am .<br />
units in <strong>the</strong> north should stack in order<br />
eliminate Japanese units in <strong>the</strong> area as fast as<br />
possible. Until all Japanese units -<br />
beachhead area are eliminated, Am<br />
movement is severely restricted. T<br />
interdiction counters should be used<br />
roads around Hida and <strong>the</strong> remain<br />
plain between Kumamoto and Om<br />
air interdiction units are correctly
22<br />
<strong>the</strong> first Game-Turn, no Japanese units<br />
originally deployed south <strong>of</strong> <strong>the</strong> North-South<br />
Boundary will be able to engage <strong>American</strong><br />
units in <strong>the</strong> north prior to <strong>the</strong> Ninth Game-<br />
Turn. The two counter stacks on <strong>the</strong> Tsuno<br />
beach will effectively block <strong>of</strong>f <strong>the</strong> east coast<br />
road. With this deployment, <strong>the</strong> results are<br />
fairly predictable. With a zero Tokko loss,<br />
<strong>American</strong> victory is almost automatic; with a<br />
100 point Tokko loss, <strong>the</strong> <strong>American</strong> chances<br />
are slightly better than 50-50; with a 200<br />
point Tokko loss, <strong>the</strong> <strong>American</strong> chances are<br />
slim indeed as <strong>the</strong> maximum <strong>the</strong> <strong>American</strong><br />
Player can practically obtain is 250 to 290<br />
points, and with a 300 Tokko loss, <strong>American</strong><br />
victory is ma<strong>the</strong>matically impossible.<br />
Optional Rule, Free Deployment: If you<br />
allow <strong>the</strong> Japanese Player free deployment,<br />
<strong>the</strong> strong nor<strong>the</strong>rn invasion usually becomes<br />
little more than a threat to prevent overconcentration<br />
in <strong>the</strong> south. However, if you can<br />
get <strong>the</strong> Japanese Player to concede that since<br />
<strong>the</strong> entire city <strong>of</strong> Kagoshima is worth 200<br />
points, <strong>the</strong>n <strong>the</strong> city <strong>of</strong> Nagasaki should be<br />
worth at least 150 points, <strong>the</strong>n you will create<br />
an exceedingly variable and fairly balanced<br />
overall game, even with free deployment.<br />
Although ..•<strong>the</strong> nor<strong>the</strong>rn deployment <strong>of</strong><br />
<strong>American</strong> units is an example <strong>of</strong> gamesmanship,<br />
<strong>the</strong> historical parallel is logical. A<br />
massive nor<strong>the</strong>rn invasion has advantages for<br />
<strong>the</strong> US from <strong>the</strong> standpoint <strong>of</strong> both time and<br />
casualties. Securing <strong>the</strong> nor<strong>the</strong>rn portion <strong>of</strong><br />
Kyushu at an earlier date would be a significant<br />
advantage to a time conscious US Army<br />
trying to obtain forward bases for <strong>the</strong><br />
invasion <strong>of</strong> Honshu. The early fall <strong>of</strong> Nagasaki,<br />
Fukuoka, Kokura and Yawata would<br />
have had an effect on Japanese morale as<br />
well as giving <strong>American</strong> forces multiple port<br />
facilities <strong>of</strong> excellent quality at <strong>the</strong> earliest<br />
possible point in time. Kyushu would, in all<br />
likelihood, be significantly reduced, due to<br />
<strong>the</strong> fact that a major portion <strong>of</strong> <strong>the</strong> <strong>American</strong><br />
objectives, securing bases for <strong>the</strong> invasion <strong>of</strong><br />
Honshu, would have been taken before <strong>the</strong><br />
bulk <strong>of</strong> <strong>the</strong> Japanese force could have been<br />
brought to bear on <strong>the</strong> <strong>American</strong> forces. The<br />
<strong>American</strong> forces could <strong>the</strong>n have gone to a<br />
more defensive posture until most <strong>of</strong> <strong>the</strong><br />
Japanese force had worn itself out against a<br />
strong defensive line.<br />
. The game <strong>Operation</strong> <strong>Olympic</strong> may be just as<br />
historically accurate in <strong>the</strong> <strong>the</strong>oretical<br />
nor<strong>the</strong>rn invasion <strong>of</strong> Kyushu as it is in <strong>the</strong><br />
<strong>the</strong>oretical sou<strong>the</strong>rn invasion.<br />
-Charles R. Bowles<br />
*<br />
A WOMAN IN W ARGAMING<br />
You said in your recent issue that you would<br />
like to hear from women wargamers. Okay,<br />
you are now hearing from one <strong>of</strong> <strong>the</strong>m.<br />
Only 1%, huh? Well, I'm not surprised,<br />
actually. All <strong>of</strong> my opponents are male (for<br />
wargames). I play many non-wargames as<br />
well as simulations and for <strong>the</strong>se I have no<br />
difficulty getting women to play with me.<br />
Why? Well, I have my own <strong>the</strong>ory about that.<br />
1. Most historical simulation games spend a<br />
lot <strong>of</strong> time discussing and manipulating<br />
weapons. Equipment isn't all that interesting<br />
to most <strong>of</strong> us. We are interested in people. If<br />
<strong>the</strong>re was more emphasis on how certain<br />
battle outcomes affected <strong>the</strong> people, I would<br />
be interested.<br />
2. The same preoccupation with numbers<br />
and weapons makes most <strong>of</strong> <strong>the</strong> S&T<br />
Magazine uninteresting to me and most <strong>of</strong><br />
my female friends. I am most interested in<br />
<strong>the</strong> reviews and feedback analysis. I seldom<br />
even read <strong>the</strong> articles all <strong>the</strong> way through.<br />
3. It's hard for me to personalize many <strong>of</strong><br />
your games. Sniper! was one <strong>of</strong> <strong>the</strong> best in<br />
this respect. I play best when I can put myself<br />
in <strong>the</strong> place <strong>of</strong> one <strong>of</strong> <strong>the</strong> units and imagine<br />
what <strong>the</strong> battle is doing to my mind.<br />
4. History wasn't ever one <strong>of</strong>. my favorite<br />
subjects. I seldom got into what really<br />
happened. Your statistics and technical<br />
articles don't help me to overcome this<br />
aversion. The games that I consistently like<br />
are set in <strong>the</strong> few time slots in which I<br />
became interested (Roman and earlier, and<br />
<strong>the</strong> far future).<br />
I wish you luck. In my experience, women are<br />
not as aggressive as men. They get <strong>the</strong>ir<br />
enjoyment from historical simulations from<br />
<strong>the</strong> chance to relive and examine <strong>the</strong> results<br />
<strong>of</strong> battles on <strong>the</strong> life sytle <strong>of</strong> <strong>the</strong> people in <strong>the</strong><br />
country involved and on <strong>the</strong> thinking <strong>of</strong> one<br />
<strong>of</strong> <strong>the</strong> combatants. They are much more<br />
likely to ask "why" concerning a rule and to<br />
eliminate complexity where <strong>the</strong>y can. Who<br />
needs demoralization rules - <strong>the</strong>y know a<br />
demoralizing situation when <strong>the</strong>y see it.<br />
Which reminds me <strong>of</strong> one <strong>of</strong> my pet peeves.<br />
Why can't <strong>the</strong>re be more mention <strong>of</strong> militia<br />
and use <strong>of</strong> called-up, untrained troops on<br />
home ground. And why no mention <strong>of</strong><br />
civilian casualties?<br />
-Sandra McCoy<br />
*<br />
WOLFPACK TWO·PLAYER GAME<br />
Below are some rules changes needed to<br />
make Wolfpack a two-Player Game:<br />
[1.0] SEQUENCE OF PLAY<br />
A. CONVOY INITIAL PLACEMENT<br />
PHASE (standard)<br />
B. WEATHER PHASE (standard)<br />
1. Storm Movement Segment<br />
2. Fog & Storm Formation Segment<br />
3. Straggle Determination Segement<br />
C. AIR PHASE<br />
1. Air Escort Allocation Segment (standard)<br />
2. Air Search Segment<br />
D. NAVAL PHASE<br />
1. Convoy Movement Segment<br />
2. Removal <strong>of</strong> U-Boat Sighting Markers<br />
(standard)<br />
E. U-BOAT OPERATIONS PHASE<br />
1. Pack Formation and Reorganization<br />
Segment (standard)<br />
2. U-Boat Movement Segment<br />
3. U-Boat DePinning Segment (standard)<br />
F. COMBAT PHASE<br />
1. U-Boat Attack Segment<br />
2. Counterattack Segment<br />
3. Straggle Reduction Segment (standard)<br />
[2.0] MOVEMENT<br />
All Convoys have a maximum Movement<br />
Allowance <strong>of</strong> five. You may move <strong>the</strong>se units<br />
as many or as few hexes up to <strong>the</strong> limit <strong>of</strong><br />
<strong>the</strong>ir Movement Allowance.<br />
All Convoy Escort units are deployed<br />
face-down as in <strong>the</strong> Standard Game. Once<br />
<strong>the</strong>se units are uncovered, <strong>the</strong>y may freely<br />
roam within three hexes <strong>of</strong> <strong>the</strong>ir Convoy<br />
units. You can consider <strong>the</strong>se units as<br />
sub-hunters, but <strong>the</strong>y still have a maximum<br />
Movement Allowance <strong>of</strong> five. All o<strong>the</strong>r<br />
Standard Sighting, Anti-Submarine and<br />
Search Rules apply as in <strong>the</strong> Stand-ard Game.<br />
[3.0] U·BOAT MOVEMENT<br />
All U-Boat units are deployed face-down at<br />
all times. All U-Boat units have a maximum<br />
Movement Allowance <strong>of</strong> seven. With every<br />
Scenario you add six spotted markers<br />
face-down as dummy units: You may have<br />
your units in any size packs that you wish. All<br />
Picket Search and Combat Rules are <strong>the</strong><br />
same as in <strong>the</strong> Standard Game.<br />
[4.0] AIR SEARCHES<br />
During <strong>the</strong> Air Search Segment you take <strong>the</strong><br />
number <strong>of</strong> Air Units searching a hex and<br />
<strong>the</strong>n look at <strong>the</strong> range and you have to pick<br />
<strong>the</strong> hit within <strong>the</strong> spread <strong>of</strong> numbers as in <strong>the</strong><br />
Standard Game.<br />
[5.0] SUBMARINE SEARCH<br />
During <strong>the</strong> Submarine Search Segment, you<br />
take <strong>the</strong> number <strong>of</strong> Escort Combat Strength<br />
Units and try to determine if <strong>the</strong> unit<br />
becomes spotted. If your Escort unit has an<br />
Air Escort attached double your Combat<br />
Strength for this Phase only.<br />
[6.0] COMBAT PHASE<br />
After <strong>the</strong> U-Boat has sighted a Convoy with<br />
Escort, <strong>the</strong> Escort is flipped right side up and<br />
<strong>the</strong> U-Boat is flipped right side up. Combat<br />
takes place as in <strong>the</strong> Standard Game. But<br />
after all <strong>the</strong> results are noted, if <strong>the</strong> U-Boats<br />
do not become Pinned, <strong>the</strong>y are again flipped<br />
upside down, so that <strong>the</strong> Allied Player cannot<br />
see <strong>the</strong> value <strong>of</strong> <strong>the</strong> unit.<br />
-R.Mataka<br />
*