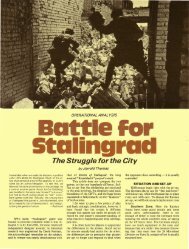
Terrible Swift Sword - Learning SPI's Great Battles of the American ...
Terrible Swift Sword - Learning SPI's Great Battles of the American ...
Terrible Swift Sword - Learning SPI's Great Battles of the American ...

Create successful ePaper yourself
Turn your PDF publications into a flip-book with our unique Google optimized e-Paper software.
4<br />
OPERATIONAL ANAL YSIS<br />
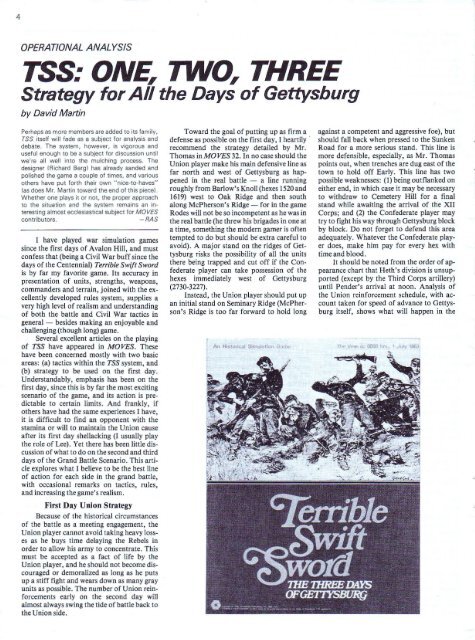
TSS: ONE, TWO, THREE<br />
Strategy for All <strong>the</strong> Days <strong>of</strong> Gettysburg<br />
by David Martin<br />
Perhaps as more members are added to its fam ilv,<br />
TSS itself will fade as a subject lor ana lysis and<br />
debate. The system , however, is vigorous and<br />
useful enough to be a subject for discussion until<br />
we're all well into <strong>the</strong> mulching process, The<br />
designer !Richard Berg) has already sanded and<br />
polished <strong>the</strong> game a couple <strong>of</strong> times, and various<br />
o<strong>the</strong>rs have pu t forth .<strong>the</strong>ir own "nice-to·haves"<br />
[as does Mr. Marti n towa rd <strong>the</strong> end <strong>of</strong> th is piecel .<br />
Whe<strong>the</strong>r one plays it or not, <strong>the</strong> proper approach<br />
to <strong>the</strong> situation and <strong>the</strong> system re mains an in·<br />
teresting almost ecclesiastical subject for MOVES<br />
contributors .<br />
- RA S<br />
1 have played war simulation games<br />
since <strong>the</strong> first days <strong>of</strong> Avalon Hill, and must<br />
confess that (being a Civil War buff since <strong>the</strong><br />
days <strong>of</strong> <strong>the</strong> Centennial) <strong>Terrible</strong> <strong>Swift</strong> <strong>Sword</strong><br />
is by far my favorite game. Its accuracy in<br />
presentation <strong>of</strong> units, strengths, weapons,<br />
commanders and terrain, joined with <strong>the</strong> excellently<br />
developed rules system, supplies a<br />
very high level <strong>of</strong> realism and understanding<br />
<strong>of</strong> both <strong>the</strong> battle and Civil War tactics in<br />
general - besides making an enjoyable and<br />
challenging (though long) game.<br />
Several excellent articles on <strong>the</strong> playing<br />
<strong>of</strong> TSS have appeared in MOVES. These<br />
have been concerned mostly with two basic<br />
areas: (a) tactics within <strong>the</strong> TSS.system, 'and<br />
(b) strategy to be used on <strong>the</strong> first day.<br />
Understandably, emphasis has been on <strong>the</strong><br />
first day, since this is by far <strong>the</strong> most exciting<br />
scenario <strong>of</strong> <strong>the</strong> game, and its action is pre·<br />
dictable to certain limits. And frankly, if<br />
o<strong>the</strong>rs have had <strong>the</strong> same experiences I have,<br />
it is difficult to find an opponent with <strong>the</strong><br />
stamina or will to maintain <strong>the</strong> Union cause<br />
after its first day shellacking (I usually play<br />
<strong>the</strong> role <strong>of</strong> Lee). Yet <strong>the</strong>re has been little discussion<br />
<strong>of</strong> what to do on <strong>the</strong> second and third<br />
days <strong>of</strong> <strong>the</strong> Grand Battle Scenario. This article<br />
explores what 1 believe to be <strong>the</strong> best line<br />
<strong>of</strong> action for each side in <strong>the</strong> grand battle,<br />
with occasional remarks on tactics, rules,<br />
and increasing <strong>the</strong> game's realism.<br />
First Day Union Strategy<br />
Because <strong>of</strong> <strong>the</strong> historical circumstances<br />
<strong>of</strong> <strong>the</strong> battle as a meeting engagement, <strong>the</strong><br />
Union player cannot avoid taking heavy losses<br />
as he buys time delaying <strong>the</strong> Rebels in<br />
order to allow his army to concentrate. This<br />
must be accepted as a fact <strong>of</strong> life by <strong>the</strong><br />
Union player, and he should not become discouraged<br />
or demoralized as long as he puts<br />
up a stiff fight and wears down as many gray<br />
units as possible. The number <strong>of</strong> Union reinforcements<br />
early on <strong>the</strong> second day will<br />
almost always swing <strong>the</strong> tide <strong>of</strong> battle back to<br />
<strong>the</strong> Union side.<br />
Toward <strong>the</strong> goal <strong>of</strong> putting up as firm a<br />
defense as possible on <strong>the</strong> first day, I heartily '<br />
recommend <strong>the</strong> strategy detailed by Mr.<br />
Thomas in MOVES 32. In no case should <strong>the</strong><br />
Union player make his main defensive line as<br />
far north and west <strong>of</strong> Gettysburg as happened<br />
in <strong>the</strong> real battle - a line running<br />
roughly from Barlow's Knoll (hexes 1520 and<br />
1619) west to Oak Ridge and <strong>the</strong>n south<br />
along McPherson's Ridge - for in <strong>the</strong> game<br />
Rodes will not be so incompetent as he was in<br />
<strong>the</strong> real battle (he threw his brigades in one at<br />
a time, something <strong>the</strong> modern gamer is <strong>of</strong>ten<br />
tempted to do but should be' extra careful to<br />
avoid). A major stand on <strong>the</strong> ridges <strong>of</strong> Gettysburg<br />
risks <strong>the</strong> possibility <strong>of</strong> all <strong>the</strong> units<br />
<strong>the</strong>re being trapped and cut <strong>of</strong>f if <strong>the</strong> Confederate<br />
player can take possession <strong>of</strong> <strong>the</strong><br />
hexes immediately west <strong>of</strong> Gettysburg<br />
(2730-3227).<br />
Instead, <strong>the</strong> Union player should put up<br />
an initial stand on Seminary Ridge (McPherson's<br />
Ridge is too far forward to hold long<br />
against a competent and aggressive foe), but<br />
should fall back when pressed to <strong>the</strong> Sunken<br />
Road for a more serious stand. This line is<br />
more defensible, especially, as Mr. Thomas<br />
points out, when trenches are dug east <strong>of</strong> <strong>the</strong><br />
town to hold <strong>of</strong>f Early. This line has two<br />
possible weaknesses: (1) being outflanked on<br />
ei<strong>the</strong>r end, in which case it may be necessary<br />
to withdraw to Cemetery Hill for a final<br />
stand while awaiting <strong>the</strong> arrival <strong>of</strong> <strong>the</strong> XII<br />
Corps; and (2) <strong>the</strong> Confederate player may<br />
try to fight his way through Gettysburg bkick<br />
by block. Do not forget to defend this area<br />
adequately. Whatever <strong>the</strong> Confederate player<br />
does, make him pay for every hex with<br />
time and blood.<br />
It should be noted from <strong>the</strong> order <strong>of</strong> appearance<br />
chart that Heth's division is unsupported<br />
(except by <strong>the</strong> Third Corps artillery)<br />
until Pender's arrival at noon. Analysis <strong>of</strong><br />
<strong>the</strong> Union reinforcement schedule, with account<br />
taken for speed <strong>of</strong> advance to Gettysburg<br />
itself, shows what will happen in <strong>the</strong>
game and what was experienced by <strong>the</strong> surprised<br />
Confederates in <strong>the</strong> real battle: from<br />
about 1100 until Pender's arrival, Heth is<br />
outnumbered by <strong>the</strong> Union forces on <strong>the</strong><br />
ridges west <strong>of</strong> Gettysburg. IfHeth's lines are<br />
overextended or too far forward and exposed,<br />
this will be a good time for a brief<br />
Union counterattack with <strong>the</strong> goal <strong>of</strong> inflicting<br />
casualties and regaining terri tory. However,<br />
<strong>the</strong> Union player should avoid wearing<br />
down his strength in any major attack. Instead,<br />
he should work for position, keeping<br />
<strong>the</strong> Confederates from outflanking him and<br />
in general just keeping <strong>the</strong>m <strong>of</strong>f balance.<br />
Doubleday's division, brought out when<br />
scheduled on <strong>the</strong> Fairfield Road, is especially<br />
useful for this purpose. The Confederate<br />
player will have to send a brigade <strong>of</strong> infantry<br />
(and he only has four available at <strong>the</strong> time) to<br />
watch Doubleday's movements. At <strong>the</strong> same<br />
time he will be unable to form a firm position<br />
on central Seminary Ridge (hexes 3733-4603)<br />
as long as Doubleday is in his rear. This will<br />
delay <strong>the</strong> Confederate attack on <strong>the</strong> Wlion<br />
center considerably. And yet, <strong>the</strong> Union<br />
player should be careful not to allow Doubleday<br />
to be cut <strong>of</strong>f - if he is trapped, he will<br />
suffer <strong>the</strong> fate <strong>of</strong> Custer. Once Doubleday's<br />
threat to <strong>the</strong> Confederate rear has been exhausted,<br />
he should be marched back toward<br />
Cemetery Ridge as intact as possible, since<br />
his large regiments will be needed later in <strong>the</strong><br />
day to hold <strong>of</strong>f <strong>the</strong> last Rebel attacks.<br />
The key to <strong>the</strong> game for <strong>the</strong> Union player<br />
is holding Cemetery Hill on <strong>the</strong> first day.<br />
Every move should be directed to this end .<br />
The Union player must prevent <strong>the</strong> Confederate<br />
player from blocking or delaying <strong>the</strong> arrival<br />
<strong>of</strong> <strong>the</strong> XII Corps, without which Cemetery<br />
Hill cannot be held. It will be very necessary<br />
to save some <strong>of</strong> Buford's cavalry for<br />
this, despite <strong>the</strong> strong temptation to use it to<br />
plug gaps elsewhere. The quicker movement<br />
rate <strong>of</strong> <strong>the</strong> cavalry, plus its high proportion<br />
<strong>of</strong> leaders (three for eight regiments, if all are<br />
still surviving) make <strong>the</strong>m <strong>the</strong> best units<br />
available to delay <strong>the</strong> Confederate rush<br />
towards Staging Area 6. The best place to<br />
deploy <strong>the</strong>m is in <strong>the</strong>' 'funnel" sou th <strong>of</strong> Benner's<br />
Hill, through which <strong>the</strong> 1st Maryland<br />
Cavalry and <strong>the</strong>n Jenkins' Cavalry Brigade<br />
will be madly charging towards Baltimore. If<br />
<strong>the</strong>se units can be slowed down enough, <strong>the</strong><br />
game can be salvaged. The XII Corps, arriving<br />
in Area 6, wi)) aid greatly in <strong>the</strong> defense <strong>of</strong><br />
Cemetery Hill. And even if <strong>the</strong> hill is lost,<br />
Confederate losses in taking it should be too<br />
heavy to permit <strong>the</strong>m to win <strong>the</strong> battle.<br />
Whatever <strong>the</strong> outcome <strong>of</strong> <strong>the</strong> Cemetery Hill<br />
fight, <strong>the</strong> arrival <strong>of</strong> <strong>the</strong> advance <strong>of</strong> <strong>the</strong> III<br />
Corps and darkness will stabilize <strong>the</strong> Union<br />
lines and save <strong>the</strong> supply train from capture.<br />
First Day: Confederate Strategy<br />
The Confederate goal on <strong>the</strong> first day is<br />
to capture Cemetery Hill with as few losses as<br />
possible while inflicting maximum losses on<br />
<strong>the</strong> enemy. The reinforcement schedule virtually<br />
guarantees a Confederate victory on<br />
<strong>the</strong> first day, but this victory must be as com·<br />
plete as possible if <strong>the</strong> South is to win <strong>the</strong><br />
whole battle, which runs ano<strong>the</strong>r two full<br />
days. Again, <strong>the</strong> best strategy for · accomplishing<br />
this has been discussed by Mr.<br />
Thomas in MOVES 32 (see also Berg in<br />
MOVES 29) . 1 wish only to add <strong>the</strong> observation<br />
that <strong>the</strong> Confederate player should al·<br />
ways be opportunistic during <strong>the</strong> early course<br />
<strong>of</strong> <strong>the</strong> battle, but should avoid a pitched battle<br />
until <strong>the</strong> arrival <strong>of</strong> Rodes at 1300. Then<br />
<strong>the</strong> strength and position (especially after<br />
'Early's arrival) guarantee success and <strong>the</strong> opportunity<br />
to exploit it completely. Too much<br />
fighting before noon only wears down<br />
Heth's division at a time when any success<br />
cannot be exploited because <strong>of</strong> <strong>the</strong> rapid concentration<br />
<strong>of</strong> <strong>the</strong> I and <strong>the</strong> XI Corps.<br />
As noted above, Heth should be aware<br />
<strong>of</strong> overextending himself between 1100 and<br />
noon. His best line <strong>of</strong> approach is to clear<br />
McPherson's Ridge, and <strong>the</strong>n wait for <strong>the</strong> arrival<br />
<strong>of</strong> Pender, who can immediately be<br />
thrown against <strong>the</strong> Federal left while Rodes<br />
and Early come in from <strong>the</strong> north. In no case<br />
should your brigades be committed piecemeal<br />
as Rodes and Heth did in <strong>the</strong> real battle<br />
under ra<strong>the</strong>r lax corps command. This serves<br />
only to chew up <strong>the</strong> brigades and render <strong>the</strong>m<br />
useless for <strong>the</strong> rest <strong>of</strong> <strong>the</strong> battle. Instead, wait<br />
until supporting units are available, and <strong>the</strong>n<br />
try to limit casualties to as few brigades as<br />
possible. Wh.erever <strong>the</strong> XI Corps is, attack it<br />
with vigor. It will break readily because <strong>of</strong> its<br />
low morale level. Once it gives in, a determined<br />
pursuit will force <strong>the</strong> collapse <strong>of</strong> <strong>the</strong><br />
whole Union line and dear <strong>the</strong> way for <strong>the</strong> attacK<br />
on Cemetery Hill.<br />
There is one small rule, 21.56 (published<br />
in <strong>the</strong> TSS Errata in MO VES 29), which governs<br />
<strong>the</strong> whole outcome <strong>of</strong> <strong>the</strong> game. This<br />
rule states that if <strong>the</strong> Confederate player exits<br />
five strength points through Staging Area 6,<br />
no Union reinforcements may be brought in<br />
from that area for <strong>the</strong> rest <strong>of</strong> <strong>the</strong> game. Exitfng<br />
<strong>the</strong>se 500 men fom Area 6 must be <strong>the</strong><br />
maj or Can federate goal on <strong>the</strong> first day,<br />
since <strong>the</strong> repercussions are colossal: <strong>the</strong> arrival<br />
<strong>of</strong> <strong>the</strong> XII Corps is delayed two hours,<br />
giving <strong>the</strong> Confederates time to take Cemetery<br />
Hill against <strong>the</strong> now demoralized 1 and<br />
XI Corps. Once <strong>the</strong> hill is taken, <strong>the</strong> Confederate<br />
player needs only to hold it for <strong>the</strong> rest<br />
<strong>of</strong> <strong>the</strong> game in order to win, thus being on <strong>the</strong><br />
defensive in a game system which definitely<br />
favors <strong>the</strong> defense. Secondly, with Area 6<br />
blocked, <strong>the</strong> XII Corps will be forced to<br />
come out in ano<strong>the</strong>r disadvantageous area,<br />
at a time (two hours later) and place where it<br />
will not be able to aid <strong>the</strong> defense <strong>of</strong> Ceme·<br />
tery Hill. The best move for <strong>the</strong> Union player<br />
would be to bring out <strong>the</strong> XII Corps in Area<br />
7. This abandons Cemetery Hill, but keeps<br />
<strong>the</strong> Corps intact as a rallying point for<br />
whatever I and XI Corps units can escape,<br />
while providing a nucleus and line for <strong>the</strong><br />
reinforcements arriving early on <strong>the</strong> second<br />
day.<br />
If <strong>the</strong> Union player brings out <strong>the</strong> XII<br />
Corps at 1840 or later in Area 5, difficulties<br />
are posed for <strong>the</strong> Confederate player which<br />
are bo<strong>the</strong>rsome but not insurmountable if he<br />
has a plan <strong>of</strong> action prepared. Two choices<br />
are available: (1) to block <strong>the</strong> whole Staging<br />
Area and force <strong>the</strong> XU Corps to fight its way<br />
onto <strong>the</strong> map and move on to Area 4 (or 7) at<br />
a fur<strong>the</strong>r loss <strong>of</strong> time; or (2) not to block<br />
Area 5, but to form a line behind <strong>the</strong> ridge<br />
running northwest from Benner's Hill and<br />
defeat <strong>the</strong> XII Corps piecemeal as it arrives,<br />
while making sure it cannot escape to <strong>the</strong><br />
south and <strong>the</strong> rest <strong>of</strong> <strong>the</strong> Federal army (I did<br />
this very successfully as <strong>the</strong> Confederate<br />
player in a large-scale miniatures game many<br />
years ago) . Ei<strong>the</strong>r choice forces <strong>the</strong> Confederate<br />
player to commit a large number <strong>of</strong><br />
troops to <strong>the</strong> area to watch for <strong>the</strong> XII Corps<br />
- troops which could be used more pr<strong>of</strong>itably<br />
attacking Cemetery Hill. (It is interesting<br />
to note that, in <strong>the</strong> actual battle, a good part<br />
<strong>of</strong> Early's division spent <strong>the</strong> evening <strong>of</strong> <strong>the</strong><br />
first day on <strong>the</strong> York Pike watching for rumored<br />
Union reinforcements from that sector.<br />
This was one <strong>of</strong> <strong>the</strong> reasons con tribu ti ng<br />
to Ewell's failure to attack Cemetery Hill<br />
that evening.)<br />
The best Confederate response to this<br />
situation would be to deploy two or three brigades<br />
north <strong>of</strong> Benner's Hill and block <strong>the</strong><br />
Hanover Road two or three hexes west <strong>of</strong> <strong>the</strong><br />
entry point <strong>of</strong> staging Area 5. Once <strong>the</strong> XII<br />
Corps comes on in this Area, it will not be<br />
able to advance very fast because <strong>of</strong> <strong>the</strong> unit<br />
astride <strong>the</strong> entry road. This will give <strong>the</strong> Confederate<br />
player a couple <strong>of</strong> turns to concentrate<br />
his forces in <strong>the</strong> threatened sector and<br />
route reinforcements to that area.<br />
Waiting for <strong>the</strong> XII Corps to appear will<br />
be nerve-wracking for <strong>the</strong> Confederate player,<br />
but fortunately in <strong>the</strong> meanwhile he can<br />
be venting his frustrations on <strong>the</strong> Union<br />
forces at Cemetery Hill. The hill will fall<br />
without <strong>the</strong> XII Corps present, but try to<br />
avoid a frontal assault. This will be much too<br />
costly. Instead, outflank <strong>the</strong> hill to <strong>the</strong> east or<br />
south and "bag" all <strong>the</strong> forces caught on <strong>the</strong><br />
hill. I f <strong>the</strong> XII Coprs appears in Area 7, <strong>the</strong><br />
Confederate player should dig in and prepare<br />
for <strong>the</strong> next day's battle (see below). If <strong>the</strong><br />
XII Corps has appeared in Area 4 or 5 (which<br />
is less likely but poses more <strong>of</strong> a challenge), it<br />
should be hemmed in and <strong>the</strong>n wiped out -<br />
into <strong>the</strong> night if necessary - by Anderson<br />
and Johnson. The ultimate "if" is if <strong>the</strong><br />
Union player holds <strong>the</strong> Corps <strong>of</strong>f <strong>the</strong> map indefinitely.<br />
All <strong>the</strong> Confederate player can do<br />
<strong>the</strong>n is to dig in near Areas 4 and 5 and wait;<br />
plans can be made for crushing <strong>the</strong> II Corps<br />
as it arrives in Area 7 in <strong>the</strong> morning <strong>of</strong><br />
July 2.<br />
The Second Day: If <strong>the</strong> Bluecoats<br />
Are Still on Cemetery HilI<br />
The strategy to be taken by each side<br />
after <strong>the</strong> first day naturally depends on <strong>the</strong><br />
results <strong>of</strong> <strong>the</strong> first day's battle. Basically,<br />
<strong>the</strong>re are two outcomes <strong>of</strong> <strong>the</strong> first day's<br />
fight: ei<strong>the</strong>r <strong>the</strong> Confederate player has<br />
taken Cemetery Hill or he hasn't.<br />
If <strong>the</strong> Confederate player has not taken<br />
Cemetery Hill by <strong>the</strong> end <strong>of</strong> July I, <strong>the</strong> battle<br />
is almost irretrievably lost. The odds are that<br />
he is playing an opponent <strong>of</strong> superior skill,<br />
and consequently it will be most difficult to<br />
drive him from his trenches on Cemetery· and<br />
Culp's Hill. In such a situation, <strong>the</strong> best <strong>the</strong><br />
Rebel player can hope for is that he might<br />
5
6<br />
catch <strong>the</strong> Union player posting his troops<br />
poorly on <strong>the</strong> sou<strong>the</strong>rn end <strong>of</strong> <strong>the</strong> field . If <strong>the</strong><br />
Union player is aggressive and forms a line in<br />
advance <strong>of</strong> Little Round Top, <strong>the</strong> Confederate<br />
player - unlike Longstreet - should<br />
strike quickly to drive him back and make a<br />
rush for Little Round Top before all <strong>the</strong><br />
Union reinforcements (especially <strong>the</strong> V[<br />
Corps) are up. If <strong>the</strong> hill is taken, <strong>the</strong> Union<br />
player will probably have to drain some <strong>of</strong><br />
his reserves from <strong>the</strong> Cemetery Hill area.<br />
This will be <strong>the</strong> perfect time for an attack on<br />
<strong>the</strong> Union right -<br />
but for heaven's sake,<br />
make it earlier in <strong>the</strong> day than Ewell did in<br />
<strong>the</strong> actual battle. Time and timing are <strong>of</strong> <strong>the</strong><br />
essence: <strong>the</strong> attack on <strong>the</strong> Federal right<br />
should be carefully timed to take advantage<br />
<strong>of</strong> <strong>the</strong> Union reaction to <strong>the</strong> attack on Little<br />
Round Top, while any delay in <strong>the</strong>se attacks<br />
only serves to allow more bluecoats to reach<br />
<strong>the</strong> critical areas <strong>of</strong> <strong>the</strong> field.<br />
~<br />
U<br />
As <strong>the</strong> reader has no doubt observed,<br />
this author highly approves Lee's strategy for<br />
<strong>the</strong> second day - for <strong>the</strong> purposes <strong>of</strong> this<br />
game - and laments <strong>the</strong> dilatoriness <strong>of</strong> his<br />
subordinates in carrying out his plans. Were<br />
<strong>the</strong> game map larger - as it could very usefully<br />
be, at least on <strong>the</strong> sou<strong>the</strong>astern and<br />
sou<strong>the</strong>rn edges - Longstreet's suggestion to<br />
march around <strong>the</strong> Union left would probably<br />
be better.<br />
If <strong>the</strong> Confederate strategy suggested<br />
above fails, Lee might as well pack up and<br />
return to Virginia. There is no way that his<br />
now battered army will be able to force a<br />
larger, fresher opponent from an entrenched<br />
position. Likewise, if <strong>the</strong> Union player<br />
chooses to remain on <strong>the</strong> passive defense for<br />
<strong>the</strong> whole second and third days <strong>of</strong> <strong>the</strong> battle,<br />
<strong>the</strong> Confederate commander will find <strong>the</strong><br />
Union fishhook line a tough nut to crack.<br />
Perhaps infiltration through <strong>the</strong> woods on<br />
<strong>the</strong> extreme Union righl or left might work,<br />
but <strong>the</strong> whole struggle will be uphill. As I<br />
pointed out above, <strong>the</strong> Confederate player<br />
has little chance to win if he does not take<br />
Cemetery Hill <strong>the</strong> first day.<br />
If <strong>the</strong> Union player has held on to Cemetery<br />
Hill <strong>the</strong> first day, no maller what <strong>the</strong><br />
price, <strong>the</strong> rest <strong>of</strong> <strong>the</strong> game should be a cakewalk,<br />
providing he makes no colossal blunders.<br />
After streng<strong>the</strong>ning <strong>the</strong> trenches on<br />
Cemetery Hill with fresh troops and artillery,<br />
<strong>the</strong> rest <strong>of</strong> <strong>the</strong> line down to Little Round Top<br />
should be carefully formed. Make sure both<br />
extreme flanks are secure. Then await <strong>the</strong> actions<br />
<strong>of</strong> <strong>the</strong> enemy, who must attack quickly.<br />
Your advantages are time (waiting for <strong>the</strong> VI<br />
Corps to arrive) and position (on <strong>the</strong> hills).<br />
Make <strong>the</strong> best <strong>of</strong> both, to force <strong>the</strong> enemy to<br />
wear down his forces. The V Corps should be<br />
kept as a reserve to meet <strong>the</strong> first major attack.<br />
Then, once <strong>the</strong> VI Corps arrives, begin<br />
a slow but steady counterattack rolling up<br />
<strong>the</strong> Confederate right flank from south to<br />
north. Your great superiority in numbers,<br />
fresh troops, artillery and ammunition<br />
should give you <strong>the</strong> decisive victory which<br />
will end <strong>the</strong> war immediately.<br />
The Second Day: If <strong>the</strong> Rebels<br />
Occupy Cemetery HiU<br />
The second possible outcome <strong>of</strong> <strong>the</strong> first<br />
day's fight is that <strong>the</strong> Confederates have<br />
taken Cemetery Hill. As outlined above, <strong>the</strong><br />
Confederate general should try to take <strong>the</strong><br />
hill with as few casualties as possible and also<br />
have Area 6 blocked. He <strong>the</strong>n has an even<br />
chance <strong>of</strong> winning <strong>the</strong> game, depending on<br />
<strong>the</strong> skill <strong>of</strong> his opponent. The Confederate<br />
chances <strong>of</strong> winning can be increased by following<br />
<strong>the</strong> suggestions outlined below. (I will<br />
deal first with both sides' strategies when all<br />
Union second/third day reinforcements are<br />
brought out in Areas 7 and 8.)<br />
Assuming that <strong>the</strong> XII Corps has arrived<br />
in Area 7 - <strong>the</strong> wiser Union strategy listed<br />
above - <strong>the</strong> Confederate player should not<br />
tangle w-ith it late on <strong>the</strong> first day. He must<br />
save all his time and strength to form lines<br />
solid enough to resist <strong>the</strong> inevitable Union<br />
counterattack. After whatever I and Xl<br />
Corps units within range have been mopped<br />
up, <strong>the</strong> Confederate player should immediately<br />
begin digging as many trenches as possible.<br />
And he definitely should not dig <strong>the</strong>m<br />
haphazardly, but should have plans ready to<br />
take best advantage <strong>of</strong> <strong>the</strong> terrain and<br />
available fields <strong>of</strong> fire . I have found <strong>the</strong><br />
following lines to work well in several games:<br />
(1) The main Union counterattack can<br />
be expected on <strong>the</strong> east side <strong>of</strong> <strong>the</strong> map. Here<br />
<strong>the</strong> Federal player will be driving to retake<br />
Baltimore Pike and to approach Cemetery<br />
Hill over <strong>the</strong> relatively open and vulnerable<br />
area to its sou<strong>the</strong>ast. To defend this area, an<br />
in-depth line will be needed. I usually run a<br />
primary line from <strong>the</strong> Angle (B5126) south<br />
along <strong>the</strong> broken ridge hexes <strong>of</strong> Cemetery<br />
Ridge to hex 4822, <strong>the</strong>n east along <strong>the</strong> slope<br />
and ridge hexes to hex COlli. Artillery<br />
should be posted in all hexes having an open<br />
field <strong>of</strong> fire. A second line, running from hex<br />
B5424 east through <strong>the</strong> woods to 5419, and<br />
<strong>the</strong>n running through <strong>the</strong> woods towards<br />
Powers Hill and/or along <strong>the</strong> small ridge to<br />
hex 5314 and <strong>the</strong> Baltimore Pike should also<br />
be fortified. If time and troops are available,<br />
fur<strong>the</strong>r trenches (with artillery as a reserve)<br />
on Cemetery Hill's vulnerable sou<strong>the</strong>ast<br />
slope will be useful.<br />
(2) The hardest area to defend is <strong>the</strong> extreme<br />
left <strong>of</strong> <strong>the</strong> Confederate line. Here I<br />
have found it best to form at least three lines<br />
<strong>of</strong> trenches between <strong>the</strong> woods south <strong>of</strong><br />
Power's Hill and <strong>the</strong> edge <strong>of</strong> <strong>the</strong> map.<br />
Recommended are lines at 0810-0801,<br />
0306-0301, and ano<strong>the</strong>r line closer to <strong>the</strong><br />
Pike. Much artillery will be needed in this<br />
area, since it is exposed and <strong>the</strong> front line will<br />
probably be overrun.<br />
(3) The position west <strong>of</strong> <strong>the</strong> Angle depends<br />
greatly on how far <strong>the</strong> III Corps advances<br />
up <strong>the</strong> Emmitsburg Road. A determined<br />
Union player will probably form it<br />
west and south <strong>of</strong> <strong>the</strong> ridge running nor<strong>the</strong>ast<br />
<strong>of</strong> <strong>the</strong> Peach Orchard. If he does, <strong>the</strong> Confederate<br />
player should entrench from <strong>the</strong><br />
Angle west to Seminary Ridge at hex A4402,<br />
taking advantage <strong>of</strong> <strong>the</strong> slope hexes on <strong>the</strong><br />
way. Artillery will also be needed here, since<br />
this position gives up a ra<strong>the</strong>r strong position<br />
to <strong>the</strong> III Corps (but in a cul-de-sac, see<br />
below).<br />
(4) The right <strong>of</strong> your line will extend<br />
from hex A4402-441O. From here any <strong>of</strong> <strong>the</strong><br />
numerous ridges running nor<strong>the</strong>ast/southwest<br />
can be used.<br />
The arrival <strong>of</strong> troops necessitates <strong>the</strong><br />
following posting <strong>of</strong> divisions. In all probability,<br />
Anderson's division will be facing <strong>the</strong><br />
<strong>the</strong> III Corps in <strong>the</strong> Confederate center, with<br />
an extension to cover <strong>the</strong> right for <strong>the</strong> moment.<br />
Johnson's fresh division is probably<br />
best used at this time on <strong>the</strong> left, with <strong>the</strong> rest<br />
<strong>of</strong> <strong>the</strong> II Corps. McLaws and Hood should<br />
be directed to <strong>the</strong> right as <strong>the</strong>y arrive (this,<br />
coincidentally, is <strong>the</strong> same relative order <strong>of</strong><br />
battle used by Lee).<br />
Dawn <strong>of</strong> <strong>the</strong> second day should now<br />
arise upon a strongly entrenched Confederate<br />
line, waiting to repel <strong>the</strong> charging blue<br />
columns. Yet <strong>the</strong> battle is definitely not yet<br />
won by <strong>the</strong> gray. The Confederate player will<br />
have to be extra careful in his defense, as he<br />
will not have a man, cannon, or shot to<br />
spare. The first need will be to react skillfully<br />
in <strong>the</strong> assignment <strong>of</strong> reserves to meet enemy<br />
attacks. If <strong>the</strong> Union player commits <strong>the</strong> II<br />
Corps as soon as it arrives, be sure to shift reserves<br />
to <strong>the</strong> center without being caught on<br />
<strong>the</strong> flank (especially <strong>the</strong> right). If <strong>the</strong> Union<br />
player is careless, you may be able to advance<br />
a division south along Willoughby Run and<br />
catch much <strong>of</strong> <strong>the</strong> III Corps in <strong>the</strong> cul-de-sac<br />
north and west <strong>of</strong> <strong>the</strong> Peach Orchard. If <strong>the</strong><br />
troops are available, this is definitely a pr<strong>of</strong>itable<br />
movement which will eliminate a<br />
strong staging area for enemy attack while<br />
shortening your own lines somewhat. Even if<br />
<strong>the</strong> III Corps does not hold this ridge area<br />
northwest <strong>of</strong> <strong>the</strong> Peach Orchard, an advance<br />
to this sector will be in order, Artillery posted<br />
from hexes 85239 to C0332 will be <strong>of</strong> excellent<br />
use in enfilading Union attacks on your<br />
center.<br />
For lhe rest <strong>of</strong> <strong>the</strong> battle, <strong>the</strong> Confederate<br />
player will be on <strong>the</strong> strategic defensive.<br />
If <strong>the</strong> Union player is attempting a mass<br />
frontal attack, his troops will eventually become<br />
disorganized and rout before your prepared<br />
positions. Just make sure that you<br />
have sufficient reserves available, especially<br />
<strong>of</strong> artillery, since many batteries will probably<br />
be lost. Hold onto every hex <strong>of</strong> your line as<br />
long as possible, but do not hesitate to withdraw<br />
to your secondary line when pressed.<br />
A few words on tactics. Beware <strong>of</strong> keeping<br />
too many depleted units in a combat area,<br />
since <strong>the</strong>ir brigades will rout more quickly. It<br />
is better to use fresh brigades in resisting<br />
enemy charges, and <strong>the</strong>n bring in depleted<br />
brigades as <strong>the</strong> enemy brigades reach <strong>the</strong>ir effectiveness<br />
level. (It is taken for granted that<br />
<strong>the</strong> Optional Brigade Combat Effectiveness<br />
rules are being used.) If lengthy melee combats<br />
occur, especially in woody areas where<br />
shooting ranges are restricted to one hex, it is<br />
tactically effective to put units <strong>of</strong> "1"<br />
strength point on top <strong>of</strong> larger regiments, especially<br />
those <strong>of</strong> brigades ready to rout from<br />
<strong>the</strong>ir number <strong>of</strong> losses. If <strong>the</strong> upper regiment<br />
in <strong>the</strong> hex is wiped out, you will not have to
oll a die to see if <strong>the</strong> lower regiment routs<br />
(see changing <strong>of</strong> rule 14.5 in MOVES 29) .<br />
Finally, do not become so involved in your<br />
strategic defensive that you forget how to attack.<br />
Several counterattacks, especially when<br />
enemy units have been routed, will be most<br />
useful to blunt enemy attacks and enfilade<br />
<strong>the</strong> rest a f his line.<br />
Instead <strong>of</strong> a frontal assault, your opponent<br />
may try to attack you on your right,<br />
where you are less well dug in. You will <strong>the</strong>n<br />
have to shift your reserves accordingly, making<br />
sure not to denude your left too much or<br />
overextend your lines. Take <strong>the</strong> best advantage<br />
you can <strong>of</strong> terrain and cross fires. And<br />
try as hard as you can to keep <strong>the</strong> enemy <strong>of</strong>f<br />
<strong>the</strong> western portion <strong>of</strong> Map B, where your<br />
line can really be stretched out and where<br />
<strong>the</strong>re are no good defenses facing south.<br />
Also, watch for a good opportunity to counterattack<br />
and cut <strong>of</strong>f <strong>the</strong> Union advance. His<br />
march so far to his left should have left a few<br />
weak poin ts or gaps along <strong>the</strong> way.<br />
Your life will be made much more difficult<br />
if <strong>the</strong> Union commander chooses to<br />
bring in <strong>the</strong> V and V I Corps in Area 5, or if he<br />
delays <strong>the</strong>ir appearance so you do not know<br />
when or where <strong>the</strong>y will come on (make sure<br />
he has committed <strong>the</strong>se orders to writing and<br />
placed <strong>the</strong>m .in a sealed envelope, so he does<br />
not cheat on you). In ei<strong>the</strong>r case, you will<br />
have to keep troops posted east <strong>of</strong> Gettysburg<br />
to watch out for <strong>the</strong> enemy. ~t least,<br />
with <strong>the</strong>se troops not yet on <strong>the</strong> map, you will<br />
be able to spare some reserves to hold in<br />
waiting on <strong>the</strong> roads immediately south <strong>of</strong><br />
Gettysburg, ready to march at <strong>the</strong> doublequick<br />
to wherever <strong>the</strong> V and VJ Corps appear.<br />
If <strong>the</strong>y do come on in Area 5, be sure to<br />
have a brigade or two <strong>the</strong>re to slow <strong>the</strong>m<br />
down while you hurry your reserves to <strong>the</strong><br />
front. Then try to contain <strong>the</strong>m - or even<br />
wipe <strong>the</strong>m out, using <strong>the</strong> strategy outlined<br />
above in reference to <strong>the</strong> XII Corps.<br />
You will find <strong>the</strong> situation similar to<br />
that faced by Lee at Chancellorsville. Just<br />
hope that your main line south <strong>of</strong> Cemetery<br />
Hill will hold better than Early did at Second<br />
Fredericksburg. If you play your cards right,<br />
you may be able to hold <strong>of</strong>f <strong>the</strong> enemy. If<br />
pressed too hard, it may become necessary to<br />
give up <strong>the</strong> eastern end <strong>of</strong> <strong>the</strong> Baltimore Pike<br />
in order to hold on to Cemetery Hill. Then<br />
you will be very thankful for <strong>the</strong> trenches dug<br />
<strong>the</strong>re by <strong>the</strong> Federals on July 1, which will<br />
supply a ready defense against <strong>the</strong>ir makers.<br />
And even if you lose Cemetery Hill, try to<br />
keep your main line in order to block <strong>the</strong><br />
enemy's line <strong>of</strong> communications from Cemetery<br />
Hill to Meade, thus depriving him <strong>of</strong> <strong>the</strong><br />
victory points for <strong>the</strong> hill (rule 28.54). Finally,<br />
if you have managed to hold on to Cemetery<br />
Hill and Area 6, try to prevent <strong>the</strong> enemy<br />
(especially Farnsworth's cavalry) from<br />
blocking your own communications back to<br />
hex 0632, thus depriving you <strong>of</strong> <strong>the</strong> victory<br />
points for exiting troops through Area 6.<br />
Union Strategy for <strong>the</strong> Second<br />
and Third Days<br />
If <strong>the</strong> Union player has lost Cemetery<br />
Hill on <strong>the</strong> first day, he is definitely in a hole,<br />
but he should not despair. The enemy may<br />
have a better position, but you stilI have<br />
superior forces , as long as you do not waste<br />
<strong>the</strong>m. This is <strong>the</strong> major point to bear in<br />
mind: do not commit your troops unsupported<br />
or too early. And secondly, do not hesitate<br />
to use your artillery shots. All too <strong>of</strong>ten<br />
has <strong>the</strong> Union player lost <strong>the</strong> game with half<br />
<strong>of</strong> his ammunition still available.<br />
As discussed previously, it is probably<br />
<strong>the</strong> best strategy to bring <strong>the</strong> XII Corps out in<br />
Area 7 late on July I. Then form on <strong>the</strong> ridge<br />
running sou<strong>the</strong>ast from hex C0818 and entrench<br />
a line all <strong>the</strong> way to <strong>the</strong> eastern edge <strong>of</strong><br />
<strong>the</strong> map. The III Corps can form on <strong>the</strong> left,<br />
but be careful not to be caught in a possible<br />
cul-de-sac northwest <strong>of</strong> <strong>the</strong> Peach Orchard.<br />
On <strong>the</strong> morning <strong>of</strong> July 2, do not get<br />
carried away and attack as soon as <strong>the</strong> II<br />
Corps and Artillery Reserve arrive. First<br />
form a solid front. Who knows - your opponent<br />
may be foolish enough to attack you.<br />
Your strategy from here depends on whe<strong>the</strong>r<br />
you want to bring out <strong>the</strong> V and/or VI Corps<br />
in Area 7 (behind your lines) or in Area 5<br />
(behind his).<br />
The more conservative player will bring<br />
out <strong>the</strong> V and VI Corps in Area 7, to join <strong>the</strong><br />
rest <strong>of</strong> <strong>the</strong> army. It is best in this case to remain<br />
in posifion until all your forces are up,<br />
even if it means delaying your counterattack<br />
until July 3. There will still be plenty <strong>of</strong> time<br />
<strong>the</strong>n, and you will have <strong>the</strong> advantage <strong>of</strong> ha v<br />
ing more fresh troops than your opponent<br />
has men in total. To repeat what I have stated<br />
be fore, do not commi t your troops piecemeal<br />
a fa McClellan at Antietam. The final push<br />
wiII be costly, and you will need to keep up<br />
constant pressure to force <strong>the</strong> enemy to<br />
break.<br />
Your alternatives once <strong>the</strong> army is ga<strong>the</strong>red<br />
are two: a frontal assault on <strong>the</strong> enemy<br />
center and left, or an end run with most <strong>of</strong><br />
your army around his right. If you choose a<br />
frontal assault - more direct but definitely<br />
more costly - be certain..to guard your<br />
flanks against enemy counterattacks and enfilading<br />
fire. It would be to your best advantage<br />
to begin with a massive artillery barrage<br />
to destroy all enemy artillery in <strong>the</strong> area. You<br />
have enough guns and ammunition to do<br />
this, and it is <strong>the</strong> enemy artillery which will<br />
inflict <strong>the</strong> most casualties on you as you<br />
reach his lines. The best area to hit is probably<br />
that portion <strong>of</strong> <strong>the</strong> enemy line from<br />
south <strong>of</strong> Power's Hill to <strong>the</strong> eastern edge <strong>of</strong><br />
<strong>the</strong> map, despite <strong>the</strong> depth <strong>of</strong> his lines <strong>the</strong>re.<br />
Constan t pressure will wear <strong>the</strong> enemy down,<br />
and once you have broken through not only<br />
will Area 6 be liberated, but <strong>the</strong> approach to<br />
Cemetery Hi'll will be easier.<br />
Your second option after bringing out<br />
<strong>the</strong> V and VI Corps in Area 7, is <strong>the</strong> end run<br />
around <strong>the</strong> Rebel left. Again, wait until you<br />
have all your forces concentrated before you<br />
begin <strong>the</strong> movement, in order to avoid piecemeal<br />
and unsupported attacks. Attacking <strong>the</strong><br />
Rebel right has its advantages and disadvantages.<br />
The advantages are: <strong>the</strong> enemy will be<br />
weaker and less well dug in on his right; it wiII<br />
be easier to stretch his lines to <strong>the</strong> breaking<br />
point once you have moved onto Map A,<br />
which is nine hexes wider to <strong>the</strong> west than<br />
Map C; and <strong>the</strong> enemy will have no ready defense<br />
line against your attack coming from<br />
<strong>the</strong> south, since all <strong>the</strong> ridges on his right run<br />
in a northwest/sou<strong>the</strong>ast direction. The disadvantages<br />
<strong>of</strong> this strategy are less in number,<br />
but should be anticipated in order to<br />
avoid <strong>the</strong>m: beware <strong>of</strong> spreading your own<br />
line too thin as you advance, allowing <strong>the</strong><br />
enemy to cut <strong>of</strong>f and surround your flanking<br />
forces; secondly, even if you carry <strong>the</strong> enemy<br />
right, you will stilI have to attack Cemetery<br />
Hill from <strong>the</strong> north or west - and you will<br />
find <strong>the</strong> enemy defending <strong>the</strong> hill in <strong>the</strong> very<br />
trenches you built on <strong>the</strong> first day <strong>of</strong> battle.<br />
Here a piece <strong>of</strong> good timing will be useful.<br />
Enough troops should be left back in your<br />
main line to be able to carry <strong>the</strong> Rebel center<br />
or left once he denudes or overextends it to<br />
protect his right. Such a well-timed assault<br />
on <strong>the</strong> enmy left should put <strong>the</strong> Confederates<br />
on <strong>the</strong> run and win <strong>the</strong> game decisively.<br />
Strategy for <strong>the</strong> Aggressive Union Player<br />
The more adventurous Union player<br />
may not choose to bring out his V and/or VI<br />
Corps in Area 7, but might choose instead to<br />
bring <strong>the</strong>m out in Area 5. Doing this, or even<br />
just delaying <strong>the</strong>ir appearance, will keep <strong>the</strong><br />
enemy greatly <strong>of</strong>f balance and make <strong>the</strong><br />
game much more tense and interesting.<br />
If you plan to bring out both Corps in<br />
Area 5, delay <strong>the</strong> V Corps until shortly after<br />
1400 on <strong>the</strong> 2d, so that it will have <strong>the</strong> VI<br />
Corps right on its heels for support. This delay<br />
will keep <strong>the</strong> enemy <strong>of</strong>f balance, not<br />
knowing where <strong>the</strong> V Corps will come out,<br />
and wiII force him to post several brigades<br />
plus heavy reserves near <strong>the</strong> town <strong>of</strong> Gettysburg.<br />
This would greatly weaken his front<br />
line no matter which strategy you are using in<br />
that sector. Bringing out just one corps in <strong>the</strong><br />
enemy rear will tie down a good number <strong>of</strong><br />
his troops far away from <strong>the</strong> main front. Just<br />
make sure your forces are not decimated as<br />
<strong>the</strong>y appear. Then assume a passive defense,<br />
since your goal is mainly to create confusion<br />
and tie down enemy forces.<br />
Bringing out both <strong>the</strong> V and VI Corps in<br />
Area 5, however, creates a whole new major<br />
front, as Hooker did in his march to Chanceliorsville.<br />
Do not, in this case, suffer <strong>the</strong><br />
fai lure <strong>of</strong> nerve which afflicted Hooker <strong>the</strong>n<br />
(fortunately <strong>the</strong> Rebels will have nei<strong>the</strong>r<br />
Stonewall Jackson nor sufficient forces to<br />
march around your flank). Your goal with<br />
both Corps will be to push steadily towards<br />
Cemetery Hill, wearing down <strong>the</strong> enemy and<br />
trying to catch him in a vise between your<br />
V /VI Corps command and <strong>the</strong> main line centered<br />
at Round Top. Once <strong>the</strong> enemy has<br />
stripped his front lines to face your force in<br />
his rear, a well-timed assault by your main<br />
line should end <strong>the</strong> game.<br />
A few final words about tactics in this<br />
section. If <strong>the</strong> Rebels have <strong>the</strong> entry to Area 5<br />
blocked, you have <strong>the</strong> option <strong>of</strong> forming in<br />
<strong>the</strong> staging area and fighting your way onto<br />
<strong>the</strong> map (Case 21.4 in <strong>the</strong> errata sheet <strong>of</strong> 13<br />
July 76) or bringing <strong>the</strong>m on still later in Area<br />
5. The latter move is preferable, since it will<br />
be difficult for <strong>the</strong> Confederate player to<br />
7
8<br />
blockade or defend that area as well as he can<br />
Area 5. If you choose to fight your way onto<br />
<strong>the</strong> map from Staging Area 5, be sure to read<br />
<strong>the</strong> provisions <strong>of</strong> Case 21.4 carefully. It may<br />
be best here to post artillery in <strong>the</strong> staging<br />
area, since <strong>the</strong>y cannot suffer losses (<strong>the</strong>y can<br />
only pinned by enemy small arms fire) or be<br />
counterattacked, and <strong>the</strong> batteries will be<br />
able to blast a hole in <strong>the</strong> enemy blockading<br />
line once <strong>the</strong>y set up. When you bring on<br />
your infantry, wait until you have a good<br />
force concentrated before making any movements.<br />
Running to <strong>the</strong> nearest woods will<br />
protect numerous units while <strong>the</strong> rest come<br />
on. And be sure to protect your leaders. As a<br />
final note, in order to avoid argument or<br />
question whenever you are delaying reinforcements<br />
or sending <strong>the</strong>m to a different entrance<br />
area, put written orders (<strong>the</strong> time and<br />
area <strong>the</strong> troops are to appear) in a sealed<br />
envelope.<br />
Playing Aids<br />
Once a game is in full swing, up to half<br />
<strong>the</strong> pieces on <strong>the</strong> map are not actual military<br />
units, but are information counters .. Many <strong>of</strong><br />
<strong>the</strong>se are necessary for <strong>the</strong> course <strong>of</strong> play<br />
(trenches, pin and ammunition depleted<br />
markers, etc.), but most <strong>of</strong> <strong>the</strong>m are simply<br />
numbered chits (strength markers and artillery<br />
ammunition markers) which clutter up<br />
<strong>the</strong> board or are easily lost track <strong>of</strong>. Anyone<br />
who has played more than a few turns <strong>of</strong> TSS<br />
knows <strong>the</strong> frustration <strong>of</strong> trying to put <strong>the</strong><br />
right numbered counters with <strong>the</strong> right pieces<br />
when someone sneezes, a stray die plows<br />
through <strong>the</strong> front lines, an engaged pile falls<br />
over, or <strong>the</strong> legendary family cat walks across<br />
<strong>the</strong> board. How many times have you been<br />
guilty <strong>of</strong> flipping over <strong>the</strong> strength marker<br />
when <strong>the</strong> unit belonging to it routs? All <strong>the</strong>se<br />
problems can be dealt with in a practical<br />
manner, although an additional amount <strong>of</strong><br />
bookkeeping will be required.<br />
(1) I have found that <strong>the</strong> artillery ammunition<br />
level markers can easily be removed<br />
from play. Instead <strong>of</strong> using <strong>the</strong>m, I have<br />
typed up and run <strong>of</strong>f a list <strong>of</strong> all <strong>the</strong> batteries<br />
in <strong>the</strong> game, listing for each <strong>the</strong> number and<br />
type <strong>of</strong> guns and shots available .<br />
Example: Bat. A 2 US<br />
t tt ttt "' . "'**"'**<br />
Whenever a shot is fi red, it is marked <strong>of</strong>f on<br />
<strong>the</strong> chart; space is also left for adding shots if<br />
<strong>the</strong> battery's ammuntion chests are refilled<br />
from <strong>the</strong> reserve ammunition train. In this<br />
way it is also easier to keep track <strong>of</strong> <strong>the</strong><br />
amount <strong>of</strong> reserve ammunition used. (I never<br />
use <strong>the</strong> charts printed on <strong>the</strong> map. It is too<br />
easy to cough and blow markers around into<br />
different boxes. Such items as number <strong>of</strong><br />
troops captured and amount <strong>of</strong> ammunition<br />
available are too critical to <strong>the</strong> outcome <strong>of</strong><br />
<strong>the</strong> game to leave <strong>the</strong>ir markers in <strong>the</strong> opeh.)<br />
(2) The artillery chart mentioned above<br />
is also useful for keeping track <strong>of</strong> <strong>the</strong> number<br />
<strong>of</strong> cannons destroyed in each battery Gust<br />
cross out <strong>the</strong> number <strong>of</strong> guns lost). This chan<br />
can <strong>the</strong>n be used in place <strong>of</strong> <strong>the</strong> strength<br />
markers on <strong>the</strong> map, or, if <strong>the</strong> strength<br />
markers are used, as a back-up system in case<br />
<strong>the</strong>re is ever any question <strong>of</strong> a battery's<br />
strength.<br />
(3) I always use ,<strong>the</strong> optional BCE rules,<br />
but have been unhappy with <strong>the</strong> chart printed<br />
with <strong>the</strong> game for several reasons: <strong>the</strong> new<br />
BeE rati ngs (see MO VES 31) need to be penciled<br />
in; artillery, headquarters and supply<br />
losses are not included on <strong>the</strong> chart; and it is<br />
difficult to keep track <strong>of</strong> which replacement<br />
leaders are commanding which units. Consequently,<br />
for my latest TSS Grand Battle<br />
game, I prepared a complete list <strong>of</strong> all units in<br />
<strong>the</strong> battle (including HQ units, etc.). It took<br />
a bit <strong>of</strong> work, but was well worth it. Every<br />
casualty was recorded on <strong>the</strong> chart, using an<br />
"X" for each point killed and a "C" for<br />
each point captured. This made it much<br />
easier to count up victory points when we<br />
finished. Room was also left for noting leader<br />
casualties and replacements.<br />
(4) "Engaged" piles are always a bo<strong>the</strong>r<br />
on <strong>the</strong> map, since <strong>the</strong>y more <strong>of</strong>ten than not<br />
take on <strong>the</strong> appearance <strong>of</strong> <strong>the</strong> Leaning Tower<br />
<strong>of</strong> Pisa. It is disaster if <strong>the</strong>y collapse (though<br />
<strong>the</strong> back-up accounting system outlined<br />
above would permit accurate recreation <strong>of</strong><br />
<strong>the</strong> pile), and difficult to pick up <strong>the</strong> pile to<br />
see what units are in it. The simple expedient<br />
<strong>of</strong> removing <strong>the</strong> engaged pile from <strong>the</strong> map<br />
and replacing it with a special marker or plastic<br />
piece from ano<strong>the</strong>r game (Risk is great<br />
from this) permits freer and safer analysis <strong>of</strong><br />
<strong>the</strong> pile.<br />
Suggestions for Rules Changes<br />
(I) The 1st South Carolina Rifles <strong>of</strong><br />
Perrin's Brigade, Pender's Division, did not<br />
take part in <strong>the</strong> battle <strong>of</strong> July 1. It was guarding<br />
a wagon train and arrived later, though I<br />
have not been able to determine precisely<br />
when. Mr. Berg suggests it should come on in<br />
<strong>the</strong> early evening <strong>of</strong> <strong>the</strong> I st; in my latest game<br />
I brought it out with <strong>the</strong> l Ith Mississippi <strong>of</strong><br />
Heth's division at 0600 on 3 July (this regiment<br />
had been guarding Herh's wagon<br />
trains) .<br />
(2) I have been concerned with <strong>the</strong><br />
amount <strong>of</strong> freedom <strong>of</strong> movement available<br />
to <strong>the</strong> Confederate player, as brigades are<br />
sent allover <strong>the</strong> map with little regard for<br />
keeping divisions intact. The leadership rules<br />
suggested by Mr. Epperson in MO VES 30<br />
should be adopted into <strong>the</strong> gaming system.<br />
This would put <strong>the</strong> Confederate player on<br />
more <strong>of</strong> a parity with <strong>the</strong> Union player in<br />
terms <strong>of</strong> command and movement. Adding<br />
Union brigade commanders to <strong>the</strong> counter<br />
mix would also be nice on a historical level,<br />
but would add greatly to <strong>the</strong> confusion <strong>of</strong><br />
battle. (At present, I lean toward leaving<br />
<strong>the</strong>m out <strong>of</strong> <strong>the</strong> game. Most Confederate brigade<br />
commanders were more experienced<br />
[han <strong>the</strong>ir Union counterparts, and <strong>the</strong> present<br />
game command structure for some reason<br />
seems to recreate very accurately <strong>the</strong><br />
command flow <strong>of</strong><strong>the</strong> real battle.)<br />
(3) Mr. Epperson's question on artillery<br />
movement are also valid. Artillery should<br />
keep toge<strong>the</strong>r in <strong>the</strong>ir brigades. Some restriction<br />
- such as inability to engage in <strong>of</strong>fensive<br />
fire - should be imposed on those batteries<br />
not within a specified radius <strong>of</strong> a<br />
designated "head" battery (artillery commanders<br />
would thus not be necessary) . Alternatively,<br />
batteries could be assigned to certain<br />
(CS) brigades or (US) divisions, and<br />
would <strong>the</strong>n fall under <strong>the</strong> command control<br />
<strong>of</strong> that infantry <strong>of</strong>ficer.<br />
(4) I have also been concerned about <strong>the</strong><br />
realism <strong>of</strong> <strong>the</strong> rules concerning captured artillery.<br />
All too <strong>of</strong>ten in <strong>the</strong> war a charge<br />
would temporarily capture enemy guns, but<br />
<strong>the</strong>n would be driven back without <strong>the</strong>m.<br />
Under <strong>the</strong> present rules, victory points are<br />
still given to <strong>the</strong> attacker for capturing <strong>the</strong><br />
guns; I would change <strong>the</strong> rule to read that he<br />
must keep possession <strong>of</strong> <strong>the</strong> guns, or drag<br />
<strong>the</strong>m away, to get victory points (see suggested<br />
Case 32.5 below).<br />
(5) Also in connection with <strong>the</strong> artillery:<br />
it <strong>of</strong>ten happened in battles that captured<br />
enemy guns were turned against <strong>the</strong>ir owners.<br />
The following rule change attempts to<br />
allow this.<br />
[32.0] CAPTURED ARTILLERY<br />
COMMENTARY: During <strong>the</strong> Civil War, artillerymen<br />
would at times "spike" <strong>the</strong>ir cannons<br />
in order to prevent <strong>the</strong>ir use by <strong>the</strong><br />
enemy if captured. Spiking would be accomplished<br />
by driving a spike or nail into <strong>the</strong> vent<br />
hole <strong>of</strong> <strong>the</strong> cannon barrel, thus making it<br />
temporarily unusable. This rule will make allowance<br />
for spiking, along with provisions<br />
for <strong>the</strong> handling <strong>of</strong> captured artillery pieces.<br />
[32.1) During <strong>the</strong> "Retreat before Melee"<br />
Phase, <strong>the</strong> owner <strong>of</strong> any battery threatened<br />
by melee may announce that he is going to attempt<br />
to spike any or all <strong>of</strong> <strong>the</strong> guns in that<br />
battery. Batteries which are "pinned" may<br />
not do so.<br />
[32_2] A die is rolled for each cannon (not<br />
battery) which is to be spiked. Spiking is accomplished<br />
on a die roll <strong>of</strong> 5 or 6. Spiked<br />
guns may not fire again.<br />
[32_3) Should <strong>the</strong> battery be captured by <strong>the</strong><br />
opposing Player in <strong>the</strong> Melee Phase, <strong>the</strong> capturing<br />
Player receives I Victory Point per<br />
gun captured (spiked or not), as stated in<br />
Case 22.11. However, <strong>the</strong> artillery counter is<br />
not removed from <strong>the</strong> map.<br />
[32_4] Captured guns may be moved at <strong>the</strong><br />
rate <strong>of</strong> one hex per Game-Turn (but not over<br />
impassable terrain, woods hexes, or crests) as<br />
long as one Strength Point <strong>of</strong> any ki nd accompanies<br />
<strong>the</strong> guns. This rule assumes that<br />
<strong>the</strong> horses belonging to <strong>the</strong> battery have been<br />
pu t out <strong>of</strong> action.<br />
[32.5] Only guns which are captured by <strong>the</strong><br />
Enemy and held in his possession or behind<br />
his lines may be counted toward his Victory<br />
Points.<br />
[32.6] Captured guns may be recaptured by<br />
<strong>the</strong>ir original owner (this Case negates clarification<br />
<strong>of</strong> Case 13.83 in MO VES 29).<br />
[32.7] Captured guns which have not been<br />
spiked may be absorbed into o<strong>the</strong>r batteries<br />
<strong>of</strong> <strong>the</strong> capturing Player, but only in accordance<br />
with <strong>the</strong> provisions <strong>of</strong> Case 20.5.<br />
[32.8] The ammunition supply <strong>of</strong> a battery<br />
captured by <strong>the</strong> Enemy is eliminated (Case<br />
23.26).