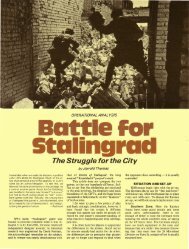
Terrible Swift Sword - Learning SPI's Great Battles of the American ...
Terrible Swift Sword - Learning SPI's Great Battles of the American ...
Terrible Swift Sword - Learning SPI's Great Battles of the American ...

You also want an ePaper? Increase the reach of your titles
YUMPU automatically turns print PDFs into web optimized ePapers that Google loves.
game and what was experienced by <strong>the</strong> surprised<br />
Confederates in <strong>the</strong> real battle: from<br />
about 1100 until Pender's arrival, Heth is<br />
outnumbered by <strong>the</strong> Union forces on <strong>the</strong><br />
ridges west <strong>of</strong> Gettysburg. IfHeth's lines are<br />
overextended or too far forward and exposed,<br />
this will be a good time for a brief<br />
Union counterattack with <strong>the</strong> goal <strong>of</strong> inflicting<br />
casualties and regaining terri tory. However,<br />
<strong>the</strong> Union player should avoid wearing<br />
down his strength in any major attack. Instead,<br />
he should work for position, keeping<br />
<strong>the</strong> Confederates from outflanking him and<br />
in general just keeping <strong>the</strong>m <strong>of</strong>f balance.<br />
Doubleday's division, brought out when<br />
scheduled on <strong>the</strong> Fairfield Road, is especially<br />
useful for this purpose. The Confederate<br />
player will have to send a brigade <strong>of</strong> infantry<br />
(and he only has four available at <strong>the</strong> time) to<br />
watch Doubleday's movements. At <strong>the</strong> same<br />
time he will be unable to form a firm position<br />
on central Seminary Ridge (hexes 3733-4603)<br />
as long as Doubleday is in his rear. This will<br />
delay <strong>the</strong> Confederate attack on <strong>the</strong> Wlion<br />
center considerably. And yet, <strong>the</strong> Union<br />
player should be careful not to allow Doubleday<br />
to be cut <strong>of</strong>f - if he is trapped, he will<br />
suffer <strong>the</strong> fate <strong>of</strong> Custer. Once Doubleday's<br />
threat to <strong>the</strong> Confederate rear has been exhausted,<br />
he should be marched back toward<br />
Cemetery Ridge as intact as possible, since<br />
his large regiments will be needed later in <strong>the</strong><br />
day to hold <strong>of</strong>f <strong>the</strong> last Rebel attacks.<br />
The key to <strong>the</strong> game for <strong>the</strong> Union player<br />
is holding Cemetery Hill on <strong>the</strong> first day.<br />
Every move should be directed to this end .<br />
The Union player must prevent <strong>the</strong> Confederate<br />
player from blocking or delaying <strong>the</strong> arrival<br />
<strong>of</strong> <strong>the</strong> XII Corps, without which Cemetery<br />
Hill cannot be held. It will be very necessary<br />
to save some <strong>of</strong> Buford's cavalry for<br />
this, despite <strong>the</strong> strong temptation to use it to<br />
plug gaps elsewhere. The quicker movement<br />
rate <strong>of</strong> <strong>the</strong> cavalry, plus its high proportion<br />
<strong>of</strong> leaders (three for eight regiments, if all are<br />
still surviving) make <strong>the</strong>m <strong>the</strong> best units<br />
available to delay <strong>the</strong> Confederate rush<br />
towards Staging Area 6. The best place to<br />
deploy <strong>the</strong>m is in <strong>the</strong>' 'funnel" sou th <strong>of</strong> Benner's<br />
Hill, through which <strong>the</strong> 1st Maryland<br />
Cavalry and <strong>the</strong>n Jenkins' Cavalry Brigade<br />
will be madly charging towards Baltimore. If<br />
<strong>the</strong>se units can be slowed down enough, <strong>the</strong><br />
game can be salvaged. The XII Corps, arriving<br />
in Area 6, wi)) aid greatly in <strong>the</strong> defense <strong>of</strong><br />
Cemetery Hill. And even if <strong>the</strong> hill is lost,<br />
Confederate losses in taking it should be too<br />
heavy to permit <strong>the</strong>m to win <strong>the</strong> battle.<br />
Whatever <strong>the</strong> outcome <strong>of</strong> <strong>the</strong> Cemetery Hill<br />
fight, <strong>the</strong> arrival <strong>of</strong> <strong>the</strong> advance <strong>of</strong> <strong>the</strong> III<br />
Corps and darkness will stabilize <strong>the</strong> Union<br />
lines and save <strong>the</strong> supply train from capture.<br />
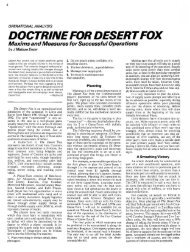
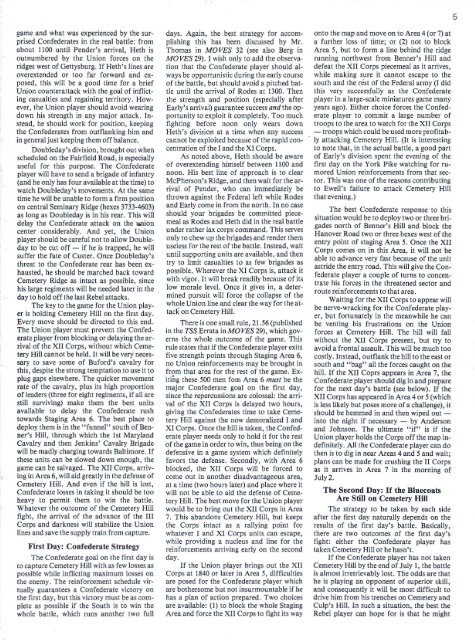
First Day: Confederate Strategy<br />
The Confederate goal on <strong>the</strong> first day is<br />
to capture Cemetery Hill with as few losses as<br />
possible while inflicting maximum losses on<br />
<strong>the</strong> enemy. The reinforcement schedule virtually<br />
guarantees a Confederate victory on<br />
<strong>the</strong> first day, but this victory must be as com·<br />
plete as possible if <strong>the</strong> South is to win <strong>the</strong><br />
whole battle, which runs ano<strong>the</strong>r two full<br />
days. Again, <strong>the</strong> best strategy for · accomplishing<br />
this has been discussed by Mr.<br />
Thomas in MOVES 32 (see also Berg in<br />
MOVES 29) . 1 wish only to add <strong>the</strong> observation<br />
that <strong>the</strong> Confederate player should al·<br />
ways be opportunistic during <strong>the</strong> early course<br />
<strong>of</strong> <strong>the</strong> battle, but should avoid a pitched battle<br />
until <strong>the</strong> arrival <strong>of</strong> Rodes at 1300. Then<br />
<strong>the</strong> strength and position (especially after<br />
'Early's arrival) guarantee success and <strong>the</strong> opportunity<br />
to exploit it completely. Too much<br />
fighting before noon only wears down<br />
Heth's division at a time when any success<br />
cannot be exploited because <strong>of</strong> <strong>the</strong> rapid concentration<br />
<strong>of</strong> <strong>the</strong> I and <strong>the</strong> XI Corps.<br />
As noted above, Heth should be aware<br />
<strong>of</strong> overextending himself between 1100 and<br />
noon. His best line <strong>of</strong> approach is to clear<br />
McPherson's Ridge, and <strong>the</strong>n wait for <strong>the</strong> arrival<br />
<strong>of</strong> Pender, who can immediately be<br />
thrown against <strong>the</strong> Federal left while Rodes<br />
and Early come in from <strong>the</strong> north. In no case<br />
should your brigades be committed piecemeal<br />
as Rodes and Heth did in <strong>the</strong> real battle<br />
under ra<strong>the</strong>r lax corps command. This serves<br />
only to chew up <strong>the</strong> brigades and render <strong>the</strong>m<br />
useless for <strong>the</strong> rest <strong>of</strong> <strong>the</strong> battle. Instead, wait<br />
until supporting units are available, and <strong>the</strong>n<br />
try to limit casualties to as few brigades as<br />
possible. Wh.erever <strong>the</strong> XI Corps is, attack it<br />
with vigor. It will break readily because <strong>of</strong> its<br />
low morale level. Once it gives in, a determined<br />
pursuit will force <strong>the</strong> collapse <strong>of</strong> <strong>the</strong><br />
whole Union line and dear <strong>the</strong> way for <strong>the</strong> attacK<br />
on Cemetery Hill.<br />
There is one small rule, 21.56 (published<br />
in <strong>the</strong> TSS Errata in MO VES 29), which governs<br />
<strong>the</strong> whole outcome <strong>of</strong> <strong>the</strong> game. This<br />
rule states that if <strong>the</strong> Confederate player exits<br />
five strength points through Staging Area 6,<br />
no Union reinforcements may be brought in<br />
from that area for <strong>the</strong> rest <strong>of</strong> <strong>the</strong> game. Exitfng<br />
<strong>the</strong>se 500 men fom Area 6 must be <strong>the</strong><br />
maj or Can federate goal on <strong>the</strong> first day,<br />
since <strong>the</strong> repercussions are colossal: <strong>the</strong> arrival<br />
<strong>of</strong> <strong>the</strong> XII Corps is delayed two hours,<br />
giving <strong>the</strong> Confederates time to take Cemetery<br />
Hill against <strong>the</strong> now demoralized 1 and<br />
XI Corps. Once <strong>the</strong> hill is taken, <strong>the</strong> Confederate<br />
player needs only to hold it for <strong>the</strong> rest<br />
<strong>of</strong> <strong>the</strong> game in order to win, thus being on <strong>the</strong><br />
defensive in a game system which definitely<br />
favors <strong>the</strong> defense. Secondly, with Area 6<br />
blocked, <strong>the</strong> XII Corps will be forced to<br />
come out in ano<strong>the</strong>r disadvantageous area,<br />
at a time (two hours later) and place where it<br />
will not be able to aid <strong>the</strong> defense <strong>of</strong> Ceme·<br />
tery Hill. The best move for <strong>the</strong> Union player<br />
would be to bring out <strong>the</strong> XII Corps in Area<br />
7. This abandons Cemetery Hill, but keeps<br />
<strong>the</strong> Corps intact as a rallying point for<br />
whatever I and XI Corps units can escape,<br />
while providing a nucleus and line for <strong>the</strong><br />
reinforcements arriving early on <strong>the</strong> second<br />
day.<br />
If <strong>the</strong> Union player brings out <strong>the</strong> XII<br />
Corps at 1840 or later in Area 5, difficulties<br />
are posed for <strong>the</strong> Confederate player which<br />
are bo<strong>the</strong>rsome but not insurmountable if he<br />
has a plan <strong>of</strong> action prepared. Two choices<br />
are available: (1) to block <strong>the</strong> whole Staging<br />
Area and force <strong>the</strong> XU Corps to fight its way<br />
onto <strong>the</strong> map and move on to Area 4 (or 7) at<br />
a fur<strong>the</strong>r loss <strong>of</strong> time; or (2) not to block<br />
Area 5, but to form a line behind <strong>the</strong> ridge<br />
running northwest from Benner's Hill and<br />
defeat <strong>the</strong> XII Corps piecemeal as it arrives,<br />
while making sure it cannot escape to <strong>the</strong><br />
south and <strong>the</strong> rest <strong>of</strong> <strong>the</strong> Federal army (I did<br />
this very successfully as <strong>the</strong> Confederate<br />
player in a large-scale miniatures game many<br />
years ago) . Ei<strong>the</strong>r choice forces <strong>the</strong> Confederate<br />
player to commit a large number <strong>of</strong><br />
troops to <strong>the</strong> area to watch for <strong>the</strong> XII Corps<br />
- troops which could be used more pr<strong>of</strong>itably<br />
attacking Cemetery Hill. (It is interesting<br />
to note that, in <strong>the</strong> actual battle, a good part<br />
<strong>of</strong> Early's division spent <strong>the</strong> evening <strong>of</strong> <strong>the</strong><br />
first day on <strong>the</strong> York Pike watching for rumored<br />
Union reinforcements from that sector.<br />
This was one <strong>of</strong> <strong>the</strong> reasons con tribu ti ng<br />
to Ewell's failure to attack Cemetery Hill<br />
that evening.)<br />
The best Confederate response to this<br />
situation would be to deploy two or three brigades<br />
north <strong>of</strong> Benner's Hill and block <strong>the</strong><br />
Hanover Road two or three hexes west <strong>of</strong> <strong>the</strong><br />
entry point <strong>of</strong> staging Area 5. Once <strong>the</strong> XII<br />
Corps comes on in this Area, it will not be<br />
able to advance very fast because <strong>of</strong> <strong>the</strong> unit<br />
astride <strong>the</strong> entry road. This will give <strong>the</strong> Confederate<br />
player a couple <strong>of</strong> turns to concentrate<br />
his forces in <strong>the</strong> threatened sector and<br />
route reinforcements to that area.<br />
Waiting for <strong>the</strong> XII Corps to appear will<br />
be nerve-wracking for <strong>the</strong> Confederate player,<br />
but fortunately in <strong>the</strong> meanwhile he can<br />
be venting his frustrations on <strong>the</strong> Union<br />
forces at Cemetery Hill. The hill will fall<br />
without <strong>the</strong> XII Corps present, but try to<br />
avoid a frontal assault. This will be much too<br />
costly. Instead, outflank <strong>the</strong> hill to <strong>the</strong> east or<br />
south and "bag" all <strong>the</strong> forces caught on <strong>the</strong><br />
hill. I f <strong>the</strong> XII Coprs appears in Area 7, <strong>the</strong><br />
Confederate player should dig in and prepare<br />
for <strong>the</strong> next day's battle (see below). If <strong>the</strong><br />
XII Corps has appeared in Area 4 or 5 (which<br />
is less likely but poses more <strong>of</strong> a challenge), it<br />
should be hemmed in and <strong>the</strong>n wiped out -<br />
into <strong>the</strong> night if necessary - by Anderson<br />
and Johnson. The ultimate "if" is if <strong>the</strong><br />
Union player holds <strong>the</strong> Corps <strong>of</strong>f <strong>the</strong> map indefinitely.<br />
All <strong>the</strong> Confederate player can do<br />
<strong>the</strong>n is to dig in near Areas 4 and 5 and wait;<br />
plans can be made for crushing <strong>the</strong> II Corps<br />
as it arrives in Area 7 in <strong>the</strong> morning <strong>of</strong><br />
July 2.<br />
The Second Day: If <strong>the</strong> Bluecoats<br />
Are Still on Cemetery HilI<br />
The strategy to be taken by each side<br />
after <strong>the</strong> first day naturally depends on <strong>the</strong><br />
results <strong>of</strong> <strong>the</strong> first day's battle. Basically,<br />
<strong>the</strong>re are two outcomes <strong>of</strong> <strong>the</strong> first day's<br />
fight: ei<strong>the</strong>r <strong>the</strong> Confederate player has<br />
taken Cemetery Hill or he hasn't.<br />
If <strong>the</strong> Confederate player has not taken<br />
Cemetery Hill by <strong>the</strong> end <strong>of</strong> July I, <strong>the</strong> battle<br />
is almost irretrievably lost. The odds are that<br />
he is playing an opponent <strong>of</strong> superior skill,<br />
and consequently it will be most difficult to<br />
drive him from his trenches on Cemetery· and<br />
Culp's Hill. In such a situation, <strong>the</strong> best <strong>the</strong><br />
Rebel player can hope for is that he might<br />
5