SAM4s SER-7000 SER-7040 Programming Manual.pdf
SAM4s SER-7000 SER-7040 Programming Manual.pdf
SAM4s SER-7000 SER-7040 Programming Manual.pdf
- No tags were found...

Create successful ePaper yourself
Turn your PDF publications into a flip-book with our unique Google optimized e-Paper software.
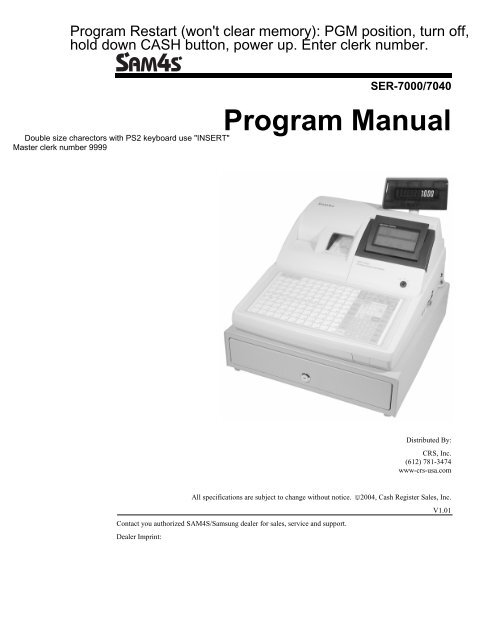
<strong>SER</strong>-<strong>7000</strong>/<strong>7040</strong>Program <strong>Manual</strong>Distributed By:CRS, Inc.(612) 781-3474www-crs-usa.comAll specifications are subject to change without notice. 2004, Cash Register Sales, Inc.V1.01Contact you authorized SAM4S/Samsung dealer for sales, service and support.Dealer Imprint:
CRS, INC.LIMITED WARRANTY AND DISCLAIMERS OF WARRANTYLIMITED WARRANTY AND DISCLAIMERSA. Cash Register Sales, Inc. (CRS) warrants the goods sold hereunder, if properly installed, maintained and operated under normalconditions with competent supervision, to be free from any defects in material, operation and workmanship for a period of six (6)months from the date of the receipt evidencing the sale of the goods to the buyer. The obligations of CRS, and the buyer’s SOLEAND EXCLUSIVE REMEDY hereunder shall be limited to the replacement or repair of any goods which are returned to CRS’splant, transportation charges prepaid and there determined by CRS to be at variance with the warranty contained herein.B. Notwithstanding any of the foregoing, CRS shall have no obligation hereunder in the event the goods become defective in whole orin part as a result of improper installation, maintenance, or repairs not made by CRS, unauthorized modification, or as a result ofremoval, improper use, abnormal operation by the buyer, or any other misuse or mistreatment of the goods.EXCLUSIVITY OF WARRANTYThe warranty contained herein is expressly in lieu of any other expressed or implied warranty, including any implied warranty ofmerchantability or fitness for a particular purpose, or any other obligation of the part of CRS. Any models, drawings, plans, affirmationsof fact, promises, or other communications by any party with reference to the performance of the goods shall not in any way modify thedisclaimers or expressed or implied warranty as set forth herein. The buyer acknowledges it is purchasing the goods solely on the basisof the commitments of CRS as expressly set forth herein. No agent of other party is authorized to make any warranties on behalf ofCRS or to assume for CRS any other liability in connection with performance of the goods hereunder.LIMITATION OF ACTIONS AND APPLICABLE LAWAny action resulting from any breach on the part of CRS as to the goods hereunder must be commenced within one (1) year after thecause of action is accrued. In no event shall CRS’s total liability for any or all breaches of any warranty or duty exceed the purchaseprice of the goods to which the breaches relate. The rights and duties of CRS and the buyer shall be determined by the laws of theState of Minnesota, and the terms and conditions of this warranty shall be construed and considered to have been made and performedin the State of Minnesota.WARNING - U.S.THIS EQUIPMENT GENERATES, USES AND CAN RADIATE RADIO FREQUENCY ENERGY, AND IF NOT INSTALLED AND USEDIN ACCORDANCE WITH THE INSTRUCTIONS MANUAL, MAY CAUSE INTERFERENCE TO RADIO COMMUNICATIONS. IT HASBEEN TESTED AND FOUND TO COMPLY WITH THE LIMITS FOR A CLASS A COMPUTING DEVICE PURSUANT TO SUBPART JOF PART 15 OF FCC RULES WHICH ARE DESIGNED TO PROVIDE REASONABLE PROTECTION AGAINST SUCHINTERFERENCE WHEN OPERATED IN A COMMERCIAL ENVIRONMENT. OPERATIONS OF THE EQUIPMENT IN ARESIDENTIAL AREA IS LIKELY TO CAUSE INTERFERENCE IN WHICH CASE THE U<strong>SER</strong>, AT HIS OWN EXPENSE, WILL BEREQUIRED TO TAKE WHATEVER MEASURES MAY BE REQUIRED TO CORRECT THE INTERFERENCE.NOTICE - CANADATHIS APPARATUS COMPLIES WITH THE CLASS “A” LIMITS FOR RADIO INTERFERENCE AS SPECIFIED IN THE CANADIANDEPARTMENT OF COMMUNICATIONS RADIO INTERFERENCE REGULATIONS.CET APPAREIL EST CONFORME AUX NORMES CLASS “A” D’INTERFERENCE RADIO TEL QUE SPECIFIER PAR MINISTRECANADIEN DES COMMUNICATIONS DANS LES REGLEMENTS D’INTERFERENCE RADIO.ATTENTIONThe product that you have purchased contains a rechargeable nickel-cadmium battery. This battery is recyclable. At the end of itsuseful life, under various state and local laws, it may be illegal to dispose of the battery into the municipal waste system.Check with your local solid waste officials for details concerning recycling options or proper disposal.
ContentsGetting Started 1About the <strong>SER</strong>-<strong>7000</strong> Series........................................................................................................1Register Controls........................................................................................................................1Power On/Off...............................................................................................................1Front View ...................................................................................................................1Display Adjustments ....................................................................................................1Rear View ....................................................................................................................1Navigating the <strong>SER</strong>-<strong>7000</strong>...........................................................................................................2Default Keyboard – <strong>SER</strong>-<strong>7000</strong> ....................................................................................2Key Descriptions..........................................................................................................4Control Lock..............................................................................................................11Key Prompting...........................................................................................................12Page Up and Page Down............................................................................................13Choosing Items from Menus ......................................................................................14Selecting and Filling Fields........................................................................................14Opening Pop-up Selection Windows .........................................................................15Entering Alpha Characters .........................................................................................16Initial Clear ..............................................................................................................................19S-Mode <strong>Programming</strong> 21S- Mode <strong>Programming</strong> Menu...................................................................................................21Self Tests..................................................................................................................................23Serial & IRC Loopback Test......................................................................................23Drawer Test................................................................................................................24RTC Setting (Real Time Clock).................................................................................24Display Test ...............................................................................................................25Keyboard Test............................................................................................................25Mode & Clerk Key Test.............................................................................................26RAM Test ..................................................................................................................26IRC Test.....................................................................................................................27Printer Test.................................................................................................................28RAM Checksum.........................................................................................................28Version Check............................................................................................................29Card Read Test ..........................................................................................................29Printer Status Check...................................................................................................30Print Image Logo .......................................................................................................30Memory Clear ..........................................................................................................................31Memory All Clear ......................................................................................................31Selective Memory Clearing........................................................................................33Memory Allocation ..................................................................................................................34Keyboard Key Relocation ........................................................................................................40PLU Key Relocation..................................................................................................41WLU Key Relocation.................................................................................................42<strong>SER</strong>-<strong>7000</strong> Program <strong>Manual</strong>Getting Started i
Function Key Relocation........................................................................................... 44System Options........................................................................................................................ 48Printer Driver Selections ......................................................................................................... 50Changing Printer Commands .................................................................................... 51Serial Port Device Selections .................................................................................................. 52Define Serial Port Parameters ................................................................................................. 53S-Mode Program Scan Printing............................................................................................... 55System Password..................................................................................................................... 56Super Macro Scan ................................................................................................................... 57ROM File Download ...............................................................................................................58Load Default Messages ...........................................................................................................58Check Unlock.......................................................................................................................... 58P-Mode <strong>Programming</strong> 59P-Mode <strong>Programming</strong> Menu................................................................................................... 59PLU <strong>Programming</strong>................................................................................................................... 61Add & Change .......................................................................................................... 62Delete PLUs.............................................................................................................. 65PLU Status Group (PLU Status Link) ..................................................................................... 67Group ...................................................................................................................................... 74Function Key........................................................................................................................... 75Function Key Program Summary.............................................................................. 76Cancel ....................................................................................................................... 79Cash .......................................................................................................................... 79Check ........................................................................................................................ 80Check Cash ............................................................................................................... 81Check Endorse .......................................................................................................... 81Currency Conversion 1-5 .......................................................................................... 82Drive Thru/Eat In/Take Out...................................................................................... 83Error Correct............................................................................................................. 83Food Stamp Tend...................................................................................................... 84Guest # ...................................................................................................................... 84KP Routing................................................................................................................ 85Macro 1-40................................................................................................................ 86Mdse Return.............................................................................................................. 86Misc Tend 1-16......................................................................................................... 87Modifier 1-10............................................................................................................ 88Not Found PLU......................................................................................................... 89#/No Sale................................................................................................................... 89P/Bal ......................................................................................................................... 89Paid Out 1-5/Recd Acct 1-5 ...................................................................................... 90%1 - %10 .................................................................................................................. 91Price Inquiry/Stock Inquiry....................................................................................... 92Print...........................................................................................................................92Print Check................................................................................................................ 92Promo........................................................................................................................ 93Recall Check 1-4....................................................................................................... 93Scale.......................................................................................................................... 95Store Check 1-4......................................................................................................... 96Tax Exempt............................................................................................................... 97Time In/Out............................................................................................................... 97Tip 1-3 ...................................................................................................................... 97Tip Declare ............................................................................................................... 98Tray Subtotal............................................................................................................. 98ii Getting Started<strong>SER</strong>-<strong>7000</strong> Program <strong>Manual</strong>
Void Item...................................................................................................................99Waste .........................................................................................................................99X/Time.......................................................................................................................99System Options ......................................................................................................................100General Function Options ........................................................................................101Tax Options .............................................................................................................107Cash Drawer Options...............................................................................................109Training Mode Options............................................................................................110Level/Modifier Options............................................................................................111Tracking File Options ..............................................................................................113Kitchen Printing/Video Options...............................................................................115Validation/Subtotal Print Options............................................................................118General Printing Options .........................................................................................120Report Printing Options ...........................................................................................124Report Options.........................................................................................................126Time Keeping Options.............................................................................................129E.J. (Electronic Journal) & Detail Printing Options.................................................131Taxes......................................................................................................................................133Add On Taxes ..........................................................................................................134Tax Table.................................................................................................................135VAT .........................................................................................................................137Messages ................................................................................................................................138Logo Message ..........................................................................................................139Error Messages ........................................................................................................140System Descriptors ..................................................................................................141Report Descriptors ...................................................................................................142Check Endorsement Message...................................................................................143Guest Check Logo Message.....................................................................................144Validation Message..................................................................................................145Window Look Up (WLU) ......................................................................................................146Overview..................................................................................................................146WLU <strong>Programming</strong>..................................................................................................147Time Period............................................................................................................................154Employee................................................................................................................................155Edit Job Codes .........................................................................................................157Edit Pay Rates..........................................................................................................158Authority Levels.....................................................................................................................159Authority Level Alpha Descriptors ..........................................................................162Printer Tables & KV Routing.................................................................................................163System Printer Routing ............................................................................................165Kitchen Video Routing ............................................................................................166Kitchen Printer Routing ...........................................................................................167Receipt Printer Routing............................................................................................169Detail Printer Routing..............................................................................................169Ingredient Inventory...............................................................................................................170Edit Ingredient .........................................................................................................171Recipe Table ............................................................................................................172Time Activated Functions ......................................................................................................173Time Activated Keyboard Levels ............................................................................174Time Activated Price Levels....................................................................................175Time Activated Macros............................................................................................176Time Activated String Reports.................................................................................177Time Activated Shifts ..............................................................................................178KP Time Period .......................................................................................................179Product Mix Groups...............................................................................................................180<strong>SER</strong>-<strong>7000</strong> Program <strong>Manual</strong>Getting Started iii
Product Mix Items................................................................................................... 181Product Mix Group Time Periods........................................................................... 182Custom Report <strong>Programming</strong>................................................................................................ 183Custom Report ........................................................................................................ 184Edit Existing Reports .............................................................................................. 186String Reports........................................................................................................................ 187PLU Stock ............................................................................................................................. 188PLU Minimum Stock............................................................................................................. 190Copy Program ....................................................................................................................... 191Program File Download ........................................................................................................ 193Select Program Files ............................................................................................... 194All Files................................................................................................................... 196P-Mode Program Scan Printing............................................................................................. 197NON-PLU Code.................................................................................................................... 199PLU & WLU Key Assignment.............................................................................................. 201PLU Key Assignment.............................................................................................. 202WLU Key Assignment ............................................................................................ 203Bitmap File Download .......................................................................................................... 204Groups By Employee ............................................................................................................ 205Employee Card Read Format ................................................................................................ 206Age Verification.................................................................................................................... 207Mix & Match Table............................................................................................................... 208Appendices 209Register Communications Ports ............................................................................................ 210Standard Ports ......................................................................................................... 210Optional Ports ......................................................................................................... 210Pin Descriptions .................................................................................................................... 210Loop Back Connections ........................................................................................................ 211System Configurations........................................................................................................... 212Inter Register Communications............................................................................... 212Glossary of Terms 215Index 225iv Getting Started<strong>SER</strong>-<strong>7000</strong> Program <strong>Manual</strong>
Getting StartedAbout the <strong>SER</strong>-<strong>7000</strong> SeriesThe <strong>SER</strong>-<strong>7000</strong> Series is offered in two different versions: The <strong>SER</strong>-<strong>7000</strong> features a flat 160-position keyboard with 107 NLU keys. Becauseit offers protection from spills, this keyboard works best in restaurants, foodservice shops, or convenience stores where food is served. The <strong>SER</strong>-<strong>7040</strong> features a 90-position keyboard with traditional raised keys. In thestandard configuration, the keyboard provides 15 NLU keys – it can be expandedto 40 NLU keys. The <strong>SER</strong>-<strong>7040</strong> works best in retail stores, or shops where it isnot necessary to place a large number of preset item keys on the keyboard.This manual includes instructions for both models. The keyboard is the only significantdifference between the two models. All other features are the same, unless otherwise noted.Register ControlsPower On/OffThe power on/off toggle switch is located on the right side at the rear of the terminal.Front ViewBy pushing on the bottom or top of the display, you can move the display to a differentviewing angle.Display AdjustmentsIn the Reg key lock position, press the Page Up key repetitively to increase contrast; pressthe Page Down key repetitively to reduce contrast.Rear ViewYou can lift the rear display and rotate it for optimum viewing.<strong>SER</strong>-<strong>7000</strong> Program <strong>Manual</strong> Getting Started 1
Navigating the <strong>SER</strong>-<strong>7000</strong>This chapter explains the conventions used for displaying and entering information.Review the information contained in this chapter before attempting to program your <strong>SER</strong>-<strong>7000</strong>.Default Keyboard – <strong>SER</strong>-<strong>7000</strong>RECTFEEDDETLFEEDRCPTON/OFF2838 48 58 68788898PRICELVL 1KEYBLVL 1RECEIPTISSUETIMECLOCKEMP #1 10 19 29 39 49 59 69 798999PRICELVL 2KEYBLVL 2ERRCORRVOIDITEMMD<strong>SER</strong>TRN2 11 20 30 40 50 60 70 8090100TAX1SHIFTEXEMPTTAXYES/NOENTERCANCEL3 12 21 31 41 51 61 71 8191101MACRO1PAGEUPPAGEDOWNRECALLCHECK4 13 22 32 42 52 62 72 8292102MACRO2STORECHECK5 14 23 33 43 53 63 73 8393103MACRO3@/FORPLUCLEARMISC2%16 15 24 34 44 54 64 74 84 94 104 789MISC1%27 16 25 35 45 55 65 75 85 95 105 456CHECK%38 17 26 36 46 56 66 76 86 96 106 123SBTLDONE9 18 27 37 47 57 67 77 87 97 107 000.CASH2 Getting Started <strong>SER</strong>-<strong>7000</strong> Program <strong>Manual</strong>
ER-<strong>7040</strong> Keyboard – Default 15 NLU ConfigurationThe <strong>SER</strong>-<strong>7040</strong> keyboard is shown below with the default legends and key assignments. Thisconfiguration has 15 keyboard NLU locations and can be expanded to 40 NLU locations.Programmable key locations are shown with a bold border.RECTFEEDDETLFEEDRCPTISSUEENTERDONETAX 1SHIFTVOIDMDSEACCTPAIDRTRNERRORCORRMACRO2MACRO3#/NSCANCELEMP#CURSORUPCURSORDOWNX/TIMEPLUCLEAR16 11F/SSHIFTTIMEIN/OUTCURSORLEFTCURSORRIGHT78927 12F/SSUBMISC1PAGEUPPAGEDOWN45638 13F/STENDCHECK% 1YES/NO12349 14SBTL% 2% 30 00.CASH510 15ER-<strong>7040</strong> Keyboard – Expanded 40 NLU ConfigurationRECTFEEDDETLFEEDRCPTISSUEENTERDONETAX 1SHIFTVOIDMDSEACCTPAIDRTRNERRORCORRMACRO2MACRO3#/NSCANCELEMP#CURSORUPCURSORDOWNX/TIMEPLUCLEAR16 111621263136F/SSHIFTTIMEIN/OUTCURSORLEFTCURSORRIGHT78927 121722273237F/SSUBMISC1PAGEUPPAGEDOWN45638 131823283338F/STENDCHECK% 1YES/NO12349 141924293439SBTL% 2% 30 00.CASH5 10 15 20 25 30 35 40<strong>SER</strong>-<strong>7000</strong> Program <strong>Manual</strong> Getting Started 3
Key DescriptionsEssential Function KeysBecause the SAM4S <strong>SER</strong>-<strong>7000</strong> keyboard is programmable, you can use the default keyboard,you can modify it, or you can design a keyboard that fits your exact needs.In order to program and operate the SAM4S <strong>SER</strong>-<strong>7000</strong>, you must place all of thefollowing keys on every keyboard: Numeric Keys 0-9 CLEAR Y/N ENTER Cursor Control Keys PAGE UP/PAGE DOWN DONE @/FOR EMP#Notes: Moving essential keys is not advised. When programming an alpha field withthe alpha overlay, the essential keys will shift back to their original position as part ofthe alpha overlay.You cannot change the assignment of an essential key (i.e. numeric key, Y/N, cursorkeys, ENTER, etc.) unless it is first located in a different position on the keyboard.Many function keys have programming options. See "Function Key" programming in "P-Mode <strong>Programming</strong>" for individual function key programming options.Function Key ListKey0 - 9, 00, 000(Numeric Keys)ADD CHECKALPHA TEXTDescriptionUsed in all modes to enter numeric information such as prices or quantities.Use to add multiple guest checks (tracking balances or soft checks) forpayment together. See "TRAY SUBTL" on page 10 to add separatetransactions when you are not tracking balances.Use to type a name or message that will be associated with a soft check.Press the ALPHA TEXT key anytime after a check has been opened, thentype a message (up to 15 characters) using the alpha keyboard overlay andpress ENTER. The message is saved and printed/displayed with the order.4 Getting Started <strong>SER</strong>-<strong>7000</strong> Program <strong>Manual</strong>
CANCELCASHCHECKCHECK CASHCHECK ENDORSECLEAR/ESCCONTINUECURR. CONV. 1-5CURSOR CONTROL KEYS()DECIMAL (.)DONEDRIVE THRUEAT-INEMPLOYEEEMPLOYEE (1-10)Press CANCEL to abort a transaction in progress. All current items areremoved (voided).Use CASH to finalize or tender cash sales. Change is computed when theamount of cash tendered is greater than the amount of the sale.Use CHECK to finalize or tender check sales. Change is computed whenthe amount of the check tendered is greater than the amount of the sale.Use the CHECK CASH key to exchange a check for cash outside of a sale.If compulsory check endorsement is set with the CHECK key, use theCHECK ENDORSE key to print the endorsement message after a check isinserted into the appropriate printer.Use the CLEAR function to clear numeric entries or error conditions. Usethe ESC (escape) function to exit program screens and return to theprevious menu or screen.Use to override the pop-up employee function after a transaction. Allowsthe employee to post an additional transaction without signing on again.Use to convert and display the value of the transaction in foreign currency.Only cash tender is allowed after pressing a CURR CONV key. Change iscalculated and issued in home currency.1. On menu screens, press the up or down keys to move the cursor to themenu item you wish to select.2. On program screens, press the cursor control keys (up, down, left, right)to move the cursor (highlighted field) to the field you wish to edit.3. On program screens, use the cursor keys to finalize your entry in thecurrent field and move the cursor to the next field.4. On operation screens, press the up or down cursor keys to select a mainitem that has been registered in the current transaction. The last itementered is automatically selected.Use the decimal key to enter fractional rates or percentages. Do not use toenter amounts; the decimal is automatically inserted in the proper position.Press the DONE key to exit a WLU, or to execute a report after all reportoptions have been selected.DRIVE THRU is a subtotal key. Press DRIVE THRU to record theamount of the transaction in the drive thru total on the financial report. Taxcalculation can be changed to accommodate different tax rules for drive thrusales.EAT-IN is a subtotal key. Press EAT-IN to record the amount of thetransaction in the eat-in total on the financial report. Tax calculation can bechanged to accommodate different tax rules for eat-in sales. Sales cannotbe split between eat-in and take-out.The EMPLOYEE # key is used to sign on a cashier, clerk, server oremployee who is clocking in or out.The EMPLOYEE (1-10) keys can be programmed to sign on a specificemployee when pressed directly, without entering a code.<strong>SER</strong>-<strong>7000</strong> Program <strong>Manual</strong> Getting Started 5
ENTERERR.CORRFD STMP SHIFTFD STMP SUBTTLFD STMP TENDGUEST #HOLDINACTIVEKP ROUTINGKEYBOARD LEVEL 1-5LIST CHECK 1-4MACRO OFF, P, R, X, Z,VOIDMACRO PAUSEMACRO SETMACRO 1 - 40MACRO #MDSE RETURNWhen programming or selecting from window look-ups, press ENTER toenter data into a field with the cursor remaining in the field.Press ERR CORR immediately after an item to void that item.Press FD STMP SHIFT to shift the pre-programmed food stamp status ofan item prior to its registration.Press FD STMP SUBTTL to display the total of food stamp eligible itemsregistered in the current transaction.Press the FD STMP TEND key to tender Food Stamps after the display ofthe food stamp eligible subtotal. Depending upon function keyprogramming, change less than $1 may be applied to any cash balance orissued as cash change.Use to record the number of guests served by a transaction. The entry maybe compulsory. The entry appears on receipts and the kitchen printer/KVS.Use to identify an individual item, or an entire transaction so that thedesignated items will not print/display at the kitchen printer/KVS at thecurrent finalization. Items designated as "hold" items will display on thescreen with an "H".The INACTIVE function key can be re-used as many times as necessary toinactivate key locations.The KP ROUTING key is used to override KP Time Period control. Forexample, a restaurant might normally operate two kitchens at one time andone kitchen at other times. In case the volume of business changes, themanager might want to control the KP routing manually. Also, a singleitem, or large order might be required to be sent to a different printer thannormal. Select STAYDOWN, TICKET POP UP or ITEM POP upoperation. To operate, press the key at any time inside or outside of atransaction.Use to select one of the five keyboard levels.Press LIST CHECK (for the appropriate tracking file) to display a list ofall open soft checks in the file.Press the MACRO OFF, P, R, X, Z, or VOID key while programming amacro sequence to allow the macro to set the register in the indicatedcontrol lock position (without actually turning the control lock.)Press the MACRO PAUSE key during macro programming to indicate apause in the macro. A macro will stop when it reaches the pause, and thenaccept an operator key entry before continuing the macro sequence.Press the MACRO SET key to create a macro at any time without goingthrough the P-mode macro program.Use to execute one of forty possible preprogrammed key sequences.Use to execute one of the forty possible macros by entering the macronumber and pressing the MACRO # key.Press the MDSE RETURN key to adjust items inside or outside of atransaction.6 Getting Started <strong>SER</strong>-<strong>7000</strong> Program <strong>Manual</strong>
MISC TEND 1-16MISC TEND #MODIFIER 1-10NEXT RECORD#/NO SALENEXT DOLLARNOT FOUND PLUP/BALPAGE DOWNPAGE UPPAID OUT 1-5PAID RECALLPress a MISC TEND key to finalize or tender sales paid by various chargesor other media. Tendering may or may not be allowed depending uponfunction key programming.Access any of the 16 possible miscellaneous tender functions by enteringthe tender number (1-16) and pressing the MISC TEND # key.Preceding a PLU entry, a modifier key changes a digit of the PLU number,causing a different PLU to be registered. Modifier keys can be set tochange any of the 14 PLU digit positions to any specified digit (0-9).Use the NEXT RECORD key when programming areas with multiplerecords, i.e. PLUs, PLU Status Groups, Groups, Function Keys, WLUs, orEmployees. Press the NEXT RECORD key from any field on the programscreen and the next sequential record will display with the cursor in thesame field position.Use to enter a non-adding memo number during a transaction (# function)or use to open the cash drawer outside of a sale (no sale function).Press the NEXT DOLLAR key to tender an amount the next whole dollarabove the sale total. For example, if the sale total is $2.52, then the NEXTDOLLAR key would automatically tender $3.00.Designed to be used in a scanning system, the NOT FOUND PLU keyallows the operator to immediately enter basic PLU information for an itemthat is not in the PLU file. If the "Not Found PLU" message displays whena PLU is entered (or when an item is scanned) the operator can press theNOT FOUND PLU key and will be prompted to enter PLU price,descriptor and linking information. The item is registered immediately.Enter an amount, and then press the <strong>Manual</strong> Previous Balance (P/BAL) keyto use the simplest form of Charge Posting/Table Service. The P/BAL keymay be used any time within a transaction. Transactions where the P/BALkey is used must be finalized with one of the STORE CHECK keys.When a transaction, menu or program contains more information than canbe displayed on the screen at one time, press the PAGE UP or PAGE DNkeys to shift your view of the information up or down. Note that the scrollindicators (,, ) tell you whether there is more information above,below, or above and below your current view.Press a PAID OUT key to remove cash, check or miscellaneous media fromthe drawer.The PAID RECALL key is used to recall last x number of transactions,starting with the last transaction finalized. (X is determined in memoryallocation.) Once recalled, a transaction could be reviewed (using thecursor keys or PAGE UP/PAGE DN) and/or corrected as necessary. Toexit the paid order view, press DONE.<strong>SER</strong>-<strong>7000</strong> Program <strong>Manual</strong> Getting Started 7
PARK ORDERUsed in conjunction with a kitchen video system and the <strong>SER</strong>VE ORDERfunction key. Enter a number and press PARK ORDER to park or"suspend" an order on the video monitor until the order is completely filled.In the case of a drive through order that cannot be completed when thecustomer arrives at the pick-up window, the operator would park the orderuntil it was completely filled. The order would then be served or bumpedby using the <strong>SER</strong>VE ORDER key.%1 - %10 Ten discount keys (%1 - %10) are available to handle various kinds ofdiscounts, markdowns and adjustments to items or transactions.PLUEnter the PLU code number and press PLU to register a PLU.PREV. RECORDPRICE INQPRICE LVL 1-20PRINTPRINT ALLPRINT CHECKPRINT HOLDPROMOPRINT SCREENQUITRECEIPT ON/OFFUse the PREV. RECORD key when programming areas with multiplerecords, i.e. PLUs, PLU Status Groups, Groups, Function Keys, WLUs, orEmployees. Press the PREV. RECORD field from any field on theprogram screen and the previous sequential record will display with thecursor in the same field position.Press the PRICE INQ to display the PLU price without actually registeringthe PLU.Press a LEVEL key prior to a PLU entry to shift the price of a PLU to adifferent price set in PLU programming.Press the PRINT function to send items that require special preparation tothe kitchen printer (or KVS) before the sale is finalized. An item can beprogrammed as an auto grill item, requiring the PRINT key to be pressedevery time the menu item is sold. This function does not affect normalkitchen printer/KVS routing.First press the one of the LIST CHECK keys to display all the open softchecks in the tracking file. While the open checks are displayed, press thePRINT ALL key to print a copy all open checks.Prints the soft guest check (tracking file) that is currently displayed. ThePRINT CHECK key may be programmed to store (service) the checkautomatically.Use to remove the "hold" designation from an item or order, so that theitems and their instructions are now sent to the kitchen printer/KVS atfinalization.Press the PROMO key to void the price (the item remains) of an item. Canbe used for 2 for 1 promotions. A PROMO count is available for eachmenu item.Press PRINT SCREEN to print a copy of the current screen on thedesignated receipt printer.Press QUIT to automatically sign off the current cashier/clerk.Press RECEIPT ON/OFF to toggle the receipt function from on to off.You must first have a receipt printer connected, identified to the register,and the print receipt automatically option (see General Printing Options)turned on.8 Getting Started <strong>SER</strong>-<strong>7000</strong> Program <strong>Manual</strong>
RECALL CHECK # 1-4RECD ACCT 1-5RECEIPTREPEATSCALESEAT #<strong>SER</strong>VE ORDERSPLIT CHECKSPLIT PAYSTOCK INQSTORE CHECK 1-4SUBTOTALTABLE # (1-4)The check tracking system can maintain only balances (hard check) orentire transactions (soft check) in the register memory. Four differenttracking files can be separated to maintain, for example: restaurant checks,call-in orders, delivery orders, and/or table balances. Press one of the fourRECALL CHECK # keys directly to begin a tracking transaction, or enterthe tracking number and press the RECALL CHECK # key to access theexisting tracking balance.Press a RECD ACCT key to add cash, check or miscellaneous media to thedrawer.Press the RECEIPT key to issue a transaction receipt at the designatedreceipt printer.Press the REPEAT key to quickly re-order a set of items. When a check isrecalled, simply press the REPEAT key to automatically register all of theitems registered at the previous posting.Press the SCALE key to automatically display the weight from a scaleconnected to the register, or to manually enter a weight for extension.Use to identify a specific seat (or person) within a transaction. Facilitatesseparate payment by seat, and identifies to the food preparation staff(through the kitchen printer/KVS) how to assemble meals. Seat numbersmay be assigned at the time of entry or, if necessary, later in the transaction.Used in conjunction with a kitchen video system and the PARK ORDERfunction key. Enter a number and press <strong>SER</strong>VE ORDER to serve or bumpthe order from a video monitor. No video keypad is needed for thisfunction.Function key not in use with current feature set.Press the SPLIT PAY key to divide the amount of a guest check into equalsegments for payment by more than one person.Press the STOCK INQ key, and then enter (or scan) an item to view thestock status of the item. (The item must be a stock item to use thisfunction.)The check tracking system can maintain only balances (hard check) orentire transactions (soft check) in the register memory. Four differenttracking files can be separated to maintain, for example, restaurant checks,call-in orders, delivery orders, and/or table balances. Press one of the fourSTORE CHECK # keys to finalize a tracking transaction. (This functionis equivalent to the <strong>SER</strong>VICE function.)Press SUBTOTAL to display the message “SUBTOTAL” on the display.Although a running total is always displayed on the bottom of the screen,the SUBTOTAL key may be required before some functions, such assubtotal discount.Use to enter the table number of the check. If a table number is entered, theTABLE # key can also be used to recall the check.<strong>SER</strong>-<strong>7000</strong> Program <strong>Manual</strong> Getting Started 9
TAKE-OUTTAX EXEMPTTAX SHIFT 1-6TIME IN/OUTTIP (1-3)TIP DECLARETRANSFER CHECK (1-4)TRAY SUBTLVALIDVOID ITEMWASTEWLUX/TIMEY/NTAKE-OUT is a subtotal key. Press TAKE-OUT to record the amount ofthe transaction in the take-out total on the financial report. Tax calculationcan be changed to accommodate different tax rules for take-out sales. Salescannot be split between eat-in and take-out.The TAX EXEMPT can be preprogrammed to exempt specific taxes froma sale.Use to shift the preprogrammed tax status of an item. Press before an itementry to make taxable.Press the TIME IN/OUT key to record start and stop work times for theregistered employee. Hours worked are maintained by the time clocksystem.Use to enter a tip amount on a check.Use to declare employee tips if you are not using the employee time keepingfeature. (If you are using employee time keeping, you are prompted todeclare tips when clocking out.)Use to transfer one or all open soft checks form one server to anotherserver. A transfer check receipt will print.Press the TRAY SUBTL key to finalize a transaction that will be paid laterwith subsequent transactions. See "ADD CHECK" on page 4 to addmultiple soft checks for payment.Press VALID to initiate a single line validation. (A printer with validationcapability must be connected to the system and programmed appropriately.)Press the VOID ITEM key to remove an item from a transaction. Locatethe cursor on the item you wish to remove and press the VOID ITEM key.Used to start and end entries of items that are wasted. A waste count ismaintained for each item and inventory is adjusted.Use to access a WLU by entering the numeric WLU number and pressingthe WLU key.Use the X/TIME key to multiply, to register split price items, or display thetime in the REG mode.When programming, press Y/N to toggle a selection from yes to no or no toyes.10 Getting Started <strong>SER</strong>-<strong>7000</strong> Program <strong>Manual</strong>
Control LockVOIDOFFS MODEREGXZPVOIDOFFREGXZUse to void (correct) items outside of a sale.The register is inoperable.(Register) use for normal registrations.Use to read register reports and perform other managerfunctions.Use to read register reports and reset totals to zero.P(Program) Use to program the register.S MODEUse for tests and special settings. This position is notmarked on the control lock.The <strong>SER</strong>-<strong>7000</strong> includes two sets of keys that can be used to access the following control lockpositions.KeyVOIDXZPGMCPositions AccessibleVOID, OFF, REG, XOFF, REG, XOFF, REG, X, ZVOID, OFF, REG, X, Z, PGMALL POSITIONS<strong>SER</strong>-<strong>7000</strong> Program <strong>Manual</strong> Getting Started 11
Key PromptingWhile you are programming the <strong>SER</strong>-<strong>7000</strong>, the bottom line of the screen displays the keysthat you are allowed to use next. (These prompts do not display on the operator screen in theREG control lock position, or in manager operations.)For example, turn the key to the P position to view the P-MODE PROGRAMMING MENU:Function keys that youare allowed to use aredisplayed at the bottomof the screen.P-MODE PROGRAMMING MENU1. PLU2. PLU STATUS GROUP3. GROUP4. FUNCTION KEY5. SYSTEM OPTION6. TAXESENTER PAGE UP/DN 12 Getting Started <strong>SER</strong>-<strong>7000</strong> Program <strong>Manual</strong>
Page Up and Page DownThe scroll indicators tell you if the area in which you are working (in this case, GeneralPrinting Options <strong>Programming</strong> area) contains more information than can be displayed at onetime.Arrow down indicates moreinformation below. PressPAGE DN to view theinformation below what iscurrently displayed.Arrow up and downindicates more informationabove and below. PressPAGE DN to view theinformation below what iscurrently displayed. PressPAGE UP to view theinformation above what iscurrently displayed.GENERAL PRINTING OPTIONS1. PRINT ON RECEIPT:EMPLOYEE NAMEYCONSECUTIVE #YITEMS BY GROUPNDATEYTIMEY ESC Y/N ENTER PAGE UP/DN GENERAL PRINTING OPTIONS1. PRINT ON RECEIPT:PREAMBLE/POSTAMBLEYORDER #YSEAT #Y2. RCPT FEED LINE AFTER PRT 003. LINES AFTER PREAMBLE 00 ESC Y/N ENTER PAGE UP/DN Arrow up indicates moreinformation above. PressPAGE UP to view theinformation above what iscurrently displayed.GENERAL PRINTING OPTIONS32.TURN OFF AUTO CUTTERN33.PRE LOGO IMAGE ON RCT(0-8) 434.POST LOGO IMAGE ON RCT(0-8) 333.PRE LOGO IMAGE ON GC(0-8) 034.POST LOGO IMAGE ON GC(0-8) 0 ESC Y/N ENTER PAGE UP/DN <strong>SER</strong>-<strong>7000</strong> Program <strong>Manual</strong> Getting Started 13
Choosing Items from MenusChoose an item from themenu in one of two ways:1. Type the number foryour choice and pressENTER.2. Press the or keysto move the cursor toyour choice and pressENTER.P-MODE PROGRAMMING MENU1. PLU2. PLU STATUS GROUP3. GROUP4. FUNCTION KEY5. SYSTEM OPTION6. TAXESENTER PAGE UP/DN The cursor automatically selects thefirst item when the menu screen isfirst opened.Selecting and Filling Fields1. Press the or keyto select the fieldabove or below thecurrent cursorposition.2. For yes/no fields,press the Y/N key totoggle from yes to no.3. For fields that acceptnumeric values, typethe appropriate valueusing numeric keys.Values that are notallowed will not beaccepted4. Press ENTER toaccept the new entryor press to acceptthe entry and advanceto the next field.PLU#00000000000001 PROGRAMDESCRIPTOR: PLU#1GROUP LINK #1 01PLU STATUS LINK# 01PIECE COUNT 000 RECIPE# 00ACTIVATE WLU# 00INACTIVENLU# ESC Y/N ENT PAGE UP/DN PLU#00000000000001 PROGRAMPRESET?YALLOW PRESET/HALO OVERRIDE? NPRC/HALO 000000.00 PRC LVL1 01PRC/HALO 000000.00 PRC LVL2 00PRC/HALO 000000.00 PRC LVL3 00PRC/HALO 000000.00 PRC LVL4 00LU# ESC Y/N ENT PAGE UP/DN 14 Getting Started <strong>SER</strong>-<strong>7000</strong> Program <strong>Manual</strong>
Opening Pop-up Selection Windows1. The arrow indicatesthe selections for thisfield are made from apop-up window.2. With the fieldselected and thecursor on the arrow,press ENTER. Apop-up windowdisplays with theselections for thefield listed.3. Press the or keysto make your choice,then press ENTER toclose the pop-upwindow. Your newchoice is displayed.GENERAL FUNCTION OPTIONSBEFORE TENDER3. DEFAULT DESTINATI NONE4. ROUNDING ON % : UP AT 55. ROUNDING ON SPLIT PRICE/MULTALWAYS DOWN6. CONSOLIDATE LIKE ITEMS Y ESC Y/N ENTER PAGE UP/DN GENERAL FUNCTION OPTIONSBEFORE TENDER3. DEFAULT DESTINATI 4. ROUNDING ON % : NONE55. ROUNDING ON SPLIT EAT-INTAKE-OUTN6. CONSOLIDATE LIKE DRIVE-THRU Y ESC Y/N ENTER PAGE UP/DN GENERAL FUNCTION OPTIONSBEFORE TENDER3. DEFAULT DESTINATI 4. ROUNDING ON % : NONE55. ROUNDING ON SPLIT EAT-INTAKE-OUTN6. CONSOLIDATE LIKE DRIVE-THRU Y ESC Y/N ENTER PAGE UP/DN NNN<strong>SER</strong>-<strong>7000</strong> Program <strong>Manual</strong> Getting Started 15
Entering Alpha CharactersYou have the option of using the Alpha Keyboard Overlay to enter descriptors (the defaultmethod) or you can enter descriptors by entering a three-digit code for each character. See“General Function Options” in P-Mode <strong>Programming</strong> to select the method you wish to enterdescriptors.PS/2 KeyboardA third option is to connect a PC keyboard to the standard PS/2 connector on the connectionpanel. With a PS/2 keyboard connected, you can complete all programming tasks. Use theSpace Bar to toggle from yes to no at Y/N fields. The commands: Page Up/Page Down,Cursor Keys, and Enter can be used on either the terminal or PC keyboard.Alpha OverlayThe key layout of the Alpha Keyboard Overlay is shown below:RECTFEEDDETLFEEDRCPTON/OFF-+ | { : “ = PRICE KEYB RECEIPTLVL 1 LVL 1 ISSUETIMECLOCKEMP #! @ # $ % ^ & * ( ) – PRICELVL 2KEYBLVL 2ERRCORRVOIDITEMMD<strong>SER</strong>TRNQW E R T Y U I O P \TAX1SHIFTEXEMPTTAXYES/NOENTERTRANSVOIDAS D F G H J K L ; ‘ MACRO1PAGEUPPAGEDOWNRECALLCHECKZX C V B N M , . / < MACRO2STORECHECKCAPSSHIFT BOLD SPACE SPACE SPACE SPACE SPACE BACK ? > MACRO3@/FORPLUCLEARMISC2[]%1789MISC1%2456CHECK%3123SBTLDONE000.CASH16 Getting Started <strong>SER</strong>-<strong>7000</strong> Program <strong>Manual</strong>
Entering Descriptors with the Alpha Overlay1. The indicator“ALPHA” displayswhen a field thataccepts alphanumericentries is selected. Atthis time, thekeyboard is shifted tothe alpha keyboardoverlay.PLU#00000000000001 PGM. ALPHADESCRIPTOR: PLU#1GROUP LINK #1 01PLU STATUS LINK# 01PIECE COUNT 000 RECIPE# 00ACTIVATE WLU# 00INACTIVENLU# ESC Y/N ENT PAGE UP/DN 2. Type a new descriptor using the typewriter style keyboard on the alpha overlay. If youmake a mistake: Press ESC and the original descriptor will be displayed again, or Press BACK to remove the previous character.3. Press ENTER to finalize the new descriptor, or press to finalize the new descriptor andmove the cursor to the next field<strong>SER</strong>-<strong>7000</strong> Program <strong>Manual</strong> Getting Started 17
Alpha Code Chart for Alpha Entry by Code NumberCHAR • ¾ © “fs” “tx” ® CODE 007 008 009 011 020 021 024 025 026 027CHAR SPACE ! " # $ % & ' ( )CODE 032 033 034 035 036 037 038 039 040 041CHAR * + , - . / 0 1 2 3CODE 042 043 044 045 046 047 048 049 050 051CHAR 4 5 6 7 8 9 : ; < =CODE 052 053 054 055 056 057 058 059 060 061CHAR > ? @ A B C D E F GCODE 062 063 064 065 066 067 068 069 070 071CHAR H I J K L M N O P QCODE 072 073 074 075 076 077 078 079 080 081CHAR R S T U V W X Y Z [CODE 082 083 084 085 086 087 088 089 090 091CHAR \ ] ^ _ ` a b c d eCODE 092 093 094 095 096 097 098 099 100 101CHAR f g h I j k l m n oCODE 102 103 104 105 106 107 108 109 110 111CHAR p q r s t u v w x yCODE 112 113 114 115 116 117 118 119 120 121CHAR z { | } ~ Ç ü é âCODE 122 123 124 125 126 127 128 129 130 131CHAR ä à å ç ê ë è ï î ìCODE 132 133 134 135 136 137 138 139 140 141CHAR Ä Å É æ Æ ô ö ò û ùCODE 142 143 144 145 146 147 148 149 150 151CHAR ÿ Ö Ü ¢ £ ¥ ö ƒ á íCODE 152 153 154 155 156 157 158 159 160 161CHAR ó ú ñ Ñ ¿ ½CODE 162 163 164 165 166 167 168 169 170 171CHAR ¼ ß øCODE 172 224 225 230 237CHARDoubleCODE 99918 Getting Started <strong>SER</strong>-<strong>7000</strong> Program <strong>Manual</strong>
Initial ClearCAUTION: Do not share this information with unauthorized users. Distribute thespecial S-Mode key only to those you may want to perform this function.The initial clear function allows you to exit any register activity and return to a beginning orcleared state. Any transaction that is in progress will be exited and totals for that transactionwill not be updated.Here are some reasons you may want to perform an initial clear: The register is in an unknown state, and you wish to exit the current programor transaction without following normal procedures. You have performed a function that includes a compulsory activity, such asvalidating or printing, and you wish to bypass the compulsory activity. An initial clear may be necessary as part of servicing, or troubleshooting an<strong>SER</strong>-<strong>7000</strong> register or system.Perform this procedure only as necessary. Contact your SAM4S dealer first if you havequestions about operating or programming your <strong>SER</strong>-<strong>7000</strong>.To Perform an Initial Clear:1. Turn the power switch located on the right side of the register to the OFFposition.2. Turn the control lock to the PGM position.3. Press and hold the key position where the CASH key is located on the defaultkeyboard layout.4. While continuing to hold the CASH key, turn the power switch to the ONposition.5. The message “SIGN ON REQUIRED” will display when the initial clear iscomplete.56CHECK23SBTL00 . CASHTO INITIALIZE:Press and hold this key positionduring power-up in PGM mode.<strong>SER</strong>-<strong>7000</strong> Program <strong>Manual</strong> Getting Started 19
20 Getting Started <strong>SER</strong>-<strong>7000</strong> Program <strong>Manual</strong>
S-Mode <strong>Programming</strong>S- Mode <strong>Programming</strong> MenuCAUTION:S-Mode functions are reserved for dealers who set-up and service your <strong>SER</strong>-<strong>7000</strong>system. The user will normally perform no S-Mode functions.The procedures described in this area are security sensitive. Many S-Mode functions,including memory clearing and memory allocation, may cause damage or loss if theyare performed without first backing up register data.A special S-Mode key secures S-Mode. The S-Mode key position is located in anunmarked position, one position clockwise from the PGM control lock position.Distribute the special S-Mode key only to those you may want to perform thesefunctions.<strong>SER</strong>-<strong>7000</strong> Program <strong>Manual</strong> S-Mode <strong>Programming</strong> 21
1. Turn the key to the Sposition.2. Choose an item fromthe menu in one oftwo ways:Type the number foryour choice and pressENTER.Press the or keysto move the cursorand press ENTER.S-MODE PROGRAMMING MENU1. SELF TESTS2. MEMORY CLEAR3. MEMORY ALLOCATION4. KEYBOARD KEY RELOCATION5. SYSTEM OPTIONS6. PRINTER DRIVER SELECTIONSENTER PAGE UP/DN S-MODE PROGRAMMING MENU7. <strong>SER</strong>IAL PORT DEVICE SELECTIONS8. DEFINE <strong>SER</strong>IAL PORT PARAMETERS9. S-MODE PROGRAM SCAN PRINTING10.SYSTEM PASSWORD11.SUPER MACRO SCAN12.ROM FILE DOWNLOADENTER PAGE UP/DN S-MODE PROGRAMMING MENU9. S-MODE PROGRAM SCAN PRINTING10. SYSTEM PASSWORD11. SUPER MACRO SCAN12. ROM FILE DOWNLOAD13. LOAD DEFAULT MESSAGES14. CHECK UNLOCKENTER PAGE UP/DN 22 S-Mode <strong>Programming</strong> <strong>SER</strong>-<strong>7000</strong> Program <strong>Manual</strong>
Self Tests1. Select SELF TEST from the S-MODE PROGRAMMING MENU to display the H/WTEST Screen.2. Choose an item from the menu in one of two ways:Type the number for your choice and press ENTER, orPress the or keys to move the cursor to your choice and press ENTER.Serial & IRC Loopback Test1. Select <strong>SER</strong>IAL &IRC LOOPBACKfrom the H/W TESTMENU.2. Power off the registerand install a loopback connector at theport(s) you wish totest.3. The display willindicate PASS/FAILfor each port. Referto "Loop BackConnections" in the"Appendix" forinformation aboutmaking a loop backtest connector.4. Press any key toreturn to the H/WTEST MENU.DATA RECEIVE TESTP1 P2 P3 P4 IRCFAIL FAIL FAIL FAIL FAILCONTROL SIGNAL TESTP1 P2 P3 P4FAIL FAIL FAIL FAILPRESS ANY KEY TO RETURN<strong>SER</strong>-<strong>7000</strong> Program <strong>Manual</strong> S-Mode <strong>Programming</strong> 23
Drawer Test1. Select DRAWERfrom the H/W TESTMENU.2. Power off the registerand install a drawer atthe ports you wish totest.3. The screen willdisplay "FIRSTDRAWER" and"SECONDDRAWER" insequence. Eachconnected drawershould open as it isdisplayed.4. Press any key toreturn to the H/WTEST MENU.FIRST DRAWERSECOND DRAWERDRAWER COMPULSORYDRAWER 1 CLOSEDDRAWER 2 CLOSEDRTC Setting (Real Time Clock)1. Select RTCSETTING from theH/W TEST MENU toset the system clockand calendar.2. Type the currentyear/month/day/hour/minute/second, pressENTER.3. Press any key toreturn to the H/WTEST MENU.ENTER DATE/TIMEYYYYMMDDHHMMSS24 S-Mode <strong>Programming</strong> <strong>SER</strong>-<strong>7000</strong> Program <strong>Manual</strong>
Display Test1. Select DISPLAYfrom the H/W TESTMENU to begin thedisplay test.2. At the completion ofthe display exercise,the message "RearLCD Test" willdisplay.3. Press any key toreturn to the H/WTEST MENU.PRESS ANY KEY TO RETURNKeyboard Test1. Select KEYBOARDfrom the H/W TESTMENU to display theKEY TEST screen.2. Each key is depictedat a square on thekeyboard. Press anykey; the key will beindicated on thedisplay.3. Turn the MODE keyto exit and return tothe H/W TESTMENU.KEY TESTPRESS KEYTURNMODE KEYTO FINISH<strong>SER</strong>-<strong>7000</strong> Program <strong>Manual</strong> S-Mode <strong>Programming</strong> 25
Mode & Clerk Key Test1. SelectMODE/CLERK KEYTEST from the H/WTEST MENU tobegin the mode/clerkkey test.2. Turn the mode key;the display indicatesthe current keyposition.3. Press any key toreturn to the H/WTEST MENU.MODE/CLERK KEY TESTTURN MODE KEY OR ENTER CLERK KPRESS ANY KEY TO FINISHREG MODERAM Test1. Select RAM from theH/W TEST MENU tobegin the RAM test.2. The display monitorsthe progress of thetest.3. At the completion ofthe RAM test, themessage "BA<strong>SER</strong>AM OK" willdisplay if there are noRAM problems.4. Press any key toreturn to the H/WTEST MENU.BASE RAM OKEXT. RAM SIZE 0(0)PRESS ANY KEY TO RETURNNOTE: This test is non-destructive. Performing this test will not affect the currentprogram or totals.26 S-Mode <strong>Programming</strong> <strong>SER</strong>-<strong>7000</strong> Program <strong>Manual</strong>
IRC Test1. Select IRC from theH/W TEST MENU todisplay the IRCTEST menu.2. Select "1. Register #Setting" to enter theIRC register number(1-32).IRC TEST1. REGISTER # SETTING2. INTERNAL LOOPBACK(CHIP)3. INTERNAL LOOPBACK(DRIVER)4. EXTERNAL LOOPBACK5. IRC SYSTEM TESTSelect 2 - 5 for aspecific test. Refer tothe table below for anexplanation of eachtest.3. Press any key to endthe test and return tothe IRC TEST menu.# TEST Notes2 INTERNAL LOOPBACK(CHIP)3 INTERNAL LOOKBACK(DRIVER)"Tests the internal IRC integrated circuit. Testruns continuously counting success (S) andfailure (F).Tests the internal IRC driver. Test runscontinuously counting success (S) and failure (F).4 EXTERNAL LOOPBACK This test requires a loopback connector. Testruns continuously counting success (S) andfailure (F).5 IRC SYSTEM TEST Test sends packet to each register in the rangeinput. Test runs continuously counting success(S) and failure (F).<strong>SER</strong>-<strong>7000</strong> Program <strong>Manual</strong> S-Mode <strong>Programming</strong> 27
Printer Test1. Select PRINTERfrom the H/W TESTMENU to begin theprinter test.2. The printers will printtest patternscontinuously until theCLEAR key ispressed.3. Press ESC to returnto the H/W TESTMENU.** <strong>SER</strong>-<strong>7000</strong> PRINTER TEST **RAM Checksum1. Select DISPLAYfrom the H/W TESTMENU to begin thedisplay test.2. The messages:"Calculating BaseRAM checksum" andCalculating Ext.RAM checksum" willdisplay momentarilybefore the RAMchecksums display.3. Press any key toreturn to the H/WTEST MENU.BASE RAM : 00020147EXT. RAM : 00000000PRESS ANY KEY TO RETURN28 S-Mode <strong>Programming</strong> <strong>SER</strong>-<strong>7000</strong> Program <strong>Manual</strong>
Version Check1. Select VERSIONCHECK from theH/W TEST MENU todisplay softwareversion and RAMinformation.2. The messages:"CALCULATINGROM CHECKSUM"will displaymomentarily beforethe versioninformation andchecksums display.3. Press any key toreturn to the H/WTEST MENU.<strong>SER</strong>-<strong>7000</strong> 0.99d NOV.26 2003RAM SIZE : 512KByteBASE(512K) EXT.(0000K)ROM CHECKSUM : 0480D37B# PLU : 107/107BOOT ROM VER : (V1.01)INIT#: 10 PFAIL# : 0PRESS ANY KEY TO RETURNCard Read Test1. Select CARD READTEST from the H/WTEST MENU to testan optional creditcard reader.2. At the messages:"SWIPE THECARD", swipe thecard through thereader.3. Press any key toreturn to the H/WTEST MENU.CARD READ TESTSWIPE THE CARD<strong>SER</strong>-<strong>7000</strong> Program <strong>Manual</strong> S-Mode <strong>Programming</strong> 29
Printer Status Check1. Select PRINTERSTATUS CHECKfrom the H/W TESTMENU to displayprinter statusinformation.2. Press any key toreturn to the H/WTEST MENU.PRINTER STATUS CHECKCOVER CLOSEDAUTO-CUTTER O.K.J-PAPER PRESENTJ-PAPERR-PAPER PRESENTR-PAPERPRESS ANY KEYPrint Image Logo1. Select PRINT IMAGE LOGO from the H/W TEST MENU to print the eight stored logobitmap images.30 S-Mode <strong>Programming</strong> <strong>SER</strong>-<strong>7000</strong> Program <strong>Manual</strong>
Memory ClearCAUTION: The procedures described in this area are security sensitive. Clearing allor parts of the <strong>SER</strong>-<strong>7000</strong> memory may cause damage or loss to the program. Do notshare this information with unauthorized users and distribute the special S-Mode keyonly to those you may want to perform these functions.Memory All ClearComplete clearing of all memory areas and installation of the default program can be donethrough the following special procedure:1. Turn the power switch located on the right side of the register to the OFFposition.2. Turn the control lock to the unmarked position one position clockwise from thePGM position.3. Press and hold the key position where the CHECK key is located on the defaultkeyboard layout.7 8 9 TND14 5 6 CHECK1 2 3 SBTLTO MEMORY ALL CLEAR:Press and hold this key positionduring power-up in S-mode.0 00 . CASH4. While continuing to hold the CHECK key while turning the power switch to theON position.5. Press the upper left key of the keyboard, then the lower left key, then the upperright key, and finally press the lower right key.<strong>SER</strong>-<strong>7000</strong> Program <strong>Manual</strong> S-Mode <strong>Programming</strong> 31
1326. The display will monitor the memory clear process, which takes about 1 minute.When complete, press any key. The display will prompt: “Enter Register Number (1-32)”. Type the registernumber on the numeric keypad and press ENTER. The display will prompt: “Default Mem. Alloc.? [Y]”. Press the Y/N key totoggle from Y (yes) to N (no), then press ENTER. The S-MODE PROGRAMMING MENU will display.432 S-Mode <strong>Programming</strong> <strong>SER</strong>-<strong>7000</strong> Program <strong>Manual</strong>
Selective Memory ClearingThe Memory Clear selection allows you to selectively clear various areas of the <strong>SER</strong>-<strong>7000</strong>memory.1. Select MEMORYCLEAR from the S-MODEPROGRAMMINGMENU to display theS-MODE MEMORYCLEAR Screen.2. Press PAGE DN toview additionalallocation options, orpress the or keysto locate the optionyou wish to set.3. Choose an item fromthe menu in one oftwo ways:Type the number foryour choice and pressENTER.Press the or keysto move the cursor toyour choice and pressENTER.4. The display will askyou to confirm yourintentions to clear thememory area byasking CLEAR? [N].Press the Y/N keyonce to change theselection to [Y], thenpress ENTER tocomplete the memoryclear.S-MODE MEMORY CLEAR1. ALL TTLS, CNTS&GRAND TTLS2. TOTALS AND COUNTERS3. GRAND TOTALS ONLY4. ORDER TRACKING#15 ORDER TRACKING#2S-MODE MEMORY CLEAR6. ORDER TRACKING#37. ORDER TRACKING#48. PAID ORDER RECALL9. PRODUCT PROJECTIONS10.TIME-KEEPINGS-MODE MEMORY CLEAR11. LOGO BITMAP IMAGE12. PRE-POLL STATUS FLAG13. PLU FILE14. SUPER MACRO15. ELECTRONIC JOURNALS-MODE MEMORY CLEAR15. ELECTRONIC JOURNAL16. INITIAL&POWER FAIL COUNTER17. CONSECUTIVE#18. GLOBAL ORDER NUMBER19. ALL (1-10)<strong>SER</strong>-<strong>7000</strong> Program <strong>Manual</strong> S-Mode <strong>Programming</strong> 33
Memory AllocationCAUTION: The procedures described in this area are security sensitive. Memory isautomatically cleared after memory allocation is set. Do not change memory allocationafter your system has been installed unless you are aware that all programs, totals andcounters will be cleared. Do not share this information with unauthorized users anddistribute the special S-Mode key only to those you may want to perform thesefunctions.1. Select MEMORYALLOCATION fromthe S-MODEPROGRAMMINGMENU to display theMEMORYALLOCATIONPROGRAMMINGScreen.2. Press PAGE DN toview additionalallocation options, orpress the or keysto locate the optionyou wish to set.MEMORY ALLOCATION PROGRAM1. DIGIT# IN REPORT TTL(8-10) 082. DIGIT# IN REPORT CNT(6-8) 63. # OF PLU 001074. # OF PLU STATUS GROUPS 00105. PRICE LEVELS PER PLU (1-4) 46. PLU REPORT BY PRICE LEVEL NREMAINING MEMORY : 23060BYTESMEMORY ALLOCATION PROGRAM7. # OF EMPLOYEES 0108. TIME ENTRIES PER EMPLOYEE 249. USE GROUP BY EMPLOYEE N10.CHECK TRACKING IS : SOFT11.# OF TRACKING FILES (0-4) 1REMAINING MEMORY :23060BYTESMEMORY ALLOCATION PROGRAM12.# OF LINES PER SOFT CHECK 05013.# OF LINES PER TRANSACTION10014.MAXIMUM # OF CHECKSTRACK 1 00020TRACK 2 00020TRACK 3 00020REMAINING MEMORY : 23060BYTESMEMORY ALLOCATION PROGRAMTRACK 4 0002015.TIME PERIOD (24/48/96) 9616.# OF PRODUCT MIX GROUPS 02017.PROD.MIX PRDS (24/48/96) 2418.PROJECTIONSNREMAINING MEMORY :23060BYTES34 S-Mode <strong>Programming</strong> <strong>SER</strong>-<strong>7000</strong> Program <strong>Manual</strong>
MEMORY ALLOCATION PROGRAM19.# OF WLU 01020.# OF LINES PER WLU 2821.# OF RECIPE 01022.# OF INVENTORY INGREDIENT 02523.# OF LINES FOR E.J. 0000024.# OF PAID RECALL TRANSAC 00REMAINING MEMORY : 23060BYTESMEMORY ALLOCATION PROGRAM25.KEYSTROKE IN SUPER MACRO 001026.STORE BITMAPN27.EAT-IN BY TIME PERIODS N28.TAKE-OUT BY TIME PERIODS N29.DRIVE-THRU BY TIME PERIODS NREMAINING MEMORY :23060BYTESMEMORY ALLOCATION PROGRAM30.TRACK 1 BY TIME PERIODS N31.TRACK 2 BY TIME PERIODS N32.TRACK 3 BY TIME PERIODS N33.TRACK 4 BY TIME PERIODS N34.# OF MIX & MATCH 005REMAINING MEMORY :23060BYTESMEMORY ALLOCATION PROGRAM35. REPORT SELECTION TABLEY=YES, N=NOZ12345FINANCIAL Y Y N N NEMPLOYEE Y Y N N NPLU Y Y N N NGROUP Y Y N N NREMAINING MEMORY : 23060BYTESMEMORY ALLOCATION PROGRAM35. REPORT SELECTION TABLEY=YES, N=NOZ12345GROUP BY TIME N N N N NTIME PERIOD Y Y N N NTIME KEEPING Y Y N N NMIX & MATCH Y N N N NREMAINING MEMORY : 23060BYTES<strong>SER</strong>-<strong>7000</strong> Program <strong>Manual</strong> S-Mode <strong>Programming</strong> 35
Memory Allocation Program NotesFIELD1 # OF DIGITS IN REPORTTOTALS (8-10)2 # OF DIGITS IN REPORTCOUNTERS (6-8)NotesDetermine the maximum size of report totals:8, 9 or 10 digits.Your choice assumes two digits to the right ofthe decimal. For example 6 digits =XXXX.XX or 7 digits = XXXXX.XX.3 # OF PLU Determine the total # of PLUs, includingPLUs by code, by scanning or bykeyboard/keyboard level.4 # OF PLU STATUS GROUPS Determine the maximum number of statusgroups to which you link PLUs. See "PLUStatus Group (PLU Status Link)" in "P-Mode<strong>Programming</strong>" for more information.5 # OF PRICE LEVELS PERPLU (1-4)6 PLU REPORT BY PRICELEVELPrices may be assigned at up to four differentprice levels for each PLU. If you wish to useprice levels, you must determine the numberof price levels here. If Price levels are set,they are set for all PLUs.If selected, the PLU report will detail sales ateach level, rather than a total and counter forsales at all levels combined.7 # OF EMPLOYEES Determine the total number of employees andset the maximum use wish to use here.Employees include all who use the registerfor any purpose, including those using onlythe time clock feature for clocking in/out.8 # OF TIME ENTRIES PEREMPLOYEEDetermine the maximum number of clockentries that can be stored in the Z1 report.After Z1, only summaries are stored on Z2reports (or Z3, Z4 or Z5 reports, ifimplemented.)9 USE GROUP BY EMPLOYEE Determine if you wish to report GROUPS byEMPLOYEE. If you choose Y, then you canreport up to 30 of the 99 groups for eachemployee. See "Groups By Employee" onpage 205 to select which groups will reportfor each employee.10 CHECK TRACKING METHOD Choose HARD or SOFT. Hard checks storeonly the check balances; soft check storecheck detail for the number of linesdetermined at step 12.36 S-Mode <strong>Programming</strong> <strong>SER</strong>-<strong>7000</strong> Program <strong>Manual</strong>
FIELD11 # OF TRACKING FILES(0-4)12 # OF LINES PER SOFTCHECK13 # OF LINES PERTRANSACTION14 MAXIMUM # OF CHECKSTRACK 1TRACK 2TRACK 3TRACK 415 # OF TIME PERIODS(24/48/96)16 # OF PRODUCT MIXGROUPS17 # OF PRODUCT MIX TIMEPERIODSNotesSelect the number of separate tracking filesyou wish to use. Select "0" for no checktracking, additional files might be used fortable tracking, house account tracking, drivethrough tracking, and/or phone ordertracking.Determine the maximum number of lines thatcan be stored in each soft check. Note thatvoided items also use lines in a check.Determine how many lines of receipt printcan be buffered for each transaction. If thisnumber is reached during a transaction, themessage "BUFFER FULL" will display andthe transaction must be finalized. Note:Must be greater than or equal to the numberof lines per soft check. Note that voideditems also use lines in a check.Determine the maximum number of checksfor each tracking file.Determine the number of periods the timereport is segmented into. For example, if youwish hourly reports for 24 hours, choose 24.The actual time for each period can becustomized. See "Time Period" in "P-Mode<strong>Programming</strong>".Product Mix Groups can be used toimplement a simplified ingredient system fortracking only essential ingredients associatedwith items (i.e. cups for beverages or numberof pieces for chicken menus.) Enter thenumber of Product Mix items you wish totrack here.Product mix groups report usage by timeperiod. Determine the number of periods youwish for product mix time reporting. Theactual time for each period can becustomized. See "Product Mix Group TimePeriods" in "P-Mode <strong>Programming</strong>".18 PROJECTIONS The Product Projection report provides ahistory of each product mix item's sales byday of week. Determine if you wish to usethis report.<strong>SER</strong>-<strong>7000</strong> Program <strong>Manual</strong> S-Mode <strong>Programming</strong> 37
FIELDNotes19 # OF WLU Enter the total number of WLUs you wish touse here. WLUs are pop-up windows listingPLUs, condiments, and/or functions. See"Window Look Up (WLU)" in "P-Mode<strong>Programming</strong>" for a complete discussion ofWLU applications.20 # OF LINES PER WLU The maximum number of lines per WLU is50.21 # OF RECIPE Enter the maximum number of recipes youwish to use if you are implementing aningredient inventory system. See "IngredientInventory" in "P-Mode <strong>Programming</strong>" formore information.22 # OF INVENTORYINGREDIENT23 # OF LINES FOR ELECT.JOURNAL24 # OF PAID RECALLTRANSACTIONS25 # OF KEYSTROKES INSUPER MACROEnter the maximum number of inventoryingredients you wish to use if you areimplementing an ingredient inventory system.See "Ingredient Inventory" in "P-Mode<strong>Programming</strong>" for more information.If you wish to capture a sales journal in <strong>SER</strong>-<strong>7000</strong> memory, enter the maximum size of theelectronic journal here. Also see "E.J.(Electronic Journal) & Detail PrintingOptions" in "P-Mode <strong>Programming</strong>" forrelated options.Enter the number of preceding transactions (amaximum of 99) that may be viewed byrepeatedly pressing the PAID RECALL key.Enter the number of transaction keystrokes,including key position changes, to berecorded in the super macro. When the supermacro memory is full, the most recent entrieswill be added and the oldest discarded. Usethe super macro as a troubleshooting tool.26 STORE BITMAP If Y, reserves 12,300 bytes of memoryregardless of actual bitmap size.27 EAT-IN BY TIME PERIODS28 TAKE-OUT BY TIMEPERIODS29 DRIVE-THRU BY TIMEPERIODS30 TRACK 1 BY TIME PERIODS31 TRACK 2 BY TIME PERIODS32 TRACK 3 BY TIME PERIODSOptions 27-33 enable reports detailing salesDollars and counts by type of sale for eachdesignated time period.38 S-Mode <strong>Programming</strong> <strong>SER</strong>-<strong>7000</strong> Program <strong>Manual</strong>
FIELD33 TRACK 4 BY TIME PERIODSNotes34 # OF MIX & MATCH Enter the maximum number of mix and matchdiscount tables that will be used.35 REPORT SELECTION TABLE Z2 represents accumulation of Z1 reports; Z3represents accumulation of Z2 reports, etc.You must select all levels below your highestselected report level. For example, if youselect Z4 reporting for a particular report,then you must also select Z1, Z2, and Z3 forthat report.<strong>SER</strong>-<strong>7000</strong> Program <strong>Manual</strong> S-Mode <strong>Programming</strong> 39
Keyboard Key Relocation1. Select KEYBOARDKEY RELOCATIONfrom the S-MODEPROGRAMMINGMENU to display theKEYBOARD KEYRELOCATIONScreen.2. Press a numeric digit(1-3) or press the or keys to move thecursor to your choice.Then press ENTERto indicate whetheryou wish to programa PLU, WLU orFUNCTION key.3. A pop up windowdisplays the keyboardlevel selection.Select the keyboardlevel you wish toprogram, pressENTER.KEYBOARD KEY RELOCATION1. PLU KEYS2. WLU KEYS3. FUNCTION KEYSESC ENTER PAGE UP/DN KEYBOARD KEY RELOCATION1. PLU KEYS 1. KBD LEVEL 12. WLU KEYS 2. KBD LEVEL 23. FUNCTION 3. KBD LEVEL 34. KBD LEVEL 45. KBD LEVEL 5ESC40 S-Mode <strong>Programming</strong> <strong>SER</strong>-<strong>7000</strong> Program <strong>Manual</strong>
PLU Key RelocationThis process accomplishes two purposes: It changes the assignment of a key location to a PLU key. You can change anexisting Function key or WLU key into a PLU key by selecting any key on thekeyboard in this program. It assigns the PLU number that is registered when this PLU key is operated. Youcan also assign the PLU registered for a key in P-Mode. See “PLU and WLUKey Assignment” in “P-Mode <strong>Programming</strong>”.1. Press any key to readand/or change thecurrent assignment;or press ESC to exit.PLU KEY RELOCATION PROGRAMMINGKEYBOARD LEVEL 1 PRESS ANY KEY TO READ AND/ORCHANGE CURRENT ASSIGNMENT PRESS ESC TO EXIT2. Type the PLUnumber you wish tobe registered (up to14 digits) when thisPLU key is pressed.Press ENTER toassign the number, orpress ESC to exitwithout changing thecurrent assignment.3. The old and newassignments for thekey you have justprogrammed display.Continue to programadditional PLU keylocations by pressinganother key.PLU KEY RELOCATION PROGRAMMINGKBD LEVEL : 1 KEY POS. : 1CURRENT PLU# 00000000000001PLU1ESC ENTERPLU KEY RELOCATION PROGRAMMINGKEYBOARD LEVEL 1 PRESS ANY KEY TO READ AND/ORCHANGE CURRENT ASSIGNMENT PRESS ESC TO EXITKEY POSITION 13:OLD=PLU# 0000000000001NEW=PLU# 0000000000002<strong>SER</strong>-<strong>7000</strong> Program <strong>Manual</strong> S-Mode <strong>Programming</strong> 41
WLU Key RelocationThis process accomplishes two purposes: It changes the assignment of a key location to a WLU key. You can change anexisting Function key or PLU key into a WLU key by selecting any key on thekeyboard in this program. It assigns the WLU number that is displayed when this WLU key is operated.The WLU # assignment for a WLU key can also be set in P-Mode. See “PLUand WLU Key Assignment” in “P-Mode <strong>Programming</strong>”.1. Press any key to readand/or change thecurrent assignment,or press ESC to exit.WLU KEY RELOCATION PROGRAMMINGKEYBOARD LEVEL 1 PRESS ANY KEY TO READ AND/ORCHANGE CURRENT ASSIGNMENT PRESS ESC TO EXIT2. Type the WLUnumber you wish tobe displayed whenthis WLU key ispressed. PressENTER to assign thenumber, or press ESCto exit withoutchanging the currentassignment.WLU KEY RELOCATION PROGRAMKBD LEVEL : 1 KEY POS. : 1CURRENT WLU#: 01KEYCODE#013 ADD CHECKESC ENTERThe current function anddescriptor for this key aredisplayed here.42 S-Mode <strong>Programming</strong> <strong>SER</strong>-<strong>7000</strong> Program <strong>Manual</strong>
3. The old and newassignments for thekey you have justprogrammed display.Continue to programadditional WLU keylocations by pressinganother key.4. Press ESC to exit. Atthe prompt:EXIT? [Y] pressENTER.5. At the prompt:SAVE KEYRELOCATION? [Y]press ENTER, orpress the Y/N key,then press ENTER toexit without savingchanges.WLU KEY RELOCATION PROGRAMMINGKEYBOARD LEVEL 1 PRESS ANY KEY TO READ AND/ORCHANGE CURRENT ASSIGNMENT PRESS ESC TO EXITKEY POSITION 13:OLD=KEYCODE#013 ADD CHECKNEW=WLU# 01 WLU#1<strong>SER</strong>-<strong>7000</strong> Program <strong>Manual</strong> S-Mode <strong>Programming</strong> 43
Function Key RelocationThis process changes the assignment of any key. You can change an existing WLU key orPLU key into a different function key by selecting any key on the keyboard in this program.1. Press any key to readand/or change thecurrent assignment,or press ESC to exit.FUNCTION KEY RELOCATION PROGRAKEYBOARD LEVEL 1 PRESS ANY KEY TO READ AND/ORCHANGE CURRENT ASSIGNMENT PRESS ESC TO EXITNOTE: You cannot change the assignment of an essential key (i.e. numeric key, Y/N,cursor keys, ENTER, etc.) unless it is first located in a different position on thekeyboard.2. The currentassignment displaysalong with a windowfrom which you canlook up functioncodes. If you do notknow the code of thefunction you wish toassign, press thePAGE UP or PAGEDN keys until thecode you wish to usecomes into view, orsee "Function KeyProgram Summary"In P-Mode<strong>Programming</strong> for alisting of functioncodes.3. Type a new key codeand press ENTER orpress ESC to exit.FUNC. KEY RELOCATION PROGRAKBD LEVEL : 1 KEY POS. : 112CUR. ASSIGN : 201 RECD ACCT11 1 4 42 3 5 53 3 6 644 S-Mode <strong>Programming</strong> <strong>SER</strong>-<strong>7000</strong> Program <strong>Manual</strong>
4. The old and newassignments for thekey you have justprogrammed display.Continue to programadditional Functionkey locations bypressing another key.5. Press ESC to exit. Atthe prompt:EXIT? [Y] pressENTER.6. At the prompt:SAVE KEYRELOCATION? [Y]press ENTER, orpress the Y/N key,then press ENTER toexit without savingchanges.FUNCTION KEY RELOCATION PROGRAKEYBOARD LEVEL 1 PRESS ANY KEY TO READ AND/ORCHANGE CURRENT ASSIGNMENT PRESS ESC TO EXITKEY POSITION 167:OLD=KEYCODE#021 CHECKNEW=KEYCODE#026 CURR.CONV1<strong>SER</strong>-<strong>7000</strong> Program <strong>Manual</strong> S-Mode <strong>Programming</strong> 45
Code# & Function1. NUMERIC 12. NUMERIC 23. NUMERIC 34. NUMERIC 45. NUMERIC 56. NUMERIC 67. NUMERIC 78. NUMERIC 79. NUMERIC 910. NUMERIC 011. NUMERIC 0012. NUMERIC 00013. ADD CHECK14. BACK SPACE15. BOLD16. CANCEL17. CAPS18. CASH19. TIP DECLARE20.21. CHECK22. CHECK CASH23. CHECK ENDORSE24. CLEAR25. CONTINUE26. CURR. CONV. 127. CURR. CONV. 228. CURR. CONV. 329. CURR. CONV. 430. CURR. CONV. 531. CURSOR DOWN ()32. CURSOR LEFT ()33. CURSOR RIGHT ()34. CURSOR UP ()35. DECIMAL (.)36. DELETE37. DONE38. DRIVE THRU39. EAT-IN40. EMPLOYEE41. EMPLOYEE 142. EMPLOYEE 243. EMPLOYEE 344. EMPLOYEE 445. EMPLOYEE 546. EMPLOYEE 647. EMPLOYEE 748. EMPLOYEE 849. EMPLOYEE 9Function Key Code ListCode# & Function50. EMPLOYEE 1051. ENTER52. ERR.CORR53. FD STMP SHIFT54. FD STMP SBTL55. FD STMP TEND56. GUEST #57. HOLD58. INACTIVE (CAN RE-USE)59. KEYBOARD LEVEL 160. KEYBOARD LEVEL 261. KEYBOARD LEVEL 362. KEYBOARD LEVEL 463. KEYBOARD LEVEL 564. LIST CHECK 165. LIST CHECK 266. LIST CHECK 367. LIST CHECK 468. MACRO OFF69. MACRO P70. MACRO PAUSE71. MACRO R72. MAC5RO S73. MACRO SET74. MACRO VOID75. MACRO X76. MACRO Z77. MACRO 178. MACRO 279. MACRO 380. MACRO 481. MACRO 582. MACRO 683. MACRO 784. MACRO 885. MACRO 986. MACRO 1087. MACRO 1188. MACRO 1289. MACRO 1390. MACRO 1491. MACRO 1592. MACRO 1693. MACRO 1794. MACRO 1895. MACRO 1996. MACRO 2097. MACRO 2198. MACRO 22Code# & Function99. MACRO 23100. MACRO 24101. MACRO 25102. MACRO 26103. MACRO 27104. MACRO 28105. MACRO 29106. MACRO 30107. MACRO 31108. MACRO 32109. MACRO 33110. MACRO 34111. MACRO 35112. MACRO 36113. MACRO 37114. MACRO 38115. MACRO 39116. MACRO 40117. MACRO #118. MDSE RETURN119. MISC TEND 1120. MISC TEND 2121. MISC TEND 3122. MISC TEND 4123. MISC TEND 5124. MISC TEND 6125. MISC TEND 7126. MISC TEND 8127. MISC TEND 9128. MISC TEND 10129. MISC TEND 11130. MISC TEND 12131. MISC TEND 13132. MISC TEND 14133. MISC TEND 15134. MISC TEND 16135. MISC TEND#136. MODIFIER 1137. MODIFIER 2138. MODIFIER 3139. MODIFIER 4140. MODIFIER 5141. MODIFIER 6142. MODIFIER 7143. MODIFIER 8144. MODIFIER 9145. MODIFIER 10146. NEXT RECORD147. #/NO SALE46 S-Mode <strong>Programming</strong> <strong>SER</strong>-<strong>7000</strong> Program <strong>Manual</strong>
Code# & Function148. P/BAL149. PAGE DOWN150. PAGE UP151. PAID OUT 1152. PAID OUT 2153. PAID OUT 3154. PAID OUT 4155. PAID OUT 5156. PAID RECALL157. % 1158. % 2159. % 3160. % 4161. % 5162. % 6163. % 7164. % 8165. % 9166. % 10167. PLU168. PREV. RECORD169. PRICE INQ170. PRICE LVL1171. PRICE LVL2172. PRICE LVL3173. PRICE LVL4174. PRICE LVL5175. PRICE LVL6176. PRICE LVL7177. PRICE LVL8178. PRICE LVL9179. PRICE LVL10180. PRICE LVL11181. PRICE LVL12182. PRICE LVL13183. PRICE LVL14184. PRICE LVL15Code# & Function185. PRICE LVL16186. PRICE LVL17187. PRICE LVL18188. PRICE LVL19189. PRICE LVL20190. PRINT191. PRINT CHECK192. PRINT HOLD193. PROMO194. PRINT SCREEN195. QUIT196. RECEIPT ON/OFF197. RECALL CHECK 1198. RECALL CHECK 2199. RECALL CHECK 3200. RECALL CHECK 4201. RECD ACCT 1202. RECD ACCT 2203. RECD ACCT 3204. RECD ACCT 4205. RECD ACCT 5206. RECEIPT207. REPEAT208. SCALE209. SEAT #210. SHIFT211. SPLIT ITEM212. SPLIT PAYMENT213. STOCK INQ214. STORE CHECK 1215. STORE CHECK 2216. STORE CHECK 3217. STORE CHECK 4218. SUBTOTAL219. TABLE # 1220. TABLE # 2221. TABLE # 3Code# & Function222. TABLE # 4223. TAKE-OUT224. TAX EXEMPT225. TAX SHIFT 1226. TAX SHIFT 2227. TAX SHIFT 3228. TAX SHIFT 4229. TAX SHIFT 5230. TAX SHIFT 6231. TIME IN/OUT232. TIP 1233. TIP 2234. TIP 3235. TRANS CHK1236. TRANS CHK2237. TRANS CHK3238. TRANS CHK4239. TRAY SUBTOTAL240. VALIDATE241. VOID ITEM242. WASTE243. WLU244. X/TIME245. YES/NO246. PARK ORDER247. <strong>SER</strong>VE ORDER248. KP ROUTING249. SPLIT CHECK250. ALPHA TEXT251. NOTFOUND PLU252. NEXT DOLLAR253. PRINT ALL<strong>SER</strong>-<strong>7000</strong> Program <strong>Manual</strong> S-Mode <strong>Programming</strong> 47
System Options1. Select SYSTEMOPTIONS from theS-MODEPROGRAMMINGMENU to display theS-MODE SYSTEMOPTIONS Screen.2. Press the keys to select a fieldto edit.3. Type a new value andpress ENTER orpress the key toaccept the entry andadvance to the nextfield.4. Press PAGE DN toview the second pageof S-MODESYSTEM OPTIONS.5. Press PAGE DN toview the last page ofS-MODE SYSTEMOPTIONS.6. Press ESC to exit.S-MODE SYSTEM OPTIONS1. REGISTER # (01-32) 012. STORE # 0000003. IRC : FROM REGISTER # 004. IRC : TO REGISTER # 005. IRC # OF RETRIES 006. PRT/DISP DECIMAL POSITION: 2 ESC Y/N ENTER PAGE UP/DN S-MODE SYSTEM OPTIONS7. PASSWORD (0000=NONE): X =0000Z1=0000Z2=0000Z3=0000Z4=0000Z5=0000 ESC Y/N ENTER PAGE UP/DN S-MODE SYSTEM OPTIONS8. REG# HOLDS CHECK TRACK DATACHECK#1 00CHECK#2 00CHECK#3 00CHECK#4 009. REG HOLDS TIME IN/OUT DATA 00 ESC Y/N ENTER PAGE UP/DN S-MODE SYSTEM OPTIONS10.REG HOLDS BACKUP CHK TRK DATACHECK#1 00CHECK#2 00CHECK#3 00CHECK#4 0011.REG HOLDS KP GLOBAL ORDER# 00 ESC Y/N ENTER PAGE UP/DN 48 S-Mode <strong>Programming</strong> <strong>SER</strong>-<strong>7000</strong> Program <strong>Manual</strong>
S-MODE SYSTEM OPTIONS12.SEND PLU DESC WHEN POLLED13.DISP PRINTER ERR WHEN POLLYYSystem Option Program Notes (S-Mode) ESC Y/N ENTER PAGE UP/DN FIELDPRINT/DISPLAYDECIMAL POSITIONREG# HOLDS KPGLOBAL ORDER#SEND PLU DESC WHENPOLLEDDISP PRINTER ERRWHEN POLLNotesSelect 0, 1, 2 or 3 from the pop-up window. Thedefault value is 2 (XX.XX).If global order number is implemented (see P-ModeSystem Options) then the register indicated contains theglobal number system.If Y, the PLU descriptor will be sent when polling.(Increases polling time.)If N, if the printer runs out of paper when printingpolled reports, the paper out condition will not interruptpolling.<strong>SER</strong>-<strong>7000</strong> Program <strong>Manual</strong> S-Mode <strong>Programming</strong> 49
Printer Driver SelectionsThis program allows you to change the commands for specific printers, or to set up a newprinter by using generic (1-5) settings.1. Select PRINTERDRIVERSELECTIONS fromthe S-MODEPROGRAMMINGMENU to display thePRINTER DRIVERSELECTIONSscreen.2. The drivers for theselected printerdisplay. Press the or keys to select theprinter for which youwish to view or editcommands. Ifnecessary, pressPAGE DN to viewadditional printers.PRINTER DRIVER SELECTIONSTYPE SAM STP103 START CANCELSAM ST INIT. IB40SAM SR COMPRESSSAM SR RED/REVCTZEN EXPANDED 1B2121 IB210150 S-Mode <strong>Programming</strong> <strong>SER</strong>-<strong>7000</strong> Program <strong>Manual</strong>
Changing Printer Commands1. With options for aprinter in view, pressthe ENTER key tomove the activecursor to the firstcommand field in thestart column.2. Press the keys to select thefield you wish to edit.Note that there arethree pages of optionsfor each printer.Type new commandinformation and pressENTER.3. Press ESC to returnthe active cursor tothe PRINTER TYPE.Press ESC again toreturn to the S-MODEPROGRAMMINGMENU.PRINTER DRIVER SELECTIONSTYPE SAM STP103 START CANCELSAM ST INIT. IB40SAM SR COMPRESSSAM SR RED/REVCTZEN EXPANDED 1B2121 IB2101PRINTER DRIVER SELECTIONSTYPE SAM STP103 START CANCELSAM ST BOLDSAM SR UNDERLINSAM SR LONGFEED 1B64CTZEN FULL CUT 1B69PRINTER DRIVER SELECTIONSTYPE SAM STP103 START CANCELSAM ST PAR. CUTSAM SR STANDARDSAM SR LOGOCTZENIB69<strong>SER</strong>-<strong>7000</strong> Program <strong>Manual</strong> S-Mode <strong>Programming</strong> 51
Serial Port Device SelectionsUse the Serial Port Device Selections program to define the type of device that is attached toeach serial port.<strong>SER</strong>IAL PORT DEVICE SELECTIONS1. Select <strong>SER</strong>IALPORT DEVICESELECTIONS fromthe S-MODEPROGRAMMINGMENU .2. Press the or keysto select the port youwish to view or edit.3. To change a portselection, pressENTER to move theactive cursor to thedevice selectioncolumn.4. Press the or keysto select a newdevice, pressENTER.5. If there are multiplesof the selected device(i.e. many types ofprinters) the optionswill display.6. Press the or keysto select a new typeand press ENTER toaccept the newselection.7. Press ESC to returnto the <strong>SER</strong>IAL PORTDEVICESELECTIONS screenwith port selectionactive.8. Press ESC again toreturn to the S-MODEPROGRAMMINGMENU.PORT DEVICE---- ------------PORT#1 DISABLEPORT#2 DISABLEPORT#3 DISABLEPORT#4DISABLEESC ENTER PAGE UP/DN <strong>SER</strong>IAL PORT DEVICE SELECTIONSPORT DEVICE---- ------------ --------PORT#1 DISABLEPORT#2 PRINTERPORT#3 VIDEOPORT#4 POLLINGESC ENTER PAGE UP/DN <strong>SER</strong>IAL PORT DEVICE SELECTIONSPORT DEVICE---- ------------ --------PORT#1 SCALEPORT#2 SCANNERPORT#3 EFT TERM.PORT#4 CHANGERESC ENTER PAGE UP/DN <strong>SER</strong>IAL PORT DEVICE SELECTIONSPORT DEVICE PRINTER TYPE---- ---------- ------------PORT#1 DISABLE SAM SRP100PORT#2 PRINTER SAM SRP270PORT#3 VIDEOSAM SRP350PORT#4 POLLING CTZEN 3551ESC ENTER PAGE UP/DN 52 S-Mode <strong>Programming</strong> <strong>SER</strong>-<strong>7000</strong> Program <strong>Manual</strong>
Define Serial Port ParametersChoose Define Serial Port Parameters to set the baud rate, parity, and other options for eachserial port.1. Select <strong>SER</strong>IALPORT DEVICESELECTIONS fromthe S-MODEPROGRAMMINGMENU to display the<strong>SER</strong>IAL PORTDEVICESELECTIONSscreen. The currentselections forPORT#1 display.2. Press the PAGE UPor PAGE DN keys toselect the port youwish to view or edit.3. Press the or keysto move the activecursor to the optionyou wish to change.4. Type a new value fora field and pressENTER, or if anarrow () displaysnext to the currentselection, pressENTER to display alist of choices.5. Press ESC to returnto the S-MODEPROGRAMMINGMENU.<strong>SER</strong>IAL PORT#1 PARAMETER SETPORT DESCRIPTION PORT1BAUD RATE009600PARITYNONEDATA BITS8STOP BITS1RETRYS 00 ESC Y/N ENTER PAGE UP/DN <strong>SER</strong>IAL PORT#1 PARAMETER SETFEED LINES BEFORE PRINTING 00FEED LINES AFTER PRINTING 07PRINT BITMAP?NLOGO SIZE (0-3) 0LINES ON "HARD" SLIP 00CUTTING AFTER PRINTING?Y ESC Y/N ENTER PAGE UP/DN <strong>SER</strong>IAL PORT#1 PARAMETER SETIF PRINTER, KICK THE DRAWER? ESC Y/N ENTER PAGE UP/DN N<strong>SER</strong>-<strong>7000</strong> Program <strong>Manual</strong> S-Mode <strong>Programming</strong> 53
Serial Port Parameters Program NotesFIELDBAUD RATEPARITYDATA BITSSTOP BITSLOGO SIZE (0-3)LINES ON “HARD” SLIPCUTTING AFTERPRINTING?IF PRINTER, KICK THEDRAWER?NotesSelect 2400, 9600, 19200, 28800, 33600, 56000 orOTHER from the pop-up window. (9600 is default.)If you select OTHER, you may enter your own value.Select NONE, EVEN, or ODD from the pop-upwindow; NONE is default.Select 8 or 7 from the pop-up window; 8 is default.Select 1 or 2 from the pop-up window; 1 is default.Controls the size of bitmap image that may be printedon the guest check.If hard check system is used, printing will stop on theguest check after the number of print lines indicatedhere is printed. Use this option to prevent overprinting when the bottom of the guest check is used asa tear off receipt.Enables auto cutter if applicable.Allows printer to send the drawer kick signal.54 S-Mode <strong>Programming</strong> <strong>SER</strong>-<strong>7000</strong> Program <strong>Manual</strong>
S-Mode Program Scan PrintingThis function allows you to print copies of the register's S-Mode programming.1. Select S-MODEPROGRAM SCANPRINTING from theS-MODEPROGRAMMINGMENU to display theS-MODEPROGRAM SCANPRINTING screen.2. Choose an item fromthe menu in one oftwo ways:S-MODE PROGRAM SCAN PRINTING1.MEMORY ALLOCATION2.SYSTEM OPTIONS3.PRINTER DRIVER SELECTIONS4.<strong>SER</strong>IAL PORT DEVICE SELECT5.DEF <strong>SER</strong>IAL PORT PARAMETERSType the number foryour choice and pressENTER.Press the or keysto move the cursor toyour choice and pressENTER.3. After selection theappropriate report isprinted.<strong>SER</strong>-<strong>7000</strong> Program <strong>Manual</strong> S-Mode <strong>Programming</strong> 55
System PasswordThe system password allows service access to all of the functions of the <strong>SER</strong>-<strong>7000</strong>. Forexample, use the system password: If you are servicing a users system and you do not know an employee codethat allow you to access necessary functions. If authority level programming prohibits you from accessing functions youneed to access in order to complete your tasks.Sign the system password to allow access to all <strong>SER</strong>-<strong>7000</strong> functions (except register modeoperations.) After you have completed your session, the system password must be signed offthrough normal sign off procedures before another employee may be signed on.If you wish to block system password access, program 0000 in the system passwordfield.1. Select SYSTEMPASSWORD fromthe S-MODE MENUto set the systempassword.2. Enter a 4-digitpassword, if desired.3. Press ENTER toreturn to the S-MODE MENU.SYSTEM PASSWORDSYSTEM PASSWORD (0000=NONE) 9999ESC ENTER56 S-Mode <strong>Programming</strong> <strong>SER</strong>-<strong>7000</strong> Program <strong>Manual</strong>
Super Macro ScanThe super macro records transaction keystrokes, including key position changes. The size ofthe super macro, in keystrokes, is set in memory allocation (see "Memory Allocation" onpage 34.) When the super macro memory is full, the most recent entries will be added andthe oldest discarded. The super macro is a troubleshooting tool.Use this program to view or print the contents of super macro memory.1. Select SUPERMACRO SCAN fromthe S-MODE MENUto view or print thesuper macro.2. Choose an item fromthe menu.SUPER MACRO SCAN1. SUPER MACRO DISPLAY2. SUPER MACRO PRINTINGESC ENTER PAGE UP/DN 3. If SUPER MACROPRINTING isselected the macrocontents will print.If SUPER MACRODISPLAY is selected,the contents willdisplay as in theexample on the right.4. Press PAGE UP orPAGE DN to viewthe entire contents.Press ESC to exit tothe SUPER MACROSCAN screen.SUPER MACRO DISPLAY# KEY---- ----------------0001 MACRO S0002 NUMERIC 10003 NUMERIC 10004 ENTERESC PAGE UP/DN<strong>SER</strong>-<strong>7000</strong> Program <strong>Manual</strong> S-Mode <strong>Programming</strong> 57
ROM File DownloadChoose ROM FILE DOWNLOAD to down load the EPROM to all satellite registers in theIRC system. All other terminals must be in the ROM download mode.Warning: This procedure will clear all totals, counters and programs from the satelliteregisters.Load Default MessagesCheck Unlock1. Choose LOAD DEFAULT MESSAGES from the S-MODE PROGRAMMINGMENU to reload the default error messages and system descriptors.2. At the message ARE YOU SURE?, press the YES/NO once to select Y, and thenpress ENTER. The default messages are loaded.If the register where a check is being posted fails before the check is finalized, the checkcannot be accessed at another register until a check unlock procedure is done.1. Choose CHECKUNLOCK. TheCHECK UNLOCKscreen displays.2. Press the or keysto move the cursor tothe port to which theprinter is attached,then press ENTER.CHECK UNLOCK1. TRACK#12. TRACK#23. TRACK#34. TRACK#4ESC ENTER PAGE UP/DN 58 S-Mode <strong>Programming</strong> <strong>SER</strong>-<strong>7000</strong> Program <strong>Manual</strong>
P-Mode <strong>Programming</strong>P-Mode <strong>Programming</strong> Menu1. Turn the key to thePGM position.2. Choose an item fromthe menu in one oftwo ways:Type the number foryour choice and pressENTER.Press the or keysto move the cursor toyour choice and pressENTER.NOTE: There are threepages on the P-MODEprogramming menu.P-MODE PROGRAMMING MENU1. PLU2. PLU STATUS GROUP3. GROUP4. FUNCTION KEY5. SYSTEM OPTION6. TAXESENTER PAGE UP/DN P-MODE PROGRAMMING MENU7. MESSAGES8. WINDOW LOOK UP (WLU)9. TIME PERIOD10. EMPLOYEE11. AUTHORITY LEVEL12. PRINTER TABLES & KV ROUTINGENTER PAGE UP/DN P-MODE PROGRAMMING MENU13. INGREDIENT INVENTORY14. TIME ACTIVATED FUNCTIONS15. PRODUCT MIX GROUPS16. CUSTOM REPORT17. STRING REP0RT18. PLU STOCKENTER PAGE UP/DN <strong>SER</strong>-<strong>7000</strong> Program <strong>Manual</strong> P-Mode <strong>Programming</strong> 59
P-MODE PROGRAMMING MENU19. PLU MINIMUM STOCK20. COPY PROGRAM21. PROGRAM FILE DOWNLOAD22. P-MODE PROGRAM SCAN PRINTING23. NON-PLU CODE24. PLU & WLU KEY RELOCATIONENTER PAGE UP/DN P-MODE PROGRAMMING MENU24. PLU & WLU KEY RELOCATION25. BITMAP FILE DOWNLOAD26. GROUPS BY EMPLOYEE27. EMPLOYEE CARD READ FORMAT28. AGE VERIFICATION29. MIX & MATCH TABLEENTER PAGE UP/DN 60 P-Mode <strong>Programming</strong> <strong>SER</strong>-<strong>7000</strong> Program <strong>Manual</strong>
PLU <strong>Programming</strong>The maximum number of PLUs available is determined in memory allocation. (See"Memory Allocation" in "S-Mode <strong>Programming</strong>".) Each PLU can be assigned a codenumber up to 14 digits in length.1. Select PLU from theP-MODEPROGRAMMINGMENU to display thePLUPROGRAMMINGscreen.2. Press a numeric digit(1-2) or press the or keys to move thecursor to ADD &CHANGE orDELETE, and thenpress ENTER.PLU PROGRAMMING1. ADD & CHANGE2 DELETEESC ENTER PAGE UP/DN <strong>SER</strong>-<strong>7000</strong> Program <strong>Manual</strong> P-Mode <strong>Programming</strong> 61
Add & Change1. Select ADD &CHANGE to accessan existing PLU orprogram a new PLU.2. Select the PLU to beprogrammed byentering the numberor pressing the PLUkey on the keyboard.PLU#00000000000000 PROGRAMMING PRESS PLU TO BE PROGRAMMED ENTER PLU NUMBER – [ENTER] ENTER PLU NUMBER – [PLU#] PRESS WIL WHERE THE PLU ISLOCATED AND SELECTAPPROPRIATE PLU3. Press the keys to select thefield you wish toprogram.PLU#00000000000001 PGM.DESCRIPTOR: PLU#1GROUP LINK #1 01PLU STATUS LINK# 01PIECE COUNT 000 RECIPE# 00ACTIVATE WLU# 00INACTIVENLU# ESC Y/N ENT PAGE UP/DN PLU#00000000000001 PGM.PRESETYALLOW PRESET/HALO OVERRIDE? NPRC/HALO 000000.00 PRC LVL1 01PRC/HALO 000000.00 PRC LVL2 02PRC/HALO 000000.00 PRC LVL3 03PRC/HALO 000000.00 PRC LVL4 04LU# ESC Y/N ENT PAGE UP/DN 62 P-Mode <strong>Programming</strong> <strong>SER</strong>-<strong>7000</strong> Program <strong>Manual</strong>
PLU Program NotesFIELDDESCRIPTORGROUP LINK #1PLU STATUS LINK #PIECE COUNTNotesEnter a descriptor up to 16 characters in length. Notethat the method you use to enter the descriptor dependsupon your selection for General Function Option #12(see “General Function Options” on page 101.) The default method is by using the Alpha KeyboardOverlay. Type the descriptor using the typewriterstylekeyboard on the overlay. If Alpha Code Entry is selected as an alternative,type the codes representing each character, see“Entering Alpha Characters” in the “Getting Started”chapter for a list of alpha codes.Enter the primary reporting group for the GROUPS andPLU BY GROUP reports. There are 99 groups available for reporting. If you wish to assign a PLU to more than onereporting group, assign the PLU to a PLU STATUSLINK# that contains the necessary assignments forGROUP LINK #2 and GROUP LINK #3. (See“PLU Status Group” on page 36.)The status link group contains the remainder of theconfigurable options for this PLU. See "PLU StatusGroup" on page 36.Enter a value in this field if you wish to use ProductMix and Product Projection reporting. The number ofunits entered here will be reflected in product mixreporting. See “PLU Status Group” on page 36 to selectproduct mix items for this PLU item. See “Product Mix Groups” on page 180 to set upproduct mix items and time periods.<strong>SER</strong>-<strong>7000</strong> Program <strong>Manual</strong> P-Mode <strong>Programming</strong> 63
FIELDRECIPE#ACTIVATE WLU#PRICE/HALOPRICE LEVEL #1-#4NotesA menu-explosion type inventory system is set up whenPLUs are assigned to a recipe number. Note thefollowing related programs and activities: See “Ingredient Inventory” on page 38 to maintainthe ingredient list with unit costs and the recipetables. See “Edit Inventory Item” in the “X-ModeProcedures” chapter of the <strong>SER</strong>-<strong>7000</strong> Operation<strong>Manual</strong> to manage receipts, transfers and waste aswell as view actual inventory and unit cost. Use report # 41, the Inventory Report to report thestatus of inventory items. Use report #43, the Food Cost Report, to report thecost of PLU item using the information from theassigned recipe.Enter the number of a WLU that you wish to activateimmediately after this PLU is registered. For example,if this item requires a condiment selection, enter thenumber of the WLU that contains a list of condimentsavailable for this item. See “WLU <strong>Programming</strong>” onpage 147 to program the items that are listed in eachWLU.Enter the preset price if the item is preset. Enter theHALO (High Amount Lock Out) if the item is notpreset, or if PRESET/HALO OVERRIDE is allowed.Prices may be assigned at up to four different pricelevels for each item. Enter the number (1-20) of thePRICE LVL key that you wish to register theassociated PRICE/HALO. If you are not using pricelevels, enter the price or HALO in the first price field,adjacent to the PRICE LEVEL#1? field, and leave thedefault value of “01” in the PRICE LEVEL #1? field.64 P-Mode <strong>Programming</strong> <strong>SER</strong>-<strong>7000</strong> Program <strong>Manual</strong>
Delete PLUs1. From the PLUPROGRAMMINGSCREEN, selectDELETE.2. Press a numeric digit(1-2) or press the or keys to move thecursor to PLUDELETE ONE BYONE or PLUDELETE BYRANGE, then pressENTER.PLU PROGRAMMING1. ADD & CHANGE1.PLU DELETE ONE BY ONE2.PLU DELET BY RANGEESC ENTER PAGE UP/DN PLU Delete One By One1. Type the PLUnumber to be deleted,press ENTER.2. The message PRESSENTER TO DELETEdisplays. PressENTER again, orpress ESC to exitwithout deleting thePLU.3. Continue from step 2if there are additionalPLUs to delete, orpress ESC to returnto the PLUPROGRAMMINGscreen.PLU DELETE PLU#00000000000000DESCRIPTOR :PLU# ESC ENTER INDIVIDUAL PLU<strong>SER</strong>-<strong>7000</strong> Program <strong>Manual</strong> P-Mode <strong>Programming</strong> 65
PLU Delete by Range1. Enter the beginningnumber of the rangeto be deleted in theFROM PLU # field,press ENTER.2. Enter the endingnumber of the rangeto be deleted in theTO PLU # field, pressENTER.PLU PROGRAMMING1. ADD & CHANGEFROM PLU # 00000000000000TO PLU # 00000000000000ESC ENTER INDIVIDUAL PLU66 P-Mode <strong>Programming</strong> <strong>SER</strong>-<strong>7000</strong> Program <strong>Manual</strong>
PLU Status Group (PLU Status Link)PLU Status Groups allow memory to be used more efficiently. In most applications, largegroups of PLUs are set with many identical options, while the PLU number, descriptor andprice are unique. On the PLU <strong>Programming</strong> Screen (see "PLU" on page 61) each PLU isassigned its' descriptor, price or prices and a few unique options. The remainder of the PLUoptions are determined by linking the individual PLU to a PLU Status Group. The PLUStatus Group contains all of the detailed programming option selections that might beassigned to an individual PLU. Separate PLU Status Groups can be set up to accommodatethe needs of groups of PLUs. Like PLUs, the total number of PLU Status Groups isdetermined by memory allocation.The maximum number of PLU Status Groups available (up to 9999) is determined inmemory allocation. (See "Memory Allocation" in "S-Mode <strong>Programming</strong>".)1. Select PLU STATUSGROUP from the P-MODEPROGRAMMINGMENU to display thePLU STATUSGROUP#PROGRAMMINGscreen. Data for thefirst status groupdisplays.2. Select a PLU statusgroup in one of twoways:Type a PLU StatusGroup number andpress ENTER.Or, press PAGE UPor PAGE DN keys toscroll through thePLU STATUSGROUP filesequentially.PLU STATUS GROUP# 1PROGRAMDESCRIPTOR : PLU STS 11 2 3 4 5 61. TAXABLE BY RATES N N N N N N2. GROUP LINK #2 003. GROUP LINK #3 004. IS PLU INACTIVE N ESC Y/N ENT PAGE UP/DN PLU STATUS GROUP#DESCRIPTOR :23PROGRAMHOT FOOD GROUP1 2 3 4 5 61. TAXABLE BY RATES N N N N N N2. GROUP LINK #2 003. GROUP LINK #3 004. IS PLU INACTIVE N ESC Y/N ENT PAGE UP/DN PLU STATUS GROUP# 23PROGRAM5. IS PLU A CONDIMENT N6. COMPULSORY CONDIMENT ENTRY N7. IS PLU SINGLE ITEM N8. IS PLU NEGATIVE N9. IS PLU HASH N10.DOES PLU USE GALLONAGE N ESC Y/N ENT PAGE UP/DN <strong>SER</strong>-<strong>7000</strong> Program <strong>Manual</strong> P-Mode <strong>Programming</strong> 67
4. Press PAGE DN toview the additionalpages of PLU StatusGroup options, orPress the or tolocate the option youwish to set.PLU STATUS GROUP# 23PROGRAM11.IS PLU FOOD STAMP ELIGIBLE N12.IS PLU MEMON13.IS PLU SCALEABLEN14.AUTO SCALE ON THIS PLU N15.AUTO TARE# (0-20) 0016.STOCK PLUN ESC Y/N ENT PAGE UP/DN PLU STATUS GROUP# 23PROGRAM17.LINK PLU# 0000000000000018.PRODUCT MIX #1 0019.PRODUCT MIX #2 0020.NEGATIVE INVENTORYN21.ALLOW PROMOY22.ALLOW WASTEY ESC Y/N ENT PAGE UP/DN PLU STATUS GROUP# 23PROGRAM23.ALLOW DISCOUNT?Y24.ALLOW SURCHARGE?Y25.COMPULSORY VALIDATIONN26.IS NON-ADD# COMPULSORY? N27.PRINT ON KV?N28.KITCHEN VIDEO GROUP # 00 ESC Y/N ENT PAGE UP/DN PLU STATUS GROUP# 23PROGRAM29.COLOR TO DISP ON KV(0-31) 0030.PRINT ON KP?N12345678931.PRINT ON KP GROUP# NNNNNNNNN32.PRINT RED ON KPN33.PRINT RED ON RECEIPTN ESC Y/N ENT PAGE UP/DN PLU STATUS GROUP# 23PROGRAM34.PRINT ON RECEIPTY35.PRINT ON JOURNALY36.DISPLAY ON REGISTER SCREEN Y37.PRINT ON GUEST CHECKSY38.PRT PRICE ON GUEST CHECKS Y39.PRT PRICE ON RECEIPT/DETAIL Y ESC Y/N ENT PAGE UP/DN 68 P-Mode <strong>Programming</strong> <strong>SER</strong>-<strong>7000</strong> Program <strong>Manual</strong>
5. Press PAGE DN toview the last page ofPLU Status Groupoptions, or Press the or keys to locatethe option you wishto set.6. Select another PLUStatus Group toprogram or pressESC to save changesand return to the P-MODEPROGRAMMINGMENU screen.PLU STATUS GROUP# 23PROGRAM40.AUTO GRILL?N41.AUTO GRILL KP GROUP # 042.ELIG. FOR CANADI-DONUT LAW 0043.AGE VERIFICATION (0-5) 044.MIX & MATCH TABLE # 0 ESC Y/N ENT PAGE UP/DN PLU Status Group Program Notes# FIELD Notes1 TAXABLE BY RATES (1-6) Select Y or N for each tax rate to determine ifthe appropriate tax(es) is automaticallycalculated when the item is sold.23GROUP LINK #2GROUP LINK #3If you wish to direct PLU sales to more thanone group, enter the second or third reportinggroup for the GROUPS and PLU BY GROUPreports here. Note the following relatedprograms: See “PLU <strong>Programming</strong>” on page 61 toprogram the first reporting group for eachPLU. See “Group” on page 74 to determinewhether each individual group adds to thegroup total on the financial report.4 IS PLU INACTIVE Select Y if you wish PLUs reported to thisgroup to be inactive (cannot be registered).5 IS PLU A CONDIMENT Condiments PLUs are different from noncondimentPLUs in the manner they displayand print during operations. Non-condimentPLUs are used for “main” items. Condimentitems are indented and displayed/printedbelow a main item so that condiments orcooking instructions are easily understood foreach “main” item.6 COMPULSORY CONDIMENTENTRYIf Y, then a condiment entry must follow theregistration of a PLU.<strong>SER</strong>-<strong>7000</strong> Program <strong>Manual</strong> P-Mode <strong>Programming</strong> 69
# FIELD Notes7 IS PLU SINGLE ITEM The transaction is finalized automaticallywhen a single item PLU is registers as thefirst item in a sale.8 IS PLU NEGATIVE Negative PLUs subtract from a sale, ratherthan add to a sale.9 IS PLU HASH HASH PLUs do not affect certain totals inreports. See General Function Option #7 todetermine specifically which totals areimpacted by HASH PLUs.10 DOES PLU USE GALLONAGE Gallonage PLUs must be set as open PLUs.The PRICE/HALO must be set as the priceper gallon. (The price is set at three decimalplaces, however the PLU programming screenwill always display in a two digit decimalformat. For example if a PLU is gallonage, aprice of $1.299 per gallon would be set as"12.99".) Gallonage PLUs will report thegallons sold in the activity counter on thePLU report by dividing the PLU total by theprice per gallon.11 IS PLU FOOD STAMPELIGIBLEA separate itemizer keeps a running total offood stamp eligible items in each transaction.Then if the sale is paid by food stamps, thefood stamp eligible subtotal can be recalled.12 IS PLU MEMO Use Memo PLUs to display a descriptor onthe screen or print a descriptor at a printer.Memo PLUs do not add to any total in the<strong>SER</strong>-<strong>7000</strong>.13 IS PLU SCALEABLE Choose Y if you wish to multiply itemsreporting to this group by a weight from ascale connected to the register. Scale weightsare entered by pressing the SCALE key.14 AUTO SCALE ON THIS PLU If Y, registrations of PLUs linked to thisgroup will automatically multiply by theweight placed upon a scale connected to theregister.15 AUTO TARE# (0-20) If Y, the tare # indicated here willautomatically subtract from the weight fromthe scale. See “Scale” on page 95 to presettare weights.70 P-Mode <strong>Programming</strong> <strong>SER</strong>-<strong>7000</strong> Program <strong>Manual</strong>
# FIELD Notes16 STOCK PLU Choose Y if you wish to track PLU stock,where each whole unit PLU activity subtractsa value of "1" from the stock counter. (Notethat if multiplication or decimalmultiplication is used when the PLU isregistered, the resulting quantity of activitywill subtract from the stock counter. Stock ismaintained in increments to the seconddecimal position, i.e. “X.XX”.) See “PLUStock” on page 188 for more information.17 LINK PLU# If you wish the registration of the PLUassigned to this PLU status group toautomatically cause the registration ofanother PLU, enter the number of the PLUyou wish to register automatically here.1819PRODUCT MIX #1PRODUCT MIX #2If you are using product mix reporting, enterthe number of the product mix item or itemshere. Note the following related programsand activities: See “Product Mix Groups” on page 180to set up product mix items. See “PLU <strong>Programming</strong>” on page 61 toenter the number of pieces to be countedto the product mix item with eachactivity. See Report #35, Product Mix Report toreport product mix item usage. See Report #36, Product Projections for ahistory of each item's sales by day ofweek.20 NEGATIVE INVENTORY Use this option only if you are using therecipe and ingredient inventory system andyou are using PLUs to designate subtractionsfrom a menu item. For example, a PLU maybe designated "No Cheese" by designating aPLU to print this instruction. By assigningthe "No Cheese" PLU to a PLU Status Groupwith this setting at Y (yes), the inventoryrecords for cheese will be maintainedcorrectly.21 ALLOW PROMO Choose Y if you wish to allow the PROMOoperation, i.e. buy two, get one free.PROMO activity will remove the item costfrom the sale, but the count will include thepromo item.<strong>SER</strong>-<strong>7000</strong> Program <strong>Manual</strong> P-Mode <strong>Programming</strong> 71
# FIELD Notes22 ALLOW WASTE If Y, the WASTE function is allowed onPLUs reporting to this group.23 ALLOW DISCOUNT If Y, the operation of an item discount afterregistration of a PLU reporting to this groupis allowed.24 ALLOW SURCHARGE If Y, the operation of an item surcharge afterregistration of a PLU reporting to this groupis allowed.25 COMPULSORY VALIDATION If Y, validation must be performed afterregistration of a PLU reporting to this groupbefore any other register activity is allowed.26 IS NON-ADD#COMPULSORY?If Y, a numeric entry must be made into theNon-Add # key before registration of a PLUreporting to this group is allowed27 PRINT ON KV? Select Y if PLUs in this group are to be sentto a kitchen video.28 KITCHEN VIDEO GROUP# Select the kitchen video group to which PLUsin this group are to be sent. Condiment PLUswith a "0" status here will "follow" the lastmain item.29 COLOR TO DISP ON KV(0-31)The color code set here will control the coloror screen format displayed on an optionalkitchen video system requisition screen.Color codes vary by KVS system. Refer tothe documentation for your video system forspecific information.30 PRINT ON KP? Select Y if PLUs in this group are to be sentto a kitchen printer.31 PRINT ON KP GROUP# Select the kitchen printer group or groups towhich PLUs in this group are to be sent.32 PRINT RED ON KP Set to Y if you wish PLUs in this group toprint in red on the kitchen printer, i.e.condiments might be printed red. Red/blackprinter must be used.33 PRINT RED ON RECEIPT Set to Y if you wish PLUs in this group toprint in red on the receipt. Red/black printermust be used.34 PRINT ON RECEIPT Must be set to Y for PLUs in this group toprint on the receipt.35 PRINT ON JOURNAL Must be set to Y for PLUs in this group toprint on the journal or collect in the electronicjournal.72 P-Mode <strong>Programming</strong> <strong>SER</strong>-<strong>7000</strong> Program <strong>Manual</strong>
# FIELD Notes36 DISPLAY ON REGISTERSCREENSet to N if you wish the registration of PLUsin this group not to display on the registeroperator screen.37 PRINT ON GUEST CHECKS Must be set to Y for PLUs in this group toprint on the guest check.38 PRT PRICE ON GUESTCHECKS39 PRT PRICE ONRECEIPT/DETAILPrints the descriptor only, rather thandescriptor and price on guest checks.Prints descriptor only, rather than descriptorand price on receipt and detail.40 AUTO GRILL? Select Y for this option to send items in thisgroup to the kitchen printer designated in thenext field. Items are sent with a one-itemdelay (at the next item or at subtotal.)41 AUTO GRILL KP GROUP# Enter the kitchen printer number for printingof auto grill items.42 ELIGIBLE FOR CANADI-DONUT LAWSpecial Provincial or State sales tax lawsmight change the taxable status of an itemdepending upon the quantity sold. Donuts,for example, might be taxable when soldindividually at a bakery, but be non-taxablewhen sold by the dozen.In such a case select Y in this field, and alsoselect Y to the appropriate tax status. Also,set tax option #3 (see "Tax Options" on page107) with the quantity at which you wish taxto be exempted, for example 12. Registrationof PLUs reported to this status group willcharge tax until the quantity with thetransaction reaches 12. When 12 or more areregistered, all will be sold without tax.43 AGE VERIFICATION (0-5) Enter 1-5 to set the age category. Theoperator will be forced to enter a date of birththat indicates an age higher than the age ofthis category before items assigned to thisgroup can be entered. See "Age Verification"on page 207 to set the minimum age for eachof up to 5 categories.44 MIX & MATCH TABLE #<strong>SER</strong>-<strong>7000</strong> Program <strong>Manual</strong> P-Mode <strong>Programming</strong> 73
GroupGroups are designated to accumulate PLU sales for convenient reporting totals. A PLU cansend its' sales information to up to 3 groups. Group Link #1 is set in PLU programming.Group Links #2 and #3 are set in PLU Status Group programming.This program allows you to set up the groups that PLU sales will report to. There are 99groups. Here you can program the group descriptor that appears on reports, and you candetermine whether that group will add to the total of all groups that appears at the end of theGroup report.1. Select GROUP fromthe P-MODEPROGAMMINGMENU to view theGROUPPROGRAMMINGscreen.2. Select the group youwish to program bytyping the groupnumber and pressingENTER, or bypressing PAGE UPor PAGE DN untilthe appropriate groupdisplays.3. Enter a descriptor ofup to 12 characters inthe descriptor field.4. Select Y or N at the"Do Not add toGroup Total?" field.Press ENTER to setthe field and advanceto the next group.5. Press ESC to returnto the P-MODEPROGAMMINGMENU.GROUP #01 PROGRAMMINGDESCRIPTOR :ADD TO GROUP TOTAL?GROUP1ESC Y/N ENT PAGE UP/DN Y74 P-Mode <strong>Programming</strong> <strong>SER</strong>-<strong>7000</strong> Program <strong>Manual</strong>
Function KeyFunction key options vary by key. Since function keys may exist on different levels of thekeyboard, or they may only be accessed through WLUs, they may be addressed forprogramming by directly pressing the key, or by entering the function key code number.In this chapter you will find: A "Function Key Program Summary" on page 76 with a list of functions and theircodes. A sample of program screens for each function key. (Sample screens for keys withonly descriptor programming and X-mode security are not shown.)Note: Although each 12 character function key descriptor is set here, if a function keyappears on the financial or employee report, the descriptor that prints on the reportmay be set separately. See “Report Descriptors” on page 142 to set descriptors forfunction keys that appear on the financial or employee report. See “Report PrintingOptions” on page 124 to determine which descriptors are used on reports.1. Select FUNCTIONKEY from the P-Mode menu todisplay theFUNCTION KEYPROGRAMMINGScreen.2. Select a function toprogram.3. The programmingoption screen for thefunction will display.FUNCTION KEY #PROGRAMMING PRESS THE KEY TO BE PROGRAMMED ENTER KEY NUMBER – [ENTER] PRESS ENTER TO VIEW KEY LIST PRESS WLU WHERE THE FUNCTIONIS LOCATED AND SELECT THEAPPROPRIATE FUNCTION KEY<strong>SER</strong>-<strong>7000</strong> Program <strong>Manual</strong> P-Mode <strong>Programming</strong> 75
Code# & FunctionFunction Key Program SummaryProgrammability1. NUMERIC 1 Descriptor2. NUMERIC 2 Descriptor3. NUMERIC 3 Descriptor4. NUMERIC 4 Descriptor5. NUMERIC 5 Descriptor6. NUMERIC 6 Descriptor7. NUMERIC 7 Descriptor8. NUMERIC 7 Descriptor9. NUMERIC 9 Descriptor10. NUMERIC 0 Descriptor11. NUMERIC 00 Descriptor12. NUMERIC 000 Descriptor13. ADD CHECK Descriptor & X-Mode Control14. BACK SPACE Descriptor15. BOLD Descriptor16. CANCEL See program screen on page 7917. CAPS Descriptor18. CASH See program screen on page 7919. TIP DECLARE See program screen on page 9820.21. CHECK See program screen on page 8022. CHECK CASH See program screen on page 8123. CHECK ENDORSE See program screen on page 8124. CLEAR Descriptor25. CONTINUE Descriptor26. CURR. CONV. 1 See program screen on page 8227. CURR. CONV. 2 See program screen on page 8228. CURR. CONV. 3 See program screen on page 8229. CURR. CONV. 4 See program screen on page 8230. CURR. CONV. 5 See program screen on page 8231. CURSOR DOWN () Descriptor32. CURSOR LEFT () Descriptor33. CURSOR RIGHT () Descriptor34. CURSOR UP () Descriptor35. DECIMAL (.) Descriptor36. DELETE Descriptor37. DONE Descriptor38. DRIVE THRU See program screen on page 8339. EAT-IN See program screen on page 8340. EMPLOYEE Descriptor41. EMPLOYEE 1 Descriptor42. EMPLOYEE 2 Descriptor43. EMPLOYEE 3 Descriptor44. EMPLOYEE 4 Descriptor45. EMPLOYEE 5 Descriptor46. EMPLOYEE 6 Descriptor47. EMPLOYEE 7 Descriptor48. EMPLOYEE 8 DescriptorCode# & FunctionProgrammability49. EMPLOYEE 9 Descriptor50. EMPLOYEE 10 Descriptor51. ENTER Descriptor52. ERR.CORR See program screen on page 8353. FD STMP SHIFT Descriptor54. FD STMP SBTL Descriptor55. FD STMP TEND See program screen on page 8456. GUEST # See program screen on page 8457. HOLD Descriptor & X-Mode Control58. INACTIVE (CAN RE-USE) Descriptor59. KEYBOARD LEVEL 1 Descriptor & X-Mode Control60. KEYBOARD LEVEL 2 Descriptor & X-Mode Control61. KEYBOARD LEVEL 3 Descriptor & X-Mode Control62. KEYBOARD LEVEL 4 Descriptor & X-Mode Control63. KEYBOARD LEVEL 5 Descriptor & X-Mode Control64. LIST CHECK 1 Descriptor & X-Mode Control65. LIST CHECK 2 Descriptor & X-Mode Control66. LIST CHECK 3 Descriptor & X-Mode Control67. LIST CHECK 4 Descriptor & X-Mode Control68. MACRO OFF Descriptor & X-Mode Control69. MACRO P Descriptor & X-Mode Control70. MACRO PAUSE Descriptor & X-Mode Control71. MACRO R Descriptor & X-Mode Control72. MAC5RO S Descriptor & X-Mode Control73. MACRO SET Descriptor & X-Mode Control74. MACRO VOID Descriptor & X-Mode Control75. MACRO X Descriptor & X-Mode Control76. MACRO Z Descriptor & X-Mode Control77. MACRO 1 See program screen on page 8478. MACRO 2 See program screen on page 8479. MACRO 3 See program screen on page 8480. MACRO 4 See program screen on page 8481. MACRO 5 See program screen on page 8482. MACRO 6 See program screen on page 8483. MACRO 7 See program screen on page 8484. MACRO 8 See program screen on page 8485. MACRO 9 See program screen on page 8486. MACRO 10 See program screen on page 8487. MACRO 11 See program screen on page 8488. MACRO 12 See program screen on page 8489. MACRO 13 See program screen on page 8490. MACRO 14 See program screen on page 8491. MACRO 15 See program screen on page 8492. MACRO 16 See program screen on page 8493. MACRO 17 See program screen on page 8494. MACRO 18 See program screen on page 8495. MACRO 19 See program screen on page 8496. MACRO 20 See program screen on page 8497. MACRO 21 See program screen on page 8476 P-Mode <strong>Programming</strong> <strong>SER</strong>-<strong>7000</strong> Program <strong>Manual</strong>
Code# & FunctionProgrammability98. MACRO 22 See program screen on page 8499. MACRO 23 See program screen on page 84100. MACRO 24 See program screen on page 84101. MACRO 25 See program screen on page 84102. MACRO 26 See program screen on page 84103. MACRO 27 See program screen on page 84104. MACRO 28 See program screen on page 84105. MACRO 29 See program screen on page 84106. MACRO 30 See program screen on page 84107. MACRO 31 See program screen on page 84108. MACRO 32 See program screen on page 84109. MACRO 33 See program screen on page 84110. MACRO 34 See program screen on page 84111. MACRO 35 See program screen on page 84112. MACRO 36 See program screen on page 84113. MACRO 37 See program screen on page 84114. MACRO 38 See program screen on page 84115. MACRO 39 See program screen on page 84116. MACRO 40 See program screen on page 84117. MACRO # Descriptor118. MDSE RETURN See program screen on page 86119. MISC TEND 1 See program screen on page 87120. MISC TEND 2 See program screen on page 87121. MISC TEND 3 See program screen on page 87122. MISC TEND 4 See program screen on page 87123. MISC TEND 5 See program screen on page 87124. MISC TEND 6 See program screen on page 87125. MISC TEND 7 See program screen on page 87126. MISC TEND 8 See program screen on page 87127. MISC TEND 9 See program screen on page 87128. MISC TEND 10 See program screen on page 87129. MISC TEND 11 See program screen on page 87130. MISC TEND 12 See program screen on page 87131. MISC TEND 13 See program screen on page 87132. MISC TEND 14 See program screen on page 87133. MISC TEND 15 See program screen on page 87134. MISC TEND 16 See program screen on page 87135. MISC TEND# Descriptor136. MODIFIER 1 See program screen on page 88137. MODIFIER 2 See program screen on page 88138. MODIFIER 3 See program screen on page 88139. MODIFIER 4 See program screen on page 88140. MODIFIER 5 See program screen on page 88141. MODIFIER 6 See program screen on page 88142. MODIFIER 7 See program screen on page 88143. MODIFIER 8 See program screen on page 88144. MODIFIER 9 See program screen on page 88145. MODIFIER 10 See program screen on page 88146. NEXT RECORD Descriptor147. #/NO SALE See program screen on page 89Code# & FunctionProgrammability148. P/BAL See program screen on page 89149. PAGE DOWN Descriptor150. PAGE UP Descriptor151. PAID OUT 1 See program screen on page 89152. PAID OUT 2 See program screen on page 89153. PAID OUT 3 See program screen on page 89154. PAID OUT 4 See program screen on page 89155. PAID OUT 5 See program screen on page 89156. PAID RECALL Descriptor & X-Mode Control157. % 1 See program screen on page 90158. % 2 See program screen on page 90159. % 3 See program screen on page 90160. % 4 See program screen on page 90161. % 5 See program screen on page 90162. % 6 See program screen on page 90163. % 7 See program screen on page 90164. % 8 See program screen on page 90165. % 9 See program screen on page 90166. % 10 See program screen on page 90167. PLU Descriptor168. PREV. RECORD Descriptor169. PRICE INQ Descriptor170. PRICE LVL1 Descriptor & X-Mode Control171. PRICE LVL2 Descriptor & X-Mode Control172. PRICE LVL3 Descriptor & X-Mode Control173. PRICE LVL4 Descriptor & X-Mode Control174. PRICE LVL5 Descriptor & X-Mode Control175. PRICE LVL6 Descriptor & X-Mode Control176. PRICE LVL7 Descriptor & X-Mode Control177. PRICE LVL8 Descriptor & X-Mode Control178. PRICE LVL9 Descriptor & X-Mode Control179. PRICE LVL10 Descriptor & X-Mode Control180. PRICE LVL11 Descriptor & X-Mode Control181. PRICE LVL12 Descriptor & X-Mode Control182. PRICE LVL13 Descriptor & X-Mode Control183. PRICE LVL14 Descriptor & X-Mode Control184. PRICE LVL15 Descriptor & X-Mode Control185. PRICE LVL16 Descriptor & X-Mode Control186. PRICE LVL17 Descriptor & X-Mode Control187. PRICE LVL18 Descriptor & X-Mode Control188. PRICE LVL19 Descriptor & X-Mode Control189. PRICE LVL20 Descriptor & X-Mode Control190. PRINT See program screen on page 92191. PRINT CHECK See program screen on page 92192. PRINT HOLD Descriptor & X-Mode Control193. PROMO See program screen on page 93194. PRINT SCREEN Descriptor195. QUIT Descriptor196. RECEIPT ON/OFF Descriptor197. RECALL CHECK 1 See program screen on page 93<strong>SER</strong>-<strong>7000</strong> Program <strong>Manual</strong> P-Mode <strong>Programming</strong> 77
Code# & FunctionProgrammability198. RECALL CHECK 2 See program screen on page 93199. RECALL CHECK 3 See program screen on page 93200. RECALL CHECK 4 See program screen on page 93201. RECD ACCT 1 See program screen on page 89202. RECD ACCT 2 See program screen on page 89203. RECD ACCT 3 See program screen on page 89204. RECD ACCT 4 See program screen on page 89205. RECD ACCT 5 See program screen on page 89206. RECEIPT Descriptor207. REPEAT Descriptor & X-Mode Control208. SCALE See program screen on page 95209. SEAT # Descriptor & X-Mode Control210. SHIFT Descriptor211. SPLIT ITEM Descriptor & X-Mode Control212. SPLIT PAYMENT Descriptor & X-Mode Control213. STOCK INQ Descriptor214. STORE CHECK 1 See program screen on page 96215. STORE CHECK 2 See program screen on page 96216. STORE CHECK 3 See program screen on page 96217. STORE CHECK 4 See program screen on page 96218. SUBTOTAL Descriptor219. TABLE # 1 Descriptor220. TABLE # 2 Descriptor221. TABLE # 3 Descriptor222. TABLE # 4 Descriptor223. TAKE-OUT See program screen on page 83224. TAX EXEMPT See program screen on page 97225. TAX SHIFT 1 Descriptor226. TAX SHIFT 2 Descriptor227. TAX SHIFT 3 Descriptor228. TAX SHIFT 4 Descriptor229. TAX SHIFT 5 Descriptor230. TAX SHIFT 6 Descriptor231. TIME IN/OUT See program screen on page 97232. TIP 1 See program screen on page 97233. TIP 2 See program screen on page 97234. TIP 3 See program screen on page 97235. TRANS CHK1 Descriptor & X-Mode ControlCode# & FunctionProgrammability236. TRANS CHK2 Descriptor & X-Mode Control237. TRANS CHK3 Descriptor & X-Mode Control238. TRANS CHK4 Descriptor & X-Mode Control239. TRAY SUBTOTAL See program screen on page 98240. VALIDATE Descriptor241. VOID ITEM See program screen on page 99242. WASTE See program screen on page 99243. WLU Descriptor & X-Mode Control244. X/TIME See program screen on page 99245. YES/NO Descriptor246. PARK ORDER Descriptor & X-Mode Control247. <strong>SER</strong>VE ORDER Descriptor & X-Mode Control248. KP ROUTING See program screen on page 85249. SPLIT CHECK Descriptor250. ALPHA TEXT Descriptor251. NOT FOUND PLU See program screen on page 89252. NEXT DOLLAR Descriptor253. PRINT ALL Descriptor254.255.256.257.258.259.260.261.262.263.264.265.266.267.268.269.270.78 P-Mode <strong>Programming</strong> <strong>SER</strong>-<strong>7000</strong> Program <strong>Manual</strong>
CancelFUNC. KEY #016 PROGRAMMINGDEFAULT DESC:CANCELDESCRIPTOR:CANCELHALO (0:NO LIMIT) 00000.00ACTIVE IN X ONLYNCOMPULSORY VALIDATIONNPRINT RECEIPTYESC Y/N ENT PAGE UP/DN CashFUNC. KEY #018 PROGRAMMINGDEFAULT DESC : CASHDESCRIPTOR :CASHHALO (0=NO LIMIT) 00000.001 2 3 4 5 6EXEMPT TAX :N N N N N NOPEN DRAWERY ESC Y/N ENT PAGE UP/DN FUNC. KEY #018 PROGRAMMINGCOMPULSORY VALIDATIONNAMOUNT TENDER COMPULSORYNDISABLE UNDER TENDERINGNUNDER TENDERING IN X ONLY NCOIN CHANGER PORT# (0-4) 0 ESC Y/N ENT PAGE UP/DN Cash Key Program NoteFIELDCOIN CHANGER PORT#(0-4)NotesEnter the number of the serial port to which the coinchanger is attached.<strong>SER</strong>-<strong>7000</strong> Program <strong>Manual</strong> P-Mode <strong>Programming</strong> 79
CheckFUNC. KEY #021 PROGRAMMINGDEFAULT DESC : CHECKDESCRIPTOR :CHECKHALO (0=NO LIMIT) 00000.001 2 3 4 5 6EXEMPT TAX :N N N N N NOPEN DRAWERY ESC Y/N ENT PAGE UP/DN FUNC. KEY #021 PROGRAMMINGCOMPULSORY VALIDATIONNCOMPULSORY CHECK ENDORSEMENT NAMOUNT TENDER COMPULSORYNDISABLE UNDER TENDERINGNUNDER TENDERING IN X ONLY NNON-ADD# ENTRY COMPULSORY N ESC Y/N ENT PAGE UP/DN FUNC. KEY #021 PROGRAMMINGHALO : Y=CHANGE/N=TENDERNCOIN CHANGER PORT# (0-4) 0ESC Y/N ENT PAGE UP/DN Check Key Program NoteFIELDCOIN CHANGER PORT#(0-4)NotesEnter the number of the serial port to which the coinchanger is attached.80 P-Mode <strong>Programming</strong> <strong>SER</strong>-<strong>7000</strong> Program <strong>Manual</strong>
Check CashFUNC. KEY #022 PROGRAMMINGDEFAULT DESC:CHECK CASHDESCRIPTOR:CHECK CASHHALO (0:NO LIMIT) 00000.00ACTIVE IN X ONLYNALLOW HALO OVERRIDE IN X ONLY NCOMPULSORY VALIDATIONNESC Y/N ENT PAGE UP/DN Check EndorseFUNC. KEY #023 PROGRAMMINGDEFAULT DESC:CHK ENDORSEDESCRIPTOR:CHK ENDORSEPRINTING PORT# (0-4) 0ESC Y/N ENT PAGE UP/DN <strong>SER</strong>-<strong>7000</strong> Program <strong>Manual</strong> P-Mode <strong>Programming</strong> 81
Currency Conversion 1-5FUNC. KEY #026 PROGRAMMINGDEFAULT DESC:CURR.CONV1DESCRIPTOR:CURR.CONV1RATE 00.000000CHANGE IN FOREIGN CURRENCY NLINKED DRAWER # (0-2) 0ESC Y/N ENT PAGE UP/DN Currency Conversion Key Program NotesFIELDRATECHANGE IN FOREIGNCURRENCYLINKED DRAWER #(0-3)NotesThe value of foreign currency can be express in twoways: foreign currency in US dollars, and the inverse,US dollars in foreign currency. For example aCanadian dollar may be worth $.70 US. The inverse ofthat value statement would be that a US dollar is worth$1.428571 Canadian dollars. Look for the rateexpressed as US dollars in foreign currency (i.e.$1.428571 as in the example above) and enter thatvalue in this field. Note: this field can contain 8 digits,with the decimal in any position. For example, you canenter 4 digits, the decimal, and four fractional digits.Select whether any change from an over-tender isissued in foreign currency (Y) or home currency (N).Select the drawer to be opened on foreign currencytender transactions.82 P-Mode <strong>Programming</strong> <strong>SER</strong>-<strong>7000</strong> Program <strong>Manual</strong>
Drive Thru/Eat In/Take OutShown below is a sample screen showing the identical function options for all the functionslisted above:FUNC. KEY #038 PROGRAMMINGDEFAULT DESC : DRIVE THRUDESCRIPTOR :DRIVE THRU1 2 3 4 5 6EXEMPT TAX :N N N N N NCOMPULSORY VALIDATION?NKP PERIOD OVERRIDE(0=NO OVER) 0ESC Y/N ENT PAGE UP/DN Drive Thru/Eat In/Take Out Key Program NotesFIELDKP PERIOD OVERRIDE(0=NO OVER)NotesEntry of a KP Group here allows kitchen printerrouting based upon destination (Eat-in/Take-out/Drivethru). Selection of a KP Group here would alsooverride KP Time Period programs. Enter 0 for nooverride.Error CorrectFUNC. KEY #052 PROGRAMMINGDEFAULT DESC:ERR.CORR.DESCRIPTOR:ERR.CORR.HALO (0:NO LIMIT) 00000.00ACTIVE IN X ONLYNCOMPULSORY VALIDATIONNESC Y/N ENT PAGE UP/DN <strong>SER</strong>-<strong>7000</strong> Program <strong>Manual</strong> P-Mode <strong>Programming</strong> 83
Food Stamp TendFUNC. KEY #055 PROGRAMMINGDEFAULT DESC : FD/S TENDDESCRIPTOR :FD/S TENDHALO (0=NO LIMIT) 00000.001 2 3 4 5 6EXEMPT TAX :N N N N N NOPEN DRAWERY ESC Y/N ENT PAGE UP/DN FUNC. KEY #055 PROGRAMMINGALLOW DECIMAL ENTRYFOOD STAMP CHANGE IS CASHALLOW OVER TENDERNNNESC Y/N ENT PAGE UP/DN Guest #FUNC. KEY #056 PROGRAMMINGDEFAULT DESC: GUEST #DESCRIPTOR: GUEST #COMP AFTER BEGINNING OF CHECK NCOMPULSORY FOR ALL SALESNPRINT ON KPNPRINT ON RECEIPTNESC Y/N ENT PAGE UP/DN 84 P-Mode <strong>Programming</strong> <strong>SER</strong>-<strong>7000</strong> Program <strong>Manual</strong>
KP RoutingFUNC. KEY #248 PROGRAMMINGDEFAULT DESC : KP ROUTINGDESCRIPTOR :KP ROUTINGACTIVE IN X ONLY?NROUTING PERIOD IS : STAYDOWNESC Y/N ENT PAGE UP/DN KP Routing Key Program NoteFIELDROUTING PERIOD ISNotesThe KP ROUTING key is used to override KP TimePeriod control. For example, a restaurant mightnormally operate two kitchens at one time and onekitchen at other times. In case the volume ofbusiness changes, the manager might want to controlthe KP routing manually. Also, a single item, orlarge order might be required to be sent to a differentprinter than normal. Select STAYDOWN, TRANS(transaction), POP UP or ITEM POP up operation.<strong>SER</strong>-<strong>7000</strong> Program <strong>Manual</strong> P-Mode <strong>Programming</strong> 85
Macro 1-40Each Macro can execute up to 50 keystrokes.1. Press keys to berecorded in the macrosequence.2. Press the PAGE UPor PAGE DN keys toview the entiremacro, if necessary.3. Press ESC to exit thefunction key program.MACRO KEY# 1 PROGRAMMING ALPHADESCRIPTORMACRO1ACTIVE IN X ONLY?N-- ----------------01 [DONE]02 [C LEFT]03ESC ENT PAGE UP/DN FUNC. KEYMdse ReturnFUNC. KEY #118 PROGRAMMINGDEFAULT DESC : MDSE RETURNDESCRIPTOR :MDSE RETURNHALO (0=NO LIMIT) 00000.00ACTIVE IN X ONLYNCOMPULSORY VALIDATIONNADD TO NET GRAND TOTALN ESC Y/N ENTER PAGE UP/DN FUNC. KEY #118 PROGRAMMINGSKIP ADJUSTMENT OF PLU TOTALRETURN CURRENT PRC LEVEL ONLYNN ESC Y/N ENTER PAGE UP/DN 86 P-Mode <strong>Programming</strong> <strong>SER</strong>-<strong>7000</strong> Program <strong>Manual</strong>
Misc Tend 1-16FUNC. KEY #119 PROGRAMMINGDEFAULT DESC : MISC TEND1DESCRIPTOR :MISC TEND1HALO (0=NO LIMIT) 00000.001 2 3 4 5 6EXEMPT TAX :N N N N N NOPEN DRAWERY ESC Y/N ENTER PAGE UP/DN FUNC. KEY #119 PROGRAMMINGCOMPULSORY VALIDATIONNAMOUNT TENDER COMPULSORYNDISABLE UNDER TENDERINGNUNDER TENDERING IN X ONLY NNON-ADD# ENTRY COMPULSORY NALLOW OVER TENDERN ESC Y/N ENTER PAGE UP/DN FUNC. KEY #119 PROGRAMMINGCOIN CHANGER PORT# (0-4) 0CONNECT EFT TERMINALNEFT TERMINAL TRANSACT KEY(0-9) 0 ESC Y/N ENTER PAGE UP/DN Misc Tend Key Program NoteFIELDCOIN CHANGER PORT#(0-4)CONNECT EFT TERMINALEFT TERMINALTRANSACTION KEY(0-9)NotesEnter the number of the serial port to which the coinchanger is attached.Reserved for future use.Reserved for future use.<strong>SER</strong>-<strong>7000</strong> Program <strong>Manual</strong> P-Mode <strong>Programming</strong> 87
Modifier 1-10FUNC. KEY #136 PROGRAMMINGDEFAULT DESC : MODIFIER1DESCRIPTOR :MODIFIER1ACTIVE IN X ONLYNMODIFY DESC ONLY(NOT PLU#) NPRINT DESC ON GUEST CHECK YPRINT DESC ON RECEIPTY ESC Y/N ENTER PAGE UP/DN FUNC. KEY #136 PROGRAMMINGPRINT DESC ON KPYAFFECT DIGIT 1-14 OF PLU# 00VALUE OF AFFECTED DIGIT(0-9) 0 ESC Y/N ENTER PAGE UP/DN Modifier Key Program NotesFIELDAFFECT DIGIT 1-14 OFPLU#VALUE OF AFFECTEDDIGIT (0-9)NotesPreceding a PLU with a Size and/or Modifier keymanipulates the PLU code assigned to the PLU key,causing a different PLU to be registered when the PLUkey is pressed. Enter the digit of the PLU number youwish to be changed when using this key. (Digit #1 isthe rightmost digit; digit #14 is the leftmost digit.)Enter the value you wish to be added in the digitposition selected. For example, if you wish to affectPLU digit #4 with a value of 1, then pressing thismodifier key prior to the registration of PLU #17 willresult in the registration of PLU #1017.88 P-Mode <strong>Programming</strong> <strong>SER</strong>-<strong>7000</strong> Program <strong>Manual</strong>
Not Found PLUFUNC. KEY #251 PROGRAMMINGDEFAULT DESC : NOTFOUND PLUDESCRIPTOR :NOTFOUND PLUSKIP IN NOT FOUND PLU REGISTRATEGROUP LINK #1NDESCRIPTORNESC Y/N ENTER PAGE UP/DN #/No SaleFUNC. KEY #147 PROGRAMMINGDEFAULT DESC : #/NOSALENOSALE DESCRIPTOR : #/NOSALEHALO DIGITS FOR NON-ADD(0-14) 00ALLOW NOSALE FUNCTIONYALLOW NON-ADD FUNCTIONYNOSALE IN X ONLYN ESC Y/N ENTER PAGE UP/DN FUNC. KEY #147 PROGRAMMINGNOSALE INACT AFT NON-ADD ENTRY YCOMP. VALIDATION ON NOSALE NCOMP. NON-ADD AT BEGIN OF SALE NNON-ADD# MUST MATCH HALONNOSALE : PRINT ON RECEIPT N ESC Y/N ENTER PAGE UP/DN P/BalFUNC. KEY #148 PROGRAMMINGDEFAULT DESC : P/BALDESCRIPTOR :P/BALMUST BE ENTERED SALE STARTCOMPULSORY P/BALNNESC Y/N ENTER PAGE UP/DN <strong>SER</strong>-<strong>7000</strong> Program <strong>Manual</strong> P-Mode <strong>Programming</strong> 89
Paid Out 1-5/Recd Acct 1-5Shown below is a sample screen showing the identical function options for all the functionslisted above:FUNC. KEY #151 PROGRAMMINGDEFAULT DESC : PAID OUT1DESCRIPTOR :PAID OUT1HALO (0:NO LIMIT) 00000.00ACTIVE IN X ONLYNCOMPULSORY VALIDATIONNESC Y/N ENTER PAGE UP/DN 90 P-Mode <strong>Programming</strong> <strong>SER</strong>-<strong>7000</strong> Program <strong>Manual</strong>
%1 - %10FUNC. KEY #157 PROGRAMMINGDEFAULT DESC : %1DESCRIPTOR : %1HALO/RATE 00.0001 2 3 4 5 6TAXABLE :N N N N N NFUNCTION IS INACTIVEN ESC Y/N ENTER PAGE UP/DN FUNC. KEY #157 PROGRAMMINGFUNCTION IS ACTIVE IN X ONLY NFUNCTION : Y=SALE/N=ITEMNFUNCTION : Y=AMOUNT/N=PERCENT NFUNCTION : Y=PLUS/N=MINUS NFUNCTION : Y=PRESET/N=OPEN NCOMPULSORY VALIDATIONN ESC Y/N ENTER PAGE UP/DN FUNC. KEY #157 PROGRAMMINGALLOW PRESET OVERRIDENPRESET OVERRIDE IN X ONLY NFUNCTION NETS ITEM TOTALNIS FOOD STAMP ELIGIBLENMULTIPLE SALE COUPONS W/O SBTL NONLY ONE DISCOUNT PER TRANS N ESC Y/N ENTER PAGE UP/DN FUNC. KEY #157 PROGRAMMINGKEY IS "DO IT" DISCOUNTFUNCTION? N ESC Y/N ENTER PAGE UP/DN % Key Program NoteFIELDKEY IS "DO IT"DISCOUNT FUNCTION?NotesIf a tender is short of the amount due, the operator hasthe option of accepting the amount tendered thus far astotal payment for the transaction. Press the % keyprogrammed with the "do it" function to finalize thesale with an amount still due. The amount due that isforgiven will be added to this key total.<strong>SER</strong>-<strong>7000</strong> Program <strong>Manual</strong> P-Mode <strong>Programming</strong> 91
Price Inquiry/Stock InquiryFUNC. KEY #169 PROGRAMMINGDEFAULT DESC : PRICE INQDESCRIPTOR :PRICE INQACTIVE IN X ONLY?NFUNC IS : Y=STAY DOWN/N=POP UP NESC Y/N ENTER PAGE UP/DN Price Inquiry Program NoteFIELDY=Stay Down/N=Pop UpNotesIf a Stay Down, when a second PLU is registered aftera stock or price inquiry, the result will be an inquiry onthe second item. If Pop Up, when a second PLU isregistered after a stock or price inquiry, the result willbe the registration of the item rather than an inquiry forthe item.PrintFUNC. KEY #190 PROGRAMMINGDEFAULT DESC : PRINTDESCRIPTOR :PRINTOUTPUT PRINTER # (0-40) 00ESC Y/N ENTER PAGE UP/DN Print CheckFUNC. KEY #191 PROGRAMMINGDEFAULT DESC : PRINT CHECKDESCRIPTOR :PRINT CHECKPRT CHK AUTOMATIC <strong>SER</strong>VICE CHK? NPRINT CONSEC# ON GUEST CHECK? YESC Y/N ENTER PAGE UP/DN 92 P-Mode <strong>Programming</strong> <strong>SER</strong>-<strong>7000</strong> Program <strong>Manual</strong>
PromoFUNC. KEY #193 PROGRAMMINGDEFAULT DESC : PROMODESCRIPTOR :PROMO1 2 3 4 5 6TAXABLE :Y Y Y Y Y YACTIVE IN X ONLYNESC Y/N ENTER PAGE UP/DN Recall Check 1-4FUNC. KEY #197 PROGRAMMINGDEFAULT DESC : RECALL CHK1DESCRIPTOR :RECALL CHK1ACTIVE IN X ONLYNENFORCE SEAT#NTABLE ENTRY REQUIREDNMULTIPLE CHECKS FOR EACH TABLE Y ESC Y/N ENTER PAGE UP/DN FUNC. KEY #197 PROGRAMMINGGUEST COUNT ENTRY REQUIRED NCOMPULSORY FOR ALL SALESNASSIGNED BY REGISTERNOPENING EMP. HAS EXCL. ACCESS YPRINT CHECK ON RECEIPTNPRINT CHECK ON JOURNALN ESC Y/N ENTER PAGE UP/DN FUNC. KEY #197 PROGRAMMINGPRINT CHECK ON KPNDRIVE THRU FEATURE ENABLED NPRT RCPT AFTER STORE CHECK NLENGTH OF CHECK# (0-10) 00SCAN CHECK#?N ESC Y/N ENTER PAGE UP/DN <strong>SER</strong>-<strong>7000</strong> Program <strong>Manual</strong> P-Mode <strong>Programming</strong> 93
Recall Check Key Program NoteFIELDDRIVE THRU FEATUREENABLED?SCAN CHECK#NotesSet to Y if the tracking file is used for drive thruwindows in fast food operations. In this case, the recallkey will automatically recall the lowest trackingnumber from the appropriate tracking file. Note: see“Store Check 1-4” on page 96. You must also set theappropriate Store Check key with the drive thru optionenabled.Allows use of scanner to enter check number.94 P-Mode <strong>Programming</strong> <strong>SER</strong>-<strong>7000</strong> Program <strong>Manual</strong>
ScaleSelect "SET TAREWEIGHTS" and pressENTER to access theTARE WEIGHTPROGRAMMINGscreen.FUNC. KEY #208 PROGRAMMINGDEFAULT DESC : SCALEDESCRIPTOR :SCALEACTIVE IN X ONLYNINHIBIT TARE WEIGHT ENTRY NTARE ENTRY IN X ONLYNTARE ENTRY IS COMPULSORYN ESC Y/N ENTER PAGE UP/DN FUNC. KEY #208 PROGRAMMINGWEIGHT SYMBOL : Y=kg/N=lbSET TARE WEIGHTSN ESC Y/N ENTER PAGE UP/DN TARE WEIGHT PROGRAMMINGTARE01 00.00 TARE 06 00.00TARE02 00.00 TARE 07 00.00TARE03 00.00 TARE 08 00.00TARE04 00.00 TARE 09 00.00TARE05 00.00 TARE 10 00.00 ESC Y/N ENTER PAGE UP/DN TARE WEIGHT PROGRAMMINGTARE11 00.00 TARE 16 00.00TARE12 00.00 TARE 17 00.00TARE13 00.00 TARE 18 00.00TARE14 00.00 TARE 19 00.00TARE15 00.00 TARE 20 00.00 ESC Y/N ENTER PAGE UP/DN <strong>SER</strong>-<strong>7000</strong> Program <strong>Manual</strong> P-Mode <strong>Programming</strong> 95
Store Check 1-4FUNC. KEY #214 PROGRAMMINGDEFAULT DESC : STORE CHK1DESCRIPTOR :STORE CHK1HALO (0:NO LIMIT) 00000.001 2 3 4 5 6EXEMPT TAX :N N N N N NACTIVE IN X ONLYN ESC Y/N ENTER PAGE UP/DN FUNC. KEY #214 PROGRAMMINGCOMPULSORY VALIDATIONNNON-ADD# COMPULSORYNPRINT ON RECEIPTYPRINT ON JOURNALYNEGATIVE BALANCE IN X ONLY NHARD CHECK PRINTER# (0-40) 00 ESC Y/N ENTER PAGE UP/DN FUNC. KEY #214 PROGRAMMINGENABLE DRIVE THROUGH OPTIONN ESC Y/N ENTER PAGE UP/DN Store Check Key Program NoteFIELDENABLE DRIVETHROUGH OPTIONNotesSet to Y if the tracking file is used for fast foodoperations. In this case, the store key willautomatically assign the next tracking number from theappropriate tracking file and store the transaction.Note: see “Recall Check 1-4” on page 93. You mustalso set the appropriate Recall Check key with the drivethru option enabled.96 P-Mode <strong>Programming</strong> <strong>SER</strong>-<strong>7000</strong> Program <strong>Manual</strong>
Tax ExemptFUNC. KEY #224 PROGRAMMINGDEFAULT DESC : TAX EXEMPTDESCRIPTOR :TAX EXEMPTHALO (0:NO LIMIT) 00000.001 2 3 4 5 6EXEMPT TAX :Y Y Y Y Y YNON-ADD# COMPULSORYNESC Y/N ENTER PAGE UP/DN Time In/OutFUNC. KEY #231 PROGRAMMINGDEFAULT DESC : TIME IN/OUTDESCRIPTOR :TIME IN/OUTACTIVE IN X ONLYNCOMPULSORY VALIDATIONNESC Y/N ENTER PAGE UP/DN Tip 1-3FUNC. KEY #232 PROGRAMMINGDEFAULT DESC : TIP1DESCRIPTOR :TIP1HALO/RATE 00000.00TIP : Y=PERCENTAGE/N=AMOUNT NTIP : Y=OPEN/N=PRESETN ESC Y/N ENTER PAGE UP/DN FUNC. KEY #232 PROGRAMMING1 2 3 4 5 6TIP IS TAXABLE BY : Y Y Y Y Y YMUST PAY BY MISC AFTER TIP NTIP AMT ADDS TO NET/GROSS TTL NCHARGE TIP IS DEDUCTED FM CASH N ESC Y/N ENTER PAGE UP/DN <strong>SER</strong>-<strong>7000</strong> Program <strong>Manual</strong> P-Mode <strong>Programming</strong> 97
Tip DeclareFUNC. KEY #019 PROGRAMMINGDEFAULT DESC : TIP DECLAREDESCRIPTOR :TIP DECLAREKEY IS ACTIVE IN X ONLYNCOMPULSORY VALIDATIONNCHARGE TIP IS DEDUCTED FM CASH NESC Y/N ENTER PAGE UP/DN Tray SubtotalFUNC. KEY #239 PROGRAMMINGDEFAULT DESC : TRAY SUBTLDESCRIPTOR :TRAY SUBTL1 2 3 4 5 6EXEMPT TAX :N N N N N NACTIVE IN X ONLYNCOMPULSORY BEFORE TENDERN ESC Y/N ENTER PAGE UP/DN FUNC. KEY #239 PROGRAMMINGCOMPULSORY VALIDATIONADVANCES CONSEC# AT FINALNN ESC Y/N ENTER PAGE UP/DN 98 P-Mode <strong>Programming</strong> <strong>SER</strong>-<strong>7000</strong> Program <strong>Manual</strong>
Void ItemFUNC. KEY #241 PROGRAMMINGDEFAULT DESC : VOID ITEMDESCRIPTOR :VOID ITEMHALO (0:NO LIMIT) 00000.00ACTIVE IN X ONLYNCOMPULSORY VALIDATIONNESC Y/N ENTER PAGE UP/DN WasteFUNC. KEY #242 PROGRAMMINGDEFAULT DESC : WASTEDESCRIPTOR :WASTEALLOW IN X ONLYNCOMPULSORY VALIDATIONNAFFECT ON PROJECTIONSYESC Y/N ENTER PAGE UP/DN Waste Key Program NoteFIELDAFFECT ONPROJECTIONSNotesIf Y, the projection report will consider actual sale pluswaste. If N, the projection report will only considersales.X/TimeFUNC. KEY #244 PROGRAMMINGDEFAULT DESC : X/TIMEDESCRIPTOR :X/TIMEALLOW SPLIT PRICINGNESC Y/N ENTER PAGE UP/DN <strong>SER</strong>-<strong>7000</strong> Program <strong>Manual</strong> P-Mode <strong>Programming</strong> 99
System OptionsOptions are sorted by category to assist the programmer in finding a specific option. Withineach category, options are also referenced by number for easy retrieval.1. Select SYSTEMOPTION from the P-Mode menu todisplay the SystemOption <strong>Programming</strong>Screen.2. Choose an item fromthe menu in one oftwo ways:Type the number foryour choice and pressENTER.Press the or keysto move the cursor toyour choice and pressENTER.SYSTEM OPTION PROGRAMMING1. GENERAL FUNCTION OPTIONS2. TAX OPTIONS3. CASH DRAWER OPTIONS4. TRAINING MODE OPTIONS5. LEVEL/MODIFIER OPTIONSSYSTEM OPTION PROGRAMMING6. TRACKING FILE OPTIONS7. KP/KV OPTIONS8. VALID/SBTL PRINT OPTIONS9. GENERAL PRINTING OPTIONS10.REPORT PRINTING OPTIONSSYSTEM OPTION PROGRAMMING9. GENERAL PRINTING OPTIONS10.REPORT PRINTING OPTIONS11.REPORT OPTIONS12.TIME KEEPING OPTIONS13.E.J. & DETAIL PRINTING OPT100 P-Mode <strong>Programming</strong> <strong>SER</strong>-<strong>7000</strong> Program <strong>Manual</strong>
General Function Options1. Select GENERALFUNCTIONOPTIONS from theSYSTEM OPTIONPROGRAMMINGscreen. The first pageof general optionsdisplays with the firstoption field selected.2. Press the keys to select a fieldto edit:3. Type a new value andpress ENTER or toaccept the entry andadvance to the nextfield.4. From the last field onthe screen press toview the next page ofoptions, or from anypoint on the screenpress PAGE DN toview the next page ofoptions.5. Press PAGE UP toreturn to the previousscreen.GENERAL FUNCTION OPTIONS1. MANAGER CONTROL (IN X-MODE):NEGATIVE SALESNNEGATIVE TENDERNZERO SALESN2. ENFORCE EAT-IN/T-OUT/D-THRU:AT BEGIN OF SALEN ESC Y/N ENTER PAGE UP/DN GENERAL FUNCTION OPTIONSBEFORE TENDERN3. DEFAULT DESTINATION NONE4. ROUNDING ON %: UP AT .55. ROUNDING ON SPLIT PRICE/MULTUP AT .56. CONSOLIDATE LIKE ITEMS Y ESC Y/N ENTER PAGE UP/DN GENERAL FUNCTION OPTIONS7. HASH OPTIONS:UPDATE SALE(RECEIPT) TOTAL NADD TO GROSS SALE TOTAL NADD NET SALE TOTALNUPDATE HASH TTL ON FIN/SFT NUPDATE TIME PERIOD REPORT N ESC Y/N ENTER PAGE UP/DN GENERAL FUNCTION OPTIONSUPDATE EMPLOYEE REPORT NUPDATE GROUP REPORTNUPDATE IND. PLU TOTALS NADD TO OVERALL PLU TOTALS NUPDATE DRAWER TOTALS RPT NUPDATE DAILY SALES REPORT N ESC Y/N ENTER PAGE UP/DN GENERAL FUNCTION OPTIONS8. ACTIVATE ROUNDING ON CASH N9. ACTIVATE ROUNDING ON SBTL N10.ROUNDING SYSTEM11.GLOBAL ENTRY LIMIT (0-7) 012.DIRECT MULTIPLICATION:ENABLEN ESC Y/N ENTER PAGE UP/DN <strong>SER</strong>-<strong>7000</strong> Program <strong>Manual</strong> P-Mode <strong>Programming</strong> 101
GENERAL FUNCTION OPTIONSMAXIMUM DIGIT (1-5) 113.PLU PRESET/HALO OVERRIDE N14.SILENT KEY DEPRESSIONN15.Y=CODE ENTRY/N=A/N OVERLAY N16.OPEN ENTRY FOR SCALE PLUS N17.DEACTIVATE VOID MODEN ESC Y/N ENTER PAGE UP/DN GENERAL FUNCTION OPTIONS18.DISABLE TIME/DATE PROGRAM N19.ALLOW PLU COPY BY RANGE N20 ALLOW POST TENDERING N21 EMP.: Y=POP UP/N=STAY DOWN N22 EMP. SIGN ON: EMPLOYEE#23.QTY LIMIT FOR X/TIME 000.000 ESC Y/N ENTER PAGE UP/DN GENERAL FUNCTION OPTIONS24.EMP. # LINKED "EMP.1" KEY 0125.EMP. # LINKED "EMP.2" KEY 0026.EMP. # LINKED "EMP.3" KEY 0027.EMP. # LINKED "EMP.4" KEY 0028.EMP. # LINKED "EMP.5" KEY 0029.EMP. # LINKED "EMP.6" KEY 00 ESC Y/N ENTER PAGE UP/DN GENERAL FUNCTION OPTIONS30.EMP. # LINKED "EMP.6" KEY 0031.EMP. # LINKED "EMP.6" KEY 0032.EMP. # LINKED "EMP.6" KEY 0033.EMP. # LINKED "EMP.6" KEY 0034.AUTO CLEAR ERROR CONDITION Y ESC Y/N ENTER PAGE UP/DN GENERAL FUNCTION OPTIONS35.GUEST CHECK BALANCE HALO(0=NO LIMIT)0000000.0036.SET DEFAULT SEAT# TO 1 N37.CONT MACRO IF MACRO IS LOOP N38.ENTER TIME FOR TRANS. VOID Y39.START AT PRICE1 IN PLU PGM Y ESC Y/N ENTER PAGE UP/DN 102 P-Mode <strong>Programming</strong> <strong>SER</strong>-<strong>7000</strong> Program <strong>Manual</strong>
GENERAL FUNCTION OPTIONS40.SCREEN SAVER (MINUTES) 0041.MENU SELECT WITHOUT ENTER N42.RECEIPT STATUS ON DISPLAY Y43.CARD READER ENABLEN44.SALES FOR 0 STOCK ITEMS Y45.DATE OF BIRTH ENTRY COMP. Y ESC Y/N ENTER PAGE UP/DN 6. Press PAGE DN toview the last of theGENERALFUNCTIONOPTIONS. Note thatthe scroll indicatorstell you when moreinformation is locatedon pages above orbelow the currentpage.GENERAL FUNCTION OPTIONS46.CHECK DIGIT OF NONPLU CODE ESC Y/N ENTER PAGE UP/DN YGeneral Function Options Program Notes# FIELD Notes1 MANAGER CONTROL (IN X-MODE):NEGATIVE SALESNEGATIVE TENDERZERO SALES2 ENFORCE EAT-IN/T-OUT/D-THRU:AT BEGIN OF SALEBEFORE TENDERDetermine which of the listed functionsrequire the key lock to be placed in the Xposition. Settings here do not affecttransactions performed in the VOID key lockmode.You can enforce EAT-IN, TAKE-OUT, orDRIVE THRU either at the beginning of asale, or before a tender by selecting Y foreither option.3 DEFAULT DESTINATION You have the option of selecting a defaultdestination selection: NONE, EAT-IN,TAKE-OUT, or DRIVE-THRU.45ROUNDING ON %ROUNDING ON SPLIT PRICE/MULTWhen calculations result in a fraction of acent, you have the option of rounding UP AT.5 ($0.005 or greater rounds up; less than0.005 rounds down) or you can choose toround any fractional calculation ALWAYSUP or ALWAYS DOWN.6 CONSOLIDATE LIKE ITEMS If Y, like items are added, i.e. "2 COKES". IfN, like items are on separate lines, i.e. "1COKE" and "1 COKE".<strong>SER</strong>-<strong>7000</strong> Program <strong>Manual</strong> P-Mode <strong>Programming</strong> 103
# FIELD Notes7 HASH OPTIONS Here you can define the meaning of HASH byselecting Y or N to each item in the list ofcalculation options. See option #9 in “PLUStatus Group” on page 36 to apply HASHstatus to PLUs assigned to a particular statusgroup.8910ACTIVATE ROUNDING ONCASHACTIVATE ROUNDING ONSBTLROUNDING SYSTEMUse this option to eliminate the use of smallvalue coins (i.e. pennies). Rounding up ordown occurs at subtotal or cash.Select the ROUNDING SYSTEM field andpress ENTER to display the ROUNDINGSYSTEM PROGRAMMING SCREEN whereup to five ranges can be set. For example ifyou wish to eliminate pennies, the rangescould be set as:#1 00-02 000 (.00-.02 rounds to .00)#2 03-07 005 (.03-.07 rounds to .05)#3 08-09 010 (.08-.09 rounds up to .10)11 GLOBAL ENTRY LIMIT (0-7) Select an entry limit that applies to allnumeric entries (i.e. amounts for PLU entry,tenders, or multiplication.) The global entrylimit will override any individuallyprogrammed limits.12 DIRECT MULTIPLICATION:ENABLEMAXIMUM DIGIT (1-5)13 PLU PRESET/HALOOVERRIDEDirect multiplication allows you to enter aquantity, then press a preset key withoutusing the X/TIME key. You can enabledirect multiplication here, and also determinethe maximum number of digits for themultiplier.Override of a preset (entry of a price into apreset key) or override of a HALO (entry of aprice greater than the PLUs high amount limitcan be allowed. Note: In order to override,you must also set the flag for each individualPLU to allow override, and you must operatean employee with the authority level #18 setto allow override.14 SILENT KEY DEPRESSION If Y, both the key depression tone and theerror tone are silenced. (Error messagescontinue to display.)15 Y= CODE ENTRY/N=A/N OVERLAYSelect the method you wish to use whenprogramming alpha characters in descriptorfields.104 P-Mode <strong>Programming</strong> <strong>SER</strong>-<strong>7000</strong> Program <strong>Manual</strong>
# FIELD Notes16 OPEN ENTRY FOR SCALEPLUSIf Y, amount entries are allowed for openscale PLUs.17 DEACTIVATE VOID MODE Set to Y to deactivate any activity in theVOID key lock position.18 DISABLE TIME/DATEPROGRAM19 ALLOW PLU COPY BYRANGESet to Y to remove the ability to change orreprogram the current date/time.If yes, the COPY PLU and COPY PLUSTATUS GROUP commands allow you tocopy statuses from a single PLU or GROUPto a range of PLUs or GROUPS. If no, youcan only copy from a single PLU or STATUSGROUP to another individual PLU orGROUP. See “Copy Program” on page 191.20 ALLOW POST TENDERING Choose Y to allow tendering after the sale hasbeen finalized, for the purpose of computingchange21 EMPLOYEE:Y=POP UP/N=STAY DOWNChoose Y to automatically sign off at thecompletion of a transaction. Choose N toregister sales continuously for the sameemployee.22 EMP. SIGN ON Select the method you wish to use whensigning on to operate the <strong>SER</strong>-<strong>7000</strong>: PUSHBUTTON, SECRET CODE, EMPLOYEE#or MCR. See “Employee Sign-On/Sign-Off”in the <strong>SER</strong>-<strong>7000</strong> Operation <strong>Manual</strong> for moreinformation.23 QTY LIMIT FOR X/TIME Determine the maximum quantity that can beused for a multiplier.24-33EMPLOYEE # LINKED"EMPOYEE1" KEY34 AUTO CLEAR ERRORCONDITION35 GUEST CHECK BALANCEHALO (0=NO LIMIT)The 10 push button employee functions(codes 41-50) can be used to sign on specificemployees. The specific employee for eachkey is assigned here.If Y, error conditions will clear automaticallyafter a momentary error tone and display ofan error message. You can continue with thecorrect sequence without first pressing theCLEAR key. If No, you must press CLEARto clear any error before continuing.You can place a high amount limit on thebalance that is stored in a tracking file. If<strong>SER</strong>-<strong>7000</strong> Program <strong>Manual</strong> P-Mode <strong>Programming</strong> 105
# FIELD Notes36 SET DEFAULT SEAT# TO 1 If yes, each item that does not receive a seat #will be assigned the default seat number of 1.Using a seat number system assists prep staffin assembling orders correctly and facilitatespayment of separate parts of a check.37 CONT MACRO IF MACRO ISLOOP38 ENTER TIME FOR TRANS.VOID39 START AT PRICE1 IN PLUPGMIf Y, continuous macros can be created byincluding a macro in a macro sequence. Acontinuous macro might be used to run a testsequence.If yes, you must enter a time before beginninga transaction void. This allows sales by timereports to be adjusted appropriately.To facilitate price changes on an existingprogram, you can choose Y to automaticallyplace the cursor in the first price field when aPLU Program screen is opened. In the defaultcondition (N) the cursor is placed at thePLU# field.40 SCREEN SAVER (MINUTES) Enter the number of minutes before aninactive screen will automatically blank.Press any key to refresh the screen.41 MENU SELECT WITHOUTENTER42 RECEIPT STATUS ONDISPLAYYou can select an item from a menu (or froma WLU that does not allow functions) byentering only the item number, rather than theitem number then ENTER. Note: If thereare more than 9 selections on the menu, youmust enter single digit selections with apreceding 0, i.e. enter 01 to select item #1.Choose Y to display the receipt on/off statuson the operator display. Receipt on displaysas "Ron"; receipt off displays as "Rof".43 CARD READER ENABLE Choose Y to enable optional magnetic stripereader.44 SALES FOR 0 STOCK ITEMS If Y, sale of items with zero stock is allowed.45 DATE OF BIRTH ENTRYCOMP.46 CHECK DIGIT OF NONPLUCODEIf Y, date of birth for age verification itemsmust be entered at prompt. Operator maypress escape to sell items when set to N.If N, Check ditis is not required for scanningprice embedded bar code.106 P-Mode <strong>Programming</strong> <strong>SER</strong>-<strong>7000</strong> Program <strong>Manual</strong>
Tax Options1. Select TAXOPTIONS from theSYSTEM OPTIONPROGRAMMINGscreen. The taxoptions display withthe first option fieldselected. (There isonly one page of taxoptions.)2. Select fields andchange information inthe same manner asdescribed for generaloptions.TAX OPTIONS1. TAX ROUND FACTOR UP AT .52. VAT SUBTRACT FROM IND. PLU N3. TAX EXEM. QTY(CANADA DONUT)004. PRT TAXABLE AMOUNTS ON R/J N ESC Y/N ENTER PAGE UP/DN TAX OPTIONS5. TAXABLE STATUS INDICATORS:DISPLAYYPRINTY6. PRINT TAX AMOUNTS AT TENDER Y7. PRT VAT TAX AMT SEPARATELY N ESC Y/N ENTER PAGE UP/DN Tax Options Program NotesTAX OPTIONS8. TAX PRT: Y=COMBIN/N=ITEMIZ N9. PRT TAX EXEM. DESC/TTLS N10.PRINT SUBTOTAL WITHOUT TAX N11.NOT SHOW FOOD STAMP INDICAT N12.PRINT TAX ON VATN ESC Y/N ENTER PAGE UP/DN # FIELD Notes1 TAX ROUNDING FACTOR When tax calculations result in a fraction of acent, you have the option of rounding UP AT.5 ($0.005 or greater rounds up; less than0.005 rounds down) or you can choose toround any fractional calculation ALWAYSUP or ALWAYS DOWN.2 VAT SUBTRACTED FROMIND. PLUChoose Y to subtract the VAT tax amountfrom the PLU totals on the PLU report. If N,the PLU report total reflects the items priceand the value added tax.<strong>SER</strong>-<strong>7000</strong> Program <strong>Manual</strong> P-Mode <strong>Programming</strong> 107
# FIELD Notes3 TAX EXEM. QTY (CANADADONUT)4 PRINT TAXABLE AMOUNTSON R/J5 TAXABLE STATUSINDICATORS:DISPLAYPRINT6 PRINT TAX AMOUNTS ATTENDER7 PRINT VAT TAX AMTSEPARATELY8 TAX PRT:Y=COMBIN/N=ITEMIZ9 PRINT TAX EXEM.DESC/TTLS10 PRINT SUBTOTAL WITHOUTTAX11 NOT SHOW FOOD STAMPINDICATEnter the quantity at which you wish tax to beexempted. For example if set at 12,registration of PLUs reported to status groupswith eligibility for Canadian donut lawselected will charge tax until the quantitywith the transaction reaches 12. When 12 ormore are registered, all will be sold withouttax. See “PLU Status Group” on page 36 formore information.Choose Y to print the tax eligible subtotalsfor each tax on the receipt and/or journal, ifprinted.In the default condition (Y), tax eligibilityindicators, i.e. T X1 display on the screen andprint on printers adjacent to the item. ChooseN to selectively remove the indicators fromthe display and/or print.When set to N, the tax charged will not printon the receipt (TAX1, TAX2, etc.)If there are multiple value added taxes,choose Y to print tax amounts separately foreach tax, rather than a single tax total.If N, each tax amount will print separately. IfY, one TAX total will print.If Y, a tax-exempt total will print on thereceipt.If Y, the merchandise subtotal does notinclude tax.In the default condition (Y), the food stampindicator, F S displays on the screen and printson printers adjacent to the item. Choose N toremove the indicator from the display andprint.12 PRINT TAX ON VAT If Y, prints breakout tax amount on VAT taxsales receipts.108 P-Mode <strong>Programming</strong> <strong>SER</strong>-<strong>7000</strong> Program <strong>Manual</strong>
Cash Drawer Options1. Select CASHDRAWER OPTIONSfrom the SYSTEMOPTIONPROGRAMMINGscreen. The cashdrawer optionsdisplay with the firstoption field selected.(There is only onepage of cash draweroptions.)2. Select fields andchange information inthe same manner asdescribed for generaloptions.CASH DRAWER OPTIONS1. SALES WITH DRAWER OPEN Y2. C-I-D AMOUNT LIMIT 00000.003. OPEN DRAWER DURING X-RPT N4. OPEN DRAWER DURING Z-RPT N5. ACTIVATE OPEN DRAWER ALARM N6. OPEN DRAWER ALARM TIME 030ESC Y/N ENTER PAGE UP/DN Cash Drawer Options Program Notes# FIELD Notes1 SALES WITH DRAWER OPEN Choose Y to force the drawer to be closedbefore registrations are allowed.2 C-I-D AMOUNT LIMIT Set the maximum amount of cash in drawerbefore a error tone and message display. Theerror can be cleared and continued sales areallowed, however the warning continues tosound at the completion of each transaction,until cash is removed from the drawer. Setthe amount to 0 to disable the cash in drawerlimit warning.3 OPEN DRAWER DURING X-RPT4 OPEN DRAWER DURING Z-RPT5 ACTIVATE OPEN DRAWERALARM6 OPEN DRAWER ALARMTIMEChoose Y to open the drawer at thecompletion of any X report.Choose Y to open the drawer at thecompletion of any Z report.If Y, an error tone sounds when the cashdrawer remains open the length of timespecified in option #6 below.Enter length of time the drawer may be open(in seconds) before the open drawer alarmsounds.<strong>SER</strong>-<strong>7000</strong> Program <strong>Manual</strong> P-Mode <strong>Programming</strong> 109
Training Mode Options1. Select TRAININGMODE OPTIONSfrom the SYSTEMOPTIONPROGRAMMINGscreen. The trainingmode options displaywith the first optionfield selected. (Thereis only one page oftraining modeoptions.)2. Select fields andchange information inthe same manner asdescribed for generaloptions.Training Mode Options Program Notes# FIELD Notes1 TRAINING MODEPASSWORD2 OPEN DRAWER IN TRAINMODETRAINING MODE OPTIONS1. TRAINING MODE PASSWORD 00002. OPEN DRAWER IN TRAIN MODE N3. TRAINING EMPLOYEE FILE # 004. ALLOW REAR DSP IN TRAINING N5. SEND ORDER TO KP/V IN TRAIN N6. PRINT JOURNALS IN TRAINING N ESC Y/N ENTER PAGE UP/DN TRAINING MODE OPTIONS7. PRINT RECEIPTS IN TRAINING N8. PRINT "TRAINING" Y ESC Y/N ENTER PAGE UP/DN Enter a 4 digit numeric password that must beused to access the TRAINING option on theX-MODE MANAGER MENU. If thepassword is 0, password entry is not required.Choose Y to open the appropriate cashdrawer during training operations.3 TRAINING EMPLOYEE FILE # Choose the employee file # that is updatedwith training activity.4 ALLOW REAR DSP INTRAINING5 SEND ORDER TO KP/V INTRAIN6 PRINT JOURNALS INTRAINING7 PRINT RECEIPTS INTRAININGChoose Y to activate the rear display duringtraining activity. If N, the rear displayindicates CLOSED during training.Choose Y to send orders to the kitchen printerand/or kitchen video during training.Choose Y to print (or update, in the case of anelectronic journal) the journal in training.Choose Y to print receipts (if receipts arenormally printed) during training.8 PRINT "TRAINING" If receipts are printed they are normallyprinted with the message TRAINING and themessage '***TRAINING***" displays on theoperator screen. Choose N to remove thesemessages.110 P-Mode <strong>Programming</strong> <strong>SER</strong>-<strong>7000</strong> Program <strong>Manual</strong>
Level/Modifier Options1. SelectLEVEL/MODIFIEROPTIONS from theSYSTEM OPTIONPROGRAMMINGscreen. Thelevel/modifier optionsdisplay with the firstoption field selected.(There is only onepage of level/modifieroptions.)2. Select fields andchange information inthe same manner asdescribed for generaloptions.LEVEL/MODIFIER OPTIONS1. DEFAULT KEYBOARD LEVEL 12. KEYBOARD LVL: STAYDOWN3. DEFAULT PRICE LEVEL 014. PRICE LEVEL: ITEM POP UP5. PLU MOD KEYS: ITEM POP UP ESC Y/N ENTER PAGE UP/DN LEVEL/MODIFIER OPTIONS6. APPLY MOD TO CODE ENT PLU N7. MODE OVERWRITES PREV MODE N ESC Y/N ENTER PAGE UP/DN <strong>SER</strong>-<strong>7000</strong> Program <strong>Manual</strong> P-Mode <strong>Programming</strong> 111
Level/Modifier Options Program Notes# FIELD Notes1 DEFAULT KEYBOARDLEVELIf keyboard levels are pop-up (see option #2),enter the level you wish to return to after anentry in a different level.3 DEFAULT PRICE LEVEL If price levels are pop-up (see option #4),enter the level you wish to return to after anentry in a different level.245KEYBOARD LVL:PRICE LEVEL:PLU MOD KEYS:6 APPLY MOD TO CODE ENTPLU7 MOD OVERWRITES PREVMODSelect the field and press ENTER. ChooseSTAY DOWN, TRANS POP UP, or ITEMPOP UP.STAY DOWN: Once chosen, will remainactive until the next choice.ITEM POP UP: Choice remains active forthe next PLU only, then returns to the default.TRANS POP UP: Choice remains active forthe remainder of the transaction, then returnsto the default with the transaction is finalized.If Y, PLU modifier keys may be used withboth keyboard PLU keys and code entryPLUs.If Y, only the last modifier entry will affectthe PLU number. Use this setting when aPLU is modified only once, i.e.small/med/large. If N, several modifiersaffecting different digit positions could beentered and then affect the PLU registered.For example, size, crust type, and/or toppingscould be indicated on pizza items.112 P-Mode <strong>Programming</strong> <strong>SER</strong>-<strong>7000</strong> Program <strong>Manual</strong>
Tracking File Options1. Select TRACKINGFILE OPTIONS fromthe SYSTEMOPTIONPROGRAMMINGscreen. The trackingfile options displaywith the first optionfield selected. (Thereare two pages oftracking file options.)2. Select fields andchange information inthe same manner asdescribed for generaloptions.TRACKING FILE OPTIONS1.AUTOMATIC TRANSFER CHECK N2.CHECKS PAID SLIP IS STUB N3.PRINT GUEST CHECK AT TENDER N4.SELECT HELD ITEMS ON RECALL Y5.WARN IF HELD ITEMS AT FINAL Y6.TRK2 HOLD CLOSED CHK FM TRK1 N ESC Y/N ENTER PAGE UP/DN TRACKING FILE OPTIONS7.TRK4 HOLD CLOSED CHK FM TRK3 N8.STARTING CHECK#:CHECK #1 0000000001CHECK #2 0000000001CHECK #3 0000000001CHECK #4 0000000001 ESC Y/N ENTER PAGE UP/DN TRACKING FILE OPTIONS9. CHECK# LIMIT (0=NO LIMIT):CHECK#1 0000000000CHECK#2 0000000000CHECK#3 0000000000CHECK#4 0000000000 ESC Y/N ENTER PAGE UP/DN TRACKING FILE OPTIONS10.RESET CHECK #1 Z1 FINANCIAL11.RESET CHECK #2 Z1 FINANCIAL12.RESET CHECK #3 Z1 FINANCIAL13.RESET CHECK #4 Z1 FINANCIAL14.DISABLE GC PRT ON RECEIPT N15.GC PRINTER #(0-40) 00 ESC Y/N ENTER PAGE UP/DN <strong>SER</strong>-<strong>7000</strong> Program <strong>Manual</strong> P-Mode <strong>Programming</strong> 113
Tracking File Options Program Notes# FIELD Notes1 AUTOMATIC TRANSFERCHECKIf Y, the check will be assigned to the lastperson who posted to the check.2 CHECKS PAID SLIP IS STUB If Y, the PRINT CHECK function produces aguest check with totals only, without itemdetail.3 PRINT GUEST CHECK ATTENDER4 SELECT HELD ITEMS ONRECALL5 WARN IF HELD ITEMS ATFINAL67TRK 2 HOLD CLOSED CHK FMTRK 1TRA 4 HOLD CLOSED CHK FMTRK 3When Y, the PRINT CHECK is active andguest check will print.Items may be "held" to temporarily postponekitchen printing (or display). If Y, held itemsare automatically selected when a check isrecalled so they may be sent to theappropriate printers/screens.If a check with held items is paid, a warningwill display.The <strong>SER</strong>-<strong>7000</strong> system does not feature astandard closed check file. However, if youdo not require all four of the available checkfiles, unused tracking files can be utilized tostore closed checks as indicated in options #9& #10. (See "Memory Allocation " in S-Mode <strong>Programming</strong>.)8 STARTING CHECK#: For each tracking file that you are using, ifyou are automatically assigning trackingnumbers, you can enter the first number ofthe tracking file to be issued after the checknumber is reset.9 CHECK# LIMIT Sets the upper limit for the check #. If setto"10", once check #10 is used, the nextcheck will be the starting check number.11121314RESET CHECK #1RESET CHECK #2RESET CHECK #3RESET CHECK #4Select when you wish the check number toreset: Z1 FINANCIAL, Z1 OPEN CHECK orNEVER.114 P-Mode <strong>Programming</strong> <strong>SER</strong>-<strong>7000</strong> Program <strong>Manual</strong>
Kitchen Printing/Video Options1. Select KITCHENPRINTING/VIDEOOPTIONS from theSYSTEM OPTIONPROGRAMMINGscreen. The kitchenprinting/video optionsdisplay with the firstoption field selected.(There are threepages of kitchenprinting/videooptions.)2. Select fields andchange information inthe same manner asdescribed for generaloptions.KITCHEN PRINTING/VIDEO OPTI1. PRINT AT KP:TOTAL AMOUNT LINENPRINT SEAT #YORDER #YTRANSACTION VOID ITEMS NPLU CODEN ESC Y/N ENTER PAGE UP/DN KITCHEN PRINTING/VIDEO OPTI1. PRINT AT KP:PLU PRICENBITMAPNNUMBER OF ITEMSNLOGO MESSAGEN2. SORT KP BY KP GROUP # Y ESC Y/N ENTER PAGE UP/DN KITCHEN PRINTING/VIDEO OPTI3. LINE FEED AT KP PRT START 004. LINE FEED AT KP END 005. COMBINE LIKE ITEMS ON KPV Y6. SEND ORDER TO KP: NAT SUBTOTALN7. SEND ORDER TO KVS ON SBTL N ESC Y/N ENTER PAGE UP/DN KITCHEN PRINTING/VIDEO OPTI8. PRINT VOIDED ORDERS AT KPV N9. KP IS: Y=REAL TIME/N=BATCH N10.KV IS: Y=REAL TIME/N=BATCH N11.USE KP THE SAME FOR ALL REG12 KP COMBINATION OF REG#&CONS#13.DISPLAY KP TIME PERIOD# N ESC Y/N ENTER PAGE UP/DN KITCHEN PRINTING/VIDEO OPTI14.DISPLAY KP ORDER#15.SEPARATE KP BY KP GROUP#16.SEPARATE KP BY KP ITEM17.SORT KP BY SEAT #NNN ESC Y/N ENTER PAGE UP/DN <strong>SER</strong>-<strong>7000</strong> Program <strong>Manual</strong> P-Mode <strong>Programming</strong> 115
Kitchen Printing/Video Options Program Notes# FIELD Notes1 PRINT AT KP:TOTAL AMOUNT LINEPRINT SEAT #ORDER #TRANSACTION VOID ITEMSPLU CODEPLU PRICEBITMATNUMBER OF ITEMSLOGO MESSAGEYou can determine the content of eachkitchen printer chit. For each item listed,select N to remove print from the kitchenprinter.Note: the TOTAL AMOUNT line includes aline for TOTAL and TAX..2 SORT KP BY KP GROUP # Use this option to create "priority print". Forexample, if you wish to group appetizers atthe beginning of the chit, then entrees next,place appetizers in a kitchen printer group(see "PLU Status Group (PLU Status Link)"on page 67) with a lower numeric value thanthe value of the group to which entrees arereported.3 # LINE FEED AT KP PRTSTARTEnter the number of lines you wish to feedbefore beginning kitchen printer print.4 # LINE FEED AT KP END Enter the number of lines you wish to feedafter beginning kitchen printer print.5 COMBINE LIKE ITEMS ONKPV6 SEND ORDER TO KP:AT SUBTOTAL7 SEND ORDER TO KVS ONSBTL8 PRINT VOIDED ORDERS ATKPV9 KP IS:Y=REAL TIME/N=BATCHIf Y, for example, if two hamburgers areentered and sent to the printer, they will printas "2 HAMBURGERS", rather than"1 HAMBURGER" and "1 HAMBURGER"on a second line. If condiments are entered,they will be separated and printed below theitems.Choose Y if you wish to print when thesubtotal key is pressed, instead of when thesale is finalized.Choose Y if you wish to send items to theKVS when the subtotal key is pressed,instead of when the sale is finalized.If N, then transaction void orders will notprint or display at the appropriateprinter/screen.Real time means that each item will print atthe printer when the next item is entered (oneitem delay). Batch means that the entireorder will print when the order is finalized.116 P-Mode <strong>Programming</strong> <strong>SER</strong>-<strong>7000</strong> Program <strong>Manual</strong>
# FIELD Notes10 KV IS:Y=REAL TIME/N=BATCHReal time means that each item will display atthe screen when the next item is entered (oneitem delay). Batch means that the entireorder will display when the order is finalized.11 USE KP Choose from "THE SAME FOR ALL REG"if all registers in the IRC system use the samekitchen printer routing or "REGISTERSEPARATELY" if different registers havedifferent routing. See "Kitchen PrinterRouting" on page 16712 KP Choose from "COMBINATION OFREG#&CONS#" or "GLOBAL ORDER#".13 DISPLAY KP TIME PERIOD# You can program four different KP routingsby time period (see "Kitchen Printer Routing"on page 167). If Y, the operator display willwhich of KP routing periods is active in thelower left portion of the display.14 DISPLAY KP ORDER # Choose Y if you wish to display the order # inthe lower left portion of the operator screenwhen the order is finalized.15 SEPARATE KP BY KP GROUP#Choose Y if you wish to separate items fromdifferent KP Groups and issue separatekitchen printer tickets for items from each KPGroup.16 SEPARATE KP BY KP ITEM Choose Y to produce a separate requisitionfor each main item.17 SORT KP BY SEAT # If seat # system is used, will sort kitchenprinter orders by seat #, for example:Seat #101 Eggs01 CoffeeCream-----------------Seat #201 Eggs01 Orange Juice<strong>SER</strong>-<strong>7000</strong> Program <strong>Manual</strong> P-Mode <strong>Programming</strong> 117
Validation/Subtotal Print Options1. SelectVALIDATION/SUBTOTAL PRINTOPTIONS from theSYSTEM OPTIONPROGRAMMINGscreen. Thevalidation andsubtotal print optionsdisplay with the firstoption field selected.(There is only onepage of validationand subtotal printoptions.)2. Select fields andchange information inthe same manner asdescribed for generaloptions.VALIDATION/SUBTOTAL OPTIONS1. VALID AMT: Y=TOTAL/N=TENDER N2. CHK VALID AMT:Y=TTL/N=TEND N3. ACTIVATE VALIDATION SENSOR N4. ALLOW MULTIPLE VALIDATIONS Y5. PRINT VALIDATION MESSAGE Y6. PRT SBTL WHEN SBTL PRESSED N ESC Y/N ENTER PAGE UP/DN VALIDATION/SUBTOTAL OPTIONS7. VALIDATION PORT# (0-7) 008. DISP RUNNING SUBTL ON POLE N ESC Y/N ENTER PAGE UP/DN 118 P-Mode <strong>Programming</strong> <strong>SER</strong>-<strong>7000</strong> Program <strong>Manual</strong>
Validation/Subtotal Print Options Program NotesNOTE: To validate, you must attach a printer with validation capability to eachregister that will validate. Use option #7 to identify the port to which the printer isattached.# FIELD Notes1 VALIDATION AMT:Y=TOTAL/N=TENDER2 CHK VALID AMT:Y=TTL/N=TEND3 ACTIVATE VALIDATIONSENSOR4 ALLOW MULTIPLEVALIDATIONS5 PRINT VALIDATIONMESSAGE6 PRINT SBTL WHEN SBTLPRESSEDFor sale validation, you can select either theamount of the sale or the amount of the tenderas the amount to print on the validation.For check sale validation, you can selecteither the amount of the sale or the amount ofthe tender as the amount to print on thevalidation.The printer must be equipped with validationoption and sensor.If Y, the validation can be done more thanonce.See "Validation Message" on page 145 toprogram a message of up to three lines.If Y, the receipt (if applicable) will print thesubtotal at the point in the transaction whenthe key was pressed.7 VALIDATION PORT# (0-4) Indicate the port on the register that isconnected to the validation printer.8 DISPLAY RUNNING SUBTLON POLEAllows the pole display to show a runningsubtotal as items are entered.<strong>SER</strong>-<strong>7000</strong> Program <strong>Manual</strong> P-Mode <strong>Programming</strong> 119
General Printing Options1. Select GENERALPRINTINGOPTIONS from theSYSTEM OPTIONPROGRAMMINGscreen. The generalprinting optionsdisplay with the firstoption field selected.(There are four pagesof general printingoptions.)GENERAL PRINTING OPTIONS1. PRINT ON RECEIPT:EMPLOYEE NAMEYCONSECUTIVE #YITEMS BY GROUPNDATEYTIMEY ESC Y/N ENTER PAGE UP/DN GENERAL PRINTING OPTIONS1. PRINT ON RECEIPT:PREAMBLE/POSTAMBLEYORDER #YSEAT #Y2. RCPT FEED LINES AFTER PRT 003. LINES AFTER PREAMBLE 00 ESC Y/N ENTER PAGE UP/DN GENERAL PRINTING OPTIONS4. LINES BEFORE POSTAMBLE 005. BUFF RECEIPT: Y=STUB/N=FULL N6. PRT RCPT WHEN SIGN ON/OFF Y7. PRT RCPT WHEN CLOCK IN/OUT Y8. CONDENSE TRAY SBTL RECEIPTS N9. JOURNAL: =REAL TIME/N=BATCH N ESC Y/N ENTER PAGE UP/DN GENERAL PRINTING OPTIONS10.PRT PLU CODE WITH DESC Y11.TRANSACTION # IS RANDOM N12.HOME CURRENCY SYMBOL $13.CURRENCY 1 SYMBOL@14.CURRENCY 2 SYMBOL@15.CURRENCY 3 SYMBOL@ ESC Y/N ENTER PAGE UP/DN GENERAL PRINTING OPTIONS16.CURRENCY 4 SYMBOL@17.CURRENCY 5 SYMBOL@18.PRINT TENDER ON RECEIPT N19.DISABLE LINE FIND ON SLIP N20.GUEST CHECK PRE/POSTAMBLENONE ESC Y/N ENTER PAGE UP/DN 120 P-Mode <strong>Programming</strong> <strong>SER</strong>-<strong>7000</strong> Program <strong>Manual</strong>
General Printing Options Program NotesGENERAL PRINTING OPTIONS21.PRINT RECEIPT AUTOMATICALLY N22.PRT RCPT AFT TIME CLK EDIT Y23.PRINT GROUP NAME WHENPRINTING ITEMS BY GROUP N24.PRT GUEST CHK PRT CNT ON GC N ESC Y/N ENTER PAGE UP/DN GENERAL PRINTING OPTIONS25.PRINT IN DOUBLETOTALNTENDERNCHANGENORDER #N26.PRT RCPT AUTOMATIC. IN VOID N ESC Y/N ENTER PAGE UP/DN GENERAL PRINTING OPTIONS27.PRT # OF ITEMS ON RECEIPT N28.ALLOW MULTIPLE RECEIPTS Y29.ITEMS ON RCPT IS # OF ITEMSPRINTED ONLY N30.PRINT TIP ON EFT RECEIPT N31.COPY OF LANTRAN RECEIPT 01 ESC Y/N ENTER PAGE UP/DN GENERAL PRINTING OPTIONS32.TURN OFF AUTO CUTTERN33.PRE LOGO IMAGE ON RCT(0-22 034.POST LOGO IMAGE ON RCT(0-22)035.PRE LOGO IMAGE ON GC(0-22) 036.POST LOGO IMAGE ON GC(0-22) 0 ESC Y/N ENTER PAGE UP/DN # FIELD Notes1 PRINT ON RECEIPT: Determine the content of each receipt byselecting Y or N for each item.2 RCPT FEED LINES AFTERPRTEnter the number of lines you wish to feedafter each receipt is printed. (Makes chitlarger.)<strong>SER</strong>-<strong>7000</strong> Program <strong>Manual</strong> P-Mode <strong>Programming</strong> 121
# FIELD Notes3 LINES AFTER PREAMBLE Enter the number of lines you wish to feedafter the preamble and before the first receiptprint line.4 LINES BEFORE POSTAMBLE Enter the number of lines you wish to afterthe last receipt line and before the postamble.5 BUFF RECEIPT:Y=STUB/N=FULL6 PRT RCPT WHEN SIGNON/OFF7 PRT RCPT WHEN CLOCKIN/OUT8 CONDENSE TRAY SBTLRECEIPTS9 JOURNAL:Y=REAL TIME/N=BATCHA stub receipt contains only the total, tenderand transaction information. A full receiptincludes item detail.If Y, a receipt is printed whenever anemployee signs off or on.If Y, a receipt is printed whenever anemployee clocks in or out.Prints each separate tray subtotal receiptwithout preamble/postamble.Prints journal on journal printer (or updateselectronic journal) line by line (real time) orat transaction finalization (batch).10 PRT PLU CODE WITH DESC If Y, both the PLU# and descriptor will printwhen a PLU is registered.11 TRANSACTION # IS RANDOM If Y, the transaction # is generated randomly,rather than sequentially.12 HOME CURRENCY SYMBOL Select the currency symbol for display,receipts, etc. ($ is default.)13-17CURRENCY (1-5)SYMBOLSelect the currency symbols to be used for thecurrency conversion function keys.18 PRINT TENDER ON RECEIPT If N, the tender will not print on the receipt.19 DISABLE LINE FIND ON SLIP If an optional slip printer is used for hardcheck operation, set this flag to Y to printwithout automatic line feed.20 GUEST CHECKPRE/POSTAMBLE21 PRINT RECEIPTAUTOMATICALLY22 PRT RCPT AFT TIME CLKEDIT23 PRINT GROUP NAME WHENPRINTING ITEMS BY GROUPSelect NONE, GUEST CHECK LOGOMESSAGE, or LOGO MESSAGE todetermine the content of the guest checkpreamble/postambleChoose Y to generate a receipt automaticallywhen transactions are tendered.If Y, a receipt is printed whenever anemployee's time is edited.If you set PRINT ON RECEIPT:ITEMS BYGROUP to Y (General Printing Option #1),and if you set this option to Y, then the groupname will be printed on the receipt.122 P-Mode <strong>Programming</strong> <strong>SER</strong>-<strong>7000</strong> Program <strong>Manual</strong>
# FIELD Notes24 PRT GUEST CHK PRT CNTON GCIf Y, a counter of the number of times theguest check has been printed appears on thecheck.25 PRINT IN DOUBLE You can choose double-width printing forTotal, Tender, Change, and/or Order #26 PRT RCPT AUTOMATIC. INVOID MODE27 PRT # OF ITEMS ONRECEIPT28 ALLOW MULTIPLERECEIPTS29 ITEMS ON RCPT IS # OFITEMS PRINTED ONLYIf Y, a receipt will automatically be printedfor transactions in VOID mode.If Y, a count of the number of items willappear on each receipt.If Y, more than one copy of the receipt can beissued after the sale.If Y, the item count on the receipt willinclude only items printed on the receipt, andwill not include items programmed not toprint on the receipt.30 PRINT TIP ON EFT RECEIPT If Y, prints tip line on credit card receipt.31 COPY OF EFT RECEIPT If Y, prints copy of credit card transactionreceipt.32 TURN OFF AUTO CUTTER If Y, auto cutter is not enabled.33 PRE LOGO IMAGE ONRCT(0-22)34 POST LOGO IMAGE ONRCT(0-22)35 PRE LOGO IMAGE ON GC(0-22)36 POST LOGO IMAGE ON GC(0-22)Select one of the loaded bit map images.Select one of the loaded bit map images.Select one of the loaded bit map images.Select one of the loaded bit map images.<strong>SER</strong>-<strong>7000</strong> Program <strong>Manual</strong> P-Mode <strong>Programming</strong> 123
Report Printing Options1. Select REPORTPRINTINGOPTIONS from theSYSTEM OPTIONPROGRAMMINGscreen. The reportprinting optionsdisplay with the firstoption field selected.(There are two pagesof report printingoptions.)2. Select fields andchange information inthe same manner asdescribed for generaloptions.REPORT PRINTING OPTIONS1. ZERO SKIP:FINANCIAL REPORTYPLU REPORTYEMPLOYEE REPORTYGROUP REPORTYTIME PERIOD REPORTY ESC Y/N ENTER PAGE UP/DN REPORT PRINTING OPTIONS1. ZERO SKIP:ALL OTHER REPORTSY2. PRT % OF SALES ON PLU RPT Y3. PRT LINKED GROUP ON PLU RPT Y4. PROMO/WASTE TTL ON PLU RPT N5. INDIV ITEM USAGE QTY ON PLU N ESC Y/N ENTER PAGE UP/DN REPORT PRINTING OPTIONS6. CNT ON TIME RPT IS CUSTOMER7. USE FUNC KEY DESC IN REPORT:REPORT DESCRIPTOR8. PRT MIN.STK RPT AFTER FIN. N9. PRT GRAND TTL ON FINAN RPT Y ESC Y/N ENTER PAGE UP/DN REPORT PRINTING OPTIONS10.PRT GROUPS BY EMPLOYEE RPTAFTER EMPLOYEE REPORT11.PRT INDIV PLU ON FOOD COST12.AUTO CUT STRING REPORT13.PRT CLK IN/OUT ON TM KEEP ESC Y/N ENTER PAGE UP/DN NNNN124 P-Mode <strong>Programming</strong> <strong>SER</strong>-<strong>7000</strong> Program <strong>Manual</strong>
Report Printing Options Program Notes# FIELD Notes1 ZERO SKIP Choose whether to print or skip totals with azero value on each of the listed reports.2 PRINT % OF SALES ON PLURPT3 PRT LINKED GROUP ON PLURPT4 PROMO/WASTE TTLS ONPLU RPT5 INDIV ITEM USAGE QTY ONPLUIf Y, the percentage of each PLUs sales iscalculated and printed on the PLU report.If Y, each item on the PLU report will alsoprint the group number of each group towhich the PLU is linked.If Y, the promo and waste detail for eachPLU will print on the PLU report.If Y, PLU report is adjusted to reflectpromo/waste totals.6 CNT ON TIME RPT IS Select Customer or Guest.7 USE FUNC KEY DESC INREPORT8 PRT MIN.STK RPT AFTERFIN.9 PRT GRAND TTL ON FINANRPT10 PRT GROUPS BYEMPLOYEE RPT AFTEREMPLOYEE REPORT11 PRT INDIV PLU ON FOODCOSTFinancial/employee reports include totals forsome function keys. The descriptor thatappears on the report can be the programmedfunction key descriptor (see "Function Key"on page 75) or can be the report descriptor(see "Report Descriptors" on page 142.)If Y, an X1 minimum stock report willautomatically follow any financial X or Zreport.If Y, the Grand Total will print on theFinancial report.If Y, the Groups by Employee report willautomatically print after the Employee report.If Y, Food Cost report will print out costs foreach individual PLU. If, N will print asummary.12 AUTO CUT STRING REPORT If Y, auto cutting printers will auto cutbetween reports.13 PRT CLK IN/OUT ON TMKEEPIf Y, each time clock entry will print out onthe Time Keeping report. If N, only totalhours will print.<strong>SER</strong>-<strong>7000</strong> Program <strong>Manual</strong> P-Mode <strong>Programming</strong> 125
Report Options1. Select REPORTOPTIONS from theSYSTEM OPTIONPROGRAMMINGscreen. The reportoptions display withthe first option fieldselected. (There aretwo pages of reportprinting options.)2. Select fields andchange information inthe same manner asdescribed for generaloptions.REPORT OPTIONS1. ONLY TTL ON PROD MIX GRP R. N2. ONLY ITEM W ACT. INV ENTRY Y3. CASH DECLARATION COMPULSORY N4. SIGN ON EMP. BEFORE REPORTS N5. ENFORCE ACT. INV BEFORE Z1 N6. RETAIN ACT. INV ENTRY IN X1 N ESC Y/N ENTER PAGE UP/DN REPORT OPTIONS7. RESET PLU RPT AT INVEN Z1 N8. RESET INVEN RPT AT PLU Z1 N9. TIME KEEPING: Y=MIN/N=100 Y10.OMIT TAX TTL FM NET SALE GT N11.ALLOW Z OF OPEN CHECK RPT Y12.CONFIRM B4 TTL RESET ON Z N ESC Y/N ENTER PAGE UP/DN REPORT OPTIONS13.RESET AFTER FINANL Z REPORT:GROSS SALES GTNNET SALES GTNNEGATIVE SALES GTNZ COUNTERNCONSECUTIVE #N ESC Y/N ENTER PAGE UP/DN REPORT OPTIONS14.VOID MODE TTL ADD TO GT Y15.ALLOW Z WITH OPEN ORDERS N16.ALLOW Z STOCK REPORTN17.ALLOW Z1 TIME KEEPING REPORTWHEN EMP. ARE CLOCKED IN N18.AVG.GST ON FIN IS FROM GST N ESC Y/N ENTER PAGE UP/DN 126 P-Mode <strong>Programming</strong> <strong>SER</strong>-<strong>7000</strong> Program <strong>Manual</strong>
Report Options Program Notes# FIELD Notes1 ONLY TTL ON PROD MIXGROUP R.2 ONLY ITEMS W ACT. INVENTRY3 CASH DECLARATIONCOMPULSORY4 SIGN ON EMP. BEFOREREPORTS5 ENFORCE ACT. INV BEFOREZ16 RETAIN ACT. INV ENTRY INX17 RESET PLU RPT AT INVENZ1?8 RESET INVEN RPT AT PLUZ1?9 TIME KEEPING:Y=MIN/N=10010 OMIT TAX TTL FM NET SALEGT11 ALLOW Z OF OPEN CHECKRPT12 CONFIRM B4 TTL RESET ONZ13 RESET AFTER FINANL ZREPORT:If Y, skips sales by time period on theProduct Mix report.Affects the Inventory report (reportingingredients from the recipe system). If Y, theInventory report will report only those itemswhere actual inventory has been enteredthrough the EDIT INVENTORY ITEMfunction of X-mode.If Y, you must declare the amount of cashbefore taking any report that reveals theexpected cash-in-drawer. This encouragesaccurate reporting and over/short amounts arecalculated and printed.If Y, an employee must be signed on in REGmode before a report may be taken.If Y, you must enter actual inventory beforerunning an inventory report.If Y, actual inventory entries are retainedafter an X Inventory report. Use N, if you aredoing inventory spot-checks on selecteditems.If Y, a Z1 PLU report will automatically begenerated when an Inventory Z1 is taken.If Y, an Inventory Z1 will automatically begenerated when a Z1 PLU report is taken.Determine whether hours worked arerecorded and calculated in minutes or decimalunits of an hour.Choose Y, to omit tax totals from the NetSales Grand total on the financial report.Choose Y, to allow a Z open check report.If Y, a warning will display before any Zreport is initiated.Select which totals and counters are resetwhen a Z1 Financial report is executed.14 VOID MODE TTL ADD TO GT If Y, activity in the VOID key lock positionadds to grand totals.15 ALLOW Z WITH OPENORDERSIf Y, any Z report is disabled until openorders are closed.<strong>SER</strong>-<strong>7000</strong> Program <strong>Manual</strong> P-Mode <strong>Programming</strong> 127
# FIELD Notes16 ALLOW Z STOCK REPORT If Y, resetting the Stock report is allowed.17 ALLOW Z1 TIME KEEPINGREPORT WHEN EMP. ARECLOCKED IN18 AVG. GST ON FIN IS FROMGSTIf Y, the time keeping report can be run whenemployees are clocked in.If N, the AVG/GST (average sale per guest orcustomer) is calculated from customer count;if Y, is calculated from guest count fromGUEST key use.128 P-Mode <strong>Programming</strong> <strong>SER</strong>-<strong>7000</strong> Program <strong>Manual</strong>
Time Keeping Options1. Select TIMEKEEPING OPTIONSfrom the SYSTEMOPTIONPROGRAMMINGscreen. The timekeeping optionsdisplay with the firstoption field selected.(There is one page oftime keepingoptions.)2. Select fields andchange information inthe same manner asdescribed for generaloptions.TIME KEEPING OPTIONS1. OVERTIME HOUR IS USED F DAY2. HOURS PER OVERTIME STARTS 0083. OVERTIME FACTOR 1.54. COMP OUT FOR BREAK OR OUT Y5. TIP REPORTING % OF SAL15.00006. EMP. TIME-IN/O EMPLOYEE# ESC Y/N ENTER PAGE UP/DN TIME KEEPING OPTIONS7. CLK IN/OUT EMP ON Z TM KEEP N ESC Y/N ENTER PAGE UP/DN Time Keeping Option Program Notes# FIELD Notes1 OVERTIME HOUR IS USED F Select Day or Week for overtime hours.2 HOURS PER OVERTIMESTARTSEnter the number of hours that must beworked per day or week before overtimestarts. For example, if field #1 is day, enter 8hours, or if field #1 is week, enter 40 hours.3 OVERTIME FACTOR Enter the factor times which the standard payrate is multiplied to determine overtime pay,i.e. enter 1.5 if rate is time and one half, orenter 2.0 if rate is double time.4 COMP OUT FOR BREAK OROUTWhen clocking out there is a choice for [OUTFOR BREAK] or [OUT]. If Y, you mustenter the appropriate number for eitherchoice, rather than just pressing ENTER tochoose the default.5 TIP REPORTING % OF SAL If Y, the percentage entered here is calculatedand reported on the Employee report.6 EMPLOYEE TIME-IN/O Select Employee # or Secret Code.<strong>SER</strong>-<strong>7000</strong> Program <strong>Manual</strong> P-Mode <strong>Programming</strong> 129
# FIELD Notes7 CLK IN/OUT EMP ON Z TMKEEPIf Y, all employees clocked in at the time ofthe Z Time Keeping report will be clockedout for the report and clocked back in afterthe report.130 P-Mode <strong>Programming</strong> <strong>SER</strong>-<strong>7000</strong> Program <strong>Manual</strong>
E.J. (Electronic Journal) & Detail Printing Options1. Select E.J.PRINTINGOPTIONS from theSYSTEM OPTIONPROGRAMMINGscreen. The firstoption field isselected. (There aretwo pages of E.J. &Detail Printingoptions.)2. Select fields andchange information inthe same manner asdescribed for generaloptions.E.J. & DETAIL PRINTING OPTI1. ACTIVATE ELECTRONIC JOURNAL N2. DISP E.J. BUFF FULL WARNING N3. E.J. OVERRIDE ON BUFF FULL N4. SEND TO ELECTRONIC JOURNAL:CASH TRANSACTIONSNCHECK TRANSACTIONSN ESC Y/N ENTER PAGE UP/DN E.J. & DETAIL PRINTING OPTI4. SEND TO ELECTRONIC JOURNAL:MISC TENDER TRANSACTIONS NTRANSACTIONS WITH %NRECD ACCT & PAID OUT NRETURN TRANSACTIONSNTRANS. WITH ERR.CORR&VOID N ESC Y/N ENTER PAGE UP/DN E.J. & DETAIL PRINTING OPTI4. SEND TO ELECTRONIC JOURNAL:NO SALESNCANCEL TRANSACTIONSNTRANSACT WITH NEG. ITEMS NREPORTSNPROGRAM SCANSN ESC Y/N ENTER PAGE UP/DN E.J. & DETAIL PRINTING OPTI4. SEND TO ELECTRONIC JOURNAL:CHECK TRACKINGN5. SEND TO DETAIL:ONLY TRANS WITH NEG ITEMS NREPORTSNPROGRAM SCANSN ESC Y/N ENTER PAGE UP/DN E.J. & DETAIL PRINTING OPTI6. CONDENSED PRINT ON DETAIL N7. PRINT NEGA. LINES IN BOLD N8. DISABLE REG. DETAIL PRINTER N ESC Y/N ENTER PAGE UP/DN <strong>SER</strong>-<strong>7000</strong> Program <strong>Manual</strong> P-Mode <strong>Programming</strong> 131
E.J. (Electronic Journal) & Detail Printing Option Program Notes# FIELD Notes1 ACTIVATE ELECTRONICJOURNAL2 DISP E.J. BUFF FULLWARNING3 E.J. OVERRIDE ON BUFFFULL?4 SEND TO ELECTRONICJOURNAL:Select Y to activate the electronic journal.Select Y to display a warning message whenthe electronic journal is full.Select Y to allow operations to continue whenthe electronic journal is full. Only the mostcurrent transactions will be maintained asmemory allows.For each type of function or transactionlisted, select Y or N to determine it will berecorded in the electronic journal. CASH TRANSACTIONS CHECK TRANSACTIONS MISC TENDER TRANSACTIONS TRANSACTIONS WITH % RECD ACCT & PAID OUT RETURN TRANSACTIONS TRANSACTIONS WITH ERR CORR&VOID NO SALES CANCEL TRANSACTIONS TRANSACTIONS WITH NEGATIVE ITEMS** REPORTS PROGRAM SCANS CHECK TRACKING**Regardless of other settings, will send only transactionswith negative items, % entries, tenders, etc. to the journal.5 SEND TO DETAIL: For each type of function or transactionlisted, select Y or N to determine it will besent to the appropriate detail/journal printer.6 CONDENSED PRINT ONDETAILTRANSACTIONS WITH NEGATIVE ITEMS**REPORTSPROGRAM SCANS**Regardless of other settings, will send onlytransactions with negative items, % entries,tenders, etc. to the detail.If Y, produces small print on detail7 PRINT NEGA. LINES IN BOLD If Y, negative lines are reverse print.8 DISABLE REG. DETAILPRINTERIf Y, journal (detail) printer is turned off.132 P-Mode <strong>Programming</strong> <strong>SER</strong>-<strong>7000</strong> Program <strong>Manual</strong>
Taxes1. Select TAXES fromthe P-Mode menu todisplay the TAXPROGRAMMINGScreen.2. Choose a tax from themenu in one of twoways:Type the number foryour choice and pressENTER.Press the or keysto move the cursor toyour choice andpress ENTER.3. The tax calculationpop-up windowdisplays. Select ADDON, TAX TABLE, orVAT.TAX PROGRAMMING1. TAX 1 ADD ON2. TAX 2 ADD ON3. TAX 3 ADD ON4. TAX 4 ADD ONTAX PROGRAMMING3. TAX 1 ADD ON4. TAX 2 ADD ON5. TAX 5 ADD ON6. TAX 6 ADD ONTAX PROGRAMMINGESC ENTER PAGE UP/DN ESC ENTER PAGE UP/DN 1. TAX 1 ADD ON2. TAX 2 TAX TABLE3. TAX 3 VAT4. TAX 4ESC ENTER PAGE UP/DN <strong>SER</strong>-<strong>7000</strong> Program <strong>Manual</strong> P-Mode <strong>Programming</strong> 133
Add On TaxesOptions for add on taxes1-5 are shown on thescreen at the right.1. Press the keys to select thefield you wish to edit.Type newinformation and pressENTER.2. Press ESC to returnto the TAXPROGRAMMINGMENU.TAX#1 BY ADD ONRATE 00.000THRESHOLD 00.00HIGH HOLD 0000000.00NOTE: Options for addon tax 6 are shown onthe screen at the right.Tax 6 should be used forthe Canadian Goodsand Services tax (GST).Here you have theoption of taxing theGST by other applicablerates (tax on tax).TAX#6 BY ADD ONRATE 00.000THRESHOLD 00.00HIGH HOLD 0000000.001 2 3 4 5GST(TAX6) IS TAXABLE : N N N N NAdd On Taxes Program NotesFIELDRATETHRESHOLDHIGH HOLDGST(TAX6) IS TAXABLENotesEnter the tax rate. If fractional, press the decimaland up to three digits.Enter the lowest amount where tax is charged.Tax is no longer charged after the amount enteredhere.Indicate the tax number of any taxes that accrue onthe GST tax amount (tax on tax).134 P-Mode <strong>Programming</strong> <strong>SER</strong>-<strong>7000</strong> Program <strong>Manual</strong>
Tax TableOptions for taxes by taxtable are shown on thescreen at the right.1. Press the keys to select thefield you wish to edit.Type newinformation and pressENTER. PressPAGE UP or PAGEDN to accessadditional break pointdifferences. You canprogram a maximumof 100 break points.2. Press ESC to returnto the TAXPROGRAMMINGMENU.TAX#1 BY TABLEMAXIMUM NON-TAXABLE AMOUNT 00.10FIRST TAX AMOUNT CHARGED 00.01# OF NON REPEAT BREAKS 05# OF REPEAT BREAKS 03BREAK POINT 1 00.21BREAK POINT 2 00.38Entries shown are for theIllinois 6% sample tableshown on the next page.Tax Table <strong>Programming</strong> NotesFieldFIRST TAX AMOUNTCHARGEDMAXIMUM NON-TAXABLE AMOUNT# OF NON-REPEATBREAKSNoteEnter the first tax amount that is charged. For thisexample the entry is 0.01.Enter the highest amount where no tax is charged. Forthis example the entry is 0.10.Enter the number of Non-repeat breaks. For this examplethe entry is 5.# OF REPEAT BREAKS Enter the number of repeat breaks. For this example theentry is 3.BREAK POINT (1-100) Enter the high amount in the range. For example, if thebreak point is .22 - .38, enter .38 for the break point.<strong>SER</strong>-<strong>7000</strong> Program <strong>Manual</strong> P-Mode <strong>Programming</strong> 135
Tax Table <strong>Programming</strong> Example - Illinois 6% Tax Table1. Examine the printed tax table for the tax you are programming.2. Examine the pattern of break point differences to determine when the breakpoints begin to repeat. Mark the beginning break points that do not fit a patternas “non-repeat breaks.” Mark the break points that are repeating in a pattern as“repeat breaks.” Count the number of repeat and non-repeat breaks.Tax Charged Sale Amount Range Break point s$0.00 $0.00 - $0.10$0.01 $0.11 - $0.21$0.02 $0.22 - $0.38$0.03 $0.39 - $0.56 Non-Repeat$0.04 $0.57 - $0.73$0.05 $0.74 - $0.91$0.06 $0.92 - $1.08$0.07 $1.09 - $1.24 Repeat$0.08 $1.25 - $1.41$0.09 $1.42 - $1.58$0.10 $1.59 - $1.74$0.11 $1.75 - $1.91$0.12 $1.92 - $2.08$0.13 $2.09 - $2.24$0.14 $2.25 - $2.41136 P-Mode <strong>Programming</strong> <strong>SER</strong>-<strong>7000</strong> Program <strong>Manual</strong>
VATOptions for VAT taxes 1-5 are shown on the screenat the right.1. Press the keys to select thefield you wish to edit.Type newinformation and pressENTER.2. Press ESC to returnto the TAXPROGRAMMINGMENU.TAX#1 BY VATRATE 00.000Options for VAT tax 6are shown on the screenat the right. Tax 6should be used for theCanadian Goods andServices tax (GST).Here you have theoption of taxing theGST by other applicablerates (tax on tax).TAX#6 BY VATRATE 00.0001 2 3 4 5GST(TAX6) IS TAXABLE : N N N N NVAT Program NotesFIELDGST(TAX6) IS TAXABLENotesIndicate the tax number of any taxes that accrue onthe GST tax amount (tax on tax).<strong>SER</strong>-<strong>7000</strong> Program <strong>Manual</strong> P-Mode <strong>Programming</strong> 137
Messages1. Choose MESSAGESfrom the P-MODEPROGRAMMINGMENU to display theMESSAGES MENUscreen.2. Choose an item fromthe menu in one oftwo ways:Type the number foryour choice and pressENTER.Press or to movethe cursor to yourchoice and pressENTER.MESSAGES MENU1. LOGO MESSAGE2. ERROR MESSAGE3. SYSTEM DESCRIPTORS4. REPORT DESCRIPTORSMESSAGES MENUESC ENTER PAGE UP/DN 4. REPORT DESCRIPTORS5. CHECK ENDORSEMENT MESSAGE6. GUEST CHECK LOGO MESSAGE7. VALIDATION MESSAGEESC ENTER PAGE UP/DN 138 P-Mode <strong>Programming</strong> <strong>SER</strong>-<strong>7000</strong> Program <strong>Manual</strong>
Logo Message1. Choose LOGOMESSAGE to displaythe LOGOMESSAGEPROGRAMMINGscreen.2. Set the JUSTIFYoption to center, leftor right justify yourmessage.3. Type the preamblemessage in the spaceprovided, up to 40characters per line.Press the keys to move thecursor to a newposition.4. Press PAGE DN toprogram the logopostamble. Type themessage in the spaceprovided. Up to 40characters per line.Press the keys to move thecursor to a newposition.5. Press ESC to exit thescreen and return tothe MESSAGESMENU screen.LOGO MESSAGE PROGRAMMINGJUSTIFY:PREAMBLE #1:PREAMBLE #2:LOGO MESSAGE PROGRAMMINGPREAMBLE #3:PREAMBLE #4:PREAMBLE #5:LOGO MESSAGE PROGRAMMINGPOSTAMBLE #1:POSTAMBLE #2:POSTAMBLE #3:LOGO MESSAGE PROGRAMMINGPOSTAMBLE #4:POSTAMBLE #5:CENTERALPHAALPHAALPHA<strong>SER</strong>-<strong>7000</strong> Program <strong>Manual</strong> P-Mode <strong>Programming</strong> 139
Error MessagesUsing this program, you can change the standard error messages from the default settings tomessages that meet your language or application needs.Note: Use (22) P-Mode Program Scan Printing to print a list of error messages.1. Choose ERRORMESSAGE from theMESSAGES MENUto display theERROR MESSAGEPROGRAMMINGscreen.2. Select a message toedit. Press the or keys and the PAGEUP or PAGE DNkeys as necessary.3. With a messageselected, type a newmessage up to 30characters in length.4. Press ENTER tofinalize each messageentry.5. Press ESC to exit thescreen and return tothe MESSAGESMENU screen.ERROR MESSAGE PROGRAMMINGALPHA(NOT USE)(NOT USE)AMOUNT REQUIREDBAD VALUEBUFFER FULL ESC Y/N ENTER PAGE UP/DN 140 P-Mode <strong>Programming</strong> <strong>SER</strong>-<strong>7000</strong> Program <strong>Manual</strong>
System DescriptorsUsing this program, you can change the standard system descriptors from the default settingsto messages that meet your language or application needs.The length of each descriptor varies. For example day of week fields are 3 characters, whileother printed messages are 5 characters or more.Note: Use (22) P-Mode Program Scan Printing to print a list of system descriptors.1. Choose SYSTEMDESCRIPTORS todisplay the SYSTEMDESCRIPTORPROGRAMMINGscreen.2. Press the keys to move thecursor to a newposition. Type a newmessage over thedefault descriptor.3. Press ESC to exit thescreen and return tothe MESSAGESMENU screen.SYSTEM DESCRIPTOR PGMALPHA#001 SUN#002 MON#003 TUE#004 WED#005 THU ESC Y/N ENTER PAGE UP/DN <strong>SER</strong>-<strong>7000</strong> Program <strong>Manual</strong> P-Mode <strong>Programming</strong> 141
Report DescriptorsUsing this program, you can change the standard descriptors that appear on financial andemployee reports from the default settings to descriptors that meet your language orapplication needs.1. Choose REPORTDESCRIPTORS fromthe MESSAGESMENU. From thepop-up menu, selectEMPLOYEE orFINANCIAL reportto edit the descriptorson the selected report.2. Select a descriptor toedit. Press the or keys and the PAGEUP or PAGE DNkeys as necessary.3. With a descriptorfield selected, type anew descriptor up to16 characters inlength.4. Press ENTER tofinalize eachdescriptor entry, pressESC to exit thescreen and return tothe MESSAGESMENU screen.MESSAGES MENU1. LOGO MESSAGE2. ERROR MESSAGE3. SYSTEM DESCRIPTORS4. REP 1.FINANCIAL REPORT2.EMPLOYEE REPORTFIN. REPORT DESC. PROGRAMALPHA#001 +PLU LVL1 TTL#002 -PLU LVL1 TTL#003 +PLU LVL2 TTL#004 -PLU LVL2 TTL#005 +PLU LVL3 TTL ESC Y/N ENTER PAGE UP/DN 142 P-Mode <strong>Programming</strong> <strong>SER</strong>-<strong>7000</strong> Program <strong>Manual</strong>
Check Endorsement Message1. Choose CHECKENDORSEMENTMESSAGE to displaythe CHECKENDORSEMENTMESSAGEPROGRAMMINGscreen.2. Set the JUSTIFYoption to center, leftor right justify yourmessage.3. Type a message in thespace provided. Upto 40 characters perline. Press the keys to move thecursor to a newposition.4. Press PAGE DN toprogram lines 6-10 ofthe message.5. Press ESC to exit thescreen and return tothe MESSAGESMENU screen.CHECK ENDORSEMENT MSG PROGRJUSTIFY :LINE #1LINE #2CENTERCHECK ENDORSEMENT MSG PROGRALPHALINE #3LINE #4LINE #5CHECK ENDORSEMENT MSG PROGRALPHALINE #6LINE #7LINE #8CHECK ENDORSEMENT MSG PROGRALPHALINE #9LINE #10<strong>SER</strong>-<strong>7000</strong> Program <strong>Manual</strong> P-Mode <strong>Programming</strong> 143
Guest Check Logo Message1. Choose GUESTCHECK MESSAGEto display the GUESTCHECK MESSAGEPROGRAMMINGscreen.2. Set the JUSTIFYoption to center, leftor right justify yourmessage3. Type a message in thespace provided. Upto 40 characters perline. Press the keys to move thecursor to a newposition.4. Press PAGE DN toprogram lines 6-10 ofthe message.5. Press ESC to exit thescreen and return tothe MESSAGESMENU screen.GUEST CHECK LOGO MSG PROGRJUSTIFY :LINE #1LINE #2CENTERGUEST CHECK LOGO MSG PROGRAALPHALINE #3LINE #4LINE #5GUEST CHECK LOGO MSG PROGRAALPHALINE #6LINE #7LINE #8GUEST CHECK LOGO MSG PROGRAALPHALINE #6LINE #7144 P-Mode <strong>Programming</strong> <strong>SER</strong>-<strong>7000</strong> Program <strong>Manual</strong>
Validation Message1. ChooseVALIDATIONMESSAGE to displaythe VALIDATIONMESSAGEPROGRAMMINGscreen.2. Set the JUSTIFYoption to center, leftor right justify yourmessage.3. Type a message in thespace provided. Upto 40 characters perline. Press the keys to move thecursor to a newposition.4. Press ESC to exit thescreen and return tothe MESSAGESMENU screen.VALIDATION MESSAGE PROGRAMJUSTIFY :LINE #1LINE #2CENTER<strong>SER</strong>-<strong>7000</strong> Program <strong>Manual</strong> P-Mode <strong>Programming</strong> 145
Window Look Up (WLU)OverviewThere are three types of items that can be found on a Window Look-Up (WLU): condiments,functions, and PLUs. The same WLU can contain any combination of condiments,functions, and PLUs.Specific features and rules for WLUs are summarized below: A specific WLU can be activated automatically after a PLU is entered. (See "PLU<strong>Programming</strong>" on page 61.) Pressing a WLU key on the keyboard can activate a specific WLU. (See "KeyboardKey Relocation in S-Mode <strong>Programming</strong>.) Or, by placing the WLU# key on thekeyboard, any number of WLUs can be accessed by typing the WLU number andpressing the WLU# key. A WLU can be linked to a subsequent WLU in order to prompt an operator through asequence of selections. Adding them in a specific order can control the order in which items appear on aWLU. Items can be deleted or items can be added in the middle of a list. The total number of WLUs and the capacity of each WLU is set in memoryallocation. (See "Memory Allocation " in S-Mode <strong>Programming</strong>.) The defaultcapacity of each WLU is 28 items; the maximum capacity is 50 items.146 P-Mode <strong>Programming</strong> <strong>SER</strong>-<strong>7000</strong> Program <strong>Manual</strong>
WLU <strong>Programming</strong>The first step in WLU programming is to select individual options for the WLU. Next, a listof items (Condiments, PLUs and/or functions) is assigned.1. Select WINDOWLOOK UP (WLU)from the P-MODEPROGRAMMINGMENU to display theWLU#PROGRAMMINGScreen.2. Type the WLUnumber and pressENTER, or pressPAGE UP or PAGEDN to scroll to theWLU you wish toprogram.3. Press the keys to select a fieldto edit: For yes/no fields,press the Y/N key totoggle from yes to no. For numeric fields,type new value.WLU#01 PROGRAMMING1. TITLE : WLU#12. ALLOW CONDIMENT NALLOW PLUNALLOW FUNCTIONSN3. # OF ITEM CHOICE(0=UNLIMIT)004. ITEM MULTIPLICATION N ESC Y/N ENTER PAGE UP/DN WLU#01 PROGRAMMING5. EXIT FROM TABLE WITH DONE Y6. LINK TO WLU# (0=NO LINK) 00EDIT ITEMS ESC Y/N ENTER PAGE UP/DN WLU Program Notes# Field Notes1 TITLE Enter a descriptor up to 12 characters inlength.2 ALLOW CONDIMENTSALLOW PLUALLOW FUNCTIONSSelect Y or N to determine the type of itemsthat are allowed to display on the WLU. Forexample, if you select N for ALLOWFUNCTIONS, you cannot add a function tothis WLU.<strong>SER</strong>-<strong>7000</strong> Program <strong>Manual</strong> P-Mode <strong>Programming</strong> 147
# Field Notes3 # OF ITEM CHOICE(0=UNLMITED)If you select 1 in this field, when a condimentis selected from the WLU, the WLU isautomatically closed. In the same manner, ifyou select 2, the WLU is automatically closedafter the second WLU is registered. If youselect 0, any number of selections can bemade. Pressing DONE then closes the WLU.4 ITEM MULTIPLICATION If Y, when a quantity of main items are sold,then condiments are entered by multiplicationuntil the quantity of condiments matches thequantity of main items. For example, 5 of themain item "chicken dinner" are entered. TheWLU displays the selections "regular" and"crispy". The WLU will close when thequantity of 5 is reached, i.e. 3 times "regular"and 2 times "crispy".148 P-Mode <strong>Programming</strong> <strong>SER</strong>-<strong>7000</strong> Program <strong>Manual</strong>
Editing WLU Items1. If you wish to add ordelete items from theWLU, select EDITITEMS and pressENTER.WLU#01 PROGRAMMING5. EXIT FROM TABLE WITH DONE Y6. LINK TO WLU# (0=NO LINK) 00EDIT ITEMS ESC Y/N ENTER PAGE UP/DN 2. On the right side ofthe screen, the WLUwindow will displaylooking exactly like itwill when it is used inoperations. Anwindow on the leftportion of the screendisplays the options:WLU#01 PROGRAMMINGPLUFUNCTIONESCVOID ITEMDONEWLU#1 ENT DONE<strong>SER</strong>-<strong>7000</strong> Program <strong>Manual</strong> P-Mode <strong>Programming</strong> 149
Adding PLUs or Condiments to a WLU1. To add PLUs orCondiments to theWLU: Press the PLU key onthe keyboard, or Type the PLUnumber and pressPLU, or Press PLU directly todisplay the PLU list.WLU#01 PROGRAMMINGPLU LIST00000000000120 ORIGINAL00000000000123 CRISPY00000000000135 BBQ00000000000136 CATSUP00000000000138 MUSTARD00000000000140 ONION2. Press the or keysto select a PLU orcondiment PLU fromthe list.3. Press ENTER toplace the PLU orcondiment PLU itemon the WLU.WLU#01 PROGRAMMINGPLU LIST00000000000141 PICKLE00000000000142 RELISH00000000000143 MAYO00000000000144 BUTTER00000000000145 NO00000000000146 ADDWLU#01 PROGRAMMINGPLUFUNCTIONESCVOID ITEMDONEWLU#11 PICKLEENT DONE4. Continue to add itemsby either pressingPLU key, typing thePLU number andpressing ENTER, orselecting the PLUfrom the PLU list.The last item enteredon the WLU listremains selected.WLU#01 PROGRAMMINGPLUFUNCTIONESCVOID ITEMDONEWLU#1143 MAYO142 RELISH144 BUTTER ENT DONEWhen a WLU contains more than 3items, the scroll indicators (, , or )show that more items appear below,above, or above and below the itemscurrently displayed.150 P-Mode <strong>Programming</strong> <strong>SER</strong>-<strong>7000</strong> Program <strong>Manual</strong>
Deleting Items From a WLU1. To delete an item,press or to selectthe item to delete.Press DELETE orVOID ITEM todelete the item.WLU#01 PROGRAMMINGPLUFUNCTIONESCVOID ITEMDONEWLU#1143 MAYO142 RELISH144 BUTTER ENT DONE2. Note that items areautomatically shiftedup to fill the spacethe deleted itemoccupied.WLU#01 PROGRAMMINGPLUFUNCTIONESCVOID ITEMDONEWLU#1143 MAYO144 BUTTER145 NO ENT DONEAdd an Item In a Specific Position Within a WLU1. To add an item in adifferent positionwithin the list, movethe cursor to theposition above whereyou wish to insert theitem.WLU#01 PROGRAMMINGPLUFUNCTIONESCVOID ITEMDONEWLU#1143 MAYO144 BUTTER145 NO ENT DONE2. Add a new PLU orcondiment.WLU#01 PROGRAMMINGPLUFUNCTIONESCVOID ITEMDONEWLU#1143 MAYO147 LETTUCE144 BUTTER ENT DONE3. Move the cursor tothe end of the listwhere you cancontinue adding itemsto the end of theWLU list.WLU#01 PROGRAMMINGPLUFUNCTIONESCVOID ITEMDONEWLU#1147 LETTUCE144 BUTTER145 NO ENT DONE<strong>SER</strong>-<strong>7000</strong> Program <strong>Manual</strong> P-Mode <strong>Programming</strong> 151
Adding Functions to a WLU1. To add functions tothe WLU, press thefunction you wish toadd or press ESC toview a function list.NOTE: ALLOWFUNCTIONS must beset to Y (yes) on theWLU programmingwindow to allowfunctions to be includedin the WLU.WLU#01 PROGRAMMINGPLUFUNCTIONESCVOID ITEMDONEWLU#11 % 3 ENT DONE2. Press ESC. TheFUNCTION LISTdisplays.WLU#01 PROGRAMMINGFUNCTION LIST1234563. Use the PAGEUP/PAGE down orcursor keys select afunction.WLU#01 PROGRAMMINGFUNCTION LIST1. ADD TITLE CHECK :2. BACK ALLOW SPACE CONDIMENTSN BOLDCANCEL ALLOW PLUCAPSCASH4. Press ENTER. Theupdated WLUdisplays. Deleteitems and edit theWLU in the samemanner as you woulddelete PLUs orcondiments.WLU#01 PROGRAMMINGPLUFUNCTIONESCVOID ITEMDONEWLU#11 % 32 ADD CHECKENT DONE152 P-Mode <strong>Programming</strong> <strong>SER</strong>-<strong>7000</strong> Program <strong>Manual</strong>
Exiting WLU Edit Items1. Press DONE to exitthe EDIT ITEMSwindow.2. Continue to programWLUs as necessaryor press ESC toreturn to the P-MODEPROGRAMMINGMENU.WLU#01 PROGRAMMINGPLUFUNCTIONESCVOID ITEMDONEWLU#11 % 32 ADD CHECKENT DONE<strong>SER</strong>-<strong>7000</strong> Program <strong>Manual</strong> P-Mode <strong>Programming</strong> 153
Time PeriodMemory allocation determines whether there are 24, 48, or 96 time periods. Time periodswill default to hourly periods if 24 periods are selected in memory allocation; 30-minuteperiods if 48 periods are selected; 15-minute periods if 96 periods are selected.Periods can be set to custom lengths using this program. If fewer periods are needed than areavailable, unneeded periods can be inactivated so that they will not appear on reports. Toinactivate a period, replace the "Y" (active) for the period with an "N" (inactive).All time units are based upon a 24-hour clock (military time).1. Select TIMEPERIOD from the P-MODEPROGRAMMINGMENU to display theTIME PERIODPROGRAMMINGscreen.2. Press the keys to select a fieldto edit.3. Type newinformation into thefield, press ENTER.4. Press ESC to exit theTIME PERIODPROGRAMMINGscreen.TIME PERIOD PROGRAMMING# OF PERIODS SET IN MEMORY: 481 Y 0000-0029 6 Y 0230-02592 Y 0030-0059 7 Y 0300-03293 Y 0100-0129 8 Y 0330-03594 Y 0130-0159 9 Y 0400-04295 Y 0200-0229 10 Y 0430-0459154 P-Mode <strong>Programming</strong> <strong>SER</strong>-<strong>7000</strong> Program <strong>Manual</strong>
EmployeeThe employee file contains information for register operators as well as employees who usethe register only to clock in or out (employee time keeping.) Specific functions that areallowed or disallowed for each employee are determined by assigning the employee to anauthority level. (See "Authority Level" on page 159.)Two 10 digit code numbers may be assigned for each employee. A time keeping code isused to clock in or out and a separate sign on code used to operate the register. The socialsecurity number is for reference only and appears only on reports.The total number of employees (up to 999) is set in memory allocation. See "MemoryAllocation" in "S-Mode <strong>Programming</strong>".1. Select EMPLOYEEfrom the P-MODEPROGRAMMINGMENU to display theEMPLOYEE#PROGRAMMINGscreen.2. Type theEMPLOYEE numberand press ENTER, orpress PAGE UP orPAGE DN to scrollto the Employee youwish to program.3. Press the keys to select a fieldto edit.4. Enter the appropriatevalue using numerickeys. Values that arenot allowed will notbe accepted.5. Press ESC to exit theEMPLOYEEPROGRAMMINGscreen.EMPLOYEE# 01 PROGRAMMING1. NAME EMPLOYEE12. SOCIAL SEC # 000-00-00003. CLOCK IN CODE 00000000004. OPERATING CODE 00000000005. LINK TO AUTHORITY LEVEL 16. OPEN DRAWER# (0-2) 1 ESC Y/N ENTER PAGE UP/DN EMPLOYEE# 01PROGRAMMINGJOB1 J2 J3 J4 J5 J67. JOB CODE# 00 00 00 00 00 008. PAY RATE# 00 00 00 00 00 009. TRAINING MODE NEDIT JOB CODESEDIT PAY RATES ESC Y/N ENTER PAGE UP/DN <strong>SER</strong>-<strong>7000</strong> Program <strong>Manual</strong> P-Mode <strong>Programming</strong> 155
Employee Program Notes# Field Notes3 CLOCK IN CODE Enter a number (up to 10 digits in length) thatwill be used by this employee to clock inand/or out.4 OPERATING CODE Enter the secret code number (up to 10 digitsin length) that can be used to sign in/out.Note that system option # 21 "EMPLOYEESIGN-ON" must be set to "SECRET CODE"to use this number. See "General FunctionOptions" on page 101.5 LINK TO AUTHORITY LEVEL Operations and programs that can be accessedby this employee are determined by selectinga authority level here. See "AuthorityLevels" on page 159 to define specificoperations for each of 9 levels.6 OPEN DRAWER# (0-2) If drawer 0 is assigned, the employee canonly perform check track postings (notpayments).78JOB CODE#PAY RATE#An employee might have more than one job,possibly with a different pay rate for eachjob. For example, in a restaurant, anemployee might work as a server one day,and on a different day or shift, work as acashier.By assigning separate job codes and pay ratesfor each employee, the built in time clock cantrack and report hours and wage costsappropriately.See "Edit Job Codes" on page 157 and "EditPay Rates" on page 158 to set up the jobcodes and pay rates you need to use.See "Time Clock Procedures" in the <strong>SER</strong>-<strong>7000</strong> Operation <strong>Manual</strong> for instructions onclocking on/off for different jobs. Note thatthe job code you assign for JOB1 is thedefault job code for clocking in/out.9 TRAINING MODE? If Y, this employee will be in training,regardless of the training mode status of theentire register.156 P-Mode <strong>Programming</strong> <strong>SER</strong>-<strong>7000</strong> Program <strong>Manual</strong>
Edit Job CodesNote: An employee with the appropriate authority level must be signed on to performjob code programming.Job codes are used to break down the hours worked for all employees into differentcategories (See "Labor Groups" report in the Operation <strong>Manual</strong>.) A breakdown of hours byjob is also reported for each employee (See "Time Keeping" reports in the Operation<strong>Manual</strong>.)The job codes to be used by all employees are set up here. There are 20 possible job codes.Each job code you wish to activate must be given a descriptor here.1. From any employeerecord screen, use theCURSOR keys toselect EDIT JOBCODES.2. Press ENTER todisplay the JOBCODEPROGRAMMINGscreen.3. Up to twenty jobcodes can beprogrammed. Enter adescriptor to activatethe associated jobcode#. Press PAGEUP or PAGE DN orpress the toposition the cursorfor programmingdescriptors.4. Press ENTER tofinalize the descriptorentry and move to thenext job codedescriptor field.2. Continue to programjob codes or pressESC to exit andreturn to theappropriateEMPLOYEE #PROGRAMMINGscreen.EMPLOYEE# 01PROGRAMMINGJOB1 J2 J3 J4 J5 J67. JOB CODE# 00 00 00 00 00 008. PAY RATE# 00 00 00 00 00 009. TRAINING MODE NEDIT JOB CODESEDIT PAY RATES ESC Y/N ENTER PAGE UP/DN JOB CODE PROGRAMMINGALPHAJOB CODE1JOB#1JOB CODE2JOB#2JOB CODE3JOB#3JOB CODE4JOB#4JOB CODE5JOB#5JOB CODE6JOB#6 ESC Y/N ENTER PAGE UP/DN <strong>SER</strong>-<strong>7000</strong> Program <strong>Manual</strong> P-Mode <strong>Programming</strong> 157
Edit Pay RatesNote: An employee with the appropriate authority level must be signed on to performpay rate programming.The pay rates to be used by all employees are set up here. There are 50 pay rates.1. From any employeerecord screen, pressthe or keys toselect EDIT PAYRATES.2. Press ENTER todisplay pay ratePROGRAMMINGscreen.3. Up to fifty pay ratescan be programmed.Enter an amount toactivate theassociated pay rate#.Press PAGE UP orPAGE DN or pressthe toposition the cursorfor programmingrates.4. Press ENTER tofinalize the rate entryand move to the nextjob code descriptorfield.2. Continue to programpay rates or pressESC to exit andreturn to theappropriateEMPLOYEE #PROGRAMMINGscreen.EMPLOYEE# 01PROGRAMMINGJOB1 J2 J3 J4 J5 J67. JOB CODE# 00 00 00 00 00 008. PAY RATE# 00 00 00 00 00 009. TRAINING MODE NEDIT JOB CODESEDIT PAY RATES ESC Y/N ENTER PAGE UP/DN PAY RATE PROGRAMMINGPAY RATE1 00.00PAY RATE2 00.00PAY RATE3 00.00PAY RATE4 00.00PAY RATE5 00.00PAY RATE6 00.00 ESC Y/N ENTER PAGE UP/DN 158 P-Mode <strong>Programming</strong> <strong>SER</strong>-<strong>7000</strong> Program <strong>Manual</strong>
Authority LevelsEach employee must be assigned to one of nine authority levels. See "Employee" on page155 to assign an employee to an authority level. The selections made here for each authoritylevel determine the operations that are allowed for each employee.For example, in a restaurant an authority level with the descriptor kitchen help could be set toallow only clocking in/out, or an authority level with the descriptor owner could be set up toallow all functions. Other authority levels could be defined for servers, cashiers andmanagers that allow only the appropriate functions.1. Select AUTHORITYLEVELS from the P-MODEPROGRAMMINGMENU to display thePROGRAMMINGscreen.2. Press the keys, PAGE UP orPAGE DN to selectthe appropriate leveland option. (Notethat there are 4 pagesof authority leveloptions.)3. Press the Y/N key totoggle from yes to no.4. Continue to selectand change options asnecessary. PressESC to return to theP-MODEPROGRAMMINGmenu.AUTHORITY LEVEL PROGRAMMINGALPHA DESCRIPTORSAUTHORITY LEVEL : 1234567891.CLK-IN/OUT ENTRY ONLYNNNNNNNNN2.CLOCK-IN BEFORE SALESNNNNNNNNN3.CLOCK-OUT W OPEN CHKSNNNNNNNNN4.GC ENTRIES ONLY NNNNNNNNN ESC Y/N ENTER PAGE UP/DN AUTHORITY LEVEL PROGRAMMINGAUTHORITY LEVEL : 1234567895.GST# ENTRY ON NEW CHKNNNNNNNNN6.PAYMENT OF OWN GC NNNNNNNNN7.PAYMENT OF ANY GC NNNNNNNNN8.TRANSFER OF GCNNNNNNNNN9.VOID OF <strong>SER</strong>VICED ITEMNNNNNNNNN ESC Y/N ENTER PAGE UP/DN AUTHORITY LEVEL PROGRAMMINGAUTHORITY LEVEL : 12345678910.CANCEL AFTER RECALL NNNNNNNNN11.CLOCK IN/OUT W MCR NNNNNNNNN12.SIGN IN/OUT W MCR NNNNNNNNN13.EDIT ANY CHECKS NNNNNNNNN14.DESTINATION CHANGE NNNNNNNNN ESC Y/N ENTER PAGE UP/DN AUTHORITY LEVEL PROGRAMMINGAUTHORITY LEVEL : 12345678915.COMBINE OWN SOFT CHKNNNNNNNNN16.COMBINE ANY SOFT CHKNNNNNNNNN17.TBL# TRANS IN R-MODENNNNNNNNN18.PLU PRC/HALO OVERRIDNNNNNNNNN19.SET DATE AND TIME NNNNNNNNN ESC Y/N ENTER PAGE UP/DN <strong>SER</strong>-<strong>7000</strong> Program <strong>Manual</strong> P-Mode <strong>Programming</strong> 159
AUTHORITY LEVEL PROGRAMMINGAUTHORITY LEVEL : 12345678920.TIME CLOCK EDIT NNNNNNNNN21.CASH DECLARATION NNNNNNNNN22.K/B AND PRICE LEVEL NNNNNNNNN23.EMPLOYEE FILE EDIT NNNNNNNNN24.PRINT & RESET OF E.JNNNNNNNNN ESC Y/N ENTER PAGE UP/DN AUTHORITY LEVEL PROGRAMMINGAUTHORITY LEVEL : 12345678925.JOB CODE EDITNNNNNNNNN26.PAY RATE EDITNNNNNNNNN27.INVENT. EDIT X MODE NNNNNNNNN28.INVENT. EDIT P MODE NNNNNNNNN29.AUTHORITY LEVEL EDITYYYYYYYYY ESC Y/N ENTER PAGE UP/DN AUTHORITY LEVEL PROGRAMMINGAUTHORITY LEVEL : 12345678930.SEAT# FOR EACH ENTRYNNNNNNNNN31.ENABLE TRAINING MODENNNNNNNNN32.ALLOW WLU FILE EDIT NNNNNNNNN33.ALLOW NO SALENNNNNNNNN34.PAID BREAKSNNNNNNNNN ESC Y/N ENTER PAGE UP/DN AUTHORITY LEVEL PROGRAMMINGAUTHORITY LEVEL : 12345678935.COMP. JOB CODE ENTRYNNNNNNNNN36.MAN. REQ. FOR CL INNNNNNNNNNN37.COMPULSORY TIP ENTRYNNNNNNNNN38.JOB CODE CHANGE NNNNNNNNN39.PLU PRC CHANGE ONLY NNNNNNNNN ESC Y/N ENTER PAGE UP/DN AUTHORITY LEVEL PROGRAMMINGAUTHORITY LEVEL : 12345678940.EDIT PLU STOCK IN X NNNNNNNNN ESC Y/N ENTER PAGE UP/DN 160 P-Mode <strong>Programming</strong> <strong>SER</strong>-<strong>7000</strong> Program <strong>Manual</strong>
Authority Level Program Notes# FIELD Notes14 DESTINATION CHANGE If Y is set here, the operator has the option ofselecting a destination (i.e. eat-in, take out,drive thru) other than the default.30 SEAT# FOR EACH ENTRY If seat # is implemented, and is notcompulsory here, each item will default toseat "01".35 COMP. JOB CODE ENTRY If Y, a job code must be selected at clock in.If N, clock in will default to the first job codefor the employee.37 COMPULSORY TIP ENTRY If Y, the employee is prompted to declare tipswhen clocking out.38 JOB CODE CHANGE If N, the employee can clock on using onlythe default job code; if Y, the employee canselect of the job code displayed at clock in.39 PLU PRC CHANGE ONLY If Y, the employee can access the PLUprogramming screen, but can edit only thePRICE/HALO and PRICE LEVEL fields.40 EDIT PLU STOCK IN X If Y, the employee will be allowed to performPLU stock edits in X mode.<strong>SER</strong>-<strong>7000</strong> Program <strong>Manual</strong> P-Mode <strong>Programming</strong> 161
Authority Level Alpha Descriptors1. Select AUTHORITYLEVELS from the P-MODEPROGRAMMINGMENU to display thePROGRAMMINGScreen.2. Press ENTER todisplay theAUTHORITYLEVEL ALPHADESCRIPTORSscreen.3. Press the or keysto select a descriptorfield to edit.4. Enter a descriptor.Press ENTER tofinalize the entry andmove to the nextauthority leveldescriptor field.5. Continue to programdescriptors or pressESC to exit andreturn to theAUTHORITYLEVELPROGRAMMINGscreen.AUTHORITY LEVEL PROGRAMMINGALPHA DESCRIPTORSAUTHORITY LEVEL : 1234567891.CLK-IN/OUT ENTRY ONLYNNNNNNNNN2.CLOCK-IN BEFORE SALESNNNNNNNNN3.CLOCK-OUT W OPEN CHKSNNNNNNNNN4.GC ENTRIES ONLY NNNNNNNNN ESC Y/N ENTER PAGE UP/DN AUTHORITY LEVEL DESCRIPTOR ALPHALEVEL 1 DESCLEVEL 2 DESCLEVEL 3 DESCLEVEL 4 DESCLEVEL 5 DESCLEVEL 6 DESC ESC Y/N ENTER PAGE UP/DN 162 P-Mode <strong>Programming</strong> <strong>SER</strong>-<strong>7000</strong> Program <strong>Manual</strong>
Printer Tables & KV RoutingThe printing system of an <strong>SER</strong>-<strong>7000</strong> register or system of registers is completely flexible.Up to 40 printers can be defined and connected to any available serial port on any registerwithin a system. Multiple printer functions can be assigned to the same printer, giving addedflexibility.1. Before programming here, you must first: See "Serial Port Device Selections" in S-Mode <strong>Programming</strong> to define the type ofdevice (i.e. printer or kitchen video) that is connected to a serial port. See "Define Serial Port Parameters" in S-Mode <strong>Programming</strong> to match the baudrate/parity/etc. between the serial port and the printer. This program also controlsthe feed lines before and after printing, the logo size, and cutting options. See "Printer Driver Selections" if you are using a printer other than the printers withpredefined drivers, or if you need to customize a driver for a printer.2. Next, assign a port for each printer. See "System Printer Routing" on page 165 to assignprinter number (1-40), give it a 10 character descriptor (i.e. salad prep, receipt, or detail)and identify the port # and the register # to which it is attached. In addition, you canidentify a back-up location for information designated to go to the printer. (For example,if the salad printer is not functioning, then information destined for that printer could besent to a different printer.)3. Finally, proceed with the parts of this program that pertain to your application: If you are using a kitchen video, see "Kitchen Video Routing" on page 166 todesignate the port # and the register # where the video controller is attached. Youcan also define a backup printer in case communication with the video controller isdisrupted. If you are using kitchen printers, see "Kitchen Printer Routing" on page 167 to linkkitchen printer groups with a printer. (The groups of items are defined by assigningPLU items to PLU Status groups where groups are identified.)Because it is sometimes necessary to change kitchen printer routing depending uponthe time of the day, (for example, separate hot and cold food kitchens may be activeduring lunch and a single kitchen active during dinner) you can make assignmentsfor four different periods. The active routing period can be controlled automaticallyby time or set manually. If you are using receipt printers, see "Kitchen Printer Routing" on page 167 to set thereceipt printer for each location. If you are using detail printers, see "Detail Printer Routing" on page 169 to designatethe journal printer for each location.<strong>SER</strong>-<strong>7000</strong> Program <strong>Manual</strong> P-Mode <strong>Programming</strong> 163
1. Select PRINTERTABLES & KVROUTING from theP-MODEPROGRAMMINGMENU to display thePRINTER & KVROUTING MENUscreen.2. Choose an item fromthe menu in one oftwo ways:Type the number foryour choice and pressENTER.Press the or keysto move the cursor toyour choice andpress ENTER.PRINTER & KV ROUTING MENU1.SYSTEM PRINTER CONFIGURATION2.KITCHEN VIDEO ROUTING3.KITCHEN PRINTER ROUTING4.RECEIPT PRINTER ROUTINGESC ENTER PAGE UP/DN PRINTER & KV ROUTING MENU2.KITCHEN VIDEO ROUTING3.KITCHEN PRINTER ROUTING4.RECEIPT PRINTER ROUTING5.DETAIL PRINTER ROUTINGESC ENTER PAGE UP/DN 164 P-Mode <strong>Programming</strong> <strong>SER</strong>-<strong>7000</strong> Program <strong>Manual</strong>
System Printer RoutingUse System Printer Routing to define the locations within the system for up to 40 possiblesystem printers.1. Select SYSTEMPRINTER ROUTINGfrom the PRINTERROUTING MENU todisplay the SYSTEMPRINTER ROUTINGscreen. Theselections for the firstof 4 of 40 possibleprinters display.2. If necessary, pressPAGE DN to view orchange locationassignments fordifferent printers.3. Press toselect the field youwish to edit. Typenew information andpress ENTER.4. Press ESC to returnto the S-MODEPROGRAMMINGMENUSYSTEM PRINTER CONFIGPRT DESCRIPTOR RG#-P#ALPHARG#-P## 1 00-0 00-0# 2 00-0 00-0# 3 00-0 00-0# 4 00-0 00-0ESC ENTER PAGE UP/DN SYSTEM PRINTER CONFIGPRT DESCRIPTOR RG#-P#ALPHARG#-P## 5 00-0 00-0# 6 00-0 00-0# 7 00-0 00-0# 8 00-0 00-0ESC ENTER PAGE UP/DN <strong>SER</strong>-<strong>7000</strong> Program <strong>Manual</strong> P-Mode <strong>Programming</strong> 165
Kitchen Video RoutingUse Kitchen Video Routing to define the location of the video controller. If you wish todesignate a backup printer in the event that the video system is not operational, enter thelocation of the back-up printer here.1. Select KITCHENVIDEO ROUTINGfrom the PRINTERROUTING MENU todisplay theKITCHEN VIDEOROUTING screen.2. Press toselect the field youwish to edit. Typenew information andpress ENTER.3. Press ESC to returnto the S-MODEPROGRAMMINGMENUKITCHEN VIDEO ROUTING ALPHAPRT DESCRIPTOR RG#-P# PRT## 1 00-0 00ESC ENTER PAGE UP/DN 166 P-Mode <strong>Programming</strong> <strong>SER</strong>-<strong>7000</strong> Program <strong>Manual</strong>
Kitchen Printer RoutingUse Kitchen Printer Routing to link the kitchen printer assignment made to items with actualprinters. (See "PLU Status Group" on page 36 to link a group of PLUs to a printerassignment number.) Because different registers might route kitchen printer items to different printers,each register can be programmed separately in this program. (see "KitchenPrinting/Video Options" (option #11) on page 115 to allow separate routing byregister.) All registers contain routing information for all of the registers in thesystem.NOTE: All registers are updated with changes made to this program at anyregister. Because it is sometimes necessary to change kitchen printer routing depending uponthe time of the day, (for example, separate hot and cold food kitchens may be activeduring lunch and a single kitchen active during dinner) you can make assignmentsfor four different periods. The active routing period can be controlled automaticallyby time or set manually. Priority printing is also controlled with this program. The order in which items areprinted on the kitchen printer ticket is determined by the order in which kitchenprinter groups are listed for each printer #. (Groups at the left are printed first;groups at the right are printed last.<strong>SER</strong>-<strong>7000</strong> Program <strong>Manual</strong> P-Mode <strong>Programming</strong> 167
1. Select KITCHENPRINTER ROUTINGfrom the S-MODEPROGRAMMINGMENU to display theKITCHEN PRINTERROUTING - PERIOD#1 screen.2. Enter a REG# (1-40)and press ENTER, orpress PAGE UP orPAGE DN until theREG# you wish toprogram is selected.3. Press toselect the field youwish to edit. Typenew information andpress ENTER.4. If necessary, pressPAGE DN to view orchange routing forperiods 2, 3, and/or 4.5. Press ESC to exit theKITCHEN PRINTERROUTING screen.REG#01 KITCHEN PRT ROUTIPERIOD#1PT KP KP KP KP KP KP KP KP KP00 0 0 0 0 0 0 0 0 000 0 0 0 0 0 0 0 0 000 0 0 0 0 0 0 0 0 000 0 0 0 0 0 0 0 0 00 0 0 0 0 0 0 0 0 0REG#01 KITCHEN PRT ROUTIPERIOD#1PT KP KP KP KP KP KP KP KP KP00 0 0 0 0 0 0 0 0 000 0 0 0 0 0 0 0 0 000 0 0 0 0 0 0 0 0 000 0 0 0 0 0 0 0 0 00 0 0 0 0 0 0 0 0 0REG#01 KITCHEN PRT ROUTIPERIOD#1PT KP KP KP KP KP KP KP KP KP00 0 0 0 0 0 0 0 0 000 0 0 0 0 0 0 0 0 000 0 0 0 0 0 0 0 0 000 0 0 0 0 0 0 0 0 00 0 0 0 0 0 0 0 0 0168 P-Mode <strong>Programming</strong> <strong>SER</strong>-<strong>7000</strong> Program <strong>Manual</strong>
Receipt Printer Routing1. Select RECEIPTPRINTER ROUTINGfrom the S-MODEPROGRAMMINGMENU to display theRECEIPT PRINTERROUTING screen.2. Press toselect the field youwish to edit. Typenew information andpress ENTER.3. If necessary, pressPAGE DN to view orchange routing for asmany additionalregisters are definedin the system.RECEIPT PRINTER ROUTINGREG# PRT# REG# PRT#00 00 00 0000 00 00 0000 00 00 0000 00 00 0000 00 00 00Note: Default setting sends receipt to theregister printer.Detail Printer Routing1. Select DETAILPRINTER ROUTINGfrom the S-MODEPROGRAMMINGMENU to display theDETAIL PRINTERROUTING screen.2. Press toselect the field youwish to edit. Typenew information andpress ENTER.3. If necessary, pressPAGE DN to view orchange routing for asmany additionalregisters are definedin the system.DETAIL PRINTER ROUTINGREG# PRT# REG# PRT#00 00 00 0000 00 00 0000 00 00 0000 00 00 0000 00 00 00Note: Default setting sends detail to theregister printer.<strong>SER</strong>-<strong>7000</strong> Program <strong>Manual</strong> P-Mode <strong>Programming</strong> 169
Ingredient InventoryA menu-explosion type inventory system is set up when PLUs are linked to a recipe# (see"PLU Status Group" on page 36.) Select INGREDIENT INVENTORY from the P-Mode<strong>Programming</strong> Menu to maintain recipe files and ingredient lists. Select EDIT INVENTORYITEM from the X-MODE MANAGER MENU (see the <strong>SER</strong>-<strong>7000</strong> Operation <strong>Manual</strong>) toreceive, transfer in/out, or enter raw waste for ingredients in this system.NOTE: Be careful not to confuse the separate and distinct inventory features of the<strong>SER</strong>-<strong>7000</strong>: Recipes and Ingredients (described here.) Product Mix Groups (see “Product Mix Groups” on page 180.) PLU Stock (see “PLU Stock” on page188),1. Select INGREDIENTINVENTORY fromthe P-MODEPROGRAMMINGMENU to display theINGREDIENTINVENTORYMENU screen.2. Choose an item fromthe menu in one oftwo ways:INGREDIENT INVENTORY MENU1. EDIT INGREDIENT2. RECIPE TABLEESC ENTER PAGE UP/DN Type the number foryour choice and pressENTER.Press the or keysto move the cursor toyour choice and pressENTER.170 P-Mode <strong>Programming</strong> <strong>SER</strong>-<strong>7000</strong> Program <strong>Manual</strong>
Edit Ingredient1. Select EDITINGREDIENT fromthe INGREDIENTINVENTORYMENU to display theINGREDIENTPROGRAMMINGscreen. The cursor ispositioned at the nextavailable ingredient.2. Add or editingredients bymoving the cursor toa field and filling ininformationaccording to the tablebelow.3. Press ESC to returnto the INGREDIENTINVENTORYMENUINGREDIENT PROGRAMMINGING# DESCRIPTOR COSTALPHA001 000.000002 000.000003 000.000 ESC Y/N ENTER PAGE UP/DN Ingredient Program NotesFIELDING#DESCRIPTORCOSTNotesThis field is the three-digit inventory number. The valuebegins at 001 and goes up to the maximum number that isassigned in memory allocation.A 12-digit descriptor is set for the inventory item. (Aninventory item is an “ingredient” of a PLU.)The cost of the item is the cost of the ingredient. The cost canbe entered accurate to three places after the decimal.<strong>SER</strong>-<strong>7000</strong> Program <strong>Manual</strong> P-Mode <strong>Programming</strong> 171
Recipe Table1. Select RECIPETABLE from theINGREDIENTINVENTORYMENU to display theRECIPE #PROGRAMMINGscreen.2. Enter a RECIPE andpress ENTER, orpress PAGE UP orPAGE DN until theRECIPE you wish toprogram is selected.3. Add or edit recipecomponents bymoving the cursor toa field and fillinginformationaccording to the tablebelow.4. Press ESC to returnto the INGREDIENTINVENTORYMENU.RECIPE# 1 PROGRAMMINGDESCRIPTORING/REC # DESCRIPTOR QTY001 INGRED00 00.000002 INGRED00 00.000003 INGRED 00.000 ESC Y/N ENTER PAGE UP/DN Recipe Table Program NotesFIELDNotesING/RECChoose whether this line corresponds to an INGredient or aRECIPE. (A recipe may be composed of recipes. Forexample, a special sauce (a recipe) may be an ingredient of asandwich recipe.)# Enter the 3-digit number of the recipe or ingredient.DESCRIPTORDisplay only. When a recipe or ingredient number is entered,the corresponding descriptor displays.QTY Enter the amount of inventory items used in the recipe, i.e. 1patty for a regular hamburger, or 2 patties for doublehamburger.172 P-Mode <strong>Programming</strong> <strong>SER</strong>-<strong>7000</strong> Program <strong>Manual</strong>
Time Activated Functions1. Select TIMEACTIVATEDFUNCTIONS fromthe P-MODEPROGRAMMINGMENU to display theTIME ACTIVATEDFUNCTIONS MENUscreen.2. Choose an item fromthe menu in one oftwo ways:Type the number foryour choice and pressENTER.Press the or keysto move the cursor toyour choice and pressENTER.TIME ACTIVATED FUNCTIONS MENU1. KEYBOARD LEVELS2. PRICE LEVELS3. MACROS4. STRING REPORTSESC ENTER PAGE UP/DN TIME ACTIVATED FUNCTIONS MENU3. MACROS4. STRING REPORTS5 . SHIFTS6. KP TIME PERIODESC ENTER PAGE UP/DN <strong>SER</strong>-<strong>7000</strong> Program <strong>Manual</strong> P-Mode <strong>Programming</strong> 173
Time Activated Keyboard Levels1. Select KEYBOARDLEVELS from theTIME ACTIVATEDFUNCTIONS MENUto display the TIMEACTIVATEDKEYBOARDLEVEL screen.2. Enter a level andpress ENTER, orpress PAGE UP orPAGE DN until thelevel you wish toprogram is selected.3. Refer to “TimeActivate KeyboardLevels ProgramNotes” on thefollowing page forinformation aboutfilling fields.4. Press ESC at anypoint to exit theTIME ACTIVATEKEYBOARDLEVELS screen.TIME ACTIVATED KBD LEVEL#1ACTIVATE AT(99:99=DISABLE) 99:99WEEK:SUN MON TUE WED THU FRI SATY Y Y Y Y Y YESC Y/N ENTER PAGE UP/DN Time Activate Keyboard Levels Program NotesFIELDACTIVATE ATWEEKSUNMONTUEWEDTHUFRISATNotesEnter the time (24 hour/military time) you wish the keyboardlevel to activate. Enter 99:99 to inactivate the keyboard levelchanges.Press the Y/N key at each day of the week field to selectwhich days the keyboard level change is to occur.174 P-Mode <strong>Programming</strong> <strong>SER</strong>-<strong>7000</strong> Program <strong>Manual</strong>
Time Activated Price Levels1. Select PRICELEVELS from theTIME ACTIVATEDFUNCTIONS MENUto display the TIMEACTIVATED PRICELEVEL screen.2. Enter a level andpress ENTER, orpress PAGE UP orPAGE DN until thelevel you wish toprogram is selected.3. Refer to “TimeActivate Price LevelsProgram Notes”below for informationabout filling fields.4. Press ESC at anypoint to exit thePRICE LEVELscreen.TIME ACTIVATED PRICE LEVEL# 1ACTIVATE AT(99:99=DISABLE) 99:99WEEK:SUN MON TUE WED THU FRI SATY Y Y Y Y Y YESC Y/N ENTER PAGE UP/DN Time Activate Price Levels Program NotesFIELDACTIVATE ATWEEKSUNMONTUEWEDTHUFRISATNotesEnter the time (24 hour/military time) you wish the price levelprogram to activate. Enter 99:99 to inactivate the price levelprogram.Press the Y/N key at each day of the week field to selectwhich days the price level program is to occur.<strong>SER</strong>-<strong>7000</strong> Program <strong>Manual</strong> P-Mode <strong>Programming</strong> 175
Time Activated Macros1. Select MACROSfrom the TIMEACTIVATEDFUNCTIONS MENUto display the TIMEACTIVATEDMACROS screen.2. Type a macro numberand press ENTER, orpress PAGE UP orPAGE DN until themacro you wish toprogram is selected.3. Refer to “TimeActivate MacroProgram Notes” onthe following pagefor information aboutfilling fields.4. Press ESC at anypoint to exit theTIME ACTIVATEDMACRO screen.TIME ACTIVATED MACRO# 1ACTIVATE AT(99:99=DISABLE) 99:99REPEAT EVERY(MIN,0=NO REPEAT)000WEEK:SUN MON TUE WED THU FRI SATY Y Y Y Y Y YESC Y/N ENTER PAGE UP/DN Time Activate Macro Program NotesFIELDACTIVATE ATREPEAT EVERYMINUTESWEEKSUNMONTUEWEDTHUFRISATNotesEnter the time (24 hour/military time) you wish the macro toactivate. Enter 99:99 to inactivate the macro.If you wish the macro to repeat, enter the interval in minutes,i.e. 60 to repeat every sixty minutes.Press the Y/N key at each day of the week field to selectwhich days the macro is to occur.176 P-Mode <strong>Programming</strong> <strong>SER</strong>-<strong>7000</strong> Program <strong>Manual</strong>
Time Activated String Reports1. Select STRINGREPORTS from theTIME ACTIVATEDFUNCTIONS MENUto display the TIMEACTIVATEDSTRING REPORTSscreen.2. Enter string report #and press ENTER, orpress PAGE UP orPAGE DN until thestring report you wishto program isselected.3. Refer to “TimeActivate StringReport ProgramNotes” on thefollowing page forinformation aboutfilling fields.4. Press ESC at anypoint to exit theTIME ACTIVATESTRING REPORTscreen.TIME ACTIVATE STRING REPORT#1ACTIVATE AT(99:99=DISABLE) 99:99REPEAT EVERY(MIN,0=NO REPEAT)000WEEK:SUN MON TUE WED THU FRI SATY Y Y Y Y Y YESC Y/N ENTER PAGE UP/DN Time Activate String Report Program NotesFIELDACTIVATE ATREPEAT EVERYMINUTESWEEKSUNMONTUEWEDTHUFRISATIRC OPTIONNotesEnter the time (24 hour/military time) you wish the stringreport to activate. Enter 99:99 to inactivate the string report.If you wish the report to repeat, enter the interval in minutes,i.e. 60 to repeat every sixty minutes.Press the Y/N key at each day of the week field to selectwhich days the string report is to occur.Select the IRC OPTION field and press ENTER. ChooseSTANDALONE or IRC ALL from the pop-up window.<strong>SER</strong>-<strong>7000</strong> Program <strong>Manual</strong> P-Mode <strong>Programming</strong> 177
Time Activated ShiftsShift time programming determines the times of day financial totals are accumulated for theShift Report.1. Select SHIFTS fromthe TIMEACTIVATEDFUNCTIONS MENUto display the SHIFTTIMEPROGRAMMINGscreen.2. The cursor displays inthe Descriptor fieldfor Shift 1. Enter anew descriptor, ifnecessary and pressENTER.3. The cursor moves tothe Start Time fieldfor Shift 1. Thedefault start time is00:00, if necessary,enter a new time andpress ENTER.4. Continue to setdescriptors and starttimes for each of 4possible shifts. Entera start time of 99:99to inactivate a shift.5. Press ESC at anypoint to exit theSHIFT TIMEPROGRAMMINGscreen.SHIFT TIME PROGRAMMINGALPHASFT DESCRIPTOR START/END TIME1 00:00 - 23:992 99:99 - 99:993 99:99 - 99:99 ESC Y/N ENTER PAGE UP/DN SHIFT TIME PROGRAMMINGALPHASFT DESCRIPTOR START/END TIME4 99:99 - 99:99TTL ESC Y/N ENTER PAGE UP/DN 178 P-Mode <strong>Programming</strong> <strong>SER</strong>-<strong>7000</strong> Program <strong>Manual</strong>
KP Time PeriodKitchen printer routing can be defined for four periods (see "Kitchen Printer Routing" onpage 167.) If you define different routing for different periods, you can set the start and endtimes for the time periods here.For example, a restaurant might require requisitions to be routed to separate hot and coldsandwich preparation areas during lunch (11:00 AM to 2:00 PM) and at all other times, allrequisitions would be routed to the hot prep area. To meet this requirement, you couldprogram different kitchen printer routing for periods 1 and 2 under the Kitchen PrinterRouting program , then set the KP Time Periods as follows:Period Start End Time1 11:00 14:002 14:01 10:593 99:99 99:994 99:99 99:991. Select KP TIMEPERIOD from theTIME ACTIVATEDFUNCTIONS MENUto display the KPTIME PERIODPROGRAMMINGscreen.2. The cursor displays inthe Start Time fieldfor Period 1, enter anew time and pressENTER.3. Continue to set startand end times foreach of 4 possibleperiods. Enter a starttime of 99:99 toinactivate a period.4. Press ESC at anypoint to exit the KPTIME PERIODPROGRAMMINGscreen.KP TIME PERIOD PROGRAMMINGPERIODSTART/END TIME1 99:99 - 00:002 99:99 - 00:003 99:99 - 00:00 ESC Y/N ENTER PAGE UP/DN KP TIME PERIOD PROGRAMMINGPERIODSTART/END TIME4 99:99 - 00:00 ESC Y/N ENTER PAGE UP/DN <strong>SER</strong>-<strong>7000</strong> Program <strong>Manual</strong> P-Mode <strong>Programming</strong> 179
Product Mix GroupsProduct Mix Groups can be used to implement a simplified ingredient system for trackingonly essential ingredients associated with items (i.e. cups for beverages or number of piecesfor chicken menus.)Product mix groups also report usage by time period and optional Product Projectionsreporting is also available. The Product Projection report provides a history of each item'ssales by day of week.NOTE: Be careful not to confuse the separate and distinct inventory features of the<strong>SER</strong>-<strong>7000</strong>: Product Mix Groups (described here.) PLU Stock (see “PLU Stock” on page188), Recipes and Ingredients (see “Ingredient Inventory” on page 38)1. Select PRODUCTMIX GROUPS fromthe P-MODEPROGRAMMINGMENU to display thePRODUCT MIXGROUPS MENUscreen.2. Choose an item fromthe menu in one oftwo ways:PRODUCT MIX GROUPS MENU1.PRODUCT MIX ITEMS2.PRODUCT MIX GROUP TIME PRIDESC ENTER PAGE UP/DN Type the number foryour choice and pressENTER.Press the or keysto move the cursor toyour choice andpress ENTER.180 P-Mode <strong>Programming</strong> <strong>SER</strong>-<strong>7000</strong> Program <strong>Manual</strong>
Product Mix Items1. Select PRODUCTMIX ITEMS from thePRODUCT MIXGROUPS MENU todisplay thePRODUCT MIXITEMPROGRAMMINGscreen.2. Add or edit items bymoving the cursor toa field and fillinginformationaccording to the tablebelow. PressENTER to finalizeeach field entry, orpress , , , or to finalize an entryand advance to thenext field.3. Press ESC to returnto the PRODUCTMIX GROUPSMENU.PRODUCT MIX ITEM PGMALPHAITM# DESCRIPTOR PCS/UNIT UNIT@001 000002 000003 000 ESC Y/N ENTER PAGE UP/DN Product Mix Item Program NotesFIELDDESCRIPTORPCS\UNITUNIT@NotesEach product mix group item can have a 12 character alphadescriptor.Enter the number of pieces in the unit. For the example shown,120 burgers to the case- Enter 120; 30 cups to the sleeve- Enter30.Enter a 4 Character descriptor for the unit, using the Alphakeyboardoverlay. This descriptor is for report purposes.<strong>SER</strong>-<strong>7000</strong> Program <strong>Manual</strong> P-Mode <strong>Programming</strong> 181
Product Mix Group Time PeriodsMemory allocation determines whether there are 24, 48, or 96 product mix group timeperiods. Product mix group time periods will default to hourly periods if 24 periods areselected in memory allocation; 30-minute periods if 48 periods are selected; 15-minuteperiods if 96 periods are selected.Periods can be set to custom lengths using this program. If fewer periods are needed than areavailable, unneeded periods can be inactivated so that they will not appear on reports. Toinactivate a period replace the "A" (active) for the period with an "I" (inactive).All time units are based upon a 24-hour clock (military time).1. Select PRODUCTMIX GROUP TIMEPERIODS from thePRODUCT MIXGROUPS MENU todisplay thePRODUCT MIXTIME PERIODPROGRAMMINGscreen.2. Press the keys to select a fieldto edit.3. Type newinformation into thefield. Press ENTER.4. Press ESC to exit thePRODUCT MIXTIME PERIODPROGRAMMINGscreen.PRODUCT MIX TIME PERIOD PGM# OF PERIODS SET IN MEMORY : 241 Y 0000-0059 6 Y 0500-05592 Y 0100-0159 7 Y 0600-06593 Y 0200-0359 8 Y 0700-07594 Y 0300-0359 9 Y 0800-08595 Y 0400-0459 10 Y 0900-0959 ESC Y/N ENTER PAGE UP/DN 182 P-Mode <strong>Programming</strong> <strong>SER</strong>-<strong>7000</strong> Program <strong>Manual</strong>
Custom Report <strong>Programming</strong>One custom report can be created. Also, on the financial or employee report, any total maybe deleted, or printed in red (provided the printer has red/black printing capability.)1. Select CUSTOMREPORT from the P-MODEPROGRAMMINGMENU to display theREPORTPROGRAMMINGmenu.2. Choose an item fromthe menu in one oftwo ways:REPORT PROGRAMMING1.CUSTOM REPORT2.MODIFY EXISTING REPORTSESC ENTER PAGE UP/DN Type the number foryour choice and pressENTER.Press the or keysto move the cursor toyour choice andpress ENTER.<strong>SER</strong>-<strong>7000</strong> Program <strong>Manual</strong> P-Mode <strong>Programming</strong> 183
Custom ReportOne custom report can be created, with up to 50 totals and counters. The report is built byselecting totals that also appear on either the financial or sales by time period reports. Whenthe custom report is created, totals and counters separate from the original report are alsocreated (in other words, you can clear the custom reports independently without affectingtotals in any other report.)Another feature of the custom report is the ability to add or subtract selected totals to create anew subtotal of selected information.1. Select CUSTOMREPORT from theREPORTPROGRAMMINGMENU to display theCUSTOM REPORTPROGRAMMINGscreen.2. Refer to "CustomReport ProgramNotes" on thefollowing page to fillthe fields for eachline of the report.3. Press ESC to exit theCUSTOM REPORTPROGRAMMINGscreen.CUSTOM REPORT PROGRAMMINGRPT TTL# # # RED +/- DESCRIPTOR01 0 000 N NON02 0 000 N NON03 0 000 N NON ESC Y/N ENTER PAGE UP/DN Use the total #998 to create a dashed separator line on the report.Use the total #999 to create a subtotal line. The subtotal line will calculate the totalsdesignated "+" or "-" that appear sequentially after the previous subtotal line. Enter acustom descriptor for the subtotal line.184 P-Mode <strong>Programming</strong> <strong>SER</strong>-<strong>7000</strong> Program <strong>Manual</strong>
Custom Report Program NotesFIELDRPT#TTL#RED?NotesWith the field selected, press DONE to display the REPORTLIST. Enter or select the number of the report from which thetotal you wish to place on the custom report originates.With the field selected, press DONE to display the TOTALLIST. Enter or select the number of the total you wish to placeon the custom report. You must first select a RPT# before youcan select a TTL#.Enter Y if the line is to be printed in red ink, enter N for black.+/- Press ENTER to select "+", "-" or NON ADD from the pop-upwindow. When the subtotal TTL# code (i.e.'999') is entered ona later line, previous totals with a + or - designation are addedand printed.DESCRIPTOR The default descriptor automatically displays when the TTL# isentered. If you wish, enter a new descriptor by replacingdefault descriptor. Type new information into the field, pressENTER.<strong>SER</strong>-<strong>7000</strong> Program <strong>Manual</strong> P-Mode <strong>Programming</strong> 185
Edit Existing Reports1. Select EDITEXISTINGREPORTS from theREPORTPROGRAMMINGMENU, then from thepop-up menu, selectFINANCIALREPORT orEMPLOYEEREPORT.REPORT PROGRAMMING1. CUSTOM REPORTS2. EDIT EXISTING REPORTS1. FINANCIAL REPORT2. EMPLOYEE REPORTN 2. The EDIT screen forthe report selecteddisplays. Each totalthat appears on thereport is listed withthe default status:PRINT=Y andRED?=N.3. If you wish to deletea total from the reportmove the cursor tothe PRINT? field forthe total you wish toremove from thereport. Press the Y/Nkey to change thestatus to NO.4. At the RED? field,enter Y if the line isto be printed in redink, enter N for black.5. Continue editing thereport as necessary.6. Press ESC to exit theCUSTOM REPORTPROGRAMMINGscreen.EDIT FINANCIAL REPORTTTL# DESCRIPTOR PRT? RED?001 +PLU LVL1 TTL Y N002 -PLU LVL1 TTL Y N003 +PLU LVL2 TTL Y N004 -PLU LVL2 TTL Y N ESC Y/N ENTER PAGE UP/DN 186 P-Mode <strong>Programming</strong> <strong>SER</strong>-<strong>7000</strong> Program <strong>Manual</strong>
String Reports1. Select STRINGREPORTS from theP-MODEPROGRAMMINGMENU.2. Type a string report#and press ENTER, orpress PAGE UP orPAGE DN until thestring report# youwish to program isselected.3. Refer to “StringReport ProgramNotes” tofill eachfield.4. Up to 24 reports maybe executed on astring report. PressPAGE UP or PAGEDN or press the keys to view allof the sequencenumbers in the report.5. Press ESC to returnto the STRINGREPORTPROGRAMMINGMENU screen.STRING REPORT#1 PROGRAMMINGDESCRIPTOR STRING REPORT #1# X/Z LEVEL RPT# DESCRIPTOR00 X 0 0001 X 0 0002 X 0 00 ESC Y/N ENTER PAGE UP/DN String Report Program NotesFIELDX/ZLEVELRPT#DESCRIPTORNotesSelect the X/Z field arrow. Press ENTER to open the window.Select the X, Z, or CURRENT option by highlighting yourselection and pressing ENTER. Use the current option if youwish to use the string for either X or Z reports. The string reportwill look at he current control lock position (either X or Z) andgenerate the appropriate report.At the RPT LVL field, select the X/Z level (i.e. Z1, X2, etc.Remember you must have allocated memory for the report levelif you wish to execute that report.)At the RPT# field, type the report number you wish to execute inthe string. Press ENTER. The report descriptor willautomatically display.<strong>SER</strong>-<strong>7000</strong> Program <strong>Manual</strong> P-Mode <strong>Programming</strong> 187
PLU StockPLU stock is a simple inventory system where each whole unit PLU activity subtracts a valueof "1" from the stock counter. (Note that if multiplication or decimal multiplication is usedwhen the PLU is registered, the resulting quantity of activity will subtract from the stockcounter. Stock is maintained increments to the second decimal position, i.e. “X.XX”.)PLU stock applies only to PLUs that are assigned to a PLU status group with the Stock PLU?setting set to Y (See “PLU Status Group” on page 36.)Select PLU STOCK to maintain stock levels on PLUs selected for stock unit inventory.NOTE: Be careful not to confuse the separate and distinct inventory features of the<strong>SER</strong>-<strong>7000</strong>: PLU Stock (described here), Recipes and Ingredients (see “Ingredient Inventory” on page 38) Product Mix Groups (See “Product Mix Groups” on page 180.)1. Select PLU STOCKfrom the P-MODEPROGRAMMINGMENU to display thePLU STOCK MENUscreen.2. Choose ADD fromthe PLU STOCKMENU to add stockto the current level, orPLU STOCK MENU1. ADD2. OVERRIDE3. SUBTRACTESC ENTER PAGE UP/DN Choose OVERRIDEfrom the PLUSTOCK MENU tochange the currentstock amount to anew setting, orChoose SUBTRACTfrom the PLUSTOCK MENU tosubtract stock fromthe current level.188 P-Mode <strong>Programming</strong> <strong>SER</strong>-<strong>7000</strong> Program <strong>Manual</strong>
3. Press the PLU to beprogrammed or enterthe PLU number andpress ENTER.4. Press the key tomove the cursor tothe stock field.5. Enter a valueassuming a two digitdecimal position (i.e.enter 2000 to display20.00 for 20 units.)Press ENTER or toa set the entry andadvance the cursor tothe next PLU.6. Continue to add,override or subtractstock as necessary.Press ESC to exit theprogram and savechanges.PLU#00000000000000 STOCK-ADDPRESS PLU TO BE PROGRAMMEDORENTER PLU NUMBER – [ENTER]PLU# ESC ENTER INDIVIDUAL PLUPLU#00000000000001 STOCK-ADDDESCRIPTOR : MMMMMMMMMMMMMMMSTOCK 0.00<strong>SER</strong>-<strong>7000</strong> Program <strong>Manual</strong> P-Mode <strong>Programming</strong> 189
PLU Minimum Stock1. Select PLUMINIMUM STOCKfrom the P-MODEPROGRAMMINGMENU to setminimum stockamounts (for the PLUMINIMUM STOCKreport.)2. Press the PLU to beprogrammed or enterthe PLU number andpress ENTER.3. Press the key tomove the cursor tothe stock field.4. Enter a valueassuming a two digitdecimal position (i.e.enter 2000 to display20.00 for 20 units.)Press ENTER or toa set the entry andadvance the cursor tothe next PLU.5. Press ESC to exit theprogram and savechanges.PLU#00000000000000 MIN.STOCK PGMPRESS PLU TO BE PROGRAMMEDORENTER PLU NUMBER – [ENTER]PLU# ESC ENTER INDIVIDUAL PLUPLU#00000000000000 MIN.STOCK PGMDESCRIPTOR : MMMMMMMMMMMMMMMMINIMUM STOCK 0.00190 P-Mode <strong>Programming</strong> <strong>SER</strong>-<strong>7000</strong> Program <strong>Manual</strong>
Copy ProgramThis function allows you to duplicate programs for: PLUs PLU Status Groups Keyboard Levels WLUsFor example, all program options for one PLU can be duplicated on another PLU.NOTE: See “General Function Options” on page 101. If General Function Option #16“ALLOW PLU COPY BY RANGE” is set to “Y”, then the options from one PLU orPLU Status Group can be copied to a range of PLUs or PLU Status Groups. If option#18 is set to “N” then the options from an individual PLU or PLU Status Group can becopied only to another individual PLU or PLU Status Group.1. Select COPYPROGRAM from theP-MODE menu todisplay the COPYPROGRAM screen.2. Choose COPY PLU COPY PLU STATUSGROUP COPY KEYBOARDLEVEL, or COPY WLU from thelist.COPY PROGRAM1. COPY PLU2. COPY PLU STATUS GROUP3. COPY KEYBOARD LEVEL4. COPY WLU5. COPY GROUPS BY EMPLOYEEN <strong>SER</strong>-<strong>7000</strong> Program <strong>Manual</strong> P-Mode <strong>Programming</strong> 191
3. At the pop-upwindow, enter the #you wish to copyfrom, press ENTER,then enter the # youwish to copy to andpress ENTER.(NOTE: If you allowcopying ofPLUs/PLU StatusGroups by range,enter the range tocopy to.)4. The warning: "COPY[Y]" displays.5. Press ENTER tocomplete the copyfunction. Press theY/N key, (to selectNO) then ENTER toescape withoutcopying.COPY PROGRAM1. COPY PLU2. COPY PLU STATUS GROUP3. COPY KEYBOARD LEVEL4. COPY WLU5. COPY GROUPS BY EMPLOYEE00000000000000192 P-Mode <strong>Programming</strong> <strong>SER</strong>-<strong>7000</strong> Program <strong>Manual</strong>
Program File DownloadDownload files only to RAM cleared registers. Download memory allocation separatelyfirst. The All Files selection does not include memory allocation.1. Select PROGRAMFILE DOWNLOADfrom the P-MODEPROGRAMMINGMENU to display thePROGRAM FILEDOWNLOADscreen.2. Choose an item fromthe menu in one oftwo ways:PROGRAM FILE DOWNLOAD1. ALL FILES2. SELECT PROGRAM FILESESC ENTER PAGE UP/DN Type the number foryour choice and pressENTER.Press the or keysto move the cursor toyour choice and pressENTER.<strong>SER</strong>-<strong>7000</strong> Program <strong>Manual</strong> P-Mode <strong>Programming</strong> 193
Select Program Files1. Choose SELECTPROGRAM FILESfrom the PROGRAMFILE DOWNLOADscreen to display theDOWNLOADINGPROGRAM FILESELECTION screen.2. At the REGISTERfield, choose ALLREGISTERS orSELECTED. (If youchoose selected,choose registers inthe same manner asALL FILESdownloading.3. At he PROGRAMFILE SELECTIONfield, press PAGEUP or PAGE DNand/or the keys toselect the items youwish to download.Press Y/N to togglefrom yes to no.4. When you havecompleted selectingprograms, pressDONE to download.DOWNLOAD PROGRAM FILE SELEC1.REGISTER : ALL REGISTERS2.PROGRAM FILE SELECTIONDATE & TIMENPLUNPLU STATUS GROUPNGROUPN FUNCTION KEY NDOWNLOAD PROGRAM FILE SELECMACRONTARE WEIGHTNGENERAL FUNCTION OPTION NTAX OPTIONNCASH DRAWER OPTIONNTRAINING MODE OPTIONN LEVEL/MODIFIER OPTION NDOWNLOAD PROGRAM FILE SELECTRACKING FILE OPTIONNKITCHEN PRINTER/VIDEO OPT NVALID/SUBTOTAL PRINT OPT NGENERAL PRINTING OPTION NREPORT PRINTING OPTION NREPORT OPTIONN TIME KEEPING OPTION NDOWNLOAD PROGRAM FILE SELECE.J. & DETAIL PRINTING OPT NTAXNLOGO MESSAGENERROR MESSAGENSYSTEM DESCRIPTORNFINANCIAL REPORT DESC. N EMPLOYEE REPORT DESCRIPTOR NDOWNLOAD PROGRAM FILE SELECCHECK ENDORSEMENT MESSAGE NGUEST CHECK LOGO MESSAGE NVALIDATION MESSAGENWINDOW LOOK UP (WLU)NTIME PERIODNEMPLOYEEN JOBCODE N194 P-Mode <strong>Programming</strong> <strong>SER</strong>-<strong>7000</strong> Program <strong>Manual</strong>
DOWNLOAD PROGRAM FILE SELECPAYRATENAUTHORITY LEVELNSYSTEM PRINTER CONFIG. NKITCHEN VIDEO ROUTING NKITCHEN PRINTER ROUTING NRECEIPT PRINTER ROUTING N DETAIL PRINTER ROUTING NDOWNLOAD PROGRAM FILE SELECINGREDIENTNRECEIPE TABLENTIME ACTIVATED KBD LEVEL NTIME ACTIVATED PRICE LEVEL NTIME ACTIVATED MACRONTIME ACTIVATED STRING RPT N SHIFT TIME NDOWNLOAD PROGRAM FILE SELECKP TIME PERIODNPRODUCT MIX ITEMSNPRODUCT MIX GRP TIME PERIODNCUSTOM REPORTNEDIT FINANCIAL REPORT NEDIT EMPLOYEE RPOERTN STRING REPORT NDOWNLOAD PROGRAM FILE SELECPLU MINIMUM STOCKNNON-PLU CODENKEYBOARD KEY RELOCATION NS-MODE SYSTEM OPTIONNPRINTER DRIVERNMEMORY ALLOCATIONN BITMAP IMAGE NDOWNLOAD PROGRAM FILE SELECGROUPS BY EMPLOYEEEMPLOYEE CARD READ FORMATAGE VERIFICATIONMIX & MATCH TABLENNNN<strong>SER</strong>-<strong>7000</strong> Program <strong>Manual</strong> P-Mode <strong>Programming</strong> 195
All Files1. Choose ALL FILESfrom the PROGRAMFILE DOWNLOADscreen to display theDOWNLOADINGREGISTERSELECTION screen.2. If you wish todownload to selectedregisters, at theREGISTER field,press ENTER toopen the pop-upwindow. ChooseSELECTED andpress ENTER todisplay theREGISTERSELECTION screen.3. At the REGISTERSELECTION screen,press the keys to move to thefield associated withthe register you wishto choose. Press Y/Nto toggle from yes tono.4. When you havecompleted selectingregisters, pressDONE to download.DOWNLOADING REGISTER SELECT1. REGISTER : ALL REGISTERSESC Y/N ENT PG UP/DN DONEDOWNLOADING REGISTER SELECT1. REGISTER : ALL REGISTERSSELECTEDESC Y/N ENT PG UP/DN DONEREGISTER SELECTION:01 02 03 04 05 06 07 08N N N N N N N N09 10 11 12 13 14 15 16N N N N N N N NESC Y/N ENT PG UP/DN DONEREGISTER SELECTION:17 18 19 20 21 22 23 24N N N N N N N N25 26 27 28 29 30 31 32N N N N N N N NESC Y/N ENT PG UP/DN DONE196 P-Mode <strong>Programming</strong> <strong>SER</strong>-<strong>7000</strong> Program <strong>Manual</strong>
P-Mode Program Scan PrintingThis function allows you to print copies of the register’s P-Mode programming.1. Select PROGRAMSCAN PRINTINGfrom the P-MODEPROGRAMMINGMENU to display theP-MODEPROGRAM SCANPRINTING screen.2. Choose an item fromthe menu in one oftwo ways:Type the number foryour choice and pressENTER.Press the or keysto move the cursor toyour choice andpress ENTER.3. After selection, theappropriate report isprinted.P-MODE PROGRAM SCAN PRINTING1. PLU BY RANGE2. PLU BY PLU STATUS GROUP3. PLU BY SELECTED PRICE LVL4. PLU STATUS GROUP BY RANGE5. GROUP BY RANGEP-MODE PROGRAM SCAN PRINTING6. ALL FUNCTION KEY7. SYSTEM OPTION8. TAXES9. MESSAGES10.WINDOW LOOK UP (WLU)P-MODE PROGRAM SCAN PRINTING11.TIME PERIOD12.EMPLOYEE BY RANGE13.JOB CODE14.PAY RATE15.AUTHORITY LEVELP-MODE PROGRAM SCAN PRINTING16.PRINTER TABLE & KV ROUTING17.INGREDIENT INVENTORY18.TIME ACTIVATED FUNCTIONS19.PRODUCT MIX GROUPS20.CUSTOM REPORT<strong>SER</strong>-<strong>7000</strong> Program <strong>Manual</strong> P-Mode <strong>Programming</strong> 197
P-MODE PROGRAM SCAN PRINTING21.STRING REPORT22.PLU STOCK BY RANGE23.PLU MINIMUM STOCK BY RANGE24.NON-PLU CODE25.TARE WEIGHTSP-MODE PROGRAM SCAN PRINTING26.KEYBOARD27.MACRO28.GROUPS BY EMP. BY RANGE29.EMPLOYEE CARD READ FORMAT30 AGE VERIFICATION198 P-Mode <strong>Programming</strong> <strong>SER</strong>-<strong>7000</strong> Program <strong>Manual</strong>
NON-PLU CodeThe NON-PLU Code program must be set if you wish to scan UPCs (using the EAN 13code) with embedded prices, weights or quantities.Within the EAN 13 code, the first two digits (part a) are used as an identifier and the lastdigit (part c) is used as a check digit. The remaining 10 digits (part b) contain the productcode and the price (or weight or quantity).a) identifier021234500250c) check digitThere are 11 identifier numbers available for non-PLU code programming: “02” and “20”through “29”. The purpose of this program is to define the format of the 10-digit part b foreach possible identifier. For example: The structure of Non PLU identifier “02” can be defined to use 5 digits for the productcode and 5 digits for the price. The structure of Non PLU identifier “20” can be defined to use 6 digits for the productcode and 4 digits for the price.To Program Non-PLU codes:b) product code & price1. Select NON-CODEPLU from the P-MODE MENU todisplay the NON-CODE PLUPROGRAMMINGscreen.2. Choose one of thenon-PLU identifiers(“02” or “20” through“29”).NON-PLU CODE PROGRAMMING1. PLU #022. PLU #203. PLU #214. PLU #22ESC ENTER PAGE UP/DN <strong>SER</strong>-<strong>7000</strong> Program <strong>Manual</strong> P-Mode <strong>Programming</strong> 199
3. The NON-PLU#PROGRAMMINGscreen displays forthe identifier youhave chosen toprogram.4. Use the table belowas a reference infilling the fields ofthis screen.5. Press ESC to returnto the NON-CODEPLUPROGRAMMINGscreen.NON-PLU# 1 (PLU#02 ) PROGRALENGTH OF FIELD 1(=PLU CODE) 0LENGTH OF FIELD 2 0CONTENT OF FIELD 2PRICEUSE PRICE CHECK DIGIT?NTAB OR DEC. POINT OF FIELD 2 0ESC Y/N ENTER PAGE UP/DN NON-PLU Code Program NotesFIELDLENGTH OF FIELD 1LENGTH OF FIELD 2CONTENT OF FIELD 2USE PRICE CHECK DIGITTAB OR DECIMAL POINTOF FIELD 2NotesAssign the length of the product code field. (Thelength of field 1 plus field 2 must equal 10.)Assign the length of the price/weight/quantity field.(The length of field 1 plus field 2 must equal 10.)Select the type of content for field 2: price, weight orquantity.Select “Y” if the price field includes a check digit.Enter the decimal point position for theprice/weight/quantity field.200 P-Mode <strong>Programming</strong> <strong>SER</strong>-<strong>7000</strong> Program <strong>Manual</strong>
PLU & WLU Key Assignment1. Select PLU & WLUKEY ASSIGNMENTfrom the P-MODEPROGRAMMINGMENU to display thePLU & WLU KEYASSIGNMENTscreen.2. Press a numeric digit(1-2) or use the or keys to move thecursor to PLU KEYSor WLU KEYS, thenpress ENTER toindicate whether youwish to program aPLU or WLU.3. A pop up windowdisplays the keyboardlevel selection.Select the keyboardlevel you wish toprogram, pressENTER.PLU & WLU KEY RELOCATION1. PLU KEYS2. WLU KEYSESC ENTER PAGE UP/DN PLU & WLU KEY RELOCATION1. PLU KEYS 1. KBD LEVEL 12. WLU KEYS 2. KBD LEVDL 23. KBD LEVEL 34. KBD LEVEL 45. KBD LEVEL 5ESC<strong>SER</strong>-<strong>7000</strong> Program <strong>Manual</strong> P-Mode <strong>Programming</strong> 201
PLU Key AssignmentThis process assigns the PLU number that is registered when a PLU key is operated.1. Press any PLU key toread and/or changethe currentassignment, or pressESC to exit.PLU KEY RELOCATION PROGRAMMINGKEYBOARD LEVEL 1 PRESS ANY KEY TO READ AND/ORCHANGE CURRENT ASSIGNMENT PRESS ESC TO EXIT2. Type the PLUnumber you wish tobe located at thisPLU key position.Press ENTER toassign the number, orpress ESC to exitwithout changing thecurrent assignment.3. The old and newassignments for thekey you have justprogrammed display.Continue to programPLU key locations asnecessary by pressinganother key.4. Press ESC to exit. Atthe prompt:EXIT? [Y] pressENTER.5. At the prompt:SAVE KEYRELOCATION? [Y]press ENTER, orpress the Y/N key,then press ENTER toexit without savingchanges.PLU KEY RELOCATION PROGRAMKBD LEVEL : 1 KEY POS. : 1CURRENT PLU# 00000000000001PLU1PLU KEY RELOCATION PROGRAMMINGKEYBOARD LEVEL 1 PRESS ANY KEY TO READ AND/ORCHANGE CURRENT ASSIGNMENT PRESS ESC TO EXITKEY POSITION 1:OLD=PLU# 0000000000001NEW=PLU# 0000000000002202 P-Mode <strong>Programming</strong> <strong>SER</strong>-<strong>7000</strong> Program <strong>Manual</strong>
WLU Key AssignmentThis process assigns the WLU number that is displayed when a WLU key is operated.1. Press any WLU keyto read and/or changethe currentassignment, or pressESC to exit.WLU KEY RELOCATION PROGRAMMINGKEYBOARD LEVEL 1 PRESS ANY KEY TO READ AND/ORCHANGE CURRENT ASSIGNMENT PRESS ESC TO EXIT2. Type the WLUnumber you wish tobe located at thisWLU key position.Press ENTER toassign the number, orpress ESC to exitwithout changing thecurrent assignment.3. The old and newassignments for thekey you have justprogrammed display.Continue to programWLU key locationsas necessary bypressing another key.4. Press ESC to exit. Atthe prompt:EXIT? [Y] pressENTER.5. At the prompt:SAVE KEYRELOCATION? [Y]press ENTER, orpress the Y/N key,then press ENTER toexit without savingchanges.WLU KEY RELOCATION PROGRAMKBD LEVEL : 1 KEY POS. : 1CURRENT WLU#:001 WLU#ESC ENTERWLU KEY ASSIGNMENT PROGRAMMINGKEYBOARD LEVEL 1 PRESS ANY KEY TO READ AND/ORCHANGE CURRENT ASSIGNMENT PRESS ESC TO EXITKEY POSITION 13:OLD=WLU# 01 WLU#1NEW=WLU# 02 WLU#2<strong>SER</strong>-<strong>7000</strong> Program <strong>Manual</strong> P-Mode <strong>Programming</strong> 203
Bitmap File DownloadIf you are printing a bitmap image on a printer (use must be using a printer with bitmapimage capability) you can send the bitmap to the printer using this program.1. Select BITMAP FILEDOWNLOAD fromthe P-MODEPROGRAMMINGMENU to display theBITMAP FILEDOWNLOADScreen.2. Press the keys toselect the port theappropriate printer isconnected to andpress ENTER todownload the imageBITMAP FILE DOWNLOADPORT#1PORT#2PORT#3PORT#4ESC ENTER PAGE UP/DN 204 P-Mode <strong>Programming</strong> <strong>SER</strong>-<strong>7000</strong> Program <strong>Manual</strong>
Groups By EmployeeIf you choose to use groups by employee (see "Memory Allocation" on page 34) you canselect which of the 99 available groups are reported for each employee. For example, youmay wish to report only food related groups for servers and beverage related groups forbartenders.GROUPS BY EMPLOYEE# 01 PROG1. Select GROUPS BYEMPLOYEE fromthe P-MODEPROGRAMMINGMENU to display theGROUPS BYEMPLOYEE Screen.2. Type theEMPLOYEE numberand press ENTER, orpress PAGE UP orPAGE DN to scrollto the Employee youwish to program.3. Press the toadvance the cursor tothe GROUP# field forgroup #01.4. Type the number ofthe group you wish toreport, press ENTER.The descriptor for thegroup willautomatically fill theDESCRIPTOR field.5. Continue to programgroup selections forup to 30 possiblereporting groups.Press PAGE UP orPAGE DN asnecessary to view all30 groups.6. Press ESC to exit theGROUPS BYEMPLOYEEprogram screen# GROUP# DESCRIPTOR01 0002 0003 00 ESC Y/N ENTEOOPAG<strong>SER</strong>-<strong>7000</strong> Program <strong>Manual</strong> P-Mode <strong>Programming</strong> 205
Employee Card Read Format1. Select EMPLOYEECARD READFORMAT from theP-MODEPROGRAMMINGMENU to display theEMPLOYEE CARDREAD FORMATScreen.EMPLOYEE CARD READ FORMAT1. READ TRACK12. CARD ID 00000000003. CHECK CARD ID N4. COLUMN OF CARD IDSTART 00DIGIT 00 ESC Y/N ENTER PAGE UP/DN EMPLOYEE CARD READ FORMAT5. COLUMN OF NUMBERSTART 00DIGIT 00 ESC Y/N ENTER PAGE UP/DN Employee Card Read Format Program NotesFIELDREADCARD IDCHECK CARD ID?COLUMN OF CARD IDCARD ID DIGITSCOLUMN OF NUMBERCARD NUMBER DIGITSNotesSet to the Track (1 or 2) that you wish to read.If ID numbers are to be used, enter the ID number (upto 10 digits) from the magnetic cards that will beaccepted. If ID numbers are not to be used, ignore thisfield.Enter Y to use card ID numbers, or N if you do notwish to use card ID numbers.Enter the number of the column that the Card IDstarts.Enter the number of digits to be read for the Card ID.Enter the number of the column that the Card numberstarts.Enter the number of digits to be read for the Cardnumber.206 P-Mode <strong>Programming</strong> <strong>SER</strong>-<strong>7000</strong> Program <strong>Manual</strong>
Age VerificationSale of age-restricted items (i.e. alcohol, tobacco) can be controlled at the point of sale byforcing to operator to enter a date of birth before a controlled item can be registered.Because you may wish to use this feature for items controlled at a different age (i.e. alcoholmay be allowed at age 21 and tobacco may be allowed at age 18), up to five different agescan be entered here. The age category (1-5) is entered at the appropriate PLU Status groupprogram.1. Select AGEVERIFICATIONfrom the P-MODEPROGRAMMINGMENU to display theAGEVERIFICATIONScreen.2. Type an age for thefirst age category,press ENTER.3. If necessary enterages for theremaining agecategories.4. Press ESC to returnto the P-MODEMENU.AGE VERIFICATION1. 002. 003. 004. 005. 00ESC Y/N ENTER PAGE UP/DN <strong>SER</strong>-<strong>7000</strong> Program <strong>Manual</strong> P-Mode <strong>Programming</strong> 207
Mix & Match TableRetailers often offer discounts when multiples of different items are purchased. Forexample, the offer: “save $5 on any three bottles of wine” can be handled by a mix andmatch discount. The default <strong>SER</strong>-<strong>7000</strong> can accommodate up to 5 different mix and matchdiscounts, the total can be increased through memory allocation.1. Select MIX &MATCH TABLEfrom the P-MODEPROGRAMMINGMENU to display theMIX & MATCHTABLE Screen.2. Enter a descriptor,trip# and price foreach table, pressENTER.3. If necessary data foradditional discounttables.4. Press ESC to returnto the P-MODEMENU.MIX & MATCH TABLE PGMALPHATBL DESCRIPTOR TRIP# PRICE001 DISCOUNT#1 00 000000.00002 DISCOUNT#2 00 000000.00003 DISCOUNT#3 00 000000.00 ESC Y/N ENTER PAGE UP/DN MIX & MATCH TABLE PGMALPHATBL DESCRIPTOR TRIP# PRICE004 DISCOUNT#4 00 000000.00005 DISCOUNT#5 00 000000.00 ESC Y/N ENTER PAGE UP/DN Mix & Match Discount Program NotesFIELDTRIP#PRICENotesTrip# is s the number of items that must be purchasedto receive the discount.Price is the amount of the discount.208 P-Mode <strong>Programming</strong> <strong>SER</strong>-<strong>7000</strong> Program <strong>Manual</strong>
Appendices<strong>SER</strong>-<strong>7000</strong> Program <strong>Manual</strong> Appendices 209
Register Communications PortsStandard PortsPORTETHERNET<strong>SER</strong>IAL #1<strong>SER</strong>IAL #2<strong>SER</strong>IAL #3DRAWER 2CONNECTOR TYPEStandard RJ45/8 wirePC type DB9/maleStandard RJ45/8 wireStandard RJ45/8 wireStandard RJ45/6 wireOptional PortsPORT<strong>SER</strong>IAL #4CONNECTOR TYPEStandard RJ45/8 wirePin DescriptionsSIGNALSPIN# SerialPort 1SerialPort 2SerialPort 3SerialPort 4~7IRCPortDrawerPort 1DrawerPort 2DrawerPort 31 /DCD NC Vcc NC TPTx+ FGND FGND FGND2 RxD RxD /DSR /DSR TPTx- Solenoid(-) Solenoid(-) Solenoid(-)3 TxD TxD TxD TxD TPRx+ COMP1 COMP2 COMP34 /DTR /DTR RxD RxD NC 24V 24V 24V5 GND GND NC NC NC Solenoid(-) Solenoid(-) Solenoid(-)6 /DSR /DSR NC NC TPRx- GND GND GND7 /RTS /RTS GND GND NC RJ-11 (Modular 6Pin)8 /CTS /CTS /DTR /DTR NC9 Vcc Vcc RJ-45 (Modular 8Pin)CONN. D-SUB9(Male)210 Appendices <strong>SER</strong>-<strong>7000</strong> Program <strong>Manual</strong>
Loop Back ConnectionsSerial 1 (DSUB9)1. /DCD2. RxD3. TxD4. /DTR5. GND6. /DSR7. /RTS8. /CTS9. VccIRC (RJ-45)1. TPTX+2. TPTX-3. TPRX+4. NC5. NC6. TPRX-7. NC8. NCSerial 2-4 (RJ-45)1. Vcc2. /DSR3. TxD4. RxD5. NC6. NC7. GND8. /DTR<strong>SER</strong>-<strong>7000</strong> Program <strong>Manual</strong> Appendices 211
System ConfigurationsInter Register CommunicationsEach <strong>SER</strong>-<strong>7000</strong> includes a standard Ethernet communications port. This port is used for allregister-to-register communications. Except for 2-registers configurations, registers arelinked by connecting each register to an Ethernet hub.2-Register ConfigurationTwo registers can be connected without a hub by a special cable. See "Crossover Cable" onthe following page for cable construction.<strong>SER</strong>-<strong>7000</strong>#1<strong>SER</strong>-<strong>7000</strong>#2E-netE-netCrossover cable3 or More Register ConfigurationsFor example, a 3-register installation might look like this:<strong>SER</strong>-<strong>7000</strong>#1<strong>SER</strong>-<strong>7000</strong>#2<strong>SER</strong>-<strong>7000</strong>#3E-netE-netE-netHUB1 2 3 4Contact your SAM4S sales representative to order the appropriate Ethernet hubs. Hubs willbe stocked in 5 port and 8 port configurations.212 Appendices <strong>SER</strong>-<strong>7000</strong> Program <strong>Manual</strong>
Crossover Cable1 RD+2 RC-3 TD+6 TD-RD+ 1RC- 2TD+ 3TD- 6Ethernet SpecificationsMore information to be supplied at a later time.Hub Speed 10 Mbps (10 million bits per second)<strong>SER</strong>-<strong>7000</strong> Program <strong>Manual</strong> Appendices 213
Requisition PrintersRequisitions can be directed from any register to any printer in the system. For example, at afood service counter with 3 registers and three preparation areas, registers and printers mightbe connected in a system as in the diagram below:<strong>SER</strong>-<strong>7000</strong>#1<strong>SER</strong>-<strong>7000</strong>#2<strong>SER</strong>-<strong>7000</strong>#3Serial 1 E-net Serial 1 E-net Serial 1 Serial 2E-netHUB1 2 3 4#1ReceiptPrinter#2DrinkRequisitionPrinter#3Hot FoodRequisitionPrinter#4Cold FoodRequisitionPrinterWithin this system, printing instructions from any of the registers can be directed to theappropriate printer, for example: All registers direct receipts to printer #1. All registers direct drink items to printer #2 All registers direct hot food items to printer #3 All registers direct cold food items to printer #4Notes for the Programmer: Use P-Mode program #1 “PLU”, to assign a PLU to a PLU Status Group. Use P-Mode program #2 “PLU Status Group” options #30 to enable printing onkitchen printer and option #31 to assign status groups to KP#’s. Use P-Mode program #12 “Printer Tables & KV Routing”, selection #3 “KitchenPrinter Routing” assign KP#’s to printers. Use P-Mode program #12 “Printer Tables & KV Routing”, selection #1 “SystemPrinter Configuration” assign printers to specific ports on registers within thesystem.214 Appendices <strong>SER</strong>-<strong>7000</strong> Program <strong>Manual</strong>
Glossary of TermsActivity CountAdd CheckThe activity counter keeps track of the number of times an entry is made on a PLU, orfunction key.The Add Check function is used to add multiple guest checks (tracking balances or softchecks) for payment together. (Use Tray Subtotal to add separate transactions when you arenot tracking balances.)Alpha Keyboard OverlayAudactionAuthority LevelsThe alpha keyboard overlay represents a new set of functions and characters for each key onthe keyboard. When you are programming a field that requires alphanumeric entries, thekeyboard automatically shifts into the alpha keyboard so that you can simply type themessage or descriptor you wish to program. An overlay legend sheet is provided to place onthe keyboard while you are programming.Refers to the total of all sales ending in a negative balance.Each employee must be assigned to one of nine authority levels. Each of the levels is set upto determine the operations that are allowed for each employee.For example, in a restaurant an authority level with the descriptor kitchen help could be setto allow only clocking in/out, or an authority level with the descriptor owner could be set upto allow all functions. Other authority levels could be defined for servers, cashiers andmanagers that allow only the appropriate functions.Auto GrillUse the Auto Grill option to send items individual items to the designated kitchen printer.Items are sent with a one-item delay (at the next item or at subtotal.)<strong>SER</strong>-<strong>7000</strong> Program <strong>Manual</strong> Glossary of Terms 215
Auto ScaleRegistrations of PLUs with auto scale status will automatically multiply by the weight placedupon a scale connected to the register. Use for items such as produce that are always sold byweight.Auto TareWith auto tare status assigned, a preprogrammed tare weight will automatically subtract fromthe weight from the scale.Bitmap FileCanadian Donut LawThe bitmap file is an image, i.e. a logo that can be printed on a receipt or guest check. Thebitmap file is downloaded to the <strong>SER</strong>-<strong>7000</strong> from a PC, and then downloaded to the memoryof the appropriate printer.Refers to special Provincial or State sales tax laws that change the taxable status of an itemdepending upon the quantity sold. Donuts, for example, might be taxable when soldindividually at a bakery. However, if a customer purchases a dozen, the food sale isconsidered non-taxable.CancelPress the CANCEL function to abort a transaction in progress. All current items areremoved (voided).Check CashCheck EndorseCompulsoryCondimentUse the CHECK CASH function to exchange a check for cash outside of a sale.If compulsory check endorsement is set with the CHECK key, use the CHECK ENDORSEfunction to print the endorsement message after a check is inserted into the appropriateprinter.When an operation is programmed compulsory, a function (i.e. Non-add number entry) mustbe performed in order to complete the operation.Condiments PLUs are different from non-condiment PLUs in the manner they display andprint during operations. Non-condiment PLUs are used for "main" items. Condiment items216 Glossary of Terms <strong>SER</strong>-<strong>7000</strong> Program <strong>Manual</strong>
are indented and displayed/printed below a main item so that condiments or cookinginstructions are easily understood for each "main" item.ContinueUse the Continue function to override the pop-up employee function after a transaction.Allows the employee to post an additional transaction without signing on again.Currency ConversionCustom ReportDefault ProgramDestinationDiscount (Item)Discount (Sale)Electronic JournalUse one of the 5 available currency conversion functions to convert and display the value ofthe transaction in foreign currency. Only cash tender is allowed after pressing a CURRCONV key. Change is calculated and issued in home currency.One custom report can be created, with up to 50 totals and counters. The report is built byselecting totals that also appear on either the financial or sales by time period reports. Whenthe custom report is created, totals and counters separate from the original report are alsocreated (in other words, you can clear either the custom independently without affectingtotals in any other report.)Another feature of the custom report is the ability to add or subtract selected totals to create anew subtotal of selected information.The original program installed in the ER-550. The register has a default program, whichmakes it operational after a RAM clear. Nearly all option, rate, and status programs are setto zero as the default condition.Refers to the destination for the sale i.e. eat-in, take out, drive thru.An item discount (coupon or %) subtracts an amount or percentage from the price of an item.This subtraction nets the Department or PLU total.A sale discount (coupon or %) subtracts an amount or percentage from the entire sale.The electronic journal is an area of memory designated to keep a sales journal. Theelectronic journal can be printed, if necessary, to provide a traditional record of all registeractivity.<strong>SER</strong>-<strong>7000</strong> Program <strong>Manual</strong> Glossary of Terms 217
Error ConditionError CorrectFood StampsGallonageAn error condition signals that an incorrect operation has occurred. It is identified by anaudible tone and an error descriptor appearing on the display.An error correct operation voids the last item entered, it must be used within a sale.In the United States, Food Stamps may be used to purchase eligible food items at food storesthat participate in the program. The <strong>SER</strong>-<strong>7000</strong> can assist a retailer in handling food stamptransactions by sorting food stamp and non-food stamp eligible items within each sale andtracking food stamp payments for eligible items.Gallonage is a status that can be assigned to a PLU. Gallonage PLUs accept a price, butprint both the price and the quantity of gallons sold. The quantity of gallons is computedfrom the price per gallon, which is set as the preset price.GroupsHALOGroups are totals that collect information from designated PLUs. For example all PLUdessert items could collect in a group total called "desserts". You can send each PLU to upto three groups. The first group is designated in PLU programming, the second and thirdgroups are designated in PLU Status Group programming.The high amount lock-out (HALO) limits the amount allowed to be entered in a PLU, orfunction key.Ingredient InventoryInitial ClearA menu-explosion type inventory system is set up when PLUs are linked to a recipe number.The X-MODE MANAGER MENU provides functions to receive, transfer in/out, or enterraw waste for ingredients used in the recipe system.The initial clear function allows you to exit any register activity and return to a beginning orcleared state. Any transaction that is in progress will be exited and totals for that transactionwill not be updated.218 Glossary of Terms <strong>SER</strong>-<strong>7000</strong> Program <strong>Manual</strong>
IRCInter Register Communications (IRC) is the term used to describe communications within anetwork of registers. Information exchanged between registers includes check informationfor posting to guest check, information to be printed or displayed at printers or videos, andsales information for consolidated reporting.The <strong>SER</strong>-<strong>7000</strong> uses ETHERNET at 10Mbps for IRC.Job CodesKeyboard LevelJob codes are used to break down the hours worked for all employees into differentcategories (See "Labor Groups" report in the Operation <strong>Manual</strong>.) A breakdown of hours byjob is also reported for each employee (See "Time Keeping" reports in the Operation<strong>Manual</strong>.)Each keyboard level is a separately defined set of keyboard functions for each key on thekeyboard. For example, separate levels might be required for different lunch/dinner menus.Or, within a restaurant different keyboards might be set up for pre-check, bar and/or cashierstations. Each register might contain the functions for each station on a separate level, sothat any register could function at any station by simply changing keyboard levels and keylegend sheets.The <strong>SER</strong>-<strong>7000</strong> has five keyboard levels.Link PLUMacroIf you wish the registration a PLU to automatically cause the registration of another PLU,enter the number of the PLU you wish to register automatically in the LINK PLU field of theappropriate PLU Status Group.Macros record key sequences for later execution. Up to 40 macros may be recorded andexecuted by pressing a function key or by entering the appropriate macro number andpressing a function key.Memo PLUsMemory AllocationUse Memo PLUs to display a descriptor on the screen or print a descriptor at a printer.Memo PLUs do not add to any total in the <strong>SER</strong>-<strong>7000</strong>.Memory allocation is a program that determines how the system memory is divided toprovide the correct features for your application. For example, you may require more or lessemployee memory, PLUs, or reporting. Memory allocation allows you to maximize thefeatures you need while minimizing the features you do not need.<strong>SER</strong>-<strong>7000</strong> Program <strong>Manual</strong> Glossary of Terms 219
ModifierNo SalePreceding a PLU entry, a modifier key changes a digit of the PLU number, causing adifferent PLU to be registered. Modifier keys can be set to change any of the 14 PLU digitpositions to any specified digit (0-9). More than one modifier key can be pressed insuccession to alter the PLU code.No sale is an operation to simply open the cash drawer.NON-PLU CodeThe NON-PLU Code program must be set if you wish to scan UPCs (using the EAN 13code) with embedded prices, weights or quantities.Within the EAN 13 code, the first two digits (part a) are used as an identifier and the lastdigit (part c) is used as a check digit. The remaining 10 digits (part b) contain the productcode and the price (or weight or quantity).OverrideOverride is an operation used to bypass a programmed price or HALO.PasswordPiece CountPLU Status Link #A four-digit password can be set to control access to reports. Different passwords can be setfor X and Z1, Z2 etc. reports.A system password can be set to allow service access to all of the functions of the <strong>SER</strong>-<strong>7000</strong>.For example, use the system password if you are servicing a users system and you do notknow an employee code that allows you to access necessary functions, or if authority levelprogramming prohibits you from accessing functions you need to access in order to completeyour tasks.The piece count is the value assigned to a PLU item that represents the number of unit piecessold when the PLU is registered. For example, the number of pieces of chicken can becounted when a chicken dinner is sold. The number of units set as the piece count will bereflected in product mix reporting.Also referred to as PLU Status Group. The status link # contains the many of theconfigurable options for a PLU.PLUsPrice look-ups (PLUs) are used to register items. PLUs can be fixed keys on the keyboard orthey can be accessed by indexing a code number and pressing the PLU key. PLUs can be220 Glossary of Terms <strong>SER</strong>-<strong>7000</strong> Program <strong>Manual</strong>
Post TenderingPrice Levelprogrammed with a preset or open price. PLUs record their own activity count and dollartotal on any of the PLU reports.The Post Tendering feature allows the operator to use the register to compute change on cashtransactions after the sale has been finalized.To calculate change due after finalizing the sale, enter the cash amount presented by thecustomer and then press CASH. The amount of change due the customer is then displayed,and the cash drawer may open.This is a calculation function only, and no totals or counters are updated by the use of thisfeature.Prices may be assigned at up to five different price levels for each item. One of up to 20price level keys is identified for each different PLU price.Product Mix Groups/Product Mix ReportingProduct Mix Groups can be used to implement a simplified ingredient system for trackingonly essential ingredients associated with items (i.e. cups for beverages or number of piecesfor chicken menus.)Product mix groups also report usage by time period and optional Product Projectionsreporting is also available. The Product Projection report provides a history of each item'ssales by day of week.PromoReceiptRecipe #The PROMO operation allows items to be sold without cost, i.e. buy two, and get one free.PROMO activity will remove the item cost from the sale, but the sales count will include thepromo item.A receipt is a printed tape given to a customer as a record of the sale transaction.A menu-explosion type inventory system is set up when PLUs are assigned to a recipenumber.Register NumberThe register number is a programmable number, which prints on the receipt and journaltapes. It identifies the electronic cash register the sale or report was performed on.<strong>SER</strong>-<strong>7000</strong> Program <strong>Manual</strong> Glossary of Terms 221
Stay-DownStock PLUSuper MacroSurcharge (Item)Surcharge (Sale)Tare WeightTax ExceptWhen a function is programmed as a stay-down function, it is valid until changed. Forexample, a stay-down clerk remains signed on until either signed off, or another clerk issigned on.Stock PLUs track the quantity of the PLU item in stock. Each time the PLU is registered, awhole unit subtracts from the stock counter. (Note that if multiplication or decimalmultiplication is used when the PLU is registered, the resulting quantity of activity willsubtract from the stock counter. Stock is maintained increments to the second decimalposition, i.e. "X.XX".)The super macro records transaction keystrokes, including key position changes. The size ofthe super macro, in keystrokes, is set in memory allocation (see "Memory Allocation" onpage 37.) When the super macro memory is full, the most recent entries will be added andthe oldest discarded. Use the super macro as a troubleshooting tool.An item percent surcharge adds a percentage to the price of an item. This addition nets thePLU total.A sale percent surcharge adds a percentage to the entire sale.A tare is the amount of weight accounted for by the container or packaging. By entering atare weight (as required by law in some areas) the weight of the container is subtracted andonly the true weight of the product is measured on the scale.Tax except is used to exclude the tax from an entire sale.Tax ShiftTenderTax shift keys are used to reverse the tax status of a PLU entry.The method of register operation in which payment is made and the transaction is finalized.222 Glossary of Terms <strong>SER</strong>-<strong>7000</strong> Program <strong>Manual</strong>
Transaction NumberA count appears at the bottom of each receipt and after each transaction on the journal tape.This count increases by one with each transaction, report, or scan.VoidWasteWLUA void operation will erase a previous item entry. It must be used inside of a sale only.The Waste function is used to start and end entries of items that are wasted. A waste count ismaintained for each item and inventory is adjusted.WLU stands for Window Look Up. A WLU pops up and displays a list of items on theoperator screen. Three types of items that can be found on a Window Look-Up (WLU):condiments, functions, and PLUs.Typically, a WLU is used to display a list of instructions or choices associated with an item.A WLU can be linked to a subsequent WLU in order to prompt an operator through asequence of selections. The default capacity of each WLU is 28 items; the maximumcapacity is 50 items.<strong>SER</strong>-<strong>7000</strong> Program <strong>Manual</strong> Glossary of Terms 223
224 Glossary of Terms <strong>SER</strong>-<strong>7000</strong> Program <strong>Manual</strong>
Index##/No Sale 89#/NO SALE 7%%1 - %10 8, 91AADD CHECK 4Add On Taxes 134Alpha Charactersentering 16Alpha Code Chart 18Alpha code entry 102Alpha Overlay 16Authority LevelAlpha Descriptors 162link to 156Authority Levelsprogramming 159auto clear error condition 102auto grill 69auto scale 68auto tare# 68AUTO-grill group # 69BbatchKP/KV 115, 116baud rate 53Buffered receipt 120, 122CCanadian Donut Law 69tax exempt Qty 107Cancel 79CANCEL 5Cash 79CASH 5Cash declaration compulsory 126, 127Cash Drawer Options 109Cashier See Employee:programmingChanging Printer Commands 51Charge key See Misc Tend 1-16Charge tip is deducted from cash 97Check 80CHECK 5check #starting 113Check Cash 81CHECK CASH 5Check Endorse 81CHECK ENDORSE 5Check Endorsement Message 143Check Unlock 58CLEAR/ESC 5Clerk See Employee:programmingcolor to display on KV 68Communications Ports 210compulsory condiment 67Compulsory drawer 109compulsory non-add#by PLU 68compulsory validationPLU 68condiment choicesWLU 148condiment multiplicationWLU 148consolidate like items 101CONTINUE 5Control Lock 11Copy Program 191CURR. CONV. 1-5 5Currency Conversion 1-5 82<strong>SER</strong>-<strong>7000</strong> Program <strong>Manual</strong> Index 225
currency symbol 122CURSOR CONTROL KEYS () 5Custom Report 183cutting after printing 53Ddata bits 53date setting 24DECIMAL 5decimal position 48Default Keyboard 2Default keyboard level 111Default MessagesLoad 58Default price level 111Delete PLUs 65Descriptorsreport 142system 141destinationdefault 101enforce 101, 103Detail Printer Routing 169direct multiplication 101, 104discountallow by PLU 68Display Adjustments 1DONE 5Downloadprogram file 193ROM file 58drawer compulsion 109drive through feature enabled 93, 96Drive Thru 83DRIVE THRU 5EE.J. & Detail Printing Options 131Eat In 83EAT-IN 5electronic journalactivate 131Electronic Journal 131, 132embedded price PLUs 199EmployeeEdit Job Codes 157Edit Pay Rates 158job code 156Pay rate 156programming 155EMPLOYEE 5EMPLOYEE (1-10) 5Enforce destination 101, 103ENTER 6enter time for transaction void 102entry limitglobal 101ERR.CORR 6Error Correct 83Error Messages 140Ethernet Specifications 213FFD STMP SHIFT 6FD STMP SUBTTL 6FD STMP TEND 6feed lines after printing 53feed lines before printing 53food stamp eligible 68Food Stamp Tend 84Function Keyprogramming 75Function Key Relocation 44Ggallonage 67General Function Options 101General Printing Options 120Global entry limit 101Groupprogramming 74Guest # 84GUEST # 6Guest Check Message 144HHASH options 101HOLD 6IINACTIVE 6Ingredientedit 171Ingredient Inventory 170Initial Clear 19InventoryIngredient 170IRC 212# of retries 48Ethernet Specifications 213from register # 48test 27to register # 48226 Index <strong>SER</strong>-<strong>7000</strong> Program <strong>Manual</strong>
JJob Code 156Job Codesedit 157KKey Relocationfunction key 44PLU 41WLU 42KeyboardER-5240 3Keyboard Key Relocation 40keyboard level 111default 111KEYBOARD LEVEL 1-5 6Keyboard Levelstime activated 174keys, register 11Kitchen Printer Routing 167Kitchen Printing/Video Options 115Kitchen Video Routing 166KP Routing (function key) 85KP ROUTING (function key) 6KP Time Period 179KV Routing 163LLevel/Modifier Options 111link plu 68LIST CHECK 1-4 6Load Default Messages 58Logo Message 139logo size 53Loop Back Connections 211MMacrosuper macro 57time activated 176MACRO # 6MACRO 1 - 40 6Macro 1-40 86MACRO PAUSE 6MACRO SET (function key) 6Manager control 101, 103Mdse Return 86MDSE RETURN 6Memory All Clear 31Memory Allocation 34Memory Clearing, selective 33MessageCheck Endorsement 143Guest Check 144logo 139validation 145Messages 138error 140Minimum Stock 190MISC TEND # 7Misc Tend 1-16 87MISC TEND 1-16 7MODIFIER 1-10 7modifier keys 111Modifier/Size 88Nnegative inventory 68NEXT RECORD 7non addPLU 67non-add# compulsoryby PLU 68NON-PLU Code 199OOpen drawer alarm 109overtime 129factor 129PP/Bal 89P/BAL 7PAGE DOWN 7PAGE UP 7Page Up and Page Down 13Paid Out 1-5 90PAID OUT 1-5 7PAID RECALL 7parity 53PARK ORDER 8password 48training mode 110PasswordSystem 56Pay rate 156Pay Ratesedit 158Pin Descriptions 210PLUallow discount 68allow surcharge 68auto grill 69<strong>SER</strong>-<strong>7000</strong> Program <strong>Manual</strong> Index 227
auto scale 68auto tare# 68compulsory condiment 67compulsory non-add # 68compulsory validation 68condiment 67copy by range 102delete 65Delete by Range 66do not display 68Eligible for Canadian Donut Law 69embedded price 199food stamp eligible 68Function key 8gallonage 67group link #2 67group link #3 67Key Assignment 201link plu 68memo 68Minimum Stock 190modifier keys 111negative 67negative inventory 68non add 67print on guest checks 68print on journal 68print on kp 68print on KV 68print on receipt 68print price on guest checks 68print price on receipt/detail 68print red on kitchen printers 68print red on receipt 68product mix 68<strong>Programming</strong> 61promo 68scaleable 68single item 67Status Group 67Stock 188stock PLU 68taxable 67waste 68PLU Key Relocation 41Pop-up Selection Windows 15post tendering 102preamble/postambleguest check 120, 122PREV. RECORD 8price embedded PLU 199Price Inq 92PRICE INQ 8price level 111default 111Price Levelstime activated 175PRICE LVL 1-20 8Print (function key) 92PRINT (function key) 8Print Check (function key) 92PRINT CHECK (function key) 8PRINT HOLD 8print red on kitchen printers 68print red on receipt 68PRINT SCREEN 8Printer Commandschanging 51Printer Driver Selections 50Printer Routing 165Printer Tables 163Priority printing 115, 116product mixPLU 68Product Mix Group Time Periods 182Product Mix Groups 180Product Mix Items 181Program File Download 193Program ScanP-Mode 197S-Mode 55promoallow by PLU 68Promo 93PROMO 8QQUIT (function key) 8Rreal timeKP/KV 115, 116RECALL CHECK # 1-4 9Recall Check 1-4 93Recd Acct 1-5 90RECD ACCT 1-5 9RECEIPT 9RECEIPT ON/OFF 8Receipt Printer Routing 169Recipe Table 172reg#holds backup check track data 48holds check tracking data 48holds KP Global order# 48register # 48REPEAT 9Report Descriptors 142Report Options 126228 Index <strong>SER</strong>-<strong>7000</strong> Program <strong>Manual</strong>
Report Printing Options 124Reportsedit existing 186string 187Requisition Printers 214retrys 53ROM File Download 58roundingtax 107Rounding 101RoutingDetail Printer 169Kitchen Printer 167Kitchen Video 166receipt printer 169RTC Setting 24SSCALE 9Scale (function key) 95scaleable 68Screen Saver 106scroll indicators 13seat #set default to 1 102SEAT # 9seat#enforce 93Self Tests 23Serial Port Device Selections 52Serial Port Parametersdefining 53<strong>SER</strong>VE ORDER 9Server See Employee:programmingShiftstime activated 178single item 67Size/Modifier 88S-ModeProgram Scan 55SPLIT PAY 9starting check # 113Stock Inq 92STOCK INQ 9stock plu 68stop bits 53Store # 48Store Check 1-4 96STORE CHECK 1-4 9String Reports 187time activated 177SUBTOTAL 9Super Macro 57surchargeallow by PLU 68System Descriptors 141System OptionsCash Drawer Options 109E.J. & Detail Printing Options 131General Function Options 101General Printing Options 120Kitchen Printing/Video Options 115Level/Modifier Options 111P-Mode 100Report Options 126Report Printing Options 124S Mode 48Tax Options 107Time Keeping Options 129Tracking File Options 113Training Mode Options 110Validation/Subtotal Print Options 118System Password 56System Printer Routing 165TTABLE # (1-4) 9Table entry required 93Take Out 83TAKE-OUT 10tare weight programming 95Tax Exempt 97TAX EXEMPT 10Tax Options 107Tax rounding 107TAX SHIFT 1-6 10Tax Table 135Taxesadd on 134programming 133VAT 137TestDisplay 25Drawer 24IRC 27Keyboard 25Mode & Clerk Key 26Printer 28RAM 26RAM Checksum 28Serial & IRC Loopback 23Version Check 29, 30Time Activated Functionsprogramming 173Time In/Out 97TIME IN/OUT 10Time Keeping Options 129Time Period<strong>SER</strong>-<strong>7000</strong> Program <strong>Manual</strong> Index 229
programming 154time setting 24TIP (1-3) 10Tip 1-3 97Tip Declare 98TIP DECLARE 10Tracking File Options 113Training Mode Options 110transfer checkautomatic 113transfer totals 113TRANSFER CHECK (1-4) 10TRAY SUBTL 10Tray Subtotal 98ZZero skip 124VVALID 10validation message 118Validation Message 145Validation/Subtotal Print Options 118VAT 137VAT subtracted fm indiv PLU ttls 107Version Check 29, 30Void Item 99VOID ITEM 10Wwasteallow by PLU 68WASTE 10Waste (function key) 99Window Look Up (WLU) 146WLUAdd an Item In a Specific Position 151Adding Functions 152Adding PLUs or Condiments 150condiment choices 148condiment multiplication 148Deleting Items 151editing items 149Function key 10Key Assignment 201programming 146WLU Key Relocation 42XX/Time 99X/TIME 10YY/N (function key) 10230 Index <strong>SER</strong>-<strong>7000</strong> Program <strong>Manual</strong>