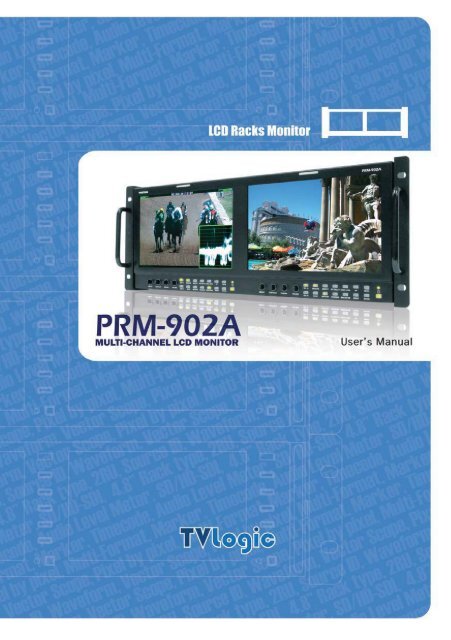
PRM-902A Manual - TVLogic
PRM-902A Manual - TVLogic
PRM-902A Manual - TVLogic
Create successful ePaper yourself
Turn your PDF publications into a flip-book with our unique Google optimized e-Paper software.
4 Critical Planning Summer 2011
Contents<strong>PRM</strong>-<strong>902A</strong>Warnings .......................................................................................................... 3Features ............................................................................................................ 4Name & Function of Each Part ......................................................................... 5OSD Menu Organization & Adjustment ........................................................... 8Other Functions .............................................................................................. 15System Default Value...................................................................................... 24Product Specification ..................................................................................... 26Contents2
<strong>PRM</strong>-<strong>902A</strong> MULTI-CHANNEL LCD MONITORWarning· Always use set voltage.- DC 12V· If liquid is spilled on or impacts this product, please disconnect the product immediatelyand seek professional help before continued use.· Keep unit disconnected during extended periods of disuse.· Keep unit in a well-ventilated place to prevent overheating.· Do not install the product near any heat-generating equipment.Also, keep the product out of direct sunlight or dusty areas.· Only clean the product with a noncommercial, mild and neutral detergent.· When transporting the product, make use of its original packaging for safer carriage.WarningFCC (Federal Communications Commission)This equipment has been tested and found to comply with the limits for class A digital device, pursuant topart 15 of the FCC Rules. These limits are designed to provide reasonable protection against harmfulinterface when the equipment is operated in a commercial environment.This equipment generates, uses, and can radiate radio frequency energy, and if not installed and used inaccordance with the instruction manual, may cause harmful interference to radio communications.Operation of this equipment in a residential to correct the interference at his own expense! Warning!! : Change or modifications not expressly approved by the manufacturer responsible forcompliance void the user’s authority to operate the equipment.Disposal of Old Electrical & Electronic Equipment(Applicable in the European Union and other European countrieswith separate collection systems)This symbol on the product or on its packing indicates that this product shall not be treated as householdwaste. Instead it shall be handed over to the applicable collection point for the recycling of electrical andelectronic equipment. By ensuring this product is disposed of correctly, you will help prevent potentialnegative consequence for the environment and human health, which could otherwise be caused byinappropriate waste handling of this product. The recycling of materials will help to conserve naturalresources.3
FeaturesMulti-Format <strong>PRM</strong>-<strong>902A</strong> Series unit has the following features:· Compatible with varied SDI SignalsThe product is compatible with varied SDI signal- 480i, 576i, 720p, 1035i, 1080i, 1080p, 1080psf, 2K· Compatible with varied Analog SignalsThe product is compatible with varied Composite, S-Video signal- NTSC, PAL, SECAMThe product is compatible with varied Component, RGB signal- 480i,576i,480p,576p,720p,1080i,1080p· Waveform/Vector Scope/Audio Level MeterWaveform & Vector Scope available for SDI SignalsEmbedded Audio Level Meter· Audio OutBuilt in Audio Disembedder and Internal SpeakersStereo Audio out using phone jack· Knob ControlEasy to adjust user configuration using the control knob· BLUE & MONO· H/V Delay· Wide Variety of Markers & Safety AreasCenter Marker, Safety Area Marker, Aspect Marker, Display Size(Scan)· Pixel To PixelProvides both full screen and unscaled native image.· Wide Screen/CCFL Backlight· 24Bit RGB LVDS Interface Panel· DC CompatibleThe product is powered by normal 12V source.· Remote control functionSimple remote controllability with single cable connection,no additional modules required· Additional FeaturesActive Loop Through/SDI, 600:1 contrast ratio, 600 cd/m2 brightness,OSD user interface, Rack MountableFeatures4
<strong>PRM</strong>-<strong>902A</strong> MULTI-CHANNEL LCD MONITORName & Function of Each PartName & Function of Each Part· [BRIGHT] knobUsed to adjust the degree of brightness between MAX(25) and MIN(-25).· [CONTRAST] knobUsed to adjust the contrast ration between MAX(25) and MIN(-25).· [CHROMA] knobUsed to adjust the saturation between MAX(25) and MIN(-25).· [VOLUME] knobUsed to adjust the volume between MAX(20) and MIN(0).· [SDI-A] button/lampUsed to select SDI A Input.· [SDI-B] button/lampUsed to select SDI B Input.· [ANALOG] button/lampUsed to select desired Analog Input (CVBS1/2/3, S-Video, Component, RGB).· [SCAN] button/lampUsed to transfer from OVER SCAN mode to ZERO SCAN mode.Mode changes in the order of ZEROSCAN -> OVERSCAN -> PIXEL TO PIXEL-> ZEROSCAN.#This function is not available in Internal Pattern and Wave Form/Vector Scope full size.5
· [ASPECT] button/lampUsed to toggle aspect ratio in SD from standard to anamorphic.- This function is not available in Internal Pattern and Wave Form/Vector Scope full size.· [MARKER] button/lampUsed to show MARKER on the screen. The type of marker at work may be selectedon the main menu.- This function is not available in Internal Pattern, Wave Form/Vector Scope full size,Pixel to Pixel and HV Delay mode.· [HVDELAY] button/lampUsed to activate the HV Delay mode.- This function is not available in Internal Pattern and Wave Form/Vector Scope full size.· [BLUE/MONO] button/lampYou may remove R(red) and G(green) from the input signal and play the screen only withB(blue) signal. Button may be pressed twice to change the screen to MONO mode.(This mode uses only Luminance value)- This function is not available in Internal Pattern and Wave Form/Vector Scope full size.· [AUDIO LEVEL] button/lampUsed to active AUDIO LEVEL METER on the screen. The type of audio level meterat work may be selected on the main menu.- This is available only SDI input.· [WAVE/VECTOR] button/lampUsed to activate the Waveform or Vector Scope. Pressing the button once will activatethe Waveform, pressing the button twice activates the Vector Scope.The type of waveform/vectorscope work may be selected on the main menu.- This is available only SDI input.· [UP] buttonUsed to navigate menu during OSD menu activation. It may also be used to toggleclockwise through 1:1 quadrants in native scan mode.· [DOWN] buttonUsed to navigate menu during OSD menu activation. It may also be used to togglecounterclockwise through 1:1 quadrants in native scan mode.· [MENU] buttonUsed to activate the OSD menu.Name & Function of Each Part· [ENTER] buttonUsed to confirm a chosen value (or mode) within the OSD menu.- This can be used to control the position of Wave/Vector in small size.· [POWER] buttonPower On/Off button.If the signal is normal, LED lights in Green. If the signal is unsupported or disconnected,LED flashes in Yellow.· TALLYLED indicating monitor’s current status using optional Remote.2
<strong>PRM</strong>-<strong>902A</strong> MULTI-CHANNEL LCD MONITOR Name & Function of Each Part· SDI A-IN (BNC)SDI A signal input terminal· SDI B-IN (BNC)SDI B signal input terminal· SDI-OUT (BNC)SDI signal output terminal· CVBS1/B/Pb (BNC)Signal input terminal used for COMPOSITE1, RGB B, COMPONENT Pb signals.· CVBS2/G/Y/S-Y (BNC)Signal input terminal used for COMPOSITE2, RGB G, COMPONENT Y, SVIDEO Y signals. · CVBS3/R/Pr/S-C (BNC)Signal input terminal used for COMPOSITE3, RGB R, COMPONENT Pr, SVIDEO C signals.· AUDIO OUT (phone jack)Used to audio output jack.· FACTORY PGM (15 pins)Input connector for FACTORY PGM allowing for firmware updates.· REMOTE (RJ-45)Connection for remote control of monitor.· DC IN (XLR, 4 pins)Used to supply DC power; 12V7
OSD Menu Organization & Adjustment[1] MAIN - Picture· BrightnessThis Item controls the degree of brightness.#Brightness can be adjusted by using the [BRIGHT] control knob on the front of the monitor.· ContrastThis item controls the contrast ratio.#Contrast can be adjusted by using the [CONTRAST] control knob on the front of the monitor.· ChromaThis item controls saturation.#Saturation can be adjusted by using the [CHROMA] control knob on the front of the monitor.· ApertureThis item controls the picture sharpness.OSD Menu Organization & Adjustment· PhaseThis item controls Phase value (Hue).#This function is only available in Composite and S-Video NTSC Input.· NTSC SetupThis item sets IRE value in NTSC mode between 0 IRE and 7.5 IRE.#This function is only available in NTSC Input.8
OSD Menu Organization & Adjustment<strong>PRM</strong>-<strong>902A</strong> MULTI-CHANNEL LCD MONITOR<strong>PRM</strong>-<strong>902A</strong> MULTI-CHANNEL LCD MONITOR[2] MAIN - Color· Color TempThis item controls Color Temperature with presets of 3200K, 5600K, 6500K, 9300K, and User1,User2, User3 mode.· UserOn User Mode, the user may select and control R, G, & B GAIN, BIAS values by usingthe [UP]/[DOWN]/[ENTER] buttons.· Color CopyIn User mode, user can copy the preset of 3200K, 5600K, 6500K or 9300K to makethe custom adjustment by using the [UP]/[DOWN]/[ENTER] button.[3] MAIN - Marker· Line MarkerThis selects the marker type when the MARKER is displayed on the screen.Compatible MARKER types are as follows: 8
OSD Menu Organization & Adjustment· Center MarkerThis item displays the CENTER MARKER on the screen.· Safety AreaThis item controls the size of the SAFETY AREA between 80%, 85%, 88%, 90%, 93%,and 100%.· Marker MatThis item darkens the area outside of MARKER setting area. The degree of the matteis between OFF(0) and (7).The higher the number the darker MARKER the matte becomes.· Marker ColorThis item controls Marker color. Selectable colors are white, gray, black, red, green,and blue.#Line Marker, Center Marker and Safety Area functions are operates onlyafter activated by pressing the MARKER button on the front of the monitor[4] MAIN - Remote · Pin1 ~ Pin6The user may connect RJ-45 jack to the remote terminal on the rear of the unit and designatea function for each pin.The selectable functions are as follows:10
<strong>PRM</strong>-<strong>902A</strong> MULTI-CHANNEL LCD MONITOROSD Menu Organization & AdjustmentANALOG CHANNELDIGITAL A CHANNELDIGITAL B CHANNELTALLY REDTALLY GREENBLUE ONLYUNDERSCANASPECTHVDELAY16:9 MARKER, 15:9 MARKER, 14:9 MARKER,13:9 MARKER, 4:3 MARKER, 4:3 ON AIR MARKER,1.85:1 MARKER, 2.35:1 MARKER, 1.85:1 & 4:3 MARKERCENTER MARKERSAFETY AREA 80%, SAFETY AREA 85%, SAFETY AREA 88%,SAFETY AREA 90%, SAFETY AREA 93%, SAFETY AREA 100%· Pin7PIN7 is for POWER ON/OFF use only.[5] MAIN - System [page1]· System DefaultUser can use the System Default menu to initialize the values of the monitor.· WaveForm SizeThis item controls the size of Waveform or Vector Scope11
OSD Menu Organization & Adjustment· WaveForm PositionThis item controls the position of Waveform or Vector Scope between Right, Center and Left.#In normal display, press Enter button to activate this feature in activated WaveForm .#This feature can be activated in small size mode only.· WaveForm BlendingThis item activates the blending of Waveform or Vector Scope.#This feather activates automatically if WaveForm overlaps with OSD.#This feather can be activated in small size mode only.· Audio Level MeterThis item set embedded audio group selects Off, G1+G2, G2+G3, G3+G4, G1+G3, G1+G4,G2+G4 to activate Audio Level Meter.· Audio ChannelThis item set embedded audio channel selects CH1 ~ CH16, Off..#WaveForm Size, WaveForm Position and WaveForm Blending functions are operatesonly after activated by pressing the WAVE/VECTOR button on the front of the monitor.#Menus or feathers which are related with WaveForm and Audio enables in SDI inputmode only.[6] MAIN - System [page2]· Source IDThis item is used to activate the source ID display by selecting BG Type or Char Type.12
<strong>PRM</strong>-<strong>902A</strong> MULTI-CHANNEL LCD MONITOR· Source ID CharacterThis item is used to customize the Source ID display. (A~Z, a~z, 0~9 and special characters)· Source ID PositionThis item controls the position of Source ID display. (Top-Left, Top-Center, Top-Right, Bottom-Right, Bottom-Center, Botttom-Left)OSD Menu Organization & Adjustment· Source ID ColorThis item is used to change the color of source ID display by selecting black, white, red,green, blue or yellow.· Time CodeThis item activates the Time Code. Select between VITC or LTC.· Internal PatternThis item used to activa the Internal Pattern of 100% White or 100% Color Bar.[7] MAIN - System [page3]· Back LightThis item controls the LED backlight setting. The value should be within rangebetween MIN(0) and MAX(15).· Firmware VersionThis item is the firmware version of the system.· License12
[8] · · [9] [10] · · · · OSD Menu Organization & Adjustment14
Other Functions[1] PIXEL TO PIXEL· <strong>PRM</strong>-483A monitor’s Pixel to Pixel mode displays input signal without scaling.· To activate the [Pixel to Pixel] mode, access the Scan menu in Syetem menu and select[Pixel to Pixel].· In the [Pixel To Pixel] mode, use the [UP]/[DOWN] buttons to toggle between 1:1 scansectionsOther FunctionsInput Action Button Available ModesHD 1080i/1080p[UP](Clockwise)[DOWN](Opposite)Center -> Left Top ->Mid Top -> Right Top -> Right Mid -> RightBottom -> Mid Bottom -> Left Bottom -> Left Mid -> Center -> ….Center -> Left Mid -> Left Bottom -> Mid Bottom -> Right Bottom-> Right Mid -> Right Top -> Mid Top -> Left Top -> Center -> …- OSD change[UP][UP][DOWN][DOWN][UP][DOWN][UP][DOWN][UP][DOWN][UP][DOWN][UP][DOWN][UP][UP][DOWN][DOWN]15
Input Action Button Available ModesHD 720p[UP](Clockwise)[DOWN](Opposite)Center -> Left Top -> Right Top -> Right Bottom -> left Bottom ->Center -> …Center -> Left Bottom -> Right Bottom -> Right Top -> Left Top-> Center -> ….- OSD change[UP][UP][UP][DOWN][DOWN][UP][DOWN][DOWN][UP][DOWN]Other Functions#Pixel To Pixel mode is available in SD mode, but 1:1 sections cannot be rotated throughas with HD sources.16
<strong>PRM</strong>-<strong>902A</strong> MULTI-CHANNEL LCD MONITOR· Positions in HD Signal 1080i/1080p modeCenter[UP]Left Top[UP]MidTop[DOWN][DOWN][UP][DOWN]RightTop[UP][DOWN]RightMid[UP][DOWN]RightBottomOther Functions[UP][DOWN]MidBottom· Position in HD Signal 720p mode[UP][DOWN]LeftBottom[UP][DOWN]LeftMidCenter[UP]Left Top[UP]Right Top[DOWN][DOWN][UP][UP][DOWN]Right Bottom[DOWN]Left Bottom17
[2] WaveForm· WaveFormOFF WaveForm· WaveForm SizeSmallFullOther Functions#If push the Input button (SDI-A ,SDI-B, Analog), WaveForm full mode is change tosmall mode automatically.· WaveForm PositionLeft Center Right18
Other Functions<strong>PRM</strong>-<strong>902A</strong> MULTI-CHANNEL LCD MONITOR· WaveForm BlendingOFFON· Exception: If overlaps with OSD, blending activates automatically.Main OSDInfo WindowPixel To PixelSource ID#This function is only available with SDI Input.19
[3] VectorScope· WaveFormVector Scope OFFVector Scope ON· VectorScope SizeSmallFullOther FunctionsWaveForm Position / Blending: Refer to the WaveForm position/blending above.#This function is only available with SDI Input.20
Other Functions<strong>PRM</strong>-<strong>902A</strong> MULTI-CHANNEL LCD MONITOR<strong>PRM</strong>-<strong>902A</strong> MULTI-CHANNEL LCD MONITOR[4] Audio Level Meter· Audio Level MeterOFFON· Avoid OverlapIn full size WaveForm mode, WaveForm shifts down to avoid the overlap with Audio Level Meter.Audio Level Meter OFFAudio Level Meter ON· Group & ChannelGroup / ChannelGroup 1CH1 CH2CH3 CH4CH1 CH2CH3 CH4Group 2#This function is only available with SDI Input.21
[5] Time Code· Time CodeTime Code + Audio Level MeterTime Code + Source IDOther FunctionsTime Code + WaveForm Full SizeTime Code + SourceID + WaveForm + Audio Level Meter#This function is only available with SDI Input.22
<strong>PRM</strong>-<strong>902A</strong> MULTI-CHANNEL LCD MONITOR[6] Source ID· Source IDBG TypeChar TypeOther Functions· Source ID PositionLeft Top Mid Top Right TopLeft Bottom Mid Bottom Right Bottom· Source ID ColorBlack White Red Green Blue Yellow23
System Default ValuePictureColorMarkerRemoteSystem [Page1]System [Page2]System [Page3]System [Button]MEMUBrightnessContrastChromaAperturePhaseNTSC SetupColor TempGain Red (1/2/3)Gain Green (1/2/3)Gain Blue (1/2/3)Bias Red (1/2/3)Bias Green (1/2/3)Bias Blue (1/2/3)Color CopyLine MarkerCenter MarkerSafety AreaMaker MatMarker ColorPIN 1PIN 2PIN 3PIN 4PIN 5PIN 6System DefaultWaveForm SizeWaveForm PositionWaveForm BlendingAudio Level MeterAudio ChannelSource IDSource ID CharacterSource ID PositionSource ID ColorTime CodeInternal PatternBack LightScanAspect RatioMarkerHV DelayBlue & MonoAudio Level MeterWaveForm/VectorValue000007.5 IRE6500K0000006500KOffOffOffOffWhiteAnalog ChannelDigital A ChannelDigital B ChannelTally RTally GBlue OnlyNoSmallRight BotOffG1+G2OffOffC A M – 1Left TopBlackOffOff0Zero Scan4:3OffOffOffOffOffSystem Default Value24
<strong>PRM</strong>-<strong>902A</strong> MULTI-CHANNEL LCD MONITOR<strong>PRM</strong>-<strong>902A</strong> MULTI-CHANNEL LCD MONITORProduct SpecificationInput (1 Screen)3 x BNC1 x BNCAnalog InputSDI 2 Channel InputOutput (1 Screen)1 x BNCSDI Output (Active Through Out)Composite1.0Vpp (With Sync)S-Video1.0Vpp (Y With Sync), 0.286Vpp(C)Input SignalComponentRGB1.0Vpp (Y With Sync), 0.7Vpp (Pb,Pr)1.0Vpp (G With Sync), 0.7Vpp (B,R)HD-SDI1.458GbpsSD-SDI270MbpsComposite / S-VideoNTSC (525/59.94i) , PAL (625/50i)Product SpecificationAnalog InputSignal FormatsSDI Input SignalFormatsAudio OutLCDComponent/ RGB (SOG)SMPTE-274MSMPTE-296MSMPTE-260MSMPTE-125MITU-R.BT.6562K FormatSizeResolutionPixel PitchColorViewing AngleLuminance of whiteContrastDisplay Area480i(59.94) , 576i(50) , 480P(59.94) , 576P(50)1080i(60/59.94/50)1080P(30/29.97/25/24/24sF/23.98/23.98sF)720P(50/59.94/60)1080i (60/59.94/50)1080p (30/29.97/25/24/24sF/23.98/23.98sF)720p (23.98/24/25/29.97/30/50/59.94/60)1035i (60/59.94)480i (59.94)576i (50)2048 X 1080 (23.98psf/24psf/23.98psf/24p)Analog Stereo (Phone Jack)Internal Speaker 2 X 1W (Stereo)9 inch800 x 480 (15:9)0.246 (H) X 0.246 (V) mm16.7M(true), 24bitH : 160 degreesV : 140 degrees600 cd/ (Center)600:1196.8 x 118.08 mm25
Product SpecificationProduct SpecificationPowerPower Consumption (Approx.)Operating TemperatureStorage TemperatureMain Body Dimensions (mm/inch)Main Body Dimensions (With Rack Bracket)WeightAccessory#Above specifications may be changed without notice12V DC36 Watts(DC)0 to 40 (32 to 104 )-30 to 50 (-22 to 122 )DC Power Adapter26


