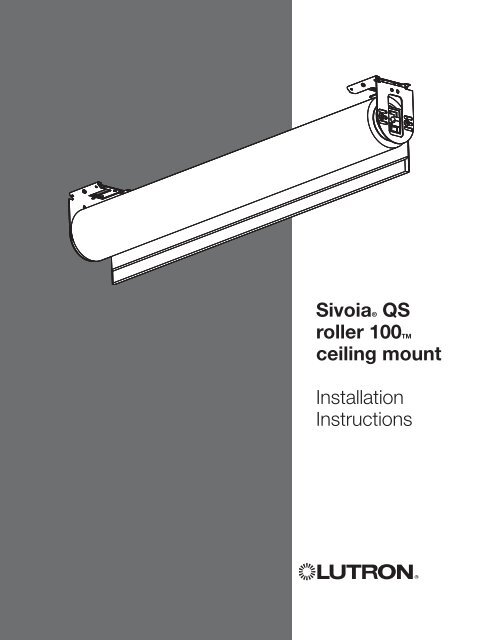
Sivoia® QS roller 100TM ceiling mount Installation Instructions - Lutron
Sivoia® QS roller 100TM ceiling mount Installation Instructions - Lutron
Sivoia® QS roller 100TM ceiling mount Installation Instructions - Lutron

You also want an ePaper? Increase the reach of your titles
YUMPU automatically turns print PDFs into web optimized ePapers that Google loves.
Sivoia® <strong>QS</strong><strong>roller</strong> <strong>100TM</strong><strong>ceiling</strong> <strong>mount</strong><strong>Installation</strong><strong>Instructions</strong>
Sivoia® <strong>QS</strong> | <strong>roller</strong> <strong>100TM</strong> <strong>ceiling</strong> <strong>mount</strong><strong>Installation</strong> instructionsTools required:Tape MeasureWire Cutter/StripperPliers#2 Phillips Screwdriver1/4 in. Hex-Head DriverLevelPower DrillBox contents:(1) Sivoia <strong>QS</strong> <strong>roller</strong> 100 (2) Ceiilng sub-bracketsLeft and right side shade brackets (attached)(1) 4-pin terminal block(2) Extra retaining screws(#6x1/4 in (#6 x 6 mm) Phillips head screws)(Actual size)(8) Mounting screws(#8x1-3/4 in (#8 x 44 mm) Hex head screws)(Actual size)(2) 4 in (102 mm) cable ties(2) 7 in (178mm) cable tiesPage Sivoia® <strong>QS</strong> <strong>roller</strong> <strong>100TM</strong> Ceiling Mount <strong>Installation</strong> instructions
1Confirm system dimensions1.1Compare system dimensions onthe package label with the windowdimensions to verify appropriatewindow/shade combination.This information can also be foundon the shade tube by lowering thefabric down far enough to exposethe tube.Package LabelSystem WidthSystem HeightSystem widthSystem heightPage Sivoia® <strong>QS</strong> <strong>roller</strong> <strong>100TM</strong> Ceiling Mount <strong>Installation</strong> instructions
2Pre-drill for cable2.1 Determine where to drill for cable access. See options below. Cable should exitfrom wall, <strong>ceiling</strong> or jamb on EDU side of system.Note: Leave 12 to 18 in (305 to 457 mm) of cable exposed.CeilingDrill for cable 0.5 in (13 mm) fromend of system and 0.5 in (13 mm)from <strong>mount</strong>ing wall.WallDrill for cable 1.25 to 2 in (32 to 51 mm)from end of system and 2 to 2.5 in(51 to 64 mm) from top of system.JambDrill for cable 0.5 in (13 mm) fromend of system and 0.5 in (13 mm)from <strong>mount</strong>ing wall.Page Sivoia® <strong>QS</strong> <strong>roller</strong> <strong>100TM</strong> Ceiling Mount <strong>Installation</strong> instructions
4Wire 4-pin terminal block4.1Strip 2 in (51 mm) of the jacket off the cable run from the <strong>ceiling</strong>.2 in(51 mm)4.2 Wire the 4-pin terminal block (provided) to the cable using a screwdriver.Make sure to tighten the screws tightly and that no insulation is inside of the terminal block.Notes:• The EDU connector will support wire sizes from AWG #12 (2.5 mm) toAWG #26 (0.2 mm). See the instruction sheet for your power supplyto choose an appropriate wire size for your application.• Strip insulation from wires so that 0.25 in (6 mm) of bare wire is exposed.MUX (Pin 4)MUX (Pin 3)24 V (Pin 2)Common (Pin 1)}To EDUConnectorPage Sivoia® <strong>QS</strong> <strong>roller</strong> <strong>100TM</strong> Ceiling Mount <strong>Installation</strong> instructions
5Mount the shade to sub-bracketsNOTICE: Shades wider than 4 ft(1.2 m) require two people to install.5.1Remove retainingscrews from shadebrackets.Note: Leave protectivewrapping on shadeduring installation.5.2 Slide back of shade bracketinto slot of sub-bracket.5.3 Slide shade back whileswinging front of shadebracket up to hook onsub-bracket.5.4 Confirm shade bracketis fully engaged ontosub-bracket.5.5 Route cable wires fromwall, <strong>ceiling</strong> or jambbetween the shade bracketand the subbracket beingcareful not to pinch wire.Page Sivoia® <strong>QS</strong> <strong>roller</strong> <strong>100TM</strong> Ceiling Mount <strong>Installation</strong> instructions
6Center and secure shade6.1Move the shade leftor right until centered.CAUTION: Risk of bodilyinjuryShade is not fully securedto the wall during theadjustment procedure.Shade must be supportedby installer duringadjustment procedure.Extreme movementfrom side-to-side maycause shade to fall.Attention should bepaid to the shadebrackets’ engagementinto the sub-bracket asside-to-side movementis not restricted at thispoint. Shades widerthan 4 ft (1.2 m) requiretwo people to centerthe shade.6.2Insert and tightenretaining screws onBOTH shade bracketsto secure the shadeinto position. Screwsshould be tighteneddown all the way.CAUTION: Risk ofbodily injury from fallingheavy object.After installing retainingscrews, gently push upand pull down on the<strong>roller</strong> shade to ensure asecure installation.Page Sivoia® <strong>QS</strong> <strong>roller</strong> <strong>100TM</strong> Ceiling Mount <strong>Installation</strong> instructions
7 Adjust shade level7.1 Turn leveling screwto raise or lower idlerside of shade until level.7.2 Adjust shade projectionfrom window so that itclears any window trim orhardware when operating.7.3 Confirm <strong>roller</strong> tube turnsfreely without rubbing onanything.Page Sivoia® <strong>QS</strong> <strong>roller</strong> <strong>100TM</strong> Ceiling Mount <strong>Installation</strong> instructions
8Connect terminal blocks8.1Plug 4-pin terminal block oncable into EDU terminal block(a cable tie can be used tosecure the terminal blockstogether).8.2Dress wires to ensure fabricdoes not rub while the shadeis moving.8.3Secure terminal blockswith 7 in (178 mm) cable tie.8.4Use 4 in (102 mm) cable tie todress wires to prevent themfrom rubbing against shadefabric.Page 10Sivoia® <strong>QS</strong> <strong>roller</strong> <strong>100TM</strong> Ceiling Mount <strong>Installation</strong> instructions
9Secure and check the shade9.1Use the programming stylus to run the shade up and down using the adjustmentbuttons ( ), re-level if needed.NOTICE: Pay careful attention to the shade roll up to ensure that it does nottelescope extremely to one side or the other.Tip: Slight telescoping is normal. However, if the shade is telescoping severely to oneside and it is level, press the “close limit” button ( ), and lower the shade all the waydown using the adjustment buttons ( ). Place a piece of tape on the side of the tubethat the fabric is telescoping away from. When finished press the “close limit” button ( )once. This technique is referred to as “shimming”. The shade will always track towardsthe side that the tape (shim) is placed on.direction of fabric telescopingtape(shim)Shim Shim will will correct correct telescoping byby moving fabric this wayPage 11Sivoia® <strong>QS</strong> <strong>roller</strong> <strong>100TM</strong> Ceiling Mount <strong>Installation</strong> instructions
10 Setting limits from the EDUSetting the open limit from the EDUThe open and close limits define the top and bottom of the shade, and are used to determinewhich direction the shade must turn in order to raise or lower. Refer to the keypad instructionsheet to set the limits remotely.10.1Tap the “open limit’ button( ). The green LED on the<strong>roller</strong> 100 EDU will turn on steady,indicating that the EDU is in“Set open limit mode.”Green LEDTap theopen limit button10.2Adjust the position of the EDU tothe desired open limit using theclockwise and counterclockwisebuttons ( ).Use thecounterclockwiseand clockwisebuttons to movethe EDU10.3Press and hold the “open limit’button ( ) for 5 seconds. Thegreen LED on the <strong>roller</strong> 100 EDUwill flash for 2 seconds, then godark, indicating that the currentposition has been stored as theopen limit.Flashing green LEDPress and hold theopen limit buttonfor 5 secondsPage 12Sivoia® <strong>QS</strong> <strong>roller</strong> <strong>100TM</strong> Ceiling Mount <strong>Installation</strong> instructions
10Setting limits from the EDU (continued)Setting the close limit from the EDU10.4Tap the “close limit’ button ( ).The green LED on the <strong>roller</strong> 100EDU will turn on steady,indicating that the EDU isin “set close limit mode”.Green LEDTap theclose limit button10.5Adjust the position of the EDU tothe desired close limit using theclockwise and counterclockwisebuttons ( ).Use thecounterclockwiseand clockwisebuttons to movethe EDU10.6Press and hold the “close limit’button ( ) for 5 seconds. Thegreen LED on the <strong>roller</strong> 100 EDUwill flash for 2 seconds, then godark, indicating that the currentposition has been stored as theclose limit.Flashing green LEDPress and hold theclose limit buttonfor 5 secondsPage 13Sivoia® <strong>QS</strong> <strong>roller</strong> <strong>100TM</strong> Ceiling Mount <strong>Installation</strong> instructions
11 Verify limits11.1 Verify the open limit by double-tapping the “open limit” ( ) button. The shade willtravel to the open limit.11.2 Verify the close limit by double-tapping the “close limit” ( ) button. The shade willtravel to the close limit.Page 14Sivoia® <strong>QS</strong> <strong>roller</strong> <strong>100TM</strong> Ceiling Mount <strong>Installation</strong> instructions
12 Verify communications12.1 Enter “link diagnostics mode” by pressingand holding the “close limit” button ( ) onthe EDU for 5 seconds. The green LEDwill flash quickly for two seconds then turnon steady, indicating the EDU is ready tobegin verifying communications withother devices.Green LEDPress and hold theclose limit buttonfor 5 seconds12.2 Initiate “link diagnostics mode” by tappingthe counterclockwise button ( ). The greenLED will begin to flash quickly (8 times persecond), and the EDU will begin to raise andlower a short distance (“wiggle”).Tap the counterclockwisebuttonGreen LEDflashing quickly12.3 This EDU is now trying to communicate withall other devices. All EDUs communicating onthe link will wiggle and flash their green LEDquickly. Verify that all other devices are ableto communicate with this device. If youdiscover any EDUs that are not wiggling,verify that the EDU is powered and wiredproperly. “Link diagnostics mode” willautomatically time out after 10 minutes.Green LEDflashing quickly12.4Exit “link diagnostics mode” by pressingand holding the “close limit” button( ) on the EDU for 5 seconds. All EDUson the link will stop wiggling and theirLED will turn off.LED offPress and hold theclose limit buttonfor 5 secondsPage 15Sivoia® <strong>QS</strong> <strong>roller</strong> <strong>100TM</strong> Ceiling Mount <strong>Installation</strong> instructions
13 Programming | restoring default settingsReturning an EDU to its factory default settingReturning an EDU to its factory defaults will clear out any programming to keypads, butwill not affect the limits.13.1 Press and hold the “close limit”button ( ) on the EDU for 5seconds. The green LED onthe EDU will flash quickly for twoseconds then turn ON steady.Flashing green LEDPress and hold theclose limit buttonfor 5 seconds13.2 Press and hold the “open limit”button ( ) for 5 seconds. Thegreen LED on the EDU will flashthen turn ON steady.Flashing green LEDPress and hold theopen limit buttonfor 5 seconds13.3 Press and hold theclockwise button ( ) for5 seconds. The green LEDon the EDU will flash thenturn ON steady.Press and hold theclockwise buttonfor 5 secondsFlashing green LED13.4Press and hold thecounterclockwise button ( ) for5 seconds. The LED on the EDUwill flash blue briefly, and thenthe EDU will reset. The EDU isnow restored to factory defaultsettings. The limits will notbe affected.Press and hold thecounterclockwise buttonfor 5 secondsLED will flash bluePage 16Sivoia® <strong>QS</strong> <strong>roller</strong> <strong>100TM</strong> Ceiling Mount <strong>Installation</strong> instructions
14TroubleshootingSymptomShade will not move using adjustmentbuttons on EDU.Shade does not fully open or fully close.Fabric is not level.Fabric is not centered over window.Shade does not move smoothly.EDU does not move, and the LED isblinking red slowly four times, and thenturning off for 4 seconds.EDU has its red LED on steady.EDU is blinking its blue LED quickly.Keypad does not control shade orsends it to the wrong level.SolutionEDU is not powered - check EDU Powerby unplugging and re-plugging in EDU.LED should flash for 5 seconds.Shade is caught on something - free shade.Limits have been set incorrectly - refer to“Set open limit” and “Set close limit” sections.Shade is caught on something - free shade.Check that brackets are <strong>mount</strong>ed level.Check that fabric is tracking correctly onthe shade tube.Check that brackets are centered.Check for binding of shade fabric onside channels.Check fabric tracking.The EDU has reached its maximum run-time.Wait 20 minutes before attempting tomove the shade.The EDU is unable to establishcommunication. Check your wiring.The EDU does not have enough power tooperate properly. Refer to the power supply’sinstruction sheet to verify your installation.This EDU is being powered by an AC supply.Use an approved 24 V supply, such as the<strong>QS</strong>PS-P1-10-60.Limits have been set incorrectly - refer to“Set open limit” and “Set close limit” sections.Refer to the keypad instruction sheet forprogramming instructions.Page 17Sivoia® <strong>QS</strong> <strong>roller</strong> <strong>100TM</strong> Ceiling Mount <strong>Installation</strong> instructions
Notes:Page 18Sivoia® <strong>QS</strong> <strong>roller</strong> <strong>100TM</strong> Ceiling Mount <strong>Installation</strong> instructions
Notes:Page 19Sivoia® <strong>QS</strong> <strong>roller</strong> <strong>100TM</strong> Ceiling Mount <strong>Installation</strong> instructions
Notes:Page 20Sivoia® <strong>QS</strong> <strong>roller</strong> <strong>100TM</strong> Ceiling Mount <strong>Installation</strong> instructions
Notes:Page 21Sivoia® <strong>QS</strong> <strong>roller</strong> <strong>100TM</strong> Ceiling Mount <strong>Installation</strong> instructions
Limited WarrantySCOPEThis limited warranty (“Warranty”) covers the <strong>Lutron</strong> supplied (a)Sivoia® <strong>QS</strong> Shade System (“Sivoia® <strong>QS</strong> Shade System”), (b) Sivoia QED®Shade System (“Sivoia QED® Shade System”), (c) manual shade systemand (d) alternating current or a/c shade system (each of the foregoingbeing a “System”). Customer acknowledges and agrees that use of theSystem constitutes acceptance of all terms and conditions ofthis Warranty.LIMITED WARRANTYSubject to the exclusions and restrictions described below, <strong>Lutron</strong> warrantsthat each System will be free from manufacturing defects from thedate of shipment by <strong>Lutron</strong> for a period of (a) one year as to the wallcontrols, interfaces and system accessories of the Sivoia® <strong>QS</strong> ShadeSystem (“External Sivoia® <strong>QS</strong> Components”) and (b) eight years as tothe other Systems and the electronic drive unit, shade fabric and shadehardware of the Sivoia® <strong>QS</strong> Shade System. If any manufacturing defectexists in the External Sivoia® <strong>QS</strong> Components, so long as Customerpromptly notifies <strong>Lutron</strong> of the defect within the one year warranty periodand, if requested by <strong>Lutron</strong>, returns the defective part(s), <strong>Lutron</strong> will, at itsoption, either repair the defective part(s) or provide comparable replacementpart(s). If any manufacturing defect exists in any of the componentsof a System other than the External Sivoia® <strong>QS</strong> Components, solong as Customer promptly notifies <strong>Lutron</strong> of the defect within the eightyear warranty period and, if requested by <strong>Lutron</strong>, returns the defectivepart(s), <strong>Lutron</strong> will, at its option, either repair the defective part(s) or issuea credit to the Customer against the purchase price of comparablereplacement part(s) purchased from <strong>Lutron</strong> as provided below:Number of years from dateof shipmentPercentage of cost ofreplacement parts credited by <strong>Lutron</strong>Up to 2 100%More than 2 butnot more than 5More than 5 butnot more than 850%25%More than 8 0%Replacement parts for the System provided by <strong>Lutron</strong> or, at its sole discretion,an approved vendor may be new, used, repaired, reconditioned,and/or made by a different manufacturer.EXCLUSIONS AND RESTRICTIONSThis Warranty will be void, and <strong>Lutron</strong> and its suppliers will have noresponsibility under this Warranty, if <strong>Lutron</strong> or its representatives cannotaccess any components of the System to inspect, diagnose problemswith or repair the System or any of its components as a result ofconcealment or inaccessibility of such components within a buildingstructure.This Warranty does not cover, and <strong>Lutron</strong> and its suppliers are notresponsible for:1. Damage, malfunction or inoperability diagnosed by <strong>Lutron</strong> or a<strong>Lutron</strong> approved third party as caused by normal wear and tear,abuse, misuse, incorrect installation, neglect, accident, interferenceor environmental factors, such as (a) use of incorrect line voltagesfuses or circuit breakers; (b) failure to install, maintain and operate theSystem pursuant to the operating instructions provided by <strong>Lutron</strong> andthe applicable provisions of the National Electrical Code and of theSafety Standards of Underwriter’s Laboratories; (c) use of incompatibledevices or accessories; (d) improper or insufficient ventilation; (e)unauthorized repairs or adjustments or alterations; (f) vandalism; (g)an act of God, such as fire, lightning, flooding, tornado, earthquake,hurricane or other problems beyond <strong>Lutron</strong>’s control; or (h) directexposure to corrosive materials.2. On-site labor costs to diagnose issues with, and remove, repair,replace, adjust, reinstall and/or reprogram the System or any of itscomponents.3. Components and equipment external to the System, such as, non-<strong>Lutron</strong> lighting and automation systems; building wiring audio-visualequipment; and non-<strong>Lutron</strong> time clocks, photosensors and motiondetectors.4. The cost of repairing or replacing other property that is damagedwhen any System does not work properly, even if the damage wascaused by the System.THIS WARRANTY IS IN LIEU OF ALL OTHER EXPRESS WARRAN-TIES. ALL IMPLIED WARRANTIES, INCLUDING THE IMPLIEDWARRANTIES OF MERCHANTABILITY AND OF FITNESS FOR APARTICULAR PURPOSE, ARE LIMITED TO EIGHT YEARS FROMTHE DATE OF SHIPMENT, EXCEPT THAT SUCH IMPLIED WAR-RANTIES ARE LIMITED TO ONE YEAR FROM THE DATE OF SHIP-MENT AS TO THE EXTERNAL Sivoia <strong>QS</strong> COMPONENTS.NO LUTRON AGENT, EMPLOYEE OR REPRESENTATIVE HAS ANYAUTHORITY TO BIND LUTRON TO ANY AFFIRMATION, REP-RESENTATION OR WARRANTY CONCERNING THE SYSTEMS.UNLESS AN AFFIRMATION, REPRESENTATION OR WARRANTYMADE BY AN AGENT, EMPLOYEE OR REPRESENTATIVE ISSPECIFICALLY INCLUDED HEREIN, OR IN STANDARD PRINTEDMATERIALS PROVIDED BY LUTRON, IT DOES NOT FORM APART OF THE BASIS OF ANY BARGAIN BETWEEN LUTRON ANDCUSTOMER AND WILL NOT IN ANY WAY BE ENFORCEABLE BYCUSTOMER.IN NO EVENT WILL LUTRON OR ANY OTHER PARTY BE LIABLEFOR EXEMPLARY, CONSEQUENTIAL, INCIDENTAL OR SPECIALDAMAGES (INCLUDING, BUT NOT LIMITED TO DAMAGES FORPERSONAL INJURY, FAILURE TO MEET ANY DUTY, INCLUDINGOF GOOD FAITH OR REASONABLE CARE, NEGLIGENCE, ORANY OTHER LOSS WHATSOEVER), NOR FOR ANY REPAIR WORKUNDERTAKEN WITHOUT LUTRON’S PRIOR WRITTEN CONSENTARISING OUT OF OR IN ANY WAY RELATED TO THE INSTAL-LATION, DEINSTALLATION, USE OF OR INABILITY TO USE THESYSTEM OR OTHERWISE UNDER OR IN CONNECTION WITHANY PROVISION OF THIS WARRANTY, EVEN IN THE EVENT OFTHE FAULT, TORT (INCLUDING NEGLIGENCE), STRICT LIABILITY,BREACH OF CONTRACT OR BREACH OF WARRANTY OF LU-TRON OR ANY OTHER PARTY, AND EVEN IF LUTRON OR SUCHOTHER PARTY WAS ADVISED OF THE POSSIBILITY OF SUCHDAMAGES.NOTWITHSTANDING ANY DAMAGES THAT CUSTOMER MIGHTINCUR FOR ANY REASON WHATSOEVER (INCLUDING, WITHOUTLIMITATION, ALL DIRECT DAMAGES AND ALL DAMAGES LISTEDABOVE), THE ENTIRE LIABILITY OF LUTRON AND OF ALLOTHER PARTIES UNDER THIS WARRANTY ON ANY CLAIM FORDAMAGES ARISING OUT OF OR IN CONNECTION WITH THEMANUFACTURE, SALE, INSTALLATION, DELIVERY, USE, REPAIR,OR REPLACEMENT OF THE SYSTEM, AND CUSTOMER’S SOLEREMEDY FOR THE FOREGOING, WILL BE LIMITED TO THEAMOUNT PAID BY CUSTOMER FOR THE SYSTEM. THE FORE-GOING LIMITATIONS, EXCLUSIONS AND DISCLAIMERS WILLAPPLY TO THE MAXIMUM EXTENT ALLOWED BY APPLICABLELAW, EVEN IF ANY REMEDY FAILS ITS ESSENTIAL PURPOSE.Page 22Sivoia® <strong>QS</strong> <strong>roller</strong> <strong>100TM</strong> Ceiling Mount <strong>Installation</strong> instructions
Limited WarrantyTechnical AssistanceTHIS WARRANTY GIVES YOU SPECIFIC LEGAL RIGHTS. YOUMAY ALSO HAVE OTHER RIGHTS WHICH VARY FROM STATE TOSTATE. SOME STATES DO NOT ALLOW LIMITATIONS ON HOWLONG AN IMPLIED WARRANTY LASTS OR THE EXCLUSION ORLIMITATION OF INCIDENTAL OR CONSEQUENTIAL DAMAGES,SO THE ABOVE LIMITATIONS OR EXCLUSIONS MAY NOT APPLYTO YOU.WARRANTY CLAIMS, TECHNICAL ASSISTANCEAND WARRANTY INFORMATION.Contact the <strong>Lutron</strong> Technical Support Center at the numbersprovided below or your local <strong>Lutron</strong> sales representative withquestions concerning the installation or operation of the System or thisWarranty, or to make a warranty claim. Please provide the exact modelnumber when calling.The product may be covered under one or more of the following U.S.patents: 6,983,783; 7,281,565, and corresponding patents pending.U.S. and foreign patents pending.<strong>Lutron</strong>, the Sunburst logo, Sivoia, and Sivoia QED are registeredtrademarks, and Sivoia <strong>QS</strong> is a trademark of <strong>Lutron</strong> Electronics Co., Inc.www.lutron.com/shadingsolutionsUSA and Canada (24 hrs/7days):call: 800.523.9466Other countries (8 a.m. – 8 p.m. EST)call: +1.610.282.3800fax: +1.610.282.3090email: shadinginfo@lutron.com©2008 LUTRON Electronics Co., Inc.P/N 045-137 REV. AWORLDHEADQUARTERS<strong>Lutron</strong> Electronics Co., Inc.7200 Suter RoadCoopersburg, PA18036-1299 USATEL: +1.610.282.3800FAX:+1.610.282.1243Technical support:1.800.523.9466or +1.610.282.6701Toll-free: 1.888.LUTRON1EUROPEANHEADQUARTERS<strong>Lutron</strong> EA Ltd6 Sovereign CloseLondon, E1W 3JF, UKTEL: +44.(0)20.7702.0657FAX: +44.(0)20.7480.6899Technical support:+44.(0)20.7680.4481FREEPHONE: 0800.282.107ASIANHEADQUARTERS<strong>Lutron</strong> GL Ltd.15 Hoe Chiang Road#07-03Singapore 089316TEL: +65.6220.4666FAX: +65.6220.4333Technical support:800.120.4491lutronsea@lutron.comCUSTOMER SERVICE/ORDERINGUK +44.(0)20.7702.0657 –09.00 - 18.00 GMTUSA +1.610.282.3800 –08.00 - 20.00 ESTCUSTOMER SERVICE/E-MAILshadinginfo@lutron.comINTERNET:www.lutron.comADDITIONAL LUTRONSALES OFFICES:GermanyTEL: +49.309.710.4590FAX: +49.309.710.4591FREEPHONE00800.5887.6635France<strong>Lutron</strong> Ltc, S.A.R.L.-Paris90 rue Villiers92300 Levallois Perret,FranceTEL: +33.1.41.05.42.80FAX: +33.1.41.05.01.80FREEPHONE: 0800.90.12.18lutronfrance@lutron.comSpain-MadridTEL: +34.91.567.84.79FAX: +34.91.567.84.78FREEPHONE 0900.948.944Spain-BarcelonaTEL: +34.93.496.57.42FAX: +34.93.496.57.50FREEPHONE 0900.948.944Hong KongTEL: +852.2104.7733FAX: +852.2104.7633BeijingTEL: +86.10.5877.1817FAX: +86.10.5877.1816SingaporeLUTRON GL Ltd. -Singapore15 Hoe Chiang Road#7-03 Tower 15Singapore 089316TEL: +65.6220.4666FAX: +65.6220.4333JapanTEL: +81.3.5575.8411FAX: +81.3.5575.8420