
Create successful ePaper yourself
Turn your PDF publications into a flip-book with our unique Google optimized e-Paper software.
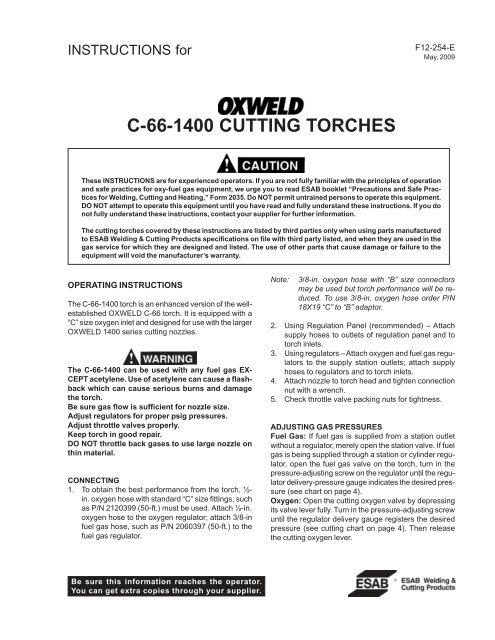
INSTRUCTIONS forF12-254-EMay, 2009C-<strong>66</strong>-<strong>1400</strong> <strong>CUTTING</strong> <strong>TORCHES</strong>These INSTRUCTIONS are for experienced operators. If you are not fully familiar with the principles of operationand safe practices for oxy-fuel gas equipment, we urge you to read ESAB booklet “Precautions and Safe Practicesfor Welding, Cutting and Heating,” Form 2035. Do NOT permit untrained persons to operate this equipment.DO NOT attempt to operate this equipment until you have read and fully understand these instructions. If you donot fully understand these instructions, contact your supplier for further information.The cutting torches covered by these instructions are listed by third parties only when using parts manufacturedto ESAB Welding & Cutting Products specifications on file with third party listed, and when they are used in thegas service for which they are designed and listed. The use of other parts that cause damage or failure to theequipment will void the manufacturer’s warranty.OPERATING INSTRUCTIONSThe C-<strong>66</strong>-<strong>1400</strong> torch is an enhanced version of the wellestablishedOXWELD C-<strong>66</strong> torch. It is equipped with a“C” size oxygen inlet and designed for use with the largerOXWELD <strong>1400</strong> series cutting nozzles.The C-<strong>66</strong>-<strong>1400</strong> can be used with any fuel gas EX-CEPT acetylene. Use of acetylene can cause a flashbackwhich can cause serious burns and damagethe torch.Be sure gas flow is sufficient for nozzle size.Adjust regulators for proper psig pressures.Adjust throttle valves properly.Keep torch in good repair.DO NOT throttle back gases to use large nozzle onthin material.CONNECTING1. To obtain the best performance from the torch, ½-in. oxygen hose with standard “C” size fittings, suchas P/N 2120399 (50-ft.) must be used. Attach ½-in.oxygen hose to the oxygen regulator; attach 3/8-infuel gas hose, such as P/N 2060397 (50-ft.) to thefuel gas regulator.Note:3/8-in. oxygen hose with “B” size connectorsmay be used but torch performance will be reduced.To use 3/8-in. oxygen hose order P/N18X19 “C” to “B” adaptor.2. Using Regulation Panel (recommended) – Attachsupply hoses to outlets of regulation panel and totorch inlets.3. Using regulators – Attach oxygen and fuel gas regulatorsto the supply station outlets; attach supplyhoses to regulators and to torch inlets.4. Attach nozzle to torch head and tighten connectionnut with a wrench.5. Check throttle valve packing nuts for tightness.ADJUSTING GAS PRESSURESFuel Gas: If fuel gas is supplied from a station outletwithout a regulator, merely open the station valve. If fuelgas is being supplied through a station or cylinder regulator,open the fuel gas valve on the torch, turn in thepressure-adjusting screw on the regulator until the regulatordelivery-pressure gauge indicates the desired pressure(see chart on page 4).Oxygen: Open the cutting oxygen valve by depressingits valve lever fully. Turn in the pressure-adjusting screwuntil the regulator delivery gauge registers the desiredpressure (see cutting chart on page 4). Then releasethe cutting oxygen lever.Be sure this information reaches the operator.You can get extra copies through your supplier.
a.b.c.d.e.f.g.h.i.j.READ AND UNDERSTAND INSTRUCTION MANUAL BEFORE INSTALLINGOR OPERATING. PROTECT YOURSELF AND OTHERS!cautionThese INSTRUCTIONS are for experienced operators. If you are not fully familiar with the principlesof operation and safe practices for gas welding and cutting equipment, we urge you to readour booklet, “Precautions and Safe Practices for Gas Welding, Cutting, and Heating,” Form F-2035.Do NOT permit untrained persons to install, operate, or maintain this equipment. Do NOT attemptto install or operate this equipment until you have read and fully understand these instructions. Ifyou do not fully understand these instructions, contact your supplier for further information. Besure to read the Safety Precautions before installing or operating this equipment.USER RESPONSIBILITYThis equipment will perform in conformity with the description thereof contained in this manual and accompanyinglabels and/or inserts when installed, operated, maintained and repaired in accordance with the instructionsprovided. This equipment must be checked periodically. Malfunctioning or poorly maintained equipmentshould not be used. Parts that are broken, missing, worn, distorted or contaminated should be replaced immediately.Should such repair or replacement become necessary, the manufacturer recommends that a telephoneor written request for service advice be made to the Authorized Distributor from whom it was purchased.This equipment or any of its parts should not be altered without the prior written approval of the manufacturer.The user of this equipment shall have the sole responsibility for any malfunction which results from improperuse, faulty maintenance, damage, improper repair or alteration by anyone other than the manufacturer or a servicefacility designated by the manufacturer.IMPORTANT SAFEGUARDSWhen using Oxy-Fuel Gas Torches, basic safety precautions should always be followed:Never use Acetylene gas at a pressure over 15 psig.Never use damaged equipment.Never use oil or grease on or around Oxygen equipment.Never use Oxygen or fuel gas to blow dirt or dust off clothing or equipment.Never light a torch with matches or a lighter. Always use a striker.Always wear the proper welding goggles, gloves and clothing when operating Oxy-Acetylene equipment.Pants should not have cuffs.Do not carry lighters, matches or other flammable objects in pockets when welding or cutting.Always be aware of others around you when using a torch.Be careful not to let welding hoses come into contact with torch flame or sparks from cutting.SAVE THESE INSTRUCTIONS.Be sure this information reaches the operator.You can get extra copies through your supplier.SAVE THESE INSTRUCTIONS!
SAFETY PRECAUTIONSThese Safety Precautions are for your protection. They summarizeprecautionary information from the references listedin Additional Safety Information section. Before performing anyinstallation or operating procedures, be sure to read and followthe safety precautions listed below as well as all othermanuals, material safety data sheets, labels, etc. Failure to observeSafety Precautions can result in injury or death.PROTECT YOURSELF AND OTHERS - Somewelding, cutting and gouging processes arenoisy and require ear protection. Hot metal cancause skin burns and heat rays may injureeyes. Training in the proper use of the processesand equipment is essential to preventaccidents. Also:1. Always wear safety glasses with side shields in any work area,even if welding helmets, face shields, or goggles are also required.2. Wear flameproof gauntlet type gloves, heavy long-sleeve shirt,cuffless trousers, high-topped shoes, and a welding helmet orcap for hair protection, to protect against hot sparks and hotmetal. A flameproof apron may also be desirable as protectionagainst radiated heat and sparks.3. Hot sparks or metal can lodge in rolled up sleeves, trouserscuffs, or pockets. Sleeves and collars should be kept buttoned,and open pockets eliminated from the front of clothing.4. Protect other personnel from hot sparks with a suitable nonflammablepartition or curtains.5. Use goggles over safety glasses when chipping slag or grinding.Chipped slag may be hot and can travel considerable distances.Bystanders should also wear goggles over safetyglasses.FIRES AND EXPLOSIONS - Heat from a flamecan act as an ignition source. Hot slag or sparkscan also cause fires or explosions. Therefore:1. Remove all combustible materials well away from the workarea or completely cover the materials with a protective nonflammablecovering. Combustible materials include wood,cloth, sawdust, liquid and gas fuels, solvents, paints and coatings,paper, etc.2. Hot sparks or hot metal can fall through cracks or crevices infloors or wall openings and cause a hidden smoldering fire onthe floor below. Make certain that such openings are protectedfrom hot sparks and metal.3. Do not weld, cut, or perform any other hot work on materials,containers, or piping until it has been completely cleaned sothat no substances on the material can produce flammable ortoxic vapors. Do not do hot work on closed containers. Theymay explode.4. Have fire extinguishing equipment handy for instant use, suchas a garden hose, a pail of water or sand, or portable fireextinguisher. Be sure you are trained in its use.5. After completing operations, inspect the work area to be surethat there are no hot sparks or hot metal which could cause alater fire. Use fire watchers when necessary.6. For additional information, refer to NFPA Standard 51B, “FirePrevention in Use of Cutting and Welding Processes”, whichis available from the National Fire Protection Association,Batterymarch Park, Quincy, MA 02269.FUMES AND GASES - Fumes and gases, particularlyin confined spaces, can cause discomfortor injury. Do not breathe fumes orgases from welding or cutting, Therefore:1. Always provide adequate ventilation in the work area by naturalor mechanical ventilation means. Do not weld, cut, or gougeon materials such as galvanized steel, stainless steel, copper,zinc, lead, beryllium, or cadmium unless positive mechanicalventilation is provided. Do not breathe fumes and gases fromthese materials.2. If you develop momentary eye, nose, or throat irritation whileoperating, this is an indication that ventilation is not adequate.Stop work at once and take necessary steps to improve ventilationin the work area. Do not continue to operate if physicaldiscomfort persists.23. Refer to ANSI/ASC Standard Z49.1 listed below for specificventilation recommendations.EQUIPMENT MAINTENANCE - Faulty or improperlymaintained equipment, such as torches, hoses andregulators, can result in poor work, but even moreimportant, it can cause injury or death through fires.Therefore:1. Always have qualified personnel perform the installation,troubleshooting, and maintenance work. Do not operate orrepair any equipment unless you are qualified to do so.2. Keep all oxy-fuel equipment free of grease or oil. Grease, oil,and other similar combustible materials, when ignited, can burnviolently in the presence of oxygen.3. Do not abuse any equipment or accessories. Keep equipmentaway from heat and wet conditions, oil or grease, corrosiveatmospheres and inclement weather.4. Keep all safety devices in position and in good repair.5. Use equipment for its intended purpose. Do not modify it inany manner.GAS CYLINDER HANDLING - Gas cylinders, ifmishandled, can rupture or explode violently.Sudden rupture of a cylinder, valve or relief devicecan injure or kill you. Therefore:1. Use the proper gas for the process and use the proper pressurereducing regulator designed to operate from the compressedgas cylinder. Do not use adaptors to mount the regulatoron the cylinder. Maintain hoses and fittings in good condition.Follow manufacturer’s operating instructions for mountingthe regulator to the gas cylinder.2. Always secure cylinders in an upright position by chain or strapto suitable hand trucks, benches, walls, post, or racks. Neversecure cylinders to work tables or fixtures where they maybecome part of an electrical circuit.3. When not in use, keep cylinder valves closed. Have the valveprotection cap in place on top of the cylinder if no regulators isinstalled. Secure and move cylinders by using suitable handtrucks. Avoid rough handling of cylinders.4. Locate cylinders away from heat, sparks, or flame of a welding,cutting, or gouging operation. Never strike an arc on acylinder.5. For additional information, refer to CGA Standard P-1, “Precautionsfor Safe Handling of Compressed Gases in Cylinders:,which is available from the Compressed Gas Association,1235 Jefferson Davis Highway, Arlington, VA 22202.ADDITIONAL SAFETY INFORMATION - For more informationon safe practices for oxy-fuel welding andcutting equipment, ask your distributor for a copy of“Precautions and Safe Practices for Gas Welding, Cutting,and Heating”, Form 2035. Gas apparatus safetyguidelines are also available on video cassettes fromyour distributor.The following publications, which are available from the AmericanWelding Society, 550 N.W. LeJuene Road, Miami, FL 33126, arerecommended to you:1. ANSI/AWS Z49.1 - “Safety in Welding and Cutting”.2. AWS F4.1 - “Recommended Safe Practices for the Preparationfor Welding and Cutting of Containers and Piping ThatHave Held Hazardous Substances”/3. AWS SP - “Safe Practices” - Reprint, Welding Handbook.This symbol appearing in this manual meansAttention! Be Alert! Your safety is involved.Used to call attention to immediate hazardswhich, if not avoided, will result in immediate,serious personal injury or loss of life.Used to call attention to potential hazardswhich could result in personal injury or loss oflife.Used to call attention to hazards which couldresult in minor personal injury.SP-GA 7/97
OPERATING DATA, CLEANING DATA, & PART NUMBERSGENERAL NOTES:1. Pressures given are measured at the torch with gases flowing; therefore pressure drop through the hoses shouldbe considered when setting pressures at the regulators.2. The table shows average values based on typical conditions. The type and quality of steel, its surface condition,the purity of the oxygen, etc. will always have a bearing on the end results.3. Use ½-in. size hose for oxygen and 3/8-in. hose for fuel gas.OXWELD 1427 Series Natural Gas Nozzles - Non-Metric DimensionsNozzle Steel Gas Pressure, psig Cutting Cleaning Gas Consumption, cfhThickness, Cutting Preheat Natural Speed, Drill Size Cutting Preheat NaturalSize Part No. In. Oxygen Oxygen Gas In./min. Preheat Cutting Oxygen Oxygen Gas12 5470099 12 75-85 8-10 16-19 4-5 55 31 800-900 100-115 65-7514 5470144 14 60-70 7-9 8-11 3.5-4.5 54 28 950-1100 115-140 75-9516 5470100 16 55-65 9-12 11-15 3-4.5 53 20 1150-1330 145-175 95-11520 5460192 20 45-55 13-18 17-23 2.5-4 52 8 1450-1700 170-225 125-15024 5460162 24 40-50 21-25 28-33 2-3.5 51 C 1850-2200 225-285 170-19028 5460193 28 30-40 28-33 39-45 2-3.5 50 K 1950-2400 315-350 210-235OXWELD 1427 Series Natural Gas Nozzles - Metric DimensionsNozzle Steel Gas Pressure, bars Cutting Cleaning Gas Consumption, m 3 /hrThickness, Cutting Preheat Natural Speed, Drill Size Cutting Preheat NaturalSize Part No. mm Oxygen Oxygen Gas mm/min. Preheat Cutting Oxygen Oxygen Gas12 5470099 300 5.3-6.0 0.6-0.7 1.1-1.3 100-125 55 31 22.7-25.5 2.8-3.3 1.8-2.114 5470144 350 4.2-4.9 0.5-0.6 0.6-0.8 90-115 54 28 26.9-31.2 3.3-4.0 2.1-2.716 5470144 400 3.9-4.6 0.6-0.8 0.8-1.1 75-115 53 20 32.6-37.7 4.1-5.0 2.7-3.320 5460192 500 3.2-3.9 0.9-1.3 1.2-2.3 65-100 52 8 41.1-48.0 4.8-6.4 3.5-4.224 5460162 600 2.8-3.5 1.5-1.8 2.0-2.3 50-90 51 C 52.4-62.3 7.2-8.1 4.8-5.428 5460193 700 2.1-2.8 2.0-2.8 2.7-3.2 50-90 50 K 55.2-68.0 8.9-9.9 5.9-6.74
MAINTENANCE INSTRUCTIONSFor all repairs other than those covered below, send theapparatus to the nearest ESAB distributor or to ESABRemanufacturing Center, 411 S. Ebenezer Road, Florence,SC 29501. Improperly repaired apparatus is hazardous.Preheat Valves: Leakage around either throttle valvecan usually be corrected by tightening packing nutslightly. If this does not stop the leakage, replace thevalve assembly.If either preheat valve fails to shut off completely, removethe valve assembly from the torch. With cleancloth, wipe the ball in the end of the stem. Then reinsertvalve assembly and tighten it several times with maximumforce. If this not eliminate leakage, try a new valvestem assembly. If then the valve does not shut off completely,send the torch to a repair station for reseating ofthe body.After installing a new throttle valve assembly, tighten thepacking nut until the valve can be turned with great difficulty,and set the unit aside, for three of four hours atleast, to set the packing. Then back off the packing nutuntil the valve turns readily.Cutting Valve: If leakage develops around the cuttingvalve stem or between the cutting valve guide and thetorch body, or if the cutting valve fails to shut off completely,proceed as follows:1. Remove cutting valve lever by merely driving outthe fulcrum spiral-pin, using a drill or piece of rod (7/32-in. dia. or smaller).2. Unscrew cutting valve guide and lift out entire valveassembly: guide (with external and internal O-rings)valve stem, spring, and O-ring retaining washer.3. Pull stem out of guide. Replace it with new part unlessthe molded rubber seat appears to be in excellentcondition.4. Remove the internal O-ring (85W01) from the guideand insert a new O-ring. Replace the external O-ring (86W70) if it shows distinct signs of wear.5. Reassemble by placing retaining washer and springin guide, then placing stem through spring and O-ring in guide.6. Screw valve assembly into body. Before reassemblingcutting lever, connect torch to oxygen source,apply at least 60 psi pressure, and check for leakagethrough valve, around stem, and around theguide.7. Reassemble cutting lever to torch.Injector: To remove the injector for inspection or replacement,first unscrew the injector chamber plug and removethe injector spring. Then run a long No. 10-32 machinescrew into the threads in the end of the injectorand withdraw the injector by pulling on the screw.Before reinstalling a previously-used injector, be surethat the O-rings at each end of the injector assemblyare in good condition. Replace them if necessary. Alsobe sure the injector chamber plug is fitted with an O-ringin good condition.Cleaning Cutting Nozzles: Cutting nozzle orificesshould be cleaned by hand using OXWELD tip cleaners,whenever a flame distortion is noticed. Maintainingclean orifices is highly recommended for reducing anyincidence of flashbacks. If you do not have tip cleaners,twist drills of the correct sizes (see table on pg. 4) maybe used. Insert the drill carefully, and push it back andforth. DO NOT TWIST THE DRILL.5
NOTES:1. “SB” and “SS” indicate silver brazed and soft solder joints. Parts that are silver brazed(indicated by *) should be replaced only by an authorized ESAB distributor repair facility orby ESAB Remanufacturing Center, 411 S. Ebenezer Rd., Florence, SC 29501.2. Brackets 718308, are equally spaced between head and coupling. Also, oxygen tube extensionmust be cut back 7/8" if using the 180-degree head.3. Oxy. Tube Ext. - Order 04027232, Mixer Tube Ext. - Order 04027250. Tubes are 12 ft.Long and must be cut to proper length.ACCESSORIES: Nozzle Reseating Tool - 52301511"—20 Tap - 4922810050Z38THUMBPIECEDRILL AT ASSEMBLYNo. 52 (.0635) DRILLPIN6232000950Z37LATCHPIN6239900151Z31INSERTGUIDE - 638243“O”-RING - 86W70“O”-RING - 85W10WASHER - 638241SPRING - 29Z97638981LEVER ASSEMBLY1" — 20 UNEFSTEM - 638891HEAD (180°) - 972778*BRACKET - 718308*OXY. TUBE EXT.*MIXER TUBE EXT.*See Table & NotesSBOXY. TUBE - 26Z03*MIXER TUBE - 999898*SBSS*OXY CONNECTION20124SBNUT33A34SBSBCOUPLING - 150Z35*BUSHING819062HANDLE - 20141SB(2) SCREW - No. 6-32 x 1/4"61325849*BODY - 638978SSHEAD (75°) - 160Z27*HEAD (90°)2117834(Not Shown)187W01 “O”-RINGINJECTOR ASSEMBLY - 01Y5886W04“O”-RING40A39SPRING86W85“O”-RING134Z55PLUGF.G. CONNECTION999082*(2) 54A87STEMASSEMBLYC-<strong>66</strong>-<strong>1400</strong> Cutting Torches AssembliesFor other available lengths ofC-<strong>66</strong>-<strong>1400</strong> Torches contact yoursalesman or ESAB distributor.32-in. - 75-deg. Head ............................................ Part No. 71831732-in. - 180-deg. Head ......................................... Part No. 71831842-in. - 75-deg. Head ............................................ Part No. 71831942-in. - 180-deg. Head ......................................... Part No. 71832048-in. - 75-deg. Head ............................................ Part No. 71832148-in. - 180-deg. Head ......................................... Part No. 71832260-in. - 75-deg. Head ............................................ Part No. 71832360-in. - 180-deg. Head ......................................... Part No. 71832472-in. - 75-deg. Head ............................................ Part No. 71832572-in. - 180-deg. Head ......................................... Part No. 71832<strong>66</strong>
ESAB Welding & Cutting Products, Florence, SC Welding EquipmentCOMMUNICATION GUIDE - CUSTOMER SERVICESA. CUSTOMER SERVICE QUESTIONS:Order Entry Product Availability Pricing DeliveryOrder Changes Saleable Goods Returns Shipping InformationEastern Distribution CenterTelephone: (800)362-7080 / Fax: (800) 634-7548Central Distribution CenterTelephone: (800)783-5360 / Fax: (800) 783-5362Western Distribution CenterTelephone: (800) 235-4012/ Fax: (888) 586-4670B. ENGINEERING SERVICE: Telephone: (843) <strong>66</strong>4-4416 / Fax : (800) 446-5693Welding Equipment TroubleshootingHours: 7:30 AM to 5:00 PM ESTWarranty Returns Authorized Repair StationsC. TECHNICAL SERVICE: Telephone: (800) ESAB-123/ Fax: (843) <strong>66</strong>4-4452Part Numbers Technical Applications Hours: 8:00 AM to 5:00 PM ESTPerformance Features Technical Specifications Equipment RecommendationsD. LITERATURE REQUESTS: Telephone: (843) <strong>66</strong>4-5562 / Fax: (843) <strong>66</strong>4-5548Hours: 7:30 AM to 4:00 PM ESTE. WELDING EQUIPMENT REPAIRS: Telephone: (843) <strong>66</strong>4-4487 / Fax: (843) <strong>66</strong>4-5557Repair Estimates Repair Status Hours: 7:30 AM to 3:30 PM ESTF. WELDING EQUIPMENT TRAINING:Telephone: (843)<strong>66</strong>4-4428 / Fax: (843) 679-5864Training School Information and RegistrationsG. WELDING PROCESS ASSISTANCE:Telephone: (800) ESAB-123 / Fax: (843) <strong>66</strong>4-4454H. TECHNICAL ASST. CONSUMABLES:Telephone : (800) 933-7070Hours: 7:30 AM to 4:00 PM ESTHours: 7:30 AM to 4:00 PM ESTHours: 7:30 AM to 5:00 PM ESTIF YOU DO NOT KNOW WHOM TO CALLTelephone: (800) ESAB-123/ Fax: (843) <strong>66</strong>4-4452/ Web:http://www.esab.comHours: 7:30 AM to 5:00 PM ESTF12-254-E 05 / 2009 Printed in U.S.A.