LEGION HK Dis and Re-Assembly Tech.pdf - Bonerepmedical.com
LEGION HK Dis and Re-Assembly Tech.pdf - Bonerepmedical.com
LEGION HK Dis and Re-Assembly Tech.pdf - Bonerepmedical.com
- No tags were found...

Create successful ePaper yourself
Turn your PDF publications into a flip-book with our unique Google optimized e-Paper software.
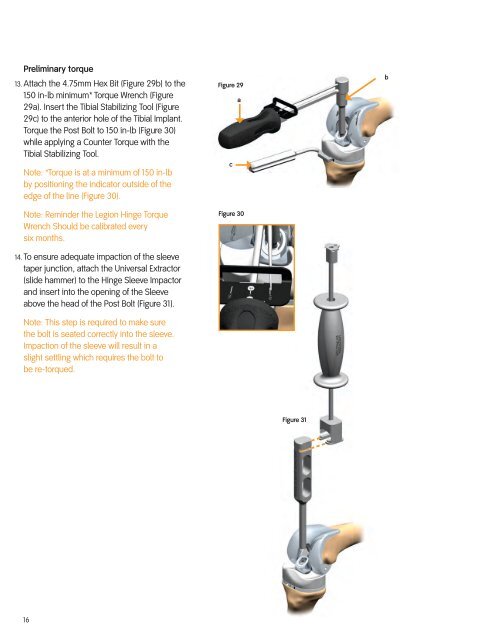
Preliminary torque13. Attach the 4.75mm Hex Bit (Figure 29b) to the150 in-lb minimum* Torque Wrench (Figure29a). Insert the Tibial Stabilizing Tool (Figure29c) to the anterior hole of the Tibial Implant.Torque the Post Bolt to 150 in-lb (Figure 30)while applying a Counter Torque with theTibial Stabilizing Tool.Note: *Torque is at a minimum of 150 in-lbby positioning the indicator outside of theedge of the line (Figure 30).Note: <strong>Re</strong>minder the Legion Hinge TorqueWrench Should be calibrated everysix months.14. To ensure adequate impaction of the sleevetaper junction, attach the Universal Extractor(slide hammer) to the Hinge Sleeve Impactor<strong>and</strong> insert into the opening of the Sleeveabove the head of the Post Bolt (Figure 31).Note: This step is required to make surethe bolt is seated correctly into the sleeve.Impaction of the sleeve will result in aslight settling which requires the bolt tobe re-torqued.Figure 29acFigure 30bFigure 3116