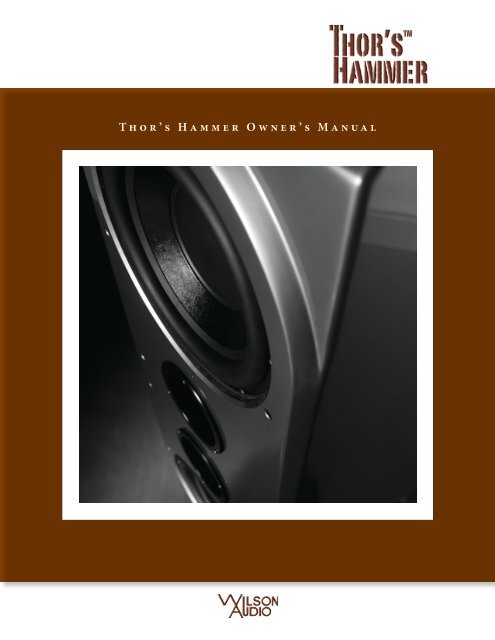
Thor's Hammer Owner's Manual - Wilson Audio
Thor's Hammer Owner's Manual - Wilson Audio
Thor's Hammer Owner's Manual - Wilson Audio

You also want an ePaper? Increase the reach of your titles
YUMPU automatically turns print PDFs into web optimized ePapers that Google loves.
T a b l e o f C o n t e n tsW i l s o n A u d i o S p e c i a l t i e s5
W i l s o n A u d i o S p e c i a l t i e s
S e c t i o n 1 – I n t r o d u c t i o n
T h o r ’ s H a m m e r O w n e r ’ s M a n u a l8W i l s o n A u d i o S p e c i a l t i e s
S e c t i o n 1 . 1 – T h o r ’ s H a m m e r I n t r o d u c t i o nhigh-end multi-channel system, or in a music system, the Thor’s <strong>Hammer</strong> offers unparalleledperformance, quality of build, and longevity. <strong>Wilson</strong> <strong>Audio</strong> delivers a productthat maintains the strictest structural tolerances, durability, and reliability. You willhave consistent, repeatable performance, unaffected by the climatic conditions, anywherein the world. The Thor’s <strong>Hammer</strong> will provide an experience with film or musiconly obtainable through <strong>Wilson</strong> products.Figure 1 – Thor’s <strong>Hammer</strong> in Theater SystemW i l s o n A u d i o S p e c i a l t i e s11
T h o r ’ s H a m m e r O w n e r ’ s M a n u a l12W i l s o n A u d i o S p e c i a l t i e s
S e c t i o n 2 – U n c r a t i n g y o u r T h o r ’ s H a m m e r
T h o r ’ s H a m m e r O w n e r ’ s M a n u a l14W i l s o n A u d i o S p e c i a l t i e s
S e c t i o n 2 . 1 – P r e p a r a t i o nSection 2.1 – PreparationYou will need the following items:• Supplied hardware kit• Known listening position• Electric screwdriver• Phillips head drive bitUncrating the Thor’s <strong>Hammer</strong>A minimum of two strong adults are required to set up the Thor’s <strong>Hammer</strong>. TheThor’s <strong>Hammer</strong> weighs over four hundred pounds, and care should be taken to preventinjury.1. With the crate lid facing up, unscrew the wood screws securing the lid.Remove the lid. Remove the foam packing material that is positioned betweenthe casters (on the bottom of the Thor’s <strong>Hammer</strong>). The Thor’s <strong>Hammer</strong>will not roll out of the crate with this packing material in place.2. Carefully rotate the crate so that the Thor’s <strong>Hammer</strong> is upright.3. While one person holds the crate, another person should gently roll theThor’s <strong>Hammer</strong> out of the crate. Be careful not to scratch the sides of thepainted enclosure.4. Move the Thor’s <strong>Hammer</strong> into the desired location. It is recommendedthat you leave the casters attached to the bottom of the Thor’s <strong>Hammer</strong>during the positioning process.Note: Be careful not to touch the driver elements when you are moving your Thor’s<strong>Hammer</strong>!W i l s o n A u d i o S p e c i a l t i e s15
W i l s o n A u d i o S p e c i a l t i e s
S e c t i o n 3 – I n Y o u r R o o m
T h o r ’ s H a m m e r O w n e r ’ s M a n u a l18W i l s o n A u d i o S p e c i a l t i e s
T h o r ’ s H a m m e r O w n e r ’ s M a n u a lby tapping the wall with the palm of your hand or stomping on the floor. Most roomsexhibit mid-bass “boom” when struck. The loudspeaker playing in the room also excitesthese resonances. To give you an idea of what the perfect wall would sound like,imagine rapping your hand against the side of a mountain. Structural wall resonancesgenerally occur in the low to mid-bass frequencies and add a false fullness to the tonalbalance. They, too, are more prominent at louder levels, but their contribution tothe sound of the speaker is more progressive. Rattling windows, picture frames, lampshades, etc., can generally be silenced with small pieces of caulk or with blocks of felt.However, short of actually adding additional layers of sheet rock to flimsy walls, thereis little that can be done to eliminate wall resonances.Volume ResonanceThe physical dimensions and volume of air in a room will also support standingwave modes and resonances at frequencies determined by the size of that room. Largerrooms will resonate at a lower frequency and have more complex (better) modal distributionsthan will smaller rooms. Volume resonances, wall panel resonances, and lowfrequency standing waves combine to form a low frequency coloration in the sound. Atits worst, it is a grossly exaggerated fullness, which tends to obscure detail and distortthe natural bass balance in the system. Careful tuning with the <strong>Wilson</strong> Controller canminimize the interaction with the room and the subwoofer.Section 3.2 – Initial Placement of Thor’s <strong>Hammer</strong>The Thor’s <strong>Hammer</strong> is shipped with casters installed on the bottom of the cabinet.Leave the casters on the Thor’s <strong>Hammer</strong> as you move it to its desired location. Thor’s<strong>Hammer</strong> can be installed either vertically or horizontally. If the intent is to install itvertically, leave the castors on as you proceed with the setup.Note: If you are installing the Thor’s <strong>Hammer</strong> horizontally, remove the castors beforetipping it onto its side. Also, make sure you orient Thor’s <strong>Hammer</strong> such that the con-20W i l s o n A u d i o S p e c i a l t i e s
S e c t i o n 3 . 3 – T h o r ’ s H a m m e r i n a M u s i c S y s t e m snectors are positioned on the side that best accommodates cable installation.Because the Thor’s <strong>Hammer</strong>’s frequency range is limited to the sub-frequency bassrange, its placement requirements are fundamentally different than for a full frequencyspeaker. Subwoofers reproduce a relatively small percentage of the audio spectrum,with a typical bandwidth of less than two octaves. The strategy for placing a subwoofercan be centered around bass optimization; the room’s effect on the midrange and treblecan be largely disregarded. When used with the <strong>Wilson</strong> <strong>Audio</strong> Controller, placementflexibility of Thor’s <strong>Hammer</strong> is further enhanced.The ideal position of the Thor’s <strong>Hammer</strong> subwoofer is somewhat dependent on itsprimary use.Section 3.3 – Thor’s <strong>Hammer</strong> in a Music SystemsFor the best musical results, it is recommended that the Thor’s <strong>Hammer</strong> be used inconjunction with the <strong>Wilson</strong> Controller in music systems.The Thor’s <strong>Hammer</strong> subwoofer was designed to enhance the musical performanceof all <strong>Wilson</strong> <strong>Audio</strong> loudspeakers. <strong>Wilson</strong> <strong>Audio</strong> loudspeakers are designed to be audiblypropagation delay correct and time coherent. The <strong>Wilson</strong> Controller was engineeredto maximize the low frequency performance of music systems without compromisingthe phase and time accuracy of <strong>Wilson</strong> loudspeakers. The versatile Phase Controlon the <strong>Wilson</strong> Controller allows the Thor’s <strong>Hammer</strong> to be optimized in the time do-Figure 2 – <strong>Wilson</strong> Controller Front PanelW i l s o n A u d i o S p e c i a l t i e s21
T h o r ’ s H a m m e r O w n e r ’ s M a n u a lFigure 3 – <strong>Wilson</strong> Controller Rear Panelmain within the listening environment. Correct phase setup of Thor’s <strong>Hammer</strong> resultsin greater frequency linearity, dynamic impact, sound-stage accuracy, and speed. (SeeController manual for details.)Successful integration with the main loudspeakers is more easily achieved whenthe Thor’s <strong>Hammer</strong> is placed between and behind the two main speakers or in the leftor right corners behind the main loudspeakers. It is possible to successfully integratethe Thor’s <strong>Hammer</strong> in other locations using the Controller’s phase control (See Controllermanual). Corner placementprovides the greatestlow frequency reinforcement(up to 6dB), but careis required in order to avoidupper bass colorationsresulting in less coherentintegration with the mainspeaker. Corner inducedupper-bass colorations canbe reduced by lowering theLow Pass Filter frequencycrossover point. FurtherFigure 4 – High Pass Filter Controls22W i l s o n A u d i o S p e c i a l t i e s
S e c t i o n 3 . 3 – T h o r ’ s H a m m e r i n a M u s i c S y s t e m scorrection of room-induced anomalies in the in-room bass response can be minimizedwith the <strong>Wilson</strong> Controller’s unique Bass Equalization Control. (See Controller owner’smanual for detailed information on critical setup.)The Thor’s <strong>Hammer</strong> can be used simultaneously as both the LFE channel subwooferin the surround mode and as the subwoofer to the main speakers when listening tomusic. This is achieved by switching between the “Line” and “Processor” inputs on theController. Low and High Pass filter settings are also switchable, allowing the Thor’s<strong>Hammer</strong> to be optimized for both music and home theater – even within the same system.(See Controller owner’s manual for detailed information on critical setup.)Bypassing The High Pass FilterIn systems where the main speakers are full range, the Thor’s <strong>Hammer</strong> can be configuredmore successfully in most rooms without the use of the High Pass Filter. Thereis a normal bass roll-off that occurs naturally in your listening room. This effect actsFigure 5 – Weighted Filter: A vs... C weightingW i l s o n A u d i o S p e c i a l t i e s23
T h o r ’ s H a m m e r O w n e r ’ s M a n u a llike a six dB per octave low pass filter. By carefully using the Controller’s Low Pass filtercontrols, along with the Bass Equalization and Phase controls (discussed in detail inthe Controller owner’s manual), you can successfully integrate the main loudspeakersin your system with the Thor’s <strong>Hammer</strong> without the use of the High Pass Filter (see theController owner’s manual for connection details).Utilizing The High Pass FilterIn some rooms or with certain speakers, there are times when a high pass filter isdesirable. The <strong>Wilson</strong> Controller an optional high quality high pass filter. The High PassFilter control is used to filter bass from the main loudspeakers. This can be desirable insystems where the main loudspeakers have limited bass dynamics or if the main poweramplifier is low power. Some rooms have extreme bass nonlinearities that can be betterameliorated when the main speaker is bass-limited. (See the Controller owner’s manualfor connection details).Section 3.4 – The Thor’s <strong>Hammer</strong> in a Home TheaterThe Thor’s <strong>Hammer</strong> can be connected in a variety of ways depending on your systemneeds. It can be used as the LFE (Low Frequency Effects) channel for a dedicatedhome theater system, or it can be used to extend the bass in a two-channel music system.In systems where it is desirable to use the Thor’s <strong>Hammer</strong> with both surround andtwo-channel music modes, you can switch between the two modes via the <strong>Wilson</strong> Controller(see Controller owner’s manual).In home theaters, where the Thor’s <strong>Hammer</strong> is used as the Low Frequency Effects(LFE) Channel, it may be located in a variety of positions, depending on architecturalconsiderations. In general, the lower frequency range will be reinforced by roomboundaries and corners. Since most of the information contained in the LFE channelis in the sub-frequency bass range, with little information in the mid and upper bass,24W i l s o n A u d i o S p e c i a l t i e s
S e c t i o n 3 . 5 – S e t u p S u m m a r ythere are some advantages to placing the Thor’s <strong>Hammer</strong> near the room boundaries ornear a corner. Some care is needed to avoid introducing upper-bass colorations causedby corner placement. While surround processors provide the low frequency equalizedsignal for the LFE Channel, it has been our experience that in some systems it is desirableto use the Low Pass crossover (via the <strong>Wilson</strong> Controller) to additionally limitupper bass range. This is particularly important and useful when the Thor’s <strong>Hammer</strong> isplaced in the corner. Since all <strong>Wilson</strong> <strong>Audio</strong> Speakers are phase and time coherent, it isvery important to time align the Thor’s <strong>Hammer</strong> in the room using the Phase Control onthe Controller (see Section 4 and the Controller owner’s manual for more details).Connection With a Surround ProcessorYou must use a dedicated amplifier to power your Thor’s <strong>Hammer</strong>. The Thor’s <strong>Hammer</strong>subwoofer can be used in conjunction with your surround processor without theneed of an additional crossovers. In those systems where the Thor’s <strong>Hammer</strong> is beingused as the point one channel in a surround system, the subwoofer is connectedthrough the sub output of the surround processor. Connect this output to the input ofthe Thor’s <strong>Hammer</strong>’s amplifier and, in turn, connect the amplifier output to the input ofthe Thor’s <strong>Hammer</strong>.In systems where it is desirable to use the subwoofer in both the surround modeand to augment the main speakers when listening to music, the following connectionstrategy employing the <strong>Wilson</strong> Controller is recommended (see also the Controllerowner’s manual for further details).Section 3.5 – Setup SummaryWhen used in a home theater system as the LFE channel, the Thor’s <strong>Hammer</strong> canbe positioned in a variety of areas within the room successfully. Room boundaries andcorners enhance low frequency coupling with the room, but care is required in attend-W i l s o n A u d i o S p e c i a l t i e s25
T h o r ’ s H a m m e r O w n e r ’ s M a n u a ling to resulting upper bass colorations.When used in a music system, the subwoofer integrates more consistently with themain speakers when placed behind the plane of the speakers or in a corner of the roombehind the main speakers. If you are using the Thor’s <strong>Hammer</strong> in conjunction with a<strong>Wilson</strong> Controller, careful setup using the Phase control and the Low and High Pass filters(see Controller owner’s manual) is necessary to optimize low bass performance andto ensure proper integration with the main loudspeakers.Note: If you are using a meter to measure bass output from your Thor’s <strong>Hammer</strong>,please be aware of the following regarding the interpretation of measurements:A. Use “slow” meter response ballistics to help average out the reading… and tokeep from going crazy trying to read it!B. Ears and meters are not directly interchangeable. They neither sample nor processthe sound in a completely analogous manner (see Figure 7).SummaryIn summary, for optimal tonal balance accuracy, resolution of low level detail,and soundstaging performance, the Thor’s <strong>Hammer</strong> Subwoofer should be positioned asoutlined in this section. If you are using a <strong>Wilson</strong> Controller, final setup of Thor’s <strong>Hammer</strong>is contained in the Controller manual. By following the guidelines in this manualand the Controller manual, your new Thor’s <strong>Hammer</strong> Subwoofer can provide you with alifetime of pure music reproduction.26W i l s o n A u d i o S p e c i a l t i e s
S e c t i o n 4 – F i n i s h i n g u p
T h o r ’ s H a m m e r O w n e r ’ s M a n u a l28W i l s o n A u d i o S p e c i a l t i e s
S e c t i o n 4 . 1 – S p i k i n g T h o r ’ s H a m m e rSection 4.1 – Spiking Thor’s <strong>Hammer</strong>The Thor’s <strong>Hammer</strong> comeswith a set of heavy duty spikesthat provide acoustical isolationas well as optimal height placementfor your Thor’s <strong>Hammer</strong>.Brass disks that fit beneath thespikes are included for installationswhere spikes might damagethe floor surface (such aswood floors).Note: Thor’s <strong>Hammer</strong> weighsover four hundred pounds(181.43 Kg). Two strong individualsare required to safelyinstall spikes.After determining theThor’s <strong>Hammer</strong>’s position, assemblethe spikes as follows:Assembly – Vertical PlacementFigure 6 – Install Spikes into the Threaded Holes onBottom1. Remove the casters from the bottom of the Thor’s <strong>Hammer</strong>2. Carefully tilting the Thor back, exposing the two front spikes holes beneath,insert threaded bolts in the bolt holes in the front of the subwooferuntil they are flush with the inner surface visible through the acousticport. Make sure the Allen key end is facing downward.3. Screw the acoustical diode onto the bolt until it fits snugly against theW i l s o n A u d i o S p e c i a l t i e s29
T h o r ’ s H a m m e r O w n e r ’ s M a n u a lbottom of the Thor’s <strong>Hammer</strong>. Do not overtighten.4. Screw the spike (with nut) all the way in until it just touches the bolt. Donot tighten the nut at this time.5. Repeat steps 1 through 4 with the other spikes.6. Using a bubble level, adjust the spikes so that the Thor’s <strong>Hammer</strong> is leveland so that all of the spikes are making equal contact with the hard surfacebeneath.The spikes, installed properly, decouple the Thor’s <strong>Hammer</strong> from the floor, reducingresonances within the room. They also provide a stable platform for the Thor’s <strong>Hammer</strong>to launch bass energy into the room. The result is cleaner, faster, more dynamicbass, with improved extension and linearity.Plinth and Spike Installation - Horizontal PlacementNote: Thor’s <strong>Hammer</strong> is extremely heavy. Two or more strong individuals are requiredto safely lay Thor’s <strong>Hammer</strong> on its side.A separate accessory plinth is supplied in the event Thor’s <strong>Hammer</strong> is placed onFigure 7 – Installing Spikes in the plinth30W i l s o n A u d i o S p e c i a l t i e s
Figure 8 – Spike AssemblyS e c t i o n 4 . 1 – S p i k i n g T h o r ’ s H a m m e rits side. This plinth features a special padded surfaceon its upper that provides a degree of protectionfor Thor’s <strong>Hammer</strong>’s painted surface. Determinethe final position of Thor’s <strong>Hammer</strong>. Makesure to position the <strong>Hammer</strong> such that the bindingposts are oriented to the side most convenient toconnection. Place the plinth in this location. Assemblespikes (see Figure 8 and follow the instructionsin the previous section) by first screwing thespike into the diode. Install the spikes into threadedholes in the bottom of the plinth.Note: Remove the casters when tipping Thor’s <strong>Hammer</strong> on its side. Thor’s <strong>Hammer</strong> isvery heavy—over four hundred pounds (182 Kg.)—and can bend or break the castershaft as the subwoofer rotates horizontally.Tip the <strong>Hammer</strong> onto its side near adjacent to the plinth. Reinstall the casters onthe top-side holes. Using the port holes and/or casters as hand grips, carefully tip theThor’s <strong>Hammer</strong> up enough that you are able to rotate the subwoofer onto its plinth. TheFigure 9 – Thor’s <strong>Hammer</strong> on plinth in the Horizontal PositionW i l s o n A u d i o S p e c i a l t i e s31
second person should then rotate his sideonto the plinth. Ensure the Thor’s <strong>Hammer</strong>is centered on the plinth as picturedin Figure 9. Remove the casters.Assembly and Care of the GrillsThe Thor’s <strong>Hammer</strong>’s grills are attachedusing <strong>Wilson</strong>’s unique austeniticstainless pin system. Each of the twogrills contain four pins. Assemble the grillby screwing each pin into the four threadedholes in each grill. The grill framesare milled from solid “X” material. Thethreads are tapped directly into the “X”material. Avoid cross threading the grillFigure 10 – Thread Steel Pins into Grill Holespins.W i l s o n A u d i o S p e c i a l t i e s
S e c t i o n 5 – C a r e o f t h e F i n i s h
T h o r ’ s H a m m e r O w n e r ’ s M a n u a l34W i l s o n A u d i o S p e c i a l t i e s
S e c t i o n 5 . 1 – C a r e o f t h e F i n i s hSection 5.1 – Care of the FinishThe Thor’s <strong>Hammer</strong> loudspeakers are hand painted with <strong>Wilson</strong>Gloss paint andhand polished to a high luster. While the finish seems quite dry to the touch, final curingand complete hardening takes place over a period of several weeks.Dusting the Thor’s <strong>Hammer</strong>It is important that the delicate paint finish of the Thor’s <strong>Hammer</strong> be dusted carefullywith the dust cloth, which has been provided. We recommend that the followingprocedure be observed when dusting the speakers:• Blow off all loose dust.• Using the special dust cloth as a brush, gently whisk off any remainingloose dust.• Shake out the dust cloth.• Dust the finish, using linear motions in one direction parallel to the floor.Avoid using circular or vertical motions.Because the paint requires a period of several weeks to fully cure, we recommendthat no cleaning fluids, such as glass cleaners, be used during this initial period oftime. When the paint is fully cured, heavy fingerprints and other minor smudges maybe removed with a glass cleaner. Always use the dust cloth. Stronger solvents are notrecommended under any circumstances. Consult your dealer for further information ifrequired. To maintain the high luster of the finish, periodic polishing may be desired.We recommend a nonabrasive carnauba-based wax and a soft cloth.Care of the GrillsPeriodically, you will want to clean the Thor’s <strong>Hammer</strong>’s grills. This is best doneby using the round brush attachment on a vacuum cleaner hose. After removing theW i l s o n A u d i o S p e c i a l t i e s35
T h o r ’ s H a m m e r O w n e r ’ s M a n u a lclosure. It was also chosen for its excellent bond strength, solvent resistance, hardness,and optimum vibrational characteristics.Section 5.3 – Depth of DesignThor’s <strong>Hammer</strong>’s compellingly authentic performance and lasting value areachieved through careful implementation of cutting edge design and engineering andthen executed using the highest performance materials. <strong>Wilson</strong> <strong>Audio</strong>’s use of proprietaryenclosure materials and adhesives are employed to achieve truly exceptionalspeaker cabinet performance. The use of these materials in the Thor’s <strong>Hammer</strong> resultsin an enclosure that is inherently inert and non-resonant. All of these structural aspectsare combined, allowing <strong>Wilson</strong> <strong>Audio</strong> to deliver a product that maintains the stricteststructural tolerances, durability, and reliability. This also means that the Thor’s <strong>Hammer</strong>swill have consistent, repeatable performance, unaffected by the climatic conditions,anywhere in the world. Finally, like all <strong>Wilson</strong> products, the Thor’s <strong>Hammer</strong> ishand-crafted with meticulous attention to detail, with an unwavering commitment toexcellence. Thus, the Thor’s <strong>Hammer</strong> will impart to her owner beauty and pleasure formany years to come.38W i l s o n A u d i o S p e c i a l t i e s
S e c t i o n 6 – S p e c i f i c a t i o n s
T h o r ’ s H a m m e r O w n e r ’ s M a n u a l40W i l s o n A u d i o S p e c i a l t i e s
Passive Thor’s <strong>Hammer</strong> SpecificationsP a s s i v e T h o r ’ s H a m m e r S p e c i f i c a t i o n sEnclosure Type:Woofer:Nominal Impedance:Sensitivity:Front Ported2 each 15 inch, dual spider4 ohms93 dB @ 1 watt (2.83v at one meter)Overall Dimensions:Weight:Height: 59” (149.86 cm) with spikeDepth: 25 1/2” (65.25 cm)Width: 20” (50.80 cm)412 lbs (186.88 Kg)545 lbs (245.21 KG) in shipping cratesW i l s o n A u d i o S p e c i a l t i e s41
T h o r ’ s H a m m e r O w n e r ’ s M a n u a lThor’s <strong>Hammer</strong> Dimensions42W i l s o n A u d i o S p e c i a l t i e s
S e c t i o n 7 – Wa r r a n t y I n f o r m a t i o n
T h o r ’ s H a m m e r O w n e r ’ s M a n u a l44W i l s o n A u d i o S p e c i a l t i e s
S e c t i o n 7 . 1 – W a r r a n t y I n f o r m a t i o nSection 7.1 – Warranty InformationLimited WarrantySubject to the conditions set forth herein, <strong>Wilson</strong> <strong>Audio</strong> warrants its electronics tobe free of manufacturing defects in material and workmanship for the Warranty Period.The Warranty Period is a period of 90 days from the date of purchase by the originalpurchaser, or if both of the following two requirements are met, the Warranty Period isa period of five (5) years from the date of purchase by the original purchaser:Requirement No. 1. No later than 30 days after product delivery to thecustomer, the customer must have returned the Warranty RegistrationForm to <strong>Wilson</strong> <strong>Audio</strong>;Requirement No. 2. The product must have been professionally installed bythe <strong>Wilson</strong> <strong>Audio</strong> dealer that sold the product to the customer.FAILURE TO COMPLY WITH EITHER REQUIREMENT NO. 1 OR REQUIREMENT NO. 2WILL RESULT IN THE WARRANTY PERIOD BEING LIMITED TO A PERIOD OF 90 DAYSONLY.ConditionsThis Limited Warranty is also subject to the following conditions and limitations.The Limited Warranty is void and inapplicable if the product has been used or handledother than in accordance with the instructions in the owner’s manual, or has beenabused or misused, damaged by accident or neglect or in being transported, or if theproduct has been tampered with or service or repair of the product has been attemptedor performed by anyone other than <strong>Wilson</strong> <strong>Audio</strong>, an authorized <strong>Wilson</strong> <strong>Audio</strong> DealerTechnician or a service or repair Center authorized by <strong>Wilson</strong> <strong>Audio</strong> to service or repairthe product. Contact <strong>Wilson</strong> <strong>Audio</strong> at (801) 377-2233 for information on locationof <strong>Wilson</strong> <strong>Audio</strong> Dealers and authorized service and repair Centers. Most repairs canW i l s o n A u d i o S p e c i a l t i e s45
T h o r ’ s H a m m e r O w n e r ’ s M a n u a lbe made in the field. In instances where return to <strong>Wilson</strong> <strong>Audio</strong>’s factory is required,the dealer or customer must first obtain a return authorization. Purchaser must pay forshipping to <strong>Wilson</strong> <strong>Audio</strong>, and <strong>Wilson</strong> <strong>Audio</strong> will pay for shipping of its choice to returnthe product to purchaser. A RETURNED PRODUCT MUST BE ACCOMPANIED BYA WRITTEN DESCRIPTION OF THE DEFECT. <strong>Wilson</strong> <strong>Audio</strong> reserves the right to modifythe design of any product without obligation to purchasers of previously manufacturedproducts and to change the prices or specifications of any product without notice orobligation to any person.RemedyIn the event that the product fails to meet the above Limited Warranty and theconditions set forth herein have been met, the purchaser’s sole remedy under this LimitedWarranty shall be to: (1) contact an authorized <strong>Wilson</strong> <strong>Audio</strong> Dealer within theWarranty Period for service or repair of the product without charge for parts or labor,which service or repair, at the Dealer’s option, shall take place either at the locationwhere the product is installed or at the Dealer’s place of business; or (2) if purchaserhas timely sought service or repair and the product cannot be serviced or repaired bythe Dealer, then purchaser may obtain a return authorization from <strong>Wilson</strong> <strong>Audio</strong> and atpurchaser’s expense return the product to <strong>Wilson</strong> <strong>Audio</strong> where the defect will be rectifiedwithout charge for parts or labor.Warranty Limited to Original PurchaserThis Limited Warranty is for the sole benefit of the original purchaser of the coveredproduct and shall not be transferred to a subsequent purchaser of the product, unlessthe product is purchased by the subsequent purchaser from an authorized <strong>Wilson</strong><strong>Audio</strong> Dealer who has certified the product in accordance with <strong>Wilson</strong> <strong>Audio</strong> standardsand requirements and the certification has been accepted by <strong>Wilson</strong> <strong>Audio</strong>, in whichevent the Limited Warranty for the product so purchased and certified shall expire at46W i l s o n A u d i o S p e c i a l t i e s
the end of the original Warranty Period applicable to the product.S e c t i o n 7 . 1 – W a r r a n t y I n f o r m a t i o nDemonstration EquipmentEquipment, while used by an authorized dealer for demonstration purposes, iswarranted to be free of manufacturing defects in materials and workmanship for a periodof five (5) years from the date of shipment to the dealer. Demo equipment needingwarranty service may be repaired on-site or, if necessary, correctly packed and returnedto <strong>Wilson</strong> <strong>Audio</strong> by the dealer at dealer’s sole expense. <strong>Wilson</strong> <strong>Audio</strong> will pay returnfreight of its choice. A returned product must be accompanied by a written descriptionof the defect. Dealer owned demonstration equipment sold at retail within two (2) yearsof date of shipment to the dealer is warranted to the first retail customer to be free ofmanufacturing defects in materials and workmanship for the same time periods as if theproduct had originally been bought for immediate resale to the retail customer. <strong>Wilson</strong><strong>Audio</strong> products are warranted for a period of 90 days, unless extended to 5 years, asprovided above, by return and filing of completed Warranty Registration at <strong>Wilson</strong> <strong>Audio</strong>within 30 days after product delivery to customer and the product was professionallyinstalled by the <strong>Wilson</strong> <strong>Audio</strong> Dealer that sold the product to the customer.MiscellaneousALL EXPRESS AND IMPLIED WARRANTIES NOT PROVIDED FOR HEREIN AREHEREBY EXPRESSLY DISCLAIMED. ANY LEGALLY IMPOSED IMPLIED WARRANTIES RE-LATING TO THE PRODUCT SHALL BE LIMITED TO THE DURATION OF THIS LIMITEDWARRANTY. THIS LIMITED WARRANTY DOES NOT EXTEND TO ANY INCIDENTAL ORCONSEQUENTIAL COSTS OR DAMAGES TO THE PURCHASER.Some states do not allow limitations on how long an implied warranty lasts oran exclusion or limitation of incidental or consequential damages, so the above limitationsor exclusions may not apply to you. This Limited Warranty gives you specificlegal rights, and you may also have other rights, which vary from state to state.W i l s o n A u d i o S p e c i a l t i e s47
T h o r ’ s H a m m e r O w n e r ’ s M a n u a l48W i l s o n A u d i o S p e c i a l t i e s