WATCH Center Series 2 Owner's Manual - Wilson Audio
WATCH Center Series 2 Owner's Manual - Wilson Audio
WATCH Center Series 2 Owner's Manual - Wilson Audio

You also want an ePaper? Increase the reach of your titles
YUMPU automatically turns print PDFs into web optimized ePapers that Google loves.
W A T C H C e n t e r C h a n n e l S e r i e s 2 O w n e r ’ s M a n u a lC o m b F i l t e r E f f e c t 3 1S e c t i o n 3 . 3 – R e s o n a n c e s 3 1S t r u c t u r a l R e s o n a n c e 3 2V o l u m e R e s o n a n c e 3 2S e c t i o n 3 . 4 – Y o u r R o o m 3 3R o o m S h a p e s 3 3W A T C H C e n t e r C h a n n e l i n a D e d i c a t e d H o m e T h e a t e r 3 4S p e a k e r P l a c e m e n t V e r s u s L i s t e n i n g P o s i t i o n 3 5S p e a k e r O r i e n t a t i o n 3 5C e n t e r C h a n n e l 3 6S u r r o u n d C h a n n e l 3 7W A T C H D o g P a s s i v e S u b w o o f e r 3 7S e c t i o n 4 – I n i t i a l S e t u p 3 9S e c t i o n 4 . 1 - F i n a l S e t u p 4 1P r e p a r a t i o n 4 1S e c t i o n 4 . 2 - C e n t e r C h a n n e l S p i k e s 4 1A s s e m b l y 4 2G r i l l A s s e m b l y 4 3S e c t i o n 4 . 3 - M e a s u r e d L i s t e n i n g P o s i t i o n 4 3P r o p a g a t i o n D e l a y C o r r e c t i o n 4 3R o o m S e t u p 4 3C e n t e r C h a n n e l C o n f i g u r a t i o n s 4 4S e c t i o n 4 . 4 – S e t u p # 1 C e n t e r C h a n n e l o n F l o o r 4 5S e c t i o n 4 . 5 – S e t u p # 2 C e n t e r C h a n n e l o n S t a n d 4 7S e c t i o n 4 . 6 – S e t U p # 3 C e n t e r o n C u s t o m S t a n d o r S h e l f 4 8S e c t i o n 4 . 7 – S e t u p # 4 C e n t e r M o u n t e d t o C e i l i n g 5 0T a b l e O f C o n t e n T SS e c t i o n 4 . 8 - C e n t e r C h a n n e l F i n a l S e t u p 5 3S t a n d o r F l o o r M o u n t e d C e n t e r C h a n n e l 5 4C e i l i n g o r O t h e r C u s t o m L o c a t i o n 5 4S e c t i o n 4 . 9 - C o n n e c t i n g S p e a k e r t o A m p l i f i e r 5 6S p e a k e r C a b l e s 5 6S p a d e L u g s 5 7C o n n e c t i o n o f t h e C e n t e r t o t h e P o w e r A m p l i f i e r 5 7C e n t e r C h a n n e l S e t u p C o m p l e t e d 5 7S e c t i o n 5 – T u n i n g a n d V o i c i n g 5 9S e c t i o n 5 . 1 - F i n a l T u n i n g a n d V o i c i n g 6 1S e c t i o n 5 . 2 - L e f t a n d R i g h t C h a n n e l s 6 1D e t e r m i n i n g F r o n t t o B a c k D i s t a n c e 6 2D e t e r m i n i n g S i d e t o S i d e D i s t a n c e 6 3S e c t i o n 5 . 3 - I n t e g r a t i n g t h e W AT C H S y s t e m 6 4I n t e g r a t i n g t h e W A T C H C e n t e r 6 4I m a g e H e i g h t 6 5C e n t e r R o t a t i o n 6 5R e s e t t i n g t h e P r o p g a t i o n D e l a y c o r r e c t i o n ( P D C ) 6 6C e n t e r C h a n n e l P o l a r i t y 6 6I n t e g r a t i n g t h e W A T C H S u r r o u n d C h a n n e l s 6 7I n t e g r a t i n g t h e P a s s i v e W A T C H D o g 6 7S e c t i o n 6 – C a r e o f t h e F i n i s h 6 9S e c t i o n 6 . 1 – C a r e o f t h e F i n i s h 7 1D u s t i n g t h e W A T C H C e n t e r 7 1C a r e o f t h e G r i l l s 7 1B r e a k - i n P e r i o d 7 2<strong>Wilson</strong> <strong>Audio</strong> Specialties<strong>Wilson</strong> <strong>Audio</strong> Specialties4 5
W A T C H C e n t e r C h a n n e l S e r i e s 2 O w n e r ’ s M a n u a lS e c t i o n 6 . 2 – E n c l o s u r e T e c h n o l o g y 7 2M a t e r i a l s 7 2A d h e s i v e 7 3S e c t i o n 6 . 3 – D e p t h o f D e s i g n 7 3S e c t i o n 7 – T r o u b l e s h o o t i n g 7 5S e c t i o n 8 - R e p a i r P r o c e d u r e s 8 1S e c t i o n 8 . 1 - R e p a i r P r o c e d u r e s 8 3R e p l a c i n g a B l o w n R e s i s t o r 8 3R e p l a c i n g a B a d D r i v e r 8 3S e c t i o n 9 – S p e c i f i c a t i o n s 8 5S e c t i o n 9 . 1 - W AT C H C e n t e r C h a n n e l S p e c i f i c a t i o n s 8 7M e a s u r e m e n t s : 8 7T a b l e 5 - F o r o n S t a n d w i t h S p i k e a n d N u t 1 0 0T a b l e 6 - F o r o n S t a n d w i t h D i o d e , S p i k e , a n d N u t 1 0 1S e c t i o n 1 1 – C e i l i n g M o u n t e d B r a c k e t 1 0 3S e c t i o n 1 1 . 1 - C e i l i n g M o u n t e d C e n t e r C h a n n e l 1 0 5S e c t i o n 1 2 – W a r r a n t y I n f o r m a t i o n 1 0 9S e c t i o n 1 2 . 1 – W a r r a n t y I n f o r m a t i o n 1 1 1L i m i t e d W a r r a n t y 1 1 1C o n d i t i o n s 1 1 1R e m e d y 1 1 2W a r r a n t y L i m i t e d t o O r i g i n a l P u r c h a s e r 1 1 2D e m o n s t r a t i o n E q u i p m e n t 1 1 3M i s c e l l a n e o u s 1 1 3D i m e n s i o n s : 8 7W e i g h t U n c r a t e d : 8 7S h i p p i n g W e i g h t ( a p p r o x i m a t e ) : 8 7C e n t e r S e r i e s 2 D i m e n s i o n s 8 8C e n t e r S e r i e s 2 M a t c h i n g S t a n d D i m e n s i o n s 8 9C e n t e r S e r i e s 2 o n M a t c h i n g S t a n d D i m e n s i o n s 9 0C e n t e r S e r i e s 2 I m p e d a n c e C u r v e 9 1S e c t i o n 1 0 - T w e e t e r A l i g n m e n t T a b l e s 9 3I n i t i a l S p i k e C o n f i g u r a t i o n 9 5T a b l e 1 - F o r o n F l o o r w i t h S p i k e a n d N u t 9 6T a b l e 2 - F o r o n F l o o r w i t h D i o d e , S p i k e , a n d N u t 9 7T a b l e 3 - F o r o n F l o o r P l a c e m e n t , O n e S p a c e r 9 8T a b l e 4 - F o r o n F l o o r P l a c e m e n t , T w o S p a c e r s 9 9<strong>Wilson</strong> <strong>Audio</strong> Specialties<strong>Wilson</strong> <strong>Audio</strong> Specialties67
<strong>Wilson</strong> <strong>Audio</strong> SpecialtiesSection 1 – Introduction
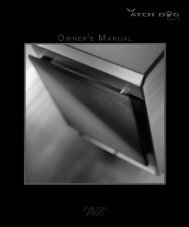
W A T C H C e n t e r C h a n n e l S e r i e s 2 O w n e r ’ s M a n u a lS e c t i o n 1 . 1 – W A T C H S y s t e m I n t r o d u c t i o nSection 1.1 – <strong>WATCH</strong> System IntroductionIf your passion is home theater, and you have sought the full sensory experience createdas your eyes absorb the vision and your skin awakens to the power of the sound, <strong>Wilson</strong><strong>Audio</strong> has your answer. Introducing <strong>WATCH</strong> - <strong>Wilson</strong> <strong>Audio</strong> Theater Comes Home.While all <strong>Wilson</strong> speakers are designed to take full advantage of today’s popularmulti-channel formats, <strong>WATCH</strong> is the first <strong>Wilson</strong> system designed from the ground up toexcel specifically at home theater performance. Best of all, it comes in a package as smallor as large as you desire.The fact is, you haven’t truly experienced home theater until you’ve felt the impact,power, and passion of a film score the way the director intended it, and no company willdeliver this passion like <strong>Wilson</strong> <strong>Audio</strong>. That’s why, for nearly twenty years, more blockbusterhits have been mixed, composed, or recorded using <strong>Wilson</strong> <strong>Audio</strong> than any otherloudspeaker.Design ConsiderationsYour <strong>WATCH</strong> System has been designed to perform all of the specific functions ofa high performance home theater system. This was a difficult task because of the manyinteractions that occur in a home theater environment. Because the <strong>WATCH</strong> System wasdesigned in-house and voiced with a variety of <strong>Wilson</strong> speakers, you can be sure that thedriver blend will be excellent whether your system includes Sophia <strong>Series</strong> 2 or the X-2Alexandria <strong>Series</strong> 2. <strong>Wilson</strong> <strong>Audio</strong> loudspeakers have set the standard for performance ina wide variety of two-channel audio and multi-channel home theater applications. The<strong>WATCH</strong> <strong>Center</strong> <strong>Series</strong> 2 ensures the most seamless integration with your <strong>Wilson</strong> <strong>Audio</strong>loudspeakers. The <strong>WATCH</strong> <strong>Center</strong> is the only center channel designed specifically to matchthe inherent quality of the Sophia, WATT/Puppy, MAXX, and, in many instances, the AlexandriaX-2.10<strong>Wilson</strong> <strong>Audio</strong> Specialties<strong>Wilson</strong> <strong>Audio</strong> Specialties11
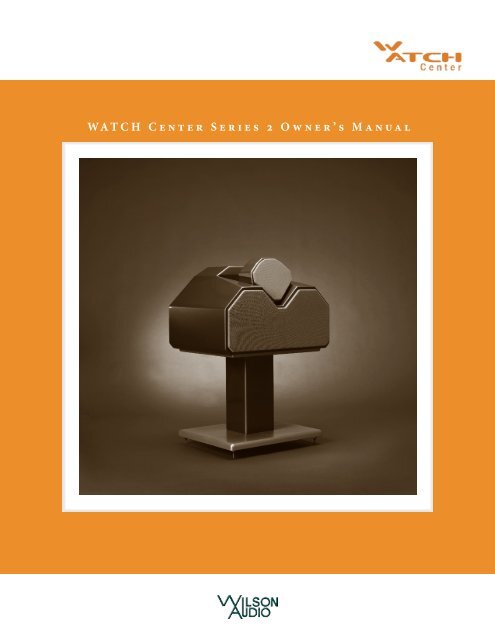
W A T C H C e n t e r C h a n n e l S e r i e s 2 O w n e r ’ s M a n u a lApplicationsOne of <strong>Wilson</strong> <strong>Audio</strong>’s most important criteria in speaker development is that aspeaker meets the accuracy and dynamic demands of studio monitoring, analytical hardwareand software evaluation, and, of course, critical music and theater soundtrack listening.The <strong>WATCH</strong> <strong>Center</strong> <strong>Series</strong> 2 has been designed to deliver all of the speed, dynamics,and musical accuracy to satisfy even the most demanding music lovers.The <strong>WATCH</strong> <strong>Center</strong> has been engineered to take full advantage of today’s multi-channelsurround formats, including the latest AC-3 (Dolby Digital) and DTS (Digital TheaterSystems) formats.It will provide years of satisfaction whether listening to two-channel audio, multichannelaudio, or to the latest movie sound track.Section 1.2 – <strong>WATCH</strong> Package<strong>WATCH</strong> <strong>Center</strong> <strong>Series</strong> 2Specifically designed to excel at center channel functions, <strong>WATCH</strong> <strong>Center</strong> is extremelydynamic with high sensitivity androbust power handling. Unlike most centerchannels, it provides listeners not onlywith optimal on-axis response, but alsosmooth, linear, off-axis performance. Thisis, in part, a result of <strong>Wilson</strong> PDC (PropagationDelay Correction) technology firstdeveloped for the WAMM ® and X-1 GrandSLAMM ® systems and later applied to therest of the <strong>Wilson</strong> Line. PDC allows for optimaltuning of a loudspeaker for various Figure 1 - <strong>WATCH</strong> <strong>Center</strong> Channel <strong>Series</strong> 2S e c t i o n 1 . 2 – W A T C H P a c k a g elistening distances and heights and gives listeners much greater control over their sound.The <strong>WATCH</strong> <strong>Center</strong> <strong>Series</strong> 2 was designed from the ground up as a center channel.It is not merely a standard speaker that was tipped onto its side. The <strong>Center</strong> channel wasvoiced and optimized to truly represent dialogue for movies as well as music and vocalswhen used in a multi-channel audio setup.Of course, the <strong>WATCH</strong> <strong>Center</strong> <strong>Series</strong> 2 lives up to <strong>Wilson</strong>’s high standards of cuttingedge design, superior build quality, and stunning sonic performance. The <strong>WATCH</strong> <strong>Center</strong>is available with a matching stand.<strong>WATCH</strong> Dog Passive SubwooferThe <strong>WATCH</strong> Dog passive subwooferis the culmination of over twenty years ofexperience at <strong>Wilson</strong> <strong>Audio</strong> in buildinghigh output, ultra-low distortion wooferand subwoofer products. It was designedto further extend and enhance the bottomoctave performance of music and theatersystems without compromising speed, tonalaccuracy, or phase coherency. The <strong>WATCH</strong>Dog will seamlessly and coherently integratewith any loudspeaker, whether youFigure 2 - <strong>WATCH</strong> Dog Passive Subwooferare augmenting a two-channel system orusing the Dog as the LFE channel in a surround system.<strong>WATCH</strong> ControllerLike other <strong>WATCH</strong> products, along with music system applications, the <strong>WATCH</strong> Dogwas designed to take advantage of today’s multi-channel formats. The unique tuneability12<strong>Wilson</strong> <strong>Audio</strong> Specialties<strong>Wilson</strong> <strong>Audio</strong> Specialties13
W A T C H C e n t e r C h a n n e l S e r i e s 2 O w n e r ’ s M a n u a lS e c t i o n 1 . 2 – W A T C H P a c k a g eFigure 3 - <strong>WATCH</strong> Controllerof the <strong>WATCH</strong> Dog isgreatly enhanced whenused with the <strong>WATCH</strong>Dog Controller activecrossover. The crossover’scomprehensivecontrol allows thethe mount itself. This causes frequency nonlinearities – accentuating some frequencies andeffectively masking others. <strong>WATCH</strong> Surround minimizes wall/ceiling resonant interactionsthrough its advanced mounting system. Using state-of-the-art materials technology firstdeveloped for the X-1 Grand SLAMM, <strong>WATCH</strong> Surround provides stunning results.The Surround is mounted to its bracket by strategically located spikes, further reducingwall interaction and resonance. The Surround can also be rotated towards the listeningposition, offering improved integration with the front speakers and better imaging.<strong>WATCH</strong> Dog to be optimized for both music and multi-channel applications, even withinthe same system. The crossover adjustments allow critical setup, ensuring the best possibleperformance in a wide range of rooms and with a variety of speakers.<strong>WATCH</strong> Surround <strong>Series</strong> 2<strong>WATCH</strong> Surround <strong>Series</strong> 2 is a perfectexample of performance disproportionate tosize. With strong power handling capacityand low end frequency response reachingConclusionFinally, a home theater, designed from the ground up as multi-channel, that is trulyhigh-end. Combine the structural and design considerations with the superior sonic qualityand finish, and you find what makes <strong>Wilson</strong> <strong>Audio</strong> the leader in the industry. <strong>Wilson</strong><strong>Audio</strong> delivers a product that maintains the strictest structural tolerances, durability andreliability. You will have consistent, repeatable performance, unaffected by the climaticconditions, anywhere in the world. You are about to experience multi-channel audio/hometheater like you never thought possible, except from <strong>Wilson</strong> ....40 Hz, this speaker will take your surroundsound to new heights. Unlike most surroundspeakers, <strong>WATCH</strong> Surround is more than anoisemaker. It brings accuracy, dynamics,and emotion to your theater, and with itsgorgeous <strong>Wilson</strong>Gloss finish, it looks rightat home on your wall.The greatest challenge for any wallmountloudspeaker is accounting for thedeleterious interaction with the wall andceiling, as well as degradation caused byFigure 4 - <strong>WATCH</strong> Surround14<strong>Wilson</strong> <strong>Audio</strong> Specialties<strong>Wilson</strong> <strong>Audio</strong> Specialties15
<strong>Wilson</strong> <strong>Audio</strong> SpecialtiesSection 2 – Uncrating your <strong>WATCH</strong> <strong>Center</strong>
W A T C H C e n t e r C h a n n e l S e r i e s 2 O w n e r ’ s M a n u a lS e c t i o n 2 . 1 – U n c r a t i n g t h e W A T C H C e n t e r C h a n n e lSection 2.1 – Uncrating the <strong>WATCH</strong> <strong>Center</strong> ChannelInitial CheckThe <strong>WATCH</strong> <strong>Center</strong> Channel is shipped in a wooden crate. If you have also purchaseda <strong>Center</strong> stand, it is shipped in a separate cardboard box. Upon receiving the crate (andcardboard box), please check their condition. If there is any damage, please report it to theshipping company immediately for insurance verification.The following items are recommended for this procedure:• Supplied hardware kit• Tape measure• Known listening position• Electric screwdriver• Phillips head drive bit or Phillips head screwdriverUncrating the <strong>WATCH</strong> <strong>Center</strong>Gently lift the <strong>Center</strong> channel out of the crate. Remove the plastic outer bag. Inventorythe crate contents. Move the <strong>Center</strong> channel into the desired location.Note: Do not cut the bag off of the <strong>Center</strong> channel. By using scissors or a knife, youcould unintentionally mark the cabinet or damage a driving element. Keep the bag incase you need to repackage the <strong>Center</strong> channel. Likewise, save your shipping crates andall packing materials. They are specifically designed to prevent harm from coming toyour <strong>WATCH</strong> <strong>Center</strong>.18<strong>Wilson</strong> <strong>Audio</strong> Specialties<strong>Wilson</strong> <strong>Audio</strong> Specialties19
W A T C H C e n t e r C h a n n e l S e r i e s 2 O w n e r ’ s M a n u a lS e c t i o n 2 . 2 – C r a t e C o n t e n t C h e c k l i s tNote: Be careful not to touch the driver elements when you are moving your <strong>Center</strong>channel.Section 2.2 – Crate Content ChecklistNow that you have unpacked your <strong>WATCH</strong> <strong>Center</strong> Channel, you can inventory all theadditional items in the crate.<strong>Center</strong> Channel Crate1 – Owner’s <strong>Manual</strong>1 – Warranty Registration1 – <strong>Center</strong> Midrange Grill1 – <strong>Center</strong> Tweeter Grill8 – Nuts1 – Blue Polishing Cloth<strong>Center</strong> Stand BoxIf you purchased a <strong>Wilson</strong> <strong>Audio</strong> <strong>Center</strong> Stand on which to mount your <strong>WATCH</strong> <strong>Center</strong>Channel, you will find the following items in the box with your stand:4 – 3/8” - 16 x 1 1/2” Socket Head Cap Screws4 – 3/8” x 7/8” Stainless Steel Flat Washers1 – 9/16” Wrench1 – 3/16” Long Arm Allen Wrench1 – 5/16” Long Arm Allen Wrench1 - Polishing Cloth-4 – Spikes4 – Brass Discs4 – Spacers2 – Diodes1 – 3/16” Allen Wrench (Handle)1 – 1/2” Nut Driver1 – 1/8” Allen Wrench20<strong>Wilson</strong> <strong>Audio</strong> Specialties<strong>Wilson</strong> <strong>Audio</strong> Specialties21
Section 3 – In Your Room22<strong>Wilson</strong> <strong>Audio</strong> Specialties
W A T C H C e n t e r C h a n n e l S e r i e s 2 O w n e r ’ s M a n u a lS e c t i o n 3 . 1 – T h e W i l s o n A u d i o S e t u p P r o c e d u r eSection 3.1 – The <strong>Wilson</strong> <strong>Audio</strong> Setup ProcedureYou are surely excited about setting up your <strong>WATCH</strong> <strong>Center</strong> <strong>Series</strong> 2 and doing somelistening, but before you begin, we would like to discuss some of the important roomacoustical information that will help you set up your loudspeakers properly.Final Listening Room Setup (Voicing)For a center channel its size, the <strong>WATCH</strong> <strong>Center</strong> is unmatched in its ability to reproducethe musical event. It is truly state-of-the-art. However, room acoustics and boundaryinteractions affect the sound of a loudspeaker to such a large degree that poor setup canseriously degrade your enjoyment of even the finest loudspeaker.Therefore, we offer the following section, which will present some guidelines onroom acoustics and their interactions with loudspeakers. While we will also outline somedetailed suggestions on the setup of the <strong>WATCH</strong> <strong>Center</strong>, we strongly suggest that you haveyour local <strong>Wilson</strong> <strong>Audio</strong> dealer perform the final speaker “voicing” with you. <strong>Wilson</strong> dealersare specially trained in setting up <strong>Wilson</strong> loudspeakers and will ensure that you realizethe full value of your purchase. What follows is an outline of the <strong>Wilson</strong> <strong>Audio</strong> Setup Procedure(WASP). When carefully followed, the process has proven to be the most effectivemethod for setting up <strong>Wilson</strong> loudspeakers.Zone of Neutrality: Main Left and Right ChannelThe “Zone of Neutrality” is an area in your room where the speakers will sound mostnatural. This location is where the speakers interact the least with adjacent room boundaries.It is important to have a clear working space while determining the Zone of Neutrality.The following is a simple method to locate the Zone of Neutrality within your listeningenvironment:1. Stand against the wall BEHIND the location where you intend to position<strong>Wilson</strong> <strong>Audio</strong> Specialties<strong>Wilson</strong> <strong>Audio</strong> Specialties2425
W A T C H C e n t e r C h a n n e l S e r i e s 2 O w n e r ’ s M a n u a lyour loudspeakers. Speaking in a moderately loud voice and at a constantvolume, project your voice out into the room. Your voice will have an overlyheavy, “chesty” quality because of your proximity to the rear wall.2. While speaking, slowly move out into the room, progressing in a directionparallel to the sidewall. It is helpful to have another listener seated in thelistening position to assist you during this process. Listen to how your voice“frees up” from the added bass energy imparted by the rear wall boundary.Also notice that your voice is quite spatially diffuse (to your assistant, yourvoice will sound spatially large and difficult to localize) as you begin to easeaway from the rear wall.3. At some point during your progression forward into the room, you will observea sonic transition in your voice; it will sound more tonally correct andless spatially diffuse (your assistant can now precisely localize the exact originof your voice). When you hear this transition, you have entered the inneredge of the Zone of Neutrality. Place a piece of tape on the floor to mark thislocation. Although it will vary from room to room, in most rooms the zonebegins between two and a half to three feet from the rear wall.4. Continue to walk slowly away from the rear wall. After some distance, usuallyone to two feet past the first piece of tape, you will begin to hear yourvoice lose focus and appear to reflect (echo) in front of you. This is causedby the return of the room’s boundary contribution; your voice is now interactingwith the opposite wall. At the point where you begin to hear thereflected sound of your voice, you have reached the inner edge of the Zoneof Neutrality. Place a piece of tape on the floor and mark this location. Thedistance between the “inner” and “outer” edge tape marks is usually betweeneight inches (for small, interactive rooms) and three feet (for large,more neutral rooms).5. Now position yourself against the side wall perpendicular to the intendedspeaker location. Stand between the two tape marks. Using the same procedureas above, begin moving into the room toward the opposite sidewall,progressing between the two pieces of tape. As above, listen for the point inthe room where your voice transitions from bass-heavy and diffuse to neu-S e c t i o n 3 . 2 – R o o m A c o u s t i c stral. Mark this point with tape. Continue your progression until there is anobvious interaction with the opposite wall in front of you and mark this pointwith tape. The four pieces of tape now form a rectangle that establishes theZone of Neutrality for the loudspeaker located on that side of the room. Usingthe four marks as your guide, tape an outline to define the boundaries ofthe rectangle.6. Repeat this process for each speaker location individually. These are yourZones of Neutrality, one for each channel.Theoretically, the Zone of Neutrality for any room runs like a path, parallel to thewalls all around the room. Adjacent to very large windows and open doors, the outeredge of the Zone of Neutrality moves closer to the wall and becomes wider. If you wereto extend the inner and outer boundaries of the Zone for the sidewalls and the front wall(behind the speakers), they would intersect. After you complete this procedure for theother loudspeaker, you will now have two rectangles, one on the floor on either side of theroom. This same procedure will be used to locate your <strong>Center</strong> channel.Section 3.2 – Room AcousticsNote: The following section contains general information on room acoustics and loudspeaker/roominteraction. The concepts outlined below are equally relevant when dealingwith multi-channel audio or home theater. The careful application of these concepts,as you evaluate the acoustical characteristics of your own room configuration, will allowyou to optimize the performance of your <strong>WATCH</strong> <strong>Center</strong> channel.Slap EchoProbably the most obnoxious form of reflection is called “slap echo.” With slap-echo,primarily midrange and high frequency sounds reflect off of two parallel hard surfaces. Thesound literally reverberates back and forth until it is finally dissipated over time. You cantest for slap echo in any room by clapping your hands sharply in the middle of the roomand listening for the characteristic sound of the echo in the midrange. Slap echo destroys<strong>Wilson</strong> <strong>Audio</strong> Specialties<strong>Wilson</strong> <strong>Audio</strong> Specialties2627
W A T C H C e n t e r C h a n n e l S e r i e s 2 O w n e r ’ s M a n u a lthe sound quality of a stereo system in two ways:• It adds harshness to the upper midrange and treble by storing time-domainsmearing energy.• It destroys the delicate phase relationships, which help to establish an accuratesoundstage.Slap echo (see Figure 5) is a common acoustical problem in the typical domestic listeningroom because most of these rooms have walls with a hard, reflective nature, onlyoccasionally interrupted by curtains, wall art, or drapes. The best (but least practical)solution to eliminate slap echo is nonparallel walls. This is because, rather than supportslap-echo, nonparallel walls allow the sound to diffuse. This approach can be accountedfor during the construction process. For existing rooms, slap echo can also be controlledS e c t i o n 3 . 2 – R o o m A c o u s t i c sentirely by the application of absorptive materials to the hard surfaces. These are absorptivematerials that can be used to ameliorate slap echo:• Illbruck Sonex®• Air duct board• Cork panels• Large ceiling to floor drapes• Carpeting to wall surfacesIn many domestic listening environments, heavy stuffed furnishings reduce slap echosomewhat. Unfortunately, their effectiveness is not predictable. Diffusers are sometimesalso used to very good subjective effect, particularly in quite large rooms. Sound absorbentmaterials such as described above will alter the tonal characteristic of the room bymaking it sound “deader,” less “bright and alive,” and “quieter.” These changes usuallymake the room more pleasant for conversation, but sometimes render it too dull in the highfrequencies to be musically involving. Soundtrack effects will be more localized. However,over-damping the room can render reproduced sound that is lacking in musical involvementand “aliveness.”Diffusers, on the other hand, do not affect the tonal balance characteristic of theroom as much. Placed properly, diffusers create a smoother and more open sound. Somediffusers, due to their construction, create narrow midrange peaks and suck out the warmthregion. Do not use diffusers on the wall behind the speakers or on the sidewalls directlybeside the speakers. It is our experience that all of these room treatment devices shouldbe used judiciously.Figure 5 - Common Room Reflection Problems28<strong>Wilson</strong> <strong>Audio</strong> Specialties<strong>Wilson</strong> <strong>Audio</strong> Specialties29
W A T C H C e n t e r C h a n n e l S e r i e s 2 O w n e r ’ s M a n u a lStanding WavesAnother type of reflection phenomenon is “standing waves.” Standing waves causethe unnatural boosting or accentuation of certain frequencies, typically in the bass, to befound at certain discreet locations in the room. These locations differ according to roomdimension and size. A room generating severe standing waves creates difficulty in setup. Inthese rooms, the speaker will sound radically different as it is moved around. The effectsof standing waves on a loudspeaker’s performance are primarily in the areas listed.• Tonal balance• Resolution of low-level detail• SoundstagingStanding waves are more difficult to correct than slap echo because they tend to occurat a lower frequency. Absorbent materials, such as Illbruck Sonex®, are ineffective atcontrolling reflections in the bass region. Moving speakers about slightly in the room is, formost people, their only control over standing waves. Sometimes a change of placement ofas little as two or three inches can dramatically alter the tonal balance of a small system.Fortunately, minor low frequency standing waves are well controlled by positioningASC Tube Traps in the corners of the room. Very serious low frequency accentuationusually requires a custom-designed bass trap system.Low frequency standing waves can be particularly troublesome in rooms constructedof concrete or brick. These materials trap the bass in the room unless it is allowed to leakout of the room through windows and doors.In general, placement of the speaker in a corner will excite the maximal number ofstanding waves in a room and is to be avoided for most direct radiator, full-range loudspeakersystems. Some benefit is achieved by placing the stereo pair of loudspeakersslightly asymmetrically in the listening room. This is so the standing waves caused by theS e c t i o n 3 . 3 – R e s o n a n c e sdistance between one speaker and its adjacent walls and floors are not the same as thestanding wave frequencies excited by the dimensions in the other channel.Comb Filter EffectThe “comb filter” effect is a special type of standing wave noticeable primarily athigher frequencies and shorter wavelengths.Acoustical comb filtering occurs when sound from a single source, such as a loudspeaker,is directed toward a microphone or listener from a distance. The first sound toreach the microphone is the direct sound, followed by a delayed, reflected sound. At certainfrequencies, cancellation occurs because the reflected sound lags in phase relativeto the direct sound. This cancellation is most apparent where the two frequencies are 180degrees out of phase. Further, there is augmentation at other frequencies where the directand the reflected sounds arrive in phase. Because it is a function of wavelength, the combfilter effect will notch out portions of the audio spectrum at linearly spaced intervals. Subjectively,comb filter effect evidences itself as follows:• Added roughness to the sound• Reduction of harmonic richness• Smearing of lateral soundstage image focus and placementComb filter effects are often caused by side wall reflections. They are best controlledby very careful speaker placement and by the judicious placement of Illbruck Sonex® orair duct panels applied to that part of the wall where the reflection occurs.Section 3.3 – ResonancesResonance in listening rooms is generally caused by two sources:• Structures within the listening room.30<strong>Wilson</strong> <strong>Audio</strong> Specialties<strong>Wilson</strong> <strong>Audio</strong> Specialties31
W A T C H C e n t e r C h a n n e l S e r i e s 2 O w n e r ’ s M a n u a l• The volume of air itself within the listening room.Structural ResonanceStructural resonances are familiar to most people as buzzes and rattles, but this typeof resonance usually only occurs at extremely high volume levels and is usually masked bythe music. In many wood frame rooms the most common type of structural resonance problemis “booming” of walls and floors. You can test for these very easily by tapping the wallwith the palm of your hand or stomping on the floor. Most rooms exhibit mid-bass “boom”when struck. The loudspeaker playing in the room also excites these resonances. To giveyou an idea of what the perfect wall would sound like, imagine rapping your hand againstthe side of a mountain. Structural wall resonances generally occur in the low to mid-bassfrequencies and add a false fullness to the tonal balance. They, too, are more prominentat louder levels, but their contribution to the sound of the speaker is more progressive.Rattling windows, picture frames, lamp shades, etc., can generally be silenced with smallpieces of caulk or with blocks of felt. However, short of actually adding additional layersof sheet rock to flimsy walls, there is little that can be done to eliminate wall resonances.Volume ResonanceThe physical dimensions and volume of air in a room will also support standing wavemodes and resonances at frequencies determined by the size of that room. Larger roomswill resonate at a lower frequency and have more complex (better) modal distributionsthan will smaller rooms. Volume resonances, wall panel resonances, and low frequencystanding waves combine to form a low frequency coloration in the sound. At its worst, it isa grossly exaggerated fullness, which tends to obscure detail and distort the natural tonalbalance of the speaker system.Occasionally, however, there is just enough resonance to give a little added warmthto the sound – an addition some listeners prefer. Careful placement of loudspeakers in theS e c t i o n 3 . 4 – Y o u r R o o mroom can dramatically reduce the speakers’ destructive interaction with low frequencymodes. ASC Tube Traps are effective in reducing some of this low frequency room coloration.Custom designed bass traps, such as perforated Helmholtz resonators, provide thegreatest degree of low frequency control.Section 3.4 – Your RoomRoom ShapesStanding waves are pressure waves propagated by the interaction of sound and opposingparallel walls. This interaction creates patterns of low and high acoustical pressurezones that accentuate and attenuate particular frequencies. Those frequencies are dependenton room size and dimension.There are three basic shapes for most rooms: square, rectangular, and L-shaped (seeFigure 6).A perfectly square room is the most difficult room in which to set up speakers. By virtueof its shape, a square room is the perfect medium for building and sustaining standingwaves. These rooms heavily influence the music played by loudspeakers, greatly diminishingthe listening experience.Long, narrow, rectangular rooms also pose their own special acoustical problems forspeaker setup. They have the ability to create several standing wave nodes, which will havedifferent standing wave frequency exaggerations depending on where you are sitting. Additionally,these long rooms are often quite lean in the bass near the center of the room.Rectangular rooms are still preferred to square rooms because, by having two sets of dissimilarlength walls, standing waves are not as strongly reinforced and will dissipate morequickly than in a square room. In these rooms, the preferred speaker position for spatialplacement and midrange resolution would be on the longer walls. Bass response would bereinforced by speaker placement on the short walls.32<strong>Wilson</strong> <strong>Audio</strong> Specialties<strong>Wilson</strong> <strong>Audio</strong> Specialties33
W A T C H C e n t e r C h a n n e l S e r i e s 2 O w n e r ’ s M a n u a lS e c t i o n 3 . 4 – Y o u r R o o mon the middle position of the couch.If the seating area consists of multiple rows of chairs, the second row should be optimizedfor the best sound quality. Odd numbers of chairs arranged in rows work best asthis will allow a single chair to be positioned in the center. This approach will also providethe best overall sound for the greatest number of seats.Speaker Placement Versus Listening PositionThe location of your listening position is as important as the careful setup of your<strong>Wilson</strong> <strong>Audio</strong> loudspeakers. The listening position should ideally be no more than 1.1 to1.25 times the distance between the tweeters on each speaker. Therefore, in a long, rectangularroom of 12’ x 18’, if the speaker tweeters are going to be 9’ apart, you should beFigure 6 - Possible Loudspeaker Placement within Various Room ShapesIn many cases, L-shaped rooms (see Figure 6) offer the best environment for speakersetup. Ideally, speakers should be set up along the primary (longest) leg of the room. Theyshould fire from the end of the leg (short wall) toward the L, or they should be along thelongest wall. In this way, both speakers are firing the same distance to the back wall. Theasymmetry of the walls in L-shaped rooms resists the buildup of standing waves (see Figure6).<strong>WATCH</strong> <strong>Center</strong> Channel in a Dedicated Home TheaterHome theaters can be organized many different ways. Some use rows of couches.Others use rows of multiple chairs.In addition to watching movies, most users want to listen to two-channel music at thehighest quality possible. It is desirable, therefore, to choose a single optimum seating positionin a home theater and build the rest of the seating positions around this position.If your optimum position is located on a couch, you should center the loudspeakerssitting 9’11’’ to 11’3’’ from the speaker. This would be more than halfway down the longaxis of the room.Many people place the speakers on one end and sit at the other end of the room.This approach will not yield the finest sound. Carefully consider your listening position.Our experience has shown that any listening position that places your head closer than 14”from a room boundary will diminish the sonic results of your listening.Speaker OrientationSpeaker placement and orientation are two of the most important considerations inobtaining superior sound. The first thing you need to do is eliminate the sidewalls as asonic influence in your system. Speakers placed too close to the sidewalls will suffer froma strong primary reflection. This can cause out-of-phase cancellations, or comb filtering,which will cancel some frequencies and change the tonal balance of the music. The <strong>Wilson</strong><strong>Audio</strong> Setup Procedure (Section 3.1) is the best method with which to position your loudspeakers.Start with the speakers about 18” from each wall and, if you need to move themrelative to the side wall, move them away from the wall, not closer.34<strong>Wilson</strong> <strong>Audio</strong> Specialties<strong>Wilson</strong> <strong>Audio</strong> Specialties35
W A T C H C e n t e r C h a n n e l S e r i e s 2 O w n e r ’ s M a n u a lA very important aspect of speaker placement is how far from the back wall to placethe speakers. The closer a loudspeaker is to the back wall, the more pronounced the lowbass energy and centering of the image will be. However, this comes at a definite reductionin stage size and bloom as well as a deterioration of upper bass quality. You must find theproper balance of these two factors, but remember, if you are partial to bass response orair and bloom, do not overcompensate your adjustments to maximize these effects. Overcompensatedsystems are sometimes pleasing in the short-term, but long-term satisfactionis always achieved through proper balance.S e c t i o n 3 . 4 – Y o u r R o o m<strong>Center</strong> channel (as measured from the tweeters) should be equal in their relationship tothe listening position. This maintains the time coherence of the three front loudspeakers.Ultimately, the <strong>Center</strong> channel phase delay correction will be made via the sliding tweetermodule.<strong>Wilson</strong> recommends that the <strong>Center</strong> channel be positioned as centrally between theLeft and Right speakers as possible. Using the <strong>Wilson</strong> <strong>Audio</strong> Setup Procedure, experimentwith the fore to aft placement of the <strong>Center</strong> channel. This process will help you find thelocation that offers the smoothest left, right, and center channel integration.<strong>Center</strong> ChannelAfter determining the general area for the Left and Right channels, determine the bestplace for your <strong>Center</strong> channel. The following center channel configurations are possible:• On the floor with the speaker angled up towards the listener.• Mounted on a stand with no upward rotation.• Mounted on a stand with longer spikes in the front of the stand and shorterspikes in the back, allowing the stand and speaker to be rotated up towardthe listener.• Mounted upside down on the ceiling above the screen, angled down towardsthe listener.With the exception of <strong>Center</strong> channels mounted on the ceiling, each of these optionsallow for some fine-tuning of the <strong>Center</strong> channel placement. If you are mounting the<strong>Center</strong> channel on the ceiling, be sure to choose the location carefully as, except for thetweeter adjustment, you will not be able to easily adjust the <strong>Center</strong> once it is mounted. Apoor placement of the <strong>Center</strong> channel will hamper its integration with the rest of the system.As a general rule, the distance from the main Left and Right channels, as well as theSurround Channel<strong>Wilson</strong> <strong>Audio</strong> has done everything possible to eliminate the boundary interactionscaused by mounting a speaker onto the wall. The mounting bracket allows for significantimprovements in detail, speed, and clarity. The Surround channels will perform well in almostany location in which they are placed. The mounting bracket and the careful designof the Surround channel have eliminated most of the sonic problems encountered whenplacing a standard speaker too close to a boundary. Nevertheless, we have performed extensivetesting on the Surround channel and found that significant improvement on speakerlinearity and integration can be achieved by careful selection of the Surround channelmounting location.We realize that the location of the Surround channel is generally set by the architectureof the room. However, if you have some flexibility in locating your Surrounds, wesuggest that you use WASP to find the Zone of Neutrality. Be sure to listen for room modesand frequency response peaks or dips.<strong>WATCH</strong> Dog Passive SubwooferBecause the <strong>WATCH</strong> Dog’s frequency range is limited to the sub-frequency bassrange, its placement requirements are slightly different than for a full frequency speaker.36<strong>Wilson</strong> <strong>Audio</strong> Specialties<strong>Wilson</strong> <strong>Audio</strong> Specialties37
W A T C H C e n t e r C h a n n e l S e r i e s 2 O w n e r ’ s M a n u a lThe ideal position of the <strong>WATCH</strong> Dog passive subwoofer is somewhat dependent on itsprimary use. In home theaters, where the <strong>WATCH</strong> Dog is used as the Low Frequency Effects(LFE) channel, it may be located in a variety of positions, depending on architecturalSection 4 – Initial Setupconsiderations. In general, the lower frequency range will be reinforced by room boundariesand corners. Since most of the information contained in the LFE channel is in the subfrequencybass range, with little information in the mid and upper bass, there are some advantagesto placing the <strong>WATCH</strong> Dog near the room boundaries or near a corner. Some careis needed to avoid introducing upper-bass colorations caused by corner placement. Whilesurround processors provide the low frequency equalized signal for the LFE Channel, it hasbeen our experience that in some systems it is desirable to use the Low Pass crossover (viathe <strong>Wilson</strong> Controller) to additionally limit upper bass range. This is particularly importantand useful when the <strong>WATCH</strong> Dog is placed in the corner. Since all <strong>Wilson</strong> <strong>Audio</strong> Speakersare phase and time coherent, it is very important to time align the <strong>WATCH</strong> Dog in the roomusing the Phase Control on the Controller (see Controller owner’s manual).38<strong>Wilson</strong> <strong>Audio</strong> Specialties
W A T C H C e n t e r C h a n n e l S e r i e s 2 O w n e r ’ s M a n u a lS e c t i o n 4 . 1 - F i n a l S e t u pNote: Before setting up the <strong>WATCH</strong> <strong>Center</strong> <strong>Series</strong> 2, study carefully Section 3, “In YourRoom.” It provides valuable information on determining the ideal room location for yourspeakers.Section 4.1 - Final SetupPreparationYou will need the following items:• Supplied hardware kit• Tape measure• Known listening positionYour dealer is trained in the art and science of the <strong>Wilson</strong> <strong>Audio</strong> Setup Procedure(WASP) outlined in Section 3, and <strong>Wilson</strong> <strong>Audio</strong> recommends dealer installation of yournew loudspeaker.Section 4.2 - <strong>Center</strong> Channel SpikesThe <strong>Center</strong> channel comes with 2 sets of spikes with a nut, a diode and spacers, andtwo sets of spikes with only the spike and nut. This will allow the speaker to be tilted to avariety of angles. These spikes also provide acoustical isolation as well as optimal heightplacement for your speakers. There are three ways of assembling the spikes (without spacers,or with one or two spacers), and your choice will depend on the location of the <strong>Center</strong>channel and personal tastes. The spacers are provided to allow for the rotation of the<strong>Center</strong> channel towards the listener. If the speaker is floor mounted, it will be tilted upwardso the drivers are firing towards the listener. If the speaker is mounted above the listeningear height, it will need to be raised more in the back so the speaker is firing down towardthe listener.<strong>Wilson</strong> <strong>Audio</strong> Specialties<strong>Wilson</strong> <strong>Audio</strong> Specialties4041
W A T C H C e n t e r C h a n n e l S e r i e s 2 O w n e r ’ s M a n u a lS e c t i o n 4 . 3 - M e a s u r e d L i s t e n i n g P o s i t i o n(see Figure 7) . Make sure the Allen key end is accessible.Allen Key Endof Setscrew2. If required, place the corresponding number of spacer discs over the bolt.3. Screw the acoustical diode onto the bolt until it is roughly halfway into thediode.Option 1(No Spacers)Nut3/4 InchSetscrew4. Screw the spike (with nut) all the way in until it just touches the bolt. Do nottighten the nut at this time.Diode5. Repeat steps 1 – 4 with the other spikes.SpikeGrill AssemblyRemove the two grills from the plastic bag. Remove 8 pins from the plastic bag. ScrewOption 2(1-2 Spacers)Optional Spacer2 InchSetscrewthe threaded section of the pins into the small holes of the grill frame on the opposite sideof the cloth.Be sure the pins are seeded and finger-tight only. Push the grill assembly intothe receptacles on the speaker baffle.2 SpacersSection 4.3 - Measured Listening PositionPropagation Delay CorrectionPropagation Delay Correction accuracy of the <strong>Center</strong> channel has been establishedand verified at <strong>Wilson</strong> <strong>Audio</strong>’s R&D laboratory. The correction tables used in this sectionFigure 7 - <strong>Center</strong> Channel Spikes Assembly DiagramAfter determining the required rotation for the <strong>Center</strong> channel, Sections 4.3-4.6, assemblethe spikes as follows:are a result of this testing.Room SetupThe <strong>Center</strong> channel allows for different listening distances (away from the speakers)and listening ear heights (measured distances from the floor up to your ear); see Figure 8Assembly1. Back out the setscrews on the bottom of the enclosure to the desired heightbelow. For each distance/ear height combination there is a unique alignment geometry. Tomake correct in-home setup of the <strong>Center</strong> channel possible without test equipment, <strong>Wilson</strong><strong>Audio</strong> has measured the correct geometric PDC (phase delay correction) alignment for<strong>Wilson</strong> <strong>Audio</strong> Specialties<strong>Wilson</strong> <strong>Audio</strong> Specialties4243
W A T C H C e n t e r C h a n n e l S e r i e s 2 O w n e r ’ s M a n u a lS e c t i o n 4 . 4 – S e t u p # 1 C e n t e r C h a n n e l o n F l o o rthe speaker. Nevertheless, the <strong>Center</strong> channel will certainly out-perform any other <strong>Center</strong>channel placed in a given location.Measure Ear HeightPlacing the <strong>WATCH</strong> <strong>Center</strong> <strong>Series</strong> 2 in any location other than on the <strong>Wilson</strong> <strong>Audio</strong><strong>WATCH</strong> <strong>Center</strong> stand will require the <strong>Center</strong> channel to be rotated towards the listeningposition. This will allow the <strong>Center</strong> channel to take advantage of the propagation delaycorrection technology (PDC). Simply placing the <strong>Center</strong> in a location without following thedirections below will hinder the performance of the <strong>Center</strong> channel. With the correct PDCMeasure Listening Distanceyou will find the vocals and dialogue more realistic and satisfying. As with any componentin your system that offers increased resolution and detail, a careful setup is required.There are four different setup procedures depending on your <strong>Center</strong> channel location.Figure 8 - Measured Listening Distance and Ear Heightdifferent distance/ear height combinations. This information is provided in Section 10. Bymeasuring the ear height and the distance from the speaker to the listening position, youwill be able to align the system for your listening position.<strong>Center</strong> Channel ConfigurationsThe <strong>WATCH</strong> <strong>Center</strong> Channel has been designed to accommodate most any mountinglocation. These locations, in order of preferred location, are as follows:#1 <strong>Center</strong> Channel on Stand (Recommended Location)#2 <strong>Center</strong> Channel on Floor#3 <strong>Center</strong> Channel on Custom Stand or Shelf#4 <strong>Center</strong> Channel on CeilingThe <strong>Center</strong> Channel crossover has been optimized for use with the <strong>Center</strong> stand. Thisis the preferred location. When you mount the <strong>Center</strong> channel in most other locations youwill begin to see more boundary interactions, which may alter the performance of yourThe possible <strong>Center</strong> channel configurations are as follows:Section 4.4 – Setup #1 <strong>Center</strong> Channel on FloorSection 4.5 – Setup #2 <strong>Center</strong> Channel on StandSection 4.6 – Setup #3 <strong>Center</strong> Channel on Custom Stand or ShelfSection 4.7 – Setup #4 <strong>Center</strong> Channel on CeilingPlease proceed to the indicated section for your particular installation for detailedsetup instructions.Section 4.4 – Setup #1 <strong>Center</strong> Channel on FloorThe floor mounted <strong>Center</strong> channel must be rotated up toward the listening position.This is done by using a taller spike in the front than in the back of the speaker (see Figure 9).The default rotation is set by using a combination of a spike, nut, and a diode. If required,additional rotation can be achieved by using the provided 1/2” spacers between the diodeand the bottom of the cabinet (see Figure 7). The amount of rotation depends on your listeningposition.Set the rotation as follows:44<strong>Wilson</strong> <strong>Audio</strong> Specialties<strong>Wilson</strong> <strong>Audio</strong> Specialties45
W A T C H C e n t e r C h a n n e l S e r i e s 2 O w n e r ’ s M a n u a lS e c t i o n 4 . 5 – S e t u p # 2 C e n t e r C h a n n e l o n S t a n dSpacers (use only ifindicated in table)Diode, Spike,and NutSpike andNut OnlyFigure 9 - Installing the <strong>Center</strong> Channel Spikes6. Using provided 3/16 Allen wrench, remove the back two setscrews from thebottom of the <strong>Center</strong> channel. Insert the spike with nut in their place. Turnto Section 10, table 1, locate your listening position on the table.7. Assemble the front spikes with the listed diode/spacer combination in Table1 (see also Figure 7).8. Install the spikes as shown in Figure 9 below.Note: the material used for the bottom of the <strong>Center</strong> channel is a high density composite.This material is easily cross threaded when installing the spikes. Be careful that thespike thread is engaging properly into the bottom.Figure 9 - Installing the Spikes10. Carefully lift the <strong>Center</strong> channel into the desired location and set itdown.Note: 4 small brass disks have been provided for use as spike pads. Place these underthe spikes to protect the finish of your floors.11. Turn to Section 4.8 for final assembly instructions.Threaded SpikesFigure 10 - Installing the <strong>Center</strong> Channel Stand SpikesSection 4.5 – Setup #2 <strong>Center</strong> Channel on Stand1. Set the stand in the desired listening location.2. Attach the spikes to the bottom of the stand by screwing the spike and nutcombination until the nut is flush with the bottom (See Figure 10 below).Note: Do not tighten the nut at this time. Wait until the fine-tuning has been completedfor the entire system and the speaker has been leveled.Note: Four small brass disks have been provided for use as spike pads. Place these underthe spikes to protect the finish of your floors.3. Using provided 3/16 Allen wrench, remove the 4 setscrews from the bottomof the <strong>Center</strong> channel. Keep these as they are the setscrews needed to assembleyour spikes and may be required during final setup.46<strong>Wilson</strong> <strong>Audio</strong> Specialties<strong>Wilson</strong> <strong>Audio</strong> Specialties47
W A T C H C e n t e r C h a n n e l S e r i e s 2 O w n e r ’ s M a n u a lS e c t i o n 4 . 6 – S e t U p # 3 C e n t e r o n C u s t o m S t a n d o r S h e l f4. Bolt the <strong>Center</strong> channel to the stand using the four 3/8 - 16 threaded sockethead capscrews and washer provided (see Figure 11).Note: Do not overtighten the bolts; a snug fit is all that is required to secure the <strong>Center</strong>Channel to the stand.5. Turn to Section 4.8 for final assembly instructions.Set Screw 4 placesSection 4.6 – Set Up #3 <strong>Center</strong> on Custom Stand or ShelfThe <strong>WATCH</strong> <strong>Center</strong> <strong>Series</strong> 2 is a non-shielded speaker and therefore, should NOT beAllen Key End of Set ScrewFigure 12 - Locating the Set ScrewsAnchor Boltplaced near a CRT television. However, the <strong>Center</strong> channel can be placed near plasma orLCD televisions.We recommend that you have a custom shelf built that allows the <strong>Center</strong> channel tobe bolted securely above the screen and rotated down toward the listening position. Section11 contains the requirements for this bracket. The speaker should be rotated so thatthe midrange drivers are firing just below the listening position. Once you have made andmounted the custom bracket, setup the <strong>Center</strong> channel as follows:1. Lay the <strong>Center</strong> channel onto its side.2. Using the provided 3/16 Allen wrench, back out the 4 setscrews from thebottom of the <strong>Center</strong> channel to the desired length.Note: Be sure that the Allen key end of the setscrew is facing out.Figure 11 - Bolting the <strong>Center</strong> Channel to the Stand48<strong>Wilson</strong> <strong>Audio</strong> Specialties<strong>Wilson</strong> <strong>Audio</strong> Specialties49
W A T C H C e n t e r C h a n n e l S e r i e s 2 O w n e r ’ s M a n u a l3. Carefully lift the <strong>Center</strong> channel and set the threaded setscrews into the 4mounting holes located on the top of the mounted custom shelf.4. Using the provided 3/8 -16 nut, bolt the <strong>Center</strong> channel to the mountingbracket.5. Turn to Section 4.8 for final assembly instructions.Section 4.7 – Setup #4 <strong>Center</strong> Mounted to CeilingNote: <strong>Wilson</strong> <strong>Audio</strong> does not provide additional hardware for the optional ceiling mountlocation of the <strong>Center</strong> channel. The <strong>Wilson</strong> customer choosing this option will need toobtain hardware him or herself.The <strong>Center</strong> channel has four 3/8-16 threaded holes on the bottom of the speaker.S e c t i o n 4 . 7 – S e t u p # 4 C e n t e r M o u n t e d t o C e i l i n gThese holes can be used to bolt the <strong>Center</strong> channel to a custom made bracket (not provided)that is attached to the ceiling. Please see Section 11 for the requirements of thiscustom bracket. The hardware used to install the <strong>Center</strong> channel on its custom ceilingmount is not provided by <strong>Wilson</strong> <strong>Audio</strong>. Once the bracket is made and mounted, followthese instructions to bolt the <strong>Center</strong> channel to the ceiling as follows:1. Set the <strong>Center</strong> channel on the floor.2. Using the provided 3/16 Allen wrench, remove the 4 setscrews from the bottomof the <strong>Center</strong> channel.3. Lay the <strong>Center</strong> channel onto its side and screw the four 3 inch setscrews 1inch into the threaded holes on the bottom of the speaker.Note: Be sure that the Allen key end of the setscrew is facing out when screwing it intothe enclosure. This will allow for easy installation and removal in the future.Midreange Drivers3/8 -16 Nut and Lockwasher.Tighten until SnugHex Key End ofSetscrewFigure 14 - Mounting <strong>Center</strong> Channel to CeilingFigure 15 - Installing Nut and Lockwasher from the Inside50<strong>Wilson</strong> <strong>Audio</strong> Specialties<strong>Wilson</strong> <strong>Audio</strong> Specialties51
W A T C H C e n t e r C h a n n e l S e r i e s 2 O w n e r ’ s M a n u a l4. Using the 5/32” Allen wrench, remove the 2 midrange drivers. Do not unsolderthe leads (see Figure 13).S e c t i o n 4 . 8 - C e n t e r C h a n n e l F i n a l S e t u p8. While two people hold the speaker up to the mounting bracket, a third personbolts the speaker to the ceiling. Use two 3/8-16 nuts on each threadedrod. This will lock the nuts into place.Note: The material used for the bottom of the <strong>Center</strong> channel is a high density composite.This material is easily cross-threaded when installing the setscrew. Be careful thatthe spike thread is engaging properly into the bottom.5. Screw the 3/8-16 nut and lockwasher onto the setscrew from the inside of theenclosure (see Figure 14).6. Tighten until snug using the open-ended wrench.7. Replace the midrange drivers.Note: The custom mounting bracket should be designed to hold 3 times the weight of the<strong>Center</strong> channel (63 lbs.). This gives and acceptable safety factor of 3.9. Turn to Section 4.8 for final assembly instructions.Section 4.8 - <strong>Center</strong> Channel Final SetupThe final setup work needed before fine tuning and other speaker setup is performedas follows:User Made CustomMounting BracketTweeter Slides Back and Forth1/4-20 SocketHead Capscrew<strong>Center</strong> Channel Mount AnglesSpeaker Down Towards the Listener<strong>Center</strong> Channel Bolts to Bracket viaFour 3/8-16 Bolts and Nut AttachedFrom Inside the SpeakerFigure 16 - Mounting <strong>Center</strong> Channel to CeilingFigure 17 - Setting the PDC52<strong>Wilson</strong> <strong>Audio</strong> Specialties<strong>Wilson</strong> <strong>Audio</strong> Specialties53
W A T C H C e n t e r C h a n n e l S e r i e s 2 O w n e r ’ s M a n u a l• Set the Propagation Delay Correction on the tweeter assembly (see Section10).• Connect the speaker cables from the amplifier.The propagation delay correction is one of the most important elements of the setup.There are two methods for setting the PDC: one for floor and stand mounted <strong>Center</strong> channeland one for ceiling or any other custom location.Stand or Floor Mounted <strong>Center</strong> Channel1. Find your measured listening distance and ear height.2. In Section 10, locate the table that corresponds to your <strong>Center</strong> channel locationand front spike combination (i.e. floor mounted <strong>Center</strong> channel with aspike, nut, diode, and one spacer).S e c t i o n 4 . 8 - C e n t e r C h a n n e l F i n a l S e t u pup to this point, you will be able to set the PDC by experiment. This is done as follows:• Unhook all the speakers except the <strong>Center</strong> channel.• Using a 3/16” Allen wrench, loosen the 1/4-20 socket head bolts that holdthe tweeter in place.• Play a sound track that has a female vocal.• Sit in your listening location and have someone slowly slide the tweeterforward and backwards. Listen for the location that the female vocal isfree from any chest or nasal sound. The vocals will be clean and clear, freefrom any veiling of the sound. This is the correct alignment position.• Lock down the tweeter in this position.Note: There is a unique PDC setting for each <strong>Center</strong> channel location and front spikecombination. Be sure you are reading from the correct table.3. Read from the table the required offset (see Section 10).Resistor Access4. Using a 3/16 Allen wrench, loosen the 1/4-20 socket head on tweeter assembly(see Figure 16 below).5. Slide the tweeter until the lock down bolt is centered above the alignmentmark on the tweeter mounting bracket.6. Retighten the socket head capscrews until snug.Note: Be careful when loosening or tightening the screws that you do not damage thepainted finish.Ceiling or Other Custom LocationMain In Binding PostsBecause of the large number of unique combinations for your location, we are unableto provide the exact alignment setting for you. If you have followed the instructions closelyFigure 18 - <strong>Center</strong> Channel Cable Connection54<strong>Wilson</strong> <strong>Audio</strong> Specialties<strong>Wilson</strong> <strong>Audio</strong> Specialties55
W A T C H C e n t e r C h a n n e l S e r i e s 2 O w n e r ’ s M a n u a lS e c t i o n 4 . 9 - C o n n e c t i n g S p e a k e r t o A m p l i f i e rSection 4.9 - Connecting Speaker to AmplifierSpeaker CablesThe high current input terminals located on the rear of your <strong>Center</strong> channel loudspeakerare color coded with a small plastic plug, so that RED (marked “+”) corresponds topositive and BLACK (marked “-”) to negative, common, or ground on the amplifier output.Be sure to connect the loudspeakers in phase with each other. We recommend the use ofSpade LugsThe spade lugs of some of the high quality cables often used with the <strong>Center</strong> channelare angled to reduce pressures on the cable during installation. Avoid the instinct to pushthe cable’s spade lug ends all the way into the <strong>Center</strong> channel’s connectors (see Figure 17).Partial insertion of these angled spade lugs will actually improve the reliability of the connection.Flat lugs may be fully inserted to connectors before tightening.Connection of the <strong>Center</strong> to the Power Amplifier1. Turn off the power amplifier(s) and remove the AC power cord from the walloutlet.2. Lay out the speaker cables before hooking them up to the <strong>Center</strong> channel.Make sure that there are no kinks, twists, or right-angled bends in the cable.If you need to turn corners, attempt to use a gradual curve as opposed to asevere right-angled bend.3. Connect the negative (normally black) end of the speaker cable to the highcurrent speaker binding post with the engraved “-” above it (see Figure 18).Note: Do not overtighten the binding posts. Overtightening can cause the poststo break off.Figure 19 - Spade Lug Attachment4. Connect the positive (normally red) end of the speaker cable to the high currentspeaker binding post with the engraved “+” above it.the very highest quality loudspeaker cables, particularly those designed for high frequencypropagation correction and phase linearity. Beware of “zip cord” type speaker cables,which will smear the sound and limit their effective bandwidth. Also, do not use braidedlitz-type loudspeaker cables as they will cause an unnatural brightness to the sound, compromisesound staging performance, and may cause instability, oscillation, and damage inwide bandwidth solid state amplifiers.5. Plug your amplifier(s) AC power cord into the wall outlet.Note: Always attempt to keep your pair of speaker cables the same length. This will ensurethat the signals arrive at each speaker in the proper time frame, by traveling thesame distance to each speaker.<strong>Center</strong> Channel Setup CompletedThis completes the initial setup of you <strong>Center</strong> channel. Final system tuning and voicing56<strong>Wilson</strong> <strong>Audio</strong> Specialties<strong>Wilson</strong> <strong>Audio</strong> Specialties57
W A T C H C e n t e r C h a n n e l S e r i e s 2 O w n e r ’ s M a n u a lshould be performed as outlined in Section 5. Section 5 will evaluate your entire speakersetup and allow you to make small modifications in speaker rotation and location that willgreatly improve the performance of your multi-channel audio or home theater system.Section 5 – Tuning and Voicing58<strong>Wilson</strong> <strong>Audio</strong> Specialties
W A T C H C e n t e r C h a n n e l S e r i e s 2 O w n e r ’ s M a n u a lS e c t i o n 5 . 1 - F i n a l T u n i n g a n d V o i c i n gSection 5.1 - Final Tuning and VoicingThis loudspeaker placement method was developed by David A. <strong>Wilson</strong>, for <strong>Wilson</strong><strong>Audio</strong> Specialties, Inc., to find optimum loudspeaker locations in any given room withinone hour. Participating in numerous audio/multi-channel/home theater shows with verydifferent and difficult acoustic environments necessitated this procedure. Currently, all<strong>Wilson</strong> <strong>Audio</strong> dealers employ this setup procedure for their customers, in order to quicklyand predictably achieve the best performance from their systems (this procedure can beused successfully with ANY moving coil speaker system).Proper system calibration is the most important step in the setup of your multichannel/hometheater system. The <strong>WATCH</strong> system offers increased resolution and overallsystem performance. This increased resolution allows you to fine tune your system, thusincreasing overall performance, more than any other system available.Fine tuning and “voicing” generally involve only small changes in location and rotation(or toe) of your multi-channel system. With proper calibration you will find thatchanges as small as 1 inch will have an impact on the performance of your system. Thefollowing sections will step you through this fine tuning process. The setup will be done asfollows:• Set up of Left and Right channels with all other speakers disconnected.• Add the <strong>Center</strong> channel.• Add the Surround channels.• Add the Subwoofer.Adding one speaker at a time will allow you to easily evaluate the integration with thesystem and make the necessary adjustments to fine tune the setup.<strong>Wilson</strong> <strong>Audio</strong> Specialties<strong>Wilson</strong> <strong>Audio</strong> Specialties6061
W A T C H C e n t e r C h a n n e l S e r i e s 2 O w n e r ’ s M a n u a lSection 5.2 - Left and Right ChannelsDetermining Front to Back DistanceThe proper setup of the left and right channels is crucial for optimum system performance.If these speakers are not set up correctly, the entire system will suffer from poorintegration. Please follow these steps carefully:• Place the speaker in an appropriate location relative to your screen and listeningarea. Make certain to remove the grills and spikes.• Toe the speakers in so that you can just barely see the inside edge whenseated in the primary listening position.S e c t i o n 5 . 2 - L e f t a n d R i g h t C h a n n e l s• Find the front to back location where the bass is tight, dynamics are correct,image is well-focused, and you find the best soundstaging. Mark thisas your final front to back location.Determining Side to Side DistanceThe distance the speakers are from the side walls is very important. This distance determinesthe amount of comb filtering you will hear. In effect, you are “tuning” the combfilter interaction between the speaker and the wall. Perform the side to side analysis asfollows:• Place a piece of tape on the floor parallel to the front edge of the speakerand again mark off 1/2 inch increments side to side.• Using removable masking tape, graph off the floor so that you can accuratelymove both speakers forward and backward in 1/2 inch increments.• Place your multi-channel processor into stereo mode.• Using a piece of full range music (dynamic with a lot of low frequencyinformation) played at a moderately high level, take notes on the soundquality. Pay specific attention to upper and lower bass quality, dynamiccontrasts, image height, and focus.• Move the speakers back or forward in 1 inch increments and then 1/2 inchincrements.Note: Moving the speakers BACK will generally increase low bass, sharpen focus,lower image height, and increase dynamics up to the point where you go too far,in which case the sound will start to lose these qualities in addition to becomingboomy and slow sounding. Moving the speakers FORWARD will increase air andbloom, raise image height, and generally increase the sense of space. Moving toofar forward will cause the soundstage to become unnaturally high with a lack offocus, dynamics, and low-end extension.• Using only one channel/speaker at a time, now determine the optimum positionwith regard to side walls.Note: A high quality, solo piano recording works well for this step.• While music is playing, slowly move the speakers left or right 1 inch then1/2 inch at a time until you achieve the best harmonic integrity.You should not need to move the speaker any more than one inch left or right fromthe original location. Do this independently for each channel. What you will hear when thespeaker moves into the correct location is a reduction of hardness and muddied harmonicsfrom the piano.Note: If you continue moving the speaker past this point, you will begin to hear againthis fatiguing artifact.When you have determined the optimum location for each speaker, mark it carefully,and make certain the toe-in is correct. When installing the spikes, the speakers may shiftslightly, but you can move them precisely back to the correct location again using yourtape markers.62<strong>Wilson</strong> <strong>Audio</strong> Specialties<strong>Wilson</strong> <strong>Audio</strong> Specialties63
W A T C H C e n t e r C h a n n e l S e r i e s 2 O w n e r ’ s M a n u a lSection 5.3 - Integrating the <strong>WATCH</strong> SystemNote: Many processors offer a setup guide that steps you through the integration of eachof the speakers, specifically, setting speaker distances, delays, and phase rotation. Theseadjustments are made via internal electrical adjustments. We have found that actualgeometric changes, that is, moving the speaker location and rotation, offer improvedresults when integrating speakers. We recommend that you follow the steps outlinedbelow, evaluate your system performance, and then make adjustments in the processor.Ultimately, you will, of course, need to make level adjustments via the processor.Integrating the <strong>WATCH</strong> <strong>Center</strong>The next step in the setup process is to fine tune the location and rotation of the<strong>Center</strong> channel. Do as follows:• Place the <strong>Center</strong> channel centered between the main speakers and evenwith the front inner edge. Set the spikes as indicated in Sections 5.2-5.5.• Follow the processor instructions on level adjustment. Adjust the level onthe <strong>Center</strong> channel so it matches in level with the left and right channels.Do not be surprised if the <strong>Center</strong> channel requires 5-7 dB lower adjustmentthan the left and right channel.• Make sure that only the front Left, Right and <strong>Center</strong> channels are connected.• With the <strong>Center</strong> channel spiked, put on a multi-channel audio track ormovie scene with which you are familiar.Image Height• Make 1/2” changes in front to back location until you find the <strong>Center</strong> channellocation that offers the best integration.Check the image height. Does the dialogue of a movie have the correct height? Is ittoo low or too high?If needed, adjust the amount of rotation until the image height is correct. On a standor floor mounted <strong>Center</strong> channel, raising the front spikes will raise the image height; loweringthe front spikes will lower the image height. Where possible, we recommend that youadd or remove a spacer to get the correct image height. This will allow the PDC to be resetusing the tables in Section 10.<strong>Center</strong> RotationOur testing has shown that a stand-mounted <strong>Center</strong> channel, at listening distancesgreater than 2-3 meters, requires the front of the <strong>Center</strong> channel to be raised about 1”. Thisis because the effects of comb-filtering are more noticeable the further you are away fromthe <strong>Center</strong> channel. This comb-filtering reveals itself as a slight nasal sound in the voice.If you notice this in the sound, you should raise the front spikes of your <strong>Center</strong> channel.This can be done by removing the front spikes and replacing them with the spike assemblyas shown in Figure 19 below. Do as follows:• Screw the spike and nutinto the diode.S e c t i o n 5 . 3 - I n t e g r a t i n g t h e W A T C H S y s t e mDiode3/4” SetScrew• Play the selection and listen for the integration with the main speakers. Asthe audio moves across the three front speakers, listen for a smooth transitionfrom one speaker to the next. You should not hear any voids in thesound stage.• Screw the 3/4” setscrewinto the front spike holesin the stand.SpikeNut• Thread the spike assemblyonto the set screw.Figure 19 - Spike Assembly: Diode No Spacers64<strong>Wilson</strong> <strong>Audio</strong> Specialties<strong>Wilson</strong> <strong>Audio</strong> Specialties65
W A T C H C e n t e r C h a n n e l S e r i e s 2 O w n e r ’ s M a n u a lResetting the Propgation Delay correction (PDC)Once the final rotation has been determined, you will need to reset the PDC. If youhave raised the speaker by adding a diode or 1/2” spacer, read the PDC from the table thatmatches your current spike configuration in Section 10. If you have adjusted the rotationby unscrewing the spike, do as follows:• Measure the distance you have raised the speaker.• Slide the tweeter forward 1/2 of the distance you raised the speaker.Note: If you lowered the speaker, then the tweeter will slide back 1/2 of the lowereddistance.Every system has a unique time and phase character, which can affect the PDC accuracy.Because of this, you may find that sliding the tweeter forward or backwards a fewpositions increases the clarity and correctness of your <strong>Center</strong> channel. If you like, experimentwith the tweeter position and lock it in position when you find the location you feelto be most accurate.<strong>Center</strong> Channel PolarityUsing a pink noise generator, play pink noise through the <strong>Center</strong> channel togetherwith alternating Left and Right channels. If the polarity is correct on the <strong>Center</strong> channel,you will hear the pink noise centered between the <strong>Center</strong> channel and either the Left orRight speakers. If the polarity is incorrect, you will hear two point sources that are unfocusedand located at each speaker playing.S e c t i o n 5 . 3 - I n t e g r a t i n g t h e W A T C H S y s t e mIntegrating the <strong>WATCH</strong> Surround Channels• Follow the processor instructions on level adjustment. Adjust the level onthe Surround channels so they match in level with the front channels.• Play a DVD that has a scene with something moving around the room.Listen for the correct spacial imaging. A correctly adjusted Surround channelwill have good imaging characteristics, will be seamlessly blended, andshould be just as transparent as the front channels.• Adjust the rotation of the Surround channel until you find the best integration.Note: The Surround channel rotates on the upper two spikes. Examine carefullythis rotation and the mounting bracket before trying to adjust the angle of rotation.Be careful when rotating the speaker as it is very heavy and could fall off ofthe mounting bracket.Integrating the Passive <strong>WATCH</strong> DogThe Passive <strong>WATCH</strong> Dog will perform well in almost any location in the room. In general,the closer you place the subwoofer to a wall or corner, the greater the augmentationof the bass. However, the increase in bass comes at a cost of perceived speed, dynamicsand bass clarity. We recommend that you experiment with the placement of the subwooferto find a balance of the above mentioned items with which you are satisfied. For completeinformation on integrating a <strong>Wilson</strong> <strong>Audio</strong> <strong>WATCH</strong> Dog, please refer to your subwooferowner’s manual.66<strong>Wilson</strong> <strong>Audio</strong> Specialties<strong>Wilson</strong> <strong>Audio</strong> Specialties67
<strong>Wilson</strong> <strong>Audio</strong> SpecialtiesSection 6 – Care of the Finish
W A T C H C e n t e r C h a n n e l S e r i e s 2 O w n e r ’ s M a n u a lS e c t i o n 6 . 1 – C a r e o f t h e F i n i s hSection 6.1 – Care of the FinishThe <strong>WATCH</strong> <strong>Center</strong> Channel <strong>Series</strong> 2 loudspeaker is hand painted with <strong>Wilson</strong>Glosspaint and hand polished to a high luster. While the finish seems quite dry to the touch,final curing and complete hardening takes place over a period of several weeks.Dusting the <strong>WATCH</strong> <strong>Center</strong>It is important that the delicate paint finish of the <strong>WATCH</strong> <strong>Center</strong> be dusted carefullywith the dust cloth, which has been provided. We recommend that the following procedurebe observed when dusting the speakers:• Blow off all loose dust.• Using the special dust cloth as a brush, gently whisk off any remainingloose dust.• Shake out the dust cloth.• Dust the finish, using linear motions in one direction parallel to the floor.Avoid using circular or vertical motions.Because the paint requires a period of several weeks to fully cure, we recommend thatno cleaning fluids, such as glass cleaners, be used during this initial period of time. Whenthe paint is fully cured, heavy fingerprints and other minor smudges may be removed witha glass cleaner. Always use the dust cloth. Stronger solvents are not recommended underany circumstances. Consult your dealer for further information if required. To maintain thehigh luster of the finish, periodic polishing may be desired. We recommend a nonabrasivecarnauba-based wax and a soft cloth.Care of the GrillsPeriodically, you will want to clean the <strong>WATCH</strong> <strong>Center</strong>’s grills. This is best done by70<strong>Wilson</strong> <strong>Audio</strong> Specialties<strong>Wilson</strong> <strong>Audio</strong> Specialties71
W A T C H C e n t e r C h a n n e l S e r i e s 2 O w n e r ’ s M a n u a lusing the round brush attachment on a vacuum cleaner hose. Gently vacuum the frontsurface of the grill. Be careful not to apply too much pressure. Do not use a hard plasticattachment against the grill. The grill cloth is stretched tightly over the grill frame. Toomuch pressure or use of a hard plastic attachment could cause the grill material to tear,especially in the corners.Often <strong>Wilson</strong> speaker owners desire to change the look of their listening room bychanging the color of their speaker grills. In addition to basic black, <strong>Wilson</strong> <strong>Audio</strong> offersa variety of grill colors to match most <strong>Wilson</strong>Gloss finishes. Contact your local dealer forgrill cloth samples or to order replacement grills for your <strong>WATCH</strong> <strong>Center</strong> channel.Break-in PeriodAll audio equipment will sound best after its components have been broken in forsome period of use. <strong>Wilson</strong> <strong>Audio</strong> breaks in all woofers and mid-range drivers for approximately12 hours. All drivers are then tested, calibrated, and matched for their acousticalproperties. In your listening room, expect 25 to 50 percent of break-in to be complete aftertwo hours of playing music at normal listening levels. Ninety percent of break-in is completeafter 24 hours of playing. Playing a CD on repeat overnight can accomplish this taskquickly. <strong>Wilson</strong> <strong>Audio</strong> recommends chamber music for this task.Section 6.2 – Enclosure TechnologyMaterials<strong>Wilson</strong> <strong>Audio</strong> has conducted many hours of research on the impact of materials onspeaker enclosure performance. Through this effort, <strong>Wilson</strong> pioneered the use of non-resonantmaterials, first with the use of mineral-filled acrylic in the WATT and continuing withthe further development of proprietary materials for X-1 Grand SLAMM and <strong>WATCH</strong> Dog.Even the best materials are not suited to all aspects of enclosure construction. Therefore,like all <strong>Wilson</strong> loudspeakers, the <strong>WATCH</strong> <strong>Center</strong> is constructed of several exotic materialsS e c t i o n 6 . 3 – D e p t h o f D e s i g nchosen for their specific performance attributes relevant to different portions of the enclosure.The <strong>WATCH</strong> <strong>Center</strong> is constructed using non-resonant, high-density, composites whichare then cross-braced to further reduce cabinet resonance. Each of these composites meetsand exceeds the highest of ANSI test standards for its use, while offering very tight tolerances,high hardness, uniform density, and dimensional stability.Adhesive<strong>Wilson</strong> <strong>Audio</strong> has conducted exhaustive research into the best adhesives to permanentlybond our speaker enclosures. This is often an overlooked element crucial to theproper performance of a loudspeaker. Correct modulus of elasticity, coefficient of thermalexpansion, and natural frequency response are just a few of the important elements of adhesives.A highly cross-linked, thermo-set adhesive is used for the construction of the enclosure.It was also chosen for its excellent bond strength, solvent resistance, hardness, andoptimum vibrational characteristics.Section 6.3 – Depth of Design<strong>WATCH</strong> <strong>Center</strong>’s compellingly authentic performance and lasting value are achievedthrough careful implementation of cutting edge design and engineering and then executedusing the highest performance materials. <strong>Wilson</strong> <strong>Audio</strong>’s use of proprietary enclosure materialsand adhesives are employed to achieve truly exceptional speaker cabinet performance.The use of these materials in the <strong>WATCH</strong> <strong>Center</strong> results in an enclosure that isinherently inert and non-resonant. All of these structural aspects are combined, allowing<strong>Wilson</strong> <strong>Audio</strong> to deliver a product that maintains the strictest structural tolerances, durability,and reliability. This also means that the <strong>WATCH</strong> <strong>Center</strong> will have consistent, repeatableperformance, unaffected by the climatic conditions, anywhere in the world. Finally, like all72<strong>Wilson</strong> <strong>Audio</strong> Specialties<strong>Wilson</strong> <strong>Audio</strong> Specialties73
W A T C H C e n t e r C h a n n e l S e r i e s 2 O w n e r ’ s M a n u a l<strong>Wilson</strong> products, the <strong>WATCH</strong> <strong>Center</strong> is hand-crafted with meticulous attention to detail,with an unwavering commitment to excellence. Thus, the <strong>WATCH</strong> <strong>Center</strong> Channel <strong>Series</strong> 2will impart to her owner beauty and pleasure for many years to come.Section 7 – Troubleshooting74<strong>Wilson</strong> <strong>Audio</strong> Specialties
W A T C H C e n t e r C h a n n e l S e r i e s 2 O w n e r ’ s M a n u a lS e c t i o n 7 - T r o u b l e s h o o t i n g :Section 7 - Troubleshooting:<strong>Center</strong> channel is not operating:Check the interconnects from thesource.Check the connections on the speakercables, both at the amplifier andspeaker ends. Watch especially forconnectors touching each other.Driver out or not playing after connectionshave been verified:If you have found a driver with nooutput, turn off your amp and disconnectthe speaker cable. Turn theloudspeaker on its side to reveal anaccess door. Note: The enclosures isquite heavy. Please use care whenmoving.Using the appropriate Allen key,open the door on the back.You will find some resistor connections.Replace the resistor with thesupplied matching resistor. Tightenthe new resistor in the old one’splace.Note: Use only <strong>Wilson</strong> <strong>Audio</strong> replacementresistors in your <strong>WATCH</strong><strong>Center</strong>. These resistors were carefullychosen for the overall sonicand thermal performance.Amplifier shuts off as soon as it is turnedon:Plug your amplifier into the wall andturn it on.Listen to the <strong>Center</strong> at a low level.The driver should now be operatingcorrectly.76<strong>Wilson</strong> <strong>Audio</strong> Specialties<strong>Wilson</strong> <strong>Audio</strong> Specialties77
W A T C H C e n t e r C h a n n e l S e r i e s 2 O w n e r ’ s M a n u a lCheck to see if your speaker cablesare properly connected to the bindingposts. Look for frayed ends, looseconnections, or a conductor contactingthe amplifier chassis.Turn the amplifier off and disconnectit from the AC wall outlet. Disconnectthe preamplifier leads to the amplifier.Now turn on the amplifier.If the problem persists:S e c t i o n 7 - T r o u b l e s h o o t i n g :Call the dealer where you bought youramplifier. You appear to have a problemwith this component.If the problem is solved:If the problem persists:There is likely something wrong withyour preamplifier or interconnect.Contact your dealer.Leave the preamp leads disconnectedand continue to the next step.Turn the amplifier off. Disconnectthe speaker leads at the main inputto the speaker. Now turn on the amplifier.If the problem is solved:If the problem persists:Call your <strong>Wilson</strong> <strong>Audio</strong> dealer. Theremay be a problem with the crossoveror the speaker’s internal wiring.Continue to the next step.Turn the amplifier off and disconnectit from the AC wall outlet. Disconnectthe speaker cable leads to theamplifier and turn the amplifier onagain.If the problem is solved:You have a short in your speaker cables.Check for frayed ends, holes(from spike feet), or make sure thatyour spade lug is not touching thechassis while it is connected to thebinding post.78<strong>Wilson</strong> <strong>Audio</strong> Specialties<strong>Wilson</strong> <strong>Audio</strong> Specialties79
<strong>Wilson</strong> <strong>Audio</strong> SpecialtiesSection 8 - Repair Procedures
W A T C H C e n t e r C h a n n e l S e r i e s 2 O w n e r ’ s M a n u a lS e c t i o n 8 . 1 - R e p a i r P r o c e d u r e sSection 8.1 - Repair ProceduresReplacing a Blown ResistorThe <strong>WATCH</strong> <strong>Center</strong> channel has a resistor that will protect the tweeter, in most cases,if the speaker is over driven during normal operation. This is done so that the driver is notdamaged. Replace a blown resistor as follows:1. Determine which driver is not playing music.2. Remove the appropriate resistor access cover from the enclosure by removingeach of the 10-32 button head machine screws (see Section 4 for resistorcover locations).3. Wrap the leads of the new resistor around the screw and re-tighten the screwinto the barrier strip.4. Re-attach the resistor access cover to the enclosure, making sure not to overtighten the screws.Replacing a Bad DriverIf you believe that a driver is blown, make sure that you have tried replacing the protectiveresistor before you replace the driver. No sound coming from a driver is often ablown resistor and not a bad driver. If you need to replace a driver, do so as follows:1. Using the supplied Allen wrench, remove the machine screws holding thedriver in place.2. Insert the Allen wrench into one of the driver screw holes 1/8 inch. Gentlylift out the driver, and place it onto the foam pad covering the front baffle.Note: It is best to place an old towel under the driver so that you will not damagethe enclosure when unsoldering the driver.3. Using a 900 degree F soldering iron, heat up the solder joints and removethe driver.82<strong>Wilson</strong> <strong>Audio</strong> Specialties<strong>Wilson</strong> <strong>Audio</strong> Specialties83
W A T C H C e n t e r C h a n n e l S e r i e s 2 O w n e r ’ s M a n u a l4. Melt a small 1/8” diameter bead of solder onto the tip of each wire. Heat thewire up until you see the solder wick into the copper.5. Place the replacement driver onto the cloth and solder on the wires to thedriver. The white wire connects to the positive side, and the black wire connectsto the negative. The positive side is generally indicated by a red dot.Make sure to heat up the solder joint completely and hold firmly in placeuntil the solder sets.Section 9 – Specifications6. Replace the driver foam gasket.7. Place the driver into the machined recess.8. Replace the machine screws, tightening them to 15 inch/pounds of torque.Note: Be careful not to over tighten the screws.84<strong>Wilson</strong> <strong>Audio</strong> Specialties
W A T C H C e n t e r C h a n n e l S e r i e s 2 O w n e r ’ s M a n u a lS e c t i o n 9 . 1 - W A T C H C e n t e r C h a n n e l S p e c i f i c a t i o n sSection 9.1 - <strong>WATCH</strong> <strong>Center</strong> Channel SpecificationsMeasurements:Impedance:Sensitivity:Frequency Response:4 ohm95 dB SPL @ 2.83 volts at 1 meter55 Hz to 25 kHzDimensions:<strong>Center</strong> Channel Height:<strong>Center</strong> Channel Depth:<strong>Center</strong> Channel Width:13 13/16” (35.14 cm)17 11/16” (44.96 cm)20” (50.80 cm)Stand Height (without spikes):Stand Depth:Stand Width:14” (35.56 cm)17” (43.18 cm)15” (38.10 cm)Weight Uncrated:Speaker Weight:Stand Weight:63 lbs (28.58 kg)51 lbs (23.13 kg)Shipping Weight (approximate):<strong>Center</strong> Channel:120 lbs (54.43 kg)Matching Stand:55 lbs (24.95 kg)86<strong>Wilson</strong> <strong>Audio</strong> Specialties<strong>Wilson</strong> <strong>Audio</strong> Specialties87
W A T C H C e n t e r C h a n n e l S e r i e s 2 O w n e r ’ s M a n u a l<strong>Center</strong> <strong>Series</strong> 2 Dimensions<strong>Center</strong> <strong>Series</strong> 2 Matching Stand DimensionsC e n t e r S e r i e s 2 M a t c h i n g S t a n d D i m e n s i o n s88<strong>Wilson</strong> <strong>Audio</strong> Specialties<strong>Wilson</strong> <strong>Audio</strong> Specialties89
W A T C H C e n t e r C h a n n e l S e r i e s 2 O w n e r ’ s M a n u a l<strong>Center</strong> <strong>Series</strong> 2 on Matching Stand Dimensions<strong>Center</strong> <strong>Series</strong> 2 Impedance Curve<strong>Wilson</strong> <strong>Audio</strong> Specialties<strong>Wilson</strong> <strong>Audio</strong> Specialties90 91
<strong>Wilson</strong> <strong>Audio</strong> SpecialtiesSection 10 - Tweeter Alignment Tables
W A T C H C e n t e r C h a n n e l S e r i e s 2 O w n e r ’ s M a n u a lS e c t i o n 1 0 - T w e e t e r A l i g n m e n t T a b l e sInitial Spike Configuration0 = Spike, Nut, and Diode Only1 = Spike, Nut Diode, and 1 Spacer2 = Spike, Nut, Diode, and 2 SpacersMeasure Ear Height (inches)36" 40" 44" 48" 52"60" 0 1 2 na na64" 0 1 2 2 na68" 0 0 1 2 na72" 0 0 1 2 276" 0 0 0 1 280" 0 0 0 1 2Spike, Nut, and DiodeMeasured Listening Distance (inches)84" 0 0 0 0 188" 0 0 0 0 192" 0 0 0 0 096" 0 0 0 0 0100" 0 0 0 0 0104" 0 0 0 0 0108" 0 0 0 0 0112" 0 0 0 0 0116" 0 0 0 0 0120" 0 0 0 0 0124" 0 0 0 0 0128" 0 0 0 0 0132" 0 0 0 0 0136" 0 0 0 0 0140" 0 0 0 0 0144" 0 0 0 0 0148" 0 0 0 0 0152" 0 0 0 0 0156" 0 0 0 0 0160" 0 0 0 0 0164" 0 0 0 0 0168" 0 0 0 0 0172" na 0 0 0 0176" na 0 0 0 0180" na 0 0 0 0Spike, Nut, Diode,and 1 SpacerSpike, Nut, Diode,and 2 Spacersna = not applicable<strong>Wilson</strong> <strong>Audio</strong> Specialties<strong>Wilson</strong> <strong>Audio</strong> Specialties94 95
W A T C H C e n t e r C h a n n e l S e r i e s 2 O w n e r ’ s M a n u a lTable 1 - For on Floor with Spike and NutT a b l e 2 - F o r o n F l o o r w i t h D i o d e , S p i k e , a n d N u tTable 2 - For on Floor with Diode, Spike, and NutMeasure Ear Height (inches)Measure Ear Height (inches)36" 40" 44" 48" 52"36" 40" 44" 48" 52"60" na na na na na60" na na na na na64" na na na na na68" na na na na naSpike and Nut Only64" na na na na na68" na na na na naSpike, Nutand DiodeSpike andNut Only72" na na na na na72" na na na na na76" na na na na na76" na na na na na80" na na na na na80" 1 na na na na84" na na na na na84" 2 na na na na88" na na na na na88" 2 na na na na92" na na na na na92" 3 1 na na naMeasured Listening Distance (inches)96" na na na na na100" na na na na na104" na na na na na108" na na na na na112" 1 na na na na116" 1 na na na na120" 2 na na na na124" 2 na na na na128" 2 1 na na na132" 3 1 na na na136" 3 1 na na naMeasured Listening Distance (inches)96" 3 1 na na na100" 4 2 na na na104" 4 3 1 na na108" 5 3 1 na na112" 5 4 2 na na116" 6 4 2 1 na120" 6 4 3 1 na124" 6 5 3 2 na128" 7 5 4 2 1132" 7 5 4 3 1136" 7 6 4 3 2140" 3 2 na na na140" 7 6 5 3 2144" 3 2 1 na na144" 8 6 5 4 2148" 4 2 1 na na148" 8 7 5 4 3152" 4 3 1 na na152" 8 7 6 4 3156" 4 3 2 na na156" 8 7 6 5 3160" 4 3 2 1 na160" 9 7 6 5 4164" 4 3 2 1 na164" 9 8 6 5 4168" 5 4 2 1 na168" 9 8 7 6 4172" 5 4 3 2 na172" 9 8 7 6 5176" 5 4 3 2 1176" 9 8 7 6 5180" 5 4 3 2 1180" 9 8 7 6 596<strong>Wilson</strong> <strong>Audio</strong> Specialties<strong>Wilson</strong> <strong>Audio</strong> Specialties97
W A T C H C e n t e r C h a n n e l S e r i e s 2 O w n e r ’ s M a n u a lTable 3 - For on Floor Placement, One SpacerTable 4 - For on Floor Placement, Two SpacersT a b l e 4 - F o r o n F l o o r P l a c e m e n t , T w o S p a c e r sMeasure Ear Height (inches)36" 40" 44" 48" 52"60" na na na na naMeasure Ear Height (inches)36" 40" 44" 48" 52"60" na na na na na64" na na na na na68" na na na na na72" 1 na na na naSpike, Nut,Diode, andOne SpacerSpike andNut Only64" 1 na na na na68" 2 na na na na72" 3 1 na na naSpike, Nut,Diode, andTwo SpacersSpike andNut Only76" 2 na na na na76" 4 2 na na na80" 3 1 na na na80" 5 3 na na na84" 4 1 na na na84" 6 3 1 na na88" 4 2 na na na88" 6 4 2 na na92" 5 3 1 na na92" 7 5 3 1 naMeasured Listening Distance (inches)96" 6 4 2 na na100" 6 4 2 na na104" 7 5 3 1 na108" 7 5 3 2 na112" 7 6 4 2 na116" 8 6 4 3 1120" 8 6 5 3 2124" 8 7 5 4 2128" 9 7 6 4 3132" 9 8 6 5 3136" 9 8 6 5 4Measured Listening Distance (inches)96" 8 6 4 1 na100" 8 6 4 2 na104" 9 7 5 3 1108" 9 7 5 4 2112" 9 8 6 4 2116" 10 8 6 5 3120" 10 9 7 5 4124" 11 9 7 6 4128" 11 9 8 6 5132" 11 10 8 7 5136" 11 10 8 7 6140" 10 8 7 5 4140" 12 10 9 7 6144" 10 8 7 6 4144" 12 11 9 8 6148" 10 9 7 6 5148" 12 11 9 8 7152" 10 9 8 6 5152" 12 11 10 8 7156" 11 9 8 7 5156" 13 11 10 9 7160" 11 9 8 7 6160" na 12 10 9 8164" 11 10 9 7 6164" na 12 11 9 8168" 11 10 9 8 6168" na 12 11 10 8172" 11 10 9 8 7172" na 12 11 10 9176" 11 10 9 8 7176" na 12 11 10 9180" 12 10 9 8 7180" na 13 11 10 998<strong>Wilson</strong> <strong>Audio</strong> Specialties<strong>Wilson</strong> <strong>Audio</strong> Specialties99
W A T C H C e n t e r C h a n n e l S e r i e s 2 O w n e r ’ s M a n u a lTable 5 - For on Stand with Spike and NutT a b l e 6 - F o r o n S t a n d w i t h D i o d e , S p i k e , a n d N u tTable 6 - For on Stand with Diode, Spike, and NutMeasure Ear Height (inches)Measure Ear Height (inches)36" 40" 44" 48" 52"36" 40" 44" 48" 52"60" 2 na na na na60" na na na na na64" 3 na na na na64" na na na na na68" 3 na na na na68" na na na na na72" 4 1 na na na72" 1 na na na na76" 4 2 na na na80" 5 2 na na na84" 5 3 na na naSpike andNut Only76" 2 na na na na80" 3 1 na na na84" 4 1 na na naSpike, Nut,and DiodeSpike andNut Only88" 5 3 1 na na88" 4 2 na na na92" 6 4 1 na na92" 5 3 1 na naMeasured Listening Distance (inches)96" 6 4 2 na na100" 6 4 2 na na104" 6 5 3 1 na108" 7 5 3 1 na112" 7 5 3 2 na116" 7 5 4 2 na120" 7 6 4 2 1124" 7 6 4 3 1128" 8 6 5 3 2132" 8 6 5 3 2136" 8 6 5 4 2140" 8 7 5 4 2Measured Listening Distance (inches)96" 6 4 2 na na100" 6 4 2 na na104" 7 5 3 1 na108" 7 5 3 2 na112" 7 6 4 2 na116" 8 6 4 3 1120" 8 6 5 3 2124" 8 7 5 4 2128" 9 7 6 4 3132" 9 8 6 5 3136" 9 8 6 5 4140" 10 8 7 5 4144" 8 7 5 4 3144" 10 8 7 6 4148" 8 7 6 4 3148" 10 9 7 6 5152" 8 7 6 4 3152" 10 9 8 6 5156" 8 7 6 5 3156" 11 9 8 7 5160" 9 7 6 5 4160" 11 9 8 7 6164" 9 7 6 5 4164" 11 10 9 7 6168" 9 8 6 5 4168" 11 10 9 8 6172" 9 8 7 5 4172" 11 10 9 8 7176" 9 8 7 6 4176" 11 10 9 8 7180" 9 8 7 6 5180" 12 10 9 8 7100<strong>Wilson</strong> <strong>Audio</strong> Specialties<strong>Wilson</strong> <strong>Audio</strong> Specialties101
Section 12 11 – Custom Ceiling Mounting Mounted Bracket<strong>Wilson</strong> <strong>Audio</strong> Specialties
W A T C H C e n t e r C h a n n e l S e r i e s 2 O w n e r ’ s M a n u a lS e c t i o n 1 1 . 1 - C e i l i n g M o u n t e d C e n t e r C h a n n e lThis section is intended to provide you with the required information for the constructionof a custom mounting bracket for your <strong>Center</strong> channel. It is important that this bracketbe made as instructed so as to be strong enough to securely fasten the <strong>Center</strong> channel tothe ceiling or wall. The requirements for the bracket are as follows:Section 11.1 - Ceiling Mounted <strong>Center</strong> ChannelA ceiling mounted <strong>Center</strong> channel will be mounted upside down (tweeter beneath themidrange drivers). It will also need to be rotated down towards the listening position. Dueto the variation in mounting locations and ceiling heights we are unable to determine foryou, based solely on listening distance and measured ear height, the amount of requiredrotation for your particular setup. However, we will offer some suggestions that will allowyou to achieve the best performance possible for your particular speaker location. Theguidelines are as follows:• The bracket must be able support 250 pounds. This is more than the weightof the <strong>Center</strong> channel, but it is necessary to maintain correct safety standards.• The bracket should angle the speaker down towards the listening position.Ideally, the midrange drivers should be firing 15” below the listening earheight (see Figure 20).• A good material for the bracket is 1” square tubing. This can be easilywelded together and will provide a rigid, strong support for your <strong>Center</strong>channel.• The slanted portion of the bracket will require mounting holes whose locationmatch those on the bottom of the <strong>Center</strong> channel. The hole pattern isshown in Figure 21.Once you have made the custom bracket, please refer to Section 4.7 for completesetup information.104<strong>Wilson</strong> <strong>Audio</strong> Specialties<strong>Wilson</strong> <strong>Audio</strong> Specialties105
W A T C H C e n t e r C h a n n e l S e r i e s 2 O w n e r ’ s M a n u a lSection 11.2 - Mounting <strong>Center</strong> Channel above ScreenMounting the <strong>Center</strong> channel above a TV requires a custom made bracket. This bracketwill support the weight of the <strong>Center</strong> channel and allow it to be rotated toward thelistening position (see Figure 20 below). This rotation will significantly improve the performanceof your <strong>Center</strong> channel, improving system integration, phase delay correction, andproviding a correct image height.The custom made bracket must have 4 mounting holes as shown in Figure 21 (opposingpage). These holes will allow the <strong>Center</strong> channel to be bolted to the mount. Make surethat the holes go all the way through the bracket and that the locations are such that theywill allow a nut to be tightened to the bolt that is inserted through these holes.User-made Custom Mounting BracketFigure 21 - <strong>Center</strong> Mounting Hole Locations<strong>Center</strong> Channel MountAngles Speaker DownThe bracket must also rotate the <strong>Center</strong> channel towards the listening position. This<strong>Center</strong> Channel Bolts to Bracketvia Four 3/8-16 Bolts and NutAttached from Inside the Speakercan be achieved by making a bracket that is higher in the back than in the front. Becausethe rotation required for the <strong>Center</strong> channel depends on your listening position, speakermount height, and listening ear height, we are unable to provide a table with all of the possiblecombinations. However, we offer the following rotational suggestions that will bringyou very close to the ideal rotation (assuming a 5 foot mounting height).Figure 20 - Mounting <strong>Center</strong> Channel to Ceiling106<strong>Wilson</strong> <strong>Audio</strong> Specialties<strong>Wilson</strong> <strong>Audio</strong> Specialties107
W A T C H C e n t e r C h a n n e l S e r i e s 2 O w n e r ’ s M a n u a lListening Distance Required Rotation5-10 feet 25 degrees10-15 feet 15 degrees15-20 feet 10 degreesSection 12 – Warranty InformationOnce you have made the custom bracket, please refer to Section 4.6 for completesetup information.Figure 20 - <strong>Center</strong> Channel Mounted above a TV108<strong>Wilson</strong> <strong>Audio</strong> Specialties
W A T C H C e n t e r C h a n n e l S e r i e s 2 O w n e r ’ s M a n u a lS e c t i o n 1 2 . 1 – W a r r a n t y I n f o r m a t i o nSection 12.1 – Warranty InformationLimited WarrantySubject to the conditions set forth herein, <strong>Wilson</strong> <strong>Audio</strong> warrants its electronics to befree of manufacturing defects in material and workmanship for the Warranty Period. TheWarranty Period is a period of 90 days from the date of purchase by the original purchaser,or if both of the following two requirements are met, the Warranty Period is a period offive (5) years from the date of purchase by the original purchaser:Requirement No. 1: No later than 30 days after product delivery to the customer,the customer must have returned the Warranty Registration Form to<strong>Wilson</strong> <strong>Audio</strong>;Requirement No. 2: The product must have been professionally installed bythe <strong>Wilson</strong> <strong>Audio</strong> dealer that sold the product to the customer.Failure to comply with either requirement no. 1 or requirement no. 2 will result in thewarranty period being limited to a period of 90 days only.ConditionsThis Limited Warranty is also subject to the following conditions and limitations. TheLimited Warranty is void and inapplicable if the product has been used or handled otherthan in accordance with the instructions in the owner’s manual, or has been abused or misused,damaged by accident or neglect or in being transported, or if the product has beentampered with or service or repair of the product has been attempted or performed byanyone other than <strong>Wilson</strong> <strong>Audio</strong>, an authorized <strong>Wilson</strong> <strong>Audio</strong> Dealer Technician or a serviceor repair center authorized by <strong>Wilson</strong> <strong>Audio</strong> to service or repair the product. Contact<strong>Wilson</strong> <strong>Audio</strong> at (801) 377-2233 for information on location of <strong>Wilson</strong> <strong>Audio</strong> Dealers andauthorized service and repair centers. Most repairs can be made in the field. In instanceswhere return to <strong>Wilson</strong> <strong>Audio</strong>’s factory is required, the dealer or customer must first obtain110<strong>Wilson</strong> <strong>Audio</strong> Specialties<strong>Wilson</strong> <strong>Audio</strong> Specialties111
W A T C H C e n t e r C h a n n e l S e r i e s 2 O w n e r ’ s M a n u a la return authorization. Purchaser must pay for shipping to <strong>Wilson</strong> <strong>Audio</strong>, and <strong>Wilson</strong> <strong>Audio</strong>will pay for shipping of its choice to return the product to purchaser. A returned productmust be accompanied by a written description of the defect. <strong>Wilson</strong> <strong>Audio</strong> reserves theright to modify the design of any product without obligation to purchasers of previouslymanufactured products and to change the prices or specifications of any product withoutnotice or obligation to any person.RemedyIn the event that the product fails to meet the above Limited Warranty and the conditionsset forth herein have been met, the purchaser’s sole remedy under this LimitedWarranty shall be to: (1) contact an authorized <strong>Wilson</strong> <strong>Audio</strong> Dealer within the WarrantyPeriod for service or repair of the product without charge for parts or labor, which serviceor repair, at the Dealer’s option, shall take place either at the location where the product isinstalled or at the Dealer’s place of business; or (2) if purchaser has timely sought serviceor repair and the product cannot be serviced or repaired by the Dealer, then purchasermay obtain a return authorization from <strong>Wilson</strong> <strong>Audio</strong> and at purchaser’s expense returnthe product to <strong>Wilson</strong> <strong>Audio</strong> where the defect will be rectified without charge for parts orlabor.Warranty Limited to Original PurchaserThis Limited Warranty is for the sole benefit of the original purchaser of the coveredproduct and shall not be transferred to a subsequent purchaser of the product, unlessthe product is purchased by the subsequent purchaser from an authorized <strong>Wilson</strong> <strong>Audio</strong>Dealer who has certified the product in accordance with <strong>Wilson</strong> <strong>Audio</strong> standards and requirementsand the certification has been accepted by <strong>Wilson</strong> <strong>Audio</strong>, in which event theS e c t i o n 1 2 . 1 – W a r r a n t y I n f o r m a t i o nDemonstration EquipmentEquipment, while used by an authorized dealer for demonstration purposes, is warrantedto be free of manufacturing defects in materials and workmanship for a period offive (5) years from the date of shipment to the dealer. Demo equipment needing warrantyservice may be repaired on-site or, if necessary, correctly packed and returned to <strong>Wilson</strong><strong>Audio</strong> by the dealer at dealer’s sole expense. <strong>Wilson</strong> <strong>Audio</strong> will pay return freight of itschoice. A returned product must be accompanied by a written description of the defect.Dealer owned demonstration equipment sold at retail within two (2) years of date of shipmentto the dealer is warranted to the first retail customer to be free of manufacturingdefects in materials and workmanship for the same time periods as if the product hadoriginally been bought for immediate resale to the retail customer. <strong>Wilson</strong> <strong>Audio</strong> productsare warranted for a period of 90 days, unless extended to 5 years, as provided above, byreturn and filing of completed Warranty Registration at <strong>Wilson</strong> <strong>Audio</strong> within 30 days afterproduct delivery to customer and the product was professionally installed by the <strong>Wilson</strong><strong>Audio</strong> Dealer that sold the product to the customer.MiscellaneousAll express and implied warranties not provided for herein are hereby expresslydisclaimed. Any legally imposed implied warranties relating to the product shall belimited to the duration of this limited warranty. This limited warranty does not extendto any incidental or consequential costs or damages to the purchaser.Some states do not allow limitations on how long an implied warranty lasts oran exclusion or limitation of incidental or consequential damages, so the above limitationsor exclusions may not apply to you. This Limited Warranty gives you specificlegal rights, and you may also have other rights, which vary from state to state.Limited Warranty for the product so purchased and certified shall expire at the end of theoriginal Warranty Period applicable to the product.<strong>Wilson</strong> <strong>Audio</strong> Specialties<strong>Wilson</strong> <strong>Audio</strong> Specialties112113