Rolera EM-C 2 User Manual - QImaging
Rolera EM-C 2 User Manual - QImaging
Rolera EM-C 2 User Manual - QImaging
- No tags were found...

You also want an ePaper? Increase the reach of your titles
YUMPU automatically turns print PDFs into web optimized ePapers that Google loves.
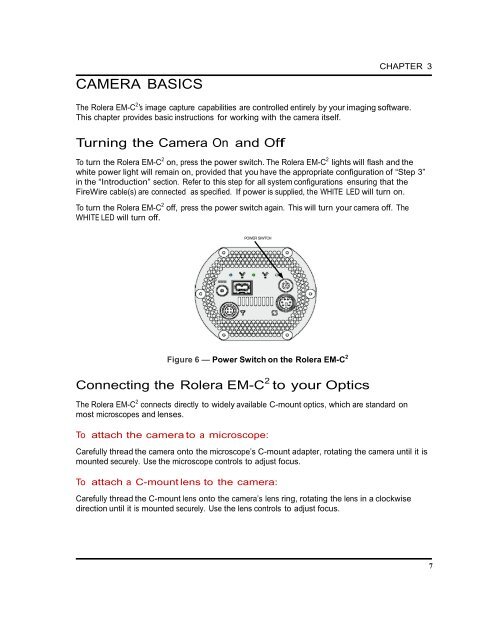
CAMERA BASICSCHAPTER 3The <strong>Rolera</strong> <strong>EM</strong>-C 2 ’s image capture capabilities are controlled entirely by your imaging software.This chapter provides basic instructions for working with the camera itself.Turning the Camera On and OffTo turn the <strong>Rolera</strong> <strong>EM</strong>-C 2 on, press the power switch. The <strong>Rolera</strong> <strong>EM</strong>-C 2 lights will flash and thewhite power light will remain on, provided that you have the appropriate configuration of “Step 3”in the “Introduction” section. Refer to this step for all system configurations ensuring that theFireWire cable(s) are connected as specified. If power is supplied, the WHITE LED will turn on.To turn the <strong>Rolera</strong> <strong>EM</strong>-C 2 off, press the power switch again. This will turn your camera off. TheWHITE LED will turn off.POWER SIWTCHFigure 6 — Power Switch on the <strong>Rolera</strong> <strong>EM</strong>-C 2Connecting the <strong>Rolera</strong> <strong>EM</strong>-C 2 to your OpticsThe <strong>Rolera</strong> <strong>EM</strong>-C 2 connects directly to widely available C-mount optics, which are standard onmost microscopes and lenses.To attach the camera to a microscope:Carefully thread the camera onto the microscope’s C-mount adapter, rotating the camera until it ismounted securely. Use the microscope controls to adjust focus.To attach a C-mount lens to the camera:Carefully thread the C-mount lens onto the camera’s lens ring, rotating the lens in a clockwisedirection until it is mounted securely. Use the lens controls to adjust focus.7