AFR REAR SHOCK OWNER'S MANUAL
AFR REAR SHOCK OWNER'S MANUAL
AFR REAR SHOCK OWNER'S MANUAL
Create successful ePaper yourself
Turn your PDF publications into a flip-book with our unique Google optimized e-Paper software.
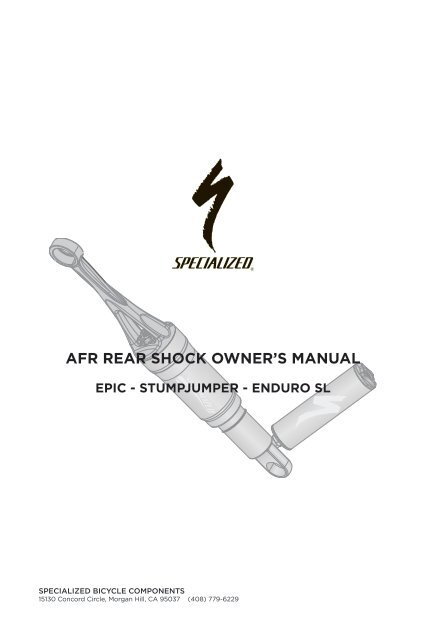
<strong>AFR</strong> <strong>REAR</strong> <strong>SHOCK</strong> OWNER’S <strong>MANUAL</strong>EPIC - STUMPJUMPER - ENDURO SLSPECIALIZED BICYCLE COMPONENTS15130 Concord Circle, Morgan Hill, CA 95037 (408) 779-6229
TABLE OF CONTENTSIntroduction............................................................................. 4Shock Terminology................................................................ 5General Maintenance............................................................ 5Warranty...................................................................................6Shock Pump............................................................................. 6Setting Sag............................................................................... 6Epic Setup................................................................................. 7Stumpjumper Setup.............................................................. 8Enduro SL Setup.................................................................... 9Please note all instructions are subject to change for improvement without notice.Rev.1, August 2006
INTRODUCTIONCongratulations on your purchase and welcome to the finest line of suspensionbikes available!Your bike is equipped with a Specialized <strong>AFR</strong> suspension unit. Please read thefollowing information for proper setup and service before riding. Please contactSpecialized at (877) 808-8154 for any questions.Please read the following warnings. Because failure to follow any warnings mayresult in a catastrophic failure, resulting in serious personal injury or death, thisphrase may not be repeated in connection with each Warning.WARNING! Make sure you have, review, and understand the warnings,instructions, and content of the manuals for your bicycle.SERVICE AND MODIFICATIONSAs a first point of contact for all warranty or service issues, please refer toyour local authorized Specialized dealer. Any service must be performed by anauthorized Specialized Service Center.Technological advances have made frames and shocks more complex, and the paceof innovation is increasing. It is impossible for this manual or the accompanyingmanuals to provide all of the information required to properly repair and/ormaintain your shock. In order to help minimize the chances of an injury, it is criticalto have work performed by an authorized Specialized Service Center.Do not modify your shock or bicycle. Any modifications, non-authorizedreplacement parts or improper service will void the warranty and can causedamage to the shock unit and/or frame and can cause injury to the rider.Proper maintenance is critical to the optimal performance and lifespan of theshock. Please follow the service schedule recommended in this manual. If yourshock ever makes any unusual noises or loses air/oil, stop riding immediately andhave the shock inspected by your local authorized Specialized dealer or by anauthorized Specialized Service Center.NOTE: Specialized shocks are pressurized with Nitrogen (Brain tanks on Epic andStumpjumper models, internal shock body on Enduro SL models). The chargedsection does not need to be opened to perform any cleaning or lubricating of themain air chamber. The charged section of the shock should not be opened exceptby an authorized service center. Attempting to open the charged section of theshock is dangerous, can result in serious injury and will void the warranty.If the shock is compressed or will not return with no load on the bicycle, donot attempt to service. Have the shock inspected by an authorized Specializedservice center.WARNING! Service on Specialized shocks requires special knowledgeand tools. Specialized recommends that all service and repairs beperformed by an authorized Specialized Service Center.WARNING! Never modify your shock or frame in any way. Donot sand, drill, fill, or remove parts. Do not install incompatibleafter-market suspension parts. Riding with a damaged, broken,malfunctioning or improperly modified frame or shock, can cause youto lose control and fall.
Caution: Any modification of your frame or shock means that yourbike no longer meets our specifications and therefore voids yourwarranty.Caution: Specialized shocks are only for use on designatedSpecialized bikes. Use of these shocks on any non-recommendedbikes can result in poor performance, damage to the shock and/orbike and will void the warranty.<strong>SHOCK</strong> TERMINOLOGYShock sag: The amount the shock compresses when the rider’s body weight isapplied to the shock while sitting on the bike. Please refer to each bike model’sshock setup chart to determine correct air pressure and corresponding sagpercentage.Compression damping: Shim controlled damping system for slow to mediumshaft speeds, controls the resistance felt from the oil damping when compressingthe shock for a firm ride feel, offering greater cornering and braking performance.Spike Valve: Part of the compression damping system that will dump largevolumes of oil as the system encounters larger, faster bump impacts allowing forgreat bump absorption without over producing compression damping, which therider feels as a form of hydraulic lock.Rebound damping: Controls the rate of return of the shock after compression.Brain Fade: Opens and closes a separate bleed circuit that allows a small amountof fluid to pass freely by the inertia valve controlled circuit. For the rider, thisadjustment will reduce the firmness of the shock’s platform at ride height.GENERAL MAINTENANCEMaintenance Schedule New Every ride Every 50 hrs Every 250 hrsSet sag X XAdjust rebound for desired speed X XCLEAN <strong>SHOCK</strong> BODYAir sleeve maintenanceClean aluminum pivot reducers, checkfor wear, greaseSend to service center for inspectionand oil changeXX(Except Epics)X(Except Epics)XCAUTION! Be sure to wipe the shock body clean after every ride to prevent wearand damage to the shock. Failure to follow this caution will void the warranty.All internal shock maintenance must be performed by an authorized SpecializedService Center. For a list of service centers, please visit www.specialized.com,e-mail at customerservice@specialized.com or call (877) 808-8154.Wash your shock with soap and water. If you ride in muddy conditions, clean andservice your shock more frequently. Do not use a pressure washer!When your shock is cycled, grease will purge from the seals. This is normal, it isnot the oil leaking from the shock.
WARRANTYFor warranty provisions, please visit www.specialized.com.<strong>SHOCK</strong> PUMPSpecialized offers a rear shock pump, to add or release air pressure from yourSpecialized rear shock. Follow the steps below:• Remove the valve cap from the shock.• Thread the pump’s valve chuck onto the shock’s schraeder valve, until pressureregisters on the pump gauge. Do not over tighten the valve chuck. If there’s nopressure in the shock, no pressure will register on the pump gauge.• Stroke the pump until you’ve reached the desired pressure (see specific modelair charts for pressure ranges). Pressure can be decreased by pressing thepressure release button on the pump body.When the valve chuck is removed, air pressure will be released. This air isNOT from the shock. It’s leftover air from the pump hose. When the pump isreattached to the valve, pressure in the shock will decrease to fill the pump hose.This will lower pressure approximately 10 PSI. (i.e. a shock set at 150 PSI will showapproximately 140 PSI when the pump’s hose is re-installed on the shock, as thehose is refilled by pressure in the shock.)NOTE! Shock pressure range is 50 to 300 PSI. Do not exceed 300 PSI.SETTING SAGSetting the sag is necessary to get the best performance from your rear shock.Proper sag is based on a percentage of the stroke of the shock. To determineproper sag, please follow the steps below.Sag is determined by lightly sitting on the saddle without bouncing (applyingrider weight only to the shock) to compress the rear shock and displace theo-ring (see fig.1). The distance between the o-ring and the shock seal is the sag.The rider should be fully dressed in ride gear and sitting in a normal ridingposition when setting sag.Option 1: 2007 and newer Specialized models come with a small sag meter,designed to help you find the correct starting point for sag, by measuring apreset distance from the shock seal to the o-ring. Follow the instructions todisplace the o-ring in order to measure sag. Place the sag meter against theshock seal, if the o-ring falls inside the sag meter notch, your shock is in theproper starting range for sag.Option 2: Determine the sag measurement in millimeters (shock stroke in mm /sag percentage). See specific bike model setup page for sag%, shock stroke anddisplacement amount. Follow the instructions to displace the o-ring in order tomeasure sag. Measure the distance from the shock seal to the o-ring.
1. Set sag:EPIC <strong>SHOCK</strong> SETUP• See the attached air chart for starting pressure. Use a high-pressure shockpump to add air.• Turn the Brain Fade knob (3) counter-clockwise to allow the shock to sag moreeasily.• Push the rubber o-ring up to the seal, sit on the bike gently, dismount gentlyand measure the distance between the shock seal and the o-ring (sag).• Adjust air pressure until desired sag is reached(This can be verified following the steps on p.6Rider Weightor the measurements below the air chart).lbs (kg) Air PSIAir pressures may vary depending on rider style 90-100 (41-45) 45-50and/or terrain.100-110 (45-50) 50-552. Adjust rebound:The red knob (2) controls the rebounddamping, the rate which the shock returnsafter the shock has been compressed.• Turn the knob clockwise for slower rebound(slower speeds, bigger hits).• Turn the knob counter-clockwise for fasterrebound (higher speeds, small bumps, moretraction.3. Tune Brain Fade inertia valve:Brain Fade is an inertia valve system offeringa range of pedal platform efficiency. The blueknob (3) controls the Race Tune inertia valvedamping.• Turn the knob clockwise for a firmer, moreefficient ride. Full clockwise is hardtail firm insmooth terrain.• Turn the knob counter-clockwise for a softer,more supple Trail Tune setting.Fig.1110-120120-130130-140140-150150-160160-170170-180180-190190-200200-210210-220220-230230-240240-250250-265265-280280-295(50-54)(54-60)(60-64)(64-68)(68-73)(73-77)(77-82)(82-86)(86-91)(91-95)(95-100)(100-104)(104-109)(109-113)(113-120)(120-127)(127-134)55-6060-7070-7575-8080-9090-100100-105105-110110-115115-125125-135135-145145-155155-165165-175175-185185-195Eye-to-eye length: 307.3mmShock stroke: 47.6mmRecommended sag: 20-25%(9.5-12mm)Firm (race sag setting: 15-20%(7.5-9.5mm)
STUMPJUMPER <strong>SHOCK</strong> SETUP1. Set sag:• See the attached air chart for starting pressure. Use a high-pressure shockpump to add air.• Turn the Brain Fade knob counter-clockwise to allow the shock to sag moreeasily.• Push the rubber o-ring up to the seal, sit on the bike gently, dismount gentlyand measure the distance between the shock seal and the o-ring (sag).• Adjust air pressure until desired sag is reached(This can be verified following the steps on p.6Rider Weightor the measurements below the air chart).lbs (kg) Air PSIAir pressures may vary depending on rider styleand/or terrain2. Adjust rebound:The red knob controls the rebound damping,the rate which the shock returns after theshock has been compressed.• Turn the knob clockwise for slower rebound(slower speeds, bigger hits).• Turn the knob counter-clockwise for fasterrebound (higher speeds, small bumps, moretraction.Higher air pressures and higher impactsrequire more rebound damping (clockwise).3. Tune Brain Fade inertia valve:Brain Fade is an inertia valve system offeringa range of pedal platform efficiency. Theblue knob controls the Trail Tune inertia valvedamping.• Turn the knob clockwise for a firmer, moreefficient ride.• Turn the knob counter-clockwise for a softer,more supple Trail Tune setting.Fig.290-100100-110110-120120-130130-140140-150150-160160-170170-180180-190190-200200-210210-220220-230230-240240-250250-265265-280280-295(41-45)(45-50)(50-54)(54-60)(60-64)(64-68)(68-73)(73-77)(77-82)(82-86)(86-91)(91-95)(95-100)(100-104)(104-109)(109-113)(113-120)(120-127)(127-134)80-9585-9595-105105-115115-125125-140140-155155-170170-180180-195195-210210-225225-240240-255255-270270-285285-300300-315315-330Stumpjumper 120 Carbon:Eye-to-eye length: 193.7mmShock stroke: 41.3mmRecommended sag: 20-25%(8-10mm)Stumpjumper 120 Alloy:Eye-to-eye length: 196.9mmShock stroke: 44.5mmRecommended sag: 20-25%(9-11mm)
ENDURO SL <strong>SHOCK</strong> SETUP1. Set sag:• See the attached air chart for starting pressure. Use a high-pressure shockpump to add air.• Push the rubber o-ring up to the seal, sit on the bike gently, dismount gentlyand measure the distance between the shock seal and the o-ring (sag).• Adjust air pressure until desired sag is reached. (This can be verified followingthe steps on p.6 or the measurements below the air chart).Air pressures may vary depending on rider styleand/or terrain2. Adjust rebound:The red knob controls the rebound damping,the rate which the shock returns after theshock has been compressed.• Turn the knob clockwise for slower rebound(slower speeds, bigger hits).• Turn the knob counter-clockwise for fasterrebound (higher speeds, small bumps, moretraction.3. Adjust compression:Specialized <strong>AFR</strong> shocks are equippedwith a spike valve to optimize the shock’scompression.Low-speed compression (induced by rider’sbody weight - pitching, diving) is adjustableby turning the blue knob.• Turn the knob clockwise for a firmer, moreefficient ride.• Turn the knob counter-clockwise for a moresupple ride, more traction.NOTE: The spike valve system is a pre-sethigh-speed compression oil flow deviceconfigured to release a large volume of oil toprevent shock spiking at higher frequencies(terrain induced impacts).The adjustable low-speed compression knobbypasses the spike valve.Rider Weightlbs (kg)90-100100-110110-120120-130130-140140-150150-160160-170170-180180-190190-200200-210210-220220-230230-240240-250250-265265-280280-295(41-45)(45-50)(50-54)(54-60)(60-64)(64-68)(68-73)(73-77)(77-82)(82-86)(86-91)(91-95)(95-100)(100-104)(104-109)(109-113)(113-120)(120-127)(127-134)Air PSI70-8080-9090-100100-110110-120120-130130-140140-150150-160160-170170-180180-190190-205205-215215-225225-235235-250250-265265-280Eye-to-eye length: 222.3mmShock stroke: 63.5mmRecommended sag: 25-30%(14-17mm)
15130 Concord CircleMorgan Hill, CA95037www.specialized.com© 2007 Specialized Bicycles10


