Bedienungsanleitung - Ljudia
Bedienungsanleitung - Ljudia
Bedienungsanleitung - Ljudia
Create successful ePaper yourself
Turn your PDF publications into a flip-book with our unique Google optimized e-Paper software.
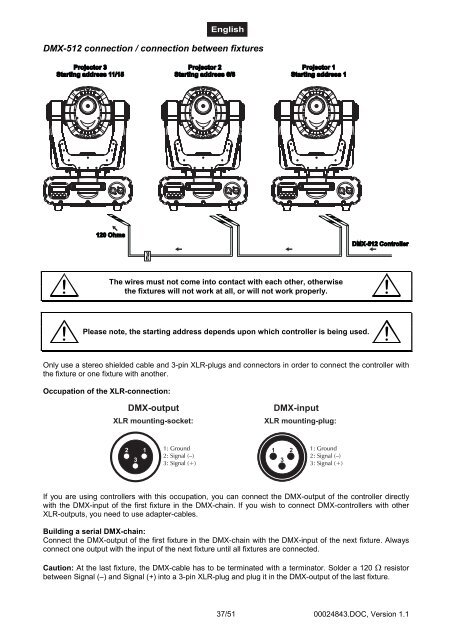
DMX-512 connection / connection between fixturesThe wires must not come into contact with each other, otherwisethe fixtures will not work at all, or will not work properly.Please note, the starting address depends upon which controller is being used.Only use a stereo shielded cable and 3-pin XLR-plugs and connectors in order to connect the controller withthe fixture or one fixture with another.Occupation of the XLR-connection:If you are using controllers with this occupation, you can connect the DMX-output of the controller directlywith the DMX-input of the first fixture in the DMX-chain. If you wish to connect DMX-controllers with otherXLR-outputs, you need to use adapter-cables.Building a serial DMX-chain:Connect the DMX-output of the first fixture in the DMX-chain with the DMX-input of the next fixture. Alwaysconnect one output with the input of the next fixture until all fixtures are connected.Caution: At the last fixture, the DMX-cable has to be terminated with a terminator. Solder a 120 resistorbetween Signal (–) and Signal (+) into a 3-pin XLR-plug and plug it in the DMX-output of the last fixture.37/5100024843.DOC, Version 1.1


