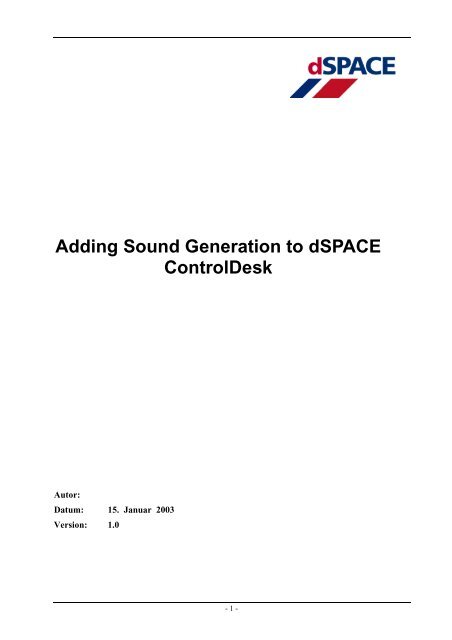
Adding Sound Generation to dSPACE ControlDesk
Adding Sound Generation to dSPACE ControlDesk
Adding Sound Generation to dSPACE ControlDesk

You also want an ePaper? Increase the reach of your titles
YUMPU automatically turns print PDFs into web optimized ePapers that Google loves.
<strong>Adding</strong> <strong>Sound</strong> <strong>Generation</strong> <strong>to</strong> <strong>dSPACE</strong><strong>ControlDesk</strong>Au<strong>to</strong>r:Datum: 15. Januar 2003Version: 1.0- 1 -
CDesk<strong>Sound</strong><strong>Generation</strong>.doc 26. February 2003<strong>Sound</strong>fonts can be created using the <strong>Sound</strong>Font edi<strong>to</strong>r software Vienna <strong>Sound</strong>Font Studiofrom Creative Technology Ltd., available at http://developer.creative.com/ in the downloadsection.3 Step-By-Step GuideThis chapter describes step-by-step how <strong>to</strong> install the sound module and enable the genera<strong>to</strong>rwithin <strong>ControlDesk</strong>. Integration is experiment-specific and must be performed for eachexperiment that has <strong>to</strong> generate sound.3.1 Getting StartedUnpack the contents of the compressed archive <strong>to</strong> a temporary folder. The archive contains onefolder named soundgenera<strong>to</strong>r. All the files needed are located in this. Make sure that the MIDIinterface works properly. There is a small stand-alone <strong>to</strong>ol available for testing purposes, so youcan test the sound hardware and software. Open the <strong>Sound</strong>ModuleTest.exe file. A dialog opens(see Figure 1). Click the Horn but<strong>to</strong>n. You should now hear a car horn sound. Click the EngineOn radio but<strong>to</strong>n <strong>to</strong> turn on the continuous car engine sound.Figure 1: MIDI Configuration testing <strong>to</strong>ol<strong>Sound</strong> hardware usually has more than one MIDI device available. The drop-down list shows allthe devices found on the system. If you hear a piano instead of a car engine, try selecting anotherdevice.If the list is empty and contains no devices, your sound hardware or software is not installedproperly.3.2 Manual Access <strong>to</strong> the <strong>Sound</strong> Card MemoryThe sound module bundle contains a <strong>Sound</strong>Font named carsound.sf2. When the soundgenera<strong>to</strong>r is called, it au<strong>to</strong>matically loads the carsound.sf2 file <strong>to</strong> the sound card’s memory.- 4 -
CDesk<strong>Sound</strong><strong>Generation</strong>.doc 26. February 2003In a few cases, it can be useful <strong>to</strong> have manual access <strong>to</strong> the sound card’s <strong>Sound</strong>Font memory.For such cases Creative Technology drivers contain a <strong>Sound</strong>Font configuration dialog (seeFigure 2). This can be opened with the AudioHQ -> <strong>Sound</strong>Font command.The sound genera<strong>to</strong>r loads the carsound.sf2 file <strong>to</strong> bank number 001. To force reload of thecarsound.sf2 file, for instance, select 001 - User Bank from the drop-down list in the <strong>Sound</strong>Font -AudioHQ dialog and click the Clear but<strong>to</strong>n. This deletes the soundfont from the sound cardmemory. The next time you start the sound genera<strong>to</strong>r, it will load the soundfont file again.Figure 2: Creative Technology Ltd. <strong>Sound</strong>Font configuration dialog3.3 InstallationFirst the sound module files have <strong>to</strong> be copied <strong>to</strong> the working folder of the experiment that youwish <strong>to</strong> generate sound in. This is done by copying the soundgenera<strong>to</strong>r folder <strong>to</strong> the workingfolder.Open the root folder of your experiment. The experiment Python script is located here by default.It has the same name as your experiment, with a leading ‘_’ character. For example, if yourexperiment has the name MyExp.cdx, your experiment script has the name _MyExp.py.Look for the experiment script of your experiment.If it has none, copy the _ExperimentName.py file <strong>to</strong> the experiment root folder and rename it sothat is has the name of your experiment with a leading ‘_’ character.- 5 -
CDesk<strong>Sound</strong><strong>Generation</strong>.doc 26. February 2003If it already has an experiment script, the two files have <strong>to</strong> be merged. Since the files can havethe same function definitions, this cannot be done by simply copying the contents of one file <strong>to</strong>the other. So you should try this only if you have basic Python programming experience.After all files have been copied and renamed, open <strong>ControlDesk</strong> and then open your experiment.The new experiment script au<strong>to</strong>matically opens the soundcontrol.lay layout (see Figure 3).Figure 3: <strong>ControlDesk</strong> with opened sound control layout3.4 Connecting the Real-Time VariablePreparations are now completed and you can connect your real-time variable from the simula<strong>to</strong>r<strong>to</strong> the sound module. This is done with the Engine RPM message instrument at the bot<strong>to</strong>m of theleft column of the sound control layout. This instrument can retrieve information from real-timehardware.Since it is connected <strong>to</strong> the event mechanism of <strong>ControlDesk</strong> and has some predefined intervals,at each interval it fires an update event delivering the current revolutions per minute (rpm, e.g.,engine frequency), <strong>to</strong> the sound module. The sound module translates this in<strong>to</strong> note and pitchvalues and sends an output signal <strong>to</strong> the sound hardware. The sound is completely generated bythe sound hardware.To connect a real-time variable, open the sound control layout and connect the variable <strong>to</strong> themessage instrument by simply dragging the engine rpm variable from the <strong>to</strong>ol window over the- 6 -
CDesk<strong>Sound</strong><strong>Generation</strong>.doc 26. February 2003message instrument (see Figure 4). The message instrument reads information from the rpmvariable and displays the information text (see Figure 5).Figure 4: Dragging the real-time variable on the message instrumentFigure 5: <strong>Sound</strong> Control layout with connected real-time variable- 7 -
CDesk<strong>Sound</strong><strong>Generation</strong>.doc 26. February 2003Now integration of the sound module is finished. To save all changes, exit <strong>ControlDesk</strong>. Amessage box asks whether you want <strong>to</strong> add all opened files <strong>to</strong> the experiment. Click Yes.<strong>ControlDesk</strong> saves all changes.A second dialog asks whether you want <strong>to</strong> save all changes. Select Yes again.Figure 6: Add all files dialogThe next time you open this particular <strong>ControlDesk</strong> experiment, the sound module will be fullyintegrated and all instruments on the sound control layout will be functional.The sound module is now set up <strong>to</strong> start the sound genera<strong>to</strong>r whenever the Animation modewithin <strong>ControlDesk</strong> is started and s<strong>to</strong>p it again when the Animation mode is ended. The carengine sound scales with the revolution frequency of the connected real-time variable.4 How <strong>to</strong> Integrate Your Own <strong>Sound</strong>sThe sound module can be used <strong>to</strong> play your own sounds - for instance, <strong>to</strong> provide feedback in<strong>ControlDesk</strong> when a certain condition occurs, e.g., when a simulation variable exceeds itsboundaries. <strong>Sound</strong>s can be added by modifying the distributed <strong>Sound</strong>Font file carsound.sf2.For sound output, the sound genera<strong>to</strong>r has a Python-based MIDI controller core component. Thiscontroller is the main interface <strong>to</strong> the sound hardware. Both configuration and output are via thePython MIDI controller module.So the integration of sounds can be divided in<strong>to</strong> two steps:1. Modification of the soundfont file2. Modification of the experimentThese steps are described in detail in the following subchapters.4.1 <strong>Adding</strong> New Samples <strong>to</strong> the <strong>Sound</strong>fontBasically, there are two ways of adding new sound samples, depending on the sound output youwant <strong>to</strong> realize.1. If you want <strong>to</strong> add sounds that fade away once triggered, this can be done relativelyeasily by adding the samples <strong>to</strong> the existing soundfont. This procedure will bedescribed in this document.2. If playback of a looped engine sound is your task, keep in mind that the creation ofloopable soundfonts can be a rather time-consuming process. It also requiresthorough experience in creating soundfonts, and last but not least, a good musicalear.- 8 -
CDesk<strong>Sound</strong><strong>Generation</strong>.doc 26. February 2003For general information about creating soundfonts, check the site http://www.hammersound.net/.This contains some downloadable tu<strong>to</strong>rials dealing with the creation of soundfonts and the usageof the Vienna <strong>Sound</strong>Font Studio. A good starting point is the tu<strong>to</strong>rial “The Art of <strong>Sound</strong>Font: AStep-by-Step Guide” by Jess Skov-Nielsen.How <strong>to</strong> add sound signalsTo add new samples, start the Vienna <strong>Sound</strong>Font Studio and load the carsound.sf2 file. Importyour sample files (must be in .wav format) <strong>to</strong> the User Sample Pool.An instrument named UserInstrument for user additions is set up for convenience.In the Instrument Pool, right-click the UserInstrument node and select the New Zone…command (see Figure 7).Figure 7: <strong>Adding</strong> a key zone within an instrumentSelect your desired sample from the dialog that opens. Now the key range of the sample has <strong>to</strong>be specified. A sound signal is a trigger-fade-off sound and can be assigned <strong>to</strong> one note key onlyso that every key in the instrument has a different sound assigned <strong>to</strong> it. Specify the one-key rangeby dragging the left border (black arrow) <strong>to</strong> the leftmost unused note key and the right border(white arrow) <strong>to</strong> the same key (see Figure 8).Figure 8: Defining a one-key zone- 9 -
CDesk<strong>Sound</strong><strong>Generation</strong>.doc 26. February 2003Then transpose the root note of your sample (red arrow) <strong>to</strong> the leftmost unused note key (seeFigure 9). Finally save the soundfont.Figure 9: Defining the root key of a sampleTo ensure that the new soundfont will be loaded next time you start the sound module, manuallyclear the memory of your sound card using the sound card software (see chapter 3.2). Ensure thatthe new file is copied <strong>to</strong> the experiment folder that you want <strong>to</strong> play the new sounds. Otherwise,your computer will not be able <strong>to</strong> recognize changes within the soundfont and will not reload themodified file, with the result that your new samples will not be played.4.2 The MIDI Controller APIThe sound module has a core controller component that is implemented as a Python class locatedin the MidiController.py file . It is available for common access in the common.py module. Ifyou want <strong>to</strong> pass function calls <strong>to</strong> the MIDI controller, import the common module and accessthe midiController variable. To play a car horn, for instance, use:import commoncommon.midiController.<strong>Sound</strong>Horn()The following list shows a selection of functions of the MIDI controller.FunctionDescriptionPlayUser<strong>Sound</strong>( int )Plays the specified note with the userinstrument. The parameter has <strong>to</strong> be aninteger.<strong>Sound</strong>CloseWindow()Plays the sound of a window lifter closing awindow.<strong>Sound</strong>EngineOutsideEnable(int) Function <strong>to</strong> enable/disable the engine sound.Call it with argument value 1 <strong>to</strong> enable theengine, 0 <strong>to</strong> disable.<strong>Sound</strong>EngineOutsideUpdatePitch(int) Function <strong>to</strong> update the engine soundfrequency. Call it with rpm value as theargument <strong>to</strong> update the engine sound- 10 -
CDesk<strong>Sound</strong><strong>Generation</strong>.doc 26. February 2003<strong>Sound</strong>OpenWindow()<strong>Sound</strong>Horn()UpdateAirStream(int)UpdateSlippageLeft(int)UpdateSlippageRight(int)frequency.Plays the sound of a window lifter opening awindow.Plays a car horn sound.Updates the volume of the air stream sound.Invoke this method with the car velocity inkilometers per hour [km/h].Plays a tire squeaking sound. Pass theslippage value of both of the left side tires.The slippage has <strong>to</strong> be passed as apercentage value. Percentage of tire velocityminus car velocity (vcar – vtire)/vcarPlays a tire squeaking sound. Pass theslippage value of both of the right side tires.The slippage has <strong>to</strong> be passed as apercentage value. Percentage of tire velocityminus car velocity (vcar – vtire)/vcar4.3 ExampleSuppose you want <strong>to</strong> add an alarm sound signal <strong>to</strong> your experiment if a certain condition isfulfilled.First the output sound has <strong>to</strong> be recorded. Afterwards, add the sample <strong>to</strong> the UserInstrument asdescribed in chapter 4.1. Notice the root key number of the sample. This is the value that youhave <strong>to</strong> pass <strong>to</strong> the MIDI Controller <strong>to</strong> play the sample. In our example, let us assume this value<strong>to</strong> be 1 (see Figure 9). The Python code fragment <strong>to</strong> play this sound would look like this:…import commonif (condition):# play the key number 1 of the UserInstrumentcommon.midiController.PlayUser<strong>Sound</strong>(1)- 11 -