Operator Manual - Barrett BORS - NIOA LEM
Operator Manual - Barrett BORS - NIOA LEM
Operator Manual - Barrett BORS - NIOA LEM
Create successful ePaper yourself
Turn your PDF publications into a flip-book with our unique Google optimized e-Paper software.
About the <strong>Operator</strong>’s <strong>Manual</strong>The <strong>BORS</strong> manual is organized into 4 main sections:1. <strong>BORS</strong> description.This section explains the functions of the <strong>BORS</strong> and the contents of the kit. Thesection also outlines the technical specifications and memory storage capacity.2. Installation and mounting.This section describes how to install the <strong>BORS</strong> unit on Mil-Std 1913 rail and itshost rifle telescope.3. Battery installation and power on/off.This section details battery installation and how to properly turn the <strong>BORS</strong> poweron and off, and describes the information displayed on the “OPERATOR’SSCREEN”4. Keypad usage and screen displays.This section describes each button on the keypad and how to use the informationon the display screens. This section also explains how to calibrate the unit,“zero” the <strong>BORS</strong> and scope with live fire, and use the <strong>BORS</strong> to determine range.Explanation of format and terms used in this manual:WARNINGA WARNING DESCRIBES AN ACTION THAT MAY RESULT IN SERIOUSINJURY OR DEATH.CautionA caution describes an action that may result in damage to equipment.NoteA note is a recommended operating technique.Text describing a <strong>BORS</strong> screen display is “CAPITALIZED AND INQUOTATIONS”.3
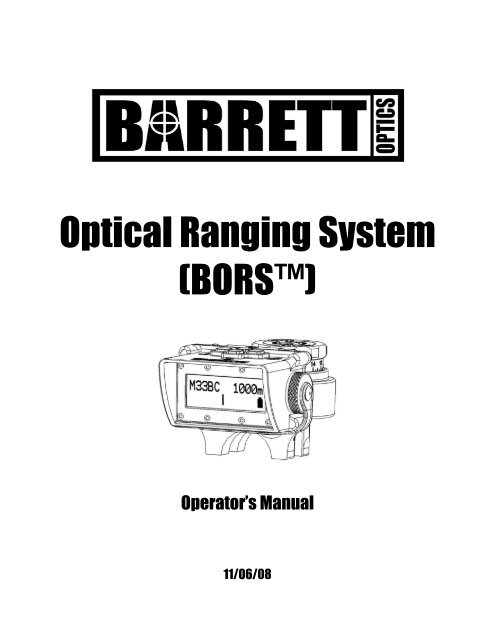
<strong>Barrett</strong> Optical Ranging System (<strong>BORS</strong>) Description<strong>BORS</strong> is a ballistic computer that mounts directly to the rifle telescope. The<strong>BORS</strong> is coupled to the scope’s elevation adjustment post. Its body serves asthe rear upper scope ring cap.The <strong>BORS</strong> continuously measures air temperature, barometric pressure, andbore line angle. Given these inputs, it automatically calculates a ballistic solutionfor a specific user selected cartridge. The user simply adjusts the <strong>BORS</strong>elevation knob to match the target’s known range with the range displayed on the<strong>BORS</strong>. This eliminates the need for “counting clicks” as target ranges change,allowing the shooter to focus on other environmental conditions, and quicklyengage multiple targets at varying ranges.The <strong>BORS</strong> memory is sufficient to hold 100 cartridge tables. Installation can becompleted in about the same time as it takes to mount a rifle telescope.Kit ContentsThe <strong>BORS</strong> kit, figure 2-1, includes the following:One <strong>Barrett</strong> Optical Ranging System with factory installed cartridge tablesOne <strong>Barrett</strong> Ballistic Software CD with Quickstart GuideOne USB to <strong>BORS</strong> Interface CableOptional set of <strong>Barrett</strong> Zero-Gap 30mm Scope RingsOne lithium ion CR-123 batteryOne <strong>BORS</strong> operator’s manualOne <strong>BORS</strong> knob adapter with 3 set screwsOne <strong>BORS</strong> elevation knob with set screwOne Tool Kit containing the following:Four 8-32 x 1 1/2” T-25 Torx® socket head cap screwsOne 10-24 x 1/2” flat head cap screwOne 3/32 L-shaped Allen WrenchOne T-25 L-shaped Torx® WrenchOne tube Loctite® 222 low strength adhesiveFour extra 10-24 x ¼” set screws4
<strong>BORS</strong> Technical SpecificationsWeight:Display:User Interface:Operating Temperature Range:Temperature Response Time:Barometric Pressure Resolution:Figure 1-113 oz. (370 grams)12 x 2 Character LCD4 Button Keypad-4°F to 158°F ( -20°C to 70°C)1 minute per 1°F of changeAltitude Range: -1,000ft to 20,000ft ( -300m to 6,000m)Angular Range: ±90°Angular Resolution: 2°Battery Type:Battery Life:1inHg or 1kPaCR-12330 hours minimum at 1,500mA/hrbattery rating5
3. Adjust the elevation knob to thehighest setting, then remove the Leupoldelevation knob (3/32in. Allen wrench)toexpose the elevation adjustment post.Figure 2-4.CautionDo not attempt to rotate theriflescope’selevation knob past itsdesigned mechanical limit.4. Place the knob adapterover theelevation post. Apply slight downwarddpressure to ensure that all set screwss(3/32in Allen) are seated below theoutside diameter of the knob adapter andtighten evenly. Use Loctite® if desired.Figure 2-5.5. Place the <strong>BORS</strong> unit ontop of therear scope ring.Start the four <strong>BORS</strong>mount screws ( T-25 Torx®wrench), butdo not tighten them. Figure 2-6.Figure 2-4Figure 2-56. Place the <strong>BORS</strong> elevation knob overthe knob adapter. Ensure the knob isfully seated on the adapterthen securewith knob screwand tighten the Knobsetscrew(3/32in Allen). Figure 2-7.CautionDonot over-tighten the set screw.7. Rotate the <strong>BORS</strong> elevation knob tothe lowest elevation setting, then backup one complete revolution. The o-ringon the elevationknob serves to align the<strong>BORS</strong> housing with the scope andreticle.CautionDo not attempt to rotate theriflescope’s elevation knob past itsdesignedd mechanical limit.Figure 2-6Figure 2-77
Powering the<strong>BORS</strong> on or offCaution<strong>BORS</strong> is designed to be powered on when elevation adjustmentss are made.Moving the elevation dial when <strong>BORS</strong> is off will result in lost data andrecalibrating the <strong>BORS</strong> to yourscope will be required (see page 21).To power on the<strong>BORS</strong> , press andhold the button, see Figure 3-2, forone or two seconds. The backlight willturn on and then the first initializationscreen will be displayed.Figure 3-2NoteA battery witha low charge remaining may not provide sufficient power to the<strong>BORS</strong> causingonly the backlight toturn on and no text or a shaded top row ofthe display to appear. Replace battery with a new or known good one, and retry.To power off the<strong>BORS</strong> , press andhold the button for 5 seconds oruntil “SHUTTING DOWN” is displayed.Figure 3-3Figure 3-3NoteTurn the <strong>BORS</strong> power off before removing the battery toprevent the loss ofselected settings.As the <strong>BORS</strong> powers up and initializes, three different screens will bedisplayed.These “Initialization Screens” will onlybe displayed for oneto two seconds andwill show current installed informationn about the <strong>BORS</strong>. The full initializationperiod is about 5 seconds.10
On the first “Initialization Screen”, thebacklight turns on, then “BARRETTOPTICS” is displayed. Figure 3-4.Figure 3-4The second “Initialization Screen” is the“LIBRARY SCREEN”. This displaysthe current Cartridge Libraryprogrammed in the <strong>BORS</strong>. Figure 3-5Figure 3-5The third and final “InitializationScreen” is the “VERSION SCREEN”.This displays the <strong>BORS</strong> firmwareversion currently installed. Figure 3-6.Figure 3-6NoteActual “LIBRARY SCREEN” and “VERSION SCREEN” may differ due tomanufacturer updates to installed cartridge library or firmware.NoteElevation adjustments can be made during the initialization period althoughchanges will not be displayed until initialization is complete and <strong>BORS</strong> displaysthe “OPERATOR’S SCREEN”.11
The “OPERATOR’S SCREEN”The screen displayed immediately following <strong>BORS</strong> initialization is the"OPERATOR'S SCREEN". This is the default <strong>BORS</strong> screen. Figure 3-7.The current selected cartridge isdisplayed in the upper left corner.In the upper right corner is therange where the horizontal line ofthe reticle and the calculatedcartridge trajectory coincide forbullet impact. The unit of measurecan be set to yards, "y", or meters,"m". See Page 20 for changing theunits of measurement basis.Figure 3-7NoteThe range displayed on the “OPERATOR’S SCREEN” is only valid if thecartridge fired is the selected cartridge in <strong>BORS</strong>.NoteThe default units of measurement basis are factory set to U.S.The Battery Life Indicator is displayed in the lower right corner. A solid batterysymbol is shown with over 50% battery life. A half-full battery symbol representsless than 50% battery life remaining. An empty battery symbol flashes when it istime to replace the battery. When battery charge is too low to sustain properoperation, <strong>BORS</strong> automatically saves all data then turns itself off.In the lower portion of the "OPERATOR'S SCREEN" is the Roll Sensor Indicatorwhich measures the side to side angle from level. An "I" will be displayed whenthe firearm is level. A "▓" will be displayed in the direction the firearm needs tobe pivoted to return to level.Figure 3-8 Figure 3-9 Figure 3-10Firearm is rolled left. Firearm is level. Firearm is rolled right.12
The pitch sensor built into <strong>BORS</strong> measures the angle of thefirearm's bore line,incline or decline, and automatically compensates the ballistic solutionin therange displayed. This canbe observed by the range changing while tilting the<strong>BORS</strong> forward and backward.NOTEIf there are no changes to the Roll Sensor Indicator or range when tilting the<strong>BORS</strong> forward to back, or side to side, contact <strong>Barrett</strong> for assistance.Figure 3-11Figure3-11 shows a <strong>BORS</strong> using aM33BAcartridge ballistic data with acalculated firing solution that providesbullet impact at 100 yards coincidentwith the horizontal reticle. The rifle islevel and the battery has a full charge.To display the current temperature, “T”,and barometric pressure, “P”, press thebutton illustrated in Figure 12. Thisscreenwill be displayed forapproximately 4 seconds beforereturning to the “OPERATOR’SSCREEN”.Figure 3-1213
<strong>BORS</strong> Keypad FunctionsThe four button keypad is used to access <strong>BORS</strong> information and displays. Theirfunction depends on whether the cartridge identification screen is displayed when thebutton is depressed or another screen is displayed when the button is depressed.The following commands are active if the “OPERATOR’S SCREEN” is displayed whena keypad button is depressed:1. Power on/off.2. Display temperature and barometric pressure.3. Power on the LCD backlight.4. Select display screen menus.The following commands are active if any screen other than the “OPERATOR’SSCREEN” is displayed when the keypad button is depressed:1. Scroll menu down.2. Select menu item.3. Scroll menu up.4. Select display screen menus.Title Icon FunctionMenuTemperature/SelectLight/Scroll UpPower/Scroll DownUsed to access <strong>BORS</strong> display menus.Displays temperature, barometric pressure,and select menu item.Illuminates the display and scrolls the menuup.Powers the <strong>BORS</strong> on, off, and scrolls themenu down.14
Press the button as illustrated inFigure 4-1. This will allow access toone of six display screens.Thescreens are accessed by eitherscrolling up , or scrolling down .The screens arearranged in thefollowing order: “ZERO CARTRIDGE”,“DETERMINE RANGE”, SELECTCARTRIDGE”,“CARTRIDGEINFORMATON””, “CHANGE UNITS”,and “CHANGE SETTINGS”. To selectone of the screens, press thebutton, or, presss the button to returnto theprevious screen.Figure 4-1SELECT CARTRIDGE1. Press and release the2. Press and release theCARTRIDGE”.button.button until the display reads“SELECT3. Press and release the button toselect the menu item. The currentlyselected cartridge will be displayedinthe top rowwith the cartridgedescription in the bottom row.Depending on the descriptionlength, the words may scroll acrossthe bottom of the screen. Figure 4-2Figure 4-24. Using the scroll buttons( or), scroll to the desiredd cartridge.5. Press and release the button when the desired cartridge is displayed.<strong>BORS</strong> will return to the“OPERATOR”S SCREEN” with the new selectedcartridge shown.15
CHANGE UNITSChanging Units of Measurement Basis<strong>BORS</strong> displays units of measurement on all screens based on either metric or U.S.equivalents. To change from the currently displayed basis to the other basis:1. Press the button.2. Press the or button until the display reads “CHANGE UNITS”.3. Press the button to change the basis from the current to the other basis.NoteThe user can confirm changing measurement basis by viewing the range unitsdisplayed on the “OPERATOR’S SCREEN” as either “y” or “m”.Displayed Metric and U.S. EquivalentsUnits Range TemperatureUS Yards FahrenheitBarometricPressureInches ofMercuryMetric Meters Celsius KilopascalsMuzzleVelocityFeet persecondMeters perSecondBulletCaliberInchesBulletMassGrainTargetSizeInchesor FeetMillimeters Grams MetersFigure 4-316
CHANGE SETTINGSCalibrating <strong>BORS</strong> to the rifle telescopeThere are three times when calibrating <strong>BORS</strong> to the scope will be required:1. After initial mounting of <strong>BORS</strong> to the scope.2. If the elevation dial is adjusted while <strong>BORS</strong> is powered off and settings arelost.3. Loss of power to <strong>BORS</strong> when in use. This does not include automatic <strong>BORS</strong>Power Off for a low battery.CautionDo not attempt to turn the rifle scope’s elevation knob past its designedmechanical limit during calibration.Calibration procedure:1. Rotate the <strong>BORS</strong> elevation knob clockwise until it reaches its lowest point.2. Press the button to enter the menu screen.3. Press the button until the screen displays “CHANGE SETTINGS”.4. Press the button. The screen will display “ADJUST BACKLIGHT”.5. Press the button once. The screen will display “DEVICE SETUP”.6. Press the button to select this screen.7. Press the button to display “ZERO ELEVATION”.8. Press the button to select thisscreen. <strong>BORS</strong> will prompt to“CONFIRM” or “CANCEL” thecalibration as shown in Figure 4-4.9. Press the button to “CONFIRM”,or the button to “CANCEL” thecalibration. “DEVICE SETUP” willbe displayed.Figure 4-4NoteThe calibration will not be properly completed if “CANCEL” is selected.10. Press the button until the “OPERATOR”S SCREEN” is displayed.Calibration is completed.17
Adjusting the Backlight1. Press the button to enter the menu screen.2. Press the button until the screen displays “CHANGE SETTINGS”. Pressthe button to select this screen.3. The screen displays “ADJUST BACKLIGHT”. Press the button to selectthis screen.4. The screen displays “BACKLIGHT SCROLL UP/DN”. See Figure 4-5.5. Press the or the button to adjust the display brightness.6. Press the button to exit the menu system.Checking the version of <strong>BORS</strong>1. Press the button to enter the menu screen.2. Press the button until the screen displays “CHANGE SETTINGS”.3. Press the button. The screen will display “ADJUST BACKLIGHT”.4. Press the button twice to display “VERSION INFORMATION”.5. Press the button to display currently loaded hardware and firmwareversions.6. Press the button to exit the menu system.Adjusting the Contrast18Figure 4-5 Figure 4-61. Press the button to enter the menu screen.2. Press the button until the screen displays “CHANGE SETTINGS”.3. Press the button. The screen will display “ADJUST BACKLIGHT”.4. Press the button. The screen will display “ADJUST CONTRAST”.5. Press the button to select this screen. The screen displays “CONTRASTSCROLL UP/DN”. See Figure 4-6.6. Press the or the button to adjust the display contrast.7. Press the button to exit the menu system.
Adjusting the Backlight Timer (length of time the backlight will illuminate)1. Press the button to enter the menu screen.2. Press the button until the screen displays “CHANGE SETTINGS”.3. Press the button. The screen will display “ADJUST BACKLIGHT”.4. Press the button. This will display “DEVICE SETUP”.5. Select this display by pressing the button. “ZERO ELEVATION” will bedisplayed.6. Now press the button to display “BACKLIGHT TIMER”.7. Press the button to select this screen.8. Use the or the button to adjust the time the backlight remains illuminated.CARTRIDGE INFORMATION1. Press and release the button to enter the menu screen.2. Press the or the button until the screen displays “CARTRIDGEINFORMATION”.3. Press and release the button. “DESCRIPTION:” is shown on the top line ofthe display. Below “DESCRIPTION:” will be displayed a user-defined summaryof the cartridge. Depending on the length of the description, the words may scrollacross the screen.4. Pressing the or the button will display the “CALIBER”, “BULLET MASS”,“BULLET B.C.”, or “MUZZLE VELOCITY” of the cartridge selected.19
ZERO CARTRIDGEPoint of impact zeroing procedure for the <strong>BORS</strong> at the live fire rangeThe zeroing procedure for the <strong>BORS</strong> is similar to zeroing any common rifle telescope.The default distance for zeroing the cartridge point of impact is 100 yards or 91 meters.The following steps zero the <strong>BORS</strong> with a specific cartridge, rifle, and rifle telescope.<strong>BORS</strong> Cartridge ZERO Procedure:1. Select the desired cartridge on the <strong>BORS</strong> “SELECT CARTRIDGE” screenand fire a series of shots to obtain a representative group of point of impactwith that cartridge type.2. Adjust the <strong>BORS</strong> elevation knobuntil the projectile’s point of impactcoincides with the rifle telescope’shorizontal reticle. If desired, adjustthe rifle scope’s left/right knob untilthe projectile’s point of impactcoincides with the rifle telescope’svertical reticle. The <strong>BORS</strong> has noinfluence on windage adjustments.Figure 4-73. ZERO the cartridge selected in <strong>BORS</strong> by doing the following:a. Press the button once. “ZERO CARTRIDGE” will be displayed.b. Press the button to select this screen. <strong>BORS</strong> will prompt“CONFIRM”, or , “CANCEL”.c. Press the button to “CONFIRM” the selection. <strong>BORS</strong> will return tothe “OPERATOR”S SCREEN” with the Range of “100y” or “91m”depending on the measurement basis.Note“100y” or “91m” is the factory default range displayed after zeroing thecartridge. The Range displayed may differ if the <strong>BORS</strong> was programmed witha customized Cartridge Library with a user defined Sight Zero Range in the<strong>Barrett</strong> Ballistic Software.4. Power the <strong>BORS</strong> off by pressing and holding the button until “SHUTTINGDOWN” is displayed. <strong>BORS</strong> will power off. The battery may be removed toprevent accidental power on of the <strong>BORS</strong>.20
NoteThese next steps are for setting the Zero reference of the elevation knob byaligning the “0” mark on the knob with the preferred index marking on either theright or left side of the <strong>BORS</strong> housing. This is only recommended for theprimary, or most frequently used cartridge.NoteThis is the only time the elevation knob should be moved while the <strong>BORS</strong> unitis off where recalibrating the <strong>BORS</strong> to the scope is not required.5. Align the “0” mark on the elevation knob to the preferred Zero reference indexmarking by doing the following:a. Loosen the set screw and flathead screw on the <strong>BORS</strong>elevation knob until the knobrotates freely on the adapterwithout moving the actualadjustment post (no clicks).Figure 4-8.b. Align the “0” mark on the knobto the preferred side indexmarking.c. Hold the knob in place andcarefully tighten the flat headscrew first, and then the setFigure 4-8screw.6. Reinstall the battery if removed and power the <strong>BORS</strong> unit on. Ensure thecorrect cartridge is selected and fire another series of shots to confirm the<strong>BORS</strong> and scope are “Zeroed” to the firearm.7. Repeat steps 2 through 6 if proper “Zero” was not achieved with the <strong>BORS</strong> orthe scope.21
Determining the Range to the Target with the <strong>BORS</strong><strong>BORS</strong> provides the user with the ability to measure and then display the range toa reference object or target. This distance can be expressed in either yards ormeters. The known vertical dimension of the reference object is used tocalculate the distance to that object.NoteRange measurements will be most accurate when the rifle is held steady and alarge reference object is selected.Figure 3-17 shows the reference object as a vehicle known to be approximately 6feet tall. The user selects “6 FEET” as the height of the reference object. Usingthe <strong>BORS</strong> elevation knob to measure the amount elevation adjustment requiredto move the horizontal reticle line the height of the vehicle, <strong>BORS</strong> is able tocalculate the distance to that vehicle.Range Finding Procedure1. Press the button to enter the menu screen.2. Press the button until the screen displays “DETERMINE RANGE”.3. Press the button to select this screen.4. The screen will display “TARGET SIZE?” on the top line. The bottom line willdisplay either “1 FOOT” or “1 METER” depending on selected measurementbasis.5. By pressing the or the button, the user can scroll to display theapproximate vertical size of a reference object. If U.S. equivalents have beenselected, “1 FOOT”, “3 FEET”, “6 FEET”, “9 FEET”, “12 FEET”, “15 FEET”, and“20 FEET” will be displayed. If metric units have been selected, “.5 meter”, “1METER”, “2 METERS, “3 METERS”, “4 METERS”, “5 METERS”, and “6METERS” will be displayed.22
1. From a steady rest, position thehorizontal crosshairs atthe top orbottom of the referencee object. Pressthebutton to selectthe height ofthe reference object. “ MEASUREETRGT USING ELEV” will be displayed.Figure 3-18Figure 3-172. Using the <strong>BORS</strong> elevation knob,move the horizontal crosshaireither from the top of the referenceeobject to its bottom, or from thebottom of theobject to its top asillustrated in Figure 3-18.NOTEThe measurement will be most accurate when the rifle is kept steadythroughoutthe procedure.3. Press the button todisplay therange to the reference object. Thedistance to the reference object willbe displayedd as “TARGET RANGE1012 YARDS” as illustrated in Figure3-19.Figure 3-194. Press the button to return to the “OPERATOR’S SCREEN”. Use the<strong>BORS</strong> elevation knob to dial the eference object’s range. Your riflescopeelevation crosshairs arenow adjusted so that your point of aim is the point ofimpact at thereferencee object’s calculated range.23
66987 REV A25


