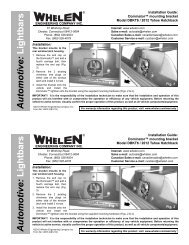
13668: Edge® 9M 2 or 4 Strobe Lighthead Kit - Whelen Engineering
13668: Edge® 9M 2 or 4 Strobe Lighthead Kit - Whelen Engineering
13668: Edge® 9M 2 or 4 Strobe Lighthead Kit - Whelen Engineering

You also want an ePaper? Increase the reach of your titles
YUMPU automatically turns print PDFs into web optimized ePapers that Google loves.
MAIN CABLE THAT EXITS LIGHTBAROption <strong>Kit</strong>: 2 <strong>or</strong> 4 <strong>Strobe</strong>sABAUXFLASHERAFLASHERBThese lighthead mounting locations are shown f<strong>or</strong> example.The lightheads can be mounted in any place on the lightbar thatyou have space. If you are only installing 2 strobe lightheads,tuck the other 2 Amp connect<strong>or</strong>s somewhere out of the wayin the lightbar.STROBE B STROBE ASTROBE CIMPORTANT NOTE: The m<strong>or</strong>e options you add, the higher the fusing of yourpower cable should be. When you add any option to your lightbar, you shouldalways consult the power cable fusing chart in the <strong>or</strong>iginal <strong>9M</strong> manual that camewith your lightbar.Power Distribution Board (See Location Below)6 Position <strong>Strobe</strong>Power Connect<strong>or</strong>NOTE: T his diagram shows the 2 flasher boards installed onto thepower distribution board. They may not be present in your lightbar.STROBESTROBEBlackBlueSC3 SC2 POS-1 = RedSTROBE POWER HARNESSPOS-2 =POS-3 =POS-1 = OrangePOS-2 = Black/WhitePOS-3 = VioletSTROBE LIGHTHEAD HARNESSTOP VIEW OF LIGHTBAR BASE12 Position <strong>Strobe</strong>Pin Connect<strong>or</strong>SCC6 Socket PowerConnect<strong>or</strong>FRONTPASSENGERLocation of PowerDistribution BoardPOWER SUPPLY "C"POWER SUPPLY "A"POWER SUPPLY "B"DRIVERPOS-1 = YellowPOS-2 = Black/WhitePOS-3 = GraySC4INNER WALL of LIGHTBAR BASEPOS-1 = BrownPOS-2 = BlackPOS-3 = GreenSC1MOUNTINGSTUDFig. 3Power SupplyInstallationSTROBE POWER SUPPLYSTROBESTROBEOUTER EDGE of LIGHTBAR BASE1/4-20 ELASTICSTOP NUTPROTECTIVECOVERPage 3