bremer VIVA
bremer VIVA
bremer VIVA
- No tags were found...

Create successful ePaper yourself
Turn your PDF publications into a flip-book with our unique Google optimized e-Paper software.
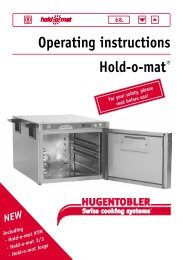
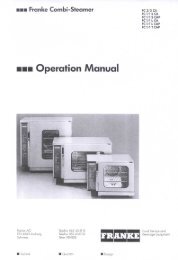
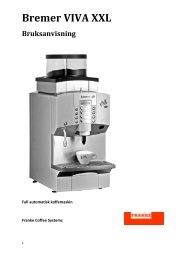
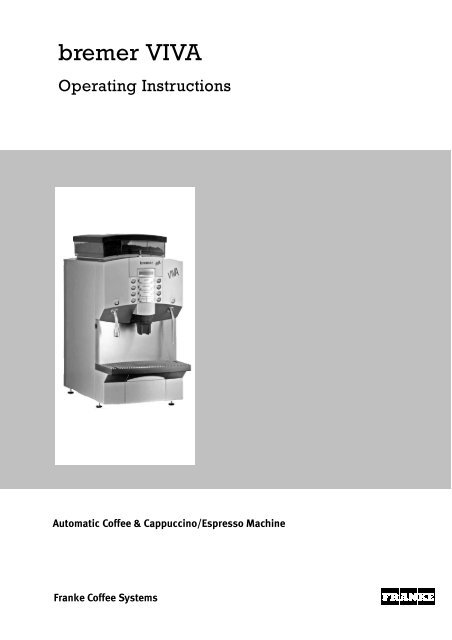
emer <strong>VIVA</strong>Operating InstructionsAutomatic Coffee & Cappuccino/Espresso MachineFranke Coffee Systems
Dear customer,before putting your coffee machine into operation, please read the operatinginstructions carefully. In this way, you protect yourself and you avoid damages tothe device.They contain important information on the correct use of your machine and willenable you to use the coffee machine with the necessary handling.Always keep these operating instructions to hand.The coffee machine enables you to prepare− brewed coffee, coffee specialities without milk− machine with milk frother as additional feature: for coffee products with milk− special coffee by adding the ground coffee to the coffee chute− tea / dispensing of hot water or steam depends on the unit type− for the commercial use only.Please use the coffee machine for the preparation of coffee only. Improper use canresult in damage to persons and objects.How does the coffee machine work ?After a button is pressed, the coffee machine fully automatically brews coffee orcoffee specialities cup for cup. The coffee beans are freshly ground for each brewingoperation.After brewing, the dry coffee grounds are scraped off into the grounds container orcontainer ejector.Key to symbols Activities to be carried outNotes, functional sequencesReference to other instructions
ContentsPage1. Notes on operating safety . . . . . . . . . . . . . . . . . . . . . . . . . . . . . . 52. Familiarise yourself with the <strong>bremer</strong> <strong>VIVA</strong> Coffee Machine . . . 62.1 Set the language for the menue . . . . . . . . . . . . . . . . . . . . . . . . . 73. Switch on the unit . . . . . . . . . . . . . . . . . . . . . . . . . . . . . . . . . . . . 83.1 Top up coffee beans . . . . . . . . . . . . . . . . . . . . . . . . . . . . . . . . . . . 83.2 Provide milk (<strong>bremer</strong> <strong>VIVA</strong> with milk frother) . . . . . . . . . . . . . . . 103.3 Prepare and take coffee . . . . . . . . . . . . . . . . . . . . . . . . . . . . . . . . 123.3.1 Preparing single portions (factory setting) . . . . . . . . . . . . . . . . 123.3.2 Set the number of portions − Multiple Selection . . . . . . . . . . . . 133.4 Manual ground coffee metering . . . . . . . . . . . . . . . . . . . . . . . . . 143.5 Manually add milk or milk froth (<strong>bremer</strong> <strong>VIVA</strong> withmilk frother) . . . . . . . . . . . . . . . . . . . . . . . . . . . . . . . . . . . . . . . . . 153.6 Emptying the grounds container . . . . . . . . . . . . . . . . . . . . . . . . . 164. Take hot water (additional Feature) . . . . . . . . . . . . . . . . . . . . . . 175. Take steam (additional feature) . . . . . . . . . . . . . . . . . . . . . . . . . 186. Cleaning and care . . . . . . . . . . . . . . . . . . . . . . . . . . . . . . . . . . . . 196.1 Cleaning the milk system (<strong>bremer</strong> <strong>VIVA</strong> with milk frother) . . . . 206.2 Cleaning the brewing unit . . . . . . . . . . . . . . . . . . . . . . . . . . . . . . 226.3 Cleaning the coffee dispenser . . . . . . . . . . . . . . . . . . . . . . . . . . 246.4 Deliming and cleaning the hot water / steam outlet(add. feature) . . . . . . . . . . . . . . . . . . . . . . . . . . . . . . . . . . . . . . . . 276.5 Clean coffee bean container and housing . . . . . . . . . . . . . . . . . 287. Switch off / End of operation . . . . . . . . . . . . . . . . . . . . . . . . . . . 293
ContentsPage8. Adjustment, programming . . . . . . . . . . . . . . . . . . . . . . . . . . . . . 308.1 Overview of the adjustment possibilities . . . . . . . . . . . . . . . . . 308.2 Display or delete the summing counter . . . . . . . . . . . . . . . . . . . 318.3 Assigning bean container to the article key . . . . . . . . . . . . . . . . 328.4 Adjusting metering quantities for article . . . . . . . . . . . . . . . . . . 338.5 Adjusting the metering quantity hot water" . . . . . . . . . . . . . . . 348.6 Assigning article names to the article key or blocking a key . . 358.7 Adjusting article control (multiple selection) . . . . . . . . . . . . . . 368.8 Changing to turbo operation" . . . . . . . . . . . . . . . . . . . . . . . . . . 378.9 Enter a secret code (PIN) to change settings . . . . . . . . . . . . . . . 388.10 Setting the dispensing sequence . . . . . . . . . . . . . . . . . . . . . . . . 399. Faults and remedies . . . . . . . . . . . . . . . . . . . . . . . . . . . . . . . . . . 4010. Technical data . . . . . . . . . . . . . . . . . . . . . . . . . . . . . . . . . . . . . . . 4311. Setting up and connecting (customer service) . . . . . . . . . . . . . 4411.1 Setting up . . . . . . . . . . . . . . . . . . . . . . . . . . . . . . . . . . . . . . . . . . . 4411.2 Remove protection / Inserting beans container . . . . . . . . . . . . 4611.3 Connecting the water supply . . . . . . . . . . . . . . . . . . . . . . . . . . . 4711.4 Connecting the water outlet . . . . . . . . . . . . . . . . . . . . . . . . . . . . 4711.5 Connecting the mains cable . . . . . . . . . . . . . . . . . . . . . . . . . . . . 4812. Rating plate data / Maintenance . . . . . . . . . . . . . . . . . . . . . . . . 4912.1 Maintenance notes . . . . . . . . . . . . . . . . . . . . . . . . . . . . . . . . . . . 5013. Dismantling, disposal . . . . . . . . . . . . . . . . . . . . . . . . . . . . . . . . . 54EU Conformity declaration . . . . . . . . . . . . . . . . . . . . . . . . . . . . . . . . . . . . . . . 554
1. Notes on operating safetyOperation The unit is not a working substance in the sense of the regulations for operatingsafety. The operator is responsible for the operation, the risk assessment, andfor the repeated tests by authorized persons.Danger ! Risk of death by electric shock!Do not spray the unit with a water hose or high-pressure cleaner.Do not allow any liquids to flow into the ventilation slits and filling openings.In the event of operating faults, refer chapter 9. "Faults, remedy" section.Attention ! If the following notes are not observed, slight injuries orproperty damage might result. The unit may only be operated− by trained staff (assigned personnel)− under supervision− for the purpose outlined in the operating instructions. Do not cover the ventilation vents ! The unit may only be operated outdoors if covered and if there is sufficient windprotection. Protect the unit from moisture and direct sunlight. The ambient temperature around the unit must not fall below freezing point.This would cause the water to freeze inside the unit and damage it.Inspection of the safety equipment in regular intervals According to the pressure vessel regulations 97/23/EG and to the regulationsfor operating safety the operator is responsible for the careful maintenance andfor the inspection of the safety equipment in regular intervals. For this reason, the unit should be inspected and serviced once a year by theauthorised Franke customer service.Extended operating pauses or shut−down of the unitBefore extended shut−down periods, the cleaning program has to be carried out.In order to avoid frost damages or in case of risk of freezing, the Frankecustomer service has to empty the unit.5
2. Familiarise yourself with the <strong>bremer</strong> <strong>VIVA</strong> CoffeeMachineCover, bean containerCover for manual ground coffee meteringand cleaning agent metering (lockable)*Bean container, leftBean container, center*Bean container, rightKeypad cover (lockable)*Milk cooling box(add. feature)Hot water buttonHot water outletCoffee dispenser:Swivelable andheight-adjustableDrip grill*Steambutton*SteamoutletDrip trayGrounds drawerwith handle*Suctionhose for milk* = Additional featureDisplay and Input Panel*Air nozzleUnit switch On / OFF (STANDBY)Start cleaning programConfirm loading cleaning tablet /dosage ground coffeeDisplay panelCOFFEEScroll backwards in the main menuScroll forwards in the main menuMaking the settings / *adding milkfroth / *clean the milk suction hoseChange settings / *adding milkDelete summing countersOpening and closing menusArticle keys:1 cupSCHÜMLIESPRESSOArticle keys:2 cupsCAPPUCCINOIndicator lamps* = Additional feature6
2.1 Set the language for the menue!!! STANDBY !!!−−−before switching onin STANDBY Modeat the machineExample: set the language to GermanCountry code081 STANDBYSTARTSTART Press the upper article key on the left handside continuously, press at the same timekey or till the requested countrycode apears in the display panelCountry code Language031 Dutch033 French044 English049 German081 Japanese095 Russian (add. feature) Confirm set country code with keySummenzählerSubsequently the setted language is shown(Summenzähler" = Summing counter) inthe display.Menüverlassen Go to Menü verlassen" (= Exit menu) withkey Confirm the setting with key!!! STANDBY !!!The desired language is set.The machine goes into the STANBY Modeand stores the new setting.In case of power failure or incorrect settingprocedure it is possible to loose applieddata.7
3. Switch on the unit Open the water valve.!!! STANDBY !!! Switch on the electrical mains switch. !!! STANDBY !!! appears in the display panel. Unlock and open keypad cover with key. Switch on the coffee machine by pressingthe on−off switch.Rinsing process runs and boiler is heated up(approx. 5 minutes).keypadopencloselockThe coffee machine is ready for operationwhen the green indicator lamps on thebuttons light up and when "Ready" isdisplayed in the display panel. Close the keypad cover and remove the key.3.1 Top up coffee beansTop up with only the amount required for the day, because the coffee beans losetheir aroma if they are in the hopper for too long.Ensure that no foreign bodies enter the hopper.8
Cover, beans containerTop up coffee beansLock (option) Unlock the hopper cover with the key andopen it. Fill the empty hopper with the required typeof coffee beans.If the appliance is equipped with 2 grinders,it will be possible to use two different sortsof coffee beans. Close the hopper after filling it so that thearoma is preserved.Example:Example:Beans containerleft(1 kg)Refill centreground containercentre(1.5 kg)right(1 kg)Display when a hopper is empty If the beans container becomes emptyduring operation, this is indicated in thedisplay panel, e.g.: "Refil coffee container tocentre". The corresponding article keys areblocked. If this message appears during a brewingoperation, it is possible that this brewingoperation took place without a sufficientamount of ground coffee. Refill the beancontainer with coffee beans and repeat thebrewing operation.Confirmation of filling Press blocked article key for approx. 5seconds.When the green indicator lamp lights upagain, the coffee machine is ready forbrewing.9
3.2 Provide milk (<strong>bremer</strong> <strong>VIVA</strong> with milk frother)Food poisoning by bad milk!CAUTIONNOTEIf off milk is used, there will be the risk of food poisoning. Forhygienic reasons, the milk has to be replaced in time. Off milk has afoul smell and must not be used.Observe the hygienic instructions and use only pre−cooled long−lifemilk.Fresh milk has to be kept away from light, in cooled conditions at 4 to8°C, and closed. The life of milk is guaranteed by the indication ofthe consumption date on the packing.Please observe that no foreign bodies must come into the milk tank.Non−cooled milk will be very hot when being doses, this can result indosage fluctuations and form a skin (clogging). Moreover, there is arisk of burning when tasting.Suction hoseSuction nozzle<strong>bremer</strong> <strong>VIVA</strong> with Milk Fridge (add. feature) Milk with a fat content of 3,5% is best suitedfor frothing. Immerse the suction hose for milk into themilk. Make sure that the suction nozzle at thesuction hose stands on the bottom of themilk container. Do not bend the suctionhose. Close the cooling compartment. Clean the suction hose two times a day, seepage 20.10
example:ReadyMilk 1 emty 05Number of possiblemilk dosagesMilk containerDisplay at <strong>bremer</strong> <strong>VIVA</strong> with Milk Fridge andlevel sensor detection (add. feature) The sensors transmit a signal, after theminimum supply level is fallen below in themilk container. In the display appears themessage. If "... empty 00 " is shown in the display the<strong>bremer</strong> <strong>VIVA</strong> proportions no more milk.Coffee products with milk dosage are closedor not selectable.Suction hoseMilk Coolbox(add. feature)<strong>bremer</strong> <strong>VIVA</strong> with Milk Coolbox (add. feature) Immerse the suction hose for milk into themilk. Make sure that the suction nozzle at thesuction hose stands on the bottom of themilk container. Do not bend the suctionhose. Clean the suction hose two times a day, seepage 20.When preparing Cappuccino or coffee with milk, milk or milk froth is meteredautomatically.Filling milk container, see operating instructions <strong>bremer</strong> <strong>VIVA</strong> Milk Fridge.For the milk quantity settings, see the Chapter "Adjust metering quantitiesfor article", see page 33.11
3.3 Prepare and take coffeeCAUTIONNOTERisk of scalding by hot coffee !After completion of the brewing process, the machine automaticallyserves hot coffee.Deposit and leave the cup during the process. Do not handle belowthe coffee outlet.During coffee production do not pull out the coffee ground tank orthe coffee outlet (outlet head), as otherwise malfunction mightresult.CoffeedispensingOutletrockerSet the outlet height of the coffee dispenserTo adapt to various vessel sizes:Height max.185 mm To adjust the height of the coffee dispenser,fold away the outlet rocker or push the coffeedispenser up or down. When using coffee pots fold the outlet rockerto the rear till stop (engages).3.3.1Preparing single portions (factory setting) Place cup under the coffee dispenser. The coffee machine is ready for operation when the green indicator lamps onthe buttons light up and when "Ready" is displayed in the display panel. Start the required brewing process by pressing the corresponding article key12The brewing process is displayed in the display panel, e.g.:PreparationCoffee cup 1xAfter each withdrawal of a coffee milk product or of milk, the coffee machineautomatically rinses the coffee dispenser.To change the coffee type and settings, see Page 30, Chapter 8.
3.3.2Set the number of portions − Multiple SelectionThe standard factory setting of the coffee machine is the preparing of singleportions, see page 12.The customer service may adjust the <strong>bremer</strong> <strong>VIVA</strong> coffee machine by starting up,so you can set the number of portions, like following example.Example: Brewing a pot of coffee − 9 cups Place a lot of empty cups under the coffeedispenser by time.PreparationCoffee cups 9xNumber of portions Press the article key as often as isnecessary until the required number ofportions is displayed in the display panel, forexample 9 times. The number of portions is shown in thedisplay panel and will be counted downduring operation / preparation.Notes for multiple selectionThe first brewing operation begins immediately when the first portion isselected.The display returns to 1" after more than 9" portions are selected.An already commenced brewing operation is completed.The number of multiple selection should not exceed the number of possibledosages during the adjusting in that case. You can set the "Multiple selection" see Adjusting article control" on page 36,if the message- and entry field / main menu is not blocked, see page 38.13
3.4 Manual ground coffee meteringThis is for preparing single portions only.Cover for groundcoffee chute (1)Lock (option)Press here to open Place the cup under the coffee dispenser. Unlock and open the cover for ground coffeechute (1)and keypad (2).Keypad cover (2)LockCover for groundcoffee chute Press the manual ground coffee meteringkey.The following command appears in thedisplay:Put in ground−>Press prd. key Add metered amounts of ground coffee tothe coffee chute− for 1 cup approx. 9 gr.,− for 2 cups approx. 14 gr.− <strong>VIVA</strong> Barista: for 3 cups approx. 20 gr. Start the required brewing process bypressing the corresponding article keyKey, manual groundcoffee meteringKeypad coverThe brewing process is displayed in thedisplay panel, e.g.:PreparationCoffee cup 1x14 Close both covers and remove the key."Manual ground coffee metering" canalso be programmed on the articlekeys, see Chapter "Assigning beancontainers to the article key", Page 32.
3.5 Manually add milk or milk froth (<strong>bremer</strong> <strong>VIVA</strong>with milk frother) Open keypad cover.The coffee maker is ready for operation when the green indicator lamps on thebuttons light up.Manual metering:− Key for milk froth− Key for milk Keep key or pressed until desired quantity of milk or milk froth isdispensed. Consider the time of approx. 5 seconds for milkdosage after releasing the key. After each additional dosage of milk or milk foam, the <strong>bremer</strong> <strong>VIVA</strong>automatically rinses the coffee dispenser.Adjust the milk quantity in the Chapter "Adjusting metering quantities forarticle", see Page 33.15
3.6 Emptying the grounds containerThe <strong>bremer</strong> <strong>VIVA</strong> coffee machine counts the number of ejected portions of groundcoffee. After the set number of portions is reached, the display signals that thegrounds container must be emptied.The number of portions can be changed by the Franke <strong>bremer</strong> Customer Servicerepresentative (factory setting 80 to 100 portions).If "Empty grounds container" appears in thedisplay panel,− preparing coffee is no longer possible. Remove, empty and clean the groundscontainer.NOTE: The grounds container must havebeen removed for at least 10 seconds so thatclearing can occur.HandleGrounds container Insert the grounds container. The message "Insert grounds container"disappears.If required, the coffee grounds can alsobe ejected into a container, see tableopening for container ejection (add.feature).CautionMountfor groundscontainerRisk of being crushed by the brewing unit ! Never reach into the open mount afterremoving the grounds container. Always switch off the machine via the mainsor master switch before cleaning it.The mount should only be wiped with adamp sponge (do not use a cloth).Refit the grounds container after cleaning.16
4. Take hot water (additional Feature)Risk of scalding by hot water!CAUTIONAfter pressing the hot water button, the machine automaticallydispenses hot water.Proceed with care. Place cup under Hot water dispenser wait untiloperation is finished. Do not handle below the hot water outlet.Hold the hot water outlet pipe at the protective handle (add. feature).Metered hot water dispensing The "metered hot water dispensing" is set atthe factory. If you wish to reset this setting to"unmetered hot water dispensing", informyour Customer Service representative. Place the cup under the hot water dispenser.HotwaterkeyHot waterdispenser Press the hot water key. Hot water is dispensed metered and stopsautomatically.To adjust the metering quantity formetered hot water dispensing, seePage 34, Chapter 8.5.Unmetered hot water dispensing Press thehot water key, the outputstarts - press the the hot water keyagain, dispensing stops.17
5. Take steam (additional feature)Risk of scalding by steam!CAUTIONAfter pressing the steam button, the machine automatically dosessteam.Proceed with care. Do not handle below the steam outlet. Avoidcontact. First, let it cool.NOTEDepending on the adjustment in the service menu (to be adjusted bythe Franke <strong>bremer</strong> customer service):Steam is distributed as long as you keep the steam button pressed(factory setting) or steam is distributed until steam distribution isdisabled by pressing the steam button repeatedly.Heating beverages Immerse the steam dispenser deep into thebeverage to be heated. Place the cup on the drip grille and releasethe steam dispenser.Steam keySteamdispensing Press the steam key till the beverage isheated up or hot enough.After heating beverages Take out the vessel. Remove steam pipe fromvessel. Press thesteam outlet.steam key, to blow out the Wipe off the steam dispenser with a dampcloth.18NoteAfter heating up the beverage it’s necessarily to blow out the steamoutlet to prevent a coustipation !
6. Cleaning and careDANGERCAUTIONNOTERisk of death if spraying the unit with water!The machine is connected to electric voltage. For this reason, neverspray the unit with a water hose or high−pressure cleaner. Watercould penetrate the unit, cause an electric shock and damage theunit.Risk of scalding during the mechanical cleaning with hot water!The machine rinses the coffee output with hot water in order to cleanit. During the automatic cleaning, do not handle below the coffeeoutlet.Before starting the cleaning program, pull the coffee dispenser /outlet downward to the drip grill. After the cleaning cycle, the coffeedispenser is hot. Avoid contact. First, let it cool.During the cleaning program do not pull out the grounds containerand coffee outlet (dispenser block), otherwise malfunctions mayhappen.Clean the <strong>bremer</strong> <strong>VIVA</strong> coffee machine− daily after the end of operation− depending on degree of pollution− after long interruptions or company vacation− by starting the cleaning program.Do not use any scouring or abrasive cleaning agents !We recommend to keep a second coffee dispenser to hand in order toavoid operational interruptions.Cleaning and care agentsDesignationBremaluxBremautBremexCleaning tablets for coffee machinesSpecial CleanerUsefor stainless steel carefor removing coffee residuesfor removing lime residuesCleaning tablets for automatic cleaning of the brewing unit<strong>VIVA</strong> KM with milk frother: for cleaning the milk system (add. feature)You can obtain cleaning agents from your Franke Customer Service agent.19
6.1 Cleaning the milk system (<strong>bremer</strong> <strong>VIVA</strong> withmilk frother)NOTEClean the milk system− for hygiene reasons− at least two times a day− with Special cleaner and hot water− especially prior to longer pauses between milk drawings− to avoid disturbances in milk dosage.Clean the milk suction hose with a damp lint−free cloth.keypad coverkeyRinse out milk residue Immerse the suction hose into the pot withapprox. 300 ml hot water. Unlock the keypad cover with the key andopen it. Press the key and keep it pressed untilthe cup is completely empty.special cleanerPreparation for the automatic cleaning programof the milk pipes Fill special cleaner / cleaning liquid into acontainer. If the liquid cleaner is used from adispenser you have to push about− <strong>VIVA</strong> KM: 5 times− <strong>VIVA</strong> KM au lait and −McD: 7 times− 4 ml special cleaner cleaning liquid per100 ml water, max. 28 ml. Fill in the vessel approx. 600 ml warm Water.Stir the cleaning liquid.20
emer <strong>VIVA</strong> coffee machine with milk fridge(add. feature)suctionhose Place the vessel into the milk fridge. Insert the suction pipe to the vessel. Close the door of the milk fridge. For rinsing the pipe, prepare a clean vesselwith approx. 0,6 Liter cold clear water.Go on with cleaning the brewing unit",see page 22.suctionhose<strong>bremer</strong> <strong>VIVA</strong> coffee machine with milk coolbox /Tetrapack (add. feature) Place the vessel on the drip tray. Insert the suction pipe to the vessel. Be sure that the pipe can not slip out of thevessel. For rinsing the pipe, prepare a clean vesselwith approx. 0,6 Liter cold clear water.Go on with cleaning the brewing unit",see page 22.21
6.2 Cleaning the brewing unitThe brewing unit is cleaned by the automatic cleaning program (durationapprox. 10 minutes).The command to execute milk cleaning is also displayed by the additionalfeature Milk frother". Use a special cleaner to rinse the milk system (durationapprox. 15 minutes).Start cleaning program Open the chute cover and keypad cover. Press the Cleaning Program key .<strong>bremer</strong> <strong>VIVA</strong> without milk froth :Go on with Cleaning the brewing unit",see Page 23."Press + to CleanMilk TubeSelect Cleaning= Brewing unit only (see page23 forsubsequent procedure)= Include milk tubesIndicates thefirst cleaningstep to beexecuted.Cleaning Tube1 13 Time RemainIndicates how many rinsingintervals are yet to be executed.The following command appears in thedisplay if milk metering is adjusted.Rinsing the milk pipe with special cleaner(<strong>bremer</strong> <strong>VIVA</strong> with Milk frother) Press key Interval rinsing starts − duration approx. 3minutes. After that there is to rinse the milkpipe with clear water.suctionhoseRinsing the milk pipe with clear water(<strong>bremer</strong> <strong>VIVA</strong> with Milk frother) Fill a clean vessel with approx. 0.6 litre coldclean water. Place it on the drip tray or intothe Milk fridge. Insert the suction pipe to the vessel.vessel22
Press + To Rinse2 TubeInstruction for second cleaningcycle (rinsing cycle) After this message press keya second time.Rinsing TubePlease waitRinsing runs from approx. 1 minute. Aninstruction appears in the message field.After the rinsing the milk system is cleaned.Add tablet pressSpoon SymbolAfter rinsing is complete (second cleaningstep) the following command appears in thedisplay to put a cleaning tablet into thechute of the machine.Chute for cleaning tabletsCleaning the brewing unit The following command appears on thedisplay:Add Tablet PressSpoon Symbol Put a cleaning tablet for coffee machines intothe chute. Confirm the tablet has been inserted − pressKey: Confirmation that cleaningtablet has been insertedThe automatic cleaning program is starting.!!! STANDBY !!!NeutralisationAfter the cleaning program is finished thecoffee machine switches off itself.STANDBY" is displayed.When the coffee machine is switched onagain, a brewing operation isautomatically performed to neutralise thebrewing unit and parts supplying the coffee,Page 8.Clean the coffee dispenser in order to avoiddisturbances and blockages, see Page 24.23
6.3 Cleaning the coffee dispenser−−−for hygiene reasonswith a cleaning brush<strong>bremer</strong> <strong>VIVA</strong> with milk frother: clean the coffee dispenser several times a daywith a special cleaner for milk systems.Pull out the coffee dispenser2 3Verriegelung1Risk of scalding! The dispenser block maybe hot. Pull the dispenser block down as far as it willgo (1). Press and hold catch (2). Pull out thedispenser block (3).Cover fordispenserblockDispenserblockBrush fordispenserblockRemove the coffee dispenser Remove the cover from the dispenser block(only with <strong>bremer</strong> <strong>VIVA</strong> with milk frother). Remove the dispenser rocker from thedispenser block.Dispenserrocker24123cleaningbrush fornozzlesPrecleaning the dispenser block Clean the dirty parts of the removed coffeedispenser individually under flowing warmwater with the provided brush. Clean with the cleaning brush for nozzles− all drillings or openings at the nozzlesof the dispenser block− the outlet openings of the dispenserrocker.
CoverDispenser blockDispenserrockerInsert all removed parts in a cleaning bath− only <strong>bremer</strong> <strong>VIVA</strong> with milk foamer− several times a day− approx. 20 minutes Proportion cleaning agent special cleaner ina container, push the dispenser 5 times andadd approx. 1 litres of hot water. Insert the dispenser block, cover, dispenserrocker into the cleaning bath− depending on degree of pollution. Put the cover for dispenser block in thecleaning solution over night and allow toreact. After the cleaning always rinse the cover,dispenser block and dispenser rocker, dry itwith a lint free cloth.Cleaning the nozzles of the guidance Clean thoroughly all plug−in connections ofthe guidance− with Bremaut and a damp cloth toremove the coffee residues− dry it with a lint free cloth. Clean carefully the drillings of the nozzles− with the clean end of the cleaningbrush for nozzles.NOTEWith cleaning the drillings in the plug−inconnections, do not press the cleaning brushor other articles with force, otherwise acustomer service employment may becomenecessary.25
CoverDispenser blockDispenser rockerAssemble the coffee dispenser and connect it tothe coffee machine Press the cover into the dispenser block untilthe stopper is reached (<strong>bremer</strong> <strong>VIVA</strong> withmilk froth). If the cover is not closed completely the milkwill be heated up too much. Please put the dispenser rocker onto thedispenser block on both sides. Assemble all parts and attach the dispenserblock the coffee machine − press till stop.26
6.4 Deliming and cleaning the hot water / steamoutlet (add. feature)−only in case of lime deposits and furringCAUTIONRisk of scalding in case of unintentional hot water outlet!Before decalcifying the hot water outlet, switch off the <strong>VIVA</strong> KM viathe on−off switchScrew off the cone and nozzle only if the machine is switched off andcooled.hot waterdispensersteam dispenserconeO-ringsteamnozlehot water nozzleoutlet withscreen andgasket Remove clockwise manually− on the left hand side : cone with hotwater nozzle, outlet with screen, gasket− on the right hand side : steam nozzle Remove these parts manually. Use a needle−nosed pliers to remove the hotwater nozzle. Except the gasket and O−rings put allremoved parts into a solution with Bremexand water for approx. 10 minutes. After that rinse thorougly with clear water. Assemble and screw all parts tightly. Clean the hot water and steam dispenserwith a damp cloth. Use hot water and steamto remove cleaning residues.27
6.5 Clean coffee bean container and housing Switch off the <strong>VIVA</strong> coffee machine− before cleaning− so that the grinder or brewing unit cannot start automatically (avoid risk ofcrushed fingers)− via the main switchClean the coffee bean containerNoteWhen cleaning the container, ensure that impurities do not enter thecoffee bean container or grinder. Any impurities which have droppedin must be removed, as they may otherwise lead to malfunctions. Wipe the coffee bean container thoroughly− to remove coffee oil and fats− whenever necessary or once per week− when empty− inside− using a damp − not wet − lintfree cloth (e.g. microfibre cloth). Thoroughly dry the coffee bean container− whenever it has been wiped with a damp cloth− so that condensation cannot form− for instance, with an absorbent household towel or kitchen roll.28Clean housing Remove coffee residues with a cleaning agent and a soft cloth. Use a damp cloth to wipe plastic parts, painted covers and stainless steelsurfaces. Dry all cleaned surfaces. Remove the drip grill and clean the drip tray. After cleaning, insert the drip grill. Clean stainless steel surfaces with a stainless steel care agent. Empty and clean the grounds container.
7. Switch off / End of operation Clean the coffee machine daily before switching off. Switch off the unit with the on−off switch!!! STANDBY !!!" appears in the display panel.NOTEThe coffee machine or things may be damaged, if you do not followthe references below: Close the water valve, if an electronic water monitor is notinstalled to guard against water damage. Switch off the electrical mains switch, if the coffee machine willnot be used for a longer time. Check the water softener after the end of operation daily. Changeit if it is necessary.To prevent calcification of the coffee machines, Britta Waterfiltersare placed into the water supply of the coffee machines.Call the Franke customer service if you get a message in thedisplay panel to change the water filter.29
8. Adjustment, programming8.1 Overview of the adjustment possibilitiesReadyNOTE: The setting is possible only, if the main menu isnot blocked by a secret code.Access to the main menu / Enter a secret code number, see page 38.Access to the submenuSumming counterCoffee cupTotal:0000000013Displaying or deleting the adding counter(Page 31)Select grinderExit submenuCoffee cupGrinder: centreAssigning bean containers to the articlekey (Page 32)Adjust dosagequantityCoffee cupGround cof.: 245Adjusting metering quantities per article(Page 33) and hot water key (Page 34)ArticledesignationKey 1Coffee cupAssigning article names to the article keyor blocking keys (Page 35)Article pricesCoffee cupPrice1:000000.00Adjusting article prices (no longer availablestarting from software version 6.12)Article controlCoffee cupRelease key: ONSwitching external billing systems on or off (Page36). Making adjustment for portion selection: Upto 9 portions can then be preselcted for each article(Page 36). Turbo operation − changing the brewingsequence − Only <strong>VIVA</strong> KM.PIN0 0 0 0 0Entering PIN = Personal identification number(secret access code) (Page 38).dosageorderCoffee cupBrewing: 1Setting dispensing sequence, for brewing,milk, foam − Only <strong>VIVA</strong> KM and <strong>VIVA</strong> KM aulait.Exit menuIMPORTANT!If the machine is switched off before the function Exitmenu" adjustments which have been made are lost!30
8.2 Display or delete the summing counterAll output articles are counted in the summing counter. These totals can bedisplayed or deleted.ReadySumming counterCoffee cupTotal:0000000012Select the required article by pressing thecorresponding article key.Exit menuE. g. 1 Espresso selectedRequest deleteConfirm andexecute delete1 espressoTotal:0000000023Display next summingcounter1 espressoDel. Sum. count.Abort the delete procedure1 espressoTotal:0000000000Display next summingcounter31
8.3 Assigning bean container to the article keyReadySelect grinderCoffee cupGrinder: centreSelect the required article by pressing the correspondingarticle keyExit menuThe article "Cup of coffee", related to this key, is used for neutralization afterautomatic cleaning. Therefore, do not use this article for manual dosage ofcoffee powder, if possible!E. g. 1 Espresso selected1 espressoGrinder: leftSelection possibilities, coffee grinderLeft Additional featureCentreRight Additional featureManual = Manual ground coffee metering32
8.4 Adjusting metering quantities for articleReadyCoffee cupGround coff.:245Select required article by pressing thecorresponding article keyAdjust dosagequantityE. g. 1 Espresso selected1 espressoGround Cof.: 290Ground coffee quantity − grinderrunning timeAdjustment range: 0 to 999in 1/100 sec.Exit menu1 espressoWater quant.: 120Brewed water quantityAdjustment range: 0 to 9991 impulse => approx. 0,5 ml120 impulses => approx. 60 ml.1 espressoBrew. press. ON_Brewing with or without pump pressureAdjustment range: OFF/ONDepending on the article1 espressoMilk foam: 000Suction time for milk foamAdjustment range: 0 to 999Value 100 = aprrox. 6 sec.1 espressoMilk: 000Change to other articleSuction time for milkAdjustment range: 0 to 999Value 100 = aprrox. 6 sec.33
8.5 Adjusting the metering quantity hot water"This setting is only effective if the "metered hot water dispensing" is activated.Adjustment to "metered/unmetered hot water dispensing" can be performed byCustomer Service. "Metered hot water dispensing" is activated at the factory.ReadyAdjust dosagequantityCoffee cupGround cof.: 245Coffee cupWater quant.:265Press the Hot Water keyExit menuWaterWater quant.:60_Water quantityAdjustment range: 0 to 99934
8.6 Assigning article names to the article key orblocking a keyReadyArticledesignationKey: 1Coffee cupSelect required article by pressing thecorresponding article keyKey 1Key 2Key 3Key 4Key 5Key 6Exit menuKey 7Key 8Key 7 und 8 (no articles) notfor <strong>VIVA</strong> KM Baristae.g. key 2 selectedKey: 2Coffee pot*<strong>VIVA</strong> KM with milk frotherand <strong>VIVA</strong> KM au laitSelect required article by pressing thecorresponding article keySelection possibilities:Coffee cupCoffee pot1 espresso2 espresso1 cafe creme2 cafe creme*1 cappuccino*2 cappuccino*Latte macchiato2 Coffee cup1 Ristretto2 Ristretto1 Schümli2 Schümli*Milk*Espresso macchiato*1 Coffee + milk*2 Coffee + milk*1 Cafe Latte*2 Cafe LatteHot waterSteamNo product =Article keyblocked35
8.7 Adjusting article control (multiple selection)The possibility for multiple selection can be switched off and on. If you haveswitched on multiple selection, you can preselect up to 9 portions during onebrewing operation, e.g. for brewing in a pot. The article keys can be assigned to anexternal billing system. If an article is paid for in the coin checker, thecorresponding article key is released by the coin checker (Setting multiple selection= 0).ReadyCoffee cupRelease key: ONSelect the required article by pressing thecorresponding article key.Article controlE. g. 1 Espresso selectedExit menu1 espressoRelease key: ONWithout external billing systemOFF = Article key blockedON = Article key releasedWith external billing systemOFF = Article key must be released byexternal billing systemON = Release article key, no billin viaexternal billing system1 espressoMult. select.: 0Switch portion selected OFF/ON0 = Only single-portions can be dispensed.1 = Up to max. 9 portions can bepreselected for each button.2−9 = The preselected number ofcups will be dispensed cup by cupafter pressing the button once.TurbomodeTurbomode only for <strong>VIVA</strong> KMand <strong>VIVA</strong> 2436
8.8 Changing to turbo operation"By changing to turbo operation", the waiting time for a brewing cycleisshortened.In this setting, a grinding cycle follows every brewing cycle. Thecoffeefor the next brewing cycle is then ground already.This function can only be set for one item key. This setting blocks allother itemkeys.ReadyCoffee cupRelease key: ON_Coffee cupMult.select: 0Articel controlTurbomodeSelect required item by pressingcorresponding item key, i.e.selected, 1cup of coffee.Exit menuAfter turbo operation entry, a grindingcycle follows automaticallywhenthis message disappears.TurbomodeCoffee cupClear the turbo operation entrywith the Clear" key37
8.9 Enter a secret code (PIN) to change settingsYou can block the message- and entry field against unwanted operation by enteringa secret code / PIN = personal identification number .The factory setting is 5 zeros. When this code (5 zeros) is entered, themessage- andentry field are not blocked.Ready0 0 0 0 0Save PINMove the cursorto the left orrightSelect the digits 0-9.The whole secret code is displayedat this menu point.Remember the digits well. Afterentering the secret code, there isnoaccess to the main menu withoutentering the right code!If the secret code gets lost, it canonly be deleted by Client ServicesPINAcess/Signing on after entering secret code:ReadyExit MenuPIN0 X X X XSelect the digits 0-9Only the number is shown at the cursorMove the cursor to the left or right (Scrolling)Confirm entered secret code with this keyPINScolling the menue is possible now.38
8.10 Setting the dispensing sequence<strong>VIVA</strong> KM with milk frother, <strong>VIVA</strong> KM au lait and <strong>VIVA</strong> 24: By means of the dispensingsequence you can for instance decide whethermilk foam or the brewing cycle startsfirst. Both of these can also run simultaneously.ReadyCoffee cupbrewing: 1Select required item by pressingthe corresponding item keydosageorderMenuExit1 Cappuccinobrewing: 11 CappuccinoMilk: Off_i.e. 1 Cappuccino selectedSetting dispensing sequence, forbrewing, milk, foam1., 2., 3. or OffExampleCoffee and milk or foam can bedispensed simultaneously = Brewingon 1, milk foam on 1.Milk and foam cannot be dispensedsimultaneously = Brewing on1, milk on 1, set foam on 2.Select required item by pressingthe corresponding item key1 CappuccinoMilk foam: 1Guarantee the function for the indicator lights ofthe product keys with milk/milk foamDuring attitude of the dosing quantity milk or milkfoam on "0" (chapter 7.4) adjust with the appropriateproduct under menu dosing sequence milkor milk foam "off".Dispensing sequenceLatte Macchiato"brewing (Coffee): 3milk: 1milk foam: 2Dispensing sequenceCappuccino"brewing (Coffee): 1milk: 2milk foam: 039
9. Faults and remedies − TroubleshootingIf faults arise with this unit, please investigate them using the following table:Faults with indication of the error codeExample:01Errorcode01 Brewing not possibleIndicator lamps on the article keys do notlight upFault / Error Possible cause Remedy*02 Indicator lamp on the steam key doesnot light up.No steam dispensing possible.Display of the error code in STANDBYmode.*03 Indicator lamp on the Hot Water or Steamkey does not light up.No hot water or steam dispensing andmilk or milk froth possible.Display of the error code in STANDBYmode.04 Indicator lamps on the article keys do notlight upBrewing is not possible.0506*07*08Indicator lamps on the article keys do notlight up.Brewing is not possible.Indicator lamp on the Hot Water or Steamkey does not light up.No hot water or steam dispensing andmilk or milk froth possible.Display of the error code in STANDBYmode.37 The temperature in the hot water/steamboiler is higher than 135°C. It switched offitself for safety reasons.Brewing plunger has notreached its positionFilling level of the steamboiler not reached.Large pressure variationsin the water supplysystem may cause theboilerelement to beswitched off for safetyreasons.Hot water/steam boilerswitched off.No water is delivered.Temperature sensor forbrewed water boiler reportsa fault.Temperature sensor forhot water/steam boilerreports a fault.The temperature sensor orpressure switch is defect.41 LON communication interfered no apb" is indicated −only <strong>VIVA</strong> KM withaccounting systemSwitch the coffee machine off andon.If the error code is still displayed,inform Customer Service.Check water pressure.Switch off <strong>VIVA</strong> KM. Press key "−"to relieve pressure in steam boiler.Switch on <strong>VIVA</strong> KM.If the error code is still displayed,inform Customer Service.Switch the coffee machine off andon.If the fault is still present,− inform Customer Service,− coffee brewing without milk ormilk froth is possible.Open the water valve.Switch the coffee machine off andon.If the error code is still displayed,inform the Customer Service.Switch the coffee machine off andon.If the error code is still displayed,inform the Customer Service.Switch the coffee machine off andon.If the fault is still present,− inform the Customer Service,− brewing coffee without milk ormilk froth is possible.Switch off the unit.Call the Franke customer service.The Franke customer service willload the apb−file.40* = These error codes are only shown in Standby−Mode. If the fault is still present after switching off and on the machinecall the Franke customer service.
Faults with indication textExample:Insert grounds containerIndication of failt Possible cause RemedyInsert grounds containerDispenser block is missingGrinder left (centre or right) is emptyDisplay only with <strong>VIVA</strong> KM au lait:Milk A or B emptyIt is not inserted intothe machine.It is not inserted into themachine.The bean container (left,centre or right) is emptyMilk container A or B isempty.Clean and insert it into themachine.Insert a clean dispenser block intothe machine.Fill up the coffee container withfresh coffee beans.Fill up the milk container with freshcooled milk."Change filter!" appears on the display.The water filter (softener)is exhausted.The cartridge for the water filter(e.g. Brita) must be replaced.Faults without indication textExample:Fault Possible cause RemedyNo display in the display field (display)Main switch upstream ofthe unit not switched on.Switch on main switch.The mains fuse hasswitched off.The entire power supplyis missing.Have any faults in the wiringsystem inspected by an approvedspecialist electrician. Switch themains fuse back on.Inform your electricity supplycompany.The <strong>VIVA</strong> KM au lait is not percolating coffeeproducts with milk or milk foam.The operating temperaturein the steam boiler isnot reached or is fallingshort of.Milk container is empty.Wait till steam boiler is heated upautomtically.Fill up the milk container.WarnungRisk of death by electric shock when touching the energizedcomponents !Never open the casing to carry out repairs by yourself. The machine isconnected to electric voltage.Repairs must be carried out only by qualified specialized personnel.41
NoteIf you cannot remedy the fault and error code is still present afterswitching off and on the machine Switch off the coffee machine with the on−off switch anddisconnect it from the electrical mains with the mains switch. Close the water valve. Call the Franke customer service and quote the error message,unit type, machine no. and the year of construction, see page.42
10. Technical dataProfessional coffee maker<strong>bremer</strong> <strong>VIVA</strong> KM230<strong>bremer</strong> <strong>VIVA</strong> KM400Number/capacity, bean containerCoffee grindersCapacity, grounds containerGround coffee scalesMetering quantity1 − 3 bean containers, depending on configurationleft and right approx. 1 kg, centre approx. 1.5 kg,total approx. 3.5 kg1 − 3, depending on configurationapprox. 100 portions set at the factory0 to max. 20 grams0 to 500 mlMains voltage 230VAC 1N 50/60Hz 400VAC 3N 50HzTotal connected loadFuses3.5 kW1 x 16 ampere6.8 kW /9.5 kW for higher output ofsteam and hot water (5.6 kWhot−water/steam boiler)3 x 16 ampereDimensions in mm (WxHxD)360 x 690 x 560 mmWeightNoise level in dB (A)Ambient temperature during operationwith 1 grinder approx. 44 kgwith 2 grinders approx. 51 kgwith 3 grinders approx. 58 kgless than 70 dB (A)5 to 35° CInletOutletFabric hose, inside diameter approx. 6 mmHose, inside diameter approx. 22 mmWe reserve the right to make technical modifications.43
11. Setting up and connecting (Customer Service)Setting up, installation, putting into operation for the first time and instructionare performed by the Franke <strong>bremer</strong> Customer Service.On the building site, the connections must be up to 1 m to the installationlocation.Manual transport: Pay attention to the weight of the unit. Wear gloves.11.1 Setting upDo not set up the unit in rooms in which work is carried out with a water hose orhigh-pressure cleaners.There must be at least 4 cm clearance at the side between the coffeemachineand the wall. Leave sufficient space above in order to be able to fill with coffeebeans.Do not set up next to source of heat! Maintain a sufficient safety distance.Set up the coffeemachine on a stable horizontal surface. Balance outunevenness with the screw-type feet!<strong>VIVA</strong> Barista: Make sure the unit is at least approx. 10 cm from the front edge ofthe supporting surface, so that the steam tap does not project over it.Routing through supply lines / container ejector (add. feature)Downwards (table openings):360120 124At the side:809280Table openingfor supply lines235560Opening possible on both sides.185Table openingfor containerejector44174
Setting up the <strong>bremer</strong> <strong>VIVA</strong> KM /−au lait with Milk Fridge (add. feature)water outlet / wastemains cablewater supplyTable opening for supply lines928080connection forequipotenitialbonding system466560( 468 )56setting upon the left orthe right side1055176impactable dooron the left orthe right side36024045
11.2 Remove protection / Inserting beans containerLockKeypad coverThe beans container may be inserted byauthorized servicemen only! Unlock keypad cover with key and open. Remove 2 screws. Pull front panel forth to the limit stop(approx. 5 mm).Protection(Styropor-piece)ScrewBeans containerBolt Remove the beans container. Remove the protection (Styropor-piece). Open the bolt. Insert beans container into the rubber bandsof the grinders. Push beans container to the back. Close the front panel. While closing the front panel, move thebeans container up and down slightly inorder to engage the catch. Fix front panel with 2 screws.46
11.3 Connecting the water supplyObserve the national guidelines for the water connection.For a water hardness of over 5° dkH (carbonate hardness), we recommend thatyou have to install a water softener in the water inlet line. Observe theinstructions on installing and using the water softener. We recommend to install an electronic water monitor to guard against waterdamage. A water tap and water filter must be installed in an easily accessible positionupstream of the water inlet hose. Use a fabric pressure hose which does not corrupt taste to extend the supplyhose. The diameter must not be smaller than the supply hose fitted at thefactory. Before connecting, rinse through the water line and the fabric pressure hose sothat no dirt particles enter the coffeemachine. Check all connections for leaks. Maximum water line pressure: 1.0 MPa (10 bar). Minimum flow pressure: 0.3 MPa (3 bar). Water temperature: up to approx. 40° C.11.4 Connecting the water outletInstall a stench trap on the drainage hose (siphon).Lay the hose with a gradient to the drain.Seal and secure the hose at the drainage pipe.The inlet and drainage hoses must not be bent or squashed.47
11.5 Connecting the mains cableAn approved electrician must make the electrical connections− with the applicable national regulations− and in accordance with the regulations of the responsible electricity supplycompany.The mobile mains connection line must be at least a rubber hose line inaccordance with national standards H05 RN-F / 227 IEC 53 or in accordancewith national regulations.An electrical mains switch− must be connected in series on the installation side in an easily accessibleplace.− The switch must disconnect the unit from the mains effectively and at allpoles.− The contact opening must be at least 3 mm in this case.Connect the coffee machine to theequipotential bonding system.Refer to the data on the rating plate for theelectrical connection.Rating plateEquipotential bonding system<strong>bremer</strong> <strong>VIVA</strong> KM − 230 V version Insert the mains plug into a correctlyinstalled grounding outlet (230 V). The mains connector must be easilyaccessible.48
12. Rating plate data / MaintenanceEntering the rating plate dataRating plate Transfer the data fom the unit’s rating plateinto these operating instructions.Type No.:Unit No.:Year of construction:Please quote this data if you require service forthe coffee machine. It will help us deal with thematter more quickly.CAUTIONRisk of electrical shock !Disconect equipment from electrical power before servicing.For continued protection against electric shock replace only withsame type and rating of fuse.Maintenance Installation, maintenance and repair work may only be carried out by authorisedCustomer Service representatives. Have your <strong>bremer</strong> <strong>VIVA</strong> coffee machine serviced regularly− after every 60.000 products− at least once per year− by an authorized Franke <strong>bremer</strong> Customer Service. According to the pressure vessel regulations 97/23/EG and to the regulationsfor operating safety the operator is responsible for the careful maintenance andfor the inspection of the safety equipment in regular intervals. Regular servicing will ensure troublefree operation of the machine. Worn parts will be replaced during such service, and all assemblies and safetymechanisms checked to ensure they function correctly. Conclude a service contract with the Customer Service. Have your CustomerService representative explain to you the advantages of a service contract. Use only original accessories and original spare parts.49
12.1 Maintenance notesDatum Name des Kundendienstes Bemerkungen50
Datum Name des Kundendienstes Bemerkungen51
52Datum Name des Kundendienstes Bemerkungen
Datum Name des Kundendienstes Bemerkungen53
13. Dismantling, disposalDismantling Before disassembling:− Remove remaining coffee beans from the bean hopper.− Remove coffee grounds from the grounds drawer and clean the drawer. For safety reasons, the following steps should be carried out by a Frankecustomer service engineer before disposing of the old machine:− Empty the boilers.− Disconnect the hoses.− Disconnect the machine from the mains supply (only machines with 400 Vfixed connection) WARNING ! Beware of electric shocks !Marking on the rating plate:Disposal of used electrical appliances (forEurope only)Franke Kaffeemaschinen AG provides for thereturn and recycling of used electricalappliances:− at the end of the appliance’s life cycle−−in cooperation with its contract partnerin the framework of European Directive2002/96/EC (WEEE).The customer is responsible for waste disposal:− after termination of use− if the supplied goods are passed on to a thirdparty− if there is no written agreement to thecontrary.Should you have any questions concerningdisposal, please contact FrankeKaffeemaschinen AG, Aarburg, Switzerland.54
Franke Coffee SystemsFranke <strong>bremer</strong> GmbHLindenweg 36-42D-97999 IgersheimTelefon +49 7931 992 0Telefax +49 7931 51700www.franke−cs.comEU ConformitydeclarationEWG-KonformitätserklärungDéclaration de conformitéeuropéenneWe hereby declare that the design ofthe machines stated below and theactual models sold by us meet therelevant safety and health requirementsas outlined in EU guidelines.This declaration shall cease to bevalid if modifications not authorisedby us are made to the machines.Hiermit erklären wir, daß die nachfolgendbezeichneten Maschinen aufgrundihrer Konzipierung und Bauart,sowie in den von uns in Verkehr gebrachtenAusführungen den einschlägigenSicherheits- und Gesundheitsanforderungender EWG-Richtlinienentsprechen. Bei nicht mit uns abgestimmtenÄnderungen der Maschinenverliert diese Erklärung ihre Gültigkeit.Nous déclarons, par la présente,que la conception et le type, demême que les versions mises encirculation, des machines décritesci-après sont conformes aux directiveseuropéennes en vigueur enmatière de sécurité et de santé.Cette déclaration perd toute validitéen cas de modification des machineseffectuée sans notre accord.Machine typesFully automatic coffee machine<strong>bremer</strong>Type <strong>VIVA</strong> KM,Type <strong>VIVA</strong> XXL,Type <strong>VIVA</strong> 24MaschinentypenGewerblicher Kaffeebereiter<strong>bremer</strong>Type <strong>VIVA</strong> KM,Type <strong>VIVA</strong> XXL,Type <strong>VIVA</strong> 24Types de machinesAutomate intégral à café<strong>bremer</strong>Type <strong>VIVA</strong> KM,Type <strong>VIVA</strong> XXL,Type <strong>VIVA</strong> 24EU guidelinesEU low voltage guideline73/23/EU, 93/68/EUEU electromagnetic compatibilityguidelines89/336/EU, 92/31/EU,93/68/EUEWG-RichtlinienEWG-Niederspannungsrichtlinie73/23/EWG, 93/68/EWGEWG-Richtlinien ElektromagnetischeVerträglichkeit89/336/EWG, 92/31/EWG,93/68/EWGDirectives européennesDirectives européennes sur les bassestensions 73/23/CEE,93/68/CEEDirectives européennes sur la compatibilitéélectromagnétique89/336/CEE, 92/31/CEE,93/68/CEEHarmonised EU standardsappliedEN60335-1: 2001−08EN60335-1: 94 +A1+A2+A11−A16:2001EN60335-2-75: 2003−04EN 60335−2−75: 2002Angewandte harmonisierteEN-NormenEN60335-1: 2001−08EN60335-1: 94 +A1+A2+A11−A16:2001EN60335-2-75: 2003−04EN60335−2−75: 2002Normes européennesharmonisées appliquéesEN60335-1: 2001−08EN60335-1: 94 +A1+A2+A11−A16:2001EN60335-2-75: 2003−04EN 60335−2−75: 2002Igersheim, den 2003−11−20ppa. Hansdieter GreiweEntwicklung / Konstruktioni. A. Herbert SannQualitätswesen55
Operating Instructions<strong>bremer</strong> <strong>VIVA</strong> KMRev. 06.06−CPrint: 2006−08Art.no. 659800Franke Kaffeemaschinen AGFranke−Strasse 9CH−4663 AarburgSwitzerlandPhone +41 62 787 37 37Fax +41 62 787 30 10www.franke−cs.com