Kite Manual - U-Turn Paragliders
Kite Manual - U-Turn Paragliders
Kite Manual - U-Turn Paragliders
- No tags were found...

You also want an ePaper? Increase the reach of your titles
YUMPU automatically turns print PDFs into web optimized ePapers that Google loves.
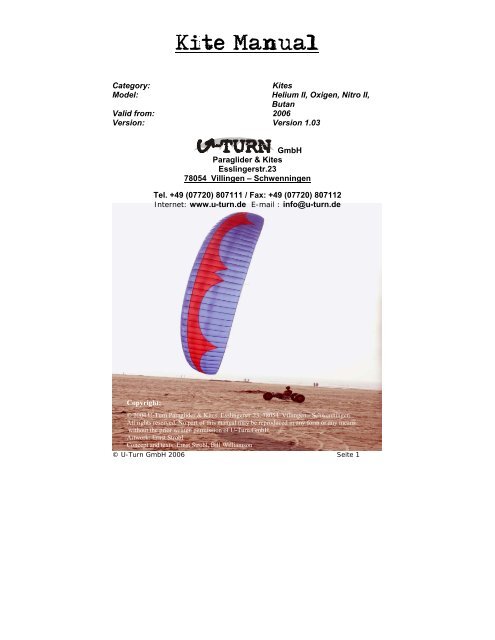
<strong>Kite</strong> <strong>Manual</strong>Category:Model:<strong>Kite</strong>sHelium II, Oxigen, Nitro II,ButanValid from: 2006Version: Version 1.03GmbHParaglider & <strong>Kite</strong>sEsslingerstr.2378054 Villingen – SchwenningenTel. +49 (07720) 807111 / Fax: +49 (07720) 807112Internet: www.u-turn.de E-mail : info@u-turn.deCopyright:© 2004 U-<strong>Turn</strong> Paraglider & <strong>Kite</strong>s, Esslingerstr.23, 78054 Villingen - SchwenningenAll rights reserved. No part of this manual may be reproduced in any form or any meanswithout the prior written permission of U-<strong>Turn</strong> GmbH.Artwork: Ernst StroblConcept and texts: Ernst Strobl, Bill Williamson© U-<strong>Turn</strong> GmbH 2006 Seite 1
A warm welcome at U-<strong>Turn</strong>!Thank you for your decision to handpick a U-<strong>Turn</strong> traction kite.Please read this operating manual carefully, understand theinformation given and follow the instructions before you launchyour new U-<strong>Turn</strong> kite.Whether beginner or expert, choosing a U-<strong>Turn</strong> kite brings youthe benefit of the highest quality and performance. Your new kiteis at the forefront of its class and will prove to be a reliablepartner.This manual will provide you with more than just safetyinformation and help getting started. There is detailed informationon all U-<strong>Turn</strong> traction kites covering construction, components,function, maintenance and tips & tricks to get the best from yournew kite.If you ever have any questions please contact your authoriseddealer, the distributor for your country (see www.u-turn.de) or U-<strong>Turn</strong> directly.We recommend that you start by reading the comprehensivesection “U-<strong>Turn</strong> kites” and then refer to those sections relevant toyour new kite.U-<strong>Turn</strong> wishes you lots of wind-powered fun!You’re U-<strong>Turn</strong> Team© U-<strong>Turn</strong> GmbH 2006 Seite 2
Table of contentsATTENTION: ...................................................................... 5U-<strong>Turn</strong> <strong>Kite</strong>s ...................................................................... 6The maiden flight:.......................................................... 6Wind and flight area: ....................................................6Set-up, 1st step: (25 metres walk) .................................6Set-up, 2nd step (100 metres walk)................................7Set-up, 3rd step (finally unpacking) ................................8Set-up, 4th step (final lines-check before launch) .............8Launching, Steering and LandingThe Launch .................................................................9The Steering.............................................................. 10The Landing .............................................................. 10Packing and unpacking the kite ................................... 11Packing..................................................................... 11Unpacking................................................................. 12Maintenance................................................................. 12Proper Care............................................................... 12General wind-table....................................................... 13The traction-<strong>Kite</strong>s ........................................................ 14© U-<strong>Turn</strong> GmbH 2006 Seite 3
Beginner-<strong>Kite</strong>s ............................................................. 15U-<strong>Turn</strong> Helium II.......................................................... 15Die Helium in portrait ................................................. 16Wind-table Helium...................................................... 16Fields of application .................................................... 16Technical data ........................................................... 17Tipps and tricks ......................................................... 17Intermediate-<strong>Kite</strong>s .......................................................... 18U-<strong>Turn</strong> Oxigen basic/pro.............................................. 18Wind-table Oxigen...................................................... 19Technical data Oxigen................................................. 19Fields of application Oxigen basic.................................. 20Fields of application Oxigen pro. ................................... 20Hochleister-<strong>Kite</strong>s............................................................. 21U-<strong>Turn</strong> Nitro II............................................................. 21Nitro in portrait.......................................................... 21Wind-table Nitro......................................................... 22Technical data Nitro.................................................... 22Fields of application Nitro. ........................................... 22U-<strong>Turn</strong> Butan ............................................................... 23Butan in portrait ........................................................ 23Wind-table Nitro......................................................... 24Technical data Nitro.................................................... 25© U-<strong>Turn</strong> GmbH 2006 Seite 4
ATTENTION:Never fly near high-voltage power lines, railway lines, roads,airports, and other people or during thunderstorms. To do sowould be grossly negligent as you could endanger the lives andpersonal safety of others as well as yourself.Keep a minimum distance of 500 metres from any of the objectsmentioned above and 5 kilometres from airports.Never use lines longer than 60 metres.Traction kites can be dangerous depending on the size of kite andthe strength of wind. Please pay attention to the wind table foryour kite and make sure that your skills match the prevailingconditions.Do not fly your new kite for the first few flights at the top of thewind range shown in the wind table. Please take time to get toknow the equipment.Only use a harness after you have developed a real command ofyour kite and only use a harness that allows you to quicklydisconnect in case of danger. Our authorised dealers will behappy to provide safety advice.Strong shoes or boots are highly recommended, as are helmet,gloves, elbow and kneepads. Sit down whilst launching your kiteif you are not sure how much pull it will develop.Before using your kite to pull your buggy or board you must havea good command of the kite.Never underestimate the power of your kite. The classification(Beginner, Intermediate, High-Performance) refers to themanageability and power delivery in certain situations. Even abeginner kite can develop several hundred kilos of pull dependingon kite size and wind strength.The manufacturer disclaims liability for any damage caused byinappropriate use of the kite.© U-<strong>Turn</strong> GmbH 2006 Seite 5
U-<strong>Turn</strong> <strong>Kite</strong>sThe maiden flight:The maiden flight with a new kite always is a special and thrillingmoment. Perhaps it is your first flight of all. Probably you had a briefingwith your authorised dealer. However, we ask you to carefully read thefollowing, even if you can’t wait to get started.Wind and flight area:Please have a look at the wind table on page X and measure the currentwind strength. Now have a look at the wind table of your new kite andnotice the wind speed and the size of your kite. The wind strength shouldbe in the lower range of that shown for your weight. If the wind is toostrong: Just sit down and read the manual again.Before you start the set-up, please have a good look around and makesure there is enough space for an enjoyable flight. To the left, the right,in front of you: No high-voltage transmission line? No road, no ditches,no airports far and wide? O.K. – let’s start now.Set-up, 1st step: (25 metres walk)Please find the spot you want to stand when launching the kite and placethe handles there. Now enjoy a short walkforwards (25 metres, with the wind at yourback). Don’t forget your kite, ground stake andlines on the winder. If a ground stake is notavailable, a strong stick will be sufficient. After25 metres you can put down your kite-bag anddrive the anchor (or stick) into the ground.© U-<strong>Turn</strong> GmbH 2006 Seite 6
Set-up 2nd step (100 metres walk)Now please take the winder and uncoil the firsttwo lines (usually these are the brake-lines). Inorder to do this, just hang the loop over theground stake – and walk towards the handles. Werecommend separating the lines, as seen in image1, right from the beginning.After having completely unwound these lines, youshould lay the ends shoulder width apart. Nowtake your handles and attach the lines to thelower attachment point of the handles.The Brake-line is always thinner than theflying-line. See image 2.After having tied each end to a handle, enjoy yourrelaxed walk back to the ground stake (pleasedon’t forget the winder). Now you repeat theprocedure with the flying-lines (or the brake-lines,depending on how they were wound onto thewinder). You attach the flying-lines to the top ofthe handles. Now it is time to fetch the groundanchor, to lay out the ends of the lines (brakelinesoutside, flying-lines inside) and to arrangethe handles as shown in image 4.Now you may think that it would be better to havea second ground stake. Be patient, later you willneed only one. What’s next? That’s right, walkback to your kite.© U-<strong>Turn</strong> GmbH 2006 Seite 7
Set-up 3rd step (finally unpacking)Reaching the kite, you take it out of the bag(which you should immediately put into yourpocket, otherwise you will have to run after itbecause of the wind...) and lay it out as shown inimage x to x. Depending on the wind you shouldkeep an eye on it, so that it does not blow away.If you are on a beach, you can put some sand onthe trailing edge to hold it down.First of all, fix both brake-lines at the knot nearthe end of the brake bridle (see image X,difference between brake and main bridle). Nowthe kite can’t move away. The next step is toconnect the flying-lines to the main bridle. Becareful not to cross any lines or to twist them.Now you step behind your kite, pulling it backcarefully, until all lines are under tension. Now youare able to see whether anything is twisted. If alllines are OK, you can now walk for the last timeback to your handles.Set-up 4th step (final lines-check before launch)Now you take your handles. Keep the brakes applied so that the kitestays on the ground! (see image 8) Please make sure that the righthand lines run to the right side of the kite and the left hand lines to theleft. If everything is OK, place the handles over the ground stake (seeimage X) and read “Launching, Steering and Landing”© U-<strong>Turn</strong> GmbH 2006 Seite 8
Launching, Steering and LandingThe LaunchThe range that your kite flies in is called the wind window. On thewindows left and right edge and at the zenith, the kites’ traction power islowest. The closer the kite flies to the centre of the window, the moretraction power appears. For this reason, you should not launch your kitein the centre, but on the right or left side of the wind window.Hold the handles near the top in your hands (one in each hand), so thatthe brake-lines can hang free. With a firm tug, equal at both handles, thekite will rise. Let it rise up to the zenith. This is the starting point foranything to come.© U-<strong>Turn</strong> GmbH 2006 Seite 9
The SteeringBy pulling one handle, you can change the flight direction of your kite.Pull on the left handle and the kite will fly to the left, pull on the righthandle and the kite will fly to the right. You can boost the steering effectby tipping the lower end of the handles (where the break-lines areattached) towards you. When doing this, the kite will not only be turnedquicker, but also partly braked. Please practise this until you master thismanoeuvre.The LandingTo touch down, fly your kite into the left or right upper area of the windwindow and then tip the bottom of both handles equally towards you.The kite will fly backwards and will touch down in a controlled manner. Ifthe kite breaks out to one side, just pull the handle on the opposite sidetowards you.© U-<strong>Turn</strong> GmbH 2006 Seite 10
Packing and unpacking the kitePackingAfter having enjoyed your first flight with your U-<strong>Turn</strong> kite and having performed a perfecttouchdown, now is thetime to pack up. There isno need to untie all thelines and to coil them onthe winder. Go to the kite,bring together all lines atthe bridle connections(without twisting them)and fix them to the Velcrotab on the trailing edge.This keeps your bridle linesin good condition and freefrom tangles so you canstart quickly on your nextflying day.Lay the bridle on the kites’lower side and fold the kiteas shown in image 10 to15. After putting the kitein the bag, walk back toyour handles and coil thelines as shown in images16 to 20.IMPORTANT:Remember the directionyou are coiling the lines,as you have to uncoil themin the opposite direction orthey will be badly twisted.For example: Hold thehandles in the right hand and hold the linestogether in the left. Rotate clockwise with the lefthand in order to coil the lines round the handles.To uncoil, hold the handles in the right handagain and unwind anti-clockwise with the lefthand.© U-<strong>Turn</strong> GmbH 2006 Seite 11
General wind-tableBFT M/S KM/H MPH Knoten Bezeichnung0 0 – 0,2 0 – 0,8 0 – 0,6 0 – 0,5 Stille1 0,3– 1,5 0,9 – 5,5 0,7 – 3,5 0,6 – 3,0 leiser Zug2 1,6– 3,3 5,6– 12,1 3,6 – 7,5 3,1 – 6,5 leichte Brise3 3,4 – 5,4 12,2– 19,6 7,6 – 12,2 6,6 – 10,5 schwache Brise4 5,5 – 7,9 19,7– 28,5 12,3 – 17,8 10,6–15,5 mäßige Brise5 8,0 – 10,7 28,6– 38,8 17,9 – 24,0 15,6–20,9 frische Brise6 10,8– 13,8 38,9 –49,8 24,1 – 31,0 21,0–26,9 starker Wind7 13,9– 17,1 49,9– 61,7 31,1 – 38,3 27,0–33,3 steifer Wind8 17,2– 20,7 61,8– 74,6 38,4 – 46,4 33,4–40,3 stürmischer Wind9 20,8– 24,4 74,7– 88,0 46,5 – 54,7 40,4–47,5 Sturm10 24,5– 28,4 88,1-102 54,8 – 63,6 47,6–55,3 schwerer Sturm11 28,5– 32,6 102,1–117 63,7 – 73,0 55,4–63,4 orkanartigerSturm12 32,7 + 117,1 + 73,1 + 63,5 + Orkan© U-<strong>Turn</strong> GmbH 2006 Seite 13
The traction-<strong>Kite</strong>s© U-<strong>Turn</strong> GmbH 2006 Seite 14
Beginner-<strong>Kite</strong>sU-<strong>Turn</strong> Helium IIFor those, who not only would, but really want…You are a kite-beginner, looking for the suitable kite? When you arelooking for a piece of sport equipment that is forgiving mistakes andmaking thrust? Then the Helium is perfect for you. Due to his wide sizerangeour kite will accompany you until you’re pro-era. Show the Heliumthat you know your stuff, because the Helium will do the same...© U-<strong>Turn</strong> GmbH 2006 Seite 15
Wind-table Helium IIFields of application• Upper-sail, sub-sail, ribs 44g/m2 Ripstop Nylon• Balance lines Silverguard XT, 50 kg collapse load• Recommended fly/brake-lines 150 kg/120 kgStarter Intermediate Profis/RacerFun/Power Kiting: +++ ++ +Buggy-Kiting: +++ + -Beachboard-Kiting: +++ + -Snow-Kiting: +++ + -Legend: +++perfect ++ super + O.K. – please not© U-<strong>Turn</strong> GmbH 2006 Seite 16
Technical dataTipps and tricks© U-<strong>Turn</strong> GmbH 2006 Seite 17
Intermediate-<strong>Kite</strong>sU-<strong>Turn</strong> Oxigen basic/pro.The rusher among the intermediates!Your U-<strong>Turn</strong> Oxigen basic provides implemented action. Whatever youneed the power for: In the buggy, on the board or in the snow – you willneed him like the air you breathe. Fast and powerful he treats the windenergy. The Oxigen is highly resistant to collapses and very forgiving anymistakes. When the stream appears, the Oxigen pulls you forwards. Doyou want to work actively? Our kite will convince you with outstandingagility. For beginners we recommend minimum 25-metres-lines and toopen the dirt-out. You always can recognize the Oxigen basic by thewhite sub-sail.Warning: This kite is addictive!© U-<strong>Turn</strong> GmbH 2006 Seite 18
Wind-table OxigenTechnical data OxigenFields of application Oxigen basicFields of application Oxigen pro.© U-<strong>Turn</strong> GmbH 2006 Seite 19
Fields of application Oxigen basic• Upper-sail, sub-sail, ribs 44g/m2 Ripstop Nylon• Balance lines Dyneema• Sub-sail whiteStarter Intermediate Profis/RacerFun/Power Kiting: + +++ +Buggy-Kiting: ++ +++ +Beachboard-Kiting: ++ +++ +Snow-Kiting: ++ +++ +Legend: +++perfect ++ super + O.K. – please notFields of application Oxigen pro.• Upper sail, sub-sail, ribs• Porcher Marine NCV PA 6.6 high tenacity• Special, water repellent coating• Balance-lines coated with Kevlar• Sub-sail in main colour upper-sailStarter Intermediate Profis/RacerFun/Power Kiting: + +++ +Buggy-Kiting: ++ +++ +Beachboard-Kiting: ++ +++ +Snow-Kiting: ++ +++ +Legend: +++perfect ++ super + O.K. – please not© U-<strong>Turn</strong> GmbH 2006 Seite 20
High performance -<strong>Kite</strong>sU-<strong>Turn</strong> Nitro II…explosive power!You are a professional pilot and you like to reach your limits?!Then face the overwhelming power of U-<strong>Turn</strong>’s Nitro. When you take itfor the first time and the cap is standing really stretched above you, yourealize: “...Everything so far was pleasure...now the gloves are takenoff.” The U-<strong>Turn</strong> Nitro pushes you to the limit. Pilot faults are punishedimmediately. But when you have a good command and the streamappears, the Nitro shows its real face. It is an outperforming powerpacketwith impressive agility, dedicated for absolute professionals. Bythe way: It is the best-designed sail at the sky. Just an aero-dynamicmasterpiece.© U-<strong>Turn</strong> GmbH 2006 Seite 21
Wind-table Nitro IITechnical data Nitro II.Fields of application Nitro II.• PA 6.6 High Tenacity• Special, water repellent coating• Balance noble rid, Germany/Kevlar/AramidStarter Intermediate Profis/RacerFun/Power Kiting: - + to ++ +++Buggy-Kiting: - + to ++ +++Beachboard-Kiting: - + to ++ +++Snow-Kiting: - + to ++ +++Legend: +++perfect++ super + O.K. – please no© U-<strong>Turn</strong> GmbH 2006 Seite 22
BUTAN... high performance in seriesThe new BUTAN is available and in stock. This high-end-kite is dedicatedto ambitious kiters and those who want to start competitive kiting,perhaps with first experiences in racing. The new kites´position isbetween our intermediate OXIGEN and our race-model NITRO.Power, power and again power – that´s the promise of the BUTAN. Thenew kite is a further development of the Raptor II, which made designerErnst Strobl well known as one of the leading constructors in the scene.After lots of tests and computer-aides design improvements the handlingof the BUTAN is much more easier and forgiving than you would expectfrom such a powerful kite. So the pilot allways can get the best of thisinnovative canopy. There is almost no shooting forward. Important:When other kites are already lying on the beach or the grasslands, thiscanopy is still giving propulsion, because it stays longer at the sky evenunder difficult wind conditions.The BUTAN is available in sizes 2,5/3,5/4,5/5,5/6,5 (each with 26 cells)and 7,5/9,0/11,0 and 13,0 (each with 32 cells). With this range the pilotwill always find the suitable kite to any wind conditions. The kite isequipped with Dyneema lines as well as with the innovative sailclothAqua Ripstop. Both the surface and the sub-sail are designed inattractive colour combinations with the typically U-<strong>Turn</strong>-claw. As amatter of course the BUTAN provides features like Easy Fix, Dirt-Outs anV-Tapes.The BUTAN is suitable for all purposes. With the buggy on the beach, theall-terrain-board on the grasslands or just for playing withnatures´power – lots of fun are always guaranteed. In time to thewinter-season we will provide special adjusted paraphenalia for ski- orsnowboard use.© U-<strong>Turn</strong> GmbH 2006 Seite 23
© U-<strong>Turn</strong> GmbH 2006 Seite 24
Wind-table ButanTechnical data ButanStarter Intermediate Profis/RacerFun/Power Kiting: + +++ +++Buggy-Kiting: ++ +++ +++Beachboard-Kiting: ++ +++ +++Snow-Kiting: ++ +++ +++Legend: +++perfect ++ super + O.K. – please not© U-<strong>Turn</strong> GmbH 2006 Seite 25
© U-<strong>Turn</strong> GmbH 2006 Seite 26