U2 Handbuch version 1.3-E.qxp - U-Turn Paragliders
U2 Handbuch version 1.3-E.qxp - U-Turn Paragliders
U2 Handbuch version 1.3-E.qxp - U-Turn Paragliders
- No tags were found...

You also want an ePaper? Increase the reach of your titles
YUMPU automatically turns print PDFs into web optimized ePapers that Google loves.
- Owner’s Manual- DHV Musterzulassung- DHV Line dataOktober 2005 / Revision <strong>1.3</strong>Copyright ©2003 by U-<strong>Turn</strong> GmbH, all rights preserved. No part of this publication may be reproduced ordeveloped further on in any way without written approval of the U-<strong>Turn</strong> GmbHText and Graphics: Ernst Strobl, Stefan Preuß, EWSAll technical details in this manual have been carefully checked by U-TURN. However we like tomention that we don't take any liability for possible mistakes, neither in legal responsibility, norin liability cases that derive from mistakable details.We preserve the right to change this manualin any way to achieve technical improvements.
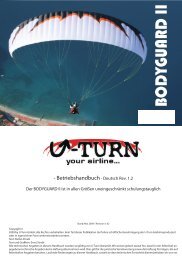
U-<strong>Turn</strong> ContactThe U-TURN crew congratulates you on buying a new U-TURNParaglider. You made a supreme choice. We wish you long andenjoyable flights and many happy landings with your U-TURN<strong>U2</strong>.Looking back at a long tradition in air sports, U-TURN providesstate of the art technology, and with our unique concepts weare setting the standard for the market. The combination oftop notch construction technology and the know-how of experiencedtest- and competition pilots provide the tools for ourprofessional work.Our customer's needs and demands are the guideline for ourwork; therefore we like to get your suggestions and critique.Should there be any open questions please feel free to contactyour U-TURN dealership or our company. We are glad to assistyou in any possible way.To keep you in the loop of information about the latest technicalimprovements and innovations about U-TURN products, weask you to fill in the questionnaire and send it back to:U-TURN GmbH<strong>Paragliders</strong> and KitesEsslinger Straße 23D-78054 Villingen-SchwennigenTel. +49 (07720) 807111Fax: +49 (07720) 807112Internet: www.u-turn.deE-mail: info@u-turn.de!Please read this manual carefully and understand the informationsit contains before you operate your <strong>U2</strong> for the first time.We wrote this manual for your safety and to enable you toeasily operate you're <strong>U2</strong>.
Answer sheetName:First name:AddressTelephone Nr.:E-Mail:U-<strong>Turn</strong> <strong>U2</strong> Serial Nr:Date of purchase:Dealership:Tested by:Paraglider since:Flying hours:Club:
ContentsIntroduction 9AFS system and new features 10-11General Aspects Of Tandem Flying 10Legal Aspects 10Your Passenger 10-11Equipment 11Flying Site and Passenger 11-12Clip-In And Check 13Launch Position 14Inflation Of The Glider 14Flight 15Landing 15-16After The Landing 16Technical Description Of The <strong>U2</strong> 16Technical Specifications 17-18Suspension System Of The <strong>U2</strong> 19Lines 19Risers 20Unaccelerated State 20Accelerated State 20The Spreader Bars 21Trimmers 21
ContentsTechnical Description Of The <strong>U2</strong> 9Harness 22Rescue System 22Flying The <strong>U2</strong> 23Operation 23Aerobatics 23Motorised Paragliding 23Tandem Flying 23Pre-Flight Check 23-24Clip-In To The Spreader Bars 24The Tandem Safety System 25Takeoff 25<strong>Turn</strong>ing 26Thermals And Turbulence 26Landing 27Towing 27Extreme Manoeuvres 28Behavior In Extreme Flying conditions 28Wingover 28Front Tuck 28Deep Stall 29Full Stall 29Negative <strong>Turn</strong> / Spin 29
ContentsExtreme Flugmanöver 30Canopy Deflation 30Emergency Steering 30Manoeuvres For Rapid Loss Of Altitude 30Spiral Dive WARNING 30B-Stall 30Big Ears 31Maintenance And Repairs 32-33Some Closing Words 33<strong>U2</strong> Assembly drawing 34DHV Luftsportgeräte-Kennblatt 35-36Line Data 37-38DHV Musterzulassung 39-40Anhang
IntroductionA warm welcome at U-<strong>Turn</strong>. Thank you for taking stock in ourproducts and the philosophy behind them.The limits of physics are unbribable. To do the most practicablewithin this given frame is our goal. We concede: This is anambitious and somehow immodest demand, but you`ll find U-<strong>Turn</strong> allways at the cutting edge of technology. Oscar Wildeonce said in his very british understatement, his taste is justbasic: Only the best is allways good enough. The U-<strong>Turn</strong>-teamagreees with this attitude: We always want to deliver the bestpossible glider. Not more, but certainly not less.Sounds at first glance not to become a mass-producer withthis philosophy, but we are convinced: There is not only anexisting market of those, who appreciate quality at reasonableprices this market is growing strongly. Our gliders are availableonly at selected flight academies that provide outstandingcompetence, high-quality service and tremendous customercare.Products, designed by pilots for pilots with this basic taste:The best... This is U-<strong>Turn</strong>´s story. Test our newest gliders inour handpicked Competence-Centers. A well-educated team offlight-instructors and test-pilots will accompany you in findingthe most suitable glider. Due to our close collaboration withour Competence-Centers, not only newcomer will be advised,but also experienced pilots: Beginning from speed-systemfinetuning as far as any maintenance procedures, in brief:From soup to nuts. And all in your flying region.Thomas & ErnstSeite 9
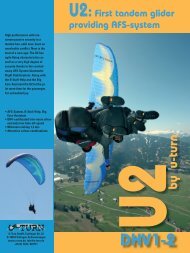
AFS system and new featuresTo paraglide with lots of fun and have the highest level of security possible,this is the promise of the revolutionary AFS-System (AutomaticFlight Stabilisation). It intervenes for the benefit of safety when an inexperiencedpilot, or a pilot in trouble, enters turbulence and is unable tofly actively. AFS works like the Electronic Stability Programs known inthe automotive industry, you could call it an “ESP for the air”.By implementing many technical innovations, designer Ernst Stroblentered a new dimension in glider design, having invented both theImproved Stabilisation System (IST) and the Multiple Speed System(MSS). Strobl now presents a paradigm shift: For the first time a designerhas managed to allow safety to happen automatically to a certainextent.The core innovation of the AFS-system is based on the principle of pretensioningthe undersurface at the trailing edge. “This idea I had duringa flight”, Strobl recalls his sudden inspiration, “It must be possible to pretensionthe under-surface by making sure of an exactly calculated cut –so that on the one hand the canopy is neutral while there is enoughpressure inside, but on the other hand any drop of pressure causes thesystem to react”.Dozens of computer-based calculations with high-end software from theaviation industry allowed the break-through to be achieved. A specialproduction process around the brake attachment points leads to thedesired effect. Whilst the canopy is gliding through smooth air and thereis enough pressure inside, the pre-tensioning is neutralised and the trailingedge stays aerodynamically perfect like a conventional glider.When entering turbulent air with the <strong>U2</strong> the system adjusts immediately,even the slightest drop of internal pressure allows the system toreact. The pre-tensioning at the trailing edge is effectively like pullingthe brakes.A canopy featuring the AFS-system reacts without any steering or brakingaction from the pilot exactly in the way that the safety experts of theDHV recommend: It flies actively and therefore safely. Ernst Stroblrecalls the fine-tuning, “Our computer-based calculations were impressivelyconfirmed during our tests”.The system is extremely responsive and top-quality manufacturing isnecessary. U-<strong>Turn</strong> Co-founder Thomas Vosseler adds, “We will guaranteea strongly supervised manufacturing process”.Andreas Schubert, of the “Rhöner Gleitschirmschulen”, who has taught10 % of all new pilots in Germany over the last ten years confirms, “Thisis a major step as far as safety is concerned. The main reason for accidents,the full collapse of the canopy, is minimized dramatically”.
AFS system and new featuresThe principle of the pre-tensioning of the canopy led Strobl to moredesign improvements. AFS works best in combination with the geometricsetting of the profiles. This means that the profiles do not run lengthwisealong the canopy (90 degrees to flight direction), but at an angle between80 and 100 degrees, allowing every cell to perform in the optimal way.Furthermore, Strobl did not design the width of the cells uniformly; heused a very fine tuned asymmetry that also required lots of computerpower to calculate. Strobl calls this dynamic cell-width reduction. In athird step the whole system works more efficiently by using a swept-backdesign of the wing tips.Together these innovations lead to better characteristics under normalflight conditions. “First I have to mention the optimal start behaviour,”says Strobl, “The first glider providing the new system is called BODY-GUARD; a DHV 1 glider that will set fantastic benchmarks. The BODY-GUARD is easily to inflate in all kinds of wind; there is no need for pullingthe A-risers or other tricks and it is impossible for the canopy to becomestuck before the overhead position. Inflation is easy even for beginnersand due to the AFS-System the canopy sits right above the pilot. Ifthe canopy falls backwards, the BODYGUARD comes up immediatelyafter releasing the brakes – even at angles where other gliders give up”.The new construction principle also automatically improves the stall characteristicsin flight. Pilots can slow down the BODYGUARD to very lowspeed without having to lose manoeuvrability. The newcomer will cometo terms and feel comfortable with an AFS-glider on the first flight foranother reason: “The wing tip comes slightly forward when the brakesare pulled”, Strobl explains, “the canopy sits right above the pilot and thiseffect can even be seen while Paramotoring, this is what inexperiencedpilots will appreciate”.
Legal AspectsThe pilot of a tandem flight takes on a heavy responsibility and itis absolutely necessary that he is familiar with all of the legal aspects.Knowledge of the rules and regulations are taught during the tandempilots course. They are essential for correct and proper tandem flying.An extract of important decrees and statutes for tandem flying inGermanyfollows:LuftPersV § 134LuftBO § 57LuftVG §§ 44-49, § 58 and § 20LuftVO § 43LuftVZO § 23!Note: The list above is just an abstract. It does not raise a claim forcompleteness. We alert you to inform yourself about the statuteseffeective in your country or the country you are flying.Your passenger!Be aware, that the first flight (especially from a high mountain) is a particularlyexciting experience for every passenger.IN GENERAL: Do not feel under pressure or be in a rush to fly.During the ride to the launch site, you should be calm and confident topromote confidence in the passenger. Explain the weather conditions,tell about flight experiences and answer all questions, even if they concerndifficult situations.Choose a quiet launch site and inspect the conditions for the takeoffrun. It is recommended that you do a warm up with the passenger andpractice running, either in line or side by side, whichever you prefer. Itis very important to inform the passenger that the start combines twostages: inflation and acceleration.Seite 10
Your passengerEquipmentFlying Site and passengerSeite 11Experience has shown that many passengers sit down in the harnesstoo soon, when the initial run is slowed down by the glider. This resultsin a start-stop. You must explain that it is necessary to inflate the gliderby doing slow steps (this allows corrections), then accelerate to give theglider flying speed.EXEPTION: With a head wind, passenger and pilot have to push againstthe wind during in the inflation stage to avoid being pulled backwards.The passenger´s clothing should be suitable for the conditions. He mustwear ankle-high boots with non-slip soles and a helmet. Gloves arerecommended. Integral helmets are safer, however, they should beequipped with a wide removable chin piece. Please inform the passengerabout the required equipment in time.Choose the appropriate launch site with the special requirementsof tandem flying in mind. It should also be absolutely obstaclefree. Youhave to consider the possibility of a longer run off and limited correctionpossiblities. For the takeoff run the following calls are arranged:• go (better: 3-2-1 go)• run• stop• right• leftWith the call "go", the passenger should help to pull the glider up. In caseof a launch stop the pilot calls "stop". Corrections of direction are doneby announcing the change of direction. Agree upon the direction of apossible launch stop before begining the launch sequence. Due to thehigher wing loading tandem flying usually requires a longer run and ahigher flight speed.Talk to your passenger about further flight stages. Never force a reluctantpassenger to launch. To overcome fear, ask your passenger not tolook down, but to pay attention to other aspects of the flight. Althoughonly the pilot is responsible for the control of the glider, let yourpassenger participate in all activities. After the canopy is laid out and thelines are arranged, the pilot helps the passenger to put on the harness.It is recommended that you perform a seated test, lifting the passengerwith the help of another pilot and adjusting the harness as necessary.
Flying Site and passengerClip-In And CheckLaunch PositionSeite 12Proper adjustment of leg loops and chest strap is very important.Many passengers tend to sit down on landing andharnesses equipped with airbag or back protector are recommended.The passenger is cliped in to the longer or shorter (if available)loop of the spreader bar depending on height. If the passenger is shorterthan the pilot he is cliped into the lower loop. This prevents the passengerbeing lifted up too soon.After you are cliped in to the spreader bar including risers,and the carabiners are connected, the passenger stands in frontof you to be cliped in properly. Ask your passenger to visuallyfollow the process. Do not forget: double check that all connectionshave been fastened securely.During all flight stages the passenger is in front of or nextto the pilot. Safety reasons do not permit a position behind the pilot!Launch position is either "in line" (passenger in front) or "side by side".a) "in line"A positive aspect of this method is that the passenger does not swingforward. During acceleration he can more easily be pushed in the rightdirection. Also an additional nudge with the knee can prevent him fromsitting down too early.b) "side by side"With this method you have better running possibilities and more room tomove. For a reverse launch this position is also favorable. A disadvantage,that is often mentioned, is that the passenger swings forward aftertakeoff. This can be prevented if the passenger holds on to the cheststap or to the cross bracing of the pilot. This launch position is difficult instrong winds, as the passenger cannot help to push against the wind andaid the inflation stage. In this case a reverse launch is recommended.(or assisted launch by two experienced pilots).With the "in line" method , the passenger should hold on to the loop ofthe spreader bar, just above the carabiners. With the "side by side"method hold on to the hip or the chest strap of the pilot.CAUTION: Perform the 5-point-check just before launch: bothharnesses, carabiners, suspension (spreader bar), lines includingbrakes and the proper position of the glider.
Inflation Of The GliderThe pilot inflates the glider as described in the instructions. With the "inline" method the passenger can help to raise the glider by holding on tothe spreader bar above the carabiners. This offers the advantage of thepassenger taking part in the launch process.FlightYou must check that the glider is properly inflated and not over-flying. Ifthere are any problems, stop the launch. If the glider is properly inflatedand the lines are untangled, "run" is the call for an aggressive rununtil the takeoff point.LandingSeite 13After take-off ask the passenger to look up to the inflated glider. Thisbuilds confidence in the aircraft (and calms him down). Ask your passenger,if he is comfortable in his harness.If his knees hang downwards, he is not yet in the right position.If his knees clearly point upwards, the passenger has alreadyslipped into the harness. If necessary, the pilot should help the passengerto slip into the harness properly. Only then, the pilot himself adjustshis own harness.Please always be aware that the turning circle of a biplace needs moreroom, steering is slower than with your familiar solo glider and generallyneeds stronger steering. How-ever, handling can be decisevely improvedby weight shifting.When you sit behind your passenger, you cannot look in his eyes. So talkwith your passenger to encourage him and to judge how he is feeling.Advise the passenger to look at the horizon and not to look down. Ingeneral: the more relaxed the pilot is, the more confidence the passengerwill have and the more he will enjoy the flight.Landing preparations should only be made during the flight.Explanations before the launch would be too much information at onetime. Especially for the preparation of the landing after long flights, it isrecommended to stimulate blood circulation in the legs.Check wind direction at the landing field, height and air traffic before flyinginto position with sufficient height. This is very important, due to thehigher approach speed and the limited flexibility of tandem flighing. Adownwind landing brings a high risk of injury and should be avoided! Ipossible, allow more room on approach than is usual with a solo glider.
LandingAfter The LandingAvoid corrections close to the ground. Experience has shown, thatdespite the order to keep on running, many passengers sit down on landing.To avoid injuries, pilot and passenger should be side by side inany case. Tell the passenger not to put out his hands on landing, dueto the injury risk. On final approach, use one leg to push the passengerto the side and give the signal to slip out of the harness into an uprightposition. Then then get ready to start running! It is your responsibility tocheck the passenger´s position.For a safe, easy landing make the final approach with good speed andapply the brakes gradually and firmly. The perfectly executed landingwill be slow and gentle.Offer the passenger the opportunity to describe his experiences or toask questions.Technical SpecificationsThe profile of <strong>U2</strong> has been specially developed by U-<strong>Turn</strong>to meet all possible requirements of a fast and safe tandem withIntermediate character and gives high performance combinedwith optimum safety. The <strong>U2</strong> is constructed of nylon clothwhich is particularly stretch-stable, durable and is speciallytreated for UV resistance.Seite 16
Technical SpecificationsSeite 17Minimum sink / glide ratio:Our products belong in each performance class to the best onesin the market. We want you to forget the adds with the fantastic glideratio declarations. go out! Try and compare!
Technische DatenMore construction details including line lengths of the U-<strong>Turn</strong> FATWILLIE can be obtained from the certification specification sheetswhich form part of this manual.At the time of delivery this glider conforms to DHV and AFNOR (SHVand ACPUL) requirements (see certification information as part of thismanual).Any changes made to the glider by the purchaser invalidate itscertification.Use this paraglider at your own risk. Each pilot is responsible forhis / her own safety.Perform a careful pre-flight check of the glider before each flight.Suspension System Of The <strong>U2</strong>LinesThe <strong>U2</strong> lines are made of 1.1, <strong>1.3</strong>, 1.6, 1.9 and 2.3mmTai-Gu lines with a specially twisted Co-Aramid-heart. This hightech line is extremely tear-resistant and stretch-stable. This isessential to avoid changes of flight behavior due to differentialstretching.The suspension line system is formed of single lines, looped and sewnat both ends. Suspension lines and brake lines bifurcate in the upperarea.The lines of one wing are collected to 5 groups:A: A1-A2A: A3-A4B: B1-B5C: C1-C4D: D1-D4The lines are coloured to support easy identification, handling and control.Special line collectors on the maillons prevent slipping of the lines.The main brake lines go thorough pullies at the D-risers.They are marked with a black dot at the point where the brake handleis fixed. This adjustment allows enough travel in extreme flight situationsand for landing and should not be changed .Seite 18
RisersThe A- and B-risers are differently coloured, to guarantee clear identificationduring launch and fast descents with B-Stall. Additionally, to easeB-Stalls, the B-riser is made longer and features a pulley system.Unaccelerated StateAccelerated StateSeite 19
The Spreader BarsThe <strong>U2</strong> is equipped with a special spreader bar. It serves to keep thedistance between pilot and passenger, which guarantees comfortableand fatigue-free flying.For a detailed description of this set-up, have a look at the "Flying The<strong>U2</strong> / Clip-In To The Spreader Bar" chapter.B, CD, EATrimmersThe <strong>U2</strong> is equipped with Trimmers, which attach to the C-D-risers. TheTrimmers adjust the trim speed. Slightly opening the trimmers easestakeoff under bad conditions.If you fly the <strong>U2</strong> at the lower load limit, it is also recommended to slightlyopen the trimmers during takeoff and flight. Handling and behavior inthe turn is positively influenced by a slightly higher trim speed.The <strong>U2</strong> is designed to retain optimum stability at a wide range ofspeeds. Despite its high performance this tandem is very easy to fly.The U-<strong>Turn</strong> <strong>U2</strong> allows the pilot to concentrate on the flight.Seite 20
HarnessRescue SystemAny harness with hang points near chest height can be used. The lowerthe hang point of the harness, the better the pilot can steer the <strong>U2</strong> withweight shift.A DHV or ACPUL certified harness if recommended. For the pilot, a specialtandem harness has proved effective, guaranteeing optimal room tomove during takeoff, flight and landing. For the passenger a simple harnesswith a shockabsorbing back protector is recommended. Too manyadjustment points can confuse the passenger and make him feel insecure.Note that the height of the hang point also affects the brake line length.If you have any questions about the harness with the <strong>U2</strong>, please contactyour dealer or U-<strong>Turn</strong>.Carrying a rescue system is not only mandatory, it is also extremely dangerousto fly without it.When you choose a safety system, make sure that it is certified and suitablefor the planned takeoff weight.For example the U-<strong>Turn</strong> Protekt Bi. The safety system should be mountedto the harness of the pilot where an accidental deployment by pilotor passenger can be avoided. It is important, that the bridle(s) of thesafety system are hooked to the main suspension of the spreader bars.(If it is mounted to the pilots harness the passenger would hang about 1meter lower, bringing a high injury risk when landing!) It is advisable toperform training for the proper handling of the safety system. Today´sbiplace gliders with more than 40 sqm area develop high loads and areextremely difficult to take in after parachute deployment.Seite 22
OperationAerobaticsThe <strong>U2</strong> has been developed and tested exclusively for foot and winchlaunch operation. Other operations are not allowed.The <strong>U2</strong> has not been developped and tested for aerobatics. It is alsoneither suitable nor certified for aerobatics. Aerobatics with the <strong>U2</strong> areseriously dangerous. Doing aerobatics can induce flying configurationswhere you enter non controllable manoeuvres. It can also overloadmaterial and ask too much of the pilot.Motorised ParaglidingThe <strong>U2</strong> has not been tested or certified for use with any kind of engine.If you want to fly the <strong>U2</strong> motorised, please get in touch with the manufacturerof the engine and U-<strong>Turn</strong> to check on certification and suitabiltyof this configuration.Tandem FlyingPre-Flight CheckThe <strong>U2</strong> is developed for biplace operation. It is not certified for single ormultiplace (more than 2 persons) operation. All persons have to beauthorized and equipment must be certified specially for biplace flying.This is necessary for pilot, passenger, harness, safety system and tandemsuspension.Seite 23As for any aircraft, a pre-flight check is required for the U-<strong>Turn</strong> <strong>U2</strong>.Tandem gliders are often used by different pilots, if you are not the onlyone who uses the glider, please perform the check thoroughly. If you letsomeone else use the glider, please remind him to do the pre-flightcheck. Also make sure that he knows the operation limits of <strong>U2</strong>and isauthorized to fly. Prior to each flight check spreader bar, risers, linesand canopy for damage - if any is detected, don´t launch. Remember -one faulty component can cause the whole structural stability of yourglider fail. Unpack your glider in a semi-circle shape. This ensuresthat the centre cells begin flying before the tips. When unfolding yourglider, consider the wind direction and arrange your glider so that yourtakeoff run is directly into the wind. Once the glider is free and untangled,check to make sure that all lines come directly to the riser. Thelines must be arranged so that there are no tangles and the A-lines areon top.
Pre-Flight CheckDouble check for a "line over", launching with a line over can be dangerous!Let the passenger take an active part in the pre-flight check, tomake him familiar with the glider.Clip-In To The Spreader BarThe <strong>U2</strong> has been tested and certified together with the delivered tandemspreader bars. Other tandem suspension systems can considerablychange flight behavior as well as behavior in extreme flight conditions.The spreader bars (see illustration, page 34) is equipped with a loop forthe pilot (A), two loops for the glider risers (B + C), and two loops for thepassenger (D + E). The pilot always clips himself in loop A. For passengerswith normal weight the glider riser is cliped in loop C, for light passengersloop B is used. Loop E is for shorter passengers, loop D for tallerpassengers. Clip in symmetrically!The Tandem Safety SystemThe compulsory biplace safety system has to be mounted beyond thereach of the passenger and according to the manufacturersinstructions.Usually the connecting line of the parachute is lead over the back of thepilot to the spreader bars. There it is hooked in to the carabiners to connectwith the main risers.Seite 24
TakeoffFront Launch: With the A-risers and the brakes in your hand,have another look at your unfolded glider. Inflate the glider witha steady, aggressive run and remember to hold your arms so thatthey are a continuation of the A-risers. (Note: with a head windof more than 5 km/h only the inner A-risers are used to pull upthe glider, both A-risers are used when there is less or no wind.)As the glider comes above your head, you should glance up to seethat the entire canopy is inflated and flying. <strong>U2</strong> has lowsurge, so there is usually no need for braking to stop the gliderfrom over-flying you. Directional control with the brakes shouldonly be attempted when the glider is above your head. Afterchecking that the wing is properly inflated, apply very slight brakepressure and accelerate rapidly down the hill. Excessive brakingwill cause the wing to fall back. After a few steps the gliderbecomes airborne as it accelerates to flying speed.!<strong>Turn</strong>ingReverse Launch: To do a reverse launch, lay out the glider and do allthe checks as before. After cliping in both yourself and the passenger,turn to face the canopy, at the same time lifting one set of risers overyour head. The passenger is now standing beside you, still facing forward.Inflate the glider with a steady pull on the A-risers and as it comesoverhead, turn and begin your takeoff run.(Note: as with the frontlaunch, use only the inner A-risers in stronger winds).NOTE: Remember the care and assistance of the passenger duringtakeoff, you can find the chapter "passenger company" in the introductionsection of this manual.Seite 25The <strong>U2</strong> is an agile glider and reacts immediately to pilot input. By usingweight shift and light braking, the U-<strong>Turn</strong> <strong>U2</strong> makes flat turns with minimumloss of altitude. Increasing the amount of brake pressure decreasesthe radius of the turn. It is important to continually feel the changingpressures in both sides of your canopy when turning. If you can motivateyour passenger to assist you with weight shifting, it will be even easierto turn.When brake pressure is increased on one side, the <strong>U2</strong> begins a fast andsteep turn, which can be made into a spiral dive. The spiral dive must beinduced and finished slowly. Bank is adjusted by pulling/releasing theinside brake.WARNING: Continuous extreme braking may cause a spin!
Thermals And TurbulenceLandingTowingEspecially during thermal flight, <strong>U2</strong> demonstrates its strength.In turbulent air, <strong>U2</strong> should be flown with a little brake to increase theangle of attack and provide greater stability. While flying in strong thermalconditions, the pilot must maintain the glider´s position above hishead by letting the glider fly fast while entering the thermal, and by brakingthe surge of the canopy when exiting the thermal. <strong>U2</strong> possesseshigh stability due to its construction and design. However, an active flyingstyle in turbulence helps increase safety by preventing unnecessarycollapses and deformation of the glider.The U-<strong>Turn</strong> <strong>U2</strong> is easy to land. While pointing into the wind, the pilotshould fly the wing fast until he is at 2 m above the ground, at which pointhe should apply both brakes evenly and completely. When landing instronger wind, less brake is required. Landing from steep turns must beavoided, due to the risk of strong pendulum.Towing with <strong>U2</strong> is allowed as long as the following rules are considered:• Before towing contact AiREA with a description of your towsystem if there is any non-standard equipment or towingprocedure to be performed.• Tow on flat ground• Towing pressure must be lower than 150 kg• People involved with towing must have the required authorization.• Equipment used in towing should be certified, safe and ingood operating condition
Behavior In Extreme Flying ConditionsWingoverFront TuckDeep StallAlthough FAT WILLIE is characterized by very high aerodynamicstability, turbulence or pilot error can result in an extreme flightcondition. Proper behavior in extreme flight conditions is besttaught in SIV courses.Every pilot who flys in turbulences or makes a mistake, canfind himself in these flying conditions.All extreme manoeuvres and flight conditions that are described hereare dangerous if they are excecuted without adequate knowledge,without enough altitude and / or without proper instruction.Wrong excecution of the described manoeuvres and flight conditionscan risk your life. Never intend to fly extreme manoeuvres with apassenger!To do a wingover, the pilot flys S-turns with increasing roll, untilthe desired roll is achieved. Wingover with <strong>U2</strong> is usually only possiblewith a very extreme roll.CAUTION: It is prohibited to fly with a roll of more than 60 degrees.A front tuck is the result of a negative angle of incidence (due toturbulence or quickly released brakes). Usually <strong>U2</strong> unfolds quickly andwithout assistance. The recovery process can be supported by evenand symmetrical braking.A Deep Stall is the result of too much pulling of the brake lines orthe rear risers, or a B-Stall that is recovered from too slowly.The <strong>U2</strong> has no tendency to Deep Stall. Usually it ceases a Deep Stallwithout assistance, if you let up the brakes or therear risers.In case of a Deep Stall, symmetrically "push" the A-risers "forward" onboth sides. Always check you have enough altitude if you try a DeepStall and never brake unevenly when you are in a Deep Stall.Seite 28
Full StallCAUTION: The forces, that affect a tandem glider of this sizeduring a Full Stall are very high.To force a Full Stall, pull both brakes all the way down. Depending on thearm length of the pilot, it might be necessary to take wraps of the brakelines. The <strong>U2</strong> does not deflate completely. It’s very heavy to keep the itin Full Stall.Stabilize the canopy before recovering the Full Stall, then symmetricallyand slowly release the brakes to refill the canopy.Negative <strong>Turn</strong> / SpinWhen the pilot applies too much brake on one side, a spin can begin. Torecover from the spin, the lower brake has to be released to let the glideraccelerate.Canopy DeflationThe <strong>U2</strong> is characterised by a very high stablility.Nevertheless, as can happen to all gliders, stronger turbulence can leadto a canopy deflation.Usually this is not a difficult situation, as the canopy inflates quickly andreliably.You can support reinflation bycorrecting on the open side and using along, steady brake action to pump out the closure.Emergency SteeringIf, for any reason, the <strong>U2</strong> cannot be controlled with the brakes, it can besteered and landed with the rear risers.Seite 29
Manoeuvres For Rapid Loss Of AltitudeSpiral DiveNOTE: Never begin any manoeuvres without having informedyour passenger!It is very easy to begin a Spiral Dive with the FATWILLIE. The SpiralDive results in very high sink rates. For its proper use in extremesituations, the Spiral Dive should be pratised in easy conditions.However:!• usually the steering pressure is markedly higher,• centrifugal forces can be very high, due to the higher wingloading and higher speed,• it is possible, that the passenger will not be able to bear thecentrifugal forces as well as the pilot.Spiral Dive WARNINGThe agile and dynamic handling of the <strong>U2</strong> leads to very high possiblesink rates when the pilot decides to do a spiral dive. Simultaneouslypilot and passanger have to bear increasing forces due to high speedswhile turning. The U-<strong>Turn</strong> GmbH expressly warns that even at sinkrates about 12m/s the capacity of pilot and/or passenger may be affected,in worst case to the point of insensibility. According to harnessesconfiguration, the pilots´ position and the sink rate the glider will keepspiral-diving until it is steered out actively. The U-<strong>Turn</strong> GmbH thereforerecommends special diligence and accuracy in carrying out thismanoeuvre.B-StallThe B-Stall begins with a symmetrical continuous pulling of theB-risers. The aerofoil is deformed and the glider loses forwardspeed.The surface is reduced and the sink rate can be increased by pullingdown further on the B-risers. Recovery involves a quick, continuousand symmetrical releas of the B-risers.Seite 30
Big EarsSeite 31The one or two outer A lines are pulled on both sides, causing thetips to collapse, allowing the glider to achieve a 3-4 m/sec sinkrate. The glider remains controllable through braking and weightshift. Releasing the A lines allows the collapsed cells to open bythemselves. If this does not happen, reinflation can be helpedwith the brakes.WARNING: Never use Big Ears and a Steep Spiral together. Youmight overload glider, pilot and equipment.Full Stalls and Spins should be avoided, as incorrect recovery with anyparaglider can be dangerous. Descent manoeuvres should be practisedin a safe manner so that proper technique can be applied in extremesituations.Maintenance and RepairsU-<strong>Turn</strong> <strong>Paragliders</strong> will retain their performance and handling characteristicsbest if routine care and maintenance are performed. If cleaning isnecessary, use warm water and a soft sponge. If you must use a soft cleaningfluid, rinse the fabric thoroughly. Always store your glider in a dryand safe place away from chemicals. Extended exposure to UV lighttends to increase permeability and fading of the material. Make everyeffort to limit the amount of time that your canopy remains in the sun.Have your glider thoroughly checked by the manufacturer / dealerafter no more than two years or earlier if your glider is used extensivelyin rough conditions or terrain. Repairs should be performed by authorisedpersonnel only.Some Closing WordsThe <strong>U2</strong> leads the way in paragliding research and development. Wewish you many long and safe flights on your U-<strong>Turn</strong> <strong>U2</strong>.Remember to treat your canopy properly and always fly with respect forconditions and your capabilities.Remember that all flying is potentially dangerous and that you must takeresponsibility for you own, and your passengers safety.Fly conservatively with respect to conditions and use ample altitude formanoeuvring.Be aware of the responsibility you carry, if you fly with a passenger. Beeven more careful when you check flight conditions.We also strongly recommend, that you use a certified harness with aback protection, a certified reserve parachute and a helmet.
<strong>U2</strong> Assembly drawingSeite 34
Luftsportgeräte-KennblattSeite 35
Luftsportgeräte-KennblattSeite 36
LeinendatenLeinendatenGleitsegelmuster:Hersteller:Max. Startgewicht:U-<strong>Turn</strong> <strong>U2</strong>U-<strong>Turn</strong> GmbH210 kg1. Leinenspezifikation:LeinenherstellerTypenbezeichnungNennfestigkeitunverarbeitetDurchmesserMaterial KernMaterial MantelLängenbezogeneMasse der LeineLängenbezogeneMasse des KernsDHVLeinenfestigkeitnach 5000KnickungenStammleine Stammleine Stammleine 1. Stockwerk Stockwerk StockwerkTAE-GU TAE-GU TAE-GU TAE-GU TAE-GU TAE-GUTeijinLimited,JapanTeijinLimited,JapanTeijinLimited,JapanTeijinLimited,JapanTeijinLimited,JapanTeijinLimited,Japan469 daN 213 daN 180 daN 165 daN 114 daN 90 daN2.3mm 1.9mm 1.6mm 1.55mm <strong>1.3</strong>mm 1.1mmTechnora Technora Technora Technora Technora TechnoraMantelPolyesterMantelPolyesterMantelPolyesterMantelPolyesterMantelPolyesterMantelPolyester4,92 g/m 4,48 g/m 3,56 g/m 2,96 g/m 1,62 g/m 1,177 g/m181,9 daN 112 daN 112 daN 99 daN 60 daN 47 daN2. Festigkeitsnachweis:2.1 Nachweis der Festigkeit der Stammleinen:StammleinenzahlA-EbeneStammleinenzahlB-EbeneStammleinenzahlA+B-EbeneStammleinenzahl(A+B) x Leinenfest. 1>8 x max. Startgew.und > 800 kg8 10 18 2549,2 kgStammleinenzahlC-EbeneStammleinenzahlD-EbeneStammleinenzahlE-EbeneStammleinenzahlC+D+E-EbeneStammleinenzahl C+D+E xLeinenfestigkeit 1>6 x max.Startge.und > 600 kg8 8 16 1775,8 kg1 Leinenfestigkeit nach 5000 Knickungen aus DHV-Gleitsegel - Leinenbelastungsversuch.e:\2004\u2-tandem\u2-rev2\doc\zulassung\leinendaten.docSeite 37
Line dataSeite 2 Festigkeitsberechnung und Leinendaten Gleitsegel U-<strong>Turn</strong> <strong>U2</strong>2.2 Nachweis der Leinenfestigkeit oberhalb der StammleinenAnzahl 2 der Leinen x Nennfestigkeit für jedes "Stockwerk" > Festigkeit der zugehörigen StammleineStammleinen 1. Stockwerk 2. Stockwerk 3. StockwerkA-LeinenB-LeinenC-LeinenD-Leinen1175,6 kg 1534 kg1373,6 kg 1534 kg1009,8 kg 1456 kg766 kg 1206 kg3. FertigungstoleranzenDie oben unter Leinendaten aufgeführten Punkte sind bei der gesamtenProduktion konstant zu halten. Ebenfalls konstant zu halten sind die Punkte:- Leinenaufbau- Zahl der Litzen Kern- Zahl der Litzen Mantel- Flecht- und Schlaglänge Kern- Flecht- und Schlaglänge Mantel- Schlichte und/oder AusrüstungSoweit bei anderen Parametern der Leine Streuungen auftreten, sind dieToleranzen diese Streuungen auf einem gesonderten Blatt anzugeben.Sachsenkam, 10.01.2005Ort, Datum_____________________________Stempel und Unterschrift Herstellervom DHV auszufüllen:Überprüft am ____________von _____________________Bemerkung:_________________________________________________________________________________________________________________________________________________________________________________________________________2 Wert inkl. Stabiloleine (bei gleichem Leinenmaterial und Durchmesser), wenn die Stabiloleine dieserLeinenebene und diesem Stockwerk zuzuordnen ist.e:\2004\u2-tandem\u2-rev2\doc\zulassung\leinendaten.docSeite 38
DHV MusterzulassungSeite 39
DHV MusterzulassungSeite 40