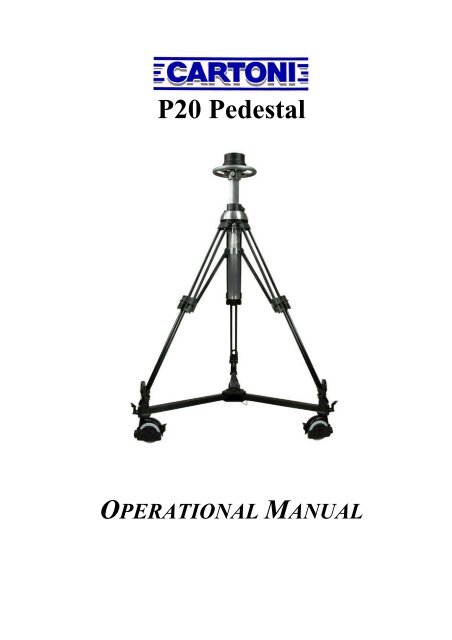
Cartoni P20 Pedistal Manual - Hollywood Studio Rentals
Cartoni P20 Pedistal Manual - Hollywood Studio Rentals
Cartoni P20 Pedistal Manual - Hollywood Studio Rentals
Create successful ePaper yourself
Turn your PDF publications into a flip-book with our unique Google optimized e-Paper software.
<strong>P20</strong> Pedestal©2008 <strong>Cartoni</strong> S.p.A. — All rights reservedThis publication may not be reproduced in full or in part, or memorised, transmittedor translated into any common or computer language, in any form or by anyelectronic, mechanical, magnetic, optical, chemical, manual or other means withoutthe express authorisation in writing of <strong>Cartoni</strong> S.p.A.<strong>Cartoni</strong> SpA holds the right to revise or change this publication without any prioradvice to any person or organization.3/17
<strong>P20</strong> PedestalCONTENTS1. INTRODUCTION 51.1. ANNEXES .....................................................................................................................................................51.2. WARRANTY...................................................................................................................................................51.3. AUTHORISED PERSONNEL ..............................................................................................................................51.4. REGULATIONS AND RELEVANT DOCUMENTATION ............................................................................................62. TRANSPORTATION AND HANDLING 72.1. TRANSPORTATION AND HANDLING ...................................................................................................................72.2. STORAGE ..................................................................................................................................................72.3. FLOORING..................................................................................................................................................72.2. OPERATIONAL CONDITIONS ............................................................................................................................72.3. ASSEMBLY....................................................................................................................................................82.4. DISMANTLING................................................................................................................................................83. TECHNICAL SPECIFICATIONS 93.1. TECHNICAL SPECIFICATIONS...........................................................................................................................93.2. SPECIFICATIONS OF <strong>P20</strong> FITMENTS.................................................................................................................93.3. MACHINE NOISE ............................................................................................................................................93.4. IDENTIFICATION PLATE ...................................................................................................................................94. DESCRIPTION OF THE MACHINE 105. UTILISATION INSTRUCTIONS 115.1. PRESSURISING THE PEDESTAL......................................................................................................................115.2. MOUNTING THE CAMERA SUPPORT HEAD .......................................................................................................125.3. CAMERA HEIGHT ADJUSTMENT .....................................................................................................................135.4. MOVING THE PEDESTAL ...............................................................................................................................135.5 LOCKING THE WHEELS ...................................................................................................................................136. SAFETY SYSTEMS 146.1. WHEEL GUARDS.......................................................................................................................................146.2. PRESSURE VALVE ....................................................................................................................................146.3. REBOUND CONTROL .................................................................................................................................147. IMPROPER USE 157.1. MANIPULATION OF THE MACHINE................................................................................................................157.2. OPERATOR POSITION................................................................................................................................157.3. PEDESTAL STABILITY ................................................................................................................................157.4. PROPER USE ...........................................................................................................................................158. MAINTENANCE 168.1. STANDARD MAINTENANCE .........................................................................................................................168.1.1. CLEANING ....................................................................................................................................168.1.2. PERIODIC INSPECTION ...................................................................................................................168.2. REPAIRS..................................................................................................................................................168.3. SPARE PARTS ..........................................................................................................................................169. DECOMMISSIONING 174/17
<strong>P20</strong> Pedestal1. INTRODUCTIONThe present manual relates to the camerasupport <strong>P20</strong> Pedestal.The tripod can only operate properly andsafely if it is used exactly as prescribed in thepresent manual and the other documentationthat accompanies the <strong>P20</strong> Pedestal.It is therefore essential to read all the saiddocumentation very carefully and to keep itin a safe place.Always make sure that anyone required tooperate the pedestal has fully understood allinstructions and regulations governing its useas well as all the symbols and controls on themachine.Although the equipment features safetydevices, not all the risks inherent its improperuse can be avoided. <strong>Cartoni</strong> S.p.A thereforeaccepts no responsibility for damage to personsor property deriving from improper useof the equipment.WARNING! Do not remove or defaceany labels, indications or warnings affixedto the machine.WARNING! Any modifications to thepedestal and/or its accessories requireprior authorisation by <strong>Cartoni</strong> S.p.A.1.1. ANNEXESThe following form an integral part of thepresent document: Blow-up diagrams of the equipment.1.2. WARRANTYThe <strong>P20</strong> Pedestal is covered by a warrantyagainst manufacturing defects for 5 yearsfrom the date of shipment.The warranty covers replacements of anydefective parts and the labour required for thepurpose; it is the client’s responsibility tobring any product requiring repair to the <strong>Cartoni</strong>S.p.A. office in Rome or to <strong>Cartoni</strong>to <strong>Cartoni</strong> authorized service centre.If it is merely a question of replacing individualcomponents, these will be suppliedfree of charge from the <strong>Cartoni</strong> S.p.A. factory.Transport costs will be charged to theclient. The present warranty is only valid ifthe pedestal has been properly used in accordancewith the manufacturer’s instructionsand has not been mishandled. <strong>Cartoni</strong> S.p.Aimmediately invalidates the warranty if modificationsand/or repairs are carried out by personsnot authorised to do so.Components subject to wear and tear arenot covered by the warranty.The warranty is also invalidated by one ofthe following: failure to comply with payment conditions; failure to carry out appropriate maintenance; removal or mistreatment of platesand/or labels containing data and technicalspecifications.The warranty absolves <strong>Cartoni</strong> S.p.A. ofall responsibility for any direct or indirectdamage deriving from its equipment and/orany time they have to be taken out of service.<strong>Cartoni</strong> S.p.A. accepts no responsibilityfor damage to the pedestal caused by improperuse or the malfunction of other equipmentconnected to the camera support.The warranty only covers machine damageand/or malfunction and does not entitlethe Purchaser to claim any damages for lossof production time due to assumed or provendamage powered by and/or connected to thepedestal itself.The present warranty forms an integralpart of the sales contract and is built into theselling price of the machine.1.3. AUTHORISED PERSONNELExtraordinary maintenance and repairs tothe pedestal can only be carried out by competentpersons who are either employed orauthorised by <strong>Cartoni</strong> S.p.A.or5/17
<strong>P20</strong> PedestalInformation regarding repair/maintenancestaff to be contacted in case of need can beobtained from <strong>Cartoni</strong> S.p.A.1.4. REGULATIONS AND RELEVANTDOCUMENTATIONThe design and construction of the machinecomply with the regulations listed below: EU Directive 98/37 covering the harmonisationof member States’ laws onmachinery (Machine Directive) Presidential Decree 459 of 24/7/96:regulation implementing EU Directives89/392 and subsequent amendments(Italian implementation of theMachine Directive) EN 292/1 (November 1992): Safety ofmachinery – General design principles– Terminology and basic methodology. EN 292/2 (November 1992): Safety ofmachinery – General design principles– Technical specifications and engineeringprinciples EN 811 (October 1996): Safety ofmachinery – Safety distances to preventdanger zones being reached by thelower limbs6/17
<strong>P20</strong> Pedestal2. TRANSPORTATION ANDHANDLING2.1. TRANSPORTATION AND HANDLINGThe pedestal is dismantled into the followingcomponent parts for shipment:ComponentWeight [kg / lbs]3-castered base 6.0 / 13.2Column 9.0 / 19.8These lightweight components are easilyhandled manually.2.2. STORAGEThe pedestal presents no particular storagerequirements as long as it is kept in anenclosed and dry environment, as indeed itshould be whenever it is transported.2.3. FLOORINGFlooring should be solid and strongenough to bear the combined weight of thepedestal and its camera.The pedestal also needs to be positionedon flooring that is almost completely smoothand flat.WARNING! The flooring should besuch as to guarantee the stability of thepedestal, both in movement and at rest.2.2. OPERATIONAL CONDITIONSThe pedestal has been designed and builtto operate in an enclosed, dry environmentand should not be used in presence of finedust or corrosive gases.The pedestal requires the following ambientoperating conditions: temperature: 5 ÷ 40 °C; humidity: 30 ÷ 95% without condensation.Figure 1 — 3-castened base and columnThe following items are also suppliedwith the pedestal: a pump for the manual pressurisationof the pedestal;Purchasers are advised to check the packagingfor damage on arrival and also makesure that none of the components show signsof impact. If any such damage be noted <strong>Cartoni</strong>S.p.A. should be informed immediately.If the product is to be forwarded elsewhere,it should be carefully packed and thegreatest care should be taken not to damageany of the components.7/17Figure 2 — Dolly and spreader circularknobs
<strong>P20</strong> Pedestal3), while the tripod legs join the dollyextension seat; fix the tripod to the skid with the rubberhooks (Fig. 10); adjust the tripod height and level thesystem using the leg tripod levers (Fig.4) and lock them in the desired position; lock the spreader locking lever and thespreader circular knobs;WARNING! When inserting the columninto the castered base be carefulnot to put a foot under the aperture onthe skid, otherwise your foot might becrushed if you lower the column toofar and fast.Figure 3 — Column-dolly assembly andspreader locking lever2.3. ASSEMBLYThe column is mounted onto the skid asfollows: open the dolly legs till to the maximumsliding position and lock them with thecircular knob (Fig. 2); loosen the spreader arms with the spreaderlocking lever and the circularknobs (Fig. 2 e Fig. 3) and insert columnbase into the skid aperture (Fig.Figure 4 — Tripod lever for height adjustment2.4. DISMANTLINGTo remove the column from the skid proceedin the opposite way; please rememberto completely bleed the compressedair out of the column before proceeding.8/17
<strong>P20</strong> Pedestal3. TECHNICALSPECIFICATIONSThe fluid head adapter Q (Fig. 3) is compatiblewith almost all types of camera supportheads on the market.3.1. TECHNICAL SPECIFICATIONSMax pressureMax payloadTotal weightMin. heightMax. heightAdjustable column heightMax. dimensionSteering wheel diameterCaster diameterCasters13 atm / 187 psi25 kg / 55 lbs15 kg / 33 lbs70 cm / 28 in166 cm / 66 in47 cm / 19 in74 cm / 30 in26 cm / 10.2 in10.0 cm / 3.9 in3 × 2 coppie3.2. SPECIFICATIONS OF <strong>P20</strong> FITMENTSEquipment used with the <strong>P20</strong> Pedestalshould comply with the following specifications: optimum weight (camera + accessories+ fluid head): 20 kg / 44 lbs; maximum weight (camera + accessories+ fluid head): 25 kg / 55 lbs; these weights should be distributed insuch a way that the centre of gravity ofthe elements mounted on the pedestalremains well inside the rim of thewheelbase.WARNING! The pedestal should onlybe used to carry cameras within theweight limits outlined above. <strong>Cartoni</strong>S.p.A. accepts no responsibility formalfunctions or damage to persons orproperty that result from using the pedestalfor purposes other than those indicatedin this manual.WARNING! It is strongly recommendednot to stand on the pedestal.3.3. MACHINE NOISEThe A weighted equivalent acoustic pressureemitted by the machine is under 70 dB(A).3.4. IDENTIFICATION PLATEThe identification plate of the machinecarries the following information: manufacturer’s name; type; serial number; year of construction; max. air feed pressure for columnpressurisation.9/17
<strong>P20</strong> Pedestal4. DESCRIPTION OF THEMACHINEPer The column can be fully extendedwhile the camera remains perfectly balancedsimply by activating the bleeder valve to releasethe excess air.The <strong>P20</strong> Pedestal is a portable system forSTUDIO applications.It consists of a column with an air poweredlift mechanism and a collapsible base.It is ideally combined for a camera, fluidhead and accessories with a total weight ofaround 25 kg / 55 lbs.The central column is innovatively designedto provide maximum stability and perfectcontrol, eliminating the risk of reboundsand ensuring exceptionally smooth wheelingcombined with accurate movement.Air can be introduced into the column usinga pump or a compressor attached to thefiller valve.Figura3 — <strong>P20</strong> Pedestal10/17
<strong>P20</strong> Pedestal5. UTILISATION INSTRUCTIONSWARNING! The pedestal should onlybe used as prescribed in section 3. <strong>Cartoni</strong>S.p.A. accepts no responsibility formalfunctions or damage to persons orproperty deriving from using the productin ways other than those indicated.WARNING! Personnel instructed inits proper use should only use the pedestal.Figure 4 — Air in/out, safety valve and pressuregauge5.1. PRESSURISING THE PEDESTALIn order for the pedestal to function, thecolumn must be filled with pressurised air tocounter-balance the weight of the camera.Figure 5 — <strong>Manual</strong> pumpThe pedestal can be pressurised by connectingeither the manual pump (Fig. 5) or thecompressed air circuit to the air intake (Fig.4).WARNING! Before pressurising thepedestal make sure that the lever in Fig. 6 hasbeen locked.11/17
<strong>P20</strong> PedestalWARNING! There is a potential riskof fingers being trapped between theupper and lower sections of the pedestal(see Fig. 9) when the column is beinglowered and particularly whenpressurised air is released; do not insertfingers into this area at such times.5.2. MOUNTING THE CAMERA SUPPORTHEADFigure 6 – Column sliding locking leverFix the fluid head to the support Q (Fig.3) as per instructions supplied with the fluidhead (methods vary from model to model).Then reinsert the fluid head support withthe fluid head itself on the column and placethe camera on the camera support.The air pressure inside the pedestal must beadjusted to match the weight of the accessoriesmounted on it, as indicated in the PayloadDiagrams (Figure 8).The air pressure can be monitored onpressure gauge M (Figure 7)When using the manual pump pressurisationlevels can be monitored on the gauge positionedon the pump base (Figure 5).If using a compressed air circuit, checkthat the air introduced is both clean and dryand that the pressure inside the circuit doesnot rise above 13 atm / 187 psi.Excess pressure can be released from thepedestal simply by pressing the in/out airmechanism (Figure 4).Payload (Kg)Payload (Kg)Payload diagram25201510501 2 3 4 5 6 7 8 9 10 11 12 13Pressure (Atm)252015105Payload diagram014 43 72 101 130 158 187 216Pressure (psi)Figura 8 — Internal air pressure and payloadFigura 7 — Pressure gauge12/17
<strong>P20</strong> PedestalWARNING! Be careful to avoid hittingset personnel when moving thepedestal or the camera. Also take carethat the wheels do not crash into obstacles(e.g. steps) which might be detrimentalto the stability of the pedestal.Figure 9 — Potential risk of fingers beingtrapped and Drag and Lock knobs5.3. CAMERA HEIGHT ADJUSTMENTTo adjust camera height: push lever (Figure 6) sideways tounlock the column; adjust column rising/lowering speedby rotating knob Drag (Fig. 9); to lockcolumn at selected height tighten knobLock (Fig. 9).5.5 LOCKING THE WHEELSThe casters rotate freely when lever T(Figure 10) is raised. By lowering lever T thecasters can be locked into 6 different positionsat 60° intervals. The wheels can belocked individually or all together in thesame position if the pedestal needs to track ina straight line.To block all wheels and hence pedestalmovement, lower lever U (Figure 10).5.4. MOVING THE PEDESTALTo wheel pedestal into position, simplygrasp steering wheel Z (Figure 1) and push.Figure 10 — Hook for tripod locking andwheels position locking levers13/17
<strong>P20</strong> Pedestal6. SAFETY SYSTEMSThe pedestal is equipped with safety systemsdesigned to eliminate the risk of injuryto its operators or other people in its vicinity.WARNING! The presence of safetysystems does not exonerate pedestaloperators from taking the utmost careto avoid any action that might endangerthemselves or their machine.WARNING! It is absolutely forbiddento tamper with, modify or attempt toremove any of the pedestal safety systems.6.1. WHEEL GUARDSThe wheels are provided with cable andfoot guards (see Figure 11) built to EN811:1996 specifications which prevent thewheels interfering with cables or other obstacleswhen the pedestal is being movedaround.6.2. PRESSURE VALVEThe column is fitted with a maximumpressure valve, which prevents air pressurerising above that level in order to protect themachine from malfunctions or breakdowns.The maximum pressure valve is set at 14bar and all column component dimensionshave been selected to tolerate an operatingpressure above that level.WARNING! It is absolutely forbiddento modify these pressure valves in anyway whatsoever. Incorrect pressurevalve settings could cause malfunctionsor breakdowns in the pedestalcomponents and could also seriouslyendanger its operators.6.3. REBOUND CONTROLIn order to prevent column rebounds whenthe column lock is released, the column itselfis equipped with a system that releases air ina controlled, gradual fashion.14/17
<strong>P20</strong> Pedestal7. IMPROPER USEDespite the safety devices, operators musttake the greatest care to avoid situations thatmight endanger themselves or others.Anyone required to operate the pedestalmust be appropriately trained in its properuse and must also be informed about the constructionand workings of the pedestal and itssafety systems.7.1. MANIPULATION OF THE MACHINEThe column must be completely depressurisedand detached from the compressed airsystem, if any, before any assembly, dismantling,maintenance or adjustment work is carriedout.To depressurise the column simply operatein the in-out pressure valve (Fig. 6) gaugezero pressure.Competent personnel trained in the correctprocedures should only carry out anysuch work.7.2. OPERATOR POSITIONAll operations should be carried out atfloor level.It is strictly forbidden to handle the machinefrom a position on any lift, hoist orcrane and equally forbidden to stand on thepedestal itself.WARNING! It is strictly forbidden toclimb onto the pedestal.7.3. PEDESTAL STABILITYThe distribution of the weight of theelements mounted on the pedestal(fluid head and camera) should be suchas to maintain their centre of gravitywell inside the rim of the casteredbase.WARNING! Items whose centre ofgravity is too close to the rim of thecastered base could cause the pedestalto tip over eventually while movingthe pedestal.When positioning the pedestal, make surethat the wheels do not run into obstacles suchas steps, since this could compromise the stabilityof the pedestal.7.4. PROPER USEThe pedestal has been designed and builtfor use as prescribed in section 3 of this manual.WARNING! It is strictly forbiddento use the pedestal in any other way than indicatedhere.15/17
<strong>P20</strong> Pedestal8. MAINTENANCEThe pedestal has been designed and builtfor minimum maintenance and problem-freeefficiency over time.After any maintenance operation, the pedestalmust be tested to ensure that it is workingproperly.WARNING! Before any maintenanceoperation is carried out the pedestalmust be detached from any air supplyline and the column completely depressurisedas described in section 5.1.8.1. STANDARD MAINTENANCEThe standard maintenance operations describedhere will be sufficient, if properlyperformed, to keep the pedestal operating efficiently.WARNING! All standard maintenanceoperations should be carried outby competent personnel instructed inthe correct and safe use of the pedestal.8.1.1. CLEANINGUse a damp cloth and no harsh cleaningproducts to remove dust, grease or other substancesfrom the pedestal. It is particularlyimportant to keep the wheels clean so thatthey can rotate freely..8.2. REPAIRSOnly the <strong>Cartoni</strong>’s own technical servicingstaff or persons authorised by <strong>Cartoni</strong>S.p.A. should be entrusted with any repairs tothe pedestal.Information on authorised servicing staffto contact is obtainable from <strong>Cartoni</strong> S.p.A.For fast, effective problem solving purposes<strong>Cartoni</strong> S.p.A. should be given the followinginformation: pedestal type; serial number (V position in Figure 9); the nature of the defect or its visiblesymptoms and when the problem arises.WARNING! All warranty conditionsare invalidated should any repair operationsbe attempted by anyone notauthorised by <strong>Cartoni</strong> S.p.A.8.3. SPARE PARTSAll spare parts should be ordered from<strong>Cartoni</strong> S.p.A. which will either supply themdirectly or indicate where they may be obtained.Refer to the blow up in the annexes to thismanual for the identification of spare parts.Remember that repairs should only be carriedout by persons employed or authorisedby <strong>Cartoni</strong> S.p.A..8.1.2. PERIODIC INSPECTIONAt least once a month all pedestal componentsshould be carefully inspected and anydamaged parts immediately replaced to preventfailures that might compromise thesafety of the pedestal.WARNING! All warranty conditionsare invalidated should any spare partsdifferent from those originallymounted on the pedestal be employed.16/17
<strong>P20</strong> Pedestal9. DECOMMISSIONINGIf the pedestal is irreparable it should betaken out of service or at least clearly labelledas “out of order”.Since the pedestal is largelymade of steel and aluminium,most of its material can be recycled.Once a pedestal is decommissioned, it isadvisable to separate out its various materialsfor differentiated utilization or disposal.Since none of the materials used on thepedestal are toxic or present any risk to thehealth of its operators, they can be handledwithout the need for any special precautions.17/17


