XPower Powerpack 300 (Emergency Power) - Xantrex
XPower Powerpack 300 (Emergency Power) - Xantrex
XPower Powerpack 300 (Emergency Power) - Xantrex

You also want an ePaper? Increase the reach of your titles
YUMPU automatically turns print PDFs into web optimized ePapers that Google loves.
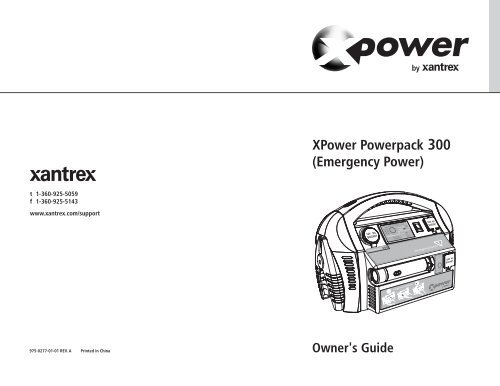
y<strong>X<strong>Power</strong></strong> <strong><strong>Power</strong>pack</strong> <strong>300</strong>(<strong>Emergency</strong> <strong>Power</strong>)t 1-360-925-5059f 1-360-925-5143www.xantrex.com/support975-0277-01-01 REV. A Printed in ChinaOwner's Guide
y<strong>X<strong>Power</strong></strong> <strong><strong>Power</strong>pack</strong><strong>300</strong>Owner’s Guide
About <strong>Xantrex</strong><strong>Xantrex</strong> Technology Inc. is a world-leading supplier of advanced powerelectronics and controls with products from 50 watt mobile units to one MWutility-scale systems for wind, solar, batteries, fuel cells, microturbines, andbackup power applications in both grid-connected and stand-alone systems.<strong>Xantrex</strong> products include inverters, battery chargers, programmable powersupplies, and variable speed drives that convert, supply, control, clean, anddistribute electrical power.Trademarks<strong>X<strong>Power</strong></strong> <strong><strong>Power</strong>pack</strong> <strong>300</strong> is a trademark of <strong>Xantrex</strong> International. <strong>Xantrex</strong> is aregistered trademark of <strong>Xantrex</strong> International.Other trademarks, registered trademarks, and product names are the property oftheir respective owners and are used herein for identification purposes only.Notice of Copyright<strong>X<strong>Power</strong></strong> <strong><strong>Power</strong>pack</strong> <strong>300</strong> Owner’s Guide © February 2006 <strong>Xantrex</strong> International.All rights reserved.Exclusion for DocumentationUNLESS SPECIFICALLY AGREED TO IN WRITING, XANTREX TECHNOLOGY INC.(“XANTREX”)(a) MAKES NO WARRANTY AS TO THE ACCURACY, SUFFICIENCY OR SUITABILITY OFANY TECHNICAL OR OTHER INFORMATION PROVIDED IN ITS MANUALS OR OTHERDOCUMENTATION.(b) ASSUMES NO RESPONSIBILITY OR LIABILITY FOR LOSSES, DAMAGES, COSTS OREXPENSES, WHETHER SPECIAL, DIRECT, INDIRECT, CONSEQUENTIAL OR INCIDENTAL,WHICH MIGHT ARISE OUT OF THE USE OF SUCH INFORMATION. THE USE OF ANYSUCH INFORMATION WILL BE ENTIRELY AT THE USER’S RISK; AND(c) REMINDS YOU THAT IF THIS MANUAL IS IN ANY LANGUAGE OTHER THANENGLISH, ALTHOUGH STEPS HAVE BEEN TAKEN TO MAINTAIN THE ACCURACY OFTHE TRANSLATION, THE ACCURACY CANNOT BE GUARANTEED. APPROVEDXANTREX CONTENT IS CONTAINED WITH THE ENGLISH LANGUAGE VERSION WHICHIS POSTED AT www.xantrex.com.Date and RevisionFebruary 2006 Revision APart Number975-0277-01-01Product Number852-0301Contact InformationPhone: 1 360-925-5059Fax: 1 360-925-5143Website: www.xantrex.com/support
About This GuidePurposeThe purpose of this Owner’s Guide is to provide explanationsand procedures for installing, operating, maintaining, andtroubleshooting the <strong>X<strong>Power</strong></strong> <strong><strong>Power</strong>pack</strong> <strong>300</strong>.OrganizationThis guide is organized into five chapters and an appendix:Chapter 1, “Introduction”, provides an overview of the mainfeatures of the <strong>X<strong>Power</strong></strong> <strong><strong>Power</strong>pack</strong> <strong>300</strong>.Chapter 2, “Features”, provides a detailed description of thefeatures of the <strong>X<strong>Power</strong></strong> <strong><strong>Power</strong>pack</strong>.Chapter 3, “Operation”, gives instructions for the mainoperational procedures of the <strong>X<strong>Power</strong></strong> <strong><strong>Power</strong>pack</strong>, includingoperating AC and DC appliances, using the air compressor,and jump-starting an engine.Chapter 4, “Maintenance”, gives instructions for rechargingthe <strong>X<strong>Power</strong></strong> <strong><strong>Power</strong>pack</strong> and changing the built-in light bulb.Chapter 5, “Troubleshooting”, provides a troubleshootingguide to the <strong>X<strong>Power</strong></strong> <strong><strong>Power</strong>pack</strong>.Appendix A, “Specifications”, provides the electrical andphysical specifications of the <strong>X<strong>Power</strong></strong> <strong><strong>Power</strong>pack</strong>.“Warranty and Return” at the end of this guide providesdetailed warranty information and instructions for gettingwarranty service.i
About This GuideConventions UsedThe following conventions are used in this guide.WARNINGWarnings identify conditions that could result in personal injury orloss of life.CAUTIONCautions identify conditions or practices that could result indamage to the unit or to other equipment.Important: These notes describe an important action item or anitem that you must pay attention to.Abbreviations and AcronymsAACAGMAhDCHzmAMHIRMSUPSVWAmpere(s)Alternating CurrentAbsorbed Glass MatAmp-hoursDirect CurrentHertzMilli-ampereMetal halide arcRoot Mean SquareUninterruptible <strong>Power</strong> SupplyVolt(s)Watt(s)ii
Important Safety InstructionsThe <strong>X<strong>Power</strong></strong> <strong><strong>Power</strong>pack</strong> <strong>300</strong> generates a type of AC powersimilar to a normal household wall outlet. Operating the<strong>X<strong>Power</strong></strong> <strong><strong>Power</strong>pack</strong> incorrectly or misusing it may damagethe equipment or create hazardous conditions for the user.Important: Before using your <strong>X<strong>Power</strong></strong> <strong><strong>Power</strong>pack</strong> <strong>300</strong>, be sureto read and save these safety instructions.Warnings and CautionsWARNING: Shock hazard. Keep away fromchildren.The <strong>X<strong>Power</strong></strong> <strong><strong>Power</strong>pack</strong> <strong>300</strong> generates the same potentially lethalAC power as a normal household wall outlet. Do not insert foreignobjects into the AC power outlet, the DC power outlet, or theventilation holes. Do not expose this product to water, rain, snow,or spray.Do not open the <strong>X<strong>Power</strong></strong> <strong><strong>Power</strong>pack</strong> <strong>300</strong>. There are no userserviceableparts inside the unit.CAUTIONThe unit will be damaged if connected to any AC load that has itsneutral conductor connected to ground. Such loads include ACdistribution wiring and house wiring.CAUTIONDo not expose the <strong>X<strong>Power</strong></strong> <strong><strong>Power</strong>pack</strong> <strong>300</strong> to temperatures over40°C (104°F).iii
Important Safety InformationWARNING: Explosion hazardDo not use this product where there are flammable fumes or gases,such as in the bilge of a gasoline-powered boat, or near propanetanks. Do not use this product in an enclosure containingautomotive-type lead-acid batteries. These batteries, unlike thesealed AGM battery in the <strong>X<strong>Power</strong></strong> <strong><strong>Power</strong>pack</strong> <strong>300</strong>, vent explosivehydrogen gas which can be ignited by sparks from electricalconnections.When working on electrical equipment, always ensure someone isnearby to help you in an emergency.WARNING: Heated surfaceEnsure at least 2" (5 cm) air space is maintained on all sides of the<strong>X<strong>Power</strong></strong> <strong><strong>Power</strong>pack</strong> <strong>300</strong>. During operation, keep away frommaterials that may be affected by high temperatures such asblankets, pillows and sleeping bags.WARNING: Fire hazardNever allow jump-start cables’ red and black clamps to touch eachother or another common metal conductor. This could causedamage to the unit and/or create a sparking/explosion hazard.Always store the clamps in the appropriate holder on each side ofthe <strong>X<strong>Power</strong></strong> <strong><strong>Power</strong>pack</strong> after use.WARNING: Fire hazardJump-start cable clamps must be connected positive to positive (redclamp to battery “+”) and negative to negative (black clamp tobattery “–”). A reverse polarity connection (positive to negative)may cause damage to the unit and/or create a sparking/explosionhazard.WARNING: Limitations on useDo not use this product in connection with life support systems orother medical equipment or devices.iv
Important Safety InformationWARNING: Fire hazardThe jump-start feature is designed for short term operation only—less than 4 seconds. Operating the jump-start feature for more than4 seconds may cause damage to the unit. Allow the <strong>X<strong>Power</strong></strong><strong><strong>Power</strong>pack</strong> <strong>300</strong> to cool down for at least 3 minutes after each jumpstart.WARNING: Fire hazardDo not leave the compressor unattended while operating. Thecompressor is designed for short term operation only. Operation ofthe compressor over an extended period of time will cause thecompressor unit to overheat and may cause damage. Allow thecompressor to cool down for 10 minutes after each 10 minutes ofcontinuous operation.v
Important Safety InformationPrecautions When Working With YourVehicle BatteryWARNING: Risk of Explosion, Fire or Burns1. Follow all instructions published by the batterymanufacturer and the manufacturer of the equipment inwhich the battery is installed.2. Make sure the area around the battery is well ventilated.3. Never smoke or allow a spark or flame in the vicinity ofthe engine or batteries.4. Be careful not to drop a metal object on the battery orallow a metal tool to simultaneously touch the positiveand negative cable ends or battery terminals. It mightspark or short-circuit the battery or other electrical partsand cause an explosion.5. Remove personal metal items such as rings, bracelets,necklaces, and watches when working with a lead-acidbattery. A lead-acid battery produces a short-circuitcurrent high enough to weld a ring or other similarobjects to metal, causing a severe burn.6. If you need to remove a battery, always remove thepositive terminal from the battery first. Make sure allaccessories are off so you don’t cause an arc.7. Someone should be within range of your voice, or closeenough to come to your aid when you work near alead-acid battery.8. Have plenty of fresh water and soap nearby in casebattery acid contacts skin, clothing, and/or eyes.9. Wear complete eye protection and clothing protection.Avoid touching your eyes while working near batteries.vi
Important Safety Information10. If battery acid contacts skin or clothing, washimmediately with soap and water. If acid enters youreyes, immediately flood them with running cold water forat least twenty minutes and get medical attentionimmediately.11. Keep a supply of baking soda on hand in the area of thebatteries. Baking soda neutralizes lead-acid batteryelectrolyte.vii
Important Safety InformationPrecautions for Using RechargeableAppliancesCAUTIONThe output of the <strong>X<strong>Power</strong></strong> <strong><strong>Power</strong>pack</strong> <strong>300</strong> inverter is a nonsinusoidalmodified sine wave, which is different from pure sinewave utility-supplied electricity. Certain types of load equipmentmay be damaged.Most rechargeable battery-operated equipment uses aseparate charger or transformer that is plugged into an ACreceptacle and produces a low voltage charging output.Some chargers for rechargeable batteries can be damaged ifconnected to the <strong>X<strong>Power</strong></strong> <strong><strong>Power</strong>pack</strong> <strong>300</strong>.Do not use the following with the <strong>X<strong>Power</strong></strong> <strong><strong>Power</strong>pack</strong> <strong>300</strong>:• Small battery-operated appliances like flashlights, razors,and night lights that can be plugged directly into an ACreceptacle to recharge.• Some chargers for battery packs used in hand powertools. These affected chargers display a warning labelstating that dangerous voltages are present at the batteryterminals.Note: If you are unsure about using your rechargeable appliancewith the <strong>X<strong>Power</strong></strong> <strong><strong>Power</strong>pack</strong> <strong>300</strong>, contact the equipmentmanufacturer to determine the rechargeable appliance’scompatibility with the modified sine wave (non-sinusoidal) ACwaveform.viii
Contents1 IntroductionAbout the <strong>X<strong>Power</strong></strong> <strong><strong>Power</strong>pack</strong> <strong>300</strong> - - - - - - - - - - - - - - - - - - - - - 1Comprehensive Protection - - - - - - - - - - - - - - - - - - - - - - - - - - - 1Automatic Overload - - - - - - - - - - - - - - - - - - - - - - - - - - - - 1Overheating - - - - - - - - - - - - - - - - - - - - - - - - - - - - - - - - - - 1Low Battery Protection - - - - - - - - - - - - - - - - - - - - - - - - - - 22 FeaturesMaterials List - - - - - - - - - - - - - - - - - - - - - - - - - - - - - - - - - - - 3<strong>X<strong>Power</strong></strong> <strong><strong>Power</strong>pack</strong> Features - - - - - - - - - - - - - - - - - - - - - - - - - 4Front Panel Detail- - - - - - - - - - - - - - - - - - - - - - - - - - - - - - 4Left Side View - - - - - - - - - - - - - - - - - - - - - - - - - - - - - - - - 6Accessories - - - - - - - - - - - - - - - - - - - - - - - - - - - - - - - - - - 73 OperationOperating Conditions and Guidelines - - - - - - - - - - - - - - - - - - - 9Choosing a Location - - - - - - - - - - - - - - - - - - - - - - - - - - - - - - 10Using <strong>X<strong>Power</strong></strong> <strong><strong>Power</strong>pack</strong> for the First Time - - - - - - - - - - - - - 11Recharging with the AC Charger - - - - - - - - - - - - - - - - - - - - - 11Using the Flashlight - - - - - - - - - - - - - - - - - - - - - - - - - - - - - - 13Operating AC Appliances - - - - - - - - - - - - - - - - - - - - - - - - - - 14Understanding AC Appliances - - - - - - - - - - - - - - - - - - - - 14Run Time on Typical AC Appliances - - - - - - - - - - - - - 14High Surge Appliances - - - - - - - - - - - - - - - - - - - - - - 15Trouble Appliances - - - - - - - - - - - - - - - - - - - - - - - - - 15Operating Several Appliances at Once - - - - - - - - - - - - 16Operating an AC Appliance - - - - - - - - - - - - - - - - - - - - - - 16Operating 12 V DC Appliances - - - - - - - - - - - - - - - - - - - - - - 17Jump-Starting a Vehicle’s Engine - - - - - - - - - - - - - - - - - - - - - 18ix
Using the Air Compressor - - - - - - - - - - - - - - - - - - - - - - - - - - 21Over-temperature Safety Protection - - - - - - - - - - - - - - - - - 21Inflating Tires - - - - - - - - - - - - - - - - - - - - - - - - - - - - - - - 22Inflating Small Sports Equipment - - - - - - - - - - - - - - - - - - 23Connecting to an External Battery- - - - - - - - - - - - - - - - - - - - - 244 MaintenanceBattery Maintenance - - - - - - - - - - - - - - - - - - - - - - - - - - - - - - 27Recharging the <strong>X<strong>Power</strong></strong> <strong><strong>Power</strong>pack</strong> Battery - - - - - - - - - - - - - - 28Recharging with the AC Charger- - - - - - - - - - - - - - - - - - - 28Recharging with the DC Charging Cable - - - - - - - - - - - - - 30Recharging with a Generator’s Regulated 12 V DC Outlet - 32Recharging from a Solar Panel - - - - - - - - - - - - - - - - - - - - 33Recycling - - - - - - - - - - - - - - - - - - - - - - - - - - - - - - - - - - - - - 345 TroubleshootingCommon Problems - - - - - - - - - - - - - - - - - - - - - - - - - - - - - - - 35Buzz in Audio Equipment - - - - - - - - - - - - - - - - - - - - - - - 35Television Interference - - - - - - - - - - - - - - - - - - - - - - - - - 35Troubleshooting Reference - - - - - - - - - - - - - - - - - - - - - - - - - 36ASpecificationsElectrical Specifications - - - - - - - - - - - - - - - - - - - - - - - - - - - 41Physical Specifications - - - - - - - - - - - - - - - - - - - - - - - - - - - - 43Warranty and Return - - - - - - - - - - - - - - - - - - - - - - - - - - - 45x
1 IntroductionAbout the <strong>X<strong>Power</strong></strong> <strong><strong>Power</strong>pack</strong> <strong>300</strong>Easy-to-use and designed for years of reliable service, the<strong>X<strong>Power</strong></strong> <strong><strong>Power</strong>pack</strong> can run many AC appliances and12 V DC appliances whenever you need power for work orplay, at home or on the road.<strong>X<strong>Power</strong></strong> <strong><strong>Power</strong>pack</strong>:• <strong>Power</strong>s 120 V AC appliances• <strong>Power</strong>s 12 V DC appliances• Jump-starts vehicle engines• Provides lighting for emergency use• Inflates vehicle tires and small sports equipmentComprehensive ProtectionAutomatic OverloadOverheatingThe <strong>X<strong>Power</strong></strong> <strong><strong>Power</strong>pack</strong> has built-in protection against outputoverload. If you connect an appliance that draws more than<strong>300</strong> W to the AC power outlet on the <strong>X<strong>Power</strong></strong> <strong><strong>Power</strong>pack</strong>, orone which draws excessive surge power, the power to the ACpower outlet automatically shuts off.The <strong>X<strong>Power</strong></strong> <strong><strong>Power</strong>pack</strong> is protected from overheating. If theinverter exceeds a safe temperature, power to the AC poweroutlet automatically shuts off.1
Comprehensive ProtectionLow Battery ProtectionLow battery protection protects the internal battery fromexcessive discharge and possible damage. When the AC<strong>Power</strong> ON/OFF switch is turned ON, an audible alarm alertsyou when the internal battery is nearly discharged(11.0 V DC) and the unit turns off at 10.5 V DC.2
2 FeaturesChapter 2 describes the main features of the <strong>X<strong>Power</strong></strong><strong><strong>Power</strong>pack</strong> <strong>300</strong>. We recommend that you familiarize yourselfwith these features before operating the unit.Materials ListYour <strong>X<strong>Power</strong></strong> <strong><strong>Power</strong>pack</strong> package includes these items:p <strong>X<strong>Power</strong></strong> <strong><strong>Power</strong>pack</strong>p Owner’s Guidep AC chargerp DC charging cablep Nozzle and needle adaptors for the compressorp Detachable flashlight3
<strong>X<strong>Power</strong></strong> <strong><strong>Power</strong>pack</strong> Features<strong>X<strong>Power</strong></strong> <strong><strong>Power</strong>pack</strong> FeaturesFront Panel Detail12 3 4567 89FeatureDescription1 DC power outlet:• <strong>Power</strong>s 12 V DC auto, RV or marine appliances• Recharges <strong>X<strong>Power</strong></strong> <strong><strong>Power</strong>pack</strong> from a 12 V outlet in a vehicleusing the DC charging cable.2 Battery Level LEDs illuminate to indicate the <strong>X<strong>Power</strong></strong> <strong><strong>Power</strong>pack</strong>battery charge level. All LEDs (two green, one yellow and one red)are illuminated when the battery is fully charged (Full), only the redLED is illuminated when the battery is completely discharged(Empty).3 Battery Level button triggers the Battery Level Full/Empty LEDindicators. Press to view the battery charge status.4
<strong>X<strong>Power</strong></strong> <strong><strong>Power</strong>pack</strong> FeaturesFeature4 Battery Status LED illuminates when the <strong>X<strong>Power</strong></strong> <strong><strong>Power</strong>pack</strong> ischarging (when an AC charger is connected to the <strong>X<strong>Power</strong></strong><strong><strong>Power</strong>pack</strong>’s AC charger input socket and plugged into thehousehold 120 V AC outlet).5 Red Incorrect Jumpstart Connection LED illuminates and analarm sounds when the jump-starting clamps are improperlyconnected to the vehicle battery.6 Green Correct Jumpstart Connection LED illuminates when thejump-starting clamps are properly connected to the vehicle battery.7 AC power ON/OFF switch illuminates when the switch is turnedON.8 AC power outlets are standard 3-prong outlets that supply120 V AC power for running AC appliances when the AC powerON/OFF switch is on.9 Flashlight detaches and recharges from the <strong><strong>Power</strong>pack</strong>.NotshownDescriptionAudible alarm (inside the unit) sounds in the event of overheatingor low <strong>X<strong>Power</strong></strong> <strong><strong>Power</strong>pack</strong> battery condition.5
<strong>X<strong>Power</strong></strong> <strong><strong>Power</strong>pack</strong> FeaturesLeft Side View123456FeatureDescription1 Pressure gauge shows the PSI (lb/in 2 ).2 Jump-starting clamp3 Jump-start power switch4 AC charger input socket5 Compressor ON/OFF switch6 Nozzle packet compartmentNot shownValve connector with connector hose6
<strong>X<strong>Power</strong></strong> <strong><strong>Power</strong>pack</strong> FeaturesAccessories12AccessoryDescription1 AC charger lets you recharge the <strong>X<strong>Power</strong></strong> <strong><strong>Power</strong>pack</strong> from astandard AC wall outlet and can only be used to recharge theinternal battery of the <strong>X<strong>Power</strong></strong> <strong><strong>Power</strong>pack</strong>.2 DC charging cable lets you recharge the <strong>X<strong>Power</strong></strong> <strong><strong>Power</strong>pack</strong>from a 12 V system in a car, SUV, RV or a boat.Not shownNozzle packet containing nozzle adaptor and sports needleadaptor.7
3 OperationChapter 3 explains how to operate the <strong>X<strong>Power</strong></strong> <strong><strong>Power</strong>pack</strong><strong>300</strong> efficiently. This chapter covers:• Recharging the <strong>X<strong>Power</strong></strong> <strong><strong>Power</strong>pack</strong> for first-time use• Using the flashlight• Operating AC appliances and 12 V DC appliances• Jump-starting a vehicle’s engine• Using the air compressor• Connecting to an external battery for additional run timeOperating Conditions and GuidelinesCAUTIONRead all operating instructions before operating the <strong>X<strong>Power</strong></strong><strong><strong>Power</strong>pack</strong>.CAUTIONThe <strong>X<strong>Power</strong></strong> <strong><strong>Power</strong>pack</strong> is not intended for use as anuninterruptible power supply.Important: The <strong>X<strong>Power</strong></strong> <strong><strong>Power</strong>pack</strong> is not suitable for use withcertain products and loadsThe continuous output wattage of this product is limited to320 watts total when supplying backup power from itsbatteries. This limit applies to the total of all items pluggedinto the product.This output wattage is not sufficient to run the followingproducts:• Items producing heat: examples include toasters,microwaves, heaters, pellet stove igniters9
Choosing a Location• Motor loads with high startup power surge requirements:Sump pumps, circular saws, larger power tools,refrigerators.Visit www.xantrex.com for higher power solutions.Choosing a LocationWARNING: Fire or explosionThe <strong>X<strong>Power</strong></strong> <strong><strong>Power</strong>pack</strong> contains components that tend to producearcs or sparks. To prevent fire or explosion, do not operate the<strong>X<strong>Power</strong></strong> <strong><strong>Power</strong>pack</strong> in compartments containing batteries orflammable materials, or in locations that require ignition-protectedequipment.The <strong>X<strong>Power</strong></strong> <strong><strong>Power</strong>pack</strong> should be operated only in a locationthat meets these requirements:DryCoolVentilatedSafeProtectedfrom batterygasesDo not allow water or other liquids to drop or splash on the<strong>X<strong>Power</strong></strong> <strong><strong>Power</strong>pack</strong>.Ambient air temperature should be between 0 and 40ºC(32 and 104ºF)—the cooler the better within this range.Leave at least 2" (5 cm) clearance around the <strong>X<strong>Power</strong></strong><strong><strong>Power</strong>pack</strong> for air flow. Ensure that the ventilation openingsare not obstructed.Do not operate the unit in the same compartment asbatteries or in any compartment capable of storingflammable liquids like gasoline.Do not operate the <strong>X<strong>Power</strong></strong> <strong><strong>Power</strong>pack</strong> where it will beexposed to battery gases. These gases are very corrosive,and prolonged exposure will damage the <strong>X<strong>Power</strong></strong><strong><strong>Power</strong>pack</strong>.10
Using <strong>X<strong>Power</strong></strong> <strong><strong>Power</strong>pack</strong> for the First TimeUsing <strong>X<strong>Power</strong></strong> <strong><strong>Power</strong>pack</strong> for the First TimeImportant: Prior to operating your AC appliance or 12 V DCappliance, ensure that the battery of the <strong>X<strong>Power</strong></strong> <strong><strong>Power</strong>pack</strong> isfully charged. If the battery has been fully discharged, rechargingwith the AC charger may take up to 24 hours.Recharging with the AC ChargerNote: The <strong>X<strong>Power</strong></strong> <strong><strong>Power</strong>pack</strong> battery level LEDs are onlyaccurate when the <strong>X<strong>Power</strong></strong> <strong><strong>Power</strong>pack</strong> has been disconnectedfrom all appliances and all charging sources for fifteen minutes.Recharging with the AC charger is a true “plug-in-andforget”charging method. We recommend leaving the ACcharger connected when the <strong>X<strong>Power</strong></strong> <strong><strong>Power</strong>pack</strong> is not in use.CAUTIONDo not operate AC or DC appliances with the <strong>X<strong>Power</strong></strong> <strong><strong>Power</strong>pack</strong>while the <strong>X<strong>Power</strong></strong> <strong><strong>Power</strong>pack</strong> is being recharged with the ACcharger.The AC charger may be permanently damaged if AC appliances or12 V DC appliances are operated while the AC charger isconnected.To recharge with the AC charger:1. Disconnect any 12 V DC appliances from the DC poweroutlets.2. Disconnect any AC products from the <strong>X<strong>Power</strong></strong><strong><strong>Power</strong>pack</strong> and turn the AC <strong>Power</strong> ON/OFF switch to OFF.3. Insert the AC charger cable end into the AC charger inputsocket located under the red jump-starting clamp (seefigure on page 6).4. Plug the AC charger into a standard AC wall outlet.The Battery Status LED changes from red to green whencharging is complete (about 24 hours if the battery iscompletely discharged).11
Recharging with the AC ChargerImportant: The 24-hour charging time for the <strong>X<strong>Power</strong></strong><strong><strong>Power</strong>pack</strong> assumes that there is 120 V AC at the AC wall outlet.If the voltage is less than 120 V AC, it may take more than 24hours to fully recharge the <strong>X<strong>Power</strong></strong> <strong><strong>Power</strong>pack</strong>. If, after 24 hoursof charging, the Battery Status LED remains red, continue tocharge the unit for another 12 hours. The unit will be ready for useeven if the Battery Status LED remains red.Important: If you keep the <strong>X<strong>Power</strong></strong> <strong><strong>Power</strong>pack</strong> in storage, thebattery will self-discharge over time. Remember to recharge thebattery every three months to keep the <strong>X<strong>Power</strong></strong> <strong><strong>Power</strong>pack</strong>operational.Note: Once fully charged, the charging current automaticallyreduces to a maintenance charge mode, and the <strong>X<strong>Power</strong></strong><strong><strong>Power</strong>pack</strong> may be left permanently connected to the AC charger.12
Using the FlashlightUsing the FlashlightThe <strong>X<strong>Power</strong></strong> <strong><strong>Power</strong>pack</strong> has a detachable flashlight thatoperates for up to 18 hours before needing to be recharged.To detach the flashlight, push the rim of the flashlight lensstraight back, then swing the light away from the unit.To replace the flashlight, insert the flashlight base first,aligning the arrow on the flashlight base with the arrow onthe <strong><strong>Power</strong>pack</strong>, then click the front of the flashlight into place(see Figure 3-1).To replace, alignthe arrows andinsert the base first.Charge FlashlightbuttonFigure 3-1 Removing and Replacing the FlashlightThe flashlight recharges whenever the <strong>X<strong>Power</strong></strong> <strong><strong>Power</strong>pack</strong> ischarging with the AC charger or DC charging cable.When a source of charging power is not available, you canrecharge the flashlight from the <strong>X<strong>Power</strong></strong> <strong><strong>Power</strong>pack</strong> internalbattery.To recharge the flashlight from the <strong>X<strong>Power</strong></strong> <strong><strong>Power</strong>pack</strong>:• Press and hold the Charge Flashlight button for twoseconds.While the flashlight recharges, the green Status LED turnson. When the flashlight is charged, the Status LED turns off.A fully discharged flashlight takes 10 hours to recharge fromthe <strong>X<strong>Power</strong></strong> <strong><strong>Power</strong>pack</strong>.13
Operating AC AppliancesOperating AC AppliancesUnderstanding AC AppliancesAC appliances are rated by how much electrical power (inwatts) they consume. <strong>X<strong>Power</strong></strong> <strong><strong>Power</strong>pack</strong> can power mostappliances within its continuous power rating (240 W, 1 A).Some appliances may be difficult or impossible to operatefrom the <strong>X<strong>Power</strong></strong> <strong><strong>Power</strong>pack</strong>. They may have high surgerequirements or should not be run from the <strong>X<strong>Power</strong></strong><strong><strong>Power</strong>pack</strong>. See “High Surge Appliances” on page 15 and“Trouble Appliances” on page 15.Run Time on Typical AC AppliancesNote: The fewer watts an AC appliance uses, the longer the<strong>X<strong>Power</strong></strong> <strong><strong>Power</strong>pack</strong> will operate before recharging is required.Typical AC appliances that can be used on the <strong>X<strong>Power</strong></strong><strong><strong>Power</strong>pack</strong> are listed in Table 3-1.Table 3-1 AC Appliances and Run TimesAC ApplianceWatts a Hours bCordless telephone (stand by) 5 20Clock radio 8 11Portable stereo 10 9Fluorescent work light 14 5Fireplace fan 20 4Laptop computer 25 3Table lamp 40 1 hr. 30 min.Color TV – 13" 60 1 hr. 30 min.Computer with 15" monitor 150 30 min.a. Represents actual power consumption as measured on sample appliances.b. Operating times assume a fully charged 12 Ah battery and may vary basedon model/brand of appliance.14
Operating AC AppliancesHigh Surge AppliancesTrouble AppliancesThe wattage rating of AC appliances is the average powerused by the appliance. Appliances such as televisions andappliances with motors consume much more power than theiraverage rating when they are first switched on.Although the <strong>X<strong>Power</strong></strong> <strong><strong>Power</strong>pack</strong> can supply momentarysurge power up to 600 W, some appliances may exceed thecapabilities of the <strong>X<strong>Power</strong></strong> <strong><strong>Power</strong>pack</strong> and trigger the safetyoverload shutdown circuit.CAUTIONThe output of the <strong>X<strong>Power</strong></strong> <strong><strong>Power</strong>pack</strong>’s inverter is a non-sinusoidalmodified sine wave. Some equipment may be damaged by the<strong>X<strong>Power</strong></strong> <strong><strong>Power</strong>pack</strong>’s inverter modified sine wave (non-sinusoidal)output .Some appliances, including the types listed below, may bedamaged if they are connected to the inverter:• Electronics that modulate RF (radio frequency) signalson the AC line will not work and may be damaged.• Speed controllers found in some fans, power tools,kitchen appliances, and other loads may be damaged.• Some chargers for small rechargeable batteries can bedamaged. See “Precautions for Using RechargeableAppliances” on page viii for details.• Metal halide arc (MHI) lights can be damaged.Note: If you are unsure about powering any device with theinverter, contact the manufacturer of the device.15
Operating AC AppliancesOperating Several Appliances at OnceYou can run several AC appliances if the total rating of all theappliances (in watts) does not exceed 240 W. Run time,however, will decrease accordingly with the number ofappliances being operated and the AC power beingconsumed.Operating an AC ApplianceBefore operating your AC appliance, ensure that the batteryof the <strong>X<strong>Power</strong></strong> <strong><strong>Power</strong>pack</strong> is fully charged. See “Rechargingwith the AC Charger” on page 11 for details.To operate an AC appliance:1. Turn the AC <strong>Power</strong> On/Off Switch to the ON position.The switch illuminates to indicate AC power is availableat the AC power outlets.2. Remove the protective cover on the AC power outlets.3. Plug the AC appliance into an AC power outlet and turnthe appliance on. <strong>X<strong>Power</strong></strong> <strong><strong>Power</strong>pack</strong> will operate mostdevices rated up to 240 W.4. Recharge the <strong>X<strong>Power</strong></strong> <strong><strong>Power</strong>pack</strong> as soon as possibleafter each use.When using the <strong>X<strong>Power</strong></strong> <strong><strong>Power</strong>pack</strong> to operate an ACappliance and the low battery warning sounds, the warninggives you time to shut your AC appliance off before loss ofAC power.If you ignore the warning, the <strong>X<strong>Power</strong></strong> <strong><strong>Power</strong>pack</strong>automatically turns off a few minutes later to prevent batterydamage.In the event of an overload, low battery voltage oroverheating, the <strong>X<strong>Power</strong></strong> <strong><strong>Power</strong>pack</strong> automatically shutsdown.16
Operating 12 V DC AppliancesOperating 12 V DC AppliancesThe <strong>X<strong>Power</strong></strong> <strong><strong>Power</strong>pack</strong> can operate 12 V DC auto, RV,marine, or other portable appliances that draw 12 A or lessfrom a 12 V DC power outlet or from a vehicle’s lightersocket.CAUTION: Equipment damageThe DC power outlet does not automatically switch off when theinternal battery is discharged. To protect the internal battery againstdamage resulting from total discharge, turn the AC <strong>Power</strong> ON/OFFswitch ON when using the <strong>X<strong>Power</strong></strong> <strong><strong>Power</strong>pack</strong> to operate a 12 V DCappliance.Having the AC <strong>Power</strong> ON/OFF switch turned ON enables the alarmto warn you when the 12 V DC appliance has nearly depleted theinternal battery.Note: The fewer watts a 12 V DC appliance draws, the longerthe <strong>X<strong>Power</strong></strong> <strong><strong>Power</strong>pack</strong> will operate before recharging is required.Typical 12 V DC appliances that can be used with the<strong>X<strong>Power</strong></strong> <strong><strong>Power</strong>pack</strong> are listed in Table 3-2.Table 3-2 12 V DC Appliances and Run Times12 V DC Appliance Watts a Hours bCellular telephone c 6 15Stereo/CD player 10 9Portable Cooler 30 2a. Represents actual power consumption as measured on sample appliances.b. Operating times assume a fully charged 12 Ah battery and may vary basedon model or brand of appliance.c. Represents talk time available from 5 recharge cycles.17
Jump-Starting a Vehicle’s EngineTo operate a 12 V DC appliance:1. Open the protective cover on the DC power outlet of the<strong>X<strong>Power</strong></strong> <strong><strong>Power</strong>pack</strong>.2. Plug the 12 V DC appliance into the DC power outlet onthe left side of the unit, and turn the 12 V DC applianceon (if required).If the 12 V DC appliance draws more than 12 A (or has ashort-circuit defect), the internal circuit breaker of the<strong>X<strong>Power</strong></strong> <strong><strong>Power</strong>pack</strong> shuts off the power to the 12 V DCappliance. If this occurs, unplug the 12 V DC appliance.The internal circuit breaker automatically resets after afew seconds.3. Fully recharge the <strong>X<strong>Power</strong></strong> <strong><strong>Power</strong>pack</strong> as soon aspossible after each use.As the DC power outlet is internally wired directly to the<strong>X<strong>Power</strong></strong> <strong><strong>Power</strong>pack</strong>’s battery, extended operation of a12 V DC appliance may result in excessive batterydischarge. See Caution for Equipment damage onpage 17.Jump-Starting a Vehicle’s EngineYou can use the <strong>X<strong>Power</strong></strong> <strong><strong>Power</strong>pack</strong> to jump-start a vehicleor boat engine (all 4 cylinder and most 6 cylinder engines)that has a 12 V starting battery.WARNING: Fire hazardNever allow jump-start cables’ red and black clamps to touch eachother or another common metal conductor. This could causedamage to the unit and/or create a sparking/explosion hazard.Always switch OFF the Jump-Start power switch and store thejump-start clamps in the appropriate holder on each side of the<strong>X<strong>Power</strong></strong> <strong><strong>Power</strong>pack</strong> after use.18
Jump-Starting a Vehicle’s EngineWARNING: Fire hazardJump-start cable clamps’ connection to the vehicle’s batteryterminals must be positive to positive (red clamp to battery “+”) andnegative to engine block. A reverse polarity connection (positive tonegative) may cause damage to the unit and/or create a sparking/explosion hazard.Important: Closely follow these instructions for jump-startingyour vehicle as they may be different from the instructionssupplied with other jump-starting products or jump-start cables.To jump-start a vehicle or boat engine:1. Turn off the vehicle or boat ignition and all accessories.2. Engage the park or emergency brake and place thetransmission in park for an automatic or neutral for amanual.3. If jump-starting a boat engine, purge the enginecompartment and bilge of all fumes before jump-starting.4. Position the <strong>X<strong>Power</strong></strong> <strong><strong>Power</strong>pack</strong> on a flat, stable surfacenear the battery and away from all moving parts of theengine.Ensure that the jump-starting power switch is OFF.5. Connect the red positive (+) clamp of the cables to thepositive (+) terminal of the engine battery.The battery’s positive terminal is usually larger indiameter than the negative terminal. In most vehicles, thebattery’s positive terminal has a red wire connected to it.6. Connect the black negative (–) clamp of the cables to theengine block, cylinder head, or other stationary heavymetal part of the motor.If the Red Jumpstart Connection LED illuminates and the<strong>X<strong>Power</strong></strong> <strong><strong>Power</strong>pack</strong>’s alarm sounds, then reverse polarityhas been detected. Correct polarity must be establishedbefore proceeding. Disconnect the jump-start clampsfrom the vehicle’s battery and redo steps 5 and 6 in thisprocedure.19
Jump-Starting a Vehicle’s EngineIf no alarm sounds, and the Green Jumpstart ConnectionLED is illuminated, then proceed to the next step.7. Switch ON the jump-starting power switch.Before starting the engine, make sure the <strong>X<strong>Power</strong></strong><strong><strong>Power</strong>pack</strong> and the cables are clear of belts and fans.8. Crank the engine for 4 seconds or until it starts,whichever is first.WARNING: Fire hazardDo not crank the engine for more than 4 seconds. The jump-startfeature is designed for short term operation only. Operating thejump-start feature for more than 4 seconds may cause damage to theunit. Allow the <strong>X<strong>Power</strong></strong> <strong><strong>Power</strong>pack</strong> to cool down for at least 3minutes after each jump-start.9. Switch OFF the jump-starting power switch.10. Remove the red positive (+) clamp and then the blacknegative (–) clamp from the vehicle.11. Store the jump-start clamps in the appropriate holder oneach side of the <strong>X<strong>Power</strong></strong> <strong><strong>Power</strong>pack</strong>.Important: Recharge the <strong>X<strong>Power</strong></strong> <strong><strong>Power</strong>pack</strong> as soon aspossible after each use. See “Recharging the <strong>X<strong>Power</strong></strong> <strong><strong>Power</strong>pack</strong>Battery” on page 28.20
Using the Air CompressorUsing the Air CompressorWARNING: Fire hazardThe compressor is designed for short term operation only.Operating the compressor over an extended period of time willcause the compressor unit to overheat which could lead to fire.Allow the compressor to cool down for 10 minutes after each10 minutes of continuous operation.WARNING: Risk of personal injury ordamage to equipmentNever leave the compressor unattended while in operation. Keepout of reach of children. The compressor is capable of inflating to250 PSI. Do not exceed the recommended pressure of either thecompressor or the object being inflated. If either recommendedpressure is exceeded, an explosion may result.WARNING: Risk of personal injury ordamage to equipmentNever leave the compressor unattended after it has switched itselfoff due to overheating. It will turn on again and continue inflatingwhen its internal temperature drops.Turn the compressor off at the power switch after each use or anytime the compressor turns off automatically.Over-temperature Safety ProtectionIt is recommended that you follow the warnings and turn thecompressor off for 10 minutes after every 10 minutes ofoperation. However, the <strong>X<strong>Power</strong></strong> <strong><strong>Power</strong>pack</strong> <strong>300</strong> is equippedwith an over-temperature safety protection feature thatautomatically turns the compressor off if it begins tooverheat. Once the compressor cools down to its normaloperating temperature it will automatically turn on again andcontinue inflating. You should turn the compressor off at thepower switch if this safety feature engages, and allow thecompressor to cool for 15 minutes before restarting.21
Using the Air CompressorInflating TiresTable 3-3 Pressure Specifications for Common ItemsTires PSI Other Inflatables PSI520-13 26 Football 13A-78-14 26 Basketball 9E78-14 30 Volleyball 5H-78-14 24 Lawn Tractor Tire 22HR-78-15 28Bicycle Tires27 x 1 ¼ 8520 x 1 ½ 40Note: The information in the table is for reference only. Forprecise pressure specifications, refer to the information suppliedwith the item to be inflated.CAUTIONIf the pressure gauge on the compressor indicates more than twicethe recommended pressure for the object you are inflating, and youhave only started to inflate the object, the valve connector isincorrectly connected to the valve stem. This may damage the<strong>X<strong>Power</strong></strong> <strong><strong>Power</strong>pack</strong> <strong>300</strong>. Remove and reattach the valve connectorto the valve stem.To inflate your vehicle, motorcycle, or bicycle tires:1. Place the valve connector securely on the tire valve stem,push it as far as possible to allow normal airflow, andclose the thumb latch. If necessary, use a supplied nozzleadaptor.2. Turn the compressor on, and inflate your tire to therecommended pressure. Use Table 3-3 as a guide only.22
Using the Air Compressor3. Turn the compressor off after appropriate pressure isreached.4. Open the thumb latch and remove the valve connectorfrom the valve stem.5. Check air pressure with a pressure gauge.Note: Leave the thumb latch in the open position for storing torelieve pressure on the internal mechanisms.Inflating Small Sports EquipmentYou can use the compressor to inflate small sports equipmentsuch as soccer balls and footballs.CAUTIONThe <strong>X<strong>Power</strong></strong> <strong><strong>Power</strong>pack</strong> <strong>300</strong> cannot be used to inflate largecapacity inflatables such as float tubes, large air mattresses, andinflatable boats. These types of products require extended inflatingtimes that may damage the compressor.To inflate small sports equipment:1. Place the valve connector fully on or into the valvereceptacle on the item. Go to Step 4.ORIf necessary, use a supplied nozzle adaptor.2. Choose the appropriate nozzle adaptor, insert the nozzleadaptor into the valve stem and close the thumb latch.3. Insert nozzle adaptor into the valve receptacle of the item.4. Turn the compressor on and inflate to appropriatepressure.WARNING: Fire hazardAllow the compressor to cool down for 10 minutes after each 10minutes of continuous operation.5. Turn the compressor off before removing nozzle adaptorfrom valve stem.23
Connecting to an External Battery6. Remove nozzle adaptor from valve connector and storein storage compartment.Note: Leave the thumb latch in the open position for storing torelieve pressure on the internal mechanism.Connecting to an External BatteryYou can extend battery operating times by connecting the<strong>X<strong>Power</strong></strong> <strong><strong>Power</strong>pack</strong> to a larger external battery.For example, an external 60 Ah battery gives approximatelyfive times the operating time of the <strong>X<strong>Power</strong></strong> <strong><strong>Power</strong>pack</strong>internal 12 Ah battery.WARNING: Fire hazardNever allow jump-start cables’ red and black clamps to touch eachother or another common metal conductor. This could causedamage to the unit and/or create a sparking/explosion hazard.WARNING: Fire hazardJump-start cable clamps must be connected positive to positive (redclamp to battery “+”) and negative to negative (black clamp tobattery “–”). A reverse polarity connection (positive to negative)may cause damage to the unit and/or create a sparking/explosionhazard.WARNING: Acid spillsUse a sealed, non-spillable battery for indoor use. Common autoand marine batteries are not suitable for indoor use unless theirfumes are vented outdoors. Common auto and marine batteriescontain acid, which is hazardous if spilled. Wear eye protection andprotective clothing when connecting the <strong>X<strong>Power</strong></strong> <strong><strong>Power</strong>pack</strong> to anexternal battery.24
Connecting to an External BatteryTo connect the <strong>X<strong>Power</strong></strong> <strong><strong>Power</strong>pack</strong> to an external batteryusing the jump-start cables:1. Ensure that the jump-start power switch is OFF.2. Connect the red positive (+) clamp of the cables to thered positive (+) terminal of the external battery.3. Connect the black negative (–) clamp of the cables to theblack negative (–) terminal of the external battery.If the Red Jumpstart Connection LED illuminates and thealarm sounds, then reverse polarity has been detected.Correct polarity must be established before proceeding.Disconnect the jump-start clamps from the battery andredo steps 2 and 3 in this procedure.If no alarm sounds, and the Green Jumpstart ConnectionLED is illuminated, then proceed to the next step.4. Switch ON the jump-start power switch.To disconnect the cables from an external battery andfrom the <strong>X<strong>Power</strong></strong> <strong><strong>Power</strong>pack</strong>:1. Ensure that the jump-start power switch is OFF.2. Remove the red positive (+) clamp, and then remove theblack negative (–) clamp from the external batteryterminals.3. Store the jump-start clamps in the appropriate holder oneach side of the <strong>X<strong>Power</strong></strong> <strong><strong>Power</strong>pack</strong>.4. Recharge the <strong>X<strong>Power</strong></strong> <strong><strong>Power</strong>pack</strong> as soon as possibleafter use.CAUTIONDo not recharge the <strong>X<strong>Power</strong></strong> <strong><strong>Power</strong>pack</strong> when an external battery isconnected. The AC charger may be damaged.25
4 MaintenanceChapter 4 provides information on maintaining your internalbattery, recharging options for the internal battery, andreplacing user-replaceable parts.Routine maintenance is required to keep your <strong>X<strong>Power</strong></strong><strong><strong>Power</strong>pack</strong> <strong>300</strong> operating properly. Occasionally clean theexterior of the unit with a damp cloth to remove theaccumulated dust and dirt.WARNING: Shock hazardDisconnect all sources of AC power and DC power beforeperforming any type of maintenance.Battery MaintenanceAll rechargeable batteries gradually discharge when leftstanding, and you need to recharge them periodically tomaintain maximum battery capacity. The AC chargersupplied with the <strong>X<strong>Power</strong></strong> <strong><strong>Power</strong>pack</strong> is designed to regulatethe charging process, ensuring that the battery is always fullycharged but never overcharged. To ensure safe rechargingand maximum battery life, recharge the <strong>X<strong>Power</strong></strong> <strong><strong>Power</strong>pack</strong>only with the supplied charger or approved battery chargers.27
Recharging the <strong>X<strong>Power</strong></strong> <strong><strong>Power</strong>pack</strong> BatteryCAUTIONDue to inherent self-discharge, lead acid batteries must be charged atleast every 3 months, especially in a warm environment. Leaving abattery in a discharged state, or not recharging every 3 months, mayresult in permanent battery damage and poor jump-startingperformance.CAUTIONDo not attempt to recharge the <strong>X<strong>Power</strong></strong> <strong><strong>Power</strong>pack</strong> battery if it isfrozen. Gradually warm the frozen battery to 0°C (32°F) beforerecharging.Recharging the <strong>X<strong>Power</strong></strong> <strong><strong>Power</strong>pack</strong> BatteryTo check the <strong>X<strong>Power</strong></strong> <strong><strong>Power</strong>pack</strong>’s charge level, press theBattery Level button.Note: The <strong>X<strong>Power</strong></strong> <strong><strong>Power</strong>pack</strong> Battery Level LEDs are onlyaccurate when the <strong>X<strong>Power</strong></strong> <strong><strong>Power</strong>pack</strong> has been disconnectedfrom all appliances and all charging sources for 15 minutes.You can recharge the battery using:• the fully automatic “plug-in-and-forget” AC charger.• the DC charging cable to recharge from your vehicle asyou drive.• a generator equipped with a regulated 12 V batterycharging outlet.• a solar panel.Recharging with the AC ChargerRecharging with the AC charger is a true “plug-in-andforget”charging method.28
Recharging the <strong>X<strong>Power</strong></strong> <strong><strong>Power</strong>pack</strong> BatteryCAUTIONDo not operate AC or DC appliances with the <strong>X<strong>Power</strong></strong> <strong><strong>Power</strong>pack</strong>while the <strong>X<strong>Power</strong></strong> <strong><strong>Power</strong>pack</strong> is being recharged with the ACcharger.The AC charger may be permanently damaged if AC appliances or12 V DC appliances are operated while the AC charger isconnected.To recharge with the AC charger:1. Disconnect any 12 V DC appliances from the DC poweroutlets.2. Disconnect any AC products from the <strong>X<strong>Power</strong></strong><strong><strong>Power</strong>pack</strong> and turn the AC <strong>Power</strong> ON/OFF switch to OFF.3. Insert the AC charger cable end into the AC charger inputsocket located under the red jump-starting clamp.4. Plug the AC charger into a standard AC wall outlet.5. While the <strong>X<strong>Power</strong></strong> <strong><strong>Power</strong>pack</strong> is recharging, the BatteryStatus LED is red. If the <strong>X<strong>Power</strong></strong> <strong><strong>Power</strong>pack</strong> iscompletely discharged, a typical recharge may take up to24 hours. When fully charged, the Battery Status LEDchanges to green and the <strong>X<strong>Power</strong></strong> <strong><strong>Power</strong>pack</strong> is ready touse.Important: The 24-hour charging time for the <strong>X<strong>Power</strong></strong><strong><strong>Power</strong>pack</strong> assumes that there is 120 V at the AC wall outlet. Ifthe voltage is less than 120 V AC, it may take more than 24 hoursto fully recharge the <strong>X<strong>Power</strong></strong> <strong><strong>Power</strong>pack</strong>. If, after 24 hours ofcharging, the Battery Status LED is still red, continue to chargethe unit for another 12 hours. The <strong>X<strong>Power</strong></strong> <strong><strong>Power</strong>pack</strong> will beready for use even if the Battery Status LED remains red.Once the <strong>X<strong>Power</strong></strong> <strong><strong>Power</strong>pack</strong> is fully charged, the chargingvoltage and current automatically reduces to a maintenancelevel and the <strong>X<strong>Power</strong></strong> <strong><strong>Power</strong>pack</strong> may be left permanentlyconnected to the AC charger. If your utility power isinterrupted, the charging process automatically restarts whenpower returns.29
Recharging the <strong>X<strong>Power</strong></strong> <strong><strong>Power</strong>pack</strong> BatteryRecharging with the DC Charging CableUsing the DC charging cable, the <strong>X<strong>Power</strong></strong> <strong><strong>Power</strong>pack</strong> can berecharged while you drive your vehicle.Important: Although the charge regulation circuitry in the<strong>X<strong>Power</strong></strong> <strong><strong>Power</strong>pack</strong> does not operate with this charging method,most vehicle voltage regulators will ensure that the <strong>X<strong>Power</strong></strong><strong><strong>Power</strong>pack</strong> is not overcharged.Note: The Battery Status LED will not illuminate when the<strong>X<strong>Power</strong></strong> <strong><strong>Power</strong>pack</strong> is recharged using the DC charging cable.WARNING: Fire and explosion hazardDo not use this recharging method if your vehicle has abnormallyhigh voltage electrical systems that operate above 15 V DC. Thismay lead to accumulations of hydrogen, causing exposure to fireand explosion hazard.CAUTIONDo not operate AC or DC appliances while the <strong>X<strong>Power</strong></strong> <strong><strong>Power</strong>pack</strong>is being recharged with the DC charging cable from your vehicle.To recharge the <strong>X<strong>Power</strong></strong> <strong><strong>Power</strong>pack</strong> while you drive usingthe DC charging cable:1. While the vehicle engine is running, plug one end of theDC charging cable into a DC power outlet on the <strong>X<strong>Power</strong></strong><strong><strong>Power</strong>pack</strong>.2. Plug the opposite end of the DC charging cable into thevehicle’s lighter socket or 12 V accessory outlet.3. Once the <strong>X<strong>Power</strong></strong> <strong><strong>Power</strong>pack</strong> is fully charged or if yourvehicle’s engine is not running, disconnect the DCcharging cable from both sockets.Most of the <strong>X<strong>Power</strong></strong> <strong><strong>Power</strong>pack</strong>’s capacity will berestored in 2 ½ hours while the vehicle engine is running.30
Recharging the <strong>X<strong>Power</strong></strong> <strong><strong>Power</strong>pack</strong> BatteryNote: The Battery Level LEDs are only accurate when the<strong>X<strong>Power</strong></strong> <strong><strong>Power</strong>pack</strong> has been disconnected from all appliancesand all charging sources for 15 minutes.Important: •• Do not leave the <strong>X<strong>Power</strong></strong> <strong><strong>Power</strong>pack</strong> permanently connectedto the vehicle’s lighter socket or 12 V accessory outlet.• Do not solder or hard wire the DC charging cable from the<strong><strong>Power</strong>pack</strong> to an external electrical system. The chargingcable is designed for temporary use only to recharge the<strong><strong>Power</strong>pack</strong> battery.31
Recharging the <strong>X<strong>Power</strong></strong> <strong><strong>Power</strong>pack</strong> BatteryRecharging with a Generator’s Regulated 12 V DCOutletWARNING: Fire and explosion hazardThe generator output must be intended for battery charging andhave an output of 15 V or less. An unregulated output or one thatexceeds 15 V DC can damage the battery.This may lead to accumulations of hydrogen, causing exposure tofire and explosion hazard.Refer to the Owner’s Guide accompanying your generator fordetailed instructions on connecting the generator to a unit likethe <strong>X<strong>Power</strong></strong> <strong><strong>Power</strong>pack</strong>.You can recharge the <strong>X<strong>Power</strong></strong> <strong><strong>Power</strong>pack</strong> using a generator inseveral ways:• Using a generator that has an auxiliary regulated12 V DC output designed for charging 12 V DCbatteries. Most generators are equipped with them. Usethis power source for faster charging.• Using a generator with a regulated 12 V DC lightersocket. Follow the connection instructions in“Recharging with the DC Charging Cable” on page 30.Using the AC charger to recharge the <strong>X<strong>Power</strong></strong> <strong><strong>Power</strong>pack</strong>from a generator is possible, but would require extendedgenerator running time.Most of the <strong>X<strong>Power</strong></strong> <strong><strong>Power</strong>pack</strong>’s battery capacity will berecharged in a few hours.Note: The Battery Level LEDs are only accurate when the<strong>X<strong>Power</strong></strong> <strong><strong>Power</strong>pack</strong> has been disconnected from all appliancesand all charging sources for 15 minutes.32
Recharging from a Solar PanelRecharging the <strong>X<strong>Power</strong></strong> <strong><strong>Power</strong>pack</strong> BatterySmall, unregulated 12 V solar panels rated to produce amaximum of 2.5 A (or 30 W) can be used to charge the<strong>X<strong>Power</strong></strong> <strong><strong>Power</strong>pack</strong> through the AC charger Input socket.You will need to purchase a standard 5.5 mm OD × 2.5 mmID (0.217 × 0.10") coaxial DC (barrel type center positive)connector to mate with the AC charger input socket.To wire the coaxial DC connector:1. Connect the solar panel’s red positive (+) wire to thecoaxial plug’s inner or center contact.2. Connect the solar panel’s black negative (–) wire to theplug’s outer contact. See Figure 4-1.Figure 4-1 Typical DC Coaxial Connector ConnectionOnce the connector is inserted into the AC charger inputsocket and the solar panel is placed in the sun, the <strong>X<strong>Power</strong></strong><strong><strong>Power</strong>pack</strong> charges automatically just as with the AC charger.See “Recharging with the AC Charger” on page 28.It takes about six hours in direct sunlight to recharge the<strong>X<strong>Power</strong></strong> <strong><strong>Power</strong>pack</strong> from a 2.5 A solar panel.33
RecyclingRecyclingThe <strong>X<strong>Power</strong></strong> <strong><strong>Power</strong>pack</strong> is designed to provide years ofservice. However, when the internal battery reaches the endof its service life, the <strong>X<strong>Power</strong></strong> <strong><strong>Power</strong>pack</strong> itself is no longerof use. The internal battery is not designed to be userreplaceable.Because the internal battery contains lead, which can behazardous if exposed to the environment, the <strong>X<strong>Power</strong></strong><strong><strong>Power</strong>pack</strong> should be recycled or safely disposed of at yourlocal recycling depot.As well, the NiMH batteries in the detachable flashlight arenot replaceable and should be disposed of in the same manneras the <strong>X<strong>Power</strong></strong> <strong><strong>Power</strong>pack</strong>.Do not dispose of the <strong>X<strong>Power</strong></strong> <strong><strong>Power</strong>pack</strong> or flashlight withcommon household waste. Please ask your local authoritiesabout recycling services that are available in your area.34
5 TroubleshootingTroubleshooting will help you identify the common problemsthan can occur with the <strong>X<strong>Power</strong></strong> <strong><strong>Power</strong>pack</strong> <strong>300</strong>.If you cannot solve the problem with the <strong>X<strong>Power</strong></strong> <strong><strong>Power</strong>pack</strong>,record the information asked for on “Information About YourSystem” on page 48 and then contact your dealer.Common ProblemsBuzz in Audio EquipmentSome inexpensive stereo systems have inadequate internalpower-supply filtering and may buzz slightly when poweredby the <strong>X<strong>Power</strong></strong> <strong><strong>Power</strong>pack</strong>. The best solution to eliminate thebuzzing is to use an audio system with a good quality filter.Television InterferenceThe <strong>X<strong>Power</strong></strong> <strong><strong>Power</strong>pack</strong> is shielded to minimize interferencewith TV signals. If TV signals are weak, you may seeinterference in the form of lines scrolling across the TVscreen. Try one of the following suggestions to minimize oreliminate the interference:• Increase the distance between the <strong>X<strong>Power</strong></strong> <strong><strong>Power</strong>pack</strong>and the TV, antenna, and cables.• Adjust the orientation of the <strong>X<strong>Power</strong></strong> <strong><strong>Power</strong>pack</strong>,television, antenna, and cables.• Maximize TV signal strength by using a better antenna.Use a shielded antenna cable where possible.• Try a different TV. Different models vary considerably intheir susceptibility to interference.35
Troubleshooting ReferenceTroubleshooting ReferenceWARNING: Electric shock hazardDo not remove the cover of the <strong>X<strong>Power</strong></strong> <strong><strong>Power</strong>pack</strong> or disassemblethe <strong>X<strong>Power</strong></strong> <strong><strong>Power</strong>pack</strong>. The <strong>X<strong>Power</strong></strong> <strong><strong>Power</strong>pack</strong> does not containany internal user-serviceable parts and attempting to service the unityourself could result in electrical shock or burn.Table 5-1 Troubleshooting referenceProblem Possible Cause SolutionAC appliancewill notoperate;audible alarmis notsounding.OverloadshutdownAlarm soundsAC appliance rated morethan <strong>300</strong> W: the safetyoverload has tripped.AC appliance is rated lessthan <strong>300</strong> W: high startingsurge has tripped thesafety overload.Appliance powerrequirements exceed thecapability of the <strong>X<strong>Power</strong></strong><strong><strong>Power</strong>pack</strong>.<strong>X<strong>Power</strong></strong> <strong><strong>Power</strong>pack</strong>battery is nearlydischarged (11.0 V).If you ignore this warning,the <strong>X<strong>Power</strong></strong> <strong><strong>Power</strong>pack</strong>automatically switches offwhen the battery reaches10.5 V.Use an AC appliance with apower rating less than <strong>300</strong> W.AC appliance may exceed the<strong>X<strong>Power</strong></strong> <strong><strong>Power</strong>pack</strong>’s surgecapability. Use an AC appliancewith a starting surge within the<strong>X<strong>Power</strong></strong> <strong><strong>Power</strong>pack</strong> surge rating.Unplug the appliance andconfirm that the appliance’spower requirement is <strong>300</strong> W orless before attempting to restartthe appliance.Turn OFF the AC <strong>Power</strong> ON/OFFSwitch and recharge the <strong>X<strong>Power</strong></strong><strong><strong>Power</strong>pack</strong>.36
Troubleshooting ReferenceTable 5-1 Troubleshooting referenceProblem Possible Cause SolutionAC appliancewill notoperate;audible alarmis sounding.Run time isless thanexpected.Battery has discharged to10.5 V.<strong>X<strong>Power</strong></strong> <strong><strong>Power</strong>pack</strong> hasoverheated due to poorventilation or excessivelywarm environmentalconditions.<strong>X<strong>Power</strong></strong> <strong><strong>Power</strong>pack</strong>battery is not fullycharged.AC appliance powerconsumption is higherthan expected.Environmentaltemperature is less than0°C (32°F) or more than40°C (104°F)Turn OFF the AC <strong>Power</strong> ON/OFFswitch and recharge the <strong>X<strong>Power</strong></strong><strong><strong>Power</strong>pack</strong>.Turn the AC <strong>Power</strong> ON/OFFswitch OFF and allow the<strong>X<strong>Power</strong></strong> <strong><strong>Power</strong>pack</strong> to cool for15 minutes or more. Clearblocked opening or removeobjects covering the unit, thenrestart the <strong>X<strong>Power</strong></strong> <strong><strong>Power</strong>pack</strong>and move it to a coolerenvironment.Recharge using the AC charger,until Battery Status LED isgreen.Check AC appliance power orwattage rating (or current drawfor 12 V DC appliances) andcompare with Table 3-1 onpage 14 and Table 3-2 onpage 17.Operate within correcttemperature range.37
Troubleshooting ReferenceTable 5-1 Troubleshooting referenceProblem Possible Cause SolutionMeasured ACoutput voltageis too low.Battery StatusLED is OFFwhen ACcharger isconnectedBattery StatusLED is red andBattery LevelLEDs showthe battery isfull when theBattery Levelbutton istriggered.Battery StatusLED is red andhas notchanged togreen after 24hours ofcharging.Using an average-readingAC voltmeter to readoutput voltage.<strong>X<strong>Power</strong></strong> <strong><strong>Power</strong>pack</strong>battery is almost fullydischarged.No AC power at the ACwall outlet.AC charger is faulty.Battery Level lights areonly accurate when the<strong>X<strong>Power</strong></strong> <strong><strong>Power</strong>pack</strong> hasbeen disconnected fromall appliances and allcharging sources for 15minutes.The voltage at the AC walloutlet is less than120 VAC.The modified sine wave outputof the <strong>X<strong>Power</strong></strong> <strong><strong>Power</strong>pack</strong>requires a true RMS readingmeter, such as the Fluke 87series, for accuratemeasurement.Press Battery Level button toverify battery status and rechargethe <strong>X<strong>Power</strong></strong> <strong><strong>Power</strong>pack</strong> asnecessary. Battery Level LEDsare only accurate when the unithas been disconnected from allappliances and all chargingsources for 15 minutes.Ensure power is available at theAC wall outlet.Replace the AC charger.Unplug the charging sources andany appliances and let the<strong>X<strong>Power</strong></strong> <strong><strong>Power</strong>pack</strong> rest for 15minutes to obtain an accuratereading.Use AC wall outlet that supplies120 V AC.Continue to charge the unit foranother 12 hours; the unit will beready to use even if the BatteryStatus light remains red.38
Troubleshooting ReferenceTable 5-1 Troubleshooting referenceProblem Possible Cause SolutionThe enginebeing jumpstartedwill notstart.The jump-startclampsmeasure zerovolts.Thecompressorruns, but won’tinflate.Thecompressorruns slowly.<strong>X<strong>Power</strong></strong> <strong><strong>Power</strong>pack</strong>battery is not fullycharged.The engine condition ispoor.The engine start capacityexceeds the <strong>X<strong>Power</strong></strong><strong><strong>Power</strong>pack</strong> jump-startcapability.Jump-start power switch isOFF.<strong>X<strong>Power</strong></strong> <strong><strong>Power</strong>pack</strong>battery needs to berecharged.The valve connector maynot be securely placed onthe valve stem.The item being inflatedmay have a leak.The compressor may haveoverheated from excessiveuse.Battery voltage is too low.Recharge the <strong>X<strong>Power</strong></strong><strong><strong>Power</strong>pack</strong> battery.Have the engine serviced.Use a higher power <strong>X<strong>Power</strong></strong><strong><strong>Power</strong>pack</strong>.Turn the jump-start powerswitch ON.Make sure the valve connector issecurely placed on the valvestem before closing the thumblatch.Make sure the item beinginflated doesn’t have a leak.Check the compressor hose forany breaks or leaks.Turn off the compressor and let itcool down.Check the condition of theinternal battery. The battery mayneed to be recharged or replaced.39
A SpecificationsElectrical Specifications\12 V DC SectionInternal battery typeInternal battery voltage (nominal)Internal battery capacity (minimum)Internal battery CCA ratingInternal battery CA ratingDC power outlet (maximum continuous load)Sealed/non-spillable, AGM(Absorbed Glass Mat) leadacid12 V DC12 Ah120 CCA180 CA12 A with automatic reset41
Electrical SpecificationsAC <strong>Power</strong> SectionOutput power• Continuous output power• Peak output power• AC output surge capacityOutput voltageOutput frequencyOutput wave formNo load current drawInput voltage rangeLow battery alarmLow battery shutdownHigh battery voltage shutdownOver temperature shutdownOverload shutdownAC output short circuit protectionFuse (internal)Operating temperature rangeStorage temperature range240 W<strong>300</strong> W480 W120 ± 10 V AC RMS60 Hz ± 1 Hzmodified sinewave
Physical SpecificationsAir CompressorPressure 250 PSI (lb/in 2 )AccessoriesDC charge cable39" (1 m) 18 AWG with male to malelighter plugs (part # 449-0187-01-01)AC chargerInput: 120 V AC, 60 Hz, 11 WOutput: 13.5 V DC, 500 mA(part # 074-1003))Flashlight Part # 808-7130Compressor nozzles Part # 160-0015-01-01Physical SpecificationsPhysical specificationsDepthWidthHeightWeight<strong>X<strong>Power</strong></strong> <strong><strong>Power</strong>pack</strong>6 1/8" (15.5 cm)12 13/32" (31.5 cm)8 3/4" (22.1 cm)11 lb 13 oz (5.4 kg)Physical specificationsLengthWidthHeight with terminalsTerminal typeInternal SW12120 battery6" (15.1 cm)2 1/2" (6.5 cm)5" (12.5 cm)M5 bolt typeImportant: All specifications are subject to change withoutnotice.43
Warranty and ReturnWarrantyWhat does this warranty cover? This Limited Warranty is provided by <strong>Xantrex</strong>Technology Inc. ("<strong>Xantrex</strong>") and covers defects in workmanship and materials in your<strong>X<strong>Power</strong></strong> <strong><strong>Power</strong>pack</strong> <strong>300</strong>. This warranty period lasts for 6 months from the date ofpurchase at the point of sale to you, the original end user customer. You require proof ofpurchase to make warranty claims.What will <strong>Xantrex</strong> do? <strong>Xantrex</strong> will, at its option, repair or replace the defectiveproduct free of charge, provided that you notify <strong>Xantrex</strong> of the product defect within theWarranty Period, and provided that <strong>Xantrex</strong> through inspection establishes the existenceof such a defect and that it is covered by this Limited Warranty.<strong>Xantrex</strong> will, at its option, use new and/or reconditioned parts in performing warrantyrepair and building replacement products. <strong>Xantrex</strong> reserves the right to use parts orproducts of original or improved design in the repair or replacement. If <strong>Xantrex</strong> repairs orreplaces a product, its warranty continues for the remaining portion of the originalWarranty Period or 90 days from the date of the return shipment to the customer,whichever is greater. All replaced products and all parts removed from repaired productsbecome the property of <strong>Xantrex</strong>.<strong>Xantrex</strong> covers both parts and labor necessary to repair the product, and return shipment tothe customer via a <strong>Xantrex</strong>-selected non-expedited surface freight within the contiguousUnited States and Canada. Alaska and Hawaii are excluded. Contact <strong>Xantrex</strong> CustomerService for details on freight policy for return shipments outside of the contiguous UnitedStates and Canada.How do you get service? If your product requires troubleshooting or warrantyservice, contact your dealer.If you are unable to contact your dealer, or the dealer is unable to provide service, contact<strong>Xantrex</strong> directly at:Phone: 1 360-925-5059Fax: 1 360-925-5143Website: www.xantrex.com/supportDirect returns may be performed according to the <strong>Xantrex</strong> Return Material AuthorizationPolicy described in your product manual. For some products, <strong>Xantrex</strong> maintains a networkof regional Authorized Service Centers. Call <strong>Xantrex</strong> or check our website to see if yourproduct can be repaired at one of these facilities.What proof of purchase is required? In any warranty claim, dated proof of purchasemust accompany the product and the product must not have been disassembled ormodified without prior written authorization by <strong>Xantrex</strong>.Proof of purchase may be in any one of the following forms:• The dated purchase receipt from the original purchase of the product at point of sale tothe end user, or• The dated dealer invoice or purchase receipt showing original equipmentmanufacturer (OEM) status, or• The dated invoice or purchase receipt showing the product exchanged under warranty45
Warranty and ReturnWhat does this warranty not cover? This Limited Warranty does not cover normalwear and tear of the product or costs related to the removal, installation, or troubleshootingof the customer's electrical systems. This warranty does not apply to and <strong>Xantrex</strong> will notbe responsible for any defect in or damage to:a) the product if it has been misused, neglected, improperly installed, physicallydamaged or altered, either internally or externally, or damaged from improper use oruse in an unsuitable environment;b) the product if it has been subjected to fire, water, generalized corrosion, biologicalinfestations, or input voltage that creates operating conditions beyond the maximum orminimum limits listed in the <strong>Xantrex</strong> product specifications including high input voltagefrom generators and lightning strikes;c) the product if repairs have been done to it other than by <strong>Xantrex</strong> or its authorized servicecenters (hereafter "ASCs");d) the product if it is used as a component part of a product expressly warranted byanother manufacturer;e) the product if its original identification (trade-mark, serial number) markings havebeen defaced, altered, or removed.DisclaimerProductTHIS LIMITED WARRANTY IS THE SOLE AND EXCLUSIVE WARRANTY PROVIDED BYXANTREX IN CONNECTION WITH YOUR XANTREX PRODUCT AND IS, WHEREPERMITTED BY LAW, IN LIEU OF ALL OTHER WARRANTIES, CONDITIONS,GUARANTEES, REPRESENTATIONS, OBLIGATIONS AND LIABILITIES, EXPRESS ORIMPLIED, STATUTORY OR OTHERWISE IN CONNECTION WITH THE PRODUCT,HOWEVER ARISING (WHETHER BY CONTRACT, TORT, NEGLIGENCE, PRINCIPLES OFMANUFACTURER'S LIABILITY, OPERATION OF LAW, CONDUCT, STATEMENT OROTHERWISE), INCLUDING WITHOUT RESTRICTION ANY IMPLIED WARRANTY ORCONDITION OF QUALITY, MERCHANTABILITY OR FITNESS FOR A PARTICULARPURPOSE. ANY IMPLIED WARRANTY OF MERCHANTABILITY OR FITNESS FOR APARTICULAR PURPOSE TO THE EXTENT REQUIRED UNDER APPLICABLE LAW TOAPPLY TO THE PRODUCT SHALL BE LIMITED IN DURATION TO THE PERIODSTIPULATED UNDER THIS LIMITED WARRANTY.IN NO EVENT WILL XANTREX BE LIABLE FOR ANY SPECIAL, INDIRECT, INCIDENTALOR CONSEQUENTIAL DAMAGES, LOSSES, COSTS OR EXPENSES HOWEVER ARISINGWHETHER IN CONTRACT OR TORT INCLUDING WITHOUT RESTRICTION ANYECONOMIC LOSSES OF ANY KIND, ANY LOSS OR DAMAGE TO PROPERTY, ANYPERSONAL INJURY, ANY DAMAGE OR INJURY ARISING FROM OR AS A RESULT OFMISUSE OR ABUSE, OR THE INCORRECT INSTALLATION, INTEGRATION OROPERATION OF THE PRODUCT.ExclusionsIf this product is a consumer product, federal law does not allow an exclusion of impliedwarranties. To the extent you are entitled to implied warranties under federal law, to theextent permitted by applicable law they are limited to the duration of this LimitedWarranty. Some states and provinces do not allow limitations or exclusions on implied46
Warranty and Returnwarranties or on the duration of an implied warranty or on the limitation or exclusion ofincidental or consequential damages, so the above limitation(s) or exclusion(s) may notapply to you. This Limited Warranty gives you specific legal rights. You may have otherrights which may vary from state to state or province to province.Warning: Limitations On UsePlease note that the <strong>X<strong>Power</strong></strong> <strong><strong>Power</strong>pack</strong> <strong>300</strong> is not intended for use as an uninterruptiblepower supply and <strong>Xantrex</strong> makes no warranty or representation in connection with anyuse of the product for such purposes.Return Material Authorization PolicyBefore returning a product directly to <strong>Xantrex</strong> you must obtain a Return MaterialAuthorization (RMA) number and the correct factory "Ship To" address. Products mustalso be shipped prepaid. Product shipments will be refused and returned at your expense ifthey are unauthorized, returned without an RMA number clearly marked on the outside ofthe shipping box, if they are shipped collect, or if they are shipped to the wrong location.When you contact <strong>Xantrex</strong> to obtain service, please have your instruction manual readyfor reference and be prepared to supply:• The serial number of your product• Information about the installation and use of the unit• Information about the failure and/or reason for the return• A copy of your dated proof of purchaseRecord these details in “Information About Your System” on page 48.Return Procedure1. Package the unit safely, preferably using the original box and packing materials.Please ensure that your product is shipped fully insured in the original packaging orequivalent. This warranty will not apply where the product is damaged due toimproper packaging.2. Include the following:• The RMA number supplied by <strong>Xantrex</strong> Technology Inc. clearly marked on theoutside of the box.• A return address where the unit can be shipped. Post office boxes are notacceptable.• A contact telephone number where you can be reached during work hours.• A brief description of the problem.3. Ship the unit prepaid to the address provided by your <strong>Xantrex</strong> customer servicerepresentative.If you are returning a product from outside of the USA or Canada In addition to theabove, you MUST include return freight funds and are fully responsible for all documents,duties, tariffs, and deposits.If you are returning a product to a <strong>Xantrex</strong> Authorized Service Center (ASC) A<strong>Xantrex</strong> return material authorization (RMA) number is not required. However, you mustcontact the ASC prior to returning the product or presenting the unit to verify any returnprocedures that may apply to that particular facility.47
Warranty and ReturnOut of Warranty ServiceIf the warranty period for your <strong>X<strong>Power</strong></strong> <strong><strong>Power</strong>pack</strong> <strong>300</strong> has expired, if the unit wasdamaged by misuse or incorrect installation, if other conditions of the warranty have notbeen met, or if no dated proof of purchase is available, your unit may be serviced orreplaced for a flat fee.To return your <strong>X<strong>Power</strong></strong> <strong><strong>Power</strong>pack</strong> <strong>300</strong> for out-of-warranty service, contact <strong>Xantrex</strong>Customer Service for a Return Material Authorization (RMA) number and follow theother steps outlined in “Return Procedure” on page 47.Payment options such as credit card or money order will be explained by the CustomerService Representative. In cases where the minimum flat fee does not apply, as withincomplete units or units with excessive damage, an additional fee will be charged. Ifapplicable, you will be contacted by Customer Service once your unit has been received.Information About Your SystemAs soon as you open your <strong>X<strong>Power</strong></strong> <strong><strong>Power</strong>pack</strong> <strong>300</strong> package, record the followinginformation and be sure to keep your proof of purchase.p Product Number 852-0301p Serial Number _______________________________p Purchased From _______________________________p Purchase Date _______________________________If you need to contact Customer Service, please record the following details beforecalling. This information will help our representatives give you better service.ppWarning, Error or PanelFault MessageAppliances operating whenproblem occurred__________________________________________________________________p Description of problem _____________________________________________________________________________________________________________________________________________________________48