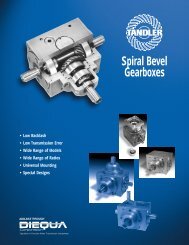
Section 7. - Bevel Gears - Quality Transmission Components
Section 7. - Bevel Gears - Quality Transmission Components
Section 7. - Bevel Gears - Quality Transmission Components
- No tags were found...
You also want an ePaper? Increase the reach of your titles
YUMPU automatically turns print PDFs into web optimized ePapers that Google loves.
Table of ContentsSpecial Characteristics, Points of Cautionin Selecting and Using <strong>Bevel</strong> <strong>Gears</strong>..........................page 228MHP High Ratio Hypoid <strong>Gears</strong>...................................page 234MBSG Ground Spiral <strong>Bevel</strong> <strong>Gears</strong>.............................page 236SBSG Ground Spiral <strong>Bevel</strong> <strong>Gears</strong>.............................page 238MBSA(B) Finished Bore Spiral <strong>Bevel</strong> <strong>Gears</strong>.............page 240SBS Spiral <strong>Bevel</strong> <strong>Gears</strong>...............................................page 248SB(SBY) <strong>Bevel</strong> <strong>Gears</strong>..................................................page 252SB <strong>Bevel</strong> <strong>Gears</strong> & Pinion Shafts................................page 260SUB Stainless Steel <strong>Bevel</strong> <strong>Gears</strong>..............................page 262PB Plastic <strong>Bevel</strong> <strong>Gears</strong>................................................page 264DB Injection Molded <strong>Bevel</strong> <strong>Gears</strong>..............................page 266BB Sintered Metal Busings..........................................page 266NISSEI KSP Ground Spiral <strong>Bevel</strong> <strong>Gears</strong>.........................page 268Catalog Number of KHK Stock <strong>Gears</strong>The Catalog Number for KHK stock gears is based on thesimple formula listed below.Please order KHK gears by specifying their Catalog Numbers.7<strong>Bevel</strong> <strong>Gears</strong>(Example)<strong>Bevel</strong> <strong>Gears</strong>M BSG 2 - 40 20 RDirection of Spiral ( R )No. of teeth of mating gear(20)No. of teeth(40)Module(2)Type (Ground Spiral <strong>Bevel</strong> Gear)Material(SCM415)MaterialS S45CM SCM415SU SUS303P MC901D Duracon(M90-44)TypeB <strong>Bevel</strong> <strong>Gears</strong>BS Spiral <strong>Bevel</strong> <strong>Gears</strong>BSG Ground Spiral <strong>Bevel</strong> <strong>Gears</strong>HP High Ratio Hypoid <strong>Gears</strong>227
<strong>Bevel</strong> <strong>Gears</strong>Large Selection of Modules, Gear Ratios, Materials and Styles !CharacteristicsKHK stock bevel gears are available in two types, spiral and straight tooth, in gear ratios of 1.5 to 5, and are offered in a large variety ofmodules, numbers of teeth, materials and styles.■ Main Features of Types of <strong>Bevel</strong> <strong>Gears</strong> OfferedThe following table lists the main features for easy selectionStraight bevel gears Spiral bevel gears TypeHypoidGearCatalog No.MHPMBSGSBSGMBSA(B) NOTE1SBSSB . SBYSUBPBDBHeat ToothPrecision SecondaryModule Gear Ratio MaterialsurfaceJIS B 1704OperationsMain CharacteristicTreatment finish1~1.52~42~42~61~51~81.5~31~30.5~115~20021.5~31.5~31.5~41.5~51.5~31.5~32SCM415SCM415S45CSCM415S45CS45C(CB FC200)SUS303MC901M90-44Combination of Our Know-How and Up-to-Date Manufacturing Techniques is at YourDisposal !Our popular KHK stock bevel gears with a large selection of sizesand types are the results ofour know-how and modernmanufacturing capabilities.We deliver reliable, highprecision, superior productsto you.Gear toothCarburizingCarburized(bore & hubsare masked)NOTE 2Gear teethinductionhardenedOverallcarburizedNOTE 3Gear teethinductionhardened----CutGroundGroundCutCutCutCutCutInjectionmolded322443(CB 4)NOTE 1: The catalog numbers with (B) at the end are identical in all features as the one without (B) except for bore and keyway dimensions.NOTE 2: Even though the bore and the hub portions are masked during the carburization and can be modified, care should be exercised sincethe hardness is somewhat higher.NOTE 3: MMSA(B) spiral bevel gears are carburized and do not allow secondary operations. However, the back surface of B7 style gears ismasked during the process so that it is possible to drill and pin on this surface.348△△△×△○○○△High speed reduction ratio, high efficiency, highrigidity and compact gear assembly.High strength, abrasion-resistant and compact forhigh-speed & torque use.Reasonably priced ground gear,yet remachinable except for the gear teeth.Ready to use without performing secondaryoperations. Strong and abrasion resistant.Large nos. of teeth and modules are offered inthese affordable spiral bevel gears.Popular series of straight bevel gears for manyuses.Suitable for food machinery due to SUS303's rustresistantquality.MC nylon products are light and can be usedwithout lubricant.Injection molded, mass-produced productions,suitable for office machines.○ Possible △ Partly possible ×Not possible228
KHK Technical InformationPlease select the most suitable products by carefully consideringthe characteristics of items and contents of the product tables. Itis also important to read all applicable “CAUTION” notes shownbelow before the final selection.Basically, KHK stock bevel gears should be selected as shownin the catalog in pairs (Ex: MBSG2-4020R should mate withMBSG2-2040L). But, for straight tooth bevel gears, there is someinterchangeability with different series. For plastic bevel gears, werecommend metal mating gears for good heat conductivity.■ Selection Chart for Straight <strong>Bevel</strong> <strong>Gears</strong> ( ○ Allowable × Not allowable)PinionSBSUBPBDBSelection Hints1. Caution in Selecting the Mating <strong>Gears</strong>GearSB SUB PB DB○○○×■ Calculation of Bending Strength of <strong>Gears</strong>○○○×○○○××××○2. Caution in Selecting <strong>Gears</strong> Based on Gear StrengthThe gear strength values shown in the product pages werecomputed by assuming a certain application environment.Therefore, they should be used as reference only. We recommendthat each user computes their own values by applying the actualusage conditions. The table below contains the assumptionsestablished for these products in order to compute gear strengths.CAUTION: The allowable torque of MHP High Ratio Hypoid <strong>Gears</strong> is the actualmeasured value when the pinion is rotating at 600 min -1 .3. Caution with Regard to the Special Characteristics of <strong>Bevel</strong> <strong>Gears</strong>1 MBSA(B) finished bore spiral bevel gears are carburizedthroughout so that they do not permit any secondary operations.However, the back surface of B7 style gears (ring type) ismasked during the process so that it is possible to drill and pinon this surface.2 The keyway sizes of MBSA(B) finished bore spiral bevel gearsare made according to JIS B 1301, medium quality (Js9), but thefinal heat treating may cause some deformation.3 The bore of SBS spiral bevel gears may somewhat be deformeddue to heat treatment and do not reach H7 tolerance.4 Due to the characteristics of the material, PB plastic bevel gears’product quality may be affected by heat or moisture absorption.Catalog No.ItemFormula NOTE 1No. of teeth of mating gearsRotationDurabilityImpact from motorImpact from loadDirection of loadAllowable bending stress at root σFlim NOTE 2Safety factor KRMBSGMBSA(B)SBSGSBSSBSBYFormula of bevel gears on bending strength(JGMA403-01)No. of teeth of mating gears of same set100min -1 (600min -1 for MBSG & SBSG)Over 10 7 cyclesUniform loadUniform loadBidirectional31.33kgf/mm 2 31.33kgf/mm 2 14kgf/mm 2 12.67kgf/mm 2 7kgf/mm 21.2SUB PB DBThe Lewis formula-100min -1-Allowable bending stress1.15kgf/mm 2(40 O C with nolubricant)NOTE3m 0.5 4.5m 0.8 4.0m 1.0 3.5kgf/mm 2■ Calculation of Surface Durability (Except those in common with bending strength)Formula NOTE 1Kinematic viscosity of lubricantGear supportAllowable Hertz stress σHlimSafety factor CRFormula of bevel gears on surface durability (JGMA404-01)100cSt(50℃ )Shafts & gear box have normal stiffness, and gears are supported on one end166kgf/mm 2 166kgf/mm 2 90kgf/mm 2 49kgf/mm 2 41.3kgf/mm 21.15NOTE 1: The gear strength formula is based on JGMA (Japanese Gear Manufacturers Association) specifications. “MC Nylon Technical Data” by Nippon PolypencoLimited and “Duracon Gear Data” by Polyplastic Co. Also, the units (min -1 ) of number of rotations and unit (kgf/mm 2 ) of stress are adjusted to the units neededin the formula.NOTE 2: Since the load is bidirectional, the allowable bending stress at root σFlim, used in JGMA 403-01 formula is set to 2/3 of the value.NOTE 3: The value for DB m0.5 was assumed by KHK.4. Other Points to Consider in the Selection ProcessSee the similarly titled section for miter gears.229
<strong>Bevel</strong> <strong>Gears</strong>Application HintsIn order to use KHK stock gears safely, carefully read theApplication Hints before proceeding. For “Notes on StartingOperations” and “Other Points to Consider in Applications”, pleasesee the Application Hints of Miter Gear Selection.5 MBSA(B) finished bore spiral bevel gears are carburizedthroughout, so that no secondary operations can be performed(except B7 style items). For items with induction hardened teeth,such as SBSG and SBS series, the hardness is high near thetooth root. When machining the front end, the machined areashould be 4 to 6mm smaller than the dimension, J.1. Caution on Performing Secondary Operations1 If you are reboring, it is important to pay special attention tolocating the center in order to avoid runout.2 The reference datum for gear cutting is the bore. Therefore, it isbest to use the bore for locating the center. If it is too difficult todo for small bores, the alternative is to use one spot on the boreand the runout of the side surface.3 If reworking using scroll chucks, we recommend the use of newor rebored jaws for improved precision. Please exercise cautionnot to crush the teeth by applying too much pressure. Anyscarring will cause noise during operation.Lathe Operations6 For tapping and keyway operations, see the examples givenin “1. Caution on Performing Secondary Operations” in KHKStock Spur Gear section. When cutting keyways, to avoid stressconcentration, always leave radii on corners.7 PB plastic bevel gears are susceptible to changes due totemperature and humidity. Dimensions may change betweenduring and after remachining operations.8 When heat treating S45C products, it is possible to get thermalstress cracks. It is best to subject them to penetrant inspectionafterwards. While the teeth strength may increase four fold, theprecision of the gear will drop approximately one grade.9 For the handling conveniences, SB and SBY series listed belowhas the tapped holes (180 ° apart, 2 places) on the holdingsurface.Catalog No.SB6-4515SBY8-4020SBY8-4515SBY5-6015SBY6-6015PCD(mm)130180210180220Tap SizeM10 deep 15M10 deep 20M10 deep 20M10 deep 15M10 deep 204 The production of bevel gears module 2.5 and over with apinning hole on the back of the hub in non-ground teeth hasbeen phased out as of August 2003. However, we may havesome stock of this configuration.230
KHK Technical Information2.Points of Caution in Assembling1 Since bevel gears are cone shaped, they produce axial thrustforces. Especially for spiral bevel gears, the directions of thrustchange with the hand of spiral and the direction of rotation. Thisis illustrated below. The bearings must be selected properly tobe able to handle these thrust forces.PRODUCT IMPROVEMENT ANNOUNCEMENTIn order to increase the gear strength of KHK standard <strong>Bevel</strong><strong>Gears</strong>, starting in June 2004, the following changes have beenintroduced. During this transition, some of the specificationswill change.Direction of rotation and thrust forcethrustthrustDrivethrustthrust1. Applicable SeriesMBSG Ground Spiral <strong>Bevel</strong> <strong>Gears</strong> – (8 Items)2. Improvement DetailsIncrease in gear strength (Approximately 15% higherbending strength compared to previous one)3. Change in the specificationsthrustDrivethrustBeforeAfterHeat treatmentTeeth induction hardenedafter carburizingCarburizing (bore & hub portion masked)thrustthrustSurface Treatment Black oxide No black Oxide2 KHK stock bevel gears are designed such that, when assembledaccording to the specified mounting distance with a toleranceof H7~H8, the backlash shown in the table is obtained.Mounting distance error, offset error and shaft angle error mustbe minimized to avoid excessive noise and wear. For variousconditions of teeth contact, please see page 198 "Correct ToothContact" and "Incorrect Tooth Contact".3 If a bevel gear is mounted on a shaft far from the bearings, theshaft may bend. We recommend mounting bevel gears as closeto the bearings as possible. This is especially important sincemost bevel gears are supported on one end. The bending ofshafts will cause abnormal noise and wear, and may even causefatigue failure of the shafts. Both shafts and bearings must bedesigned with sufficient strength.4 Due to the thrust load of bevel gears, the gears, shafts andbearings have the tendency to loosen up during operation. <strong>Bevel</strong>gears should be fastened to the shaft with keys and set screws,taper pins, step shafts, etc.5 When installing MBSA(B) spiral bevel gears in B7 style (ringtype), always secure the gears onto the mounting base with taperpins to absorb the rotational loads. It is dangerous to secure withbolts only.The corner tips of the gear-teeth of KHK stock <strong>Bevel</strong> <strong>Gears</strong> aremachine chamfered for safety and for prevention of damages.■The chamfering of the corner gear tips for bevel gear (unit: mm)over 5Module0.5 up to 11 up to 2.52.5 up to 5Outside edge R0.51.02.03.0Inside edge Rall burrs removed0.51.01.5Example of KHK Gear ApplicationsTaper pinGear<strong>Components</strong> of automated line (<strong>Bevel</strong> <strong>Gears</strong>)Mounting base231
<strong>Bevel</strong> <strong>Gears</strong>■ Features of MHP High Ratio Hypoid <strong>Gears</strong>A pair of MHP high-ratio hypoid gears are able to produce an amazing speed of reduction of 200:1 in one stage.1. Total-cost reductionThe MHP provides a compact gearingbody replacing several stages ofreduction gears. This reduces the costsharply.2. High efficiencyCompared to worm gear drives, the MHPhas less sliding contact. The resultinghigher efficiency allows the use of smallermotors (See the graph on the right).3. High rigidityThe carburized hypoid gears lead tosmaller size than comparable worms gears.4. Compact gear assemblyThe size of the gear housing is nearly thesame as outer diameter of the large gear.(See the diagrams below)EfficiencyComparison of the efficiency of MHP High Ratio Hypoid <strong>Gears</strong> and Worm <strong>Gears</strong>Worm <strong>Gears</strong>MHPComparison of MHP and worm <strong>Gears</strong>MHPWorm GearPositionReduction■ How to determine the radial and thrust loadsBefore using the MHP high-ratio hypoid gears, be sure to confirmthe direction of radial and thrust loads. Following equations areused to compute these loads. The radial and thrust load coefficientsare given on the product pages.Radial load calculationStrengthSCM415 Heat TreatedMiniaturizationof Main BodyFC, BCRaw MaterialS45C+Induction HardenedWRP: Radial load on the pinion or L(N)WRP= WKp X TG X nzWhereWKP: Radial load coefficient of pinion or L(given on the product pages)TG: Torque of gear or R(N.m)n: Number of teeth of pinion or Lz: Number of teeth of gear or REfficiencyReduced MotorCapacityWRG: Radial load on the gear or R(N)WRG= WKG X TGWhereWKG: Radial load coefficient of gear or R (given on the product pages)TG: Torque of gear or R(N.m)ex,50Wex,60WThrust load calculationWXP: Thrust load on the pinion or L(N)WXP: WNP X TG X nzWhereWNP: Thrust load coefficient of pinion or L (given on the product page)TG: Torque of gear or R(N.m)n: Number of teeth of pinion or Lz: Number of teeth of gear or RWXG: Thrust load of gear of R(N)WXG=WNG X TGWhereWNG: Thrust load coefficient of gear or R (given on the product pages)TG: Torque of gear or R(N.m)R: Right-hand thread at speed ratio 1/1L: Left-hand thread at speed ratio 1/1232
KHK Technical Information■ Variations in tooth contact due to poor alignment of gearsIf the gear engagement position is out of the normal position, variations in tooth contact, as illustrated below, may appear.(1) Tooth contact ?in case of a shaft-angle error (2) Tooth contact in case of a shaft-offset errorToe contactToe contactToecontactToe contactErrorHigh toecontactLow toecontactHigh heel contactLow heel contactError(offset is large)Low toe contactHeelcontactHeel contactHeel contactErrorHigh toecontactError(offset is small)Low heel contactHigh heel contactHeel contact(3) Tooth contact in case of a pinion set position error (4) Tooth contact in case of a gear set position errorLow heel contactToe contactHigh toecontactErrorToecontactLow toe contactHigh heel contactHeel contactHeel contactErrorLow toecontactHigh toe contactLow heel contactErrorToecontactHeel contactHeel contactErrorToe contactHigh heel contact233
ModulesMHP High Ratio Hypoid <strong>Gears</strong> 1~1.5OffsetB8 Shape■ Modules 1~1.5<strong>Bevel</strong><strong>Gears</strong>Catalog No. Reduction ratio NominalmoduleMHP1-0453RMHP1-3045LMHP1.5-0453RMHP1.5-3045LMHP1-0603RMHP1-3060LMHP1.5-0603RMHP1.5-3060LMHP1-0602RMHP1-2060LMHP1.5-0602RMHP1.5-2060LMHP1-0451RMHP1-1045LMHP1.5-0451RMHP1.5-1045LMHP1-0601RMHP1-1060LMHP1.5-0601RMHP1.5-1060LMHP1-0901RMHP1-1090LMHP1-1201RMHP1-1120LMHP1-1801RMHP1-1180LMHP1-2001RMHP1-1200LActualmodule15 m1 1.06715 m1.5 1.73320 m1 1.0520 m1.5 1.63330 m1 1.0530 m1.5 1.63345 m1 1.06745 m1.5 1.73360 m1 1.0560 m1.5 1.63390 m1 1.089120 m1 0.817180 m1 1200 m1 1DirectionNo. of teeth Shapeof spiral453453603603602602451451601601901120118012001RLRLRLRLRLRLRLRLRLRLRLRLRLRLB9B8B9B8B9B8B9B8B9B8B9B8B9B8B9B8B9B8B9B8B9B8B9B8B9B8B9B8Bore・Shaft Dia. Hub dia. Pitch dia. Outside dia. Mounting distance Total length Hub width Length of bore and shaftA (Bore: H7・Shaft: h7) B C D E F H I1222.11431.11226.12036.11222.12031.11220.11426.11222.12031.12031.12031.12542.12542.130―40―34―50―34―50―30―40―34―50―50―50―70―70―4810.3781<strong>7.</strong>66311.79815.76312.8981<strong>7.</strong>74810.17818.36312.9981<strong>7.</strong>79815.79813.418022.420021.54810.3781<strong>7.</strong>66311.79815.76312.8981<strong>7.</strong>74810.17818.36312.9981<strong>7.</strong>79815.79813.418022.420021.5191272817021142331992113433175191152815221134331753317033170472424725216.311323.714818.112528.71681<strong>7.</strong>812028.214916.510423.91381<strong>7.</strong>912228.215128.814929.314940.120040.62057―10―8―13―8―13―7―10―8―13―13―13―18―18―149420116161022513516942511614852010216942511625116251163515435154MHP234■Twist direction and offset positionThe hypoid-gear engagement position is dependent on the twist direction of the pinion thread.Fig. 1 Fig. 2Fig. 1: Below centerThe engagement position with the left-handpinion is called the below center.Fig. 2: Above CenterThe engagement position with the right-handthread pinion is called the above center.NOTE 3: KHK stock Hypoid <strong>Gears</strong> areavailable in Below Center type (Fig. 1) only.Above Center type (Fig. 2) is unavailable.
Hypoid <strong>Gears</strong>Precision gradeGear teethPressure angleMaterialHeat treatmentJIS B 1704 grade 3Gleason20°SCM415Carburizing NOTE 4SpecificationsTooth hardnessSurface treatmentTooth surface finishDatum reference surfacefor gear cutting60~63HRCNOTE 4: The areas marked with ---- on the diagram are masked duringthe carburizing and can be modified, even though the hardnessis somewhat higher.—CutBore (Shaft if pinion)Secondary Operations Possible except tooth areaB9 ShapeFace width Holding surface dia. Offset Radial load coefficient NOTE 1 Thrust load coefficient NOTE 1 Allowable torque Allowable torque(J) K L CW CCW CW CCW (N・m) NOTE 2 (kgf・m)(6)(10)(8)(10)(8)(10)(6)(10)(8)(10)(10)(10)(15)(18)35.1―56.5―46.4―76.8―46.4―76.7―34.9―56―46.3―76.8―76.2―76.4―148.2―162.4―101815221828142520303232606548.4814<strong>7.</strong>326.78100.0933.88159.4320.44119.3233.59186.5920.39142.7148.04400.8126.36233.5933.3435<strong>7.</strong>6122.63303.0621.08464.721.17720.7811.69614.0410.77695.62−3<strong>7.</strong>67523.74−18.67338.45−26.2502.91−16.54194.45−24.15784.31−15.29466.2−35.581579.79−16.041034.08−23.121564.81−1<strong>7.</strong>19974.4−15.721404.28−16.461811.47−9.251458.9−8.91430.7513969.928.98566.7210.11956.55<strong>7.</strong>1557<strong>7.</strong>568.211461.235.96899.111.133014.66.881755.84<strong>7.</strong>412936.725.821912.115.71277<strong>7.</strong>986.393718.133.533026.673.583074.3531.74−831.1621.19−466.6323.73−829.7413.95−511.7724.77−1248.614.75−782.2134.11−2605.2622.02−1439.5825.14−2514.0915.81−1675.6515.17−2443.7314.76−3326.46<strong>7.</strong>96−2721.83<strong>7.</strong>05−2808.83Backlash(mm)10.3 1.05 0.05~0.1541.2 4.20 0.10~0.2023.3 2.38 0.05~0.1582.4 8.40 0.10~0.2024.1 2.46 0.05~0.158<strong>7.</strong>3 8.90 0.10~0.2011.3 1.15 0.05~0.1546.6 4.75 0.10~0.2025.3 2.58 0.05~0.1594.0 9.58 0.10~0.2071.4 <strong>7.</strong>28 0.05~0.1551.8 5.28 0.03~0.10260 26.5 0.05~0.15333 34.0 0.05~0.15NOTE 1: Factors to be used for calculating radial and thrust loads, CW and CCW stand for clockwise and counterclockwise rotation, respectively. See B8Shape above. A plus sign means that two gears in a set are apart from each other when load is applied. A minus sign means that they approacheach other when load is applied. For the method of calculation, see “How to determine the radial and thrust loads” on page 232.NOTE 2: The allowable torques are obtained from the results of experimentation with the pinion at 600 min -1 lubricated with Kingstar SG-O (NIHON GREASE).Weight(kg)0.150.290.500.730.290.450.941.150.290.280.940.770.160.220.500.480.290.280.940.770.940.760.940.753.991.884.761.88Catalog No.MHP1-0453RMHP1-3045LMHP1.5-0453RMHP1.5-3045LMHP1-0603RMHP1-3060LMHP1.5-0603RMHP1.5-3060LMHP1-0602RMHP1-2060LMHP1.5-0602RMHP1.5-2060LMHP1-0451RMHP1-1045LMHP1.5-0451RMHP1.5-1045LMHP1-0601RMHP1-1060LMHP1.5-0601RMHP1.5-1060LMHP1-0901RMHP1-1090LMHP1-1201RMHP1-1120LMHP1-1801RMHP1-1180LMHP1-2001RMHP1-1200L<strong>Bevel</strong><strong>Gears</strong>MHP235
ModulesMBSG Ground Spiral <strong>Bevel</strong> <strong>Gears</strong> 2~4■ Modules 2~4B3 Shape<strong>Bevel</strong><strong>Gears</strong>Catalog No. Gear ratio Module No. of teeth Directionof spiralMBSG2-4020RMBSG2-2040LMBSG2.5-4020RMBSG2.5-2040LMBSG3-4020RMBSG3-2040LMBSG4-4020RMBSG4-2040L2m2m2.5m3m44020402040204020RLRLRLRLShapeB4B3B4B3B4B3B4B3Bore Hub dia. Pitch dia. Outside dia. Mounting distance Total length Crown to back lengthAH7 B C D E F G15 45 80 81.1 45 31.78 26.112 35 40 44.1 55 28.16 16.02CAUTION: Dimensions of the outside diameter, the overall length and crown to back length are all theoretical values, and some differences will occur due to the cornerchamfering of the gear tips.161220162520554365528070100501206016080101.2955.12121.5766.03162.0688.46506560807510033.3531.0139.8138.948.2745.3826.2916.2831.5721.513<strong>7.</strong>0622.12MBSG■ Contact Surface of Spiral <strong>Bevel</strong> <strong>Gears</strong>Tooth surfaces of spiral gears have concave and convex sides. Changesin the rotational direction of the driving gear alters the contact surfaceaccordingly. The illustrations show top views of RH and LH spiral gears,and the tables on the right explain the different contact surface dependingon the situation.Concave surfaceRH spiral as a driving gearRotating direction ofdriving gear NOTE 1RH rotation(clockwise)LH rotation(counterclockwise)Driving gear (RH spiral)Convex surfaceConcave surfaceContact surfaceDriven gear (LH spiral)Concave surfaceConvex surfaceLH spiral as a driving gearToothRH spiralConvexsurfaceToothLH spiralRotating direction ofdriving gear NOTE 1RH rotation(clockwise)Driving gear (LH spiral)Concave surfaceContact surfaceDriven gear (RH spiral)Convex surfaceLH rotation(counterclockwise)Convex surfaceConcave surfaceNOTE 1: Rotational directions given in the tables are for viewing the gears fromthe hub side.236
Ground Spiral <strong>Bevel</strong> <strong>Gears</strong>Precision gradeGear teethPressure angleHelix angleMaterialHeat treatmentJIS B 1704 grade 2Gleason20°35°SCM415Carburizing NOTE 1SpecificationsTooth hardnessSurface treatmentTooth surface finishDatum reference surfacefor gear grindingSecondary Operations55~60HRCNOTE 1: The areas marked with ---- on the diagram are masked duringthe carburizing and can be modified, even though the hardness issomewhat higher.—CutBorePossible for portion notcarburizingB4 ShapeHub width Length of bore Face width Holding surface dia. Allowable torque(N・m) NOTE 2 Allowable torque(kgf・m) BacklashH I J K Bending strength Surface durability Bending strength Surface durability2952.7 51.8 8<strong>7.</strong>2 5.28 8.89142725.39 25.9 43.6 2.65 4.451813.751613.252018221<strong>7.</strong>530293536.5424317202766.9929.9780.2836.56106.6351.2599.349.716984.940520317085.129514772236110.15.071<strong>7.</strong>38.6541.320.71<strong>7.</strong>48.6830.115.073.736.8(mm)0.05~0.110.06~0.120.07~0.130.10~0.16NOTE 2: The allowable torques shown in the table are the calculated values according to the assumed usage conditions. Please see page 229 for more details.Weight(kg)0.550.170.960.271.520.553.301.10Catalog No.MBSG2-4020RMBSG2-2040LMBSG2.5-4020RMBSG2.5-2040LMBSG3-4020RMBSG3-2040LMBSG4-4020RMBSG4-2040L■ Forces Acting on Spiral <strong>Bevel</strong> Gear TeethFor a spiral bevel gear with shaft angle ∑ = 90°, pressure angleαn=20° and spiral angleβm = 35°, the tables below show the axial thrust force Fa and the radial force Fr when atangential force Fu of 100 units is applied at the center of face width.<strong>Bevel</strong><strong>Gears</strong>MBSGThe tables show the values ofaxial thrust force Faradial force Fr(1) Forces acting upon pinion(2) Forces acting upon gearContactsurfaceConcavesurfaceConvexsurface1.080.9-18.1Gear ratio z2 /z1surface1.5 2.0 2.5 3.0 4.0 5.0 1.082.9 82.5 81.5 80.5 78.7 7<strong>7.</strong>4-1.9 8.4 15.2 20.0 26.1 29.8-18.1 -33.6 -42.8 -48.5 -52.4 -5<strong>7.</strong>2 -59.980.9 75.8 71.1 6<strong>7.</strong>3 64.3 60.1 5<strong>7.</strong>3ContactConcavesurfaceConvexsurface80.9-18.1Gear ratio z2 /z11.5 2.0 2.5 3.0 4.0 5.075.8 71.1 6<strong>7.</strong>3 64.3 60.1 5<strong>7.</strong>3-33.6 -42.8 -48.5 -52.4 -5<strong>7.</strong>2 -59.9-18.1 -1.9 8.4 15.2 20.0 26.1 29.880.9 82.9 82.5 81.5 80.5 78.7 7<strong>7.</strong>4237
ModulesSBSG Ground Spiral <strong>Bevel</strong> <strong>Gears</strong> 2~4■ Modules 2~4B3 Shape<strong>Bevel</strong><strong>Gears</strong>SBSGCatalog No. Gear ratio Module No. of teeth Directionof spiralSBSG2-3020RSBSG2-2030LSBSG2.5-3020RSBSG2.5-2030LSBSG3-3020RSBSG3-2030LSBSG4-3020RSBSG4-2030LSBSG2-4020RSBSG2-2040LSBSG2.5-4020RSBSG2.5-2040LSBSG3-4020RSBSG3-2040LSBSG4-4020RSBSG4-2040LSBSG2-4515RSBSG2-1545LSBSG2.5-4515RSBSG2.5-1545LSBSG3-4515RSBSG3-1545L1.523m2m2.5m3m4m2m2.5m3m4m2m2.5m330203020302030204020402040204020451545154515RLRLRLRLRLRLRLRLRLRLRLShapeB4B3B4B3B4B3B4B3B4B3B4B3B4B3B4B3B4B3B4B3B4B3Bore Hub dia. Pitch dia. Outside dia. Mounting distance Total length Crown to back lengthAH7 B C D E F G12 35 60 61.6 40 26.6 21.210 30 40 43.55 45 24.91 16.18CAUTION: Dimensions of the outside diameter, the overall length and crown to back length are all theoretical values, and some differences will occur due to the cornerchamfering of the gear tips.15121616202012121512201620201210151220154540504570604032504060507060402450306038755090601208080401005012060160809030112.53<strong>7.</strong>5135457<strong>7.</strong>0954.4392.2165.58122.858<strong>7.</strong>3480.9944.1101.2755.2121.4866.07162.0788.590.6734.78113.3243.36135.9952.085055557075904560557565908012040605075559033.8630.8835.3440.174<strong>7.</strong>4948.1732.263439.6543.6145.7650.6353.6966.2430.2929.6638.2538.2740.5944.9826.5618.9826.6626.863<strong>7.</strong>1432.4525.992131.2726.336.4731.5242.0742.1226.0115.832.4719.7333.9823.68238
Ground Spiral <strong>Bevel</strong> <strong>Gears</strong>SpecificationsPrecision gradeGear teethPressure angleHelix angleMaterialHeat treatmentJIS B 1704 grade 2Gleason20°35°S45CTeeth induction hardenedTooth hardnessSurface treatmentTooth surface finishDatum reference surfacefor gear grinding48~53HRCBlack oxide exceptground surfaceGroundBoreSecondary Operations Possible except tooth areasB4 ShapeHub width Length of bore Face width Holding surface dia. Allowable torque(N・m) NOTE 1 Allowable torque(kgf・m) BacklashH I J K Bending strength Surface durability Bending strength Surface durability233<strong>7.</strong>56 14.1 14.2 1.44 1.44112221.34 9.61 9.44 0.98 0.961511.671814.1717202523.3318182022.5242<strong>7.</strong>528351714221<strong>7.</strong>52021.3330283137404327323440384745622629353735441517201520222815202345.612<strong>7.</strong>425<strong>7.</strong>1434.7178.5946.8948.4621.1159.2620.5373.7829.63102.3942.859.0719.1572.8220.4888.228.5229.019.848.433.110672.225.512.851.725.984.842.51959<strong>7.</strong>934.811.259.018.999.331.829.719.850.433.611375.326.713.455.12<strong>7.</strong>691.946.021710928.19.3848.316.182.52<strong>7.</strong>52.962.024.943.3710.8<strong>7.</strong>362.601.305.272.648.654.3319.99.983.551.146.011.9310.13.243.032.025.143.4211.5<strong>7.</strong>682.731.365.622.819.384.6922.211.12.870.964.931.648.412.80(mm)0.05~0.110.06~0.120.07~0.130.10~0.160.05~0.110.06~0.120.07~0.130.10~0.160.05~0.110.06~0.120.07~0.13NOTE 1: The allowable torques shown in the table are the calculated values according to the assumed usage conditions. Please see page 229 for more details.Weight(kg)0.250.120.550.230.800.501.801.100.500.191.100.401.600.703.301.500.700.101.000.201.800.35Catalog No.SBSG2-3020RSBSG2-2030LSBSG2.5-3020RSBSG2.5-2030LSBSG3-3020RSBSG3-2030LSBSG4-3020RSBSG4-2030LSBSG2-4020RSBSG2-2040LSBSG2.5-4020RSBSG2.5-2040LSBSG3-4020RSBSG3-2040LSBSG4-4020RSBSG4-2040LSBSG2-4515RSBSG2-1545LSBSG2.5-4515RSBSG2.5-1545LSBSG3-4515RSBSG3-1545L<strong>Bevel</strong><strong>Gears</strong>SBSG239
ModulesMBSA(B) Finished Bore Spiral <strong>Bevel</strong> <strong>Gears</strong> 2~6WidthDepth■ Modules 2~6B3 ShapeMBSẠMBSBMBSA4-2030L30MBSB4-2030Lm4 20 L BK70 80 8<strong>7.</strong>34 85 45.53 2<strong>7.</strong>45 21.67 4235MBSA5-3020Rm5 30 R B7 80 ― 150 ― 70 35.53 23.8 ― 31MBSA5-2030L35m5 20 L BK87 100 109.2 105 55.05 33.07 25.67 51MBSB5-2030L40MBSA6-3020Rm6 30 R B7 90 ― 180 ― 80 38.86 24.37 ― 33MBSA6-2030L45m6 20 L BK105 120 130.48 125 65.57 38.49 30 60MBSB6-2030L50Catalog No. Gear ratio Module No. of teeth Directionof spiralShapeAH7 B C D E F G H IMBSA2-3020R20m2 30 R B4MBSB2-3020R2240 60 61.36 40 26.8 21.02 14 23MBSA2-2030L15m2 20 L BKMBSB2-2030L1835 40 43.49 45 24.96 16.16 13.33 23MBSA2.5-3020R22m2.5 30 R B4MBSB2.5-3020R2548 75 76.74 50 33.6 26.31 18 30MBSA2.5-2030L18m2.5 20 L BKMBSB2.5-2030L2043 50 54.43 55 30.08 18.98 15.17 28MBSA3-3020R25m3 30 R B4MBSB3-3020R3060 90 92.21 60 40.34 31.66 21 36MBSA3-2030L22MBSB3-2030L1.5 m3 20 L BK2553 60 65.58 65 35.17 21.86 1<strong>7.</strong>67 32.5MBSA4-3020R35m4 30 R B4MBSB4-3020R4075 120 122.91 70 43.99 32.18 21 39<strong>Bevel</strong><strong>Gears</strong>Bore Hub dia. Pitch dia. Outside dia. Mounting distance Total length Crown to back length Hub width Length of boreCAUTION: With the exception of B7 type gears, dimensions of the outside diameter, the overall length and crown to back length are all theoretical values, and somedifferences will occur due to the corner chamfering of the gear tips.CAUTION: The products which are hardened by carburizing allow no secondary machining, however, the back surface of B7 type gears is masked during the process sothat it is possible to drill and pin on this surface.240
Finished Bore Spiral <strong>Bevel</strong> <strong>Gears</strong>WidthB7 ShapePrecision gradeGear teethPressure angleHelix angleMaterialHeat treatmentJIS B 1704 grade 4Gleason20°35°SCM415Overall Carburizing NOTE 4SpecificationsTooth hardnessSurface treatmentTooth surface finishDatum reference surfacefor gear cuttingSecondary Operations55~60HRC—CutBoreNot Possible except the mounting surfaceon B7 shapeNOTE 4: It is possible to perform secondary operations on the mountingsurface of B7 shape dut to masking during carburizing.B4 ShapeDepthFace width Holding surface dia. Keyway NOTE 1 Threaded hole NOTE 2 Allowable torque(N・m) NOTE 3 Allowable torque(kgf・m) Backlash WeightJ K Width × Depth Thread size L Bending strength Surface durability Bending strength Surface durability (mm) (kg)Catalog No.11 3<strong>7.</strong>566 x 2.8 M60.27 MBSA2-3020R7 34.4 38.4 3.51 3.91 0.06~0.166 x 2.8 M60.26 MBSB2-3020R11 24.345 x 2.3 M50.15 MBSA2-2030L6.5 23.5 25.6 2.39 2.61 0.06~0.166 x 2.8 M60.13 MBSB2-2030L14 48.016 x 2.8 M60.55 MBSA2.5-3020R9 68.0 76.8 6.93 <strong>7.</strong>84 0.07~0.178 x 3.3 M80.52 MBSB2.5-3020R14 31.026 x 2.8 M60.27 MBSA2.5-2030L<strong>7.</strong>5 46.4 51.2 4.73 5.22 0.07~0.176 x 2.8 M60.26 MBSB2.5-2030L17 5<strong>7.</strong>148 x 3.3 M81.10 MBSA3-3020R11 118 135 12.1 13.8 0.08~0.188 x 3.3 M81.00 MBSB3-3020R17 36.26 x 2.8 M60.49 MBSA3-2030L9 80.7 90.1 8.23 9.19 0.08~0.188 x 3.3 M80.46 MBSB3-2030L23 76.7210 x 3.3 M82.00 MBSA4-3020R10 283 328 28.9 33.5 0.12~0.2712 x 3.3 M81.90 MBSB4-3020R23 48.078 x 3.3 M81.10 MBSA4-2030L11 193 219 19.7 22.3 0.12~0.2710 x 3.3 M81.00 MBSB4-2030L28 9<strong>7.</strong>36 ― 6-M10 110 544 637 55.4 64.9 0.14~0.34 3.00 MBSA5-3020R28 62.0410 x 3.3 M82.10 MBSA5-2030L13 371 425 3<strong>7.</strong>8 43.3 0.14~0.3412 x 3.3 M82.00 MBSB5-2030L34 115.61 ― 6-M10 120 927 1120 94.6 114 0.16~0.36 4.80 MBSA6-3020R34 72.4114 x 3.8 M83.40 MBSA6-2030L15 633 745 64.5 76.0 0.16~0.3614 x 3.8 M83.20 MBSB6-2030LNOTE 1: Although the dimensions of the keyway are made to the JIS (Js9) tolerance, there may be somedeviations due to the effects of the heat treatment.NOTE 2: A set screw comes with these products.NOTE 3: The allowable torques shown in the table are the calculated values according to the assumed usageconditions. Please see page 229 for more details.When installing B7 shape (ring type) gear,always secure them onto the mountingbase with taper pins to absorb the rotationalloads. It is dangerous to secure with boltsonly.GearMounting baseTaper pin<strong>Bevel</strong><strong>Gears</strong>MBSẠMBSB241
ModulesMBSA(B) Finished Bore Spiral <strong>Bevel</strong> <strong>Gears</strong> 2~6WidthDepth■ Modules 2~6B3 Shape<strong>Bevel</strong><strong>Gears</strong>Bore Hub dia. Pitch dia. Outside dia. Mounting distance Total length Crown to back length Hub width Length of boreMBSẠMBSBMBSA5-4020Rm5 40 R B7 90 ― 200 ― 70 35.2 22.98 ― 30MBSA5-2040L40m5 20 L BK87 100 109.91 125 5<strong>7.</strong>11 2<strong>7.</strong>48 21.75 53.5MBSB5-2040L45MBSA6-4020Rm6 40 R B7 110 ― 240 ― 80 3<strong>7.</strong>89 23.62 ― 32MBSA6-2040L50m6 20 L BK105 120 132.04 150 6<strong>7.</strong>8 33.01 26.25 64MBSB6-2040L55Catalog No. Gear ratio Module No. of teeth Directionof spiralShapeAH7 B C D E F G H IMBSA2-4020R20m2 40 R B4MBSB2-4020R2245 80 81.06 45 31.83 26.06 18 29MBSA2-2040L15m2 20 L BKMBSB2-2040L1835 40 44.2 55 28.16 16.05 13.75 27MBSA2.5-4020R25m2.5 40 R B4MBSB2.5-4020R2855 100 101.29 50 33.35 26.29 16 30MBSA2.5-2040L20m2.5 20 L BKMBSB2.5-2040L2243 50 55.12 65 31.01 16.28 13.25 29MBSA3-4020R30m3 40 R B4MBSB3-4020R3565 120 121.57 60 39.81 31.57 21 35MBSA3-2040L 222m3 20 L BKMBSB3-2040L2553 60 66.03 80 38.9 21.51 18.25 36.5MBSA4-4020Rm4 40 R B7 80 ― 160 ― 60 32.08 22.53 ― 28MBSA4-2040L30m4 20 L BKMBSB4-2040L3570 80 88.46 100 45.38 22.12 1<strong>7.</strong>5 43CAUTION: With the exception of B7 type gears, dimensions of the outside diameter, the overall length and crown to back length are all theoretical values, and somedifferences will occur due to the corner chamfering of the gear tips.CAUTION: The products which are hardened by carburizing allow no secondary machining, however, the back surface of B7 type gears is masked during the process sothat it is possible to drill and pin on this surface.242
Finished Bore Spiral <strong>Bevel</strong> <strong>Gears</strong>SpecificationsB7 ShapePrecision gradeGear teethPressure angleHelix angleMaterialHeat treatmentJIS B 1704 grade 4Gleason20°35°SCM415Overall Carburizing NOTE 4Tooth hardnessSurface treatmentTooth surface finishDatum reference surfacefor gear cuttingSecondary Operations55~60HRC—CutBoreNot Possible except the mounting surfaceon B7 shapeNOTE 4: It is possible to perform secondary operations on the mountingsurface of B7 shape dut to masking during carburizing.WidthB4 ShapeDepthFace width Holding surface dia. Keyway NOTE 1 Threaded hole NOTE 2 Allowable torque(N・m) NOTE 3 Allowable torque(kgf・m) Backlash WeightJ K Width × Depth Thread size L Bending strength Surface durability Bending strength Surface durability (mm) (kg)Catalog No.14 52.76 x 2.8 M60.55 MBSA2-4020R9 59.6 69.6 6.08 <strong>7.</strong>09 0.06~0.166 x 2.8 M60.53 MBSB2-4020R14 25.395 x 2.3 M50.17 MBSA2-2040L7 29.9 34.8 3.05 3.55 0.06~0.166 x 2.8 M60.16 MBSB2-2040L17 66.998 x 3.3 M80.96 MBSA2.5-4020R8 114 135 11.7 13.8 0.07~0.178 x 3.3 M80.93 MBSB2.5-4020R17 29.976 x 2.8 M60.27 MBSA2.5-2040L7 5<strong>7.</strong>3 6<strong>7.</strong>6 5.84 6.89 0.07~0.176 x 2.8 M60.25 MBSB2.5-2040L20 80.288 x 3.3 M81.52 MBSA3-4020R11 195 233 19.9 23.7 0.08~0.1810 x 3.3 M81.45 MBSB3-4020R20 36.566 x 2.8 M60.55 MBSA3-2040L9.5 9<strong>7.</strong>7 116 9.97 11.9 0.08~0.188 x 3.3 M80.51 MBSB3-2040L27 10<strong>7.</strong>63 ― 6-M10 110 466 564 4<strong>7.</strong>5 5<strong>7.</strong>5 0.12~0.27 3.20 MBSA4-4020R27 51.258 x 3.3 M81.10 MBSA4-2040L9 234 282 23.8 28.8 0.12~0.2710 x 3.3 M81.00 MBSB4-2040L34 133.97 ― 6-M10 120 915 1120 93.3 114 0.14~0.34 5.70 MBSA5-4020R34 61.9512 x 3.3 M82.10 MBSA5-2040L11 458 559 46.7 5<strong>7.</strong>0 0.14~0.3414 x 3.8 M82.00 MBSB5-2040L40 162.56 ― 6-M10 140 1530 1920 156 196 0.16~0.36 8.60 MBSA6-4020R40 7<strong>7.</strong>1114 x 3.8 M83.50 MBSA6-2040L14 766 961 78.1 9<strong>7.</strong>9 0.16~0.3616 x 4.3 M103.30 MBSB6-2040LNOTE 1: Although the dimensions of the keyway are made to the JIS (Js9) tolerance, there may be somedeviations due to the effects of the heat treatment.NOTE 2: A set screw comes with these products.NOTE 3: The allowable torques shown in the table are the calculated values according to the assumed usageconditions. Please see page 229 for more details.Taper pin<strong>Bevel</strong><strong>Gears</strong>MBSẠMBSBWhen installing B7 shape (ring type) gear,always secure them onto the mountingbase with taper pins to absorb the rotationalloads. It is dangerous to secure with boltsonly.GearMounting base243
ModulesMBSA(B) Finished Bore Spiral <strong>Bevel</strong> <strong>Gears</strong> 2~6WidthDepth■ Modules 2~6B3 Shape<strong>Bevel</strong><strong>Gears</strong>Bore Hub dia. Pitch dia. Outside dia. Mounting distance Total length Crown to back length Hub width Length of boreMBSẠMBSBMBSA5-4518Rm5 45 R B7 100 ― 225 ― 65 33.37 22.82 ― 28MBSA5-1845L35m5 18 L BK80 90 101.07 135 5<strong>7.</strong>3 24.71 20.5 54.5MBSB5-1845L42MBSA6-4518Rm6 45 R B7 110 ― 270 ― 75 36.97 24.19 ― 30MBSA6-1845L45m6 18 L BK95 108 120.55 160 66.73 2<strong>7.</strong>51 22.4 63MBSB6-1845L50Catalog No. Gear ratio Module No. of teeth Directionof spiralShapeAH7 B C D E F G H IMBSA2-4518R20m2 45 R B4MBSB2-4518R2548 90 90.79 40 2<strong>7.</strong>67 22.98 15 25MBSA2-1845L12m2 18 L BKMBSB2-1845L1632 36 40.42 60 28.54 15.88 14.2 2<strong>7.</strong>5MBSA2.5-4518R25m2.5 45 R B4MBSB2.5-4518R3055 112.5 113.49 50 34.94 28.74 19 31MBSA2.5-1845L15m2.5 18 L BKMBSB2.5-1845L2040 45 50.35 72 33.19 16.82 14.75 31.5MBSA3-4518R30m3 45 R B4MBSB3-4518R3565 135 136.24 60 41.65 34.55 22 37MBSA3-1845L 2.520m3 18 L BKMBSB3-1845L2548 54 60.69 85 3<strong>7.</strong>82 18.84 16.3 36MBSA4-4518Rm4 45 R B7 80 ― 180 ― 55 29.77 21.25 ― 25MBSA4-1845L28m4 18 L BKMBSB4-1845L3263 72 80.86 110 48.03 21.77 18.2 46CAUTION: With the exception of B7 type gears, dimensions of the outside diameter, the overall length and crown to back length are all theoretical values, and somedifferences will occur due to the corner chamfering of the gear tips.CAUTION: The products which are hardened by carburizing allow no secondary machining, however, the back surface of B7 type gears is masked during the process sothat it is possible to drill and pin on this surface.244
Finished Bore Spiral <strong>Bevel</strong> <strong>Gears</strong>WidthB7 ShapePrecision gradeGear teethPressure angleHelix angleMaterialHeat treatmentJIS B 1704 grade 4Gleason20°35°SCM415Overall Carburizing NOTE 4SpecificationsTooth hardnessSurface treatmentTooth surface finishDatum reference surfacefor gear cuttingSecondary Operations55~60HRC—CutBoreNot Possible except the mounting surfaceon B7 shapeNOTE 4: It is possible to perform secondary operations on the mountingsurface of B7 shape dut to masking during carburizing.B4 ShapeDepthFace width Holding surface dia. Keyway NOTE 1 Threaded hole NOTE 2 Allowable torque(N・m) NOTE 3 Allowable torque(kgf・m) Backlash WeightJ K Width × Depth Thread size L Bending strength Surface durability Bending strength Surface durability (mm) (kg)Catalog No.14 62.246 x 2.8 M60.59 MBSA2-4518R8 69.3 74.3 <strong>7.</strong>06 <strong>7.</strong>58 0.06~0.168 x 3.3 M80.54 MBSB2-4518R14 23.114 x 1.8 M50.15 MBSA2-1845L7 2<strong>7.</strong>2 29.7 2.77 3.03 0.06~0.165 x 2.3 M50.13 MBSB2-1845L18 76.538 x 3.3 M81.13 MBSA2.5-4518R10 138 150 14.1 15.3 0.07~0.178 x 3.3 M81.08 MBSB2.5-4518R18 26.825 x 2.3 M50.27 MBSA2.5-1845L8 54.1 59.9 5.52 6.11 0.07~0.176 x 2.8 M60.24 MBSB2.5-1845L21 92.968 x 3.3 M81.95 MBSA3-4518R11 234 256 23.8 26.1 0.08~0.1810 x 3.3 M81.90 MBSB3-4518R21 33.416 x 2.8 M60.42 MBSA3-1845L9 91.8 103 9.36 10.5 0.08~0.188 x 3.3 M80.37 MBSB3-1845L29 122.33 ― 6-M10 110 567 630 5<strong>7.</strong>8 64.3 0.12~0.27 4.00 MBSA4-4518R29 45.838 x 3.3 M80.92 MBSA4-1845L10 223 252 22.7 25.7 0.12~0.2710 x 3.3 M80.85 MBSB4-1845L36 153.85 ― 6-M10 130 1100 1240 112 126 0.14~0.34 6.90 MBSA5-4518R36 56.1310 x 3.3 M81.70 MBSA5-1845L11 433 495 44.2 50.5 0.14~0.3412 x 3.3 M81.60 MBSB5-1845L43 184.57 ― 6-M10 140 1860 2150 190 219 0.16~0.36 11.0 MBSA6-4518R43 66.4414 x 3.8 M82.70 MBSA6-1845L12 731 859 74.6 8<strong>7.</strong>6 0.16~0.3614 x 3.8 M82.50 MBSB6-1845LNOTE 1: Although the dimensions of the keyway are made to the JIS (Js9) tolerance, there may be some deviations due to the effects of the heat treatment.NOTE 2: A set screw comes with these products.NOTE 3: The allowable torques shown in the table are the calculated values according to the assumed usage conditions. Please see page 229 for more details.<strong>Bevel</strong><strong>Gears</strong>MBSẠMBSBTaper pinWhen installing B7 shape (ring type) gear,always secure them onto the mountingbase with taper pins to absorb the rotationalloads. It is dangerous to secure with boltsonly.GearMounting base245
ModulesMBSA(B) Finished Bore Spiral <strong>Bevel</strong> <strong>Gears</strong> 2~6WidthDepth■ Modules 2~6B3 Shape<strong>Bevel</strong><strong>Gears</strong>Bore Hub dia. Pitch dia. Outside dia. Mounting distance Total length Crown to back length Hub width Length of boreMBSẠMBSBMBSA5-4515Rm5 45 R B7 90 ― 225 ― 60 33.57 25.16 ― 28MBSA5-1545L28m5 15 L BK65 75 86.55 135 56.89 24.43 20.83 54MBSB5-1545L32MBSA6-4515Rm6 45 R B7 110 ― 270 ― 70 38.28 28.05 ― 32MBSA6-1545L35m6 15 L BK78 90 103.13 160 66.39 2<strong>7.</strong>19 23 63MBSB6-1545L40Catalog No. Gear ratio Module No. of teeth Directionof spiralShapeAH7 B C D E F G H IMBSA2-4515R20m2 45 R B4MBSB2-4515R2248 90 90.66 40 30.01 25.99 18 27MBSA2-1545LBT 10m2 15 LMBSB2-1545LBK 1226 30 34.59 55 23.78 10.77 9.33 22.5MBSA2.5-4515R22m2.5 45 R B4MBSB2.5-4515R2555 112.5 113.28 45 32.43 2<strong>7.</strong>42 18 28MBSA2.5-1545L12m2.5 15 L BKMBSB2.5-1545L1532 3<strong>7.</strong>5 43.06 70 30.51 14.68 12.84 29MBSA3-4515R30m3 45 R B4MBSB3-4515R3265 135 136.03 55 39.94 34.05 22 35MBSA3-1545L 318m3 15 L BKMBSB3-1545L2038 45 52 85 38.12 18.67 16.33 36.5MBSA4-4515Rm4 45 R B7 80 ― 180 ― 50 28.85 22.14 ― 25MBSA4-1545L22m4 15 L BKMBSB4-1545L2552 60 69.24 110 4<strong>7.</strong>51 21.54 18.67 45.5CAUTION: With the exception of B7 type gears, dimensions of the outside diameter, the overall length and crown to back length are all theoretical values, and somedifferences will occur due to the corner chamfering of the gear tips.CAUTION: The products which are hardened by carburizing allow no secondary machining, however, the back surface of B7 type gears is masked during the process sothat it is possible to drill and pin on this surface.246
Finished Bore Spiral <strong>Bevel</strong> <strong>Gears</strong>WidthB7 ShapePrecision gradeGear teethPressure angleHelix angleMaterialHeat treatmentJIS B 1704 grade 4Gleason20°35°SCM415Overall Carburizing NOTE 4SpecificationsTooth hardnessSurface treatmentTooth surface finishDatum reference surfacefor gear cuttingSecondary Operations55~60HRC—CutBoreNot Possible except the mounting surfaceon B7 shapeNOTE 4: It is possible to perform secondary operations on the mountingsurface of B7 shape dut to masking during carburizing.B4 ShapeDepthFace width Holding surface dia. Keyway NOTE 1 Threaded hole NOTE 2 Allowable torque(N・m) NOTE 3 Allowable torque(kgf・m) Backlash WeightJ K Width × Depth Thread size L Bending strength Surface durability Bending strength Surface durability (mm) (kg)Catalog No.14 61.826 x 2.8 M60.62 MBSA2-4515R9 6<strong>7.</strong>8 61.3 6.91 6.25 0.06~0.166 x 2.8 M60.61 MBSB2-4515R14 16.46― M40.08 MBSA2-1545L5 21.7 20.4 2.22 2.08 0.06~0.164 x 1.8 M50.07 MBSB2-1545L17 7<strong>7.</strong>836 x 2.8 M60.99 MBSA2.5-4515R9 130 119 13.3 12.1 0.07~0.178 x 3.3 M80.96 MBSB2.5-4515R17 21.484 x 1.8 M50.16 MBSA2.5-1545L7 41.6 39.6 4.24 4.04 0.07~0.175 x 2.3 M50.14 MBSB2.5-1545L21 92.398 x 3.3 M81.80 MBSA3-4515R11 229 211 23.3 21.6 0.08~0.1810 x 3.3 M81.77 MBSB3-4515R21 26.186 x 2.8 M60.25 MBSA3-1545L9 73.3 70.5 <strong>7.</strong>48 <strong>7.</strong>18 0.08~0.186 x 2.8 M60.23 MBSB3-1545L28 124.3 ― 6-M10 110 542 508 55.3 51.8 0.12~0.27 4.00 MBSA4-4515R28 35.916 x 2.8 M60.64 MBSA4-1545L10 174 169 1<strong>7.</strong>7 1<strong>7.</strong>3 0.12~0.278 x 3.3 M80.60 MBSB4-1545L35 154.88 ― 6-M10 120 1060 1000 108 102 0.14~0.34 <strong>7.</strong>30 MBSA5-4515R35 42.648 x 3.3 M81.20 MBSA5-1545L11 339 334 34.6 34.1 0.14~0.3410 x 3.3 M81.10 MBSB5-1545L42 186.12 ― 6-M10 140 1790 1740 183 178 0.16~0.36 12.0 MBSA6-4515R42 52.3710 x 3.3 M81.90 MBSA6-1545L12 575 581 58.6 59.3 0.16~0.3612 x 3.3 M81.80 MBSB6-1545LNOTE 1: Although the dimensions of the keyway are made to the JIS (Js9) tolerance, there may be some deviations due to the effects of the heat treatment.NOTE 2: A set screw comes with these products.NOTE 3: The allowable torques shown in the table are the calculated values according to the assumed usage conditions. Please see page 229 for more details.<strong>Bevel</strong><strong>Gears</strong>MBSẠMBSBWhen installing B7 shape (ring type) gear,always secure them onto the mountingbase with taper pins to absorb the rotationalloads. It is dangerous to secure with boltsonly.GearMounting baseTaper pin247
ModulesSBS Spiral <strong>Bevel</strong> <strong>Gears</strong> 1~5B3 ShapeB4 Shape■ Modules 1~5<strong>Bevel</strong><strong>Gears</strong>SCatalog No. Gear ratio Module No. of teeth Directionof spiralSBS2-3020RSBS2-2030LSBS2.5-3020RSBS2.5-2030LSBS3-3020RSBS3-2030LSBS4-3020RSBS4-2030LSBS5-3020RSBS5-2030LSBS1-4020RSBS1-2040LSBS1.5-4020RSBS1.5-2040LSBS2-4020RSBS2-2040LSBS2.5-4020RSBS2.5-2040LSBS3-4020RSBS3-2040LSBS4-4020RSBS4-2040LSBS5-4020RSBS5-2040LSBS2.5-3618RSBS2.5-1836LSBS3-3618RSBS3-1836LSBS4-3618RSBS4-1836L1.522m2m2.5m3m4m5m1m1.5m2m2.5m3m4m5m2.5m3m4302030203020302030204020402040204020402040204020361836183618RLRLRLRLRLRLRLRLRLRLRLRLRLRLRLShapeB4B3B4B3B4B3B4B3B4B3B4B3B4B3B4B3B4B3B4B3B4B3B5B3B4B3B4B3B4B3Bore NOTE 1 Hub dia. Pitch dia. Outside dia. Mounting distance Total length Crown to back lengthA B C D E F G35 60 61.36 40 26.830 40 43.49 45 24.96CAUTION: Dimensions of the outside diameter, the overall length and crown to back length are all theoretical values, and some differences will occur due to the cornerchamfering of the gear tips.NOTE1: Due to heat treating, some deformation of the bore may occur. It may be necessary to ream the bore to bring it to the stated dimensions.1210151216162020252286108121215122016202025221512201620204540504570609080251638254032504060507060100805538604670607550906012080150100402060308040100501206016080200100904510854144727<strong>7.</strong>0954.4392.2165.58122.858<strong>7.</strong>34153.67109.240.5222.0860.7533.088144.1101.2755.2121.4866.07162.0788.5202.54110.4591.2950.3109.5360.28145.9980.1950555570759090110222835464560557565908012090140436452757210033.8630.8835.3440.174<strong>7.</strong>4948.1758.0861.6215.0213.7324.9325.4532.2734.0439.6543.6145.7650.6353.6966.2455.0268.4828.3834.0634.8239.7848.8452.5121.0216.1626.5618.9826.6626.863<strong>7.</strong>1432.4542.7538.0712.528.5220.7516.772621.0231.2726.336.4731.5242.0742.1242.5442.6121.7920.3226.5322.573<strong>7.</strong>9930.05BS248
Spiral <strong>Bevel</strong> <strong>Gears</strong>SpecificationsPrecision gradeJIS B 1704 grade 4Tooth hardness48~53HRCGear teethGleasonSurface treatmentBlack oxidePressure angleHelix angleMaterial20°35°S45CTooth surface finishDatum reference surfacefor gear cuttingSecondary OperationsCutBorePossible except tooth areasHeat treatmentTeeth induction hardenedB5 Shape*FD has die-forged finish.Hub width Length of bore Face width Holding surface dia. Allowable torque(N・m) NOTE 2 Allowable torque(kgf・m) BacklashH I J K Bending strength Surface durability Bending strength Surface durability233<strong>7.</strong>56 15.4 11.3 1.57 1.15112221.34 10.5 <strong>7.</strong>52 1.07 0.771511.671814.1717202523.332428.33871514.7518182022.5242<strong>7.</strong>528352635131<strong>7.</strong>25171925253028313740435056121222242732344038474562506324323037424915172030610152022283016202645.612<strong>7.</strong>425<strong>7.</strong>1434.7178.5946.8991.2254.8326.589.1739.641<strong>7.</strong>2848.4620.9259.2620.5373.7829.63102.3942.8138.945<strong>7.</strong>845<strong>7.</strong>7425.4368.2728.5991.8739.7431.721.652.936.111578.72531733.011.5110.95.462<strong>7.</strong>813.956.428.292.546.421310737618841.720.974.03<strong>7.</strong>017386.423.615.739.726.588.158.81951302.221.118.224.1121.310.743.721.972.636.317084.830215129.314.752.426.212462.13.232.205.393.6811.88.0325.81<strong>7.</strong>60.310.151.110.562.831.425.752.889.444.7321.710.938.319.24.262.13<strong>7.</strong>543.781<strong>7.</strong>68.812.401.604.052.708.995.9919.913.30.230.110.840.422.171.094.462.23<strong>7.</strong>403.701<strong>7.</strong>38.6530.815.42.991.495.352.6712.76.33(mm)0.06~0.160.07~0.170.08~0.180.12~0.270.14~0.340.03~0.130.05~0.150.06~0.160.07~0.170.08~0.180.12~0.270.14~0.340.07~0.170.08~0.180.12~0.27NOTE 2: The allowable torques shown in the table are the calculated values according to the assumed usage conditions. Please see page 229 for more details.Weight(kg)0.250.120.550.230.800.501.801.104.402.500.070.020.230.090.500.191.100.401.600.703.301.506.002.900.750.301.750.502.701.50Catalog No.SBS2-3020RSBS2-2030LSBS2.5-3020RSBS2.5-2030LSBS3-3020RSBS3-2030LSBS4-3020RSBS4-2030LSBS5-3020RSBS5-2030LSBS1-4020RSBS1-2040LSBS1.5-4020RSBS1.5-2040LSBS2-4020RSBS2-2040LSBS2.5-4020RSBS2.5-2040LSBS3-4020RSBS3-2040LSBS4-4020RSBS4-2040LSBS5-4020RSBS5-2040LSBS2.5-3618RSBS2.5-1836LSBS3-3618RSBS3-1836LSBS4-3618RSBS4-1836L<strong>Bevel</strong><strong>Gears</strong>SBS249
ModulesSBS Spiral <strong>Bevel</strong> <strong>Gears</strong> 1.5~5B3 ShapeB4 Shape■ Modules 1.5~5<strong>Bevel</strong><strong>Gears</strong>SCatalog No. Gear ratio Module No. of teeth Directionof spiralSBS2-4518RSBS2-1845LSBS2.5-4518RSBS2.5-1845LSBS3-4518RSBS3-1845LSBS4-4518RSBS4-1845LSBS5-4518RSBS5-1845LSBS2-4515RSBS2-1545LSBS2.5-4515RSBS2.5-1545LSBS3-4515RSBS3-1545LSBS4-4515RSBS4-1545LSBS5-4515RSBS5-1545LSBS1.5-6015RSBS1.5-1560LSBS2-6015RSBS2-1560LSBS2.5-6015RSBS2.5-1560LSBS3-6015RSBS3-1560L2.534m2m2.5m3m4m5m2m2.5m3m4m5m1.5m2m2.5m345184518451845184518451545154515451545156015601560156015RLRLRLRLRLRLRLRLRLRLRLRLRLRLCAUTION: Dimensions of the outside diameter, the overall length and crown to back length are all theoretical values, and some differences will occur due to the cornerchamfering of the gear tips.NOTE1: Due to heat treating, some deformation of the bore may occur. It may be necessary to ream the bore to bring it to the stated dimensions.ShapeB4B3B4B3B4B3B4B3B4B3B4B3B4B3B4B3B5B3B5B3B4B3B4B3B4B3B4B3Bore NOTE 1 Hub dia. Pitch dia. Outside dia. Mounting distance Total length Crown to back lengthAH7 B C D E F G12 48 90 90.79 40 2<strong>7.</strong>67 22.9810 32 36 40.42 60 28.54 15.881512201625203022121015122015201630201281510201220155540654880621008040245030603880509060601880241003012038112.5451355418072225909030112.53<strong>7.</strong>51354518060225759022.5120301503<strong>7.</strong>518045113.4950.35136.2460.69181.5780.86225.81103.8790.6734.78113.3243.36135.9952.08181.369.3226.6186.5590.3626.09120.4634.68150.544.16180.5752.6450726085751109013540605075559070115751453256427553946411234.9433.1941.653<strong>7.</strong>8250.9848.035<strong>7.</strong>956.0230.2929.6638.2538.2740.5944.9850.6254.3750.0566.8924.0822.9531.530.9439.6838.94<strong>7.</strong>6144.0128.7416.8234.5518.8440.9621.7746.0125.2726.0115.832.4719.7333.9823.6841.9526.5539.9234.4321.4811.452<strong>7.</strong>9115.5835.2419.8342.6422.96BS250
Spiral <strong>Bevel</strong> <strong>Gears</strong>SpecificationsPrecision gradeGear teethPressure angleHelix angleMaterialHeat treatmentJIS B 1704 grade 4Gleason20°35°S45CTeeth induction hardenedTooth hardnessSurface treatmentTooth surface finishDatum reference surfacefor gear cutting48~53HRCBlack oxideCutBoreSecondary Operations Possible except tooth areasB5 Shape*FD has die-forged finish.Hub width Length of bore Face width Holding surface dia. Allowable torque(N・m) NOTE 2 Allowable torque(kgf・m) BacklashH I J K Bending strength Surface durability Bending strength Surface durability2562.24 31.0 21.9 3.16 2.23142<strong>7.</strong>523.11 12.2 8.74 1.24 0.891514.21814.752216.324182820.51714221<strong>7.</strong>52021.332423.3320301210.431614.252018.062521.123131.5373645465152.5262935373544455244652122.52730343<strong>7.</strong>541431821293415202330351216202276.5326.8292.9633.41122.3345.83156.5656.959.0719.1572.8220.4888.228.52118.0832.24152.8848.6465.3915.558<strong>7.</strong>0218.06108.6420.58134.431.5861.624.210441.025399.547418631.710.164.320.610834.725381.147315220.74.8949.211.696.122.615636.844.01<strong>7.</strong>675.430.218574.135014018.86.2738.712.965.821.915652.029598.212.33.0729.6<strong>7.</strong>3958.414.695.723.96.282.4710.74.1825.810.248.419.03.231.036.562.1011.13.5425.88.2748.315.52.120.505.011.189.792.3115.93.754.491.80<strong>7.</strong>693.0718.9<strong>7.</strong>5635.714.31.920.643.941.316.712.2415.95.3030.010.01.250.313.010.755.951.499.762.44(mm)0.06~0.160.07~0.170.08~0.180.12~0.270.14~0.340.06~0.160.07~0.170.08~0.180.12~0.270.14~0.340.05~0.150.06~0.160.07~0.170.08~0.18NOTE 2: The allowable torques shown in the table are the calculated values according to the assumed usage conditions. Please see page 229 for more details.Weight(kg)0.660.161.270.292.050.454.801.008.702.000.700.101.000.171.800.354.000.706.001.400.700.041.600.103.240.205.440.35Catalog No.SBS2-4518RSBS2-1845LSBS2.5-4518RSBS2.5-1845LSBS3-4518RSBS3-1845LSBS4-4518RSBS4-1845LSBS5-4518RSBS5-1845LSBS2-4515RSBS2-1545LSBS2.5-4515RSBS2.5-1545LSBS3-4515RSBS3-1545LSBS4-4515RSBS4-1545LSBS5-4515RSBS5-1545LSBS1.5-6015RSBS1.5-1560LSBS2-6015RSBS2-1560LSBS2.5-6015RSBS2.5-1560LSBS3-6015RSBS3-1560L<strong>Bevel</strong><strong>Gears</strong>SBS251
ModulesSB <strong>Bevel</strong> <strong>Gears</strong> 1.5~6B3 ShapeB4 Shape■ Modules 1.5~6<strong>Bevel</strong><strong>Gears</strong>SBCatalog No. Gear ratio Module No. of teeth ShapeSB1.5-3020SB1.5-2030SB2-3020SB2-2030SB2.5-3020SB2.5-2030SB3-3020SB3-2030SB4-3020SB4-2030SB5-3020SB5-2030SB1.5-3015SB1.5-1530SB2-3015SB2-1530SB2.5-3015SB2.5-1530SB3-3015SB3-1530SB4-3015SB4-1530SB5-3015SB5-1530SB6-3015SB6-1530SB2.5-3618SB2.5-1836SB3-3618SB3-1836SB4-3618SB4-18361.522m1.5m2m2.5m3m4m5m1.5m2m2.5m3m4m5m6m2.5m3m43020302030203020302030203015301530153015301530153015361836183618B4B3B4B3B4B3B4B3B4B3B4B3B4B3B4B3B4B3B4B3B4B3B5B3B5B3B4B3B4B3B4B3Bore Hub dia. Pitch dia. Outside dia. Mounting distance Total length Crown to back length Hub widthAH7 B C D E F G H10 30 45 46.24 28 18.53 13.93 88 25 30 33.13 33 18.63 11.54 8.8310 35 60 61.65 40 26.87 21.24 1510 30 40 44.18 45 25.06 16.39 11.6715 45 75 7<strong>7.</strong>07 50 34.22 26.55 1812 35 50 55.22 55 31.06 19.24 12.515 50 90 92.48 55 35.56 26.86 1715 45 60 66.27 70 40.48 2<strong>7.</strong>09 2020 70 120 123.3 75 4<strong>7.</strong>71 3<strong>7.</strong>48 2515 60 80 88.32 90 48.53 32.77 23.2325 90 150 154.13 90 58.45 43.1 2420 80 100 110.45 110 62.11 38.48 28.338 25 45 45.88 25 1<strong>7.</strong>85 14.63 96 16 22.5 26.11 32 1<strong>7.</strong>23 10.4 <strong>7.</strong>8810 30 60 61.17 31 21.6 1<strong>7.</strong>17 108 22 30 34.81 40 20.59 11.2 815 40 75 76.46 40 28.75 22.71 1512 30 3<strong>7.</strong>5 43.51 55 31.81 19 15.6316 50 90 91.76 50 3<strong>7.</strong>3 29.26 1812 35 45 52.22 70 43.88 26.8 22.520 60 120 122.34 60 42.4 32.34 2016 50 60 69.62 85 48.74 2<strong>7.</strong>41 22.520 70 150 152.93 75 52.5 40.43 2520 60 75 8<strong>7.</strong>03 110 63.61 38.01 31.2525 80 180 183.5 90 62.6 48.52 2825 70 90 104.44 125 68.5 38.6 3015 55 90 91.46 43 28.52 21.96 1312 38 45 51.01 64 34.27 20.5 1<strong>7.</strong>2520 60 108 109.76 52 34.95 26.76 1716 46 54 61.22 75 40.01 22.8 1920 70 144 146.34 72 49 38.34 2520 60 72 81.62 100 52.77 30.41 25CAUTION: Dimensions of the outside diameter, the overall length and crown to back length are all theoretical values, and some differences will occur due to the cornerchamfering of the gear tips.252
<strong>Bevel</strong> <strong>Gears</strong>SpecificationsPrecision gradeGear teethPressure angleMaterialHeat treatmentJIS B 1704 grade 3Gleason20°S45CTooth hardnessSurface treatmentTooth surface finishDatum reference surfacefor gear cuttingLess than 194HBBlack oxideCutBore— Secondary Operations PossibleB5 Shape (Type SB)*FD has die-forged finish.Length of bore Face width Holding surface dia. Allowable torque(N・m) NOTE 1 Allowable torque(kgf・m) BacklashI J K Bending strength Surface durability Bending strength Surface durability162<strong>7.</strong>37 5.82 0.65 0.59 0.079171<strong>7.</strong>05 4.04 0.44 0.41 0.04233<strong>7.</strong>56 13.1 1.52 1.33 0.16112221.34 9.07 1.01 0.92 0.103045.61 26.9 3.21 2.75 0.3315282<strong>7.</strong>42 18.7 2.14 1.91 0.22315<strong>7.</strong>14 44.9 5.45 4.58 0.56173734.71 31.2 3.63 3.18 0.374078.59 98.2 12.3 10.0 1.25204346.89 68.1 8.20 6.95 0.845091.22 215 2<strong>7.</strong>6 22.0 2.81305654.83 150 18.4 15.3 1.871528.36 5.02 0.47 0.51 0.05815.510.72 2.60 0.24 0.26 0.02183<strong>7.</strong>4 12.1 1.18 1.24 0.12111916.81 6.28 0.59 0.64 0.062444.21 24.9 2.48 2.54 0.25152916.42 12.9 1.24 1.32 0.13304<strong>7.</strong>78 45.6 4.60 4.65 0.47204119.56 23.6 2.30 2.41 0.233670.1 104 10.9 10.7 1.11254632.2 54.0 5.43 5.51 0.554890.41 199 21.3 20.3 2.17305832.83 103 10.6 10.5 1.0957109.74 336 36.9 34.2 3.77356345.47 174 18.5 1<strong>7.</strong>7 1.88245<strong>7.</strong>72 35.9 4.08 3.66 0.42163225.44 18.1 2.04 1.84 0.213068.28 63.7 <strong>7.</strong>34 6.49 0.75203728.56 32.0 3.67 3.27 0.374291.86 149 1<strong>7.</strong>7 15.2 1.80264939.72 74.8 8.85 <strong>7.</strong>62 0.90(mm)0.05~0.150.06~0.160.07~0.170.08~0.180.12~0.270.14~0.340.05~0.150.06~0.160.07~0.170.08~0.180.12~0.270.14~0.340.16~0.360.07~0.170.08~0.180.12~0.27NOTE 1: The allowable torques shown in the table are the calculated values according to the assumed usage conditions. Please see page 229 for more details.Weight(kg)0.130.060.250.120.550.230.800.501.801.104.402.500.060.030.200.060.400.150.800.301.600.702.701.304.801.800.750.301.750.502.701.50Catalog No.SB1.5-3020SB1.5-2030SB2-3020SB2-2030SB2.5-3020SB2.5-2030SB3-3020SB3-2030SB4-3020SB4-2030SB5-3020SB5-2030SB1.5-3015SB1.5-1530SB2-3015SB2-1530SB2.5-3015SB2.5-1530SB3-3015SB3-1530SB4-3015SB4-1530SB5-3015SB5-1530SB6-3015SB6-1530SB2.5-3618SB2.5-1836SB3-3618SB3-1836SB4-3618SB4-1836<strong>Bevel</strong><strong>Gears</strong>SB253
ModulesSB.SBY <strong>Bevel</strong> <strong>Gears</strong> 1~8B3 ShapeB4 Shape■ Modules 1~8<strong>Bevel</strong><strong>Gears</strong>SḄSBYCatalog No. Gear ratio Module No. of teeth ShapeSB1-4020SB1-2040SB1.25-4020SB1.25-2040SB1.5-4020SB1.5-2040SB2-4020SB2-2040SB2.5-4020SB2.5-2040SB3-4020SB3-2040SB4-4020SB4-2040SB5-4020SB5-2040SB6-4020SB6-2040SBY8-4020SBY8-2040SB1-4518SB1-1845SB1.25-4518SB1.25-1845SB1.5-4518SB1.5-1845SB2-4518SB2-1845SB2.5-4518SB2.5-1845SB3-4518SB3-1845SB4-4518SB4-1845SB5-4518SB5-184522.5m1m1.25m1.5m2m2.5m3m4m5m6m8m1m1.25m1.5m2m2.5m3m4m5402040204020402040204020402040204020402045184518451845184518451845184518B4B3B4B3B4B3B4B3B4B3B4B3B4B3B5B3B5B3BTB3B4B3B4B3B4B3B4B3B4B3B4B3B4B3B4B3Bore Hub dia. Pitch dia. Outside dia. Mounting distance Total length Crown to back length Hub widthAH7 B C D E F G H8 25 40 40.59 22 15.07 12.59 86 16 20 22.41 28 13.78 8.6 710 32 50 50.73 27 18.54 15.23 108 22 25 28.01 36 18.66 11.75 10.2510 38 60 60.88 35 25.01 20.88 158 25 30 33.61 46 25.54 16.9 14.7512 40 80 81.17 45 32.37 26.17 1812 32 40 44.81 60 34.16 21.2 1815 50 100 101.46 55 39.73 31.46 2012 40 50 56.01 75 43.78 26.5 22.520 60 120 121.76 65 45.85 36.76 2416 50 60 6<strong>7.</strong>22 90 50.81 31.8 2<strong>7.</strong>520 70 160 162.34 80 53.92 42.34 2820 60 80 89.62 120 66.59 42.41 3525 100 200 202.93 90 55.33 42.93 2620 80 100 112.03 140 68.92 43.01 3525 85 240 243.52 105 65.05 48.52 2825 90 120 134.44 160 78.16 43.6 32.535 180 320 324.69 130 75.36 54.69 2530 120 160 179.25 210 98 54.81 408 30 45 45.46 23 16.95 14.57 106 15 18 20.57 32 16.34 10.02 8.910 34 56.25 56.82 26 18.53 15.46 108 19 22.5 25.72 40 20.66 12.52 11.1710 36 6<strong>7.</strong>5 68.18 30 21.1 1<strong>7.</strong>35 108 23 27 30.86 45 21.97 12.02 10.4512 48 90 90.91 40 2<strong>7.</strong>91 23.14 1510 32 36 41.15 60 28.69 16.03 14.215 55 112.5 113.64 50 35.06 28.92 1812 40 45 51.44 72 33.31 1<strong>7.</strong>04 14.7520 65 135 136.37 60 41.86 34.71 2216 48 54 61.72 85 38.04 19.05 16.320 80 180 181.82 75 51.16 41.28 2420 62 72 82.3 110 48.28 22.06 1825 100 225 22<strong>7.</strong>28 90 59.43 4<strong>7.</strong>85 2820 80 90 102.87 135 55.82 25.07 20.5CAUTION: Dimensions of the outside diameter, the overall length and crown to back length are all theoretical values, and some differences will occur due to the cornerchamfering of the gear tips.254
<strong>Bevel</strong> <strong>Gears</strong>SpecificationsPrecision gradeGear teethPressure angleMaterialHeat treatmentJIS B 1704 grade 3Gleason20°S45CTooth hardnessSurface treatmentTooth surface finishDatum reference surfacefor gear cuttingCutBore— Secondary Operations PossibleLess than 194HBBlack oxideB5 Shape (Type SB)*FD has die-forged finish.Length of bore Face width Holding surface dia. Allowable torque(N・m) NOTE 1 Allowable torque(kgf・m) BacklashI J K Bending strength Surface durability Bending strength Surface durability1226.58 2.61 0.29 0.27 0.036129.17 1.32 0.15 0.13 0.021633.61 5.33 0.61 0.54 0.0681713.22 2.69 0.31 0.27 0.032239.64 9.47 1.11 0.97 0.1110241<strong>7.</strong>28 4.77 0.56 0.49 0.062748.46 24.2 2.92 2.46 0.30153220.92 12.2 1.46 1.24 0.153560.28 49.0 6.04 4.99 0.62204124.56 24.7 3.02 2.52 0.313873.81 80.4 10.1 8.20 1.03224729.61 40.5 5.06 4.13 0.5245102.39 185 24.1 18.9 2.46286242.78 93.3 12.0 9.51 1.2350138.92 327 43.9 33.3 4.4730635<strong>7.</strong>84 165 21.9 16.8 2.2458158.56 600 83.2 61.2 8.48407061.11 302 41.6 30.8 4.2461219.2 1350 196 138 20.0509096.39 679 98.1 69.3 10.01530.73 3.35 0.35 0.34 0.04715.510.31 1.33 0.14 0.14 0.01163<strong>7.</strong>86 6.67 0.72 0.68 0.07919.512.16 2.65 0.29 0.27 0.031845 11.7 1.29 1.19 0.13112116.51 4.64 0.51 0.47 0.052562.24 26.8 3.05 2.74 0.31142<strong>7.</strong>523.11 10.7 1.22 1.09 0.123176.53 53.4 6.20 5.44 0.631831.526.82 21.2 2.48 2.16 0.253792.96 90.5 10.7 9.23 1.09213633.41 36.0 4.29 3.67 0.4445122.33 220 26.8 22.4 2.73294645.83 8<strong>7.</strong>3 10.7 8.91 1.0951156.56 411 51.8 41.9 5.283452.556.9 164 20.7 16.7 2.11(mm)0.03~0.130.04~0.140.05~0.150.06~0.160.07~0.170.08~0.180.12~0.270.14~0.340.16~0.360.20~0.450.03~0.130.04~0.140.05~0.150.06~0.160.07~0.170.08~0.180.12~0.270.14~0.34NOTE 1: The allowable torques shown in the table are the calculated values according to the assumed usage conditions. Please see page 229 for more details.Weight(kg)0.070.020.140.050.230.090.500.201.100.401.600.703.301.506.002.90<strong>7.</strong>904.1025.09.400.110.020.170.040.290.060.660.161.270.292.050.454.801.008.702.00Catalog No.SB1-4020SB1-2040SB1.25-4020SB1.25-2040SB1.5-4020SB1.5-2040SB2-4020SB2-2040SB2.5-4020SB2.5-2040SB3-4020SB3-2040SB4-4020SB4-2040SB5-4020SB5-2040SB6-4020SB6-2040SBY8-4020SBY8-2040SB1-4518SB1-1845SB1.25-4518SB1.25-1845SB1.5-4518SB1.5-1845SB2-4518SB2-1845SB2.5-4518SB2.5-1845SB3-4518SB3-1845SB4-4518SB4-1845SB5-4518SB5-1845<strong>Bevel</strong><strong>Gears</strong>SḄSBY255
SB.SBY <strong>Bevel</strong> <strong>Gears</strong> ModulesB3 ShapeB4 Shape■ Modules 1~8<strong>Bevel</strong>gearsSḄSBYBore Hub dia. Pitch dia. Outside dia. Mounting distance Total length Crown to back length Hub widthCatalog No. Gear ratio Module No. of teeth ShapeAH7 B C D E F G HSB1-451545 B4 8 30 45 45.37 17 11.77 10.06 5m1SB1-154515 B3 6 12 15 1<strong>7.</strong>67 29 12.51 6.95 6SB1.25-451545 B4 10 34 56.25 56.72 21 14.61 12.33 6m1.25SB1.25-154515 B3 8 15 18.75 22.09 36 15.85 8.43 <strong>7.</strong>25SB1.5-451545 B4 10 36 6<strong>7.</strong>5 68.06 28 20.44 1<strong>7.</strong>59 11m1.5SB1.5-154515 B3 8 18 22.5 26.51 47 23.19 13.92 12.5SB2-451545 B4 12 40 90 90.75 40 30.4 26.12 17m2SB2-154515 B3 10 24 30 35.35 60 29.8 15.89 14SB2.5-451545 B4 15 50 112.5 113.43 50 38.35 32.65 22m2.5SB2.5-154515 B3 12 30 3<strong>7.</strong>5 44.18 75 38.41 19.86 1<strong>7.</strong>53SB3-451545 B4 20 60 135 136.12 55 40.74 34.18 20m3SB3-154515 B3 15 38 45 53.02 90 45.17 23.84 21.33SB4-451545 B5 20 80 180 181.5 70 50.79 42.24 24m4SB4-154515 B3 16 50 60 70.69 115 54.6 26.78 23.33SB5-451545 B5 25 90 225 226.87 75 50.28 40.3 20m5SB5-154515 B3 20 60 75 88.37 145 6<strong>7.</strong>19 34.73 30SB6-451545 BT 30 160 270 272.24 100 72.62 58.36 30m6SB6-154515 B3 25 70 90 106.03 175 89.04 42.67 36.67SBY8-451545 BT 35 200 360 362.99 125 83.74 69.49 30m8SBY8-154515 B3 30 100 120 141.39 230 99.93 53.56 46.67CAUTION: Dimensions of the outside diameter, the overall length and crown to back length are all theoretical values, and some differences will occur due to the cornerchamfering of the gear tips.*The blue catalog number signify new items. The holding surface of SB6-4515 and SBY8-4515 have tapped tooling holes. See page 230 for more details.256
<strong>Bevel</strong> <strong>Gears</strong>SpecificationsPrecision gradeGear teethPressure angleMaterialHeat treatmentJIS B 1704 grade 3Gleason20°S45C—Tooth hardnessSurface treatmentTooth surface finishDatum reference surfacefor gear cuttingSecondary Operations PossibleLess than 194HBBlack oxideCutBoreB5 Shape (Type SB)*FD has die-forged finish.Length of bore Face width Holding surface dia. Allowable torque(N・m) NOTE 1 Allowable torque(kgf・m) Backlash WeightCatalog No.I J K Bending strength Surface durability Bending strength Surface durability (mm) (kg)932.02 2.84 0.27 0.29 0.0270.09 SB1-451560.03~0.131210.05 0.98 0.09 0.10 0.00910.01 SB1-15451239.63 5.80 0.56 0.59 0.0570.20 SB1.25-451580.04~0.141510.9 2.00 0.19 0.20 0.0190.02 SB1.25-15451746.58 10.3 1.02 1.05 0.100.25 SB1.5-4515100.05~0.1522.514.75 3.56 0.34 0.36 0.0350.05 SB1.5-15452659.04 26.4 2.68 2.69 0.270.70 SB2-4515150.06~0.162919.13 9.10 0.89 0.93 0.0910.10 SB2-15453572.84 53.6 5.55 5.46 0.571.00 SB2.5-4515200.07~0.173720.51 18.5 1.85 1.89 0.190.20 SB2.5-15453588.18 90.2 9.53 9.20 0.971.80 SB3-4515230.08~0.184322.53 31.2 3.18 3.18 0.320.35 SB3-154545118.09 211 23.0 21.5 2.354.00 SB4-4515300.12~0.275232.26 72.8 <strong>7.</strong>67 <strong>7.</strong>43 0.780.70 SB4-154544152.88 394 44.3 40.2 4.526.00 SB5-4515350.14~0.346548.64 136 14.8 13.9 1.511.40 SB5-154562169.26 751 8<strong>7.</strong>0 76.6 8.871<strong>7.</strong>5 SB6-4515500.16~0.368649.77 259 39.9 26.4 4.062.40 SB6-154567255.92 1470 179 150 18.335.0 SBY8-4515500.20~0.459361.77 506 59.7 51.6 6.095.90 SBY8-1545NOTE 1: The allowable torques shown in the table are the calculated values according to the assumed usage conditions. Please see page 229 for more details.<strong>Bevel</strong>gearsSḄSBY257
SB.SBY <strong>Bevel</strong> <strong>Gears</strong> ModulesB3 ShapeB4 Shape■ Modules 1.5~6<strong>Bevel</strong>gearsSḄSBYCatalog No. Gear ratio Module No. of teeth ShapeSB1.5-6015SB1.5-1560SB2-6015SB2-1560SB2.5-6015SB2.5-1560SB3-6015SB3-1560SB4-6015SB4-1560SBY5-6015SBY5-1560SBY6-6015SBY6-15604m1.5m2m2.5m3m4m5m66015601560156015601560156015B4B3B4B3B4B3B4B3B5B3BTB3BTB3Bore Hub dia. Pitch dia. Outside dia. Mounting distance Total length Crown to back length Hub widthAH7 B C D E F G H12 50 90 90.41 32 24.2 21.58 128 18 22.5 26.66 56 23.01 11.52 10.4315 60 120 120.55 42 31.6 28.1 1610 24 30 35.55 75 31.01 15.69 14.2520 70 150 150.69 53 40 35.63 2012 30 3<strong>7.</strong>5 44.44 94 39.02 19.87 18.0620 80 180 180.83 64 4<strong>7.</strong>97 43.15 2515 38 45 53.33 112 44.1 23.04 21.1225 85 240 241.1 80 59.2 52.2 3616 50 60 71.1 150 62 31.4 28.7530 180 300 301.38 80 54.01 45.26 2025 60 75 88.9 185 75.03 36.74 33.1335 200 360 361.66 100 68.16 58.31 2525 75 90 106.66 220 85.17 42.08 38.13*The blue catalog number signify new items. The holding surface of SBY5-6015 and SBY6-6015 have tapped tooling holes. See page 230 for more details.CAUTION: Dimensions of the outside diameter, the overall length and crown to back length are all theoretical values, and some differences will occur due to the cornerchamfering of the gear tips.258
<strong>Bevel</strong> <strong>Gears</strong>SpecificationsPrecision gradeGear teethPressure angleMaterialHeat treatmentJIS B 1704 grade 3Gleason20°S45C—Tooth hardnessSurface treatmentTooth surface finishDatum reference surfacefor gear cuttingSecondary Operations PossibleLess than 194HBBlack oxideCutBoreB5 Shape (Type SB)*FD has die-forged finish.Length of bore Face width Holding surface dia. Allowable torque(N・m) NOTE 2 Allowable torque(kgf・m) BacklashI J K Bending strength Surface durability Bending strength Surface durability2165.38 1<strong>7.</strong>3 1.75 1.77 0.181222.515.54 4.46 0.44 0.45 0.045278<strong>7.</strong>02 41.3 4.30 4.21 0.44163018.06 10.6 1.07 1.08 0.1134108.64 80.2 8.54 8.18 0.87203<strong>7.</strong>520.57 20.6 2.13 2.10 0.2241134.4 130 14.2 13.3 1.44224331.58 33.5 3.54 3.42 0.3653174.03 328 3<strong>7.</strong>0 33.5 3.77326036.12 84.5 9.24 8.62 0.9445218.79 642 74.4 65.4 <strong>7.</strong>59407349.15 165 18.6 16.8 1.905626<strong>7.</strong>73 1050 126 107 12.8458254.92 270 31.5 2<strong>7.</strong>5 3.21(mm)0.05~0.150.06~0.160.07~0.170.08~0.180.12~0.270.14~0.340.16~0.36NOTE 2: The allowable torques shown in the table are the calculated values according to the assumed usage conditions. Please see page 229 for more details.Weight(kg)0.620.041.300.102.500.204.200.356.000.901<strong>7.</strong>11.6030.02.90Catalog No.SB1.5-6015SB1.5-1560SB2-6015SB2-1560SB2.5-6015SB2.5-1560SB3-6015SB3-1560SB4-6015SB4-1560SBY5-6015SBY5-1560SBY6-6015SBY6-1560<strong>Bevel</strong>gearsSḄSBY259
SB <strong>Bevel</strong> <strong>Gears</strong> & Pinion shafts ModulesB8 ShapeScrew■ Modules 1.5~3<strong>Bevel</strong>gearsCatalog No. Gear ratio ModuleSB1.5-6012SB1.5-1260SB2-6012SB2-1260SB2.5-6012SB2.5-1260SB3-6012SB3-12605m1.5m2m2.5m3No. ofteeth6012601260126012ShapeB4B8B4B8B4B8B4B8Bore・Shaft dia. Hub dia. Pitch dia. Outside dia. Mounting distance Total length Crown to back length Hub width Length of bore・shaft1212.21515.22020.22025.25B C D E F G H I50 90 90.33 30 23.89 21.82 12 2115 18 22.24 50 9<strong>7.</strong>06 5.42 4.7 1<strong>7.</strong>06CAUTION: Dimensions of the outside diameter, the overall length and crown to back length are all theoretical values, and some differences will occur due to the cornerchamfering of the gear tips.602070258030120241503018036120.4329.65150.543<strong>7.</strong>06180.6544.48406650836010031.8511<strong>7.</strong>0839.81143.14<strong>7.</strong>43172.1929.096.5636.368.743.6410.85165.620<strong>7.</strong>5259.42422.083428.14132.19SB260
<strong>Bevel</strong> <strong>Gears</strong> & Pinion ShaftsSpecificationsPrecision gradeGear teethPressure angleMaterialHeat treatmentJIS B 1704 grade 3Gleason20°S45CThermal refined (pinion only) NOTE 1Tooth hardnessSurface treatmentTooth surface finishDatum reference surfacefor gear cuttingSecondary OperationsLess than 194HB(pinion are less than 225~260HB)—CutBore except shaft for pinionPossibleNOTE 1: The pinion is thermaly with refinined in order to increase stiffness.B4 ShapeFace width Holding surface dia. Shaft lengthScrew sizeAllowable torque(N・m) NOTE 1 Allowable torque(kgf・m) BacklashJ K M Bending strength Surface durability Bending strength Surface durability1265.52 ― ― 18.0 1.41 1.83 0.14― 80 M5 4.01 0.46 0.41 0.0471686.96 ― ― 42.6 3.43 4.34 0.35― 95 M6 9.50 1.12 0.97 0.1120108.8 ― ― 83.2 6.85 8.48 0.70― 115 M8 18.5 2.23 1.89 0.2322134.73 ― ― 135 11.4 13.8 1.16― 140 M8 30.1 3.70 3.07 0.38(mm)0.05~0.150.06~0.160.07~0.170.08~0.18NOTE 2: The allowable torques shown in the table are the calculated values according to the assumed usage conditions. Please see page 229 for more details.Weight(kg)0.420.101.300.202.500.414.200.75Catalog No.SB1.5-6012SB1.5-1260SB2-6012SB2-1260SB2.5-6012SB2.5-1260SB3-6012SB3-1260<strong>Bevel</strong>gearsSB261
SUB Stainless Steel <strong>Bevel</strong> <strong>Gears</strong> Modules■ Modules 1.5~3B3 Shape<strong>Bevel</strong>gearsSCatalog No. Gear ratio Module No. of teeth ShapeSUB1.5-3020SUB1.5-2030SUB2-3020SUB2-2030SUB2.5-3020SUB2.5-2030SUB3-3020SUB3-2030SUB1.5-4020SUB1.5-2040SUB2-4020SUB2-2040SUB2.5-4020SUB2.5-2040SUB3-4020SUB3-2040SUB1.5-4515SUB1.5-1545SUB2-4515SUB2-1545SUB2.5-4515SUB2.5-1545SUB3-4515SUB3-15451.523m1.5m2m2.5m3m1.5m2m2.5m3m1.5m2m2.5m3302030203020302040204020402040204515451545154515B4B3B4B3B4B3B4B3B4B3B4B3B4B3B4B3B4B3B4B3B4B3B4B3Bore Hub dia. Pitch dia. Outside dia. Mounting distance Total length Crown to back length Hub widthAH7 B C D E F G H10 30 45 46.24 28 18.53 13.93 88 25 30 33.13 33 18.63 11.54 8.83101015121515108121215122016108121015122015CAUTION: Dimensions of the outside diameter, the overall length and crown to back length are all theoretical values, and some differences will occur due to the cornerchamfering of the gear tips.353545406050382550326040705036186024603080386040755090606030804010050120606<strong>7.</strong>522.59030112.53<strong>7.</strong>51354561.6544.187<strong>7.</strong>0755.2292.4866.2760.8833.6181.1744.81101.4656.02121.766<strong>7.</strong>2268.0626.5190.7535.35113.4344.18136.1253.024045505555703546456055756590284740605075559026.8725.0634.2231.0635.5640.4825.0125.5432.3734.1639.7343.7845.8550.8120.4423.1930.429.838.3538.4140.7445.1721.2416.3926.5519.2426.862<strong>7.</strong>0920.8816.926.1721.231.4626.536.7631.81<strong>7.</strong>5913.9226.1215.8932.6519.8634.1823.841513.331814.161721.661514.7518182022.5242<strong>7.</strong>51112.51714221<strong>7.</strong>52021.33UB262
Stainless Steel <strong>Bevel</strong> <strong>Gears</strong>Precision gradeGear teethPressure angleMaterialHeat treatmentJIS B 1704 grade 3Gleason20°SUS303SpecificationsTooth hardnessSurface treatmentTooth surface finishDatum reference surfacefor gear cutting*Available on special order: Same gear made from SUS304.Less than 187HBCutBore— Secondary Operations Possible—B4 ShapeLength of bore Face width Holding surface dia. Allowable torque(N・m) NOTE 1 Allowable torque(kgf・m) BacklashI J K Bending strength Surface durability Bending strength Surface durability2<strong>7.</strong>37 3.22 0.46 0.33 0.04791<strong>7.</strong>05 2.23 0.31 0.23 0.032161723223028313722242732354138471722.526293537354311151710152022101520233<strong>7.</strong>5621.3445.612<strong>7.</strong>425<strong>7.</strong>1434.7139.641<strong>7.</strong>2848.4620.9260.2824.5673.8129.6146.5814.7559.0419.1372.8420.5188.1822.53<strong>7.</strong>225.0114.910.324.81<strong>7.</strong>25.232.6413.46.722<strong>7.</strong>113.644.422.45.701.9714.65.0329.610.249.91<strong>7.</strong>21.080.722.281.523.872.580.790.402.071.044.292.15<strong>7.</strong>193.600.720.241.900.633.941.316.772.260.740.511.521.052.531.760.530.271.360.692.761.394.532.280.580.201.490.513.021.045.091.760.110.0740.230.150.390.260.0810.0400.210.110.440.220.730.370.0740.0250.190.0650.400.130.690.23(mm)0.05~0.150.06~0.160.07~0.170.08~0.180.05~0.150.06~0.160.07~0.170.08~0.180.05~0.150.06~0.160.07~0.170.08~0.18NOTE 1: The allowable torques shown in the table are the calculated values according to the assumed usage conditions. Please see page 229 for more details.Weight(kg)0.120.060.260.160.550.280.950.550.270.090.620.201.230.401.900.700.250.040.810.101.300.202.300.35Catalog No.SUB1.5-3020SUB1.5-2030SUB2-3020SUB2-2030SUB2.5-3020SUB2.5-2030SUB3-3020SUB3-2030SUB1.5-4020SUB1.5-2040SUB2-4020SUB2-2040SUB2.5-4020SUB2.5-2040SUB3-4020SUB3-2040SUB1.5-4515SUB1.5-1545SUB2-4515SUB2-1545SUB2.5-4515SUB2.5-1545SUB3-4515SUB3-1545<strong>Bevel</strong>gearsSUB263
PB Plastic <strong>Bevel</strong> <strong>Gears</strong> Modules■ Modules 1.5~3B3 Shape<strong>Bevel</strong>gearsPBCatalog No. Gear ratio Module No. of teeth ShapePB1.5-3020PB1.5-2030PB2-3020PB2-2030PB2.5-3020PB2.5-2030PB3-3020PB3-2030PB1-4020PB1-2040PB1.25-4020PB1.25-2040PB1.5-4020PB1.5-2040PB2-4020PB2-2040PB2.5-4020PB2.5-2040PB3-4020PB3-2040PB1.5-4515PB1.5-1545PB2-4515PB2-1545PB2.5-4515PB2.5-1545PB3-4515PB3-15451.523m1.5m2m2.5m3m1m1.25m1.5m2m2.5m3m1.5m2m2.5m330203020302030204020402040204020402040204515451545154515B4B3B4B3B4B3B4B3B4B3B4B3B4B3B4B3B4B3B4B3B4B3B4B3B4B3B4B3Bore NOTE 1 Hub dia. Pitch dia. Outside dia. Mounting distance Total length Crown to back length Hub widthA B C D E F G H10 30 45 46.24 28 18.53 13.93 88 25 30 33.13 33 18.63 11.54 8.8310101512151586108108121215122016108121015122015CAUTION: Dimensions of the outside diameter, the overall length and crown to back length are all theoretical values, and some differences will occur due to the cornerchamfering of the gear tips.NOTE1: The bore tolerance at the time of production is H8. Significant variations in temperature or humidity can cause dimensional changes in plastic gears (MC Nylon).Please see page 32 for more details.3535454060502516322238254032504060504018602460308038604075509060402050256030804010050120606<strong>7.</strong>522.59030112.53<strong>7.</strong>51354561.6544.187<strong>7.</strong>0755.2292.4866.2740.5922.4150.7328.0160.8833.6181.1744.81101.4756.01121.766<strong>7.</strong>2268.0626.5190.7535.35113.4344.18136.1253.02404550555570222827363546456055756590284740605075559026.8725.0634.2231.0635.5640.4815.0713.7818.5418.6625.0125.5432.3734.1639.7343.7845.8550.8120.4423.1930.429.838.3538.4140.7445.1721.2416.3926.5519.2426.862<strong>7.</strong>0912.598.615.2311.7520.8816.926.1721.231.4726.536.7631.81<strong>7.</strong>5913.9226.1215.8932.6519.8634.1823.841513.331814.161721.66871010.251514.7518182022.5242<strong>7.</strong>51112.51714221<strong>7.</strong>52021.33264
Plastic <strong>Bevel</strong> <strong>Gears</strong>SpecificationsPrecision gradeGear teethPressure angleMaterialHeat treatmentJIS B 1704 grade 4Gleason20°MC901Tooth hardnessSurface treatmentTooth surface finishDatum reference surfacefor gear cutting115~120HRRCutBore— Secondary Operations Possible—B4 ShapeLength of bore Face width Holding surface dia. Allowable torque(N・m) NOTE 2 Allowable torque(kgf・m) BacklashI J K Bending strength Surface durability Bending strength Surface durability2<strong>7.</strong>37 1.340.149―1<strong>7.</strong>05 0.730.07416172322302831371212161722242732354138471722.52629353735431115176810152022101520233<strong>7.</strong>5621.3445.612<strong>7.</strong>425<strong>7.</strong>1434.7126.589.1733.6113.2239.641<strong>7.</strong>2848.4620.9260.2824.5673.8129.6146.5814.7559.0419.1372.8420.5188.1822.543.081.676.193.3710.55.710.640.241.290.482.270.855.602.1011.14.1718.8<strong>7.</strong>042.740.596.801.4613.62.9123.14.96(mm)― 0.10~0.20NOTE 2: The allowable torques shown in the table are the calculated values using the Lewis formula.―――――――――――――0.310.170.630.341.070.580.0650.0250.130.0490.230.0870.570.211.130.431.910.720.280.0560.690.151.380.302.360.51― 0.11~0.21― 0.12~0.22― 0.13~0.23― 0.08~0.18― 0.09~0.19― 0.10~0.20― 0.11~0.21― 0.12~0.22― 0.13~0.23― 0.10~0.20― 0.11~0.21― 0.12~0.22― 0.13~0.23Weight(kg)0.0180.00900.0390.0230.0820.040.140.0810.010.00300.020.00700.0340.0130.070.030.160.060.240.100.040.00600.120.0130.200.0270.350.05Catalog No.PB1.5-3020PB1.5-2030PB2-3020PB2-2030PB2.5-3020PB2.5-2030PB3-3020PB3-2030PB1-4020PB1-2040PB1.25-4020PB1.25-2040PB1.5-4020PB1.5-2040PB2-4020PB2-2040PB2.5-4020PB2.5-2040PB3-4020PB3-2040PB1.5-4515PB1.5-1545PB2-4515PB2-1545PB2.5-4515PB2.5-1545PB3-4515PB3-1545<strong>Bevel</strong>gearsPB265
DB Injection Molded <strong>Bevel</strong> <strong>Gears</strong> Modules■ Modules 0.5~1B1 ShapeCatalog No. Gear ratio Module No. of teeth ShapeDB0.5-4020DB0.5-2040DB0.8-4020DB0.8-2040DB1-4020DB1-20402m0.5m0.8m1402040204020B9B1B9B1B9B1Bore NOTE 1 Hub dia. Pitch dia. Outside dia. Mounting distance Total length Crown to back lengthAH7 B C D E F G4 12 20 20.29 12 8.33 <strong>7.</strong>293 8 10 11.2 16 8.46 6.35465NOTE1: The bore tolerance is generally –0.05 to –0.1 but may be + value at the central portion of the hole. Re-machining the bore is not recommended since reworkingmaterial may expose voids.151218153216402032.471<strong>7.</strong>9240.5922.41824223011.9111.514.4514.4910.478.4812.5810.6<strong>Bevel</strong>gearsBB Sintered Metal BushingsThe table shows a series of standard metal bushings that can bepressed into standard injection molded gears. They can be used asbearing metal on idler gears or to reduce the bore of the gears.(unit: mm)CatalogNo.I.D. of bushingd +0.020O.D. of bushingLengthD +0.02-0.01 L 0-0.3DḄBB266Products that can use the bushingBB30507 3 5 07 DS0.5, DM0.8, DB0.8BB30608 3 6 08 DS0.5, DS0.8, DM1BB40609 4 6 09 DS0.8, DM1BB40612 4 6 12 DS1, DB1BB50812 5 8 12 DS1BB50814 5 8 14 DS1, DM1.5Material: Oil impregnated sintered bronze.
Injection Molded <strong>Bevel</strong> <strong>Gears</strong>SpecificationsPrecision gradeGear teethPressure angleMaterialHeat treatmentJIS B 1704 grade 8Gleason20°Duracon(M90-44)Tooth hardnessSurface treatmentTooth surface finishDatum reference surfacefor tooth forming110~120HRRInjection molded— Secondary Operations Not recommended (may expose voids)—BoreB9 ShapeHub width Length of bore Face width Holding surface dia. Allowable torque(N・m) NOTE 2 Allowable torque(kgf・m) BacklashH I J K Bending strength Bending strength4 714.41 0.24 0.0252.54 ―― 0.092 0.00946 1024.17 0.91 0.0933.55 ―― 0.34 0.0357 1229.94 1.59 0.164.57 ―― 0.60 0.061(mm)0.03~0.090.03~0.110.03~0.13NOTE 2: The allowable torques shown in the table are the calculated values using the Lewis formula.Weight(kg)2163126Catalog No.DB0.5-4020DB0.5-2040DB0.8-4020DB0.8-2040DB1-4020DB1-2040■ Dimensional tolerance table (unit: mm)Range Tolerancebelow 3±0.203 up to 6 ±0.256 up to 10 ±0.3010 up to 18 ±0.3518 up to 30 ±0.40over 30 ±0.50<strong>Bevel</strong>gearsDḄBB267
NISSEI KSP Ground Spiral <strong>Bevel</strong> <strong>Gears</strong>New Products<strong>Bevel</strong>gearsKSP■ Catalog Number of NISSEI Spiral <strong>Bevel</strong> <strong>Gears</strong>The catalog number systems of KSP Ground Spiral Miter <strong>Gears</strong> differs from othermiter gears.KSP 031 001 G F LHand of Spiral (L)Products Shape(Finished Shape)Surface finish (Ground)■ The Characteristics of KSP Spiral <strong>Bevel</strong> <strong>Gears</strong>1. JIS Grade 0, high strength, high precision products2. Superior performance with regard to high speed, low noise, andlow vibration.3. Module range from 1.5 to 64. Three gear ratios: 1, 1.5 and 2■ Products ShapeType F - Finished ShapeType U - Shape to Allow Secondary Operations*The heavy lines in the figure below indicate the masked areasduring carburizingGear Ratio (1)OD of the Larger gear(31mm)Type (Spiral Miter <strong>Gears</strong>)268
Ground Spiral <strong>Bevel</strong> <strong>Gears</strong>■ Regarding the <strong>Transmission</strong> Capability Table1. The values given in the table are for a service factor of 1.Using the table on theright, please modify the value according to the actual conditions.2. For speed increaser applications (where the gear is the driver and the pinion isdriven), the torque on the pinion is the value in the table multiplied by the speed ratio.(Ex.) For speed ratio of 1/1.5, the torque on the pinion is 1/1.5 times the value given inthe table.Impact from PrimeMoverUniform Load(Motor, Turbine, Hydraulic Motor)Light Impact Load(Multicylinder Engine)Medium Impact Load(Single Cylinder Engine)Impact from Load Side of MachineUniform Load1.001.251.50Medium Impact Load1.251.501.75Heavy Impact Load1.752.002.25■ <strong>Transmission</strong> Capability Table(Gear ratio: 1) Upper <strong>Transmission</strong> Capability(kw) Lower Torqu(N ・ m)Rotation(rpm)Model 50 100 300 600 900 1200 1800 3000KSP031001KSP040001KSP053001KSP066001KSP078001KSP092001KSP105001KSP132001KSP157001KSP1840010.035 0.068 0.195 0.375 0.548 0.716 1.04 1.656.65 6.51 6.20 5.98 5.82 5.69 5.51 5.250.092 0.179 0.511 0.980 1.43 1.86 2.69 4.251<strong>7.</strong>6 1<strong>7.</strong>2 16.3 15.6 15.2 14.8 14.3 13.50.211 0.412 1.17 2.23 3.25 4.22 6.08 9.5540.4 39.3 3<strong>7.</strong>3 35.6 34.5 33.6 32.3 30.40.367 0.715 2.02 3.85 5.59 <strong>7.</strong>26 10.4 16.370.2 68.3 64.4 61.4 59.3 5<strong>7.</strong>8 55.4 52.00.577 1.12 3.16 6.00 8.68 11.2 16.1 25.1109.8 106.9 101.0 95.5 92.2 89.5 85.5 79.80.901 1.75 4.91 9.31 13.5 1<strong>7.</strong>4 24.9 38.6172.6 166.7 156.9 148.1 143.2 138.3 132.4 122.61.44 2.78 <strong>7.</strong>80 14.7 21.2 2<strong>7.</strong>4 39.1 60.3274.6 265.8 248.1 234.4 225.6 218.7 20<strong>7.</strong>9 192.22.33 4.50 12.6 23.6 34.0 43.7 62.0 95.0445.2 430.5 400.1 376.6 360.9 348.1 329.5 302.03.68 <strong>7.</strong>10 19.7 3<strong>7.</strong>0 53.0 68.1 96.2 146704.1 678.6 628.6 589.4 562.9 542.3 510.9 466.85.31 10.2 28.3 52.8 75.5 96.8 136 2061010 976.7 901.2 841.4 801.2 770.8 722.8 656.1■ <strong>Transmission</strong> Capability Table(Gear ratio:1.5) Upper <strong>Transmission</strong> Capability(kw) Lower Torqu(N ・ m)Rotation(rpm)Model 50 100 300 600 900 1200 1800 3000KSP0481.5KSP0611.5KSP0741.5KSP0901.5KSP1051.5KSP1241.5KSP1411.5KSP1631.5KSP1811.50.077 0.151 0.432 0.830 1.21 1.58 2.29 3.6422.2 21.6 20.6 19.8 19.3 18.9 18.2 1<strong>7.</strong>40.159 0.309 0.882 1.69 2.46 3.21 4.64 <strong>7.</strong>3345.4 44.3 42.2 40.4 39.2 38.3 3<strong>7.</strong>0 35.00.277 0.540 1.53 2.93 4.27 5.55 8.00 12.679.4 7<strong>7.</strong>4 73.4 70.1 68.0 66.3 63.7 60.10.466 0.908 2.57 4.90 <strong>7.</strong>12 9.24 13.3 20.8133.4 130.4 122.6 116.7 113.8 110.8 105.9 99.00.700 1.36 3.84 <strong>7.</strong>31 10.6 13.7 19.7 30.7201.0 195.2 183.4 174.6 168.7 163.8 156.9 14<strong>7.</strong>11.03 2.00 5.63 10.7 15.5 20.0 28.6 44.5295.2 286.4 268.7 255.0 246.1 239.3 22<strong>7.</strong>5 212.81.56 3.03 8.51 16.1 23.2 30.1 42.9 66.4448.2 434.4 406.0 384.4 370.7 358.9 341.3 31<strong>7.</strong>72.27 4.39 12.3 23.2 33.4 43.1 61.4 94.6650.2 628.6 58<strong>7.</strong>4 554.1 532.5 514.8 489.4 452.12.92 5.64 15.8 29.7 42.7 55.1 78.3 120836.5 809.0 754.1 710.0 680.6 658.0 623.7 574.7<strong>Bevel</strong>gearsKSP■ <strong>Transmission</strong> Capability Table(Gear ratio: 2) Upper <strong>Transmission</strong> Capability(kw) Lower Torqu(N ・ m)Rotation(rpm)Model 50 100 300 600 900 1200 1800 3000KSP039002KSP056002KSP075002KSP096002KSP119002KSP145002KSP1720020.025 0.049 0.142 0.275 0.404 0.528 0.770 1.239.63 9.45 9.07 8.76 8.57 8.41 8.17 <strong>7.</strong>830.075 0.147 0.423 0.814 1.19 1.55 2.26 3.5928.8 28.1 2<strong>7.</strong>0 26.0 25.3 24.8 23.9 22.80.185 0.361 1.03 1.98 2.89 3.76 5.45 8.6170.7 69.0 65.7 63.1 61.3 59.9 5<strong>7.</strong>9 54.80.364 0.710 2.02 3.86 5.62 <strong>7.</strong>31 10.5 16.6139.3 135.3 128.5 122.6 119.6 116.7 111.8 105.90.649 1.26 3.58 6.82 9.90 12.9 18.5 29.0248.1 241.2 22<strong>7.</strong>5 21<strong>7.</strong>7 209.9 205.0 196.1 184.41.07 2.08 5.87 11.2 16.2 21.0 30.1 46.9408.9 39<strong>7.</strong>2 373.6 356.0 343.2 333.4 319.7 298.11.78 3.45 9.72 18.4 26.6 34.5 49.3 76.5680.6 660.0 618.8 58<strong>7.</strong>4 565.8 549.2 523.7 48<strong>7.</strong>4269
NISSEI KSP Ground Spiral Miter <strong>Gears</strong> ModulesNew Products■ Type F (Finished Style)A ShapeB ShapeMiter<strong>Gears</strong>Catalog No. Gear ratio ModuleKSP031001GF LKSP031001GF RKSP040001GF LKSP040001GF RKSP053001GF LKSP053001GF RKSP066001GF LKSP066001GF RKSP078001GF LKSP078001GF RKSP092001GF LKSP092001GF RKSP105001GF LKSP105001GF RKSP132001GF LKSP132001GF RKSP157001GF LKSP157001GF RKSP184001GF LKSP184001GF R1No. ofteethm1.5 20m2 20m2.5 21m3 21m3.5 22m4 22m4.5 23m5 26m5.5 28m6 30Directionof spiralLRLRLRLRLRLRLRLRLRLRPitch dia. Face width ShapeOutside dia. Holding surface dia. Bore Hub dia. Length of boreA B CH7 D E30 7 A 31 16.2 12 22 1340 9 B 40 22.5 14 31 1452.5 12 B 53 31.1 19 38 2063 15 B 66 33.6 23 47 2577 18 B 78 43.1 27 54 2788 21 B 92 48.6 30 63 32103.5 25 C 105 50 32 70 35130 29 C 132 64 36 82 41154 34 C 157 76 40 92 47180 38 C 184 84 48 101 51KSP■ Type U (Style Allowimg Modifications)A ShapeB ShapeCatalog No. Gear ratio ModuleKSP031001GU LKSP031001GU RKSP040001GU LKSP040001GU RKSP053001GU LKSP053001GU RKSP066001GU LKSP066001GU RKSP078001GU LKSP078001GU RKSP092001GU LKSP092001GU RKSP105001GU LKSP105001GU RKSP132001GU LKSP132001GU RKSP157001GU LKSP157001GU RKSP184001GU LKSP184001GU R1No. ofteethm1.5 20m2 20m2.5 21m3 21m3.5 22m4 22m4.5 23m5 26m5.5 28m6 30Directionof spiralLRLRLRLRLRLRLRLRLRLRPitch dia. Face width ShapeOutside dia. Holding surface dia. Bore Hub dia. Length of boreA B CH7 D E30 7 A 31 16.2 10 22 1340 9 B 40 22.5 12 31 1452.5 12 B 53 31.1 14 38 2063 15 B 66 33.6 16 47 2577 18 B 78 43.1 20 54 2788 21 B 92 48.6 22 63 32103.5 25 C 105 50 26 70 35130 29 C 132 64 30 82 41154 34 C 157 76 32 92 47180 38 C 184 84 40 101 51270
Ground Spiral Miter <strong>Gears</strong>SpecificationsPrecision gradeJIS B 1704 grade 0Tooth hardness60~63HRCGear teethGleasonSurface treatmentNonePressure angle20°Shaft angle90°C ShapeHelix angleMaterialHeat treatment35°SCM415(Module 3.5 and above are SCM420)Overall CarburizingTooth surface finishDatum reference surfacefor gear grindingGroundBoreSecondary Operations Not possibleHub width Total length Mounting distanceF G HKeywayAllowable torque(kgf・m)NOTE1Backlash(mm)Weight of set(kg)6 15 25 4 x 1.8 0.61 0 ~0.05 0.087 16.5 30 5 x 2.3 1.59 0 ~0.05 0.168 23 40 6 x 2.8 3.63 0.05~0.10 0.3613 29.5 50 7 x 3 6.26 0.05~0.10 0.6812 32 57 8 x 3.3 9.74 0.05~0.10 1.0814 38 66 8 x 3.3 15.1 0.05~0.10 1.7614 39 72 10 x 3.3 23.9 0.05~0.10 2.5014 45 88 10 x 3.3 38.4 0.05~0.10 4.7820 53.5 105 12 x 3.3 60.1 0.05~0.10 <strong>7.</strong>4217 56.5 118 14 x 3.8 85.8 0.05~0.10 11.1Catalog No.KSP031001GF LKSP031001GF RKSP040001GF LKSP040001GF RKSP053001GF LKSP053001GF RKSP066001GF LKSP066001GF RKSP078001GF LKSP078001GF RKSP092001GF LKSP092001GF RKSP105001GF LKSP105001GF RKSP132001GF LKSP132001GF RKSP157001GF LKSP157001GF RKSP184001GF LKSP184001GF RSpecificationsMiter<strong>Gears</strong>Precision gradeJIS B 1704 grade 0Tooth hardness60~63HRCGear teethGleasonSurface treatmentNoneKSPPressure angle20°Shaft angle90°C ShapeHelix angleMaterialHeat treatment35°SCM415(Module 3.5 and above are SCM420)Carburized(bore & hubs are masked)Tooth surface finishDatum reference surfacefor gear grindingGroundBoreSecondary Operations Possible where maskedHub width Total length Mounting distanceF G HMachinablemax. boreAllowable torque(kgf・m)NOTE1Backlash(mm)Weight of set(kg)6 15 25 12 0.61 0 ~0.05 0.087 16.5 30 16 1.59 0 ~0.05 0.188 23 40 22 3.63 0.05~0.10 0.4213 29.5 50 25 6.26 0.05~0.10 0.7812 32 57 32 9.74 0.05~0.10 1.1814 38 66 38 15.1 0.05~0.10 1.9214 39 72 40 23.9 0.05~0.10 2.6614 45 88 48 38.4 0.05~0.10 4.9820 53.5 105 55 60.1 0.05~0.10 <strong>7.</strong>8017 56.5 118 62 85.8 0.05~0.10 11.6271Catalog No.KSP031001GU LKSP031001GU RKSP040001GU LKSP040001GU RKSP053001GU LKSP053001GU RKSP066001GU LKSP066001GU RKSP078001GU LKSP078001GU RKSP092001GU LKSP092001GU RKSP105001GU LKSP105001GU RKSP132001GU LKSP132001GU RKSP157001GU LKSP157001GU RKSP184001GU LKSP184001GU RNOTE 1: The allowable torques areobtained by conversion from thetable on page 269 for 600 min -1 .
モジュールNISSEI KSP Ground Spiral <strong>Bevel</strong> <strong>Gears</strong> ModulesNew ProductsA ShapeB Shape■ Type F (Finished Style)Catalog No. Gear ratio Module No. of teeth Directionof spiralKSP0481.5GF PKSP0481.5GF GKSP0611.5GF PKSP0611.5GF GKSP0741.5GF PKSP0741.5GF GKSP0901.5GF PKSP0901.5GF GKSP1051.5GF PKSP1051.5GF GKSP1241.5GF PKSP1241.5GF GKSP1411.5GF PKSP1411.5GF GKSP1631.5GF PKSP1631.5GF GKSP1811.5GF PKSP1811.5GF G1.5m2m2.25m2.75m3m3.5m3.75m4.25m4.5m5162418271827203020302233223324362436LRLRLRLRLRLRLRLRLRPitch dia. Face width324840.560.7549.574.2560907010582.5123.7593.5140.2510816212018091215182124283235Outside dia. Holding surface dia. Bore Hub dia. Length of boreShapeA B CH7 D EAC34481<strong>7.</strong>630.4121524301317AC426122.436.2152030401720AC527428.844.5202540502025BC639034.154.7222744562429BD741053<strong>7.</strong>853253050632532BD8712446.664273356692935BD9914152.968303663733241BD11316364.676334069823547BD12618171.886364573904148<strong>Bevel</strong>gearsKSP272A ShapeB Shape■ Type U (Style Allowing Modifications)Catalog No. Gear ratio Module No. of teeth Directionof spiralKSP0481.5GU PKSP0481.5GU GKSP0611.5GU PKSP0611.5GU GKSP0741.5GU PKSP0741.5GU GKSP0901.5GU PKSP0901.5GU GKSP1051.5GU PKSP1051.5GU GKSP1241.5GU PKSP1241.5GU GKSP1411.5GU PKSP1411.5GU GKSP1631.5GU PKSP1631.5GU GKSP1811.5GU PKSP1811.5GU G1.5m2m2.25m2.75m3m3.5m3.75m4.25m4.5m5162418271827203020302233223324362436LRLRLRLRLRLRLRLRLRPitch dia. Face width3248940.560.751249.574.2515609018701052182.5123.752493.5140.25281081623212018035Outside dia. Holding surface dia. Bore Hub dia. Length of boreShapeA B CH7 D EAC34481<strong>7.</strong>630.4101224301317AC426122.436.2121430401720AC527428.844.5142040502025BC639034.154.7162044562429BD741053<strong>7.</strong>853202250632532BD8712446.664202656692935BD9914152.968223063733241BD11316364.676263269823547BD12618171.886303873904148
Ground Spiral <strong>Bevel</strong> <strong>Gears</strong>SpecificationsPrecision gradeJIS B 1704 grade 0Tooth hardness60~63HRCGear teethGleasonSurface treatmentNonePressure angle20°Shaft angle90°C ShapeD ShapeHelix angleMaterialHeat treatment35°SCM415(Module 3.5 and above are SCM420)Overall CarburizingTooth surface finishDatum reference surfacefor gear grindingGroundBoreSecondary Operations Not possibleHub width Total length Mounting distanceF G H4.3714.51931305.1101923.539375.7122229464581326.533565371328.53463577143336.574647173643.5827471938.549.59285101945.550.510590Keyway4 x 1.85 x 2.35 x 2.36 x 2.86 x 2.87 x 36 x 2.88 x 3.37 x 38 x 3.38 x 3.310 x 3.38 x 3.310 x 3.310 x 3.312 x 3.310 x 3.314 x 3.8Allowable torque(kgf・m)NOTE1Backlash(mm)Weight of set(kg)2.02 0 ~0.05 0.184.12 0.05~0.10 0.34<strong>7.</strong>15 0.05~0.10 0.6211.9 0.05~0.10 1.081<strong>7.</strong>8 0.05~0.10 1.5226.0 0.05~0.10 2.3539.2 0.05~0.10 3.4256.5 0.05~0.10 5.2072.4 0.05~0.10 6.77Catalog No.KSP0481.5GF PKSP0481.5GF GKSP0611.5GF PKSP0611.5GF GKSP0741.5GF PKSP0741.5GF GKSP0901.5GF PKSP0901.5GF GKSP1051.5GF PKSP1051.5GF GKSP1241.5GF PKSP1241.5GF GKSP1411.5GF PKSP1411.5GF GKSP1631.5GF PKSP1631.5GF GKSP1811.5GF PKSP1811.5GF GSpecifications<strong>Bevel</strong>gearsPrecision gradeJIS B 1704 grade 0Tooth hardness60~63HRCGear teethGleasonSurface treatmentNoneKSPPressure angle20°Shaft angle90°C ShapeD ShapeHelix angleMaterialHeat treatment35°SCM415(Module 3.5 and above are SCM420)Carburized(bore & hubs are masked)Tooth surface finishDatum reference surfacefor gear grindingGroundBoreSecondary Operations Possible where maskedHub width Total length Mounting distanceF G H4.3714.51931305.1101923.539375.7122229464581326.533565371328.53463577143336.574647173643.5827471938.549.59285101945.550.510590Machinablemax. bore―2016272035254228423648425048555560Allowable torque(kgf・m)NOTE1Backlash(mm)Weight of set(kg)2.02 0 ~0.05 0.194.12 0.05~0.10 0.38<strong>7.</strong>15 0.05~0.10 0.6911.9 0.05~0.10 1.181<strong>7.</strong>8 0.05~0.10 1.6526.0 0.05~0.10 2.5139.2 0.05~0.10 3.6156.5 0.05~0.10 5.4872.4 0.05~0.10 <strong>7.</strong>06NOTE1: The allowable torques are obtained by conversion from the table on page 269 for 600 min -1 .273Catalog No.KSP0481.5GU PKSP0481.5GU GKSP0611.5GU PKSP0611.5GU GKSP0741.5GU PKSP0741.5GU GKSP0901.5GU PKSP0901.5GU GKSP1051.5GU PKSP1051.5GU GKSP1241.5GU PKSP1241.5GU GKSP1411.5GU PKSP1411.5GU GKSP1631.5GU PKSP1631.5GU GKSP1811.5GU PKSP1811.5GU G
NISSEI KSP Ground Spiral <strong>Bevel</strong> <strong>Gears</strong>New ProductsA ShapeB Shape■ Type F (Finished Style)Catalog No. Gear ratio Module No. of teeth Directionof spiralKSP039002GC PKSP039002GF GKSP056002GF PKSP056002GF GKSP075002GF PKSP075002GF GKSP096002GF PKSP096002GF GKSP119002GF PKSP119002GF GKSP145002GF PKSP145002GF GKSP172002GF PKSP172002GF G2m1.5m2m2.5m3m3.5m4m4.51326142815301632173418361938LRLRLRLRLRLRLRPitch dia. Face width19.53928563<strong>7.</strong>575489659.51197214485.51717101418222732Outside dia. Holding surface dia. Bore Hub dia. Length of boreShapeA B CH7 D EAC223910.224.181216241413BC305615.335.6101620301218BD407516.936142230441724BD539623.546172736561929BD6511931.154223344632534BD7814531.260263654732839BD9317244.470334269793446<strong>Bevel</strong>gearsKSPA ShapeB Shape■ Type U (Style Allowing Modifications)Catalog No. Gear ratio Module No. of teeth Directionof spiralKSP039002GU PKSP039002GU GKSP056002GU PKSP056002GU GKSP075002GU PKSP075002GU GKSP096002GU PKSP096002GU GKSP119002GU PKSP119002GU GKSP145002GU PKSP145002GU GKSP172002GU PKSP172002GU G2m1.5m2m2.5m3m3.5m4m4.51326142815301632173418361938LRLRLRLRLRLRLRPitch dia. Face width19.53928563<strong>7.</strong>575489659.51197214485.51717101418222732Outside dia. Holding surface dia. Bore Hub dia. Length of boreShapeA B CH7 D EAC223910.224.181016241413BC305615.335.681220301218BD407516.936121630441724BD539623.546122036561929BD6511931.154162644632534BD7814531.260203054732839BD9317244.470263669793446274
Ground Spiral <strong>Bevel</strong> <strong>Gears</strong>SpecificationsPrecision gradeGear teethPressure angleHelix angleMaterialHeat treatmentJIS B 1704 grade 0Gleason20°35°SCM415(Module 3.5 and above are SCM420)Overall CarburizingTooth hardnessSurface treatmentShaft angleTooth surface finishDatum reference surfacefor gear grinding60~63HRCNone90°GroundBoreSecondary Operations Not possibleC ShapeD ShapeHub width Total length Mounting distanceF G H<strong>7.</strong>6714.5152822281320.532304.61119.525.5443821221.53153473.6152<strong>7.</strong>535.567553.5163340.580644.42038479475Keyway(Screw)(2-M4 , I=5)4 x 1.83 x 1.45 x 2.35 x 2.36 x 2.85 x 2.38 x 3.36 x 2.810 x 3.38 x 3.310 x 3.310 x 3.312 x 3.3Allowable torque(kgf・m)NOTE1Backlash(mm)Weight of set(kg)0.89 0 ~0.05 0.082.65 0 ~0.05 0.216.43 0.05~0.10 0.5012.5 0.05~0.10 1.0322.2 0.05~0.10 1.7036.3 0.05~0.10 2.9159.9 0.05~0.10 4.51Catalog No.KSP039002GC PKSP039002GF GKSP056002GF PKSP056002GF GKSP075002GF PKSP075002GF GKSP096002GF PKSP096002GF GKSP119002GF PKSP119002GF GKSP145002GF PKSP145002GF GKSP172002GF PKSP172002GF GPrecision gradeJIS B 1704 grade 0SpecificationsTooth hardness60~63HRC<strong>Bevel</strong>gearsGear teethGleasonSurface treatmentNoneKSPPressure angle20°Shaft angle90°C ShapeD ShapeHelix angleMaterialHeat treatment35°SCM415(Module 3.5 and above are SCM420)Carburized(bore & hubs are masked)Tooth surface finishDatum reference surfacefor gear grindingGroundBoreSecondary Operations Possible where maskedHub width Total length Mounting distance Machinable Allowable torque Backlash Weight of setF G H max. bore (kgf・m)NOTE1 (mm) (kg)Catalog No.<strong>7.</strong>6714.5152822―200.89 0 ~0.05 0.09KSP039002GU PKSP039002GU G281320.5323010202.65 0 ~0.05 0.23KSP056002GU PKSP056002GU G4.61119.525.5443814256.43 0.05~0.10 0.54KSP075002GU PKSP075002GU G21221.5315347193212.5 0.05~0.10 1.11KSP096002GU PKSP096002GU G3.6152<strong>7.</strong>535.56755254022.2 0.05~0.10 1.81KSP119002GU PKSP119002GU G3.5163340.58064304236.3 0.05~0.10 3.09KSP145002GU PKSP145002GU G4.42038479475385059.9 0.05~0.10 4.77KSP172002GU PKSP172002GU GNOTE1: The allowable torques are obtained by conversion from the table on page 269 for 600 min -1 .275
NISSEI KSP Ground Spiral <strong>Bevel</strong> <strong>Gears</strong>■ Adjusting Tooth Contact< Centering tooth contact >(1)When there is an angular error of the shafts(1)When assembled correctly, the contact will occur inthe middle of the tooth flank.(2)The contact in the face width direction should be inthe center of the face width, but somewhat closer totoe is ideal.When the gears are assembled in to the gearbox andthe backlash is adjusted, adjust the gearbox to obtainthe tooth contact as shown below. Inaccurate assemblywill lead to irregular noise and uneven wear,Toe contactErrorHeelHeel contactError<strong>Bevel</strong>gearsToeKSP(2)When the pinion shaft is offset(3) When the mounting distance of the pinion is incorrectHeel contactLow contactHigh contactToe contactHeel contactErrorErrorHigh contactLow contactToe contactHeel contactToe contactHigh contactLow contactErrorErrorHigh contactLow contact276


