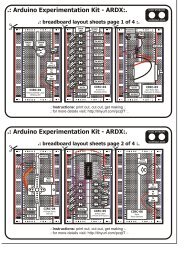
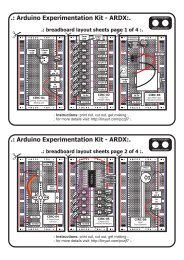
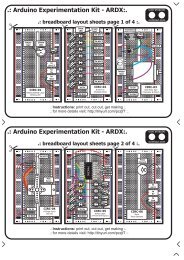
CIRC-07.:Button Pressing:..:Pushbuttons:.WHAT WE’RE DOING:Up to this point we have focused entirely on outputs, time toget our <strong>Arduino</strong> to listen, watch and feel. We'll start with asimple pushbutton. Wiring up the pushbutton is simple. There isone component, the pull up resistor, that might seem out of place.This is included because an <strong>Arduino</strong> doesn't sense the same way we do (ie button pressed,button unpressed). Instead it looks at the voltage on the pin and decides whether it is HIGHor LOW. The button is set up to pull the <strong>Arduino</strong>'s pin LOW when it is pressed, however, whenthe button is unpressed the voltage of the pin will float (causing occasional errors). To get the<strong>Arduino</strong> to reliably read the pin as HIGH when the button is unpressed, we add the pull upresistor.(note: the first example program uses only one of the two buttons)THE CIRCUIT:Parts:CIRC-07Breadboard Sheetx110k Ohm ResistorBrown-Black-Orangex22 Pin Headerx4330 Ohm ResistorOrange-Orange-Brownx1Pushbuttonx2Red LEDx1Wire<strong>Arduino</strong>pin 13Schematic<strong>Arduino</strong>pin 2 pin 3+5 voltsLEDresistor(10k ohm)resistor(330ohm)pushbuttongnd(ground) (-)The Internet.:download:.breadboard layout sheethttp://ardx.org/BBLS07S.:view:.assembly videohttp://ardx.org/VIDE0720
CODE (no need to type everything in just click)File > Examples > Digital > Button(example from the great arduino.cc site check it out for other great ideas)/** Button* by DojoDave ** Turns on and off a light emitting diode(LED) connected to digital* pin 13, when pressing a pushbutton attached to pin 7.* http://www.arduino.cc/en/Tutorial/Button*/int ledPin = 13;int inputPin = 2;int val = 0;void setup() {pinMode(ledPin, OUTPUT);pinMode(inputPin, INPUT);}// choose the pin for the LED// choose the input pin (for a pushbutton)// variable for reading the pin status// declare LED as output// declare pushbutton as inputvoid loop(){val = digitalRead(inputPin); // read input valueif (val == HIGH) {// check if the input is HIGHdigitalWrite(ledPin, LOW); // turn LED OFF} else {digitalWrite(ledPin, HIGH); // turn LED ON}}CIRC-07NOT WORKING? (3 things to try)Light Not Turning OnThe pushbutton is squareand because of this it is easyto put it in the wrong way.Give it a 90 degree twist andsee if it starts working.Light Not FadingA bit of a silly mistake weconstantly made, when youswitch from simple on off tofading remember to move theLED wire from pin 13 to pin 9.Underwhelmed?No worries these circuits are allsuper stripped down to makeplaying with the componentseasy, but once you throw themtogether the sky is the limit.MAKING IT BETTEROn button off button:The initial example may be a little underwhelming (ie. Idon't really need an <strong>Arduino</strong> to do this), lets make it alittle more complicated. One button will turn the LED onthe other will turn the LED off. Change the code to.int ledPin = 13; // choose the pin for the LEDint inputPin1 = 3; // button 1int inputPin2 = 2; // button 2void setup() {pinMode(ledPin, OUTPUT); // declare LED as outputpinMode(inputPin1, INPUT); // make button 1 an inputpinMode(inputPin2, INPUT); // make button 2 an input}void loop(){if (digitalRead(inputPin1) == LOW) {digitalWrite(ledPin, LOW); // turn LED OFF} else if (digitalRead(inputPin2) == LOW) {digitalWrite(ledPin, HIGH); // turn LED ON}}Upload the program to your board, and start toggling theLED on and off.Fading up and down:Lets use the buttons to control an analog signal. To do thisyou will need to change the wire connecting the LED from pin13 to pin 9, also change this in code.int ledPin = 13; ----> int ledPin = 9;Next change the loop() code to read.int value = 0;void loop(){if (digitalRead(inputPin1) == LOW) { value--; }else if (digitalRead(inputPin2) == LOW) { value++; }value = constrain(value, 0, 255);analogWrite(ledPin, value);delay(10);}Changing fade speed:If you would like the LED to fade faster or slower, there is onlyone line of code that needs changing;delay(10); ----> delay(new #);To fade faster make the number smaller, slower requires alarger number.MORE, MORE, MORE:More details, where to buy more parts, where to ask more questions:http://ardx.org/CIRC0721