TC Hub pinout - AIM Racing Data Power
TC Hub pinout - AIM Racing Data Power
TC Hub pinout - AIM Racing Data Power

Create successful ePaper yourself
Turn your PDF publications into a flip-book with our unique Google optimized e-Paper software.
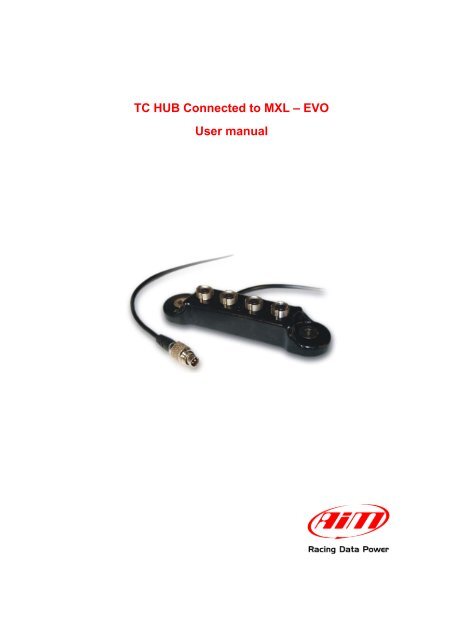
<strong>TC</strong> HUB Connected to MXL – EVO<br />
User manual
INDEX<br />
<strong>TC</strong> <strong>Hub</strong> connected to MXL and EVO<br />
User manual<br />
Release 1.01<br />
Chapter 1 – Characteristics, part number and installation ........................................ 2<br />
1.1 – Part number ........................................................................................................................ 2<br />
1.2 – Installation .......................................................................................................................... 2<br />
1.3 – Connection with MXL and EVO ........................................................................................ 2<br />
Chapter 2 – Configuration on MXL – EVO ................................................................... 3<br />
2.1 – Configurations of MXL and EVO displays ....................................................................... 5<br />
Chapter 3 – <strong>Data</strong> visualisation and analysis ............................................................... 7<br />
3.1 – <strong>Data</strong> visualisation on MXL ................................................................................................ 7<br />
3.2 – <strong>Data</strong> visualisation on EVO ................................................................................................ 7<br />
3.3 – <strong>Data</strong> analysis with Race Studio Analysis ........................................................................ 7<br />
Appendix – Technical drawings ................................................................................... 8<br />
www.aim-sportline.com 1
<strong>TC</strong> <strong>Hub</strong> connected to MXL and EVO<br />
User manual<br />
Release 1.01<br />
0Chapter 1 – Characteristics, part number and installation<br />
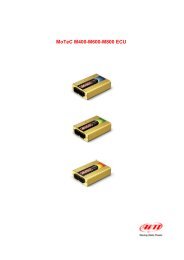
<strong>TC</strong> <strong>Hub</strong> is a thermocouples multiplier that can support up to four thermo couples (“K”<br />
type only) and cascade connection of more TH <strong>Hub</strong> is possible. It communicates<br />
through the CAN protocol increasing available channels without occupying any analog<br />
channel of the logger and minimizing wiring overall. <strong>TC</strong> <strong>Hub</strong> can be connected to: MXL<br />
Pista, MXL Pro05, Evo3 Pro, Evo3 Pista and EVO4 and is waterproof IP 65.<br />
<strong>TC</strong> <strong>Hub</strong> can monitor any temperature like, exhaust gas of all cylinders, water and oil<br />
temperature. It correctly support also infrared sensors that simulate thermocouples<br />
working mode (“K” type only).<br />
41.1 – Part number<br />
<strong>TC</strong> <strong>Hub</strong> (with 150 cm CAN cable) part number is: X08U<strong>TC</strong>C<strong>TC</strong><br />
51.2 – Installation<br />
To install <strong>TC</strong> <strong>Hub</strong> use the proper lateral holes and install it far from heat sources or from<br />
electromagnetic interference sources. Pay attention not to let cables pass near to heat<br />
sources.<br />
61.3 – Connection with MXL and EVO<br />
<strong>TC</strong> <strong>Hub</strong> can be connected as any CAN peripheral as shown here below.<br />
Warning: connect <strong>TC</strong> <strong>Hub</strong> and MXL/EVO when both devices are OFF.<br />
www.aim-sportline.com 2
<strong>TC</strong> <strong>Hub</strong> connected to MXL and EVO<br />
User manual<br />
Release 1.01<br />
1Chapter 2 – Configuration on MXL – EVO<br />
At the very first installation, <strong>TC</strong> <strong>Hub</strong> is to be configured as MXL and/or EVO expansion<br />
using Race Studio 2 software. After this it will be automatically recognised at each<br />
network start. In this example <strong>TC</strong> <strong>Hub</strong> is connected to MXL Pro05.<br />
To configure <strong>TC</strong> <strong>Hub</strong> run Race Studio2 software, press “<strong>AIM</strong> System Manager” (1) and<br />
select the proper logger (2) as shown here below.<br />
“System Manager” window appears showing “Select configuration” layer (1). Select the<br />
configuration <strong>TC</strong> <strong>Hub</strong> is to be added to (it will be highlighted in yellow as here below) or<br />
create a new one and then select “CAN Expansions configurator” (2) layer.<br />
www.aim-sportline.com 3
<strong>TC</strong> <strong>Hub</strong> connected to MXL and EVO<br />
User manual<br />
Release 1.01<br />
In case of very first configuration the layer will show up empty, press “Add expansion”<br />
(or “Delete Expansion” to eliminate an expansion and then confirm the choice) and the<br />
window here below appears:<br />
Press “<strong>TC</strong> <strong>Hub</strong>” (1) and the fields below the images enables.<br />
Fill in the configuration name (2) and press “Get serial number from a connected<br />
expansion” (3) button or type the serial number printed on the label placed under <strong>TC</strong><br />
<strong>Hub</strong> in the proper field (left of “3” button).<br />
Repeat this operation for all connected <strong>TC</strong> <strong>Hub</strong>.<br />
So many layers as many <strong>TC</strong> <strong>Hub</strong> have been added appear under “Add expansion” and<br />
“Del. expansion” buttons.<br />
To configure each <strong>TC</strong> <strong>Hub</strong> select the related layer, as shown here below and<br />
enable/disable the channels connected to the thermocouples, name the channels, set<br />
their sampling frequency, unit of measure and low/high scale values.<br />
www.aim-sportline.com 4
102.1 – Configurations of MXL and EVO displays<br />
<strong>TC</strong> <strong>Hub</strong> connected to MXL and EVO<br />
User manual<br />
Release 1.01<br />
<strong>TC</strong> <strong>Hub</strong> channels can be shown on MXL display setting them in “System Configuration”<br />
layer as shown here below.<br />
<strong>TC</strong> <strong>Hub</strong> channels visualisation can be set like the visualisation of any other channel<br />
(see MXL user manual for further information). In the example here below <strong>TC</strong> <strong>Hub</strong><br />
enabled channels to be shown are <strong>TC</strong>_1, <strong>TC</strong>_2 e <strong>TC</strong>_3. Each of them can be shown in<br />
a field of the display.<br />
In case, on the contrary, <strong>TC</strong> <strong>Hub</strong> is connected to an EVO, data visualisation is only<br />
possible if the logger is connected to a Formula Steering Wheel display or to a<br />
MyChron3 Dash and shown channels are set in the display configuration as shown<br />
here below.<br />
www.aim-sportline.com 5
<strong>TC</strong> <strong>Hub</strong> connected to MXL and EVO<br />
User manual<br />
Release 1.01<br />
When all parameters have been fixed and the field have been associated with the<br />
respective channel the configuration is to be transmitted to the logger. Just press<br />
“Transmit” button on Race Studio 2 top keyboard. When the configuration has been<br />
transmitted a confirmation message appears.<br />
In case PC-logger USB connection is not ok or one or more peripherals have not been<br />
correctly recognised by the logger one of the following messages appears:<br />
USB error:<br />
unplug the USB cable from both the PC and the logger, re-plug it and retry to transmit<br />
the configuration.<br />
The expansion has not been recognised by the logger: check that the expansion ID<br />
number is correct and retry transmitting the configuration to the logger.<br />
www.aim-sportline.com 6
<strong>TC</strong> <strong>Hub</strong> connected to MXL and EVO<br />
User manual<br />
Release 1.01<br />
2Chapter 3 – <strong>Data</strong> visualisation and analysis<br />
73.1 – <strong>Data</strong> visualisation on MXL<br />
<strong>TC</strong> <strong>Hub</strong> channels visualisation on MXL works exactly like the visualisation of any other<br />
MXL channel and display pages are scrolled pressing “Quit/VIEW”. Refer to MXL user<br />
manual for any further information. In the image here below Temperature channel<br />
sampled through <strong>TC</strong> <strong>Hub</strong> value is 70° and channel name is OIL T.<br />
<strong>Power</strong>ing on MXL, <strong>TC</strong> <strong>Hub</strong> is automatically recognised.<br />
83.2 – <strong>Data</strong> visualisation on EVO<br />
<strong>TC</strong> <strong>Hub</strong> channels visualisation on EVO works exactly like the visualisation of any other<br />
channel and is thereby possible only if the logger is connected to a display. The only<br />
display that allows the visualisation of <strong>TC</strong> <strong>Hub</strong> channels are MyChron3 Dash and<br />
Formula Steering wheel. Refer to EVO3 Pro/Pista or EVO4 user manual for further<br />
information. In the image here below Temperature channel sampled through <strong>TC</strong> <strong>Hub</strong><br />
value is 70 and channel label is “°C”.<br />
<strong>Power</strong>ing on EVO, <strong>TC</strong> <strong>Hub</strong> is automatically recognised.<br />
93.3 – <strong>Data</strong> analysis with Race Studio Analysis<br />
<strong>TC</strong> <strong>Hub</strong> does not influence data analysis views made through Race Studio Analysis<br />
because of <strong>TC</strong> <strong>Hub</strong> only adds four temperature channels that can be viewed like any<br />
other temperature channel.<br />
www.aim-sportline.com 7
3Appendix – Technical drawings<br />
<strong>TC</strong> <strong>Hub</strong> connected to MXL and EVO<br />
User manual<br />
Release 1.01<br />
N. rev. / Rev. N. Descrizione / Description <strong>Data</strong> / Date Firma / Signature Contr. da / Ckd. by<br />
<strong>TC</strong> <strong>Hub</strong> <strong>pinout</strong><br />
123<br />
<strong>Racing</strong> <strong>Data</strong> <strong>Power</strong><br />
93<br />
Rif. / Ref. Q.tà/Q.ty Material / Material N. articolo / Item N.<br />
Progettato da / Designed by Contr. da / Ckd. by Approvato da / Approved by Nome file / File name <strong>Data</strong> / Date Scala / Scale<br />
Titolo / Title<br />
CAN cable<br />
1500 mm lenght<br />
1<br />
3<br />
2<br />
3 pins female<br />
Binder connector <strong>pinout</strong><br />
Pinout <strong>TC</strong> <strong>Hub</strong><br />
N. disegno / Drawing N. Rev. / Rev. Foglio / Sheet<br />
www.aim-sportline.com 8<br />
Position 1 Position 2 Position 3 Position 4<br />
Temperature Channel 4<br />
GND<br />
n.c.<br />
1<br />
2<br />
3<br />
Temperature Channel 3<br />
GND<br />
n.c.<br />
1<br />
2<br />
3<br />
Temperature Channel 2<br />
GND<br />
n.c.<br />
1<br />
2<br />
3<br />
Temperature Channel 1<br />
GND<br />
n.c.<br />
1<br />
2<br />
3<br />
1 of 1