HydraSleeve Manual - Waterra-In-Situ
HydraSleeve Manual - Waterra-In-Situ
HydraSleeve Manual - Waterra-In-Situ
- No tags were found...

You also want an ePaper? Increase the reach of your titles
YUMPU automatically turns print PDFs into web optimized ePapers that Google loves.
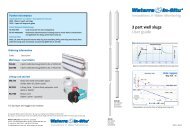
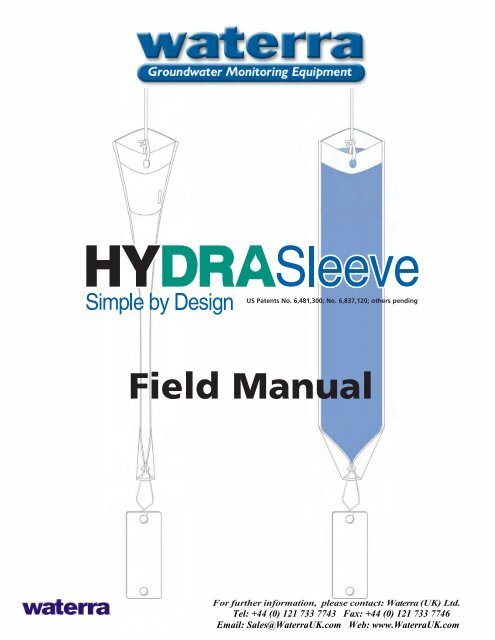
US Patents No. 6,481,300; No. 6,837,120; others pendingField <strong>Manual</strong>For further information, please contact: <strong>Waterra</strong> (UK) Ltd.Tel: +44 (0) 121 733 7743 Fax: +44 (0) 121 733 7746Email: Sales@<strong>Waterra</strong>UK.com Web: www.<strong>Waterra</strong>UK.com
<strong>In</strong>troductionThe <strong>HydraSleeve</strong> groundwater sampler can be used to collect a representative sample for mostphysical and chemical parameters without purging the well. It collects a whole water samplefrom a user-defined interval (typically within the well screen), without mixing fluid from otherintervals. One or more <strong>HydraSleeve</strong>s are placed within the screened interval of the monitoringwell, and a period of time is allocated for the well to re-equilibrate. Hours to months later,the sealed <strong>HydraSleeve</strong> can be activated for sample collection. When activated, <strong>HydraSleeve</strong>collects a sample with no drawdown and minimal agitation or displacement of the watercolumn. Once the sampler is full, the one-way reed valve collapses, preventing mixing ofextraneous, non-representative fluid during recovery.AssemblyAssembling the <strong>HydraSleeve</strong> is simple, and can be done by one person in the field, taking onlya minute or two.1 Remove<strong>HydraSleeve</strong>from package andgrasp top to “pop”open.4Fold the twoholes at bottomof <strong>HydraSleeve</strong>together and attachweight2Squeeze side finstogether at topto bend reinforcingstrips outward.5Sampler is readyto insert into thewell.3Attach line tohole at top of<strong>HydraSleeve</strong>.2
Placing the <strong>HydraSleeve</strong>(s)To collect a representative groundwater sample without purging, the well must be allowedtime to re-equilibrate after placement of the sampler. When any device is lowered into a well,some mixing of the water column occurs. The diameter of the device and its shape greatlyaffect the degree of mixing. The flat cross-section of the empty <strong>HydraSleeve</strong> minimizes the disturbanceto the water column as the sampler is lowered into position, reducing the time neededfor the well to return to equilibrium.There are three basic methods for holding a <strong>HydraSleeve</strong> in position as the well equilibrates.TOP DOWN DEPLOYMENT (Figure 1)Measure the correct amount of suspensionline needed to "hang" the top of the<strong>HydraSleeve</strong>(s) at the desired samplingdepth (in most cases, this will be at the bottomof the sampling zone). The upper endof the tether can be connected to the wellcap to suspend the <strong>HydraSleeve</strong> at the correctdepth until activated for sampling.Note: For deep settings, it may be difficultto accurately measure long segments of suspensionline in the field. Factory prepared,custom suspension line and attachmentpoints can be provided.Figure 1Suspend <strong>HydraSleeve</strong>at correct depth fromtop of well by accuratelymeasuring thetether length.Top of well screenBOTTOM DEPLOYMENT (Figure 2)Sound the well to determine the exactdepth. Lower the weighted <strong>HydraSleeve</strong>into the well and let it touch the bottom.Very slowly (less than 1/2 foot per second)raise the sampler to the point where thecheck valve is at the depth the sample is tobe collected. Attach the suspension line tothe top of the well to suspend it at thisdepth. (It is often easier to measure a fewfeet from the bottom of the well up to thesample point, than it is to measure manyfeet from the top of the well down.)Alternately, the sampler can be left on thebottom until the well re-equilibrates. Forsampling, it can be very slowly pulled(< 1/2 fps) to sampling depth, then activated(see “Sample Collection,” p. 6) to collect thesample, and retrieved to the surface.∆Figure 2Top of well screenSample depth1. (Left) Lower <strong>HydraSleeve</strong>to bottom of well and:2. (Right) Slowly (< 1/2 fps) pullup to desired sample depth.Suspend <strong>HydraSleeve</strong> while wellequilibrates. Collect sample.Alternately,3. Let <strong>HydraSleeve</strong> rest on thebottom until well equilibrates,then slowly pull into positionand begin sampling.∆ ∆3
Multiple <strong>In</strong>terval DeploymentThere are two basic methods for placing multiple <strong>HydraSleeve</strong>s in a well to collect samplesfrom different levels simultaneously.ATTACHED TO A SINGLE TETHER (Figure 4)To use 3 or more samplers simultaneously,we recommend attaching them all to atether for support to prevent the samplingstring from pulling apart. The weight isattached to a single length of suspensionline and allowed to rest on the bottom ofthe well. The top and bottom of each<strong>HydraSleeve</strong> are attached to the tether atthe desired sample intervals. Cable tie orstainless steel clips (supplied) work well forattaching the <strong>HydraSleeve</strong>s to the line.Simply push one end of the clip betweenstrands of the rope at the desired pointbefore attaching the clip to the<strong>HydraSleeve</strong>.Figure 4Separate <strong>HydraSleeve</strong>sto the desired spacingby measuring alongthe tether whenattaching samplers.Top of well screenATTACHED END TO END (Figure 5)To place 2 or 3 stacked <strong>HydraSleeve</strong>s forvertical profiling, use one of the methodsdescribed above to locate the bottomsampler. Attach the bottom of the topsampler to the top of the following<strong>HydraSleeve</strong>(s) with a carefully measuredlength of suspension cable. Connect theweight to the bottom sampler. Note: ifmany <strong>HydraSleeve</strong>s are attached to a tether,more weight may be required than with asingle sampler.Figure 5Separate <strong>HydraSleeve</strong>sto the desired spacingby measuring tetherbetween samplers.Top of well screen5
Sample CollectionThe <strong>HydraSleeve</strong> must move upward at a rate of one foot per second or faster (about thespeed a bailer is usually pulled upward) for water to pass through the check valve into thesample sleeve. The total upward distance the check valve must travel to fill the sample sleeveis about 1 to 2 times the length of the sampler. For example, a 24-inch <strong>HydraSleeve</strong> needs atotal upward movement of 24 to no more than 48 inches to fill. The upward motion can beaccomplished using one long continuous pull, several short strokes, or any combination thatmoves the check valve the required distance in the open position. A special technique is usedfor sampling low-yield wells.CONTINUOUS PULL (Figure 6)Pull the <strong>HydraSleeve</strong> continuously upwardfrom its starting point at a constant 1 to 2feet per second until full. This method usuallyprovides the least turbid samples and isanalogous to coring the water column fromthe bottom up.Note: When using this method, the screeninterval should be long enough so the samplerfills before exiting the top of the screen.Figure 6Sampler fullPull the <strong>HydraSleeve</strong>continuously upwardfrom its starting pointat a constant 1-2 fps.The sleeve will fillwhen pulled upapprox. 1 to 2 timesits length.Top of well screenSample intervalSHORT STROKES (Figure 7)Pull the sampler upward at about 1 to 2feet per second for the length of the samplerand let it drop back to the startingpoint. Repeat the cycle 3 to 5 times.This method provides a shorter samplinginterval than the continuous pull method(above), and usually reduces the turbiditylevels of the sample below that of numerousrapid, short cycles (below). The samplecomes from between the top of the cycleand the bottom of the sampler at its lowestpoint.Figure 7Top point of cyclePull the <strong>HydraSleeve</strong>up the length of thesampler at 1-2 fps andallow to drop back tothe starting point.Repeat cycle 3 to 5times to fill sleeve.Top of well screenSample intervalBottom point of cycle6
RAPID, SHORT CYCLES (Figure 8)Cycle the <strong>HydraSleeve</strong> up and down usingrapid, short strokes (6-inch cycle at a minimumof 1 cycle per second) 5 to 8 times.This method provides the shortest samplinginterval. Dye studies have shown that whenusing this method the sample flows into thecheck valve from along the length of thesampler and immediately above the checkvalve. The sample interval is from the bottomthe sampler at its lowest point in thecycle to the top of the check valve at thepeak of the cycle.Figure 8Rapidly cycle samplerup and down approx.6 inches.Top point of cycleTop of well screenSample intervalBottom point of cycleSAMPLING LOW-YIELD WELLS (Figure 9)<strong>HydraSleeve</strong> provides the best availabletechnology for sampling low yield wells.When pulled upward after the well re-equilibrates,the <strong>HydraSleeve</strong> will collect a watercore from the top of the sampler to about itsown length above that point. The sample iscollected with no drawdown in the well andminimal sample agitation. An optional topweight can be attached to compress thesampler in the bottom of the well if neededfor an extremely short water column. Witha top weight, the check valve is pusheddown to within a foot of the bottom of thewell.Figure 9Sampler fullPull the <strong>HydraSleeve</strong>continuously upwardfrom the starting pointat a constant speedTop weightTop of well screenSample interval7
Sample DischargeThe best way to remove a sample from the <strong>HydraSleeve</strong> with the least amount of aeration andagitation is with the short plastic discharge tube (included).First, squeeze the full sampler just belowthe top to expel water resting abovethe flexible check valve. (Photo 1, top left)Then, push the pointed discharge tubethrough the outer polyethylene sleeve about3-4 inches below the white reinforcing strips.(Photo 2, middle left)1Discharge the sample into the desired container.(Photo 3, bottom left)2Raising and lowering the bottom of thesampler or pinching the sample sleeve justbelow the discharge tube will control theflow of the sample. The sample sleeve canalso be squeezed, forcing fluid up throughthe discharge tube, similar to squeezing atube of toothpaste. With a little practice,and using a flat surface to set the samplecontainers on, <strong>HydraSleeve</strong> samplingbecomes a one-person operation.3For further information, please contact: <strong>Waterra</strong> (UK) Ltd.Tel: +44 (0) 121 733 7743 Fax: +44 (0) 121 733 7746Email: Sales@<strong>Waterra</strong>UK.com Web: www.<strong>Waterra</strong>UK.com