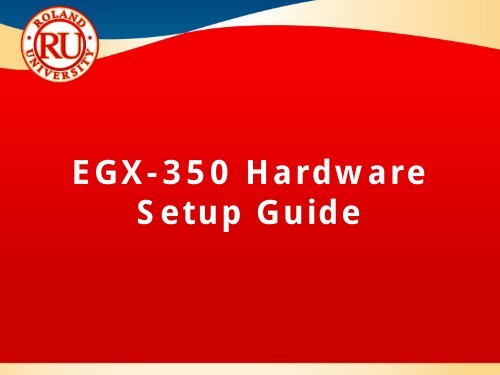
EGX-350 Hardware Setup Guide - Support
EGX-350 Hardware Setup Guide - Support
EGX-350 Hardware Setup Guide - Support
- No tags were found...

Create successful ePaper yourself
Turn your PDF publications into a flip-book with our unique Google optimized e-Paper software.
<strong>EGX</strong>-<strong>350</strong> <strong>Hardware</strong><strong>Setup</strong> <strong>Guide</strong>
<strong>EGX</strong> Series <strong>Hardware</strong> <strong>Setup</strong><strong>Guide</strong> This guide covers the basic setup for theRoland <strong>EGX</strong>-<strong>350</strong> desktop engraver.NOTES: The setup covers Nosecone, Non-Noseconeand Scribing setup as well as setup forRhinestone template creation. For additional details and information on aparticular configuration always refer to theUsers Manual for your engraver.
<strong>EGX</strong>-<strong>350</strong> <strong>Hardware</strong>Configuration forNosecone Engraving
<strong>EGX</strong>-<strong>350</strong> <strong>Setup</strong> for NoseconeEngravingPower the units primary power switch on the rightrear of the unit.NOTES:Turn the Emergency (secondary power) switchclockwise to power the unit on.The Handy Panel will power on and display themodel and boot version. Once completed thedisplay will read “HIT ENTER”.At this point press the ENTER key to initialize theunit.Once the initialization is completed, the carriagewill be located to the View position (Left rear).Place the adhesive sheet (AS-10) in the lower leftcorner of the table and place the material in thecorner as well.
<strong>EGX</strong>-<strong>350</strong> <strong>Setup</strong> for NoseconeEngravingOn the Handy Panel press the MENU key multipletimes until you see the I/O, OTHERS,ADJUSTMENT menu.NOTES:Using the arrow keys on the Handy Panel movethe cursor to OTHERS and press the ENTER key toenter the sub-menu.Press the MENU key multiple times until you seeAUTO Z CONTROL.Using the arrow keys on the Handy Panel movethe cursor to ON and press the ENTER key to setthe value (shown with brackets).The display will display SET lock lever to 1 or 2 fora few seconds and return the AUTO Z CONTROLscreen.
<strong>EGX</strong>-<strong>350</strong> <strong>Setup</strong> for NoseconeEngraving On the <strong>EGX</strong>-<strong>350</strong> set the lock lever to either 1 or 2by pressing the lever in and then down. This willallow the Z Axis to “float up and down”.NOTES:Using the arrow keys on the control panel movethe carriage so that the spindle unit is over thelower left corner of the material.Once the spindle is over the lower left corner ofthe material, press the XY ORIGIN SET button andpress the ENTER key to set that as your originpoint.Remove the cutter tool from the cutter knob(brass knob) and install the cutter knob on thetop of the spindle assembly.
<strong>EGX</strong>-<strong>350</strong> <strong>Setup</strong> for NoseconeEngravingInstall the collet to the bottom of the spindleassembly and tighten it with the supplied spannerwrenches.NOTES:Install the Nosecone assembly on the spindleassembly all the way up until it stops and thenback off 2-3 full turns. This will allow you to setthe depth for engraving.Using the arrow keys move the nosecone over aflat area of the material.Using the Z- key lower the nosecone all the waydown until the machine stops. The display willshow and asterisks next to Z AUTO.
<strong>EGX</strong>-<strong>350</strong> <strong>Setup</strong> for NoseconeEngravingInsert the cutter gently until it touches thesurface of the material and tighten it in placeusing the supplied hex wrench.NOTES:Raise the Z Axis by using the Z+ key to clear thematerial.Loosen the retaining screw and rotate thenosecone counter clockwise to set the desireddepth. Each tick mark is equal to 0.001”(0.0245mm). One full turn is equal to 0.025”(0.635mm).Secure the nosecone with the retaining screw.Your machine is now ready for noseconeengraving.
<strong>EGX</strong>-<strong>350</strong> <strong>Hardware</strong>Configuration for Non-Nosecone Engraving
<strong>EGX</strong>-<strong>350</strong> <strong>Setup</strong> for Non-Nosecone EngravingPower the units primary power switch on the rightrear of the unit.NOTES:Turn the Emergency (secondary power) switchclockwise to power the unit on.The Handy Panel will power on and display themodel and boot version. Once completed thedisplay will read “HIT ENTER”.At this point press the ENTER key to initialize theunit.Once the initialization is completed, the carriagewill be located to the View position (Left rear).Place the adhesive sheet (AS-10) in the lower leftcorner of the table and place the material in thecorner as well.
<strong>EGX</strong>-<strong>350</strong> <strong>Setup</strong> for Non-Nosecone EngravingOn the Handy Panel press the MENU key multipletimes until you see the I/O, OTHERS,ADJUSTMENT menu.NOTES:Using the arrow keys on the Handy Panel movethe cursor to OTHERS and press the ENTER key toenter the sub-menu.Press the MENU key multiple times until you seeAUTO Z CONTROL.Using the arrow keys on the Handy Panel movethe cursor to OFF and press the ENTER key to setthe value (shown with brackets).The display will display SET lock lever to 3 for afew seconds and return the AUTO Z CONTROLscreen.
<strong>EGX</strong>-<strong>350</strong> <strong>Setup</strong> for Non-Nosecone EngravingOn the <strong>EGX</strong>-<strong>350</strong> set the lock lever to 3 bypressing the lever in and then down. This will lockthe Z Axis position.NOTES:Using the arrow keys on the control panel movethe carriage so that the spindle unit is over thelower left corner of the material.Once the spindle is over the lower left corner ofthe material, press the XY ORIGIN SET button andpress the ENTER key to set that as your originpoint.Remove the cutter tool from the cutter knob(brass knob) and install the cutter knob on thetop of the spindle assembly.
<strong>EGX</strong>-<strong>350</strong> <strong>Setup</strong> for Non-Nosecone EngravingInstall the collet to the bottom of the spindleassembly and tighten it with the supplied spannerwrenches.NOTES:Using the arrow keys move the nosecone over aflat area of the material.Using the Z- key lower the nosecone until thebottom of the collet is approx 10mm above thematerial.Insert the cutter until it touches the material andlock in place with the supplied hex wrench.Press the Z ORIGIN SET key to bring up the Zsettings on the display.Using the arrow keys move the cursor over Z0and press the ENTER key to set this position asthe surface.
<strong>EGX</strong>-<strong>350</strong> <strong>Setup</strong> for Non-Nosecone EngravingPress the Z+ key to raise the tool off the surfaceapproximately 1/8”.NOTES:Press the arrow key to move the cursor to Z2 andpress the ENTER key to set this value as theclearance gap.NEVER set Z1 on the machine. Z1 is the amountof depth you want to cut and is controlled via thesoftware.Your machine is now ready for non-noseconeengraving.
<strong>EGX</strong>-<strong>350</strong> <strong>Hardware</strong>Configuration forScribing
<strong>EGX</strong>-<strong>350</strong> <strong>Setup</strong> for ScribingPower the units primary power switch on the rightrear of the unit.NOTES:Turn the Emergency (secondary power) switchclockwise to power the unit on.The Handy Panel will power on and display themodel and boot version. Once completed thedisplay will read “HIT ENTER”.At this point press the ENTER key to initialize theunit.Once the initialization is completed, the carriagewill be located to the View position (Left rear).Place the adhesive sheet (AS-10) in the lower leftcorner of the table and place the material in thecorner as well.
<strong>EGX</strong>-<strong>350</strong> <strong>Setup</strong> for ScribingOn the Handy Panel press the MENU key multipletimes until you see the I/O, OTHERS,ADJUSTMENT menu.NOTES:Using the arrow keys on the Handy Panel movethe cursor to OTHERS and press the ENTER key toenter the sub-menu.The first item in the sub-menu is REVOLUTION.Using the arrow keys on the Handy Panel movethe cursor to OFF and press the ENTER key to setthe value (shown with brackets).The spindle is now turned off for scribing/diamonddrag engraving.
<strong>EGX</strong>-<strong>350</strong> <strong>Setup</strong> for ScribingPress the MENU key multiple times until you seeAUTO Z CONTROL.NOTES:Using the arrow keys on the Handy Panel movethe cursor to ON and press the ENTER key to setthe value (shown with brackets).The display will display SET lock lever to 1 or 2 fora few seconds and return the AUTO Z CONTROLscreen.
<strong>EGX</strong>-<strong>350</strong> <strong>Setup</strong> for Scribing On the <strong>EGX</strong>-<strong>350</strong> set the lock lever to either 1 or 2by pressing the lever in and then down. This willallow the Z Axis to “float up and down”.NOTES:Using the arrow keys on the control panel movethe carriage so that the spindle unit is over thelower left corner of the material.Once the spindle is over the lower left corner ofthe material, press the XY ORIGIN SET button andpress the ENTER key to set that as your originpoint.Remove the cutter tool from the cutter knob(brass knob) and install the cutter knob on thetop of the spindle assembly.
<strong>EGX</strong>-<strong>350</strong> <strong>Setup</strong> for ScribingInstall the collet to the bottom of the spindleassembly and tighten it with the supplied spannerwrenches.NOTES:Insert the diamond scraper tool into the cutterholder and have the tool protrude from thebottom of the collet by at least 10mm.Tighten the tool in place with the supplied hexwrench.Your machine is now ready to diamond scribe.
<strong>EGX</strong>-<strong>350</strong> <strong>Hardware</strong>Configuration forRhinestone TemplateCreation(when using R-WearStudio)
<strong>EGX</strong>-<strong>350</strong> <strong>Setup</strong> for RhinestoneTemplate CreationPower the units primary power switch on the rightrear of the unit.NOTES:Turn the Emergency (secondary power) switchclockwise to power the unit on.The Handy Panel will power on and display themodel and boot version. Once completed thedisplay will read “HIT ENTER”.At this point press the ENTER key to initialize theunit.Once the initialization is completed, the carriagewill be located to the View position (Left rear).Place the adhesive sheet (AS-10) in the lower leftcorner of the table and place the material in thecorner as well.
<strong>EGX</strong>-<strong>350</strong> <strong>Setup</strong> for RhinestoneTemplate CreationOn the Handy Panel press the MENU key multipletimes until you see the I/O, OTHERS,ADJUSTMENT menu.NOTES:Using the arrow keys on the Handy Panel movethe cursor to OTHERS and press the ENTER key toenter the sub-menu.Press the MENU key multiple times until you seeAUTO Z CONTROL.Using the arrow keys on the Handy Panel movethe cursor to OFF and press the ENTER key to setthe value (shown with brackets).The display will display SET lock lever to 3 for afew seconds and return the AUTO Z CONTROLscreen.
<strong>EGX</strong>-<strong>350</strong> <strong>Setup</strong> for RhinestoneTemplate CreationOn the <strong>EGX</strong>-<strong>350</strong> set the lock lever to 3 bypressing the lever in and then down. This will lockthe Z Axis position.NOTES:Measure and mark the center of the material.Using the arrow keys on the control panel movethe carriage so that the spindle unit is over thecenter of the material.Once the spindle is over the lower left corner ofthe material, press the XY ORIGIN SET button andpress the ENTER key to set that as your originpoint.Remove the cutter tool from the cutter knob(brass knob) and install the cutter knob on thetop of the spindle assembly.
<strong>EGX</strong>-<strong>350</strong> <strong>Setup</strong> for RhinestoneTemplate CreationInstall the collet to the bottom of the spindleassembly and tighten it with the supplied spannerwrenches.NOTES:Using the arrow keys move the nosecone over aflat area of the material.Using the Z- key lower the nosecone until thebottom of the collet is approx 10mm above thematerial.Insert the cutter until it touches the material andlock in place with the supplied hex wrench.Press the Z ORIGIN SET key to bring up the Zsettings on the display.Using the arrow keys move the cursor over Z0and press the ENTER key to set this position asthe surface (noted by brackets).
<strong>EGX</strong>-<strong>350</strong> <strong>Setup</strong> for RhinestoneTemplate CreationPress the Z+ key to raise the tool off the surfaceapproximately 1/8”.NOTES:Press the arrow key to move the cursor to Z2 andpress the ENTER key to set this value as theclearance gap (noted by brackets).NEVER set Z1 on the machine. Z1 is the amountof depth you want to cut and is controlled via thesoftware.Your machine is now ready for rhinestonetemplate creation via R-WearStudio.Design your template in R-WearStudio.When you select Engrave, ensure that theEngrave Position is set for Center.