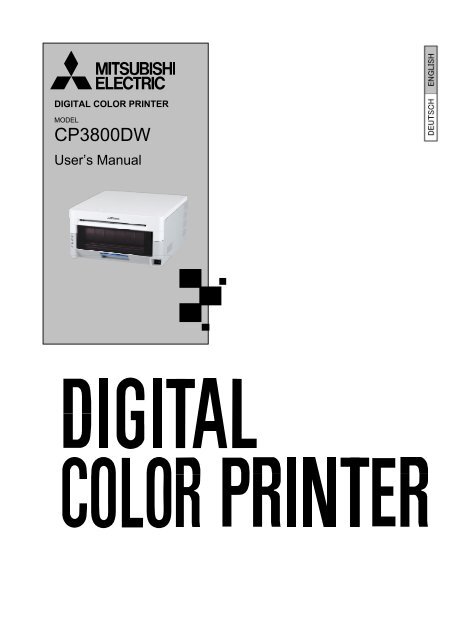
CP3800DW User Manual English - Mitsubishi Electric Europe Benelux
CP3800DW User Manual English - Mitsubishi Electric Europe Benelux
CP3800DW User Manual English - Mitsubishi Electric Europe Benelux
- No tags were found...
Create successful ePaper yourself
Turn your PDF publications into a flip-book with our unique Google optimized e-Paper software.
●American, Canadian <strong>User</strong>sCord set No INQ.1417Parts number Rating Acquired Standard NoPlug CAT-009 125V 13A UL:E69228 CSA:LL93534Cord SJT 1.25mm 2 3GUL:E69167 CSA:LL97391LL92902 LL42379Connector EF-28 125V 13A UL:E69228 CSA:LL93534Cord set No 5-AB0638Parts number Rating Acquired Standard NoPlug KP-30 125V 13A UL: E118569 CSA: LR84390Cord SJT 1.25mm 2 3G UL: E42955 CSA: LL84512Connector KS-32 125V 13A UL: E118569 CSA: LL84391●<strong>Europe</strong>an <strong>User</strong>sCord set No 764SCord set No 764SParts number Rating Acquired Standard NoPlug 203 10/16A 250V EN60799Cord H05VV-F 1.00mm 2 3G EN60799Connector EF-28 250V 10A EN60799Parts number Rating Acquired Standard NoPlug KP-4819Y 10 / 16A 250V IEC60884Cord H05VV-F(GTCE-3) 1.00mm 2 3G IEC60227-5Connector KS-31A 250V 10A IEC60320-13
<strong>English</strong>Hereby, <strong>Mitsubishi</strong> <strong>Electric</strong> Corporation declares that this <strong>CP3800DW</strong> is incompliance with the essential requirements and other relevant provisions of Directive1999/5/EC.Finnish<strong>Mitsubishi</strong> <strong>Electric</strong> Corporation vakuuttaa täten että <strong>CP3800DW</strong> tyyppinen laite ondirektiivin 1999/5/EY oleellisten vaatimusten ja sitä koskevien direktiivin muidenehtojen mukainen.DutchHierbij verklaart <strong>Mitsubishi</strong> <strong>Electric</strong> Corporation dat het toestel <strong>CP3800DW</strong> inovereenstemming is met de essentiële eisen en de andere relevante bepalingen vanrichtlijn 1999/5/EGBij deze verklaart <strong>Mitsubishi</strong> <strong>Electric</strong> Corporation dat deze <strong>CP3800DW</strong> voldoet aan deessentiële eisen en aan de overige relevante bepalingen van Richtlijn 1999/5/EC.FrenchPar la présente <strong>Mitsubishi</strong> <strong>Electric</strong> Corporation déclare que ľappareil <strong>CP3800DW</strong> estconforme aux exigences essentielles et aux autres dispositions pertinentes de ladirective 1999/5/CE.Par la présente, <strong>Mitsubishi</strong> <strong>Electric</strong> Corporation déclare que ce <strong>CP3800DW</strong> estconforme aux exigences essentielles et aux autres dispositions de la directive1999/5/CE qui lui sont applicables.SwedishHärmed intygar <strong>Mitsubishi</strong> <strong>Electric</strong> Corporation att denna <strong>CP3800DW</strong> står Iöverensstämmelse med de väsentliga egenskapskrav och övriga relevantabestämmelser som framgår av direktiv 1999/5/EG.DanishUndertegnede <strong>Mitsubishi</strong> <strong>Electric</strong> Corporation erklærer herved, at følgende udstyr<strong>CP3800DW</strong> overholder de væsentlige krav og øvrige relevante krav i direktiv1999/5/EFGermanHiermit erklärt <strong>Mitsubishi</strong> <strong>Electric</strong> Corporation dass sich dieser/diese/dieses<strong>CP3800DW</strong> in Übereinstimmung mit den grundlegenden Anforderungen und denanderen relevanten Vorschriften der Richtlinie 1999/5/EG befindet".(BMWi)Hiermit erklärt <strong>Mitsubishi</strong> <strong>Electric</strong> Corporation die Übereinstimmung des Gerätes<strong>CP3800DW</strong> mit den grundlegenden Anforderungen und den anderen relevantenFestlegungen der Richtlinie 1999/5/EG.(Wien)GreekME THN ΠAPOYΣA <strong>Mitsubishi</strong> <strong>Electric</strong> Corporation ΔHΛΩNEI OTI <strong>CP3800DW</strong>ΣYMMOPΦΩNETAI ΠPOΣ TIΣ OYΣIΩΔEIΣ AΠAITHΣEIΣ KAI TIΣ ΛOIΠEΣ ΣXETIKEΣ ΔIATAΞEIΣTHΣ OΔΗΓIΑΣ 1999/5/EK4
ItalianCon la presente <strong>Mitsubishi</strong> <strong>Electric</strong> Corporation dichiara che questo <strong>CP3800DW</strong> èconforme ai requisiti essenziali ed alle altre disposizioni pertinenti stabilite dalladirettiva 1999/5/CE.SpanishPor medio de la presente <strong>Mitsubishi</strong> <strong>Electric</strong> Corporation declara que el <strong>CP3800DW</strong>cumple con los requisitos esenciales y cualesquiera otras disposiciones aplicables oexigibles de la Directiva 1999/5/CE.Portuguese<strong>Mitsubishi</strong> <strong>Electric</strong> Corporation declara que este <strong>CP3800DW</strong> está conforme com osrequisitos essenciais e outras disposições da Directiva 1999/5/CE.MaltiHawnhekk, <strong>Mitsubishi</strong> <strong>Electric</strong> Corporation jiddikjara li dan <strong>CP3800DW</strong> jikkonformamal-ħtiġijiet essenzjali u ma provvedimenti oħrajn relevanti li hemm fid-Dirrettiva1999/5/EC5
Table of ContentsIntroduction·················································································································2Cautions for Set-up····························································································2Table of Contents ································································································6Setting Up the Printer ............................................................................................. 7Checking the Contents···························································································7Names of Components···························································································8Connecting the Power Cord·············································································9Connecting to the Computer············································································9Paper and Ribbon·····································································································10Setting the Media ······································································································11Trouble-shooting .................................................................................................... 16Error Displays··············································································································16Solving Media Errors·····························································································17Cleaning ................................................................................................................... 21Platen Roller ·················································································································21Specifications........................................................................................................... 226
Names of ComponentsSetting i g Up the ePrintert r[Front of Unit]LEDPrint Feed OutPower SwitchOpen LeverScrap BoxPlaten Roller[Back of Unit]USB portVentilation[Side of Unit]Power Plug SocketVentilationCAUTION・ Please be careful not to hurt yourself or damage anything on the edges of the printer.8
Connecting the Power CordSetting i g Up the ePrinterr 1. Make sure that the printer’s power switch is set to the OFF position.2. Plug the cord connector end into the printer Power Plug Socket.3. Plug the cord into the wall outlet.Connecting to the Computer1. Make sure that both the printer and computer power switches are set to the OFF position.2. Connect the USB cable to the printer and the computer.3. Turn on the power.CAUTION・ Please use the power cable that came with the printer, and be sure to attach the ground wire.9
Paper and RibbonSetting i gUp the ePrinterType8inchPaperWidth: 203mmRibbonWidth: 210mmCAUTION・ Set the paper and ribbon without putting them directly on the work surface. Any dust or dirt could getinside the printer and adversely affect the print quality.10
Setting the MediaSetting nUp the Printer1. Release the Open Lever, and pull out the mechanism unit.Open Lever2. Open the Paper Release lever.Paper Release Lever3. Remove the scrap boxScrap Box4. Remove the entire paper cassette unit.11
Setting nUp the Printer5. Install the new roll of paper on the paper holder.When installing it, make sure there are no gaps between the paper and the holder.Make sure the paper is not sticking out. If the end of the roll is uneven (with paper sticking out), remove it fromthe holder, and flatten it.○No gaps×Check for uneven endsCheck for uneven ends×6. Set the paper holder into the paper cassette. (Set it firmly all the way in)Set the paper in the direction indicated below.Paper directionSeal12
Setting i g Up the ePrintert r7. Remove the tape, and advance the roll as indicated by the arrow. Set the end of the paper about 5mm beyondthe roller. When doing this, insert the paper straight along the seal. If it isn’t inserted straight, the paper willbe crooked, which could cause white line on the edges of the print, ribbon wrinkles, and register slippage.Path of the paperAs seen from above○ ×8. Set the paper cassette into the printer.13
Setting nUp the Printer9. Turn the paper in the direction of the arrow. When it is advanced enough, the buzzer will beep, and theflashing LED (orange) will go out.It is easier to set if the paper is turned while securing the holder with one hand.10. Set the scrap box, and close the cover.The printer will not operate without the scrap box.If the mechanism unit is closed without the scrap box attached, there will be a “No Scrap Box Error”, and theLED will flash (red).CAUTION・ The printer will not operate without the scrap box attached.・ When the scrap box is removed, do not insert your fingers in the cutter at the top.They could be cut or severed.・ As prints are cut, the scrap box fills with scrap paper. Be sure to empty it when you change the paperand ribbon. If it becomes over-filled with scraps, it could cause problems with the printer.14
11. Set the new ribbon into the ribbon cassette.Advance the ribbon in the direction of the arrow, and take up any slack.Setting nUp the PrinterTake UpSupplySet it with the supply side in front.Set hereSupply side13.Close the mechanism unit.*When the mechanism unit is closed, the printer will run initialization (4 blank sheets will be fed out).However, if the power is turned ON after the paper is set, it won’t run the initialization.By running initialization, the dirty outer layer of paper is cut off.*In order to facilitate media color adjustment, media type recognition, and print quantity management, anIC chip is built into the ink ribbon. Media without an IC chip, which has not been evaluated andcleared, may not function properly. (If correct data cannot be read from the IC chip, an alarm willsound. In this case, in order to protect the printer, it will lower the concentration for printing.)*Please change the media as a set, because the IC chip for each ribbon has unique information.Otherwise, errors could occur.CAUTION・ Replace the ribbon and paper as a set to avoid problems later.15
Error DisplaysTrouble-shootingPowerRibbonPaperErrorThe flashing LED indicates the printer statusLED displayStatusPower Ribbon Paper ErrorSolutionRefertoPaper End*1● Put in a new roll of paper P.12Ribbon End*1● Put in a new roll of ribbon P.16Door is Open●P.12(no paper)Door is OpenSet the paper properly and close themechanism unit● Close the mechanism unit P.16No ScrapBox● Set the scrap box P.15Paper Error● ● ● Free the paper, and reset it correctly P.18Ribbon Error● ● ● Fix the ribbon, and set it correctly P.20System Error*2● ● Re-boot the printer (turn off, then on) -Head CoolDownThe head is cooling off (auto-recovery) -*● indicates lit, indicates flashing, and blank is not lit*1 Exchange the paper and ribbon as a set.*2 If the system error cannot be corrected, contact the dealer.16
Solving Media ErrorsTrouble-shootingr o bhootion1. Pull out the mechanism unit.2. Remove the ribbon cassette.a. If the paper is jammed:1. Pull any paper remaining in the printer in the direction shown, and cut off any wrinkled or partiallyprinted areas evenly with scissors.Printing over an already printed area will cause the ribbon to stick, and the paper will jam again.When pulling the paper out, pull it slowly. Application of too much force could damage the printer.CAUTION・ Please be careful not to hurt yourself or damage anything on the edges of the printer.17
Trouble-shootingos og2. Remove the scrap box, and rewind the paper.3. Cut off any partially printed, wrinkled, or otherwise inferior paper evenly with a pair of scissors, andreset the paper. If wrinkles or partially printed areas are left, it could cause the paper to jam again.Cutting the paper○ ×Then follow the methods as for setting the media.18
Trouble-shootingb. If the ribbon is pulled into the mechanism:1. Cut the ribbon.2. Carefully remove any ribbon remaining in the mechanism.Any pieces of ribbon left inside the mechanism could affect print quality.In this case, clean the platen roller see P.223. Reattach the ribbon with cellophane (or similar) tape.Tape4. Rotate the up-take ribbon several times until the tape is out of sight. Take care that there is no slack inthe ribbon.Then, refer to a. If the paper is jammed.19
Trouble-shootingc. If the printer is stopped in the middle of cutting:1. Turn the power back ON. Free the jammed paper, and return the cutter blade to its ready position.If the jammed paper cannot be freed, please contact a service representative.2. Remove any partially printed material from inside the mechanism unit.Then, refer to a. If the paper is jammed.d. If power is cut during printing:*If the power is cut during printing, you will not be able to pull out the mechanism unit.1. Turn the power back ON. The partial print will be cut into scrap-size pieces and removed.After this, you will be able to pull out the mechanism unit.2. Check that there is no printed material in the mechanism unit.If the paper is jammed, refer to a. If the paper is jammed.CAUTION・ Do not turn the power OFF while printing. This could damage the printer.20
Platen RollerCleaningIf there is an indent on the pictures at a regular interval, or if the back of the picture (white side) isdirty, clean the platen roller.There may be dust, grime, adhesives, etc. from the ribbon or paper on the platen roller.1. Prepare a piece of gauze or other soft cloth soaked in ethyl alcohol.Benzenes or thinners other than ethyl alcohol may permeate the resin, so they should not be used.2. Wipe off any grime while turning the platen roller.CAUTION・ Please be careful not to hurt yourself or damage anything on the edges of the printer.・ Never use benzenes or thinners other than ethyl alcohol, as they may permeate the resin.21
SpecificationsModel<strong>CP3800DW</strong>Print typeThermal dye sublimation transferPrint mode High-speed mode High quality modeResolution 300×300dpi 300×600dpi8×4 203×102mm8×5 203×127mm8×6 203×152mmPrint size 8×8 203×203mm8×10 203×254mmA4203×297mm8×12 203×305mmPrint sheet8×10 130 sheets8×12 110 sheets8×10 Approx. 30 sec Approx. 40 secPrint time A4 Approx. 34 sec Approx. 45 sec8×12 Approx. 35 sec Approx. 46 secRibbon typeYMC+overcoatInterfaceUSB2.0Driver-compatible OSWindows 2000/XPDimensions322mm W ×366mm D × 170mm HWeightApprox. 14kg(printer only)PowerAC100V-240V 50/60HzPower consumption 120V 4.0A 240V 1.7ANoise A-weighted sound pressure level < 70dB: " less than 70 dB"OperatingTemp. 5 – 35 degrees C in natural conditionsEnvironmentHumidity 35 – 80% with no condensation*These specifications may be changed without prior notice.22
Information on servicing the printerFor questions regarding operation and servicing of the printer, contact the dealer where the printer was purchased,or consult at the following:MITSUBISHI DIGITAL ELECTRONICS AMERICA, INC.9351 Jeronimo Road, Irvine, CA 92618, U.S.A.Phone 949-465-6000<strong>Mitsubishi</strong> <strong>Electric</strong> <strong>Europe</strong> B.V.UK BranchTravellers Lane, Hatfi eld, Herts. AL10 8XB, England, U.K.Phone +44 (0) 1707 276100 FAX +44 (0) 1707 278755German BranchGothaer Strasse 8, 40880 Ratingen ; Postfach 1548, 40835 Ratingen ; GermanyPhone +49 (2102) 486-9250 FAX +49 (2102) 486-7320French Branch25, Boulevard des Bouvets - 92741 NANTERRE cedex, FrancePhone +33 (1) 55 68 55 00 FAX +33 (1) 55 68 57 31Italian BranchCentro Direzionale Colleoni, Palazzo Sirio, ingresso n.1Viale Colleoni, 7, 20041 Agrate Brianza, (Milano) ItalyPhone +39 03960531 FAX +39 0396053214<strong>Benelux</strong> BranchNijverheidsweg 23a,3641 RP Mijdrecht, The NetherlandsPhone +31 (0) 297-282461 FAX +31 (0) 297-283936Spanish Branch (Barcelona)Ctra. de Rubi, 76-80 - Apdo. 42008190-Sant Cugat del Valles - (Barcelona) SpainPhone +34 93 565 3154 FAX +34 93 589 4388Please contact the nearest <strong>Mitsubishi</strong> sales branch to get DOC (Declaration of Conformity) of the EC Directive1999/5/EC.


