You also want an ePaper? Increase the reach of your titles
YUMPU automatically turns print PDFs into web optimized ePapers that Google loves.
GRUNDFOS <strong>PRODUCT</strong> <strong>GUIDE</strong><br />
<strong>Grundfos</strong> <strong>CUE</strong><br />
Frequency converters for pump control<br />
60 Hz
2<br />
Contents<br />
Introduction<br />
<strong>Grundfos</strong> <strong>CUE</strong> ................................................................4<br />
Features and benefits<br />
User interface .................................................................6<br />
Functions ........................................................................6<br />
Inputs and outputs ..........................................................6<br />
Accessories ....................................................................7<br />
Applications<br />
Overview applications.....................................................8<br />
Identification<br />
Nameplate ......................................................................9<br />
Product range<br />
Overview.......................................................................10<br />
Functions<br />
Overview.......................................................................11<br />
Operating modes ..........................................................13<br />
Control modes ..............................................................14<br />
Setpoints.......................................................................17<br />
Setting the direction of rotation .....................................20<br />
Status functions ............................................................20<br />
Logging functions..........................................................20<br />
PID controller ................................................................21<br />
Stop functions ...............................................................22<br />
Dry-running protection ..................................................23<br />
Duty/standby.................................................................23<br />
Operating range............................................................24<br />
Motor bearing monitoring..............................................24<br />
Standstill heating ..........................................................24<br />
Ramps ..........................................................................25<br />
Proportional differential pressure, parabolic .................25<br />
Hmax update ................................................................26<br />
Differential pressure from two sensors .........................26<br />
Start delay after power-up.............................................26<br />
Auto/manual restart after alarm ....................................26<br />
Limit exceeded..............................................................27<br />
Digital inputs .................................................................27<br />
Signal relays .................................................................28<br />
Analog inputs ................................................................28<br />
Analog output................................................................28<br />
MCB 114 sensor input module......................................29<br />
GENIbus .......................................................................29<br />
Copy of setting..............................................................30<br />
Pipe fill (PC Tool)..........................................................30<br />
<strong>Grundfos</strong> <strong>CUE</strong><br />
Installation<br />
Mechanical installation ................................................. 31<br />
Electrical installation..................................................... 32<br />
RFI filters ...................................................................... 34<br />
Output filters ................................................................. 34<br />
EMC-correct installation ............................................... 35<br />
Operation<br />
Control panel ................................................................ 37<br />
Start-up guide............................................................... 37<br />
Warning and alarm list.................................................. 38<br />
<strong>CUE</strong> selection<br />
How to select a <strong>CUE</strong> .................................................... 39<br />
Special conditions......................................................... 40<br />
Selection tables ............................................................ 41<br />
Technical data<br />
Main dimensions and weight ........................................ 42<br />
Surroundings ................................................................ 47<br />
Sound pressure level.................................................... 47<br />
Terminal tightening torques.......................................... 47<br />
Cables .......................................................................... 47<br />
Fuses............................................................................ 48<br />
Inputs and outputs........................................................ 51<br />
Accessories<br />
Product numbers .......................................................... 52<br />
MCB 114 sensor input module ..................................... 53<br />
<strong>Grundfos</strong> Local Control Panel, GLCP........................... 54<br />
Remote-mounting option for GLCP .............................. 54<br />
Floor-mounting option................................................... 55<br />
IP21/NEMA1 kit ............................................................ 55<br />
Output filters ................................................................. 56<br />
<strong>Grundfos</strong> differential pressure sensor, DPI .................. 59<br />
Further product documentation<br />
WebCAPS .................................................................... 59<br />
WinCAPS...................................................................... 60
Mission<br />
<strong>Grundfos</strong> <strong>CUE</strong><br />
— to successfully develop, produce and sell high-quality pumps and<br />
pumping systems worldwide, contributing to a better quality of life and<br />
a healthy environment<br />
• One of the 3 largest pump companies in the world<br />
The second largest manufacturer of submersible motors in the world<br />
World headquarters in Denmark<br />
North American headquarters in Kansas City - Manufacturing in Fresno, California<br />
72 companies in 41 countries<br />
Bjerringbro, Denmark<br />
Fresno, California Olathe, Kansas<br />
Monterrey, Mexico Allentown, Pennsylvania Oakville, Ontario<br />
More than 10 million motors and pumps produced annually worldwide<br />
North American companies operating in USA, Canada and Mexico<br />
Continuous reinvestment in growth and development enables the company to<br />
BE responsible, THINK ahead, and INNOVATE<br />
3
4<br />
Introduction<br />
<strong>Grundfos</strong> <strong>CUE</strong><br />
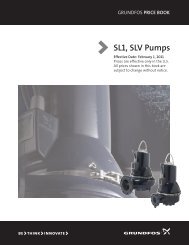
The <strong>CUE</strong> is a series of frequency converters designed<br />
for speed control of a wide range of <strong>Grundfos</strong> pumps.<br />
Fig. 1 <strong>Grundfos</strong> <strong>CUE</strong> solution<br />
GrA4409<br />
1-60 HP<br />
.75-300 HP<br />
<strong>Grundfos</strong> <strong>CUE</strong><br />
Built-in E-pump functionality<br />
The <strong>CUE</strong> solution contains the same control functionality as the <strong>Grundfos</strong> E-pumps and is thus a supplement to the<br />
E-pump range. See the table below.<br />
All <strong>CUE</strong> Solutions are available in two enclosure classes: IP21 (NEMA 1) or IP55 (Nema 12).<br />
POWER SUPPLY<br />
3 x 525-690V<br />
3 x 525-600V<br />
3 x 380-500V<br />
3 x 200-240V<br />
1 x 200-240V<br />
0.5-7.5 HP<br />
1-10 HP<br />
0.5-1.5 HP 1.5-10 HP<br />
0.75-30 HP<br />
10-300 HP<br />
E-PUMPS <strong>CUE</strong><br />
0.25 1 3 10 30 90 300 HP<br />
* Power supply only up to 480 V<br />
**Power supply only 208 to 230 V
Introduction<br />
Designed for <strong>Grundfos</strong> pumps<br />
The <strong>CUE</strong> can be used in both new and existing installations,<br />
but the pump and motor should be suitable for<br />
use with frequency converters.<br />
The table below shows which <strong>Grundfos</strong> pump types the<br />
<strong>CUE</strong> is designed for.<br />
Pump type<br />
AFG<br />
AMD<br />
AMG<br />
BM, BMB, BMP<br />
BME, BMET, BMEX<br />
CH, CHI, CHN, CHV<br />
CHIU<br />
Contra<br />
CPH, CPV<br />
CR, CRI, CRN, CRT<br />
CRK<br />
CV<br />
DP, EF<br />
durietta<br />
Euro HYGIA<br />
F&B HYGIA<br />
HS<br />
LC, LF<br />
MAXA, MAXANA<br />
MTA, MTH, MTR<br />
MTB<br />
NB, NK<br />
NBG, NKG<br />
S<br />
SE, SEN, SEV<br />
SP,SP-G, SP-NE<br />
SPK<br />
SRP<br />
TP<br />
VL<br />
Further technical documentation<br />
Installation and operating instructions contain all information<br />
for putting the <strong>CUE</strong> into operation.<br />
Installation and operating instructions of the MCB<br />
114 sensor input module contain all information for<br />
installation of the MCB 114.<br />
Technical documentation is available on www.grundfos.com<br />
> International website > WebCAPS.<br />
If you have any questions, please contact the nearest<br />
<strong>Grundfos</strong> company or service workshop.<br />
<strong>Grundfos</strong> <strong>CUE</strong><br />
5
6<br />
Features and benefits<br />
User interface<br />
The user interface offers these possibilities:<br />
Local operation via a control panel with graphic display<br />
where the menu structure is based on the wellknown<br />
system from <strong>Grundfos</strong> E-pumps.<br />
Remote operation via external signals, for instance<br />
via digital inputs or GENIbus.<br />
Monitoring of operating status via indicator lights<br />
and signal relays.<br />
Display of alarm or warning and logging of the last<br />
five alarms and warnings.<br />
Functions<br />
Control modes for centrifugal pumps<br />
The <strong>CUE</strong> has a wide range of pump-specific functions:<br />
Open loop:<br />
The speed is kept at a set value in the range of min.<br />
and max. speed.<br />
Proportional differential pressure:<br />
The differential pressure is reduced at a falling flow<br />
rate and increased at a rising flow rate.<br />
Constant differential pressure:<br />
The differential pressure is kept constant, independently<br />
of the flow rate.<br />
Constant pressure:<br />
The pressure is kept constant, independently of the<br />
flow rate.<br />
Constant level:<br />
The liquid level is kept constant, independently of<br />
the flow rate.<br />
Constant flow rate:<br />
The flow rate is kept constant, independently of the<br />
head.<br />
Constant temperature:<br />
The liquid temperature is kept constant, independently<br />
of the flow rate.<br />
Constant other value:<br />
Any other value is kept constant.<br />
Start-up guide<br />
The <strong>CUE</strong> has a start-up guide, which begins at the first<br />
start-up. Here a number of parameters are set automatically<br />
on basis of the pump type. Other parameters are<br />
set manually on basis of the data on the motor and<br />
pump nameplates.<br />
Thanks to the start-up guide, the installer can quickly<br />
set central parameters and put the <strong>CUE</strong> into operation.<br />
Direction of rotation test<br />
During the start-up guide, the <strong>CUE</strong> automatically tests<br />
<strong>Grundfos</strong> <strong>CUE</strong><br />
and sets the correct direction of rotation without changing<br />
the cable connections. This feature is activated only<br />
if a pressure or flow sensor is installed.<br />
Duty/standby<br />
The duty/standby function is used to alternate between<br />
two pumps. Each pump is connected to a <strong>CUE</strong> unit. The<br />
primary task is to start the standby pump if the duty<br />
pump is stopped due to an alarm and to alternate the<br />
two pumps at least every 24 hours.<br />
Duty/standby operation increases the security of supply<br />
and ensures even use between the two pumps.<br />
Dry-running protection<br />
To protect the pump, select the dry-running function<br />
together with an external sensor so that lack of inlet<br />
pressure or water shortage can be detected.<br />
Low-flow stop function<br />
In control mode constant pressure or constant level, the<br />
stop function is used for changing between on/off operation<br />
at low or no flow and continuous operation at high<br />
flow rate.<br />
The low-flow stop function protects the pump and saves<br />
energy.<br />
Monitoring of lubrication of motor bearings<br />
When the bearing monitoring function is active, a warning<br />
will appear in the display when the motor bearings<br />
are to be relubricated or replaced. Furthermore, the<br />
function gives an estimated time to service.<br />
This aids in motor maintenance programs.<br />
Inputs and outputs<br />
The <strong>CUE</strong> is equipped with a number of inputs and outputs:<br />
1 analog input, 0-10 V, 4-20 mA<br />
- external setpoint<br />
1 analog input, 4-20 mA<br />
- sensor input, feedback sensor<br />
1 analog output, 0-20 mA<br />
4 digital inputs<br />
- start/stop and 3 programmable inputs<br />
2 signal relays (C/NO/NC)<br />
- programmable<br />
1 RS-485 GENIbus connection.
Features and benefits<br />
Accessories<br />
<strong>Grundfos</strong> offers a number of accessories for the <strong>CUE</strong>.<br />
MCB 114 sensor input module<br />
The MCB 114 is an option offering additional analog<br />
inputs for the <strong>CUE</strong>:<br />
1 analog input, 4-20 mA<br />
2 inputs for Pt100/Pt1000 temperature sensors.<br />
Output filters<br />
Output filters are used primarily for protecting the motor<br />
against overvoltage and increased operating temperature.<br />
However, output filters can also be used for reduction<br />
of acoustic motor noise.<br />
<strong>Grundfos</strong> provides two types of output filter as accessories<br />
for the <strong>CUE</strong>:<br />
dU/dt filters<br />
sine-wave filters.<br />
Floor mounting option<br />
The <strong>CUE</strong> is default installed on the wall. The enclosures<br />
D1 and D2 can also be installed on the floor on a<br />
pedestal designed for that purpose.<br />
For information about enclosures, see page 45.<br />
Remote mounting kit<br />
Allows control pad to be mounted remotely; 9.8 ft (3m)<br />
cable.<br />
<strong>Grundfos</strong> <strong>CUE</strong><br />
7
8<br />
Applications<br />
Overview applications<br />
The <strong>CUE</strong> is a multi-purpose frequency converter suitable<br />
for a variety of applications demanding reliable and<br />
cost-efficient pump operation.<br />
The <strong>CUE</strong> is used in five main fields of application:<br />
Water supply and pressure boosting<br />
Besides general water supply in municipal and industrial<br />
waterworks, the <strong>CUE</strong> is used for these specific<br />
applications:<br />
water supply<br />
pressure boosting<br />
washing.<br />
The typical control modes are constant pressure, constant<br />
flow rate. Stop functions are used to stop the<br />
pump when low or no flow is detected.<br />
Heating and air-conditioning<br />
Liquid transfer in:<br />
heating applications<br />
cooling and air-conditioning applications.<br />
The typical control modes are proportional pressure or<br />
constant temperature.<br />
Process and sanitary applications<br />
Liquid transfer in:<br />
breweries and dairies<br />
pure-water applications<br />
process applications<br />
purification applications.<br />
The <strong>CUE</strong> is typically controlled by an external controller.<br />
The typical control mode is Open loop.<br />
Groundwater<br />
Typical applications:<br />
groundwater supply to waterworks<br />
irrigation in horticulture and agriculture<br />
dewatering.<br />
The typical control modes are constant pressure, constant<br />
flow rate or constant level control.<br />
Wastewater<br />
Transfer of:<br />
wastewater<br />
effluent<br />
drainage water<br />
process water.<br />
The typical control mode is constant level function<br />
(emptying function).<br />
<strong>Grundfos</strong> <strong>CUE</strong><br />
TM03 0146 4204<br />
TM03 0147 4204<br />
TM03 0148 4204<br />
TM03 0149 4204<br />
TM04 0223 5107
Identification<br />
Nameplate<br />
The <strong>CUE</strong> can be identified by means of the nameplate.<br />
An example is shown below.<br />
Fig. 2 Example of nameplate<br />
Text Description<br />
T/C:<br />
<strong>CUE</strong> (product name)<br />
202P132... (internal code)<br />
Prod.no: Product number: 96754515*<br />
Serial number: 123456G123<br />
S/N: The last three digits indicate the production date:<br />
12 is the week, and 3 is the year 2003.<br />
0.75 kW Typical shaft power on the motor<br />
IN: Supply voltage, frequency and maximum input current<br />
Motor voltage, frequency and maximum output current.<br />
OUT: The maximum output frequency usually depends on the<br />
pump type.<br />
CHASSIS/<br />
IP20<br />
Enclosure class<br />
Tamb. Maximum ambient temperature<br />
* Product number is for drive only. Refer to price lists for packaged drive<br />
part numbers.<br />
<strong>Grundfos</strong> <strong>CUE</strong><br />
9
10<br />
Product range<br />
Overview<br />
The <strong>CUE</strong> cabinet sizes are characterised by their<br />
enclosures. The table shows the relation between<br />
power size (P2), mains supply (V) and enclosure class<br />
(IP). It shows the complete range of the <strong>CUE</strong>.<br />
Typical shaft power P2<br />
* <strong>CUE</strong> Hp ratings do not always match motor Hp ratings. Always size <strong>CUE</strong> by max amperage output and motor amperage.<br />
<strong>Grundfos</strong> <strong>CUE</strong><br />
1 x 200-240 V 3 x 200-240 V<br />
Mains supply and enclosure class<br />
3 x 380-500 V 3 x 525-600 V 3 x 525-690 V<br />
[kW] [HP]* IP20 IP21 IP55 IP20 IP55 IP20 IP21 IP54 IP55 IP20 IP55 IP21 IP54 IP55<br />
0.55 0.75 � �<br />
0.75 1 � � � � � �<br />
1.1 1.5 � � � � � � � �<br />
1.5 2 � � � � � � � �<br />
2.2 3 � � � � � � � �<br />
3 4 � � � � � � � �<br />
3.7 5 � � � �<br />
4 5 � � � �<br />
5.5 7.5 � � � � � � � �<br />
7.5 10 � � � � � � � �<br />
11 15 � � � � � �<br />
15 20 � � � � � �<br />
18.5 25 � � � � � �<br />
22 30 � � � � � �<br />
30 40 � � � � � �<br />
37 50 � � � � � �<br />
45 60 � � � � � �<br />
55 75 � � � �<br />
75 100 � � � �<br />
90 125 � � � �<br />
110 150 � � � �<br />
132 200 � � � �<br />
160 250 � � � �<br />
200 300 � � � �<br />
250 350 � � � �
Functions<br />
Overview<br />
The table below shows the functions settings offered by<br />
the <strong>CUE</strong>.<br />
<strong>CUE</strong> functions<br />
Operating modes, see page 13<br />
<strong>CUE</strong><br />
Setting or reading via:<br />
GENIbus PC Tool*<br />
Normal � � �<br />
Stop � � �<br />
Min. � � �<br />
Max.<br />
Control modes, see page 14<br />
� � �<br />
Open loop � � �<br />
Proportional differential pressure � � �<br />
Constant differential pressure � � �<br />
Constant pressure � � �<br />
Constant pressure with stop function � � �<br />
Constant level � � �<br />
Constant level with stop function � � �<br />
Constant flow rate � � �<br />
Constant temperature � � �<br />
Constant other value<br />
Setpoints, see page 17<br />
� � �<br />
Setpoint, <strong>CUE</strong> menu �<br />
External setpoint � � �<br />
GENIbus setpoint �<br />
Predefined setpoints from digital inputs<br />
Additional functions, see page 20<br />
�<br />
Setting the direction of rotation � �<br />
Status information � �<br />
Logging information � �<br />
PID controller � � �<br />
Stop functions � �<br />
Dry-running protection � �<br />
Duty/standby � �<br />
Operating range � � �<br />
Motor bearing monitoring � � �<br />
Standstill heating � � �<br />
Ramps � �<br />
Proportional differential pressure, parabolic �<br />
Hmax update �<br />
Differential pressure from two sensors �<br />
Start delay after power-up �<br />
Auto/manual restart after alarm � �<br />
Limit exceeded � �<br />
Copy settings �<br />
Pipe fill � �<br />
<strong>Grundfos</strong> <strong>CUE</strong><br />
11
12<br />
Functions<br />
<strong>CUE</strong> functions<br />
Digital inputs, see page 27<br />
<strong>CUE</strong><br />
Setting or reading via:<br />
GENIbus PC Tool*<br />
Start/stop � �<br />
Min. (Min. curve) � �<br />
Max. (Max. curve) � �<br />
External fault � �<br />
Flow switch � �<br />
Alarm reset � �<br />
Dry running (from external sensor) � �<br />
Accumulated flow (from pulse flow sensor) � �<br />
Additional set of ramps, ramp selector �<br />
Predefined setpoints from digital input<br />
Signal relays, see page 28<br />
�<br />
Ready � �<br />
Warning � �<br />
Alarm � �<br />
Operation � �<br />
Pump running � �<br />
Relubricate � �<br />
External relay control �<br />
Limit exceeded<br />
Analog inputs, see page 28<br />
�<br />
External setpoint � �<br />
Sensor 1<br />
Analog output, see page 28<br />
� �<br />
Feedback value �<br />
Speed �<br />
Frequency �<br />
Motor current �<br />
External setpoint input �<br />
Limit exceeded<br />
MCB 114 sensor input module, see page 29<br />
�<br />
Sensor input 2 � �<br />
Temperature sensor 1 � �<br />
Temperature sensor 2 � �<br />
� Default<br />
� Optional with GENIbus<br />
� Optional with PC-tool<br />
* The PC Tool is a software program supplied on a CD and hardware connecting<br />
your computer with the <strong>CUE</strong>.<br />
<strong>Grundfos</strong> <strong>CUE</strong>
Functions<br />
Operating modes<br />
These operating modes can be selected with the <strong>CUE</strong>:<br />
Normal<br />
Stop<br />
Min.<br />
Max.<br />
The operating modes can be set without changing the<br />
setpoint setting.<br />
Normal<br />
The pump operates in the control mode selected. See<br />
page 14.<br />
The control modes are different ways of controlling the<br />
pump speed when the operating mode is set to Normal.<br />
Stop<br />
The pump has been stopped by user.<br />
Min. curve<br />
The pump is running at a set value for minimum speed.<br />
See fig. 3.<br />
This operating mode can for instance be used in periods<br />
with a very small flow requirement.<br />
Max. curve<br />
The pump is running at a set value for maximum speed.<br />
See fig. 3.<br />
This operating mode can for instance be used for venting<br />
the pump during installation.<br />
Min.<br />
Fig. 3 Min. and max. curves<br />
Max.<br />
TM03 8813 2507<br />
<strong>Grundfos</strong> <strong>CUE</strong><br />
13
14<br />
Functions<br />
Control modes<br />
The <strong>CUE</strong> has a built-in PID controller that provides<br />
closed-loop control of the value you want to control.<br />
The <strong>CUE</strong> can also be set to open-loop control where<br />
the setpoint represents the desired pump speed.<br />
Open loop is typically used without sensor. All other<br />
control modes require a sensor.<br />
The table below shows the functions and possible settings<br />
offered by the <strong>CUE</strong>.<br />
Overview<br />
Pump type Open loop<br />
See fur her description on the next pages.<br />
Proportional<br />
differential<br />
pressure<br />
Constant<br />
differential<br />
pressure<br />
Constant<br />
pressure<br />
Constant<br />
level<br />
Constant<br />
flow rate<br />
Constant<br />
temperature<br />
<strong>Grundfos</strong> <strong>CUE</strong><br />
Constant<br />
other value<br />
AFG � � � �<br />
AMD � � � �<br />
AMG � � � �<br />
BM, BMB � � � � �<br />
BME, BMET, BMEX � � � � �<br />
BMP � � � � � �<br />
CH, CHI, CHN, CHV � � � � � �<br />
CHIU � � � � � �<br />
Contra � � � � � �<br />
CPH, CPV � � � � � �<br />
CR, CRI, CRN, CRT � � � � � �<br />
CRK � � � � � �<br />
CV � � � � � �<br />
DP, EF � � � � �<br />
durietta � � � � � �<br />
Euro HYGIA � � � � � �<br />
F&B HYGIA � � � � � �<br />
HS � � � � � �<br />
LC, LF � � � � � �<br />
MAXA, MAXANA � � � � � � �<br />
MTA, MTH, MTR � � � � � �<br />
MTB � � � � � �<br />
NB, NK � � � � � � �<br />
NBG, NKG � � � � � � �<br />
S � � � � �<br />
SE, SEN, SEV � � � � �<br />
SP,SP-G, SP-NE � � � � � �<br />
SPK � � � � � �<br />
SRP � � � �<br />
TP � � � � � � � �<br />
VL � � � � �<br />
Other � � � � � � � �
Functions<br />
Open loop, constant curve<br />
The speed is kept at a set value in the range between<br />
the min. and max. curves. See fig. 4.<br />
Min.<br />
Fig. 4 Open loop, constant curve<br />
In control mode Open loop, the setpoint is set in% of the<br />
nominal speed. The setting range will lie between the<br />
min. and max. curves.<br />
Operation on constant curve can for instance be used<br />
for pumps with no sensor connected.<br />
This control mode is also typically used in connection<br />
with an overall control system such as Control MPC or<br />
another external controller.<br />
Proportional differential pressure<br />
The differential pressure of the pump is reduced at falling<br />
flow rate and increased at rising flow rate. See fig. 5.<br />
Q max.<br />
Max.<br />
TM03 8479 1607<br />
TM03 8475 1607<br />
<strong>CUE</strong><br />
<strong>CUE</strong><br />
Fig. 5 Proportional differential pressure<br />
The pump is controlled according to a differential pressure<br />
measured across the pump. This means that the<br />
pump system offers a proportional differential pressure<br />
in the Q-range of 0 to Q max. , represented by the sloping<br />
line in the QH diagram.<br />
Δp<br />
TM03 9727 4307<br />
TM03 8804 2507<br />
<strong>Grundfos</strong> <strong>CUE</strong><br />
Constant differential pressure, pump<br />
The differential pressure of the pump is kept constant,<br />
independently of the flow rate. See fig. 6.<br />
H set<br />
Fig. 6 Constant differential pressure, pump<br />
The pump is controlled according to a constant differential<br />
pressure measured across the pump. This means<br />
that the pump system offers constant differential pressure<br />
in the Q-range of 0 to Q max., represented by the<br />
horizontal line in the QH diagram.<br />
Constant differential pressure, system<br />
The differential pressure of the system is kept constant,<br />
independently of the flow rate. See fig. 7.<br />
H set<br />
Q max.<br />
Q max.<br />
Fig. 7 Constant differential pressure, system<br />
TM03 8476 1607<br />
TM03 8476 1607<br />
<strong>CUE</strong><br />
The pump is controlled according to a constant differential<br />
pressure measured across the system. This means<br />
that the pump offers constant differential pressure of<br />
the system in the Q-range of 0 to Q max., represented by<br />
the horizontal line in the QH diagram.<br />
Δp<br />
<strong>CUE</strong><br />
Δp<br />
TM03 8804 2507<br />
TM03 8806 2507<br />
15
16<br />
Functions<br />
Constant pressure with stop function<br />
The outlet pressure is kept constant at high flow rate.<br />
On/off operation at low flow rate. See fig. 8.<br />
H set<br />
Q min.<br />
Fig. 8 Constant pressure with stop function<br />
The pump is controlled according to a constant pressure<br />
measured after the pump. This means that the<br />
pump offers a constant pressure in the Q-range of Q min<br />
to Q max., represented by the horizontal line in the QH<br />
diagram.<br />
Constant level<br />
The liquid level is kept constant, independently of the<br />
flow rate. See fig. 9.<br />
Q min<br />
Q max.<br />
Q max<br />
Fig. 9 Constant level<br />
The pump is controlled according to a constant liquid<br />
level. This means that the pump offers a constant level<br />
in the Q-range of Q min. to Q max., represented by the<br />
parable line in the QH diagram.<br />
The function is default an emptying function.<br />
TM03 8477 1607<br />
TM03 8482 1607<br />
L<br />
<strong>CUE</strong><br />
P<br />
<strong>CUE</strong><br />
TM03 8807 2507<br />
TM03 8808 2607<br />
<strong>Grundfos</strong> <strong>CUE</strong><br />
Constant level with stop function<br />
The liquid level is kept constant at high flow rate. On/off<br />
operation at low flow rate. See fig. 10.<br />
Q min<br />
Fig. 10 Constant level with stop function<br />
The pump is controlled according to a constant liquid<br />
level. This means that the pump offers a constant level<br />
in the Q-range of Q min. to Q max., represented by the<br />
parable line in the QH diagram.<br />
The function is default an emptying function.<br />
Constant flow rate<br />
The flow rate is kept constant, independently of the<br />
head. See fig. 11.<br />
Q min<br />
Q max.<br />
Q max<br />
TM03 8482 1607<br />
TM03 8478 1607<br />
Fig. 11 Constant flow rate<br />
The pump is controlled according to a constant flow<br />
rate, represented by the vertical line in the QH diagram.<br />
L<br />
<strong>CUE</strong><br />
<strong>CUE</strong><br />
Q<br />
TM03 8809 2607<br />
TM03 8810 2507
Functions<br />
Constant temperature<br />
The liquid temperature is kept constant, independently<br />
of the flow rate. See fig. 12.<br />
Q min<br />
Fig. 12 Constant temperature<br />
The pump is controlled according to a constant temperature.<br />
This means that the pump offers a variable flow<br />
rate in the Q-range of Q min. to Q max., represented by the<br />
parable line in the QH diagram.<br />
Constant other value<br />
Any other value is kept constant. See the <strong>CUE</strong> installation<br />
and operation instructions for further information.<br />
Setpoints<br />
Q max<br />
The setpoint is normally set in the menu Operation via<br />
the <strong>CUE</strong> control panel. If needed, the setpoint can be<br />
influenced via the external setpoint input.<br />
The <strong>CUE</strong> offers these setpoint possibilities:<br />
Setpoint, <strong>CUE</strong> menu (default)<br />
External setpoint (default)<br />
Predefined setpoints (setting via PC Tool)<br />
GENIbus setpoint (setting via GENIbus).<br />
TM03 8482 1607<br />
Setpoint, <strong>CUE</strong> menu<br />
The setpoint can be set by the user via the <strong>CUE</strong> control<br />
panel when the <strong>CUE</strong> is in local operating mode and no<br />
digital inputs are used for predefined setpoints.<br />
Fig. 13 Setpoint, <strong>CUE</strong> menu<br />
<strong>CUE</strong><br />
Setpoint, <strong>CUE</strong> menu Actual setpoint<br />
The setpoint range depends on the selected control<br />
mode.<br />
t<br />
TM03 8811 2507<br />
TM04 0374 0608<br />
<strong>Grundfos</strong> <strong>CUE</strong><br />
In control mode Open loop, the setpoint is set in% corresponding<br />
to the required speed. The setting range is<br />
between the min. and max. curves.<br />
In control mode Proportional differential pressure, the<br />
setting range is equal to 25% to 90% of max. head.<br />
In all other control modes, the setting range is equal to<br />
the sensor measuring range.<br />
External setpoint<br />
The setpoint set via the <strong>CUE</strong> menu can be influenced<br />
by connecting an analog signal to the external setpoint<br />
input.<br />
Setpoint, <strong>CUE</strong> menu Actual setpoint<br />
External setpoint signal<br />
Fig. 14 Setpoint, <strong>CUE</strong> menu and external setpoint signal<br />
This function offers these possibilities:<br />
External setpoint (default)<br />
Inverse external setpoint (setting via control panel)<br />
External setpoint with stop (setting via PC Tool)<br />
External setpoint based on a reference table (setting<br />
via PC Tool).<br />
The external setpoint signal is used for calculating the<br />
actual setpoint. The minimum signal is the minimum<br />
setpoint, and the maximum signal is the setpoint set via<br />
the <strong>CUE</strong> menu. See fig. 15.<br />
TM04 0373 0608<br />
17
18<br />
Functions<br />
External setpoint influence (default)<br />
The actual setpoint is a linear function of the external<br />
setpoint signal. See fig. 15.<br />
Actual<br />
setpoint<br />
Max.<br />
Setpoint,<br />
<strong>CUE</strong> menu<br />
Min.<br />
0 V<br />
0/4 mA<br />
Fig. 15 External setpoint<br />
The minimum and maximum values of the external setpoint<br />
signal can be set via the PC Tool. See fig. 16.<br />
Actual<br />
setpoint<br />
Max.<br />
Setpoint,<br />
<strong>CUE</strong> menu<br />
Min.<br />
0 V<br />
0/4 mA<br />
Fig. 16 Reduced external setpoint signal<br />
10 V<br />
20 mA<br />
External setpoint signal<br />
Min. Max. 10 V<br />
20 mA<br />
External setpoint signal<br />
TM04 0626 0908<br />
TM04 0363 0908<br />
<strong>Grundfos</strong> <strong>CUE</strong><br />
Inverse external setpoint<br />
The actual setpoint is an inverse linear function of the<br />
external setpoint signal. See fig. 17.<br />
Actual<br />
setpoint<br />
Max.<br />
Setpoint,<br />
<strong>CUE</strong> menu<br />
Min.<br />
0 V<br />
0/4 mA<br />
Fig. 17 Inverse external setpoint signal<br />
10 V<br />
20 mA<br />
External setpoint signal<br />
The minimum and maximum values of the external setpoint<br />
signal can be set via the control panel. See fig. 18.<br />
Actual<br />
setpoint<br />
Max.<br />
Setpoint,<br />
<strong>CUE</strong> menu<br />
Min.<br />
0 V<br />
0/4 mA<br />
Min. Max. 10 V<br />
20 mA<br />
External setpoint signal<br />
Fig. 18 Reduced inverse external setpoint signal<br />
TM04 0627 0908<br />
TM04 0365 0908
Functions<br />
External setpoint with stop function<br />
Setting via PC Tool.<br />
The actual setpoint with stop is a linear function of the<br />
external setpoint signal above 20% signal and on/off<br />
operation below 20% signal. See fig. 19.<br />
Actual<br />
setpoint<br />
Max.<br />
Setpoint,<br />
<strong>CUE</strong> menu<br />
Min.<br />
Stop<br />
0 V<br />
0/4 mA<br />
Fig. 19 External setpoint with stop function<br />
10 V<br />
20 mA<br />
External setpoint signal<br />
When the external setpoint signal is below 10%, the<br />
operating mode is Stop.<br />
When the external setpoint signal is above 15%, the<br />
operating mode is Normal.<br />
External setpoint based on a reference table<br />
Setting via PC Tool.<br />
The actual setpoint is a piecewise linear function of the<br />
external setpoint signal. See fig. 20.<br />
Actual<br />
setpoint<br />
Max.<br />
Setpoint,<br />
<strong>CUE</strong> menu<br />
Min.<br />
0 V<br />
0/4 mA<br />
20%<br />
10 V<br />
20 mA<br />
External setpoint signal<br />
Fig. 20 External setpoint based on a reference table<br />
TM04 0364 0608<br />
TM04 0366 0608<br />
<strong>Grundfos</strong> <strong>CUE</strong><br />
The linear function is defined as an interpolation<br />
between the points in a table. The table has of up to 8<br />
points.<br />
Predefined setpoints<br />
Setting via PC Tool.<br />
This function makes it possible to select up to seven<br />
predefined setpoints using one to three digital inputs.<br />
The setpoints are selected as a binary coding of the<br />
digital inputs as shown in the table below.<br />
Predefined<br />
setpoint<br />
DI 2 DI 3 DI 4<br />
1 x<br />
2 x<br />
3 x x<br />
4 x<br />
5 x x<br />
6 x x<br />
7 x x x<br />
x = Closed contact<br />
If none of the digital inputs are activated, the operating<br />
mode can be configured to Stop or to being controlled<br />
according to a setpoint set via the control panel.<br />
If Min., Max. or Stop is selected via the control panel,<br />
the predefined setpoints are overruled.<br />
Note: Predefined setpoints cannot be influenced by the<br />
external setpoint input.<br />
GENIbus setpoint<br />
If the <strong>CUE</strong> is remote-controlled via the GENIbus input,<br />
the setpoint is set via the bus.<br />
Note: The GENIbus setpoint cannot be influenced by<br />
the external setpoint signal.<br />
19
20<br />
Functions<br />
Setting the direction of rotation<br />
The start-up guide begins the first time the <strong>CUE</strong> is connected<br />
to supply voltage. While going through the startup<br />
guide, the <strong>CUE</strong> tests and sets the correct direction<br />
of rotation without changing the cable connections to<br />
the motor.<br />
The correct direction of rotation can be set in these<br />
ways:<br />
automatic setting<br />
manual setting when the direction of rotation is visible<br />
manual setting when the direction of rotation is not<br />
visible.<br />
Automatic setting<br />
The <strong>CUE</strong> automatically tests and sets the correct direction<br />
of rotation without changing the cable connections.<br />
This feature is activated only if a flow or pressure sensor<br />
is installed.<br />
This test is not suitable for all pump types and will in<br />
certain cases not be able to determine for certainty the<br />
correct direction of rotation. In these cases, the <strong>CUE</strong><br />
changes over to manual setting where the direction of<br />
rotation is determined on the basis of the installer’s<br />
observations.<br />
Manual setting when the direction of rotation is<br />
visible<br />
The correct direction of rotation is set manually without<br />
changing the cable connections. This requires that it is<br />
possible to observe the motor fan or shaft.<br />
Manual setting when the direction of rotation is not<br />
visible<br />
The correct direction of rotation is set manually without<br />
changing the cable connections. This requires that it is<br />
possible to observe the head or flow rate.<br />
Status functions<br />
The <strong>CUE</strong> shows these data:<br />
power consumption<br />
operating hours<br />
accumulated flow<br />
energy per m 3 or gallon (requires flow meter).<br />
The status information can be shown in the display.<br />
Power consumption<br />
The value of the power consumption is an accumulated<br />
value calculated from the pump’s birth and cannot be<br />
reset. No additional sensor is required.<br />
<strong>Grundfos</strong> <strong>CUE</strong><br />
Operating hours<br />
The value of operating hours is an accumulated value<br />
calculated from the pump’s birth and cannot be reset.<br />
No additional sensor is required.<br />
Accumulated flow<br />
The value of accumulated flow is calculated by means<br />
of a flow measurement from either a digital pulse input<br />
or an analog input.<br />
When using a digital input, the number of pulses is<br />
counted and multiplied by the litre/pulse parameter in<br />
order to get the accumulated flow.<br />
When using an analog input, the accumulated flow<br />
value is updated every 10 seconds with the volume<br />
pumped in that period.<br />
Energy per m 3 or gallon<br />
The actual energy per m 3 (kWh/m 3 ) is calculated as<br />
actual power consumption divided by actual flow rate.<br />
Logging functions<br />
Alarm and warning log<br />
The latest five alarms and five warnings are logged with<br />
a timestamp corresponding to the power on time after<br />
the fault has occurred. The alarm and warning log can<br />
be shown directly on the display.<br />
See the warning and alarm list page 38.<br />
Correlated histogram (setting via PC Tool)<br />
The correlated histogram is a way to examine the joint<br />
distribution of two parameters. The logging for a correlated<br />
histogram are count of the number of samples that<br />
at the same time are within a given interval of variable<br />
1 and variable 2.
Functions<br />
PID controller<br />
The <strong>CUE</strong> has a built-in PID controller for speed control<br />
of pumps. The factory setting of gain (Kp ) and integral<br />
time (Ti ) can easily be changed in the control panel.<br />
The controller can operate in both normal and inverse<br />
mode.<br />
Normal mode<br />
Normal mode is used in systems in which an increase<br />
in pump performance will result in a rise in the value<br />
measured at the feedback sensor. This will typically be<br />
the case in most <strong>CUE</strong> applications.<br />
Normal mode is selected by setting the gain (Kp ) to a<br />
positive value in the control panel.<br />
Inverse mode<br />
Inverse mode is used in systems in which an increase<br />
in pump performance will result in a drop in the value<br />
measured at the feedback sensor. This mode will typically<br />
be used for constant level operation (emptying<br />
tank) and for constant temperature operation in cooling<br />
systems.<br />
Inverse mode is selected by setting the gain (Kp ) to a<br />
negative value in the control panel.<br />
Description<br />
The PID controller compares the required setpoint<br />
(p set ) with the actual value (p) measured by the transmitter<br />
(P). See fig. 21.<br />
Setpoint p set<br />
p set<br />
<strong>CUE</strong><br />
Q Qmax Fig. 21 Constant pressure control<br />
Measured value p<br />
If the measured value is higher than the required setpoint,<br />
the PID controller will reduce the speed and the<br />
performance of the pump until the measured value is<br />
equal to the required setpoint.<br />
P<br />
TM04 0367 0608<br />
Suggested controller settings<br />
System/application<br />
L<br />
<strong>CUE</strong><br />
<strong>CUE</strong><br />
<strong>CUE</strong><br />
<strong>CUE</strong><br />
<strong>CUE</strong><br />
<strong>CUE</strong><br />
p<br />
Δt<br />
<strong>CUE</strong><br />
<strong>CUE</strong><br />
p<br />
t<br />
Q<br />
L 2<br />
L 2<br />
<strong>CUE</strong><br />
L 2<br />
Δp<br />
L 1<br />
Δp<br />
t<br />
Heating<br />
system 1)<br />
<strong>Grundfos</strong> <strong>CUE</strong><br />
*Ti = 100 seconds (factory setting).<br />
Heating systems are systems in which an increase in pump performance<br />
will result in a rise in temperature at the sensor.<br />
Cooling systems are systems in which an increase in pump performance<br />
will result in a drop in temperature at the sensor.<br />
L 1 =Distance in [m] between pump and sensor.<br />
L 2 =Distance in [m] between heat exchanger and sensor.<br />
K p<br />
Cooling<br />
system 2)<br />
T i<br />
0.2 0.5<br />
SP, SP-G, SP-NE: 0.5 0.5<br />
0.2 0.5<br />
SP, SP-G, SP-NE: 0.5 0.5<br />
0.2 0.5<br />
–2.5 100<br />
0.5 –0.5 10 + 5L 2<br />
0.5 10 + 5L 2<br />
0.5 –0.5 30 + 5L 2*<br />
0.5 0.5*<br />
0.5<br />
L 1 < 5 m: 0.5*<br />
L 1 > 5 m: 3*<br />
L 1 > 10 m: 5*<br />
21
22<br />
Functions<br />
Stop functions<br />
Constant pressure with stop function<br />
The purpose of the stop function is to stop the pump<br />
when low or no flow is detected.<br />
When low flow is detected, the pump is in on/off operation.<br />
If there is flow, the pump will continue operating<br />
according to the setpoint. See fig. 22.<br />
Stop pressure<br />
ΔH<br />
Start pressure<br />
Fig. 22 Constant pressure with stop function. Difference<br />
between start and stop pressures (ΔH)<br />
Low flow can be detected in two different ways:<br />
a built-in low-flow detection function<br />
a flow switch connected to a digital input.<br />
Low-flow detection function<br />
The low-flow detection function will check the flow regularly<br />
by reducing the speed for a short time. No or only<br />
a small change in pressure means that there is low flow.<br />
Low-flow detection with flow switch<br />
When a flow switch detects low flow, the digital input<br />
will be activated.<br />
Operating conditions for the stop function<br />
It is only possible to use the stop function if the system<br />
incorporates these components:<br />
a pressure sensor<br />
a non-return valve<br />
a diaphragm tank.<br />
On/off operation<br />
Continuous operation<br />
TM03 8477 1607<br />
<strong>Grundfos</strong> <strong>CUE</strong><br />
Note: The non-return valve must always be installed<br />
before the pressure sensor. See figs 23 and 24.<br />
Fig. 23 Position of the non-return valve and pressure sensor<br />
in a system with suction lift operation<br />
Pump<br />
Pump<br />
Non-return valve<br />
Fig. 24 Position of the non-return valve and pressure sensor<br />
in a system with positive inlet pressure<br />
Diaphragm tank<br />
The stop function requires a diaphragm tank of a certain<br />
minimum size. The tank must be installed as close<br />
as possible after the pump, and the precharge pressure<br />
must be 0.7 x actual setpoint.<br />
Recommended diaphragm tank size:<br />
Rated flow rate of pump<br />
gpm (m³/h)<br />
Pressure sensor<br />
Pressure sensor<br />
Non-return valve<br />
Diaphragm tank<br />
Diaphragm tank<br />
Typical diaphragm tank size<br />
gal (litres)<br />
0-25 (0-6) 2 (8)<br />
25-100 (7-24) 4 (18)<br />
100-175 (25-40) 14 (50)<br />
175-300 (41-70) 32 (120)<br />
300-450 (71-100) 44 (180)<br />
If a diaphragm tank of the above size is installed in the<br />
system, the factory setting of ΔH is the correct setting.<br />
If the tank installed is too small, the pump will start and<br />
stop too often.<br />
TM03 8582 1907<br />
TM03 8583 1907
Functions<br />
Constant level with stop function<br />
The purpose of the stop function is to stop the pump<br />
when low or no flow is detected.<br />
Note: It is only possible to set constant level with stop<br />
function if the system incorporates a level sensor, and<br />
all valves can be closed.<br />
When low flow is detected, the pump is in on/off operation.<br />
If there is flow, the pump will continue operating<br />
according to the setpoint. See fig. 25.<br />
Start level<br />
ΔH<br />
Stop level<br />
Fig. 25 Constant level with stop function. Difference between<br />
start and stop levels (ΔH)<br />
Low flow can be detected in two different ways:<br />
with the built-in low-flow detection function<br />
with a flow switch connected to a digital input.<br />
Low-flow detection function<br />
The low-flow detection function will check the flow regularly<br />
by measurement of speed and power.<br />
Low-flow detection with flow switch<br />
When a flow switch detects low flow, the digital input<br />
will be activated.<br />
Dry-running protection<br />
L<br />
<strong>CUE</strong><br />
This function protects the pump against dry running.<br />
When lack of inlet pressure or water shortage is<br />
detected, the pump will be stopped before being damaging.<br />
Lack of inlet pressure or water shortage can be<br />
detected in two ways:<br />
With a switch connected to a digital input configured<br />
to dry-running protection.<br />
The <strong>CUE</strong> checks if the shaft power is below a drypump<br />
limit for a configurable time (setting via PC<br />
Tool).<br />
The use of a digital input requires an accessory, such<br />
as:<br />
a <strong>Grundfos</strong> Liqtec ® dry-running switch<br />
a pressure switch installed on the suction side of the<br />
pump<br />
TM03 8809 2607<br />
<strong>Grundfos</strong> <strong>CUE</strong><br />
a float switch installed on the suction side of the<br />
pump.<br />
The pump cannot restart as long as the input is activated.<br />
Restart may be delayed by up to 30 minutes,<br />
depending of the pump family.<br />
Duty/standby<br />
The built-in duty/standby function applies to two pumps<br />
connected in parallel to ensure reliability of supply. See<br />
fig. 26.<br />
<strong>CUE</strong><br />
<strong>CUE</strong><br />
Fig. 26 Two pumps connected in parallel and controlled<br />
via GENIbus<br />
These are the primary purposes of the function:<br />
To let one pump run at a time.<br />
To start the standby pump if the duty pump stops<br />
due to an alarm.<br />
To alternate the pumps at least every 24 hours.<br />
Description<br />
The two pumps are electrically connected by means of<br />
the GENIbus interface. Each pump must be connected<br />
to its own <strong>CUE</strong> and sensor.<br />
Note: The two pumps running duty/standby in this way<br />
cannot use the GENIbus interface for remote communication.<br />
The function is activated via the control panel.<br />
Operating mode<br />
The two pumps use their own local operating mode. For<br />
instance, pump 1 can operate in Normal mode, and<br />
pump 2 can operate in Max. mode.<br />
Control mode<br />
Both pumps must have the same control mode.<br />
p<br />
p<br />
TM04 0368 0608<br />
23
24<br />
Functions<br />
Operating range<br />
The area between the min. and max. speed is the<br />
actual operating range of the pump.<br />
The operating range can be changed by the user within<br />
the area defined by the pump-dependent speed range.<br />
For some pump families over synchronous operation<br />
(max. speed above 100%) will be possible. This<br />
requires an over-size motor to deliver the shaft power<br />
required by the pump during over-synchronous operation.<br />
Pump-dependent speed range<br />
Min. Nom. Max.<br />
Actual operation<br />
Min. Max.<br />
speed range<br />
Min. speed adj. range<br />
Fig. 27 Setting of the min. and max. speed in % of the<br />
nominal speed of the pump<br />
H<br />
100 %<br />
Max. curve<br />
Min. curve<br />
Pump-dependent<br />
min. performance<br />
Max. speed adj. range<br />
100%<br />
Operating range<br />
Fig. 28 Operating range of the <strong>CUE</strong><br />
Motor bearing monitoring<br />
This function is used to give an indication when it is time<br />
to relubricate or change the motor bearings.<br />
It shows these pieces of information:<br />
When to relubricate the motor bearings.<br />
How many times relubrication has been confirmed,<br />
When to replace the motor bearings.<br />
Default function<br />
The default function is based on the "mileage" of the<br />
pump and takes into account if the pump has been running<br />
with reduced speed.<br />
Q<br />
Speed [%]<br />
TM00 7747 1896<br />
<strong>Grundfos</strong> <strong>CUE</strong><br />
Extended function<br />
The bearing temperature is also included in the calculation.<br />
The extended function requires an MCB 114 sensor<br />
input module and Pt100/Pt1000 sensors measuring the<br />
bearing temperature.<br />
Monitoring of motor bearing temperatures<br />
When temperature sensor 1 and 2 are used for measuring<br />
the motor bearing temperature, a warning or an<br />
alarm will be generated if the bearing temperature gets<br />
too high.<br />
Warnings and alarms are generated and reset using<br />
hysteresis. See fig. 29.<br />
Alarm limit<br />
Warning limit<br />
Normal<br />
203 °F<br />
(95 °C)<br />
Fig. 29 Monitoring of bearing temperature with warning<br />
and alarm limits<br />
Standstill heating<br />
212° F<br />
(100 °C)<br />
239 °F<br />
(115 °C)<br />
248 °F<br />
(120 °C)<br />
Temperature<br />
This function pre-heats the motor during standstill in<br />
order to avoid condensation within the motor.<br />
When the pump is stopped by a stop command, a current<br />
will be applied to the motor windings in order to<br />
keep the temperature within the motor above the dewpoint<br />
temperature. No external heater is needed.<br />
The pre-heating of the motor is especially important<br />
when the motor is installed under these conditions:<br />
high humidity<br />
outdoor installation.<br />
The consequences of condensed moisture within the<br />
motor are for example corrosion damage to electrical<br />
contacts and the bearings of the motor shaft.<br />
TM04 0371 0608
Functions<br />
Ramps<br />
The controller incorporates two types of ramp:<br />
ramp-up and ramp-down (default)<br />
initial and final ramps (setting via PC-Tool).<br />
Speed<br />
Nominal<br />
Max.<br />
Min.<br />
Initial ramp Final ramp<br />
Ramp-up Ramp-down<br />
Fig. 30 Ramp-up and ramp-down of the <strong>CUE</strong><br />
Time<br />
Ramp-up and ramp-down<br />
The ramp-up and ramp-down are used for protection<br />
against overload when starting and stopping the <strong>CUE</strong>.<br />
The setting is done by means of the control panel.<br />
The ramp-up time is the acceleration time from 0 rpm to<br />
nominal motor speed.<br />
The ramp-down time is the deceleration time from nominal<br />
motor speed to 0 rpm.<br />
Additional set of ramp-up and ramp-down (setting via<br />
PC Tool)<br />
An additional set of ramp-up and ramp-down can be<br />
remote-set to predefined ramps by means of a digital<br />
input.<br />
Initial and final ramps<br />
The initial and final ramps prevent operation for a<br />
longer time than necessary at speeds below minimum<br />
speed.<br />
The setting is done automatically based on the pump<br />
family selected in the start-up guide.<br />
TM03 9439 0908<br />
<strong>Grundfos</strong> <strong>CUE</strong><br />
Proportional differential pressure,<br />
parabolic<br />
Setting via PC Tool.<br />
The proportional differential pressure can be selected<br />
with one of these flow dependencies:<br />
linear (default), see page 15<br />
parabolic (setting via PC Tool).<br />
When the flow dependency is selected as parabolic, the<br />
differential pressure of the pump will be reduced with a<br />
parabolic curve at falling flow rate and increased at rising<br />
flow rate. See fig. 31.<br />
Q max.<br />
TM04 1695 0908<br />
<strong>CUE</strong><br />
Fig. 31 Proportional differential pressure, parabolic curve<br />
The pump is controlled according to a differential pressure<br />
measured across the pump. This means that the<br />
pump system offers a flow-compensated differential<br />
pressure in the Q-range of 0 to Q max. , represented by<br />
the parabolic curve in the QH diagram.<br />
Δp<br />
TM03 8804 2507<br />
25
26<br />
Functions<br />
Hmax update<br />
Setting via PC Tool.<br />
This function is used in connection with the control<br />
mode Proportional differential pressure. The purpose is<br />
to find the "true" value of the maximum head at no flow<br />
and nominal pump speed. See fig. 32.<br />
H max.<br />
Fig. 32 Proportional differential pressure, H max update<br />
The function consists of two steps:<br />
1. Ramping up the speed to nominal speed.<br />
2. Measuring Hmax for 20 seconds at nominal speed.<br />
Valves must be closed so that the pump is operating<br />
without flow.<br />
Differential pressure from two<br />
sensors<br />
Setting via PC Tool.<br />
The purpose of this function is to make differential pressure<br />
control possible by using measurements from two<br />
separate pressure sensors.<br />
It can be used in these control modes:<br />
Proportional differential pressure. See page 15<br />
Constant differential pressure. See page 15.<br />
The function requires an MCB 114 sensor input module.<br />
Sensor 2<br />
<strong>CUE</strong><br />
Δp<br />
Fig. 33 Differential pressure from two sensors<br />
Sensor 1 is connected to the sensor input 1.<br />
TM04 1696 0908<br />
<strong>CUE</strong><br />
Δp<br />
Sensor 1<br />
TM03 8804 2507<br />
TM04 0622 0908<br />
<strong>Grundfos</strong> <strong>CUE</strong><br />
Sensor 2 is connected to the sensor input 2 of an MCB<br />
114 sensor input module.<br />
Start delay after power-up<br />
Setting via PC Tool.<br />
The start delay after power-up is a delay between<br />
power being applied and the pump starting.<br />
Power on:<br />
Start <strong>CUE</strong>:<br />
Fig. 34 Start delay after power-up<br />
The purpose is to allow remote control equipment to<br />
start up before the pump.<br />
The start delay is deactivated if a remote command is<br />
received via GENIbus.<br />
Auto/manual restart after alarm<br />
Setting via PC Tool.<br />
Start delay<br />
Time<br />
In case of an alarm, the <strong>CUE</strong> will stop the pump or<br />
change the operating mode, depending on the alarm<br />
and pump type. See Warning and alarm list on page 38.<br />
Pump operation will be resumed when the cause of the<br />
alarm has been remedied and the alarm has been reset<br />
automatically or manually.<br />
The <strong>CUE</strong> can be configured to activate and deactivate<br />
automatic restart for all alarms or for groups of alarms.<br />
TM04 0621 0908
Functions<br />
Limit exceeded<br />
Setting via PC Tool.<br />
This is a monitoring function offering information, warning<br />
or alarm when a low or high limit is exceeded. See<br />
fig. 35.<br />
High limit<br />
Hysteresis<br />
Low limit<br />
On<br />
Off<br />
1 2 1<br />
3 4 5<br />
Fig. 35 Example of low limit exceeded<br />
Description<br />
The function has two timers: a detection delay timer<br />
and a reset delay timer.<br />
The detection delay timer starts when a limit is<br />
exceeded (1). See fig. 35. The time is configurable.<br />
A: If the limit is no longer exceeded (2) when the detection<br />
time expires, the timer will be reset.<br />
B: If the limit is still exceeded (3) when the detection<br />
time expires, the output of the detector will change to<br />
“limit exceeded”.<br />
The reset delay timer starts when the detector output is<br />
“limit exceeded” and the limit is no longer exceeded,<br />
using hysteresis (4).<br />
C: When the delay time has expired (5), the detector<br />
output changes to “limit not exceeded”.<br />
Input possibilities<br />
It is possible to have two limit exceeded functions in<br />
parallel with these inputs:<br />
all analog inputs<br />
all Pt100/Pt1000 inputs.<br />
The use of Pt100/Pt100 inputs requires an MCB 114<br />
sensor input module.<br />
Output possibilities<br />
There are these output possibilities:<br />
signal relay 1 and 2<br />
analog output<br />
warning and alarm.<br />
A<br />
B C<br />
Limit exceeded<br />
Temperature<br />
TM04 0369 0608<br />
Digital inputs<br />
<strong>Grundfos</strong> <strong>CUE</strong><br />
As standard, the <strong>CUE</strong> offers these digital inputs:<br />
one digital input for external start/stop<br />
three programmable digital inputs.<br />
The three digital inputs can be set to these functions:<br />
min. (min. curve)<br />
max. (max. curve)<br />
external fault<br />
flow switch<br />
alarm reset<br />
dry-running protection (via external switch)<br />
accumulated flow (pulse flow, only DI 4)<br />
predefined ramps (setting via PC Tool)<br />
predefined setpoints (setting via PC Tool).<br />
Start/stop<br />
The pump will start if the pump is ready to run (the state<br />
of the on/off button is on, and no alarms prevent the<br />
pump from running.<br />
Min.<br />
The pump will run according to the min. curve.<br />
Max.<br />
The pump will run according to the max. curve.<br />
External fault<br />
If the input is activated for more than 5 seconds, external<br />
fault will be indicated.<br />
Flow switch<br />
The flow switch indicates no flow in constant pressure<br />
with stop function and constant level with stop function.<br />
It requires an external signal from a flow switch or a<br />
controller.<br />
Alarm reset<br />
When the input has been activated, the alarm will be<br />
reset if the cause of the alarm no longer exists.<br />
Dry running<br />
Indicates lack of inlet pressure or water shortage, and<br />
the pump will be stopped. The pump cannot restart as<br />
long as the input is activated. Restart may be delayed<br />
by up to 30 minutes, depending of the pump family.<br />
For further information, see page 23.<br />
Accumulated flow (only DI 4)<br />
The number of pulses is counted and multiplied by the<br />
litre/pulse parameter in order to get the accumulated<br />
flow. This requires the use of an accessory, such as a<br />
pulse sensor.<br />
27
28<br />
Functions<br />
Predefined ramps (setting via PC Tool)<br />
The ramp-up and ramp-down time can be remote-set<br />
from the default setting to a predefined setting by<br />
means of PC Tool.<br />
For further information, see page 25.<br />
Predefined setpoints (setting via PC Tool)<br />
One to seven predefined setpoints can be selected via<br />
digital inputs configured for this purpose.<br />
For further information, see Predefined setpoints on<br />
page 19.<br />
Signal relays<br />
The two relay outputs can be independently set to these<br />
indications:<br />
ready<br />
alarm<br />
operation<br />
pump running<br />
warning<br />
relubricate<br />
external control (setting via PC Tool)<br />
limit exceeded (setting via PC Tool).<br />
Ready<br />
The pump is ready to run or running.<br />
Warning<br />
There is a warning.<br />
Alarm<br />
There is an alarm.<br />
Operation<br />
The pump is running or has been stopped by a stop<br />
function.<br />
Pump running<br />
The pump is running.<br />
Relubricate<br />
Lubrication time is exceeded.<br />
External relay control (setting via PC Tool)<br />
This function offers information, warning or alarm when<br />
a signal is given via GENIbus.<br />
Limit exceeded (setting via PC Tool)<br />
This function offers information, warning or alarm when<br />
a low or high limit is exceeded.<br />
Analog inputs<br />
<strong>Grundfos</strong> <strong>CUE</strong><br />
As standard, the <strong>CUE</strong> offers these analog inputs:<br />
one analog input for external setpoint<br />
one analog input for sensor 1.<br />
External setpoint<br />
The setpoint can be influenced by connecting an analog<br />
signal to the setpoint input.<br />
For further information, see page 17.<br />
Sensor 1<br />
The sensor 1 is default used for control in closed loop.<br />
In closed loop, the feedback signal is kept at a given<br />
setpoint by a PID controller.<br />
In open loop, sensor 1 can be used for monitoring.<br />
Analog output<br />
The analog output (0-20 mA) can be set via the PC Tool<br />
to one of these indications:<br />
feedback value<br />
speed<br />
frequency<br />
motor current<br />
external setpoint input<br />
limit exceeded.<br />
The analog output is default set to not active.<br />
Feedback value<br />
The output signal is a function of the actual feedback<br />
value.<br />
Speed<br />
The output signal is a function of the actual pump<br />
speed.<br />
Frequency<br />
The output signal is a function of the actual frequency.<br />
Motor current<br />
The output signal is a function of the actual motor current.<br />
External setpoint input<br />
The output signal is a function of the external setpoint<br />
input.<br />
Limit exceeded<br />
The output signal indicates whether the limit is<br />
exceeded:<br />
Minimum output = limit is not exceeded.<br />
Maximum output = limit is exceeded.<br />
Default setting is NOT ACTIVE.
Functions<br />
MCB 114 sensor input module<br />
The MCB 114 sensor input module offers three additional<br />
analog inputs for the <strong>CUE</strong>:<br />
one analog 4-20 mA input for an additional sensor<br />
two analog Pt100/Pt1000 inputs for temperature<br />
sensors.<br />
Sensor 2<br />
The analog 4-20 mA input is used for these functions:<br />
Monitoring of measured value of sensor 2 (default<br />
setting).<br />
Measured value of sensor 2 used for control purpose.<br />
This makes differential pressure control possible<br />
by using measurements from sensor 1 and<br />
sensor 2 (setting by means of PC Tool).<br />
Temperature sensors 1 and 2<br />
The analog Pt100/Pt1000 inputs are used for monitoring<br />
of these temperatures:<br />
drive-end motor bearing<br />
non drive-end motor bearing<br />
other liquid 1<br />
other liquid 2<br />
motor windings<br />
pumped liquid<br />
ambient temperature.<br />
Displays<br />
MCB 114 input<br />
Further information<br />
See MCB 114 sensor input module, page 53.<br />
See also the <strong>CUE</strong> and MCB 114 installation and operating<br />
instructions.<br />
GENIbus<br />
Display Menu Number<br />
Reading Setting<br />
Sensor 2 (2.5) (3.16)<br />
Temperature sensor 1 (2.12) (3.21)<br />
Temperature sensor 2 (2.13) (3.22)<br />
The <strong>CUE</strong> supports serial communication via the RS-<br />
485 connection. The communication enables connection<br />
to a building management system or another external<br />
control system.<br />
Operating parameters, such as setpoint and operating<br />
mode, can be remote-set via the bus signal. At the<br />
same time, the pump can provide status information<br />
about important parameters, such as actual value of<br />
control parameter, input power and fault indications.<br />
<strong>Grundfos</strong> <strong>CUE</strong><br />
Protocol<br />
Using GENIbus interface, the protocol selection of the<br />
RS-485 port must be selected to GENIbus, and the<br />
communication must be set according to the <strong>Grundfos</strong><br />
GENIbus standard.<br />
Pump number<br />
Using GENIbus interface, a pump number between 1<br />
and 199 must be allocated to each pump via the control<br />
panel.<br />
Local/remote operating mode<br />
In local operating mode, the unit is controlled from local<br />
sources, i.e. control panel and digital input.<br />
In remote operating mode, the unit is controlled via<br />
GENIbus. Change to remote operating mode is done<br />
via the GENIbus.<br />
Priority of settings<br />
The <strong>CUE</strong> can be controlled in various ways at the same<br />
time. If two or more operating modes are active at the<br />
same time, the operating mode with the highest priority<br />
will be in force.<br />
Local operating mode<br />
Priority <strong>CUE</strong> menu External signal<br />
1 Stop<br />
2 Max.<br />
3 Stop<br />
4 Max.<br />
5 Min. Min.<br />
6 Normal Normal<br />
Example: If an external signal has activated the operating<br />
mode Max., it will only be possible to stop the<br />
pump.<br />
Remote operating mode<br />
Priority <strong>CUE</strong> menu External signal Bus signal<br />
1 Stop<br />
2 Max.<br />
3 Stop Stop<br />
4 Max.<br />
5 Min.<br />
6 Normal<br />
Example: If the bus signal has activated the operating<br />
mode Max., it will only be possible to stop the pump.<br />
29
30<br />
Functions<br />
Copy of Settings<br />
The <strong>Grundfos</strong> Local Control Panel (GLCP) can be used<br />
to copy the settings made on one <strong>CUE</strong> to another <strong>CUE</strong>.<br />
The function includes two different possibilities:<br />
Make a copy of the setup from the present <strong>CUE</strong> to<br />
the <strong>Grundfos</strong> Local Control Panel<br />
Make a copy of the setup stored in the <strong>Grundfos</strong> Local<br />
Control Panel to the <strong>CUE</strong><br />
Both functions must be used in the correct order to copy<br />
a setup from one <strong>CUE</strong> to another.<br />
A setup can be used for more than once, when it is<br />
loaded into the <strong>Grundfos</strong> Local Control Panel.<br />
The copy can only be performed between units of the<br />
same size and firmware version.<br />
Pipe fill (PC Tool)<br />
The pipe fill function is used for filling empty pipes with<br />
water in a controlled manner. With pipe fill disabled the<br />
speed will go to maximum speed when filling the pipes<br />
in pressure controlled systems where pipes are empty<br />
at start up, and when the pipes are filled the high speed<br />
will give pressure spikes in the system, before the<br />
speed is reduced properly to fit the actual need in the<br />
application.<br />
The pipe filling function can be used to avoid these<br />
pressure spikes, by introducing a pipe filling sequence<br />
before the system is turned into normal operation.<br />
The pipe filling function can limit the speed of the pump<br />
during fill mode operation; this will decrease the pressure<br />
spikes at full pipes. A time limit or a filled pipe<br />
pressure can be used to deactivate the pipe fill function<br />
and turn the <strong>CUE</strong> into normal operation.<br />
The following parameters are used in fill mode:<br />
Pipe fill<br />
Activate or deactivate the function<br />
Pipe fill speed<br />
The maximum speed used during pipe filling (horizontal<br />
piping)<br />
Pipe fill time<br />
The time it takes to fill the pipes, the <strong>CUE</strong> turns into<br />
normal operation when the pipe fill time has passed<br />
Pipe fill rate<br />
If a vertical pipe system is being filled a pipe fill rate<br />
in scale of the used transmitter can be used to limit<br />
the pipe filling rate Example: [0.3bar/sec] (vertical<br />
piping)<br />
<strong>Grundfos</strong> <strong>CUE</strong><br />
Filled setpoint<br />
The setpoint where the pipe fill function is deactivated<br />
and the <strong>CUE</strong> turns into normal operation.
Installation<br />
Mechanical installation<br />
The <strong>CUE</strong> cabinet sizes are characterised by their<br />
enclosure. The <strong>CUE</strong> is available in three enclosure<br />
classes: IP21, IP54 and IP55. To see the relationship of<br />
enclosure class and enclosure type, see tables starting<br />
on page 41.<br />
The general installation requirements necessitate special<br />
considerations as to these aspects:<br />
Enclosure class IP54/55 must be installed freely accessible,<br />
but must not be installed outdoors without<br />
additional protection against water and the sun.<br />
The <strong>CUE</strong> contains a large number of mechanical<br />
and electronic components and must therefore not<br />
be installed in an environment where the air contains<br />
liquids, particles or gasses which may affect<br />
and damage the electronic components.<br />
In applications requiring Ex approval, the <strong>CUE</strong><br />
should be installed outside the hazardous area.<br />
Space requirements and air circulation<br />
<strong>CUE</strong> units can be mounted side by side, but as a sufficient<br />
air circulation is required for cooling, these<br />
requirements must be met:<br />
Sufficient free space above and below the <strong>CUE</strong>.<br />
See table below.<br />
Hang the <strong>CUE</strong> directly on the wall, or fit it with a<br />
back plate to secure sufficient air flow for cooling.<br />
See fig. 36.<br />
Outlet<br />
temperature<br />
Inlet<br />
temperature<br />
Fig. 36 <strong>CUE</strong> hung directly on the wall or fitted with a back<br />
plate<br />
Required free space above and below the <strong>CUE</strong><br />
Enclosure Space - in [mm]<br />
A2, A3, A5 4 (100)<br />
B1, B2, B3, B4, C1, C3 8 (200)<br />
C2, C4, D1, D2 9 (225)<br />
TM03 8859 2607<br />
<strong>Grundfos</strong> <strong>CUE</strong><br />
Required free space in front of the <strong>CUE</strong><br />
Furthermore, there must be sufficient space in front of<br />
the <strong>CUE</strong> for opening the door of the <strong>CUE</strong>. See fig. 37.<br />
Fig. 37 Free space in front of <strong>CUE</strong> enclosures D1 and D2<br />
Ventilation of built-in <strong>CUE</strong><br />
The <strong>CUE</strong> can be mounted in a control cabinet if sufficient<br />
air circulation is ensured. The quantity of air flow<br />
required for cooling the <strong>CUE</strong> can be calculated as follows:<br />
q v<br />
Insert P in Watt and ΔT in F (Fahrenheit.<br />
P is the power loss of all equipment integrated in the<br />
same cabinet. Calculate the power loss P of the <strong>CUE</strong> by<br />
means of the typical shaft power P2 multiplied by the<br />
efficiency.<br />
ΔT is the difference between the outlet temperature and<br />
the inlet temperature (ambient) of the cooling air. See<br />
fig. 36.<br />
Note: The inlet and outlet temperatures must not be<br />
higher than the values in the table below.<br />
Output current<br />
21.0 in.<br />
Max. inlet<br />
temperature<br />
Max. outlet<br />
temperature<br />
Up to 177 amps 122 °F (50 °C) 131 °F (55 °C)<br />
Over 177 amps 113°F (45 °C) 122 °F (50 °C)<br />
The average inlet temperature over 24 hours must be<br />
9 °F lower.<br />
15.7 in.<br />
P ∑ 3.285 ×<br />
= ------------------------------- ft<br />
ΔT<br />
3 [ / min]<br />
TM03 9897 4607<br />
31
32<br />
Installation<br />
The outlet from the ventilation must be placed above<br />
the highest-mounted <strong>CUE</strong>. Allowance must be made for<br />
the pressure loss across the inlet filters of the control<br />
panel and for the fact that the pressure will drop as the<br />
filters get choked.<br />
Example: Calculate the required air flow for cooling of<br />
a built-in <strong>CUE</strong> when the ambient temperature is 80° F<br />
(27 °C). The <strong>CUE</strong> has a typical shaft power of 11.0 kW<br />
(ISHP) and an efficiency of 0.98. See page 44.<br />
Calculate the power loss of the <strong>CUE</strong>:<br />
P = P2 x efficiency = 11.0 x (1-0.98) x 1000= 220 W.<br />
Calculate the required air flow for cooling the <strong>CUE</strong>:<br />
q v = (P x 3.285) / (ΔT) = (220 x 3.285) / (131-80) =<br />
14.2 ft 3 /min.<br />
Electrical installation<br />
Note: Always observe national and local regulations as<br />
to cable cross-section, short circuit protection and overcurrent<br />
when installing the <strong>CUE</strong>.<br />
ELCB<br />
Fig. 38 Example of three-phase mains connection of the<br />
<strong>CUE</strong> with mains switch, back-up fuses and additional<br />
protection<br />
Electrical protection<br />
Protection against electric shock, indirect contact<br />
Protective conductors must always have a yellow/green<br />
(PE) or yellow/green/blue (PEN) colour marking.<br />
Instructions according to EN IEC 61800-5-1:<br />
The <strong>CUE</strong> must be stationary, installed permanently<br />
and connected permanently to the mains supply.<br />
The earth connection must be carried out with duplicate<br />
protective conductors or with a single reinforced<br />
protective conductor with a cross-section of<br />
minimum 8 AWG [10 mm 2 ].<br />
Protection against short-circuit, fuses<br />
The <strong>CUE</strong> and the supply system must be protected<br />
against short-circuit.<br />
<strong>Grundfos</strong> demands that the fuses mentioned on 48 are<br />
used for protection against short-circuit.<br />
TM03 8525 1807<br />
<strong>Grundfos</strong> <strong>CUE</strong><br />
The <strong>CUE</strong> offers complete short-circuit protection in<br />
case of a short-circuit on the motor output.<br />
Additional protection<br />
Note: The leakage current to earth exceeds 3.5 A.<br />
If the <strong>CUE</strong> is connected to an electrical installation<br />
where an earth leakage circuit breaker (ELCB) is used<br />
as additional protection, the circuit breaker must be of<br />
a type marked with the following symbols:<br />
The circuit breaker is type B.<br />
ELCB<br />
The total leakage current of all the electrical equipment<br />
in the installation must be taken into account.<br />
Leakage current of the <strong>CUE</strong> in normal operation, see<br />
page 51.<br />
During start and in asymmetrical supply systems, the<br />
leakage current can be higher than normal and may<br />
cause the ELCB to trip.<br />
Motor protection<br />
The motor requires no external motor protection. The<br />
<strong>CUE</strong> protects the motor against thermal overloading<br />
and blocking.<br />
Protection against overcurrent<br />
The <strong>CUE</strong> has an internal overcurrent protection for<br />
overload protection on the motor output.<br />
Protection against mains voltage transients<br />
The <strong>CUE</strong> is protected against mains voltage transients<br />
according to EN 61800-3, second environment.
Installation<br />
Mains and motor connection<br />
The supply voltage and frequency are marked on the<br />
<strong>CUE</strong> nameplate. Make sure that the <strong>CUE</strong> is suitable for<br />
the electricity supply of the installation site.<br />
Mains switch<br />
A mains switch can be installed before the <strong>CUE</strong> according<br />
to local regulations. See fig. 38.<br />
Wiring diagram<br />
The wires in the terminal box must be as short as possible.<br />
Excepted from this is the protective conductor<br />
which must be so long that it is the last one to be disconnected<br />
in case the cable is inadvertently pulled out<br />
of the cable entry.<br />
Fig. 39 Wiring diagram, three-phase mains connection<br />
Terminal Function<br />
91 (L1)<br />
92 (L2) Three-phase supply<br />
93 (L3)<br />
95/99 (PE) Earth connection<br />
96 (U)<br />
97 (V)<br />
Three-phase motor connection, 0-100 % of mains<br />
voltage<br />
98 (W)<br />
Note: use terminals 91 and 92 for single phase <strong>CUE</strong>’s.<br />
Connecting the signal terminals<br />
Note: As a precaution, signal cables must be separated<br />
from other groups by reinforced insulation in their entire<br />
lengths.<br />
Note: If no external on/off switch is connected, shortcircuit<br />
terminals 18 and 20 using a short wire.<br />
TM03 8799 2507<br />
Wiring diagram, signal terminals<br />
RS-485 GND Y<br />
RS-485 A<br />
RS-485 B<br />
+24 V out<br />
+24 V out<br />
Start/stop<br />
0-10 V, 4-20 mA<br />
DI 2<br />
1 K<br />
0-20 mA<br />
GND<br />
AO 1<br />
Fig. 40 Wiring diagram, signal terminals<br />
<strong>Grundfos</strong> <strong>CUE</strong><br />
Terminal Type Function<br />
12 +24 V out Supply to sensor<br />
13 +24 V out Additional supply<br />
18 DI 1 Digital input, start/stop<br />
19 DI 2 Digital input, programmable<br />
20 GND Common frame for digital inputs<br />
32 DI 3 Digital input, programmable<br />
33 DI 4 Digital input, programmable<br />
39 GND Frame for analog output<br />
42 AO 1 Analog output, 0-20 mA<br />
50 +10 V out Supply to potentiometer<br />
53 AI 1 External setpoint, 0-10 V, 0/4-20 mA<br />
54 AI 2 Sensor input, sensor 1, 0/4-20 mA<br />
55 GND Common frame for analog inputs<br />
61 RS-485 GND Y GENIbus, screen (frame)<br />
68 RS-485 A GENIbus, signal A (+)<br />
69 RS-485 B GENIbus, signal B (-)<br />
Terminals 27 and 29 are not used.<br />
Connect the signal cables according to the guidelines<br />
for good practice to ensure EMC-correct installation.<br />
See section EMC-correct installation, 35.<br />
+10 V out<br />
DI 3<br />
4-20 mA<br />
Ext. setpoint<br />
Sensor 1<br />
GND<br />
DI 4<br />
GND<br />
Use shielded signal cables.<br />
Use a 3-conductor shielded bus cable.<br />
Terminals<br />
53 and 54:<br />
U = 0-10 V<br />
I = 4-20mA<br />
TM03 8800 2507<br />
33
34<br />
Installation<br />
RFI filters<br />
To meet the EMC requirements, the <strong>CUE</strong> comes with<br />
the following types of built-in radio frequency interference<br />
filter (RFI).<br />
Voltage Typical shaft power P2 RFI filter type<br />
1 x 200-240 V 1.5-10 Hp (1.1-7.5 kW) C1<br />
3 x 200-240 V 1-60 Hp (0.75-45 kW) C1<br />
3 x 380-500 V<br />
RFI filter types are according to EN 61800-3.<br />
C1 is a high-performance filter. C2 and C3 are typically<br />
RFI filter types for standard frequency converters.<br />
Description of RFI filter types<br />
C1: For use in domestic areas.<br />
C2: For use in domestic and industrial areas, connected<br />
permanently to the mains supply. In domestic<br />
areas, special care should be taken regarding EMCcorrect<br />
installation.<br />
C3: For use in industrial areas with own low-voltage<br />
transformer.<br />
Equipment of category C2<br />
In a domestic environment this product may cause<br />
radio interference in which case supplementary mitigation<br />
measures may be required.<br />
Equipment of category C3<br />
This type of power drive system (PDS) is not intended<br />
to be used on a low-voltage public network<br />
which supplies domestic premises.<br />
Radio frequency interference is expected if used on<br />
such a network.<br />
Output filters<br />
0.75-125 Hp (0.55-90 kW) C1<br />
150-350 Hp (110-250 kW) C2<br />
3 x 525-600 V 1-10 Hp (0.75-7.5 kW) C3<br />
3 x 525-690 V 15-350 Hp (11-250 kW) C3<br />
Output filters are used for reducing the voltage stress<br />
on the motor windings and the stress on the motor insulation<br />
system as well as for decreasing acoustic noise<br />
from the frequency converter-driven motor.<br />
<strong>Grundfos</strong> offers two types of output filter as accessories<br />
for the <strong>CUE</strong>:<br />
dU/dt filters<br />
sine-wave filters<br />
The filters are IP20/NEMA1 enclosure.<br />
<strong>Grundfos</strong> <strong>CUE</strong><br />
dU/dt filters<br />
Motor insulation stress is often caused by the combination<br />
of rapid voltage and current increase. The rapid<br />
energy changes can also be reflected back to the DC<br />
line in the inverter and cause shut down. The dU/dt filter<br />
is designed to reduce the voltage rise time/the rapid<br />
energy change in the motor, and by that intervention, it<br />
prevents premature aging and flashover in the motor<br />
insulation.<br />
The dU/dt filters have a positive influence on the radiation<br />
of magnetic noise in the cable that connects the<br />
drive to the motor. The voltage wave form is still pulseshaped<br />
but the du/dt ratio is reduced in comparison<br />
with the installation without filter.<br />
Sine-wave filters<br />
Sine-wave filters are designed to allow only low frequencies<br />
to pass. High frequencies are consequently<br />
shunted away, which results in a sinusoidal phase-tophase<br />
voltage waveform and sinusoidal current waveforms.<br />
With the sinusoidal waveforms, the use of special<br />
adjustable frequency drive motors with reinforced<br />
insulation is no longer needed. The acoustic noise from<br />
the motor is also damped as a consequence of the<br />
wave condition.<br />
Besides the features of the dU/dt filter, the sine-wave<br />
filter also reduces insulation stress and bearing<br />
currents in the motor, thus leading to prolonged motor<br />
lifetime and longer periods between service. Sine-wave<br />
filters enable use of longer motor cables in applications<br />
where the motor is installed far from the drive. The<br />
length is unfortunately limited because the filter does<br />
not reduce leakage currents in the cables.<br />
Use of output filters<br />
The table below explains in which cases an output filter<br />
is required. From the table it can be seen if a filter is<br />
needed, and which type to use.<br />
The selection depends of:<br />
pump type<br />
motor cable length<br />
the required reduction of the acoustic noise from the<br />
motor.
Installation<br />
Pump type<br />
SP, BM, BMB with<br />
380 V motor and up<br />
Other pumps, noise<br />
reduction<br />
Other pumps, higher<br />
noise reduction<br />
Pumps with 690 V<br />
motor<br />
Typical shaft<br />
power P2<br />
The lengths stated apply to the motor cable.<br />
dU/dt filter<br />
Up to 10 Hp –<br />
15 Hp and up<br />
0-500 ft<br />
(0-150 m)<br />
Motor cable<br />
Use a shielded/armored motor cable to comply with<br />
EMC emission specifications (or install the cable in a<br />
metal conduit). Keep the motor cable as short as possible<br />
to reduce the noise level and leakage currents.<br />
Connect the motor cable shield/armor to both the<br />
decoupling plate of the adjustable frequency drive and<br />
to the metal of the motor. (Same applies to both ends of<br />
the metal conduit if used instead of a shield.)<br />
Mains cable,<br />
unscreened<br />
Up to 10 Hp –<br />
Fig. 41 Example of installation without filter<br />
Mains cable,<br />
unscreened<br />
<strong>CUE</strong><br />
15 Hp and up<br />
0-500 ft<br />
(0-150 m)<br />
Up to 10 Hp –<br />
15 Hp and up –<br />
All<br />
0-500 ft<br />
(0-150 m)<br />
Motor cable,<br />
screened<br />
Motor cable,<br />
screened<br />
<strong>CUE</strong> Filter<br />
Sine-wave<br />
filter<br />
0-1000 ft<br />
(0-300 m)<br />
500-1000 ft<br />
(150-300 m)<br />
0-1000 ft<br />
(0-300 m)<br />
500-1000 ft<br />
(150-300 m)<br />
0-1000 ft<br />
(0-300 m)<br />
0-1000 ft<br />
(0-300 m)<br />
500-1000 ft<br />
(150-300 m)<br />
Fig. 42 Example of installation with filter. The cable between<br />
the <strong>CUE</strong> and filter must be short<br />
M<br />
M<br />
TM03 8802 2507<br />
TM03 8803 2507<br />
EMC-correct installation<br />
<strong>Grundfos</strong> <strong>CUE</strong><br />
This section gives guidelines for good practice when<br />
installing the <strong>CUE</strong>. Follow these guidelines to meet EN<br />
61800-3, first environment.<br />
Use only motor and signal cables with a braided<br />
metal screen in applications without output filter.<br />
There are no special requirements to supply cables,<br />
apart from local requirements.<br />
Leave the screen as close to the connecting terminals<br />
as possible. See fig. 43.<br />
Avoid terminating the screen by twisting the ends.<br />
See fig. 44. Use cable clamps or EMC screwed cable<br />
entries instead.<br />
Connect the screen to frame at both ends for both<br />
motor and signal cables. See fig. 45. If the controller<br />
has no cable clamps, connect only the screen to the<br />
<strong>CUE</strong>. See fig. 46.<br />
Avoid unscreened motor and signal cables in electrical<br />
cabinets with frequency converters.<br />
Make the motor cable as short as possible in applications<br />
without output filter to limit the noise level<br />
and minimize leakage currents.<br />
Screws for frame connections must always be tightened<br />
whether a cable is connected or not.<br />
Keep main cables, motor cables and signal cables<br />
separated in the installation, if possible.<br />
Other installation methods may give similar EMC<br />
results if the above guidelines for good practice are followed.<br />
35
36<br />
Installation<br />
Fig. 43 Example of stripped cable with screen<br />
Fig. 44 Do not twist the screen ends<br />
Controller<br />
Fig. 45 Example of connection of a 3-conductor bus cable<br />
with screen connected at both ends<br />
Controller<br />
<strong>CUE</strong><br />
<strong>CUE</strong><br />
Fig. 46 Example of connection of a 3-conductor bus cable<br />
with screen connected at the <strong>CUE</strong> (controller with<br />
no cable clamps)<br />
TM02 1325 0901<br />
TM03 8812 2507<br />
TM03 8732 2407<br />
TM03 8731 2407<br />
<strong>Grundfos</strong> <strong>CUE</strong>
Operation<br />
Control panel<br />
The control panel is used for local setting of the <strong>CUE</strong>.<br />
The functions available depend on the pump family.<br />
Fig. 47 Control panel of the <strong>CUE</strong><br />
Editing buttons<br />
Button Function<br />
On/<br />
Off<br />
OK<br />
Navigating buttons<br />
Makes the pump ready for operation/starts and stops<br />
the pump.<br />
Saves changed values, resets alarms and expands the<br />
value field.<br />
Changes values in the value field.<br />
Button Function<br />
Navigates from one menu to another. When the menu<br />
> is changed, the display shown will always be the top<br />
display of the new menu.<br />
><br />
+ -<br />
> ><br />
On<br />
On/<br />
Off<br />
Off<br />
Alarm<br />
Navigates up and down in the individual menu.<br />
Indicator lights<br />
The operating condition of the pump is indicated by the<br />
indicator lights on the front of the control panel. See fig.<br />
47.<br />
The table shows the function of the indicator lights.<br />
Indicator light Function<br />
><br />
><br />
OK<br />
><br />
CU <strong>CUE</strong><br />
The pump is running or has been stopped by a stop<br />
function.<br />
On (green)<br />
If flashing, the pump has been stopped by the user<br />
(<strong>CUE</strong> menu), external start/stop or bus.<br />
Off (orange) The pump has been stopped with the on/off button.<br />
Alarm (red) Indicates an alarm or a warning.<br />
><br />
+<br />
-<br />
TM03 8719 2507<br />
Start-up guide<br />
<strong>Grundfos</strong> <strong>CUE</strong><br />
Use the start-up guide for the general setting of the<br />
<strong>CUE</strong> including the setting of the correct direction of<br />
rotation.<br />
The start-up guide is started the first time when the<br />
<strong>CUE</strong> is connected to supply voltage. It can be restarted<br />
in menu GENERAL. Please note that in this case all<br />
previous settings will be erased.<br />
37
38<br />
Operation<br />
Warning and alarm list<br />
Code and display text<br />
Warning<br />
Status<br />
Operating<br />
mode<br />
Resetting<br />
1 Too high leakage current � Stop Man.<br />
2 Mains phase failure � Stop Aut.<br />
3 External fault � Stop Man.<br />
16 Other fault<br />
�<br />
�<br />
Stop<br />
Stop<br />
Aut.<br />
Man.<br />
30 Replace motor bearings � – Man. 3)<br />
32 Overvoltage<br />
�<br />
�<br />
–<br />
Stop<br />
Aut.<br />
Aut.<br />
40 Undervoltage<br />
�<br />
�<br />
–<br />
Stop<br />
Aut.<br />
Aut.<br />
48 Overload<br />
�<br />
�<br />
Stop<br />
Stop<br />
Aut.<br />
Man.<br />
49 Overload � Stop Aut.<br />
55 Overload<br />
�<br />
�<br />
–<br />
Stop<br />
Aut.<br />
Aut.<br />
57 Dry running � Stop Aut.<br />
64<br />
Too high <strong>CUE</strong> temperature<br />
� Stop Aut.<br />
70<br />
Too high motor temperature<br />
� Stop Aut.<br />
77<br />
Communication fault,<br />
duty/standby<br />
� – Aut.<br />
89 Sensor 1 outside range � 1) Aut.<br />
91<br />
Temperature sensor 1<br />
outside range<br />
� – Aut.<br />
93 Sensor 2 outside range � – Aut.<br />
96<br />
Setpoint signal outside<br />
range<br />
� 1) Aut.<br />
148<br />
Too high bearing temperature<br />
�<br />
�<br />
–<br />
Stop<br />
Aut.<br />
Aut.<br />
149<br />
Too high bearing temperature<br />
�<br />
�<br />
–<br />
Stop<br />
Aut.<br />
Aut.<br />
155 Inrush fault � Stop Aut.<br />
175<br />
Temperature sensor 2<br />
outside range<br />
� – Aut.<br />
240<br />
Relubricate motor bearings<br />
� – Man. 3)<br />
241 Motor phase failure<br />
�<br />
�<br />
–<br />
Stop<br />
Aut.<br />
Aut.<br />
242 AMA2) did not succeed � – Man.<br />
1)<br />
In case of an alarm, the <strong>CUE</strong> will change the operating mode depending<br />
on the pump type. For example: In constant pressure mode, SP’s will<br />
run at min. speed while CR’s will run at 70% of max. speed.<br />
2) AMA, Automatic Motor Adaptation.<br />
3)<br />
Warning is reset in display 3.20.<br />
In case of fault or malfunction of the <strong>CUE</strong>, the latest five<br />
warnings and latest five alarms can be found in the log<br />
menus.<br />
Alarm<br />
Locked alarm<br />
<strong>Grundfos</strong> <strong>CUE</strong><br />
Warning<br />
The <strong>CUE</strong> will continue the operation as long as the<br />
warning is active. The warning remains active until the<br />
cause no longer exists. Some warnings may switch to<br />
alarm condition if the warning has been present for a<br />
period.<br />
Alarm<br />
In case of an alarm, the <strong>CUE</strong> will stop the pump or<br />
change the operating mode depending on the alarm<br />
type and pump type.<br />
Pump operation will be resumed when the cause of the<br />
alarm has been remedied and the alarm has been<br />
reset.<br />
Resetting an alarm manually<br />
Press OK in the alarm display.<br />
Press On/Off twice.<br />
Activate a digital input DI 2-DI 4 set to Alarm reset<br />
or the digital input DI 1 (Start/stop).<br />
If it is not possible to reset an alarm, the reason may be<br />
that the fault has not been remedied, or that the alarm<br />
has been locked.<br />
Locked alarm<br />
In case of a locked alarm, the <strong>CUE</strong> will stop the pump<br />
and become locked. Pump operation cannot be<br />
resumed until the cause of the locked alarm has been<br />
remedied and the alarm has been reset.<br />
Resetting a locked alarm<br />
Switch off the electricity supply to the <strong>CUE</strong> for approx.<br />
30 seconds. Switch on the electricity supply,<br />
and press OK in the alarm display to reset the<br />
alarm.
<strong>CUE</strong> selection<br />
How to select a <strong>CUE</strong><br />
The size of the <strong>CUE</strong> is determined quickly and precisely<br />
based on the max. motor current. See fig. 48.<br />
The power size, which is the typical shaft power P2, is<br />
only an approximate value and cannot be used to select<br />
the nominal size of the <strong>CUE</strong>.<br />
Pump<br />
Max. motor<br />
current<br />
Fig. 48 Selection of <strong>CUE</strong> based on max. motor current<br />
The main steps<br />
When you have selected the pump, follow these steps<br />
to select a <strong>CUE</strong>:<br />
1. Select the voltage range of the <strong>CUE</strong>. It should fit the<br />
motor voltage and the mains supply at the installation<br />
site.<br />
2. Find the max. motor current*on the motor nameplate<br />
or in the data sheet of the selected motor. Select<br />
the first <strong>CUE</strong> that is able to deliver the max.<br />
motor current. See selection tables starting on page<br />
41.<br />
3. Select the enclosure class. Choose IP21 or IP54/55.<br />
See selection tables starting on page 41.<br />
4. Check if an output filter is required. Select the output<br />
filter according to the table on page 34.<br />
5. Select the accessories required for the application.<br />
It could be sensors or additional input modules.<br />
Selecting the different accessories may require additional<br />
steps.<br />
* Important note: If motor has service factor, use<br />
service factor amperes for max. motor current.<br />
The actual motor current should always be less than or<br />
equal to the output current of the <strong>CUE</strong>.<br />
If not, the <strong>CUE</strong> will reduce the maximum speed when<br />
the maximum limit is reached during operation.<br />
Motor nameplate<br />
3 ~MOT MG 160 MB<br />
50 Hz<br />
Eff. % 90<br />
n 2920-2930 min -1<br />
P 2 11,0 kW<br />
U 380-415 D<br />
No<br />
V<br />
I 1/1 21,4 A<br />
I max 23,6 A<br />
cos 0.89-0.87<br />
CL F IP 55<br />
DE NDE<br />
96075740<br />
Example 1<br />
These data are given:<br />
Max. output<br />
current<br />
<strong>Grundfos</strong> <strong>CUE</strong><br />
voltage range is 3 x 460 V<br />
max. motor current is 23.6 A.<br />
enclosure class of the <strong>CUE</strong> must be IP21.<br />
Select the <strong>CUE</strong> according to the selection tables in section<br />
Mains supply 3 x 440 - 500V on 43.<br />
Data of the <strong>CUE</strong> selected:<br />
<strong>CUE</strong><br />
Max. output current: 27A<br />
Product number (IP21): 91136772<br />
TM04 0375 0608<br />
39
40<br />
<strong>CUE</strong> selection<br />
Special conditions<br />
Derating must be taken into account when using the<br />
<strong>CUE</strong> in these situations:<br />
low air pressure (heights)<br />
low speeds<br />
installations with long motor cables<br />
cables with a large cross-section<br />
high ambient temperature.<br />
The required action is described in the next sections.<br />
Low air pressure<br />
At low air pressure, the cooling capability of air is<br />
reduced.<br />
At altitudes above 3,280 ft (1,000 m), the max. output<br />
current should be derated in accordance with the diagram<br />
in fig. 49.<br />
3,280 ft (1km) 6,600 ft (2 km) 9,800 ft (3 km)<br />
Fig. 49 Derating of output current at low air pressure<br />
At altitudes above 6,600 ft (2,000 m), PELV cannot be<br />
met. PELV = Protective Extra Low Voltage.<br />
An alternative is to lower the ambient temperature at<br />
high altitudes and thereby ensure 100% output current<br />
at high altitudes.<br />
Example 2<br />
At an altitude of 6,600 ft (2,000 m), the output current<br />
27 A of the selected <strong>CUE</strong> in example 1 must be derated<br />
to 92% according to fig. 49. This is equal to 25 A.<br />
TM04 0222 5107<br />
<strong>Grundfos</strong> <strong>CUE</strong><br />
High ambient temperature<br />
If the output current is reduced to 80 % of the nominal<br />
output current of the <strong>CUE</strong> in questions, the ambient<br />
may be 5 °C higher.<br />
The other possibility is to use a unit one size bigger. For<br />
higher temperature increases, bigger units are<br />
required. The efficiency of the <strong>CUE</strong> will, however, be<br />
reduced at higher temperatures.<br />
If the <strong>CUE</strong> gets too hot, it will reduce the switching<br />
frequency.<br />
Note that the nominal temperature rating depends on<br />
the enclosure type.<br />
The maximum ambient temperature of the different<br />
enclosures can be found in section Technical data on<br />
p. 45.
<strong>CUE</strong> selection<br />
Selection tables<br />
Mains supply 1 x 200-240 V<br />
Rated<br />
Input<br />
Voltage<br />
1 x 200-240V<br />
<strong>CUE</strong><br />
output<br />
amps<br />
enclosure<br />
rating<br />
* includes <strong>CUE</strong> and 0-120 psi 4-20mA sensor<br />
<strong>CUE</strong> only<br />
part number<br />
<strong>CUE</strong> constant<br />
pressure*<br />
part number<br />
Enclosure<br />
Max<br />
conductor<br />
(AWG)<br />
Efficiency<br />
<strong>Grundfos</strong> <strong>CUE</strong><br />
output filter<br />
dU/dt Sine wave<br />
6.6 IP21 91136746 91136789 A3 10 0.96 96754973<br />
6.6 IP55 91136854 91136908 A5 10 0.96 96754973<br />
7.5 IP21 91136832 91136843 B1 8 0.96 96754973<br />
7.5 IP55 91136855 91136909 B1 8 0.96 96754973<br />
10.6 IP21 91136833 91136844 B1 8 0.96 96754976<br />
10.6 IP55 91136856 91136910 B1 8 0.96 96754976<br />
12.5 IP21 91136834 91136845 B1 8 0.96 96754976<br />
12.5 IP55 91136857 91136911 B1 8 0.96 96754976<br />
16.7 IP21 91136835 91136846 B1 8 0.96 96754976<br />
16.7 IP55 91136858 91136912 B1 8 0.96 96754976<br />
24.2 IP21 91136836 91136847 B1 8 0.98 96754977<br />
24.2 IP55 91136859 91136913 B1 8 0.98 96754977<br />
30.8 IP21 91136837 91136848 B2 2 0.98 96754978<br />
30.8 IP55 91136860 91136914 B2 2 0.98 96754978<br />
41
42<br />
<strong>CUE</strong> selection<br />
Mains supply 3 x 200-240 V<br />
Rated<br />
Input<br />
Voltage<br />
3 x 200-240V<br />
<strong>CUE</strong><br />
output<br />
amps<br />
enclosure<br />
rating<br />
* includes <strong>CUE</strong> and 0-120 psi 4-20mA sensor<br />
<strong>CUE</strong> only<br />
part number<br />
<strong>CUE</strong> constant<br />
pressure*<br />
part number<br />
Enclosure<br />
Max<br />
conductor<br />
(AWG)<br />
Efficiency<br />
<strong>Grundfos</strong> <strong>CUE</strong><br />
output filter<br />
dU/dt Sine wave<br />
4.6 IP21 91136747 91136790 A2 10 0.95 96754973<br />
4.6 IP55 91136861 91136915 A5 10 0.95 96754973<br />
6.6 IP21 91136748 91136791 A2 10 0.96 96754973<br />
6.6 IP55 91136862 91136916 A5 10 0.96 96754973<br />
7.5 IP21 91136749 91136792 A2 10 0.96 96754973<br />
7.5 IP55 91136863 91136917 A5 10 0.96 96754973<br />
10.6 IP21 91136750 91136793 A2 10 0.96 96754976<br />
10.6 IP55 91136864 91136918 A5 10 0.96 96754976<br />
12.5 IP21 91136751 91136794 A3 10 0.96 96754976<br />
12.5 IP55 91136865 91136919 A5 10 0.96 96754976<br />
16.7 IP21 91136752 91136795 A3 10 0.96 96754976<br />
16.7 IP55 91136866 91136920 A5 10 0.96 96754976<br />
24.2 IP21 91136753 91136796 B3 8 0.96 96754977<br />
24.2 IP55 91136867 91136921 B1 8 0.96 96754977<br />
30.8 IP21 91136754 91136797 B3 8 0.96 96754978<br />
30.8 IP55 91136868 91136922 B1 8 0.96 96754978<br />
46.2 IP21 91136755 91136798 B3 8 0.96 96755019<br />
46.2 IP55 91136869 91136923 B1 8 0.96 96755019<br />
59.4 IP21 91136756 91136799 B4 2 0.96 96755021<br />
59.4 IP55 91136870 91136924 B2 2 0.96 96755021<br />
74.8 IP21 91136757 91136800 B4 1/0 0.96 96755032<br />
74.8 IP55 91136871 91136925 C1 1/0 0.96 96755032<br />
88 IP21 91136758 91136801 C3 1/0 0.97 96755033<br />
88 IP55 91136872 91136926 C1 1/0 0.97 96755033<br />
115 IP21 91136759 91136802 C3 1/0 0.97 96755033<br />
115 IP55 91136873 91136927 C1 1/0 0.97 96755033<br />
143 IP21 91136760 91136803 C4 4/0 0.97 96755034<br />
143 IP55 91136874 91136928 C2 4/0 0.97 96755034<br />
170 IP21 91136761 91136804 C4 250 MCM 0.97 96755034<br />
170 IP55 91136875 91136929 C2 250 MCM 0.97 96755034
<strong>CUE</strong> selection<br />
Mains supply 3 x 440 - 500V<br />
Rated<br />
Input<br />
Voltage<br />
3 x 440 - 500V<br />
<strong>CUE</strong><br />
output<br />
amps<br />
enclosure<br />
rating<br />
* includes <strong>CUE</strong> and 0-120 psi 4-20mA sensor<br />
<strong>CUE</strong> only<br />
part number<br />
<strong>CUE</strong> constant<br />
pressure*<br />
part number<br />
Enclosure<br />
Max<br />
conductor<br />
(AWG)<br />
Efficiency<br />
<strong>Grundfos</strong> <strong>CUE</strong><br />
output filter<br />
dU/dt Sine wave<br />
1.6 IP21 91136762 91136805 A2 10 0.95 96754941<br />
1.6 IP55 91136876 91136930 A5 10 0.95 96754941<br />
2.1 IP21 91136763 91136806 A2 10 0.96 96754941<br />
2.1 IP55 91136877 91136931 A5 10 0.96 96754941<br />
2.7 IP21 91136764 91136807 A2 10 0.96 96754972<br />
2.7 IP55 91136878 91136932 A5 10 0.96 96754972<br />
3.4 IP21 91136765 91136808 A2 10 0.97 96754972<br />
3.4 IP55 91136879 91136933 A5 10 0.97 96754972<br />
4.8 IP21 91136766 91136809 A2 10 0.97 96754973<br />
4.8 IP55 91136880 91136934 A5 10 0.97 96754973<br />
6.3 IP21 91136767 91136810 A2 10 0.97 96754973<br />
6.3 IP55 91136881 91136935 A5 10 0.97 96754973<br />
8.2 IP21 91136768 91136811 A2 10 0.97 96754974<br />
8.2 IP55 91136882 91136936 A5 10 0.97 96754974<br />
11 IP21 91136769 91136812 A3 10 0.97 96754976<br />
11 IP55 91136883 91136937 A5 10 0.97 96754976<br />
14.5 IP21 91136770 91136813 A3 10 0.97 96754976<br />
14.5 IP55 91136884 91136938 A5 10 0.97 96754976<br />
21 IP21 91136771 91136814 B3 8 0.98 96755062 96754977<br />
21 IP55 91136885 91136939 B1 8 0.98 96755062 96754977<br />
27 IP21 91136772 91136815 B3 8 0.98 96755063 96754978<br />
27 IP55 91136886 91136940 B1 8 0.98 96755063 96754978<br />
34 IP21 91136773 91136816 B3 8 0.98 96755063 96754978<br />
34 IP55 91136887 91136941 B1 8 0.98 96755063 96754978<br />
40 IP21 91136774 91136817 B4 2 0.98 96755063 96755019<br />
40 IP55 91136888 91136942 B2 2 0.98 96755063 96755019<br />
52 IP21 91136775 91136818 B4 2 0.98 96755064 96755021<br />
52 IP55 91136889 91136943 B2 2 0.98 96755064 96755021<br />
65 IP21 91136776 91136819 B4 1/0 0.98 96755064 96755032<br />
65 IP55 91136890 91136944 C1 1/0 0.98 96755064 96755032<br />
80 IP21 91136777 91136820 C3 1/0 0.98 96755066 96755033<br />
80 IP55 91136891 91136945 C1 1/0 0.98 96755066 96755033<br />
105 IP21 91136778 91136821 C3 1/0 0.98 96755066 96755033<br />
105 IP55 91136892 91136946 C1 1/0 0.98 96755066 96755033<br />
130 IP21 91136779 91136822 C4 4/0 0.98 96755067 96755034<br />
130 IP55 91136893 91136947 C2 4/0 0.98 96755067 96755034<br />
160 IP21 91136780 91136823 C4 250 MCM 0.99 96755067 96755034<br />
160 IP55 91136894 91136948 C2 250 MCM 0.99 96755067 96755034<br />
190 IP21 96754649 - D1 2 x 2/0 0.98 96755069 96755037<br />
190 IP54 96754666 - D1 2 x 2/0 0.98 96755069 96755037<br />
240 IP21 96754651 - D1 2 x 2/0 0.98 96755069 96755037<br />
240 IP54 96754669 - D1 2 x 2/0 0.98 96755069 96755037<br />
43
44<br />
<strong>CUE</strong> selection<br />
Mains supply 3 x 525-600 V<br />
Rated<br />
Input<br />
Voltage<br />
3 x 525 - 600V<br />
<strong>CUE</strong><br />
output<br />
amps<br />
enclosure<br />
rating<br />
* includes <strong>CUE</strong> and 0-120 psi 4-20mA sensor<br />
<strong>CUE</strong> only<br />
part number<br />
<strong>CUE</strong> constant<br />
pressure*<br />
part number<br />
Enclosure<br />
Max<br />
conductor<br />
(AWG)<br />
Efficiency<br />
<strong>Grundfos</strong> <strong>CUE</strong><br />
output filter<br />
dU/dt Sine wave<br />
1.7 IP21 91136781 91136824 A3 10 0.97 96755040<br />
1.7 IP55 91136900 91136954 A5 10 0.97 96755040<br />
2.4 IP21 91136782 91136825 A3 10 0.97 96755040<br />
2.4 IP55 91136901 91136955 A5 10 0.97 96755040<br />
2.7 IP21 91136783 91136826 A3 10 0.97 96755040<br />
2.7 IP55 91136902 91136956 A5 10 0.97 96755040<br />
3.9 IP21 91136784 91136827 A3 10 0.97 96755040<br />
3.9 IP55 91136903 91136957 A5 10 0.97 96755040<br />
4.9 IP21 91136785 91136828 A3 10 0.97 96755040<br />
4.9 IP55 91136904 91136958 A5 10 0.97 96755040<br />
6.1 IP21 91136786 91136829 A3 10 0.97 96755040<br />
6.1 IP55 91136905 91136959 A5 10 0.97 96755040<br />
9 IP21 91136787 91136830 A3 10 0.97 96755040<br />
9 IP55 91136906 91136960 A5 10 0.97 96755040<br />
11 IP21 91136788 91136831 A3 10 0.97 96755040<br />
11 IP55 91136907 91136961 A5 10 0.97 96755040
Technical data<br />
Main dimensions and weight<br />
TM03 9000 2807<br />
<strong>Grundfos</strong> <strong>CUE</strong><br />
Fig. 50 Enclosures A2 and A3 Fig. 51 Enclosures A5, B1, B2, B3, B4, C1, C2, C3 and C4<br />
Fig. 52 Enclosures D1 and D2<br />
Enclosure<br />
A2 10.55<br />
(268)<br />
with IP21/NEMA1 kit 14.76<br />
(375)<br />
A3 10.55<br />
(268)<br />
with IP21/NEMA1 kit 14.76<br />
(375)<br />
A5 16.54<br />
(420)<br />
B1 18.90<br />
(480)<br />
B2 25.59<br />
(650)<br />
B3 15.71<br />
(399)<br />
B4, C3, C4<br />
Height [in (mm)] 1) Width [in (mm)] 1) Depth [in (mm)] 1) Screw holes [in (mm)] Weight<br />
[lb (kg)]<br />
A a B b C C 2) c ∅d ∅e f<br />
10.12<br />
(257)<br />
13.78<br />
(350)<br />
10.12<br />
(257)<br />
13.78<br />
(350)<br />
15.83<br />
402)<br />
17.87<br />
(454)<br />
24.57<br />
(624)<br />
14.96<br />
(380)<br />
with IP21/NEMA1 kit 18.71<br />
(475) –<br />
B4 20.47<br />
(520)<br />
19.49<br />
(495)<br />
with IP21/NEMA1 kit 26.38<br />
(670) –<br />
C1 26.77<br />
(680)<br />
25.52<br />
(648)<br />
3.54<br />
(90)<br />
3.54<br />
(90)<br />
5.12<br />
(130)<br />
5.12<br />
(130)<br />
9.53<br />
(242)<br />
9.53<br />
(242)<br />
9.53<br />
(242)<br />
6.50<br />
(165)<br />
2.76<br />
(70)<br />
2.76<br />
(70)<br />
4.34<br />
(110)<br />
4.34<br />
(110)<br />
8.47<br />
(215)<br />
8.27<br />
(210)<br />
8.27<br />
(210)<br />
5.52<br />
(140)<br />
6.50<br />
(165) –<br />
9.09 in<br />
(231)<br />
7.87<br />
(200)<br />
10.04<br />
(255) –<br />
12.13 in<br />
(308)<br />
10.71<br />
(272)<br />
8.08<br />
(205)<br />
8.08<br />
(205)<br />
8.08<br />
(205)<br />
8.08<br />
(205)<br />
7.87<br />
(200)<br />
10.24<br />
(260)<br />
10.24<br />
(260)<br />
9.76<br />
(248)<br />
9.80<br />
(249)<br />
9.53<br />
(242)<br />
9.69<br />
(246)<br />
12.21<br />
(310)<br />
8.62<br />
(219)<br />
8.62<br />
(219)<br />
8.62<br />
(219)<br />
8.62<br />
(219)<br />
7.87<br />
(200)<br />
10.24<br />
(260)<br />
10.24<br />
(260)<br />
10.32<br />
(262)<br />
10.32<br />
(262)<br />
.315<br />
(8.0)<br />
.315<br />
(8.0)<br />
.315<br />
(8.0)<br />
.315<br />
(8.0)<br />
.323<br />
(8.2)<br />
.472<br />
(12 0)<br />
.472<br />
(12 0)<br />
.315<br />
(8 0)<br />
.315<br />
(8 0)<br />
.433<br />
(11)<br />
.433<br />
(11)<br />
.433<br />
(11)<br />
.433<br />
(11)<br />
.472<br />
(12)<br />
.748<br />
(19)<br />
.748<br />
(19)<br />
.472<br />
(12)<br />
.472<br />
(12)<br />
9.53<br />
(242) – –<br />
9.69<br />
(246) – –<br />
12.21<br />
(310)<br />
.472<br />
(12 0)<br />
.748<br />
(19)<br />
.217<br />
(5.5)<br />
.217<br />
(5.5)<br />
.217<br />
(5.5)<br />
.217<br />
(5.5)<br />
.256<br />
(6.5)<br />
.354<br />
(9.0)<br />
.354<br />
(9.0)<br />
.268<br />
(6.8)<br />
.268<br />
(6.8)<br />
.335<br />
(8.5)<br />
.335<br />
(8.5)<br />
.354<br />
(9.0)<br />
.354<br />
(9.0)<br />
.354<br />
(9.0)<br />
.354<br />
(9.0)<br />
.354<br />
(9.0)<br />
.354<br />
(9.0)<br />
.354<br />
(9.0)<br />
.354<br />
(9.0)<br />
.311<br />
(7.9)<br />
10.8<br />
(4.9)<br />
11.7<br />
(5.3)<br />
14.6<br />
(6.6)<br />
15.4<br />
(7.0)<br />
30.9<br />
(14)<br />
26.5<br />
(23)<br />
59.5<br />
(27)<br />
26.5<br />
(12)<br />
.311<br />
(7.9) –<br />
.591<br />
(15.0)<br />
51.8<br />
(23.5)<br />
.591<br />
(15.0) –<br />
.386<br />
(9.8)<br />
99.2<br />
(45)<br />
TM03 9002 2807<br />
TM03 9922 4607<br />
45
46<br />
Technical data<br />
Enclosure<br />
C2 30.31<br />
(770)<br />
C3 21.65<br />
(550)<br />
29.09<br />
(739)<br />
20.51<br />
(521)<br />
with IP21/NEMA1 kit 21.65<br />
(755) –<br />
C4 25.98<br />
(660)<br />
24.84<br />
(631)<br />
with IP21/NEMA1 kit 37.40<br />
(950) –<br />
D1 47.60<br />
(1209)<br />
D2 62.56<br />
(1589)<br />
45.43<br />
(1154)<br />
60.43<br />
(1535)<br />
1) The dimensions are maximum height, width and depth.<br />
2) Depth with MCB 114 option<br />
Shipping dimensions of D1 and D2:<br />
Height x width x length = 650 x 570 x 1730 mm.<br />
14.57<br />
(370)<br />
12.13<br />
(308)<br />
13.15<br />
(334)<br />
10.63<br />
(270)<br />
12.95<br />
(329) –<br />
14.57<br />
(370)<br />
12.99<br />
(330)<br />
15.39<br />
(391) –<br />
16.54<br />
(420)<br />
16.54<br />
(420)<br />
11.97<br />
(304)<br />
11.97<br />
(304)<br />
13.19<br />
(335)<br />
13.11<br />
(333)<br />
13.27<br />
(337)<br />
13.11<br />
(333)<br />
13.27<br />
(337)<br />
13.19<br />
(335)<br />
14.96<br />
(380) –<br />
14.96<br />
(380) –<br />
.472<br />
(12 0)<br />
.748<br />
(19)<br />
13.11<br />
(333)<br />
13.27<br />
– –<br />
(337)<br />
13.11<br />
– –<br />
(333)<br />
13.27<br />
– –<br />
(337) – –<br />
.787<br />
(20)<br />
.787<br />
(20)<br />
.433<br />
(11)<br />
.433<br />
(11)<br />
.354<br />
(9.0)<br />
.335<br />
(8.5)<br />
.335<br />
(8.5)<br />
.335<br />
(8.5)<br />
.335<br />
(8.5)<br />
.433<br />
(11)<br />
.433<br />
(11)<br />
<strong>Grundfos</strong> <strong>CUE</strong><br />
Height [in (mm)] 1) Width [in (mm)] 1) Depth [in (mm)] 1) Screw holes [in (mm)] Weight<br />
[lb (kg)]<br />
A a B b C C 2) c ∅d ∅e f<br />
.386<br />
(9.8)<br />
.669<br />
(17.0)<br />
.669<br />
(17.0)<br />
.669<br />
(17.0)<br />
.669<br />
(17.0)<br />
.984<br />
(25)<br />
.984<br />
(25)<br />
143.3<br />
(65)<br />
77.2<br />
(35)<br />
–<br />
110 2<br />
(50)<br />
–<br />
229.3<br />
(104)<br />
332.9<br />
(151)
Technical data<br />
Surroundings<br />
Relative humidity 5-95 % RH<br />
Minimum ambient temperature at full operation 32° F (0 °C)<br />
Minimum ambient temperature at reduced operation<br />
14° F (–10 °C)<br />
Temperature during storage and transportation<br />
–13° F to 149° F<br />
(–25 to 65 °C)<br />
Storage duration Max. 6 months<br />
Maximum altitude above sea level with full performance<br />
3,280 ft (1 km)<br />
Maximum altitude above sea level with performance<br />
reduction<br />
<strong>CUE</strong>, up to 160 amps<br />
6,600 ft (2 km)<br />
Ambient temperature Max. 122 °F (50 °C)<br />
Average ambient temperature over 24 hours<br />
<strong>CUE</strong>, 190 amps and above<br />
Max. 113° F (45 °C)<br />
Ambient temperature Max. 113° F (45 °C)<br />
Average ambient temperature over 24 hours Max. 104° F (40 °C)<br />
Note: The <strong>CUE</strong> comes in a packaging which is not suitable<br />
for outdoor storage.<br />
Sound pressure level<br />
Maximum sound pressure level measured at a<br />
distance of 1 m from the unit:<br />
Enclosure Sound pressure level [dBA]<br />
A2 60<br />
A3 60<br />
A5 63<br />
B1 67<br />
B2 70<br />
B3 63 1)<br />
B4 63<br />
C1 62<br />
C2 65<br />
C3 67<br />
C4 –<br />
D1 76<br />
D2 74<br />
1) The sound pressure level for B3 in the 3 x 525-600 V range is 70 dBA.<br />
The sound pressure level of a motor controlled by a frequency<br />
converter may be higher than that of a corresponding<br />
motor which is not controlled by a frequency<br />
converter.<br />
Terminal tightening torques<br />
1) Conductor cross-section ≤ 95 mm 2 .<br />
2) Conductor cross-section ≥ 95 mm 2 .<br />
Cables<br />
Cable length<br />
Cable cross-section to signal terminals<br />
<strong>Grundfos</strong> <strong>CUE</strong><br />
Tightening torque [Nm]<br />
Enclosure<br />
Mains Motor Ground Relay<br />
A2 1.8 1.8 3 0.6<br />
A3 1.8 1.8 3 0.6<br />
A5 1.8 1.8 3 0.6<br />
B1 1.8 1.8 3 0.6<br />
B2 4.5 4.5 3 0.6<br />
B3 1.8 1.8 3 0.6<br />
B4 4.5 4.5 3 0.6<br />
C1 10 10 3 0.6<br />
C2 141) /242) 141) /242) 3 0.6<br />
C3 10 10 3 0.6<br />
C4 141) /242) 141) /242) 3 0.6<br />
D1 19 19 19 0.6<br />
D2 19 19 19 0.6<br />
Maximum length, screened motor cable 500 ft (150 m)<br />
Maximum length, unscreened motor cable 1000 ft (300 m)<br />
Maximum length, signal cable 1000 ft (300 m)<br />
Maximum cable cross-section to signal<br />
terminals, rigid conductor<br />
Maximum cable cross-section to signal<br />
terminals, flexible conductor<br />
Minimum cable cross-section to signal<br />
terminals<br />
16 AWG (1.5 mm 2 )<br />
18 AWG (1.0 mm 2 )<br />
22 AWG (0.5 mm 2 )<br />
Note: For cable cross-section to mains and motor, see<br />
next section Fuses on page 48.<br />
47
48<br />
Technical data<br />
Fuses<br />
Non-UL fuses and conductor cross-section to mains and motor<br />
Typical shaft<br />
power P2<br />
Maximum<br />
fuse size<br />
Fuse<br />
type<br />
Maximum conductor<br />
cross-section<br />
[kW] [A] [AWG] (mm 2 )<br />
1 x 200-240 V<br />
1.1 20 – 12 (4)<br />
1.5 30 – 8 (10)<br />
2.2 40 – 8 (10)<br />
3 40 – 8 (10)<br />
3.7 60 – 8 (10)<br />
5.5 80 – 8 (10)<br />
7.5 100 – 2 (35)<br />
3 x 200-240 V<br />
0.75 10 gG 12 (4)<br />
1.1 20 gG 12 (4)<br />
1.5 20 gG 12 (4)<br />
2.2 20 gG 12 (4)<br />
3 32 gG 12 (4)<br />
3.7 32 gG 12 (4)<br />
5.5 63 gG 8 (10)<br />
7.5 63 gG 8 (10)<br />
11 63 gG 8 (10)<br />
15 80 gG 2 (35)<br />
18.5 125 gG 1 (50)<br />
22 125 gG 1 (50)<br />
30 160 gG 1 (50)<br />
37 200 aR 3/0 (95)<br />
45 250 aR 4/0 (120)<br />
3 x 380-500 V<br />
0.55 10 gG 12 (4)<br />
0.75 10 gG 12 (4)<br />
1.1 10 gG 12 (4)<br />
1.5 10 gG 12 (4)<br />
2.2 20 gG 12 (4)<br />
3 20 gG 12 (4)<br />
4 20 gG 12 (4)<br />
5.5 32 gG 12 (4)<br />
7.5 32 gG 12 (4)<br />
11 63 gG 8 (10)<br />
15 63 gG 8 (10)<br />
18.5 63 gG 8 (10)<br />
22 63 gG 2 (35)<br />
30 80 gG 2 (35)<br />
37 100 gG 1 (50)<br />
45 125 gG 1 (50)<br />
55 160 gG 1 (50)<br />
75 250 aR 3/0 (95)<br />
90 250 aR 4/0 (120)<br />
110 300 gG 2 x 70<br />
132 350 gG 2 x 70<br />
160 400 gG 2 x 185<br />
200 500 gG 2 x 185<br />
250 600 gR 2 x 185<br />
3 x 525-600 V<br />
Typical shaft<br />
power P2<br />
<strong>Grundfos</strong> <strong>CUE</strong><br />
0.75 10 gG 12 (4)<br />
1.1 10 gG 12 (4)<br />
1.5 10 gG 12 (4)<br />
2.2 20 gG 12 (4)<br />
3 20 gG 12 (4)<br />
4 20 gG 12 (4)<br />
5.5 32 gG 12 (4)<br />
7.5 32 gG 12 (4)<br />
3 x 525-690 V<br />
Maximum<br />
fuse size<br />
Fuse<br />
type<br />
Maximum conductor<br />
cross-section<br />
[kW] [A] [AWG] (mm 2 )<br />
11 – – –<br />
15 – – –<br />
18.5 – – –<br />
22 – – –<br />
30 – – –<br />
37 – – –<br />
45 – – –<br />
55 – – –<br />
75 – – –<br />
90 – – –<br />
110 225 – 2 x 70<br />
132 250 – 2 x 70<br />
160 350 – 2 x 185<br />
200 400 – 2 x 185<br />
250 500 – 2 x 185
Technical data<br />
UL fuses and conductor cross-section to mains and motor<br />
<strong>Grundfos</strong> <strong>CUE</strong><br />
<strong>CUE</strong> Output<br />
Fuse type Maximum conductor<br />
Amps<br />
Bussmann Bussmann Bussmann SIBA Littel Fuse Ferraz-Shawmut Ferraz-Shawmut cross-section<br />
[Amp (kW)] RK1 J<br />
T<br />
RK1<br />
RK1<br />
CC<br />
RK1<br />
[AWG]<br />
1 x 200-240 V<br />
6.6 (1.1)<br />
KTN-R20 – – – – – – 10<br />
7.5 (1.5) KTN-R30 – – – – – – 7<br />
10.6 (2.2) KTN-R40 – – – – – – 7<br />
12.5 (3) KTN-R40 – – – – – – 7<br />
16.7 (3.7) KTN-R60 – – – – – – 7<br />
24.2 (5.5) – – – – – – – 7<br />
30.8 (7.5) – – – – – – – 2<br />
3 x 200-240 V<br />
4.6 (0.75) KTN-R10 JKS-10 JJN-10 5017906-010 KTN-R10 ATM-R10 A2K-10R 10<br />
6.6 (1.1) KTN-R20 JKS-20 JJN-20 5017906-020 KTN-R20 ATM-R20 A2K-20R 10<br />
7.5 (1.5) KTN-R20 JKS-20 JJN-20 5017906-020 KTN-R20 ATM-R20 A2K-20R 10<br />
10.6 (2.2) KTN-R20 JKS-20 JJN-20 5017906-020 KTN-R20 ATM-R20 A2K-20R 10<br />
12.5 (3) KTN-R30 JKS-30 JJN-30 5012406-032 KTN-R30 ATM-R30 A2K-30R 10<br />
16.7 (3.7) KTN-R30 JKS-30 JJN-30 5012406-032 KTN-R30 ATM-R30 A2K-30R 10<br />
24.2 (5.5) KTN-R50 JKS-50 JJN-50 5012406-050 KLN-R50 – A2K-50R 7<br />
30.8 (7.5) KTN-R50 JKS-60 JJN-60 5012406-050 KLN-R60 – A2K-50R 7<br />
46.2 (11) KTN-R60 JKS-60 JJN-60 5014006-063 KLN-R60 A2K-60R A2K-60R 7<br />
59.4 (15) KTN-R80 JKS-80 JJN-80 5014006-080 KLN-R80 A2K-80R A2K-80R 2<br />
74.8 (18.5) KTN-R125 JKS-150 JJN-125 2028220-125 KLN-R125 A2K-125R A2K-125R 1/0<br />
88 (22) KTN-R125 JKS-150 JJN-125 2028220-125 KLN-R125 A2K-125R A2K-125R 1/0<br />
115 (30) FWX-150 – – 2028220-150 L25S-150 A25X-150 A25X-150 1/0<br />
143 (37) FWX-200 – – 2028220-200 L25S-200 A25X-200 A25X-200 4/0<br />
170 (45) FWX-250 – – 2028220-250 L25S-250 A25X-250 A25X-250 250 MCM<br />
3 x 380-500 V<br />
1.6 (0.55) KTS-R10 JKS-10 JJS-10 5017906-010 KTN-R10 ATM-R10 A2K-10R 10<br />
2.1 (0.75) KTS-R10 JKS-10 JJS-10 5017906-010 KTN-R10 ATM-R10 A2K-10R 10<br />
2.7 (1.1) KTS-R10 JKS-10 JJS-10 5017906-010 KTN-R10 ATM-R10 A2K-10R 10<br />
3.4 (1.5) KTS-R10 JKS-10 JJS-10 5017906-010 KTN-R10 ATM-R10 A2K-10R 10<br />
4.3 (2.2) KTS-R20 JKS-20 JJS-20 5017906-020 KTN-R20 ATM-R20 A2K-20R 10<br />
6.3 (3) KTS-R20 JKS-20 JJS-20 5017906-020 KTN-R20 ATM-R20 A2K-20R 10<br />
8.2 (4) KTS-R20 JKS-20 JJS-20 5017906-020 KTN-R20 ATM-R20 A2K-20R 10<br />
11 (5.5) KTS-R30 JKS-30 JJS-30 5012406-032 KTN-R30 ATM-R30 A2K-30R 10<br />
14.5 (7.5) KTS-R30 JKS-30 JJS-30 5012406-032 KTN-R30 ATM-R30 A2K-30R 10<br />
21 (11) KTS-R40 JKS-40 JJS-40 5014006-040 KLS-R40 – A6K-40R 7<br />
27 (15) KTS-R40 JKS-40 JJS-40 5014006-040 KLS-R40 – A6K-40R 7<br />
34 (18.5) KTS-R50 JKS-50 JJS-50 5014006-050 KLS-R50 – A6K-50R 7<br />
40 (22) KTS-R60 JKS-60 JJS-60 5014006-063 KLS-R60 – A6K-60R 2<br />
52 (30) KTS-R80 JKS-80 JJS-80 2028220-100 KLS-R80 – A6K-80R 2<br />
65 (37) KTS-R100 JKS-100 JJS-100 2028220-125 KLS-R100 – A6K-100R 1/0<br />
80 (45) KTS-R125 JKS-150 JJS-150 2028220-125 KLS-R125 – A6K-125R 1/0<br />
105 (55) KTS-R150 JKS-150 JJS-150 2028220-160 KLS-R150 – A6K-150R 1/0<br />
130 (75) FWH-220 – – 2028220-200 L50S-225 – A50-P225 4/0<br />
160 (90) FWH-250 – – 2028220-250 L50S-250 – A50-P250 250 MCM<br />
3 x 525-600 V<br />
1.7 (0.75) KTS-R10 JKS-10 JJS-10 5017906-010 KTN-R10 ATM-R10 A2K-10R 10<br />
2.4 (1.1) KTS-R10 JKS-10 JJS-10 5017906-010 KTN-R10 ATM-R10 A2K-10R 10<br />
2.7 (1.5) KTS-R10 JKS-10 JJS-10 5017906-010 KTN-R10 ATM-R10 A2K-10R 10<br />
3.9 (2.2) KTS-R20 JKS-20 JJS-20 5017906-020 KTN-R20 ATM-R20 A2K-20R 10<br />
4.9 (3) KTS-R20 JKS-20 JJS-20 5017906-020 KTN-R20 ATM-R20 A2K-20R 10<br />
6.1 (4) KTS-R20 JKS-20 JJS-20 5017906-020 KTN-R20 ATM-R20 A2K-20R 10<br />
9 (5.5) KTS-R30 JKS-30 JJS-30 5012406-032 KTN-R30 ATM-R30 A2K-30R 10<br />
49
50<br />
Technical data<br />
<strong>Grundfos</strong> <strong>CUE</strong><br />
<strong>CUE</strong> Output<br />
Fuse type Maximum conductor<br />
Amps<br />
Bussmann Bussmann Bussmann SIBA Littel Fuse Ferraz-Shawmut Ferraz-Shawmut cross-section<br />
[Amp (kW)] RK1 J<br />
T<br />
RK1<br />
RK1<br />
CC<br />
RK1<br />
[AWG]<br />
11 (7.5) KTS-R30 JKS-30 JJS-30 5012406-032 KTN-R30 ATM-R30 A2K-30R 10<br />
3 x 525-690 V<br />
– – – – – – – – –<br />
– – – – – – – – –<br />
– – – – – – – – –<br />
– – – – – – – – –<br />
– – – – – – – – –<br />
– – – – – – – – –<br />
– – – – – – – – –<br />
– – – – – – – – –<br />
– – – – – – – – –<br />
– – – – – – – – –<br />
<strong>CUE</strong> Output<br />
Fuse type Maximum conductor<br />
Amps Bussmann Bussmann Bussmann Bussmann SIBA Littel Fuse Ferraz-Shawmut cross-section<br />
[Amps (kW)]<br />
3 x 380-500 V<br />
E1958<br />
JFHR2<br />
E4273<br />
T/JDDZ<br />
E4274<br />
H/JDDZ<br />
E125085<br />
JFHR2<br />
E180276<br />
RKI/JDDZ<br />
E71611<br />
JFHR2<br />
E60314<br />
JFHR2<br />
[AWG]<br />
190 (110) FWH-300 JJS-300 NOS-300 170M3017 2028220-315 L50S-300 A50-P300 2 x 2/0<br />
240 (132) FWH-350 JJS-350 NOS-350 170M3018 2028220-315 L50S-350 A50-P350 2 x 2/0<br />
302 (160) FWH-400 JJS-400 NOS-400 170M4012 206xx32-400 L50S-400 A50-P400 2 x 350 MCM<br />
361 (200) FWH-500 JJS-500 NOS-500 170M4014 206xx32-500 L50S-500 A50-P500 2 x 350 MCM<br />
443 (250) FWH-600 JJS-600 NOS-600 170M4016 206xx32-600 L50S-600 A50-P600 2 x 350 MCM<br />
– – – – Bussmann SIBA<br />
– Ferraz-Shawmut<br />
–<br />
E125085 E180276<br />
E76491<br />
3 x 525-690 V<br />
JFHR2 JFHR2<br />
JFHR2<br />
155 (110) – – – 170M3017 2061032.315 – 6.6URD30D08A0315 2 x 2/0<br />
192 (132) – – – 170M3018 2061032.350 – 6.6URD30D08A0350 2 x 2/0<br />
242 (160) – – – 170M4011 2061032.350 – 6.6URD30D08A0350 2 x 350 MCM<br />
290 (200) – – – 170M4012 2061032.400 – 6.6URD30D08A0400 2 x 350 MCM<br />
344 (250) – – – 170M4014 2061032.500 – 6.6URD30D08A0500 2 x 350 MCM
Technical data<br />
Inputs and outputs<br />
Mains supply (L1, L2, L3)<br />
Supply voltage 200-240 V ± 10 %<br />
Supply voltage 380-500 V ± 10 %<br />
Supply voltage 525-600 V ± 10 %<br />
Supply voltage 525-690 V ± 10 %<br />
Supply frequency 50/60 Hz<br />
Maximum temporary imbalance between<br />
phases<br />
3 % of rated value<br />
Leakage current to earth >3.5 mA<br />
Number of cut-ins, enclosure A max. 2 times/min.<br />
Number of cut-ins, enclosures B and C max. 1 time/min.<br />
Number of cut-ins, enclosures D max. 1 time/2 min.<br />
Note: Do not use the supply voltage for switching the<br />
<strong>CUE</strong> on and off.<br />
Motor output (U, V, W)<br />
Output voltage 0-100% 1)<br />
Output frequency 0-100 Hz 2)<br />
Switching on output not recommended<br />
1) Output voltage in% of supply voltage.<br />
2) Depending on the pump family selected.<br />
RS-485 GENIbus connection<br />
Terminal number 68 (A), 69 (B), 61 GND (Y)<br />
The RS-485 circuit is functionally separated from other<br />
central circuits and galvanically separated from the<br />
supply voltage (PELV).<br />
Digital inputs<br />
Terminal number 18, 19, 32, 33<br />
Voltage level 0-24 VDC<br />
Voltage level, open contact > 19 VDC<br />
Voltage level, closed contact < 14 VDC<br />
Maximum voltage on input 28 VDC<br />
Input resistance, Ri Approx. 4 kΩ<br />
All digital inputs are galvanically separated from the<br />
supply voltage (PELV) and other high-voltage terminals.<br />
Signal relays<br />
1) IEC 60947, parts 4 and 5.<br />
<strong>Grundfos</strong> <strong>CUE</strong><br />
Relay 01, terminal number 1 (C), 2 (NO), 3 (NC)<br />
Relay 02, terminal number 4 (C), 5 (NO), 6 (NC)<br />
Maximum terminal load (AC-1) 1)<br />
240 VAC, 2 A<br />
Maximum terminal load (AC-15) 1)<br />
240 VAC, 0.2 A<br />
Maximum terminal load (DC-1) 1)<br />
50 VDC, 1 A<br />
Minimum terminal load<br />
24 V DC 10 mA<br />
24 V AC 20 mA<br />
C Common<br />
NO Normally open<br />
NC Normally closed<br />
The relay contacts are galvanically separated from<br />
other circuits by reinforced insulation (PELV).<br />
Analog inputs<br />
Analog input 1, terminal number 53<br />
Voltage signal A53 = "U" 1)<br />
Voltage range 0-10 V<br />
Input resistance, Ri Approx. 10 kΩ<br />
Maximum voltage ± 20 V<br />
Analog input 2, terminal number 54<br />
Current signal A54 = "I" 1)<br />
Current range 0-20, 4-20 mA<br />
Input resistance, Ri Approx. 200 Ω<br />
Maximum current 30 mA<br />
Maximum fault, terminals 53, 54 0.5 % of full scale<br />
The factory setting is voltage signal “U”.<br />
All analog inputs are galvanically separated from the<br />
supply voltage (PELV) and other high-voltage terminals.<br />
Analog output<br />
Analog output 1, terminal number 42<br />
Current range 0-20 mA<br />
Maximum load to frame 500 Ω<br />
Maximum fault 0.8 % of full scale<br />
The analog output is galvanically separated from the<br />
supply voltage (PELV) and other high-voltage terminals.<br />
MCB 114 sensor input module<br />
Analog input 3, terminal number 2<br />
Current range 0/4-20 mA<br />
Input resistance < 200 Ω<br />
Analog inputs 4, terminal number 4, 5<br />
Analog inputs 5, terminal number 7, 8<br />
Signal type, 2- or 3-wire Pt100/Pt1000<br />
Note: When using Pt100 with 3-wire cable, the resistance<br />
must not exceed 30 Ω.<br />
51
52<br />
Accessories<br />
Product numbers<br />
<strong>CUE</strong> accessories<br />
Add-on module, see page 53 Type Product number<br />
Sensor input module<br />
Control panel, see page 54<br />
MCB 114 96760901<br />
<strong>Grundfos</strong> Local Control Panel GLCP 96809398<br />
Remote-mounting option for GLCP, with 9.8 ft (3 m) cable<br />
Floor-mounting option, see page 55<br />
GLCP remote mounting 96801229<br />
Enclosure D1 and D2, option including pedestal parts and instructions<br />
Output filters, see page 56<br />
Floor mounting 96801230<br />
Sine-wave filters 1)<br />
dU/dt filters 1)<br />
1) Product numbers for sine-wave filters and dU/dt filters, see pages 41 to 44.<br />
Communication modules<br />
Gateways Type Product number<br />
LonWorks gateway CIU 100 96753736<br />
Profibus gateway CIU 150 96753081<br />
Modbus gateway CIU 200 96753082<br />
GSM modem CIU 250 96787106<br />
Sensors<br />
<strong>Grundfos</strong> <strong>CUE</strong><br />
Danfoss pressure sensor Type Measuring range [psi] (bar) Product number<br />
Kit* 0-120 psi (0-8 bar) 96437852<br />
6 ft potted cable 0-200 psi (0-14 bar) 91120777<br />
Kit* 0-87 psi (0-6 bar) 91136169<br />
Pressure connection: NPT 1/2”<br />
Kit* 0-145 psi (0-10 bar) 91136170<br />
Kit* 0-232 psi (0-16 bar) 91136171<br />
Kit* 0-362 psi (0-25 bar) 91136172<br />
Kit* 0-580 psi (0-40 bar) 91136173<br />
Kit* 0-870 psi (0-60 bar) 91136174<br />
<strong>Grundfos</strong> differential pressure sensor option, 0.9 m screened cable<br />
0-8.7 psi (0-0.6 bar) 96611522<br />
Pressure connection: 7/16”<br />
0-14.5 psi (0-1.0 bar) 96611523<br />
Including fittings for pressure connection (1/4" - 7/16"),<br />
0-23 psi (0-1.6 bar) 96611524<br />
brackets for wall and motor mounting,<br />
3 capillary tubes (short/long) and 5 cable clips (black),<br />
installation and operating instructions,<br />
0-36 psi (0-2.5 bar)<br />
0-58 psi (0-4.0 bar)<br />
96611525<br />
96611526<br />
service kit instructions<br />
0-87 psi (0-6.0 bar) 96611527<br />
0-145 psi (0-10 bar) 96611550<br />
* Note: Kits include a 6 ft cable with removable potted plug in addition to a standard plug for remote mounting. All sensors have a 4-20 mA output.<br />
Other accessories<br />
Dry-running protection 1) Type Product number<br />
LiqTec dry-run protector 1 x 115V LiqTec 96556430<br />
LiqTec dry-run protector 1 x 220V LiqTec 96556429<br />
LiqTec Extension Cable Kit LiqTec Ext. Cable 96443676<br />
1) Main pump types CR, CRI, CRN, MTR, SPK, CRK, CHI.<br />
2) Sensor connection: 1/2”.
Accessories<br />
MCB 114 sensor input module<br />
Fig. 53 MCB 114 sensor input module<br />
The MCB 114 offers three additional analog inputs for<br />
the <strong>CUE</strong>:<br />
one analog 0/4-20 mA input for an additional sensor<br />
two analog Pt100/Pt1000 inputs for temperature<br />
sensors.<br />
The three analog inputs are default used for monitoring.<br />
For further information, see section MCB 114 sensor<br />
input module on page 29.<br />
Scope of delivery<br />
The MCB 114 comes with a terminal cover, an<br />
extended frame and an identification label to put onto<br />
the <strong>CUE</strong>.<br />
Terminal cover<br />
Fig. 54 Scope of delivery<br />
Extended frame<br />
MCB 114 sensor<br />
input module<br />
TM04 0293 0308<br />
TM04 0026 4807<br />
Technical data<br />
<strong>Grundfos</strong> <strong>CUE</strong><br />
Relative humidity 5-95% RH<br />
Ambient temperature during operation<br />
14 to 131° F<br />
(–10 to 55° C)<br />
Temperature during storage and transportation<br />
–13 to 158° F<br />
(–25 to 70° C)<br />
Maximum length, signal cable<br />
Analog input 3<br />
984 ft (300 m)<br />
Terminal number 2<br />
Current range 0/4-20 mA<br />
Input resistance<br />
Analog inputs 4 and 5<br />
< 200 Ω<br />
Terminal number 4, 5 and 7, 8<br />
Signal type, 2- or 3-wire Pt100/Pt1000<br />
All analog inputs are galvanically separated from the<br />
supply voltage (PELV) and other high-voltage terminals.<br />
Wiring diagram<br />
+24 V out<br />
Sensor 2<br />
0/4-20 mA<br />
GND<br />
Temperature<br />
sensor 1<br />
GND<br />
Temperature<br />
sensor 2<br />
Fig. 55 Wiring diagram, MCB 114<br />
Terminal Type Function<br />
1 +24 V out Supply to sensor<br />
2 AI 3 Sensor 2, 0/4-20 mA<br />
3 GND Common frame for analog input<br />
4, 5 AI 4 Temperature sensor 1, Pt100/Pt1000<br />
6 GND Common frame for temperature sensor 1<br />
7, 8 AI 5 Temperature sensor 2, Pt100/Pt1000<br />
9 GND Common frame for temperature sensor 2<br />
GND<br />
Terminals 10, 11 and 12 are not used<br />
3-wire<br />
2-wire<br />
TM03 9483 4007<br />
53
54<br />
Accessories<br />
<strong>Grundfos</strong> Local Control Panel, GLCP<br />
GLCP is used for local setting of the <strong>CUE</strong>.<br />
The <strong>CUE</strong> unit comes default with a GLCP fitted, but the<br />
control panel is also available as an option.<br />
Cable is not included in the option.<br />
On<br />
On/<br />
Off<br />
Off<br />
Alarm<br />
><br />
><br />
OK<br />
><br />
><br />
CU <strong>CUE</strong><br />
+<br />
Fig. 56 Control panel of the <strong>CUE</strong><br />
For further information, see the installation and operating<br />
instructions of the <strong>CUE</strong>.<br />
-<br />
TM03 8719 2507<br />
<strong>Grundfos</strong> <strong>CUE</strong><br />
Remote-mounting option for GLCP<br />
By means of a remote-mounting option, the GLCP can<br />
also be moved to the front of a cabinet. The enclosure<br />
is IP65. The fastening screws must be tightened to a<br />
torque of maximum 1 Nm.<br />
The remote-mounting option includes fasteners, 3 m<br />
cable and gasket.<br />
Fig. 57 Remote-mounting option for GLCP<br />
Dimensions<br />
64.5 ± 1 mm<br />
Max. R2<br />
Cutout<br />
129.5 ± 1 mm<br />
Fig. 58 Cabinet mounting, dimensions of cutout<br />
For further information, see the installation and operating<br />
instructions of the remote-mounting option.<br />
Min. 72 mm<br />
TM04 0376 0608<br />
TM04 0377 0608
Accessories<br />
Floor-mounting option<br />
By means of a pedestal, the <strong>CUE</strong> can also be mounted<br />
on the floor. A pedestal has been designed for that purpose.<br />
One pedestal fits both enclosure D1 and D2.<br />
Scope of delivery<br />
Primary pedestal frame<br />
Vented front cover<br />
Two side covers<br />
Two front brackets<br />
Hardware for assembly<br />
Instructions.<br />
Drilling dimensions<br />
Back<br />
Front<br />
Fig. 59 Drilling template for pedestal [mm]<br />
Fig. 60 <strong>CUE</strong> enclosure D1 or D2 on a pedestal<br />
Please see the instructions of the pedestal option for<br />
further information.<br />
TM03 9923 4607<br />
TM03 9895 4607<br />
IP21/NEMA1 kit<br />
<strong>Grundfos</strong> <strong>CUE</strong><br />
An IP20 enclosure can be upgraded to IP21/NEMA1<br />
with the IP20/NEMA1 kit. The power terminals (mains<br />
and motor) will be covered. See fig. 61.<br />
E<br />
B<br />
D<br />
Fig. 61 Example of IP21/NEMA1 kit for enclosure A3<br />
A: Top cover<br />
B: Brim<br />
C: Base part<br />
D: Base cover<br />
E: Screw(s).<br />
If the MCB 114 sensor input module is fitted, the brim<br />
(B) must be fitted on the top cover (A).<br />
A<br />
C<br />
TM04 0372 0608<br />
55
56<br />
Accessories<br />
Output filters<br />
<strong>Grundfos</strong> offers two types of output filter as accessories<br />
for the <strong>CUE</strong>:<br />
dU/dt filters<br />
sine-wave filters.<br />
The filters are in IP20/NEMA1 enclosure.<br />
Fig. 62 Wall-mounted sine-wave filters<br />
Use of output filters<br />
The table below explains in which cases an output filter<br />
is required. From the table, it can be seen if a filter is<br />
needed and which type to use.<br />
Pump type<br />
SP, BM, BMB with<br />
380 V motor and up<br />
Other pumps, noise<br />
reduction<br />
Other pumps, higher<br />
noise reduction<br />
Pumps with 690 V<br />
motor<br />
Typical shaft<br />
power P2<br />
dU/dt filter<br />
Up to 7.5 kW –<br />
11 kW and up<br />
0-492 ft<br />
(0-150 m)<br />
Up to 7.5 kW –<br />
11 kW and up<br />
0-492 ft<br />
(0-150 m)<br />
Up to 7.5 kW –<br />
11 kW and up –<br />
The lengths stated apply to the motor cable.<br />
For information about installation, see page 34.<br />
All<br />
0-492 ft<br />
(0-150 m)<br />
Sine-wave<br />
filter<br />
GrA 4456<br />
0-984 ft<br />
(0-300 m)<br />
492-984 ft<br />
(150-300 m)<br />
0-984 ft<br />
(0-300 m)<br />
492-984 ft<br />
(150-300 m)<br />
0-984 ft<br />
(0-300 m)<br />
0-984 ft<br />
(0-300 m)<br />
492-984 ft<br />
(150-300 m)<br />
<strong>Grundfos</strong> <strong>CUE</strong>
Accessories<br />
Dimensions and weight of output filters<br />
Fig. 63 Wall mounting Fig. 64 Floor mounting<br />
Product number Mounting<br />
Sine-wave filters<br />
dU/dt filters<br />
TM04 0625 0908<br />
<strong>Grundfos</strong> <strong>CUE</strong><br />
Height [in (mm)] Width [in (mm)] Depth [in (mm)] Screw holes [in (mm)] Weight<br />
[lbs (kg)]<br />
A a B b C c ∅d ∅e f<br />
96754941 Wall 7.87 (200) 7.48 (190) 2.95 (75) 2 36 (60) 8 07 (205) – .315 (8) .177 (4.5) 276 (7) 7 3 (3 3)<br />
96754972 Wall 7.87 (200) 7.48 (190) 2.95 (75) 2 36 (60) 8 07 (205) – .315 (8) .177 (4.5) 276 (7) 9 3 (4 2)<br />
96754973 Wall 10 55 (268) 10.12 (257) 3.54 (90) 2.76 (70) 8.11 (206) – .433 (11) .256 (6 5) .315 (8) 101.0 (5.8)<br />
96754974 Wall 10 55 (268) 10.12 (257) 3.54 (90) 2.76 (70) 8 07 (205) – .433 (11) .256 (6 5) .315 (8) 103.9 (7.1)<br />
96754976 Wall 10 55 (268) 10.12 (257) 5.12 (130) 3 54 (90) 8 07 (205) – .433 (11) 256 (6 5) 315 (8) 20.1 (9.1)<br />
96754977 Wall 12 99 (330) 12.28 (312) 5.90 (150) 4.72 (120) 10.24 (260) – .748 (19) .354 (9) .472 (12) 37 3 (16.9)<br />
96754978 Wall 16 93 (430) 16.22 (412) 5.90 (150) 4.72 (120) 10.24 (260) – .748 (19) .354 (9) .472 (12) 43 9 (19.9)<br />
96755019 Wall 20 87 (530) 19.69 (500) 6.69 (170) 4.92 (125) 10.24 (260) – .748 (19) .354 (9) .472 (12) 86.0 (39)<br />
96755021 Wall 24 02 (610) 22.83 (580) 6.69 (170) 4.92 (125) 10.24 (260) – .748 (19) .354 (9) .472 (12) 90.4 (41)<br />
96755032 Wall 24 02 (610) 22.83 (580) 6.69 (170) 5.32 (135) 10.24 (260) – .748 (19) .354 (9) .472 (12) 119 0 (54)<br />
96755033 Floor 20 55 (522) – 26.38 (670) 11.42 (290) 19.69 (500) 18.11 (460) .591 (15) .433 (11) – 191 8 (87)<br />
96755034 Floor 30.79 (782) – 37.01 (940) 15.74 (400) 25.60 (650) 24 02 (610) .591 (15) .433 (11) – 249.1 (113)<br />
96755037 Floor 30.79 (782) – 37.01 (940) 15.74 (400) 25.60 (650) 24 02 (610) .591 (15) .433 (11) – 418.9 (190)<br />
96755038 Floor 30.79 (782) – 37.01 (940) 16 93 (430) 25.60 (650) 24 02 (610) .591 (15) .433 (11) – 540.1 (245)<br />
96755039 Floor 29 21 (742) – 4 39 (1050) 16 93 (430) 29.92 (760) 28 32 (720) .591 (15) .433 (11) – 683.4 (310)<br />
96755040 Wall 16 93 (430) 16.22 (412) 5.90 (150) 4.72 (120) 10.24 (260) – .748 (19) .354 (9) .472 (12) 36 8 (16.7)<br />
96755041 Floor 20 55 (522) – 26.38 (670) 8.66 (220) 19.69 (500) 18.11 (460) .591 (15) .433 (11) – 121 3 (55)<br />
96755042 Floor 20 55 (522) – 26.38 (670) 10 24 (260) 19.69 (500) 18.11 (460) .591 (15) .433 (11) – 154 3 (70)<br />
96755043 Floor 20 55 (522) – 26.38 (670) 12 20 (310) 19.69 (500) 18.11 (460) .591 (15) .433 (11) – 231.5 (105)<br />
96755044 Floor 20 55 (522) – 25.20 (640) 14 96 (380) 19.69 (500) 18.11 (460) .591 (15) .433 (11) – 330.7 (150)<br />
96755045 Floor 30.79 (782) – 35.83 (910) 16 93 (430) 25.60 (650) 24 02 (610) .591 (15) .433 (11) – 485.0 (220)<br />
96755047 Floor 30.79 (782) – 37.01 (940) 19 69 (500) 25.60 (650) 24 02 (610) .591 (15) .433 (11) – 628.3 (285)<br />
96755049 Floor 43.35 (1152) – 50.79 (1290) 19 29 (490) 31.50 (800) 29 92 (760) .591 (15) .433 (11) – 815.7 (370)<br />
96755050 Floor 43.35 (1152) – 50.79 (1290) 21 26 (540) 31.50 (800) 29 92 (760) – – – 1212 5 (550)<br />
96755062 Wall 10 55 (268) 10.12 (257) 4.72 (120) 3 54 (90) 8 07 (205) – .433 (11) 256 (6 5) 315 (8) 11.5 (5.2)<br />
96755063 Wall 12 99 (330) 12.28 (312) 6.69 (170) 4.92 (125) 10.24 (260) – .748 (19) .354 (9) .472 (12) 20.5 (9.3)<br />
96755064 Wall 12 99 (330) 12.28 (312) 6.69 (170) 4.92 (125) 10.24 (260) – .748 (19) .354 (9) .472 (12) 23 6 (10.7)<br />
96755066 Wall 12 99 (330) 12.28 (312) 6.69 (170) 4.92 (125) 10.24 (260) – .748 (19) .354 (9) .472 (12) 28 2 (12.8)<br />
96755067 Floor 18.19 (462) – 24.02 (610) 6.89 (175) 17.32 (440) 15.74 (400) .591 (15) .433 (11) – 72.8 (33)<br />
96755069 Floor 18 23 (463) – 24.02 (610) 7.48 (190) 17.32 (440) 15.74 (400) .591 (15) .433 (11) – 110 2 (50)<br />
96755070 Floor 22.48 (571) – 30.31 (770) 7.48 (190) 21.56 (550) 20 08 (510) .591 (15) .433 (11) – 132.3 (60)<br />
96755071 Floor 20 55 (522) – 26.38 (670) 8.47 (215) 19.69 (500) 18.11 (460) .591 (15) .433 (11) – 127.9 (58)<br />
96755078 Wall – 11.81 (300) 5.91 (150) 4.72 (120) 10.24 (260) – .748 (19) .354 (9) .472 (12) 18.3 (8.3)<br />
96755079 Wall – 12.28 (312) 6.69 (170) 4.92 (125) 10.24 (260) – .748 (19) .354 (9) .472 (12) 20.7 (9.4)<br />
96755080 Wall 12 99 (330) 12.28 (312) 6.69 (170) 4.92 (125) 10.24 (260) – .748 (19) .354 (9) .472 (12) 26.01 (11 8)<br />
96755081 Wall 12 99 (330) 12.28 (312) 6.69 (170) 4.92 (125) 10.24 (260) – .748 (19) .354 (9) .472 (12) 26 9 (12.2)<br />
96755082 Floor 20 55 (522) – 26.38 (670) 8.47 (215) 19.69 (500) 18.11 (460) .591 (15 .433 (11) – 99.2 (45)<br />
96755083 Floor 20 55 (522) – 25.20 (640) 8.47 (215) 19.69 (500) 18.11 (460) .591 (15 .433 (11) – 103.6 (47)<br />
96755084 Floor 20 55 (522) – 26.38 (670) 8.47 (215) 19.69 (500) 18.11 (460) .591 (15 .433 (11) – 103.6 (47)<br />
96755085 Floor 20 55 (522) – 26.38 (670) 8.47 (215) 19.69 (500) 18.11 (460) .591 (15 .433 (11) – 114 6 (52)<br />
TM04 0624 0908<br />
57
58<br />
Accessories<br />
<strong>Grundfos</strong> differential pressure<br />
sensor, DPI<br />
Product description<br />
A cable (pos. 1) goes through an M12 x 1.5 pg connection.<br />
See fig. 65.<br />
The sensor housing and parts in contact with the<br />
medium are made of Inox DIN W.-Nr. 1.4305 (pos. 3)<br />
with composite PA top (pos. 2). The pressure connections<br />
(pos. 4) are DIN W.-Nr. 1.4305, 7/16” UNF, and<br />
gaskets are FKM.<br />
4<br />
Fig. 65 DPI position numbers<br />
The sensor is supplied with angular bracket for mounting<br />
on motor or bracket for wall mounting. See fig. 67.<br />
Options with other cable lengths and various fitting connectors<br />
are available.<br />
Dimensions<br />
7/16 - 20 UNF<br />
14<br />
SW 14<br />
P2<br />
P1<br />
Fig. 66 Dimensions, DPI<br />
6<br />
P2<br />
P1<br />
ø45<br />
77<br />
1<br />
2<br />
3<br />
TM03 2057 3505<br />
TM03 2059 3505<br />
Wiring diagram<br />
Fig. 67 Wiring diagram, DPI<br />
No Colour Function<br />
Technical data<br />
<strong>Grundfos</strong> <strong>CUE</strong><br />
1 Brown Supply voltage, 12-30 V<br />
2 Yellow GND<br />
3 Green Control signal<br />
4 White<br />
Test signal. Must not be connected to supply voltage<br />
(conductor can be cut off)<br />
Supply voltage 12-30 VDC<br />
Output signal 4-20 mA<br />
24 V: max. 500 [Ω]<br />
Load [Ω]<br />
16 V: max. 200 [Ω]<br />
12 V: max. 100 [Ω]<br />
Max. system pressure,<br />
P1 and P2 simultaneously<br />
232 psi (16 bar)<br />
Rupture pressure [bar] 1.5 x system pressure<br />
Measuring accuracy 2 5% BFSL<br />
Response time < 0.5 sec<br />
Media temperature range<br />
+14 °F to +158 °F<br />
(–10 °C to +70 °C)<br />
Storage temperature range<br />
–40 °F to 176 °F<br />
(–40 °C to +80 °C)<br />
3-wire 0.13 mm<br />
Electrical connection<br />
2<br />
2.9 ft (0.9 m) cable<br />
M12 x 1.5 in sensor top<br />
Short-circuit proof Yes<br />
Protected against reverse polarity Yes<br />
Over supply voltage Yes<br />
Materials in contact with medium<br />
DIN W.-Nr. 1.4305<br />
FKM and PPS<br />
Enclosure class IP55<br />
Weight 550 g<br />
EMC (electromagnetic compatibility) According to EN 61326-1<br />
Emission/immunity According to EN 61326-1<br />
Connections 7/16”-UNF<br />
Sealing material FKM<br />
TM03 2225 3905
Further product<br />
documentation<br />
WebCAPS<br />
<strong>Grundfos</strong> <strong>CUE</strong><br />
WebCAPS is a Web-based Computer Aided Product<br />
Selection program available on www.grundfos.com.<br />
WebCAPS contains detailed information on more than<br />
185,000 <strong>Grundfos</strong> products in more than 20 languages.<br />
In WebCAPS, all information is divided into 6 sections:<br />
Catalogue<br />
Literature<br />
Service<br />
Sizing<br />
Replacement<br />
CAD drawings.<br />
Catalogue<br />
This section is based on fields of applica ion and pump types, and<br />
contains<br />
technical data<br />
curves (QH, Eta, P1, P2, etc) which can be adapted to the density<br />
and viscosity of the pumped liquid and show the number of<br />
pumps in operation<br />
product photos<br />
dimensional drawings<br />
wiring diagrams<br />
quotation texts, etc.<br />
Literature<br />
In this section you can access all the latest documents of a given<br />
pump, such as<br />
data booklets<br />
installation and operating instructions<br />
service documentation, such as Service kit catalogue and<br />
Service kit instructions<br />
quick guides<br />
product brochures, etc.<br />
Service<br />
This section contains an easy-to-use interactive service catalogue.<br />
Here you can find and identify service parts of bo h existing and discontinued<br />
<strong>Grundfos</strong> pumps.<br />
Furthermore, this section contains service videos showing you how<br />
to replace service parts.<br />
59
60<br />
Further product<br />
documentation<br />
WinCAPS<br />
Fig. 1 WinCAPS CD-ROM<br />
Sizing<br />
0 1<br />
<strong>Grundfos</strong> <strong>CUE</strong><br />
This section is based on different fields of applica ion and installation<br />
examples, and gives easy step-by-step instructions in how to<br />
select the most suitable and efficient pump for your installation<br />
carry out advanced calculations based on energy consumption,<br />
payback periods, load profiles, life cycle costs, etc.<br />
analyse your selected pump via the built-in life cycle cost tool<br />
determine the flow velocity in wastewater applications, etc.<br />
Replacement<br />
In this section you find a guide to selecting and comparing replacement<br />
data of an installed pump in order to replace the pump with a<br />
more efficient <strong>Grundfos</strong> pump.<br />
The section contains replacement data of a wide range of pumps<br />
produced by other manufacturers than <strong>Grundfos</strong>.<br />
Based on an easy step-by-step guide, you can compare <strong>Grundfos</strong><br />
pumps with the one you have installed on your site. When you have<br />
specified the installed pump, the guide will suggest a number of<br />
<strong>Grundfos</strong> pumps which can improve both comfort and efficiency.<br />
CAD drawings<br />
In this section it is possible to download 2-dimensional (2D) and 3dimensional<br />
(3D) CAD drawings of most <strong>Grundfos</strong> pumps.<br />
These formats are available in WebCAPS:<br />
2-dimensional drawings:<br />
.dxf, wireframe drawings<br />
.dwg, wireframe drawings.<br />
3-dimensional drawings:<br />
.dwg, wireframe drawings (without surfaces)<br />
.stp, solid drawings (with surfaces)<br />
.eprt, E-drawings.<br />
WinCAPS is a Windows-based Computer Aided<br />
Product Selection program containing detailed information<br />
on more than 185,000 <strong>Grundfos</strong> products in more<br />
than 20 languages.<br />
The program contains the same features and functions<br />
as WebCAPS, but is an ideal solution if no Internet<br />
connection is available.<br />
WinCAPS is available on CD-ROM and updated once a<br />
year.
<strong>Grundfos</strong> <strong>CUE</strong><br />
61
62<br />
<strong>Grundfos</strong> <strong>CUE</strong>
<strong>Grundfos</strong> <strong>CUE</strong><br />
63
L-<strong>CUE</strong>-PG-01 1009<br />
Rep. 1108<br />
GRUNDFOS Pumps Corporation<br />
17100 West 118th Terrace<br />
Olathe, Kansas 66061<br />
Phone: +1-913-227-3400<br />
Telefax: +1-913-227-3500<br />
www.grundfos.com<br />
US<br />
© 2008, 2009 <strong>Grundfos</strong> Pumps Corp.<br />
GRUNDFOS Canada Inc.<br />
2941 Brighton Road<br />
Oakville, Ontario L6H 6C9 Canada<br />
Phone: +1-905 829 9533<br />
Telefax: +1-905 829 9512<br />
Bombas GRUNDFOS de Mexico S.A. de C.V.<br />
Boulevard TLC No. 15<br />
Parque Industrial Stiva Aeropuerto<br />
Apodaca, N.L. Mexico 66600<br />
Phone: +52-81-8144 4000<br />
Telefax: +52-81-8144 4010<br />
Being responsible is our foundation<br />
Thinking ahead makes it possible<br />
Innovation is the essence<br />
Subject to alterations.<br />
The name <strong>Grundfos</strong>, the <strong>Grundfos</strong> logo, and the payoff Be–Think–Innovate are registered trademarks<br />
owned by <strong>Grundfos</strong> Management A/S or <strong>Grundfos</strong> A/S, Denmark. All rights reserved worldwide.