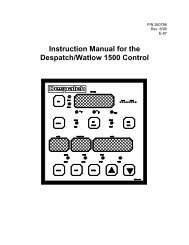
Manual C-188 Rev 8-12 - Despatch Industries
Manual C-188 Rev 8-12 - Despatch Industries
Manual C-188 Rev 8-12 - Despatch Industries
- No tags were found...

Create successful ePaper yourself
Turn your PDF publications into a flip-book with our unique Google optimized e-Paper software.
LBB Series Oven Owner’s <strong>Manual</strong>ABOUT THIS MANUALVersion 15 1LBB SERIES OVENOWNER’S MANUALC-<strong>188</strong>PN 146230VERSION 158/20<strong>12</strong>Copyright © 20<strong>12</strong> by <strong>Despatch</strong> <strong>Industries</strong>.All rights reserved. No part of the contents of this manual may be reproduced, copied or transmitted in any form or by anymeans including graphic, electronic, or mechanical methods or photocopying, recording, or information storage andretrieval systems without the written permission of <strong>Despatch</strong> <strong>Industries</strong>, unless for purchaser's personal use.
ABOUT THIS MANUALLBB Series Oven Owner’s <strong>Manual</strong>2 Version 15<strong>Rev</strong>ision History<strong>Rev</strong>ision Date Author DescriptionCUpdated electrical drawings in DRAWINGSAND SPARE PARTS LISTS section.DCorrections.ECorrection, page 19, set-up parameter tableFParts lists corrections in DRAWINGS ANDSPARE PARTS LISTS sectionGCorrections to SPECIFICATIONS section,addition of options and features in APPENDIXHChange Product Warranty pageIUpdate drawings and High Limit informationJParts lists corrections in DRAWING ANDSPARE PARTS LISTS section. Corrected<strong>Despatch</strong> address.KParts lists corrections in DRAWING ANDSPARE PARTS LISTS sectionLUpdated warranty<strong>12</strong> 3/2011 Livingston <strong>Rev</strong>ise format13 9/2011 Livingston Additional parts tables14 6/20<strong>12</strong> Livingston Update for Protocol 315 8/20<strong>12</strong> Livingston Corrections—Power SectionCopyright © 20<strong>12</strong> by <strong>Despatch</strong> <strong>Industries</strong>.All rights reserved. No part of the contents of this manual may be reproduced, copied or transmitted in any form or by anymeans including graphic, electronic, or mechanical methods or photocopying, recording, or information storage andretrieval systems without the written permission of <strong>Despatch</strong> <strong>Industries</strong>, unless for purchaser's personal use.
LBB Series Oven Owner’s <strong>Manual</strong>ABOUT THIS MANUALVersion 15 58.3.8. LBB2-18-1 ......................................................................................................... 648.3.9. LBB2-27-1 ......................................................................................................... 658.4. Electrical Schematics ............................................................................................. 65FiguresFigure 1. Disconnect Switch.......................................................................................................... 20Figure 2. LBB Forced Convection Benchtop Oven. ..................................................................... 21Figure 3. Horizontal Airflow through the LBB Oven. .................................................................. 21Figure 4. LBB Series Oven Primary Control Instrument .............................................................. 22Figure 5. Protocol 3 Operator Interface. ........................................................................................ 23Figure 6. High Limit Instrument. .................................................................................................. 24Figure 7. LBB Series Oven Name Plate. ....................................................................................... 27Figure 8. LBB Series Oven with Top Removed. ........................................................................... 28Figure 9. Wiring Access through Rear of Oven. ........................................................................... 28Figure 10. Close-up of Connector Block. ...................................................................................... 28Figure 11. LBB Series Oven Control Panel. ................................................................................. 32Figure <strong>12</strong>. Adjust Damper to Set Exhaust Vent by rotating the outer component. ....................... 32Figure 13. Remove Control Panel to Access Control Instrument. ................................................ 46Figure 14. Providing easy access to the Control instrument. ........................................................ 47Figure 15. Remove Old Control and High Limit Instruments and Wiring (Rear View). .............. 47Figure 16. Prepare to remove control instrument by removing the mounting bracket. ................. 48Figure 17. Connections to Control Instrument. ............................................................................. 48Figure 18. High Limit Connector Block on Control Board. .......................................................... 49Figure 19. Press and Hold Tabs to Remove High Limit Instrument. ............................................ 50Figure 20. Connections to High Limit Instrument. ....................................................................... 50Figure 21. Connections to High Limit Instrument. ....................................................................... 50Figure 22. Remove Screws to Remove Each Duct. ....................................................................... 51Figure 23. Typical Heating Element. ............................................................................................ 52Figure 24. Fan Motor Location and Close-up. .............................................................................. 53Figure 25. Optional LBB Oven Stand. .......................................................................................... 57Figure 26. Timer Option Displays and Switches. .......................................................................... 58Figure 27. Stacking Kit Assembly Components. .......................................................................... 60Figure 28. LBB1-23A-1 Schematic. .............................................................................................. 66Figure 29. LBB1-23B-1 Schematic. .............................................................................................. 66Figure 30. LBB1-43A-1 Schematic. .............................................................................................. 66Figure 31. LBB1-43B-1 Schematic. .............................................................................................. 66Figure 32. LBB1-69A-1 Schematic. .............................................................................................. 66Figure 33. LBB1-69B-1 Schematic. .............................................................................................. 66Figure 34. LBB2-<strong>12</strong>-1 Schematic. ................................................................................................. 66Figure 35. LBB2-18-1 Schematic. ................................................................................................. 66Figure 36. LBB2-27-1 Schematic. ................................................................................................. 66TablesTable 1. Operating/Environmental Conditions (For indoor use). .................................................. 14Table 2. Control Instrument Explanations. .................................................................................... 23Table 3. High Limit Instrument Explanations. .............................................................................. 24Table 4. Control Instrument Operating Parameters. ...................................................................... 34Table 5. Control Instrument Set-up Parameters. ........................................................................... 35Copyright © 20<strong>12</strong> by <strong>Despatch</strong> <strong>Industries</strong>.All rights reserved. No part of the contents of this manual may be reproduced, copied or transmitted in any form or by anymeans including graphic, electronic, or mechanical methods or photocopying, recording, or information storage andretrieval systems without the written permission of <strong>Despatch</strong> <strong>Industries</strong>, unless for purchaser's personal use.
ABOUT THIS MANUALLBB Series Oven Owner’s <strong>Manual</strong>6 Version 15Table 6. High Limit instrument Setup Parameters. ....................................................................... 39Table 7. Common Technical Issues and Remedies. ...................................................................... 54Table 8. LBB1-23A-1 Parts. .......................................................................................................... 61Table 9. LBB1-23B-1 Parts. .......................................................................................................... 61Table 10. LBB1-43A-1 Parts. ........................................................................................................ 62Table 11. LBB1-43B-1 Parts. ........................................................................................................ 62Table <strong>12</strong>. LBB1-69A-1 Parts. ........................................................................................................ 63Table 13. LBB1-69B-1 Parts. ........................................................................................................ 63Table 14. LBB2-<strong>12</strong>-1 Parts............................................................................................................ 64Table 15. LBB2-18-1 Parts............................................................................................................ 64Table 16. LBB2-27-1 Parts............................................................................................................ 65Copyright © 20<strong>12</strong> by <strong>Despatch</strong> <strong>Industries</strong>.All rights reserved. No part of the contents of this manual may be reproduced, copied or transmitted in any form or by anymeans including graphic, electronic, or mechanical methods or photocopying, recording, or information storage andretrieval systems without the written permission of <strong>Despatch</strong> <strong>Industries</strong>, unless for purchaser's personal use.
LAC Series Oven Owner’s <strong>Manual</strong>ABOUT THIS MANUALVersion 15 71. About This <strong>Manual</strong>1.1. Important User InformationCopyright © 20<strong>12</strong> by <strong>Despatch</strong> <strong>Industries</strong>.All rights reserved. No part of the contents of this manual may be reproduced, copied, ortransmitted in any form or by any means including graphic, electronic, or mechanical methods orphotocopying, recording, or information storage and retrieval systems without the writtenpermission of the publisher, unless it is for the purchaser's personal use.Printed and bound in the United States of America.The information in this manual is subject to change without notice and does not represent acommitment on the part of <strong>Despatch</strong> <strong>Industries</strong>. <strong>Despatch</strong> <strong>Industries</strong> does not assume anyresponsibility for any errors that may appear in this manual.In no event will <strong>Despatch</strong> <strong>Industries</strong> be liable for technical or editorial omissions made herein,nor for direct, indirect, special, incidental, or consequential damages resulting from the use ordefect of this manual.Values displayed on screens are examples only. Thoughthose values may be typical, contact <strong>Despatch</strong> <strong>Industries</strong> forthe final value.Users of this equipment must comply with operatingprocedures and training of operation personnel as requiredby the Occupational Safety and Health Act (OSHA) of 1970,Section 5 and relevant safety standards, as well as othersafety rules and regulations of state and local governments.Refer to the relevant safety standards in OSHA and NationalFire Protection Association (NFPA), section 86 of 1990.Copyright © 20<strong>12</strong> by <strong>Despatch</strong> <strong>Industries</strong>.All rights reserved. No part of the contents of this manual may be reproduced, copied or transmitted in any form or by anymeans including graphic, electronic, or mechanical methods or photocopying, recording, or information storage andretrieval systems without the written permission of <strong>Despatch</strong> <strong>Industries</strong>, unless for purchaser's personal use.
ABOUT THIS MANUALLAC Series Oven Owner’s <strong>Manual</strong>8 Version 15Danger!Only fully-trained and qualified personnel should setup andmaintain this equipment. Improper setup and operation of thisequipment could cause an explosion that may result inequipment damage, personal injury or possible death.The information in this document is not intended to cover all possible conditions and situationsthat might occur. The end user must exercise caution and common sense when installing ormaintaining <strong>Despatch</strong> <strong>Industries</strong> products. If any questions or problems arise, call <strong>Despatch</strong><strong>Industries</strong> at 1-888-DESPATCH or 1-952-469-5424.1.2. Manufacturer & ServiceThe LBB Series oven is manufactured by <strong>Despatch</strong> <strong>Industries</strong>.<strong>Despatch</strong> has specialized in thermal processing for over 100 years. Technical expertise gainedover those years helps provide innovative solutions to critical applications in vertical markets andcutting edge technology worldwide. <strong>Despatch</strong> products are backed by a drive for long-termcustomer satisfaction and a strong sense of responsibility. The worldwide network of factorytrainedService Professionals is available to support your <strong>Despatch</strong> equipment. From full servicepreventive maintenance to routine repair and certified calibration and uniformity, the <strong>Despatch</strong>service network is positioned to respond to your business needs. Our service programs arecustomized to meet your specific needs using our Advantage Service Assurance Program(ASAP). For more information on ASAP, visit www.despatch.com.Global Headquarters Contact Service & TechnicalSupport<strong>Despatch</strong> <strong>Industries</strong>8860 207th StreetLakeville, MN 55044USAInternational/Main: 1-952-469-5424US toll free: 1-888-337-7282Fax: 1-952-469-4513info@despatch.comwww.despatch.comService: 1-952-469-8230US toll free: 1-800-473-7373Service @despatch.com1.3. Organization of this <strong>Manual</strong>This owner’s manual contains the most comprehensive set of information for the <strong>Despatch</strong> LBBSeries ovens, including installation instructions, theory of operation, operating instructions,among other things.Copyright © 20<strong>12</strong> by <strong>Despatch</strong> <strong>Industries</strong>.All rights reserved. No part of the contents of this manual may be reproduced, copied or transmitted in any form or by anymeans including graphic, electronic, or mechanical methods or photocopying, recording, or information storage andretrieval systems without the written permission of <strong>Despatch</strong> <strong>Industries</strong>, unless for purchaser's personal use.
LAC Series Oven Owner’s <strong>Manual</strong>ABOUT THIS MANUALVersion 15 9Danger!Failure to heed warnings in this instruction manual and on theoven could result in personal injury, property damage or death.1.4. ConventionsThis icon signifies information that describes an unsafecondition that may result in death, serious injury, or damage tothe equipment.Danger!Warning!Caution!NoticeLOG OUTDanger is the signal word used to indicate a hazardoussituation that, if not avoided, will result in death or severeinjury.Warning is the signal word used to indicate a hazardoussituation that, if not avoided, could result in death or severeinjury.Caution is the signal word used to indicate a hazardoussituation that, if not avoided, could result in moderate or minorinjury.Notice is the signal word used to indicate a hazardous situationthat, if not avoided, could result in property damage.This icon signifies supplemental important information.Bold, 10 point sans-serif typeface indicates a specific key orbutton on screen to click.Copyright © 20<strong>12</strong> by <strong>Despatch</strong> <strong>Industries</strong>.All rights reserved. No part of the contents of this manual may be reproduced, copied or transmitted in any form or by anymeans including graphic, electronic, or mechanical methods or photocopying, recording, or information storage andretrieval systems without the written permission of <strong>Despatch</strong> <strong>Industries</strong>, unless for purchaser's personal use.
W0 DABOUT THIS MANUALLAC Series Oven Owner’s <strong>Manual</strong>10 Version 151.5. Specifications1.5.1. DimensionsLBBModelNo.Chamber Sizein (cm)Capacityfeet 3(liters)Overall Sizein (cm)H W D HShelvesProvidedon ShelfCentersin (cm)MaximumNumber ofShelfPositionsChamberDoors1-23 18(46)18(46)<strong>12</strong>(30)2.3(65)24(61)23(58)26(66)2 on 2”(5.1)5 11-43 24(61)14(36)22(56)4.3(<strong>12</strong>2)30(76)19(48)36(91)2 on 2”(5.1)10 11-69 30(76)18(46)22(56)6.9(195)34(86)23(58)36(91)2 on 2”(5.1)10 22-<strong>12</strong> 30(76)20(51)35(89)<strong>12</strong>.1(343)36(91)25(64)51(130)2 on 2”(5.1)16 22-18 37(94)24(61)35(89)18(510)43(102)29(74)51(130)2 on 2”(5.1)16 22-27 37(94)37(94)35(89)27.7(785)43(102)42(107)51(130)2 on 2”(5.1)16 2The LBB oven is not intended to process solvents or other volatileor flammable materials. Oven exhaust is intended for coolingpurposes only.Warning!Do not place this oven in an environment harmful to electricalcomponents.Placing this oven in an environment detrimental to electricalcomponents (for example, environments where carbon fibers, coaldust or similar contaminants may be present) may result incomponent failure.Do not use liquids in the oven. Do not set product or liquids on topof the oven. Liquids that may spill on the oven floor or top of ovenmay cause considerable damage to the oven.Contact <strong>Despatch</strong> for options available to help prevent suchfailures.Copyright © 20<strong>12</strong> by <strong>Despatch</strong> <strong>Industries</strong>.All rights reserved. No part of the contents of this manual may be reproduced, copied or transmitted in any form or by anymeans including graphic, electronic, or mechanical methods or photocopying, recording, or information storage andretrieval systems without the written permission of <strong>Despatch</strong> <strong>Industries</strong>, unless for purchaser's personal use.
LAC Series Oven Owner’s <strong>Manual</strong>ABOUT THIS MANUALVersion 15 111.5.2. CapacitiesCapacityLBB Model Number1-23 1-43 1-69 2-<strong>12</strong> 2-18 2-27Maximum LoadLbs (Kg)200(91)200(91)400(181)600(272)600(272)600(272)Maximum Shelf LoadLbs (Kgs)50(23)50(23)200 *(91)200*(91)200*(91)200*(91)Exhaust CapacityCFM (LPS)1(0.5)2(0.9)3(1.4)<strong>12</strong>(5.7)14(6.6)14(6.6)Maximum load capacity not valid on ovens with the “control panellocated on bottom” option.Warning!Do not exceed a total of 400 Lbs. (181 Kg) for stacked LBB1-69 ovens.1.5.3. PowerIf the line voltage for your LBB Series oven varies more than 10% from the oven voltage rating,electrical components such as relays and temperature controls may operate erratically. If the line voltage is lower than the oven voltage rating, heat-up time may be significantlylonger and motors may overload or run hot If the line voltage is higher than the nameplate rating, motors may run hot and draw excessiveamperage* LBB1-69 and larger models have reinforced shelves. Standard duty (50 Lbs. maximum) shelves are alsoavailable.Copyright © 20<strong>12</strong> by <strong>Despatch</strong> <strong>Industries</strong>.All rights reserved. No part of the contents of this manual may be reproduced, copied or transmitted in any form or by anymeans including graphic, electronic, or mechanical methods or photocopying, recording, or information storage andretrieval systems without the written permission of <strong>Despatch</strong> <strong>Industries</strong>, unless for purchaser's personal use.
ABOUT THIS MANUALLAC Series Oven Owner’s <strong>Manual</strong><strong>12</strong> Version 15Model Volts Amps Hertz PhaseHeaterKWCord and PlugLBB 1-23A <strong>12</strong>0 11.6 50/60 1 1.2 Included, 15 AmpLBB 1-23B 240 5.8 50/60 1 1.2 Included, 15 AmpLBB 1-43A <strong>12</strong>0 15.3 50/60 1 1.6 Included, 20 AmpLBB 1-43B 240 7.7 50/60 1 1.6 Included, 15 AmpLBB 1-69A † <strong>12</strong>0 21.6 50/60 1 2.4 None, HardwiredLBB 1-69B † 240 10.8 50/60 1 2.4 None, HardwiredLBB 2-<strong>12</strong> † 240 16.6 50/60 1 3.6 None, HardwiredLBB 2-18 † 240 16.7 50/60 1 3.6 None, HardwiredLBB2-27 † 240 21.7 50/60 1 4.8 None, HardwiredOvens designed for 240 volts (check your oven nameplate for powerrequirement) will operate satisfactorily on a minimum of 208 volts, butwith a 25% reduction in heater power. If your power characteristics arelower, contact <strong>Despatch</strong> industries.† Models LBB1-69, LBB2-<strong>12</strong>, -18 and -27 must be hardwired to the electric supply using 10 AWG orlarger wire suitable for at least 75 °C (167 °F).Copyright © 20<strong>12</strong> by <strong>Despatch</strong> <strong>Industries</strong>.All rights reserved. No part of the contents of this manual may be reproduced, copied or transmitted in any form or by anymeans including graphic, electronic, or mechanical methods or photocopying, recording, or information storage andretrieval systems without the written permission of <strong>Despatch</strong> <strong>Industries</strong>, unless for purchaser's personal use.
LAC Series Oven Owner’s <strong>Manual</strong>ABOUT THIS MANUALVersion 15 131.5.4. TemperatureTemperature andParametersLBB Model Number1-23 1-43 1-69 2-<strong>12</strong> 2-18 2-27Time totemperature(approximateminutes with noload40°C-150°C40°C-204°C17 17 15 15 17 1730 30 26 30 33 33Recovery time withdoor open 1 minute(approximatesminutes with noload)Temperatureuniformity at:150°C 2 2 3 3 3 4204°C 4 4 6 6 7 8150°C +/- 3°C +/- 3°C +/- 3°C +/- 2°C +/- 3°C +/- 3°C204°C +/- 4°C +/- 4°C +/- 4°C +/- 3°C +/- 4°C +/- 4°COperating range with 20°Cambient:35°C- 204°C40°C-204°CControl Stability ± 0.5 °CDampers must be open to operate at the minimumtemperature.“Time to Temperature” and “Temperature Uniformity”values are based on 240V/60 Hz operation, with controlpanel located on top. Actual results may vary slightlydepending on unit configuration and operating conditions.Copyright © 20<strong>12</strong> by <strong>Despatch</strong> <strong>Industries</strong>.All rights reserved. No part of the contents of this manual may be reproduced, copied or transmitted in any form or by anymeans including graphic, electronic, or mechanical methods or photocopying, recording, or information storage andretrieval systems without the written permission of <strong>Despatch</strong> <strong>Industries</strong>, unless for purchaser's personal use.
ABOUT THIS MANUALLAC Series Oven Owner’s <strong>Manual</strong>14 Version 151.5.5. LBB Series Oven Operating ConditionsThe LBB Series oven is for indoor use. Table 1 provides the operating conditions.Table 1. Operating/Environmental Conditions (For indoor use).ItemDescriptionOperating Temperature ‡Relative HumidityMaximum Altitude18°C to 40°C (64.4°F to 104°F)70% non‐condensing2,000 meters (6,600 feet)‡ Fluctuations in temperature can occur at elevated ambient temperature values.Copyright © 20<strong>12</strong> by <strong>Despatch</strong> <strong>Industries</strong>.All rights reserved. No part of the contents of this manual may be reproduced, copied or transmitted in any form or by anymeans including graphic, electronic, or mechanical methods or photocopying, recording, or information storage andretrieval systems without the written permission of <strong>Despatch</strong> <strong>Industries</strong>, unless for purchaser's personal use.
LBB Series Oven Owner’s <strong>Manual</strong>SAFETYVersion 15 152. Safety2.1. Safety InformationDo not work on the LBB Series oven without reading and understanding this section whichcontains important information and warnings. Ignoring these warnings can result in death, seriousinjury or damage to the machine and product.2.1.1. LockoutCarefully follow the established Lock Out Tag Out policies ofyour company in all cases.Machine lockout places the LBB Series oven into a zero energy state and prevents accidentalmachine start up. Always follow the Lockout Procedure described in this Section before cleaning,maintaining or repairing the LBB Series oven. An accidental start-up, while working on the LBBSeries oven, can result in serious injury or death.2.1.1.1. Lockout Requirements1. Every power source that can energize any element of the LBB Series oven must be shut off atthe closest possible power source. This includes air, water and electricity, including theDisconnect Switch.2. After energy sources are locked out, test to ensure circuits are de-energized.2.1.1.2. Lockout ProcedureDanger!Electrical panels contain high voltage. Disconnect and lock outthe power supply before working inside any electrical panels.Failure to lock out the power supply can result in death or injury.Personnel authorized to lockout equipment must have the necessary locks to perform the lockout.1. Physically disconnect all electrical power to the machine or lockout the appropriate breakeror disconnects.2. Close all valves and bleed off any pressure.3. Test for power by attempting a start with the machine controls.4. Identify the Lockout Condition with a tag on the electrical disconnect and pneumatic shut offvalve.5. When work is complete, remove all tags and restore the machine to its working state.Copyright © 20<strong>12</strong> by <strong>Despatch</strong> <strong>Industries</strong>.All rights reserved. No part of the contents of this manual may be reproduced, copied or transmitted in any form or by anymeans including graphic, electronic, or mechanical methods or photocopying, recording, or information storage andretrieval systems without the written permission of <strong>Despatch</strong> <strong>Industries</strong>, unless for purchaser's personal use.
SAFETYLBB Series Oven Owner’s <strong>Manual</strong>16 Version 152.2. Provisions for Lifting and CarryingCaution!Do not tilt oven while lifting. Do not lift oven using the doorhandle to prevent damage to the oven and/or personnelinvolved.Caution!Do not risk injury when lifting equipment. Take properprecautions when lifting, carrying or otherwise maintainingheavy items.How to lift the different sizes of ovens:NoticeLBB1-<strong>12</strong> & LBB1-43: Four people lift oven’s lowercorners and place on wheeled transport pallet. Pushpallet to desired site and lift oven from pallet, again liftusing lower corners.LBB1-69, LBB2-<strong>12</strong>, LBB2-18, LBB 2-27: Do not lift byhand. Lift with fork lifter and transport pallet.Copyright © 20<strong>12</strong> by <strong>Despatch</strong> <strong>Industries</strong>.All rights reserved. No part of the contents of this manual may be reproduced, copied or transmitted in any form or by anymeans including graphic, electronic, or mechanical methods or photocopying, recording, or information storage andretrieval systems without the written permission of <strong>Despatch</strong> <strong>Industries</strong>, unless for purchaser's personal use.
LBB Series Oven Owner’s <strong>Manual</strong>SAFETYVersion 15 172.3. MaintenanceOnly qualified and trained personnel should perform maintenance or repair.Warning!Do not place this oven in an environment harmful to electricalcomponents.Placing this oven in an environment detrimental to electricalcomponents (for example, environments where carbon fibers,coal dust or similar contaminants may be present) may resultin component failure.Contact <strong>Despatch</strong> for options available to help prevent suchfailures.2.4. Electrical PowerOnly qualified and trained personnel should perform electrical maintenance or electrical repair.Danger!Contact with energized electrical sources may result in seriousinjury or death.Before performing maintenance, disconnect all electrical power from the machine. Use apadlock and lockout all disconnects feeding power to the machine.Never clean or repair the oven when in operation.Unauthorized alterations or modifications to LBB Series oven are strictly forbidden. Nevermodify any electrical circuits. Unauthorized modifications can impair the function and safetyof the LBB Series oven.Copyright © 20<strong>12</strong> by <strong>Despatch</strong> <strong>Industries</strong>.All rights reserved. No part of the contents of this manual may be reproduced, copied or transmitted in any form or by anymeans including graphic, electronic, or mechanical methods or photocopying, recording, or information storage andretrieval systems without the written permission of <strong>Despatch</strong> <strong>Industries</strong>, unless for purchaser's personal use.
SAFETYLBB Series Oven Owner’s <strong>Manual</strong>18 Version 15Warning!Do not place this oven in an environment harmful to electricalcomponents.Placing this oven in an environment detrimental to electricalcomponents (for example, environments where carbon fibers,coal dust or similar contaminants may be present) may resultin component failure.Do not use liquids in the oven. Do not set product or liquidson top of the oven. Liquids that may spill on the oven floor ortop of oven may cause considerable damage to the oven.Contact <strong>Despatch</strong> for options available to help prevent suchfailures.2.5. FireKeep the LBB Series oven clean and free of scrap materials, oil or solvents to prevent thepossibility of fire. In the event of fire, use a fire extinguisher as follows.1. Leave door (s) as they are.2. De-energize the machine immediately by turning OFF the DISCONNECT SWITCH.3. Turn off the remote main disconnect (customer supplied disconnect).4. Shut off fuel5. Call the fire department or extinguish the fire.Danger!Always disconnect all power before extinguishing a fire.Attempting to extinguish a fire in a machine connected toelectrical power can result in serious injury or death!2.6. Equipment Lockout RequirementsTo prevent injury or equipment damage during inspection or repair, the LBB Series oven must belocked out.2.6.1. Emergency StopWhen a risk of personal injury or damage to the LBB Series oven exists, turn OFF the oven byremoving/unplugging the cord. This shuts off all electrical power to the oven.Copyright © 20<strong>12</strong> by <strong>Despatch</strong> <strong>Industries</strong>.All rights reserved. No part of the contents of this manual may be reproduced, copied or transmitted in any form or by anymeans including graphic, electronic, or mechanical methods or photocopying, recording, or information storage andretrieval systems without the written permission of <strong>Despatch</strong> <strong>Industries</strong>, unless for purchaser's personal use.
LBB Series Oven Owner’s <strong>Manual</strong>SAFETYVersion 15 192.7. Disconnecting Devices2.7.1. Power Requirements<strong>Despatch</strong> recommends the LBB Series Ovens have unobstructed access to a dedicated powersource.Use a power stabilizer if voltage fluctuation is greater than ±10%nominal voltage fluctuation.2.7.2. Disconnecting Hard-Wired UnitsLBB permanently-connected (hard-wired) ovens include models LBB1-69, LBB2-<strong>12</strong>, LBB2-18and LBB2-27. Permanently-connected and multi-phased equipment must employ a switch orcircuit-breaker as means for disconnection. For permanently-connected equipment, installationinstructions must specify a switch or circuit-breaker is included during the facility oveninstallation for complete isolation.The disconnecting device must be installed in close proximity to the equipment and within easyreach of the operator. The disconnecting device must be marked as the disconnecting device forthe equipment. If the unit is equipped with an ON/OFF switch, mark the ON/OFF positionclearly.Follow local codes and requirements for installing and usingdisconnect switches.Danger!Keep switch or circuit-breaker in building installation, close tothe equipment, within easy reach of the operator and clearlymarked.2.7.3. Disconnecting Corded UnitsLBB cord-connected ovens include models LBB1-21 and LBB1-43. To disconnect a corded unit,unplug the cord from the power source.Copyright © 20<strong>12</strong> by <strong>Despatch</strong> <strong>Industries</strong>.All rights reserved. No part of the contents of this manual may be reproduced, copied or transmitted in any form or by anymeans including graphic, electronic, or mechanical methods or photocopying, recording, or information storage andretrieval systems without the written permission of <strong>Despatch</strong> <strong>Industries</strong>, unless for purchaser's personal use.
SAFETYLBB Series Oven Owner’s <strong>Manual</strong>20 Version 152.7.4. Disconnecting Units with Optional Disconnect SwitchThe LBB Series oven has an optional Disconnect Switch (Figure 1).This Disconnect Switch is located on the front of the oven andconnected to the load break switch behind the panel that disconnectsor connects power from the main line. When a risk of personal injuryor damage to the LBB Series oven exists, turn off the DisconnectSwitch. This shuts off all electrical power to the oven.Figure 1. DisconnectSwitch.Copyright © 20<strong>12</strong> by <strong>Despatch</strong> <strong>Industries</strong>.All rights reserved. No part of the contents of this manual may be reproduced, copied or transmitted in any form or by anymeans including graphic, electronic, or mechanical methods or photocopying, recording, or information storage andretrieval systems without the written permission of <strong>Despatch</strong> <strong>Industries</strong>, unless for purchaser's personal use.
LBB Series Oven Owner’s <strong>Manual</strong>THEORY OF OPERATIONVersion 15 213. Theory of Operation3.1. The LBB Series OvenThe <strong>Despatch</strong> LBB Series ovens (Figure 2) effectively distribute heat with a processing timeamong the fastest of any lab oven its class. LBB Series ovens are effectively used in testing,preheating, sterilizing, drying, aging and curing as well as other production applications. TheLBB Series ovens incorporate forced circulating airflow with precision digital control to deliverfast processing. The overall result is efficient productivity understrenuous conditions.Figure 2. LBB Forced ConvectionBenchtop Oven.The LBB Series ovens are precise and practical. The unique <strong>Despatch</strong>design moves convected heat through stainless steel ducts on each sideof the oven (Figure 3). The air is circulated with a high volume fan.The LBB Series ovens employ higher volume fans than anycompetitive model. The chamber can be densely loaded withoutinterfering with the process. For your convenience the fresh air intakeis fixed. The exhaust rate is regulated by a damper on the back of theunit.Recirculation FanHeaterExhaustFigure 3. Horizontal Airflow through theLBB Oven.Copyright © 20<strong>12</strong> by <strong>Despatch</strong> <strong>Industries</strong>.All rights reserved. No part of the contents of this manual may be reproduced, copied or transmitted in any form or by anymeans including graphic, electronic, or mechanical methods or photocopying, recording, or information storage andretrieval systems without the written permission of <strong>Despatch</strong> <strong>Industries</strong>, unless for purchaser's personal use.
THEORY OF OPERATIONLBB Series Oven Owner’s <strong>Manual</strong>22 Version 15Warning!Do not remove the hat bracket as it distributes exhaust air andprotects the exhaust opening from being completely covered.3.1.1. Oven TheoryThe LBB Series forced circulating oven uses fan to circulate air through the chamber. Acirculating oven is much more efficient and uniform oven than a gravity-convection oven due tothe constant air movement. Soaking at a desired setpoint still depends on a number of parametersincluding chamber area, load mass, the ability to absorb heat and the exhaust rate. But soak timeswith a forced circulating oven may be shortened.The LBB Series oven is capable of heating to 204°C (400°F). The oven uses amicroprocessor-based digital control to display the actual chamber temperature at the sensingpoint. The temperature sensor is located to optimize control action for the entire chamber forvarious load conditions. The control display may fluctuate a few degrees around the setpoint,reflecting temperature changes at the sensor location. However, overall chamber temperatureremains stable. The strategic location of the sensor compensates for delays in heat convection andenhances the performance and temperature control of the oven. The oven has been designed foran overall result of quality productivity where fast processing and versatility are critical.3.2. Control Systems3.2.1. Primary Control InstrumentThe LBB Series oven is equipped with amicroprocessor-based digital control instrumentconfigured as a proportional controller and set toits optimum operating values (Figure 4). Initiallythe control instrument allows the heater to operateat full power. As the actual oven temperaturereaches the setpoint, the control instrument cyclesthe heater on and off, minimizing processtemperature fluctuations. Table 2 providesexplanation for working with the controlinstrument.Figure 4. LBB Series Oven Primary Control InstrumentCopyright © 20<strong>12</strong> by <strong>Despatch</strong> <strong>Industries</strong>.All rights reserved. No part of the contents of this manual may be reproduced, copied or transmitted in any form or by anymeans including graphic, electronic, or mechanical methods or photocopying, recording, or information storage andretrieval systems without the written permission of <strong>Despatch</strong> <strong>Industries</strong>, unless for purchaser's personal use.
LBB Series Oven Owner’s <strong>Manual</strong>THEORY OF OPERATIONVersion 15 23Table 2. Control Instrument Explanations.DisplayMain (PV) DisplayDescriptionTypically displays actual oven temperature. Press SET/ENT to displaysetpoint. Displays parameter code and value.Key Press to switch between PV and SP displays. Enter data using or . Pressrepeatedly to switches through parameter displays.Decrease setpoint or mode parameterIncrease setpoint or mode parameterSPLit when setpoint value displaysOUTLit when control calls for heatAL1 –2N/A3.3. The Protocol 3 ControllerThe Protocol 3 controller is a microprocessor based digital temperature controller designed forsimple and flexible oven operation (Figure 5). The Protocol 3 controller operates as a dualfunctioningcontroller/High Limit instrument. The control portion utilizes a time proportioningvoltage signal to control heating devices with minimal temperature fluctuations.The High Limit portion protects theproduct and/or the oven fromoverheating. If the product beingprocessed has a critical hightemperature limit, the High Limitsetpoint should be set to atemperature somewhat below thetemperature at which the productcould be damaged. If the productdoes not have a critical hightemperature limit, the High Limitsetpoint should be set 5 to 15 degreeshigher than the maximumprogrammed setpoint at which the ovenwill operate.Figure 5. Protocol 3 Operator Interface.The Protocol 3 controller provides three primary operating modes: <strong>Manual</strong>: Oven operates continuously at a fixed temperature until turned off. Timer: Oven operates at a fixed temperature for a user-selected time period, and thenautomatically turns off. Profile: Temperatures increase or decrease as defined by 255 segments that can be allocatedto 64 ramp and soak profiles. The profiles can be linked to provide additional temperaturecombinations.<strong>Rev</strong>iew the Protocol 3 Controller Owner’s <strong>Manual</strong> for more information.Copyright © 20<strong>12</strong> by <strong>Despatch</strong> <strong>Industries</strong>.All rights reserved. No part of the contents of this manual may be reproduced, copied or transmitted in any form or by anymeans including graphic, electronic, or mechanical methods or photocopying, recording, or information storage andretrieval systems without the written permission of <strong>Despatch</strong> <strong>Industries</strong>, unless for purchaser's personal use.
THEORY OF OPERATIONLBB Series Oven Owner’s <strong>Manual</strong>24 Version 153.3.1. High Limit InstrumentThe LBB Series oven is equipped with a HighLimit instrument (Figure 6). The High Limitinstrument protects the oven or product bydiscontinuing the heating process when the HighLimit is exceeded.Set the High Limit instrument to a temperature10°C - 14°C higher than the control instrumentsetpoint, or to a temperature that should not beexceeded in the process. If the setting on the HighLimit instrument is exceeded the heater shutsdown. See Table 3 for explanation about the HighLimit instrument.Figure 6. High Limit Instrument.Reset the High Limit instrument by pressing the RESETbutton on the instrument.Table 3. High Limit Instrument Explanations.FeaturesOP1C/FPVHSP1SP2LOCKDescriptionOutput 1 status value. (OP2 normally not used for LBB Ovens).Degree indicator.: Celsius or FahrenheitProcess valueHigh Limit setpoint 1. (LSP1 typically not used for LBB Ovens).Setpoint 2 for output 2 (typically not used for LBB Ovens)Lock status indicatorScroll Key, used for advancing available displaysIncreases a setpoint or mode parameterDecreases a setpoint or mode parameterReset the High Limit, return to normal display3.3.1.1. Product High Limit InstrumentIf the product being processed has a critical high temperature limit, use the High Limit instrumentas a product High Limit instrument. Set the High Limit instrument to a temperature somewhatbelow the temperature at which the product could be damaged.3.3.1.2. Oven High Limit InstrumentIf the product being processed does not have a critical high temperature limit, use the High Limitas an oven High Limit instrument to protect the oven equipment. Set the High Limit to 204°C.Copyright © 20<strong>12</strong> by <strong>Despatch</strong> <strong>Industries</strong>.All rights reserved. No part of the contents of this manual may be reproduced, copied or transmitted in any form or by anymeans including graphic, electronic, or mechanical methods or photocopying, recording, or information storage andretrieval systems without the written permission of <strong>Despatch</strong> <strong>Industries</strong>, unless for purchaser's personal use.
ASSEMBLY & SETUPLBB Series Oven Owner’s <strong>Manual</strong>26 Version 154.2.2. Set-up ProcedureWarning!All grounding and safety equipment must be in compliance withapplicable codes, ordinances and accepted safe practices.Warning!Do not use the oven in wet, corrosive or explosive atmospheresunless this oven is specifically designed for a specialatmosphere.1. Place oven on bench top or optional cabinet base.a. Ensure a minimum of two (2) inches (5.1 cm) clearance in the rear of oven to provideproper ventilation. The oven may be placed next to another cabinet, or next to anotheroven, with three (3) inch (7.6 cm) clearance (the doors will still open).b. Ensure oven is level and plumb for proper heat distribution and operation of allmechanical components.2. Identify correct power source indicated on the specification nameplate.3. Plug or hardwire oven directly to the electric supply.Copyright © 20<strong>12</strong> by <strong>Despatch</strong> <strong>Industries</strong>.All rights reserved. No part of the contents of this manual may be reproduced, copied or transmitted in any form or by anymeans including graphic, electronic, or mechanical methods or photocopying, recording, or information storage andretrieval systems without the written permission of <strong>Despatch</strong> <strong>Industries</strong>, unless for purchaser's personal use.
ASSEMBLY & SETUPLBB Series Oven Owner’s <strong>Manual</strong>28 Version 15To wire the LBB Series oven (for unitsrequiring hardwiring):1. Remove the top cover for access tothe connector block (Figure 8).Figure 8. LBB Series Oven with Top Removed.2. Run the wire through the rear accesshole (Figure 9) and connect theappropriate wires at the connectorblock (Figure 10).Figure 9. Wiring Access through Rear of Oven.Figure 10. Close-up of Connector Block.Copyright © 20<strong>12</strong> by <strong>Despatch</strong> <strong>Industries</strong>.All rights reserved. No part of the contents of this manual may be reproduced, copied or transmitted in any form or by anymeans including graphic, electronic, or mechanical methods or photocopying, recording, or information storage andretrieval systems without the written permission of <strong>Despatch</strong> <strong>Industries</strong>, unless for purchaser's personal use.
LBB Series Oven Owner’s <strong>Manual</strong>OPERATIONVersion 15 295. OperationUsers and operators of this oven must comply with operatingprocedures and training of operating personnel as required bythe Occupational Safety and Health Act (OSHA) of 1970, Section5 and relevant safety standards, and other safety rules andregulations of state and local governments. Refer to the relevantsafety standards in OSHA and National Fire ProtectionAssociation (NFPA), Section 86 of 1990.Warning!Do not use the oven in wet, corrosive or explosive atmospheresunless this oven is specifically designed for a specialatmosphere.5.1. Load Oven<strong>Despatch</strong> <strong>Industries</strong> cannot be responsible for either theprocess or process temperature used, or for the quality of theproduct being processed. The purchaser and operator areresponsible ensure that the product undergoing processing in a<strong>Despatch</strong> oven is adequately protected from damage.Carefully following the instructions in this manual will help thepurchaser and operator in fulfilling that responsibility.Warning!Do not use liquids in the oven. Do not set product or liquids ontop of the oven. Liquids that may spill on the oven floor or top ofoven may cause considerable damage to the oven.Warning!Never operate the LBB Series oven at a temperature in excess ofthe maximum operating temperature of 204°C (400°F).Copyright © 20<strong>12</strong> by <strong>Despatch</strong> <strong>Industries</strong>.All rights reserved. No part of the contents of this manual may be reproduced, copied or transmitted in any form or by anymeans including graphic, electronic, or mechanical methods or photocopying, recording, or information storage andretrieval systems without the written permission of <strong>Despatch</strong> <strong>Industries</strong>, unless for purchaser's personal use.
OPERATIONLBB Series Oven Owner’s <strong>Manual</strong>30 Version 15The two shelves are designed to be pulled out about halfway without tipping. Do not overload theshelves (Refer to Support Capacity listed in Section 1.5.3). Distribute the workload evenly soairflow is not restricted. Do not overfill your oven. The workload should not take up more thantwo-thirds of any dimension of the inside cavity.For units where the controls are on the bottom, avoid spilling on the heater elements or oven floorwhen loading the oven. Do not place the load on the oven floor plate. Placing the load on theoven floor may cause the load to heat unevenly and the weight may cause shorting out of theheater elements. Use the shelves provided.Caution!Always place loads on the shelves provided to avoid possibleuneven heating and damage to the oven.5.2. Pre-Startup ChecklistWarning!Do not use flammable solvent or other flammable material in thisoven. Do not process closed containers of any substance orliquid in this oven because they may explode under heat.□□□□Know the system. Read this manual carefully. Make use of its instructions and explanations.Safe, continuous, satisfactory, trouble-free operation depends primarily on your degree ofunderstanding the system and your willingness to keep all parts in proper operating condition.Check line voltage. Voltage must correspond to nameplate requirements of motors andcontrols. A wrong voltage can result in serious damage. Refer to Section 1.5.4 for moreinformation.Check fresh air and exhaust openings. Do not be careless about restrictions in and around thefresh air and exhaust openings and stacks. Under no condition can they be permitted tobecome so filled with dirt that they reduce airflow. Refer to the Set-up instructions (4.2.2) formore information.Ventilation. An exhaust opening resides in the rear of the unit.The exhaust vent may have to be closed to reach the maximumtemperature of 204°C, especially if operating on 208 volts. Theexhaust vent may need to be opened to operate properly at thelower range of the oven's design.□Helpful hints: For drying ovens, open vent to prevent buildup of moistureCopyright © 20<strong>12</strong> by <strong>Despatch</strong> <strong>Industries</strong>.All rights reserved. No part of the contents of this manual may be reproduced, copied or transmitted in any form or by anymeans including graphic, electronic, or mechanical methods or photocopying, recording, or information storage andretrieval systems without the written permission of <strong>Despatch</strong> <strong>Industries</strong>, unless for purchaser's personal use.
LBB Series Oven Owner’s <strong>Manual</strong>OPERATIONVersion 15 31For sample heating, close vent when no ventilation is required5.3. Operating ProcedureWarning!Do not use flammable solvent or other flammable material in thisoven. Do not process closed containers of any substance orliquid in this oven because they may explode under heat.For fastest oven heat-up time, close the exhaust vent. After thedesired temperature is reached, adjust the vent as needed.5.3.1. Start Oven1. Turn POWER ON (Figure 11). The circulating fan will start.2. Set exhaust vent to desired opening by adjusting the damper at the rear of the oven (Figure<strong>12</strong>).a. Adjust the vent for maximum performance at various operating temperatures.3. Enter desired setpoint on the High Limit instrument.a. Set the High Limit instrument to a temperature 10° to 14°C higher than the desiredsetpoint or to a temperature that should not be exceeded in the process.b. If the LOCK on the High Limit instrument is lit, press and hold the RESET for four (4)seconds to enable ▲ and ▼.If the High Limit instrument is exceeded the heater shutsdown. Reset the High Limit instrument by pushing RESET onthe High Limit instrument.c. Press . HSP1 will light.d. Use ▲ and ▼ to set the High Limit temperature.e. Press RESET (or ) once to enter the value and return to the process variable PVmode.4. Enter setpoint on the Control instrument.a. Press until the SP lights.b. Use ▲ and ▼ to set the operating temperature.c. Press to enter the setpoint.d. Press again to display the process temperature.5. Turn HEATER ON.Copyright © 20<strong>12</strong> by <strong>Despatch</strong> <strong>Industries</strong>.All rights reserved. No part of the contents of this manual may be reproduced, copied or transmitted in any form or by anymeans including graphic, electronic, or mechanical methods or photocopying, recording, or information storage andretrieval systems without the written permission of <strong>Despatch</strong> <strong>Industries</strong>, unless for purchaser's personal use.
OPERATIONLBB Series Oven Owner’s <strong>Manual</strong>32 Version 15a. When the process value on the Control instrument reaches setpoint, OUT cycles ON andOFF to maintain the temperature setpoint.b. OUT lights when the control calls for heat.6. Turn HEATER OFF after the heating cycle is complete.7. Do not turn the fan OFF until the oven chamber temperature is below 100 ◦ C (2<strong>12</strong> ◦ F).Figure 11. LBB Series Oven Control Panel.Figure <strong>12</strong>. Adjust Damper to Set Exhaust Vent by rotating the outer component.Copyright © 20<strong>12</strong> by <strong>Despatch</strong> <strong>Industries</strong>.All rights reserved. No part of the contents of this manual may be reproduced, copied or transmitted in any form or by anymeans including graphic, electronic, or mechanical methods or photocopying, recording, or information storage andretrieval systems without the written permission of <strong>Despatch</strong> <strong>Industries</strong>, unless for purchaser's personal use.
LBB Series Oven Owner’s <strong>Manual</strong>OPERATIONVersion 15 335.4. Working with the Control InstrumentDanger!Failure to heed warnings in this instruction manual and on theoven could result in personal injury, property damage or death.The LBB Series oven is factory tested and the controls have been factory-set for normal operatingconditions.In most applications it is not necessary to alter the oven’ssettings, except for Setpoint.This section contains information for changing setpoints, programming modes, and displayingtemperature, along with instructions for oven zone calibration, parameter setup mode andtroubleshooting.5.4.1. Change SetpointWarning!Never operate oven at a temperature in excess of the maximumoperating temperature of 204°C (400°F).To enter Setpoint on the Control instrument:1. Press . SP will light.2. Use ▲ and ▼ to set the operating temperature.a. The right decimal point LED will flash indicating the Setpoint is being changed.b. The right decimal point LED stops flashing when the new value has been entered.3. Press to enter the Setpoint.4. Press again to display the process temperature.Copyright © 20<strong>12</strong> by <strong>Despatch</strong> <strong>Industries</strong>.All rights reserved. No part of the contents of this manual may be reproduced, copied or transmitted in any form or by anymeans including graphic, electronic, or mechanical methods or photocopying, recording, or information storage andretrieval systems without the written permission of <strong>Despatch</strong> <strong>Industries</strong>, unless for purchaser's personal use.
OPERATIONLBB Series Oven Owner’s <strong>Manual</strong>34 Version 155.4.2. Control Instrument Parameter Programming ModeWarning!Changing program parameters alters the function of the Control.Proceed carefully and fully understand each parameter beforechanging that parameter.Control instrument parameters are set through the Operating and Set-up modes. In mostapplications, it is not necessary to alter the oven settings. The following instructions describe howto access, view and if desired, change the parameters. Once the Operating and Set-up modes areaccessed, SP will start blinking on and off. Table 4 and Table 5 explain the Operating and Set-upMode parameters.The Control Instrument will not allow the display to be altered improperly. The ControlInstrument will automatically exit the Parameter Programming mode if no keys are pressed forabout two (2) minutes.5.4.2.1. Entering Control Instrument Operating and Set-up ModeTo enter the Operating and Set-up Mode (Figure 4):1. Press for three (3) seconds.2. Press until the desired parameter displays. See Table 4 for more information.3. Press ▲ or ▼ to display the value.4. Use ▲ or ▼ to move to the desired setting.5. Press to enter the value.6. Press and hold for three (3) seconds to return to the display mode.Table 4. Control Instrument Operating Parameters.Code Name Description SettingsCtLControlModeDetermines whether controller functions as a timeproportional or an on/off control.PIDAt Auto-tuning OFF for PID tuning, ON for controller to tune process OFFPIdProportionalBandIntegralTimeDerivativeTimeExpressed in degrees, value determines the band widthon both sides of the setpoint within which the controlprovides proportional control.Expressed in seconds, value corrects for errors in actualtemperature versus the setpointExpressed in seconds, value shows the effect of thederivative time is in direct proportion to the time setting4(8 if F) 41504 If P is not displayed the Control Mode (CtL) must be first set to PID.Copyright © 20<strong>12</strong> by <strong>Despatch</strong> <strong>Industries</strong>.All rights reserved. No part of the contents of this manual may be reproduced, copied or transmitted in any form or by anymeans including graphic, electronic, or mechanical methods or photocopying, recording, or information storage andretrieval systems without the written permission of <strong>Despatch</strong> <strong>Industries</strong>, unless for purchaser's personal use.
LBB Series Oven Owner’s <strong>Manual</strong>OPERATIONVersion 15 35Ct Cycle Time Expressed in seconds, value shows total time for oneON/OFF cycle of the controller output during theproportional actionFL Input Filter Expressed in seconds. Use this function when the PV mayfluctuate greatly (for example, when an input signalbSPV Bias(Offset)contains noise)Expressed in degrees, from –199 to 999. Use thisparameter to set the actual oven temperature to thecontroller display.LoC Key Lock Provides levels of access to the controller: 0 = No key lock, full access to controller 1 = Prevents changing of all parameters exceptsetpoint 2 = Prevents all parameters from being changedincluding the setpoint -1 = Set to enter the Set-up parameter setting display.nr <strong>Manual</strong> Only when I & d are OFF. Expressed in percent.Reset Controller outputs this value when process variable equalssetpoint, but only if I = 0.HyS Hysteresis Only when CtL is OFF, change CtL to PID)Expressed in degrees. When CtL = OFF, this valuedetermines the change in temperature needed to turncontroller output from full OFF to full ON.1001N/AN/A5.4.2.2. Control Instrument Operating Mode NotesThe controller is factory set to LoC=1 (allowing only the setpoint to be changed). This settingprevents inadvertent changing of control parameters.If necessary to alter control parameters, change the LoC=1 to LoC=0. See Section 5.4.2.1 formore information.When LoC = -1, parameters are displayed in the order shown in the Set-Up Parameters table(Table 5).Note: If unable to change setup parameters:o Change the LoC = 0o Press the until LoC appears againo Change LoC = -1o Press theTable 5. Control Instrument Set-up Parameters.Code Name Description SettingsSet for type of input and whether PV is in °C or °F 5In Input Type(35 if F)SPHSPLSetpoint HighSetpoint LowThe maximum setpoint limit for oven. The user cannotset the setpoint above the maximum setpoint.The minimum setpoint limit of oven. The user cannotchange the setpoint below this lower setpoint limit.204 (400 ifF)0 (32 if F)Copyright © 20<strong>12</strong> by <strong>Despatch</strong> <strong>Industries</strong>.All rights reserved. No part of the contents of this manual may be reproduced, copied or transmitted in any form or by anymeans including graphic, electronic, or mechanical methods or photocopying, recording, or information storage andretrieval systems without the written permission of <strong>Despatch</strong> <strong>Industries</strong>, unless for purchaser's personal use.
OPERATIONLBB Series Oven Owner’s <strong>Manual</strong>36 Version 15SCdrdSPSuperFunctionDirect/<strong>Rev</strong>erseActionPV/SP Display<strong>Despatch</strong> recommends leaving the SC feature OFFDirect/<strong>Rev</strong>erse action. This value is set for 0 (reverseaction).Priority of PV/SP display. This parameter eitherdisplays the PV (process variable) or SP (setpoint). 0 = process variable 1 = setpointOFF005.4.3. Change Control Instrument Display from Centigrade toFahrenheitWarning!Program parameter changes will alter the function of the Controlinstrument. Proceed carefully and fully understand eachparameter before changing that parameter.Configure the Control instrument for either °C or °F. Use the following steps to change controlfrom displaying °C to °F:1. Press and hold for three (3) seconds.a. CtL displays.b. SP will flash indicating the Control Instrument has entered Operating Parameter mode.2. Press until LoC displays.3. Press or to enter parameter.4. Press the to set the value to –1.a. SP will flash rapidly indicating the Control Instrument has entered Set-Up Parametermode.5. Press to enter the value.a. In displays.b. Press the or to enter the parameter.c. Note: If unable to change setup parameters, follow this procedure:i. Press and hold for three (3) seconds to return to the operation mode.ii. Change the LoC to 0.iii. Press until LoC displays.iv. Change LoC to -1.v. Press .6. Enter the value 35.a. The right decimal point LED will flash indicating that the setpoint is being changed.b. The decimal will stop flashing when the new value has been entered.c. Press to enter the value.7. Press until SPH displays.a. Press or to enter the desired parameter.8. Enter a value 400.a. Press to enter the value.Copyright © 20<strong>12</strong> by <strong>Despatch</strong> <strong>Industries</strong>.All rights reserved. No part of the contents of this manual may be reproduced, copied or transmitted in any form or by anymeans including graphic, electronic, or mechanical methods or photocopying, recording, or information storage andretrieval systems without the written permission of <strong>Despatch</strong> <strong>Industries</strong>, unless for purchaser's personal use.
LBB Series Oven Owner’s <strong>Manual</strong>OPERATIONVersion 15 379. Repeat steps 7-8 for SPL .10. Enter a value of 32.11. Press and hold the for three (3) seconds to return to the operation mode.a. The control now reads in degrees Fahrenheit.b. Enter the desired setpoint.Refer to Table 5 to change tuning parameters, if necessary.To change from Fahrenheit to Centigrade, repeat the steps inSection 5.4.3 using In = 5, SPH = 204, SPL = 05.4.4. Oven Zone CalibrationThe Control instrument has been factory-tested and calibrated. Under normal operatingconditions, recalibration should not be necessary. However, to recalibrate the Control Instrumentfor a specific operating condition, follow the instructions below.Warning!Changing program parameters alters the function of the Control.Proceed carefully and fully understand each parameter beforechanging that parameter.1. Required Equipment: Temperature measuring device with a compatible temperature sensor.2. Verify that bS (PV Bias) programmed in the Control instrument is set to 0. For moreinformation on programming parameters refer to Section 5.4.2.1.3. Locate the temperature sensor of the temperature measuring device at the center of thechamber.Load the chamber with a standard amount of product tosimulate a specific operation condition.4. Operate the oven until it reaches the desired operating temperature and the Control instrumentis regulating.a. It will take several minutes for the unit to stabilize at the controlled temperature.b. Allow at least 30 minutes of operation at the stabilized temperature before proceeding.5. Subtract the average controlled temperature (value appearing on the Control instrumentdisplay) from the actual oven temperature (value appearing on the temperature measuringdevice display).a. Note that the Control instrument and the temperature sensing device must be in the samescale (C or F).Copyright © 20<strong>12</strong> by <strong>Despatch</strong> <strong>Industries</strong>.All rights reserved. No part of the contents of this manual may be reproduced, copied or transmitted in any form or by anymeans including graphic, electronic, or mechanical methods or photocopying, recording, or information storage andretrieval systems without the written permission of <strong>Despatch</strong> <strong>Industries</strong>, unless for purchaser's personal use.
OPERATIONLBB Series Oven Owner’s <strong>Manual</strong>38 Version 155.4.5. Set the High LimitDanger!Failure to heed warnings in this instruction manual and on theoven could result in personal injury, property damage or death.The oven has been factory-tested with the High Limit instrument factory-preset for normaloperating conditions. In most applications, it will not be necessary to alter the oven's settings,except for the Setpoint. This section contains information and reference material to changeSetpoint, access the Set-up mode and change display between °C and °F.The High Limit instrument was carefully programmed at the factory using the Operating and Setupmode. The parameters that may be accessed include; display functions, and thermocoupleselection.5.4.5.1. Change the High Limit Instrument SetpointWarning!Never operate oven at a temperature in excess of the maximumoperating temperature of 204°C (400°F).Enter setpoint on the High Limit instrument. Set High Limit instrument to a temperature 10°C to14°C higher than the setpoint or to a temperature that should not be exceeded in the process.1. If on the High Limit instrument is lit, press and hold for four (4) seconds toenable and .2. Press , HSP1 will light.3. Use and to set High Limit temperature.4. Press or once to return (also enters the value) to the process variable PVmode.5. If the High Limit instrument is exceeded the heater will shut down.6. Reset the High Limit instrument by pushing on the High Limit instrument.Copyright © 20<strong>12</strong> by <strong>Despatch</strong> <strong>Industries</strong>.All rights reserved. No part of the contents of this manual may be reproduced, copied or transmitted in any form or by anymeans including graphic, electronic, or mechanical methods or photocopying, recording, or information storage andretrieval systems without the written permission of <strong>Despatch</strong> <strong>Industries</strong>, unless for purchaser's personal use.
LBB Series Oven Owner’s <strong>Manual</strong>OPERATIONVersion 15 395.4.6. High Limit Instrument Parameter Setup ModeWarning!Changing program parameters alters the function of the HighLimit. Proceed carefully and fully understand each parameterbefore changing that parameter.Set High Limit instrument parameters using the Operating and Set-up modes (Section 5.4.2.1). Inmost applications, it is not necessary to alter the oven settings. The following instructionsdescribe how to access, view and, if desired, change the parameters.If the on the High Limit instrument is lit, press and hold for four (4) seconds to enableand . The High Limit instrument will automatically exit Setup mode if no keys are pressedfor about two (2) minutes.1. Press and hold for four (4) seconds to enter Setup mode.2. Press until desired parameter displays. See the Setup Parameter Table for moreinformation.a. The display will alternate between the parameter name and value.b. Use or to move to the desired setting.c. Press to the value and advance to the next parameter.3. To leave setup parameters press . The High Limit instrument automatically exits Setupmode if no keys are pressed for about two (2) minutes.5.4.7. High Limit Instrument Setup ParametersTable 6 explains the High Limit instrument setup parameters.When changing between centigrade and Fahrenheit, the setupparameters Filt, o1.Hy, HSP.L and HSP.H settings convertautomatically.Table 6. High Limit instrument Setup Parameters.Code Name Description SettingsinPt Input typeSelect thermocouple type. LBB Series ovens use typeJ thermocouplesJ_tCunit Process unit.Select between °C and °F for reading processtemperatureC (or F)rESoDisplay Select location of decimal point on process-relatedresolution. parametersNo.dPCopyright © 20<strong>12</strong> by <strong>Despatch</strong> <strong>Industries</strong>.All rights reserved. No part of the contents of this manual may be reproduced, copied or transmitted in any form or by anymeans including graphic, electronic, or mechanical methods or photocopying, recording, or information storage andretrieval systems without the written permission of <strong>Despatch</strong> <strong>Industries</strong>, unless for purchaser's personal use.
OPERATIONLBB Series Oven Owner’s <strong>Manual</strong>40 Version 15SHifFiltout1o1.HyHSP.LHSP.HPV shift value(offset).PV filter.Output 1function.Output 1hysteresisvalue.Lower limit ofHSP1.Upper limit ofHSP1.Moves the display temperature to the oventemperatureIf the process value is unstable to read, increasing thisvalue steadies the input signal.Function of the output. Must be set to Hi. for High Limitcontrol.Amount of degrees the temperature must be below thesetpoint temperature before the High Limit can be reset 2.0Minimum temperature setting for the High LimitMaximum temperature setting for the High Limit00Hi.0 (32 if F)204 (400 ifF)out2 Second output <strong>Despatch</strong> does not use this function NonediSPPuHiPuLot.AbnNormal displayformat.Process valuehighProcess valuelowAbnormal timeUsed to select the display in normal condition: PV = Process Value SP! = High Limit Setpoint SAFE = The word “safe” in normal conditionRead-Only Data: Maximum process value since lastUNLOCK operation.Read-Only Data: Minimum process value since lastUNLOCK operation.Total accumulated minutes of abnormal conditionssince last UNLOCK operation.PVNoneNoneNone5.4.8. Change High Limit instrument Display from Centigrade toFahrenheitWarning!Changing program parameters alters the function of the Control.Proceed carefully and fully understand each parameter beforechanging that parameter.Configure the High Limit instrument for either °C or °F. Use the following steps to change HighLimit instrument from displaying °C to °F (and for changing back):1. If on the High Limit instrument is lit, press and hold for four (4) seconds toenable and .2. Press and hold for four (4) seconds to enter Setup mode.3. Press until unit displays.4. Press or to display value.5. Use or to move to the desired setting.6. Press to enter the value and advance to the next parameter.Copyright © 20<strong>12</strong> by <strong>Despatch</strong> <strong>Industries</strong>.All rights reserved. No part of the contents of this manual may be reproduced, copied or transmitted in any form or by anymeans including graphic, electronic, or mechanical methods or photocopying, recording, or information storage andretrieval systems without the written permission of <strong>Despatch</strong> <strong>Industries</strong>, unless for purchaser's personal use.
LBB Series Oven Owner’s <strong>Manual</strong>OPERATIONVersion 15 417. Press to return the High Limit instrument to normal mode.8. The High Limit instrument has been changed, enter the desired setpoint.5.5. Working with Optional Protocol 3 Controller Operating ModesRefer to the Protocol 3 Controller Owner’s <strong>Manual</strong> for specifics on working with the Protocol 3controller.Copyright © 20<strong>12</strong> by <strong>Despatch</strong> <strong>Industries</strong>.All rights reserved. No part of the contents of this manual may be reproduced, copied or transmitted in any form or by anymeans including graphic, electronic, or mechanical methods or photocopying, recording, or information storage andretrieval systems without the written permission of <strong>Despatch</strong> <strong>Industries</strong>, unless for purchaser's personal use.
MAINTENANCELBB Series Oven Owner’s <strong>Manual</strong>42 Version 156. MaintenanceDanger!Failure to heed warnings in this instruction manual and onthe oven could result in personal injury, property damage ordeath.Danger!Do not attempt any service on this oven before opening themain power disconnect switch.Warning!Do not place this oven in an environment harmful to electricalcomponents.Placing this oven in an environment detrimental to electricalcomponents (for example, environments where carbon fibers,coal dust or similar contaminants may be present) may resultin component failure.Do not use liquids in the oven. Do not set product or liquidson top of the oven. Liquids that may spill on the oven floor ortop of oven may cause considerable damage to the oven.Contact <strong>Despatch</strong> for options available to help prevent suchfailures.6.1. ChecklistKeep equipment clean. Gradual dirt accumulation retards airflow. A dirty oven can result inunsatisfactory operation such as unbalanced temperature in the work chamber, reducedheating capacity, reduced production, overheated components, and the like. Keep the walls,floor and ceiling of the oven work chamber free of dirt and dust. Floating dust or accumulateddirt may produce unsatisfactory work results. Keep all equipment accessible. Do not permitother materials to be stored or piled against it.Protect controls against excessive heat—particularly controls, motors or other equipmentcontaining electronic components. Temperatures greater than 51.5°C (<strong>12</strong>5°F) should beavoided.Copyright © 20<strong>12</strong> by <strong>Despatch</strong> <strong>Industries</strong>.All rights reserved. No part of the contents of this manual may be reproduced, copied or transmitted in any form or by anymeans including graphic, electronic, or mechanical methods or photocopying, recording, or information storage andretrieval systems without the written permission of <strong>Despatch</strong> <strong>Industries</strong>, unless for purchaser's personal use.
LBB Series Oven Owner’s <strong>Manual</strong>MAINTENANCEVersion 15 43Establish maintenance and checkup schedules. Do this promptly and follow the schedulesfaithfully. Careful operation and maintenance will be more than paid for in continuous, safeand economical operation.Maintain equipment in good repair. Make repairs immediately. Delays may be costly inadded expense for labor and materials and in prolonged shut down.Practice safety. Make it a prime policy to know what you are doing before you do it. Makecaution, patience, and good judgment the safety watchwords for the operation of your oven.6.2. LubricationFan motor bearings are permanently lubricated. All door latches, hinges, door operatingmechanisms, bearing or wear surfaces should be lubricated to ensure easy operation.6.3. Cleaning and Decontamination6.3.1. Cleaning the LBB Series OvenWarning!Do not clean oven without first disconnecting power.For best product results, clean the oven monthly. To clean the oven:1. Wipe all surfaces with a moistened towel or use a neutral cleaning agent.2. Use a moistened towel to remove cleaning agents when finished.3. Dry oven completely before turning it on again.Clean stainless steel surfaces quarterly. To clean stainless steel surfaces:1. Remove stains or spots with MEK (Methyl-Ethyl-Ketone).2. Immediately after using MEK, wash steel surface using a polyurethane cloth or spongewith clean water and liquid detergent.Clean quickly for maximum surface protection.NoticeUsing water that contains chlorine or hydrochloric acid to cleanmay damage the oven. Choose a neutral cleaning agentinstead.Copyright © 20<strong>12</strong> by <strong>Despatch</strong> <strong>Industries</strong>.All rights reserved. No part of the contents of this manual may be reproduced, copied or transmitted in any form or by anymeans including graphic, electronic, or mechanical methods or photocopying, recording, or information storage andretrieval systems without the written permission of <strong>Despatch</strong> <strong>Industries</strong>, unless for purchaser's personal use.
MAINTENANCELBB Series Oven Owner’s <strong>Manual</strong>44 Version 156.3.2. Decontaminating the LBB Series OvenWarning!Do not decontaminate oven without first disconnecting power.Ensure adequate personal safety while decontaminating oven.NoticeBefore using any cleaning or decontamination method exceptthose recommended by the manufacturer, users should checkwith the manufacturer that the proposed method will notdamage the equipment.For best results, decontaminate the work zone daily.1. Wipe all work surfaces with an appropriate disinfectant.2. Use a neutral cleaning agent. Do not use acidic or chlorine cleaning detergents as theymay damage or corrode the oven.If necessary, remove highly contaminated inner chamber partsfor cleaning or exchange.Danger!Explosive gases may form during decontamination. Dry andventilate oven before start-up to avoid explosions.6.4. Routine TestsDanger!Failure to heed warnings in this instruction manual and on theoven could result in personal injury, property damage or death.Copyright © 20<strong>12</strong> by <strong>Despatch</strong> <strong>Industries</strong>.All rights reserved. No part of the contents of this manual may be reproduced, copied or transmitted in any form or by anymeans including graphic, electronic, or mechanical methods or photocopying, recording, or information storage andretrieval systems without the written permission of <strong>Despatch</strong> <strong>Industries</strong>, unless for purchaser's personal use.
LBB Series Oven Owner’s <strong>Manual</strong>MAINTENANCEVersion 15 45Test LBB Series oven functions regularly and carefully for best performance. Safety of personneland maintenance of your equipment may depend on the proper operation of any of thetemperature control functions.6.4.1. Test Control InstrumentTest the Control instrument every 40 hours: Check that the Control instrument OUT LED is cycling ON and OFF Verify that the heater works6.4.2. Test High Limit InstrumentTest the High Limit instrument every 40 hours. With the oven operating at a set temperature, setHigh Limit instrument down to the setpoint operating temperature: The High Limit instrument is tripped when OP1 lights Push after adjusting the High Limit instrument back to a higher setting, or by lettingthe oven temperature drop a few degrees based on the hysteresis value of the High Limitinstrument6.5. Replacement PartsDanger!Do not attempt any service on this oven before opening themain power disconnect switch.To order or return parts, contact <strong>Despatch</strong> Service and Technical Support. When returning parts, a<strong>Despatch</strong> representative will provide an MRA (Material Return Authorization) number. Attachthe MRA number to the returned part for identification. When ordering parts, expedite the processby having the model number, serial number and part number on hand.Global Headquarters Contact Service & TechnicalSupport<strong>Despatch</strong> <strong>Industries</strong> International/Main: 1-952-469-5424 Service: 1-952-469-82308860 207th Street US toll free: 1-888-337-7282 US toll free: 1-800-473-7373Lakeville, MN 55044 Fax: 1-952-469-4513Fax: 1- 952-469-8193USAinfo@despatch.comwww.despatch.comService @despatch.com6.5.1. Replace the Control InstrumentCopyright © 20<strong>12</strong> by <strong>Despatch</strong> <strong>Industries</strong>.All rights reserved. No part of the contents of this manual may be reproduced, copied or transmitted in any form or by anymeans including graphic, electronic, or mechanical methods or photocopying, recording, or information storage andretrieval systems without the written permission of <strong>Despatch</strong> <strong>Industries</strong>, unless for purchaser's personal use.
MAINTENANCELBB Series Oven Owner’s <strong>Manual</strong>46 Version 15Danger!Do not attempt any service on this oven before opening themain power disconnect switch.Tools needed: One-quarter (1/4) inch socket set Screwdriver T20 Torx bit driver1. Disconnect power.2. Remove four screws from the face of the control panel (Figure 13).Figure 13. Remove Control Panel to Access Control Instrument.3. Slide the panel forward (Figure 14).Copyright © 20<strong>12</strong> by <strong>Despatch</strong> <strong>Industries</strong>.All rights reserved. No part of the contents of this manual may be reproduced, copied or transmitted in any form or by anymeans including graphic, electronic, or mechanical methods or photocopying, recording, or information storage andretrieval systems without the written permission of <strong>Despatch</strong> <strong>Industries</strong>, unless for purchaser's personal use.
LBB Series Oven Owner’s <strong>Manual</strong>MAINTENANCEVersion 15 47Figure 14. Providing easy access to the Control instrument.4. Remove wires from the old control instrument, carefully noting which wires connect to whichterminals (Figure 15).Control InstrumentHigh LimitInstrumentThermocouple wiresFigure 15. Remove Old Control and High Limit Instruments and Wiring (Rear View).Copyright © 20<strong>12</strong> by <strong>Despatch</strong> <strong>Industries</strong>.All rights reserved. No part of the contents of this manual may be reproduced, copied or transmitted in any form or by anymeans including graphic, electronic, or mechanical methods or photocopying, recording, or information storage andretrieval systems without the written permission of <strong>Despatch</strong> <strong>Industries</strong>, unless for purchaser's personal use.
MAINTENANCELBB Series Oven Owner’s <strong>Manual</strong>48 Version 155. Move the Control instrument mounting bracket back and off (Figure 16).Control InstrumentMounting BracketFigure 16. Prepare to remove control instrument by removing the mounting bracket.6. Remove old Control instrument from the panel.7. Install new Control instrument into the control panel.8. Secure instrument mounting bracket.9. Reattach wires to the new Control instrument. Double-check that the wires are connectedcorrectly. See Figure 17 for correct Control instrument connections.10. Replace control panel.Figure 17. Connections to Control Instrument.Copyright © 20<strong>12</strong> by <strong>Despatch</strong> <strong>Industries</strong>.All rights reserved. No part of the contents of this manual may be reproduced, copied or transmitted in any form or by anymeans including graphic, electronic, or mechanical methods or photocopying, recording, or information storage andretrieval systems without the written permission of <strong>Despatch</strong> <strong>Industries</strong>, unless for purchaser's personal use.
LBB Series Oven Owner’s <strong>Manual</strong>MAINTENANCEVersion 15 496.5.2. Replace High Limit InstrumentDanger!Do not attempt any service on this oven before opening themain power disconnect switch.Tools needed: One-quarter (1/4) inch socket set Screwdriver T20 Torx bit driver1. Disconnect power.2. Remove four screws from the face of the control panel (Figure 13).3. Slide the panel forward (Figure 14).4. Remove wires from the old High Limit instrument, carefully noting which wiresconnect to which terminals (Figure 15).5. Disconnect High Limit instrument connector from circuit board (Figure 18).High LimitConnectorBlockFigure 18. High Limit Connector Block on Control Board.6. Disconnect the thermocouple wires (Figure 15).7. Press and hold down the tabs holding the High Limit instrument to the control panel and slideit out (Figure 19).Copyright © 20<strong>12</strong> by <strong>Despatch</strong> <strong>Industries</strong>.All rights reserved. No part of the contents of this manual may be reproduced, copied or transmitted in any form or by anymeans including graphic, electronic, or mechanical methods or photocopying, recording, or information storage andretrieval systems without the written permission of <strong>Despatch</strong> <strong>Industries</strong>, unless for purchaser's personal use.
MAINTENANCELBB Series Oven Owner’s <strong>Manual</strong>50 Version 15Figure 19. Press and Hold Tabs to Remove High Limit Instrument.8. Install new High Limit instrument into the control panel.9. Replace mounting bracket.10. Connect High Limit instrument connector plug to the circuit board (Figure 18).11. Reattach thermocouple wires. Make sure that the wires are connected correctly. (Figure 15).See Figure 20 for correct High Limit instrument connections.<strong>12</strong>. Replace control panel.Figure 20. Connections to High Limit Instrument.Copyright © 20<strong>12</strong> by <strong>Despatch</strong> <strong>Industries</strong>.All rights reserved. No part of the contents of this manual may be reproduced, copied or transmitted in any form or by anymeans including graphic, electronic, or mechanical methods or photocopying, recording, or information storage andretrieval systems without the written permission of <strong>Despatch</strong> <strong>Industries</strong>, unless for purchaser's personal use.
LBB Series Oven Owner’s <strong>Manual</strong>MAINTENANCEVersion 15 516.5.3. Replace (Optional) Protocol 3 ControllerRefer to the Protocol 3 Owner’s <strong>Manual</strong> for instructions on replacing the Protocol 3 Controller.6.5.4. Replace Heater UnitDanger!Do not attempt any service on this oven before opening themain power disconnect switch.Tools needed: 3/8 inch wrench One-quarter (1/4) inch socket set T20 Torx bit driver1. Disconnect power.2. Remove shelves (Figure 22).3. Remove left and right side ductsa. Remove screws from each duct.b. Remove duct from oven.4. Remove heater cover (located on the top orbottom of the oven, depending on model).a. Remove screws from the heater cover.b. Remove heater cover from the oven.5. Disconnect heater leads from heater element withwrench, carefully noting which wires connect towhich terminals.6. Remove old heater (Figure 23).a. Remove screws holding the heater frame tothe oven body.b. Remove heater and discard.7. Install new heatera. Secure new heater frame with screws.b. Attach heater leads to appropriate terminals.8. Replace heater cover.9. Replace side ducts.10. Replace shelves.Figure 22. Remove Screws to Remove Each Duct.Copyright © 20<strong>12</strong> by <strong>Despatch</strong> <strong>Industries</strong>.All rights reserved. No part of the contents of this manual may be reproduced, copied or transmitted in any form or by anymeans including graphic, electronic, or mechanical methods or photocopying, recording, or information storage andretrieval systems without the written permission of <strong>Despatch</strong> <strong>Industries</strong>, unless for purchaser's personal use.
MAINTENANCELBB Series Oven Owner’s <strong>Manual</strong>52 Version 15Figure 23. Typical Heating Element.6.5.5. Replace Fan MotorDanger!Do not attempt any service on this oven before opening themain power disconnect switch.Tools needed: One-quarter (1/4) inch socket set 5/32 inch Allen wrenchScrewdriverT20 Torx bit driver1. Disconnect power.2. Remove shelves (Figure 22).3. Remove left and right side ductsa. Remove screws from each duct.b. Remove duct from oven.4. Remove heater cover (located on the top or bottom of the oven, depending on model).Copyright © 20<strong>12</strong> by <strong>Despatch</strong> <strong>Industries</strong>.All rights reserved. No part of the contents of this manual may be reproduced, copied or transmitted in any form or by anymeans including graphic, electronic, or mechanical methods or photocopying, recording, or information storage andretrieval systems without the written permission of <strong>Despatch</strong> <strong>Industries</strong>, unless for purchaser's personal use.
LBB Series Oven Owner’s <strong>Manual</strong>MAINTENANCEVersion 15 53a. Remove screws from the heater cover.b. Remove heater cover from the oven.5. Loosen setscrews (2) on fan wheel inmiddle of oven top. Access the fan wheelthrough the heater opening or bydisconnecting and removing the heaterassembly. Refer to Section 6.5.4 forinformation on removing the heater unit.6. Remove top cover to reveal fan motor(Figure 24).7. Remove fan motora. Disconnect motor leads from circuitboardb. Unscrew screws (4) holding motormounts to bodyc. Lift fan motor from oven body.8. After running at temperature, the fan wheelmay stick to the shaft. Separating the fanwheel from the fan motor shaft may requireforce.9. Take motor mount off old motor.10. Put motor mount onto new motor.11. Replace fan motor.a. Reattach motor to oven body.b. Reattach motor lead plug to circuitboard.Figure 24. Fan Motor Location and Close-up.<strong>12</strong>. Replace top cover.13. Put fan wheel onto shaft from inside of oven.14. Adjust fan wheel for 3/16-inch clearance between wheel and inlet ring.15. Tighten setscrews on the fan wheel.16. Check that setscrews hit the flats machined into the motor shaft.17. Replace heater pan assembly if removed. Refer to Section 6.5.4 for information on removingthe heater unit.18. Replace heater cover.19. Replace side ducts.20. Replace shelves.Copyright © 20<strong>12</strong> by <strong>Despatch</strong> <strong>Industries</strong>.All rights reserved. No part of the contents of this manual may be reproduced, copied or transmitted in any form or by anymeans including graphic, electronic, or mechanical methods or photocopying, recording, or information storage andretrieval systems without the written permission of <strong>Despatch</strong> <strong>Industries</strong>, unless for purchaser's personal use.
MAINTENANCELBB Series Oven Owner’s <strong>Manual</strong>54 Version 157. TroubleshootingLike any equipment operating over long periods of time, technical issues may arise. Table 7 liststhe common technical issues, their causes and remedies.Table 7. Common Technical Issues and Remedies.Technical Issue Probably Cause Suggested Remedy/Next StepNo powerCheck power source and/or oven and wall fuses.Failure to heat orBurned out heater(s) Replace element (see Warranty statement,Section 8.1).only heats up to30–50 °CControl InstrumentmalfunctionCheck control parameters. Replace controller ifOUT LED on controller does not turn on.Loose wireconnectionsDisconnect power and check connections behindcontrol panel.Improperly loaded Reduce load or redistribute load in chamber.workloadLow line voltageSupply sufficient power and proper connections.Check for circuit overload.Slow heat upFrequent heaterelement burnoutErratictemperatureInaccuratetemperatureExcess surfaceor doortemperature1 or 2 heatingelements burned outVent is wide open.Fan motor failureHarmful fumesgenerated by loadSpillage or splatteringof material on heaterelementsOverheating ovenFan motor failureControl instrumentmalfunctionControl instrumentmiscalibrationDoor seal deteriorationDoor closed into top orbottom latch onlyCheck heater amperage on the nameplate.Replace burned out element (see Warrantystatement, Section 8.1).Close vent.Replace fan motor.Increase vent opening or discontinue process.Disconnect power and clean oven chamber andelements.Check the Control and High Limit instruments.Replace fan motor.Check control parameters before replacing theControl instrument.Check control parameters. Recalibrate Controlinstrument.Replace door seal.See specific difficulty below for this problem.Improper airflowExcessivevibrationFan motor failureUnbalanced fan wheelDirty fan wheelUnbalanced fan wheelReplace fan motor.Reposition fan wheel within 3/10” from top ofhousing. Replace fan wheel.Clean fan.Replace fan wheel.Copyright © 20<strong>12</strong> by <strong>Despatch</strong> <strong>Industries</strong>.All rights reserved. No part of the contents of this manual may be reproduced, copied or transmitted in any form or by anymeans including graphic, electronic, or mechanical methods or photocopying, recording, or information storage andretrieval systems without the written permission of <strong>Despatch</strong> <strong>Industries</strong>, unless for purchaser's personal use.
LBB Series Oven Owner’s <strong>Manual</strong>TROUBLESHOOTINGVersion 15 55Technical Issue Probably Cause Suggested Remedy/Next StepFan wheel has shifted Inspect the wheel. Reposition fan wheel withinor fallen.0.25” from top of housing.Grinding noiseOven will notcontrol atSetpointHeater does notshut down untiltemp. reachesthe High LimitsettingDoor closes intotop or bottomlatch onlyDoor will notstay closedDebris has fallen intofan through shaftcollar.High Limit instrumentset too lowControl instrumentmalfunctionAir friction ofrecirculation fanControl instrumentmalfunctionSSR RelaymalfunctionUneven latch tensionadjustmentInadequate latchtensionInspect the wheel for damage. Remove debris.Set the High Limit higher.Check control parameters before replacingControl instrument.Open exhaust air vent. Unit will not control atminimum operating temperature with vent(s)closed.Verify control parameters. Replace controlinstrument if no output exists.Replace relay if Control output exists.Ensure that latch strike is contacting center oflatch. Adjust mounting angle as required. Adjustdoor for even top and bottom latch tension byturning screws on ends of latch. Clockwiseincreases tension on latch. Counterclockwisedecreases tension.Ensure that latch strike is contacting center oflatch. Adjust mounting angle to center asrequired. Increase latch tension by turningscrews on end of latch clockwise. Adjust in evenincrements on all four screws to keep door pulleven.Copyright © 20<strong>12</strong> by <strong>Despatch</strong> <strong>Industries</strong>.All rights reserved. No part of the contents of this manual may be reproduced, copied or transmitted in any form or by anymeans including graphic, electronic, or mechanical methods or photocopying, recording, or information storage andretrieval systems without the written permission of <strong>Despatch</strong> <strong>Industries</strong>, unless for purchaser's personal use.
APPENDICESLBB Series Oven Owner’s <strong>Manual</strong>56 Version 158. Appendices8.1. Standard Products WarrantyCopyright © 20<strong>12</strong> by <strong>Despatch</strong> <strong>Industries</strong>.All rights reserved. No part of the contents of this manual may be reproduced, copied or transmitted in any form or by anymeans including graphic, electronic, or mechanical methods or photocopying, recording, or information storage andretrieval systems without the written permission of <strong>Despatch</strong> <strong>Industries</strong>, unless for purchaser's personal use.
LBB Series Oven Owner’s <strong>Manual</strong>APPENDICESVersion 15 578.2. Optional Equipment8.2.1. Assemble Oven Stand1. Install four rubber grommets into holes in the stand (Figure 25).a. For LBB1-69 stands, the rear grommets mount into the forward set of rear holes.b. On LBB2-<strong>12</strong> stands the rear grommets mount into the set of holes closest to the rearof the stand.2. Place the oven on top of the stand. The four embossed areas in the bottom of the oven shouldcenter in the grommets.3. Using the self-drilling screw and large flat washer provided, install through each embossedarea as shown below.Figure 25. Optional LBB Oven Stand.Copyright © 20<strong>12</strong> by <strong>Despatch</strong> <strong>Industries</strong>.All rights reserved. No part of the contents of this manual may be reproduced, copied or transmitted in any form or by anymeans including graphic, electronic, or mechanical methods or photocopying, recording, or information storage andretrieval systems without the written permission of <strong>Despatch</strong> <strong>Industries</strong>, unless for purchaser's personal use.
APPENDICESLBB Series Oven Owner’s <strong>Manual</strong>58 Version 158.2.2. Timer OptionUse the timer option to count down in hours toward powering the heater OFF (Figure 26).When the timer is ON, the delayedcontact remains closed allowingpower to the heater. The rangedisplay increments from 0 and theTiming LED blinks slowly. Whenthe preset value is reached and thetiming cycle is complete, the TimingLED blinks rapidly and the delayedcontact opens and shuts off theheater. The heater remains off untileither the TIMER switch is turnedOFF, or reset.Range and Decimal Point Switchesare available only when the Time isnot mounted in the panel, todiscourage tampering.Figure 26. Timer Option Displays and Switches.Actual timer may vary from the model pictured (Figure 26).8.2.2.1. Operating the Timer1. Rotate each knob to the desired time setting.2. Turn the Timer Switch to ON. The timer is now incrementing from 0 to the desired setting.3. Set the HEATER switch to ON, if not already ON.4. When the timer reaches the preset value, the heater shuts OFF.5. To reset the timer, set the Timer Switch OFF then to ON.6. To manually control the time, set Timer Switch OFF.Copyright © 20<strong>12</strong> by <strong>Despatch</strong> <strong>Industries</strong>.All rights reserved. No part of the contents of this manual may be reproduced, copied or transmitted in any form or by anymeans including graphic, electronic, or mechanical methods or photocopying, recording, or information storage andretrieval systems without the written permission of <strong>Despatch</strong> <strong>Industries</strong>, unless for purchaser's personal use.
LBB Series Oven Owner’s <strong>Manual</strong>APPENDICESVersion 15 598.2.2.2. Configure the TimerDanger!Do not attempt any service on this oven before opening themain power disconnect switch.The timer is configured for XX.X hours (that is, two positions left of the decimal, one to theright) from our factory. The timer can be easily set up for different timing ranges. Follow theseinstructions to configure the timer:1. Remove power from oven.2. Remove top cover.3. Remove socket from rear of timer.4. Remove timer panel mounting bracket and remove timer from panel.5. Using a small screwdriver, insert it the Range and Decimal Point Switch slots for the timer(Figure 26).a. Slide the Range Switch to the desired position. Verify range by looking in face of timerin the range window.b. Slide the Decimal Point switch to the desired position. Verify Decimal Point position bylooking at the decimal position in face of timer.6. Remount timer in panel.7. Reattach timer socket to timer.8. Replace top cover.9. Apply power to oven and follow instructions in the timer operation section.8.2.3. Timer Option with Audible and Visual AlarmThe Timer option sounds an alarm and turns on a light when the timer times out. Clear the alarm condition by turning the heater switch OFF. Reset the timer before turning heater switch ON. Turning the timer switch off also clears the alarm condition, but the heater remains ON.Each oven schematic (Section 0) shows the wiring for this option.8.2.4. High Alarm Limit OptionThe High Alarm Limit option sounds an alarm and turns on a light when a High Limit conditionoccurs. Silence the alarm horn by pressing the alarm silence switch. The light remains ON. Clear the High Limit condition to clear the alarm. See Troubleshooting (Section 7) forsolutions to High Limit conditions.Copyright © 20<strong>12</strong> by <strong>Despatch</strong> <strong>Industries</strong>.All rights reserved. No part of the contents of this manual may be reproduced, copied or transmitted in any form or by anymeans including graphic, electronic, or mechanical methods or photocopying, recording, or information storage andretrieval systems without the written permission of <strong>Despatch</strong> <strong>Industries</strong>, unless for purchaser's personal use.
APPENDICESLBB Series Oven Owner’s <strong>Manual</strong>60 Version 15Reset the High Limit instrument whenever it has tripped. Reset the High Limit Instrument byallowing the oven chamber to cool slightly (or by setting the High Limit Instrument byseveral degrees) and pushing .Each oven schematic (Section 8.4) shows the wiring for this option.8.2.5. Recorder OptionThe circular chart recorder uses and independent thermocouple to record the user’s process.Charts used are either 24 hour or 7 day. See the recorder manufacturer’s manual supplied withthis manual.Each oven schematic (Section 0) shows the wiring for this option.8.2.6. Stacking Kit Assembly InstructionsStacking Kit only for Models LBB1-23, LBB1-43 and LBB1-69.1. Locate the four stacking kit brackets found in the kit.2. Place each of the brackets on top of each of the four corners of one of the lower ovens in thestack being assembled.3. Slide the angle of each bracket into the slots in the embossed area on top of the oven (Figure27).4. Use the four 10-16 x .50 screws included in the kit to attach the brackets to the oven top.5. Place the upper oven onto the lower one. The embossed feet on the upper oven should fit intothe brackets attached in the last three steps.Figure 27. Stacking Kit Assembly Components.Copyright © 20<strong>12</strong> by <strong>Despatch</strong> <strong>Industries</strong>.All rights reserved. No part of the contents of this manual may be reproduced, copied or transmitted in any form or by anymeans including graphic, electronic, or mechanical methods or photocopying, recording, or information storage andretrieval systems without the written permission of <strong>Despatch</strong> <strong>Industries</strong>, unless for purchaser's personal use.
LBB Series Oven Owner’s <strong>Manual</strong>APPENDICESVersion 15 618.3. Part Lists8.3.1. LBB1-23A-1Table 8. LBB1-23A-1 Parts.Part Number Quantity Description144755 1 Thermocouple140097 2 Switch For Power And Heater057345 1 Relay Heater SSR165051 1 High Limit <strong>Despatch</strong> L91144749 1 Control - Des2000007818 1 Heater 1.2kw <strong>12</strong>0/240v145858 1 Door Seal148048 1 Door Pull008199 2 Latch Ay145828 2 Standard Shelf007281 1 Fan Wheel008333 1 Motor 00.04hp 110/220v006049 1 Control Compartment Muffin Fan150131 1 Circuit Board <strong>12</strong>0v<strong>12</strong>3306 1 Fuse Atdr-04.00a Motor<strong>12</strong>5562 1 Fuse Atdr-<strong>12</strong>.00a Heater8.3.2. LBB1-23B-1Table 9. LBB1-23B-1 Parts.Part Number Quantity Description144755 1 Thermocouple140097 2 Switch For Power And Heater057345 1 Relay Heater SSR165051 1 High Limit - <strong>Despatch</strong> L91144749 1 Control - Des2000007818 1 Heater 1.2kw <strong>12</strong>0/240v145858 1 Door Seal148048 1 Door Pull008199 2 Latch Ay145828 2 Standard Shelf007281 1 Fan Wheel008333 1 Motor 00.04hp 110/220v015229 1 Control Compartment Muffin Fan150132 1 Circuit Board 240v117172 2 Fuse Atdr-03.00a Motor<strong>12</strong>3692 2 Fuse Atdr-6.00a HeaterCopyright © 20<strong>12</strong> by <strong>Despatch</strong> <strong>Industries</strong>.All rights reserved. No part of the contents of this manual may be reproduced, copied or transmitted in any form or by anymeans including graphic, electronic, or mechanical methods or photocopying, recording, or information storage andretrieval systems without the written permission of <strong>Despatch</strong> <strong>Industries</strong>, unless for purchaser's personal use.
APPENDICESLBB Series Oven Owner’s <strong>Manual</strong>62 Version 158.3.3. LBB1-43A-1Table 10. LBB1-43A-1 Parts.Part Number Quantity Description144755 1 Thermocouple140097 2 Switch For Power And Heater057345 1 Relay Heater SSR165051 1 High Limit - <strong>Despatch</strong> L91144749 1 Control - Des2000054353 1 Heater 1.6kw <strong>12</strong>0/240v145920 1 Door Seal148048 1 Door Pull008199 2 Latch Ay146025 2 Standard Shelf007281 1 Fan Wheel008333 1 Motor 00.04hp 110/220v006049 1 Control Compartment Muffin Fan150131 1 Circuit Board <strong>12</strong>0v<strong>12</strong>3306 1 Fuse Atdr-04.00a Motor144785 1 Fuse Atdr-17.5a Heater8.3.4. LBB1-43B-1Table 11. LBB1-43B-1 Parts.Part Number Quantity Description144755 1 Thermocouple140097 2 Switch For Power And Heater057345 1 Relay Heater SSR165051 1 High Limit - <strong>Despatch</strong> L91144749 1 Control - Des2000054353 1 Heater 1.6kw <strong>12</strong>0/240v145920 1 Door Seal148048 1 Door Pull008199 2 Latch Ay146025 2 Standard Shelf007281 1 Fan Wheel008333 1 Motor 00.04hp 110/220v015229 1 Control Compartment Muffin Fan150132 1 Circuit Board 240v117172 2 Fuse Atdr-03.00a Motor144799 2 Fuse Atdr-8.00a HeaterCopyright © 20<strong>12</strong> by <strong>Despatch</strong> <strong>Industries</strong>.All rights reserved. No part of the contents of this manual may be reproduced, copied or transmitted in any form or by anymeans including graphic, electronic, or mechanical methods or photocopying, recording, or information storage andretrieval systems without the written permission of <strong>Despatch</strong> <strong>Industries</strong>, unless for purchaser's personal use.
LBB Series Oven Owner’s <strong>Manual</strong>APPENDICESVersion 15 638.3.5. LBB1-69A-1Table <strong>12</strong>. LBB1-69A-1 Parts.Part Number Quantity Description144755 1 Thermocouple140097 2 Switch For Power And Heater057345 1 Relay Heater SSR165051 1 High Limit - <strong>Despatch</strong> L91144749 1 Control - Des2000007819 1 Heater 2.4kw <strong>12</strong>0/240v145725 1 Door Seal008057 3 Center Door Seal148048 1 Door Pull008199 2 Latch Ay146024 2 Standard Shelf094717 2 Reinforced Shelf007281 1 Fan Wheel008333 1 Motor 00.04hp 110/220v006049 1 Control Compartment Muffin Fan150131 1 Circuit Board <strong>12</strong>0v<strong>12</strong>3306 1 Fuse Atdr-04.00a Motor134923 1 Fuse Atdr-25.00a Heater8.3.6. LBB1-69B-1Table 13. LBB1-69B-1 Parts.Part Number Quantity Description144755 1 Thermocouple140097 2 Switch For Power And Heater057345 1 Relay Heater SSR165051 1 High Limit - <strong>Despatch</strong> L91144749 1 Control - Des2000007819 1 Heater 2.4kw <strong>12</strong>0/240v145725 1 Door Seal008057 3 Center Door Seal148048 1 Door Pull008199 2 Latch Ay146024 2 Standard Shelf094717 2 Reinforced Shelf007281 1 Fan Wheel008333 1 Motor 00.04hp 110/220v015229 1 Control Compartment Muffin Fan150132 1 Circuit Board 240v117172 2 Fuse Atdr-03.00a Motor<strong>12</strong>5562 2 Fuse Atdr-<strong>12</strong>.00a HeaterCopyright © 20<strong>12</strong> by <strong>Despatch</strong> <strong>Industries</strong>.All rights reserved. No part of the contents of this manual may be reproduced, copied or transmitted in any form or by anymeans including graphic, electronic, or mechanical methods or photocopying, recording, or information storage andretrieval systems without the written permission of <strong>Despatch</strong> <strong>Industries</strong>, unless for purchaser's personal use.
APPENDICESLBB Series Oven Owner’s <strong>Manual</strong>64 Version 158.3.7. LBB2-<strong>12</strong>-1Table 14. LBB2-<strong>12</strong>-1 Parts.Part Number Quantity Description144755 1 Thermocouple140097 2 Switch For Power And Heater057345 1 Relay Heater SSR165051 1 High Limit <strong>Despatch</strong> L91144749 1 Control - Des2000007778 1 Heater 3.6kw 208/240v145773 1 Door Seal008057 4 Center Door Seal148048 1 Door Pull008199 2 Latch Ay145779 2 Standard Shelf146023 2 Reinforced Shelf015876 1 Fan Wheel145783 1 Motor 00.25hp 110/220v015229 1 Control Compartment Muffin Fan150132 1 Circuit Board 240v117172 2 Fuse Atdr-03.00a Motor<strong>12</strong>4475 2 Fuse Atdr-20.00a Heater8.3.8. LBB2-18-1Table 15. LBB2-18-1 Parts.Part Number Quantity Description144755 1 Thermocouple140097 2 Switch For Power And Heater057345 1 Relay Heater SSR165051 1 High Limit - <strong>Despatch</strong> L91144749 1 Control - Des2000007818 3 Heater 1.2kw <strong>12</strong>0/240v145814 1 Door Seal008057 4 Center Door Seal148048 1 Door Pull008199 2 Latch Ay016471 2 Standard Shelf105498 2 Reinforced Shelf015876 1 Fan Wheel145783 1 Motor 00.25hp 110/220v015229 1 Control Compartment Muffin Fan150132 1 Circuit Board 240v117172 2 Fuse Atdr-03.00a Motor<strong>12</strong>4475 2 Fuse Atdr-20.00a HeaterCopyright © 20<strong>12</strong> by <strong>Despatch</strong> <strong>Industries</strong>.All rights reserved. No part of the contents of this manual may be reproduced, copied or transmitted in any form or by anymeans including graphic, electronic, or mechanical methods or photocopying, recording, or information storage andretrieval systems without the written permission of <strong>Despatch</strong> <strong>Industries</strong>, unless for purchaser's personal use.
LBB Series Oven Owner’s <strong>Manual</strong>APPENDICESVersion 15 658.3.9. LBB2-27-1Table 16. LBB2-27-1 Parts.Part Number Quantity Description144755 1 Thermocouple140097 2 Switch For Power And Heater057345 1 Relay Heater SSR165051 1 High Limit - <strong>Despatch</strong> L91144749 1 Control - Des2000007819 2 Heater 2.4kw <strong>12</strong>0/240v145814 1 Door Seal008057 4 Center Door Seal148048 1 Door Pull008199 2 Latch Ay016472 2 Standard Shelf105497 2 Reinforced Shelf015876 1 Fan Wheel145783 1 Motor 00.25hp 110/220v015229 1 Control Compartment Muffin Fan150132 1 Circuit Board 240v117172 2 Fuse Atdr-03.00a Motor134923 2 Fuse Atdr-25.00a Heater8.4. Electrical SchematicsThe following pages provide electrical schematics for these LBB Series ovens: LBB1-23A-1: Figure 28 LBB1-69B-1: Figure 33 LBB1-23B-1: Figure 29 LBB2-<strong>12</strong>-1: Figure 34 LBB1-43A-1: Figure 30 LBB2-18-1: Figure 35 LBB1-43B-1: Figure 31 LBB2-27-1: Figure 36 LBB1-69A-1: Figure 32Note that each schematic also includes wiring for the Timer (8.2.2), High Limit Alarm (8.2.4) andRecorder (8.2.5) options.Copyright © 20<strong>12</strong> by <strong>Despatch</strong> <strong>Industries</strong>.All rights reserved. No part of the contents of this manual may be reproduced, copied or transmitted in any form or by anymeans including graphic, electronic, or mechanical methods or photocopying, recording, or information storage andretrieval systems without the written permission of <strong>Despatch</strong> <strong>Industries</strong>, unless for purchaser's personal use.
APPENDICESLBB Series Oven Owner’s <strong>Manual</strong>66 Version 15Figure 28. LBB1-23A-1 Schematic.Copyright © 20<strong>12</strong> by <strong>Despatch</strong> <strong>Industries</strong>.All rights reserved. No part of the contents of this manual may be reproduced, copied or transmitted in any form or by any means including graphic, electronic, or mechanical methodsor photocopying, recording, or information storage and retrieval systems without the written permission of <strong>Despatch</strong> <strong>Industries</strong>, unless for purchaser's personal use.
LBB Series Oven Owner’s <strong>Manual</strong>APPENDICESVersion 15 67Figure 29. LBB1-23B-1 Schematic.Copyright © 20<strong>12</strong> by <strong>Despatch</strong> <strong>Industries</strong>.All rights reserved. No part of the contents of this manual may be reproduced, copied or transmitted in any form or by any means including graphic, electronic, or mechanical methodsor photocopying, recording, or information storage and retrieval systems without the written permission of <strong>Despatch</strong> <strong>Industries</strong>, unless for purchaser's personal use.
APPENDICESLBB Series Oven Owner’s <strong>Manual</strong>68 Version 15Figure 30. LBB1-43A-1 Schematic.Copyright © 20<strong>12</strong> by <strong>Despatch</strong> <strong>Industries</strong>.All rights reserved. No part of the contents of this manual may be reproduced, copied or transmitted in any form or by any means including graphic, electronic, or mechanical methodsor photocopying, recording, or information storage and retrieval systems without the written permission of <strong>Despatch</strong> <strong>Industries</strong>, unless for purchaser's personal use.
LBB Series Oven Owner’s <strong>Manual</strong>APPENDICESVersion 15 69Figure 31. LBB1-43B-1 Schematic.Copyright © 20<strong>12</strong> by <strong>Despatch</strong> <strong>Industries</strong>.All rights reserved. No part of the contents of this manual may be reproduced, copied or transmitted in any form or by any means including graphic, electronic, or mechanical methodsor photocopying, recording, or information storage and retrieval systems without the written permission of <strong>Despatch</strong> <strong>Industries</strong>, unless for purchaser's personal use.
APPENDICESLBB Series Oven Owner’s <strong>Manual</strong>70 Version 15Figure 32. LBB1-69A-1 Schematic.Copyright © 20<strong>12</strong> by <strong>Despatch</strong> <strong>Industries</strong>.All rights reserved. No part of the contents of this manual may be reproduced, copied or transmitted in any form or by any means including graphic, electronic, or mechanical methodsor photocopying, recording, or information storage and retrieval systems without the written permission of <strong>Despatch</strong> <strong>Industries</strong>, unless for purchaser's personal use.
LBB Series Oven Owner’s <strong>Manual</strong>APPENDICESVersion 15 71Figure 33. LBB1-69B-1 Schematic.Copyright © 20<strong>12</strong> by <strong>Despatch</strong> <strong>Industries</strong>.All rights reserved. No part of the contents of this manual may be reproduced, copied or transmitted in any form or by any means including graphic, electronic, or mechanical methodsor photocopying, recording, or information storage and retrieval systems without the written permission of <strong>Despatch</strong> <strong>Industries</strong>, unless for purchaser's personal use.
APPENDICESLBB Series Oven Owner’s <strong>Manual</strong>72 Version 15Figure 34. LBB2-<strong>12</strong>-1 Schematic.Copyright © 20<strong>12</strong> by <strong>Despatch</strong> <strong>Industries</strong>.All rights reserved. No part of the contents of this manual may be reproduced, copied or transmitted in any form or by any means including graphic, electronic, or mechanical methodsor photocopying, recording, or information storage and retrieval systems without the written permission of <strong>Despatch</strong> <strong>Industries</strong>, unless for purchaser's personal use.
LBB Series Oven Owner’s <strong>Manual</strong>APPENDICESVersion 15 73Figure 35. LBB2-18-1 Schematic.Copyright © 20<strong>12</strong> by <strong>Despatch</strong> <strong>Industries</strong>.All rights reserved. No part of the contents of this manual may be reproduced, copied or transmitted in any form or by any means including graphic, electronic, or mechanical methodsor photocopying, recording, or information storage and retrieval systems without the written permission of <strong>Despatch</strong> <strong>Industries</strong>, unless for purchaser's personal use.
APPENDICESLBB Series Oven Owner’s <strong>Manual</strong>74 Version 15Figure 36. LBB2-27-1 Schematic.Copyright © 20<strong>12</strong> by <strong>Despatch</strong> <strong>Industries</strong>.All rights reserved. No part of the contents of this manual may be reproduced, copied or transmitted in any form or by any means including graphic, electronic, or mechanical methodsor photocopying, recording, or information storage and retrieval systems without the written permission of <strong>Despatch</strong> <strong>Industries</strong>, unless for purchaser's personal use.
LBB Series Oven Owner’s <strong>Manual</strong>Version 15 753rdDraft—Copyright © 20<strong>12</strong> by <strong>Despatch</strong> <strong>Industries</strong>.All rights reserved. No part of the contents of this manual may be reproduced, copied or transmitted in any form or by anymeans including graphic, electronic, or mechanical methods or photocopying, recording, or information storage andretrieval systems without the written permission of <strong>Despatch</strong> <strong>Industries</strong>, unless for purchaser's personal use.