Theme: ILP â Individual Learning Plans (ILP)
Theme: ILP â Individual Learning Plans (ILP)
Theme: ILP â Individual Learning Plans (ILP)
- No tags were found...
You also want an ePaper? Increase the reach of your titles
YUMPU automatically turns print PDFs into web optimized ePapers that Google loves.
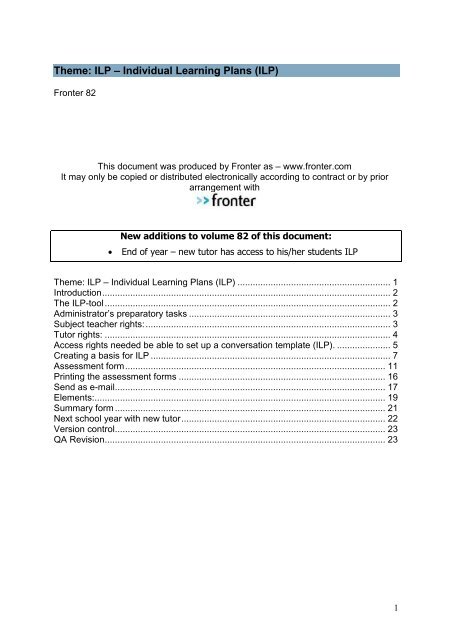
<strong>Theme</strong>: <strong>ILP</strong> – <strong>Individual</strong> <strong>Learning</strong> <strong>Plans</strong> (<strong>ILP</strong>)Fronter 82This document was produced by Fronter as – www.fronter.comIt may only be copied or distributed electronically according to contract or by priorarrangement withNew additions to volume 82 of this document:• End of year – new tutor has access to his/her students <strong>ILP</strong><strong>Theme</strong>: <strong>ILP</strong> – <strong>Individual</strong> <strong>Learning</strong> <strong>Plans</strong> (<strong>ILP</strong>) ............................................................ 1Introduction................................................................................................................. 2The <strong>ILP</strong>-tool................................................................................................................ 2Administrator’s preparatory tasks ............................................................................... 3Subject teacher rights:................................................................................................ 3Tutor rights: ................................................................................................................ 4Access rights needed be able to set up a conversation template (<strong>ILP</strong>). ..................... 5Creating a basis for <strong>ILP</strong> .............................................................................................. 7Assessment form...................................................................................................... 11Printing the assessment forms ................................................................................. 16Send as e-mail.......................................................................................................... 17Elements:.................................................................................................................. 19Summary form .......................................................................................................... 21Next school year with new tutor................................................................................ 22Version control.......................................................................................................... 23QA Revision.............................................................................................................. 231
IntroductionThis document deals with <strong>ILP</strong> (<strong>Individual</strong> <strong>Learning</strong> <strong>Plans</strong>) in Fronter. This is a usefultool for teachers to enable them to follow students’ progress more closely. It makes iteasy for teachers to plan, organise and carry out conversations/tutorials with thestudents/pupils. Teachers who have shared responsibilities for a course, subject or aclass (a typical subject teacher) can enter their assessments of the student/pupil inthis tool and have easy access to work that the students/ pupils have carried out.The tutor teacher will get the total overview of all assessments given by subjectteachers on “their” students/pupils and they also have the possibility to give their ownassessments. Students/pupils can give their self reflection, comments and input aswell.Fronter is continually developing and improving. Consequently, you may find somediscrepancies between documentation and application. This guide was written forFronter 82We hope you find this guide useful.Lillehammer, June 2008Steinar Hov/Ingun VaglidThe <strong>ILP</strong>-toolThis tool can be placed in the personal tool-list:2
Administrator’s preparatory tasksIn this section we describe the tasks that the administrator must perform or check sothat the <strong>ILP</strong> can be used by tutors/mentors and subject teachers.Two new rights must be added in the admin-module; this is carried out underSettings regarding the whole building. These setting can only be carried out by theTop administrator.310 Enable <strong>Individual</strong> learning plan (<strong>ILP</strong>) tool316 Extend contact rights with tutor and subject teacher (if you are already using theAbsence tool this setting will already have been activated).For teachers to be able to view and comment on their students/ pupils, they musthave the appropriate rights for their groups. The administrator needs to make surethat the correct rights have been awarded, either by importing students and teachersor by carrying these out manually.Subject teacher rights:To enable the subject teachers to write an evaluation on their pupils/students theymust have the right Subject teacher for this group of pupils/students.You can do this by first highlighting the relevant subject group (that contains thepupils/students). Then you must select Give others access in this org.unit:In the drop down menu you must then select the group that contains the correctsubject teacher:3
In this example the group with subject teacher is called Art C1001 (T), and you nowgive this group the contact access Subject teacher. It should appear like this:Tutor rights:To enable tutors to write an evaluation/assessment and read the comments from thesubject teachers to their contact pupils they have to have the right Tutor for theircontact/student groups.First you select the correct student/pupil group (here: C1001) and then Give otheraccess in this org.unit:4
Then you have to locate the group that contains Tutor and assign it the right Tutor.Access rights needed be able to set up a conversation template(<strong>ILP</strong>).It is normal for an administrator to prepare for the <strong>ILP</strong> or Conversation to be carriedout during a school year. This may consist of 2 mandatory conversations during theschool year. An administrator does not need any additional access right to do thisand to assign it to all students/pupils and subject teachers and tutors.All teachers are able to create a conversation template without having any extraaccess right beyond what is normal in Fronter for a teacher. But they can only makethem accessible to groups they have View contacts rights on (default on all groupsyou are member of).We recommend that the administrator set up this conversation template withagreement of the lay out and texts from the teachers.Example:Contact group: C1001Contact teacher: C1001 - CTSubject teacher group in Art for these pupils: Art C1001 (T)If the contact teacher wants to create an <strong>ILP</strong>/Conversation, and wants to invite thesubject teacher in Art to give an evaluation/assessment of common pupils/student heneeds to be able to “see” the subject teacher. Below you will see how the settingshould be:5
Creating a basis for <strong>ILP</strong>Once the administrator has carried out the tasks mentioned above, the tool is ready to use. Inprimary, secondary and high schools this tool is typically used for assessments and/or parents’evenings and as a tool for collaboration between teachers regarding individual students. Foruniversity it is mainly used to create the students development plan.Choose New conversation template:1. Title: Give the Conversation a title and a description if you like. Examples of atitle could be: “Conversation spring 2007”, a description could be: “In thepresence of pupil/student and parents”, “Basis for a work-plan”.2. Customise opening hours: choose whether the tutorial base should always beopen. If you select closed you must enter in order to open it when the time isright (the conversation will be on display in the <strong>ILP</strong> overview, but it cannot beopened). You can also select Customise opening hours, so the systemcontrols when the conversation is to be accessible. If an administrator createsconversations that are mandatory during the school year it is good to have thislast option.3. Assessment form: Here you create a form for subject teacher, tutor andstudent/ pupil to use, to give assessment and information prior to a (verbal)conversation. The fields 1,2 etc. are used to define the headings of thecolumns in the form that is to be used. Fronter has created some pre-definedheadings that you may alter yourself. It may also be desirable for the pupil/student to be able to give feedback or write own comments. Place a tick in thefield Write access for student where this is desirable. In all the other columnsthe pupil/ student will only be able to read the teachers’ comments.7
4. Date: Choose a date for when the different basis you select are to bedisplayed. This means you enter from which date the Final assessmentportfolio, Result matrix, Absence and Grades are to be displayed. You willnormally just want to see data that have been added since the previousconversation leading up to the current conversation. Here you select thosebases that are to be accessible in the <strong>ILP</strong>. You will then be able to view forinstance absence and marks without having to switch to the Absence tool;everything is accessible inside the <strong>ILP</strong>- tool. You select those bases youthink you will need for the assessment and during the conversation.5. Summary form: By selecting this option you create a form that is to be usedduring the verbal conversation. This becomes a form where you as ateacher together with the pupil/ student (possibly parents) make notesabout what you have decided and agreed upon during the conversation.Some examples could be: “This is what we have agreed upon”, “Teacher isresponsible for”, ”Pupil/ student is responsible for”, “Short- term goals”,Long- term goals” etc.8
6. Select groups that should have access to this conversation template. Anadministrator will thus recognise the group structure (org. unit structure) thatlies in the admin- module. Everybody who creates a conversation will be ableto view all the groups where they have the access right View contacts. This isstandard right in those groups where they are members themselves. If ateacher is to be able to create a conversation for other groups as well, he/shemust have the access right View contacts or higher for these groups (subjectteacher-right and tutor-right is higher)9
Note you must place a tick for all the groups you want to allow access to theconversation base. There is no “inheritance” downwards in the hierarchy by ticking asuperior group.You finish by selecting Save. The conversation can now be accessed in View underthe <strong>ILP</strong>-tool.When everything above is set, then the teachers and students can access theconversation template from their <strong>ILP</strong> tool in the personal tool bar:10
Assessment formIf the creator of the conversation base placed a tick for Assessment form this will bewhere you start when you click on the title:In the drop down menu for users or groups you will find those pupil-/student groupswhere you are subject or tutor:Note!Administrator will not be able to write evaluations on any pupil/student. as long asthey don’t have subject teacher or tutor access.Since you often need a number of forms (one for each subject or topic etc), eachteacher creates his/her form by clicking on New assessment form:Choose a sensible title for the assessment form. This will be accessible in the dropdown menu Assessment forms. It may be appropriate to use subject names likeMaths, 1MA, English, Social competence etc.Note that a contact teacher will be able to view all forms from subject teachers fortheir tutor/mentor group of pupils/students. A subject teacher will only be able to seehis/her own forms.11
In the screen below you will see a form where a teacher is to fill in assessmentinformation for English.1, 2 and 3 are the headings that were predefined when you created the conversation.There are several ways to fill in an evaluation form:Contracted viewThis is the easiest display to use if the teacher wants to write a shortdescription/assessment on each pupil/student.Click in a text field for a student – it will expand for better typing, and Save.Expanded viewThis display gives you one and one student at the time, and an overview of allassessment forms for the selected student.12
• Click on a field and it will expand substantially:Publishing assessment form to studentsWhen the teacher types in the fields Short term goals etc. it is invisible to thestudents (1). The final assessment form is made visible to the students in to two waysfrom the menu Assessment forms:13
(2): The student can read the text in the fields Short term goals and Long termgoals. The students can also write his/her comments in the field Students’comments.(3): The teacher’s comments are invisible to the student, but the student can writehis/her comments in the field Students’ comments.For a student an assessment form may look like this:The two fields Short term goals and Long term goals are readable to the student, butthe field Students’ comments is writeable. Here the student can write his/hercomments to this conversation.It can look like this:14
Printing the assessment formsBy selecting the printer symbol in the upper right hand corner you can print out theassessment forms:Before the form is printed you will get a preview. The printer button is placed to theright:16
Send as e-mailThese assessment forms can be sent as an e-mail attachment. First you select apupil’s/student’s name from the drop down menu:Send as e-mail is placed at the bottom of the page.The E-mail in Fronter starts up, the form becomes an attachment, and you can enteror search for an e-mail address:17
Elements:The tab next to Assessment form is called Elements. You will find a report (read only)of existing tools you have used in Fronter. The administrator has made themavailable in the conversation template. These tools are mirror of tools in rooms andpersonal rooms in Fronter, so you don’t have to leave the <strong>ILP</strong> tool to get access toevidence of the students work.You will see below the Final assessment portfolio belonging to Helen regarding oneof the learning goals:Under the option Final assessment portfolio in <strong>ILP</strong> it will look like this:19
Summary formWe have now arrived at the actual pupil/student conversation. Search for or select apupil/student from the drop down menu. You can quickly navigate through thepupil/student group by using the Previous and Next buttons. If photos of thepupils/students have been uploaded in the contact card this will also be displayed onthe screen and in the printout of the conversation:You can choose to print the summary of the review:21
or send it as an e-mail attachment:Next school year with new tutorThe <strong>ILP</strong> is saved in Fronter until it will be deleted by the administrator (thecreator/owner). Since the <strong>ILP</strong> tool is a personal tool, the teachers and the studentswill have access to all their <strong>ILP</strong>s as long as they have a login to Fronter.The students new tutor will have access to his/her students <strong>ILP</strong>s.The tutor and the students will have read access to a closed <strong>ILP</strong>/conversationtemplate and they will have write access to an open <strong>ILP</strong>/conversation template (forstudents: only if they have been assigned write access).22
Version controlVersion Date Description Responsible62.1 29.08.06 <strong>Theme</strong>: <strong>ILP</strong> Ingun Vaglid71.1 27.04.07 same Steinar Hov82.1 24.06.08 Added New school Ingun VaglidyearQA RevisionDate Verified by Comments23.10.06 Steinar Hov Checked and corrected27.04.07 Ingun Vaglid Checked and corrected08.07.08 Steinar Hov Checked and corrected23


