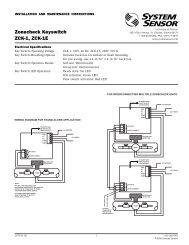
DH100LP Air Duct Smoke Detector with Extended Air Speed Range
DH100LP Air Duct Smoke Detector with Extended Air Speed Range
DH100LP Air Duct Smoke Detector with Extended Air Speed Range

Create successful ePaper yourself
Turn your PDF publications into a flip-book with our unique Google optimized e-Paper software.
[5.3] Secure The <strong>Detector</strong> Housing To The <strong>Duct</strong>Slide the foam gaskets over the tube bushings as shown inFigure 3. Use the two machine screws to screw the detectorhousing to the duct.CAUTION: Do not overtighten the screws.Figure 3. Installation of foam gaskets over samplingtube bushings:SCREW HOLES FORATTACHING HOUSINGTO DUCT WORK.A78-2045-00[5.4] Sampling Tube Installation of <strong>Duct</strong>s GreaterThan 1 1 ⁄2 Feet WideThe sampling tube is identified by a series of air inlet holeson the tube. One plastic tube is included for ducts up to 18″in width. All other lengths must be purchased separately.Order the correct length, as specified in Table 1, for widthof the duct where it will be installed. The exhaust tube ismolded onto the base of the duct housing, and theA2440-00 Exhaust Tube Extension is available as an accessoryin those cases where the molded exhaust port does notextend at least 2 inches into the duct.The inlet tube is always installed <strong>with</strong> the air inlet holesfacing into the air flow. To assist proper installation, thetube’s mounting flange is marked <strong>with</strong> arrows. Make surethe inlet tube is mounted so that the arrows point into theair flow (see Figure 4). Figure 5 shows the various combinationsof tube mounting configurations <strong>with</strong> respect to airflow. Mounting the detector housing in a vertical orientationis acceptable, provided that the air flows directly intothe sampling tube holes as indicated in Figure 4.Table 1. Inlet tubes required for different ductwidths:Outside <strong>Duct</strong> Width Inlet Tube Required1 to 2 ft. ST-1.52 to 4 ft. ST-34 to 8 ft. ST-58 to 12 ft. ST-10[5.4.1] Installation For <strong>Duct</strong>s Greater Than 1 1 ⁄2 FeetBut Less Than 8 Feet Wide1. If the tube is longer than the width of the air duct, drill a3⁄4-inch hole in the duct opposite the hole already cut forthe inlet tube. Make sure the hole is 1″ to 2″ below theinlet hole on the opposite side of the duct to allow formoisture drainage. If the tube is shorter than the width ofthe air duct, install the end plug into the inlet tube asshown in Figure 4. Sampling tubes over 3 ft. long must besupported at the end opposite the duct detector.2. Slide the tube into the housing bushing that meets theair flow first. Position the tube so that the arrows pointinto the air flow.3. Secure the tube flange to the housing bushing <strong>with</strong> two#6 self-tapping screws.4. For tubes longer than the width of the air duct, the tubeshould extend out of the opposite side of the duct. Ifthere are more than 2 holes in the section of the tubeextending out of the duct, select a different length usingTable 1. Otherwise, trim the end of the tube protrudingthrough the duct so that 1″ to 2″ of the tube extend outsidethe duct. Plug this end <strong>with</strong> the end plug and tapeclosed any holes in the protruding section of the tube. Besure to seal the duct when the tube protrudes.Figure 4. <strong>Air</strong> duct detector inlet samplingAIR HOLESFLANGE8-2047-00Figure 5. Tube mounting configurations <strong>with</strong> varyingair flow direction:AIR FLOWDIRECTIONDETECTORHOUSINGAIR FLOWDIRECTIONDETECTORHOUSINGARROWSMUST FACEINTO AIR FLOWINLETTUBEEXHAUSTTUBEDOTS INDICATE POSITION OFSAMPLING TUBE HOLESA. B.EXHAUSTTUBEINLETTUBEHORIZONTAL MOUNTING OF HOUSINGEXHAUSTTUBEEXHAUSTTUBEINLETINLETTUBETUBEC. D.VERTICAL MOUNTING OF HOUSINGAIR FLOW DIRECTIONINLETTUBEENDPLUGAIR FLOWDIRECTIONDETECTORHOUSINGDETECTORHOUSINGAIR FLOWDIRECTIONA78-1812-08NOTE: Only metal sampling tubes may be used on orientationsC and D.D200-15-00 3 I56-0083-00
WARNINGIn no case should more than 2 air inlet holes be cut off thetube. There must be a minimum of 10 holes in the tubeexposed to the air stream.[5.4.2] Installation For <strong>Duct</strong>s More Than 8 Feet WideNOTE: To install inlet tubes in ducts more than 8 feet wide,work must be performed inside the air duct.Sampling of air in ducts wider than 8 feet is accomplishedby using the ST-10 inlet sampling tube. If thetube is shorter than the width of the air duct, installthe end plug into the inlet tube as shown in Figure4 and support the end opposite the duct smokedetector.Install the inlet tube as follows:1. Drill a 3 ⁄4-inch hole in the duct opposite the hole alreadydrilled for the inlet tube. Drill the hole 1″ to 2″ below theinlet hole on the opposite side of the duct to allow formoisture drainage away from the detector.2. Slide the inlet tube <strong>with</strong> the flange into the housing bushingthat meets the air flow first. Position the tube so thatthe arrows point into the air flow. Secure the tube flangeto the housing bushing <strong>with</strong> two #6 self-tapping screws.3. From inside the duct, couple the other sections of theinlet tube to the section already installed using the1⁄2-inch conduit fittings supplied. Make sure that theholes on both of the air inlet tubes are lined up and facinginto the air flow.4. Trim the end of the tube protruding through the duct sothat 1″ to 2″ of the tube extend outside the duct. Plugthis end <strong>with</strong> the end plug and tape closed any holes inthe protruding section of the tube. Be sure to seal theduct when the tube protrudes.NOTE: An alternate method to using the ST-10 is to usetwo ST-5 inlet tubes. Remove the flange from oneof the tubes and install as described above. Afterthe installation, use electrical tape to close offsome of the sampling holes so that there are a totalof 10 to 12 holes spaced as evenly as possibleacross the width of the duct.NOTE: <strong>Air</strong> currents inside the duct may cause excessivevibration, especially when the longer sampling tubes areused. In these cases a 3 inch floor flange (available at mostplumbing supply stores) may be used to fasten the samplingtube to the other side of the duct. When using theflange/connector mounting technique, drill a 1 to 1 1 ⁄4 inchhole where the flange will be used.[5.4.3] Modifications of Inlet Sampling TubesThere may be applications where duct widths are not whatis specified for the installation. In such cases, it is permissibleto modify an inlet sampling tube that is longer thannecessary to span the duct width.Use a 0.193-inch diameter (#10) drill and add the appropriatenumber of holes so that the total number of holesexposed to the air flow in the duct is 10 to 12. Space theadditional holes as evenly as possible over the length of thetube.NOTE: This procedure should only be used as a temporaryfix. It is not intended as a permanent substitute forordering the correct length tubes.[5.5] Install The FiltersTo install the sampling tube filters, simply push the filtersinto the sampling and exhaust tube holes as shown inFigure 6. If a metal sampling tube is used, install the filterover the sampling tube.Figure 6. Sampling tube filter installation:WARNINGFilters require periodic cleaning or replacement, dependingon the amount of dust and dirt accumulated. Visuallyinspect the filters at least quarterly; inspect them moreoften if the dust accumulation warrants it. See Section [6]for more information. Replacement filters can be orderedfrom System Sensor, 3825 Ohio Ave., St. Charles, IL 60174.(Exhaust tube/intake tube filter P/N F36-09-11)[5.6] Field WiringWiring Installation GuidelinesAll wiring must be installed in compliance <strong>with</strong> theNational Electrical Code and the local codes having jurisdiction.Proper wire gauges should be used. The conductorsused to connect smoke detectors to control panels andaccessory devices should be color-coded to prevent wiringmistakes. Improper connections can prevent a system fromresponding properly in the event of a fire.D200-15-00 4 I56-0083-00
For signal wiring, (the wiring between interconnecteddetectors or from detectors to auxiliary devices), it is usuallyrecommended that single conductor wire be no smallerthan 18 gauge. The duct smoke detector terminalsaccommodate wire sizes up to 12 gauge. The last foot ofconduit should be flexible conduit (available in electricalsupply houses), which facilitates easier installation andputs less strain on the conduit holes in the housing. Solidconduit connections may be used if desired.<strong>Smoke</strong> detectors and alarm system control panels havespecifications for allowable loop resistance. Consult thecontrol panel manufacturer’s specifications for the totalloop resistance allowed for the particular model controlpanel being used before wiring the detector loop.Wiring InstructionsThe <strong>DH100LP</strong> detectors are designed for easy wiring. Thehousing provides a terminal strip <strong>with</strong> clamping plates.Wiring connections are made by stripping about 3/8-inchof insulation from the end of the wire, sliding the bare endunder the plate, and tightening the clamping plate screw.The <strong>DH100LP</strong> duct smoke detector is designed to operate<strong>with</strong> 12 or 24 VDC UL listed 2-wire compatible control panels.Alarm current must be limited by the control panel to100mA or less. An example of a UL listed compatible controlpanel is the Fire-Lite model Sensiscan 1000 using zonecard ANC-2 and compatibility identification “A”. Install perinstallation instruction S1000/801. A maximum of 20 detectorsmay be installed per zone.[5.7] Perform <strong>Detector</strong> Check1. Perform STANDBY AND TROUBLE TEST per Section[6.2.1].2. Perform MAGNET TEST per Section [6.2.2.1]. TheRTS451 test of Section [6.2.2.2] may substitute for thisrequirement.3. Perform AIR FLOW TEST per Section [6.1.1].4. Perform SMOKE RESPONSE TEST per Section [6.1.2].5. Perform SENSITIVITY TEST per Section [6.2.3].[5.8] Install The CoverInstall the cover using the six screws that are captured inthe housing cover. Be certain filters are installed as specifiedin Section [5.5]. Make sure that the cover fits into thebase groove and that all gaskets are in their proper positions.Tighten the six screws.[6] <strong>Duct</strong> <strong>Smoke</strong> <strong>Detector</strong> Maintenance And TestProceduresTest and maintain duct smoke detectors as recommendedin NFPA 72. The tests contained in this manual weredevised to assist maintenance personnel in verification ofproper detector operation.Before conducting these tests, notify the proper authoritiesthat the smoke detection system will be temporarily out ofservice. Disable the zone or system under test to preventunwanted alarms.[6.1] <strong>Smoke</strong> Entry Tests[6.1.1] <strong>Air</strong> FlowThe <strong>DH100LP</strong> is designed to operate over an extended airspeed range of 100 to 4000 FPM. To verify sufficient samplingof ducted air, turn the air handler on and use a manometer tomeasure the differential pressure between the two samplingtubes. The differential pressure should measure at least0.0015 inches of water and no more than 1.2 inches of water.Because most commercially available manometers cannotaccurately measure very low pressure differentials, applications<strong>with</strong> less than 500 FPM of duct air speed may requireone of the following: 1) the use of a current-sourcing pressuretransmitter (Dwyer model numbers 607-1 or 607-01) see fieldbulletin Z75-79-00 or; 2) the use of aerosol smoke per section6.1.2.[6.1.2] <strong>Air</strong> Flow Test using Aerosol <strong>Smoke</strong>Drill a 1 ⁄4″ hole 3 feet upstream from the duct smoke detector.With the air handler on, measure the air velocity <strong>with</strong>an anemometer. <strong>Air</strong> speed must be at least 100 FPM. If theair speed is greater than 500 FPM, use a conventionalmanometer to measure differential pressure between thesampling tubes. Spray aerosol smoke* into the duct throughthe 1 ⁄4″ hole for five seconds. Wait two minutes for the ductsmoke detector to alarm. If the duct smoke detector alarms,air is flowing through the detector. Remove the duct smokedetector cover and blow out the residual aerosol smoke fromthe chamber and reset the duct smoke detector. Use ducttape to seal the aerosol smoke entry hole.*Aerosol smoke can be purchased from Home Safeguard Industries,Malibu, CA. Phone: 310/457-5813.To determine if smoke is capable of entering the sensingchamber, visually identify any obstructions. Plug theexhaust and inlet tube holes to prevent ducted air from carryingsmoke away from the detector head, then blow smokesuch as cigarette, cotton wick, or punk directly at the headto cause an alarm. REMEMBER TO REMOVE THE PLUGSAFTER THIS TEST, OR THE DETECTOR WILL NOT FUNC-TION PROPERLY.[6.1.3] Filter ReplacementThe filters do not substantially affect smoke performanceeven when up to 90% of the filter is clogged. Quarterlyvisual inspection usually suffices to determine whether thefilters should be replaced because only a high percentage ofcontamination affects performance. If further testing isrequired, compare differential pressure readings <strong>with</strong> and<strong>with</strong>out the filters installed. If the difference exceeds 10%replace the filters. In no case should the pressure differentialfall below 0.0015 inches of water.D200-15-00 5 I56-0083-00
Figure 7. System wiring diagram for 2-wire duct smoke detectors (detectors powered from initiating circuit):CAUTIONDo not loop wire under terminals when wiring detectors. Break wire runs to provide system supervision of connections.UL LISTEDCOMPATIBLE 2-WIRECONTROL PANEL(+)ALARMINITIATIONLOOP1ST DETECTORIN LOOP DH100SUPERVISORYSWITCH7 6(+) IN (+) OUT45(+)(–)(+)(–)RA400Z (OPTIONAL)REMOTE ALARM LED2.8 VDC NOM.IN ALARMLAST DETECTORIN LOOP DH100SUPERVISORYSWITCH7 6(+) IN (+) OUT45(+)(–)(+)(–)EOL RESISTORSPECIFIED BYPANEL MANUFACTURERRA400Z (OPTIONAL)EREMOTE ALARM LEDOLR2.8 VDC NOM.IN ALARM(–)8(–) IN (–) OUT8(–) IN (–) OUTSTYLE D OPTIONAL WIRINGA78-2350-01Figure 8. Wiring diagram for RTS451/RTS451KEY Remote Test Station to 2-wire duct smoke detectors:2-Wire Wiring to RTS 451 KEYV In +7V In / V Out –8DH100RTS451 KEYTest +15TestTest / Reset –24Reset +33RA +41AlarmLEDResetRA –52V Out +66 No ConnectionV In +V In / V Out –78Panel+–[6.2] Standby, Alarm, And Sensitivity Tests[6.2.1] Standby And TroubleStandby — Look for the presence of the flashing greenLED through the transparent housing cover.The LED should flash approximately every 10seconds.Trouble —If the Green LED does not flash, then the detectorlacks power (check wiring, panel, orpower supply), the detector board is missing(replace), or the unit is defective (return forreplacement).Test —The trouble condition can be caused intentionallyto verify correct operation of the system.Remove the detector board to cause atrouble condition locally and at the systemcontrol panel.D200-15-00 6 I56-0083-00
[6.2.2] Alarm Tests[6.2.2.1] M02-04-00 Magnet Test1. Place the painted surface of the magnet onto the TESTlocator on the bottom of the housing (Figure 9).2. The red alarm LEDs on the detector should latch on, asshould any accessories (i.e. RA400Z, RTS451). Verifysystem control panel alarm status, and control panelexecution of all intended auxiliary functions (i.e. fanshutdown, damper control, etc.).3. The detector must be reset by the system control panel,the local reset button, or the remote accessory.Figure 9. Testing detector alarm:[7] <strong>Detector</strong> Cleaning ProceduresNotify the proper authorities that the smoke detector systemis undergoing maintenance, and that the system willtemporarily be out of service. Disable the zone or systemundergoing maintenance to prevent unwanted alarms andpossible dispatch of the fire department.[7.1] <strong>Air</strong> Filters1. Turn off power to the system.2. Remove and inspect sampling tube filters.3. If filters are heavily coated <strong>with</strong> dirt, replace them <strong>with</strong>new filters. If they are not heavily coated, use a vacuumcleaner or compressed air nozzle to remove dust, thenreinstall the filters.[7.2] Photo <strong>Detector</strong> Boards1. Remove the screen by gently grasping on each side andpulling straight off2. Lift the photo chamber in the same fashion. Vacuum thescreen and cover. Use clean, compressed air to loosenand blow out any remaining debris. Replacementscreens (S08-39-01) are available.3. Vacuum photo chamber, then use clean compressed airto blow area clean.4. Replace the chamber by pressing it onto the base. Pressthe screen into place. It should fit tightly on the chamber.[6.2.2.2] RTS451/RTS451KEY Remote Test StationThe RTS451/RTS451KEY Remote Test Station facilitates testof the alarm capability of the duct smoke detector as indicatedin the RTS451/RTS451KEY manual. The <strong>DH100LP</strong>duct smoke detector can be reset by theRTS451/RTS451KEY. If a system control panel is used, thepanel itself may also require testing.To install the RTS451/RTS451KEY, connect the device asshown in Figure 8; wire runs must be limited to 25 ohmsor less per interconnecting wire.[6.2.3] Sensitivity Tests[6.2.3.1] MOD400 or MOD400R TestAfter verification of alarm capability, use the MOD400R testmodule <strong>with</strong> a voltmeter to check detector sensitivity asindicated in the test module’s manual. The housing covermust be removed to perform this test.[8.0] Board Replacement[8.1] <strong>Detector</strong> Board Replacement1. Remove the two detector board mounting screws.2. Pull gently on the board to remove it.3. To replace the board, align the board mounting features,holes, and the interconnect terminals. Push the boardinto place.4. Secure board <strong>with</strong> the two mounting screws.[8.2] Power Board replacement1. Disconnect wiring from the terminal block.2. Remove the two power board mounting screws.3. Pull gently on the board to remove it.4. To replace the board, align the board mounting features,holes, and the interconnect terminals. Push the boardinto place.5. Secure board <strong>with</strong> the two mounting screws.6. Re-connect wiring to terminal block.If test module readings indicate that the detector head isoutside of the acceptable range that is printed on the labelof the detector, the detector requires cleaning per Section[7] of this manual.D200-15-00 7 I56-0083-00