Operator's Guide Sequin Device - ZSK Stickmaschinen GmbH
Operator's Guide Sequin Device - ZSK Stickmaschinen GmbH
Operator's Guide Sequin Device - ZSK Stickmaschinen GmbH
- No tags were found...

You also want an ePaper? Increase the reach of your titles
YUMPU automatically turns print PDFs into web optimized ePapers that Google loves.
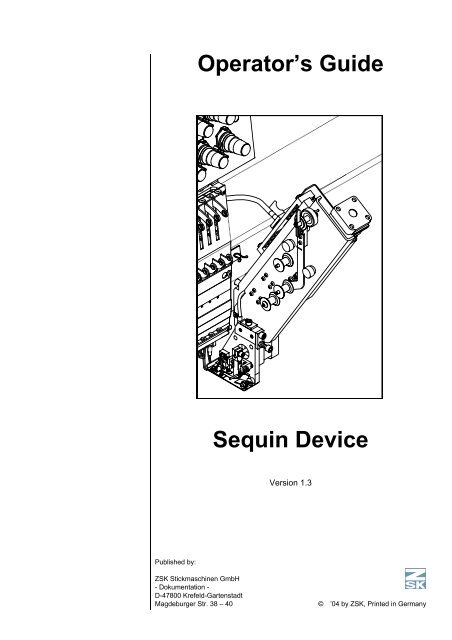
Operator’s <strong>Guide</strong><strong>Sequin</strong> <strong>Device</strong>Version 1.3Published by:<strong>ZSK</strong> <strong>Stickmaschinen</strong> <strong>GmbH</strong>- Dokumentation -D-47800 Krefeld-GartenstadtMagdeburger Str. 38 – 40© ’04 by <strong>ZSK</strong>, Printed in Germany
Subject to change. © ’04 by <strong>ZSK</strong>, Printed in Germany
ContentsContentsFunction 1 - 1Intended use . . . . . . . . . . . . . . . . . . . . . . . . . . . . . . . . . . . . . . . . . . . 1 - 1Materials . . . . . . . . . . . . . . . . . . . . . . . . . . . . . . . . . . . . . . . . . . . . . . 1 - 1Overview 2 - 1General view. . . . . . . . . . . . . . . . . . . . . . . . . . . . . . . . . . . . . . . . . . . 2 - 1Partial view: LEDs. . . . . . . . . . . . . . . . . . . . . . . . . . . . . . . . . . . . . . . 2 - 2Partial view: sequin head . . . . . . . . . . . . . . . . . . . . . . . . . . . . . . . . . 2 - 3Assembling 3 - 1Erstmontage . . . . . . . . . . . . . . . . . . . . . . . . . . . . . . . . . . . . . . . . . . . 3 - 1Needle holder . . . . . . . . . . . . . . . . . . . . . . . . . . . . . . . . . . . . . . . . . . 3 - 2Clearance betweenblade plate and stitch plate . . . . . . . . . . . . . . . . . . . . . . . . . . . . . 3 - 3Removing/installing. . . . . . . . . . . . . . . . . . . . . . . . . . . . . . . . . . . . . . 3 - 5Changing sequin head . . . . . . . . . . . . . . . . . . . . . . . . . . . . . . . . . . . 3 - 8Embroidery preparations 4 - 1Installing reel. . . . . . . . . . . . . . . . . . . . . . . . . . . . . . . . . . . . . . . . . . . 4 - 1Threading sequin tape . . . . . . . . . . . . . . . . . . . . . . . . . . . . . . . . . . . 4 - 1Threading yarn . . . . . . . . . . . . . . . . . . . . . . . . . . . . . . . . . . . . . . . . . 4 - 4Exchanging needle . . . . . . . . . . . . . . . . . . . . . . . . . . . . . . . . . . . . . . 4 - 4Changing position . . . . . . . . . . . . . . . . . . . . . . . . . . . . . . . . . . . . . . . 4 - 5Control unit settings . . . . . . . . . . . . . . . . . . . . . . . . . . . . . . . . . . . . . 4 - 8Reduction in embroidery field size . . . . . . . . . . . . . . . . . . . . . . . . . 4 - 1400009t13IVZ.fm 26.2.04/Ge <strong>Sequin</strong> <strong>Device</strong> - Version 1.3 C - 1
Contents<strong>Sequin</strong> designs 5 - 1Editing. . . . . . . . . . . . . . . . . . . . . . . . . . . . . . . . . . . . . . . . . . . . . . . . 5 - 1Punching. . . . . . . . . . . . . . . . . . . . . . . . . . . . . . . . . . . . . . . . . . . . . . 5 - 1Troubleshooting 6 - 1Maintenance 7 - 1Monthly . . . . . . . . . . . . . . . . . . . . . . . . . . . . . . . . . . . . . . . . . . . . . . . 7 - 1Index I - 1C - 2 <strong>Sequin</strong> <strong>Device</strong> - Version 1.3 00009t13IVZ.fm 26.2.04/Ge
Function1. Function1.1 Intended useThe <strong>ZSK</strong> sequin device is used for embroidery with commercially available sequins.It must be used in conjunction with special sequin designs containing specialfunctions that actuate the sequin device.1.2 Materials1.2.1 Embroidery material<strong>Sequin</strong>s can be attached to all materials that are suitable for conventional embroidery.1.2.2 YarnNOTEAvoid using cotton yarns as far as possible because they fray easilyon the sharp edges of the sequins.High-strength polyester and monofilament yarns are particularly suitable forsequin embroidery.1.2.3 <strong>Sequin</strong>sCommercially available sequin tapes on reels can be used with the <strong>ZSK</strong> sequindevice. One suitable sequin head is required for each sequin diameter.Range of sequin diameters:Standard sequin diameters:<strong>Sequin</strong> hole diameter:<strong>Sequin</strong> thickness:Reel diameter:4-9 mm5 mm, 7 mm1.5 mm0.2 mm180 mm00009113.fm 26.2.04/Ge,Kx <strong>Sequin</strong> <strong>Device</strong> - Version 1.3 1 - 1
Function1 - 2 <strong>Sequin</strong> <strong>Device</strong> - Version 1.3 00009113.fm 26.2.04/Ge,Kx
Overview2.2 Partial view: LEDsNOTESome sequin devices are equipped with light-emitting diodes (LEDs)that indicate the device's current position.Figure 2,2:View of right side withLEDs2.2-12.2-2Lit LED indicates:(2.2-1) = Rest position(2.2-2) = Interim position(2.2-3) = Operating position2.2-300008115The operating position is adopted as soon as sequins are to be attached to the designor parts of the design.The sequin device adopts the interim position when individual parts of the designare not to be embroidered with sequins.The rest position is adopted once the design is finished.2 - 2 <strong>Sequin</strong> <strong>Device</strong> - Version 1.3 00009213.fm 26.2.04/Ge,Kx
Overview2.3 Partial view: sequin headFigure 2,3:Partial view, sequin head<strong>Sequin</strong> head connectingcable<strong>Sequin</strong> head mountingFeed leverPositioning wireHinged bladeSlideControl barLeaf springBlade plate0000812700009213.fm 26.2.04/Ge,Kx <strong>Sequin</strong> <strong>Device</strong> - Version 1.3 2 - 3
Overview2 - 4 <strong>Sequin</strong> <strong>Device</strong> - Version 1.3 00009213.fm 26.2.04/Ge,Kx
Assembling3. Assembling3.1 ErstmontageThe initial installation of sequin devices is to be performed only byservice personnel trained specifically to carry out this task by<strong>ZSK</strong>.The <strong>ZSK</strong> sequin device is available in two different versions for mounting eitheron the left or right of the embroidery head. If sufficient space is available, two sequindevices can be attached to each head; one on the left and one on the right.Figure 3,1:Presser foot and needleholder for sequin device3.1-1When the sequin device is installedfor the first time, a special presserfoot (3.1-1) and needle holder (3.1-2) are attached at the relevant outermostneedle of the embroidery head.3.1-200008123NOTEOnce it has been made ready for sequins, the needle can still beused for conventional embroidery without sequins as well, but thequality is likely to be impaired. If you wish to resume conventionalembroidery to the usual quality standard, you are advised to havethe machine set up again accordingly by <strong>ZSK</strong> service engineerstrained to performed this work.00009313.fm 26.2.04/Ge,Kx <strong>Sequin</strong> <strong>Device</strong> - Version 1.3 3 - 1
Assembling3.2 Needle holderNOTE00008124Depending on the version, two different needle holders are availablefor the sequin device. If you wish to embroider caps with the sequindevice, you need the needle holder with the rounded underside. Itcan be obtained subsequently from <strong>ZSK</strong> under order number:270 022 204.3.2.1 Exchanging needleNOTEBefore reinstalling the needle holder, make sure that the threadguide is correctly positioned. Depending on the version of thesequin device (e.g. right-hand sequin device = right-hand threadguide) the thread guide is inserted in the right or left side of theneedle holder. See Fig. 3,2.Figure 3,2:Needle holderwith thread guideRightLeft00008143Figure 3,3:Exchanging needle holder• Slacken off screw (3.3-3).• Remove needle.3.3-13.3-23.3-3• Grip O-ring (3.3-1) and washer(3.3-2).• Remove needle holder.• Attach new needle holder.• Tighten screw.000081213 - 2 <strong>Sequin</strong> <strong>Device</strong> - Version 1.3 00009313.fm 26.2.04/Ge,Kx
Assembling3.3 Clearance betweenblade plate and stitch plateFigure 3,4:Overview, clearancebetween blade plate andstitch plateBlade plate, bottom edgeStitch plate, top edge 00008121Figure 3,5:Table, adjustment rangefor clearance betweenblade plate and stitch plate3.3.1 Adjustment rangeClearance betweenblade plate and stitch plateNeedle holder00008124 00008124Suitable forallembroidery applicationsMinimum (mm)Maximum (mm)essential for4,56,5cap embroidery0000810300008106Needle holder00008122 00008120Suitable forallembroidery applicationsMinimum (mm)Maximum (mm)except4,05,0cap embroidery00008104000081050000810500009313.fm 26.2.04/Ge,Kx <strong>Sequin</strong> <strong>Device</strong> - Version 1.3 3 - 3
Assembling3.3.2 Adjusting clearanceWhen adjusting the clearance between the blade plate and stitchplate, always observe the values in table Fig. 3,5 otherwisemechanical damage can occur. Realign the sequin head once youhave adjusted the clearance. See “Aligning sequin head”.NOTEThe clearance from the bottom edge of the blade plate to the topedge of the stitch plate is accurately adjusted at the factory for mostembroidery applications. If you wish to embroidery very thick materialsor designs containing appliqués with the sequin device, youcan increase the clearance up to the maximum value indicated. Consulttable Fig. 3,5 for the available adjusting range.00380832• Use the control unit to move the sequin head to the operating position. See“Changing position manually” under TFT or LCD.Figure 3,6:Adjusting clearance• Slacken off adjusting screw (3.6-1).3.6-1• Adjust the clearance by slidingthe sequin device in theappropriate direction.• Tighten the adjusting screw.000081093 - 4 <strong>Sequin</strong> <strong>Device</strong> - Version 1.3 00009313.fm 26.2.04/Ge,Kx
Assembling3.4 Removing/installingSwitch off the machine and pull out the mains plug beforeremoving or reinstalling the sequin device.You can detach the sequin device if you do not intend to use it for an extendedperiod. You can reinstall the head easily yourself because no adjustments need tobe made.3.4.1 RemovingWhen detaching the sequin device, never slacken off fasteningscrew (3.7-1). Slackening off this screw readjusts the entiresequin device.Figure 3,7:Do not slacken offfastening screw3.7-10000812500009313.fm 26.2.04/Ge,Kx <strong>Sequin</strong> <strong>Device</strong> - Version 1.3 3 - 5
AssemblingFigure 3,8:Removing3.8-13.8-23.8-33.8-4• Move the sequin device to therest position.• Slacken off screws (3.9-1)(depending on sequin deviceversion).• Pull out connector (3.8-2).• Place connecting cable (3.8-1) inplastic clip (3.8-3) on the front ofthe machine.• Remove retaining screw (3.8-4)while gripping the sequindevice; pull off the device to thefront.00008113 00008107Figure 3,9:Connector,variant with screws3.9-100008142Figure 3,10:Plastic clip • Twist the ends of the clip tosecure the connecting cable.000081123 - 6 <strong>Sequin</strong> <strong>Device</strong> - Version 1.3 00009313.fm 26.2.04/Ge,Kx
Assembling3.4.2 InstallingNOTEFigure 3,11:Installing3.11-13.11-23.11-33.11-4The sequin devices are consecutively numbered. Always installthem in the prescribed sequence. In compliance with the embroideryhead numbering, start on the right of the machine with sequin deviceNo. 1.• Insert the sequin device with pin(3.11-4) in matching adapter(3.11-3).• Tighten retaining screw (3.11-5).• Release connecting cable (3.11-1) from the plastic clip.• Insert connector (3.11-2) in themating socket.3.11-500008113 00008107NOTEInsert the connector in the mating socket without exerting any force– it is designed to prevent insertion the wrong way round.Figure 3,12:Connector with screws3.12-1Depending on the version of the sequindevice:• Turn screws (3.12-1) to makethem hand-tight.0000814200009313.fm 26.2.04/Ge,Kx <strong>Sequin</strong> <strong>Device</strong> - Version 1.3 3 - 7
Assembling3.5 Changing sequin headThe sequin head has to be changed if you wish to work with a different sequin diameter.NOTEAfter changing the sequin head, adjust the sequin feed. See “Adjustingsequin feed”.3.5.1 Detaching sequin headFigure 3,13:Detaching sequin head• Disconnect the machine fromthe power supply.• Pull out sequin head connector(3.13-1).3.13-13.13-23.13-3• Unscrew and remove cableclamp screw (3.13-3).• Release the cable from cableclamp (3.13-2).00008104Figure 3,14:Detaching sequin head3.14-13.14-2• Unscrew and remove retainingscrew (3.14-1) while grippingsequin head (3.14-3).• Lower the sequin head andremove it from mounting (3.14-2).3.14-3000081083 - 8 <strong>Sequin</strong> <strong>Device</strong> - Version 1.3 00009313.fm 26.2.04/Ge,Kx
Assembling3.5.2 Installing sequin headFigure 3,15:Installing sequin head3.15-13.15-23.15-33.15-43.15-5• Slacken off locknut (3.15-4).• Slightly slacken off stop screw(3.15-5).• Insert sequin head (3.15-3) pinmounting (3.15-2) and push itagainst the stop pin.• Lightly tighten retaining screw(3.15-1).00008130NOTEInsert the connector in the mating socket without exerting any force– it is designed to prevent insertion the wrong way round.Figure 3,16:Installing sequin head3.16-13.16-2• Insert connector (3.16-1) in themating socket.• Secure the cable with cableclamp (3.16-2).• Insert sequin tape. See“Embroidery preparations”.• Switch on the machine.00008111• Execute a manual color change. Consult the operator's guide for the controlunit.• Lower the sequin device to the operating position. See “Embroiderypreparations”.00009313.fm 26.2.04/Ge,Kx <strong>Sequin</strong> <strong>Device</strong> - Version 1.3 3 - 9
Assembling3.5.3 Aligning sequin headSwitch on manual pantograph positioning before working on themachine, while it is stationary, with the main switch on. In this setting,you can operate the pantograph manually, but cannot startthe machine inadvertently.- Aligning front to back00008110Figure 3,17:Aligning front to back3.17-13.17-23.17-33.17-4• Slightly slacken off retainingscrew (3.17-1).• Slacken off locknut (3.17-3).• Turn adjusting screw (3.17-4) toposition the sequin head inmounting (3.17-2) so that theneedle is located towards theback of the sequin hole. SeeFig. 3,19.00008104• Tighten the retaining screw.• Tighten the locknut.3 - 10 <strong>Sequin</strong> <strong>Device</strong> - Version 1.3 00009313.fm 26.2.04/Ge,Kx
Assembling- Aligning side to side00008132NOTEManufacturing tolerances can make it necessary for you to align thesequin head in the side-to-side direction.Figure 3,18:Side view• Slightly slacken off retainingscrew (3.18-1).3.18-13.18-23.18-3• Slacken off fastening screw(3.18-3).• Align the sequin head with theneedle by means of eccentricbolt (3.18-2).• Tighten the retaining screw.• Tighten the fastening screw.00008133Checking alignmentFigure 3,19:Needle positionHinged blade0000810200009313.fm 26.2.04/Ge,Kx <strong>Sequin</strong> <strong>Device</strong> - Version 1.3 3 - 11
Assembling3 - 12 <strong>Sequin</strong> <strong>Device</strong> - Version 1.3 00009313.fm 26.2.04/Ge,Kx
4. Embroidery preparationsEmbroidery preparations4.1 Installing reelFigure 4,1:Installing reelFelt washersEnd washer000081354.2 Threading sequin tapeFigure 4,2:Threading sequin tape attop• Thread the sequin tape aroundthe rollers. See Fig. 4,2.0000812800009413.fm 26.2.04/Ge,Kx <strong>Sequin</strong> <strong>Device</strong> - Version 1.3 4 - 1
Embroidery preparationsFigure 4,3:Insertion aid• With insertion aid (4.3-1)attached, push the sequin tapeinto the sequin head.4.3-1⇒The insertion aid raisesslide (4.4-3).00008139Figure 4,4:Feed lever• Pull back feed lever (4.4-1) withcontrol bar (4.4-2) and hold it inposition.4.4-14.4-24.4-300008131Figure 4,5:Threading sequin tape atbottom00008126• Pull the insertion aid out of the sequin head towards the sequin feed Fig. 4,5.4 - 2 <strong>Sequin</strong> <strong>Device</strong> - Version 1.3 00009413.fm 26.2.04/Ge,Kx
Embroidery preparationsNOTEWith the aid of control bar (4.4-2) on the feed lever you can operatethe sequin feed manually and thus check that the sequin tape is beingadvanced correctly.4.2.1 Manual trimmingFigure 4,6:Trimming sequin tape• Trim any surplus tape bypressing down hinged blade(4.6-1).4.6-10000811600009413.fm 26.2.04/Ge,Kx <strong>Sequin</strong> <strong>Device</strong> - Version 1.3 4 - 3
Embroidery preparations4.3 Threading yarnNOTEPass the thread that attaches the sequin tape to the work throughthe thread guide before threading the appropriate needle.000081434.4 Exchanging needle4 mm dia. sequin tapeNOTEIf you wish to embroider 4 mm dia. sequin tape, you must use a specialneedle with a flat side. This needle is supplied together with thesequin head for embroidering 4 mm dia. sequin tape. It can be reorderedfrom <strong>ZSK</strong> under order number: 574 687. Change the needle inthe same way as you would change a conventional one. When insertingthe needle, it is essential to ensure that the flat side faces thehinged blade.000081184 - 4 <strong>Sequin</strong> <strong>Device</strong> - Version 1.3 00009413.fm 26.2.04/Ge,Kx
4.5 Changing positionEmbroidery preparationsNOTEThe sequin device is actuated automatically by means of specialfunctions in the design or by special machine operations.The sequin device is automatically returned to the rest position inthe event of a malfunction, e.g. a thread break. Once the fault hasbeen remedied, it is lowered again when the machine is next startedup.You can also move individual sequin devices to the rest positionmanually by pressing the appropriate embroidery head button – theembroidery head and thus the sequin device are switched off, andthe sequin device moves to the rest position.4.5.1 Operating, rest and interim positionsThe table below describes the various positions of the sequin device and the situationsin which they can occur.Figure 4,7:Table of sequin devicepositionsPosition<strong>Sequin</strong> devicewithout LEDs<strong>Sequin</strong> device withLEDsRest position(raised)e.g.Head offThread breakSpecial functions:Raise sequinTrimmingNeedle changeEnd of designe.g.Head offThread breakSpecial functions:Needle changeEnd of designInterim position(middle)not availablee.g.Special functions:Raise sequinTrimmingOperating position(lowered)EmbroideringEmbroidering00009413.fm 26.2.04/Ge,Kx <strong>Sequin</strong> <strong>Device</strong> - Version 1.3 4 - 5
Embroidery preparations<strong>Sequin</strong> device without LEDsThe sequin head is lowered to the operating position for embroidering sequinsand raised again afterwards to the rest position.<strong>Sequin</strong> device with LEDsThe sequin head is lowered to the operating position for embroidering sequinsand raised again afterwards to the rest position. Once the design is finished, thesequin device adopts the rest position. The adopted position is indicated by therelevant LED. Also see “Partial view: LEDs”.4.5.2 Changing position manuallyYou can trigger a position change manually from the control unit for testing purposesas well.TFT control unitStarting from the “<strong>ZSK</strong> machine control” menu:0000813600461015• Press button EService.00461051• Press button A Tests / diagnostics.• In the menu “Test machine devices” press the appropriate button for theinstalled version of the sequin device, e.g. button D <strong>Sequin</strong> right (if the deviceis installed on the right).00461315• Press button X Start testing.00380832• Depending on the machine type, either press the reverse embroidery key orpush the operating lever back to the left and hold.⇒The sequin device moves to the next position.4 - 6 <strong>Sequin</strong> <strong>Device</strong> - Version 1.3 00009413.fm 26.2.04/Ge,Kx
Embroidery preparationsLCD control unitStarting from the “Machine” basic screen:00008114MENU• Press MENU key.003808295• Press key 5 “Service”.00380811+MENU• Hold down SHIFT and press MENU.00380825 00380829• Press key 9 “More service functions”.003808153• Press key 3 “Test machine attachment”.0038080900380820 003808232• In the selection menu use the cursor keys to select the appropriate option, e.g.“<strong>Sequin</strong> right”.• Press key 2 “Start testing”.0038080800380832• Depending on the machine type, either press the reverse embroidery key orpush the operating lever back to the left.⇒The sequin device moves to the next position.NOTEYou can employ the same method to initiate a single sequin feed fortest purposes – at the time the sequin device must be in the rest position(raised). Mark the SEQUIN LEFT or SEQUIN RIGHT item. Thenpress the STOP key or move the lever to the left as appropriate.00009413.fm 26.2.04/Ge,Kx <strong>Sequin</strong> <strong>Device</strong> - Version 1.3 4 - 7
4.6 Control unit settingsEmbroidery preparations4.6.1 Switching embroidery device on and offTFT control unitStarting from the “<strong>ZSK</strong> machine control” menu:0000813600461014• Press button D Machine setup.• In the menu “Embroidery machine setup data” underB Tools, switch the embroidery device on or off as required. To do so,activate/deactivate the box alongside C <strong>Sequin</strong>s. Consult the operator's guidefor the control unit.LCD control unitStarting from the “Machine” basic screen:00008114MENU• Press MENU key.00380829• Press key 4 “Machine setup”.00380810• Press key 4 “Tools”.003808103• Press key 3 “<strong>Sequin</strong>s”.00380809or1• Press key 0 “Deactivate” or 1 “Activate”.00380816 003808074 - 8 <strong>Sequin</strong> <strong>Device</strong> - Version 1.3 00009413.fm 26.2.04/Ge,Kx
Embroidery preparations• Press the RETURN key to confirm your selection.00380830• Press the RETURN key again to accept the tools setup.00380830NOTEIndividual sequin devices can also be switched on and off, togetherwith the heads to which they are attached, with the embroidery headbuttons. If the embroidery devices are switched off in the Toolsmenu, designs containing sequins cannot be embroidered.4.6.2 Adjusting speedNOTEA maximum speed of 700 rpm is recommended for embroidering sequins.The speed is automatically set to 700 rpm when the sequindevice is activated.TFT control unitStarting from the “<strong>ZSK</strong> machine control” menu:0000813600461014• Press key D Machine setup.In the menu “Embroidery machine setup data” under A Speeds setup, you can setthe sequin embroidery speed under F <strong>Sequin</strong>s. Consult the operator's guide forthe control unit.• Enter the desired speed alongside menu item F <strong>Sequin</strong>s.00461273• Confirm the speed with X Confirm.00009413.fm 26.2.04/Ge,Kx <strong>Sequin</strong> <strong>Device</strong> - Version 1.3 4 - 9
Embroidery preparationsLCD control unitStarting from the “Machine” basic screen:00008114MENU• Press MENU key.00380829• Press key 4 “Machine setup”.003808101• Press key 1 “Speeds setup”.003808075• Press key 5 “<strong>Sequin</strong>s”.00380811• Enter the desired speed on the control unit's number keypad.• Press the RETURN key to confirm your selection.00380830• Press the RETURN key again to accept the speed.003808304 - 10 <strong>Sequin</strong> <strong>Device</strong> - Version 1.3 00009413.fm 26.2.04/Ge,Kx
Embroidery preparations4.6.3 Adjusting sequin feedNOTEAdjust the sequin feed only if you have changed to a sequin head fora different sequin size.TFT control unitStarting from the “<strong>ZSK</strong> machine control” menu:0000813600461014• Press button D Machine setup.Set the feed with Motor for sequin feed ... in the menu “Embroidery machine setupdata” under C <strong>Sequin</strong>s setup.• Enter the nominal sequin size (e.g. “7” for an outside diameter of 7 mm) inthe Motor for sequin feed ... box.00461273• Confirm the setting with X Confirm.LCD control unitStarting from the “Machine” basic screen:00008114MENU• Press MENU key.00380829• Press key 4 “Machine setup”.00380810MENU• Hold down SHIFT and press MENU.00380825 0038082900009413.fm 26.2.04/Ge,Kx <strong>Sequin</strong> <strong>Device</strong> - Version 1.3 4 - 11
Embroidery preparations• Press key 9 “More service functions”.003808151or2• Depending on the installed device, press key 1 or 2.0038080700380808• Enter the nominal sequin size (e.g. “7” for an outside diameter of 7 mm) inthe box.• Press the RETURN key to confirm.00380830TFT and LCD control unitsNOTEOnce you have adjusted the sequin feed, perform a feed motor resetin order to return the motor to its 0 position.Initiating a resetFigure 4,8:Reset• Use control bar (4.8-3) to movefeed lever (4.8-2) to the travellimit in the feeding direction ofthe sequin tape.4.8-1• Slacken off screw (4.8-1).4.8-24.8-3000081294 - 12 <strong>Sequin</strong> <strong>Device</strong> - Version 1.3 00009413.fm 26.2.04/Ge,Kx
Embroidery preparationsFigure 4,9:Start key00264096• Press start key⇒ A whistle sounds.⇒ The reset is initiated.• Tighten screw (4.8-1).Figure 4,10:Stop key • Press stop key00264094⇒ The reset isterminated.00009413.fm 26.2.04/Ge,Kx <strong>Sequin</strong> <strong>Device</strong> - Version 1.3 4 - 13
Embroidery preparations4.7 Reduction in embroidery field sizeNOTEWhen in the operating position, the sequin device reduces the sizeof the available embroidery field (4.11-1).Depending on the machine type, the safety area (4.11-2) inside theborder frame (4.11-3) is of various sizes or entirely absent. This areadetermines the extent of the lateral restriction of the embroideryfield (dimension A in table Fig. 4,13).Figure 4,11:Embroidery field withoutuse of sequins4.11-14.11-24.11-3000080104 - 14 <strong>Sequin</strong> <strong>Device</strong> - Version 1.3 00009413.fm 26.2.04/Ge,Kx
Embroidery preparationsNOTEBefore embroidering, check that the motif fits inside the availableembroidery field when the sequin devices are lowered. To avoid additionalrestrictions, use only flat border or side clamps to securethe work at the side.Figure 4,12:Restricted embroidery fieldwith sequin deviceinstalled on right4.12-1Restricted embroidery field (4.12-1)with sequin device (4.12-2) installedon right. If the sequin deviceis mounted on the left, the embroideryfield is accordingly reduced onthe left (mirror image).4.12-200008010Figure 4,13:Table of embroidery fieldrestrictions00008134Embroidery field restrictionfor border frame embroidery(device on right)Flat border clampleft/rightFlat side clampleft/rightToggle-joint clampleft/rightA[mm]B[mm]C[mm]≤ 60 90 15≤ 40 90 15≤ 60 100 15NOTESpecial note must be taken of the reduced embroidery field in caseof single frame embroidery.Switch off the sequin device (SEQUINS OFF) once you no longerneed it. The sequin device does not reduce the size of the embroideryfield when it is in the rest position.With the sequin device lowered (in the operating position), no otherspecial functions can be executed apart from sequin functions andjump stitches.00009413.fm 26.2.04/Ge,Kx <strong>Sequin</strong> <strong>Device</strong> - Version 1.3 4 - 15
Embroidery preparations4 - 16 <strong>Sequin</strong> <strong>Device</strong> - Version 1.3 00009413.fm 26.2.04/Ge,Kx
<strong>Sequin</strong> designs5. <strong>Sequin</strong> designs5.1 EditingDo not use the HEIGHT, WIDTH and ANGLE editor functions withsequin designs.The lengths of certain stitches are matched to the sequin diameter and must notbe modified globally with the HEIGHT and WIDTH functions.The final stitch before inserting a sequin must always be positioned after the sequin(see 'Punching' below). It must not come out in front as a result of rotatingthe design with ANGLE.5.2 PunchingNOTE<strong>Sequin</strong> designs should always be created by experienced punchersfamiliar with the peculiarities of sequin embroidery.To help non-punchers understand design-related embroidery problems, we haveoutlined a number of important basic rules that must be observed when punchingsequin designs. These basic rules are not envisaged as a substitute for a punchingmanual. Punchers will find detailed information on creating sequin designs inthe manuals provided with their punching software and in the relevant specialistliterature.00009513.fm 26.2.04/Ge,Kx <strong>Sequin</strong> <strong>Device</strong> - Version 1.3 5 - 1
<strong>Sequin</strong> designs<strong>ZSK</strong> sequin designs contain special functions for sequins:- The SEQUINS ON function advances the sequin and inserts a stitch in thesequin hole. The sequin device is lowered automatically the first timeSEQUINS ON occurs.- SEQUINS OFF raises the sequin device to the rest position.- Before embroidering sequins, execute a needle change to the needle to whichthe sequin device is assigned.If the needle misses the sequin hole (Fig. 5,1) because the sequinis incorrectly placed, this may result in damage to the embroiderymaterial, needles or stitch plates.Figure 5,1:<strong>Sequin</strong> advance and finalstitch before sequin isattached5.1-15.1-2- <strong>Sequin</strong>s are fed from the front(5.1-1). The last stitch before asequin is inserted must belocated behind the positionenvisaged for the sequin (5.1-2),otherwise the sequin will bedeflected by the taut upperthread and placed in the wrongposition.Figure 5,2:Applying sequins - You are recommend to apply thesequins with a sequence ofstitches forming a star. In theillustration the SEQUINS ONfunction is initiated by the stitchfrom 1 to 2.5 - 2 <strong>Sequin</strong> <strong>Device</strong> - Version 1.3 00009513.fm 26.2.04/Ge,Kx
Troubleshooting6. TroubleshootingThe following tables are designed to help you rectify faults caused by incorrectoperation or minor damage.Fault Possible cause RemedyNo sequin advance Connector not inserted properly • Check that all the sequin deviceconnectors are properlyinserted<strong>Sequin</strong> tape incorrectly inserted • Insert the sequin tape againIndividual sequinheads not beingraised/loweredConnector not inserted properly• Check that all the sequin deviceconnectors are properlyinsertedEmbroidery head is switched off • Switch on embroidery headNeedle break whenattaching sequinsThread break whenattaching sequinsError in design:the final stitch before the sequinwas outside the permitted area• Edit the designIncorrect sequin head • Insert the correct sequin headfor the sequin diameter<strong>Sequin</strong> tape incorrectly inserted • Insert the sequin tape again<strong>Sequin</strong> feed incorrectly set • Reset in the EMBROIDERYMACHINE SETUP DATA menuYarn too weak • Use polyester or monofilamentyarnNeedle positioned in front half ofsequin hole• Adjust front-to-back alignmentof sequin head00009613.fm 26.2.04/Ge,Kx <strong>Sequin</strong> <strong>Device</strong> - Version 1.3 6 - 1
TroubleshootingFault Possible cause Remedy<strong>Sequin</strong>s trimmed atthe incorrect placeIncorrect sequin head • Insert the correct sequin headfor the sequin diameter<strong>Sequin</strong> feed incorrectly set • Reset in the EMBROIDERYMACHINE SETUP DATA menu<strong>Sequin</strong> tape incorrectly inserted • Insert the sequin tape again<strong>Sequin</strong> devicecolliding withembroidery frameScreen message:END POSITIONSEQUINDesign does not fit inside theavailable embroidery fieldStart point of design was not chosencorrectly<strong>Sequin</strong> head has not been moved toits top or bottom end position• Choose a different design Bearin mind that the embroideryfield is reduced by the footprintof the sequin head• Align the pantograph carefullybefore starting the design. Bearin mind that the embroideryfield is reduced by the footprintof the sequin head• Check all connections Checkwhether the spindle isadequately lubricated and - ifnecessary - apply a littlegrease. If the messagecontinues to be issued, contactthe <strong>ZSK</strong> service department6 - 2 <strong>Sequin</strong> <strong>Device</strong> - Version 1.3 00009613.fm 26.2.04/Ge,Kx
Maintenance7. Maintenance7.1 MonthlyAs a general rule, cleaning and maintenance work are to be carriedout only with the mains plug removed from the socket.Lubricate the spindles of all sequin devices every month with the grease providedwith the machine accessories.7.1.1 Greasing spindleFigure 7,1:Greasing spindle• Detach cover (7.1-1) from therear of the sequin device.• Apply a light coating of greasewith a brush along the entirelength of spindle (7.1-2).7.1-1• Attach the cover.7.1-200008014On no account is the machine to be restarted before you have reinstalledall covers properly.00009713.fm 26.2.04/Ge,Kx <strong>Sequin</strong> <strong>Device</strong> - Version 1.3 7 - 1
Maintenance7 - 2 <strong>Sequin</strong> <strong>Device</strong> - Version 1.3 00009713.fm 26.2.04/Ge,Kx
IndexIndexAAdapter 2-1Adjusting speed 4-9Aligning front to back, sequin head 3-10Aligning sequin head 3-10Aligning side to side, sequin head 3-11Assembling 3-1BBlade plate 2-3CCable clamp 3-9Cap embroidery 3-2Changing position manually 4-6Checking alignment of sequin head 3-11Cleaning and maintenance work 7-1Clearance between blade plate and stitch plate 3-3Clearance, adjusting 3-4Connector (sequin device) 2-1Connector (sequin head) 3-9Connector with screws 3-63-7Connector, inserting 3-73-9Control bar 2-3Control unit settings 4-8Converted needle 3-1Cotton yarns 1-1DDifferent sequin size 4-11EEccentric bolt 3-11Editing 5-1Embroidery device, switching on and off 4-8Embroidery field restriction,border frame embroidery 4-15Embroidery material 1-1Embroidery preparations 4-1Exchanging needle 4-4Exchanging needle holder 3-2FFeed lever 2-34-2Front-to-back alignment, sequin head 3-10Function 1-1GGeneral view 2-1<strong>Guide</strong> roller, bottom 2-1<strong>Guide</strong> roller, top 2-1HHinged blade 2-3IInitial installation 3-1Insertion aid 4-2Insertion aid, pulling towards sequin feed 4-2Installing reel 4-1Installing sequin device 3-7Intended use 1-1Interim position 2-24-5LLCD, adjusting sequin feed 4-11LCD, adjusting speed 4-10LCD, changing position manually 4-7LCD, embroidery device, switching on and off 4-8Leaf spring 2-3LED lit 2-2LEDs 2-2MMaintenance 7-1Manual trimming, sequin tape 4-3Materials 1-1Monofilament yarns 1-1Mounting for sequin head 2-3NNeedle change 5-2Needle holder 3-13-2Needle holder, cap embroidery 3-2Needle holder, exchanging 3-2Needle holder, rounded underside 3-2Needle, converted 3-1OOperating position 2-24-54-14Overview 2-1PPartial view, LEDs 2-200009t13MIX.fm 26.2.04/Ge,Kx <strong>Sequin</strong> <strong>Device</strong> - Version 1.3 Index - 1
IndexPartial view, sequin head 2-3Plastic clip 3-6Polyester yarns 1-1Position, changing manually 4-6Positioning wire 2-3Presser foot 3-1Punching 5-1QQuality impairment 3-1RReduced embroidery field, single frame 4-15Reel holder 2-1Reel, installing 4-1Removing sequin device 3-5Reset, initiating 4-12Reset, terminating 4-13Rest position 2-24-5TTensioning roller 2-1TFT, adjusting sequin feed 4-11TFT, adjusting speed 4-9TFT, changing position manually 4-6TFT, embroidery device, switching on and off 4-8Thread guide 3-24-4Threading 4-4Threading sequin tape 4-1Threading yarn 4-4Troubleshooting 6-1YYarn 1-1Yarn, threading 4-4SSafety area 4-14sequin 4-3<strong>Sequin</strong> advance 5-2<strong>Sequin</strong> designs 5-1<strong>Sequin</strong> device with LEDs 4-6<strong>Sequin</strong> device without LEDs 4-6<strong>Sequin</strong> diameter 1-1<strong>Sequin</strong> feed, adjusting 3-84-11<strong>Sequin</strong> feed, manual 4-3<strong>Sequin</strong> feed, pulling insertion aid towards 4-2<strong>Sequin</strong> head 2-1<strong>Sequin</strong> head mounting 2-3<strong>Sequin</strong> head, changing 3-8<strong>Sequin</strong> head, connecting cable 2-3<strong>Sequin</strong> head, connector 3-9<strong>Sequin</strong> head, detaching 3-8<strong>Sequin</strong> head, partial view 2-3<strong>Sequin</strong> size, different 4-11<strong>Sequin</strong> tape, 4 mm dia. 4-4<strong>Sequin</strong> tape, threading 4-1<strong>Sequin</strong> tape, threading at bottom 4-2<strong>Sequin</strong> tape, threading at top 4-1<strong>Sequin</strong> tape, trimming manually 4-3<strong>Sequin</strong>s,applying 5-2Settings, control unit 4-8Side-to-side alignment, sequin head 3-11Single frame, reduced embroidery field 4-15Slide 2-3Special needle 4-4Speed, adjusting 4-9Switching off and on, embroidery device 4-8Switching on and off, embroidery device 4-8Index - 2 <strong>Sequin</strong> <strong>Device</strong> - Version 1.3 00009t13MIX.fm 26.2.04/Ge,Kx
Index00009t13MIX.fm 26.2.04/Ge,Kx <strong>Sequin</strong> <strong>Device</strong> - Version 1.3 Index - 3
<strong>Sequin</strong> <strong>Device</strong> - Version 1.3