Chiller Manual.pdf - Vogt Tube Ice
Chiller Manual.pdf - Vogt Tube Ice
Chiller Manual.pdf - Vogt Tube Ice
- No tags were found...

Create successful ePaper yourself
Turn your PDF publications into a flip-book with our unique Google optimized e-Paper software.
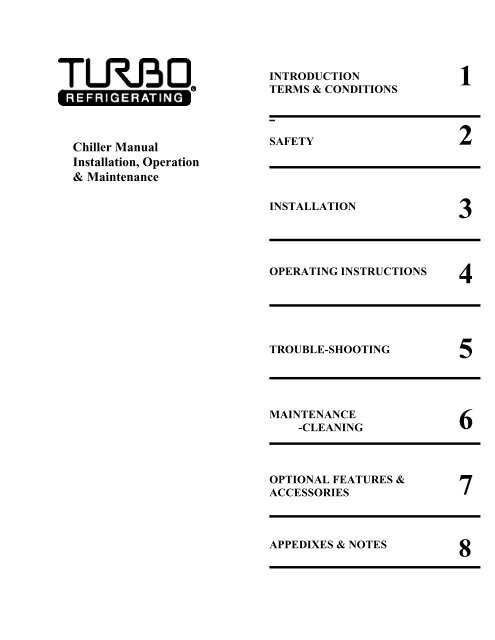
<strong>Chiller</strong> <strong>Manual</strong>Installation, Operation& MaintenanceINTRODUCTIONTERMS & CONDITIONS_SAFETYINSTALLATION123OPERATING INSTRUCTIONS4TROUBLE-SHOOTING5MAINTENANCE-CLEANING6OPTIONAL FEATURES &ACCESSORIES7APPEDIXES & NOTES8
Read Safety Section before installing or using equipment<strong>Chiller</strong> <strong>Manual</strong> Installation, Operation & MaintenanceINTRODUCTIONTurbo Refrigerating is asupplier of fluid chillers,icemaking, and ice storageequipment. TURBO® doesnot engineer or design fluidchilling systems, icesystems, ice plants, orprocessing lines. TURBOcan provide assistance inlocating qualifiedcompanies familiar with theinstallation and operation ofTURBO chillers. Contactthe factory at the address ortelephone numbers listed atthe end of this section.Information on safety,installation, operation,maintenance and troubleshootingis contained in thismanual. If you havequestions concerning any ofthese phases, contactTURBO or one of itsdistributors to ensure thatyou fully understand theinstructions and guidelines.You must read all of theinformation carefully andmake sure that all personnelinvolved in the installationhave also read andunderstood the informationand safety instructions. Thiswill help avoid injury topersonnel and/or damage tothe equipment. Both arevaluable assets to youroperation. Take the time toprotect them.Read the manual contentsbefore you start yourinstallation or operation.This will save time byensuring that all necessarymaterials and tools areavailable when theequipment arrives.HistoryTURBO has beenproducing a line of fluidchillers since 1984equipment as well asicemakers and icegenerators for the iceindustry since 1960. Thechillers described in thismanual are part of a familyof products designedspecifically for theindustrial market for avariety of cooling needs.Fluid Heat ExchangersHTD and HF series heatexchangers are designed toinstantaneously chill fluidsfalling over verticalstainless steel plates in athin falling film. Because ofmethod of chilling theliquid heat exchangers areoften referred to as fallingfilm chillers.HTD SeriesHTD stands for HighTemperature Difference.Fluids are chilled or heatedover large temperaturedifferences, ranging from5°F to 60°F in a single passusing R-22, ammonia orglycol as the refrigerantinside the plate. Systems areavailable in directexpansion (DX), floodedand recirculated models.Flow rates are availableover a wide range but aretypical considered relativelylow. Higher flow rates canbe obtained with HFchillers.HF <strong>Chiller</strong>sHF stands for High Flow.Fluids are chilled overnarrow temperaturedifferences, ranging from1°F to 2°F. The plate’s longnarrow geometry enableshigh fluid flow over theIntroduction 2/01 Turbo Refrigerating 1-1
Read Safety Section before installing or using equipmentplate. Ammonia, R-22 andglycol are all available foruse in direct expansion,flooded and recirculatedsystems.ApplicationsHTD/HF chillers aresuitable for a variety ofapplications including:• Food• Beverage• Chemical• ManufacturingModelsA number of standard andspecial chiller plates areavailable in a variety ofconfigurations to meetmany applications. Standardplate sizes include:• 48” x 60”• 72’ x 60”• 96” x 60”• 144” x 24”Refrigerants/RefrigerantFeed<strong>Chiller</strong>s are available in R-22, ammonia, and glycolwith direct expansion (DX),flooded, and recirculatedrefrigerant feed. <strong>Chiller</strong>scan be furnished with theirown high side andcondensing unit orconnected to existingrefrigeration systems.Associated Equipment<strong>Ice</strong>makers/<strong>Ice</strong> GeneratorsTURBO® C-Line<strong>Ice</strong>makersPackaged ice applicationsrequire a dry sub-cooled iceand uniform fragmentednuggets. TURBO hasproduced the C-lineicemaker since 1964. Thisproduct line uses a waterdefrost to produce ice incapacities ranging from 1ton per dry to 200 tons perday in CAR and CAR-LR(ammonia) and CF (R-22)models.TURBO® TIG/TIGAR<strong>Ice</strong> GeneratorsIn industrial applicationswhere ice is being used forprocessing or for top icing,TURBO produces a seriesof wet ice generators calledthe TIG (R-22) and TIGAR(NH3) series. These hot gasdefrost icemakers are builtwith the same high qualitystandards and engineeringas the TURBO® icemakersof the sixties. The onlydifference is that theicemaking process producesslightly wetter ices due tothe hot gas defrost, and thestandard system used toproduce dry, uniform icenuggets is eliminated. As aresult, a random shapedpiece of fragmented ice isproduced at a lower cost perton.In applications wheretotally dry, uniform ice isnot required; theTIG/TIGAR series offers alow cost alternative.Typical Applications• Produce (broccoli,carrots, etc.) – top icing inthe field (trailer mountedunits) or in the processingarea• Concrete icing• Ingredient icing(bakeries)• Fish icing• Poultry icing• Chemical and dyeprocesses• Emergency coolingloads• <strong>Ice</strong> slurries• Catering trucks• Salad bars or display ice• Food processing<strong>Ice</strong> Storage SystemsTURBO® rakes and storagebins were introduced in1967. There are three basicsizes in the hydraulicversion as well as twolarger versions known asautomatic ice rakes(described in this manual).The smaller hydraulicmodels range in capacityfrom 20 to 87 tons while thelarger automatic ice rakesrange from 100 to 300 tonsof ice storage.TURBO rakes have beenused in USDA inspectedinstallations.USDA DesignAll TURBO® ice storagesystems are designed tomeet USDA guidelines andmeet rugged industrialstandards which make themthe most reliable in theindustry. Each system isdesigned to make theloading and unloading ofthe ice storage system as1-2 Turbo Refrigerating 2/01 Introduction
Read Safety Section before installing or using equipmentsafe and simple as possible.Regardless of size, all of theice storage systems operatein basically the same simpleyet reliable manner.The entire load and unloadsequence is automatic anddoes not require theoperator to be in contactwith the ice or any movingparts in the ice storagesystem.The continuous presence ofan operator is not requiredalthough it is recommended.At the end of the day, thebin is empty (on a designday). The bin refillsovernight and is full whenpersonnel return to work.NOTE: All controls areadjustable to allow theload or unload rate tomatch the customer’sproduction and/ordelivery requirements.Rake VariationsCB and Automatic rakes areavailable in a number ofstandard sizes toaccommodate bulk storagecapacities ranging from 20tons to 400 tons. Models areavailable in standard 10’,12’-6”, 15’ and 20’ widths;20’ to 55’ length; heightsfrom 9’ to 25’ making itpossible to produce avariety of standardcapacities.Optional Rake FeaturesAlthough TURBO designsand builds the ice storagesystem to be as flexible aspossible, the standardsystem may not meet aparticular application.TURBO can design astorage system to meetalmost any need.TURBO® Block PressTURBO offers anotherfeature to make optimumprofits from your iceproduction. Instead ofthrowing away the snowproduced by the breakerbar, ice sizer, screwconveyors, or otherhandling devices, install aTURBO® block press. Thisblock press converts thesnow into ten or fifty-fivepound blocks of ice.Introduced in 1977, theblock press is a completelyautomatic, hydraulicpowered unit capable ofproducing from 120 to anexcess of 400 ten poundblocks per hour.The block press is availablewith a block baggerattachment, which means:• Eliminates handlinguntil the block is in the bag• A better product• Higher profitsRugged industrialconstruction and stainlesssteel or UHMW in all areasof ice contact make theTURBO® block press themost reliable on the market.Special ApplicationsTURBO is in the businessof supplying equipment tomeet the needs of thecustomer. If you have anapplication or a need that isnot discussed here, contact:Turbo Refrigerating, LLCSales DepartmentP.O. Box 396Denton, Texas 76202-0396Phone: 940-387-4301Fax: 940-382-0364Web Site:WWW.vogtice.comCustomer ServiceThe TURBO servicedepartment providesassistance for all customerneeds. TURBO conductstraining schools at thefactory and at variouslocations throughout theworld.NOTE: The model andserial number of yourTURBO equipment islocated on the datanameplate attached to theelectrical control panel.Please refer to the modeland serial number whenmaking inquiries aboutthe equipment. This willenable our personnel tohandle your questionsquickly and accurately.Introduction 2/01 Turbo Refrigerating 1-3
Read Safety Section before installing or using equipmentHigh ValuesTURBO highly values its friends and customers in the industry. Please remember to:T hink safely – act safely.U nderstand operating procedures and dangers of the equipment.R emember to think before you act.B efore you act, understand the consequences of your actions.O bserve equipment warnings and labels.1-4 Turbo Refrigerating 2/01 Introduction
Read Safety Section before installing or using equipmentTurbo Refrigerating, LLC(the “Company”) agrees tosell the Equipmentdescribed herein upon thefollowing terms andconditions of sale which,accordingly, supersede anyof Buyer’s additional orinconsistent terms andconditions of purchase.1. Terms and Prices(a) All orders are to beaccompanied by a twentypercent (20%) downpayment or an acceptableirrevocable letter of creditconfirmed on a U.S. Bankacceptable to Turbo. Noorders are to be enteredwithout payment or L/C inhand.(b) All orders are subject tothe approval of theCompany’s home office.Unless otherwise stated,standard terms of paymentare thirty (30) days net fromthe earlier of date ofshipment or readiness of theEquipment for shipment. Ifpartial shipments are made,payment shall become dueand payable to the partialshipment.(c) In addition to thepurchase price, Buyer shallpay any excise, sales,privilege, use or any othertaxes, Local, State orFederal, which theTERMS &CONDITIONSCompany may be requiredto pay arising from the saleor delivery of theEquipment or the usethereof. Prepaid freight, ifapplicable, will be added tothe purchase price andinvoiced separately. Whereprice includes transportationor other shipping charges,any increases intransportation rates or othershipping charges from dateof quotation or purchaseorder shall be for theaccount of and paid byBuyer.(d) Contract prices aresubject to adjustment to theCompany’s prices in effectat time of shipment unlessotherwise specified in aseparate Price AdjustmentPolicy attached to theproposal or other contractdocument of the Company.(e) If Buyer requestschanges in the Equipmentor delays progress of themanufacture or shipment ofthe Equipment, the contractprice shall be adjusted toreflect increases in sellingprice caused thereby.2. ShipmentShipment is F.O.B.Company’s plant or place ofmanufacture, unlessotherwise specified. Risk ofloss shall pass to Buyerupon delivery totransporting carrier.3. Delivery(a) The Company willendeavor to make shipmentof orders as scheduled.However, all shipment datesare approximate only, andthe Company reserves theright to readjust shipmentschedules.(b) Under no circumstanceswill the Company beresponsible or incur anyliability for costs ordamages of any nature(whether general,consequential, as a penaltyor liquidated damages orotherwise) arising out of orowing to (i) any delays indelivery or (ii) failure tomake delivery at agreed orspecified times due tocircumstances beyond itsreasonable control.(c) If shipment is delayed orsuspended by Buyer, Buyershall pay (i) Company’sinvoice for the Equipmentas per payment terms, (ii)Company’s handling andstorage charges then ineffect, and (iii) demurragecharges if loaded on railcars.4. Limited Warranty:Warranty Adjustment:Introduction 2/01 Turbo Refrigerating 1-5
Read Safety Section before installing or using equipmentExclusions: Limitation ofLiability(a) LIMITEDWARRANTYThe Company warrants thatat the time of shipment theEquipment manufactured byit shall be merchantable,free from defects in materialand workmanship and shallpossess the characteristicsrepresented in writing bythe Company. TheCompany’s warranty isconditioned upon theEquipment being properlyinstalled and maintainedand operated within theEquipment’s capacity undernormal load conditions withcompetent supervisedoperators and, if theEquipment uses water, withproper water conditioning.Equipment, accessories andother parts and componentsnot manufactured by theCompany are warrantedonly to the extent of and bythe original manufacturer’swarranty to the Company,in no event shall such othermanufacturer’s warrantycreate any more extensivewarranty obligations of theCompany to the Buyer thanthe Company’s warrantycovering Equipmentmanufactured by theCompany.(b) EXCLUSIONS FROMWARRANTY(i) THE FOREGOING ISIN LIEU OF ALL OTHERWARRANTIES, ORALOR EXPRESS ORIMPLIED, INCLUDINGANY WARRANTIESTHAT EXTEND BEYONDTHE DESCRIPTION OFTHE EQUIPMENT.THERE ARE NOEXPRESS WARRANTIESOTHER THAN THOSECONTAINED IN THISPARAGRAPH 4 AND TOTHE EXTENTPERMITTED BY LAWTHERE ARE NOIMPLIED WARRANTIESOF FITNESS FOR APARTICULAR PURPOSE.THE PROVISIONS OFTHIS PARAGRAPH 4 ASTO DURATION,WARRANTYADJUSTMENT ANDLIMITATION OFLIABILITY SHALL BETHE SAME FOR BOTHIMPLIED WARRANTIES(IF ANY) AND EXPRESSWARRANTIES.(ii) The Company’swarranty is solely as statedin (a) above and does notapply or extend, forexample, to expendableitems, ordinary wear andtear, altered units; unitsrepaired by persons notexpressly approved by theCompany, materials not ofthe Company’smanufacture, or damagecaused by accident, theelements, abuse, misuse,temporary heat, overloading,or by erosive orcorrosive substances or bythe alien presence of oil,grease, scale, deposits orother contaminants in theEquipment.(c) WARRANTYADJUSTMENTBuyer must make claim ofany breach of any warrantyby written notice to theCompany’s home officewithin thirty (30) days ofthe discovery of any defect.The Company agrees at itsoption to repair or replace,BUT NOT INSTALL,F.O.B. Company’s plant,any part or parts of theEquipment which withintwelve (12) months fromthe date of initial operationbut no more than eighteen(18) months from date ofshipment shall prove to theCompany’s satisfaction(including return to theCompany’s plant,transportation prepaid, forinspection, if required bythe Company) to bedefective within the aboveWarranty. Any warrantyadjustments made by theCompany shall not extendthe initial warranty periodset forth above. Thewarranty period forreplacements made by theCompany shall terminateupon the termination of theinitial warranty period setforth above. Expensesincurred by Buyer inreplacing or repairing or1-6 Turbo Refrigerating 2/01 Introduction
Read Safety Section before installing or using equipmentreturning the Equipment orany part or parts will not bereimbursed by theCompany.(d) SPARE ANDREPLACEMENT PARTSWARRANTYADJUSTMENTThe Company sells spareand replacement parts. Thissubparagraph (d) is theWarranty Adjustment forsuch parts. Buyer mustmake claim of any breachof any spare or replacementparts warranty by writtennotice to the Company’shome office within thirty(30) days of the discoveryof any alleged defect for allsuch parts manufactured bythe Company. TheCompany agrees at itsoption to repair or replace,BUT NOT INSTALL,F.O.B. Company’s plant,any part or parts of materialit manufactures which,within one (1) year from thedate of shipment shall proveto the Company’ssatisfactory (includingreturn to the Company’splant, transportationprepaid, for inspection, ifrequired by the Company)to be defective within thisParts Warranty. TheWarranty and warrantyperiod for spare andreplacement parts notmanufactured by theCompany (purchased by theCompany, from third partysuppliers) shall be limited tothe Warranty and WarrantyAdjustment extended to theCompany by the originalmanufacturer of such parts,in no event shall such othermanufacturer’s warrantycreate any more extensivewarranty obligation of theCompany to the Buyer forsuch parts than theCompany’s WarrantyAdjustment covering partsmanufactured by theCompany as set forth in thissubparagraph (d). Expensesincurred by the Buyer inreplacing, repairing, orreturning the spare orreplacements parts will notbe reimbursed by theCompany.(e) LIMITATION OFLIABILITYThe above WarrantyAdjustment sets forthBuyer’s exclusive remedyand the extent of theCompany’s liability forbreach of implied (if any)and express warranties,representations, instructionsor defects from any cause inconnection with the sale oruse of the Equipment. THECOMPANY SHALL NOTBE LIABLE FOR ANYSPECIAL, INDIRECT ORCONSEQUENTIALDAMAGES OR FORLOSS, DAMAGE OREXPENSE, DIRECTLYOR INDIRECTLYARISING FROM THEUSE OF THEEQUIPMENT OR FROMANY OTHER CAUSEWHETHER BASED ONWARRANTY (EXPRESSOR IMPLIED) OR TORTOR CONTRACT, andregardless of any advices orrecommendations that mayhave been renderedconcerning the purchase,installation or use of theEquipment.5. Patents(a) PATENT INDEMNITYAND CONDITIONSThe Company agrees at itsown expense to defend andhold Buyer harmless in theevent of any suits institutedagainst Buyer for an allegedinfringement of any claimof any United States Patentcovering solely to thestructure of the Equipmentas originally manufacturedby the Company per theCompany’s specifications,and without modification bythe Buyer, provided buyershall (i) have given theCompany immediate noticein writing of any such claimor institution or threat ofsuch suit, and (ii) havepermitted the Company todefend or settle the same,and have given all neededinformation assistance andauthority to enable theCompany to do so. Buyershall defend and indemnifythe Company against allexpenses, costs and loss byreason of any real or allegedinfringement by theIntroduction 2/01 Turbo Refrigerating 1-7
Read Safety Section before installing or using equipmentCompany’s incorporating adesign or modificationrequested by Buyer.(b) LIMITATION OFLIABILITYThe Company’s totalliability hereunder isexpressly limited to anamount no greater than thesales price of the Equipmentand may be satisfied by theCompany’s refunding toBuyer, at the Company’soption, the sales price of theEquipment in the event theCompany elects to defendany such suit and thestructure of the saidEquipment is held toinfringe any such UnitedStates Patent and if theBuyer’s use thereof isenjoined, the Companyshall, at its expense and atits option (i) obtain for theBuyer the right to continueusing the Equipment, or (ii)supply non-infringingEquipment for installationby Buyer, or (iii) modify theEquipment so that itbecomes non-infringing, or(iv) refund the then marketvalue of the Equipment.6. Prior UseIf damage to the Equipmentor other property or injuryto persons is caused by useor operation of theEquipment prior to beingplaced in initial operation(“Start up”) by theCompany where start up isincluded in the purchaseprice, then Buyer shallindemnify and hold theCompany harmless from allliability, costs and expensesfor all such damage orinjury.7. Equipment ChangesThe Company may, butshall not be obligated to,incorporate in theEquipment any changes inspecifications, design,material, construction,arrangement, orcomponents.8. Security InterestInsurance(a) To secure payment ofthe purchase price, Buyeragrees that the Companyshall retain a securityinterest in the Equipmentuntil Buyer shall have paidin cash the full purchaseprice when due, interest atthe highest lawful contractrate until so paid and thecosts of collection,including reasonableattorney’s fees. TheEquipment shall at times beconsidered and remainpersonal property andBuyer shall perform all actsnecessary to assure andperfect retention of theCompany’s security interestagainst the rights orinterests of third persons. Inthe event Buyer defaults inpayment of any part of thepurchase price when due, orfails to comply with anyand all provisions of thiscontract, the Company shallhave the remedies availableunder the UniformCommercial Code.(b) So long as the purchaseprice is unpaid, Buyer at itscost shall obtain insuranceagainst loss or damage fromall external causes, namingthe Company as an insured,in an amount and formsufficient to protect theCompany’s interest in theEquipment.9. CancellationBuyer cannot cancel ordersplaced with the Company,except with the Company’sexpress written consent andupon terms and payment tothe Company indemnifyingthe Company against loss,including but not limited toexpenses incurred andcommitments made by theCompany.10. Loss, Damage or DelayThe Company shall not beliable for loss, damage ordelay resulting from causesbeyond its reasonablecontrol or caused by strikesor labor difficulties,lockouts, acts or omissionsof any governmentalauthority or the Buyer,insurrection or riot, war,fires, floods, Acts of God,breakdown of essentialmachinery, accidents,1-8 Turbo Refrigerating 2/01 Introduction
Read Safety Section before installing or using equipmentpriorities or embargoes, carand material shortages,delays in transportation orinability to obtain labor,materials or parts fromusual sources. In the eventof any delay from suchsources, performance willbe postponed by such lengthof time as may bereasonably necessary tocompensate for the delay. Inthe event performance bythe Company of thisagreement cannot beaccomplished by theCompany due to any actionof governmental agencies,or any laws, rules orregulations of the UnitedStates Government, theCompany (at its option)may cancel this agreementwithout liability. In noevent shall the Company beliable for any loss ordamage of any kind,including consequential orspecial damages of anynature.11. Work By Others:Accessory and SafetyDevicesThe Company, being only asupplier of the Equipment,shall have no responsibilityfor labor or work of anynature relating to theinstallation or operation oruse of the Equipment, all ofwhich shall be performedby Buyer or others. It is theresponsibility of Buyer tofurnish such accessory andsafety devices as may bedesired by it and/or requiredby law or OSHA standardsrespecting Buyer’s use ofthe Equipment. Buyer shallbe responsible forascertaining that theEquipment is installed andoperated in accordance withall code requirements andother applicable laws, rules,regulations and ordinances.12. Complete AgreementTHE COMPLETEAGREEMENT BETWEENTHE COMPANY ANDBUYER IS CONTAINEDHEREIN AND NOADDITIONAL ORDIFFERENT TERM ORCONDITION STATED BYBUYER SHALL BEBINDING UNLESSAGREED TO BY THECOMPANY IN WRITING.No course of prior dealingsand no usage of the tradeshall be relevant tosupplement or explain anyterms used in thisAgreement. ThisAgreement may bemodified only by a writingsigned by both theCompany and Buyer andshall be governed by theUniform Commercial Codeas enacted the State ofTexas. The failure of theCompany to insist uponstrict performance of any ofthe terms and conditionsstated herein shall not beconsidered a continuingwaiver of any such term orcondition or any of theCompany’s rights.Introduction 2/01 Turbo Refrigerating 1-9
WARNING! Read this section first. Failure to carefully follow these instructions could result inpermanent injury or loss of life.<strong>Chiller</strong> Generator Operation & Maintenance <strong>Manual</strong>Section 2: SAFETYHere are some safety points tokeep in mind when creating anefficient yet safe workingenvironment.Safety DefinitionsStatements or labels in thismanual or on the productpreceded by the followingwords are of specialsignificance:WarningIndicates severe personalinjury or death will result ifinstructions are not followed.CautionIndicates a strong possibility ofsevere personal injury or deathif instructions are not followed.ImportantIndicates hazards or unsafepractices which could causeminor personal injury orproduct or property damage.NoteGives helpful information.Machinery Is DangerousMachinery can hurt you if youare not careful. Use cautionduring assembly and operationof equipment.ALWAYS:• Read the entire manualfirst.• Use common sense and becareful.• Have enough manpower.• Have the proper tools.• Follow directions andillustrations.• Check to see that allequipment meetsapplicable installationcodes for your area as wellas state and federalrequirements.• Have sufficient safetywarnings on all equipment.• Make sure all safetydevices and guards are inplace.Note:Warning labels attached to thechiller, equipment installedwith the chiller, and on accesspanels should be followed.They are shown in Figures 2-1,and 2-2.Safety 2/04 Turbo Refrigerating, LLC 2-1
WARNING! Read this section first. Failure to carefully follow these instructions could result inpermanent injury or loss of life.Figure 2-1 Warning Labels on Control PanelsFigure 2-2 Warning Label on Access PanelsIf all labels are not attachedand visible or labels start tobecome illegible, contact:Turbo RefrigeratingService DepartmentP.O. Box 396Denton, Texas 76202-0396Phone:940-387-4301Fax: 940-382-03642-2 Turbo Refrigerating, LLC 2/04 Safety
WARNING! Read this section first. Failure to carefully follow these instructions could result inpermanent injury or loss of life.Involve Your Peoplearea and notify qualifiedpersonnel.Before operating equipment,have the people involved in theoperating or maintenance ofthe equipment meet to discussthe dangers and safety aspectsof the chiller.• Warn them of the danger ofmiscommunication.• Turn electricity off andlock it out when workingon the chiller.• Have a person trained andqualified in the operationof the equipment on duty toensure that the electricitystays locked out to protectpersonnel working on theequipment.Pull disconnect and lock out allelectrical service beforeremoving any guards, accesspanels, and/or covers.Never operate the unit withoutall guards, access panels, andcovers in place and securelyfastened.If leaks in the refrigerantpiping require welding, be surerefrigerant is bled off and thesystem is open beforeattempting to repair. Protecteyes with the proper eyeprotection.Always wear proper eyeprotection when cleaning thesystem.Use only recommended icemachine cleaners suitable forstainless steel. Followinstructions and warningssupplied by the manufacturerof the cleaning agents.Never open the control panel(by others unless otherwisespecified) withoutdisconnecting and locking outelectrical service. All electricalwork should be performed by aqualified electrician.When servicing the chillerTURBO recommends that atleast two (2) people be presentat all times.If an outside contractor isrequired to install or serviceyour chiller, require him tofurnish you with a certificateof insurance before performingany work on your equipment.TURBO recommends that theperson hiring a contractor toperform work be satisfied withtheir experience andcompetence.All refrigerant field pipingshould be done in compliancewith section 5 of StandardANSI/IIAR 74-2-1984 (or thelatest edition, if available).Field piping is not supplied byTURBO.All refrigerant relief valvevent lines must be routed to asafe discharge location havingadequate ventilation tothrough the relief system.Consideration should be givento prevailing winds to ensurethat refrigerant releases are notcarried to or trapped inoccupied areas. The contractorshould verify that the methodused meets local, state, andfederal codes.Note:Field piping is required byothers from all safety reliefdevices supplied with thevarious components.A written evacuation planshould be available to allemployees and the local firedepartment should be providedwith a copy. The written planshould be developed jointlybetween the fire departmentand operators or otherdesignated personnel familiarwith the refrigeration system.Fire department personnelshould be familiarized with therefrigeration system, includingthe location of isolation valvesand controls for terminatingoperation of the system and/orisolating leaks. Emergencyphone numbers should beposted in a visible manner nearall areas in which theequipment is located.IMPORTANTA copy of the evacuationplan should be available ineach area in whichequipment is located. Thelocation should be clearlymarked, easily accessible,and away from piping orcomponents from whichDo not expose insulation(polyurethane) to open flame.If ignited, it will give offhighly toxic fumes. Leave the dissipate refrigerant dischargedSafety 2/04 Turbo Refrigerating, LLC 2-3
WARNING! Read this section first. Failure to carefully follow these instructions could result inpermanent injury or loss of life.escaping refrigerant wouldprevent access.All leaks should be reportedand repaired immediately.Each pressure vessel (ifsupplied) is equipped with asafety relief valve to preventoperation over design limits.Smaller models use a singlerelief valve. Larger models usedual safety relief type valveswith a three-way manifold. If asafety relief valve discharges,the three-way valve positionshould be changed to the“good" relief valve and the“discharged” relief valveimmediately replaced.WARNINGNever install a second reliefvalve in the outlet of theoriginal valve. All reliefvalves used in this system areatmospheric relief devices.Installation of any restrictionin the valve outlet, includinga second relief valve, willprevent proper operation ofthe safety relief valve.Failure to carefully followthese instructions couldresult in permanent injury orloss of life.Additional information onrefrigeration system safetymay be obtained throughInternational Institute ofAmmonia Refrigeration (IIAR)for ammonia systems,Refrigerating Engineers andTechnicians Association(RETA) for Freon systems, orAmerican Society of Heating,Refrigerating, and Air-Conditioning Engineers, Inc.(ASHRAE) bulletinANSI/ASHRAE 15-1994 –“Safety code for MechanicalRefrigeration”.To request information contactRETA at:Refrigerating Engineers andTechnicians Association4700 West Lake AvenueGlenview, Ill.60025-1485Phone: 847-375-4738Fax: 847-375-6338E-mail: info@reta.comContact IIAR at:International Institute ofAmmonia Refrigeration1100 North Glebe RoadArlington, VA 22201Phone: 703-312-4200Fax: 703-312-0065E-mail: http://www.iiar.orgContact ASHRAE at:American Society ofHeating, Refrigerating, andAir-Conditioning Engineers,Inc.1791 Tullie Circle, N.E.Atlanta, GA 30329Phone: 404-636-8400Web: http://www.ashrae.orgNotes:1. Per the OSHA HazardCommunication Standard,material safety data sheetsfor refrigerants andrefrigerant oils are onpages 2-9 through 2-16.2. The safety lockoutprocedure is on pages 2-9through 2-11.Checklist for Lock Out OfControls-By others unlessotherwise specifiedTo lock out the chillercontrols:1. Pull disconnects and lockout all electrical service –single-phase and threephasepower. Refer to the“Safety LockoutProcedure” on page 2-9.2. Turn the master controlselector switch (provided)to the “off” position.Emergency Stop Button-Byothers unless otherwisespecifiedA red push/pull mushroomhead emergency switch is onthe control panel door foremergency cut-off of thecontrol circuit power. Thisbutton is not to be used forservice or lock out. This is anemergency button only.If you have any questions, callTurbo Refrigerating ServiceDepartment at:Telephone: 940-387-4301Fax: 940-382-03642-4 Turbo Refrigerating, LLC 2/04 Safety
WARNING! Read this section first. Failure to carefully follow these instructions could result inpermanent injury or loss of life.SAFETY LOCKOUT PROCEDUREEffective November 1, 1989I. PurposeThe purpose of this procedureis to prevent injury and/ordeath to personnel by requiringthat certain precautions betaken before servicing orrepairing equipment. It hasbeen developed andimplemented so as to complywith 29 CFR 1910.147, of theOccupational Safety andHealth Act, as amended.These precautions include:1. Shutting off and lockingout electrical power.2. Releasing pressure inpneumatic and hydraulicsystems.3. Effectively isolating thoseportions of equipment andmachinery that are energyintensive and are beingserviced or maintained.II. ScopeThis procedure includes thoseemployees whose dutiesrequire them to domaintenance work on powerdrivenequipment. It covers theservicing or maintenance ofmachines or equipment inwhich the unexpectedenergization, start-up orrelease of stored energy couldcause injury.III. SupervisoryResponsibilityIt is the responsibility of allsupervisors having contactwith such operations to:A. Instruct all affectedemployees as to the content ofthis program.B. Ensure compliance withthis procedure.IV. Safety LocksSafety locks and keys will beissued to designatedemployees. Locks and keysmust be returned to the plantmanager when an employeetransfers to another assignmentor terminates his employment.Safety and supervisorypersonnel shall have access tomaster keys for protectivelocks, and under certaincontrolled conditions, beavailable to assist in theremoval of safety locks.Safety locks are painted yellowfor electricians and red formaintenance personnel. Theselocks are to be used only forlocking out machinery, tooling,and equipment described inthis procedure.V. Safety DepartmentResponsibilityIt is the responsibility of theSafety Coordinator to inspectthe plant on a periodic basis toensure compliance with thisprocedure. If it is determinedthat this procedure is not beingcomplied with, immediatecorrective action will beinitiated. Wherever possible,such action will be taken inconjunction with the first-linesupervisor; however, higherlevel management personnelwill be involved if theviolation is of a serious orrepetitive nature.VI. Rules and RegulationsThe following rules andregulations have beenestablished and are mandated:A. Any electrician ormaintenance person whoseduties require that he orothers be exposed to thehazards of electrical shockor moving equipment mustperform those duties in asafe and uncompromisingmanner. The followingsteps outline suchprecautions:1. The employee mustunderstand the equipmentwith which he is workingand its hazards.Safety 2/04 Turbo Refrigerating, LLC 2-5
WARNING! Read this section first. Failure to carefully follow these instructions could result inpermanent injury or loss of life.2. When working withelectrical equipmentwhere the accidentalstarting of suchequipment or release ofstored energy wouldcreate a hazard, theemployee must turn offall power to the unit oruse energy isolatingdevices and apply hispersonal lock, and havethe supervisor of thatarea apply his personallock. At all times whenmaintenance is beingperformed on ourequipment, thatequipment will have 2locks on it, one by theperson performing themaintenance plus theone of the supervisor.3. In instances wheremultiple circuits are ina circuit breaker box,an attachingmechanism will beplaced on the outside ofthe box to allow thatbox to be locked outand prevent the doorfrom being opened.B. Each employee whoperforms the dutiesprescribed above will beprovided with an individualsafety lock and one key. Ifmore that one employee isassigned to a task, eachemployee is required toplace his own lock and tagso the controls cannot beoperated, even thoughanother person may havecompleted his own task,and remove his own lock.C. If the equipment controlsare so located that only onelock can beaccommodated, a specialattachment thataccommodates severallocks must be used. Thisattachment will be issuedto all designatedemployees.D. Should an employee berequired to work onanother piece of equipmentand need to leave his lockon the present equipment,another lock must beobtained from the plantmanager.E. Should it be necessary tooperate a piece ofequipment which is lockedout, every effort should bemade by supervision tolocate the employee whoselock is on the equipment. Ifthat employee cannot belocated, the supervisor mayobtain a master key for thelock. The supervisor mustpersonally assure himselfthat it is safe to remove thelock. The lock should thanbe returned to the properemployee.This procedure must be usedwith extreme caution and goodjudgement. There is dangerthat the employee involvedwill return thinking that themachine is still locked out,when it has actually beenturned back on.F. If a machine is locked outand it is necessary to leavethe area, recheck the lockupon returning to makesure that the machine isstill locked out. Whilesupervision will makeevery attempt to avoid theremoval of locks, theremay be situations when itmust be done. This recheckis for your protection.G. It is sometimes necessaryto operate equipment forpurposes of testing ormaking adjustments priorto the actual completion ofthe work. It is recognizedthat electricians must workon live circuits from timeto time, particularly whentrouble-shooting, butextreme caution must beused under thesecircumstances. Never workalone when changing livewiring.VII. Outside ContractorsWhenever outside servicingpersonnel are to be engaged inactivities covered by the scopeand application of this lockoutand tag procedure, suchpersonnel are to be informed ofthis procedure by the personresponsible for their workactivity and are to direct themto follow its requirements.Failure to do so shall requirethat they do not be permitted tocontinue working in the plant.2-6 Turbo Refrigerating, LLC 2/04 Safety
WARNING! Read this section first. Failure to carefully follow these instructions could result inpermanent injury or loss of life.VIII. Failure to FollowProceduresThese procedures have beendeveloped to protectemployees from serious injury.It is necessary that allemployees follow them. Thoseemployees not complying withthe provisions in thisprocedure will be subject todisciplinary action, up to andincluding discharge.Safety 2/04 Turbo Refrigerating, LLC 2-7
WARNING! Read this section first. Failure to carefully follow these instructions could result inpermanent injury or loss of life.Material Safety Data Sheets (MSDS)Material Safety Data Sheets (MSDS) are provided for all refrigerants (ammonia, Freon, glycol, refrigerantoils) typically used in chiller applications.See MSDS sheets attached for details.2-8 Turbo Refrigerating, LLC 2/04 Safety
WARNING! Read this section first. Failure to carefully follow these instructions could result inpermanent injury or loss of life.Safety 2/04 Turbo Refrigerating, LLC 2-9
WARNING! Read this section first. Failure to carefully follow these instructions could result inpermanent injury or loss of life.2-10 Turbo Refrigerating, LLC 2/04 Safety
WARNING! Read this section first. Failure to carefully follow these instructions could result inpermanent injury or loss of life.Safety 2/04 Turbo Refrigerating, LLC 2-11
WARNING! Read this section first. Failure to carefully follow these instructions could result inpermanent injury or loss of life.2-12 Turbo Refrigerating, LLC 2/04 Safety
WARNING! Read this section first. Failure to carefully follow these instructions could result inpermanent injury or loss of life.Material Safety Data Sheet for Anhydrous AmmoniaI. Product IdentificationTrade Name: Anhydrous AmmoniaSynonyms: AmmoniaManufacturer's Name: USS Agri-Chemicals, Division, United States Steel CorporationRegular Telephone: 404/572-4000Emergency Telephone: 800/424-9300 (Chemtrec)Address: P.O. Box 1685, Atlanta, GA 30301Chemical Name: AmmoniaFormula: NH3CAS No.: 7664-41-7Chemical Family: Nitrogen HydrideEPA Reg. No.: Code A100-6259II. Hazardous IngredientsMaterial or Component: Ammonia%: 100Hazard Data (TLV): 50 PPM in air by volume, 8 hour time weighted average in any 8-hour work shift of a40-hour work week (OSHA).III. Physical DataBoiling Point, 760 MM Hg: –33.3°C (–28.0°F)Melting Point: @ 1 atm.: –77.8°C (–107.9°F)Specific Gravity (H20=1): @ –33.3°C, 1 atm.: 0.682Vapor Pressure: Sat. Liq. @ 32°F: 47.6 psigVapor Density (Air=1): @ 0.0°C (32°F), 1 atm.: 0.597Solubility in H20 % By Wt.: @ 32°F, 1 atm.: 47.3% Volatiles by Vol.: 100Evaporation Rate (Butyl Acetate=1): not applicableAppearance And Odor: Colorless liquid or vapor with characteristic pungent odor.IV. Fire and Explosion DataFlash Point (Test Method): Not applicable.Autoignition Temperature: 671°C (1204°F) (iron bomb)Flammable Limits in Air, % by Volume: 16 – 25Extinguishing Media: Water spray or fog, dry chemicals, carbon dioxide.Special Fire Fighting Procedures: Stop flow of gas; move containers from fire zone if possible; stay clearof tank heads; use water to keep fire exposed containers cool and to protect personnel. Fire fightingpersonnel must be equipped with appropriate protective clothing and respiratory equipment.Unusual Fire and Explosion Hazard: Presence of oil or other combustibles will increase fire hazard.Safety 2/04 Turbo Refrigerating, LLC 2-13
WARNING! Read this section first. Failure to carefully follow these instructions could result inpermanent injury or loss of life.V. Health Hazard InformationToxicity DataInhalation: Moderately toxic. LCLo: 1,000 PPM/3 hrs. (Humans)Skin Contact: Corrosive: 1st and 2nd degree burns. Burns may be fatal if extensive.Skin Absorption: Not listed as potentially contributing to overall exposure by the cutaneous route.Eye Contact: Corrosive: Blindness may follow serious eye burns caused by liquid ammonia.Ingestion: Highly Toxic: Five ml of ammonia solution (28% NH3) has been recorded a fatal oral dose.Effects of ExposureAcute Overexposure: Concentrations of ammonia in air of 5,000 to 10,000 PPM are reportedly fatal.Chronic Overexposure: Concentrations of ammonia in air of 2,500 to 6,000 PPM during 30 minuteexposure are considered dangerous to life.Emergency and First Aid ProceduresEyes: Flood immediately with copious quantities of clean water. Irrigation must continue for at least15 minutes. Patient must receive prompt attention from a physician.Skin: Flood with water for 15 minutes and remove any contaminated clothing. Do not use salves orointments during 24 hour period after injury. Subsequent treatment is as for thermal burns.Inhalation: Remove to uncontaminated area and begin artificial respiration immediately if necessary. Ifavailable, administer oxygen when breathing restored. Call physician.Ingestion: If patient is conscious and able, have him drink large quantities of water. If vomiting begins,place patient face down with head lower than hips.Notes to Physician: If respiratory embarrassment is the result of pulmonary edema, provide appropriatesupportive treatment and drug therapy.VI. Reactivity DataConditions Contributing To Instability: Dissociation begins to occur at 429° – 498°C (804° – 930°F)Incompatibility: Store separately from oxidizers, halogens and acids.Hazardous Decomposition Products: Hydrogen and nitrogen.Conditions Contributing To Hazardous Polymerization: Not applicable.VII. Spill or Leak ProceduresSteps To Be Taken If Material Is Released Or Spilled:Stop leak if no risk involved. Avoid breathing vapor or liquid. Evacuate personnel not equipped withprotective clothing and equipment. Use copious amounts of water spray or fog to reduce concentration andlower vapor pressure. Do NOT put water on liquid ammonia spill unless more than 100 volumes of water areavailable for each volume of liquid ammonia.Neutralizing Chemicals: Do NOT neutralize with chemicals. Use water only.2-14 Turbo Refrigerating, LLC 2/04 Safety
WARNING! Read this section first. Failure to carefully follow these instructions could result inpermanent injury or loss of life.Waste Disposal Method:Contain run-off of liquid ammonia or ammonia in water from getting into a stream, lake, sewer, or ditch bybuilding a dam. Let ammonia evaporate or soak into the ground. Notify local, state, and federal authorities.Release of 100# or more of ammonia within 24 hours must be reported to the National Response Center,telephone: 800/424-8802.VIII. Special Protection InformationVentilation Requirements: Under normal operating conditions, sufficient ventilation is required to avoidvapor concentrations exceeding a threshold limit value of 50 PPM in air byvolume based upon an 8-hour time weighted average. See 29 CFR 1910.1000.Specific Personal Safety EquipmentRespiratory (Specify in Detail): Gas masks with canisters approved for ammonia by NIOSH/MSHA maybe used in concentrations in air of up to 30,000 PPM. Over this limit or inunknown concentrations, approved air supplied respiratory equipment inpressure demand mode must be used.Eye:Tight fitting chemical splash goggles with hooded ventilation. A full face shield may be worn overthe goggles for additional protection, but not as a substitute for the goggles.Gloves: Gauntlet type rubber or plastic impervious to ammonia.Other Clothing and Equipment: For emergency and rescue purposes, protective slicker or protective pantsand jacket; protective boots; hard hat; life line; safety shower and eyewash.IX. Dot InformationShipping Name:Anhydrous Ammonia, Nonflammable Gas, UN1005, RQClassification:Nonflammable GasLabel:Nonflammable GasPlacard:Nonflammable GasUSSAC Hazard Class Code: C2X. Special PrecautionsPrecautionary Statements:WARNING! HAZARDOUS LIQUID AND VAPOR UNDER PRESSURE. LIQUID CAUSESBURNS. VAPOR EXTREMELY IRRITATING. Do not breathe vapor. Do not get in eyes, on skin, orclothing.Other Handling and Storage Requirements:Store and use with adequate ventilation, protect containers from excessive heat or physical damage. Zinc,copper, and copper base alloys such as brass are subject to rapid destruction by moist ammonia. Refer toANSI K61.1.The information and recommendations contained herein are based upon data believed to be correct.However, no guaranty or warranty of any kind expressed or implied is made by TURBO with respectto the information contained herein. This data is provided solely for your consideration andinvestigation.Safety 2/04 Turbo Refrigerating, LLC 2-15
WARNING! Read this section first. Failure to carefully follow these instructions could result inpermanent injury or loss of life.Material Safety Data Sheet for Suniso 3 GS & 4 GSProduct: Refrigeration Oil Suniso 3GS and 4GSSection I.Manufacturing Division or Subsidiary: Sonneborn DivisionAddress (Number, Street, City, State, Zip Code): P.O. Box 308 Gretna, Louisiana 70053Emergency Telephone (Manufacturer): 1-504-366-7281Chemical Name or Family: Refined Mineral OilFormula: A mixture of liquid hydrocarbons refined from petroleum.Section II. Chemical and Physical PropertiesHazardous Decomposition Products: Upon combustion, CO2 and CO are generated.Incompatibility (Keep Away From): Strong oxidizing agents such as chromic acid, hydrogen peroxide andbromine.List All Toxic and Hazardous Ingredients: NoneForm: Viscous liquid Odor: PetroleumAppearance: Clear liquidColor: AmberSpecific Gravity (water = 1): 0.91 @ 15.6° CBoiling Point: >500° F (>260° C)Melting Point: NASolubility in Water: Insoluble% Volatile (by weight %): NegligibleEvap. Rate: NegligibleVapor Pressure (mm Hg at 20° C): 10pH As Is: NAStrong Acid qStrong Base qStable nUnstable qViscosity SUS at 100° F: nSection III. Fire and Explosion DataSpecial Fire Fighting Procedures: Wear self-contained breathing apparatus. Water spray is an unsuitableextinguishing agent.Unusual Fire and Explosion Hazards: NoneFlash Point (Method Used): ASTM D-92 >300° F (>150° C)Flammable Limits %: NAExtinguishing Agents: n Dry Chemical n CO2 n Water fogq Water spray n Foam n Sand/Earthq Other:2-16 Turbo Refrigerating, LLC 2/04 Safety
WARNING! Read this section first. Failure to carefully follow these instructions could result inpermanent injury or loss of life.Section IV. Health Hazard DataPermissible Concentrations (air): 5 mg/m3 mineral oil mist (OSHA).Effects of Overexpose: Prolonged contact may cause minor skin irritation.Toxicological Properties: NDAEmergency First Aid Procedures:Eyes: Flush with large amounts of water for at least 15 minutes. If redness or irritation persists,contact a physician.Skin Contact: Wash with soap and water. Wash clothing before reuse.Inhalation: None normally required.If Swallowed: Call a physician.Section V. Special Protection InformationVentilation Type Required (Local, Mechanical, Special): NARespiratory Protection (Specify Type): NAProtective Gloves: Oil resistant rubberEye Protection: Chemical splash gogglesOther Protective Equipment: Rubber apronSection VI. Handling Of Spills or LeaksProcedures for Clean-up:Stop leak, dike up large spills. Use inert absorbent material such as earth, sand, or vermiculite for clean-up.Waste Disposal:Dispose of in accordance with Local, State, and Federal government regulations.Section VII. Special PrecautionsPrecautions to be taken in Handling and Storage:Avoid exposure to heat and flame. Protect against eye and skin contact. Wash thoroughly after handling.Section VIII. Transportation DataUnregulated by D.O.T. nRegulated by D.O.T. qTransportation Emergency Information: CHEM TREC 1-800-424-9300U.S. D.O.T. Proper Shipping Name: NAU.S. D.O.T. Hazard Class: NAI.D. Number: NARQ: NALabel(s) Required: NAFreight Classification: Petroleum Oil NOIBNSpecial Transportation Notes: NASafety 2/04 Turbo Refrigerating, LLC 2-17
WARNING! Read this section first. Failure to carefully follow these instructions could result inpermanent injury or loss of life.Section IX. CommentsCAS #64742-52-5Signature: ____________________________________Title: ________________________________________Telephone:____________________________________Date: ________________________________________Revision Date:_________________________________Sent To:______________________________________Supersedes: ___________________________________TURBO believes the statements, technical information and recommendations contained herein arereliable, but they are given without warranty or guarantee of any kind, express or implied, andTURBO assumes no responsibility for any loss, damage, or expense, direct or consequential, arisingout of their use.2-18 Turbo Refrigerating, LLC 2/04 Safety
WARNING! Read this section first. Failure to carefully follow these instructions could result inpermanent injury or loss of life.Material Safety Data Sheet for Suniso 3 GS & 4 GSProduct: Refrigeration Oil Suniso 3GS and 4GSSection I.Manufacturing Division or Subsidiary: Sonneborn DivisionAddress (Number, Street, City, State, Zip Code): P.O. Box 308 Gretna, Louisiana 70053Emergency Telephone (Manufacturer): 1-504-366-7281Chemical Name or Family: Refined Mineral OilFormula: A mixture of liquid hydrocarbons refined from petroleum.Section II. Chemical and Physical PropertiesHazardous Decomposition Products: Upon combustion, CO2 and CO are generated.Incompatibility (Keep Away From): Strong oxidizing agents such as chromic acid, hydrogen peroxide andbromine.List All Toxic and Hazardous Ingredients: NoneForm: Viscous liquid Odor: PetroleumAppearance: Clear liquidColor: AmberSpecific Gravity (water = 1): 0.91 @ 15.6° CBoiling Point: >500° F (>260° C)Melting Point: NASolubility in Water: Insoluble% Volatile (by weight %): NegligibleEvap. Rate: NegligibleVapor Pressure (mm Hg at 20° C): 10pH As Is: NAStrong Acid qStrong Base qStable nUnstable qViscosity SUS at 100° F: nSection III. Fire and Explosion DataSpecial Fire Fighting Procedures: Wear self-contained breathing apparatus. Water spray is an unsuitableextinguishing agent.Unusual Fire and Explosion Hazards: NoneFlash Point (Method Used): ASTM D-92 >300° F (>150° C)Flammable Limits %: NAExtinguishing Agents: n Dry Chemical n CO2 n Water fogq Water spray n Foam n Sand/Earthq Other:Safety 2/04 Turbo Refrigerating, LLC 2-19
WARNING! Read this section first. Failure to carefully follow these instructions could result inpermanent injury or loss of life.Section IV. Health Hazard DataPermissible Concentrations (air): 5 mg/m3 mineral oil mist (OSHA).Effects of Overexpose: Prolonged contact may cause minor skin irritation.Toxicological Properties: NDAEmergency First Aid Procedures:Eyes: Flush with large amounts of water for at least 15 minutes. If redness or irritation persists,contact a physician.Skin Contact: Wash with soap and water. Wash clothing before reuse.Inhalation: None normally required.If Swallowed: Call a physician.Section V. Special Protection InformationVentilation Type Required (Local, Mechanical, Special): NARespiratory Protection (Specify Type): NAProtective Gloves: Oil resistant rubberEye Protection: Chemical splash gogglesOther Protective Equipment: Rubber apronSection VI. Handling Of Spills or LeaksProcedures for Clean-up:Stop leak, dike up large spills. Use inert absorbent material such as earth, sand, or vermiculite for clean-up.Waste Disposal:Dispose of in accordance with Local, State, and Federal government regulations.Section VII. Special PrecautionsPrecautions to be taken in Handling and Storage:Avoid exposure to heat and flame. Protect against eye and skin contact. Wash thoroughly after handling.Section VIII. Transportation DataUnregulated by D.O.T. nRegulated by D.O.T. qTransportation Emergency Information: CHEM TREC 1-800-424-9300U.S. D.O.T. Proper Shipping Name: NAU.S. D.O.T. Hazard Class: NAI.D. Number: NARQ: NALabel(s) Required: NAFreight Classification: Petroleum Oil NOIBNSpecial Transportation Notes: NA2-20 Turbo Refrigerating, LLC 2/04 Safety
WARNING! Read this section first. Failure to carefully follow these instructions could result inpermanent injury or loss of life.Section IX. CommentsCAS #64742-52-5Signature: ____________________________________Title: ________________________________________Telephone: ___________________________________Date: ________________________________________Revision Date: ________________________________Sent To: _____________________________________Supersedes:___________________________________TURBO believes the statements, technical information and recommendations contained herein arereliable, but they are given without warranty or guarantee of any kind, express or implied, andTURBO assumes no responsibility for any loss, damage, or expense, direct or consequential, arisingout of their use.Safety 2/04 Turbo Refrigerating, LLC 2-21
WARNING! Read this section first. Failure to carefully follow these instructions could result inpermanent injury or loss of life.Material Safety Data Sheet for Propylene Glycol1 - PRODUCT IDENTIFICATIONPRODUCT NAME:FORMULA:PROPYLENE GLYCOLCH3CHOHCH2OHCOMMON SYNONYMS: 1,2-PROPANEDIOL; 1,2-DIHYDROXYPROPANE;METHYLETHYLENE GLYCOL;PROPANE-1,2-DIOLPRECAUTIONARY LABELLINGFLAMMABILITY - 1 SLIGHTREACTIVITY - 1 SLIGHTCONTACT - 2 MODERATEHAZARD RATINGS ARE 0 TO 4 (0 = NO HAZARD; 4 = EXTREME HAZARD).LABORATORY PROTECTIVE EQUIPMENTSAFETY GLASSES; LAB COATPRECAUTIONARY LABEL STATEMENTS:WARNING CAUSES IRRITATIONAVOID CONTACT WITH EYES, SKIN, CLOTHING. KEEP IN TIGHTLY CLOSEDCONTAINER. WASH THOROUGHLY AFTER HANDLING.APPEARANCE & ODOR: COLORLESS, ODORLESS VISCOUS LIQUID.UNUSUAL FIRE & EXPLOSION HAZARDSCLOSED CONTAINERS EXPOSED TO HEAT MAY EXPLODE.5 - HEALTH HAZARD DATAEMERGENCY AND FIRST AID PROCEDURESIN CASE OF CONTACT, IMMEDIATELY FLUSH EYES WITH PLENTY OF WATERFOR AT LEAST 15 MINUTES. FLUSH SKIN WITH WATER.7 - SPILL AND DISPOSAL PROCEDURESSTEPS TO BE TAKEN IN THE EVENT OF A SPILL OR DISCHARGE.WEAR SELF-CONTAINED BREATHING APPARATUS AND FULL PROTECTIVECLOTHING.STOP LEAK IF YOU CAN DO SO WITHOUT RISK. USE WATER SPRAY TOREDUCE VAPORS.TAKE UP WITH SAND OR OTHER NON-COMBUSTIBLE ABSORBENT MATERIAL ANDPLACE INTO CONTAINER FOR LATER DISPOSAL. FLUSH SPILL AREA WITHWATER.2-22 Turbo Refrigerating, LLC 2/04 Safety
WARNING! Read this section first. Failure to carefully follow these instructions could result inpermanent injury or loss of life.DISPOSAL PROCEDUREDISPOSE IN ACCORDANCE WITH ALL APPLICABLE FEDERAL, STATE, ANDLOCAL ENVIRONMENTAL REGULATIONS.8 - PROTECTIVE EQUIPMENTVENTILATION:USE ADEQUATE GENERAL OR LOCAL EXHAUST VENTILATION TO KEEP VAPORAND MIST LEVELS AS LOW AS POSSIBLE.IF AIRBORNE CONCENTRATION ISHIGH, USE AN APPROPRIATE RESPIRATOR OR DUST MASK.EYE/SKIN PROTECTION:SAFETY GOGGLES, UNIFORM, APRON, PROPER GLOVES ARE RECOMMENDED.Safety 2/04 Turbo Refrigerating, LLC 2-23
WARNING! Read safety section before this section. Failure to carefully follow these instructions couldresult in permanent injury or loss of life.<strong>Chiller</strong> Operation & Maintenance <strong>Manual</strong>Section 3: INSTALLATION & PRE-START-UPREQUIREMENTSTo install and prepare theTURBO® HTD, HF or uHTDchiller, you will need two tothree people whose skillsinclude mechanical, welding,and plumbing capabilities, and aqualified electrician.This section includes step-bystepinstructions on installingand connecting your chiller.Your chiller has been tested andinspected at the factory prior topacking and shipping.Installation Sequence1. Delivery Inspection2. Hoisting or Moving3. Site Preparation4. Mounting and Leveling5. Electrical Connections6. Water Connections7. Refrigerant Piping9. Testing Refrigeration Systemfor Leaks10. Evacuating the System11. Refrigerant Charging12. Post Installation Clean Up13. Optional High Sidea. Air-Cooled Condensersb. Evaporative-CooledCondensersc. Water-Cooled Condensers14. Optional RefrigerantRecirculation System15. Optional Flooded SystemComponentsIMPORTANTPay special attention to anybold print or boxed inparagraphs. Following thisinformation is essential for asafe, efficient installation.To Help You Get Started• Read instructionscompletely beforeinstallation.• Gather all required tools.• Standard water andrefrigerant connections arelocated on the front of the<strong>Chiller</strong> as you face the inletwater connection on the<strong>Chiller</strong>. The waterconnections for the reservoir(sump) are located on theright side of the <strong>Chiller</strong>/reservoir assembly.• Inlet and Outlet refrigerantconnections are on the frontof the evaporator section.Connections can be madefrom either side.• Hinged access doors arelocated on both ends forcleaning access.• Hinged roof panel(s) with amechanism to hold roofpanel open are provided ontop.• All doors and hinged roofpanels have slip hinge pinsfor easy removal.• Reference Figure 3-1 fortypical chiller configuration.NOTE: The refrigerant andwater connections on thechiller can be reversed byrotating the chiller (uppersection) on the reservoirduring installation. Unlessotherwise specified theconnections will be as shownin Figure 3-1.Installation & Assembly Requirements 3/04 Turbo Refrigerating, LLC 3-1
WARNING! Read safety section before this section. Failure to carefully follow these instructions couldresult in permanent injury or loss of life.Figure 3-1 Typical <strong>Chiller</strong> Orientation (Typical HTDA9612XX Shown)Recommended Service andCleaning ClearancesMinimum recommendedclearances for service andcleaning:• 48" on all sides• 36" above the chiller foraccess to the waterdistribution pan(s) andheader(s) for cleaning.Access doors are provided onthe front, rear, and top of thechiller.Note: To locate theconnections on the oppositerotate the upper chillersection 180° when placing iton the chiller sump.Tools Required forInstallationTo install the <strong>Chiller</strong>, you willneed two to three people whoseskills include mechanical,welding, and plumbingcapabilities as well as aqualified electrician. Thefollowing is a list of toolsrequired for safe erection andassembly of the <strong>Chiller</strong>:• Wrenches and sockets (a fullset up to 1 1/8")• Phillips (not cross-point) andstandard (slotted) screwdrivers• Level (four feet long)• Tape measure (thirty feetlong)• Pry bar• Lifting straps (2000#)• Welder suitable for carbon-tostainlesssteel• Framing square• Forklift or craneAlways remember –SAFETYFIRST!!!3-2 Turbo Refrigerating, LLC 3/04 Installation & Assembly Requirements
WARNING! Read safety section before this section. Failure to carefully follow these instructions couldresult in permanent injury or loss of life.1. DELIVERY INSPECTIONAll <strong>Chiller</strong>s and reservoirs (ifsupplied) are inspected at thefactory to assure shipment of amechanically sound piece ofequipment. If providedelectrical controls and optionsare also factory testedTURBO® <strong>Chiller</strong>s are shippedon “air-ride” trailers to ensurethat the equipment arrives in thebest possible condition.Inspect the <strong>Chiller</strong> and reservoirthoroughly upon arrival at theinstallation site to check for anyshipment damage. Report anydamage to the transportationcompany immediately so that anauthorized agent can:Delivery Inspection Checklist1. Inspect panels.2. Open and inspect looseequipment and crate(s).3. Inspect evaporator plates.4. Inspect valves (ifapplicable) and piping.5. Damage and missing partsmust be noted on bill oflading at the time of receipt.• Using the Packing Listprovided with the shipmentexamine the <strong>Chiller</strong> and/orloose parts shipped with theunit to ensure everything onthe list has been received.• Determine the extent of thedamage.• Take the necessary steps torectify the claim withoutcostly delays.Since most equipment isshipped FOB Factory title to theequipment transfers to theowner when it is loaded on thetruck and leaves the factory.Therefore any claims must befiled by the owner. NotifyTURBO of any claims made.Installation & Assembly Requirements 3/04 Turbo Refrigerating, LLC 3-3
WARNING! Read safety section before this section. Failure to carefully follow these instructions couldresult in permanent injury or loss of life.2. HOISTING OR MOVINGEquipment RiggingInstructionsThe <strong>Chiller</strong> should be lifted bythe lifting straps (slings) aroundthe plate bank inside the frame.A spreader bar and blocks maybe required to protect the plates.The hinged roof panels andfront and rear doors should beremoved during the riggingoperation.Figure 3-2 shows theconfiguration with lifting slingsaround the plate bank andreservoir (sump).Figure 3-2 <strong>Chiller</strong> Lifting Configuration3-4 Turbo Refrigerating, LLC 3/04 Installation & Assembly Requirements
WARNING! Read safety section before this section. Failure to carefully follow these instructions couldresult in permanent injury or loss of life.Hoisting or MovingIf a <strong>Chiller</strong> is installed in alocation that requires theunit to be lifted by meansof a crane, TURBOrequires that the liftingand/or slinging be donefrom the bottom of theunit. Use a spreader at thetop of the unit to preventthe plates from beingdamaged. A competentrigging and hoistingcontractor can handle thejob without danger ordamage to the <strong>Chiller</strong>.If a <strong>Chiller</strong> has to bemoved along a floor, road,driveway, etc., use eitherpipes as rollers or dollies(of sufficient capacity)under the unit or ifavailable a large forklifton both ends should beused. The unit can also bemoved by a large forkliftfrom one end with heavyduty dollies under eachcorner of the other end.IMPORTANTNever lift or sling the<strong>Chiller</strong> with devicesfastened to the top framestructure. Lift the<strong>Chiller</strong> only from thebottom of the plate bank.Before hoisting, the riggermust ensure that the loadis properly balanced toprevent tilting or tippingof the <strong>Chiller</strong>. Test theload before lifting it offthe truck or ground.WARNINGHoisting or movingheavy equipment shouldonly be done bycompetent rigging andhoisting contractors.Never allow personnel togo under the unit whileit is in the air. Failure tocarefully follow theseinstructions could resultin permanent injury orloss of life.The following tables listthe shipping weights of allstandard chillers andreservoirs. Consult thefactory for shippingweights of special or selfcontainedchiller thatinclude the high side orother options.Table 3-1. Standard HTD <strong>Chiller</strong> Models Shipping Weights48" Plate <strong>Chiller</strong> ModelsMODELSHIPWT(LBS)OPERATINGWT(LBS)MODELSHIPWT(LBS)OPERATINGWT(LBS)HTD "X" -48-06-01 1,482 2,466 HTD "X" -48-12-07 2,540 4,634HTD "X" -48-06-02 1,587 2,637 HTD "X" -48-12-08 2,645 4,805HTD "X" -48-06-03 1,692 2,809 HTD "X" -48-12-09 2,750 4,977HTD "X" -48-06-04 1,797 2,981 HTD "X" -48-12-10 2,855 5,149HTD "X" -48-06-05 1,902 3,153 HTD "X" -48-12-11 2,960 5,320HTD "X" -48-06-06 2,007 3,324 HTD "X" -48-12-12 3,065 5,492HTD "X" -48-06-07 2,112 3,496 HTD "X" -48-12-13 3,170 5,664DIMENSIONS (IN) L W DIMENSIONS (IN) L W68 36 68 60Installation & Assembly Requirements 3/04 Turbo Refrigerating, LLC 3-5
WARNING! Read safety section before this section. Failure to carefully follow these instructions couldresult in permanent injury or loss of life.72" Plate <strong>Chiller</strong> ModelsMODELSHIPWT(LBS)OPERATINGWT(LBS)MODELSHIPWT(LBS)OPERATINGWT(LBS)HTD "X" -72-06-01 1,856 3,227 HTD "X" -72-12-07 3,347 6,296HTD "X" -72-06-02 2,014 3,488 HTD "X" -72-12-08 3,505 6,557HTD "X" -72-06-03 2,172 3,749 HTD "X" -72-12-09 3,663 6,818HTD "X" -72-06-04 2,330 4,011 HTD "X" -72-12-10 3,821 7,079HTD "X" -72-06-05 2,488 4,272 HTD "X" -72-12-11 3,979 7,340HTD "X" -72-06-06 2,646 4,533 HTD "X" -72-12-12 4,137 7,601HTD "X" -72-06-07 2,804 4,794 HTD "X" -72-12-13 4,295 7,862DIMENSIONS (IN) L W DIMENSIONS (IN) L W92 36 92 6096" Plate <strong>Chiller</strong>MODELSHIPWT(LBS)OPERATINGWT(LBS)MODELSHIPWEIGHT(LBS)OPERATINGWEIGHT(LBS)HTD 'X'-96-06-01 2,321 4,087 HTD 'X'-96-12-07 4,147 7,959HTD 'X'-96-06-02 2,531 4,436 HTD 'X'-96-12-08 4,357 8,308HTD 'X'-96-06-03 2,741 4,786 HTD 'X'-96-12-09 4,567 8657HTD 'X'-96-06-04 2,951 5,135 HTD 'X'-96-12-10 4,777 9,007HTD 'X'-96-06-05 3,161 5,485 HTD 'X'-96-12-11 4,987 9,357HTD 'X'-96-06-06 3,371 5,834 HTD 'X'-96-12-12 5,197 9,706HTD 'X'-96-06-07 3,581 6,184 HTD 'X'-96-12-13 5,407 10,056DIMENSIONS (IN) L W DIMENSIONS (IN) L W116 36 116 603-6 Turbo Refrigerating, LLC 3/04 Installation & Assembly Requirements
WARNING! Read safety section before this section. Failure to carefully follow these instructions couldresult in permanent injury or loss of life.96" Plate <strong>Chiller</strong>MODELSHIPWT(LBS)OPERATINGWT(LBS)MODELSHIPWT(LBS)OPERATINGWT(LBS)HTD 'X'-96-18-14 6,195 12,192 HTD 'X'-96-30-20 8,055 14,623HTD 'X'-96-18-15 6,405 12,542 HTD 'X'-96-30-21 8,265 14959HTD 'X'-96-18-16 6,615 12,891 HTD 'X'-96-30-22 8,475 15,296HTD 'X'-96-18-17 6,825 13,241 HTD 'X'-96-30-23 8,685 15,632HTD 'X-'96-18-18 7,035 13,590 HTD 'X'-96-30-24 8,895 15,968HTD 'X'-96-18-19 7,245 13,939 HTD 'X'-96-30-25 9,105 16,304HTD 'X'-96-18-20 7,455 14,289 HTD 'X'-96-30-26 9,315 16,640HTD 'X'-96-30-27 9,525 16,976HTD 'X'-96-30-28 9,735 17,313HTD 'X'-96-30-29 9,945 17,649HTD 'X'-96-30-30 10,155 17,985DIMENSIONS (IN) L W DIMENSIONS (IN) L W116 83½ 116 83½Consists of standard insulated reservoir with 3" legs, evaporator section, water distribution pan,PVC water distribution header, splash curtains and insulated panels. Door configuration is topand end. <strong>Chiller</strong>s are shipped in two pieces with a charge of inert gas.DESIGN NOTE: HTD 'X' 96-30-XX is not suitable for flooded applications. ConsultFactory.Installation & Assembly Requirements 3/04 Turbo Refrigerating, LLC 3-7
WARNING! Read safety section before this section. Failure to carefully follow these instructions couldresult in permanent injury or loss of life.Table 3-2. Un-insulated (uHTD)<strong>Chiller</strong> Shipping Weightsu<strong>Chiller</strong>MODELSHIPWT.(LBS)OPERATINGWEIGHT(LBS)UHTD "X" -48-06-01 1,395 2,370UHTD "X" -48-06-02 1,500 2,485UHTD "X" -48-06-03 1,620 2,610UHTD "X" -48-06-04 1,725 2,740UHTD "X" -48-06-05 1,840 2,780UHTD "X" -48-06-06 1,965 3,025UHTD "X" -48-06-07 2,085 3,026DIMENSIONS (IN) L W68 36Consists of standard insulated reservoir with 3" legs, un-insulated evaporator section panels,water distribution pan, all constructed of stainless steel, and PVC water distribution header.Door configuration is top and end. <strong>Chiller</strong>s are shipped in two pieces with a charge of inert gas.3-8 Turbo Refrigerating, LLC 3/04 Installation & Assembly Requirements
WARNING! Read safety section before this section. Failure to carefully follow these instructions couldresult in permanent injury or loss of life.Table 3-3. High Flow(HF) <strong>Chiller</strong> Shipping Weights144" Plate Hi Flow <strong>Chiller</strong>MODELSHIP WT.(LBS)OPERATINGWEIGHT(LBS)MODELSHIPWT.(LBS)OPERATINGWEIGHT(LBS)HF 'X'-144-06-01 1,935 4,355 HF 'X'-144-12-07 3,325 7,700HF 'X'-144-06-02 2,065 4,495 HF 'X'-144-12-08 3,460 7,895HF 'X'-144-06-03 2,195 4,635 HF 'X'-144-12-09 3,585 8,080HF 'X'-144-06-04 2,340 4,840 HF 'X'-144-12-10 3,715 8,275HF 'X'-144-06-05 2,485 5,045 HF 'X'-144-12-11 3,885 8,510HF 'X'-144-06-06 2,625 5,250 HF 'X'-144-12-12 3,995 8,680HF 'X'-144-06-07 2,765 5,450 HF 'X'-144-12-13 4,105 8,920DIMENSIONS (IN) L W DIMENSIONS (IN) L W163 36 163 60Consists of standard insulated reservoir with 3" legs, evaporator section, water distribution pan,PVC water distribution header, splash curtains and insulated panels. Door configuration is topand end. <strong>Chiller</strong>s are shipped in two pieces with a charge of inert gas.144" Plate Hi Flow <strong>Chiller</strong>MODELSHIPWT.(LBS)OPERATINGWEIGHT(LBS)HF 'X'-144-12-07 3,325 7,700HF 'X'-144-12-08 3,460 7,895HF 'X'-144-12-09 3,585 8,080HF 'X'-144-12-10 3,715 8,275HF 'X'-144-12-11 3,885 8,510HF 'X'-144-12-12 3,995 8,680HF 'X'-144-12-13 4,105 8,920DIMENSIONS (IN) L W163 60Consists of standard insulated reservoir with 3" legs, evaporator section, water distribution pan,PVC water distribution header, splash curtains and insulated panels. Door configuration is topand end. <strong>Chiller</strong>s are shipped in two pieces with a charge of inert gas.Installation & Assembly Requirements 3/04 Turbo Refrigerating, LLC 3-9
WARNING! Read safety section before this section. Failure to carefully follow these instructions could result in permanent injury or loss oflife.Table 3-4. Reservoir Shipping Weights and Capacities.Size# OFPLATESCHILLERMODELOVERALL TANKDIMENSIONL W HWATERLEVEL(IN)GAL /INSUMP WEIGHT(SEE NOTE)SHIPWTOPWT# OFLEGSACTUALCAPACITY(GAL)HTD-48-06 68 8.875 271 1,188 6 110STDMEDIUM1 THRU 67 THRU1214 THRU301 THRU 67 THRU1214 THRU30HTD-72-06 92 3612.2 346 1,614 152HTD-96-06 116422 2,048 19515.53HTD-48-12 68 17½ 12½380 2,006 195HTD-72-12 92 6021.35 482 2,709 267HTD-96-1227.18 583 3,419 340116HTD-96-XX 83½38 1/2 741 4,786 482HTD-48-06 68 37½ 32 1/2" 8.875 1851,669288HTD-72-06 92 3612.2 2282,271397HTD-96-06 1162705052,85615.53HTD-48-12 682282,813505HTD-72-12 92 6021.35 2703,831694HTD-96-1227.18 3138834,842116HTD-96-XX 83½38 1/2 3556,7511,2523-10 Turbo Refrigerating, LLC 3/04 Installation & Assembly Requirements
WARNING! Read safety section before this section. Failure to carefully follow these instructions could result in permanent injury or loss oflife.HTD-48-06 68 15.53 4103,7045051 THRU 6HTD-72-06 92 6021.35 5045,024694HIGH7 THRU12HTD-96-06 11627.18 598HTD-48-12 68 24.4 528HTD-72-12 92 9233.56 6396,3365,5157,51188837931,091HTD-96-12 11642.71 7509,4901,388EXTRAHIGH1 THRU 30HTD-48-XX 68 24.4HTD-72-XX 92 92 45½ 40 1/2" 33.56824 8,1461,003 11,06989881,359HTD-96-XX 11642.711,182 13,9841,730Installation & Assembly Requirements 3/04 Turbo Refrigerating, LLC 3-11
WARNING! Read safety section before this section. Failure to carefully follow these instructions couldresult in permanent injury or loss of life.3. SITE PREPARATIONInstall the <strong>Chiller</strong> in an areawhere the ambient temperaturedoes not fall below 40°F or riseabove 100°F. The chiller andreservoir (sump) on all HTD/HFchillers are insulated againstexcessive heat infiltration. MostReservoirs are optional on HFseries chillers are providedwithout reservoirs. uHTDchiller cabinets are notinsulated.Provide adequate working spaceon all sides and the top of the<strong>Chiller</strong> for easy access toservice and clean.Outdoor InstallationInsulated chillers are suitablefor outdoor installation. Forease of maintenance andcleaning as well as access underall weather conditions indoorinstallations are preferred.Outside installation typicallyrequire additional installationconsiderations including but notlimited to:• Provisions for chilleroperation in conditionswhere the ambient isbelow 40°F to preventfreeze up. Operation forshort intervals (less than8 hours per day) ispossible withoutproblems. Foroperations requiring24/7 (24 hours per day;seven days a week)outdoor installations arenot recommended.• A cover over the roofpanels to prevent debris,rain, snow, and otheroutdoor contaminatesfrom collecting on theroof and preventingnormal opening of theroof panel for cleaningwithout contaminatingthe interior of thechiller. Optional roofvinyl covers areavailable.IMPORTANTNormal freeze-up precautionsshould be taken when pumpor drain lines must be exposedto freezing temperatures.Concrete SlabIf the <strong>Chiller</strong> is to be mountedon a concrete slab, the surfaceof the slab must be level orshimming must be providedunder the unit to ensure that it islevel to ensure proper waterflow over the evaporator plates.Leveling legs are provided onall chiller reservoirs for finalleveling after thechiller/reservoir are set in place.IMPORTANTFailure to follow theseguidelines could result inuneven water distributionover the evaporator plates.Location of all leveling feet onthe chiller reservoir is shown onthe data sheet provided with thechiller.Raised CurbingA raised curbing around theoutside of the <strong>Chiller</strong> isrecommended to contain anycondensate, leakage, or cleaningfluid during maintenance fromthe unit. A curbing height oftwo (2) to three (3) inches istypically sufficient. Refer toFigure 3-6.Elevated InstallationSome installations requiremounting the <strong>Chiller</strong> at anelevation above grade. In thesecases, a structural steel platform(capable of supporting thedynamic and static load) mustbe provided.Due to variations in local andstate codes, a local firmspecializing in structural steelshould be consulted todetermine the requirements ofthe steel to be erected. ContactTURBO for informationrequired by the firm that isproviding the steel platformincluding weight, dimensions,connection locations, and accessrequirements for service. Thesteel supporting the unit mustbe level or shimmed to obtain asatisfactory level. The sameguidelines for supported andunsupported sections apply asfor concrete slabs. Refer toFigure 3-4.3-12 Turbo Refrigerating, LLC 3/04 Installation & Assembly Requirements
WARNING! Read safety section before this section. Failure to carefully follow these instructions couldresult in permanent injury or loss of life.Figure 3-4 Elevated InstallationAccess, Service, Air SpaceWhen laying out the unitinstallation, allow adequatespace around the unit for accessand service. Give particularattention to the location of the<strong>Chiller</strong>, optional evaporatorhigh side equipment, andoptional refrigerantrecirculation unit. Removal orservice of larger, heaviercomponents (condensers,compressors, etc.) may requireaccess by a forklift or otherlifting devices which requireadditional space.On air cooled condensers,evaporative condensers, andcooling towers (supplied as anoption or by others), adequatespace must be allowed for airintake and air discharges toprevent insufficient air supplyor recirculation of discharge air.Allow space for electricaldisconnects and load centers (byothers) near the equipment andfor conduit runs from the loadcenter to the equipment.Water Pressure LinesProperly size the water pipingto the make-up waterconnection and cooling tower(if equipped) to deliver thespecified flow and pressure.Standard design parameters for<strong>Chiller</strong>s use minimum 5 PSIGcity water pressure or waterpumped from storage at theinlet to the chiller. If availablewater pressure is below 5 PSIGat the inlet water connection,consult TURBO to determine ifa booster pump is required. Themaximum water pressure is 100PSIG. Systems with waterpressures over 100 PSIG shouldbe equipped with pressurereducing valves in the lines tothe <strong>Chiller</strong>. Expansion tanksmay be required on somesystems with high waterpressure to prevent waterhammer.Floor DrainThe <strong>Chiller</strong> reservoir requiresperiodic cleaning. Makeprovisions for a floor drain todispose of this water and for theunit overflow drain.Water TreatmentOptional make-up waterstrainers are available to removesolids and material large enoughto plug openings in the waterdistribution system. Consult alocal water treatment companyto determine if additional watertreatment or filtration isrequired to produce the desiredwater quality and reducemaintenance of the waterdistribution system.Installation & Assembly Requirements 3/04 Turbo Refrigerating, LLC 3-13
WARNING! Read safety section before this section. Failure to carefully follow these instructions couldresult in permanent injury or loss of life.4. MOUNTING AND LEVELINGSet the <strong>Chiller</strong> on a solid, levelbase or floor. Refer to step 3.Reference "Site Preparation" onpage 3-6 for additional details.IMPORTANTIt is imperative that the<strong>Chiller</strong> be level in both lengthand width. Failure to levelthe <strong>Chiller</strong> in both directionswill disturb the water flowpatterns and may causeincomplete coverage of thechilling surfaces.Use a level with a minimumlength of forty-eight (48) inchesto insure a good installation.As indicated in step 3 levelinglegs are provided on allreservoirs for leveling the<strong>Chiller</strong>/reservoir assembly.3-14 Turbo Refrigerating, LLC 3/04 Installation & Assembly Requirements
WARNING! Read safety section before this section. Failure to carefully follow these instructions couldresult in permanent injury or loss of life.General <strong>Chiller</strong> RequirementsWater temperature and flow areused to determine the number ofevaporator plates required forthe chilling service to beprovided. All chiller capacitiesare based on the entering watertemperature, leaving watertemperature, specific heat of thefluid, and the flow rate over thechiller plates. The number ofplates is determined by the loadcalculated from the data aboveand the saturated evaporatortemperature which is typicallybetween 26°F and 30°F forapplications using water as thefluid being chilled.The holes sizes in the waterdistribution pan and the waterdistribution header are alsobased on the water flow overthe plates. To minimize foulingof the holes in the header andpan, the maximum diametersize allowable withoutimpacting water distribution isused.Water QualityWhen the fluid to be cooled iswater, the water quality canaffect the performance andcorrosion resistance of thesystem if proper correctiveaction is not taken.5. WATER SYSTEMtemperature can not beobtained. Refer to themaintenance section forcleaning procedures.Free chlorine is released fromthe water as it is dischargedfrom the distribution header. Asthe chlorine level of the waterincreases or if the water is superchlorinated, the free chlorinelevel can concentrate and causecorrosion of even stainless steelsurfaces that are not wettedduring operation. Thesesurfaces include the chillerframe, parts of the waterdistribution pan, exterior panelsurfaces, and refrigerantheaders. The free chlorine mustbe vented to reduce theconcentration level. Venting canbe obtained by installingoptional vents or typically byweekly cleaning procedures toremove the stagnant water thatcollects on the non-wettedsurfaces and vent free chlorine.Cleaning procedures aredescribed in the maintenancesection. Opening the cabinetdoors releases trapped chlorine.If followed by a fresh waterwash down of all the surfaceson a weekly basis the systemwill typically remain in apassive state and corrosion free.Weekly cleaning also eliminatesscale build that requires moreaggressive cleaning methods toremove.Water TemperatureEntering water temperatures ontypical chiller installations canrange from 90°F down to 35°F.For entering water temperaturesover 90°F consult the factory.Leaving water temperatures towithin 0.5°F of the fluid freezepoint are obtainable.The fluid to be cooled isbrought into the chiller throughthe water inlets located at thetop of the chiller. Entering fluidis discharged from the PVCfluid distribution system locatedinside the chiller into thestainless steel water distributionpan to ensure optimumdistribution to all plates in thesystem. From the waterdistribution pan, the fluid flowsover the exterior of the chillerplates and is discharged into thereservoir located below thechiller. Pump, drain, andoverflow connections arelocated in the reservoir.High flow (HF) chillers forsome application do not use areservoir below the chillerplates. For these applicationsthe chilled fluid is dischargeddirectly into the process, over aprocessing conveyor carryingthe product, or directly into achilled fluid tank.Minerals in the water can causeReference the Maintenancea scale build up on the surfaceSection for additionalof the heat transfer surface. Ifinformation on cleaning, andthis fouling is not removed fromthe “Handling and Postthe plates the leaving waterInstallation” section of theInstallation & Assembly Requirements 3/04 Turbo Refrigerating, LLC 3-15
WARNING! Read safety section before this section. Failure to carefully follow these instructions couldresult in permanent injury or loss of life.Installation Instructions foradditional steps to follow toensure the long term integrity ofthe chiller. If you are uncertainabout the quality of the water orfluid to be used in the chillerconsult the factory forassistance.Water Distribution HeaderA PVC water distributionheader is located inside the unit.This is designed for easydisassembly for cleaning. Thelaterals that branch off of themain lines can be removed fromthe fittings into which they areinserted for cleaning. Plasticcaps are located on the end ofthe laterals to permit full accessto the lateral interior from bothends. These parts are not gluedtogether to allow fordisassembly for cleaning.Holes in the water distributionheader are sized for evendistribution of the fluid into thepan and large enough to passsolids in the fluid stream.Reference “Water DistributionPan Filter” below for removalof solids and debris from thefluid stream.Larger chillers normally usemultiple water distributionheaders to make them easier toremove for cleaning.Stainless steel water distributionheaders with sanitary fittings foreasy disconnect and removal ofthe complete water distributionsystem are available as anoption.Water Distribution PanA stainless steel waterdistribution pan is located ontop of the chiller plates touniformly distribute the fluidover all the plates. The size andnumber of holes in the pans areselected to match the flowrequirements specified by thecustomer. At design rate ratesthe water level in the pans is atapproximately the 50% fulllevel. All pans are designed tomaintain proper flow over a 2:1flow range that covers a waterlevel from approximately 1”minimum to 4” maximum in thepan.NOTE: Water levels below 1”in the water distribution panwill result in water wicking(separation of the fluid flowover the plates) and will resultin freeze ups due to erraticfluid flow to t he plates.Water levels above 4” canresult in excessive splashingand also result in freeze-upsdue to the splashing freezingon the refrigerant headers orother surfaces that arenormally not wetted.Larger chillers normally usemultiple water distribution pansto make them easier to removefor cleaning.Water Distribution Pan Filterin the water distribution pan.For USDA applications aperforated PVC sheet is used inthe bottom of the waterdistribution pan to filter thewater before it plugs the holesin the water distribution pan.The PVC filter requires morefrequent cleaning to ensureproper water distribution at alltimes.InsulationFluid lines connected to thechiller should be insulated toreduce heat infiltration andcondensation. Insulation ofthese lines is by others.A filter pad is located in thebottom of the water distributionpan for all non-USDAapplications to filter debris thatis large enough to plug the holes3-16 Turbo Refrigerating, LLC 3/04 Installation & Assembly Requirements
WARNING! Read safety section before this section. Failure to carefully follow these instructions couldresult in permanent injury or loss of life.6. ELECTRICAL CONNECTIONSStandard chillers consist of theupper evaporator section andlower reservoir. No electricalcomponents are required forthese components. Control ofthe chiller and/or water systemis an option or typicallysupplied by others andintegrated into the controlsystems for other parts of theprocessing plant.The options section can bereferenced for optional kitsrequired for a complete systemand the electrical requirementsfor each.WARNINGAll electrical work should bedone only by a qualifiedelectrician. Do NOT turnpower on at this time. Failureto carefully follow theseinstructions could result inpermanent injury or loss oflife.IMPORTANTElectrical wiring diagrams foroptional control systems arelocated in each control paneland are furnished with eachoperating manual. Consultthese diagrams before makingelectrical service connections.Electrical Service Connections<strong>Chiller</strong>s can be furnished withoptional features factory wired.Electrical service connections tothe following is required byothers:• L1, L2, L3 motor starterconnectors (three phase)• L1, L2 control circuitconnections (single phase)All of these connections aremade on the terminal blockslocated inside the optional<strong>Chiller</strong> control panel ifsupplied. Installation ofdisconnect switches or circuitbreakers is by others in theincoming power lines ahead ofthe control panel on the chiller.Field wiring is required fromthe electrical source todisconnects and/or circuitbreakers, and fromdisconnects/circuit breakers tothe terminal blocks in thechiller. All field wiring isprovided by others.Checking Pump RotationThe water pump (by otherunless otherwise specified)rotation is typically indicated onthe pump housing. Pumprotation can be verified byobserving the fan rotation onthe pump motor or bymeasuring the amp draw of themotor. The correct motor ampdraw will be higher than theamp draw in the reverserotation. Rotation can bechanged by reversing two of thephases on the motor starter; i.e.reverse the wiring connectionsto L2 and L3 if the rotation isnot correct.Note:When checking rotation, onlythe power to the pump shouldbe on. Turn the three phasepower to the othercomponents in the system off.Installation & Assembly Requirements 3/04 Turbo Refrigerating, LLC 3-17
WARNING! Read safety section before this section. Failure to carefully follow these instructions couldresult in permanent injury or loss of life.Water Pump ConnectionA MPT connection is providedat the bottom of the reservoirfor connection to a water pumpto be used to pump the chilledwater to the process or finaldistribution point.This connection is typicallylocated at the same end as theoverflow and drain connection.Multiple pump connections orconnections in differentlocations including the bottomof the reservoir are available asoptions.Water Overflow ConnectionA connection for wateroverflow is located on the frontof the chiller above the pumpconnection. This is piped to anoverflow drain for disposal ifthe pump fail, water flow to thechiller exceeds design flow, orthe lines become plugged.Piping to a safe dischargelocation is by others.Drain ConnectionA female coupling is factoryinstalled in the bottom of thepump connection. The reservoiris shipped from the factory witha plug installed in theconnection. The plug may beremoved and replaced by a shutoff (isolation) valve for drainingthe reservoir for service or7. WATER CONNECTIONScleaning. The shut off valveshould be closed during normaloperation. Installation of thevalve and piping are by others.IMPORTANTNormal freeze-up precautionsshould be taken when pumpor drain lines must be exposedto freezing temperatures.Connection Size and LocationRefer to the Data Sheet suppliedwith the manual for connectionsizes and locations. Thelocations shown in Figure 3-1are typical. Locations forspecial chillers may vary.Optional ComponentsWater Requirements(Optional Condensing Unit)Water Cooled CondensersWater-cooled condenserssupplied on chiller high sidesare the conventionalcondenser/receiver combinationtype. They feature shell andtube type construction,cleanable with removableheads. The water in and outconnections are sized to permitmaximum water flow at peakrequirements.Condenser water requirementsare based on 85°F water to thecondenser, 95°F water off thecondenser, and 105°Fcondensing. The condenser’sdesign water flow rate is basedon 3 GPM/ton of refrigeration.*The actual flow rate is whollycontingent on the watertemperature and evaporator loadbut will not exceed the designflow.* Tons of refrigeration = TotalHeat Rejection @ 10°FSET/105°F SDT ÷ 15,000BTU/tonOptional Water RegulatingValve (SC Models Only)A water regulating valve can befurnished in the <strong>Chiller</strong> highside and must be field installedexternal of the unit in the outletwater line. A 1/4" SAE flaretype valve is provided on thewater cooled condenser for thewater regulator high pressuregas connection. The regulatormodulates in response toincreases and decreases in thedischarge pressure to maintain aconstant pressure under alloperating conditions.Evaporative-CooledCondensersEvaporative-cooled condenserscan also be supplied withoptional high side system to beused with TURBO chillers.The same basic requirementsfor water quality andtemperature apply toevaporative-cooled systemsexcept evaporative-cooled3-18 Turbo Refrigerating, LLC 3/04 Installation & Assembly Requirements
WARNING! Read safety section before this section. Failure to carefully follow these instructions couldresult in permanent injury or loss of life.condensers like cooling towers other devices used to feed liquid Optional Features &sizing is based on the design to the recirculation vessel or Accessories for Winterizing.wet bulb temperature for the surge drum.installation location. Standardselections are based on a design When contemplating the use ofwet bulb temperature of 78°F city or well water forand a saturated condensingcondensing, a careful checktemperature of 95°F. For other should be made of the seasonaldesign conditions consult the variation in the waterfactory.temperatures and the quality ofthe water.Discharge Pressure ControlsWhen optional cooling towersare used and no other positivemeans of regulating headpressure are provided (i.e., fanand pump pressure switches), awater regulating valve will berequired. Adequate headpressure is important to provideproper refrigerant flow torefrigerant control valves suchas hand expansion valves orWater flow lines should besized large enough for therequired flow at the maximumwater temperature to beencountered.For applications requiringcondenser water above 85°F,consult TURBO. When <strong>Chiller</strong>sare installed in an area wherethe ambient falls belowfreezing, refer to section 8 –Optional evaporative-cooledcondensers also requiredischarge pressure controls tomaintain the discharge under alloperating conditions. Dischargepressure controls include avariety of methods. Airdischarge dampers thatmodulate in response to thedischarge pressure are the mosteconomical. Flood backcontrols and variable frequencydrives (VFD) may be requiredfor applications that operate in awide range of ambientconditions including lowambient conditions wheredampers alone may not besufficient. Consult factory foradditional information.Installation & Assembly Requirements 3/04 Turbo Refrigerating, LLC 3-19
WARNING! Read safety section before this section. Failure to carefully follow these instructions couldresult in permanent injury or loss of life.All piping in the chiller is 304Lstainless steel. Optional 316Lpiping is also available.Refrigerant connections arestubbed out on the right side ofthe chiller for standardinstallation. These connectionscan be easily reversed byrotating the chiller on thereservoir during installation.NOTE: Although theconnections can be reversed inthe field please specify theside the refrigerant headersshould exit when the chiller isordered to ensure the packagealong with any optionsprovided can be properlyassembled in the field.Piping in a refrigerant systemhas two functions:1. To carry the refrigerantthrough the system as aliquid, a gas, or a liquid/gasmixture with a minimumpressure drop.2. To return any oil entrainedin the refrigerant to thecompressor.Avoid trapping the lines exceptfor specific purposes. If trapsare used, the horizontaldimension should be as short aspossible to avoid excessivetrapping of oil. Suction mainsshould be pitched toward thecompressor.8. REFRIGERANT PIPINGSteel Pipe JointsAs indicated all piping insidethe chiller is stainless steel. It is;however, acceptable to connectcarbon steel pipe to the inlet andoutlet connections.IMPORTANT: When weldingcarbon steel to stainless steel,the chiller should be coveredduring all grinding, weldingand deburring operations toavoid contamination of thestainless steel surfaces.Failures to follow theseinstructions could result inpitting or corrosion of thestainless steel. Referenceadditional information onpost-installation clean up inthis section.Clean threads on the pipe andfittings to remove all traces ofgrease or oil. Wipe the threadsdry with a lintless wiping cloth.Threaded JointsStandard refrigerantconnections are butt weld.Threaded connections are notrecommended but can besupplied if specified. Forthreaded connections on pipingfor refrigerants, use Teflonthread sealing tape. Wrap thetape around the threaded maleportion of the joint about twofull turns, thread into the femaleportion, and tighten. If threadsealing tape is not available,conventional thread fillingcompound may be used. Usethread filling compoundsparingly and on the pipe only.Do not put any thread fillingcompound on the first twothreads, this prevents any of thecompound from entering thesystem.Refer to the Data Sheet in themanual for the refrigerantconnection sizes and location.The locations shown in Figure3-1 are typical. Locations forspecial chillers may vary.Steel PipeCarbon steel or stainless steelpipe can be used for refrigerantlines but must be eithersandblasted or pickled to ensurecomplete removal of wax, oil,or other processing films.Pipe Line HangersHangers and supports for coilsand pipe lines should receivecareful attention. Hangers musthave ample strength and besecurely anchored to withstandany vibration from thecompressor and adequatelysupport the pipe lines.Storage / Inactive SystemsIf the equipment is not installedupon receipt or is installed butnot put in service, the interiormust be maintained in a cleandry environment. All units are3-20 Turbo Refrigerating, LLC 3/04 Installation & Assembly Requirements
WARNING! Read safety section before this section. Failure to carefully follow these instructions couldresult in permanent injury or loss of life.evacuated and charged with installation, the system should water and air dried or wiped offnitrogen or an ammonia holding be properly evacuated and an with clean dry cloth. Thecharge to protect the system. ammonia holding chargeintegrity of the system shouldDuring installation the dryestablished. All externalbe checked on a regular basis toholding charge will be lost. If surfaced should also beavoid damage during thethe system is not started after thoroughly washed with clean extended off period.Installation & Assembly Requirements 3/04 Turbo Refrigerating, LLC 3-21
WARNING! Read safety section before this section. Failure to carefully follow these instructions couldresult in permanent injury or loss of life.9. TESTING REFRIGERATION SYSTEM FOR LEAKS – FIELDPIPINGTesting for leaks assures a tightsystem that operates withoutloss of refrigerant.In order to test field piping forleaks, the system pressure mustbe built up. Test pressures forthe system’s low side and highside are defined in the followingstandards:• ANSI/ASHRAE 15 SafetyCode For MechanicalRefrigeration• ANSI B9.1 Safety Code forMechanical Refrigeration• ASME/ANSI B31.5Refrigeration PipingThese standards should bereferenced for field testpressures and procedures. Thesepressures will usually sufficebut check local codes as theymay differ.IMPORTANTDo not use the compressor tobuild up the pressure; it is notdesigned to pump air. Seriousoverheating and damage mayresult.Prior to Testing1. If test pressures exceed thesettings of system reliefvalves or safety devices,remove the system reliefvalves or safety devices andplug the connection duringthe test.2. Open all valves except thoseleading to the atmosphere.3. Open all solenoids by liftingtheir stems manually.4. Open all bypassarrangements.Oil free dry nitrogen may beused to raise the pressure to theproper level for testing.TestingWhen the proper pressure isattained:1. Test for leaks with amixture of four parts waterand one part liquid soapapplied to all flanges andthreaded or welded jointswith a one inch round brush.A small amount of glycerinadded to the test solution willstrengthen the bubbles andimprove the solution.2. Observe the entire joint.If a leak is present, theescaping gas will cause thetest solution to bubble.3. After all leaks are foundand marked, relieve thesystem pressure and repairleaks.IMPORTANTNever attempt to repairwelded joints while thesystem is under pressure.Welded joints should beground and re-welded. Donot simply add more weldto a leaking joint.4. After all the joints havebeen repaired and thesystem is considered “tight”,test the chiller withrefrigerant.5. Attach a drum of theproper refrigerant to thesystem and allow the gas toenter until a pressure of 5PSIG is reached.6. Remove the refrigerantdrum and bring the pressureto the recommended testlevel with oil free drynitrogen.7. Check the entire systemagain for leaks, using asulfur stick or electronicleak detector. Check allflanged, welded, screwed,and gasket joints, all valvestem packings, and allparting lines on castings. Ifany leaks are found, theymust be repaired andrechecked before the systemcan be considered tight.Test PressureThe evaporator plates whenASME coded are rated for 202psig. However, during pressuretesting, the maximumrecommended test pressure is150 psig.3-22 Turbo Refrigerating, LLC 3/04 Installation & Assembly Requirements
WARNING! Read safety section before this section. Failure to carefully follow these instructions couldresult in permanent injury or loss of life.Reasons to EvacuateRefrigeration systems operatebest when only refrigerant ispresent in the system. Stepsmust be taken to remove all air,water vapor, and all other noncondensablesfrom the <strong>Chiller</strong>unit before charging it withrefrigerant. If air, water vapor,or non-condensables are left inthe system, various operatingdifficulties can be encountered,including:1. Water will decrease thecapacity of the evaporatorand cause formation of icein orifice openings causingrestriction or complete shutoffof refrigerant flow.2. Air and non-condensableswill lodge in the condenser;decrease the space forcondensing liquid and causethe head pressures to rise,thus reducing capacity.Helpful HintsIf properly evacuated asoutlined below, the system willbe oxygen free, dry, and therewill be no non-condensables tocause problems later.If at all possible, the pipingshould not be insulated beforethe evacuation process isstarted.The evacuation should not bedone unless the room10. EVACUATING THE SYSTEMtemperature is 60° or higher (toallow for proper moisture boiloff).If free moisture is in the systembefore evacuation (such aswater collected in traps or lowplaces in the piping), this caneasily be detected by feeling ofthese traps and low places. Ifmoisture is present, it willcondense in the low places andfreeze. It can be removed bygently heating the trap thefarthest away from the vacuumpump. This causes the water toboil, the ice to melt, and thevapor to collect in the next traptowards the vacuum pump.Repeat this process until allpockets of water have beenboiled off and the vacuumpump has had a chance toremove all of the water vaporfrom the system.Proper Measuring InstrumentIt is not possible to read highvacuums or low absolutepressures with a pressure gaugeor mercury monometer.Use the proper gaugemanufactured by McLeod,Stokes, and Airserco. Thesegauges usually read in the rangefrom 20 to 20,000 microns.High Vacuum PumpUse a high vacuum pumpcapable of attaining a blankedoff pressure of 10 microns orless.Attach this pump to the systemand allow it to operate until thepressure in the system has beenreduced somewhere below 500microns.Connect the high vacuum pumpinto the refrigeration systemfollowing the manufacturer’sinstructions.Note:For best results, connect thepump to the high side and thelow side of the system so thatthe entire system isthoroughly evacuated.Connect the vacuum indicatoror gauge into the system inaccordance with themanufacturer’s instructions.First EvacuationA single evacuation of thesystem is not satisfactory toremove all of the air, water, andnon-condensables present. Todo a complete job, the tripleevacuation method isrecommended:1. When the pump is firstturned on, reduce the systempressure as low as the pumpis able to bring it.2. Allow the pump to operatefor five (5) or six (6) hours.Installation & Assembly Requirements 3/04 Turbo Refrigerating, LLC 3-23
WARNING! Read safety section before this section. Failure to carefully follow these instructions couldresult in permanent injury or loss of life.3. Stop the pump and isolatethe system.4. Allow it to stand at thisvacuum for another five (5)to six (6) hours.5. Break the vacuum.6. Raise the system pressureup to zero (0) with oil freedry nitrogen.Second Evacuation1. Start the second evacuation,again allowing the pump tooperate, and reduce thepressure to less than 500microns.2. Allow the pump to operatefor two (2) or three (3)hours.3. Stop the pump and allow thesystem to stand with thisvacuum for a minimum ofthree (3) hours.4. Break the vacuum with theoil pumped dry nitrogen.5. Raise the pressure in thesystem to zero (0).Third Evacuation1. Operate the pump until thesystem pressure is reducedbelow the 500 micronfigure.2. Allow the pump to operatean additional six (6) hours.3. Stop the system and allow itto stand for approximatelytwelve (12) hours at the lowpressure.4. Break the vacuum with theoil free dry nitrogen.5. Allow the pressure in thesystem to come up toslightly above zero (0)pounds (drier cartridges andmoisture indicators may beinstalled in the system).6. Evacuate the system belowthe 500 micron figure andcharge with the refrigerantbeing used for the system.3-24 Turbo Refrigerating, LLC 3/04 Installation & Assembly Requirements
WARNING! Read safety section before this section. Failure to carefully follow these instructions couldresult in permanent injury or loss of life.11. CHARGING THE SYSTEM WITH REFRIGERANT OILAfter the complete systemconsisting of the <strong>Chiller</strong>(evaporator), high side, andrefrigerant recirculation unit isstarted, it may be necessary toadd oil to maintain the properlevel in the compressor (byothers).IMPORTANT: Refer to themanual and specificationsprovided by the supply of allaccessories equipment. Theinformation provided in thissection applies to optionalequipment supplied byTURBO.Note:Production capacity of the<strong>Chiller</strong> is based on an oil freeNH 3 refrigerant supply forammonia systems. Optionalequipment supplied for therefrigeration system mustprovide for proper oilmanagement. Consult thehigh side and/or refrigerantrecirculation package supplierfor additional information onoil management.When properly charged, the oillevel in the compressor shouldbe visible in the compressorsight glass. An oil reservoir mayalso be used on these units.Other equipment such as the oilfilter or oil coolers (when used)also require an oil charge.Therefore, the oil level in thecompressor and oil reservoirshould be rechecked after thecompressor has been operated.If additional oil is required, addonly the oil specified by thecompressor manufacturer. Useonly dehydrated, wax-free,refrigerant grade oil of suitableviscosity.Periodic Checks & RecordsThe above oil check should bedone at start-up or after anyservice work is performed.Periodic checks should be doneon a regular basis. Keepcomplete records of anyadditions to or removal of oil tothe system.Refrigerant OilUnless otherwise specified, thefollowing refrigeration oilshould be used:• Sun Oil Suniso 3GS• DuPont synthetic oil, 150SSU only• Texaco Capella B1Consult the equipment supplierspecifications.IMPORTANTDo not mix different types orgrades of oil. Do not overfillwith oil; this is especially trueon the hermetic typecompressors. Make sure theoil is fresh and notcontaminated.Oil QualityPeriodic analysis of oil samplesby local testing laboratories candetect unusual build-up ofmetals or other contaminants(which result from wear orother debris in the oil) beforethey become a problem.Installation & Assembly Requirements 3/04 Turbo Refrigerating, LLC 3-25
WARNING! Read safety section before this section. Failure to carefully follow these instructions couldresult in permanent injury or loss of life.<strong>Chiller</strong>sAll <strong>Chiller</strong> models are furnishedwithout refrigerant charge. Theentire refrigerant system mustbe evacuated (refer to step 9 –Evacuating the System) andthen charged by following theprocedure set forth under“Adding Refrigerant” on thispage. Each unit is shipped witha holding charge to keep thesystem dry during shipment orstorage. If the holding charge isnot in the system at the time ofreceipt or installation notify thefactory before proceeding.NOTE: Freon <strong>Chiller</strong>s soldwith the optional high side asself-contained models andshipped within the UnitedStates may be shipped withthe operating charge factoryinstalled. Ammonia modelsregardless of options includedare shipped only with aholding charge for bothdomestic and internationalorders.Possible Leaks<strong>Chiller</strong> units are furnished witha nitrogen holding charge tokeep the system dry duringshipping. A leak in therefrigerant circuit might occurduring shipping or handling. If aleak is detected, immediatecorrective action should betaken before refrigerant gas isadded to the system. Refer to12. REFRIGERANT CHARGINGstep 8 – Testing RefrigerationSystem for Leaks.Adding RefrigerantIMPORTANTBefore adding refrigerant orplacing the unit in operation,evacuate the entire system toensure a completely drysystem. Refer to step 9 –Evacuating the System.Whenever refrigerant is addedto any <strong>Chiller</strong> system, extremecare should be taken in chargingrefrigerant into the system.The <strong>Chiller</strong> unit should beplaced in operation and theliquid level observed during thefirst five minutes of operationand every hour after that untilthe oil level is stableWith the head pressure between180 PSIG and 213 PSIG,additional refrigerant, ifrequired, should be slowlycharged into the suction of thecompressor as a gas only (neveras a liquid). Be sure that allcharging lines are clean andproperly purged of air. Air ispurged from the charging lineby allowing some refrigerant toescape while attaching the hoseto the charging port.When the liquid level in therefrigerant recirculation drumand/or receiver (depending theconfiguration of the system) isstable, the unit is fully charged.The unit data nameplate lists theunit model, refrigerant type, andrefrigerant charge of theevaporator only. Alwaysmonitor and record how muchrefrigerant is added. Additionalrefrigerant will be required forfield piping and/or othercomponents added to thesystems by others. Neverexceed the refrigerant chargespecified by the “system”supplier.IMPORTANTDo not overcharge therefrigerant circuit becausethis induces high dischargepressures. Be sure the correcttype of refrigerant is beingadded to the systems.Ammonia (NH 3 ) and Freon(R-22) are standardrefrigerants for all <strong>Chiller</strong>s.Refrigerant 404A is availableas an option.3-26 Turbo Refrigerating, LLC 3/04 Installation & Assembly Requirements
WARNING! Read safety section before this section. Failure to carefully follow these instructions couldresult in permanent injury or loss of life.TABLE 3-3 Evaporator Operating Charge per PlatePlate Size Ammonia, pounds Freon R-22, pounds 20% Propylene Glycol,pounds48” x 60” 8.1 14.5 19.772” x 60” 12.5 22.0 30.096” x 60” 17.0 30.0 40.824” x 144” 9.1 16.4 22.3Note: To determine the total evaporator charge, multiply the number of plates in the chiller by the weightsshown per plate in the table. For example a HTDA480606 chiller is an ammonia chiller with six (6) 48” x 60”plates. The total operating charge of the chiller only would be 48.6 pounds of ammonia (6 plates x 8.1 poundsper plate).Additional charge will be required for piping and other components in the system.Remote Air or EvaporativeCooled Units (Optional)Optional condensing unitsfurnished for use with remoteair cooled condensers (SCAR)or remote evaporative cooledcondensers (SCER) are shippedwithout the operating chargeand will require refrigerant gas.Follow the procedure set forthunder “Adding Refrigerant” onthis page. Each unit is shippedwith a holding charge to keepthe system dry during shipmentor storage.Refrigerant RecirculationSystems (Optional)Optional refrigerantrecirculation vessels are shippedwithout a refrigerant charge.Relief DevicesRelief valves should be installedon all pressure vessels(condensers, receivers, etc.) toprevent excessive pressurebuild-up in the system. Thesesafety relief valves should bevented to a safe discharge point.Field piping will be required tovent the valve outside forindoor installations or to alocation away from exposure topersonnel for indoor or outdoorinstallations. Refer to Figure 3-9, Figure 3-10, and Figure 3-11.Figure 3-9 Typical Optional Air Cooled Condenser Relief Valve Field PipingInstallation & Assembly Requirements 3/04 Turbo Refrigerating, LLC 3-27
WARNING! Read safety section before this section. Failure to carefully follow these instructions couldresult in permanent injury or loss of life.Figure 3-10 Typical Indoor Installation Relief Valve Piping of Optional CondensingUnitFigure 3-11 Correct and Incorrect Relief Valve Discharge Piping3-28 Turbo Refrigerating, LLC 3/04 Installation & Assembly Requirements
WARNING! Read safety section before this section. Failure to carefully follow these instructions couldresult in permanent injury or loss of life.TURBO provides a relief valveon all pressure vessels suppliedwith optional kits andaccessories for are supplied toassist in the proper sizing ofrelief devices used on the<strong>Chiller</strong> “system” includingcomponents not supplied byTURBO.WARNINGAll relief valves must be pipedto a safe discharge location.Failure to carefully followthese instructions could resultin permanent injury or loss oflife.All relief valves are tagged withthe above warning or a similarwarning.Do not attempt to addrefrigerant to the system beforepiping all relief valveconnections.ANSI/ASHRAE 15-1987 codepermits a maximum backpressure through the relief valvedischarge piping of 25% of theinlet pressure while the deviceis discharging at rated capacity.Based on the set pressure andcapacity of the relief device, themaximum length of dischargepiping can be calculated usingthe formula:L = [0.2146(d 5 )(P o 2 – P 2 2 )/fCr 2 ] – [(d)Ln P o / P 2 ) / 6f] ASHRAE Addendum 15c-2000where:L = maximum length of relief valve discharge piping (ft)P 2 = Absolute pressure at relief valve outlet (PSIA)P o = Absolute back pressure at relief valve outlet (PSIA)d = Internal diameter of discharge piping (inches)Cr = Rated capacity of relief valve (lbs. of air per minute)f = Moody friction factor in full turbulent flow (see list below for factors)Ln = Natural logarithmP o = 0.15 P + 14.7 for conventional relief valvesWhere P = Set pressure of the relief valve usedFriction factors for typical pipe sizes are:Table 3-10 Relief Valve Piping Friction FactorsPipe size Internal Diameter, inches Friction factor, f½” 0.622 0.0259¾” 0.824 0.02401” 1.049 0.02251-1/4” 1.038 0.02091-1/2” 1.610 0.02022” 2.067 0.01902-1/2” 2.469 0.0173For larger sizes consult ASHRAE, the relief valve or TURBOFor selection of relief valve, the calculated discharge rate is:C = f DL 1Installation & Assembly Requirements 3/04 Turbo Refrigerating, LLC 3-29
WARNING! Read safety section before this section. Failure to carefully follow these instructions couldresult in permanent injury or loss of life.Where:C = minimum required discharge capacity of relief valve (lbs. of air per minute)f = 0.5 for NH3D = outside diameter of vessel (ft)L 1 = length of vessel (ft)Example:A <strong>Chiller</strong> with a water cooled condensing unit using a 12-3/4" diameter x 48" receiver.Design relief pressure is 300 PSIG.Refrigerant is NH3 (ammonia) – refrigerant grade.Minimum required discharge capacity of the relief valve:C = f DL 1 =(0.5)*(12-3/4/12)*(48/12)= 2.1 pounds of air per minute requiredAnd maximum discharge piping length:Where:Then:L = [0.2146(d 5 )(P o 2 – P 2 2 )/fCr 2 ] – [(d)Ln P o / P 2 ) / 6f]P 2 = 14.7 PSIA2 =Therefore P 2 216.09P o = (0.15*300) +14.7 = 59.7 PSIA2 =Therefore P o 3,564.09d = 1.049" (1-1/4" SCH40 pipe)d 5 = 1.2702Cr = 20.5 pounds of air per minuteHansen H5600R pressure relief valve 1/2" x 3/4" (inlet x outlet) or equivalentCr 2 = 420.25Ln P o / P 2 = Ln(59.7/14.7) = 1.401L=[(0.2146*1.2702*(3,564.09-216.09)/(0.0225*420.25)] – [1.049*1.401/(6*0.0225)] = 85.6 feetTherefore, a 1" SCH40 pipe is adequate for installations with relief valve discharge piping less than 86 feetlong. If longer piping is required, a larger pipe size may be required. In the example above a 1-1/4” line couldbe used for relief discharge lines up to 394 feet.For other applications the tables and formulas above should be used to calculate the relief valve size and themaximum piping distance. For convenience Table 3-11 below shows typical valve selections and pipingdistances for the relief valves used on standard TURBO models.3-30 Turbo Refrigerating, LLC 3/04 Installation & Assembly Requirements
WARNING! Read safety section before this section. Failure to carefully follow these instructions couldresult in permanent injury or loss of life.Table 3-11 Maximum Equivalent Relief Valve discharge PipingMaximum Equivalent Length of Outlet PipingRelief Pressure, Relief Valve Capacity, lbs/minSchedule 40 Pipe SizePSIG Size,inches of air ¾” 1” 1-1/4” 1-1/2” 2” 2-1/2”150 ½” x ¾” 10.6 30 119 524½” x ¾” 31.3 7 51 125 456½” x 1” 35.8 4 37 92 344250 ½” x ¾” 17.2 22 93 422½” x ¾” 50.5 25 70 298½” x 1” 57.7 25 70 298¾” x 1” 17.2 93 422¾” x 1” 57.7 25 70 2981” x 1-1/4” 85.4 4 23 124 344300 ½” x ¾” 20.5 19 86 394½” x ¾” 60.1 32 88 370½” x 1” 68.6 21 63 278¾” x 1” 20.5 86 394¾” x 1” 68.6 21 63 2781” x 1-1/4” 101.6 19 113 319350 ½” x ¾” 24.1 27 113 510½” x ¾” 70.1 46 118 480½” x 1” 80.0 32 86 364¾” x 1” 24.1 27 113 510¾” x 1” 80.0 32 86 3641” x 1-1/4” 118.5 29 152 419Installation & Assembly Requirements 3/04 Turbo Refrigerating, LLC 3-31
WARNING! Read safety section before this section. Failure to carefully follow these instructions couldresult in permanent injury or loss of life.Three critical steps arerequired to ensure the<strong>Chiller</strong> operates reliablyand is corrosion free forthe life of theinstallation. The threeGolden Rules are:a. Ship it cleanb. Install it cleanc. Keep it cleanRule #1. Ship it Clean.The equipment mustleave the factory is aclean passive state. Allstainless steel has apassive layer thatprovides a protectivebarrier againstcorrosion. To ensure thispassive layer exists.TURBO passivates allchillers prior toshipment. Passivation ofthe entire chiller frame,plate bank, refrigerantheaders and waterdistribution pan in anitric acid passivationtank ensurescontaminates from themanufacturing processare completely removedfrom the surface of thestainless steelcomponents and aprotective passive layerexists.13. POST INSTALLATION CLEAN UPcontaminates that couldcause corrosion.During shipment thechiller and reservoir (ifsupplied) are stretchwrapped to eliminatecontamination duringtransportation to the jobsite.Rule #2. Install it Clean.Installation of the chillerrequires connection of carbonsteel piping to connections onthe chiller as well as othernormal grinding, and weldingprocesses that can contaminatethe stainless surfaces of thechiller. Every effort must bemade to eliminate thepossibility of this contaminationincluding covering the chiller toavoid exposure of the surfacesduring installation. To ensurethe surfaces are clean. Uponcompletion of the installationprocess the final step should bea complete cleaning of allsurfaces using a citric acidcleaner followed by a freshwater rinse and drying.Rule #3. Keep it Clean.After the chiller is put intoservice it must be cleaned on aregular basis to ensure that itremains clean and the stainlesssteel surfaces maintain theirpassive layer. Cleaning andsanitizing procedures may varydepending on the applicationand plant guidelines. However,as a minimum requirement forshould be opened at least on aweekly basis and the entireinterior and exterior surfacesflushed with fresh water. Areassuch as the frame and sides ofthe water distribution panshould be watched closely.These areas typically havestagnant water droplets thatdraw free chlorine. If left longenough the concentration willincrease to the point that thepassive layer is stripped and pitcorrosion will result.The key to a long corrosion freelife for your investment is tokeep it clean. Additionalinformation follows on how toclean the chiller duringinstallation and the basicweekly cleaning process.<strong>Chiller</strong> Protection duringInstallationA tarp or canvas cover shouldbe used during all piping andinstallation work done aroundthee chiller after it is set inplace and leveled. The coverwill protect contaminates fromwelding, grinding or otherinstallation steps that couldcome in contact with the chillersurface. After the chiller is setand leveled the exterior panelsthat were removed during thatstep in the process should bereplaced and closed to protectthe interior of the cabinet andthe reservoir.After passivation theexterior panels areinstalled and all areas ofthe chiller are againWeld Zone Clean Upcleaned to removedInstallation of the chillerany installation the chillerincludes welding the refrigerant3-32 Turbo Refrigerating, LLC 3/04 Installation & Assembly Requirements
WARNING! Read safety section before this section. Failure to carefully follow these instructions couldresult in permanent injury or loss of life.connection to the chiller. After for proper use and safetychlorine content) rinse tothe welding has been completed precautions.remove the cleaning agent.it is recommended that this be.cleaned. Use a wire brush to Other AreasNOTE: Citric acid cleaningremove loose scale. Next treat In addition to weld zones any agents are environmentalthe area with a passivationarea that has been in contact friendly and can be safelyagent such as DeRustit towith carbon steel (tools, pry drain to local drainpassivate the stainless steel next bars, moving devices, etc.)connections.to the carbon-to-stainless steel should be examined for signs ofweld joint. Follow thediscoloration or contamination After the interior surfaces areinstructions on the passivating and if necessary these areas cleaned and rinsed, the sameagent or contact TURBO for should also be passivated.procedure should be followed toadditional information onclean the exterior surfaces.passivating agents. Afterpassivating the weld area shouldbe rinsed with fresh water.IMPORTANT: Thepassivating process describedabove is done with apassivating gel applied with abrush to the area to be treatedand is not the same as thenitric acid passivationdescribed at the beginning ofthis section. Nitric acidpassivation is done in a tankwith the dilute nitric acidsolution at elevatedtemperatures and the chillerimmersed in the solution. Thisprocess is followed by aneutralization and rinseprocess. Only speciallytrained personnel shouldperform this type oftreatment. It is notrecommended for localpersonnel or job sitepassivation.If clean lifting straps were usedto hoist the chiller into place theplates should be free ofcontamination in the area thestraps were in contact with theplates. It may be necessary totreat the two outer plates thatthe straps are in more contactwith during the lifting process.Final CleaningOnce the installation processhas been completed thecomplete chiller should becleaned. Using a citric acidcleaning agent in a spray bottle,wet all of the stainless steelsurfaces starting on the inside ofthe chiller. If necessary use aScotch-Brite TM Light DutyCleaning Pad No. 66 (white incolor) or equivalent. These padsare designed specifically forcleaning stainless steel.Abrasive pads of any typeshould not be used on thestainless steel surfaces.Abrasive pads or heavyscrubbing of the stainless steelsurfaces strips the protectivepassive layer and leads tocorrosion. Contact TURBO foradditional information.If the chiller is to be put intoservice no additional action isrequired. If the chiller will notbe put into immediate service itis recommended that it becovered until the time it isactivated.IMPORTANT: ReferenceStep 7- Refrigerant Piping foradditional requirements forsecuring idle or inactivesystems.When using the passivatinggel to do the localizedpassivation proper safetyequipment including eyeprotection and glove shouldbe used. Follow allinstructions on the product The final step in the citric acidcleaning is a fresh water (lowInstallation & Assembly Requirements 3/04 Turbo Refrigerating, LLC 3-33
WARNING! Read safety section before this section. Failure to carefully follow these instructions couldresult in permanent injury or loss of life.A. AMMONIA (NH 3 ) SYSTEMS13.PRE-START-UP CHECKLISTCustomer________________________________________Date____________________________________________Serial No ________________________________________Model __________________________________________Check off the following items prior to start-up of the unit (recirculated or flooded):□1. Verify that all loose components shipped for field installation are at the jobsite and have been installedper the manufacturer’s instructions.Note: The <strong>Chiller</strong> is a low side evaporator only. Field connection to a condensing unit andrefrigerant recirculation unit or surge vessel are required to complete the system. Fieldconnections may include water piping, refrigerant piping, electrical controls and power, andinsulation of vessels and piping. Refer to the wiring and piping diagrams provided with the unitfor field connection requirements.□2. Familiarize yourself with the installation site: the location of safety equipment, eye wash and showersfor exposure to ammonia (NH 3) , and evacuation plans in the event of an NH 3 release.□3. Review the operating and maintenance manual provided with the equipment. Read the safety sectionbefore starting the installation of the equipment.□4. Complete the checklist provided with the condensing unit (if applicable).□5. Complete the checklist provided with the refrigerant recirculation unit or surge drum (if applicable).□6. Verify that all field electrical connections to the evaporator have been completed per the wiring diagramprovided with the equipment and per the instructions in the operating and maintenance manual. Circuitbreakers and/or electrical disconnects are not supplied by TURBO but are required by code in mostlocations. Supply and proper installation of the circuit breakers and/or disconnects to meet all applicablecodes is the responsibility of others.□7. Verify that all field refrigerant piping connections to the evaporator have been completed per the pipingdiagram provided with the equipment and per the instructions in the operating and maintenance manual.Supply and proper installation of field refrigerant piping to meet all applicable codes is the responsibilityof others.□8. If the unit is to be connected to an existing central system, verify the interface requirements for theevaporator to the central system.□9. Verify that all relief valves have been piped to a safe discharge location (refer to the operating andmaintenance manual for guidelines).3-34 Turbo Refrigerating, LLC 3/04 Installation & Assembly Requirements
WARNING! Read safety section before this section. Failure to carefully follow these instructions couldresult in permanent injury or loss of life.□10. Verify that all field water piping connections to the evaporator have been completed per the pipingdiagram provided with the equipment and per the instructions in the operating and maintenance manual.Supply and proper installation of field water piping to meet all applicable codes is the responsibility ofothers. Flush and drain all water piping and water tanks.Note: Water piping may include the make-up water to condensers, oil coolers, or componentssupplied by others with the condensing unit and/or refrigerant recirculation unit, and the makeupwater connection to the evaporator. Water drain and overflow piping is required from theevaporator to the proper disposal points (provided by others).□11. Verify that the complete system has been properly evacuated, leak checked, and charged with theproper refrigerant (refrigerant grade ammonia - NH 3 ).Note: Each of the above functions is the responsibility of others. Refrigerant is not supplied withthe equipment.□12. Note all leaks found and repaired during step number 11.Checklist Completed By __________________________________Date__________________________________________________If you have any questions concerning the above checklist or any other aspect of equipment installation inpreparation for start-up, contact:Turbo Refrigerating, LLCService DepartmentP.O. Box 396Denton, Texas 76202-0396Phone:940-387-4301Fax: 940-382-0364Installation & Assembly Requirements 3/04 Turbo Refrigerating, LLC 3-35
WARNING! Read safety section before this section. Failure to carefully follow these instructions couldresult in permanent injury or loss of life.B. DIRECT EXPANSION (DX) FREON SYSTEMSCustomer________________________________________Date____________________________________________Serial No ________________________________________Model __________________________________________Check off the following items prior to start-up of the unit (recirculated or flooded):□1. Verify that all loose components shipped for field installation are at the jobsite and have been installedper the manufacturer’s instructions.Note: The <strong>Chiller</strong> is a low side evaporator only. Field connection to a condensing unit andrefrigerant recirculation unit or surge vessel are required to complete the system. Fieldconnections may include water piping, refrigerant piping, electrical controls and power, andinsulation of vessels and piping. Refer to the wiring and piping diagrams provided with the unitfor field connection requirements.□2. Familiarize yourself with the installation site: the location of safety equipment, and evacuation plans inthe event of a fire or other hazardous situations.□3. Review the operating and maintenance manual provided with the equipment. Read the safety sectionbefore starting the installation of the equipment.□4. Complete the checklist provided with the condensing unit (if applicable).□5. Complete the checklist provided with the high side and condenser (if applicable).□6. Verify that all field electrical connections to the evaporator have been completed per the wiring diagramprovided with the equipment and per the instructions in the operating and maintenance manual. Circuitbreakers and/or electrical disconnects are not supplied by TURBO but are required by code in mostlocations. Supply and proper installation of the circuit breakers and/or disconnects to meet all applicablecodes is the responsibility of others.□7. Verify that all field refrigerant piping connections to the evaporator have been completed per the pipingdiagram provided with the equipment and per the instructions in the operating and maintenance manual.Supply and proper installation of field refrigerant piping to meet all applicable codes is the responsibilityof others.□8. Verify the interface requirements for the evaporator to the high side and condenser.□9. Verify that all relief valves have been piped to a safe discharge location (refer to the operating andmaintenance manual for guidelines).□10. Verify that all field water piping connections to the evaporator have been completed per the pipingdiagram provided with the equipment and per the instructions in the operating and maintenance manual.3-36 Turbo Refrigerating, LLC 3/04 Installation & Assembly Requirements
WARNING! Read safety section before this section. Failure to carefully follow these instructions couldresult in permanent injury or loss of life.Supply and proper installation of field water piping to meet all applicable codes is the responsibility ofothers. Flush and drain all water piping and water tanks.Note: Water piping may include the make-up water to chiller, condensers, oil coolers, or othercomponents supplied by others with the condensing unit, and the make-up water connection to theevaporator. Water drain and overflow piping is required from the evaporator to the properdisposal points (provided by others).□11. Verify that the complete system has been properly evacuated, leak checked, and charged with theproper refrigerant.Note: Each of the above functions is the responsibility of others. Refrigerant is not supplied withthe equipment.□12. Note all leaks found and repaired during step number 11.Checklist Completed By __________________________________Date__________________________________________________If you have any questions concerning the above checklist or any other aspect of equipment installation inpreparation for start-up, contact:Turbo Refrigerating, LLCService DepartmentP.O. Box 396Denton, Texas 76202-0396Phone:940-387-4301Fax: 940-382-0364Installation & Assembly Requirements 3/04 Turbo Refrigerating, LLC 3-37
WARNING! Read safety section before this section. Failure to carefully follow these instructions couldresult in permanent injury or loss of life.C. GLYCOL SYSTEMSCustomer________________________________________Date____________________________________________Serial No ________________________________________Model __________________________________________Check off the following items prior to start-up of the unit (recirculated or flooded):□1. Verify that all loose components shipped for field installation are at the jobsite and have been installedper the manufacturer’s instructions.Note: The <strong>Chiller</strong> is a low side evaporator only. Field connection to a glycol system are requiredto complete the system. Field connections may include water piping, glycol piping, electricalcontrols and power, and insulation of vessels and piping. Refer to the wiring and piping diagramsprovided with the unit for field connection requirements.□2. Familiarize yourself with the installation site: the location of safety equipment, and evacuation plans inthe event of a fire or other hazardous situations.□3. Review the operating and maintenance manual provided with the equipment. Read the safety sectionbefore starting the installation of the equipment.□4. Complete the checklist provided with the glycol unit (if applicable).□6. Verify that all field electrical connections to the evaporator have been completed per the wiring diagramprovided with the equipment and per the instructions in the operating and maintenance manual. Circuitbreakers and/or electrical disconnects are not supplied by TURBO but are required by code in mostlocations. Supply and proper installation of the circuit breakers and/or disconnects to meet all applicablecodes is the responsibility of others.□7. Verify that all field glycol piping connections to the evaporator have been completed per the pipingdiagram provided with the equipment and per the instructions in the operating and maintenance manual.Supply and proper installation of field glycol piping to meet all applicable codes is the responsibility ofothers.□8. Verify the interface requirements for the evaporator to the glycol system.□9. Verify that all relief valves have been piped to a safe discharge location (refer to the operating andmaintenance manual with equipment supplied by others for guidelines).□10. Verify that all field water piping connections to the evaporator have been completed per the pipingdiagram provided with the equipment and per the instructions in the operating and maintenance manual.Supply and proper installation of field water piping to meet all applicable codes is the responsibility ofothers. Flush and drain all water piping and water tanks.3-38 Turbo Refrigerating, LLC 3/04 Installation & Assembly Requirements
WARNING! Read safety section before this section. Failure to carefully follow these instructions couldresult in permanent injury or loss of life.Note: Water piping may include the make-up water to chiller, condensers, oil coolers, or othercomponents supplied by others with the glycol system, and the make-up water connection to theevaporator. Water drain and overflow piping is required from the evaporator to the properdisposal points (provided by others).□11. Verify that the complete system has been properly evacuated, and leak checked.Note: Each of the above functions is the responsibility of others. Glycol is not supplied with theequipment.□12. Note all leaks found and repaired during step number 11.Checklist Completed By __________________________________Date__________________________________________________If you have any questions concerning the above checklist or any other aspect of equipment installation inpreparation for start-up, contact:Turbo Refrigerating, LLCService DepartmentP.O. Box 396Denton, Texas 76202-0396Phone:940-387-4301Fax: 940-382-0364Installation & Assembly Requirements 3/04 Turbo Refrigerating, LLC 3-39
WARNING! Read safety section before this section. Failure to carefully follow these instructions couldresult in permanent injury or loss of life.14.START-UP CHECKLISTThe checklist below is a reduction of the actual checklist. Contact TURBO for a full sized checklist.3-40 Turbo Refrigerating, LLC 3/04 Installation & Assembly Requirements
WARNING! Read the Safety Section before this section. Failure to carefully follow theseinstructions could result in permanent injury or loss of life.<strong>Chiller</strong> Operation & Maintenance <strong>Manual</strong>Section 4: OPERATING INSTRUCTIONSThis section describes the<strong>Chiller</strong> operating sequence andthe function of the <strong>Chiller</strong>components and control panelcomponents (if supplied). Hintsare provided for safe, efficient,and reliable operation of boththe <strong>Chiller</strong> and associatedequipment for operating R-22,ammonia and glycol systemsusing direct expansion,recirculated, or floodedsystems. Information is alsoprovided on options includingrecirculators and floodedsystem components. Onlystandard features are discussedin this section. For optionalfeatures and accessories, referto section 8 – Optional Features& Accessories.Operation Sequence ofHTD <strong>Chiller</strong>General InformationThe Turbo high TD chillerconsists of a bank of stainlesssteel plates mounted in astainless steel frame. Thecabinet is enclosed by two inchinsulated panels and doors onthe sides and top. The bottomof the unit is open and sits ontop of an insulated sump.<strong>Chiller</strong>s can also beprovided without a sump formounting over raceways orexisting water collectionsystems. Optional door andpanel arrangements areavailable. Standard <strong>Chiller</strong>shave doors are both ends andthe top.A water distribution pan(stainless steel) and a PVCdistribution header are installedon top of the plates.Stainless steel refrigerant inletand outlet headers are providedon the same side as the waterinlet connection.Option kits are available forthe <strong>Chiller</strong> with either floodedor recirculated ammonia or R-22, or glycol. <strong>Chiller</strong>s are alsoavailable in direct expansion(DX) models.Options for flooded chillersinclude a surge drum, waterlevel controls, high pressureliquid line controls, a drysuction line pressure regulatorand controls, a dual relief valveassembly for the surge drum, asurge drum, and oil drain drum.Options for recirculatingsystems include the liquid linevalve kit, a suction line kit,which includes a pressureregulator, and refrigerantrecirculation systems.Options for DX include theexpansion valve group, theliquid line valves, and a filterdrier.High side systems are alsoavailable with water-cooled,evaporative –cooled or aircooledcondensers.Typical operation of flooded,recirculated, direct expansionand glycol chillers is describedbelow.Operating Instructions 3/04 Turbo Refrigerating, LLC 4-1
WARNING! Read the Safety Section before this section. Failure to carefully follow these instructionscould result in permanent injury or loss of life.Typical Start-Up ProcedureOperating SequenceRefer to the wiring diagram andladder logic provided with theunit for complete informationon CHILLER-FL modelcontrols.Field connections are requiredto the:• Optional operating levelrefrigerant switch• Solenoid coils on thesuction pressure regulators(SS‘X’) located above theevaporator• Optional high pressureliquid solenoid valveAlso refer to operatinginstructions for additional fieldconnected devices.As indicated in Figure 4-2,typical wiring, the switchesmust be connected to thedesignated input module of thePLC for the evaporator tooperate properly.Controls (Reference Figure 4-1)Compressor Relay (CR1)A control relay is provided inthe control panel to control theoperation of a remote high side(by others). Through the logicof the PLC, the relay isenergized via an output of thePLC. When the relay isenergized, a normally openFLOODED SYSTEM OPERATION(N.O.) dry contact closes. Thecontrol circuit of the remotehigh side should be connectedto these dry contacts to initiatethe start and stop of the system(i.e., for systems with dedicatedcompressors, the evaporatorshould be turned ON before thecompressor operation is started,and turned OFF upontermination of the chillingprocess). For evaporatorsconnected to a central system,the dry contacts can be used toindicate the status of the <strong>Chiller</strong>(OFF/ON) at a remote controlpanel (central equipmentroom).Optional Refrigerant LevelFloat Switches (FSHL) -Electronic Level ProbeAlthough the surge drum/liquidlevel assembly is supplied onlyas an option from TURBO, it isrequired for the system tofunction properly. Inputs fromthe electronic level probe andFSHL switch are required tocontrol the operating and highliquid level in the surge drum.If the level reaches the highrefrigerant level sensor of theelectronic level indicator,operation of the surge drum,condensing unit, and evaporatorare terminated immediately.The FSHL is a mechanical floatswitch used as a maximumliquid level control and is wiredin parallel to the electroniclevel probe as a secondaryswitch to terminate operation ifthe electronic switch shouldfail.The electronic probe has aprobe column installed in theliquid column. This column hastwo (2) sensors. One sensor isfor the high level cut-out. Thesecond sensor is used to controlthe high pressure liquidsolenoid valve that suppliesrefrigerant to the surge drum.When the liquid level dropsbelow the setting of theoperating level sensor, thecontacts of the sensor close toenergize the liquid solenoid.When the liquid level reachesthe proper operating level, thesensor contacts open and thehigh pressure liquid solenoidvalve closes. The liquid level iscontinuously monitored by theelectronic level controls duringoperation.On flooded models, a liquidlevel failure indicator light isprovided on the control panel.This light is connected to asignal from the optional surgedrum/liquid level assembly. Ifthe operating level in the surgedrum is above 50%, the highlevel refrigerant float switch(FSHL) should close. Uponclosure of the switch contact,the input to the programmablecontroller (PLC) immediatelyterminates operation of theevaporator. Field connection ofthe FSHL switch is required toensure adequate protection forthe high side equipment (byothers).4-2 Turbo Refrigerating, LLC 3/04 Operating Instructions
WARNING! Read the Safety Section before this section. Failure to carefully follow these instructionscould result in permanent injury or loss of life.High Pressure LiquidSolenoid Valve (HPLS)The refrigerant make-up feed tothe optional surge drum iscontrolled by the high pressureliquid solenoid valve shown inFigure 4-3. The surgedrum/liquid level controls areoptional. However, the controlof the HPLS should beconnected to the controls of theevaporator. Field wiring (byothers) is required between theevaporator control panel andthe remote surge drum. The coilof the HPLS is connected to theoutput of a PLC module. Referto the wiring diagram providedwith the evaporator for theterminal strip numbers in theevaporator control panel towhich field connections arerequired.The HPLS opens, feedingrefrigerant to the surge drumwhen the FSOL is closed,indicating a low level.Figure 4-5 Typical Optional Surge Drum/Liquid Level ControlsOperating Instructions 3/04 Turbo Refrigerating, LLC 4-3
WARNING! Read the Safety Section before this section. Failure to carefully follow theseinstructions could result in permanent injury or loss of life.Flooded Ammonia<strong>Chiller</strong>The following is controlsequence typical for<strong>Chiller</strong>s provided withoptional TURBOcontrols. The operatingsequence can be providedby others.Turn the master controlswitch (MCS) to the "on"position.The following sequenceshould occur (ReferenceFigure 4-1):1. Time delay relay(TDl) energizes. ContactsTD1-1 and TD1-2instantaneously close.A green pilot lightindicates that the switch isin the "on" position.2. When TD1-1 isclosed, the compressorcontrol circuit terminalsare energized, providingCR2-1 (N.C. contact ofCR2) is closed. Undernormal circumstances, theCR2-1 contact should beclosed. Compressorcontrols are provided byothers.3. At the same time,TD1-2 closes, energizingthe refrigerant liquid feedcontrols (i.e., therefrigerant float switchesand liquid solenoid).4. When MCS isswitched to the "on"position, the watersolenoid (WS) (open)contact is energized,operating the watersolenoid.5. During the start-upsequence, the surge drumrefrigerant level should bebelow the operating level.When the refrigerant feedcircuit is energized, theoperating level and highlevel refrigerant switchesshould both be in theirnormal positions. OLFS-1 and NLFS-1should be closed andOLFS-2 and NLFS-2should be open. CR2control relay wouldthen be de-energized.6. Under this condition,CR1 control relay wouldbe energized throughNLFS-L OLFS-1,CR1-1, and CR3-1 (watersolenoid open) would allbe closed, resulting in therefrigerant liquidsolenoid (LS) being open.7. The refrigerantlevel in the surgedrum rises until thelevel reaches theoperating level floatswitch. As the floatrises up in the floatchamber, the contactsof the switch reverse(i.e., OLFS-1 opensand OLFS-2 closes).When LS closes, agreen pilot lightindicates that therefrigerant level hasdroppedapproximately oneinch and that theliquid solenoidwill open to maintainthe surge drumrefrigerant level.— The hand expansionvalve on the liquid feedline to the surge drum canbe adjusted to obtain asteady modulation of theliquid level within the oneinch differential of thefloat switch.8. In the event that therefrigerant liquid solenoidfails to close or the loaddrops (causing therefrigerant level to raiseabove the OLFS switch),the high level float switchcontacts would reverse.This would de-energizethe CR1 control relaycausing LS to close. Atthe same time, the CR2control relay wouldenergize causing theCR2-1 contacts to open(which shuts off thecompressor circuit), andthe CR2-2 contacts toclose (turning on thered pilot light indicatinghigh level).9. A set of terminalconnections are wiredparallel with CR2 relayfor connection to a remotealarm circuit.4-4 Turbo Refrigerating, LLC 3/04 Operating Instructions
WARNING! Read the Safety Section before this section. Failure to carefully follow theseinstructions could result in permanent injury or loss of life.FIGURE 4-1. Typical <strong>Chiller</strong> Wiring for Flooded systemOperating InstructionsRefrigerating, LLC 4-53/04 Turbo
WARNING! Read the Safety Section before this section. Failure to carefully follow theseinstructions could result in permanent injury or loss of life.Shut Down Procedure(Flooded Ammonia<strong>Chiller</strong>)Turn the master controlswitch (MCS) to the "off ”position.The following sequenceshould occur:1. Time delay relay TD1 isde-energized and thepower to the watersolenoid switch relayLPR is removed.- The WS (closed)switch on the motoractuated water solenoid isenergized through acontact block on the MCSswitch assembly, causingthe water solenoid toclose regardless of thesump float switchposition.2. TD1-2 should openinstantaneously uponturning MCS "off". Thisshould terminate power tothe refrigerant feed circuitand close the refrigerantliquid solenoid.3. TD 1-1 should start totime open (0-3 minute offdelay). With therefrigerant liquid solenoid"off" and the compressorcircuit "on", therefrigerant system shouldstart to pump down untileither the compressorcycles "off” on suctionpressure through thecompressor low suctionpressure safety switch, orthe TD1 time delay timesout and the TD1-1contacts open.Pump and WaterDistributor CircuitThe chilled water isdrawn from the sump(reservoir) and pumped tothe process or otherdistribution points. Thepump is typically suppliedby others.If the water is recirculatedor returns to the chillerthe return water shouldenter at the waterconnection on the front ofthe chiller.The water distributionheader evenly fills thewater distribution pans.The water distributionpans allow a thin film ofwater to run over bothsides of the evaporatorplates. This water runscontinuously while themachine is in operation.Overflow Drain CircuitAn overflow drain box orstandpipe is provided inthe reservoir to allow foroverflow in case of watersurges or interruption offlow to the process.The overflow drain box ispiped to the outside of theunit for field connectionto a drain line.water circulating systemand water distributionpan(s) may cause thereservoir to overflow.Typical ShutdownSequenceThe TURBO® <strong>Chiller</strong>can be turned off withoutpump down of the systemduring daily operation. Ifthe system is to be shutdown for longer timeperiods a pump down ofthe system including theevaporator plates isrecommended. For dailyoperation the chilleroperation is typicallyterminated by turning themaster control switch off.It is also recommendedthat an emergency stopand the safety failureswitches be provided.Normal shutdown isinitiated by turning themaster control switch(MCS) to the OFFposition or by a remotesignal. Any normallyclosed (N.C.) contact inseries with the MCScontact blocks in thecontrol system wiring willinitiate the shutdownsequence. This caninclude:• Process controls• Time clocks• Remote safetyinterlocksDuring shutdown, thewater that drains back to After a normal shutdownthe reservoir from the sequence is initiated, the4-6 Turbo Refrigerating, LLC 3/04 Operating Instructions
WARNING! Read the Safety Section before this section. Failure to carefully follow theseinstructions could result in permanent injury or loss of life.main liquid solenoidvalve (LS – by others) isde-energized to stop theflow of refrigerant to thesurge drum. Thecompressors and waterpump(s) stop.Note:The high side packagecan be provided with anoptional pump-downcycle to keep therefrigerant in a receiveror combinationcondenser/receiver.WARNINGCHILLER modelsequipped with acontinuous pump downcycle can restartautomatically even if themaster control switch isOFF. Never attemptservicing thecompressor withoutlocking out the electricalservice. Failure tocarefully follow theseinstructions could resultin permanent injury orloss of life.With the optional pumpdownfeature, the unit willstay off as long as theevaporator pressure isbelow the setting of thelow pressure safetyswitch.If the evaporator pressurerises, due to incompletepump-down or liquidbypass around the LS, thecompressor willOperating InstructionsRefrigerating, LLC 4-7automatically restart andrun until the system is“pumped down” and thecompressor stops again.If this sequence continuesmore than three (3) times,locate the source of thepressure (defectivesolenoid valve, etc.) andrepair.Shutting Equipment OffFor an Extended Periodof TimeAn extended period oftime is more than fortyeight(48) hours.Close the isolation “king”valve on the outlet of thereceiver or optionalcombinationcondenser/receiver.Turn off the three phaseelectrical power to thecompressor, and waterpump(s). Disconnect orcircuit breakers furnishedby others.Do not turn off the singlephase control circuitpower. This may turn offpower to the compressorcrankcase heater in theoptional high sidepackage and optionalwinterizing equipment.IMPORTANTIf the control circuitpower has been turnedoff, it should be turnedon for a minimum oftwenty-four (24) hoursprior to use to ensurethat any liquidrefrigerant thatmigrated to thecompressor crankcase(by others) is eliminatedprior to start-up.Failure to follow theseinstructions could resultin failure or damage tothe compressor.Optional FeaturesCondenser DischargePressure ControlWater CooledOptional pressureactuated water regulatingvalve(s) are fieldinstalled. Optionalcooling tower and coolingtower pumps are notsupplied.Evaporative CooledAn upstream pressureregulator is in thedischarge line entering thecondenser. A hot gasbypass through adownstream pressureregulator is provided tomaintain receiver pressureduring “cold” start-up.Factory installed on SCEmodels; supplied for fieldinstallation on SCERmodels.A variable speed fanmotor control (optional)can also be provided toadjust the RPM of thecondenser fan motor to3/04 Turbo
WARNING! Read the Safety Section before this section. Failure to carefully follow theseinstructions could result in permanent injury or loss of life.maintain a desireddischarge pressure.Air CooledThe fan cycling withflood-back controlsconsists of an upstreamregulator in the condenserdrain line to the receiver.The downstream regulatoris in the hot gas bypassline to the receiver inlet.Refrigerant FloatSwitchOperating Level(Electronic ProbeSensor)Inputs from the electroniclevel probe are required tocontrol the operatingliquid level in the surgedrum. The operating levelis typically 3" for asmaller system and up to4"–6" for larger units.This level is factory set.sensor contacts open andthe high pressure liquidsolenoid valve closes. Theliquid level iscontinuously monitoredby the electronic levelcontrols during operation.The refrigerant is droppedto evaporator pressurethrough the handexpansion valve. For a26°F system, the pressureis reduced from acondenser pressure of150-250 PSIG to 40 PSIGfor ammonia; 50 PSIG forR-22. A certain amount ofthe liquid refrigerant boilsoff as a gas due to thissudden reduction inpressure. The gas goes tothe top of the surge drumand is removed throughthe dry suction.of the high refrigerantlevel is determined andcorrected, the controlsmust be reset beforenormal operation canresume.IMPORTANTThe system should bepumped down after ahigh refrigerant leveltrip before normaloperation is resumed.This will eliminate thepossibility of a liquidslug or liquid carry-overfrom the surge drum.High Level (FSHL)A mechanical float switchis wired in parallel to theelectronic probe highlevel sensor to provideback-up to the primaryhigh refrigerant levelcontrols. The FSHLswitch provides the sameprotection as theelectronic probe.Although this shouldprovide adequate surgeprotection for thecompressor, systems withmultiple evaporators mayrequire an additional“knock-out" drum at thecompressor.High Level (ElectronicProbe Sensor)The second probe in theThe electronic probe has a probe column is located atprobe column installed in the high refrigerant level.the liquid columnThis sensor is typicallyattached to the surgelocated at the 50% leveldrum. This column has of the surge drum. If thetwo (2) sensors. Therefrigerant level reacheslower sensor is used to the high refrigerant levelcontrol the high pressure sensor of the electronicliquid solenoid valve that level indicator, operationsupplies refrigerant to the of the surge drum,A set of electrical contactssurge drum. When the condensing unit, andin the float switch opensliquid level drops below evaporator are terminated or closes as the float inthe setting of theimmediately. The contacts the float chamber rises oroperating level sensor, the of the sensor open tofalls with the liquid level.contacts of the sensor indicate a failureThe normally openclose to energize thecondition. If the liquid contacts are connected toliquid solenoid. When the drops after operation is the PLC and remain openliquid level reaches the terminated, the unit will during normal operation.proper operating level, the not restart. After the cause If the liquid solenoid4-8 Turbo Refrigerating, LLC 3/04 Operating Instructions
WARNING! Read the Safety Section before this section. Failure to carefully follow theseinstructions could result in permanent injury or loss of life.sticks open or the systemsurges, raising the liquidlevel in the surge drum,the float raises in the floatchamber and the normallyopen contacts close tosignal the PLC that a highlevel exists.The PLC immediatelyshuts the unit off toprevent liquid carryoverto the compressor. A highliquid level shut downrequires resetting thecontrols before the unitcan be restarted.IMPORTANTDetermine the cause ofthe surge or high liquidlevel before returningthe unit to normaloperation.The float valvecomponents include thefloat valve and two (2)isolating valves. Aconnection is provided inthe surge drum for thevent line from the top ofthe float switch to a pointalways above themaximum liquid level.The bottom connectionshould be installed in theliquid leg from the bottomof the surge drum. Thisline should be pitcheddown to prevent trappingrefrigerant oil in thebottom of the float switch.High Pressure LiquidLineOperating InstructionsRefrigerating, LLC 4-9This set of valves consistsof two (2) isolatingvalves, a strainer, a liquidsolenoid valve, and ahand expansion valve.High pressure liquidrefrigerant is metered intothe surge drum throughthe hand expansion(pressure reducing) valve.A signal from therefrigerant float switchenergizes the liquidsolenoid valve when theliquid level in the surgedrum is below the setpoint.When the liquid solenoidopens, high pressureliquid refrigerant entersthe hand expansion valveand is dropped toevaporator pressure. Thehand expansion valve canbe adjusted to maintain asteady flow of refrigerantto the surge drum. If thehand expansion valve isoverfeeding, there will bea tendency for the floatswitch and liquid solenoidto short cycle and causeerratic pressure controls.Closing the valve toomuch will cause the liquidlevel to drop faster thanthe liquid being added,thus starving theevaporators.A bypass hand expansionvalve is provided to allowoperation with the mainliquid feed line closed.This allows service of thestrainer and liquidsolenoid valve withoutinterrupting operation.The isolation valve andhand expansion valve areclosed and the bypassvalve opened for thismode of operation.Dual Pressure ReliefValve AssemblyTwo (2) relief valves aremounted on a three waymanifold with thecommon connectiongoing to the safety valveconnection located on thetop of the surge drum.Each valve has an FPToutlet connection whichshould be piped to theoutside or other safeventing area.In the event that a reliefvalve does open, thecause of the excessivepressure should beimmediately determinedand corrected. The reliefvalve in service at thetime should be isolatedand replaced.Oil Accumulator DrumTo prevent oil fromaccumulating in theevaporator, an oilaccumulator drum isprovided for installationat the bottom of the liquidleg from the surge drum.Included with the oilaccumulator is a pressurerelief valve, isolatingvalves for the oil inlet, an3/04 Turbo
WARNING! Read the Safety Section before this section. Failure to carefully follow theseinstructions could result in permanent injury or loss of life.oil pot vent, and oil drainconnections. A pipe plugis provided for the oildrain valve in case ofleakage through the valveor accidental opening ofthe oil drain valve.During normal operation,the oil inlet valve and oilpot vent valve will alwaysbe open. The oil drainvalve is closed. As theliquid refrigerant and oilflows down the liquid leg,the velocity is very low,allowing the heavier oil toseparate and go to thebottom of the liquid legalong with the liquidrefrigerant where it isdrained into the oilaccumulator. Oil willcontinue to displace theliquid in the oilaccumulator until itreaches a level requiring itto be removed.valve. The end of the hoseshould be placed in abucket of water to absorbthe NH 3 removed with theoil.Once the oil is removed,close the oil drain valveand replace the plug.Open the oil vent linefirst, then the oil draininlet valve.WARNINGNever leave the oilaccumulator isolated forextended periods oftime. Excessive pressurewill develop in theisolated drum. A reliefvalve is provided as asafety device. Failure tocarefully follow theseinstructions could resultin permanent injury ofloss of life.Note:SET (saturated evaporatortemperature) for thechilling mode is notedabove. For condenserselection use a SET 10°Fabove Chilling mode SETfor calculating the TotalHeat of Rejection (THR)used for selecting thecondenser. This ensuresadequate sizing for startupand pull down loads.THR (total heat rejection)is evaporator load pluscompressor input for opencompressor at selectedSET. For example:<strong>Chiller</strong> SET is 26°F,therefore select condenserbased on 26°F + 10°F =36°FTHR = Evaporator load(BTU/HR) @ 36°F +compressor BHP @ 36°Fx 2,545Isolation of the drum forextended periods of time Fluid TemperatureTo drain the oil from the means that the small oil Water “on” chiller plates:oil accumulator, isolate pot built into the bottom Specified by customer.the oil accumulator by of the liquid leg may not For entering waterclosing the oil inlet valve hold all of the oiltemperatures above 90°Fand the oil pot vent valve. accumulated. The excess consult the factoryAfter the oil accumulator oil would then go to thewarms up, check the oil evaporator, resulting in Water “off” chiller plates:drain valve to make sure poor or erratic operation Minimum 32.5°F forit is tightly closed and including failure towater; consult factory forthen carefully remove the harvest properly.other fluidspipe plug from the valveoutlet. Remove the plug Flooded SystemFluid Flow Ratesslowly because gas or Operating Parameters Reference Table 4-1small amounts of liquidcould be trapped in the Saturated Evaporator Surge Drum Locationvalve outlet. Next,26°F Minimum (40 PSIG Minimum 42" forconnect a hose or some for ammonia; 50 PSIG for ammonia; 72” for R-22other means of draining R-22).the oil to the outlet of the4-10 Turbo Refrigerating, LLC 3/04 Operating Instructions
WARNING! Read the Safety Section before this section. Failure to carefully follow theseinstructions could result in permanent injury or loss of life.This distance is from thetop of the evaporator plateto the bottom of the drum.Relief Valve Setting250 PSIGOperating InstructionsRefrigerating, LLC 4-113/04 Turbo
WARNING! Read the Safety Section before this section. Failure to carefully follow theseinstructions could result in permanent injury or loss of life.Self-Contained DX<strong>Chiller</strong>sDirect expansion (DX)chillers are typicallysupplied with refrigerantR-22 although directexpansion ammoniasystems are also available.DX chiller use a thermalexpansion valve (TXV)with a refrigerantdistributor, and distributortubes to meter therefrigerant to theevaporator plates. Since theplates are not overfed inthe same manner asrecirculated chiller, the gasleaving the plates issuperheated and free ofliquid. The dry suction gasleaving the plates isreturned to the suction ofthe compressor through adry suction line. This lineis connected to a suctionaccumulator/heatexchanger before thecompressor to boil off anyliquid refrigerant resultingby momentary overfeed ofthe TXV or improperadjustment of the TXVsuperheat setting.Superheat setting iscovered later in thissection.Direct Expansion (DX) HTD <strong>Chiller</strong>sconsists of the motor/compressor assembly andcondenser.Various operatingconditions are described inthis section as well asoptions available for DXsystems.ControlsAll DX <strong>Chiller</strong> modelsoperate in the same basicway and control panelcomponents are the sameexcept for size (largermagnetic starters forpumps, compressors,condenser fan and pumpmotors, etc.). The controlpanel contains:• Programmable logiccontroller (PLC)• Magnetic starter forthe:– Water pump(s)– Compressor(s)– Condenser fan andpump(s)• Magnetic motorstarter for the optionalevaporative condenserfan and pump (whereapplicable – SCEmodels)• Magnetic motorstarter for the fan(s)on optional air cooledcondensers (whereapplicable – SCAmodels)• Magnetic motor(on optional high sidepackage)Note:Controls necessary forcomponents used todistribute the chilledwater to points of useare not furnished byTURBO. Such controlscan be provided as anoption.Control Panel DoorThe control panel doorcontains the followingitems:• Master controlselector switch –ON/OFF• Two 10-amp fuses• Reset buttons for themagnetic starteroverload relays• Emergency stopbutton• Warning labels• Data nameplate• Safety failure pilotlight(s)Refer to section 2 –Safety for a list of allwarning labels that shouldbe on the control paneldoor. If any labels aremissing, contact TURBOimmediately to obtain themissing labels.Self-contained chillersconsist of the DX chillermounted on a commonNote:skid with the condensingRefer to the serialunit. The condensing unitstarter for compressor number on the data4-12 Turbo Refrigerating, LLC 3/04 Operating Instructions
WARNING! Read the Safety Section before this section. Failure to carefully follow these instructionscould result in permanent injury or loss of life.nameplate whenEmergency Stop Pushinquiring about theButtonIf the system is off forcontrols. A file ismore than thirty (30)maintained under thisminutes verify that theserial number. Thiscompressor crankcaseensures that allheaters on the optionalinformation required tohigh side package haveassist you can bebeen on long enough toaccessed quickly andboil off any liquidaccurately.refrigerant in thecrankcase.WARNINGThe selector switch isnot a service disconnect.Lock out electricalpower to controls beforeperforming service.Have a qualifiedelectrician perform allservice. Failure tocarefully follow theseinstructions could resultin permanent injury orloss of life.Electrical ComponentsDescriptionMaster Control Switch(ON/OFF)A two position, camoperated master controlswitch (MCS) with anormally open (N.O.)contact block is providedto input a signal to theprogrammable controller.This signal initiates thelogic required to start andstop the chiller. Turningthe selector switch to theOFF position initiates ashutdown sequence.Actual termination ofoperation occursimmediately.A large, red, mushroomhead push button with anormally closed contactblock is located on thecontrol panel door and iswired into the maincontrol circuit wiring. Ifimmediate termination ofoperation is required, thepush button is pushed in.This cuts off the singlephase control circuitpower and stops allelectrical devices locatedwithin the unit, includingany optional high side orliquid recirculation unitsand optional winterizingcontrols that are fieldwired to the control panelby others.WARNINGNever use theemergency stop buttonas a service disconnect.Failure to carefullyfollow these instructionscould result inpermanent injury or lossof life.Resetting theEmergency Stop PushButtonRestart the high sidepackage (compressor) andallow it to pump-downthe system to preventliquid slugging of thecompressor when thesystem is restarted. Thecompressor should shutoffon a low pressure(suction) safety at thecompletion of the pumpdown.Refer to thecompressormanufacturer’sspecifications.Return the isolation valveto the open position andplace the MDS switchesin the AUTO position oneat a time as the unit isrestarted.To restart, pull out theemergency stop pushbutton. Turn on the MCS.Turn the keyed MCSIf the emergency stop wasswitch to the OFFused, determine why andposition. Close thetake action to correct theisolation valve in theproblem before returningmain liquid line to the to normal operation.evaporator and theisolation valve in the high Control Devicespressure liquid refrigerantline to the optionalrecirculation vessel.Operating Instructions 3/04 Turbo Refrigerating, LLC 4-13
WARNING! Read the Safety Section before this section. Failure to carefully follow these instructionscould result in permanent injury or loss of life.Water Pump Selector Switch (MAN/AUTO)-OptionDuring normal operation,the MANUAL/AUTOselector switch shouldalways be in the AUTOposition. In this position,the <strong>Chiller</strong> waterrecirculating pump willrun to supply water to thechiller evaporator platesand /or other chilled waterdistribution points whenthe programmablecontroller logic (PLC)output module is ON. Atthe termination of thechilling operation, thewater pump is turned OFFthrough the PLC logic.During service,maintenance, or cleaningof the evaporator plates orreservoir, the water pumpcan be turned ONmanually by placing theselector switch in theMANUAL position. Inthis position, the logic ofthe PLC is bypassed andthe water pump(s) willoperate until the switch isreturned to the AUTOposition. With the switchin MANUAL, the water iscirculated over theevaporator plates even ifthe Master Control Switch(MCS) is in the OFFposition.immediately be returnedto the AUTO position fornormal automaticoperation.IMPORTANTThe water system doesnot have a water levelswitch to indicate ifwater is in reservoir. Ifthe switch is placed inthe MAN position, thewater pump will runeven if the reservoir isempty. Damage to thewater pump can resultfrom such an operation.Water Pump Interlock(WP-1)An interlock is installedon the magnetic starter ofthe water recirculatingpump. The normally open(N.O.) WP-1 interlock isused to input a signal tothe programmablecontroller indicatingwater is being supplied tothe evaporator plates. Ifthe interlock closure isnot obtained (i.e., thepump starter fails), thePLC logic will terminateoperation of the chillerafter a preset time delay(typically 2 seconds).The WP-1 interlock is aproof of water flow signalthat must be input to thePLC for normalevaporator operation.failure. The PLC requiresa reset signal after such afailure. To reset, turn theMCS to the OFF positionand then back to the ONposition. Before resetting,determine the cause of thefailure and correct.Reservoir Water LevelControlsRefer to the chillermanual Options Sectionfor the operation of thewater level controls(Option #1) for thechillers. The operation ofthe water level controls isthe same for both the DXand flooded chillers.Safety Failure Relay(SFR) Dry Contact ofSFR (SFR-1)A control relay isconnected to an output ofthe PLC to indicate that asafety failure hasoccurred. If any of thesafeties trip, the logic ofthe PLC will energize theSFR relay. Although thecontrol panel does nothave a safety failure pilotlight on the control paneldoor, the following pilotlights should be ON if afailure does occur:• Compressor failure –CM-1 interlock failsto close or opensduring operation• Water pump failure –WP‘X’-1 interlockfails to close or opensUpon completion of theservice or cleaningA red pilot light is locatedoperation, the selector on the control panel doorswitch shouldto indicate a water pumpduring operation (if4-14 Turbo Refrigerating, LLC 3/04 Operating Instructions
WARNING! Read the Safety Section before this section. Failure to carefully follow these instructionscould result in permanent injury or loss of life.the unit has 3 pumps, draws air from the outsidethen X = 3; for 4through an inlet grill andpumps, then X = 4; filter.etc.)A dry contact of thesafety failure relay (SFR-1) is provided forinterface to modems, autodialers, or other remotealarms to indicate that afailure has occurred. Allof the failures indicatedwill terminate operationof the unit. The cause ofthe failure must bedetermined and correctedbefore the SFR is reset. Ifthe failure has beencorrected, the SFR can bereset by turning the MCSto OFF and then back toON.Terminal stripconnections are providedin the control panel forfield connections ofremote alarms. Refer tothe wiring diagramprovided with the unit forthe terminal strip numbersto which the connection ismade.Control Panel Fan(CPF)Control Circuit FusesA 10 amp fuse is locatedin each leg of the singlephase control circuitpower to the controlpanel. On panels usingcontrol circuit step downtransformers, the fuse(s)are located on thesecondary side of thetransformer. Separatecircuit breakers (byothers) are required forthe transformer andelectrical panel service.Control circuit overloadsor shorts can cause thefuse(s) to blow. Beforereplacing the fuse(s), havea qualified electriciancheck all components inthe electrical panel and onthe machine to determinethe overload cause.Correct all defects orproblems immediately.Never bypass fuse(s)protection.Magnetic Starters withBimetallic OverloadRelayOverloads produceelectrical currents thatexceed the rating of theoverload causing it toproduce enough heat toopen a circuit in theoverload relay. Thewiring of the starter coil isconnected in series withthe overload relay. As aresult, the starter will deenergizewhen theoverload relay contactopens.A reset mechanism islocated on the overloadrelay and a push button ison the control panel doorto operate the “reset”mechanism on the starteroverload relay.WARNINGSHave a qualifiedelectrician determine thecause of the overloadbefore resetting. Neverbypass the overloadrelay. Never use anoverload size larger thanthe size specified by thefactory. Failure tocarefully follow theseinstructions could resultin permanent injury orloss of life.A ventilation fan isThree bimetallic heatermounted on the control Each electrical motorelements are factory sizedpanel to provide cooling used in the <strong>Chiller</strong> isand supplied to match theto the electronics andprovided with a magnetic motor horsepower andelectrical components in starter to start and stop voltage.the panel. Theeach motor. Each startertemperature in the control contains an overload relay All magnetic starters arepanel enclosure is(bimetallic type) tosupplied with dualmaintained below 120°F protect the motor from voltage/dual frequencyto ensure proper operation overloads.coils (115 or 230 VAC;of the controls. The fan50/60 hertz).Operating Instructions 3/04 Turbo Refrigerating, LLC 4-15
WARNING! Read the Safety Section before this section. Failure to carefully follow these instructionscould result in permanent injury or loss of life.Auxiliary interlocks aremounted on the magneticstarters to controlauxiliary operations (i.e.,the water pump interlockis used to input a signal tothe PLC, indicating thatthe water pump startersare energized).Additional auxiliaryinterlocks can beprovided. ConsultTURBO for information.Programmable LogicController (PLC)Refer to Appendix A.An Underwriter’sLaboratory (UL) listedprogrammable logiccontroller is used tocontrol the operatingsequence of the unit. ThePLC consists of the:• Power supply• Central processingunit (CPU withEEPROM)• Input/output modules(I/O)Each electrical device orgroup of devices isconnected to an I/Ocontact.Standard Inputs• Master control switch• Safety circuit• Water pump interlock(by others)• NH 3 pump -recirculated units only(by others)Outputs• Electric motor startercoils– Water pumps• Remote signal tooptional equipment(high side,recirculation unit,etc.)• Solenoid valve coilson refrigerant controlvalves (if applicable)Additional I/Os can beprovided for remoteequipment operation(optional).All chiller controls, andtime delays areprogrammed into thePLC. Certain time andtime-delay presets can beeasily field adjustedthrough the PLCprogrammer pad supplied.A keyed switch is locatedon the PLC programmerto prevent unauthorizedaccess or changes to theprogram. The PLCprogrammer may beremoved when not in useor password protected toprevent access to thecontrol logic.Electric MotorsStandard, open, dripproof230/460/3/60motors are used for thecompressor(s), waterpump(s), and othermotors supplied byTURBO.Optional 208 or 575voltage motors areavailable for 50 and 60hertz systems. Each motoris bottom wired to amagnetic starter at thefactory. Starter top wiring(incoming power), motordisconnects, and/or circuitbreakers should befurnished by others tomeet all local electricalcodes.Start -Up ProcedureTurn the master controlswitch (MCS) to the "on"position.The following sequenceshould occur:1. Time delay relay(TD1) energizes.Contacts TD1-1 andTD1-2 instantaneouslyclose. A green pilot lightindicates that the switch isin the "on" position.2. When TD1-1 closes,the compressor controlcircuit terminals areenergized, providingpower to the compressorsafety circuit and therefrigerant liquid solenoidvalve through the TD2-1contacts. TD1-1 is alreadyclosed; therefore, theliquid solenoid opens andthe increase in pressurecauses the low pressurecut-out switch (LP) to4-16 Turbo Refrigerating, LLC 3/04 Operating Instructions
WARNING! Read the Safety Section before this section. Failure to carefully follow these instructionscould result in permanent injury or loss of life."make", starting thecut-out to "make" and startcompressor. (If the LP the compressor.)switch does not close, theRefrigeration SystemsTD2-1 contact times open (Self-Contained R-22and closes the liquidModels:solenoid valve. To restart SC/SCA/SCE/SCAR andthe chiller, MCS must be SCER)turned "off" and then back"on" to reset the timedelay relays).3. The refrigerant liquidsolenoid valve is heldopen through acompressor interlock andremains open until theMCS switch is turned"off.Shut-Down Procedure(DX <strong>Chiller</strong>s)The shut-down procedurefor the DX chillers is thesame as for the floodedchillers. Refer to theflooded chiller manual.In addition to theprocedure described in theflooded chiller manual, theTD2-1 contact of TD2should closeinstantaneously on the DXchiller. The refrigerantliquid solenoid will stillremain closed, allowingthe system to "pumpdown"since the TD1-2contact opens at thesame time TD2-1 closes.Self-contained R-22models are available infour types: SC watercooledcondenser, SCAair-cooled condenser,SCE evaporative-cooled,SCAR air-cooled remote,and SCER evaporativecooledremote. SCER andSCAR require installationof the condenser in thefield; i.e. the condenser isnot mounted on acommon skid wit thecompressor/motorassembly and chiller. Allof the self-containedmodels have the samerefrigeration system andfunctionally are the same.SC ModelsThe SC models have acomplete refrigerationsystem within theconfines of the unitframe. The liquidrefrigerant charge isstored in the lower shellportion of thecombinationcondenser/receiver. Aking valve is provided inthe liquid line leaving thecondenser/receiver.Liquid refrigerant flowsfrom the condenser /receiver through a filterdrier, sight glass andliquid solenoid valve andenters a liquid-to-suctiongas heat exchanger wherethe liquid refrigerantis sub-cooled. The subcooledliquid then entersa thermostatic expansionvalve where it ismetered and fed to arefrigerant distributorand then delivered to theevaporators where therefrigerant load is appliedvia the water flowingover the outside of theplates. The refrigerantload applied to the platescauses the liquidrefrigerant to evaporateinto a gas. The refrigerantgas is drawn from theevaporators and flows bymeans of the suction linethrough theliquid to suction gas heatexchanger.This heat exchangerintroduces a small amountof superheat into thesuction gas that ensuresthat no liquid droplets ofrefrigerant will enter thecompressor. The suctiongas then entersthe compressor where itis then discharged to thewater-cooled condenser.The water-cooledcondenser removes theheat of rejection inducedby the refrigeration loadat the evaporatorsand the heat ofcompression and therebycondenses the hot gasback to liquid and storestheliquid in the lower half ofthe condenser shell readyThe system will nowpump-down and shut-offon low pressure withrefrigerant stored in thecondenser or receiver, asapplicable. When MCS isturned "on", the systemwill automatically restart(i.e., TD1-2 contact closesand opens LS throughTD2-1. Opening the liquidsolenoid raises thepressure in the systemcausing the low pressureOperating Instructions 3/04 Turbo Refrigerating, LLC 4-17
WARNING! Read the Safety Section before this section. Failure to carefully follow these instructionscould result in permanent injury or loss of life.for passage through thesystem again.The thermostaticexpansion valve iscontrolled by a sensingdevice, which istemperature actuated,placed on the suction linecoming from the suctionheader, and regulates thearea of the expansionvalve orifice openingthrough which the liquidmust flow. During thechiller operation, therefrigerant liquid solenoidremains open at all times.A cooling tower andcooling tower pump re alsorequired for the high sideand can be provided asoptions. The cooling toweris typically not mounted onthe skid with the high sidewater-cooled condenser.to a remote air-cooledcondenser. The condenseris also available as anoption.SCE/SCER ModelsThe SCE unit has areceiver instead of acombinationcondenser/receiver andincludes an evaporativecooledcondenser pipedinto the refrigerant circuiton the discharge side ofthe compressor. The hotgas is condensed into aliquid in the air-cooledcondenser and then flowsto the storage receiver.The SCER units operatethe same as the SCE butare furnished without theevaporative-cooledcondenser. A receiver isfurnished with the SCERmodel but must beinstalled and connected toa remote evaporativecooledcondenser byothers. The condenser isalso available as an option.SCA/SCAR ModelsThe SCA unit has areceiver instead of acombinationcondenser/receiver andincludes an air-cooledcondenser piped into therefrigerant circuit on thedischarge side of thecompressor. The hot gas iscondensed into a liquid inthe air-cooled condenserand then flows to thestorage receiver.The SCAR units operatethe same as the SCA butare furnished without theair-cooled condenser. Areceiver is furnished withthe SCAR model but mustbe installed and connected4-18 Turbo Refrigerating, LLC 3/04 Operating Instructions
WARNING! Read the Safety Section before this section. Failure to carefully follow these instructionscould result in permanent injury or loss of life.RECIRCULATED OPERATIONRecirculated chiller forammonia and R-22 require arefrigerant pumping system tosupply refrigerant to the chiller.The refrigerant recirculatorsystems typically consists of apressure vessel (surge drum)with a wet suction connection,a dry suction connection, aliquid valve connection, aliquid feed assembly with handexpansion valve to reduce thehigh pressure line supply toevaporator pressure, reliefvalve assembly, a primaryrefrigerant and stand-byrefrigerant (if specified, and arefrigerant level control systemfor the surge drum. The surgedrum separates the liquid andgas returned from the chiller inthe wet suction line and returndry gas to the compressor viathe dry suction line. Refrigerantfeed to the surge drum iscontrolled by the refrigerantlevel controls. As the chillingprocess evaporates a portion ofthe liquid flowing through thechiller and it is returned to thecompressor, liquid to replacethis refrigerant is metered in tothe surge drum through a handexpansion valve.Typically operating conditionsand sequence of operation aredescribed below. The operatingsequence is typical forammonia and R-22 chillers.Typical Daily Start-UpSequenceThe master control switch(MCS) is turned to the ONposition.Through the PLC, a signalenergizes the remote optionalhigh side and recirculation unitsrequired for operation of thesystem for a preset timeinterval.If all other safety switches arein a “non-trip” status, the waterpump(s), compressor motor,and NH 3 pump motor energizeand the liquid solenoid remainsopen.With the recirculation unit andhigh side (compressor) on,refrigerant is pumped to theevaporator plates and waterflows over both sides of eachevaporator plate.If the unit fails to start, refer tosection 5 – Trouble-Shooting.Operation continues in thismode until the unit is turned offor a safety failure occurs.Typical Refrigerant SequenceLiquid NH 3 is pumped to thetop of each plate bank. Liquidenters the evaporator platesthrough orificed headers. Wateris circulated over the outside ofthe vertical evaporator plates.The water is ON anytime theunit is running.As the refrigerant leaves theplates, the liquid-vapor mixtureis collected in the wet suctionheader. The wet suction branchline is connected to surge drum(by others). The vapor isseparated from the liquid in thesurge drum and returned to therefrigeration high side via thedry suction lines.Liquid refrigerant is maintainedat a level of approximately 3"in the bottom of the surge drumto ensure an adequate liquidsupply to the recirculationpump(s) at all times.Oil Accumulator Drum(Optional)To prevent oil fromaccumulating in the evaporator,an oil accumulator drum isprovided for installation at thebottom of the liquid leg fromthe surge drum. Included withthe oil accumulator is apressure relief valve, isolatingvalves for the oil inlet, an oilpot vent, and oil drainconnections. A pipe plug isprovided for the oil drain valvein case of leakage through thevalve or accidental opening ofthe oil drain valve.During normal operation, theoil inlet valve and oil pot ventOperating Instructions 3/04 Turbo Refrigerating, LLC 4-19
WARNING! Read the Safety Section before this section. Failure to carefully follow these instructionscould result in permanent injury or loss of life.valve will always be open. Theoil drain valve is closed. As theliquid refrigerant and oil flowsdown the liquid leg, thevelocity is very low, allowingthe heavier oil to separate andgo to the bottom of the liquidleg along with the liquidrefrigerant where it is drainedinto the oil accumulator. Oilwill continue to displace theliquid in the oil accumulatoruntil it reaches a level requiringit to be removed.To drain the oil from the oilaccumulator, isolate the oilaccumulator by closing the oilinlet valve and the oil pot ventvalve. After the oil accumulatorwarms up, check the oil drainvalve to make sure it is tightlyclosed and then carefullyremove the pipe plug from thevalve outlet. Remove the plugslowly because gas or smallamounts of liquid could betrapped in the valve outlet.Next, connect a hose or someother means of draining the oilto the outlet of the valve. Theend of the hose should beplaced in a bucket of water toabsorb the NH3 removed withthe oil.Once the oil is removed, closethe oil drain valve and replacethe plug. Open the oil vent linefirst, then the oil drain inletvalve.A relief valve is provided as asafety device. Failure tocarefully follow theseinstructions could result inpermanent injury of loss oflife.Isolation of the drum forextended periods of time meansthat the small oil pot built intothe bottom of the liquid legmay not hold all of the oilaccumulated. The excess oilwould then go to theevaporator, resulting in poor orerratic operation.Control DevicesCompressor/NH3Pump/Liquid SolenoidControl RelayA control relay is provided inthe control panel to control theoperation of remotecomponents including thecompressor/condensing unit,NH 3 pump, and high pressureliquid solenoid. All of thesecomponents are supplied byothers or as an option byTURBO. Through the logic ofthe PLC, the Control Relay isenergized via an output of thePLC. When the relay isenergized, a normally open(N.O.) dry contact of theControl Relay (-1) closes. Thecontrol circuit of therecirculation unit should beconnected to these dry contactsto initiate the start and stop ofthe NH 3 pump (i.e., theevaporator and NH 3 pumpshould be turned on before thecompressor is started andthe chiller operation). Forevaporators connected to acentral system, the dry contactscan be used to indicate thestatus of the chiller (ON/OFF)at a remote control panel suchas the central equipment room.Additional relay contacts or aninterlock of the NH 3 pumpshould be used to start thecompressor/condensing unit aswell as to open and close thehigh pressure liquid solenoidsupplying liquid refrigerant tothe recirculating unit.The following sequence may beused to control the compressor,NH 3 pump, and liquid solenoid:1. The Control Relay (-1)contact closes to turn theNH 3 pump on.2. An interlock of the NH 3pump (by others) is used toinput a signal to thecompressor (condensingunit) control circuit toinitiate start-up of thecompressor and to energizethe high pressure liquidsolenoid valve.3. An interlock of thecompressor starter is usedto input a signal to thechiller PLC indicating thecompressor has started. Theinterlock of the compressorwould be connected as a drycontact in series with theNH 3 pump interlock (AP-1)and would provide the samecontrol as the AP-1interlock.WARNINGNever leave the oilaccumulator isolated forextended periods of time.Excessive pressure willdevelop in the isolated drum. turned off upon termination of4-20 Turbo Refrigerating, LLC 3/04 Operating Instructions
WARNING! Read the Safety Section before this section. Failure to carefully follow these instructionscould result in permanent injury or loss of life.Note:For central plant operationsonly, the NH 3 pump interlockinput is required to the PLC.NH 3 Pump Interlock (AP-1) -Recirculating Units OnlyAn interlock of the NH 3recirculating pump magneticstarter (AP-1) is required as aninput to the programmablecontroller. The normally open(N.O.) dry contact must be fieldinstalled by others. The chillerwill not operate without thisinput present. Refer to thewiring diagram provided withthe <strong>Chiller</strong> for the terminal stripnumbers which the contacts areconnected to. The NH 3recirculating pump can beprovided by TURBO as anoption.The AP interlock is a proof ofoperation for the supply of NH 3refrigerant to the evaporatorplates by the remoterecirculating unit. This signalmust be received by the PLClogic for the evaporator tooperate. If the signal is notreceived, the PLC logic willterminate operation of theevaporator after a preset timedelay (typically 2 seconds).Field wiring by others isrequired for all installations. Ajumper is not installed betweenthe terminal strip connectionswhen the evaporator is shipped.Refrigerant Level FloatSwitches (FSHL) - ElectronicLevel ProbeAlthough the recirculationunit/liquid level assembly issupplied only as an option fromTURBO, it is required for thesystem to function properly.Inputs from the electronic levelprobe and the FSHL switch arerequired to control theoperating, low, and high liquidlevel in the recirculation drum.If the level reaches the highrefrigerant level sensor of theelectronic level indicator,operation of the recirculator,condensing unit, and evaporatorare terminated immediately.The FSHL is a mechanical floatswitch used as a maximumliquid level control and is wiredin parallel to the electroniclevel probe as a secondaryswitch to terminate operation ifthe electronic switch shouldfail.energize the liquid solenoidvalve to feed liquid refrigerantto the vessel. When the liquidlevel reaches the properoperating level, the sensorcontacts open, and the highpressure liquid solenoid valvecloses.The third sensor is used toterminate operation of the NH3recirculating pump if therefrigerant level in therecirculation vessel is notadequate (too low) to supplyliquid to the NH3 pump. Theliquid level is continuouslymonitored by the electroniclevel controls during operation.Pump and Water DistributorCircuitThe water is drawn from thereservoir and pumped to theprocess or to the waterdistribution header in the<strong>Chiller</strong>.Overflow Drain CircuitAn overflow drain box isprovided in the reservoir toallow for overflow incase ofsurges in the water flow.The electronic probe has aThe overflow drain box is pipedprobe column installed in the to the outside of the unit forA red pilot light is located on liquid column. This column has field connection to a drain line.the control panel door tothree (3) sensors. One sensor isindicate an NH 3 pump failure. for the high level cut-out. The Shutting Equipment Off ForThe PLC requires a reset signal second sensor is used to control an Extended Period of Timeafter such a failure. Turn the the high pressure liquidMCS to the OFF position and solenoid valve that supplies An extended period of time isthen back to the AUTO position refrigerant to the surge drum. more than forty-eight (48)to reset. After resetting,When the liquid level drops hours.operation should be monitored below the setting of theto determine the cause of the operating level sensor, theClose the isolation “king” valvefailure.contacts of the sensor close to on the outlet of the optionalOperating Instructions 3/04 Turbo Refrigerating, LLC 4-21
WARNING! Read the Safety Section before this section. Failure to carefully follow these instructionscould result in permanent injury or loss of life.receiver or optionalcombinationcondenser/receiver.Turn off the three phaseelectrical power to thecompressor, NH3 pumps, waterpump(s), and other motors(disconnect or circuit breakersfurnished by others).Do not turn off the single phasecontrol circuit power. This mayturn off power to thecompressor crankcase heater inthe optional high side packageand optional winterizingequipment and/or the PLCpower supply.IMPORTANTIf the control circuit powerhas been turned off, it shouldbe turned on for a minimumof twenty-four (24) hoursprior to use to ensure thatany liquid refrigerant thatmigrated to the compressorcrankcase (by others) iseliminated prior to start-up.Failure to follow theseinstructions could result infailure or damage to thecompressor.4-22 Turbo Refrigerating, LLC 3/04 Operating Instructions
WARNING! Read the Safety Section before this section. Failure to carefully follow these instructionscould result in permanent injury or loss of life.SpecificationsSpecificationsRefrigerantRefrigerant grade NH3(ammonia) – do not useagricultural grade NH3.Evaporator Temperature26°F (40 PSIG for ammonia; 50PSIG for R-22) Minimum forwater; consult factory for otherfluids including glycols.Design ConditionsWater CooledCondensing 105°F(214 PSIG for R-22; 214 PSIGfor ammonia)Water in 85°FWater out 95°FDesign wet bulb: 78°FEvaporative CooledCondensing 95°F(181 PSIG for R-22; 181 PSIGfor ammonia)Design wet bulb: 78°FAir CooledCondensing 120°F(260 PSIG for R-22; 272 PSIGfor ammonia)Design dry bulb 100°FNote:SET (saturated evaporatortemperature) for the chillingmode is noted above. Forcondenser selection use a SET10°F above Chilling mode SETfor calculating the Total Heat ofRejection (THR) used forselecting the condenser. Thisensures adequate sizing forstart-up and pull down loads.THR (total heat rejection) isevaporator load pluscompressor input for opencompressor at selected SET.For example:<strong>Chiller</strong> SET is 26°F, thereforeselect condenser based on 26°F+ 10°F = 36°FTHR = Evaporator load(BTU/HR) @ 36°F +compressor BHP @ 36°F x2,545Refrigerant FeedPumped liquid at a recirculationrate of 4:1.Make-Up WaterTemperature• Entering watertemperature specifiedby customer. Above90°F consult factory• Leaving watertemperature minimum32.5°F for water;consult factory for otherfluids.Make-Up Water PressureAt inlet to water distributionheader 8 PSIGMake-Up Water FlowFlow rates for standard chillerplates are shown in the tablebelow.Table 4-1 Plate Specifications (Per Plate)Plate Overall Length, inches48” 72” 96” 144”Plate Overall Wetted Length, inches 44 68 92 140Plate Overall Depth, inches 60 60 60 24Maximum water flow, Gallons per minute 44 68 92 140Maximum water flow, Gallons per minute 5.5 8.5 11.5 17.5Internal volume, cubic feet 0.31 0.47 0.64 0.35Weight, pounds 105 158 210 126Note: 1. All plate sizes and data are standard for R-22 and ammonia applications.2. Consult factory for other materials or flow conditions.3. All data is per plate. To determine total flow for a plate bank multiply the data above by the number ofplates in t he system. For example a HTDA960606 chiller is a flooded chiller with six (6) 96” by 60”plates. The maximum water flow for this system is:Maximum Flow = 6 plates x 92 GPM per plate = 522 GPMOperating Instructions 3/04 Turbo Refrigerating, LLC 4-23
WARNING! Read the Safety Section before this section. Failure to carefully follow these instructionscould result in permanent injury or loss of life.Make-Up Water FeedControlReference TURBO option kit#1 for “Water Level Controls”Evaporator Plates304 Stainless SteelHydraulically blown to inflateto proper rise.304L available as option.Design Operating Pressure200 PSIGBurst Pressure1,500 PSIG4-24 Turbo Refrigerating, LLC 3/04 Operating Instructions
WARNING! Read the Safety Section before this section. Failure to carefully follow these instructionscould result in permanent injury or loss of life.Optional FeaturesCondenser DischargePressure ControlWater CooledOptional pressure actuatedwater regulating valve(s) arefield installed. Optional coolingtower and cooling tower pumpsare available.Evaporative CooledAn upstream pressure regulatoris in the discharge line enteringthe condenser. A hot gas bypassthrough a downstream pressureregulator is provided tomaintain receiver pressureduring “cold” start-up. Factoryinstalled on SCE models;supplied for field installation onSCER models.A variable speed fan motorcontrol (optional) adjusts theRPM of the condenser fanmotor to maintain a desireddischarge pressure.Air CooledFan cycling can be used inplace of flood-back controls insome installations. Air cooledunits are provided with floodbackcontrols as standard.Variable speed drives are alsoavailable.Reservoir Water LevelControlsRefer to the chiller manualOptions Section for theoperation of the water levelcontrols (Option #1) for thechillers. The operation of thewater level controls is the samefor both the DX and floodedchillers.Operating Instructions 3/04 Turbo Refrigerating, LLC 4-25
WARNING! Read the Safety Section before this section. Failure to carefully follow these instructionscould result in permanent injury or loss of life.GLYCOL SYSTEM OPERATIONGlycol chillers use propylene orethylene glycol as a secondaryrefrigerant that is pumpedthrough the plates to chill thefluid flowing over the exteriorof the plates. A glycolpumping system to supply theglycol is required (by others).The system typically consists ofa pump, and a glycol chiller.Typical operating conditionsand sequence of operation aredescribed below.Typical Start-UpThe master control switch(MCS) is turned to the ONposition.Through the PLC, a signalenergizes the remote optionalglycol system, glycol pump(s)and the external water system.If all other safety switches inthe glycol system and pumpingsystems are in a “non-trip”status, the water pump(s) for the external flow over the plates,compressor motor and controlsfor the glycol system, and theglycol pump start to supplyglycol to the chiller. .With the glycol system on,refrigerant (glycol) is pumpedto the evaporator plates andwater flows over both sides ofeach evaporator plate.If the unit fails to start, refer tosection 5 – Trouble-Shooting.Operation continues in thismode until the unit is turned offor a safety failure occurs.Typical Refrigerant SequenceGlycol is pumped to the top ofeach plate bank. Liquid entersthe evaporator plates throughglycol supply headers. Water iscirculated over the outside ofthe vertical evaporator plates.The water is ON anytime theunit is running.As the refrigerant leaves theplates, the glycol is collected inthe suction header or glycolreturn. The suction/glycolreturn branch line is connectedto main glycol return line (byothers).Pump and Water DistributorCircuitThe water is drawn from thereservoir and pumped to theprocess or to the waterdistribution header in the<strong>Chiller</strong>.Overflow Drain CircuitAn overflow drain box isprovided in the reservoir toallow for overflow incase ofsurges in the water flow.The overflow drain box is pipedto the outside of the unit forfield connection to a drain line.Shutting Equipment Off Foran Extended Period of TimeGlycol chillers should bedrained and cleaned bothinternally and external if theyare being stored or taken out ofservice for extended timeperiods. Extended period oftime is more than 30 days.Refer to the cleaning andmaintenance sections of themanual for additionalinformation on cleaning.The refrigeration system (byothers) for the glycol chillermay require a pump down toisolation the refrigerant chargeinto the receiver or combinationwater-cooledcondenser/receiver. This istypically done by closing theisolation “king” valve on theoutlet of the optional receiveror optional combinationcondenser/receiver.Turn off the three phaseelectrical power to thecompressor, glycol pumps,water pump(s), and othermotors (disconnect or circuitbreakers furnished by others).Do not turn off the single phasecontrol circuit power. This mayturn off power to thecompressor crankcase heater inthe optional high side packageand optional winterizingequipment and/or the PLCpower supply.4-26 Turbo Refrigerating, LLC 3/04 Operating Instructions
WARNING! Read the Safety Section before this section. Failure to carefully follow these instructionscould result in permanent injury or loss of life.IMPORTANTof 10 PSIG or less (16 PSIG problems in chiller with longerIf the control circuit power Maximum). The number of plates (96” and 144” plates).has been turned off, it should plates used can be adjusted tobe turned on for a minimum ensure the flow rates meet the Consult factory if inletof twenty-four (24) hourspressure drop criteria.pressures higher than 85 PSIGprior to use to ensure thatare to be provided to the chiller.any liquid refrigerant that Glycol Pressuremigrated to the compressorcrankcase (by others) iseliminated prior to start-up.Failure to follow theseinstructions could result infailure or damage to thecompressor.SpecificationGlycol TemperatureThe temperature of the glycolpumped through the evaporatorplates is determined by theapplication to obtain the desiredfluid temperature of theexternal flow over the plates. Ifthe external flow is water, theglycol temperatures wouldnever be lower than 25°F. Theflow rate through the plate(s) aswell as the glycol temperatureand concentration can beadjusted to obtain the desiredleaving temperature of theexternal fluid.The glycol entering and leavingtemperatures are calculated foreach application to meet therefrigeration load and externalfluid temperature requirements.As indicated above the glycolcircuit is designed for 10 PSIGor less pressure drop throughthe plates. The maximumdesign pressure drop is 16PSIG. Glycol pumps should besized for the pressure dropspecified above plus all pipinglosses, elevation losses, andvalves losses. For example,select a glycol pump for thefollowing conditions;• Glycol flow rate: 138gallons per minute(GPM).• Refrigerant: 42 %propylene glycol• Pressure drop –evaporator: 11 PSIG• Pressure drop –system(piping, elevation, andvalves): 15 PSIGSolution:• Total pressure drop = 11+15 = 26 PSIor• For 42% propyleneglycol at 65.4 poundsper cubic foot = 57.2foot of head.Pump selection:• 138 GPM at a 57.2 foothead (26 PSI).Note: The pressure limit onthe glycol circuit is not toprevent plate failures orleaks. The plate burstpressures are well beyondthese pressures. However,plate bowing that causeserratic flow over the plateexterior can result. Erraticflow can affect the chillerperformance including highleaving fluid temperaturesand freeze up in areas starvedfor adequate fluid flow.Glycol FlowThe flow for the internalglycol flow is calculated foreach application to provide theThe maximum glycol pressuremaximum performance withoutat the inlet to the glycol circuitminimal pressure drop throughis 85 PSIG. Above 85 PSIG,t he plates. Flow rates arethe plates deflect enough totypically selected for a pressurecause water distributiondrop through the glycol circuitOperating Instructions 3/04 Turbo Refrigerating, LLC 4-27
WARNING! Read Safety Section before this section. Failure to carefully follow these instructions could result in permanent injuryor loss of life.<strong>Chiller</strong> Operation & Maintenance <strong>Manual</strong>Section 5: TROUBLE-SHOOTINGThis section lists common problems and suggests solutions with various chillers and chiller systems. Some of the problems and solutionsapply to optional equipment o r equipment supplied by others and may vary. Many problems are easy to solve if you know what causedthem. If your problem is not covered in this section, contact Turbo Refrigerating at: 1-940-387-4301 Ask for the Service Department.The following pages describe problems you might encounter and provide diagnostic instructions and solutions.PROBLEMS AND SOLUTIONSProblem Causes SolutionsCompressor will not start.Note: For optionalcompressor suppliedby others orseparately, consultsupplier’s data foradditionalinformation.No three phase or control circuitpower, tripped circuit breaker.Blown fuse.Refrigerant recirculation unit orpump(s) “off” or “tripped”.Check fuses and disconnect. Reset tripped circuit breakers.Reset or replace manual reset.Determine cause of low recirculator before restarting.Improper signal at the programmablecontroller.The run and power lights must be on for unit to operate. Checkfor loose connection and control circuit power to controller.<strong>Chiller</strong> MCS turned off.Turn switch to “ON” position. For dedicated system theicemaker should be on before the compressor starts.Trouble-Shooting 03/04 Turbo Refrigerating, LLC 5-1
WARNING! Read Safety Section before this section. Failure to carefully follow these instructions could result in permanent injuryor loss of life.ProblemUnit drawing high amps(compressor or water pumpmotors).CausesEmergency stop button depressed.Overload relay on magnetic startertripped.Loose terminal connections.Defective motor bearings or motor.Motor defective.Debris or restriction preventingnormal operation.SolutionsDetermine reason emergency stop button was used and correctbefore resetting.Determine cause of motor overload. Depress manual resetbutton.Tighten connections (qualified electrician).Replace. Check compressor/motor alignment and mountingbolts before restarting.Replace or rewind.Clear obstruction and restart.Trouble-Shooting 03/04 Turbo Refrigerating, LLC 5-2
WARNING! Read Safety Section before this section. Failure to carefully follow these instructions could result in permanent injuryor loss of life.Problem<strong>Chiller</strong> evaporator temperature toohigh; leaving water temperature toohighCausesHigh discharge pressure:- Defective water regulating valve(water cooled).- Fouling at condenser (water cooled)..- Faulty water pump (water orevaporative cooled).- Fouling at condenser (air cooled).- Flood back valves out of adjustment(air or evaporative cooled).- Belt worn or loose causing belts toslip (air or evaporative cooled).- Fan turning too slow (air cooled).Ammonia Recirculated Models:NH3 pump off or flow restricted(recirculated system).SolutionsCheck pressure sensing connection to regulator. Replace ifnecessary.Clean condenser by brushing and/or acid treatment. Consultmanufacturer for water treatment recommendations.Replace pump. Check pump suction and discharge forobstructions.Clean with air, water hose, or brushing. Remove debris fromcondenser inlet.Adjust to maintain 180 PSIG.Adjust, replace belts.Change sheave to increase speed up to FLA of motor. Consultfactory before restarting. Check for restrictions.Check pump overload. Check pump suction and discharge forobstructions. Check bypass pressure regulator. Rebuild pump.Low on NH3..Search for leak and repair. Add refrigerant to maintain properlevel in recirculator or surge drum (flooded) and high pressurereceiverTrouble-Shooting 03/04 Turbo Refrigerating, LLC 5-3
WARNING! Read Safety Section before this section. Failure to carefully follow these instructions could result in permanent injuryor loss of life.ProblemCausesHand expansion valve improperlyadjusted.Plugged or restricted strainer onliquid or recirculation unit (by others).Plugged or restricted liquid linestrainer.Air or other non-condensable inrefrigerant system.Restriction in piping.Power off to condensing unit.SolutionsBalance all hand expansion valves to maintain adequaterefrigerant to all sections. Open the valve(s) if necessary untilproper evaporator temperature is obtained. Note: It may benecessary to close the hand TXV to other sections/chillers toincrease flow to chiller that is not operating properly. Adjusthand expansion valve to maintain 40-45 PSIG in each chiller.Reference chiller specifications for evaporator temperature.Clean strainer. Restrictions can be observed by temperaturedrop across the strainer resulting in lower temperature at outlet.If temperature can not be measured isolate the strainer andremove it for visual inspection.Clean strainer. Restrictions can be observed by temperaturedrop across the strainer resulting in lower temperature at outlet.If temperature can not be measured isolate the strainer andremove it for visual inspection.Bleed air from condenser. Replace refrigerant charge ifcontamination can not be removed.Check all isolation valves for proper position – open or closed.Except for the hand expansion valves all other valves should befully open or closed and should not be used for throttling orflow control.Check power, circuit breaker, and disconnects to all motors,starters, and control switches.Trouble-Shooting 03/04 Turbo Refrigerating, LLC 5-4
WARNING! Read Safety Section before this section. Failure to carefully follow these instructions could result in permanent injuryor loss of life.ProblemCausesSolutionsInsufficient water flow to condenser Clean or replace.(water cooled):Check adjustment. Replace if required.- Strainer plugged.-Float valve defective (make-up waterline to cooling tower).-Pump impeller wornCondenser pump prime lost – lowwater level in sump..Condenser water make-up valve closedor restricted.Recirculating water pump off:-Motor overloads tripped.-Water recirculating pump prime lost.Low water level in reservoir.-Strainer plugged.-Check valve stuck closed.-water connection broken or watersupply lost-water level sensor switch defectiveCheck water pump impeller for wear – replace impeller orpump if necessary.Add water to cooling tower. Determine cause of water loss.- leak in sump or piping- water line broken- isolation valve in water line closedClean, repair, open, or replace valve.Check pump for restrictions. Reset starter overload relay.Locate water feed restriction. Add water to tank.Remove and clean.Remove and clean.Clean, repair, or replace valve. This check is installed andnormally located outside the unit at the liquid line connection tothe ice generatorVerify connection to the water solenoid valve and check theupstream water piping and valves outside unit.Verify the solenoid opening in response to the water levelsensor switch signal. Verify the water level assembly isproperly positioned – make sure assembly in firmly in place andhas not slipped down in the mounting bracket.Note: Some older models were not equipped with a make-upwater header. Consult the factory for additional information.Trouble-Shooting 03/04 Turbo Refrigerating, LLC 5-5
WARNING! Read Safety Section before this section. Failure to carefully follow these instructions could result in permanent injuryor loss of life.ProblemCauses-water solenoid coil failedEvaporator plates oil logged.SolutionsVerify the coil energizes when the output for the water solenoidis on. It can also be tested by applying power from the controlcircuit L1 to the water solenoid coil using a jumper totemporarily pulse the coilDrain oil from NH3 recirculation unit oil reservoir. Raiseevaporator plate temperature by placing manual defrost switch(MDS) in manual position or by spraying plates with warmwater (not to exceed 90°F).High suction pressure.Orifice in liquid header to evaporatorplate plugged.Water temperature too high.Consult factory.Water temperature above 60°F (based on incoming city water).High discharge pressure.Note: Optional condensing unitsupplied by others orseparately, consult supplier’sdata for additional information.Improperly adjusted hand expansionvalve (overfeeding refrigerant).Refrigerant system overcharged.Dirty condenser.Non-condensable in refrigerant.Head pressure controls improperly set.Discharge line check valve inoperativeor partially open.Check expansion valve adjustment (close to reduce refrigerantflow). Set to maintain 15 PSIG in all sections.Verify actual charge. Reduce charge as required.Clean.Air in system. Remove by purging.Readjust to correct setting.Normally 190–220 PSIG for water cooled; 170–190 PSIG forevaporative cooled; 210–250 PSIG for air cooled.Check and replace if required.Trouble-Shooting 03/04 Turbo Refrigerating, LLC 5-6
WARNING! Read Safety Section before this section. Failure to carefully follow these instructions could result in permanent injuryor loss of life.ProblemCausesSolutionsCheck position of all isolation valves Open all valves fully open or to correct position. Make sure alland pressure controls.pressure controls are properly adjusted and in automaticposition.Low oil pressure.Note: Optional condensing unitsupplied by others orseparately, consult supplier’sdata for additional information.Excessive vibration of motorand compressor.Note: Optional condensing unitsupplied by others orseparately, consult supplier’sdata for additional information.Excessive motor temperature.Note: Optional condensing unitsupplied by others orseparately, consult supplier’sdata for additional information.Oil reservoir full indicating need formaintenance.Plugged or stopped up oil strainer.Low oil level in crankcase.Defective compressor oil pump.Oil leakMisalignment.Loose motor/compressor hold downbolts.Flooding of compressor.Defective or worn bearing.Structural support under unitinsufficient.Drain oil reservoir and add new oil to compressor.Clean. Purge line.Consult supplier’s data.Check rotation and wear. Replace as required.Check all areas around system for signs of oil leakage. Repairleak and recharge system with oil.Realign to within specifications.Tighten. Check alignment.Adjust high pressure liquid line hand expansion valve setting.Check refrigerant level controls on NH3 recirculation unit toensure high refrigerant level switch is operative.Remove coupling and check bearing.Reinforce structural support. Shim as required. Consult factoryfor guidelines.Trouble-Shooting 03/04 Turbo Refrigerating, LLC 5-7
WARNING! Read the Safety Section before this section. Failure to carefully follow these instructionscould result in permanent injury or loss of life.To help you get the bestperformance from your <strong>Chiller</strong>system, follow the maintenanceinstructions listed below. If youhave questions concerning themaintenance or upkeep of yourequipment, contact:Turbo RefrigeratingService DepartmentP.O. Box 396Denton, Texas 76202Phone: 940-387-4301Fax: 940-382-0364Daily InspectionsInspect the chiller daily todetermine that the unit isoperating properly. Observe t hefluid flow over the plates toensure the water distributionsystem is free of debris. Checkas required.<strong>Chiller</strong> Operation & Maintenance <strong>Manual</strong>Section 6: MAINTENANCEWeekly Inspections (Includesaccessory equipment usedwith the <strong>Chiller</strong> System)Check the oil level in thecompressor.Check for signs of oil leakage.Check the refrigerant liquidlevel in the receiver (ifapplicable) or during pumpdownto ensure that the level isproper and has not changedCheck the receiver. Inspectvalve packings and relief valvefor indications of refrigerantloss.Check for 20-30% refrigerantlevel in the receiver (or thesupplier’s recommendation)while operating.• General neathousekeepingClean the chiller weekly:• Clean the waterdistribution pan andheader. Thedistribution headercan be easilydisassembled toremove debris insidethe header or clearplugged holes.• If necessary removethe water distributionheader from the waterdistribution pan andwipe out all loosedebris in the pans.Unplug holes in thepans as required toensure complete flowover the entire plate.• Check for indicationsof discoloration onthe frame, water,pans, panels, andheaders. If necessaryuse citric acid toclean the areas usinga non-abrasivecleaning pad. Followthe cleaning with afresh water rinse.When starting, observe that the Check unit at least once a week.discharge and suction pressures A visual inspection includes andare correct on the gauges and is not limited to:are stable to ensure the proper• Leaksrefrigerant feed to the chiller.• Vibration of pipingon other components• Capillary tubesrubbing• Unusual noises• Tight bolts, nuts,screwsMaintenance 03/04 Turbo Refrigerating, LLC 6-1
WARNING! Read the Safety Section before this section. Failure to carefully follow these instructionscould result in permanent injury or loss of life.After Initial Ten Hours ofOperationCheck for indications ofdiscoloration on the frame,water, pans, panels, andheaders. If necessary usecitric acid to clean the areasusing a non-abrasivecleaning pad. Follow thecleaning with a fresh waterrinse.After Initial Fifty Hours ofOperationCheck for indications ofdiscoloration on the frame,water, pans, panels, andheaders. If necessary usecitric acid to clean the areasusing a non-abrasivecleaning pad. Follow thecleaning with a fresh waterrinse.Have a qualified electriciancheck the control panel forloose connections or loose lugson the magnetic starter.Every Six WeeksGrease all greasable fittings onthe shaft bearings.Water Scale Build-UpOne of the main concerns withany system using water is scalebuild-up resulting from:• Solids build-up on theinterior of water cooledcondenser (if so equipped)To avoid these problems,consult a local water treatmentconsultant and follow theseguidelines below.Goldenrod water treatmentsystems are also available from<strong>Vogt</strong> <strong>Ice</strong>. The Goldenrod caneliminate scaling problems inmost cases. Consult the factoryfor additional information.Plates Forming ScaleFlush plates with an acceptableicemaker cleaner – typicallycitric acid. Have wateranalyzed.Stainless Steel SurfaceCleaningScale on the chiller platesresulting from mineral depositsin the water and other sourcesof contamination can reduce theefficiency of the plate. If leftuntreated, it may result indeterioration of the metalsurface thus reducing the life ofthe plates.The life and efficiency of theplates are dependent on propercare and cleaning of the surface.Since conditions andinstallation of equipment varyfrom location to location, it isdifficult to provide a simplesolution to selecting a cleaningand sanitizing method. Tounit, contact a local reputablesupplier of chemical andcleaning sanitizing products.Based on the knowledge of thelocal water conditions, thematerial to be cleaned (304and/or 304L stainless steel), andthe operating conditions of theequipment, they canrecommend a cleaning andsanitizing product to meet yourspecific needs.Helpful Hints1. Chlorine will attackstainless steel. Most watersupplies contain chlorine inlevels too low to causeconcern. Some cleaningagents contain high levels ofchlorine and should beavoided unless the cleaningprocess can be closelycontrolled and a thoroughrinsing of the plates and anyother parts coming incontact with the cleaningagent can be ensured everytime.2. Water scale can be removedusing dilute nitric acid under1% or phosphoric acidunder 5% at temperatures nohigher than 105°F. Thesesolutions must be free ofsalt and thoroughly flushedfrom all surfacesimmediately after use with a1/4% caustic and plainwater flush.• Solids forming the plates• Solids build-up in the waterCitric acid cleaning agentsdistribution pan and headersare also recommended forobtain the best care for yourfrequent cleaning. Regular03/04 Turbo Refrigerating, LLC 6-2 Maintenance
WARNING! Read the Safety Section before this section. Failure to carefully follow these instructionscould result in permanent injury or loss of life.use eliminates the need touse stronger acids such asthe nitric acid mixture toremove built up scale.3. Hydrochloric and sulphuricacid should not be used.Scale and Solids Forming InWater TankDrain and flush tank at leastonce a week. Solids can stop upthe holes in distribution pans.Clean pan by using an air hose,a vacuum cleaner, or a brush. Ifexcessive or frequent cleaningis required, consult the factory.Clean strainer in make-up waterline.Dirty or scaled tubes in watercooled condensers can causehigh discharge pressure.Periodically remove thecondenser head and use acondenser tube cleaning brushto remove scale. Acids orchemical additives can also beused. Care should be exercisedwhen using acid. Followdirections on the container(consult local chemicaltreatment supplier).Cooling towers should betreated for scale and algae whenneeded.Air cooled condensers can bewashed out using a water hoseand flushing out against theairflow. Prior to performing thisservice, ensure that the electriccircuit is disconnected andlocked out. Lubricate the fanbearing and tighten belts whereequipped according to themanufacturer’s specification.Note:TURBO recommends thatwarnings and labels for anyadditional equipment notsupplied by TURBO need tobe added to the weeklyinspection sheet.Maintenance 03/04 Turbo Refrigerating, LLC 6-3
WARNING! Read the Safety Section before this section. Failure to carefully follow these instructionscould result in permanent injury or loss of life.Table 6-2 Sample Weekly Maintenance Log SheetDateEvaporator plates cleanFirst Shift StartSecond Shift StartThird Shift StartFirst Shift EndSecond Shift EndThird Shift EndFrame, panel interior, water distribution pan and headers cleanFirst Shift StartSecond Shift StartThird Shift StartFirst Shift EndSecond Shift EndThird Shift EndWater flow across all plates providing complete wetting of plate surfaceFirst Shift StartSecond Shift StartThird Shift StartFirst Shift EndSecond Shift EndThird Shift End<strong>Chiller</strong> High Side Head (discharge) Pressure within normal range (Referencemanual for various refrigerants and condensing types)First Shift StartSecond Shift StartThird Shift StartFirst Shift EndSecond Shift EndThird Shift End<strong>Chiller</strong> Suction Pressure within normal range (Reference chillerspecifications for proper pressure)First Shift StartSecond Shift StartThird Shift StartFirst Shift EndSecond Shift EndThird Shift EndCompressor Oil PressureFirst Shift StartSecond Shift StartThird Shift StartFirst Shift EndSecond Shift EndThird Shift End<strong>Chiller</strong> Entering Water Temperature within Normal LimitsFirst Shift StartSecond Shift StartThird Shift StartFirst Shift EndSecond Shift EndThird Shift End03/04 Turbo Refrigerating, LLC 6-4 Maintenance
WARNING! Read the Safety Section before this section. Failure to carefully follow these instructionscould result in permanent injury or loss of life.<strong>Chiller</strong> Leaving Water Temperature within Normal LimitsFirst Shift StartSecond Shift StartThird Shift StartFirst Shift EndSecond Shift EndThird Shift End<strong>Chiller</strong> Inlet Water Pressure within Normal LimitsFirst Shift StartSecond Shift StartThird Shift StartFirst Shift EndSecond Shift EndThird Shift EndAmbient TemperatureFirst Shift StartSecond Shift StartThird Shift StartFirst Shift EndSecond Shift EndThird Shift EndOperatorsRemarksFirst ShiftSecond ShiftThird ShiftFirst ShiftSecond ShiftThird ShiftMaintenance 03/04 Turbo Refrigerating, LLC 6-5
WARNING! Read the Safety Section before this section. Failure to carefully follow theseinstructions could result in permanent injury or loss of life.<strong>Chiller</strong> Operation & Maintenance <strong>Manual</strong>Section 7: OPTIONS AND ACCESSORIESOption KitsA number of options areavailable with HTDA, HFAND UHTD chillers. A fewof the options are describedbelow and include the basickits for the chiller water andcomponents for therefrigeration systems as wellas condensing units,refrigerant recirculationpackages, complete skidmounted systems and more.Figure 1 below shows thebasic option kits availablefor chillers.Figure1. <strong>Chiller</strong> Option Kits – Flooded and Recirculated ModelsOptions & Accessories 03/04 Turbo Refrigerating, LLC 7-1
WARNING! Read the Safety Section before this section. Failure to carefully follow theseinstructions could result in permanent injury or loss of life.Standard option kitdescriptions:Option #1Water Level Controls –All <strong>Chiller</strong> ModelThe water level controlsconsist of a motoractuated water solenoid,water strainer, and afloat switch assembly.The float switch assemblyconsists of a SPDT switchmounted in a "splash"enclosure on theend of a stainless steelrod. This rod acts as theadjusting arm and wiringconduit for the floatswitch. A wiring junctionbox is mounted on top ofthe rod.A set of plastic blocks areattached to the fixedlower panel in the upperframe of the chiller.The top block can beremoved and the rodassembly installedbetween the two blocks.Loosen the two (2) boltsholding the plastic blockstogether and move theassembly up or down asrequired to obtain thedesired water level in thesump.The float switch contactsare rated for pilot dutyonly. A solid stateswitching relay (LPR) isused with the floatswitch to activate themotor actuated solenoid.Refer to the wiringdiagram for connections.Starting with the sumpempty and MCS "on", thefollowing sequencewould occur:1. The float switch (FS)should be on thebottom of the"splash" enclosure.The normallyclosed contact of theload-pack relay (LPR)should be open andthe LPR relay shouldbeenergized.2. With the LPRenergized, thenormally open contactshould be closed,energizing the WS(open) switch of thewater solenoid. Thevalve should rotate a1/4 turn and stop,permittingwater to enter thesump.3. Water will continue toenter the sump untileither MCS is turned"off" or the waterlevelreaches FS.— If MCS is turned"off", power to thecommon terminalon the LPR isdisconnectedand switched tothe WS (closed)switch on thewater solenoidvalve.- If the water levelreaches FS, thefloat moves upthe stem of theswitch causingtheN.C. FS contact toopen. When FSopens, the LPRrelay de-energizescausing theN.C. contacts toclose. The WS(closed) switch onthe water solenoidis energizedand the watersolenoid valvecloses.— If the sump waterlevel drops belowFS and MCS is"on", the FS andthe LPR relaycontacts shouldreverse. The WS(open) switch inthe water solenoidshould beemerged and thevalve shouldrotate 1/4 turn tothe openposition.4. FSand the LPR relaywill continue tomaintain thedesired waterlevel until MCS isturned "off" (seenote 3).Notes: If the sequenceof the water solenoidis opposite thesequence describedabove, it canbe reversed bychanging the wires onthe N.C. and the N.O.contacts of the LPRrelay or turning thefloat on FS.4. A CR3 control relay isOptions & Accessories 03/04 Turbo Refrigerating, LLC 7-2
WARNING! Read the Safety Section before this section. Failure to carefully follow theseinstructions could result in permanent injury or loss of life.shown in parallel with thewater solenoid. Itsfunction is to close therefrigerant liquid solenoidvalve when the water supplyis shut off. This isdone to prevent surging ofthe low pressure surgedrum duringno load conditionsIf a different methodof control is used andthe CR3 relay isWS (open) switch of theomitted, a pilot light,surge suppressor,metal-oxide variator,or some type of loadmust be wired parallelwith WS (open) inorder for the LPR relayto function properly.4. Water level controlsare intended for use ata high level control.Water flow to thechiller can becontrolled in the waterreturn connection ormake-up waterconnection.Flow control valvesmay also be used onthe outlet connectionof the sump tomaintain a steadysump water level.Figure 2. Water Level Controls OptionOptions & Accessories 03/04 Turbo Refrigerating, LLC 7-3
WARNING! Read the Safety Section before this section. Failure to carefully follow theseinstructions could result in permanent injury or loss of life.Option #2Surge Drum (FloodedAmmonia)A low pressure vessel(surge drum) operating atevaporator pressure isused to maintain a liquidseal on the evaporator,and provide separation ofthe liquid from the vaporin the wet returnline.Each surge drum isprovided with a liquidleg connection in thebottom of the drum, awet suction connectionon the end opposite theliquid log connection, adry suction connection tothe high side, a highpressure liquidconnection, a relief valveconnection and a gas(top) connection for therefrigerant float switchassembly. The bottomfloat switch assembly isinstalled in the liquid legby others.The normal operatinglevel in the surge drum isthree inches. Each surgedram is sized tomatch the designconditions for theapplication. Sufficientvolume is allowed forpull-downand operation at higherloads for short periods.Float switch assembliesshould be set to aseven inch high levelsetting.Insulation of the surgedrum and all connectionsis field installed byothers.Figure 3. Typical Surge DrumOptions & Accessories 03/04 Turbo Refrigerating, LLC 7-4
WARNING! Read the Safety Section before this section. Failure to carefully follow theseinstructions could result in permanent injury or loss of life.Option #3Oil Drum (Ammonia)In flooded ammoniasystems, the refrigerantoil contained in the liquidammonia must be removedfrom the systembefore it enters the chillerplates. The liquid legfrom the surge drumto the chiller is notprovided with any of theoption kits. When theliquid leg is field installed,it should beprovided with an oil potlower than the horizontalportion of the liquidleg. This allows the oil tocollect in the bottom ofthe liquid leg before itreaches the chillerrefrigerant inlet.To remove therefrigerant oil, an oildrain drum with anisolating valve isprovided. Thisdrum is also providedwith a 150 # reliefvalve.exposureto ammonia in theevent of an accidentFailure to carefullyfollow theseinstructionscould result inpermanent injury orloss of life.The isolating valve,located between the oilpot on the liquid leg andthe drum inlet, isclosed.A drain valve is locatedon the bottom of the oildrum to remove the oil.________________________________WARNING __________________________Only qualified servicepersonnel shouldremove oil from the oildrum. Such personnelshould have properknowledge of handlingammonia as well astreatment forOptions & Accessories 03/04 Turbo Refrigerating, LLC 7-5
WARNING! Read the Safety Section before this section. Failure to carefully follow theseinstructions could result in permanent injury or loss of life.Option #4Liquid Line ValvePackageHigh pressurerefrigerant is suppliedto the surge drumthrough a refrigerantsolenoid valve,strainer, and handexpansion valve todrop the pressure to thelower system operatingpressure in the surgedrum.between the valves.NEVER leave theisolating valve closedunless service is beingperformed. Whenoperating the straineror solenoid valve, therefrigerant betweenthe isolating valvemust be bled offslowly. Failure tocarefully follow theseinstructions couldresult in permanentinjury or loss of life.A by-pass handexpansion valve ispiped in parallel to therefrigerant solenoidvalve, strainer, andisolating valve. Byclosing the main handexpansion valve andisolating valve, thesolenoid valve andstrainer may be servicedwithout shutting thesystem off (for serviceor emergency use only).The operation of therefrigerant solenoid iscontrolled by the floatswitches OLFS andNELS mounted on thesurge drum.________________________________WARNING __________________________Only qualified servicepersonnel shouldattempt to service therefrigerant solenoidvalve or strainer.When the isolatingvalves are closed andthe line is exposed toheat, excessivepressure can developOptions & Accessories 03/04 Turbo Refrigerating, LLC 7-6
WARNING! Read the Safety Section before this section. Failure to carefully follow theseinstructions could result in permanent injury or loss of life.Option #5Suction Line Packagewith PressureRegulatorIsolating valves areprovided on both sides ofthe pressure regulator sothat it can be servicedwithout affecting the restof the system.To prevent iceformation on the chillerplates due to variationsin system loading, asuction pressureregulator is installed inthe dry suction linefrom the surge drum tothe system highside.During periods of lowload on the system,resulting from reducedwater flow or lowertemperature waterentering the chiller, thesuction pressureregulator senses thelower upstreampressure (surge drumpressure) and modulatesto close the regulator.As the regulator closes,the upstream pressureincreases. As thepressure increases, theregulator modulatesopen to reduce the surgedrum pressure. Theregulator continues tomodulate and control thesurge drum pressure tothe desired pressuresetting.For a typical chillersystem using water asthe chilled media, asuction temperature of26°F can be usedwithout icing the chillerplate(s).Options & Accessories 03/04 Turbo Refrigerating, LLC 7-7
WARNING! Read the Safety Section before this section. Failure to carefully follow theseinstructions could result in permanent injury or loss of life.Option #6Dual Relief ValveAssemblyTwo pressure reliefvalves mounted on athree-way valve areneeded to protect thesurge drum fromexcessive pressure.For ammonia systems,a 150 PSIG relief valveis used. Only one reliefvalve is in use at atime. If the relief valvein use should open, thechiller should be shutoff immediately andthe cause of theproblem determined.and relief valve.Failure to carefullyfollow theseinstructions couldresult in permanentinjury or loss of life.Before restarting thechiller, the three-wayvalve should be closedto isolate the reliefvalve inuse at the time of theoverpressure. When thethree-way valve closesthe 'A r relief valve, itopens the 'B' reliefvalve thus providingcontinuous protection.After the first valve hasbeen isolated, it shouldbe replaced with a newvalve.________________________________WARNING __________________________Only qualifiedpersonnel shouldattempt to replace therelief valve. Cautionmust beused in removing thevalve to preventsudden exposure torefrigerant betweenthe three-way valveOptions & Accessories 03/04 Turbo Refrigerating, LLC 7-8
WARNING! Read the Safety Section before this section. Failure to carefully follow theseinstructions could result in permanent injury or loss of life.Option #7Refrigerant LevelControlTwo refrigerant floats areused to control therefrigerant level in thesurge drum.The normal refrigerantoperating level in thesurge drum is threeinches and is controlledby the lower operatinglevel float switch(OLFS). The refrigerantliquid solenoid willremain open and feedrefrigerant through thehand expansion valve inthe liquid line until therefrigerant level raisesthe float in the floatswitch. This causes theswitch contacts toreverse and shut offrefrigerant flow to thesurge drum.If the OLFS switchshould fail to shut off therefrigerant or if thesystem should surge, ahigh refrigerant levelswitch (HLFS) is alsoprovided. The HLFSswitch shuts off therefrigerant liquidsolenoid, as well as thecompressor circuit.Contacts are alsoprovided for connectionto a remote alarm circuit.A typical operatingsequence is describedbelow:1. The refrigerant levelcontrol circuit isenergized.2. At start-up, therefrigerant is belowthe level of theoperating level(OLFS) and highlevel (HLFS) floatswitches, therefore,the refrigerant liquidsolenoid valve shouldenergize to feedliquid to the surgedrum through thehand expansionvalve.The solenoid valvewill remain openuntil the liquid levelreaches the operatinglevel of the OLFSand then it closes.3. As the liquid level inthe surge drum dropsbelow the differential(approximately oneinch) of the floatswitch, the liquidsolenoid should openand feed refrigerantto the surge drumuntil OLFS reachesits operating leveland shuts the liquidsolenoid "off.4. If the refrigerantlevel does not reachthe operating level,the hand expansionvalve should beopened SLOWLY toallow additionalrefrigerant flow.Adjust the handexpansion valve untilthere is a steadymodulation of therefrigerant solenoidvalve throughOLFS.Each float switch isprovided with two (2)isolating valves toallow service of thefloat switches withoutpurging the entire surgedrum._______________________________ WOnly qualified servicepersonnel shouldperform service workor remove the floatswitches. Cautionmust be used toremove the refrigerantcontained in the floatswitch chamber andpiping from theisolating valves to thefloat switch. NEVERleave both isolatingvalves closed exceptwhen performingservice (i.e., whenexposed to heat,excessive pressure candevelop between thetwo isolating valveswhen closed. Purge therefrigerant as soon aspossible after closingthe valves.) Failure tocarefully follow theseinstructions couldresult in permanentinjury or loss of life.Options & Accessories 03/04 Turbo Refrigerating, LLC 7-9
WARNING! Read the Safety Section before this section. Failure to carefully follow theseinstructions could result in permanent injury or loss of life.Aligning motor andcompressor assembly<strong>Chiller</strong> models are furnishedwith direct coupled motors andcompressors. The couplingcenter section is shipped loosefor field installation. Thecompressor and motor arecarefully aligned at the factorybefore testing.Coupling CenterCheck for alignment beforeinserting the coupling centersection.Compressor MotorInspect the compressor motoralignment with a dial indicatorto check if it may have beendisturbed during shipment orinstallation. See Table 3-1.Motor & Compressor FlangesCheck the alignment of themotor and compressor flangeswith a dial indicator on themotor flange. The procedurefor checking alignment andalignment tolerances follow.Both angular and parallel mustbe checked. For the details onthe compressor manufactureralignment procedure, refer tothe Installation, Start-Up andService Instructions located inthe Appendix & Notes Section.Motor/Compressor AssemblyThe motor/compressorassembly is doweled to the baseafter the factory alignment iscompleted to help maintainalignment and aid inrepositioning the motor afterservicing.Compressor AlignmentIf, for any reason, thecompressor alignment is notwithin tolerance afterreinstallation of the coupling, itmust be realigned (refer toTable 3-1).Doweling ProcedureSince doweling is performedafter the motor/compressoralignment has been hot checked(i.e. compressor has been runand brought up to operatingtemperature after initialalignment), some models areshipped from the factorywithout doweling.Note:All self-contained SC, SCA,and SCE models are factoryrun and doweled. SCAR andSCER utilize remotecondensers and are notfactory run.In such cases, doweling is doneafter the initial start-up of theequipment. The followingprocedure is used:1. With the compressor atoperating temperature,verify the compressoralignment.2. With the compressor still atoperating temperature, drilland ream two (2) holesdiagonally opposite on boththe compressor and motor.Do not ream the holes toodeep. Part of the dowel pinshould protrude above thecompressor or motor foot(see step 4 below). SeeFigure 3-12.Tools Required:- Drill motor- 9/32" diameter drill- #6 taper reamer3. Insert the #6 x 2 1/2"hardened taper dowel pins inthe holes.4. Using a rubber hammer ormallet, tap the dowel lightlyinto position. Leave1/8" – 3/16" of the dowel pinabove the motor foot(required to tap and loosenthe dowel for removal whenrequired).5. Coat the dowels with whitelead or lubricant to preventrusting.Options & Accessories 03/04 Turbo Refrigerating, LLC 7-10
WARNING! Read the Safety Section before this section. Failure to carefully follow these instructionscould result in permanent injury or loss of life.ReferenceFigure 3-12 DowelingRefer to the compressor manufacturer alignment procedure in the Installation, Start-Up and ServiceInstructions in the Appendix & Notes Section.Table 3-1 Compressor Alignment TolerancesOptions & Accessories 03/04 Turbo Refrigerating, LLC 7-11
WARNING! Read the Safety Section before this section. Failure to carefully follow these instructionscould result in permanent injury or loss of life.Options & Accessories 03/04 Turbo Refrigerating, LLC 7-12
WARNING! Read the Safety Section before this section. Failure to carefully follow these instructionscould result in permanent injury or loss of life.Optional CondensingUnitsCondensing unitssupplied by TURBOconsist of the followingbasic components:Motor/CompressorAssemblyOpen drive or screwcompressor. Whenrequired, water cooledheads and/or watercooled oil coolers areprovided. Water piping(if required) to themotor/compressorassembly is notincluded.CondenserWater cooled isstandard. Evaporativecooled and air-cooledare available.Condenser HeadPressure ControlsWater regulating valveis standard for watercooled.High PressureReceiverFor storage ofrefrigerant charge duringpump down for serviceor extended off periods.Includes inlet isolationvalve, outlet valve, andsafety relief valves.ControlsMagnetic starters for thecompressor motor(s).Gauge and safetyconsole for high, low,and oil pressure safetycircuit. ON/OFF mastercontrol switch andterminal switchconnections forconnection of thecontrol circuit powerand lugs for the threephase powerconnections. Main andbranch circuit breakersand disconnects are notprovided.RefrigerantThe refrigerantoperating chargerequired is provided byothers for all modelsexcept SC, SCA andSCE. Models withoutthe refrigerant aresupplied with either anitrogen holding chargeonly. SC, SCA and SCEmodels are factorycharged prior toshipment except forinternational shipments.International shipmentsfor all models areshipped with a nitrogenholding charge only.evacuation andcharging process.Structural Base FrameCapable of supportingthe basic componentslisted above duringtransportation andoperation.Field PipingSC, SCA and SCEmodels are factory pipedincluding the refrigerantpiping between theevaporator section andthe condensing unit – norefrigerant field pipingis required. Field pipingbetween the condensingunit and all othercomponents is requiredfor SCAR and SCERmodels with remote aircooled(SCAR) orevaporative -cooled(SCER) condensers.Field piping is by others.Electrical ServiceSC, SCA and SCEmodels are factory wiredincluding the wiringbetween the evaporatorsection and thecondensing unit – nofield wiring is required.Field wiring between thecondensing unit and allother components isrequired for SCAR andSCER models withremote air-cooledNOTE:The nitrogen holdingcharge isapproximately 15PSIGand must be relievedbefore beginning the (SCAR) or evaporative -Options & Accessories 03/04 Turbo Refrigerating, LLC 7-13
WARNING! Read the Safety Section before this section. Failure to carefully followthese instructions could result in permanent injury or loss of life.cooled (SCER)condensers. Field wiringis by others.Single-phase and threephaseelectrical serviceto the evaporator sectionand all othercomponents is fieldinstalled by others.Terminal blockconnections areprovided in the controlpanel. Main circuitbreakers and branchcircuits breakers and/ordisconnects are notprovided. Main andbranch protection mustbe provided by others inaccordance with alllocal, state and federalcodes.Cooling Tower andCooling TowerPump(s)Not included with thecondensing unit -available as options.Consult TURBO foradditional information.Options & Accessories7-1403/04 Turbo Refrigerating, LLC
WARNING! Read the Safety Section before this section. Failure to carefully followthese instructions could result in permanent injury or loss of life.Optional Flooded UnitTIG evaporators areavailable for floodedoperation withrefrigerant R-22.Forflooded models theevaporator is connectedto an optional surgedrum. The surge drumpackage supplied byTURBO consists of:Surge DrumSized for therefrigeration duty listedabove. This vesselserves as the source ofliquid refrigerant for theevaporator plates as wellas a surge vessel toseparate the liquid andgas returning from theevaporator. Connectionsare provided for the wetsuction return, drysuction to thecompressor, relief valve,oil drain, high pressureliquid make-up, liquidlevel column, and pumpvent.High PressureRefrigerant Make-UpLine AssemblyConsists of a liquidsolenoid valve, handexpansion valve, andisolation valves on theinlet and outlet of theassembly. A secondhand expansion valve isconnected in parallel tothe solenoid valve andmain hand expansionvalve. The manualbypass permits operationwhile the solenoid valveand/or hand expansionare being serviced.Dual Safety ReliefValvesProvided. Field pipingby others is requiredfrom the discharge ofthe relief valves to a safedischarge location.Refer to section 2 –Safety.Oil Recovery VesselConsists of an oil pot,relief valve, vent line,and isolation valves forthe removal of oil fromthe system. Oil isremoved manually fromthe oil pot connected tothe drop leg of the surgedrum.Structural Base FrameCapable of supportingthe components listedabove duringtransportation andoperation.Surge Drum InsulationRequired for properoperation. Due tovariations inrequirements, insulationof the vessel and pipingis field installed andprovided by others.Insulation and jacketingcan be supplied as anoption.Options & Accessories7-1503/04 Turbo Refrigerating, LLC