Stanley WAMS Getting Started Guide - OSI Security Devices
Stanley WAMS Getting Started Guide - OSI Security Devices
Stanley WAMS Getting Started Guide - OSI Security Devices
- No tags were found...

You also want an ePaper? Increase the reach of your titles
YUMPU automatically turns print PDFs into web optimized ePapers that Google loves.
Copyright ©2012 <strong>Stanley</strong> <strong>Security</strong> Solutions, Inc.All rights reserved.Information in this document is subject to change without notice and doesnot represent a commitment on the part of <strong>Stanley</strong> <strong>Security</strong> Solutions, Inc.The software described in this document are furnished under a licenseagreement or nondisclosure agreement.This publication is intended to be an accurate description and set ofinstructions pertaining to its subject matter. However, as with anypublication of this complexity, errors or omissions are possible. Pleasecall <strong>Stanley</strong> <strong>Security</strong> Solutions, Inc at (317) 849-2250 if you see any errorsor have any questions. No part of this manual and/or databases maybe reproduced or transmitted in any form or by any means, electronic ormechanical, including photocopying, recording, or information storageand retrieval systems, for any purpose, without the express writtenpermission of <strong>Stanley</strong> <strong>Security</strong> Solutions, Inc.This document is distributed as is, without warranty of any kind,either express or implied, respecting the contents of this book,including but not limited to implied warranties for the publication’squality, performance, merchantability, or fitness for any particularpurpose. Neither <strong>Stanley</strong> <strong>Security</strong> Solutions, Inc, nor its dealers ordistributors shall be liable to the user or any other person or entitywith respect to any liability, loss, or damage caused or alleged to becaused directly or indirectly by this publication.The <strong>Stanley</strong> Wi-Q AMS and Wi-Q Technology are registeredtrademarks of <strong>Stanley</strong> <strong>Security</strong> Solutions, Inc.Wi-Spy and MetaGeek are registered trademarks of MetaGeek, LLC.Microsoft, Windows, CE, and ActiveSync are registered trademarks ofMicrosoft Corporation.T85201/Rev A March 2012
FCC CertificationThis equipment has been tested and found to comply with the limitsfor Class B Digital Device, pursuant to Part 15 of the FCC Rules. Theselimits are designed to provide reasonable protection against harmfulinterference in a residential installation. This equipment generates andcan radiate radio frequency energy and, if not installed and used inaccordance with the instructions, may cause harmful interference to radiocommunications. However, there is no guarantee that interference willnot occur in a particular installation. If this equipment does cause harmfulinterference to radio or television reception, which can be determined byturning the equipment off and on, you can try to correct the interferenceby taking one or more of the following measures.• Reorient or relocate the receiving antenna• Increase the separation between the equipment and receiver• Connect the equipment into an outlet on a circuit different fromthat to which the receiver is connected• Consult the dealer or an experienced radio/TV technician for help.This device has been designed to operate with a maximum gain of 2.2dB. Approved antennas are listed below. Antennas not included in thislist or having a gain greater than 10 dB are strictly prohibited for usewith this device. The required antenna impedance is 50 ohms.Approved Antennas• Portal Gateway and Single Door Controller• Antenna Factor ANT-2.4-CW-RCT-xx• Reader• Integrated AntennaIMPORTANT! Any changes or modifications not expressly approved bythe party responsible for compliance could void the user’s authority tooperate the equipment.
ContentsSystem Overview .....................................................................8Task 1: Develop a Site Plan...................................................10Task 2: Prepare Your Computer ...........................................14Task 3: Gather and Organize Segment Data .....................16Task 4: Install Software ........................................................18Task 5: Creating Your Segment Tree ...................................18Task 6: Setup Credential Settings ...................................... 20Task 7: Configure Portal Gateways .................................... 20Task 8: Install Portal Gateways .......................................... 20Task 9: Install Door Hardware .............................................21Task 10: Sign On and Configure Controllers......................21Task 11: Configure Software .............................................. 23System Setup Checklist ....................................................... 28
<strong>Getting</strong> <strong>Started</strong>This booklet is your <strong>Getting</strong> <strong>Started</strong> guide through <strong>Stanley</strong> Wi-Q3.0 Access Management System (Wi-Q AMS) and OmnilockWireless Access Management System (Omnilock <strong>WAMS</strong>)setup. It will give you a quick understanding of basic systemcomponents and operation. The Sample Segment Plan sectionwill get you thinking about how to plan your own segment andmake use of system features.All elements and features of Wi-Q AMS and Omnilock <strong>WAMS</strong>are described in detail in the Wi-Q AMS/Omnilock <strong>WAMS</strong> User<strong>Guide</strong>, following the tab structure. This manual presents a SetupChecklist.Take a few minutes to review and understand this material beforebeginning the installation process. The time you spend here willhelp you identify problems and create solutions as you work yourway through hardware installation and setup, software configuration,and system operation. If you are unfamiliar with the termsused in wireless technology, you may want to refer to the Glossaryat the end of the User <strong>Guide</strong>.7
System OverviewThe <strong>Stanley</strong> Wi-Q Access Management System (Wi-Q AMS) andthe <strong>Stanley</strong> Omnilock Wireless Access Management System (Omnilock<strong>WAMS</strong>) integrate powerful access management softwarewith Portal Gateways, Wireless Access Controllers, and multiplecontroller formats that work together to enable all decision-makingat the door. The system runs remotely with no need for hard-wiring,providing innovative access control in any environment. Wi-QAMS and Omnilock <strong>WAMS</strong> are versatile so you can create a wholenew system, retrofit existing hardware, and include various CCTValarms, general alarms, and inputs/outputs.Basic System ComponentsA basic system has three components: a host computer anddatabase with Wi-Q AMS or Omnilock <strong>WAMS</strong> installed, aPortal Gateway, and a Wireless Controller at the door. Figure 1is a simple diagram showing the three components.Figure 1Four Basic ComponentsPORTALGATEWAYHOSTLAN/WANWIRELESSDOORCONTROLLERThe Host Computer and database — Wi-Q AMS or Omnilock<strong>WAMS</strong> software is installed at the Host computer and set upto tell the Portal Gateways on the network which Wireless8
• Wi-Q Technology Site Survey Tool — provides detailed informationabout Portal Gateway capacities, antenna types,and ranges to develop an effective working Site Plan.• Wi-Spy Spectrum Analysis Tool by MetaGeek (or equivalent)—provides a window into what radio channels arebeing used in your building and what channels are availablefor Wi-Q and Omnilock.Reviewing the Sample Site PlanThe Host (A) is located in Building 1. The Building 1 PortalGateway (B) is located near the electrical panel in the communications/electronicsroom. This Portal Gateway will collecttransactions from the 12 Controllers in Building 1. As you cansee by the gray circle representing the Portal’s range, it alsoextends to the entrance of Building 2 and the Parking Garage.This provides redundant coverage of those areas should eitherof the other Portals go offline.The Building 2 Portal Gateway (C) is positioned next to the electricalpanel. Portal Gateway C has a range that covers the 48rooms in this three-story dorm, front and rear access doors andelevator access points on each of the three floors (53 Controllers).The Gateway’s range also provides redundant coverage tothe pedestrian access and elevator of the Parking Garage.The Parking Garage Portal Gateway (D) is positioned to coverthe pedestrian door near the dorm and the stairway and elevatordoors. Its range also extends to the entrance of Buildings 1 and 2.11
Figure 2Sample Site Installation PlanParking Garage108Building 2116107115106114CComm./105Elect.113200 ftStair/Elevators104112103111102Stair/Elevators110DPortalGateway1013 Story Dorm Rooms101-148Double Occupancy96 Students10950 ftAdmin.6 StaffHostPortalGatewayBAElectricalPanel BoxHousekeeping10 Staff150 ftBuilding 1Lecture 1Lecture 2250 ft12
If you don’t already have a site plan indicating building dimensions,distances between buildings, parking segments, andother gated access points, contact your facilities maintenanceor project engineer. If none are available, you will need to visitthe site, take measurements and draw up a plan of your own.Device IdentificationEach device in the system will have its own unique identity. Itwill be important for you to document that identity, along withcapacities and locations planned for the device. At a minimum,you must record the Media Access Control address (MAC address)for each device. This 12-digit number is assigned by themanufacturer of a network device so that it can be recognizedas a unique member of a network. When you move on toconfigure the Host computer, these numbers will identify eachController and Portal Gateway recognized by the system. It willalso be important to give each device a common name such as‘Parking Garage’ or ‘Admin Building.’ We recommend creatinga list that includes the MAC address, device name, location,capacity, and type of antenna so that installers on the site willhave a reference for installing the correct device in a location.It will also be helpful to temporarily identify each device withsome kind of removable label.Positioning Portal GatewaysTo optimize system performance, it is important to positionPortal Gateways to receive maximum signal strength from thereaders. You can ensure maximum signal strength using theWi-Q Technology Site Survey Tool and the Wi-Spy SpectrumAnalyzer by MetaGeek.13
HardwareconfigurationParameterConfig 1 Config 2* Config 3* Config 4*CPU Speed1 cores @3GHz2 cores @3GHz4 cores @3GHz8 cores @ 3GHzx 2 machines(SQL server &communicationserver)RAM 1 GB 4 GB 4 GB 8 GBHard Disk 40 GB 40 GB 40 GB 100 GBOSWindows XP,Windows 7Professional,or Windows7 UltimateWindows7 Ultimate64 bitServer2003 32bit, Server2008 32bit, orServer2008 64bitServer 2008 x64SQL VersionPortalGateways2005 Expressor newer2008Standard2008Standard50 100 250 1000<strong>Devices</strong> 300 1000 3000 10000Users 1000 5000 10000 50000Segments 1 1 1 1Ethernet 1000 Base T 1000Base T1000Base T2008 Standard1000 Base T* — requires tuning of system parameters during installation by<strong>Stanley</strong> <strong>Security</strong> Solutions Technical Support15
It will be helpful to create a table listing what you know abouteach user. Starting with a list of names, think about building atable that defines basic information about each user, includingtheir User Type, User Group, Shift, and so on. Following is avery simple example:Last First User Type Bldg. User Group Timezone ShuntAlverez Alicia Manager A Admin Default DefaultBennet Fred General A Lecture Default 30 sec.Ford Aldo General B Service Service 1 30 sec.What User Groups will help you manage security? Do you haveshift workers who are allowed on site only during certain daysor hours? Will there be areas off limits to certain groups? Dosome users need extra time to pass through a door, such as toaccommodate a food cart or wheel chair? Start thinking aboutthese elements and begin organizing the data as soon as possibleso you’ll be ready when your equipment and software areready. It is a good idea to use a software application such asMicrosoft ® Excel ® for this purpose. That way, you can sort thedata to help you plan your segment. Detailed information aboutyour options when adding users to the system are presented inthe User <strong>Guide</strong>.17
Importing DataNote To upgrade or import a Wi-Q 2.0 database to Wi-Q 3.0AMS, see your <strong>Stanley</strong> Representative to maintain theintegrity of your data. Before upgrading a Wi-Q 2.0 to a3.0 system, make sure that each Portal Gateway has aunique IP address.If you have an existing database that already containsmuch of the information you need, you can likely modifya version and import it into Wi-Q 3.0 AMS or Omnilock<strong>WAMS</strong> using the program’s System Administratorfeature. If you have a large organization, this will saveyou time and cut down on data entry error. Completeinformation about importing data to Wi-Q AMS andOmnilock <strong>WAMS</strong> is presented in the User <strong>Guide</strong>.Task 4: Install SoftwareOnce you have prepared your computer, you are ready to installsystem software at the Host computer. This may be performedconcurrently with installation operations at the segment siteComplete instructions for installing the software are presentedin the User <strong>Guide</strong>.Task 5: Creating Your Segment TreeWhat will your site look like within Wi-Q AMS or Omnilock<strong>WAMS</strong>? Which reader groups will be associated with whichPortal Gateways? Once the equipment is installed and thesoftware is installed, you will create a visual representation ofyour site within the software. This will be your Segment Tree. Itis important to give this some thought before jumping in. You’llfind the Segment Tree in the software’s Configuration module.18
Figure 3Segment TreeElements are listed in a hierarchy of folders and sub-folders.Once you have created the hierarchy, you will drag the devicesinto the appropriate folders. You can organize your SegmentTree by Portals and Controllers, or by building locations, or byany other method you prefer.You may have noticed that the Portal name is there, but isn’tvery descriptive. It is a good idea to think about the people whowill use the system to best determine how to represent it in thesoftware. For example, it will easier for an operator to recognizea Portal in the system if it’s identified as “AdministrationBuilding” instead of repeating its MAC address. This becomeseven more apparent when viewing Portals in the TransactionsMonitor where you don’t have the Segment Tree to give youclues. This should get you thinking about how you will organizeyour Segment Tree and name your system devices to best serveyour organization.19
Detailed instructions for planning and creating a segment treeare presented in the User <strong>Guide</strong>.Task 6: Setup Credential SettingsKeypad credentials, magnetic card settings, and PIN lengthsare all set in this task. If your card access system will have orcurrently has cards encoded with keypad credentials, expirationdate, facility code, issue number, or user ID settings, you canset up matching card credential settings in Wi-Q AMS or Omnilock<strong>WAMS</strong>. Detailed steps are presented in the User <strong>Guide</strong>.Task 7: Configure Portal GatewaysYou can configure Portal Gateways directly from the AMS and<strong>WAMS</strong> software. The software establishes communicationwith your hardware devices using a built-in wireless detector.A network administrator may need to help assign IP addressesto factory default Portal Gateways.More information about configuring Portal Gateways can befound in the User <strong>Guide</strong>.Task 8: Install Portal GatewaysOnce you have determined the optimum Portal Gatewayplacement and verified signal strength using the Site SurveyTool, you are ready to permanently install the devices. Themost common installation site is inside an existing protectedarea such as a locked room or other secure enclosure, or aboveceiling level.Portal Gateways must be located where they can receive 12VDC power from a transformer plugged into a dedicated power20
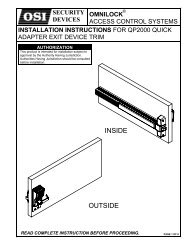
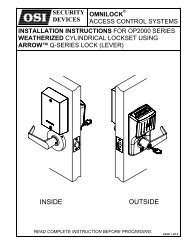
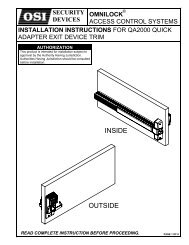
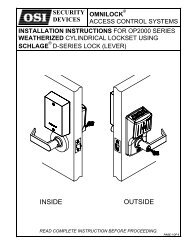
source using one of the following devices:• Power Over Ethernet Power Supply/Inserter POE InjectorP/N WQD-12927-001• Power Over Ethernet Active Splitter with Isolation POESplitter P/N WQD-12928-001If this is not possible, ensure Portal Gateways are plugged intoa 24/7 power circuit that cannot be turned off at a switch. Inaddition, they must also have access to an Ethernet connection.Complete instructions for permanent Portal Gateway installationare given in the User <strong>Guide</strong>.Task 9: Install Door HardwareWi-Q AMS and Omnilock <strong>WAMS</strong> software is designed to operatewith <strong>Stanley</strong> Wi-Q Technology BEST ® and Omnilock mortiselocks, cylindrical locks, exit hardware trim, and Wireless AccessControllers (WACs). Complete installation instructions areincluded with your hardware package, and as Appendices in theWi-Q 3.0 AMS Users <strong>Guide</strong>. You can save time and frustrationby ensuring you have all the tools and equipment listed in theInstallation <strong>Guide</strong>s before traveling to the site.Task 10: Sign On and Configure ControllersSign On ControllersNote You must have installed the software before you can signon Controllers.If your facility (segment) uses Controllers with keypads,you must physically enter a Sign On Key number at each21
Controller. This will establish the connection between theControllers and the Portals, and ultimately to a segmentin the software. If you use card readers, you can create asign-on card to use at each reader. Either way, you mustsign on each Controller in the system to register themin the database and ultimately establish communicationwith Wi-Q AMS or Omnilock <strong>WAMS</strong>.To do this, you will need to obtain the Sign On Key fromthe Configurator module, Figure 4.Figure 4Configurator Sign On KeyComplete instructions for signing on Controllers are presentedin the User <strong>Guide</strong>.Configure ControllersOnce Controllers are signed on, you can proceed to configurethem. If you have already configured User Groups and Users,22
you can assign them to the Controllers now.Task 11: Configure SoftwareOnce you have created a Segment and all network devices havebeen assigned to their appropriate folders in the Segment Tree,you are ready to begin configuring the system.The Configurator application can be customized so that not alltabs are visible. The following sections describe the six toplevelConfigurator tabs.Segment TabThe Segment tab was shown in Figure 4. Here you will configureglobal settings such as User Groups, Credentials, andglobal time (daylight savings) settings. Will you need to createsome custom user fields to describe your credential holders,such as address or party to notify in an emergency? What typeof credentials will be used in the system? Will you use keypadControllers or card readers? Will you require PIN numbers forsome operations? These are questions you need to resolve asyou work your way through Segment Configuration.Portals TabOnce Portal Gateways are added or imported and then assignedto a workstation, they will be listed in the right pane. You canbuild a Segment Tree and then organize your Portal Gateways,usually by building, floor or area, so that you can identify themin your facility.The software identifies the status of each Portal Gateway andController with one of four icons:23
Icon Name DescriptionQuestionMarkDevice is loading.Green CircleDevice is online.Red XDevice is offline.Blue DownArrowPortal Gateway or Controller is notassigned to a workstation or theworkstation is not running.Readers TabOnce Controllers are signed on they will automatically be listedunder and can be dragged and droppedto the Segment Tree folder structure that you’ve created.Users TabHere you will add users to the system, configure any specialcontrols or types for the user, or assign them to a particularUser Group by drilling down to various dialog boxes. Is the usera temporary employee? You may want to consider providinga Deactivation date for their credential. Do they use a wheelchair?You will want to add some extra unlock time to theirReader Control configuration. This is where a detailed UserInformation sheet will come in handy to save you time whenconfiguring Users in the system, Figure 5.24
Figure 5Users TabTimezone TabYou can display Timezones by day, week or month, view anyTimezone user groups that have been created, and manageTimezones using the Timezone Tab, Figure 6 By default, allreaders in the system are included in the Master Timezone.For the greatest majority of facilities, the default access levelprovided in the Master Timezone gives you all the options youneed to manage your segment. Within the Master Timezone,you can create any number of Timezone intervals and TimezoneGroups to further define access levels.25
Figure 6Displaying the Timezones tabIt is important to review the detailed information about Timezonesbefore considering this action. See the User <strong>Guide</strong>.Firmware TabNote Depending on the User application level, this tab may notbe visible.Use this tab to upgrade firmware for Portal Gateways andControllers. You may be notified to do this when an upgradebecomes available to fix a bug or add functionality to theControllers and Portal Gateways.26
Configuration SummaryOther than first creating at least one Segment, there is nospecific configuration order. If you have some details available,but not others, go ahead and start with what you have.For example, you can wait to add users to the system untilthe Controllers have been signed on (Task 10). You can assignControllers to users when you are ready to add them. If youadd the users first, they will be available to assign to Controllerswhen the Controllers are signed on. Likewise, if you findthat you need to create Timezone Groups after you have addedusers, you can go ahead and create the Timezone Groups andassign users to them.It’s a good idea to review the detailed instructions and give thisprocess some thought before jumping in.Wi-Q AMS and Omnilock <strong>WAMS</strong> are set up in eleven basictasks. Completing these tasks will ensure you get your systemup and running as quickly and efficiently as possible. Sometasks are performed at the Host computer and some at the segmentsite. It is appropriate to perform some tasks concurrently.For example, you may have someone prepare your computerand install the software concurrently with site plan developmentand hardware installation. However, you must have thesoftware installed and Portal Gateways online before you cansign on Controllers.27
System Setup ChecklistFor detailed instructions about how to perform all steps in eachtask, see the User <strong>Guide</strong> as referenced.Note System setup does not proceed in a linear manner. Thefollowing references prompt you to skip around withinthe User <strong>Guide</strong>. Task 1: Develop a Site Plan, page 17. Task 2: Position Portal Gateways, page 21. Task 3: Prepare your Computer, page 34. Task 4: Gather and Organize Segment Data, page 44. Task 5: Install Software, page 46. Task 6: Create your Segment, page 54. Task 7: Add and Configure Portal Gateways, page 58. Task 8: Install Portal Gateways, page 24. Task 9: Install Door Hardware, page 28. Task 10: Sign On and Configure Controllers, page 75. Task 11: Configure AMS/<strong>WAMS</strong> Software, page 87.