USB Interface II and Logger32 setup - microHAM
USB Interface II and Logger32 setup - microHAM
USB Interface II and Logger32 setup - microHAM
- No tags were found...

You also want an ePaper? Increase the reach of your titles
YUMPU automatically turns print PDFs into web optimized ePapers that Google loves.
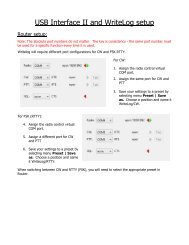
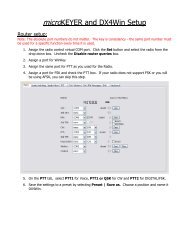
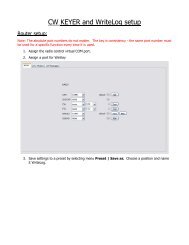
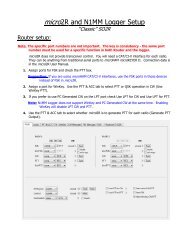
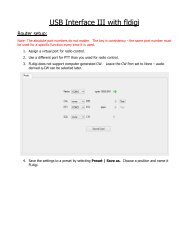
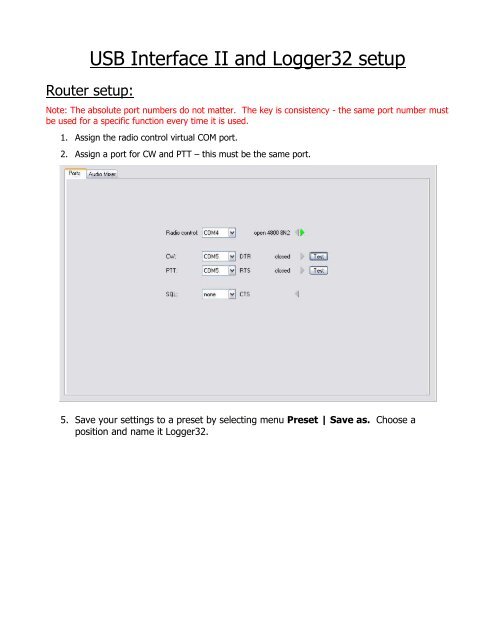
<strong>USB</strong> <strong>Interface</strong> <strong>II</strong> <strong>and</strong> <strong>Logger32</strong> <strong>setup</strong>Router <strong>setup</strong>:Note: The absolute port numbers do not matter. The key is consistency - the same port number mustbe used for a specific function every time it is used.1. Assign the radio control virtual COM port.2. Assign a port for CW <strong>and</strong> PTT – this must be the same port.5. Save your settings to a preset by selecting menu Preset | Save as. Choose aposition <strong>and</strong> name it <strong>Logger32</strong>.
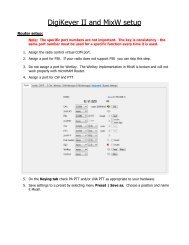
<strong>Logger32</strong> <strong>setup</strong>:1. Click Setup | Radio | Radio 1configuration ...2. Select the virtual COM port you used forcontrol in Router's Ports tab3. Select the Baud Rate, Parity, Databits, Parity,<strong>and</strong> Stop Bits settings required by your radio.4. Uncheck “Set DTR high” <strong>and</strong> “set RTS high”5. Click the CW icon to open the CWmachine6. Select Config | Software7. Select Config | Keyer Setup8. Select the Serial Port you set forCW in Router's Ports tab9. Select “Use dedicated serial portfor CW”10. Select “PTT on selected port”unless you prefer QSK CW.11. Click “Apply”12. Click on the Speaker icon to open theSoundcard Data Window13. Click Settings | Radio PTT options14. Select the Serial Port you chose for CW<strong>and</strong> PTT on Router's Ports tab15. Select RTS Keying only16. Select PTT by Serial Port17. Check “MMTTY FSK on <strong>USB</strong> Port”!18. Click “OK” to save
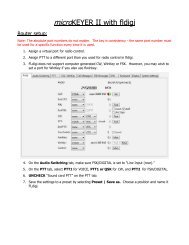
19. Click on Mode | MMTTY Engine | St<strong>and</strong>ard RTTY (170Hz)20. Click on the Wrench icon to Open MMTTY Setup21. Choose the Misc Tab.22. Select Source Mono23. Set Clock 1102524. Select the sound card DeviceIDTo obtain the Device ID, clickGet ID button on Router'sAudio Mixer tab.25. Select COM-TxD (FSK) for theTX Port.26. Select the EXTFSK window (it may be minimized to thetaskbar)27. Set the serial port that you selected for CW <strong>and</strong> PTTon Router's Ports tab28. Set FSK output to DTR29. Set PTT output to RTS.