ES1AE - Manual - Mini Ethernet to RS-232 ... - B&B Electronics
ES1AE - Manual - Mini Ethernet to RS-232 ... - B&B Electronics
ES1AE - Manual - Mini Ethernet to RS-232 ... - B&B Electronics
- No tags were found...
Create successful ePaper yourself
Turn your PDF publications into a flip-book with our unique Google optimized e-Paper software.
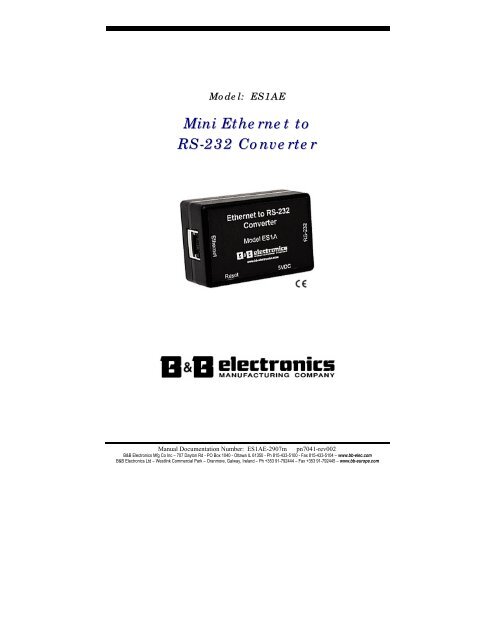
Model: <strong>ES1AE</strong><strong>Mini</strong> <strong>Ethernet</strong> <strong>to</strong><strong>RS</strong>-<strong>232</strong> Converter<strong>Manual</strong> Documentation Number: <strong>ES1AE</strong>-2907m pn7041-rev002B&B <strong>Electronics</strong> Mfg Co Inc – 707 Day<strong>to</strong>n Rd - PO Box 1040 - Ottawa IL 61350 - Ph 815-433-5100 - Fax 815-433-5104 – www.bb-elec.comB&B <strong>Electronics</strong> Ltd – Westlink Commercial Park – Oranmore, Galway, Ireland – Ph +353 91-792444 – Fax +353 91-792445 – www.bb-europe.com
<strong>Manual</strong> Documentation Number: <strong>ES1AE</strong>-2907m pn7041-rev002B&B <strong>Electronics</strong> Mfg Co Inc – 707 Day<strong>to</strong>n Rd - PO Box 1040 - Ottawa IL 61350 - Ph 815-433-5100 - Fax 815-433-5104 – www.bb-elec.comB&B <strong>Electronics</strong> Ltd – Westlink Commercial Park – Oranmore, Galway, Ireland – Ph +353 91-792444 – Fax +353 91-792445 – www.bb-europe.com
International HeadquartersB&B <strong>Electronics</strong> Mfg. Co. Inc.707 Day<strong>to</strong>n RoadOttawa, IL 61350 USAPhone (815) 433-5100 -- General Fax (815) 433-5105Website: www.bb-elec.comSales e-mail: orders@bb-elec.com -- Fax (815) 433-5109Technical Support e-mail: support@bb.elec.com -- Fax (815) 433-5104European HeadquartersB&B <strong>Electronics</strong> Ltd.Westlink Commercial ParkOranmore, Co. Galway, IrelandPhone +353 91-792444 -- Fax +353 91-792445Website: www.bb-europe.comSales e-mail: sales@bb-europe.comTechnical Support e-mail: support@bb-europe.com© B&B <strong>Electronics</strong> – November 2005<strong>Manual</strong> Documentation Number: <strong>ES1AE</strong>-2907m pn7041-rev002B&B <strong>Electronics</strong> Mfg Co Inc – 707 Day<strong>to</strong>n Rd - PO Box 1040 - Ottawa IL 61350 - Ph 815-433-5100 - Fax 815-433-5104 – www.bb-elec.comB&B <strong>Electronics</strong> Ltd – Westlink Commercial Park – Oranmore, Galway, Ireland – Ph +353 91-792444 – Fax +353 91-792445 – www.bb-europe.com
© 2005 B&B <strong>Electronics</strong>. No part of this publication may be reproduced or transmitted in any form or by any means, electronic ormechanical, including pho<strong>to</strong>graphy, recording, or any information s<strong>to</strong>rage and retrieval system without written consent. Informationin this manual is subject <strong>to</strong> change without notice, and does not represent a commitment on the part of B&B <strong>Electronics</strong>.B&B <strong>Electronics</strong> shall not be liable for incidental or consequential damages resulting from the furnishing, performance, or use ofthis manual.All brand names used in this manual are the registered trademarks of their respective owners. The use of trademarks or otherdesignations in this publication is for reference purposes only and does not constitute an endorsement by the trademark holder.<strong>Manual</strong> Documentation Number: <strong>ES1AE</strong>-2907m pn7041-rev002B&B <strong>Electronics</strong> Mfg Co Inc – 707 Day<strong>to</strong>n Rd - PO Box 1040 - Ottawa IL 61350 - Ph 815-433-5100 - Fax 815-433-5104 – www.bb-elec.comB&B <strong>Electronics</strong> Ltd – Westlink Commercial Park – Oranmore, Galway, Ireland – Ph +353 91-792444 – Fax +353 91-792445 – www.bb-europe.com
Table of ContentsCHAPTER 1: INTRODUCTION..............................................................................1FEATURES...................................................................................................................1COMMUNICATION MODES ..........................................................................................2Direct IP ............................................................................................................... 2Virtual COM Port ................................................................................................. 2Paired Mode ......................................................................................................... 2Other Communications Modes.............................................................................. 3CHAPTER 2: HARDWARE OVERVIEW ..............................................................5PACKAGE CHECKLIST .................................................................................................5INDICATO<strong>RS</strong>, SWITCHES AND CONNECTO<strong>RS</strong>................................................................6Link Integrity LED (Yellow).................................................................................. 6Network Activity LED ........................................................................................... 6Reset Switch .......................................................................................................... 6<strong>Ethernet</strong> Port Connec<strong>to</strong>r....................................................................................... 6Serial Port Connec<strong>to</strong>r........................................................................................... 7Power Connec<strong>to</strong>r .................................................................................................. 7CONNECTING THE HARDWARE ...................................................................................7Configuration Connections................................................................................... 7CHAPTER 3: GETTING STARTED .......................................................................91. Check the contents of your ES1A package. It should contain….................... 92. Set up the Hardware ..................................................................................... 93. Power it Up................................................................................................... 94. Get the IP Address ........................................................................................ 95. Login ............................................................................................................. 96. Configure the ES1A..................................................................................... 107. Set up VCOM (if using the RealPort profile) .............................................. 108. Communicate .............................................................................................. 10CHAPTER 4: CONFIGURING THE IP ADDRESS.............................................11USING THE DISCOVERY SOFTWARE ..........................................................................11CHAPTER 5: USING THE WEB CONFIGURATION AND MANAGEMENTINTERFACE..............................................................................................................13<strong>Manual</strong> Documentation Number: <strong>ES1AE</strong>-2907m pn7041-rev002 iB&B <strong>Electronics</strong> Mfg Co Inc – 707 Day<strong>to</strong>n Rd - PO Box 1040 - Ottawa IL 61350 - Ph 815-433-5100 - Fax 815-433-5104 – www.bb-elec.comB&B <strong>Electronics</strong> Ltd – Westlink Commercial Park – Oranmore, Galway, Ireland – Ph +353 91-792444 – Fax +353 91-792445 – www.bb-europe.com
LOGGING IN..............................................................................................................13LOGGING OUT ..........................................................................................................13USING TUTORIAL AND HELP.....................................................................................14CONFIGURING NETWORK SETTINGS .........................................................................14IP Settings........................................................................................................... 15Network Services Settings ................................................................................... 15Advanced Network Settings................................................................................. 15CONFIGURING THE SERIAL PORT ..............................................................................16Port Profile Settings............................................................................................ 16Basic Serial Settings ........................................................................................... 21Advanced Serial Settings..................................................................................... 21CONFIGURING ALARMS AND NOTIFICATION.............................................................22Alarm Notification Settings................................................................................. 22Alarm Conditions................................................................................................ 22Alarm Destinations ............................................................................................. 23CHAPTER 6: MANAGING THE ES1A.................................................................25SYSTEM SETTINGS ....................................................................................................25Device Identity Settings....................................................................................... 25Simple Network Management Pro<strong>to</strong>col (SNMP) Settings................................... 25USING REMOTE MANAGEMENT ................................................................................25MANAGING USE<strong>RS</strong> AND PERMISSIONS ......................................................................25Changing the Root Username and Password ..................................................... 25Adding New Users............................................................................................... 26Configuring User Access and Permissions ......................................................... 26MANAGING SERIAL PORTS AND CONNECTIONS ........................................................27Serial Ports ......................................................................................................... 27Connections ........................................................................................................ 27CHAPTER 7: USING ADMINISTRATIVE FEATURES ....................................29FILE MANAGEMENT..................................................................................................29BACKUP/RESTORE ....................................................................................................29UPDATE FIRMWARE..................................................................................................29FACTORY DEFAULT SETTINGS ................................................................................29SYSTEM INFORMATION .............................................................................................30General ............................................................................................................... 30GPIO................................................................................................................... 30Serial................................................................................................................... 30Network............................................................................................................... 31REBOOT ....................................................................................................................32CHAPTER 8: USING REALPORT........................................................................33Configuring the IP Address................................................................................. 33Configuring the Serial Port for RealPort............................................................ 33ii <strong>Manual</strong> Documentation Number: <strong>ES1AE</strong>-2907m pn7041-rev002B&B <strong>Electronics</strong> Mfg Co Inc – 707 Day<strong>to</strong>n Rd - PO Box 1040 - Ottawa IL 61350 - Ph 815-433-5100 - Fax 815-433-5104 – www.bb-elec.comB&B <strong>Electronics</strong> Ltd – Westlink Commercial Park – Oranmore, Galway, Ireland – Ph +353 91-792444 – Fax +353 91-792445 – www.bb-europe.com
Adding a Virtual COM Port using RealPort....................................................... 34Removing a Virtual COM Port using RealPort .................................................. 34Updating RealPort.............................................................................................. 35APPENDIX A: DEFAULT CONFIGURATION SETTINGS ...............................37APPENDIX B: PRODUCT SPECIFICATIONS ...................................................39APPENDIX C: DIMENSIONAL DIAGRAMS......................................................41APPENDIX D: <strong>RS</strong>-<strong>232</strong> CONNECTIONS...............................................................42APPENDIX E: NETWORK CONNECTIONS ......................................................43<strong>Manual</strong> Documentation Number: <strong>ES1AE</strong>-2907m pn7041-rev002 iiiB&B <strong>Electronics</strong> Mfg Co Inc – 707 Day<strong>to</strong>n Rd - PO Box 1040 - Ottawa IL 61350 - Ph 815-433-5100 - Fax 815-433-5104 – www.bb-elec.comB&B <strong>Electronics</strong> Ltd – Westlink Commercial Park – Oranmore, Galway, Ireland – Ph +353 91-792444 – Fax +353 91-792445 – www.bb-europe.com
<strong>Manual</strong> Documentation Number: <strong>ES1AE</strong>-2907m pn7041-rev002B&B <strong>Electronics</strong> Mfg Co Inc – 707 Day<strong>to</strong>n Rd - PO Box 1040 - Ottawa IL 61350 - Ph 815-433-5100 - Fax 815-433-5104 – www.bb-elec.comB&B <strong>Electronics</strong> Ltd – Westlink Commercial Park – Oranmore, Galway, Ireland – Ph +353 91-792444 – Fax +353 91-792445 – www.bb-europe.com
IntroductionChapter 1: IntroductionES1A <strong>Mini</strong> <strong>Ethernet</strong> <strong>to</strong> <strong>RS</strong>-<strong>232</strong> Converters provide simple and costeffectivesolutions for connecting <strong>RS</strong>-<strong>232</strong> devices <strong>to</strong> <strong>Ethernet</strong> networks.ES1A converters make it easy <strong>to</strong> connect serial printers, copiers, buildingau<strong>to</strong>mation, retail, point-of-sale, warehousing and banking equipmentdirectly in<strong>to</strong> <strong>Ethernet</strong> networks.ES1A converters support virtual COM port, console management, TCPand UDP socket, serial bridge, modem emulation and cus<strong>to</strong>mconnections. Network addresses can be obtained dynamically or manually.Simple Network Management Pro<strong>to</strong>col (SNMP) is supported. Configurationis accomplished through a web-based user interface.Figure 1.ES1A <strong>Mini</strong> <strong>Ethernet</strong> <strong>to</strong> <strong>RS</strong>-<strong>232</strong> ConverterFeatures• Converts <strong>Ethernet</strong> <strong>to</strong> <strong>RS</strong>-<strong>232</strong> serial• Small, economical and configurable• Supports TD, RD, T<strong>RS</strong>, CTS, DTR, DCD, DSR and GND <strong>RS</strong>-<strong>232</strong> lines• LEDs indicate link integrity and data transfer activity• 10/100 Mbps au<strong>to</strong>-detecting operation• Web Configuration and Management user interface• Email event notification1 <strong>Manual</strong> Documentation Number: ES1A -2907m pn7041-rev002B&B <strong>Electronics</strong> Mfg Co Inc – 707 Day<strong>to</strong>n Rd - PO Box 1040 - Ottawa IL 61350 - Ph 815-433-5100 - Fax 815-433-5104 – www.bb-elec.comB&B <strong>Electronics</strong> Ltd – Westlink Commercial Park – Oranmore, Galway, Ireland – Ph +353 91-792444 – Fax +353 91-792445 – www.bb-europe.com
Other Communications ModesES1A Converters also feature the following communications profiles:IntroductionModem Emulation Mode allows you <strong>to</strong> configure the serial port <strong>to</strong> operateas if it is a modem. For legacy applications where a serial device is set up <strong>to</strong>communicate through a modem, the serial device can now be connected <strong>to</strong>the ES1A and communication occurs over the network. The ES1A emulatesmodem responses <strong>to</strong> and from the serial device.In Console Management Mode the ES1A can be configured for connection<strong>to</strong> the management port typically found on network devices such as routers,switches and servers. This allows remote management of the network device.Communication can be accomplished using telnet <strong>to</strong> a specific port in theconverter.Cus<strong>to</strong>m Mode allows you <strong>to</strong> cus<strong>to</strong>m configure the ES1A serial port and isused if your application does not fit in<strong>to</strong> any other predefined modes.3 <strong>Manual</strong> Documentation Number: ES1A -2907m pn7041-rev002B&B <strong>Electronics</strong> Mfg Co Inc – 707 Day<strong>to</strong>n Rd - PO Box 1040 - Ottawa IL 61350 - Ph 815-433-5100 - Fax 815-433-5104 – www.bb-elec.comB&B <strong>Electronics</strong> Ltd – Westlink Commercial Park – Oranmore, Galway, Ireland – Ph +353 91-792444 – Fax +353 91-792445 – www.bb-europe.com
Introduction4 <strong>Manual</strong> Documentation Number: ES1A -2907m pn7041-rev002B&B <strong>Electronics</strong> Mfg Co Inc – 707 Day<strong>to</strong>n Rd - PO Box 1040 - Ottawa IL 61350 - Ph 815-433-5100 - Fax 815-433-5104 – www.bb-elec.comB&B <strong>Electronics</strong> Ltd – Westlink Commercial Park – Oranmore, Galway, Ireland – Ph +353 91-792444 – Fax +353 91-792445 – www.bb-europe.com
Hardware OverviewChapter 2: Hardware OverviewPackage ChecklistES1A <strong>Ethernet</strong> <strong>to</strong> <strong>RS</strong>-<strong>232</strong> Converters are shipped with the following itemsincluded: The ES1A module A printed version of this user manual A printed version of the ES1A Quick Start Guide CD-ROM disc witho B&B discovery softwareo RealPort drivers for Windows 98/ME/2001/XP/NT 4.0/Vistao this user manual in PDF forma<strong>to</strong> a Quick Start guide in PDF formatFigure 2.Top View of the ES1A Converter<strong>Manual</strong> Documentation Number ES1A -2907m pn7041-rev002 5B&B <strong>Electronics</strong> Mfg Co Inc – 707 Day<strong>to</strong>n Rd - PO Box 1040 - Ottawa IL 61350 - Ph 815-433-5100 - Fax 815-433-5104 – www.bb-elec.comB&B <strong>Electronics</strong> Ltd – Westlink Commercial Park – Oranmore, Galway, Ireland – Ph +353 91-792444 – Fax +353 91-792445 – www.bb-europe.com
Hardware OverviewIndica<strong>to</strong>rs, Switches and Connec<strong>to</strong>rsLink Integrity LED (Yellow)When the yellow LED located on the <strong>Ethernet</strong> jack is illuminated it indicatesthat a connection (link integrity) has been established between the converterand a node on the network.Network Activity LEDWhen the green LED located on the <strong>Ethernet</strong> jack is flashing it indicates thatdata is being sent across the network.Figure 3.LED Indica<strong>to</strong>rs on the ES1AReset SwitchThe Reset switch is a recessed switch located on the side of the ES1A. TheReset switch provides two functions:Press and release within 10 secondsPress and hold for more than 10 secondswhile powering upResets the ES1AReloads fac<strong>to</strong>ry default values<strong>Ethernet</strong> Port Connec<strong>to</strong>rThe <strong>Ethernet</strong> Port connec<strong>to</strong>r is a standard RJ-45 receptacle that allows theserial server <strong>to</strong> be connected <strong>to</strong> an <strong>Ethernet</strong> network. On the ES1A twoindica<strong>to</strong>r LEDs are built in<strong>to</strong> the RJ-45 connec<strong>to</strong>r.6 <strong>Manual</strong> Documentation Number: ES1A -2907m pn7041-rev002B&B <strong>Electronics</strong> Mfg Co Inc – 707 Day<strong>to</strong>n Rd - PO Box 1040 - Ottawa IL 61350 - Ph 815-433-5100 - Fax 815-433-5104 – www.bb-elec.comB&B <strong>Electronics</strong> Ltd – Westlink Commercial Park – Oranmore, Galway, Ireland – Ph +353 91-792444 – Fax +353 91-792445 – www.bb-europe.com
Hardware OverviewSerial Port Connec<strong>to</strong>rThe Serial Port Connec<strong>to</strong>r is a DB-9 male connec<strong>to</strong>r (configured as a DTE)supporting <strong>RS</strong>-<strong>232</strong> serial communications including TD, RD, T<strong>RS</strong>, CTS, DTR,DCD, DSR and GND signal lines. Use a standard serial cable if connecting <strong>to</strong> aDCE; use a null modem (crossover) cable if connecting <strong>to</strong> a DTE.Refer <strong>to</strong> Appendices D, and E for connection pin-outs.Power Connec<strong>to</strong>rPower is supplied <strong>to</strong> the ES1A by a 5VDC 1200ma power supply. Thepower connec<strong>to</strong>r is a 5.5mm by 2.1mm barrel jack. The tip is positive.Connecting the HardwareTypically, the ES1A is connected <strong>to</strong> a network via a hub, switch or routerusing standard CAT-5 cable. Configuration is accomplished over thenetwork, or via a direct connection (see below) using the Web Configurationand Management InterfaceConfiguration ConnectionsYour ES1A converter typically is configured over the network connectionusing standard browser software. It also could be connected directly <strong>to</strong> a PCnetwork adapter. To do so an <strong>Ethernet</strong> crossover cable is required.Figure 4.Direct Configuration Connection<strong>Manual</strong> Documentation Number ES1A -2907m pn7041-rev002 7B&B <strong>Electronics</strong> Mfg Co Inc – 707 Day<strong>to</strong>n Rd - PO Box 1040 - Ottawa IL 61350 - Ph 815-433-5100 - Fax 815-433-5104 – www.bb-elec.comB&B <strong>Electronics</strong> Ltd – Westlink Commercial Park – Oranmore, Galway, Ireland – Ph +353 91-792444 – Fax +353 91-792445 – www.bb-europe.com
Hardware Overview8 <strong>Manual</strong> Documentation Number: ES1A -2907m pn7041-rev002B&B <strong>Electronics</strong> Mfg Co Inc – 707 Day<strong>to</strong>n Rd - PO Box 1040 - Ottawa IL 61350 - Ph 815-433-5100 - Fax 815-433-5104 – www.bb-elec.comB&B <strong>Electronics</strong> Ltd – Westlink Commercial Park – Oranmore, Galway, Ireland – Ph +353 91-792444 – Fax +353 91-792445 – www.bb-europe.com
Getting StartedChapter 3: Getting Started1. Check the contents of your ES1A package. It should contain… The ES1A module A printed version of this user manual A printed version of the ES1A Quick Start Guide CD-ROM disc with discovery software, RealPort software, this manual, QuickStart guide2. Set up the Hardware Connect your PC <strong>to</strong> the network Connect the ES1A serial port <strong>to</strong> your serial device (Use a serial cable if it isDCE, null modem cable if it is DTE.) Connect the ES1A <strong>Ethernet</strong> connec<strong>to</strong>r <strong>to</strong> a network switch or hub (CAT-5cable)3. Power it Up Power the ES1A by connecting the 5VDC power supply <strong>to</strong> the barrel jack When a connection is established with the network the yellow LED willilluminate The ES1A will au<strong>to</strong>matically try <strong>to</strong> obtain an IP address, or generate one itself4. Get the IP Address Use the discovery software on your CD (finder.exe) <strong>to</strong> get the IP address foryour ES1A5. Login In a web browser on your PC, type in the IP address and access the WebConfiguration and Management Interface Login using the username ‘root’ and password ‘dbps’<strong>Manual</strong> Documentation Number ES1A -2907m pn7041-rev002 9B&B <strong>Electronics</strong> Mfg Co Inc – 707 Day<strong>to</strong>n Rd - PO Box 1040 - Ottawa IL 61350 - Ph 815-433-5100 - Fax 815-433-5104 – www.bb-elec.comB&B <strong>Electronics</strong> Ltd – Westlink Commercial Park – Oranmore, Galway, Ireland – Ph +353 91-792444 – Fax +353 91-792445 – www.bb-europe.com
Getting Started6. Configure the ES1A In the Configuration, Serial Ports page select the Port Profile you require foruse with your application (E.g. RealPort for virtual COM port, TCP Server,UDP server, Serial Bridge, etc) Configure the serial port settings for the selected Port Profile (E.g. In TCPSockets select client or server, TCP port numbers, etc.) Also configure baudrate, data bits, etc in Basic Serial Settings. Configure any required alarms and notification If RealPort profile was selected (virtual COM port) do the next step (Set upVCOM)7. Set up VCOM (if using the RealPort profile) Start the RealPort software wizard (located on the included CD) Select Add a New Device Select your ES1A from the list Select an unused COM port number Follow the wizard <strong>to</strong> set up a virtual COM port8. Communicate Configure and then start your application10 <strong>Manual</strong> Documentation Number: ES1A -2907m pn7041-rev002B&B <strong>Electronics</strong> Mfg Co Inc – 707 Day<strong>to</strong>n Rd - PO Box 1040 - Ottawa IL 61350 - Ph 815-433-5100 - Fax 815-433-5104 – www.bb-elec.comB&B <strong>Electronics</strong> Ltd – Westlink Commercial Park – Oranmore, Galway, Ireland – Ph +353 91-792444 – Fax +353 91-792445 – www.bb-europe.com
Configuring the IP AddressChapter 4: Configuring the IP AddressBefore you can begin the configuration of your ES1A you must know its IPaddress <strong>to</strong> access it with a web browser. Once you have access <strong>to</strong> theConfiguration and Management Interface via a web browser you can reset theIP address using static IP addressing, if necessary.Your ES1A comes from the fac<strong>to</strong>ry configured <strong>to</strong> obtain an IP addressdynamically, or failing that, <strong>to</strong> generate its own IP address using the APIPApro<strong>to</strong>col. You can determine the current IP address using the discoverysoftware included on the CD with your ES1AUsing the Discovery Software1. Connect the ES1A <strong>to</strong> your network (with PoE supply installed andoperating). When it starts it will obtain an IP address.2. To determine the initial IP address of your ES1A, start the finder.exeutility included on the included CD.Figure 5.Discovery Utility Dialog3. The finder.exe utility scans the network for devices and then listseach device’s IP Address, MAC Address, Name and Product ID.Identify your ES1A by its MAC address (printed on a label on theES1A).<strong>Manual</strong> Documentation Number ES1A -2907m pn7041-rev002 11B&B <strong>Electronics</strong> Mfg Co Inc – 707 Day<strong>to</strong>n Rd - PO Box 1040 - Ottawa IL 61350 - Ph 815-433-5100 - Fax 815-433-5104 – www.bb-elec.comB&B <strong>Electronics</strong> Ltd – Westlink Commercial Park – Oranmore, Galway, Ireland – Ph +353 91-792444 – Fax +353 91-792445 – www.bb-europe.com
Configuring the ES1AIf you need <strong>to</strong> change the IP address of the ES1A, you can accomplish thisusing the discovery software, or you can open the Web Configuration andManagement Interface and do it there. (See Configuring Network Settingslater in the next chapter.)1. To change the IP address of the ES1A from the discovery software,click Configure IP Settings.2. In the dialog that appears, select <strong>Manual</strong>ly configure networksettings.3. Type the new IP Address, Subnet Mask, Default Gateway andsystem password (initially dbps) in the appropriate boxes, then clickApply.4. Click Reboot Device. This may take a minute or more <strong>to</strong> complete.5. Click Refresh List <strong>to</strong> confirm the new IP address has beenaccepted.12 <strong>Manual</strong> Documentation Number: ES1A -2907m pn7041-rev002B&B <strong>Electronics</strong> Mfg Co Inc – 707 Day<strong>to</strong>n Rd - PO Box 1040 - Ottawa IL 61350 - Ph 815-433-5100 - Fax 815-433-5104 – www.bb-elec.comB&B <strong>Electronics</strong> Ltd – Westlink Commercial Park – Oranmore, Galway, Ireland – Ph +353 91-792444 – Fax +353 91-792445 – www.bb-europe.com
Using the Web Configuration and Management InterfaceChapter 5: Using the Web Configurationand Management InterfaceLogging InThe ES1A <strong>Ethernet</strong> <strong>to</strong> <strong>RS</strong>-<strong>232</strong> Converter can be configured using theConfiguration and Management Interface via a standard web browsersuch as Internet Explorer or Firefox.1. Before you can begin configuring your ES1A Converter, you mustlogin <strong>to</strong> the Configuration and Management Interface. To login,open your browser, type the IP address of your ES1A converter in<strong>to</strong>the address bar and press Enter. The Login page will appear.2. Enter your Username and Password, then click Login.The first time you login, type the default (root) username andpassword.ooUsername: rootPassword: dbpsThe default username and password are preconfigured <strong>to</strong> give you fulladministra<strong>to</strong>r permissions, allowing you <strong>to</strong> add and configure permissions foradditional users. For security purposes, you may want <strong>to</strong> change the usernameand password after you have access the interface for the first time. To changeusernames and passwords, and <strong>to</strong> add and configure new users, seeManaging Users and Permissions in Chapter 6.When the username and password are accepted the Configuration andManagement Interface homepage will appear.Logging OutTo log out of the Web Configuration and Management Interface, clickLogout on the menu bar. To finish logging out of the web server, and preventaccess by other users, you also must close the browser.<strong>Manual</strong> Documentation Number ES1A -2907m pn7041-rev002 13B&B <strong>Electronics</strong> Mfg Co Inc – 707 Day<strong>to</strong>n Rd - PO Box 1040 - Ottawa IL 61350 - Ph 815-433-5100 - Fax 815-433-5104 – www.bb-elec.comB&B <strong>Electronics</strong> Ltd – Westlink Commercial Park – Oranmore, Galway, Ireland – Ph +353 91-792444 – Fax +353 91-792445 – www.bb-europe.com
Using the Web Configuration and Management InterfaceUsing Tu<strong>to</strong>rial and HelpYou can access the ES1A Tu<strong>to</strong>rial by clicking Tu<strong>to</strong>rial on the Configurationand Management homepage. Clicking Help on any page of the Configurationand Management Interface opens <strong>to</strong>pics specific <strong>to</strong> that page.After logging in, if there is no activity for a period of time your session may timeout. Clicking on any link will return you <strong>to</strong> the Web Login page where you willhave <strong>to</strong> log in again <strong>to</strong> continue your session.Figure 6.The ES1A Configuration and Management HomepageConfiguring Network SettingsThe Network Configuration page contains three sections with hyperlinkedmenu bars. Click IP Settings, Network Services Settings or AdvancedNetwork Settings <strong>to</strong> access these areas.14 <strong>Manual</strong> Documentation Number: ES1A -2907m pn7041-rev002B&B <strong>Electronics</strong> Mfg Co Inc – 707 Day<strong>to</strong>n Rd - PO Box 1040 - Ottawa IL 61350 - Ph 815-433-5100 - Fax 815-433-5104 – www.bb-elec.comB&B <strong>Electronics</strong> Ltd – Westlink Commercial Park – Oranmore, Galway, Ireland – Ph +353 91-792444 – Fax +353 91-792445 – www.bb-europe.com
Using the Web Configuration and Management InterfaceIP SettingsFigure 7.Network, IP Settings PageThe IP Settings section allows you <strong>to</strong> select between dynamic or static IPaddressing. The ES1A’s default setting is Obtain an IP addressau<strong>to</strong>matically using DHCP, or dynamic IP addressing.When the ES1A is first connected it will try <strong>to</strong> obtain an IP address au<strong>to</strong>matically. If it fails, itwill assign an IP address <strong>to</strong> itself using the Au<strong>to</strong>matic Private IP Addressing (APIPA)pro<strong>to</strong>col. You can re-configure the ES1A for static IP address by selecting Use the followingIP address and assign the IP address yourself.If Use the following IP address: is selected, you are choosing static IPaddressing. When this option is selected the IP Address, Subnet Mask andDefault Gateway text boxes become available. You must determine theappropriate parameters and enter them yourself. (If you do not know what <strong>to</strong>enter ask your network administra<strong>to</strong>r for assistance.)To implement any changes in this section, click Apply. A page will appearasking you <strong>to</strong> Reboot the ES1A so that the changes can take effect.Network Services SettingsThe Network Services Settings section allows you <strong>to</strong> enable or disableseveral common network services and configure their associated ports.Typically you will not have <strong>to</strong> change these settings.Advanced Network SettingsThe Advanced Network Settings section allows you <strong>to</strong> fine-tune thenetwork connection. Typically these setting will not need <strong>to</strong> be changed.<strong>Manual</strong> Documentation Number ES1A -2907m pn7041-rev002 15B&B <strong>Electronics</strong> Mfg Co Inc – 707 Day<strong>to</strong>n Rd - PO Box 1040 - Ottawa IL 61350 - Ph 815-433-5100 - Fax 815-433-5104 – www.bb-elec.comB&B <strong>Electronics</strong> Ltd – Westlink Commercial Park – Oranmore, Galway, Ireland – Ph +353 91-792444 – Fax +353 91-792445 – www.bb-europe.com
Using the Web Configuration and Management InterfaceConsult the web-based tu<strong>to</strong>rial and/or your network administra<strong>to</strong>r for moreinformation on Network Services and Advanced Network settings.Configuring the Serial PortThe Serial Port Configuration page displays information about the serialport on your ES1A, including its description, its profile (operating mode) andserial settings (baud rate, data bits, parity, s<strong>to</strong>p bits). You will have <strong>to</strong>configure these parameters <strong>to</strong> set up your system for the type of operationrequired and <strong>to</strong> match the parameters of the serial device <strong>to</strong> which the ES1Ais connected.To open the Serial Port Configuration page, under the Configuration menuclick Serial Ports. When you first access this page a list of ports, theirdescription, profile and serial configuration appears. (If the ES1A has not yetbeen configured for the first time the Profile column may indicate.)To access detailed settings for the ES1A serial port, click Port 1. The SerialPort Configuration page that appears includes three sections withhyperlinked menu bars.• Port Profile Settings• Basic Serial Settings• Advanced Serial SettingsPort Profile SettingsThe Port Profile Settings section displays the current serial port mode ofoperation, a description of that profile and a hyperlink <strong>to</strong> Change Profile…Click the Change Profile… menu bar <strong>to</strong> open the Select Port Profile page.Any of eight possible serial port profiles can be selected.16 <strong>Manual</strong> Documentation Number: ES1A -2907m pn7041-rev002B&B <strong>Electronics</strong> Mfg Co Inc – 707 Day<strong>to</strong>n Rd - PO Box 1040 - Ottawa IL 61350 - Ph 815-433-5100 - Fax 815-433-5104 – www.bb-elec.comB&B <strong>Electronics</strong> Ltd – Westlink Commercial Park – Oranmore, Galway, Ireland – Ph +353 91-792444 – Fax +353 91-792445 – www.bb-europe.com
Using the Web Configuration and Management InterfaceFigure 8.Select Port Profile PageRealPortSelect RealPort <strong>to</strong> implement the use of virtual COM ports. This allows you<strong>to</strong> map a COM port on a PC <strong>to</strong> the serial port on your ES1A. Using RealPortsoftware (included with the ES1A) you create a virtual COM port on the PC.When your application sends data <strong>to</strong> this port, RealPort redirects the dataacross the network <strong>to</strong> the ES1A. The ES1A passes the data <strong>to</strong> the serialdevice connected <strong>to</strong> its serial port. The network is transparent <strong>to</strong> the userapplication and the serial device connected <strong>to</strong> the ES1A.For information on how <strong>to</strong> use RealPort <strong>to</strong> create virtual COM ports on your PCsee Chapter 8Console ManagementIn Console Management the ES1A can be configured for connection <strong>to</strong> themanagement port typically found on network devices such as routers,switches and servers. This allows remote management of the network device.Communication can be accomplished using telnet <strong>to</strong> a specific port in theconverter.<strong>Manual</strong> Documentation Number ES1A -2907m pn7041-rev002 17B&B <strong>Electronics</strong> Mfg Co Inc – 707 Day<strong>to</strong>n Rd - PO Box 1040 - Ottawa IL 61350 - Ph 815-433-5100 - Fax 815-433-5104 – www.bb-elec.comB&B <strong>Electronics</strong> Ltd – Westlink Commercial Park – Oranmore, Galway, Ireland – Ph +353 91-792444 – Fax +353 91-792445 – www.bb-europe.com
Using the Web Configuration and Management InterfaceTCP SocketsSelect TCP Sockets <strong>to</strong> implement Direct IP Mode using TCP. When usingTCP Sockets your converter can be configured as a TCP server or TCPclient.TCP Server SettingsIf your ES1A is configured as a TCP server, other network devicescan initiate a TCP connection with the serial device connected <strong>to</strong> theES1A serial port. (This is also referred <strong>to</strong> as reverse telnet.) Networkdevices initiating connections must be configured with the IPaddress of the ES1A and the TCP port number associated with itsserial port.After selecting TCP Sockets, click Apply <strong>to</strong> return <strong>to</strong> the SerialPort Configuration page. Select the TCP Server Settings asrequired by your application.Figure 9.TCP Server SettingsFor each option, the TCP port number is shown. You can alsoEnable TCP Keep Alive for each selection. (If Enable Keep Aliveis selected the connections is maintained even if no data is beingsent.)TCP Client SettingsIf your ES1A is configured as a TCP client it will au<strong>to</strong>maticallyestablish a bi-directional TCP connection between the serial deviceand a server or other networked device. Selecting Au<strong>to</strong>maticallyestablish TCP connections enables this feature and itsconfiguration options become available.18 <strong>Manual</strong> Documentation Number: ES1A -2907m pn7041-rev002B&B <strong>Electronics</strong> Mfg Co Inc – 707 Day<strong>to</strong>n Rd - PO Box 1040 - Ottawa IL 61350 - Ph 815-433-5100 - Fax 815-433-5104 – www.bb-elec.comB&B <strong>Electronics</strong> Ltd – Westlink Commercial Park – Oranmore, Galway, Ireland – Ph +353 91-792444 – Fax +353 91-792445 – www.bb-europe.com
Using the Web Configuration and Management InterfaceFigure 10. TCP Client SettingsConsult the Tu<strong>to</strong>rial and online Help for more detail.UDP SocketsSelect UDP Sockets <strong>to</strong> implement Direct IP Mode using UDP pro<strong>to</strong>col.When using UDP Sockets your converter can be configured as a UDP serveror UDP client.UDP Server SettingsIf your ES1A is configured as a UDP server, other network devicescan initiate a UDP connection with the serial device connected <strong>to</strong> theES1A serial port. Network devices initiating connections must beconfigured with the IP address of the ES1A and the UDP portnumber associated with its serial port.After selecting UDP Sockets, click Apply <strong>to</strong> return <strong>to</strong> the SerialPort Configuration page. Select the TCP Server Settings asrequired by your application.<strong>Manual</strong> Documentation Number ES1A -2907m pn7041-rev002 19B&B <strong>Electronics</strong> Mfg Co Inc – 707 Day<strong>to</strong>n Rd - PO Box 1040 - Ottawa IL 61350 - Ph 815-433-5100 - Fax 815-433-5104 – www.bb-elec.comB&B <strong>Electronics</strong> Ltd – Westlink Commercial Park – Oranmore, Galway, Ireland – Ph +353 91-792444 – Fax +353 91-792445 – www.bb-europe.com
Using the Web Configuration and Management InterfaceFigure 11. UDP Server SettingsUDP Client SettingsIf your ES1A is configured as a UDP client you can au<strong>to</strong>maticallydistribute serial data from you ES1A <strong>to</strong> many devices at the sametime. This is sometimes referred <strong>to</strong> as Data Distribution or UDPMulticast.Figure 12. UDP Client SettingsYou can configure multiple destinations. In the appropriate boxes,type the Description, Send To IP address or DNS name and UDPPort number, then click Add. You can also configure the conditionsunder which <strong>to</strong> send data.Consult the Tu<strong>to</strong>rial and online Help for more detail.20 <strong>Manual</strong> Documentation Number: ES1A -2907m pn7041-rev002B&B <strong>Electronics</strong> Mfg Co Inc – 707 Day<strong>to</strong>n Rd - PO Box 1040 - Ottawa IL 61350 - Ph 815-433-5100 - Fax 815-433-5104 – www.bb-elec.comB&B <strong>Electronics</strong> Ltd – Westlink Commercial Park – Oranmore, Galway, Ireland – Ph +353 91-792444 – Fax +353 91-792445 – www.bb-europe.com
Serial BridgeUsing the Web Configuration and Management InterfaceSelect Serial Bridge <strong>to</strong> implement Paired Mode (also called serial tunneling).This allows serial devices connected <strong>to</strong> two ES1A converters <strong>to</strong> communicateacross the network. The two ES1A converters au<strong>to</strong>matically connect <strong>to</strong> eachother.Modem EmulationSelect Modem Emulation <strong>to</strong> configure the serial port <strong>to</strong> operate as if it is amodem. For legacy applications where a serial device is set up <strong>to</strong>communicate through a modem, the serial device can be connected <strong>to</strong> theES1A and communication occurs over the network. The ES1A emulatesmodem responses <strong>to</strong> and from the serial device.Cus<strong>to</strong>mSelect Cus<strong>to</strong>m <strong>to</strong> cus<strong>to</strong>m configure the ES1A serial port and is used if yourapplication does not fit in<strong>to</strong> any other predefined modes. This is an advancedoption that allows full configuration of the serial port.ApplyAfter you have selected a port profile, click the Apply but<strong>to</strong>n. The SerialPort Configuration page will re-appear and will contain additionalconfiguration settings specific <strong>to</strong> the profile you have chosen.For more information on these configuration options see the web-based Tu<strong>to</strong>rialand online Help.Basic Serial SettingsClick the Basic Serial Settings menu bar on the Serial Port Configurationpage <strong>to</strong> configure the ES1A’s serial port Baud Rate, Data Bits, Parity, S<strong>to</strong>pBits and Flow Control parameters. For all profiles except RealPort, theBasic Serial Settings configuration section allows you <strong>to</strong> set theseparameters. When the RealPort profile is selected the serial port settings willbe directed by the PC applications using the virtual COM port.Advanced Serial SettingsClick the Advanced Serial Settings menu bar <strong>to</strong> access settings used <strong>to</strong> finetune the serial port. Typically these setting will not need <strong>to</strong> be changed.Consult the web-based tu<strong>to</strong>rial for more information if necessary.<strong>Manual</strong> Documentation Number ES1A -2907m pn7041-rev002 21B&B <strong>Electronics</strong> Mfg Co Inc – 707 Day<strong>to</strong>n Rd - PO Box 1040 - Ottawa IL 61350 - Ph 815-433-5100 - Fax 815-433-5104 – www.bb-elec.comB&B <strong>Electronics</strong> Ltd – Westlink Commercial Park – Oranmore, Galway, Ireland – Ph +353 91-792444 – Fax +353 91-792445 – www.bb-europe.com
Using the Web Configuration and Management InterfaceConfiguring Alarms and NotificationThe ES1A can be configured <strong>to</strong> generate alarms and send notification emailsbased on the occurrence of specific events. Events include the states of some<strong>RS</strong>-<strong>232</strong> handshake (GPIO) lines and the detection of specified characterpatterns within the serial data stream. The Alarms Configuration pagedisplays the current alarm settings and allows you <strong>to</strong> configure them. Itcontains two sections: Alarm Notification Settings and Alarm Conditions.Note: In the ES1A GPIO lines are permanently configured as <strong>RS</strong>-<strong>232</strong> hardwarehandshake lines <strong>to</strong> support the standard <strong>RS</strong>-<strong>232</strong> interface. Do not attempt <strong>to</strong>re-configure the settings in the GPIO section of the Web Configurationand Management Interface.Alarm Notification SettingsThe Alarm Notification Settings page provides a checkbox <strong>to</strong> enable alarmnotifications. Text boxes are provided <strong>to</strong> enter the IP address of your SMTPmail server and the email address that will be placed in the From field of theemail.Alarm ConditionsThe Alarm Conditions page is a tabular listing of 32 alarms that can beconfigured. Table headings include Enable (a checkbox), Alarmname/number, Type of alarm, Trigger conditions, SNMP Trap, Send <strong>to</strong>address and Email Subject line.Clicking on the Alarm name opens an Alarm Configuration page for thatspecific alarm. The page contains two sections: Alarm Conditions andAlarm Destinations.Alarm Conditions allows you <strong>to</strong> select GPIO-based or serial data patternbasedevents.GPIO is not supported in the ES1A but it is possible <strong>to</strong> use the Send alarms basedon GPIO pin states feature <strong>to</strong> generate alarms based on the condition of some <strong>RS</strong>-<strong>232</strong> hardware handshake lines. For assistance in implementing this feature callB&B <strong>Electronics</strong> Technical Support or email support@bb-elec.comTo Send alarms based on serial data pattern matching, select that optionand type a character string in<strong>to</strong> the text box provided.22 <strong>Manual</strong> Documentation Number: ES1A -2907m pn7041-rev002B&B <strong>Electronics</strong> Mfg Co Inc – 707 Day<strong>to</strong>n Rd - PO Box 1040 - Ottawa IL 61350 - Ph 815-433-5100 - Fax 815-433-5104 – www.bb-elec.comB&B <strong>Electronics</strong> Ltd – Westlink Commercial Park – Oranmore, Galway, Ireland – Ph +353 91-792444 – Fax +353 91-792445 – www.bb-europe.com
Alarm DestinationsUsing the Web Configuration and Management InterfaceAlarm Destinations allows you <strong>to</strong> specify where <strong>to</strong> send alarm notificationemails, their priority and subject title. Type the information in<strong>to</strong> the Mail <strong>to</strong>email address, CC address, set the Priority and type in the Subject line.To send an SNMP trap, select Send SNMP trap <strong>to</strong> following destinationwhen alarm occurs and type the destination IP address for the SNMP trap.<strong>Manual</strong> Documentation Number ES1A -2907m pn7041-rev002 23B&B <strong>Electronics</strong> Mfg Co Inc – 707 Day<strong>to</strong>n Rd - PO Box 1040 - Ottawa IL 61350 - Ph 815-433-5100 - Fax 815-433-5104 – www.bb-elec.comB&B <strong>Electronics</strong> Ltd – Westlink Commercial Park – Oranmore, Galway, Ireland – Ph +353 91-792444 – Fax +353 91-792445 – www.bb-europe.com
Using the Web Configuration and Management Interface24 <strong>Manual</strong> Documentation Number: ES1A -2907m pn7041-rev002B&B <strong>Electronics</strong> Mfg Co Inc – 707 Day<strong>to</strong>n Rd - PO Box 1040 - Ottawa IL 61350 - Ph 815-433-5100 - Fax 815-433-5104 – www.bb-elec.comB&B <strong>Electronics</strong> Ltd – Westlink Commercial Park – Oranmore, Galway, Ireland – Ph +353 91-792444 – Fax +353 91-792445 – www.bb-europe.com
Managing the ES1AChapter 6: Managing the ES1ASystem SettingsThe System configuration page contains two sections: the Device IdentitySettings and the Simple Network Management Pro<strong>to</strong>col (SNMP) Settings.Device Identity SettingsThe Device Identity Settings page allows you <strong>to</strong> enter a Description such asthe network name of the ES1A, the SNMP Contact person, a text descriptionof the Location of the ES1A and the Device ID number.Simple Network Management Pro<strong>to</strong>col (SNMP) SettingsThe SNMP Settings page allows you <strong>to</strong> enable and configure SNMP andSNMP traps.For more information on using SNMP access the Tu<strong>to</strong>rial and Help files andrequest assistance from your network administra<strong>to</strong>r.Using Remote ManagementThe ES1A can be remotely managed using the Connectware Manager, aserver installed on a separate computer. There are three sections <strong>to</strong> theRemote Management Configuration page: Connections, Security andAdvanced settings.For more information on Remote Management Configuration click theConnectware Manager Tu<strong>to</strong>rial link.Managing Users and PermissionsThe Users configuration page allows you <strong>to</strong> add, remove and edit Usersinformation including passwords, access privileges and user permissions.Changing the Root Username and PasswordYou may want <strong>to</strong> change the Root username and password after you havegained access <strong>to</strong> the Web Configuration and Management Interface. To<strong>Manual</strong> Documentation Number ES1A -2907m pn7041-rev002 25B&B <strong>Electronics</strong> Mfg Co Inc – 707 Day<strong>to</strong>n Rd - PO Box 1040 - Ottawa IL 61350 - Ph 815-433-5100 - Fax 815-433-5104 – www.bb-elec.comB&B <strong>Electronics</strong> Ltd – Westlink Commercial Park – Oranmore, Galway, Ireland – Ph +353 91-792444 – Fax +353 91-792445 – www.bb-europe.com
Managing the ES1Achange your username and password click Users under the Configurationmenu. Follow the prompts <strong>to</strong> enter a new username and password. ClickApply <strong>to</strong> complete the procedure.Adding New UsersThe root user of the ES1A (using the default username and password) hascomplete administrative rights, including access and control of allconfiguration parameters. As administra<strong>to</strong>r you can add other users andconfigure the specific rights of each.Non-administra<strong>to</strong>rs can also set up new users, access and permissions (if theyhave permission) but a user cannot set another user’s permission level higherthan their own permission level, nor can a user raise their own permissionlevel.1. In the Configuration menu, click Users. The User Configurationpage appears.2. Click New. The Add New User page appears.3. Type a new username in the New Username box.4. Type a new password in the New Password box. The characters youtype will be masked by asterisks.5. Type the new password again in the Confirm Password box. Thecharacters you type will be masked by asterisks.6. Click Apply. After a short delay a message box appears at the <strong>to</strong>p ofthe page announcing, “Changes have been saved successfully.”Configuring User Access and Permissions1. In the Configuration menu, click Users. The User Configurationpage appears.2. Click the username <strong>to</strong> be configured. The User Configuration –Username page appears. To change the username or password,make the changes under User Configuration and click Apply.3. Click the User Access link. The User Access page opens. SelectAllow command line access and/or Web Interface Access. ClickApply. (See the online help for more information on these choices.)26 <strong>Manual</strong> Documentation Number: ES1A -2907m pn7041-rev002B&B <strong>Electronics</strong> Mfg Co Inc – 707 Day<strong>to</strong>n Rd - PO Box 1040 - Ottawa IL 61350 - Ph 815-433-5100 - Fax 815-433-5104 – www.bb-elec.comB&B <strong>Electronics</strong> Ltd – Westlink Commercial Park – Oranmore, Galway, Ireland – Ph +353 91-792444 – Fax +353 91-792445 – www.bb-europe.com
Managing the ES1A4. Click the User Permissions link. The User Permissions pageappears containing a list of permissions and dropdown lists. Foreach item on the list select the level of permission <strong>to</strong> be granted <strong>to</strong>the user. (See the online help for more information on thesechoices.)Managing Serial Ports and ConnectionsThe Management section of the Web Configuration and ManagementInterface provides information about the current operational state of theES1A.Serial PortsThe Serial Port Management page displays information on: Port number,Description, Profile and Connections. If you click Connections the PortConnections Management page appears displaying information on where theport is Connected From, Connected To, the Pro<strong>to</strong>col (or profile) beingused and the number of Sessions. This information can be Refreshed and, ifthe Action box is selected the Disconnect but<strong>to</strong>n become available allowingyou <strong>to</strong> disconnect.ConnectionsThe Connections Management page displays network connectionsinformation including Connected From, Connected To, the Pro<strong>to</strong>col in useand the number of Sessions.<strong>Manual</strong> Documentation Number ES1A -2907m pn7041-rev002 27B&B <strong>Electronics</strong> Mfg Co Inc – 707 Day<strong>to</strong>n Rd - PO Box 1040 - Ottawa IL 61350 - Ph 815-433-5100 - Fax 815-433-5104 – www.bb-elec.comB&B <strong>Electronics</strong> Ltd – Westlink Commercial Park – Oranmore, Galway, Ireland – Ph +353 91-792444 – Fax +353 91-792445 – www.bb-europe.com
Managing the ES1A28 <strong>Manual</strong> Documentation Number: ES1A -2907m pn7041-rev002B&B <strong>Electronics</strong> Mfg Co Inc – 707 Day<strong>to</strong>n Rd - PO Box 1040 - Ottawa IL 61350 - Ph 815-433-5100 - Fax 815-433-5104 – www.bb-elec.comB&B <strong>Electronics</strong> Ltd – Westlink Commercial Park – Oranmore, Galway, Ireland – Ph +353 91-792444 – Fax +353 91-792445 – www.bb-europe.com
Using Administrative FeaturesChapter 7: Using AdministrativeFeaturesFor additional information on each of the following features access theTu<strong>to</strong>rial and Help files.File ManagementThe File Management page provides facilities <strong>to</strong> upload and/or managecus<strong>to</strong>m web pages and files such as your applet and HTML files <strong>to</strong> the ES1A.Uploading an index.htm or index.html file will au<strong>to</strong>matically load that pageupon logging in<strong>to</strong> the ES1A.Backup/Res<strong>to</strong>reThe Backup/Res<strong>to</strong>re page allows you <strong>to</strong> backup the current configurationsettings on your ES1A <strong>to</strong> a folder on your PC. You can also res<strong>to</strong>re theconfiguration from a saved file.Update FirmwareThe Update Firmware page allows you <strong>to</strong> select firmware from a folder onyour computer and upload it <strong>to</strong> the ES1A.Caution: When updating the firmware, check the support site and release notesfor more information <strong>to</strong> determine if the ES1A must update the POST beforeupdating the firmware.Fac<strong>to</strong>ry Default SettingsThe Fac<strong>to</strong>ry Default Settings page allows you <strong>to</strong> reset the ES1A <strong>to</strong> fac<strong>to</strong>rydefaults (see Appendix A) with the option of keeping network settings asthey are.Caution: Res<strong>to</strong>ring the fac<strong>to</strong>ry default settings will clear all current settings andau<strong>to</strong>matically reboot the ES1A.<strong>Manual</strong> Documentation Number ES1A -2907m pn7041-rev002 29B&B <strong>Electronics</strong> Mfg Co Inc – 707 Day<strong>to</strong>n Rd - PO Box 1040 - Ottawa IL 61350 - Ph 815-433-5100 - Fax 815-433-5104 – www.bb-elec.comB&B <strong>Electronics</strong> Ltd – Westlink Commercial Park – Oranmore, Galway, Ireland – Ph +353 91-792444 – Fax +353 91-792445 – www.bb-europe.com
Using Administrative FeaturesSystem InformationThe System Information page displays information about your ES1A:General• Model• MAC Address• Firmware Version• Boot Version• POST Version• CPU Utilization• Up Time• Total Memory• Used Memory• Free MemoryGPIOSerialNot applicable <strong>to</strong> the ES1AThe Serial page displays a table containing the following information:• Port number• Description• Profile• Serial Configuration (baud rate, data bits, parity, s<strong>to</strong>p bitsIf you click Port 1 the Serial Port Diagnostics page appears:30 <strong>Manual</strong> Documentation Number: ES1A -2907m pn7041-rev002B&B <strong>Electronics</strong> Mfg Co Inc – 707 Day<strong>to</strong>n Rd - PO Box 1040 - Ottawa IL 61350 - Ph 815-433-5100 - Fax 815-433-5104 – www.bb-elec.comB&B <strong>Electronics</strong> Ltd – Westlink Commercial Park – Oranmore, Galway, Ireland – Ph +353 91-792444 – Fax +353 91-792445 – www.bb-europe.com
Using Administrative FeaturesNetworkFigure 13. Serial Port Diagnostics PageThe Network page displays statistics related <strong>to</strong> IP, TCP, UDP and ICMPpro<strong>to</strong>col activities.Figure 14. Network Information Page<strong>Manual</strong> Documentation Number ES1A -2907m pn7041-rev002 31B&B <strong>Electronics</strong> Mfg Co Inc – 707 Day<strong>to</strong>n Rd - PO Box 1040 - Ottawa IL 61350 - Ph 815-433-5100 - Fax 815-433-5104 – www.bb-elec.comB&B <strong>Electronics</strong> Ltd – Westlink Commercial Park – Oranmore, Galway, Ireland – Ph +353 91-792444 – Fax +353 91-792445 – www.bb-europe.com
Using Administrative FeaturesRebootThe Reboot page allows you <strong>to</strong> reboot the ES1A. If you click on Reboot theprocess will take approximately one minute <strong>to</strong> complete.32 <strong>Manual</strong> Documentation Number: ES1A -2907m pn7041-rev002B&B <strong>Electronics</strong> Mfg Co Inc – 707 Day<strong>to</strong>n Rd - PO Box 1040 - Ottawa IL 61350 - Ph 815-433-5100 - Fax 815-433-5104 – www.bb-elec.comB&B <strong>Electronics</strong> Ltd – Westlink Commercial Park – Oranmore, Galway, Ireland – Ph +353 91-792444 – Fax +353 91-792445 – www.bb-europe.com
Using RealPortChapter 8: Using RealPortRealPort is a COM port redirec<strong>to</strong>r program that allows you <strong>to</strong> add andremove virtual COM ports on your PC and update the RealPort software.Virtual COM ports allow you <strong>to</strong> set up a connection between your PC and thedevice connected <strong>to</strong> the serial port on your ES1A via an <strong>Ethernet</strong> networkconnection using TCP/IP. If you will be using virtual COM ports(configuring your serial port with the RealPort profile) you must use RealPort<strong>to</strong> configure those ports on your PC. Once you have configured a new virtualCOM (VCOM) port using RealPort, application software can communicatethrough that COM port as if it is located within the PC.There are three steps <strong>to</strong> setting up a virtual COM port with RealPort.1. Configure the ES1A with an IP address2. Configure the ES1A serial port for RealPort (VCOM) mode3. Configure the port itself using RealPortConfiguring the IP AddressSee Chapter 3, Configuring the IP AddressConfiguring the Serial Port for RealPort1. Login <strong>to</strong> the Web Configuration and Management Interface.2. Select Configuration, Serial Port.3. On the Serial Port Configuration page, check the Profile for theport. If it is not RealPort, click Port 1.4. On the page that appears click Change Profile.5. On the Select Port Profile page, select RealPort, then click Apply.<strong>Manual</strong> Documentation Number ES1A -2907m pn7041-rev002 33B&B <strong>Electronics</strong> Mfg Co Inc – 707 Day<strong>to</strong>n Rd - PO Box 1040 - Ottawa IL 61350 - Ph 815-433-5100 - Fax 815-433-5104 – www.bb-elec.comB&B <strong>Electronics</strong> Ltd – Westlink Commercial Park – Oranmore, Galway, Ireland – Ph +353 91-792444 – Fax +353 91-792445 – www.bb-europe.com
Using RealPortAdding a Virtual COM Port using RealPortWindows 2001/XP/Vista:Windows 98, ME, NT 4.0:1. Locate the RealPort driver software on the CD you received withyour ES1A.2. Find the RealPort setup.exe file for your PC’s operating system.3. Start the setup.exe file. The RealPort Setup Wizard Welcomedialog appears.4. Select the Add a New Device, then click Next. The Select Devicedialog appears listing the IP Address, MAC Address and Model ofall devices on the network. To identify your ES1A compare theMAC address listed with the MAC address on the label on yourES1A.5. Select the device <strong>to</strong> be configured as a virtual COM port and clickNext.6. In the Select COM Port dialog that appears, select the COM portnumber <strong>to</strong> be assigned <strong>to</strong> the ES1A. Click Next. A progress screenwill appear.7. When the process is complete click Finish.1. Follow the readme.txt included with each O/S on the CD (nosetup.exe available).Removing a Virtual COM Port using RealPortWindows 2001/XP/Vista:1. Locate the RealPort driver software on the CD you received withyour ES1A.2. Find the RealPort setup.exe file for your operating system.3. Start the setup.exe file. The RealPort Setup Wizard Welcomedialog appears.34 <strong>Manual</strong> Documentation Number: ES1A -2907m pn7041-rev002B&B <strong>Electronics</strong> Mfg Co Inc – 707 Day<strong>to</strong>n Rd - PO Box 1040 - Ottawa IL 61350 - Ph 815-433-5100 - Fax 815-433-5104 – www.bb-elec.comB&B <strong>Electronics</strong> Ltd – Westlink Commercial Park – Oranmore, Galway, Ireland – Ph +353 91-792444 – Fax +353 91-792445 – www.bb-europe.com
Windows 98, ME, NT 4.0:Using RealPort4. Select the Remove an Existing Device, then click Next. The SelectDevice <strong>to</strong> Remove dialog appears listing the IP Address, MACAddress and Model of all devices on the network. To identify yourES1A compare the MAC address listed with the MAC address onthe label on your ES1A.5. Select the device <strong>to</strong> be removed and click Next.6. In the Select COM Port dialog that appears, select the COM portnumber <strong>to</strong> be assigned <strong>to</strong> the ES1A. Click Next. A progress screenwill appear.7. When the process is complete click Finish.1. Follow the readme.txt included with each O/S on the CD (nosetup.exe available).Updating RealPortWindows 2001/XP/Vista:Windows 98, ME, NT 4.0:1. Locate the RealPort driver software on the CD you received withyour ES1A.2. Find the RealPort setup.exe file for your operating system.3. Start the setup.exe file. The RealPort Setup Wizard Welcomedialog appears.4. Select the Update RealPort Software, then click Next.5. A progress dialog will appear.6. When the process is complete a dialog will indicate that you mustrestart your computer before the new settings will take effect. ClickYes <strong>to</strong> restart your computer now.1. Follow the readme.txt included with each O/S on the CD (nosetup.exe available).<strong>Manual</strong> Documentation Number ES1A -2907m pn7041-rev002 35B&B <strong>Electronics</strong> Mfg Co Inc – 707 Day<strong>to</strong>n Rd - PO Box 1040 - Ottawa IL 61350 - Ph 815-433-5100 - Fax 815-433-5104 – www.bb-elec.comB&B <strong>Electronics</strong> Ltd – Westlink Commercial Park – Oranmore, Galway, Ireland – Ph +353 91-792444 – Fax +353 91-792445 – www.bb-europe.com
Using RealPort36 <strong>Manual</strong> Documentation Number: ES1A -2907m pn7041-rev002B&B <strong>Electronics</strong> Mfg Co Inc – 707 Day<strong>to</strong>n Rd - PO Box 1040 - Ottawa IL 61350 - Ph 815-433-5100 - Fax 815-433-5104 – www.bb-elec.comB&B <strong>Electronics</strong> Ltd – Westlink Commercial Park – Oranmore, Galway, Ireland – Ph +353 91-792444 – Fax +353 91-792445 – www.bb-europe.com
Default Configuration SettingsAppendix A: Default ConfigurationSettingsServer Name:ES1AUsername:rootPassword:dbpsDHCP:EnabledBaud Rate: 9600Data//S<strong>to</strong>p: 8/1Parity:NoneFlow Control:NoneTCP/UDP Pro<strong>to</strong>col:TCPConnection Mode:TCP SocketTCP/UDP port: 2001<strong>Manual</strong> Documentation Number ES1A -2907m pn7041-rev002 37B&B <strong>Electronics</strong> Mfg Co Inc – 707 Day<strong>to</strong>n Rd - PO Box 1040 - Ottawa IL 61350 - Ph 815-433-5100 - Fax 815-433-5104 – www.bb-elec.comB&B <strong>Electronics</strong> Ltd – Westlink Commercial Park – Oranmore, Galway, Ireland – Ph +353 91-792444 – Fax +353 91-792445 – www.bb-europe.com
Default Configuration Settings38 <strong>Manual</strong> Documentation Number: ES1A -2907m pn7041-rev002B&B <strong>Electronics</strong> Mfg Co Inc – 707 Day<strong>to</strong>n Rd - PO Box 1040 - Ottawa IL 61350 - Ph 815-433-5100 - Fax 815-433-5104 – www.bb-elec.comB&B <strong>Electronics</strong> Ltd – Westlink Commercial Park – Oranmore, Galway, Ireland – Ph +353 91-792444 – Fax +353 91-792445 – www.bb-europe.com
Product SpecificationsAppendix B: Product SpecificationsModel:<strong>Manual</strong>:Operating Systems Supported:ES1APaper copy of this manual, PDF availableCD-ROM disk: RealPort virtual COM port software for Windows 98/ME/2001/XP/NT 4.0/VistaB&B Discovery software (finder.exe)PDF of ES1A User <strong>Manual</strong>PDF of Quick Start guideDimensionsPower Supply Requirements:Power Consumption: 1.5WOperating Temperature:S<strong>to</strong>rage Temperature:Humidity:Approvals:Link Integrity Indica<strong>to</strong>r:Activity Indica<strong>to</strong>r:<strong>Ethernet</strong> Connec<strong>to</strong>r:<strong>Ethernet</strong> Standards Supported:Pro<strong>to</strong>cols Supported:Serial Connec<strong>to</strong>r:<strong>RS</strong>-<strong>232</strong> Interface Lines Supported:Windows 98/ME/2001/XP/NT 4.0/Vista(call B&B Tech Support for other operating systems)2.1 x 3.0 x 3.34 in (5.3 x 7.6 x 8.5 cm)5VDC 500mA min via 5.5mm by 2.1mm barrel jack tip positive0 <strong>to</strong> 70 °C (32 <strong>to</strong> 158 °F)−40 <strong>to</strong> 85 °C (−40 <strong>to</strong> 185 °F)10% <strong>to</strong> 90% R.H. non-condensingCE, FCC, Class BYellow LED (on <strong>Ethernet</strong> connec<strong>to</strong>r)Green LED (on <strong>Ethernet</strong> connec<strong>to</strong>r)Single RJ-45 female (with built-in LED indica<strong>to</strong>rs)IEEE 802.3 10/100 Mbps au<strong>to</strong>-detecting, 10BaseT, 100BaseTXTCP, UDP, DHCP, SNMP, SSL/TLS, TELNET, RLOGIN, RFC 2217, LPD,HTTP/HTTPS, SMTP, ICMP, IGMP, ARP9 pin D-type male (DB-9M)TD, RD, RTS, CTS, DTR, DSR, DCD, DSR, GNDSerial Data Rates: 50, 75, 110, 134, 150, 200, 300, 600, 1200, 1800, 2400, 4800, 9600,14400, 19200, 28800, 38400, 57600, 115200, 230400 bpsParity:Data Bits: 5, 6, 7 or 8S<strong>to</strong>p Bits: 1, 2Flow Control:None, Even, Odd, Mark, SpaceNone, Hardware, Software<strong>Manual</strong> Documentation Number ES1A -2907m pn7041-rev002 39B&B <strong>Electronics</strong> Mfg Co Inc – 707 Day<strong>to</strong>n Rd - PO Box 1040 - Ottawa IL 61350 - Ph 815-433-5100 - Fax 815-433-5104 – www.bb-elec.comB&B <strong>Electronics</strong> Ltd – Westlink Commercial Park – Oranmore, Galway, Ireland – Ph +353 91-792444 – Fax +353 91-792445 – www.bb-europe.com
Product SpecificationsSet-up Options:Web Configuration and Management InterfaceConfiguration Modes:Configuration Method:Security:Direct IP (TCP or UDP Sockets)Virtual COM Port (RealPort)Paired Mode (serial bridge/serial tunneling)Modem EmulationCus<strong>to</strong>mUses any web browser via built-in web serverCus<strong>to</strong>mizable web interface option with support for Java appletsAdmin configuration password protectionStrong SSL v3.0 / TLS v1.0 based encryption – DES (56 bit), 3DES (168bit), AES (128/256 bit)Device Management: SNMP – RFC 1213/1215/1316/131IP Address Assignment:TCP/UDP Forwarding Characteristics:Event Notification:Accessories:Static IP, DHCP, Au<strong>to</strong>-IPBytes, Idle Time, Data PatternVia email with SNMP traps triggered by matching data pattern5VDC 1200MA power supply40 <strong>Manual</strong> Documentation Number: ES1A -2907m pn7041-rev002B&B <strong>Electronics</strong> Mfg Co Inc – 707 Day<strong>to</strong>n Rd - PO Box 1040 - Ottawa IL 61350 - Ph 815-433-5100 - Fax 815-433-5104 – www.bb-elec.comB&B <strong>Electronics</strong> Ltd – Westlink Commercial Park – Oranmore, Galway, Ireland – Ph +353 91-792444 – Fax +353 91-792445 – www.bb-europe.com
Dimensional DiagramsAppendix C: Dimensional DiagramsFigure 15. Dimensional Diagram of the ES1A<strong>Manual</strong> Documentation Number ES1A -2907m pn7041-rev002 41B&B <strong>Electronics</strong> Mfg Co Inc – 707 Day<strong>to</strong>n Rd - PO Box 1040 - Ottawa IL 61350 - Ph 815-433-5100 - Fax 815-433-5104 – www.bb-elec.comB&B <strong>Electronics</strong> Ltd – Westlink Commercial Park – Oranmore, Galway, Ireland – Ph +353 91-792444 – Fax +353 91-792445 – www.bb-europe.com
<strong>RS</strong>-<strong>232</strong> ConnectionsAppendix D: <strong>RS</strong>-<strong>232</strong> ConnectionsDB-9M Signal <strong>RS</strong>-<strong>232</strong> DTEPin1 Carrier Detect DCD In2 Receive Data RXD In3 Transmit Data TXD Out4 Data Terminal Ready DTR Out5 Signal Ground GND ---6 Data Set Ready DSR In7 Request To Send RTS Out8 Clear To Send CTS In9 Not Connected NA NAFigure 16. <strong>RS</strong>-<strong>232</strong> Connections in a DB-9 Connec<strong>to</strong>r42 <strong>Manual</strong> Documentation Number: ES1A -2907m pn7041-rev002B&B <strong>Electronics</strong> Mfg Co Inc – 707 Day<strong>to</strong>n Rd - PO Box 1040 - Ottawa IL 61350 - Ph 815-433-5100 - Fax 815-433-5104 – www.bb-elec.comB&B <strong>Electronics</strong> Ltd – Westlink Commercial Park – Oranmore, Galway, Ireland – Ph +353 91-792444 – Fax +353 91-792445 – www.bb-europe.com
Appendix E: Network ConnectionsRJ-45 Pin Signal Wire Color1 TX+ White-Green2 TX+ Green3 RX+ White-Orange4 Not used Blue5 Not used White-Blue6 RX- Orange7 Not used White-Brown8 Not used BrownFigure 17. Pin-out for an <strong>Ethernet</strong> CableDECLARATION OF CONFORMITYManufacturer’s Name:B&B <strong>Electronics</strong> Manufacturing CompanyManufacturer’s Address: P.O. Box 1040707Day<strong>to</strong>n RoadOttawa, IL 61350 USAModel Numbers:<strong>ES1AE</strong>Description:<strong>Mini</strong>-<strong>Ethernet</strong> <strong>to</strong> <strong>RS</strong>-<strong>232</strong> ConverterType:Light industrial ITE equipmentApplication of Council Directive: 89/336-EECStandards: EN 55022EN 61000-6-1EN 61000 (-4-2, -4-3, -4-4, -4-5, -4-6, -4-8, -4-11)Michael J. Fahrion, Direc<strong>to</strong>r of Engineering<strong>Manual</strong> Documentation Number: ES1A-2605m pn7041-rev001B&B <strong>Electronics</strong> Mfg Co Inc – 707 Day<strong>to</strong>n Rd - PO Box 1040 - Ottawa IL 61350 - Ph 815-433-5100 - Fax 815-433-5104 – www.bb-elec.comB&B <strong>Electronics</strong> Ltd – Westlink Commercial Park – Oranmore, Galway, Ireland – Ph +353 91-792444 – Fax +353 91-792445 – www.bb-europe.com


