Earth Explorer Tutorial - EarthExplorer - the USGS
Earth Explorer Tutorial - EarthExplorer - the USGS
Earth Explorer Tutorial - EarthExplorer - the USGS

You also want an ePaper? Increase the reach of your titles
YUMPU automatically turns print PDFs into web optimized ePapers that Google loves.
<strong>Earth</strong><strong>Explorer</strong><br />
Help Documentation<br />
Version 2.0<br />
September 2012
Document History<br />
Number Date and Sections Notes<br />
1 February 2011 Original document 0.1<br />
2 April 2011 Updated with comments/table of contents<br />
3 June 2011 Updated with comments from LTA staff<br />
4 July 2011 Updated graphics, fomatting.<br />
5 September 2011 Updated to guidelines on user docs and review by<br />
LDCM<br />
6 September 2012 Updated login/registration<br />
Page: ii
Table of contents<br />
Document History .................................................................................................................. ii<br />
Table of contents .................................................................................................................. iii<br />
Table of Figures ................................................................................................................... iv<br />
I. Introduction ................................................................................................................... 1<br />
A. Key Features ........................................................................................................... 1<br />
B. System/Browser requirements ................................................................................ 1<br />
II. User Interface................................................................................................................ 3<br />
A. Header/Footer Elements ......................................................................................... 3<br />
B. Body ........................................................................................................................ 5<br />
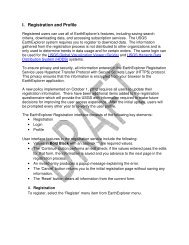
III. Registration and Profile ............................................................................................ 10<br />
A. Registration ........................................................................................................... 10<br />
B. Login ..................................................................................................................... 17<br />
C. Profile .................................................................................................................... 18<br />
IV. Perform a Search ..................................................................................................... 23<br />
A. Search Criteria Tab ............................................................................................... 23<br />
B. Select Data Set(s): ................................................................................................ 42<br />
C. Enter Additional Criteria: ....................................................................................... 45<br />
D. View Search Results ............................................................................................. 49<br />
Appendix ............................................................................................................................ 73<br />
Page: iii
Table of Figures<br />
Figure 1 - <strong>Earth</strong><strong>Explorer</strong> User Interface ................................................................................ 3<br />
Figure 2 - Header ................................................................................................................. 3<br />
Figure 3 - <strong>Earth</strong><strong>Explorer</strong> Menu Bar....................................................................................... 4<br />
Figure 4 - Footer .................................................................................................................. 5<br />
Figure 5 - Body ..................................................................................................................... 6<br />
Figure 6 - Google Map Navigation Controls ......................................................................... 7<br />
Figure 7 - Custom Location Features ................................................................................... 8<br />
Figure 8 - Registration ........................................................................................................ 11<br />
Figure 9 - Registration Login .............................................................................................. 11<br />
Figure 10 - User Affiliation/Data Usage Form ..................................................................... 13<br />
Figure 11 - Address ............................................................................................................ 16<br />
Figure 12 - Confirmation Page ........................................................................................... 17<br />
Figure 13 - Login ................................................................................................................ 17<br />
Figure 14 - Login/Password ............................................................................................... 18<br />
Figure 15 - Menu Bar Items ................................................................................................ 18<br />
Figure 16 - Edit User Profile ............................................................................................... 19<br />
Figure 17 - Interface Options .............................................................................................. 19<br />
Figure 18 - Data Set List .................................................................................................... 20<br />
Figure 19 - Sort Order ........................................................................................................ 20<br />
Figure 20 - Metadata View ................................................................................................. 20<br />
Figure 21 - Saved Criteria .................................................................................................. 21<br />
Figure 22 - Standing Request ............................................................................................ 21<br />
Figure 23 - Order Tracking ................................................................................................. 22<br />
Figure 24 - <strong>Earth</strong><strong>Explorer</strong> Search Tabs .............................................................................. 23<br />
Figure 25 - Point Search .................................................................................................... 24<br />
Figure 26 - Line Search ...................................................................................................... 24<br />
Figure 27 - Rectangle Search ............................................................................................ 25<br />
Figure 28 - Polygon Search ................................................................................................ 26<br />
Figure 29 - Circular Polygon Tool ....................................................................................... 27<br />
Figure 30 - Example circle area of interest ......................................................................... 27<br />
Figure 31 - Clear Selection ................................................................................................. 28<br />
Figure 32 - Add Map to Selection ....................................................................................... 28<br />
Figure 33 - Add Map to Selection Example ........................................................................ 28<br />
Figure 34 - Enter Address .................................................................................................. 29<br />
Figure 35 - Enter Address Location .................................................................................... 29<br />
Figure 36 - Enter Latitude/Longitude .................................................................................. 30<br />
Figure 37 - Enter Latitude/Longitude Location ................................................................... 30<br />
Figure 38 - Place Name ..................................................................................................... 31<br />
Figure 39 - Place Name - Multiple Options ......................................................................... 31<br />
Figure 40 - Place Name - Multiple Option - Selected Place ............................................... 32<br />
Figure 41 - Path/Row ......................................................................................................... 33<br />
Figure 42 - Path/Row Location ........................................................................................... 34<br />
Figure 43 - US Feature Place name Search ...................................................................... 34<br />
Figure 44 - US Feature Place name Search Results ......................................................... 35<br />
Figure 45 - US Feature Place name Selected .................................................................... 35<br />
Figure 46 - Add Coordinate ................................................................................................ 36<br />
Page: iv
Figure 47 - Add New Coordinate ........................................................................................ 36<br />
Figure 48 - Add New Coordinate Location ......................................................................... 37<br />
Figure 49 - Delete or Edit Coordinates ............................................................................... 37<br />
Figure 50 - Predefined Area - Add Shape .......................................................................... 38<br />
Figure 51 - Predefined Search Area ................................................................................... 38<br />
Figure 52 - Upload ESRI Shapefile .................................................................................... 39<br />
Figure 53 - Upload KML/KMZ file ....................................................................................... 39<br />
Figure 54 - Example uploaded KML file ............................................................................. 40<br />
Figure 55 - KML Example ................................................................................................... 40<br />
Figure 56 - Dates Selected ................................................................................................. 41<br />
Figure 57 - Number of records to return ............................................................................. 41<br />
Figure 58 - <strong>Earth</strong><strong>Explorer</strong> Search Tabs – Data Sets .......................................................... 42<br />
Figure 59 - Data Set Selection Expandable View ............................................................... 43<br />
Figure 60 - Dataset mouse over example .......................................................................... 43<br />
Figure 61 - Dataset with cost of reproduction icon ............................................................. 44<br />
Figure 62 - Data Set Prefilter .............................................................................................. 44<br />
Figure 63 - <strong>Earth</strong><strong>Explorer</strong> Additional Criteria Tab ............................................................... 45<br />
Figure 64 - Example Additional Criteria form ...................................................................... 46<br />
Figure 65 - Data Set Criteria forms .................................................................................... 47<br />
Figure 66 - Unique Criteria Form ........................................................................................ 48<br />
Figure 67 - <strong>Earth</strong><strong>Explorer</strong> Results Tab ............................................................................... 49<br />
Figure 68 - Example Results .............................................................................................. 49<br />
Figure 69 - Search Result Control ...................................................................................... 50<br />
Figure 70 - Show All Footprints .......................................................................................... 51<br />
Figure 71 - Show All Browse .............................................................................................. 51<br />
Figure 72 - Browse Opacity Example ................................................................................. 52<br />
Figure 73 - Select Data Set Results ................................................................................... 53<br />
Figure 74 - Example Search Results .................................................................................. 54<br />
Figure 75 - Example Scene Level Results ......................................................................... 55<br />
Figure 76 - Footprint Overlay ............................................................................................. 55<br />
Figure 77 - Browse Overlay ................................................................................................ 56<br />
Figure 78 - Login before downloading ................................................................................ 56<br />
Figure 79 - Download Options Dialog................................................................................. 57<br />
Figure 80 - Download Scene .............................................................................................. 57<br />
Figure 81 - Download Scene Dialog ................................................................................... 57<br />
Figure 82 - Bulk Download - Added to Item Basket ............................................................ 58<br />
Figure 83 - Bulk Download Item Basket ............................................................................. 58<br />
Figure 84 - Bulk Download Order Review .......................................................................... 59<br />
Figure 85 - Bulk Download Validation ................................................................................ 59<br />
Figure 86 - Order Scene ..................................................................................................... 60<br />
Figure 87 - Item Basket Example ....................................................................................... 60<br />
Figure 88 - Item Basket ...................................................................................................... 61<br />
Figure 89 - Checkout Summary ......................................................................................... 61<br />
Figure 90 - Roll View .......................................................................................................... 62<br />
Figure 91 - Example Scene Level Results ......................................................................... 63<br />
Figure 92 - Show Browse and Metadata ............................................................................ 63<br />
Figure 93 - Browse and Metadata View ............................................................................. 64<br />
Figure 94 - Multiple Browse Display Example .................................................................... 65<br />
Figure 95 - Open New Window – Display Browse .............................................................. 66<br />
Figure 96 - FGDC Format .................................................................................................. 66<br />
Page: v
Figure 97 - Default Search Results Returned = 100 ........................................................... 67<br />
Figure 98 - Total Search Results of query = 2570 .............................................................. 67<br />
Figure 99 - Search Criteria - Number of records to return .................................................. 67<br />
Figure 100 - Export Options ............................................................................................... 68<br />
Figure 101 - Submit Standing Request .............................................................................. 70<br />
Figure 102 - Standing Request Form ................................................................................. 71<br />
Figure 103 - Manage Criteria ............................................................................................. 71<br />
Figure 104 - Standing Request .......................................................................................... 72<br />
Page: vi
I. Introduction<br />
<strong>Earth</strong><strong>Explorer</strong> (http://ear<strong>the</strong>xplorer.usgs.gov) provides online search, browse display,<br />
data download, and exports of metadata to support scientists and users with access to<br />
earth science data from <strong>the</strong> archives of <strong>the</strong> U.S. Geological Survey (<strong>USGS</strong>). <strong>Earth</strong><strong>Explorer</strong><br />
provides an enhanced user interface using state-of-<strong>the</strong> art JavaScript libraries, Hypertext<br />
Preprocessor (PHP), and <strong>the</strong> advanced Oracle spatial engine.<br />
A. Key Features<br />
Key features in <strong>Earth</strong><strong>Explorer</strong> include:<br />
� Fast, geospatial search engine<br />
� Map viewer for viewing overlay footprints and browse overlays<br />
� Simple, fast Graphical User Interface (GUI)<br />
� Data access tool to search and discover data<br />
� Textual query capability<br />
� Keyhole Markup Language (KML) export capability to interface with Google <strong>Earth</strong><br />
� Save or export queries, results, and map overlay for reuse<br />
� Request on-demand products<br />
� Access to browse images from standard products<br />
� User au<strong>the</strong>ntication service for access to specialized datasets and tools<br />
� Access to Landsat Data Continuity Mission (LDCM) quality band data<br />
� Standard product downloads<br />
� User notifications of new acquisitions and available products through subscription<br />
services<br />
� Updated software code base supporting JavaScript and PHP<br />
B. System/Browser requirements<br />
The following are <strong>the</strong> hardware and software requirements for using <strong>Earth</strong><strong>Explorer</strong>:<br />
� Hardware Requirements – Windows:<br />
o 233 Gigahertz (GHz) processor - 2GHz or better recommended<br />
o Minimum of 256 Megabyte (MB) Random Access Memory (RAM) – 4<br />
Gigabyte (GB) recommended<br />
o Minimum of 20GB of free space - 100GB recommended<br />
o Display capable of 800x600 with 256 colors and 32MB of video RAM<br />
o Mouse<br />
o Keyboard<br />
� Hardware Requirements – Apple Mac:<br />
o Intel x86 or PowerPC G3, G4, or G5 - 2GHz or better recommended<br />
o Minimum of 256MB RAM - 4GB recommended<br />
o Minimum of 20GB of free space - 100GB recommended<br />
o Display capable of 800x600 with 256 colors and 32MB of video RAM<br />
o Mouse<br />
o Keyboard<br />
� Support handheld and tablet devices via browsers<br />
Page: 1
� Network Requirements:<br />
o Broadband connection 15 Megabit per Second (Mbps)<br />
o 3G network impacts display speed<br />
� Software Requirements:<br />
o Operating System: Windows XP, Windows Vista, Windows 7, Windows<br />
Server 2000, Windows Server 2003, Windows Server 2008<br />
o Mac OS X<br />
o Unix<br />
o Linux<br />
o Solaris<br />
� Browsers supported:<br />
o Internet <strong>Explorer</strong> (7.x, 8.x, 9.x)<br />
o Firefox (3.x, 4.x)<br />
o Chrome (10.x)<br />
o Opera (10.x)<br />
o Safari (5.x)<br />
Page: 2
II. User Interface<br />
The <strong>Earth</strong><strong>Explorer</strong> user interface provides <strong>the</strong> overall capability for you to interact with <strong>the</strong><br />
<strong>Earth</strong><strong>Explorer</strong> components and services. The <strong>Earth</strong><strong>Explorer</strong> user interface (Figure 1) is<br />
composed of <strong>the</strong> following key elements:<br />
� Standard <strong>USGS</strong> header/footer elements<br />
� <strong>Earth</strong><strong>Explorer</strong> menu bar<br />
� Body<br />
Figure 1 - <strong>Earth</strong><strong>Explorer</strong> User Interface<br />
A. Header/Footer Elements<br />
The <strong>Earth</strong><strong>Explorer</strong> header/footer elements are based on <strong>the</strong> <strong>USGS</strong> Visual Identification<br />
Policy standard guidelines. The <strong>Earth</strong><strong>Explorer</strong> client is compliant with Section 508<br />
guidelines.<br />
1. Header<br />
The <strong>Earth</strong><strong>Explorer</strong> client header (Figure 2) is located at <strong>the</strong> top of <strong>the</strong> web page.<br />
The header is common across all web pages in <strong>Earth</strong><strong>Explorer</strong> but may be different<br />
based on your user role or ‘branding’ applied to <strong>the</strong> <strong>Earth</strong><strong>Explorer</strong> client.<br />
Figure 2 - Header<br />
Page: 3
Elements of <strong>the</strong> header include:<br />
� <strong>USGS</strong> Logo (upper left corner) reflects <strong>the</strong> relevance of <strong>the</strong> Bureau's work in<br />
today's world and communicates <strong>USGS</strong>’s purpose to <strong>the</strong> public.<br />
� <strong>USGS</strong> Links (upper right corner) reflect links to <strong>the</strong> <strong>USGS</strong> website, <strong>USGS</strong><br />
contact information, and <strong>the</strong> <strong>USGS</strong> search tool.<br />
� Title Bar is a standard bar describing <strong>the</strong> website; in this case,<br />
‘<strong>Earth</strong><strong>Explorer</strong>’.<br />
� <strong>Earth</strong><strong>Explorer</strong> Menu Bar.<br />
2. <strong>Earth</strong><strong>Explorer</strong> Menu Bar<br />
The <strong>Earth</strong><strong>Explorer</strong> menu bar (Figure 3) is directly below <strong>the</strong> header. The<br />
<strong>Earth</strong><strong>Explorer</strong> menu bar supplies a common starting point to access additional<br />
functionality, options, and preferences for <strong>the</strong> <strong>Earth</strong><strong>Explorer</strong> client via dropdown<br />
menus.<br />
Figure 3 - <strong>Earth</strong><strong>Explorer</strong> Menu Bar<br />
The common menu items in <strong>the</strong> header include:<br />
� Home – Returns you to a common starting point within <strong>the</strong> application.<br />
� System Message – Provides links and information regarding system<br />
messages.<br />
� Login – Provides a link to <strong>the</strong> <strong>Earth</strong><strong>Explorer</strong> Login/Registration Service.<br />
� Register – Provides a link to <strong>the</strong> <strong>Earth</strong><strong>Explorer</strong> Registration Service.<br />
� Feedback – Provides a link to <strong>the</strong> feedback form.<br />
� Help – Provides information about <strong>Earth</strong><strong>Explorer</strong>.<br />
Additional menu bar items display when you register or log in. Some of <strong>the</strong>se<br />
additional features include:<br />
� Profile – Provides access to your profile preferences and allows you to<br />
customize your profile.<br />
� Save Criteria – Allows you to save your search criteria for future searches.<br />
� Load Favorite – Allows you to load/apply a saved search criteria.<br />
� Manage Criteria – Allows you to modify previously saved search criteria.<br />
These options are described in fur<strong>the</strong>r details in <strong>the</strong> <strong>Earth</strong><strong>Explorer</strong> Profile<br />
(Section III).<br />
3. Footer<br />
The <strong>Earth</strong><strong>Explorer</strong> client footer (Figure 4) is located at <strong>the</strong> bottom of <strong>the</strong> web page.<br />
The footer is common across all web pages in <strong>Earth</strong><strong>Explorer</strong> but may be slightly<br />
different based on your user role or ‘branding’ applied to <strong>the</strong> <strong>Earth</strong><strong>Explorer</strong> client.<br />
Page: 4
Figure 4 - Footer<br />
The common menu items in <strong>the</strong> footer include:<br />
� Accessibility – Provides a link to <strong>the</strong> <strong>USGS</strong> Accessibility Policy (Section 508).<br />
The <strong>USGS</strong> Accessibility Policy ensures that all electronic and information<br />
technology developed, procured, maintained, or used by <strong>the</strong> <strong>USGS</strong> is<br />
accessible to people with disabilities.<br />
� FOIA – Provides a link to <strong>the</strong> U.S. Geological Survey Freedom of Information<br />
Act (FOIA) Electronic Reading Room. FOIA requests for a copy of <strong>USGS</strong><br />
records can be made by any individual or public/private organization o<strong>the</strong>r<br />
than a Federal agency.<br />
� Privacy – Provides a link to <strong>the</strong> <strong>USGS</strong> Privacy Policies. This information<br />
identifies <strong>USGS</strong> and <strong>the</strong> Department of Interior (DOI) privacy policies.<br />
� Policies and Notices – Provides a link to <strong>the</strong> <strong>USGS</strong> Policies and Important<br />
Notices website. This information describes <strong>the</strong> principal policies and o<strong>the</strong>r<br />
important notices that govern information posted on <strong>USGS</strong> websites.<br />
� Google Maps API Disclaimer – Provides a link to <strong>the</strong> Google Maps API<br />
Disclaimer. This information outlines <strong>the</strong> Google Map Application<br />
Programming Interface (API) terms and conditions for using <strong>the</strong> Google Map<br />
service.<br />
B. Body<br />
The body (Figure 5) includes <strong>the</strong> main <strong>Earth</strong><strong>Explorer</strong> capabilities and is composed of<br />
<strong>the</strong> Search Criteria and <strong>the</strong> Google Map components.<br />
Page: 5
Figure 5 - Body<br />
1. Search Criteria<br />
The <strong>Earth</strong><strong>Explorer</strong> Search Criteria component is located on <strong>the</strong> left side of <strong>the</strong><br />
<strong>Earth</strong><strong>Explorer</strong> body element. The Search Criteria component allows you to enter<br />
search criteria, select datasets to query, enter additional criteria, and review results<br />
in a tabular window. Additional details on <strong>the</strong> Search Criteria component are<br />
provided in <strong>the</strong> ‘Perform a Search’ in section IV.<br />
2. Google Map<br />
The Google Map component is located on <strong>the</strong> right side of <strong>the</strong> <strong>Earth</strong><strong>Explorer</strong> body<br />
element. The Google Map application interface embeds Google Maps within <strong>the</strong><br />
<strong>Earth</strong><strong>Explorer</strong> client.<br />
Before using <strong>the</strong> Google Map component, you should be familiar with <strong>the</strong> navigation<br />
and location features provided in <strong>the</strong> Google Map interface that <strong>Earth</strong><strong>Explorer</strong> uses.<br />
Page: 6
Figure 6 - Google Map Navigation Controls<br />
Use <strong>the</strong> following controls to navigate Google Maps (Figure 6):<br />
� Pan Control – Click <strong>the</strong> appropriate arrow to move <strong>the</strong> view north, south, east<br />
or west. (1)<br />
� Street View – Click and drag to navigate to <strong>the</strong> street-level view of <strong>the</strong><br />
interested area (2).<br />
� Zoom – Click <strong>the</strong> plus sign (+) to zoom in to <strong>the</strong> center of <strong>the</strong> map; click <strong>the</strong><br />
minus sign (–) to zoom out (3).<br />
� Zoom Slider – Drag <strong>the</strong> zoom slider up/down to zoom in or out incrementally<br />
(4).<br />
� Pan – Click and drag <strong>the</strong> map to <strong>the</strong> desired location or view.<br />
� Use Page Up, Page Down, Home, and End for faster scrolling up, down, left,<br />
and right, respectively.<br />
� Press Control and click <strong>the</strong> plus sign (+) to zoom in or press Control and click<br />
<strong>the</strong> minus sign (–) to zoom out.<br />
Page: 7
The Google Map component provides <strong>the</strong> following custom location features (Figure<br />
7) to aid in locating geospatial data.<br />
Figure 7 - Custom Location Features<br />
1<br />
Google Maps offers <strong>the</strong> following location features:<br />
� Coordinates – Coordinate values update as you move <strong>the</strong> mouse on <strong>the</strong> map<br />
interface.<br />
� Options<br />
� Auto-Center – Centers <strong>the</strong> map on <strong>the</strong> display<br />
� Polygon – Allows entering search criteria by polygon<br />
� Circle – Allows entering search criteria by using a circle radius<br />
� Overlays – Overlays a grid based on <strong>the</strong> selection<br />
Page: 8<br />
2<br />
3<br />
4
� Overlays a decimal degree grid over <strong>the</strong> map interface. Click to turn on<br />
and off.<br />
� DMS Grid – Overlays Degrees, Minutes, Seconds (DMS) grid over <strong>the</strong> map<br />
interface. Click to turn on and off.<br />
� Map/Satellite – Toggles between <strong>the</strong> Map View and <strong>the</strong> Satellite View.<br />
� Map View:<br />
o Terrain – Shows basic topographic features.<br />
� Satellite View:<br />
o 45° – Zooms to special 45° imagery for certain locations.<br />
o Labels – Displays feature labels.<br />
Page: 9
III. Registration and Profile<br />
Registered users can use all of <strong>Earth</strong><strong>Explorer</strong>’s features, including saving search criteria,<br />
downloading data, and accessing subscription services. The <strong>USGS</strong> <strong>Earth</strong><strong>Explorer</strong> system<br />
requires you to register to download data. The information ga<strong>the</strong>red from <strong>the</strong> registration<br />
process is not distributed to o<strong>the</strong>r organizations and is only used to determine trends in<br />
data usage and for certain orders. The same login can be used for <strong>the</strong> <strong>USGS</strong> Global<br />
Visualization Viewer (GloVis) and <strong>USGS</strong> Hazards Data Distribution System (HDDS)<br />
systems.<br />
To ensure privacy and security, all information entered in <strong>the</strong> <strong>Earth</strong><strong>Explorer</strong> Registration<br />
Service uses Hypertext Transfer Protocol with Secure Sockets Layer (HTTPS) protocol.<br />
This privacy ensures that <strong>the</strong> information is encrypted from your browser to <strong>the</strong><br />
<strong>Earth</strong><strong>Explorer</strong> application.<br />
A new policy implemented on October 1, 2012 requires all users to update <strong>the</strong>ir registration<br />
information. There have been additional items added to <strong>the</strong> registration questionnaire<br />
which will provide <strong>the</strong> <strong>USGS</strong> with information required to make future decisions for<br />
improving <strong>the</strong> user access experience. After <strong>the</strong> initial update, users will be prompted<br />
every o<strong>the</strong>r year to re-verify <strong>the</strong> user profile.<br />
The <strong>Earth</strong><strong>Explorer</strong> Registration interface consists of <strong>the</strong> following key elements:<br />
� Registration<br />
� Login<br />
� Profile<br />
User interface features in <strong>the</strong> registration service include <strong>the</strong> following:<br />
� Values in Bold Black with an asterisk ‘*’ are required values.<br />
� The ‘Continue’ button performs an edit check; if <strong>the</strong> values entered pass <strong>the</strong> edits for<br />
that form, <strong>the</strong> information is saved and you advance to <strong>the</strong> next page in <strong>the</strong><br />
registration process.<br />
� An invalid entry produces a popup message explaining <strong>the</strong> error.<br />
� The ‘Cancel’ button returns you to <strong>the</strong> initial registration page without saving any<br />
information.<br />
� The ‘Reset’ button clears all information from <strong>the</strong> current form.<br />
A. Registration<br />
To register, select <strong>the</strong> ‘Register’ menu item from <strong>Earth</strong><strong>Explorer</strong> menu.<br />
Page: 10
Figure 8 - Registration<br />
1. Registration Login Page<br />
The Registration process (Figure 8) requires you to create a username and<br />
password, select a secret question, and type a secret answer. Once registered with<br />
<strong>Earth</strong><strong>Explorer</strong>, only <strong>the</strong> ‘Login’ process is required.<br />
Figure 9 - Registration Login<br />
Page: 11<br />
Select ‘Register’
The Registration Login page (Figure 9) requires you to type <strong>the</strong> following values:<br />
� Username (Required) – Type your preferred username.<br />
� Password (Required) – Type a password. The password must be between 8<br />
and 16 characters long and contain at least one alphabetic character and one<br />
numeric character.<br />
� Confirm Password (Required) – Type <strong>the</strong> password entered in <strong>the</strong> previous<br />
password field.<br />
� Cancel – Returns you to <strong>the</strong> initial registration page without saving any<br />
information<br />
� Continue – Performs a check; if <strong>the</strong> values entered are valid, <strong>the</strong> information<br />
is saved and you advance to <strong>the</strong> User Affiliation/Data Usage form.<br />
2. User Affiliation/Data Usage Information Page<br />
The User Affiliation/Data Usage Information page (Figure 10) allows you to enter<br />
your affiliation and identify uses of <strong>the</strong> data. This information is used to ga<strong>the</strong>r<br />
statistics on how <strong>the</strong> data is used and what organizations are using this data.<br />
Page: 12
Figure 10 - User Affiliation/Data Usage Form<br />
The User Affiliation/Data Usage (Figure 10) form identified <strong>the</strong> affiliation you are<br />
associated with and <strong>the</strong> primary and secondary uses of <strong>the</strong> data. The <strong>USGS</strong> uses<br />
Page: 13
this information to determine data usage trends, which provide target specific user<br />
groups.<br />
The User Affiliate/Data Usage page requires you to type <strong>the</strong> following values:<br />
� *Sector: Indicates <strong>the</strong> organization affiliation (Required)<br />
� U.S. Federal Government<br />
� U.S. State/Provincial/Department Government<br />
� U.S. Local Government<br />
� Tribe/Nation/Indigenous Group<br />
� Non-U.S. Federal/National Government<br />
� Academic Institution<br />
� Non-profit Organization<br />
� Private Business<br />
� General Public<br />
� O<strong>the</strong>r<br />
� Additional Department/Agency: Based on <strong>the</strong> value selected above, additional<br />
information may be required, such as:<br />
� *Department (Required)<br />
� *Agency (Required)<br />
� User of remotely sensed data: *Which of <strong>the</strong> following characterizes you as a<br />
user of remotely sensed data from <strong>USGS</strong>? Select <strong>the</strong> characteristic that<br />
identifies your role as a user of remote sensed data. (Required)<br />
� Data provider<br />
� Product developer<br />
� Technical user<br />
� End user<br />
� Manager<br />
� O<strong>the</strong>r (please specify)<br />
� *Data Use: Does your work use remotely sensed data from <strong>the</strong> <strong>USGS</strong> (Y/N)<br />
(Required). If yes, select <strong>the</strong> operational percentage that identifies <strong>the</strong><br />
percentage used for operational support.<br />
� *Primary application: Select <strong>the</strong> primary application for which you have used<br />
remotely sensed data from <strong>the</strong> <strong>USGS</strong> in <strong>the</strong> past year? Select one (1) item<br />
from <strong>the</strong> drop down item box. (Required)<br />
� Secondary use of data: In addition to <strong>the</strong> primary application, in what o<strong>the</strong>r<br />
areas have you used remotely sensed data from <strong>USGS</strong> in <strong>the</strong> past year?<br />
(Please check all that apply.) (Required)<br />
Page: 14
� O<strong>the</strong>r Application – If none of <strong>the</strong> secondary values match, enter <strong>the</strong> o<strong>the</strong>r<br />
application use of <strong>the</strong> data.<br />
� Distribution characteristics: Over <strong>the</strong> next year, approximately how much of<br />
<strong>the</strong> remotely sensed data you acquire from <strong>USGS</strong> will you distribute to o<strong>the</strong>rs<br />
to use as opposed to using it yourself? (Please select only one answer.)<br />
(Required)<br />
� Importance of free and open access to data: Over <strong>the</strong> next year, how<br />
important will free and open access to remotely sensed data from <strong>USGS</strong> be<br />
to conducting your work? (Please select only one answer.) (Required)<br />
Cancel – Returns you to <strong>the</strong> initial login page without saving any information.<br />
Continue – Performs validation of <strong>the</strong> information entered; if <strong>the</strong> values entered are<br />
valid, <strong>the</strong> information is saved and you advance to <strong>the</strong> User Affiliation/Data Usage<br />
form.<br />
3. Address page<br />
Type <strong>the</strong> address information in <strong>the</strong> Address page (Figure 11). The address<br />
information is used only for contact information; however, some data products<br />
require shipping information to deliver products. Address information is not shared<br />
with any commercial or o<strong>the</strong>r government agencies. Please refer to <strong>the</strong> <strong>USGS</strong>/DOI<br />
Privacy Policy concerning how this information is used.<br />
Page: 15
Figure 11 - Address<br />
The Address page requires you to type <strong>the</strong> following values:<br />
� *First Name (Required) – First name of <strong>the</strong> user.<br />
� *Last Name (Required) – Last name of <strong>the</strong> user.<br />
� Company/Organization – Affiliated company or organization.<br />
� *Address 1 (Required) – Address line 1.<br />
� Address 2 – Address line 2.<br />
� *Country (Required) – Country you are from.<br />
� *City (Required) – City where you reside.<br />
� *State/Province (Required) – State/province where you reside.<br />
� *Zip/Postal Code (Required) – Zip code or postal cod.<br />
� *E-mail (Required) – Email address.<br />
� Alternative E-mail – Additional email address.<br />
� *Telephone (Required) – Primary telephone number.<br />
� Fax – Fax number.<br />
4. Confirmation<br />
The Confirmation page (Figure 12) displays after successful registration. Click<br />
‘Return to <strong>the</strong> page where I registered’ to return to <strong>the</strong> page you started <strong>the</strong><br />
registration process.<br />
Page: 16
Figure 12 - Confirmation Page<br />
After registering for <strong>the</strong> first time, you are automatically logged in to <strong>Earth</strong><strong>Explorer</strong>.<br />
B. Login<br />
The Login page allows you to log in to <strong>Earth</strong><strong>Explorer</strong>. A registered user can use all of<br />
<strong>Earth</strong><strong>Explorer</strong>'s features, including saving search criteria, downloading data, and<br />
accessing subscription services.<br />
5.<br />
Login Process<br />
a. To log in, select <strong>the</strong> ‘Login’ menu item from <strong>the</strong> <strong>Earth</strong><strong>Explorer</strong> menu (Figure<br />
13). (Note: After registering <strong>the</strong> first time, you are automatically logged in.)<br />
Figure 13 - Login<br />
b. Type <strong>the</strong> username and password and <strong>the</strong>n click <strong>the</strong> ‘Sign In’ button (Figure<br />
14).<br />
Page: 17<br />
Select ‘Login’
Figure 14 - Login/Password<br />
c. Click <strong>the</strong> link to receive directions for updating <strong>the</strong><br />
password.<br />
d. Once logged in, additional items appear in <strong>the</strong> main menu bar:<br />
Figure 15 - Menu Bar Items<br />
6. Logout Process<br />
To log out of <strong>Earth</strong><strong>Explorer</strong>, click ‘Logout’ in <strong>the</strong> <strong>Earth</strong><strong>Explorer</strong> menu.<br />
C. Profile<br />
The Profile menu allows you to modify your profile information.<br />
7. Profile Home<br />
The ‘Profile Home’ option allows you to modify your profile information (Figure 16).<br />
You cannot modify your (Username).<br />
a. Change Password – View and change a password<br />
b. Contact Address – View and modify contact address<br />
c. User Affiliation – View and modify your affiliation<br />
Page: 18
Figure 16 - Edit User Profile<br />
Click <strong>the</strong> ’Edit’ button to modify <strong>the</strong> desired information.<br />
8. Interface Options<br />
The ‘Interface Options’ page allows you to modify information associated with <strong>the</strong><br />
overall system interface. The following options modify <strong>the</strong> overall <strong>Earth</strong><strong>Explorer</strong><br />
interface:<br />
d. Interface options (Figure 17) – Modifies tool tips, <strong>the</strong> number of metadata<br />
results per page, allow standing requests and o<strong>the</strong>r specific system options.<br />
For some options, only <strong>the</strong> Application Administrator can modify.<br />
Figure 17 - Interface Options<br />
e. Data Sets page (Figure 18) – Modifies <strong>the</strong> list of datasets shown in <strong>the</strong> Data<br />
Sets Component.<br />
Page: 19
Figure 18 - Data Set List<br />
f. Sort Order page (Figure 19) – Modifies <strong>the</strong> sort order for each dataset.<br />
Figure 19 - Sort Order<br />
g. Metadata View page (Figure 20) – Modifies <strong>the</strong> detailed metadata view for<br />
each dataset.<br />
Figure 20 - Metadata View<br />
9. Saved Criteria<br />
The ‘Saved Criteria’ option (Figure 21) – Modifies <strong>the</strong> saved criteria options from<br />
previous searches.<br />
Page: 20
Figure 21 - Saved Criteria<br />
In Figure 21, <strong>the</strong> search criterion was saved with <strong>the</strong> name ‘Search_Site_1’. Any<br />
information can be entered when saving <strong>the</strong> search criteria.<br />
� Selecting <strong>the</strong> favorite box icon saves <strong>the</strong> search criteria to your<br />
favorites list<br />
� The load criteria icon loads <strong>the</strong> search criteria automatically to<br />
<strong>Earth</strong><strong>Explorer</strong><br />
� The delete icon removes <strong>the</strong> search criteria from <strong>the</strong> saved criteria<br />
10. Standing Request<br />
Click <strong>the</strong> ‘Standing Request’ (Figure 22) to view a list of entered standing requests.<br />
Figure 22 - Standing Request<br />
The Standing Request function notifies you via email when a new acquisition<br />
matches <strong>the</strong> search criteria for <strong>the</strong> requested dataset. You can <strong>the</strong>n review<br />
metadata and browse for <strong>the</strong> returned scenes. See Section IV, D, 3, Standing<br />
Request for more details on <strong>the</strong> Standing Request function.<br />
11. Order Tracking<br />
Click <strong>the</strong> ‘Order Tracking’ (Figure 23) option to display <strong>the</strong> list of orders you have<br />
placed.<br />
Page: 21
Figure 23 - Order Tracking<br />
Click <strong>the</strong> order number to show <strong>the</strong> order details, <strong>the</strong> products ordered, and <strong>the</strong><br />
current status of each item ordered.<br />
Page: 22
IV. Perform a Search<br />
<strong>Earth</strong><strong>Explorer</strong> allows you to search, download, and order data held in <strong>USGS</strong> archives<br />
through a number of query options. <strong>Earth</strong><strong>Explorer</strong> uses tabs in <strong>the</strong> application to move<br />
through each portion of <strong>the</strong> search process. The <strong>Earth</strong><strong>Explorer</strong> search process is divided<br />
into four main areas (Figure 24):<br />
� Search Criteria Tab – Provides <strong>the</strong> interface for entering various search options.<br />
� Data Sets Tab – Provides <strong>the</strong> interface for selecting <strong>the</strong> datasets you are interested<br />
in searching.<br />
� Additional Criteria Tab – Provides an interface for entering additional search criteria<br />
specific to <strong>the</strong> selected datasets.<br />
� Results Tab – Provides <strong>the</strong> interface for displaying a textual and graphical view of<br />
<strong>the</strong> query results.<br />
Figure 24 - <strong>Earth</strong><strong>Explorer</strong> Search Tabs<br />
A. Search Criteria Tab<br />
The Search Criteria tab provides a location to enter search criteria for an area of<br />
interest. You have <strong>the</strong> option to ei<strong>the</strong>r type <strong>the</strong> location criteria via <strong>the</strong> textual<br />
information component or with <strong>the</strong> Google Map interface. The search criteria options<br />
include:<br />
� Google Map Interface – Enter <strong>the</strong> area of interest through <strong>the</strong> Google Map<br />
interface<br />
� Address/Place – Enter an address or place name<br />
� Area Selected – Enter coordinates to define an area of interest. The area<br />
selected is updated when you select an area on <strong>the</strong> map or when you enter an<br />
address or place name<br />
� Predefined Area – Select from a list of predefined areas for a query<br />
� Upload shapefile or KML file – Update a ESRI shapefile or KML file as <strong>the</strong> query<br />
area<br />
� Dates Selected – Enter a date or date range<br />
� Number of records to return – Modify <strong>the</strong> number of scenes returned from a<br />
search.<br />
1. Enter Area of Interest Search using Google Map Interface<br />
Using <strong>the</strong> Google Map interface, enter <strong>the</strong> geospatial area of interest using <strong>the</strong><br />
mouse or o<strong>the</strong>r pointing device.<br />
Options for entering location criteria include:<br />
a. Define a single point search (Figure 25) – Click an area on <strong>the</strong> map once<br />
using <strong>the</strong> mouse to define a single point search. The latitude and longitude of<br />
<strong>the</strong> point selection displays in <strong>the</strong> ‘Area Selected’ box.<br />
Page: 23
Figure 25 - Point Search<br />
b. Define a line search (Figure 26) – To perform a line search, select two points<br />
on <strong>the</strong> map to define a line segment. The latitude and longitude of <strong>the</strong> two<br />
points selected display in <strong>the</strong> ‘Area Selected’ box.<br />
Figure 26 - Line Search<br />
c. Define a rectangle search (Figure 27) – Press <strong>the</strong> Shift key after starting <strong>the</strong><br />
selection, and continue to hold <strong>the</strong> Shift key until <strong>the</strong> correct rectangle or<br />
square is defined. This action defines <strong>the</strong> constraints of <strong>the</strong> rectangle /<br />
Page: 24
square. If you press <strong>the</strong> Shift key before making <strong>the</strong> selection, <strong>the</strong> resulting<br />
selection is added to <strong>the</strong> existing selection. The latitude and longitude of <strong>the</strong><br />
four points selected display in <strong>the</strong> ‘Area Selected’ box. To modify <strong>the</strong><br />
rectangle, click one of <strong>the</strong> numbered points on <strong>the</strong> map and drag <strong>the</strong> point to<br />
a new location.<br />
Figure 27 - Rectangle Search<br />
d. Define a polygon - Click multiple times to define an area (Figure 28). As each<br />
point of <strong>the</strong> polygon is selected, <strong>the</strong> latitude and longitude of <strong>the</strong> defined<br />
polygon displays in <strong>the</strong> ‘Area Selected’ box. To modify <strong>the</strong> rectangle, click<br />
one of <strong>the</strong> numbered points on <strong>the</strong> map and drag <strong>the</strong> point to a new location.<br />
Page: 25
Figure 28 - Polygon Search<br />
Page: 26
e. Define a circle – Select <strong>the</strong> Options tab on <strong>the</strong> Google Map display <strong>the</strong>n<br />
click <strong>the</strong> ‘Circle’ option (Figure 29). The ‘Search Criteria’ box allow entry<br />
of a circle polygon. To define a circle, click two points on <strong>the</strong> map (Figure<br />
30). To modify <strong>the</strong> circle radius, click and drag one of <strong>the</strong> points to a new<br />
location. The coordinates of <strong>the</strong> points defining <strong>the</strong> circle display in <strong>the</strong><br />
‘Area Selected’ box. Click “Point Polygon Tool” to turn off <strong>the</strong> Circular<br />
Polygon tool.<br />
Figure 29 - Circular Polygon Tool<br />
Figure 30 - Example circle area of interest<br />
Page: 27
f. Clear Selection (Figure 31) – Click <strong>the</strong> ‘Clear Selection’ button to clear <strong>the</strong><br />
search criteria from <strong>the</strong> map.<br />
Figure 31 - Clear Selection<br />
g. Add Map to Selection (Figure 32) – Click <strong>the</strong> ‘Add Map to Selection’ button to<br />
add <strong>the</strong> current map view as <strong>the</strong> area of interest.<br />
Figure 32 - Add Map to Selection<br />
The color of <strong>the</strong> screen changes, indicating <strong>the</strong> area displayed on <strong>the</strong> map as an<br />
area of interest (Figure 33). The latitude and longitude of <strong>the</strong> map extent display<br />
in <strong>the</strong> ‘Area Selected’ box.<br />
Figure 33 - Add Map to Selection Example<br />
The coordinates of <strong>the</strong> map extent display in <strong>the</strong> ‘Area Selected’ box.<br />
2. Enter Search using Address/Place<br />
The Address/Place subcomponent allows you to enter a specific address, latitude,<br />
longitude, United States or World feature, or Landsat Worldwide Reference System<br />
(WRS) Path/Row.<br />
Page: 28
a. Address – Enter a specific address; for example, in <strong>the</strong> Address: field, type<br />
47914 252nd St, Sioux Falls, SD (Figure 34). Press Enter or click ‘Show’ to<br />
display <strong>the</strong> location on <strong>the</strong> map and <strong>the</strong> coordinate in <strong>the</strong> ‘Area Selected’<br />
subcomponent (Figure 35).<br />
Figure 34 - Enter Address<br />
Figure 35 - Enter Address Location<br />
Page: 29
. Latitude/Longitude – Enter a specific latitude/longitude; for example, type 43<br />
43' 57" N, 096 37' 42" W (Figure 36). Press Enter or click ‘Show’ to display<br />
<strong>the</strong> location on <strong>the</strong> map and <strong>the</strong> coordinates in <strong>the</strong> ‘Area Selected’<br />
subcomponent (Figure 37).<br />
Figure 36 - Enter Latitude/Longitude<br />
Figure 37 - Enter Latitude/Longitude Location<br />
Page: 30
c. Place Name – Enter a place name. For example, type Mount Rushmore<br />
(Figure 38) and press Enter or click ‘Show’ to display <strong>the</strong> location on <strong>the</strong> map<br />
and <strong>the</strong> coordinate in ‘Area Selected’ (Figure 39).<br />
Figure 38 - Place Name<br />
If you are unsure of a specific location, type a placename and press Enter (or<br />
click ‘Show’) to display a list of possible options. For example, type EROS<br />
and <strong>the</strong>n click ‘Show’ to display a list of possible places that match EROS.<br />
Figure 39 - Place Name - Multiple Options<br />
Click an item in <strong>the</strong> Address/Place list to show <strong>the</strong> location on <strong>the</strong> map (Figure<br />
40).<br />
Page: 31
Figure 40 - Place Name - Multiple Option - Selected Place<br />
d. Path/Row – Select <strong>the</strong> Path/Row option to enter WRS1 or WRS2 path row<br />
criteria for <strong>the</strong> search.<br />
Select <strong>the</strong> Path/Row button to display <strong>the</strong> Path/Row WRS criteria dialog box<br />
(Figure 41). Select ei<strong>the</strong>r WRS1 or WRS2 and <strong>the</strong>n type <strong>the</strong> Path and Row<br />
for <strong>the</strong> desired area. For example, select ‘WRS2’ and type Path: 31 and Row:<br />
29 to identify <strong>the</strong> center point for WRS2, Path 31, and Row 29. Click ‘Show’<br />
to identify <strong>the</strong> path/row location on <strong>the</strong> map (Figure 42).<br />
Page: 32
Figure 41 - Path/Row<br />
Page: 33
Figure 42 - Path/Row Location<br />
e. US/World Feature – Select ei<strong>the</strong>r a United States or World feature.<br />
Click <strong>the</strong> ‘Feature’ button to display <strong>the</strong> US/World Feature Search dialog box.<br />
Type a State/Country, Feature Class, or Feature type (Figure 43).<br />
Figure 43 - US Feature Place name Search<br />
Page: 34
For example, on <strong>the</strong> ‘US Features’ tab, select ‘South Dakota’ from <strong>the</strong> State<br />
dropdown, select ‘Airport’ from <strong>the</strong> Feature Type dropdown, and click ‘Search’<br />
to display a list of all airports in South Dakota (Figure 44).<br />
Figure 44 - US Feature Place name Search Results<br />
Click <strong>the</strong> desired feature from <strong>the</strong> results list to close <strong>the</strong> dialog and display<br />
<strong>the</strong> feature location on <strong>the</strong> map (Figure 45).<br />
Figure 45 - US Feature Place name Selected<br />
Page: 35
3. Enter Search manually using <strong>the</strong> Area Selected<br />
To add or update <strong>the</strong> Area Selected coordinates; enter <strong>the</strong> location information using<br />
<strong>the</strong> Google Map interface or <strong>the</strong> Address/Place interface. A second way to define an<br />
area of interest is to manually type <strong>the</strong> latitude/longitude coordinates within <strong>the</strong> ‘Area<br />
Selected’.<br />
To enter latitude/longitude coordinates manually, select <strong>the</strong> ‘Degree/Minute/Second’<br />
or ‘Decimal’ option. This method displays how <strong>the</strong> latitude/longitude information is<br />
entered. Click ‘Add Coordinate’ (Figure 46).<br />
Figure 46 - Add Coordinate<br />
Click ‘Add Coordinate’ to display <strong>the</strong> ‘Add new Coordinate’ dialog box. As shown in<br />
Figure 47, enter degrees, minutes, and seconds of a point in <strong>the</strong> dialog box. After<br />
clicking Add, <strong>the</strong> dialog disappears, <strong>the</strong> point displays on <strong>the</strong> map, and <strong>the</strong><br />
coordinate is added to Area Selected. Use this method to enter multiple points<br />
(Figure 48).<br />
Figure 47 - Add New Coordinate<br />
Page: 36
Figure 48 - Add New Coordinate Location<br />
Click to delete a coordinate or click to edit a coordinate (Figure 49).<br />
Figure 49 - Delete or Edit Coordinates<br />
4. Predefined Area<br />
The ‘Predefined Area’ option provides a list of predefined areas to perform a search<br />
on. The list of predefined areas includes:<br />
� States<br />
� Counties<br />
� Congressional Districts<br />
Selecting <strong>the</strong> ‘Predefined Area’ tab displays <strong>the</strong> ‘Add Shape’ dialog box as shown in<br />
Figure 50. Select <strong>the</strong> desired State, Area type (State, County, Congress District),<br />
and Area (County name or Congressional District name).<br />
Page: 37
Figure 50 - Predefined Area - Add Shape<br />
The outline of <strong>the</strong> selected Predefined area is <strong>the</strong>n displayed on <strong>the</strong> Google Map<br />
interface (Figure 51).<br />
Figure 51 - Predefined Search Area<br />
5. Upload ESRI Shapefile or KML file<br />
The <strong>Earth</strong><strong>Explorer</strong> interface provides <strong>the</strong> capability to upload ei<strong>the</strong>r an ESRI<br />
Shapefile or Google <strong>Earth</strong> Keyhole Markup Language file as search criteria.<br />
a. Upload ESRI Shapefile<br />
Selecting <strong>the</strong> ‘Shapefile’ tab on <strong>the</strong> ‘Coordinates’ dialog box displays <strong>the</strong> input<br />
form for <strong>the</strong> uploading ESRI Shapefile information for a search area (Figure 52).<br />
Shapefiles are limited to one record containing one polygon or line string with a<br />
maximum 30 points.<br />
Page: 38
Figure 52 - Upload ESRI Shapefile<br />
The ESRI Shapefile dialog box requires all of <strong>the</strong> following files: .shp, .shx, .dbf<br />
and .dbf.<br />
b. Upload KML/KMZ file<br />
Selecting <strong>the</strong> ‘KML’ tab on <strong>the</strong> ‘Coordinates’ dialog box displays <strong>the</strong> input form for<br />
<strong>the</strong> uploading a KML or KMZ file for a search area (Figure 52). The KML or KMZ<br />
file is limited to one record containing one polygon or line string with a maximum<br />
30 points.<br />
Figure 53 - Upload KML/KMZ file<br />
Browse to <strong>the</strong> desired KML or KMZ file, select <strong>the</strong> desired file, and <strong>the</strong>n select<br />
<strong>the</strong> ‘Upload’ file button to process <strong>the</strong> KML/KMZ file to <strong>the</strong> desired polygon<br />
search area. Figure 54 is an example KML file uploaded to <strong>Earth</strong><strong>Explorer</strong> with 4<br />
polygon points identified in <strong>the</strong> KML.<br />
Page: 39
Figure 54 - Example uploaded KML file<br />
The following is <strong>the</strong> example used to create <strong>the</strong> KML polygon search example.<br />
<br />
<br />
<br />
<br />
<br />
-98.2,44.4<br />
-96.2,44.4<br />
-96.2,42<br />
-98.2,42<br />
-98.2,44.4<br />
<br />
<br />
<br />
<br />
#a00000ff<br />
0<br />
<br />
<br />
<br />
<br />
Figure 55 - KML Example<br />
Page: 40
6. Dates Selected<br />
The ‘Dates Selected’ option provides a method for entering a beginning and ending<br />
date range to refine <strong>the</strong> search criteria (Figure 56). You are not required to modify<br />
<strong>the</strong> default date range; however, a date range is highly recommended to reduce <strong>the</strong><br />
number of search results returned from a search. ‘Search Months’ allows you to<br />
specify which months to search within <strong>the</strong> date range specified.<br />
For example, Figure 56 shows a search range of 01/01/2008 to 12/31/2009, with<br />
selected months of April, May, June, and July.<br />
Figure 56 - Dates Selected<br />
7. Number of records to return<br />
The <strong>Earth</strong><strong>Explorer</strong> interface allows you to select <strong>the</strong> number of records to return<br />
from a search. Use <strong>the</strong> ‘Results Options’ tab to select <strong>the</strong> maximum number of<br />
scenes returned (Figure 57).<br />
Figure 57 - Number of records to return<br />
Page: 41
Once you enter <strong>the</strong> search criteria, click <strong>the</strong> ‘Data Sets’ tab at <strong>the</strong> top or bottom of<br />
<strong>the</strong> ‘Enter Search Criteria’ form.<br />
B. Select Data Set(s):<br />
The ‘Data Sets’ tab selects which dataset(s) to search (Figure 58).<br />
Figure 58 - <strong>Earth</strong><strong>Explorer</strong> Search Tabs – Data Sets<br />
The ‘Data Set’ menu (Figure 59) categorizes datasets into similar data collections.<br />
<strong>Earth</strong><strong>Explorer</strong> uses a dynamic tree menu with expandable/collapsible links for each<br />
major data category. Click <strong>the</strong> plus sign ( ) next to <strong>the</strong> category name to expand <strong>the</strong><br />
list of datasets for that collection. Click <strong>the</strong> minus sign ( ) next to <strong>the</strong> category name<br />
to collapse <strong>the</strong> list.<br />
Page: 42
Figure 59 - Data Set Selection Expandable View<br />
Information about a collection is identified with <strong>the</strong> ‘Related Links’ icon ( ). Information<br />
about each dataset is identified with <strong>the</strong> Information icon ( ). Moving <strong>the</strong> mouse<br />
pointer over a dataset displays a longer description of <strong>the</strong> dataset (Figure 60).<br />
Figure 60 - Dataset mouse over example<br />
The majority of <strong>the</strong> datasets are available for download from <strong>the</strong> <strong>USGS</strong> at no cost. A<br />
few datasets have a minimal fee to cover <strong>the</strong> cost of increasing <strong>the</strong> priority in<br />
production. These datasets are identified with a dollar sign icon ( ) (Figure 61).<br />
Page: 43
Figure 61 - Dataset with cost of reproduction icon<br />
Data Set Prefilter – Select <strong>the</strong> Data Set Prefilter option to filter any datasets that do not<br />
match a user’s search criteria (Figure 62). Apply <strong>the</strong> prefilter to narrow <strong>the</strong> list of<br />
datasets to include only those based on <strong>the</strong> area of interest, date range, and months<br />
selected on <strong>the</strong> Search Criteria tab.<br />
Figure 62 - Data Set Prefilter<br />
The prefilter does not guarantee results for <strong>the</strong> defined search criteria.<br />
Click <strong>the</strong> ‘Clear All Selected’ button to unselect all datasets that<br />
were selected.<br />
After selecting a dataset, click <strong>the</strong> ‘Additional Criteria’ tab to enter additional criteria, or<br />
click <strong>the</strong> ‘Results’ tab to execute <strong>the</strong> search and view <strong>the</strong> results for <strong>the</strong> criteria entered.<br />
Page: 44
C. Enter Additional Criteria:<br />
The ‘Additional Criteria’ tab is an optional input area that allows <strong>the</strong> entry of additional<br />
search criteria specific to <strong>the</strong> dataset(s) selected. Click <strong>the</strong> ‘Additional Criteria’ tab to<br />
display <strong>the</strong> additional criteria for <strong>the</strong> first dataset selected (Figure 63).<br />
Figure 63 - <strong>Earth</strong><strong>Explorer</strong> Additional Criteria Tab<br />
To narrow <strong>the</strong> results of a search, each dataset in <strong>Earth</strong><strong>Explorer</strong> has additional specific<br />
criteria that can be entered (Figure 64).<br />
Page: 45
Figure 64 - Example Additional Criteria form<br />
Page: 46
Select <strong>the</strong> dataset from <strong>the</strong> dropdown (if you only select one dataset, only one dataset<br />
appears in <strong>the</strong> dropdown) (Figure 65).<br />
Figure 65 - Data Set Criteria forms<br />
Each criteria page is different and is based on <strong>the</strong> unique specific search criteria defined<br />
for that dataset. In <strong>the</strong> following example, <strong>the</strong> specific search criteria include:<br />
� WRS Path<br />
� WRS Row<br />
� Cloud Cover<br />
� Data Category<br />
� Day Night<br />
� Landsat Scene Identifier<br />
Click <strong>the</strong> title of a search criteria attribute to provide information about <strong>the</strong> particular<br />
search item.<br />
Page: 47
Figure 66 - Unique Criteria Form<br />
Enter <strong>the</strong> additional criteria as desired to narrow <strong>the</strong> search (Figure 66).<br />
Click <strong>the</strong> ‘Reset’ button to clear <strong>the</strong> page of <strong>the</strong> current dataset listed. The ‘Reset All’<br />
button clears <strong>the</strong> criteria forms for all <strong>the</strong> datasets listed. Once you enter <strong>the</strong> additional<br />
criteria (if any), click <strong>the</strong> ‘Results’ tab or button to execute a search.<br />
Page: 48
D. View Search Results<br />
The ‘Results’ tab (Figure 67) executes a search using <strong>the</strong> search criteria and displays<br />
<strong>the</strong> results for <strong>the</strong> search criteria. The left side of <strong>the</strong> page displays <strong>the</strong> results panel<br />
with <strong>the</strong> thumbnail and textual information for each scene returned from <strong>the</strong> search.<br />
The right side of <strong>the</strong> page displays <strong>the</strong> Google Map interface with an outline of <strong>the</strong><br />
identified area of interest (Figure 68).<br />
Figure 67 - <strong>Earth</strong><strong>Explorer</strong> Results Tab<br />
Figure 68 - Example Results<br />
The Search Results panel includes <strong>the</strong> following components:<br />
� Show Result Controls – Shows all footprints, provides browse options, adds all<br />
page results to <strong>the</strong> shopping basket, and modifies <strong>the</strong> opacity of browse<br />
displayed on <strong>the</strong> map<br />
� Search Results List – Displays <strong>the</strong> thumbnail, textual information, icons to view<br />
details of each scene, view browse, and request downloads of data and o<strong>the</strong>r<br />
visualization controls for each record returned from <strong>the</strong> search<br />
� Google Map Interface – Displays <strong>the</strong> search area, views footprints on <strong>the</strong> map,<br />
and reviews a browse image for each scene through <strong>the</strong> Google Map interface<br />
1. Search Result Controls<br />
The Search Results Controls (Figure 69) provide options for:<br />
� Displaying all footprints on <strong>the</strong> map display from <strong>the</strong> search results list<br />
� Displaying all browse on <strong>the</strong> map display from <strong>the</strong> search results list<br />
Page: 49
� Adding all search results displayed on this page to <strong>the</strong> item basket<br />
Figure 69 - Search Result Control<br />
Page: 50
Select ‘Show All Footprints’ (Figure 70) to display footprints from <strong>the</strong> current page of<br />
results.<br />
Figure 70 - Show All Footprints<br />
Select ‘Show All Browse’ (Figure 71) to display all browse from <strong>the</strong> current page of<br />
results.<br />
Figure 71 - Show All Browse<br />
Page: 51
Select ‘Add All Results from Page to Order’ to add all results displayed on <strong>the</strong><br />
current page to <strong>the</strong> item selection basket.<br />
The ‘Browse Opacity’ slider (Figure 72) adjusts <strong>the</strong> opacity level of <strong>the</strong> overlay<br />
browse images.<br />
Figure 72 - Browse Opacity Example<br />
2. Search Results List<br />
The Search Results List provides <strong>the</strong> controls for displaying <strong>the</strong> search results.<br />
Each search result includes a thumbnail image, textual information on each scene,<br />
links to view browse and download, and o<strong>the</strong>r visualization controls.<br />
c. Multiple Datasets<br />
<strong>Earth</strong><strong>Explorer</strong> searches multiple datasets (Figure 73). The results of <strong>the</strong> first<br />
dataset display in <strong>the</strong> results panel. Use <strong>the</strong> “Data Set” selection box to<br />
select and view each additional dataset.<br />
Page: 52
Figure 73 - Select Data Set Results<br />
Figure 74 displays an example of search results.<br />
Page: 53
Figure 74 - Example Search Results<br />
d. Overlay and Download Controls<br />
Page: 54
Each search result record includes a thumbnail image, textual information on<br />
each scene, links to view browse and download data, and o<strong>the</strong>r visualization<br />
controls. Based on <strong>the</strong> dataset and user profile, some controls may not be<br />
available (Figure 75).<br />
Figure 75 - Example Scene Level Results<br />
The following is an overview of <strong>the</strong> overlay and download controls:<br />
� Show Footprint – Select <strong>the</strong> ‘Show Footprint’ ( ) icon to display <strong>the</strong><br />
footprint of <strong>the</strong> selected scenes on Google Map (Figure 76). When <strong>the</strong><br />
footprint option is on, <strong>the</strong> footprint icon is highlighted. Click <strong>the</strong> highlighted<br />
icon to turn off <strong>the</strong> footprint option. Multiple footprints can be selected and<br />
displayed on <strong>the</strong> map. Each footprint displays in a different color.<br />
Figure 76 - Footprint Overlay<br />
� Show Browse Overlay – Click <strong>the</strong> ‘Show Browse Overlay’ ( ) icon to<br />
display a preview image (browse) of <strong>the</strong> scene on <strong>the</strong> map (Figure 77).<br />
Page: 55
When <strong>the</strong> browse option is on, <strong>the</strong> browse icon is highlighted. Click <strong>the</strong><br />
highlighted icon to turn off <strong>the</strong> browse option. Multiple browse can be<br />
selected and displayed on <strong>the</strong> map.<br />
Figure 77 - Browse Overlay<br />
� Show Metadata and Browse - Click <strong>the</strong> thumbnail image or icon to<br />
display <strong>the</strong> reduced resolution browse image and full metadata for <strong>the</strong><br />
selected scene (Section IV, f).<br />
� Download Options – Click <strong>the</strong> ‘Download Options’ icon ( ) to allow<br />
registered users to download <strong>the</strong> selected data (Figure 78). Selecting <strong>the</strong><br />
‘Download Options’ icon before registering or logging in displays <strong>the</strong><br />
following prompt:<br />
Figure 78 - Login before downloading<br />
Click <strong>the</strong> ‘Login’ to log in to <strong>Earth</strong><strong>Explorer</strong>.<br />
After logging in and clicking <strong>the</strong> ‘Download Options’ icon, a page similar to<br />
<strong>the</strong> following displays (Figure 79):<br />
Page: 56
Figure 79 - Download Options Dialog<br />
Depending on <strong>the</strong> dataset, multiple products may be available for<br />
download. After selecting <strong>the</strong> desired product, and clicking “Select<br />
Download Option”, <strong>the</strong> following dialog displays (Figure 80):<br />
Figure 80 - Download Scene<br />
Click ‘Download’ to start <strong>the</strong> download process. A ‘File Download’ dialog<br />
box displays (Figure 81). Select ‘Save’ to prompt for <strong>the</strong> location to save<br />
<strong>the</strong> file.<br />
Figure 81 - Download Scene Dialog<br />
� Bulk download – Click <strong>the</strong> ‘Bulk Download’ icon ( ) to allow registered<br />
users to bulk download <strong>the</strong> selected data (Figure 82). Selecting <strong>the</strong> ‘Bulk<br />
Download’ icon adds <strong>the</strong> selected scenes to <strong>the</strong> Item Basket.<br />
Page: 57
Figure 82 - Bulk Download - Added to Item Basket<br />
Selecting <strong>the</strong> ‘Item Basket’ in <strong>the</strong> menu displays <strong>the</strong> ‘Bulk Download Item<br />
Basket’ (Figure 83). Based on <strong>the</strong> dataset, multiple options may be<br />
available to select <strong>the</strong> type of product(s) to download.<br />
Figure 83 - Bulk Download Item Basket<br />
After identifying <strong>the</strong> type of product desired, select <strong>the</strong> ‘Proceed to<br />
Checkout’ button to review <strong>the</strong> bulk request (Figure 84).<br />
Page: 58<br />
Bulk<br />
Download<br />
Icon
Figure 84 - Bulk Download Order Review<br />
Selecting <strong>the</strong> ‘Submit Order’ button submits <strong>the</strong> bulk order for processing.<br />
Figure 85 - Bulk Download Validation<br />
The ‘Bulk Download Validation’ form (Figure 85) displays <strong>the</strong> scenes<br />
requested through <strong>the</strong> bulk download interface. To begin <strong>the</strong> download<br />
process, <strong>the</strong> Bulk Download Application (BDA) is required. First time<br />
users: please download, install and open <strong>the</strong> BDA. Returning users:<br />
please open <strong>the</strong> BDA installed on your system. You will be required to<br />
login using <strong>the</strong> <strong>Earth</strong><strong>Explorer</strong> username and password used to complete<br />
your bulk download request.<br />
e. Order Controls<br />
The majority of <strong>the</strong> products available through <strong>Earth</strong><strong>Explorer</strong> for registered users<br />
are available via download. In some cases, order requests are available for<br />
selected products. Ordering products usually requires some specialized image<br />
or data processing. If a dataset has an option for ordering, <strong>the</strong> ‘Order Scene’<br />
icon ( ) displays. This option allows registered users to order or request<br />
specialized processing on certain products. The ‘Order Scene’ icon is greyed out<br />
unless you are registered and logged in. In addition, a few products require a<br />
small fee for <strong>the</strong> cost of processing.<br />
Page: 59
Click <strong>the</strong> ‘Order Scene’ icon to add <strong>the</strong> selected scene to <strong>the</strong> ‘Item Basket’. As<br />
each scene is added to <strong>the</strong> ‘Item Selection’ basket on <strong>the</strong> menu bar, <strong>the</strong> number<br />
of scenes added to <strong>the</strong> basket is updated and <strong>the</strong> ‘Order Scene’ icon changes to<br />
green (Figure 86).<br />
Figure 86 - Order Scene<br />
In some cases, additional ordering parameters may be required to complete an<br />
order.<br />
To view items in <strong>the</strong> Item Basket, click ‘Item Basket’ in <strong>the</strong> menu bar or <strong>the</strong> ‘View<br />
Item Basket’ button at <strong>the</strong> bottom of <strong>the</strong> results page<br />
(Figure 87).<br />
Figure 87 - Item Basket Example<br />
Order Icon<br />
In <strong>the</strong> following example, <strong>the</strong> first item is for an Aerial Photo Single Frame<br />
scanning request. There is one option for <strong>the</strong> micron size of processing<br />
parameters. The cost of scanning is $30.<br />
The second item is a request for a Landsat 7 Enhanced Thematic Mapper Plus<br />
(ETM+) Level 0, Scan Line Corrector (SLC) OFF On-Demand product.<br />
Processing parameters are not available for this product; this item is at no cost.<br />
The overall cost is $30 for <strong>the</strong> scanned product and $5 for <strong>the</strong> handling fee<br />
(Figure 88).<br />
Page: 60<br />
Item Basket
Figure 88 - Item Basket<br />
Click ‘Submit Order’ to submit <strong>the</strong> order for processing. You will receive a<br />
confirmation email. The Checkout Summary page displays and you can print or<br />
save this summary for your records (Figure 89).<br />
Figure 89 - Checkout Summary<br />
Page: 61
Ordering Aerial Photography provides a method for downloading scenes from an<br />
entire roll. Select <strong>the</strong> roll icon ( ) to display <strong>the</strong> ‘Roll View’ for <strong>the</strong> selected<br />
scene’s roll (Figure 90).<br />
Figure 90 - Roll View<br />
For each scene on <strong>the</strong> roll, you can download, add to a bulk order, or order<br />
images.<br />
f. Browse and Metadata<br />
<strong>Earth</strong><strong>Explorer</strong> displays a thumbnail image, browse, and detailed metadata<br />
information for each scene returned from a search (Figure 91).<br />
Page: 62
Figure 91 - Example Scene Level Results<br />
Show Browse and Metadata – On <strong>the</strong> thumbnail, mouse over to display <strong>the</strong><br />
‘Show Browse and Metadata’ (Figure 92).<br />
Figure 92 - Show Browse and Metadata<br />
Click <strong>the</strong> thumbnail image or icon to display <strong>the</strong> reduced resolution browse<br />
image and full metadata for <strong>the</strong> selected scene (Figure 93).<br />
Page: 63
Figure 93 - Browse and Metadata View<br />
The Browse and Metadata view includes <strong>the</strong> following:<br />
� The Browse image of <strong>the</strong> selected scene displays at <strong>the</strong> top center of <strong>the</strong><br />
lightbox display. If multiple browse areas are available for <strong>the</strong> image, an<br />
image control is displayed to allow viewing multiple browse images.<br />
Figure 94 is an example of multiple browse for an image. Each available<br />
image displays as a thumbnail in <strong>the</strong> lower left corner of <strong>the</strong> display. To<br />
switch between browse, click <strong>the</strong> arrow () or click one of <strong>the</strong> thumbnails<br />
at <strong>the</strong> lower left corner for <strong>the</strong> page.<br />
Page: 64
Figure 94 - Multiple Browse Display Example<br />
� Data Set Attributes – Each dataset has unique attributes describing <strong>the</strong><br />
metadata associated with <strong>the</strong> scene. Each attribute has a hyperlink to <strong>the</strong><br />
detailed information on that particular dataset.<br />
� Attribute Value – The information associated with each attribute.<br />
� Open New Window – Click ‘Open New Window’ to display <strong>the</strong> selected<br />
browse in a separate window (Figure 95).<br />
Page: 65
Figure 95 - Open New Window – Display Browse<br />
� FGDC Format – Click <strong>the</strong> ‘FGDC Format’ button to display <strong>the</strong> metadata in<br />
<strong>the</strong> Federal Geographic Data Committee (FGDC) format. Click ‘Table<br />
Format’ on <strong>the</strong> FGDC view to display <strong>the</strong> ‘Browse and Metadata’ view<br />
(Figure 96).<br />
Figure 96 - FGDC Format<br />
g. Search Results Controls<br />
The <strong>Earth</strong><strong>Explorer</strong> user interface controls on <strong>the</strong> Search Results include:<br />
Page: 66
� Scroll bar – Click to view additional items returned from <strong>the</strong> search.<br />
� Displaying X – XX of XX - Results Per Page – The default ‘Results Per<br />
Page’ is ten records. To show more results on <strong>the</strong> page, change <strong>the</strong><br />
‘Results Per Page’ in <strong>the</strong> ‘User Profile’ to a higher number. The ‘User<br />
Profile’ requires you to be registered. Additional information on <strong>the</strong><br />
‘User Profile’ is covered in more detail in Section III Registration and<br />
Profile.<br />
� Information icon ( ) – Click to see <strong>the</strong> number of<br />
records in <strong>the</strong> dataset. Figure 97 provides an example. In this case,<br />
<strong>the</strong> search returned 100 records (<strong>the</strong> default setting) but <strong>the</strong> number of<br />
items in <strong>the</strong> dataset is 2,570 (Figure 98).<br />
Figure 97 - Default Search Results Returned = 100<br />
Figure 98 - Total Search Results of query = 2570<br />
To modify <strong>the</strong> number of search results, refer to <strong>the</strong> ‘Profile’ on <strong>the</strong><br />
<strong>Earth</strong><strong>Explorer</strong> menu. Select <strong>the</strong> ‘Results per Page’ in <strong>the</strong> profile to modify <strong>the</strong><br />
‘Results Per Page:’ on <strong>the</strong> ‘Update User Interface Options’ panel (Figure 99).<br />
Figure 99 - Search Criteria - Number of records to return<br />
Paging controls include <strong>the</strong> following:<br />
� Page Number ( ) - Selects a different page of results<br />
� Next - Displays <strong>the</strong> next page<br />
� Previous - Displays <strong>the</strong> previous page<br />
� First - Displays <strong>the</strong> first page<br />
� Last - Displays <strong>the</strong> last page<br />
Page: 67
h. Export Metadata<br />
<strong>Earth</strong><strong>Explorer</strong> provides an option to ‘Export Metadata’ results in a number of<br />
popular formats (Figure 100).<br />
Figure 100 - Export Options<br />
To export metadata, select <strong>the</strong> ‘Export Metadata’ button.<br />
Select <strong>the</strong> ‘Include Browse’ option to include browse images with <strong>the</strong> metadata.<br />
The following metadata formats are supported:<br />
� Delimited - Generates a .txt file, with <strong>the</strong> delimiter of choice (comma or<br />
pipe) with <strong>the</strong> returned, non-excluded results from a search. The<br />
information includes <strong>the</strong> full metadata as displayed in <strong>the</strong> lightbox.<br />
� KML - Generates a .kml file with <strong>the</strong> returned, non-excluded results from a<br />
search. The information in this export includes <strong>the</strong> full metadata as<br />
displayed in <strong>the</strong> standard metadata dialog. The KML 2.2 standard is used<br />
for this KML file. This export format is not available for result sets larger<br />
than 1000 results.<br />
� KMZ - Generates a .kmz file with <strong>the</strong> returned, non-excluded results from<br />
a search. The information in this export includes <strong>the</strong> full metadata as<br />
displayed in <strong>the</strong> standard metadata dialog. The KML 2.2 standard is used<br />
for this KMZ file. This export format is not available for result sets larger<br />
than 1000 results.<br />
� FGDC - Generates a FGDC format file in ISO 19115 format.<br />
� Full Results (CSV) - Allows a user to enter <strong>the</strong> number of records to<br />
return. The export function uses this number, along with <strong>the</strong> current<br />
search criteria to generate a csv formatted export of search results. The<br />
metadata in this export includes <strong>the</strong> metadata returned on <strong>the</strong> search<br />
result screen. This export does not take into consideration excluded<br />
scenes.<br />
Page: 68
� Shapefile - Generates a .zip file with <strong>the</strong> returned, non-excluded results<br />
from a search. Files included in <strong>the</strong> .zip file include a .shp, .shx, .dbf, and<br />
.prj. Shapefiles are generated using <strong>the</strong> ERSI standards. Limited<br />
metadata is included with this export. This export is not available for result<br />
sets larger than 1000 results.<br />
Click to exclude a scene from <strong>the</strong> metadata export. Click<br />
to return <strong>the</strong> excluded scenes to <strong>the</strong> list.<br />
Page: 69
3.<br />
Standing Request<br />
The ‘Standing Request’ function allows registered users to run searches for new<br />
acquisitions, in <strong>the</strong> background, using <strong>the</strong> same search criteria. The Submit<br />
Standing Request button is only visible if you are logged in to <strong>Earth</strong><strong>Explorer</strong><br />
The ‘Submit Standing Request’ button is at <strong>the</strong> bottom of<br />
<strong>the</strong> search results list panel (Figure 101).<br />
Figure 101 - Submit Standing Request<br />
Select <strong>the</strong> ‘Submit Standing Request’ button to display <strong>the</strong> ‘Save as Standing<br />
Request’ form (Figure 102).<br />
Page: 70
Figure 102 - Standing Request Form<br />
Enter <strong>the</strong> following criteria for a standing request:<br />
� Name – Enter a name for this request<br />
� Frequency – Select Daily, Weekly, Monthly, or Quarterly, which<br />
determines how frequent <strong>the</strong> search runs<br />
� Date range for <strong>the</strong> standing request will run.<br />
o Start Date – Select <strong>the</strong> start date for <strong>the</strong> standing request<br />
o End Date – Select <strong>the</strong> end date for <strong>the</strong> standing request<br />
� Search date range.<br />
o Start Date – Select <strong>the</strong> start date for <strong>the</strong> search date<br />
o End Date – Select <strong>the</strong> end date for <strong>the</strong> search date<br />
Click <strong>the</strong> ‘Submit’ button to execute <strong>the</strong> standing request.<br />
To review standing requests, click ‘Profile’ on <strong>the</strong> <strong>Earth</strong><strong>Explorer</strong> Main menu bar<br />
(Figure 103).<br />
Figure 103 - Manage Criteria<br />
Page: 71
This action displays <strong>the</strong> ‘Profile Menu’. Click ‘Standing Request’ on <strong>the</strong> Profile menu<br />
to see <strong>the</strong> list of entered standing requests (Figure 104).<br />
Figure 104 - Standing Request<br />
The Standing Request module sends you an email when a new acquisition matches<br />
<strong>the</strong> search criteria. You can <strong>the</strong>n review metadata and browse for <strong>the</strong> returned<br />
scenes.<br />
Page: 72
Page: 73<br />
Appendix<br />
Acronym Description<br />
API Application Programming Interface<br />
DMS Degrees, Minutes, Seconds<br />
DOI Department of Interior<br />
EE <strong>Earth</strong><strong>Explorer</strong><br />
EROS <strong>Earth</strong> Resources Observation and Science Center<br />
ETM+ Enhanced Thematic Mapper Plus<br />
FGDC Federal Geographic Data Committee<br />
FOIA Freedom of Information Act<br />
GB Gigabyte<br />
GHZ Gigahertz<br />
GloVIS <strong>USGS</strong> Global Visualization Viewer<br />
GUI Graphical User Interface<br />
HDDS Hazards Data Distribution Systems<br />
HTTPS Hypertext Transfer Protocol Secure<br />
KML Keyhole Markup Language<br />
L1G Level 1 Systematic Correction<br />
L1T Level 1 Standard Terrain Correction<br />
LDCM Landsat Data Continuity Mission<br />
MB Megabyte<br />
Mbps Megabit per Second<br />
OGC Open Geospatial Consortium<br />
PC Personal Computer<br />
PHP Hypertext Preprocessor<br />
RSS Really Simple Syndication<br />
SLC Scan Line Corrector<br />
<strong>USGS</strong> United States Geological Survey<br />
WRS Worldwide Reference System