PP20D Installation Guide (FS-1020D) - Files.oce.com - Océ
PP20D Installation Guide (FS-1020D) - Files.oce.com - Océ
PP20D Installation Guide (FS-1020D) - Files.oce.com - Océ
Create successful ePaper yourself
Turn your PDF publications into a flip-book with our unique Google optimized e-Paper software.
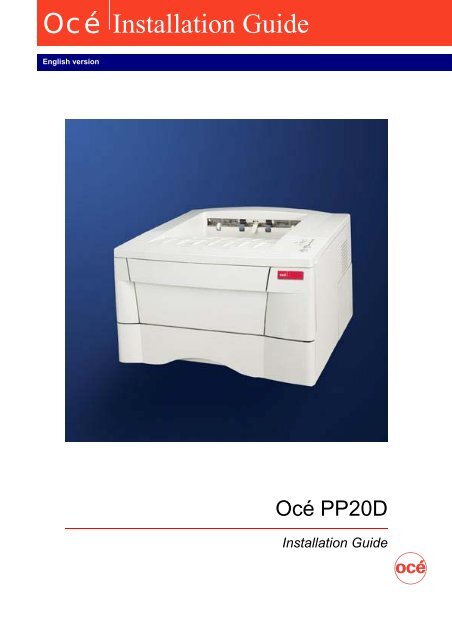
Education ServicesOcé <strong>Installation</strong> <strong>Guide</strong>1.1.1.English versionOcé <strong>PP20D</strong><strong>Installation</strong> <strong>Guide</strong>
CautionNO LIABILITY IS ASSUMED FOR ANY DAMAGE CAUSED BY IMPROPER INSTALLATION.Notice on SoftwareSOFTWARE USED WITH THIS PRINTER MUST SUPPORT THE PRINTER'S EMULATIONMODE. The printer is factory-set to emulate the HP PCL 6. The emulation mode can be changed byfollowing the pr<strong>oce</strong>dures described in the Operation <strong>Guide</strong> contained as an electronic file in theKy<strong>oce</strong>ra Mita Document Library CD-ROM supplied with the printer.NoticeThe information in this manual is subject to change without notification. Additional pages may beinserted in future editions. The user is asked to excuse any technical inaccuracies or typographicalerrors in the present edition.No responsibility is assumed if accidents occur while the user is following the instructions in thismanual. No responsibility is assumed for defects in the printer's firmware (contents of its read-onlymemory).This manual, any copyrightable subject matter sold or provided with or in connection with the saleof the page printer, are protected by copyright. All rights are reserved. Copying or other reproductionof all or part of this manual, any copyrightable subject matter without the prior written consentof Ky<strong>oce</strong>ra Corporation is prohibited. Any copies made of all or part of this manual, anycopyrightable subject must contain the same copyright notice as the material from which the copyingis done.Table of ContentsSTEP 1 Unpacking .......................................................................1STEP 2STEP 3Positioning the Printer....................................................3Installing the Toner Container........................................4STEP 4 Connecting the Printer to the Computer .......................7STEP 5STEP 6STEP 7Connecting the Power Cord...........................................9Adding Paper to the Paper Cassette and MP Tray......10Printing a Status Page..................................................17©2003 by KYOCERA MITA CORPORATION All rights reserved. Revision 1.0., September 2003
-STEP1UnpackingCarefully remove the printer and other items from the box. Check that nothing is missingagainst the list of shipped <strong>com</strong>ponents below.List of Shipped Components(A)(B)(C)(D)PrinterToner Container [TK-18] (B)PrinterCleaning Cloth (A)Power Cord (D)CD-ROMs (A)<strong>Installation</strong> <strong>Guide</strong> [this booklet] (A)Extension Tray (C)[for U.S.A. only]1
STEP2Positioning the PrinterMake sure that the place of installation meets the following requirements:Clearance25 cm (9-7/8inches)30 cm (11-13/16 inches)40 cm(15-3/4inches)Be sure to secure enough spacearound the printer. Prolongeduse without sufficient clearancemay cause heat to build upwithin the printer, resulting infire.50 cm(19-11/16inches)25 cm(9-7/8inches)EnvironmentTemperature 10 to 32.5 °C (50 to 90.5 °F), ideally about 23 °C (73.4 °F)Humidity 20 to 80 %, ideally 60 %Do not install the printer where temperature or humidity is outside the re<strong>com</strong>mendedrange. Print quality may suffer and there will be an increasedchance of paper jams.Places to AvoidAvoid installing the printer in locations subject to:• Direct drafts of hot or cold air• Direct drafts from outside (Avoid locations near building entrances.)• Sudden temperature or humidity changes• Sources of high temperature, for example, near stoves or radiators• Excessive dust• Vibration• Unstable surfaces and surfaces that are not level• Ammonia or other harmful fumes (If you are planning to fumigate the room, ormake liberal use of insecticide, remove the printer first!)• Excessive sunlight or humidity• Lack of ventilation• Low air pressure, e.g., elevations greater than 2000 meters (6500 feet) abovesea level3
STEP3Installing the Toner ContainerBefore you can use the printer for the first time, you must set up the printer by installingthe toner container and interfacing with the <strong>com</strong>puter.1 Open the printer top cover all the way.2 Confirm that the lock lever is in therelease (UNLOCK) position. If not, pull itforward until it is in the release position.3 Take the toner container from the bag.Hold it with the protective seal (orangecolored)facing up. Shake the toner containerhorizontally at least 5 times. Thisensures that the toner is evenly distributedinside.4
4 Carefully remove the protective seal.5 Install the toner container into theprinter.6 Push firmly on the top of the toner containerat the positions marked PUSHHERE.5
LOCK7 Push the lock lever to the lock (LOCK)position.UNLOCKLOCKUNLOCK8 Close the top cover.To remove the toner containerLock Lever #2Pull the lock lever #1 to the release(UNLOCK) position, pull the lock lever#2, then gently remove the toner container.Lock Lever #16
STEP4Connecting the Printer to the ComputerThere are various ways of connecting the printer to the <strong>com</strong>puter, such as through theparallel interface connector, through the USB (Universal Serial Bus) interface connector,through the optional serial interface board kit (IB-11) or through the optional networkinterface board.Printer ConnectionsNetworkOptional Serial InterfaceBoard kit (IB-11)Optional NetworkInterface Board(DC 3.3V)Serial InterfaceUSBInterfacePrinter (Rear)Parallel InterfacePower SupplyBefore performing this step, be sure to turn off both the printer and the <strong>com</strong>puter’spower switches and unplug the printer’s power plug from the poweroutlet. Failure to do so may result in electrical shock.The standard Centronics parallel interface connector and USB interface connectorare located on the rear of the printer.7
Parallel Interface ConnectionClips1 Plug one end of the printer cable (notincluded) into the parallel interface connectoron the rear of the printer.• Use a parallel printer cablethat <strong>com</strong>plies with theIEEE1284 standards.• The printer will work best if itis installed near the <strong>com</strong>puter.The connecting cable shouldbe shielded and not be longerthan 3 meters (10 feet).To printerPrinter Cable2 Close the clips on both sides to fix theconnector in place.Plug the other end of the printer cableinto the <strong>com</strong>puter’s Centronics parallelinterface connector.USB (Universal Serial Bus) Interface Connection1 Plug one end of the USB cable on therear of the printer.•Use a cable that <strong>com</strong>plieswith Revision 2.0 of USB standard(a rectangular Type Aplug and a square Type Bplug).To printerUSB Cable• The connecting cable shouldbe shielded and not be longerthan 5 meters (16 feet).2 Plug the other end of the USB cable intothe <strong>com</strong>puter’s USB interface connector.8
STEP5Connecting the Power CordThis section describes the pr<strong>oce</strong>dure for connecting the power cable and variouscautions.Notes on Power Supply• Install the printer near an AC wall outlet, preferably one that can be used forthe printer alone.• Only use this printer with the supply voltage indicated on the serial numberlabel attached to the printer’s rear panel.• If an extension cord is used, the total length of the power cord plus extensionshould be 5 meters (16 feet) or less.Power RequirementsVoltage110 V, 120 V, 220 to 240 V, ±10 % at each voltageFrequency 60 Hz (110 V, 120 V) ±2 %, 50/60 Hz (220 to 240 V) ±2 %Current capacity Max. 6.5 A at 110 V, max. 7.1 A at 120 V, or max. 3.8 A at 220 to 240 VTo Connect the Power Cord• Be sure the printer’s power switch is turned off.• Only use the power cord supplied with the printer.Power CordConnector1 Plug the power cord into the power cordconnector on the rear of the printer.Power Cord2 Connect the other end of the power cordinto a power outlet.Be sure to connect to a 3-wiregrounded power strip.9
STEP6Adding Paper to the Paper Cassette andMP TrayThe paper cassette can ac<strong>com</strong>modate A5 to Legal size paper and can hold approximately250 sheets. The Multi-Purpose tray can ac<strong>com</strong>modate the various paper sizesand can hold approximately 50 sheets of paper.The following paper weights can be used with the printer.Paper sourcePaper cassetteMP trayPaper weight60 to 105 g/m²60 to 163 g/m²The edges of paper are sharp. When loading paper, be careful not to cutyour hand on the paper.Paper cassetteStandard paper sizes are attached to the inside of the paper cassette as shown inthe following figure. Align the paper guides and paper stopper to the paper sizeyou want to print on as described on the next page.A4B5A510
1 Pull the paper cassette all the way out ofthe printer.Release ButtonPaper Stopper2 Adjust the position of the paper stopperlocated at the rear of the paper cassette.Press in the release button and slide thestopper to the desired paper size. Whenshipped from the factory, the paper cassetteis set to either A4 or Letter size.Release ButtonPaper <strong>Guide</strong>In order to load either Folio orOficio II size paper into thepaper cassette, refer to Adjustingthe paper stopper for Folioand Oficio II sizes on page 14and adjust the paper stopper.3 Adjust the position of the paper guideslocated on the left and right sides of thepaper cassette. Press in the release buttonon the left side guide and slide to thedesired paper size.When using custom size paper, movethe paper guides and paper stopper allthe way out, insert the paper, thenadjust the paper guides and paperstopper to the size of the paper. Adjustthem so that they are in light contactwith the paper.The printer does not automaticallydetect the size of the paperloaded into the paper cassetteor MP tray. As a result, wheneveryou load paper having adifferent size, you must adjustthe paper size. For details,refer to the Operation <strong>Guide</strong>contained as an electronic filein the CD-ROM supplied withthe printer.11
Fan the media (paper/transparencies),then tap it on a levelsurface to avoid media jams orskewed printing.4 Slide the paper into the paper cassette.Load LimitDo not load more paper than willfit under the load limits on thetop of the paper guides. (thepaper cassette will hold approximately250 sheets of paper witha 80 g/m² (21 lb.) basis weight,or with a thickness of 110microns.)5 Insert the paper cassette into the slot inthe printer. Push it straight in as far asit will go.12
To use large size paperPaper StopperBe sure to open the paper stopperwhen printing onto A4 or Letter sizepaper.SubtrayWhen printing onto paper of a sizelarger than A4 or Letter, be sure toopen the paper stopper, and then openthe subtray as well.Extension TrayWhen printing onto Legal size paper,install the extension tray that isincluded with your printer onto thepaper stopper. (The extension tray issupplied for U.S.A. only.)13
Adjusting the paper stopper for Folio and Oficio IIsizesPerform the following pr<strong>oce</strong>dure in order to adjust the paper stopper when loadingFolio and Oficio II size paper into the paper cassette.1 Remove the stopper extension lock fromthe paper stopper.StopperExtensionLock(1)2 Slide the paper stopper back until theedge of the cut out portions (1) of thepaper stopper are aligned with the backedge of the paper cassette.3 Insert the stopper extension lock intothe holes in the paper stopper.4 To secure the stopper extension lock inplace, press down on the lock and slidethe paper stopper back slightly. Thepaper stopper will be fixed in place forFolio and Oficio II size paper.14
Multi-Purpose (MP) tray1 Pull the MP tray towards you until itstops.2 Pull out the subtray and unfold the flap.SubtrayFlap3 Adjust the position of the paper guideson the MP tray. Standard paper sizesare attached to the MP tray. For standardpaper sizes, slide the guides to theposition marked correspondingly.• Do not load more paper thanwill fit under the load limits onthe inside of the MP tray.• If the paper is considerablycurled in one direction, forexample, if the paper isalready printed on one side,try to roll the paper in theopposite direction to counteractthe curl. Printed sheetswill then <strong>com</strong>e out flat.CorrectIncorrect15
EnvelopesEnvelopes should be fed in the face-up position, right edge first.Test a sample envelope on the printer and check that printing quality is satisfactorybefore purchasing.Some types of envelopes are not suitablefor printing. For details on suitabletypes of envelopes, see theOperation <strong>Guide</strong> contained as an electronicfile in the CD-ROM suppliedwith the printer.To close the MP trayClose the flap on the subtray, then push in the subtray and close the MP tray.NoBe careful not to push the trayback into the printer with thesubtray folded out horizontallyas shown in the figure.16
STEP7Printing a Status PageTo test the printer, print a status page indicating factory settings.1 Turn on the printer’s power switch.Upon turning on the power, theprinter’s 4 indicators flash in sequenceuntil printer initialization is <strong>com</strong>plete,then the indicator ( [on line]) lightssteadily.If the indicator does not light,check that previous steps wereperformed properly.If you install the toner container andturn on the power, after a moment theindicators light in sequence from top tobottom. When the printer is firstswitched on after toner installation,there will be a delay ofapproximately 15 minutes beforethe printer gets ready to print.Once the indicator lights, printerinstallation is <strong>com</strong>plete.2 The printer can print two differenttypes of status page — standard andservice-purpose. A service-purpose statuspage contains more detailed informationabout printer settings than astandard status page.• To print a standard status page, pressthe key for at least 3 seconds andthe indicators light in sequence fromtop to bottom.• To print a service-purpose statuspage, press the key for more than10 seconds and the indicators light insequence twice from top to bottom.If the status page prints correctly,printer setup is <strong>com</strong>plete. For detailson using the printer, refer to the Operation<strong>Guide</strong> contained as an electronicfile in the CD-ROM supplied with theprinter.17
Correcting a Paper JamIf a paper jam occurs while you are printing, remove the jammed paper asdescribed below. After you have removed the jammed paper, open and close thetop cover once.Jam at the Face-down Tray and the Rear CoverOpen the rear cover and remove thejammed paper as shown in the figure.Rear CoverJam at the Paper CassettePull out the paper cassette and removethe jammed paper.Paper CassetteJam at the Duplexer1 Open the rear cover and remove the jammedpaper as shown in the figure.Rear Cover18
2 Pull the paper cassette all the way out of theprinter.Paper Cassette3 Open the duplexer’s rear cover andremove any jammed paper.Duplexer’s RearCover4 Open the duplexer’s front cover andremove any jammed paper.Duplexer’sFront Cover19
Jam Inside the PrinterTop cover1 Open the printer’s top cover.2 Open the printer’s front cover.Front Cover3 Lift the pr<strong>oce</strong>ss unit together with thetoner container out of the printer.Pr<strong>oce</strong>ss Unit4 Remove the jammed paper.When pulling the paper, pullgently so as not to tear it. Tornpieces of paper are difficult toremove and may be easily overlooked,preventing recoveryfrom the jam.5 Replace the pr<strong>oce</strong>ss unit and toner container,then close the printer.20
Jam at the MP Tray1 Leaving any paper that may be jammedthere, remove the rest of the paper fromthe MP tray.Do not try to forcefully pull outpaper that has already beenfed partially in to the MP tray.Instead, pr<strong>oce</strong>ed to the nextstep.2 Open the printer’s top cover.Top Cover3 Open the printer’s front cover.Front Cover21
4 Lift the pr<strong>oce</strong>ss unit, together with thetoner container, out of the printer.Pr<strong>oce</strong>ss unit(A)RegistrationRoller(metal)(B)RegistrationRoller(metal)5 Use the following pr<strong>oce</strong>dure that correspondsto the status of the jammedpaper, in order to remove that paper.(A) If the leading edge of the jammedpaper has been fed further into theprinter than the metal registrationroller, remove the jammed paper by itsleading edge.(B) If the paper has not been fed as faras the metal registration roller,remove the jammed paper from theMP tray side.22
FCC statement (for users in the United States)This device <strong>com</strong>plies with Part 15 of the FCC Rules. Operation is subject to the following two conditions:(1) This device may not cause harmful interference, and (2) this device must accept anyinterference received, including interference that may cause undesired operation.■ NoteThis equipment has been tested and found to <strong>com</strong>ply with the limits for a Class B digital device,pursuant to Part 15 of the FCC Rules. These limits are designed to provide reasonable protectionagainst harmful interference in a residential installation. This equipment generates, uses, and canradiate radio frequency energy and, if not installed and used in accordance with the instructions,may cause harmful interference to radio <strong>com</strong>munications. However, there is no guarantee thatinterference will not occur in a particular installation. If this equipment does cause harmful interferenceto radio or television reception, which can be determined by turning the equipment off andon, the user is encouraged to try to correct the interference by one or more of the following measures:• Reorient or relocate the receiving antenna.• Increase the separation between the equipment and receiver.• Connect the equipment into an outlet on a circuit different from that to which the receiver is connected.• Consult the dealer or an experienced radio/TV technician for help.Changes or modifications not expressly approved by the manufacturer for <strong>com</strong>pliance could void theuser’s authority to operate the equipment. Shielded circular cable should be used for interfacingwith the <strong>com</strong>puter.■ Caution to userAny modification without prior permission may cause harmful interference.If any modification/change is introduced to this equipment without prior permission, Ky<strong>oce</strong>ra Mitaas the manufacturer cannot guarantee <strong>com</strong>pliance with FCC rules. To use equipment which doesnot <strong>com</strong>ply with FCC rules is prohibited. The printer may be optionally installed with the followingunits:■ Options Conforming to the Class B limits• IB-11 Serial Interface Board Kit• IB-20/IB-21E/22 Network Interface Card• PF-17 Paper Feeder (250 sheets)Important note on the interface connectorsBe sure to turn off printer power before connecting or disconnecting an interface cable to the printer.For protection against static discharge which may be applied to the printer's internal electronicsthrough the interface connector(s), keep any interface connector which is not in use capped usingthe protective cap supplied.Note: Use shielded interface cable.Safety information■ Laser safetyThis printer is certified as a Class 1 laser product under the U.S. Department of Health and HumanServices (DHHS) Radiation Performance Standard according to Radiation Control for Health andSafety Act of 1968. This means that the printer does not produce hazardous laser radiation. Sinceradiation emitted inside the printer is <strong>com</strong>pletely confined within protective housings and externalcovers, the laser beam cannot escape from the printer during any phase of user operation.■ Laser noticeThis printer is certified in the U.S. to conform to the requirements of DHHS 21 CFR Subchapter forClass I (1) laser products, and elsewhere is certified as a Class I laser product conforming to therequirements of IEC 825.23
DANGER: INVISIBLE LASER RADIATION WHEN OPEN. AVOID DIRECT EXPOSURE TO BEAM.CAUTION: Use of controls or adjustments or performance of pr<strong>oce</strong>dures other than those specifiedherein may result in hazardous radiation exposure.■ Caution labelsLabel inside the printer (Laser radiation warning)(European/Asian/Pacific countries) (U.S.A./Canada)Label on the printer’s rear panelLabel inside the rearCDRH regulationsThe Center of Devices and Radiological Health (CDRH) of the U.S. Food and Drug Administrationimplemented regulations for laser products on August 2, 1976. These regulations apply to laserproducts manufactured after August 1, 1976. Compliance is mandatory for products marketed inthe United States. A label indicating <strong>com</strong>pliance with the CDRH regulations must be attached tolaser products marketed in the United States.Ozone concentrationThe printers generate ozone gas (O 3 ) which may concentrate in the place of installation and causean unpleasant smell. To minimize concentration of ozone gas to less than 0.1 ppm, we re<strong>com</strong>mendyou not to install the printer in a confined area where ventilation is blocked.24
IMPORTANT SAFEGUARDS1. Read all of these instructions and save these instructions for later use.2. Unplug this product from the wall outlet before cleaning.3. Do not use this product near water.4. Do not place this product on an unstable cart, stand, or table. The product may fall, causing seriousdamage to the product.5. Slots and openings in the cabinet and the back are provided for ventilation to ensure reliable operationof the product and to protect it from overheating, these openings must not be blocked or covered.The openings should never be blocked by placing the product on a bed, sofa, rug, or othersimilar surface. This product should never be placed near or over a radiator or heat register. Thisproduct should not be placed in a built-in installation unless proper ventilation is provided.6. This product is equipped with a 3-wire grounding type plug, a plug having a third (grounding) pin.This plug will only fit into a grounding-type power outlet. This is a safety feature. If you are unableto insert the plug into the outlet, contact your electrician to replace your obsolete outlet. Do notdefeat the purpose of the grounding-type plug.7. Do not allow anything to rest on the power cord. Do not locate this product where persons will walkon the cord.8. If an extension cord is used with this product, make sure that the total of the ampere ratings onthe products plugged into the extension cord do not exceed the extension cord ampere rating.9. Never push objects of any kind into this product through cabinet slots as they may touch dangerousvoltage points or short out parts that could result in a risk of fire or electric shock. Never spill liquidof any kind on the product.10. Except as explained elsewhere in User's Manual, do not attempt to service this product yourself.Removing covers may expose you to dangerous voltage points or other risks. Refer all servicing inthose <strong>com</strong>partments to service personnel.11. Unplug this product from the wall outlet and refer servicing to qualified service personnel underthe following conditions:A- When the power cord or plug is damaged or frayed.B- If liquid has been spilled into the product.C- If the product has been exposed to rain or water.D- If the product does not operate normally when the operating instructions are followed.Adjust only those controls that are covered by the operating instructions since improperadjustment of other controls may result in damage and will often require extensive work bya qualified technician to restore the product to normal operation.E- If the product has been dropped or the cabinet has been damaged.Canadian Department of Communications <strong>com</strong>pliance statementThis Class B digital apparatus <strong>com</strong>plies with Canadian ICES-003.Avis de conformité aux normes du ministère des Communications duCanadaCet appareil numérique de la classe B est conforme à la norme NMB-003 du Canada.ISO 7779Maschinenlärminformationsverordnung 3. GSGV, 18.01.1991: Der höchste Schalldruckpegelbeträgt 70 dB(A) oder weniger gemäß ISO 7779.25
CE Marking Directiveaccording to Council Directive 89/336/EEC and 73/23/EECManufacturer's name: Ky<strong>oce</strong>ra Mita Corporation Tamaki PlantManufacturer's address: 704-19 Nojino, Tamaki-Cho, Watarai-Gun, Mie-Ken 519-0497, Japandeclares that the productProduct name: Page PrinterModel number: <strong>FS</strong>-<strong>1020D</strong> (as tested with the enhancement optional unit: PF-17 and IB-21E)conforms to the following product specifications.EN 55 022:1998 Class BEN 61 000-3-2:1995EN 61 000-3-3:1995EN 55 024:1998EN 60 950:1992 (+A1+A2+A3+A4+A11)EN 60 825-1:1994+A11The manufacturer and its merchandising <strong>com</strong>panies retain the following technical documentationin anticipation of the inspection that may be conducted by the authorities concerned.User's instruction that conforms to the applicable specificationsTechnical drawingsDescriptions of the pr<strong>oce</strong>dures that guarantee the conformityOther technical informationDeclaration of Conformity (Australia)Manufacturer's name: Ky<strong>oce</strong>ra Mita Corporation Tamaki PlantManufacturer's address: 704-19 Nojino, Tamaki-Cho, Watarai-Gun, Mie-Ken 519-0497, Japandeclares that the productProduct name: Page PrinterModel number: <strong>FS</strong>-<strong>1020D</strong> (as tested with the enhancement optional unit: PF-17 and IB-21E)Description of device:The model <strong>FS</strong>-<strong>1020D</strong> is a 20-ppm, A4 size plain paper supporting page printer, utilizing laser, dry toner,etc.The printer can be equipped with the optional paper feeder model PF-17.Conforms to the following product specifications.AS/NZS 3548: 1995 (EN 55 022:1998 Class B)IEC 60950 (EN 60 950:1992+A1+A2+A3+A4+A11)IEC 60825-1 (EN 60 825-1:1994+A11)The manufacturer and its merchandising <strong>com</strong>panies retain the following technical documentationin anticipation of the inspection that may be conducted by the authorities concerned.User's instruction that conforms to the applicable specificationsTechnical drawingsDescriptions of the pr<strong>oce</strong>dures that guarantee the conformityOther technical informationKy<strong>oce</strong>ra Mita Australia Pty., Ltd.6-10 Talavera Road, North Ryde, NSW 2113, AustraliaPhone: +61 2-9888-9999Fax: +61 2-9888-958826
Declaration of Conformity (U.S.A.)Model Number: Page Printer <strong>FS</strong>-<strong>1020D</strong> (as tested with enhancement optional units:PF-17, IB-21E.)Trade Name: Ky<strong>oce</strong>ra MitaResponsible Party: Ky<strong>oce</strong>ra Mita America Inc.Address:225 Sand Road PO Box 40008 Fairfield, New Jersey 07004-0008, U.S.A.Telephone number: (973) 808-8444Fax number: (973) 882-6000Manufacturer’s name: Ky<strong>oce</strong>ra Mita Corporation Tamaki PlantManufacturer’s address:704-19 Nojino, Tamaki-Cho, Watarai-Gun, Mie-Ken 519-0497, JapanThis device <strong>com</strong>plies with Part 15 of the FCC Rules, Operation is subject to the following two conditions:(1) This device may not cause harmful interference, and (2) this device must accept anyinterference received, including interference that may cause undesired operation.The manufacturer and its merchandising <strong>com</strong>panies retain the following technical documentationin anticipation of the inspection that may be conducted by the authorities concerned.User’s instruction that conforms to the applicable specifications.Technical drawings.Descriptions of the pr<strong>oce</strong>dures that guarantee the conformity.Other technical information.Ky<strong>oce</strong>ra Mita America Inc.DisclaimerWe shall have no liability or responsibility to customers or any other person or entity with respect toany liability, loss or damage caused or alleged to be caused directly or indirectly by equipment sold orfurnished by us, including but not limited to, any interruption of service, loss of business or anticipatoryprofits, or consequential damages resulting from the use or operation of the equipment or software.Prolonged Non-Use and Moving the Printer■ Prolonged Non-useIf you ever leave the printer unused for a long period of time, remove the power cord from the wall outlet.We re<strong>com</strong>mend you consult with your dealer about the additional actions you should take to avoidpossible damages that may occur when the printer is used next time.■ Moving the PrinterWhen you move the printer:• Move it gently.• Keep it as level as possible, to avoid spilling tonerinside the printer as shown in the figure.• If you ship the printer, remove and ship the pr<strong>oce</strong>ssunit separately. Pack the pr<strong>oce</strong>ss unit in a plasticbag and ship them separate from the printer itself.Be sure to consult a serviceman before attemptinglong-distance transportation of the printer.27
ENERGY STAR ®As an ENERGY STAR Partner, we have determined that this product meets theENERGY STAR guidelines for energy efficiency.The basic objective of the ENERGY STAR Program is to reduce environmentalpollution by encouraging the manufacture and sale of equipment that usesenergy more efficiently.This printer is equipped with a sleep timer function that conforms with the standardsof the ENERGY STAR Program. This function makes it possible to reducethe amount of electrical power consumed by the printer. For maximum powersavings, turn off the printer's power supply when not using the printer forextended periods of time.For details on the sleep timer function and printer power consumption, refer tothe CD-ROM instruction manual provided with the printer.Initial settings of the sleep timer function and power saved using the sleep timerfunction:Initial sleep mode setting Power consumption in sleep mode5 minutes (15 minutes) 4.3 W (20 W) [220 to 240 V, 50 Hz/60 Hz]4.4 W (20 W) [110 V, 60 Hz]4.5 W (20 W) [120 V, 60 Hz]( ): ENERGY STAR program guidelineGroup for Energy Efficient Appliances (GEEA)OptionsThe goal of GEEA is efficient use of energy. This product has a high-efficiencyprofile and meets the criteria for receiving the GEEA-Label.( ): GEEA criteriaThe following options are available for the printer.Initial sleep mode setting Power consumption in sleep mode5 minutes (15 minutes) 4.3 W (10 W) [220 to 240 V, 50 Hz/60 Hz]4.4 W (10 W) [110 V, 60 Hz]4.5 W (10 W) [120 V, 60 Hz]Printer12Network Interface Card(3.3 V DC)orSerial Interface BoardKit (IB-11)Paper feeder(PF-17)1Network Interface Card (IB-20/21E/22)Enables printing from multiple <strong>com</strong>putersvia a network.Serial lnterface Board Kit (IB-11)Connect to the <strong>com</strong>puter’s serialprinter port with a serial cable.Paper Feeder (PF-17)2 Holds approximately 250 sheets of A5to Legal size paper.Other OptionsMemory DIMM, CompactFlashcardSee your dealer for purchasing informationof these optional devices that are bestsuited for use with this printer.28
Regarding TradenamesKPDL and KIR (Ky<strong>oce</strong>ra Image Refinement) are trademarks of Ky<strong>oce</strong>ra Corporation.Hewlett-Packard, PCL, and PJL are registered trademarks of Hewlett-Packard Company. Centronicsis a trade name of Centronics Data Computer Corp. PostScript is a registered trademark ofAdobe Systems Incorporated. Adobe and Acrobat are trademarks of Adobe Systems Incorporated.ENERGYSTAR is a U.S. registered mark. All other brand and product names are registeredtrademarks or trademarks of their respective <strong>com</strong>panies.This Ky<strong>oce</strong>ra Mita page printer uses PeerlessPrintXL to provide the HP LaserJet <strong>com</strong>patible PCL6 language emulation. PeerlessPrintXL is a trademark of The Peerless Group, Redondo Beach, CA90278, U.S.A.This product was developed using the Tornado Real Time Operating System and Tools from WindRiver Systems.This product contains U<strong>FS</strong>T and MicroType ® fonts from Agfa Corporation.IBM PROGRAM LICENSE AGREEMENTTHE DEVICE YOU HAVE PURCHASED CONTAINS ONE OR MORE SOFTWARE PROGRAMS("PROGRAMS") WHICH BELONG TO INTERNATIONAL BUSINESS MACHINES CORPORA-TION ("IBM"). THIS DOCUMENT DEFINES THE TERMS AND CONDITIONS UNDER WHICHTHE SOFTWARE IS BEING LICENSED TO YOU BY IBM. IF YOU DO NOT AGREE WITH THETERMS AND CONDITIONS OF THIS LICENSE, THEN WITHIN 14 DAYS AFTER YOURACQUISITION OF THE DEVICE YOU MAY RETURN THE DEVICE FOR A FULL REFUND. IFYOU DO NOT SO RETURN THE DEVICE WITHIN THE 14 DAYS, THEN YOU WILL BEASSUMED TO HAVE AGREED TO THESE TERMS AND CONDITIONS.The Programs are licensed not sold. IBM, or the applicable IBM country organization, grants you alicense for the Programs only in the country where you acquired the Programs. You obtain no rightsother than those granted you under this license.The term "Programs" means the original and all whole or partial copies of it, including modified copiesor portions merged into other programs. IBM retains title to the Programs. IBM owns, or haslicensed from the owner, copyrights in the Programs.1. LicenseUnder this license, you may use the Programs only with the device on which they are installed andtransfer possession of the Programs and the device to another party.If you transfer the Programs, you must transfer a copy of this license and any other documentationto the other party. Your license is then terminated. The other party agrees to these terms and conditionsby its first use of the Program.You may not:1) use, copy, modify, merge, or transfer copies of the Program except as provided in this license;2) reverse assemble or reverse <strong>com</strong>pile the Program; or3) sublicense, rent, lease, or assign the Program.2. Limited WarrantyThe Programs are provided "AS IS."THERE ARE NO OTHER WARRANTIES COVERING THE PROGRAMS (OR CONDITIONS),EXPRESS OR IMPLIED, INCLUDING, BUT NOT LIMITED TO, THE IMPLIED WARRANTIESOF MERCHANTABILITY AND FITNESS FOR A PARTICULAR PURPOSE.Some jurisdictions do not allow the exclusion of implied warranties, so the above exclusion may notapply to you.SUPPLEMENT TO AGREEMENT FOR SOFTWARE BUNDLING AND DISTRIBUTION FORALDC29
3. Limitation of RemediesIBM’s entire liability under this license is the following;1) For any claim (including fundamental breach), in any form, related in any way to this license,IBM's liability will be for actual damages only and will be limited to the greater of:a) the equivalent of U.S.$25,000 in your local currency; orb) IBM's then generally available license fee for the ProgramThis limitation will not apply to claims for bodily injury or damages to real or tangible personalproperty for which IBM is legally liable.IBM will not be liable for any lost profits, lost savings, or any incidental damages or other economicconsequential damages, even if IBM, or its authorized supplier, has been advised of the possibilityof such damages. IBM will not be liable for any damages claimed by you based on any third partyclaim. This limitation of remedies also applies to any developer of Programs supplied to IBM. IBM'sand the developer's limitations of remedies are not cumulative. Such developer is an intended beneficiaryof this Section. Some jurisdictions do not allow these limitations or exclusions, so they maynot apply to you.4. GeneralYou may terminate your license at any time. IBM may terminate your license if you fail to <strong>com</strong>plywith the terms and conditions of this license. In either event, you must destroy all your copies of theProgram. You are responsible for payment of any taxes, including personal property taxes, resultingfrom this license. Neither party may bring an action, regardless of form, more than two years afterthe cause of action arose. If you acquired the Program in the United States, this license is governedby the laws of the State of New York. If you acquired the Program in Canada, this license is governedby the laws of the Province of Ontario. Otherwise, this license is governed by the laws of thecountry in which you acquired the Program.30
This page intentionally left blank.
This page intentionally left blank.
Operating Keys and IndicatorsFor details on operating pr<strong>oce</strong>dures, see the <strong>FS</strong>-<strong>1020D</strong> Operation <strong>Guide</strong> contained as anelectronic file in the CD-ROM supplied with the printer.123456Operator PanelNumber Name Function1 Ready indicator Indicates whether the printer is on-line oroff-line.2 Data indicator Indicates that the printer is receiving data.3 Attention indicator Indicates whether the paper cassette isempty or a paper jam has occurred.4 Toner indicator Indicates when toner is low, or when toneris exhausted.5 (Cancel key) Abandons a printing job.6 (Go key) • Switches the printer on-line and off-line.• When pressed for 3 or more seconds,prints a user status page.• Prints and feeds out one page.Printed in China7KKTB11E++AX/2FM80010A 2003.9


