
You also want an ePaper? Increase the reach of your titles
YUMPU automatically turns print PDFs into web optimized ePapers that Google loves.
CONTENTSi
CHAPTERONEDJANGO DOCUMENTATIONEverything you need to know about <strong>Django</strong> (and <strong>the</strong>n some).1.1 Getting helpHaving trouble? We’d like to help!• Try <strong>the</strong> FAQ – it’s got answers to many common questions.• Looking for specific information? Try <strong>the</strong> genindex, modindex or <strong>the</strong> detailed table of contents.• Search for information in <strong>the</strong> archives of <strong>the</strong> django-users mailing list, or post a question.• Ask a question in <strong>the</strong> #django IRC channel, or search <strong>the</strong> IRC logs to see if it’s been asked before.• Report bugs with <strong>Django</strong> in our ticket tracker.1.2 First steps• From scratch: Overview | Installation• Tutorial: Part 1 | Part 2 | Part 3 | Part 41.3 The model layer• Models: Model syntax | Field types | Meta options• QuerySets: Executing queries | QuerySet method reference• Model instances: Instance methods | Accessing related objects• Advanced: Managers | Raw SQL | Transactions | Aggregation | Custom fields | Multiple databases• O<strong>the</strong>r: Supported databases | Legacy databases | Providing initial data | Optimize database access1.4 The template layer• For designers: Syntax overview | Built-in tags and filters• For programmers: Template API | Custom tags and filters1
<strong>Django</strong> <strong>Documentation</strong>, Release 1.21.5 The view layer• The basics: URLconfs | View functions | Shortcuts• Reference: Request/response objects• File uploads: Overview | File objects | Storage API | Managing files | Custom storage• Generic views: Overview | Built-in generic views• Advanced: Generating CSV | Generating PDF• Middleware: Overview | Built-in middleware classes1.6 Forms• The basics: Overview | Form API | Built-in fields | Built-in widgets• Advanced: Forms for models | Integrating media | Formsets | Customizing validation• Extras: Form preview | Form wizard1.7 The development process• Settings: Overview | Full list of settings• Exceptions: Overview• django-admin.py and manage.py: Overview | Adding custom commands• Testing: Overview• Deployment: Overview | Apache/mod_wsgi | Apache/mod_python | FastCGI/SCGI/AJP | Apache au<strong>the</strong>ntication| Serving static files | Tracking code errors by e-mail1.8 O<strong>the</strong>r batteries included• Admin site | Admin actions | Admin documentation generator• Au<strong>the</strong>ntication• Cache system• Conditional content processing• Comments | Moderation | Custom comments• Content types• Cross Site Request Forgery protection• Databrowse• E-mail (sending)• Flatpages• Geo<strong>Django</strong>2 Chapter 1. <strong>Django</strong> documentation
<strong>Django</strong> <strong>Documentation</strong>, Release 1.2• Humanize• Internationalization• Jython support• “Local flavor”• Messages• Pagination• Redirects• Serialization• Sessions• Signals• Sitemaps• Sites• Syndication feeds (RSS/Atom)• Unicode in <strong>Django</strong>• Web design helpers• Validators1.9 The <strong>Django</strong> open-source project• Community: How to get involved | The release process | Team of committers | The <strong>Django</strong> source code repository• Design philosophies: Overview• <strong>Documentation</strong>: About this documentation• Third-party distributions: Overview• <strong>Django</strong> over time: API stability | Release notes and upgrading instructions | Deprecation Timeline1.9. The <strong>Django</strong> open-source project 3
<strong>Django</strong> <strong>Documentation</strong>, Release 1.24 Chapter 1. <strong>Django</strong> documentation
CHAPTERTWOGETTING STARTEDNew to <strong>Django</strong>? Or to Web development in general? Well, you came to <strong>the</strong> right place: read this material to quicklyget up and running.2.1 <strong>Django</strong> at a glanceBecause <strong>Django</strong> was developed in a fast-paced newsroom environment, it was designed to make common Webdevelopmenttasks fast and easy. Here’s an informal overview of how to write a database-driven Web app with <strong>Django</strong>.The goal of this document is to give you enough technical specifics to understand how <strong>Django</strong> works, but this isn’tintended to be a tutorial or reference – but we’ve got both! When you’re ready to start a project, you can start with <strong>the</strong>tutorial or dive right into more detailed documentation.2.1.1 Design your modelAlthough you can use <strong>Django</strong> without a database, it comes with an object-relational mapper in which you describeyour database layout in Python code.The data-model syntax offers many rich ways of representing your models – so far, it’s been solving two years’ worth ofdatabase-schema problems. Here’s a quick example, which might be saved in <strong>the</strong> file mysite/news/models.py:class Reporter(models.Model):full_name = models.CharField(max_length=70)def __unicode__(self):return self.full_nameclass Article(models.Model):pub_date = models.DateTimeField()headline = models.CharField(max_length=200)content = models.TextField()reporter = models.ForeignKey(Reporter)def __unicode__(self):return self.headline2.1.2 Install itNext, run <strong>the</strong> <strong>Django</strong> command-line utility to create <strong>the</strong> database tables automatically:5
<strong>Django</strong> <strong>Documentation</strong>, Release 1.2manage.py syncdbThe syncdb command looks at all your available models and creates tables in your database for whichever tablesdon’t already exist.2.1.3 Enjoy <strong>the</strong> free APIWith that, you’ve got a free, and rich, Python API to access your data. The API is created on <strong>the</strong> fly, no code generationnecessary:# Import <strong>the</strong> models we created from our "news" app>>> from news.models import Reporter, Article# No reporters are in <strong>the</strong> system yet.>>> Reporter.objects.all()[]# Create a new Reporter.>>> r = Reporter(full_name=’John Smith’)# Save <strong>the</strong> object into <strong>the</strong> database. You have to call save() explicitly.>>> r.save()# Now it has an ID.>>> r.id1# Now <strong>the</strong> new reporter is in <strong>the</strong> database.>>> Reporter.objects.all()[]# Fields are represented as attributes on <strong>the</strong> Python object.>>> r.full_name’John Smith’# <strong>Django</strong> provides a rich database lookup API.>>> Reporter.objects.get(id=1)>>> Reporter.objects.get(full_name__startswith=’John’)>>> Reporter.objects.get(full_name__contains=’mith’)>>> Reporter.objects.get(id=2)Traceback (most recent call last):...DoesNotExist: Reporter matching query does not exist.# Create an article.>>> from datetime import datetime>>> a = Article(pub_date=datetime.now(), headline=’<strong>Django</strong> is cool’,... content=’Yeah.’, reporter=r)>>> a.save()# Now <strong>the</strong> article is in <strong>the</strong> database.>>> Article.objects.all()[]6 Chapter 2. Getting started
<strong>Django</strong> <strong>Documentation</strong>, Release 1.2# Article objects get API access to related Reporter objects.>>> r = a.reporter>>> r.full_name’John Smith’# And vice versa: Reporter objects get API access to Article objects.>>> r.article_set.all()[]# The API follows relationships as far as you need, performing efficient# JOINs for you behind <strong>the</strong> scenes.# This finds all articles by a reporter whose name starts with "John".>>> Article.objects.filter(reporter__full_name__startswith="John")[]# Change an object by altering its attributes and calling save().>>> r.full_name = ’Billy Goat’>>> r.save()# Delete an object with delete().>>> r.delete()2.1.4 A dynamic admin interface: it’s not just scaffolding – it’s <strong>the</strong> whole houseOnce your models are defined, <strong>Django</strong> can automatically create a professional, production ready administrative interface– a Web site that lets au<strong>the</strong>nticated users add, change and delete objects. It’s as easy as registering your model in<strong>the</strong> admin site:# In models.py...from django.db import modelsclass Article(models.Model):pub_date = models.DateTimeField()headline = models.CharField(max_length=200)content = models.TextField()reporter = models.ForeignKey(Reporter)# In admin.py in <strong>the</strong> same directory...import modelsfrom django.contrib import adminadmin.site.register(models.Article)The philosophy here is that your site is edited by a staff, or a client, or maybe just you – and you don’t want to have todeal with creating backend interfaces just to manage content.One typical workflow in creating <strong>Django</strong> apps is to create models and get <strong>the</strong> admin sites up and running as fast aspossible, so your staff (or clients) can start populating data. Then, develop <strong>the</strong> way data is presented to <strong>the</strong> public.2.1.5 Design your URLsA clean, elegant URL scheme is an important detail in a high-quality Web application. <strong>Django</strong> encourages beautifulURL design and doesn’t put any cruft in URLs, like .php or .asp.2.1. <strong>Django</strong> at a glance 7
<strong>Django</strong> <strong>Documentation</strong>, Release 1.2To design URLs for an app, you create a Python module called a URLconf . A table of contents for your app, it containsa simple mapping between URL patterns and Python callback functions. URLconfs also serve to decouple URLs fromPython code.Here’s what a URLconf might look like for <strong>the</strong> Reporter/Article example above:from django.conf.urls.defaults import *urlpatterns = patterns(’’,(r’^articles/(\d{4})/$’, ’news.views.year_archive’),(r’^articles/(\d{4})/(\d{2})/$’, ’news.views.month_archive’),(r’^articles/(\d{4})/(\d{2})/(\d+)/$’, ’news.views.article_detail’),)The code above maps URLs, as simple regular expressions, to <strong>the</strong> location of Python callback functions (“views”).The regular expressions use paren<strong>the</strong>sis to “capture” values from <strong>the</strong> URLs. When a user requests a page, <strong>Django</strong> runsthrough each pattern, in order, and stops at <strong>the</strong> first one that matches <strong>the</strong> requested URL. (If none of <strong>the</strong>m matches,<strong>Django</strong> calls a special-case 404 view.) This is blazingly fast, because <strong>the</strong> regular expressions are compiled at loadtime.Once one of <strong>the</strong> regexes matches, <strong>Django</strong> imports and calls <strong>the</strong> given view, which is a simple Python function. Eachview gets passed a request object – which contains request metadata – and <strong>the</strong> values captured in <strong>the</strong> regex.For example, if a user requested <strong>the</strong> URL “/articles/2005/05/39323/”, <strong>Django</strong> would call <strong>the</strong> functionnews.views.article_detail(request, ’2005’, ’05’, ’39323’).2.1.6 Write your viewsEach view is responsible for doing one of two things: Returning an HttpResponse object containing <strong>the</strong> contentfor <strong>the</strong> requested page, or raising an exception such as Http404. The rest is up to you.Generally, a view retrieves data according to <strong>the</strong> parameters, loads a template and renders <strong>the</strong> template with <strong>the</strong>retrieved data. Here’s an example view for year_archive from above:def year_archive(request, year):a_list = Article.objects.filter(pub_date__year=year)return render_to_response(’news/year_archive.html’, {’year’: year, ’article_list’: a_list})This example uses <strong>Django</strong>’s template system, which has several powerful features but strives to stay simple enoughfor non-programmers to use.2.1.7 Design your templatesThe code above loads <strong>the</strong> news/year_archive.html template.<strong>Django</strong> has a template search path, which allows you to minimize redundancy among templates. In your <strong>Django</strong>settings, you specify a list of directories to check for templates. If a template doesn’t exist in <strong>the</strong> first directory, itchecks <strong>the</strong> second, and so on.Let’s say <strong>the</strong> news/article_detail.html template was found. Here’s what that might look like:{% extends "base.html" %}{% block title %}Articles for {{ year }}{% endblock %}{% block content %}Articles for {{ year }}8 Chapter 2. Getting started
<strong>Django</strong> <strong>Documentation</strong>, Release 1.2{% for article in article_list %}{{ article.headline }}By {{ article.reporter.full_name }}Published {{ article.pub_date|date:"F j, Y" }}{% endfor %}{% endblock %}Variables are surrounded by double-curly braces. {{ article.headline }} means “Output <strong>the</strong> value of <strong>the</strong>article’s headline attribute.” But dots aren’t used only for attribute lookup: They also can do dictionary-key lookup,index lookup and function calls.Note {{ article.pub_date|date:"F j, Y" }} uses a Unix-style “pipe” (<strong>the</strong> “|” character). This is calleda template filter, and it’s a way to filter <strong>the</strong> value of a variable. In this case, <strong>the</strong> date filter formats a Python datetimeobject in <strong>the</strong> given format (as found in PHP’s date function; yes, <strong>the</strong>re is one good idea in PHP).You can chain toge<strong>the</strong>r as many filters as you’d like. You can write custom filters. You can write custom template tags,which run custom Python code behind <strong>the</strong> scenes.Finally, <strong>Django</strong> uses <strong>the</strong> concept of “template inheritance”: That’s what <strong>the</strong> {% extends "base.html" %}does. It means “First load <strong>the</strong> template called ‘base’, which has defined a bunch of blocks, and fill <strong>the</strong> blocks with<strong>the</strong> following blocks.” In short, that lets you dramatically cut down on redundancy in templates: each template has todefine only what’s unique to that template.Here’s what <strong>the</strong> “base.html” template might look like:{% block title %}{% endblock %}{% block content %}{% endblock %}Simplistically, it defines <strong>the</strong> look-and-feel of <strong>the</strong> site (with <strong>the</strong> site’s logo), and provides “holes” for child templates tofill. This makes a site redesign as easy as changing a single file – <strong>the</strong> base template.It also lets you create multiple versions of a site, with different base templates, while reusing child templates. <strong>Django</strong>’screators have used this technique to create strikingly different cell-phone editions of sites – simply by creating a newbase template.Note that you don’t have to use <strong>Django</strong>’s template system if you prefer ano<strong>the</strong>r system. While <strong>Django</strong>’s templatesystem is particularly well-integrated with <strong>Django</strong>’s model layer, nothing forces you to use it. For that matter, youdon’t have to use <strong>Django</strong>’s database API, ei<strong>the</strong>r. You can use ano<strong>the</strong>r database abstraction layer, you can read XMLfiles, you can read files off disk, or anything you want. Each piece of <strong>Django</strong> – models, views, templates – is decoupledfrom <strong>the</strong> next.2.1.8 This is just <strong>the</strong> surfaceThis has been only a quick overview of <strong>Django</strong>’s functionality. Some more useful features:• A caching framework that integrates with memcached or o<strong>the</strong>r backends.• A syndication framework that makes creating RSS and Atom feeds as easy as writing a small Python class.• More sexy automatically-generated admin features – this overview barely scratched <strong>the</strong> surface.The next obvious steps are for you to download <strong>Django</strong>, read <strong>the</strong> tutorial and join <strong>the</strong> community. Thanks for yourinterest!2.1. <strong>Django</strong> at a glance 9
<strong>Django</strong> <strong>Documentation</strong>, Release 1.22.2 Quick install guideBefore you can use <strong>Django</strong>, you’ll need to get it installed. We have a complete installation guide that covers all<strong>the</strong> possibilities; this guide will guide you to a simple, minimal installation that’ll work while you walk through <strong>the</strong>introduction.2.2.1 Install PythonBeing a Python Web framework, <strong>Django</strong> requires Python. It works with any Python version from 2.4 to 2.7 (due tobackwards incompatibilities in Python 3.0, <strong>Django</strong> does not currently work with Python 3.0; see <strong>the</strong> <strong>Django</strong> FAQ formore information on supported Python versions and <strong>the</strong> 3.0 transition), but we recommend installing Python 2.5 orlater. If you do so, you won’t need to set up a database just yet: Python 2.5 or later includes a lightweight databasecalled SQLite.Get Python at http://www.python.org. If you’re running Linux or Mac OS X, you probably already have it installed.<strong>Django</strong> on JythonIf you use Jython (a Python implementation for <strong>the</strong> Java platform), you’ll need to follow a few additional steps. SeeRunning <strong>Django</strong> on Jython for details.You can verify that Python’s installed by typing python from your shell; you should see something like:Python 2.5.1 (r251:54863, Jan 17 2008, 19:35:17)[GCC 4.0.1 (Apple Inc. build 5465)] on darwinType "help", "copyright", "credits" or "license" for more information.>>>2.2.2 Set up a databaseIf you installed Python 2.5 or later, you can skip this step for now.If not, or if you’d like to work with a “large” database engine like PostgreSQL, MySQL, or Oracle, consult <strong>the</strong> databaseinstallation information.2.2.3 Remove any old versions of <strong>Django</strong>If you are upgrading your installation of <strong>Django</strong> from a previous version, you will need to uninstall <strong>the</strong> old <strong>Django</strong>version before installing <strong>the</strong> new version.2.2.4 Install <strong>Django</strong>You’ve got three easy options to install <strong>Django</strong>:• Install a version of <strong>Django</strong> provided by your operating system distribution. This is <strong>the</strong> quickest option for thosewho have operating systems that distribute <strong>Django</strong>.• Install an official release. This is <strong>the</strong> best approach for users who want a stable version number and aren’tconcerned about running a slightly older version of <strong>Django</strong>.• Install <strong>the</strong> latest development version. This is best for users who want <strong>the</strong> latest-and-greatest features and aren’tafraid of running brand-new code.10 Chapter 2. Getting started
<strong>Django</strong> <strong>Documentation</strong>, Release 1.2Always refer to <strong>the</strong> documentation that corresponds to <strong>the</strong> version of <strong>Django</strong> you’re using!If you do ei<strong>the</strong>r of <strong>the</strong> first two steps, keep an eye out for parts of <strong>the</strong> documentation marked new in developmentversion. That phrase flags features that are only available in development versions of <strong>Django</strong>, and <strong>the</strong>y likely won’twork with an official release.2.2.5 That’s it!That’s it – you can now move onto <strong>the</strong> tutorial.2.3 Writing your first <strong>Django</strong> app, part 1Let’s learn by example.Throughout this tutorial, we’ll walk you through <strong>the</strong> creation of a basic poll application.It’ll consist of two parts:• A public site that lets people view polls and vote in <strong>the</strong>m.• An admin site that lets you add, change and delete polls.We’ll assume you have <strong>Django</strong> installed already. You can tell <strong>Django</strong> is installed by running <strong>the</strong> Python interactiveinterpreter and typing import django. If that command runs successfully, with no errors, <strong>Django</strong> is installed.Where to get help:If you’re having trouble going through this tutorial, please post a message to django-users or drop by #django onirc.freenode.net to chat with o<strong>the</strong>r <strong>Django</strong> users who might be able to help.2.3.1 Creating a projectIf this is your first time using <strong>Django</strong>, you’ll have to take care of some initial setup. Namely, you’ll need to autogeneratesome code that establishes a <strong>Django</strong> project – a collection of settings for an instance of <strong>Django</strong>, includingdatabase configuration, <strong>Django</strong>-specific options and application-specific settings.From <strong>the</strong> command line, cd into a directory where you’d like to store your code, <strong>the</strong>n run <strong>the</strong> commanddjango-admin.py startproject mysite. This will create a mysite directory in your current directory.Script name may differ in distribution packagesIf you installed <strong>Django</strong> using a Linux distribution’s package manager (e.g. apt-get or yum) django-admin.pymay have been renamed to django-admin. You may continue through this documentation by omitting .py fromeach command.Mac OS X permissionsIf you’re using Mac OS X, you may see <strong>the</strong> message “permission denied” when you try to run django-admin.pystartproject. This is because, on Unix-based systems like OS X, a file must be marked as “executable” before itcan be run as a program. To do this, open Terminal.app and navigate (using <strong>the</strong> cd command) to <strong>the</strong> directory wheredjango-admin.py is installed, <strong>the</strong>n run <strong>the</strong> command chmod +x django-admin.py.2.3. Writing your first <strong>Django</strong> app, part 1 11
<strong>Django</strong> <strong>Documentation</strong>, Release 1.2Note: You’ll need to avoid naming projects after built-in Python or <strong>Django</strong> components. In particular, this meansyou should avoid using names like django (which will conflict with <strong>Django</strong> itself) or test (which conflicts with abuilt-in Python package).django-admin.py should be on your system path if you installed <strong>Django</strong> via python setup.py. If it’s noton your path, you can find it in site-packages/django/bin, where ‘site-packages‘ is a directorywithin your Python installation. Consider symlinking to django-admin.py from some place on your path, such as/usr/local/bin.Where should this code live?If your background is in PHP, you’re probably used to putting code under <strong>the</strong> Web server’s document root (in a placesuch as /var/www). With <strong>Django</strong>, you don’t do that. It’s not a good idea to put any of this Python code within yourWeb server’s document root, because it risks <strong>the</strong> possibility that people may be able to view your code over <strong>the</strong> Web.That’s not good for security.Put your code in some directory outside of <strong>the</strong> document root, such as /home/mycode.Let’s look at what startproject created:mysite/__init__.pymanage.pysettings.pyurls.pyThese files are:• __init__.py: An empty file that tells Python that this directory should be considered a Python package.(<strong>Read</strong> more about packages in <strong>the</strong> official Python docs if you’re a Python beginner.)• manage.py: A command-line utility that lets you interact with this <strong>Django</strong> project in various ways. You canread all <strong>the</strong> details about manage.py in django-admin.py and manage.py.• settings.py: Settings/configuration for this <strong>Django</strong> project. <strong>Django</strong> settings will tell you all about howsettings work.• urls.py: The URL declarations for this <strong>Django</strong> project; a “table of contents” of your <strong>Django</strong>-powered site.You can read more about URLs in URL dispatcher.The development serverLet’s verify this worked. Change into <strong>the</strong> mysite directory, if you haven’t already, and run <strong>the</strong> command pythonmanage.py runserver. You’ll see <strong>the</strong> following output on <strong>the</strong> command line:Validating models...0 errors found.<strong>Django</strong> version 1.0, using settings ’mysite.settings’Development server is running at http://127.0.0.1:8000/Quit <strong>the</strong> server with CONTROL-C.You’ve started <strong>the</strong> <strong>Django</strong> development server, a lightweight Web server written purely in Python. We’ve included thiswith <strong>Django</strong> so you can develop things rapidly, without having to deal with configuring a production server – such asApache – until you’re ready for production.12 Chapter 2. Getting started
<strong>Django</strong> <strong>Documentation</strong>, Release 1.2Now’s a good time to note: DON’T use this server in anything resembling a production environment. It’s intendedonly for use while developing. (We’re in <strong>the</strong> business of making Web frameworks, not Web servers.)Now that <strong>the</strong> server’s running, visit http://127.0.0.1:8000/ with your Web browser. You’ll see a “Welcome to <strong>Django</strong>”page, in pleasant, light-blue pastel. It worked!Changing <strong>the</strong> portBy default, <strong>the</strong> runserver command starts <strong>the</strong> development server on <strong>the</strong> internal IP at port 8000.If you want to change <strong>the</strong> server’s port, pass it as a command-line argument. For instance, this command starts <strong>the</strong>server on port 8080:python manage.py runserver 8080If you want to change <strong>the</strong> server’s IP, pass it along with <strong>the</strong> port. So to listen on all public IPs (useful if you want toshow off your work on o<strong>the</strong>r computers), use:python manage.py runserver 0.0.0.0:8000Full docs for <strong>the</strong> development server can be found in <strong>the</strong> runserver reference.Database setupNow, edit settings.py. It’s a normal Python module with module-level variables representing <strong>Django</strong> settings.Change <strong>the</strong> following keys in <strong>the</strong> DATABASES ’default’ item to match your databases connection settings.• ENGINE – Ei<strong>the</strong>r ’django.db.backends.postgresql_psycopg2’,’django.db.backends.mysql’ or ’django.db.backends.sqlite3’. O<strong>the</strong>r backends arealso available.• NAME – The name of your database. If you’re using SQLite, <strong>the</strong> database will be a file on your computer; inthat case, NAME should be <strong>the</strong> full absolute path, including filename, of that file. If <strong>the</strong> file doesn’t exist, it willautomatically be created when you synchronize <strong>the</strong> database for <strong>the</strong> first time (see below).When specifying <strong>the</strong> path, always use forward slashes, even on Windows (e.g.C:/homes/user/mysite/sqlite3.db).• USER – Your database username (not used for SQLite).• PASSWORD – Your database password (not used for SQLite).• HOST – The host your database is on. Leave this as an empty string if your database server is on <strong>the</strong> samephysical machine (not used for SQLite).If you’re new to databases, we recommend simply using SQLite (by setting ENGINE to’django.db.backends.sqlite3’). SQLite is included as part of Python 2.5 and later, so you won’tneed to install anything else.Note: If you’re using PostgreSQL or MySQL, make sure you’ve created a database by this point. Do that with“CREATE DATABASE database_name;” within your database’s interactive prompt.If you’re using SQLite, you don’t need to create anything beforehand - <strong>the</strong> database file will be created automaticallywhen it is needed.While you’re editing settings.py, take note of <strong>the</strong> INSTALLED_APPS setting towards <strong>the</strong> bottom of <strong>the</strong> file.That variable holds <strong>the</strong> names of all <strong>Django</strong> applications that are activated in this <strong>Django</strong> instance. Apps can be usedin multiple projects, and you can package and distribute <strong>the</strong>m for use by o<strong>the</strong>rs in <strong>the</strong>ir projects.2.3. Writing your first <strong>Django</strong> app, part 1 13
<strong>Django</strong> <strong>Documentation</strong>, Release 1.2By default, INSTALLED_APPS contains <strong>the</strong> following apps, all of which come with <strong>Django</strong>:• django.contrib.auth – An au<strong>the</strong>ntication system.• django.contrib.contenttypes – A framework for content types.• django.contrib.sessions – A session framework.• django.contrib.sites – A framework for managing multiple sites with one <strong>Django</strong> installation.• django.contrib.messages – A messaging framework.These applications are included by default as a convenience for <strong>the</strong> common case.Each of <strong>the</strong>se applications makes use of at least one database table, though, so we need to create <strong>the</strong> tables in <strong>the</strong>database before we can use <strong>the</strong>m. To do that, run <strong>the</strong> following command:python manage.py syncdbThe syncdb command looks at <strong>the</strong> INSTALLED_APPS setting and creates any necessary database tables accordingto <strong>the</strong> database settings in your settings.py file. You’ll see a message for each database table it creates, and you’llget a prompt asking you if you’d like to create a superuser account for <strong>the</strong> au<strong>the</strong>ntication system. Go ahead and dothat.If you’re interested, run <strong>the</strong> command-line client for your database and type \dt (PostgreSQL), SHOW TABLES;(MySQL), or .schema (SQLite) to display <strong>the</strong> tables <strong>Django</strong> created.For <strong>the</strong> minimalistsLike we said above, <strong>the</strong> default applications are included for <strong>the</strong> common case, but not everybody needs <strong>the</strong>m. If youdon’t need any or all of <strong>the</strong>m, feel free to comment-out or delete <strong>the</strong> appropriate line(s) from INSTALLED_APPSbefore running syncdb. The syncdb command will only create tables for apps in INSTALLED_APPS.2.3.2 Creating modelsNow that your environment – a “project” – is set up, you’re set to start doing work.Each application you write in <strong>Django</strong> consists of a Python package, somewhere on your Python path, that follows acertain convention. <strong>Django</strong> comes with a utility that automatically generates <strong>the</strong> basic directory structure of an app, soyou can focus on writing code ra<strong>the</strong>r than creating directories.Projects vs. appsWhat’s <strong>the</strong> difference between a project and an app? An app is a Web application that does something – e.g., a Weblogsystem, a database of public records or a simple poll app. A project is a collection of configuration and apps for aparticular Web site. A project can contain multiple apps. An app can be in multiple projects.Your apps can live anywhere on your Python path. In this tutorial, we’ll create our poll app in <strong>the</strong> mysite directoryfor simplicity.To create your app, make sure you’re in <strong>the</strong> mysite directory and type this command:python manage.py startapp pollsThat’ll create a directory polls, which is laid out like this:polls/__init__.pymodels.py14 Chapter 2. Getting started
<strong>Django</strong> <strong>Documentation</strong>, Release 1.2tests.pyviews.pyThis directory structure will house <strong>the</strong> poll application.The first step in writing a database Web app in <strong>Django</strong> is to define your models – essentially, your database layout,with additional metadata.PhilosophyA model is <strong>the</strong> single, definitive source of data about your data. It contains <strong>the</strong> essential fields and behaviors of <strong>the</strong> datayou’re storing. <strong>Django</strong> follows <strong>the</strong> DRY Principle. The goal is to define your data model in one place and automaticallyderive things from it.In our simple poll app, we’ll create two models: polls and choices. A poll has a question and a publication date. Achoice has two fields: <strong>the</strong> text of <strong>the</strong> choice and a vote tally. Each choice is associated with a poll.These concepts are represented by simple Python classes. Edit <strong>the</strong> polls/models.py file so it looks like this:from django.db import modelsclass Poll(models.Model):question = models.CharField(max_length=200)pub_date = models.DateTimeField(’date published’)class Choice(models.Model):poll = models.ForeignKey(Poll)choice = models.CharField(max_length=200)votes = models.IntegerField()The code is straightforward. Each model is represented by a class that subclasses django.db.models.Model.Each model has a number of class variables, each of which represents a database field in <strong>the</strong> model.Each field is represented by an instance of a Field class – e.g., CharField for character fields andDateTimeField for datetimes. This tells <strong>Django</strong> what type of data each field holds.The name of each Field instance (e.g. question or pub_date ) is <strong>the</strong> field’s name, in machine-friendly format.You’ll use this value in your Python code, and your database will use it as <strong>the</strong> column name.You can use an optional first positional argument to a Field to designate a human-readable name. That’s used in acouple of introspective parts of <strong>Django</strong>, and it doubles as documentation. If this field isn’t provided, <strong>Django</strong> will use<strong>the</strong> machine-readable name. In this example, we’ve only defined a human-readable name for Poll.pub_date. Forall o<strong>the</strong>r fields in this model, <strong>the</strong> field’s machine-readable name will suffice as its human-readable name.Some Field classes have required elements. CharField, for example, requires that you give it a max_length.That’s used not only in <strong>the</strong> database schema, but in validation, as we’ll soon see.Finally, note a relationship is defined, using ForeignKey. That tells <strong>Django</strong> each Choice is related to a single Poll.<strong>Django</strong> supports all <strong>the</strong> common database relationships: many-to-ones, many-to-manys and one-to-ones.2.3.3 Activating modelsThat small bit of model code gives <strong>Django</strong> a lot of information. With it, <strong>Django</strong> is able to:• Create a database schema (CREATE TABLE statements) for this app.• Create a Python database-access API for accessing Poll and Choice objects.2.3. Writing your first <strong>Django</strong> app, part 1 15
<strong>Django</strong> <strong>Documentation</strong>, Release 1.2But first we need to tell our project that <strong>the</strong> polls app is installed.Philosophy<strong>Django</strong> apps are “pluggable”: You can use an app in multiple projects, and you can distribute apps, because <strong>the</strong>y don’thave to be tied to a given <strong>Django</strong> installation.Edit <strong>the</strong> settings.py file again, and change <strong>the</strong> INSTALLED_APPS setting to include <strong>the</strong> string ’polls’. Soit’ll look like this:INSTALLED_APPS = (’django.contrib.auth’,’django.contrib.contenttypes’,’django.contrib.sessions’,’django.contrib.sites’,’polls’)Now <strong>Django</strong> knows to include <strong>the</strong> polls app. Let’s run ano<strong>the</strong>r command:python manage.py sql pollsYou should see something similar to <strong>the</strong> following (<strong>the</strong> CREATE TABLE SQL statements for <strong>the</strong> polls app):BEGIN;CREATE TABLE "polls_poll" ("id" serial NOT NULL PRIMARY KEY,"question" varchar(200) NOT NULL,"pub_date" timestamp with time zone NOT NULL);CREATE TABLE "polls_choice" ("id" serial NOT NULL PRIMARY KEY,"poll_id" integer NOT NULL REFERENCES "polls_poll" ("id"),"choice" varchar(200) NOT NULL,"votes" integer NOT NULL);COMMIT;Note <strong>the</strong> following:• The exact output will vary depending on <strong>the</strong> database you are using.• Table names are automatically generated by combining <strong>the</strong> name of <strong>the</strong> app (polls) and <strong>the</strong> lowercase nameof <strong>the</strong> model – poll and choice. (You can override this behavior.)• Primary keys (IDs) are added automatically. (You can override this, too.)• By convention, <strong>Django</strong> appends "_id" to <strong>the</strong> foreign key field name. Yes, you can override this, as well.• The foreign key relationship is made explicit by a REFERENCES statement.• It’s tailored to <strong>the</strong> database you’re using, so database-specific field types such as auto_increment (MySQL),serial (PostgreSQL), or integer primary key (SQLite) are handled for you automatically. Same goesfor quoting of field names – e.g., using double quotes or single quotes. The author of this tutorial runs PostgreSQL,so <strong>the</strong> example output is in PostgreSQL syntax.• The sql command doesn’t actually run <strong>the</strong> SQL in your database - it just prints it to <strong>the</strong> screen so that youcan see what SQL <strong>Django</strong> thinks is required. If you wanted to, you could copy and paste this SQL into yourdatabase prompt. However, as we will see shortly, <strong>Django</strong> provides an easier way of committing <strong>the</strong> SQL to <strong>the</strong>database.16 Chapter 2. Getting started
<strong>Django</strong> <strong>Documentation</strong>, Release 1.2If you’re interested, also run <strong>the</strong> following commands:• python manage.py validate – Checks for any errors in <strong>the</strong> construction of your models.• python manage.py sqlcustom polls – Outputs any custom SQL statements (such as table modificationsor constraints) that are defined for <strong>the</strong> application.• python manage.py sqlclear polls – Outputs <strong>the</strong> necessary DROP TABLE statements for this app,according to which tables already exist in your database (if any).• python manage.py sqlindexes polls – Outputs <strong>the</strong> CREATE INDEX statements for this app.• python manage.py sqlall polls – A combination of all <strong>the</strong> SQL from <strong>the</strong> sql, sqlcustom, andsqlindexes commands.Looking at <strong>the</strong> output of those commands can help you understand what’s actually happening under <strong>the</strong> hood.Now, run syncdb again to create those model tables in your database:python manage.py syncdbThe syncdb command runs <strong>the</strong> sql from ‘sqlall’ on your database for all apps in INSTALLED_APPS that don’talready exist in your database. This creates all <strong>the</strong> tables, initial data and indexes for any apps you have added to yourproject since <strong>the</strong> last time you ran syncdb. syncdb can be called as often as you like, and it will only ever create <strong>the</strong>tables that don’t exist.<strong>Read</strong> <strong>the</strong> django-admin.py documentation for full information on what <strong>the</strong> manage.py utility can do.2.3.4 Playing with <strong>the</strong> APINow, let’s hop into <strong>the</strong> interactive Python shell and play around with <strong>the</strong> free API <strong>Django</strong> gives you. To invoke <strong>the</strong>Python shell, use this command:python manage.py shellWe’re using this instead of simply typing “python”, because manage.py sets up <strong>the</strong> project’s environment for you.“Setting up <strong>the</strong> environment” involves two things:• Putting polls on sys.path. For flexibility, several pieces of <strong>Django</strong> refer to projects in Python dotted-pathnotation (e.g. ’polls.models’). In order for this to work, <strong>the</strong> polls package has to be on sys.path.We’ve already seen one example of this: <strong>the</strong> INSTALLED_APPS setting is a list of packages in dotted-pathnotation.• Setting <strong>the</strong> DJANGO_SETTINGS_MODULE environment variable, which gives <strong>Django</strong> <strong>the</strong> path to yoursettings.py file.Bypassing manage.pyIf you’d ra<strong>the</strong>r not use manage.py, no problem. Just make sure mysite and polls are at <strong>the</strong> root level on<strong>the</strong> Python path (i.e., import mysite and import polls work) and set <strong>the</strong> DJANGO_SETTINGS_MODULEenvironment variable to mysite.settings.For more information on all of this, see <strong>the</strong> django-admin.py documentation.Once you’re in <strong>the</strong> shell, explore <strong>the</strong> database API:>>> from polls.models import Poll, Choice # Import <strong>the</strong> model classes we just wrote.# No polls are in <strong>the</strong> system yet.>>> Poll.objects.all()2.3. Writing your first <strong>Django</strong> app, part 1 17
<strong>Django</strong> <strong>Documentation</strong>, Release 1.2[]# Create a new Poll.>>> import datetime>>> p = Poll(question="What’s up?", pub_date=datetime.datetime.now())# Save <strong>the</strong> object into <strong>the</strong> database. You have to call save() explicitly.>>> p.save()# Now it has an ID. Note that this might say "1L" instead of "1", depending# on which database you’re using. That’s no biggie; it just means your# database backend prefers to return integers as Python long integer# objects.>>> p.id1# Access database columns via Python attributes.>>> p.question"What’s up?">>> p.pub_datedatetime.datetime(2007, 7, 15, 12, 00, 53)# Change values by changing <strong>the</strong> attributes, <strong>the</strong>n calling save().>>> p.pub_date = datetime.datetime(2007, 4, 1, 0, 0)>>> p.save()# objects.all() displays all <strong>the</strong> polls in <strong>the</strong> database.>>> Poll.objects.all()[]Wait a minute. is, utterly, an unhelpful representation of this object. Let’s fix that byediting <strong>the</strong> polls model (in <strong>the</strong> polls/models.py file) and adding a __unicode__() method to both Poll andChoice:class Poll(models.Model):# ...def __unicode__(self):return self.questionclass Choice(models.Model):# ...def __unicode__(self):return self.choiceIt’s important to add __unicode__() methods to your models, not only for your own sanity when dealing with <strong>the</strong>interactive prompt, but also because objects’ representations are used throughout <strong>Django</strong>’s automatically-generatedadmin.Why __unicode__() and not __str__()?If you’re familiar with Python, you might be in <strong>the</strong> habit of adding __str__() methods to your classes, not__unicode__() methods. We use __unicode__() here because <strong>Django</strong> models deal with Unicode by default.All data stored in your database is converted to Unicode when it’s returned.<strong>Django</strong> models have a default __str__() method that calls __unicode__() and converts <strong>the</strong> result to a UTF-8bytestring. This means that unicode(p) will return a Unicode string, and str(p) will return a normal string, withcharacters encoded as UTF-8.If all of this is jibberish to you, just remember to add __unicode__() methods to your models. With any luck,18 Chapter 2. Getting started
<strong>Django</strong> <strong>Documentation</strong>, Release 1.2things should Just Work for you.Note <strong>the</strong>se are normal Python methods. Let’s add a custom method, just for demonstration:import datetime# ...class Poll(models.Model):# ...def was_published_today(self):return self.pub_date.date() == datetime.date.today()Note <strong>the</strong> addition of import datetime to reference Python’s standard datetime module.Save <strong>the</strong>se changes and start a new Python interactive shell by running python manage.py shell again:>>> from polls.models import Poll, Choice# Make sure our __unicode__() addition worked.>>> Poll.objects.all()[]# <strong>Django</strong> provides a rich database lookup API that’s entirely driven by# keyword arguments.>>> Poll.objects.filter(id=1)[]>>> Poll.objects.filter(question__startswith=’What’)[]# Get <strong>the</strong> poll whose year is 2007.>>> Poll.objects.get(pub_date__year=2007)>>> Poll.objects.get(id=2)Traceback (most recent call last):...DoesNotExist: Poll matching query does not exist.# Lookup by a primary key is <strong>the</strong> most common case, so <strong>Django</strong> provides a# shortcut for primary-key exact lookups.# The following is identical to Poll.objects.get(id=1).>>> Poll.objects.get(pk=1)# Make sure our custom method worked.>>> p = Poll.objects.get(pk=1)>>> p.was_published_today()False# Give <strong>the</strong> Poll a couple of Choices. The create call constructs a new# choice object, does <strong>the</strong> INSERT statement, adds <strong>the</strong> choice to <strong>the</strong> set# of available choices and returns <strong>the</strong> new Choice object. <strong>Django</strong> creates# a set to hold <strong>the</strong> "o<strong>the</strong>r side" of a ForeignKey relation# (e.g. a poll’s choices) which can be accessed via <strong>the</strong> API.>>> p = Poll.objects.get(pk=1)# Display any choices from <strong>the</strong> related object set -- none so far.>>> p.choice_set.all()[]2.3. Writing your first <strong>Django</strong> app, part 1 19
<strong>Django</strong> <strong>Documentation</strong>, Release 1.2# Create three choices.>>> p.choice_set.create(choice=’Not much’, votes=0)>>> p.choice_set.create(choice=’The sky’, votes=0)>>> c = p.choice_set.create(choice=’Just hacking again’, votes=0)# Choice objects have API access to <strong>the</strong>ir related Poll objects.>>> c.poll# And vice versa: Poll objects get access to Choice objects.>>> p.choice_set.all()[, , ]>>> p.choice_set.count()3# The API automatically follows relationships as far as you need.# Use double underscores to separate relationships.# This works as many levels deep as you want; <strong>the</strong>re’s no limit.# Find all Choices for any poll whose pub_date is in 2007.>>> Choice.objects.filter(poll__pub_date__year=2007)[, , ]# Let’s delete one of <strong>the</strong> choices. Use delete() for that.>>> c = p.choice_set.filter(choice__startswith=’Just hacking’)>>> c.delete()For more information on model relations, see Accessing related objects. For full details on <strong>the</strong> database API, see ourDatabase API reference.When you’re comfortable with <strong>the</strong> API, read part 2 of this tutorial to get <strong>Django</strong>’s automatic admin working.2.4 Writing your first <strong>Django</strong> app, part 2This tutorial begins where Tutorial 1 left off. We’re continuing <strong>the</strong> Web-poll application and will focus on <strong>Django</strong>’sautomatically-generated admin site.PhilosophyGenerating admin sites for your staff or clients to add, change and delete content is tedious work that doesn’t requiremuch creativity. For that reason, <strong>Django</strong> entirely automates creation of admin interfaces for models.<strong>Django</strong> was written in a newsroom environment, with a very clear separation between “content publishers” and <strong>the</strong>“public” site. Site managers use <strong>the</strong> system to add news stories, events, sports scores, etc., and that content is displayedon <strong>the</strong> public site. <strong>Django</strong> solves <strong>the</strong> problem of creating a unified interface for site administrators to edit content.The admin isn’t necessarily intended to be used by site visitors; it’s for site managers.2.4.1 Activate <strong>the</strong> admin siteThe <strong>Django</strong> admin site is not activated by default – it’s an opt-in thing. To activate <strong>the</strong> admin site for your installation,do <strong>the</strong>se three things:• Add "django.contrib.admin" to your INSTALLED_APPS setting.20 Chapter 2. Getting started
<strong>Django</strong> <strong>Documentation</strong>, Release 1.2• Run python manage.py syncdb. Since you have added a new application toINSTALLED_APPS, <strong>the</strong> database tables need to be updated.• Edit your mysite/urls.py file and uncomment <strong>the</strong> lines that reference <strong>the</strong> admin – <strong>the</strong>re arethree lines in total to uncomment. This file is a URLconf; we’ll dig into URLconfs in <strong>the</strong> nexttutorial. For now, all you need to know is that it maps URL roots to applications. In <strong>the</strong> end, youshould have a urls.py file that looks like this:Changed in version 1.1: The method for adding admin urls has changed in <strong>Django</strong> 1.1.from django.conf.urls.defaults import *# Uncomment <strong>the</strong> next two lines to enable <strong>the</strong> admin:from django.contrib import adminadmin.autodiscover()urlpatterns = patterns(’’,# Example:# (r’^mysite/’, include(’mysite.foo.urls’)),# Uncomment <strong>the</strong> admin/doc line below and add ’django.contrib.admindocs’# to INSTALLED_APPS to enable admin documentation:# (r’^admin/doc/’, include(’django.contrib.admindocs.urls’)),)# Uncomment <strong>the</strong> next line to enable <strong>the</strong> admin:(r’^admin/’, include(admin.site.urls)),(The bold lines are <strong>the</strong> ones that needed to be uncommented.)2.4.2 Start <strong>the</strong> development serverLet’s start <strong>the</strong> development server and explore <strong>the</strong> admin site.Recall from Tutorial 1 that you start <strong>the</strong> development server like so:python manage.py runserverNow, open a Web browser and go to “/admin/” on your local domain – e.g., http://127.0.0.1:8000/admin/. You shouldsee <strong>the</strong> admin’s login screen:2.4. Writing your first <strong>Django</strong> app, part 2 21
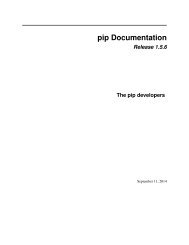
<strong>Django</strong> <strong>Documentation</strong>, Release 1.22.4.3 Enter <strong>the</strong> admin siteNow, try logging in. (You created a superuser account in <strong>the</strong> first part of this tutorial, remember? If you didn’t createone or forgot <strong>the</strong> password you can create ano<strong>the</strong>r one.) You should see <strong>the</strong> <strong>Django</strong> admin index page:You should see a few o<strong>the</strong>r types of editable content, including groups, users and sites. These are core features <strong>Django</strong>ships with by default.2.4.4 Make <strong>the</strong> poll app modifiable in <strong>the</strong> adminBut where’s our poll app? It’s not displayed on <strong>the</strong> admin index page.Just one thing to do: We need to tell <strong>the</strong> admin that Poll objects have an admin interface. To do this, create a filecalled admin.py in your polls directory, and edit it to look like this:from polls.models import Pollfrom django.contrib import adminadmin.site.register(Poll)You’ll need to restart <strong>the</strong> development server to see your changes. Normally, <strong>the</strong> server auto-reloads code every timeyou modify a file, but <strong>the</strong> action of creating a new file doesn’t trigger <strong>the</strong> auto-reloading logic.2.4.5 Explore <strong>the</strong> free admin functionalityNow that we’ve registered Poll, <strong>Django</strong> knows that it should be displayed on <strong>the</strong> admin index page:Click “Polls.” Now you’re at <strong>the</strong> “change list” page for polls. This page displays all <strong>the</strong> polls in <strong>the</strong> database and letsyou choose one to change it. There’s <strong>the</strong> “What’s up?” poll we created in <strong>the</strong> first tutorial:22 Chapter 2. Getting started
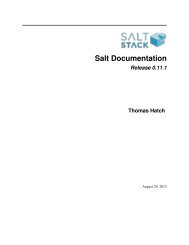
<strong>Django</strong> <strong>Documentation</strong>, Release 1.2Click <strong>the</strong> “What’s up?” poll to edit it:Things to note here:• The form is automatically generated from <strong>the</strong> Poll model.• The different model field types (DateTimeField, CharField) correspond to <strong>the</strong> appropriate HTML inputwidget. Each type of field knows how to display itself in <strong>the</strong> <strong>Django</strong> admin.• Each DateTimeField gets free JavaScript shortcuts. Dates get a “Today” shortcut and calendar popup, andtimes get a “Now” shortcut and a convenient popup that lists commonly entered times.The bottom part of <strong>the</strong> page gives you a couple of options:• Save – Saves changes and returns to <strong>the</strong> change-list page for this type of object.• Save and continue editing – Saves changes and reloads <strong>the</strong> admin page for this object.• Save and add ano<strong>the</strong>r – Saves changes and loads a new, blank form for this type of object.• Delete – Displays a delete confirmation page.Change <strong>the</strong> “Date published” by clicking <strong>the</strong> “Today” and “Now” shortcuts. Then click “Save and continue editing.”Then click “History” in <strong>the</strong> upper right. You’ll see a page listing all changes made to this object via <strong>the</strong> <strong>Django</strong> admin,with <strong>the</strong> timestamp and username of <strong>the</strong> person who made <strong>the</strong> change:2.4. Writing your first <strong>Django</strong> app, part 2 23
<strong>Django</strong> <strong>Documentation</strong>, Release 1.22.4.6 Customize <strong>the</strong> admin formTake a few minutes to marvel at all <strong>the</strong> code you didn’t have to write. By registering <strong>the</strong> Poll model withadmin.site.register(Poll), <strong>Django</strong> was able to construct a default form representation. Often, you’ll wantto customize how <strong>the</strong> admin form looks and works. You’ll do this by telling <strong>Django</strong> <strong>the</strong> options you want when youregister <strong>the</strong> object.Let’s see how this works by re-ordering <strong>the</strong> fields on <strong>the</strong> edit form. Replace <strong>the</strong> admin.site.register(Poll)line with:class PollAdmin(admin.ModelAdmin):fields = [’pub_date’, ’question’]admin.site.register(Poll, PollAdmin)You’ll follow this pattern – create a model admin object, <strong>the</strong>n pass it as <strong>the</strong> second argument toadmin.site.register() – any time you need to change <strong>the</strong> admin options for an object.This particular change above makes <strong>the</strong> “Publication date” come before <strong>the</strong> “Question” field:This isn’t impressive with only two fields, but for admin forms with dozens of fields, choosing an intuitive order is animportant usability detail.And speaking of forms with dozens of fields, you might want to split <strong>the</strong> form up into fieldsets:class PollAdmin(admin.ModelAdmin):fieldsets = [(None,{’fields’: [’question’]}),(’Date information’, {’fields’: [’pub_date’]}),]admin.site.register(Poll, PollAdmin)The first element of each tuple in fieldsets is <strong>the</strong> title of <strong>the</strong> fieldset. Here’s what our form looks like now:24 Chapter 2. Getting started
<strong>Django</strong> <strong>Documentation</strong>, Release 1.2You can assign arbitrary HTML classes to each fieldset. <strong>Django</strong> provides a "collapse" class that displays aparticular fieldset initially collapsed. This is useful when you have a long form that contains a number of fields thataren’t commonly used:class PollAdmin(admin.ModelAdmin):fieldsets = [(None,{’fields’: [’question’]}),(’Date information’, {’fields’: [’pub_date’], ’classes’: [’collapse’]}),]2.4.7 Adding related objectsOK, we have our Poll admin page. But a Poll has multiple Choices, and <strong>the</strong> admin page doesn’t display choices.Yet.There are two ways to solve this problem. The first is to register Choice with <strong>the</strong> admin just as we did with Poll.That’s easy:from polls.models import Choiceadmin.site.register(Choice)2.4. Writing your first <strong>Django</strong> app, part 2 25
<strong>Django</strong> <strong>Documentation</strong>, Release 1.2It works like this: There are three slots for related Choices – as specified by extra – and each time you come backto <strong>the</strong> “Change” page for an already-created object, you get ano<strong>the</strong>r three extra slots.One small problem, though. It takes a lot of screen space to display all <strong>the</strong> fields for entering related Choice objects.For that reason, <strong>Django</strong> offers a tabular way of displaying inline related objects; you just need to change <strong>the</strong>ChoiceInline declaration to read:class ChoiceInline(admin.TabularInline):#...With that TabularInline (instead of StackedInline), <strong>the</strong> related objects are displayed in a more compact,table-based format:2.4. Writing your first <strong>Django</strong> app, part 2 27
<strong>Django</strong> <strong>Documentation</strong>, Release 1.22.4.8 Customize <strong>the</strong> admin change listNow that <strong>the</strong> Poll admin page is looking good, let’s make some tweaks to <strong>the</strong> “change list” page – <strong>the</strong> one that displaysall <strong>the</strong> polls in <strong>the</strong> system.Here’s what it looks like at this point:By default, <strong>Django</strong> displays <strong>the</strong> str() of each object. But sometimes it’d be more helpful if we could displayindividual fields. To do that, use <strong>the</strong> list_display admin option, which is a tuple of field names to display, ascolumns, on <strong>the</strong> change list page for <strong>the</strong> object:class PollAdmin(admin.ModelAdmin):# ...list_display = (’question’, ’pub_date’)Just for good measure, let’s also include <strong>the</strong> was_published_today custom method from Tutorial 1:class PollAdmin(admin.ModelAdmin):# ...28 Chapter 2. Getting started
<strong>Django</strong> <strong>Documentation</strong>, Release 1.2list_display = (’question’, ’pub_date’, ’was_published_today’)Now <strong>the</strong> poll change list page looks like this:You can click on <strong>the</strong> column headers to sort by those values – except in <strong>the</strong> case of <strong>the</strong> was_published_todayheader, because sorting by <strong>the</strong> output of an arbitrary method is not supported. Also note that <strong>the</strong> column header forwas_published_today is, by default, <strong>the</strong> name of <strong>the</strong> method (with underscores replaced with spaces). But youcan change that by giving that method (in models.py) a short_description attribute:def was_published_today(self):return self.pub_date.date() == datetime.date.today()was_published_today.short_description = ’Published today?’Edit your admin.py file again and add an improvement to <strong>the</strong> Poll change list page: Filters. Add <strong>the</strong> following line toPollAdmin:list_filter = [’pub_date’]That adds a “Filter” sidebar that lets people filter <strong>the</strong> change list by <strong>the</strong> pub_date field:The type of filter displayed depends on <strong>the</strong> type of field you’re filtering on. Because pub_date is a DateTimeField,<strong>Django</strong> knows to give <strong>the</strong> default filter options for DateTimeFields: “Any date,” “Today,” “Past 7 days,” “This month,”“This year.”This is shaping up well. Let’s add some search capability:search_fields = [’question’]That adds a search box at <strong>the</strong> top of <strong>the</strong> change list. When somebody enters search terms, <strong>Django</strong> will search <strong>the</strong>question field. You can use as many fields as you’d like – although because it uses a LIKE query behind <strong>the</strong>scenes, keep it reasonable, to keep your database happy.Finally, because Poll objects have dates, it’d be convenient to be able to drill down by date. Add this line:date_hierarchy = ’pub_date’2.4. Writing your first <strong>Django</strong> app, part 2 29
<strong>Django</strong> <strong>Documentation</strong>, Release 1.2That adds hierarchical navigation, by date, to <strong>the</strong> top of <strong>the</strong> change list page. At top level, it displays all availableyears. Then it drills down to months and, ultimately, days.Now’s also a good time to note that change lists give you free pagination. The default is to display 50 items per page.Change-list pagination, search boxes, filters, date-hierarchies and column-header-ordering all work toge<strong>the</strong>r like youthink <strong>the</strong>y should.2.4.9 Customize <strong>the</strong> admin look and feelClearly, having “<strong>Django</strong> administration” at <strong>the</strong> top of each admin page is ridiculous. It’s just placeholder text.That’s easy to change, though, using <strong>Django</strong>’s template system. The <strong>Django</strong> admin is powered by <strong>Django</strong> itself, andits interfaces use <strong>Django</strong>’s own template system.Open your settings file (mysite/settings.py, remember) and look at <strong>the</strong> TEMPLATE_DIRS setting.TEMPLATE_DIRS is a tuple of filesystem directories to check when loading <strong>Django</strong> templates. It’s a search path.By default, TEMPLATE_DIRS is empty. So, let’s add a line to it, to tell <strong>Django</strong> where our templates live:TEMPLATE_DIRS = ("/home/my_username/mytemplates", # Change this to your own directory.)Now copy <strong>the</strong> template admin/base_site.html from within <strong>the</strong> default <strong>Django</strong> admin templatedirectory in <strong>the</strong> source code of <strong>Django</strong> itself (django/contrib/admin/templates)into an admin subdirectory of whichever directory you’re using in TEMPLATE_DIRS. Forexample, if your TEMPLATE_DIRS includes "/home/my_username/mytemplates", asabove, <strong>the</strong>n copy django/contrib/admin/templates/admin/base_site.html to/home/my_username/mytemplates/admin/base_site.html. Don’t forget that admin subdirectory.Then, just edit <strong>the</strong> file and replace <strong>the</strong> generic <strong>Django</strong> text with your own site’s name as you see fit.This template file contains lots of text like {% block branding %} and {{ title }}. The {% and {{ tagsare part of <strong>Django</strong>’s template language. When <strong>Django</strong> renders admin/base_site.html, this template languagewill be evaluated to produce <strong>the</strong> final HTML page. Don’t worry if you can’t make any sense of <strong>the</strong> template right now– we’ll delve into <strong>Django</strong>’s templating language in Tutorial 3.Note that any of <strong>Django</strong>’s default admin templates can be overridden. To override a template, just do <strong>the</strong> same thingyou did with base_site.html – copy it from <strong>the</strong> default directory into your custom directory, and make changes.Astute readers will ask: But if TEMPLATE_DIRS was empty by default, how was <strong>Django</strong> finding <strong>the</strong> default admintemplates? The answer is that, by default, <strong>Django</strong> automatically looks for a templates/ subdirectory within eachapp package, for use as a fallback. See <strong>the</strong> template loader documentation for full information.2.4.10 Customize <strong>the</strong> admin index pageOn a similar note, you might want to customize <strong>the</strong> look and feel of <strong>the</strong> <strong>Django</strong> admin index page.By default, it displays all <strong>the</strong> apps in INSTALLED_APPS that have been registered with <strong>the</strong> admin application, inalphabetical order. You may want to make significant changes to <strong>the</strong> layout. After all, <strong>the</strong> index is probably <strong>the</strong> mostimportant page of <strong>the</strong> admin, and it should be easy to use.The template to customize is admin/index.html. (Do <strong>the</strong> same as with admin/base_site.html in <strong>the</strong>previous section – copy it from <strong>the</strong> default directory to your custom template directory.) Edit <strong>the</strong> file, and you’ll see ituses a template variable called app_list. That variable contains every installed <strong>Django</strong> app. Instead of using that,you can hard-code links to object-specific admin pages in whatever way you think is best. Again, don’t worry if youcan’t understand <strong>the</strong> template language – we’ll cover that in more detail in Tutorial 3.30 Chapter 2. Getting started
<strong>Django</strong> <strong>Documentation</strong>, Release 1.2When you’re comfortable with <strong>the</strong> admin site, read part 3 of this tutorial to start working on public poll views.2.5 Writing your first <strong>Django</strong> app, part 3This tutorial begins where Tutorial 2 left off. We’re continuing <strong>the</strong> Web-poll application and will focus on creating <strong>the</strong>public interface – “views.”2.5.1 PhilosophyA view is a “type” of Web page in your <strong>Django</strong> application that generally serves a specific function and has a specifictemplate. For example, in a Weblog application, you might have <strong>the</strong> following views:• Blog homepage – displays <strong>the</strong> latest few entries.• Entry “detail” page – permalink page for a single entry.• Year-based archive page – displays all months with entries in <strong>the</strong> given year.• Month-based archive page – displays all days with entries in <strong>the</strong> given month.• Day-based archive page – displays all entries in <strong>the</strong> given day.• Comment action – handles posting comments to a given entry.In our poll application, we’ll have <strong>the</strong> following four views:• Poll “archive” page – displays <strong>the</strong> latest few polls.• Poll “detail” page – displays a poll question, with no results but with a form to vote.• Poll “results” page – displays results for a particular poll.• Vote action – handles voting for a particular choice in a particular poll.In <strong>Django</strong>, each view is represented by a simple Python function.2.5.2 Design your URLsThe first step of writing views is to design your URL structure. You do this by creating a Python module, called aURLconf. URLconfs are how <strong>Django</strong> associates a given URL with given Python code.When a user requests a <strong>Django</strong>-powered page, <strong>the</strong> system looks at <strong>the</strong> ROOT_URLCONF setting, which contains astring in Python dotted syntax. <strong>Django</strong> loads that module and looks for a module-level variable called urlpatterns,which is a sequence of tuples in <strong>the</strong> following format:(regular expression, Python callback function [, optional dictionary])<strong>Django</strong> starts at <strong>the</strong> first regular expression and makes its way down <strong>the</strong> list, comparing <strong>the</strong> requested URL againsteach regular expression until it finds one that matches.When it finds a match, <strong>Django</strong> calls <strong>the</strong> Python callback function, with an HttpRequest object as <strong>the</strong> first argument,any “captured” values from <strong>the</strong> regular expression as keyword arguments, and, optionally, arbitrary keyword argumentsfrom <strong>the</strong> dictionary (an optional third item in <strong>the</strong> tuple).For more on HttpRequest objects, see <strong>the</strong> Request and response objects. For more details on URLconfs, see <strong>the</strong>URL dispatcher.2.5. Writing your first <strong>Django</strong> app, part 3 31
<strong>Django</strong> <strong>Documentation</strong>, Release 1.2When you ran django-admin.py startproject mysite at <strong>the</strong> beginning of Tutorial 1, it created a defaultURLconf in mysite/urls.py. It also automatically set your ROOT_URLCONF setting (in settings.py) topoint at that file:ROOT_URLCONF = ’mysite.urls’Time for an example. Edit mysite/urls.py so it looks like this:from django.conf.urls.defaults import *from django.contrib import adminadmin.autodiscover()urlpatterns = patterns(’’,(r’^polls/$’, ’polls.views.index’),(r’^polls/(?P\d+)/$’, ’polls.views.detail’),(r’^polls/(?P\d+)/results/$’, ’polls.views.results’),(r’^polls/(?P\d+)/vote/$’, ’polls.views.vote’),(r’^admin/’, include(admin.site.urls)),)This is worth a review. When somebody requests a page from your Web site – say, “/polls/23/”, <strong>Django</strong> willload this Python module, because it’s pointed to by <strong>the</strong> ROOT_URLCONF setting. It finds <strong>the</strong> variable namedurlpatterns and traverses <strong>the</strong> regular expressions in order. When it finds a regular expression that matches –r’^polls/(?P\d+)/$’ – it loads <strong>the</strong> function detail() from polls/views.py. Finally, itcalls that detail() function like so:detail(request=, poll_id=’23’)The poll_id=’23’ part comes from (?P\d+). Using paren<strong>the</strong>ses around a pattern “captures” <strong>the</strong>text matched by that pattern and sends it as an argument to <strong>the</strong> view function; <strong>the</strong> ?P defines <strong>the</strong> namethat will be used to identify <strong>the</strong> matched pattern; and \d+ is a regular expression to match a sequence of digits (i.e., anumber).Because <strong>the</strong> URL patterns are regular expressions, <strong>the</strong>re really is no limit on what you can do with <strong>the</strong>m. And <strong>the</strong>re’sno need to add URL cruft such as .php – unless you have a sick sense of humor, in which case you can do somethinglike this:(r’^polls/latest\.php$’, ’polls.views.index’),But, don’t do that. It’s silly.Note that <strong>the</strong>se regular expressions do not search GET and POST parameters, or <strong>the</strong> domain name. For example,in a request to http://www.example.com/myapp/, <strong>the</strong> URLconf will look for myapp/. In a request tohttp://www.example.com/myapp/?page=3, <strong>the</strong> URLconf will look for myapp/.If you need help with regular expressions, see Wikipedia’s entry and <strong>the</strong> Python documentation. Also, <strong>the</strong> O’Reillybook “Mastering Regular Expressions” by Jeffrey Friedl is fantastic.Finally, a performance note: <strong>the</strong>se regular expressions are compiled <strong>the</strong> first time <strong>the</strong> URLconf module is loaded.They’re super fast.2.5.3 Write your first viewWell, we haven’t created any views yet – we just have <strong>the</strong> URLconf. But let’s make sure <strong>Django</strong> is following <strong>the</strong>URLconf properly.Fire up <strong>the</strong> <strong>Django</strong> development Web server:32 Chapter 2. Getting started
<strong>Django</strong> <strong>Documentation</strong>, Release 1.2python manage.py runserverNow go to “http://localhost:8000/polls/” on your domain in your Web browser. You should get a pleasantly-colorederror page with <strong>the</strong> following message:ViewDoesNotExist at /polls/Tried index in module polls.views. Error was: ’module’object has no attribute ’index’This error happened because you haven’t written a function index() in <strong>the</strong> module polls/views.py.Try “/polls/23/”, “/polls/23/results/” and “/polls/23/vote/”. The error messages tell you which view <strong>Django</strong> tried (andfailed to find, because you haven’t written any views yet).Time to write <strong>the</strong> first view. Open <strong>the</strong> file polls/views.py and put <strong>the</strong> following Python code in it:from django.http import HttpResponsedef index(request):return HttpResponse("Hello, world. You’re at <strong>the</strong> poll index.")This is <strong>the</strong> simplest view possible. Go to “/polls/” in your browser, and you should see your text.Now lets add a few more views. These views are slightly different, because <strong>the</strong>y take an argument (which, remember,is passed in from whatever was captured by <strong>the</strong> regular expression in <strong>the</strong> URLconf):def detail(request, poll_id):return HttpResponse("You’re looking at poll %s." % poll_id)def results(request, poll_id):return HttpResponse("You’re looking at <strong>the</strong> results of poll %s." % poll_id)def vote(request, poll_id):return HttpResponse("You’re voting on poll %s." % poll_id)Take a look in your browser, at “/polls/34/”. It’ll run <strong>the</strong> detail() method and display whatever ID you provide in <strong>the</strong>URL. Try “/polls/34/results/” and “/polls/34/vote/” too – <strong>the</strong>se will display <strong>the</strong> placeholder results and voting pages.2.5.4 Write views that actually do somethingEach view is responsible for doing one of two things: Returning an HttpResponse object containing <strong>the</strong> contentfor <strong>the</strong> requested page, or raising an exception such as Http404. The rest is up to you.Your view can read records from a database, or not. It can use a template system such as <strong>Django</strong>’s – or a third-partyPython template system – or not. It can generate a PDF file, output XML, create a ZIP file on <strong>the</strong> fly, anything youwant, using whatever Python libraries you want.All <strong>Django</strong> wants is that HttpResponse. Or an exception.Because it’s convenient, let’s use <strong>Django</strong>’s own database API, which we covered in Tutorial 1. Here’s one stab at<strong>the</strong> index() view, which displays <strong>the</strong> latest 5 poll questions in <strong>the</strong> system, separated by commas, according topublication date:from polls.models import Pollfrom django.http import HttpResponsedef index(request):latest_poll_list = Poll.objects.all().order_by(’-pub_date’)[:5]2.5. Writing your first <strong>Django</strong> app, part 3 33
<strong>Django</strong> <strong>Documentation</strong>, Release 1.2output = ’, ’.join([p.question for p in latest_poll_list])return HttpResponse(output)There’s a problem here, though: The page’s design is hard-coded in <strong>the</strong> view. If you want to change <strong>the</strong> way <strong>the</strong> pagelooks, you’ll have to edit this Python code. So let’s use <strong>Django</strong>’s template system to separate <strong>the</strong> design from Python:from django.template import Context, loaderfrom polls.models import Pollfrom django.http import HttpResponsedef index(request):latest_poll_list = Poll.objects.all().order_by(’-pub_date’)[:5]t = loader.get_template(’polls/index.html’)c = Context({’latest_poll_list’: latest_poll_list,})return HttpResponse(t.render(c))That code loads <strong>the</strong> template called “polls/index.html” and passes it a context. The context is a dictionary mappingtemplate variable names to Python objects.Reload <strong>the</strong> page. Now you’ll see an error:TemplateDoesNotExist at /polls/polls/index.htmlAh. There’s no template yet. First, create a directory, somewhere on your filesystem, whose contents <strong>Django</strong> canaccess. (<strong>Django</strong> runs as whatever user your server runs.) Don’t put <strong>the</strong>m under your document root, though. Youprobably shouldn’t make <strong>the</strong>m public, just for security’s sake. Then edit TEMPLATE_DIRS in your settings.pyto tell <strong>Django</strong> where it can find templates – just as you did in <strong>the</strong> “Customize <strong>the</strong> admin look and feel” section ofTutorial 2.When you’ve done that, create a directory polls in your template directory. Within that, create a file calledindex.html. Note that our loader.get_template(’polls/index.html’) code from above maps to“[template_directory]/polls/index.html” on <strong>the</strong> filesystem.Put <strong>the</strong> following code in that template:{% if latest_poll_list %}{% for poll in latest_poll_list %}{{ poll.question }}{% endfor %}{% else %}No polls are available.{% endif %}Load <strong>the</strong> page in your Web browser, and you should see a bulleted-list containing <strong>the</strong> “What’s up” poll from Tutorial1. The link points to <strong>the</strong> poll’s detail page.A shortcut: render_to_response()It’s a very common idiom to load a template, fill a context and return an HttpResponse object with <strong>the</strong> result of <strong>the</strong>rendered template. <strong>Django</strong> provides a shortcut. Here’s <strong>the</strong> full index() view, rewritten:from django.shortcuts import render_to_responsefrom polls.models import Poll34 Chapter 2. Getting started
<strong>Django</strong> <strong>Documentation</strong>, Release 1.2def index(request):latest_poll_list = Poll.objects.all().order_by(’-pub_date’)[:5]return render_to_response(’polls/index.html’, {’latest_poll_list’: latest_poll_list})Note that once we’ve done this in all <strong>the</strong>se views, we no longer need to import loader, Context andHttpResponse.The render_to_response() function takes a template name as its first argument and a dictionary as its optionalsecond argument. It returns an HttpResponse object of <strong>the</strong> given template rendered with <strong>the</strong> given context.2.5.5 Raising 404Now, let’s tackle <strong>the</strong> poll detail view – <strong>the</strong> page that displays <strong>the</strong> question for a given poll. Here’s <strong>the</strong> view:from django.http import Http404# ...def detail(request, poll_id):try:p = Poll.objects.get(pk=poll_id)except Poll.DoesNotExist:raise Http404return render_to_response(’polls/detail.html’, {’poll’: p})The new concept here: The view raises <strong>the</strong> Http404 exception if a poll with <strong>the</strong> requested ID doesn’t exist.We’ll discuss what you could put in that polls/detail.html template a bit later, but if you’d like to quickly get<strong>the</strong> above example working, just:{{ poll }}will get you started for now.A shortcut: get_object_or_404()It’s a very common idiom to use get() and raise Http404 if <strong>the</strong> object doesn’t exist. <strong>Django</strong> provides a shortcut.Here’s <strong>the</strong> detail() view, rewritten:from django.shortcuts import render_to_response, get_object_or_404# ...def detail(request, poll_id):p = get_object_or_404(Poll, pk=poll_id)return render_to_response(’polls/detail.html’, {’poll’: p})The get_object_or_404() function takes a <strong>Django</strong> model as its first argument and an arbitrary number ofkeyword arguments, which it passes to <strong>the</strong> module’s get() function. It raises Http404 if <strong>the</strong> object doesn’t exist.PhilosophyWhy do we use a helper function get_object_or_404() instead of automatically catching <strong>the</strong>ObjectDoesNotExist exceptions at a higher level, or having <strong>the</strong> model API raise Http404 instead ofObjectDoesNotExist?Because that would couple <strong>the</strong> model layer to <strong>the</strong> view layer. One of <strong>the</strong> foremost design goals of <strong>Django</strong> is to maintainloose coupling.2.5. Writing your first <strong>Django</strong> app, part 3 35
<strong>Django</strong> <strong>Documentation</strong>, Release 1.2There’s also a get_list_or_404() function, which works just as get_object_or_404() – except usingfilter() instead of get(). It raises Http404 if <strong>the</strong> list is empty.2.5.6 Write a 404 (page not found) viewWhen you raise Http404 from within a view, <strong>Django</strong> will load a special view devoted to handling 404 errors. It findsit by looking for <strong>the</strong> variable handler404, which is a string in Python dotted syntax – <strong>the</strong> same format <strong>the</strong> normalURLconf callbacks use. A 404 view itself has nothing special: It’s just a normal view.You normally won’t have to bo<strong>the</strong>r with writing 404 views. By default, URLconfs have <strong>the</strong> following line up top:from django.conf.urls.defaults import *That takes care of setting handler404 in <strong>the</strong> current module. As youcan see in django/conf/urls/defaults.py, handler404 is set todjango.views.defaults.page_not_found() by default.Four more things to note about 404 views:• If DEBUG is set to True (in your settings module) <strong>the</strong>n your 404 view will never be used (and thus <strong>the</strong>404.html template will never be rendered) because <strong>the</strong> traceback will be displayed instead.• The 404 view is also called if <strong>Django</strong> doesn’t find a match after checking every regular expression in <strong>the</strong>URLconf.• If you don’t define your own 404 view – and simply use <strong>the</strong> default, which is recommended – you still have oneobligation: To create a 404.html template in <strong>the</strong> root of your template directory. The default 404 view willuse that template for all 404 errors.• If DEBUG is set to False (in your settings module) and if you didn’t create a 404.html file, an Http500 israised instead. So remember to create a 404.html.2.5.7 Write a 500 (server error) viewSimilarly, URLconfs may define a handler500, which points to a view to call in case of server errors. Server errorshappen when you have runtime errors in view code.2.5.8 Use <strong>the</strong> template systemBack to <strong>the</strong> detail() view for our poll application.“polls/detail.html” template might look like:Given <strong>the</strong> context variable poll, here’s what <strong>the</strong>{{ poll.question }}{% for choice in poll.choice_set.all %}{{ choice.choice }}{% endfor %}The template system uses dot-lookup syntax to access variable attributes. In <strong>the</strong> example of {{ poll.question}}, first <strong>Django</strong> does a dictionary lookup on <strong>the</strong> object poll. Failing that, it tries attribute lookup – which works, inthis case. If attribute lookup had failed, it would’ve tried calling <strong>the</strong> method question() on <strong>the</strong> poll object.Method-calling happens in <strong>the</strong> {% for %} loop: poll.choice_set.all is interpreted as <strong>the</strong> Python codepoll.choice_set.all(), which returns an iterable of Choice objects and is suitable for use in <strong>the</strong> {% for %}tag.36 Chapter 2. Getting started
<strong>Django</strong> <strong>Documentation</strong>, Release 1.2See <strong>the</strong> template guide for more about templates.2.5.9 Simplifying <strong>the</strong> URLconfsTake some time to play around with <strong>the</strong> views and template system. As you edit <strong>the</strong> URLconf, you may notice <strong>the</strong>re’sa fair bit of redundancy in it:urlpatterns = patterns(’’,(r’^polls/$’, ’polls.views.index’),(r’^polls/(?P\d+)/$’, ’polls.views.detail’),(r’^polls/(?P\d+)/results/$’, ’polls.views.results’),(r’^polls/(?P\d+)/vote/$’, ’polls.views.vote’),)Namely, polls.views is in every callback.Because this is a common case, <strong>the</strong> URLconf framework provides a shortcut for common prefixes. You can factor out<strong>the</strong> common prefixes and add <strong>the</strong>m as <strong>the</strong> first argument to patterns(), like so:urlpatterns = patterns(’polls.views’,(r’^polls/$’, ’index’),(r’^polls/(?P\d+)/$’, ’detail’),(r’^polls/(?P\d+)/results/$’, ’results’),(r’^polls/(?P\d+)/vote/$’, ’vote’),)This is functionally identical to <strong>the</strong> previous formatting. It’s just a bit tidier.Since you generally don’t want <strong>the</strong> prefix for one app to be applied to every callback in your URLconf, you canconcatenate multiple patterns(). Your full mysite/urls.py might now look like this:from django.conf.urls.defaults import *from django.contrib import adminadmin.autodiscover()urlpatterns = patterns(’polls.views’,(r’^polls/$’, ’index’),(r’^polls/(?P\d+)/$’, ’detail’),(r’^polls/(?P\d+)/results/$’, ’results’),(r’^polls/(?P\d+)/vote/$’, ’vote’),)urlpatterns += patterns(’’,(r’^admin/’, include(admin.site.urls)),)2.5.10 Decoupling <strong>the</strong> URLconfsWhile we’re at it, we should take <strong>the</strong> time to decouple our poll-app URLs from our <strong>Django</strong> project configuration.<strong>Django</strong> apps are meant to be pluggable – that is, each particular app should be transferable to ano<strong>the</strong>r <strong>Django</strong> installationwith minimal fuss.Our poll app is pretty decoupled at this point, thanks to <strong>the</strong> strict directory structure that python manage.pystartapp created, but one part of it is coupled to <strong>the</strong> <strong>Django</strong> settings: The URLconf.We’ve been editing <strong>the</strong> URLs in mysite/urls.py, but <strong>the</strong> URL design of an app is specific to <strong>the</strong> app, not to <strong>the</strong><strong>Django</strong> installation – so let’s move <strong>the</strong> URLs within <strong>the</strong> app directory.2.5. Writing your first <strong>Django</strong> app, part 3 37
<strong>Django</strong> <strong>Documentation</strong>, Release 1.2Copy <strong>the</strong> file mysite/urls.py to polls/urls.py. Then, change mysite/urls.py to remove <strong>the</strong> pollspecificURLs and insert an include(), leaving you with:# This also imports <strong>the</strong> include functionfrom django.conf.urls.defaults import *from django.contrib import adminadmin.autodiscover()urlpatterns = patterns(’’,(r’^polls/’, include(’polls.urls’)),(r’^admin/’, include(admin.site.urls)),)include() simply references ano<strong>the</strong>r URLconf. Note that <strong>the</strong> regular expression doesn’t have a $ (end-of-stringmatch character) but has <strong>the</strong> trailing slash. Whenever <strong>Django</strong> encounters include(), it chops off whatever part of<strong>the</strong> URL matched up to that point and sends <strong>the</strong> remaining string to <strong>the</strong> included URLconf for fur<strong>the</strong>r processing.Here’s what happens if a user goes to “/polls/34/” in this system:• <strong>Django</strong> will find <strong>the</strong> match at ’^polls/’• Then, <strong>Django</strong> will strip off <strong>the</strong> matching text ("polls/") and send <strong>the</strong> remaining text – "34/" – to <strong>the</strong>‘polls.urls’ URLconf for fur<strong>the</strong>r processing.Now that we’ve decoupled that, we need to decouple <strong>the</strong> polls.urls URLconf by removing <strong>the</strong> leading “polls/”from each line, and removing <strong>the</strong> lines registering <strong>the</strong> admin site. Your polls.urls file should now look like this:from django.conf.urls.defaults import *urlpatterns = patterns(’polls.views’,(r’^$’, ’index’),(r’^(?P\d+)/$’, ’detail’),(r’^(?P\d+)/results/$’, ’results’),(r’^(?P\d+)/vote/$’, ’vote’),)The idea behind include() and URLconf decoupling is to make it easy to plug-and-play URLs. Now that polls arein <strong>the</strong>ir own URLconf, <strong>the</strong>y can be placed under “/polls/”, or under “/fun_polls/”, or under “/content/polls/”, or anyo<strong>the</strong>r path root, and <strong>the</strong> app will still work.All <strong>the</strong> poll app cares about is its relative path, not its absolute path.When you’re comfortable with writing views, read part 4 of this tutorial to learn about simple form processing andgeneric views.2.6 Writing your first <strong>Django</strong> app, part 4This tutorial begins where Tutorial 3 left off. We’re continuing <strong>the</strong> Web-poll application and will focus on simple formprocessing and cutting down our code.2.6.1 Write a simple formLet’s update our poll detail template (“polls/detail.html”) from <strong>the</strong> last tutorial, so that <strong>the</strong> template contains an HTML element:38 Chapter 2. Getting started
<strong>Django</strong> <strong>Documentation</strong>, Release 1.2{{ poll.question }}{% if error_message %}{{ error_message }}{% endif %}{% csrf_token %}{% for choice in poll.choice_set.all %}{{ choice.choice }}{% endfor %}A quick rundown:• The above template displays a radio button for each poll choice. The value of each radio button is <strong>the</strong> associatedpoll choice’s ID. The name of each radio button is "choice". That means, when somebody selects oneof <strong>the</strong> radio buttons and submits <strong>the</strong> form, it’ll send <strong>the</strong> POST data choice=3. This is HTML Forms 101.• We set <strong>the</strong> form’s action to /polls/{{ poll.id }}/vote/, and we set method="post". Usingmethod="post" (as opposed to method="get") is very important, because <strong>the</strong> act of submitting this formwill alter data server-side. Whenever you create a form that alters data server-side, use method="post". Thistip isn’t specific to <strong>Django</strong>; it’s just good Web development practice.• forloop.counter indicates how many times <strong>the</strong> for tag has gone through its loop• Since we’re creating a POST form (which can have <strong>the</strong> effect of modifying data), we need to worry about CrossSite Request Forgeries. Thankfully, you don’t have to worry too hard, because <strong>Django</strong> comes with a very easyto-usesystem for protecting against it. In short, all POST forms that are targeted at internal URLs should use<strong>the</strong> {% csrf_token %} template tag.The {% csrf_token %} tag requires information from <strong>the</strong> request object, which is not normally accessible fromwithin <strong>the</strong> template context. To fix this, a small adjustment needs to be made to <strong>the</strong> detail view, so that it looks like<strong>the</strong> following:from django.template import RequestContext# ...def detail(request, poll_id):p = get_object_or_404(Poll, pk=poll_id)return render_to_response(’polls/detail.html’, {’poll’: p},context_instance=RequestContext(request))The details of how this works are explained in <strong>the</strong> documentation for RequestContext.Now, let’s create a <strong>Django</strong> view that handles <strong>the</strong> submitted data and does something with it. Remember, in Tutorial 3,we created a URLconf for <strong>the</strong> polls application that includes this line:(r’^(?P\d+)/vote/$’, ’vote’),We also created a dummy implementation of <strong>the</strong> vote() function. Let’s create a real version. Add <strong>the</strong> following topolls/views.py:from django.shortcuts import get_object_or_404, render_to_responsefrom django.http import HttpResponseRedirect, HttpResponsefrom django.core.urlresolvers import reversefrom django.template import RequestContextfrom polls.models import Choice, Poll# ...def vote(request, poll_id):p = get_object_or_404(Poll, pk=poll_id)2.6. Writing your first <strong>Django</strong> app, part 4 39
<strong>Django</strong> <strong>Documentation</strong>, Release 1.2try:selected_choice = p.choice_set.get(pk=request.POST[’choice’])except (KeyError, Choice.DoesNotExist):# Redisplay <strong>the</strong> poll voting form.return render_to_response(’polls/detail.html’, {’poll’: p,’error_message’: "You didn’t select a choice.",}, context_instance=RequestContext(request))else:selected_choice.votes += 1selected_choice.save()# Always return an HttpResponseRedirect after successfully dealing# with POST data. This prevents data from being posted twice if a# user hits <strong>the</strong> Back button.return HttpResponseRedirect(reverse(’polls.views.results’, args=(p.id,)))This code includes a few things we haven’t covered yet in this tutorial:• request.POST is a dictionary-like object that lets you access submitted data by key name. In this case,request.POST[’choice’] returns <strong>the</strong> ID of <strong>the</strong> selected choice, as a string. request.POST values arealways strings.Note that <strong>Django</strong> also provides request.GET for accessing GET data in <strong>the</strong> same way – but we’re explicitlyusing request.POST in our code, to ensure that data is only altered via a POST call.• request.POST[’choice’] will raise KeyError if choice wasn’t provided in POST data. The abovecode checks for KeyError and redisplays <strong>the</strong> poll form with an error message if choice isn’t given.• After incrementing <strong>the</strong> choice count, <strong>the</strong> code returns an HttpResponseRedirect ra<strong>the</strong>r than a normalHttpResponse. HttpResponseRedirect takes a single argument: <strong>the</strong> URL to which <strong>the</strong> user will beredirected (see <strong>the</strong> following point for how we construct <strong>the</strong> URL in this case).As <strong>the</strong> Python comment above points out, you should always return an HttpResponseRedirect aftersuccessfully dealing with POST data. This tip isn’t specific to <strong>Django</strong>; it’s just good Web development practice.• We are using <strong>the</strong> reverse() function in <strong>the</strong> HttpResponseRedirect constructor in this example. Thisfunction helps avoid having to hardcode a URL in <strong>the</strong> view function. It is given <strong>the</strong> name of <strong>the</strong> view that wewant to pass control to and <strong>the</strong> variable portion of <strong>the</strong> URL pattern that points to that view. In this case, using<strong>the</strong> URLconf we set up in Tutorial 3, this reverse() call will return a string like’/polls/3/results/’... where <strong>the</strong> 3 is <strong>the</strong> value of p.id. This redirected URL will <strong>the</strong>n call <strong>the</strong> ’results’ view to display <strong>the</strong>final page. Note that you need to use <strong>the</strong> full name of <strong>the</strong> view here (including <strong>the</strong> prefix).As mentioned in Tutorial 3, request is a HttpRequest object. For more on HttpRequest objects, see <strong>the</strong>request and response documentation.After somebody votes in a poll, <strong>the</strong> vote() view redirects to <strong>the</strong> results page for <strong>the</strong> poll. Let’s write that view:def results(request, poll_id):p = get_object_or_404(Poll, pk=poll_id)return render_to_response(’polls/results.html’, {’poll’: p})This is almost exactly <strong>the</strong> same as <strong>the</strong> detail() view from Tutorial 3. The only difference is <strong>the</strong> template name.We’ll fix this redundancy later.Now, create a results.html template:{{ poll.question }}40 Chapter 2. Getting started
<strong>Django</strong> <strong>Documentation</strong>, Release 1.2{% for choice in poll.choice_set.all %}{{ choice.choice }} -- {{ choice.votes }} vote{{ choice.votes|pluralize }}{% endfor %}Vote again?Now, go to /polls/1/ in your browser and vote in <strong>the</strong> poll. You should see a results page that gets updated eachtime you vote. If you submit <strong>the</strong> form without having chosen a choice, you should see <strong>the</strong> error message.2.6.2 Use generic views: Less code is betterThe detail() (from Tutorial 3) and results() views are stupidly simple – and, as mentioned above, redundant.The index() view (also from Tutorial 3), which displays a list of polls, is similar.These views represent a common case of basic Web development: getting data from <strong>the</strong> database according to aparameter passed in <strong>the</strong> URL, loading a template and returning <strong>the</strong> rendered template. Because this is so common,<strong>Django</strong> provides a shortcut, called <strong>the</strong> “generic views” system.Generic views abstract common patterns to <strong>the</strong> point where you don’t even need to write Python code to write an app.Let’s convert our poll app to use <strong>the</strong> generic views system, so we can delete a bunch of our own code. We’ll just haveto take a few steps to make <strong>the</strong> conversion. We will:1. Convert <strong>the</strong> URLconf.2. Rename a few templates.3. Delete some of <strong>the</strong> old, unneeded views.4. Fix up URL handling for <strong>the</strong> new views.<strong>Read</strong> on for details.Why <strong>the</strong> code-shuffle?Generally, when writing a <strong>Django</strong> app, you’ll evaluate whe<strong>the</strong>r generic views are a good fit for your problem, andyou’ll use <strong>the</strong>m from <strong>the</strong> beginning, ra<strong>the</strong>r than refactoring your code halfway through. But this tutorial intentionallyhas focused on writing <strong>the</strong> views “<strong>the</strong> hard way” until now, to focus on core concepts.You should know basic math before you start using a calculator.First, open <strong>the</strong> polls/urls.py URLconf. It looks like this, according to <strong>the</strong> tutorial so far:from django.conf.urls.defaults import *urlpatterns = patterns(’polls.views’,(r’^$’, ’index’),(r’^(?P\d+)/$’, ’detail’),(r’^(?P\d+)/results/$’, ’results’),(r’^(?P\d+)/vote/$’, ’vote’),)Change it like so:from django.conf.urls.defaults import *from polls.models import Poll2.6. Writing your first <strong>Django</strong> app, part 4 41
<strong>Django</strong> <strong>Documentation</strong>, Release 1.2info_dict = {’queryset’: Poll.objects.all(),}urlpatterns = patterns(’’,(r’^$’, ’django.views.generic.list_detail.object_list’, info_dict),(r’^(?P\d+)/$’, ’django.views.generic.list_detail.object_detail’, info_dict),url(r’^(?P\d+)/results/$’, ’django.views.generic.list_detail.object_detail’, dict(info(r’^(?P\d+)/vote/$’, ’polls.views.vote’),)We’re using two generic views here: object_list() and object_detail(). Respectively, those two viewsabstract <strong>the</strong> concepts of “display a list of objects” and “display a detail page for a particular type of object.”• Each generic view needs to know what data it will be acting upon. This data is provided in a dictionary. Thequeryset key in this dictionary points to <strong>the</strong> list of objects to be manipulated by <strong>the</strong> generic view.• The object_detail() generic view expects <strong>the</strong> ID value captured from <strong>the</strong> URL to be called"object_id", so we’ve changed poll_id to object_id for <strong>the</strong> generic views.• We’ve added a name, poll_results, to <strong>the</strong> results view so that we have a way to refer to its URL later on(see <strong>the</strong> documentation about naming URL patterns for information). We’re also using <strong>the</strong> url() function fromdjango.conf.urls.defaults here. It’s a good habit to use url() when you are providing a patternname like this.By default, <strong>the</strong> object_detail() generic view uses a template called /_detail.html. In our case, it’ll use <strong>the</strong> template "polls/poll_detail.html". Thus, rename yourpolls/detail.html template to polls/poll_detail.html, and change <strong>the</strong> render_to_response()line in vote().Similarly, <strong>the</strong> object_list() generic view uses a template called /_list.html. Thus, rename polls/index.html to polls/poll_list.html.Because we have more than one entry in <strong>the</strong> URLconf that uses object_detail() for <strong>the</strong> polls app, we manuallyspecify a template name for <strong>the</strong> results view: template_name=’polls/results.html’. O<strong>the</strong>rwise, bothviews would use <strong>the</strong> same template. Note that we use dict() to return an altered dictionary in place.Note: django.db.models.QuerySet.all() is lazyIt might look a little frightening to see Poll.objects.all() being used in a detail view which only needs onePoll object, but don’t worry; Poll.objects.all() is actually a special object called a QuerySet, whichis “lazy” and doesn’t hit your database until it absolutely has to. By <strong>the</strong> time <strong>the</strong> database query happens, <strong>the</strong>object_detail() generic view will have narrowed its scope down to a single object, so <strong>the</strong> eventual query willonly select one row from <strong>the</strong> database.If you’d like to know more about how that works, The <strong>Django</strong> database API documentation explains <strong>the</strong> lazy natureof QuerySet objects.In previous parts of <strong>the</strong> tutorial, <strong>the</strong> templates have been provided with a context that contains <strong>the</strong> polland latest_poll_list context variables. However, <strong>the</strong> generic views provide <strong>the</strong> variables object andobject_list as context. Therefore, you need to change your templates to match <strong>the</strong> new context variables. Gothrough your templates, and modify any reference to latest_poll_list to object_list, and change anyreference to poll to object.You can now delete <strong>the</strong> index(), detail() and results() views from polls/views.py. We don’t need<strong>the</strong>m anymore – <strong>the</strong>y have been replaced by generic views.The vote() view is still required. However, it must be modified to match <strong>the</strong> new context variables. In <strong>the</strong>render_to_response() call, rename <strong>the</strong> poll context variable to object.42 Chapter 2. Getting started
<strong>Django</strong> <strong>Documentation</strong>, Release 1.2The last thing to do is fix <strong>the</strong> URL handling to account for <strong>the</strong> use of generic views. In <strong>the</strong> vote view above, we used<strong>the</strong> reverse() function to avoid hard-coding our URLs. Now that we’ve switched to a generic view, we’ll need tochange <strong>the</strong> reverse() call to point back to our new generic view. We can’t simply use <strong>the</strong> view function anymore– generic views can be (and are) used multiple times – but we can use <strong>the</strong> name we’ve given:return HttpResponseRedirect(reverse(’poll_results’, args=(p.id,)))Run <strong>the</strong> server, and use your new polling app based on generic views.For full details on generic views, see <strong>the</strong> generic views documentation.2.6.3 Coming soonThe tutorial ends here for <strong>the</strong> time being. Future installments of <strong>the</strong> tutorial will cover:• Advanced form processing• Using <strong>the</strong> RSS framework• Using <strong>the</strong> cache framework• Using <strong>the</strong> comments framework• Advanced admin features: Permissions• Advanced admin features: Custom JavaScriptIn <strong>the</strong> meantime, you might want to check out some pointers on where to go from here2.7 What to read nextSo you’ve read all <strong>the</strong> introductory material and have decided you’d like to keep using <strong>Django</strong>. We’ve only justscratched <strong>the</strong> surface with this intro (in fact, if you’ve read every single word you’ve still read less than 10% of <strong>the</strong>overall documentation).So what’s next?Well, we’ve always been big fans of learning by doing. At this point you should know enough to start a project of yourown and start fooling around. As you need to learn new tricks, come back to <strong>the</strong> documentation.We’ve put a lot of effort into making <strong>Django</strong>’s documentation useful, easy to read and as complete as possible. Therest of this document explains more about how <strong>the</strong> documentation works so that you can get <strong>the</strong> most out of it.(Yes, this is documentation about documentation. Rest assured we have no plans to write a document about how toread <strong>the</strong> document about documentation.)2.7.1 Finding documentation<strong>Django</strong>’s got a lot of documentation – almost 200,000 words – so finding what you need can sometimes be tricky. Afew good places to start are <strong>the</strong> search and <strong>the</strong> genindex.Or you can just browse around!2.7. What to read next 43
<strong>Django</strong> <strong>Documentation</strong>, Release 1.22.7.2 How <strong>the</strong> documentation is organized<strong>Django</strong>’s main documentation is broken up into “chunks” designed to fill different needs:• The introductory material is designed for people new to <strong>Django</strong> – or to Web development in general. It doesn’tcover anything in depth, but instead gives a high-level overview of how developing in <strong>Django</strong> “feels”.• The topic guides, on <strong>the</strong> o<strong>the</strong>r hand, dive deep into individual parts of <strong>Django</strong>. There are complete guides to<strong>Django</strong>’s model system, template engine, forms framework, and much more.This is probably where you’ll want to spend most of your time; if you work your way through <strong>the</strong>se guides youshould come out knowing pretty much everything <strong>the</strong>re is to know about <strong>Django</strong>.• Web development is often broad, not deep – problems span many domains. We’ve written a set of how-to guidesthat answer common “How do I ...?” questions. Here you’ll find information about generating PDFs with<strong>Django</strong>, writing custom template tags, and more.Answers to really common questions can also be found in <strong>the</strong> FAQ.• The guides and how-to’s don’t cover every single class, function, and method available in <strong>Django</strong> – that wouldbe overwhelming when you’re trying to learn. Instead, details about individual classes, functions, methods,and modules are kept in <strong>the</strong> reference. This is where you’ll turn to find <strong>the</strong> details of a particular function orwhathaveyou.• Finally, <strong>the</strong>re’s some “specialized” documentation not usually relevant to most developers. This includes <strong>the</strong>release notes, documentation of obsolete features, internals documentation for those who want to add code to<strong>Django</strong> itself, and a few o<strong>the</strong>r things that simply don’t fit elsewhere.2.7.3 How documentation is updatedJust as <strong>the</strong> <strong>Django</strong> code base is developed and improved on a daily basis, our documentation is consistently improving.We improve documentation for several reasons:• To make content fixes, such as grammar/typo corrections.• To add information and/or examples to existing sections that need to be expanded.• To document <strong>Django</strong> features that aren’t yet documented. (The list of such features is shrinking but existsnone<strong>the</strong>less.)• To add documentation for new features as new features get added, or as <strong>Django</strong> APIs or behaviors change.<strong>Django</strong>’s documentation is kept in <strong>the</strong> same source control system as its code. It lives in <strong>the</strong> django/trunk/docs directoryof our Subversion repository. Each document online is a separate text file in <strong>the</strong> repository.2.7.4 Where to get itYou can read <strong>Django</strong> documentation in several ways. They are, in order of preference:On <strong>the</strong> WebThe most recent version of <strong>the</strong> <strong>Django</strong> documentation lives at http://docs.djangoproject.com/en/dev/. These HTMLpages are generated automatically from <strong>the</strong> text files in source control. That means <strong>the</strong>y reflect <strong>the</strong> “latest and greatest”in <strong>Django</strong> – <strong>the</strong>y include <strong>the</strong> very latest corrections and additions, and <strong>the</strong>y discuss <strong>the</strong> latest <strong>Django</strong> features, whichmay only be available to users of <strong>the</strong> <strong>Django</strong> development version. (See “Differences between versions” below.)44 Chapter 2. Getting started
<strong>Django</strong> <strong>Documentation</strong>, Release 1.2We encourage you to help improve <strong>the</strong> docs by submitting changes, corrections and suggestions in <strong>the</strong> ticket system.The <strong>Django</strong> developers actively monitor <strong>the</strong> ticket system and use your feedback to improve <strong>the</strong> documentation foreverybody.Note, however, that tickets should explicitly relate to <strong>the</strong> documentation, ra<strong>the</strong>r than asking broad tech-support questions.If you need help with your particular <strong>Django</strong> setup, try <strong>the</strong> django-users mailing list or <strong>the</strong> #django IRC channelinstead.In plain textFor offline reading, or just for convenience, you can read <strong>the</strong> <strong>Django</strong> documentation in plain text.If you’re using an official release of <strong>Django</strong>, note that <strong>the</strong> zipped package (tarball) of <strong>the</strong> code includes a docs/directory, which contains all <strong>the</strong> documentation for that release.If you’re using <strong>the</strong> development version of <strong>Django</strong> (aka <strong>the</strong> Subversion “trunk”), note that <strong>the</strong> docs/ directory containsall of <strong>the</strong> documentation. You can svn update it, just as you svn update <strong>the</strong> Python code, in order to get<strong>the</strong> latest changes.You can check out <strong>the</strong> latest <strong>Django</strong> documentation from Subversion using this shell command:$ svn co http://code.djangoproject.com/svn/django/trunk/docs/ django_docsOne low-tech way of taking advantage of <strong>the</strong> text documentation is by using <strong>the</strong> Unix grep utility to search for aphrase in all of <strong>the</strong> documentation. For example, this will show you each mention of <strong>the</strong> phrase “max_length” in any<strong>Django</strong> document:$ grep -r max_length /path/to/django/docs/As HTML, locallyYou can get a local copy of <strong>the</strong> HTML documentation following a few easy steps:• <strong>Django</strong>’s documentation uses a system called Sphinx to convert from plain text to HTML. You’ll need toinstall Sphinx by ei<strong>the</strong>r downloading and installing <strong>the</strong> package from <strong>the</strong> Sphinx Web site, or by Python’seasy_install:$ easy_install Sphinx• Then, just use <strong>the</strong> included Makefile to turn <strong>the</strong> documentation into HTML:$ cd path/to/django/docs$ make htmlYou’ll need GNU Make installed for this.• The HTML documentation will be placed in docs/_build/html.Note: Generation of <strong>the</strong> <strong>Django</strong> documentation will work with Sphinx version 0.6 or newer, but we recommend goingstraight to Sphinx 1.0.2 or newer.2.7.5 Differences between versionsAs previously mentioned, <strong>the</strong> text documentation in our Subversion repository contains <strong>the</strong> “latest and greatest”changes and additions. These changes often include documentation of new features added in <strong>the</strong> <strong>Django</strong> develop-2.7. What to read next 45
<strong>Django</strong> <strong>Documentation</strong>, Release 1.2ment version – <strong>the</strong> Subversion (“trunk”) version of <strong>Django</strong>. For that reason, it’s worth pointing out our policy onkeeping straight <strong>the</strong> documentation for various versions of <strong>the</strong> framework.We follow this policy:• The primary documentation on djangoproject.com is an HTML version of <strong>the</strong> latest docs in Subversion. Thesedocs always correspond to <strong>the</strong> latest official <strong>Django</strong> release, plus whatever features we’ve added/changed in <strong>the</strong>framework since <strong>the</strong> latest release.• As we add features to <strong>Django</strong>’s development version, we try to update <strong>the</strong> documentation in <strong>the</strong> same Subversioncommit transaction.• To distinguish feature changes/additions in <strong>the</strong> docs, we use <strong>the</strong> phrase: “New in version X.Y”, being X.Y <strong>the</strong>next release version (hence, <strong>the</strong> one being developed).• <strong>Documentation</strong> for a particular <strong>Django</strong> release is frozen once <strong>the</strong> version has been released officially. It remainsa snapshot of <strong>the</strong> docs as of <strong>the</strong> moment of <strong>the</strong> release. We will make exceptions to this rule in <strong>the</strong> case ofretroactive security updates or o<strong>the</strong>r such retroactive changes. Once documentation is frozen, we add a note to<strong>the</strong> top of each frozen document that says “These docs are frozen for <strong>Django</strong> version XXX” and links to <strong>the</strong>current version of that document.• The main documentation Web page includes links to documentation for all previous versions.See Also:If you’re new to Python, you might want to start by getting an idea of what <strong>the</strong> language is like. <strong>Django</strong> is 100%Python, so if you’ve got minimal comfort with Python you’ll probably get a lot more out of <strong>Django</strong>.If you’re new to programming entirely, you might want to start with this list of Python resources for non-programmersIf you already know a few o<strong>the</strong>r languages and want to get up to speed with Python quickly, we recommend Dive IntoPython (also available in a dead-tree version). If that’s not quite your style, <strong>the</strong>re are quite a few o<strong>the</strong>r books aboutPython.46 Chapter 2. Getting started
CHAPTERTHREEUSING DJANGOIntroductions to all <strong>the</strong> key parts of <strong>Django</strong> you’ll need to know:3.1 How to install <strong>Django</strong>This document will get you up and running with <strong>Django</strong>.3.1.1 Install PythonBeing a Python Web framework, <strong>Django</strong> requires Python.It works with any Python version from 2.4 to 2.7 (due to backwards incompatibilities in Python 3.0, <strong>Django</strong> does notcurrently work with Python 3.0; see <strong>the</strong> <strong>Django</strong> FAQ for more information on supported Python versions and <strong>the</strong> 3.0transition).Get Python at http://www.python.org. If you’re running Linux or Mac OS X, you probably already have it installed.<strong>Django</strong> on JythonIf you use Jython (a Python implementation for <strong>the</strong> Java platform), you’ll need to follow a few additional steps. SeeRunning <strong>Django</strong> on Jython for details.3.1.2 Install Apache and mod_wsgiIf you just want to experiment with <strong>Django</strong>, skip ahead to <strong>the</strong> next section; <strong>Django</strong> includes a lightweight Web serveryou can use for testing, so you won’t need to set up Apache until you’re ready to deploy <strong>Django</strong> in production.If you want to use <strong>Django</strong> on a production site, use Apache with mod_wsgi. mod_wsgi is similar to mod_perl –it embeds Python within Apache and loads Python code into memory when <strong>the</strong> server starts. Code stays in memorythroughout <strong>the</strong> life of an Apache process, which leads to significant performance gains over o<strong>the</strong>r server arrangements.Make sure you have Apache installed, with <strong>the</strong> mod_wsgi module activated. <strong>Django</strong> will work with any version ofApache that supports mod_wsgi.See How to use <strong>Django</strong> with mod_wsgi for information on how to configure mod_wsgi once you have it installed.If you can’t use mod_wsgi for some reason, fear not: <strong>Django</strong> supports many o<strong>the</strong>r deployment options. A great secondchoice is mod_python, <strong>the</strong> predecessor to mod_wsgi. Additionally, <strong>Django</strong> follows <strong>the</strong> WSGI spec, which allows itto run on a variety of server platforms. See <strong>the</strong> server-arrangements wiki page for specific installation instructions foreach platform.47
<strong>Django</strong> <strong>Documentation</strong>, Release 1.23.1.3 Get your database runningIf you plan to use <strong>Django</strong>’s database API functionality, you’ll need to make sure a database server is running. <strong>Django</strong>supports many different database servers and is officially supported with PostgreSQL, MySQL, Oracle and SQLite(although SQLite doesn’t require a separate server to be running).In addition to <strong>the</strong> officially supported databases, <strong>the</strong>re are backends provided by 3rd parties that allow you to use o<strong>the</strong>rdatabases with <strong>Django</strong>:• Sybase SQL Anywhere• IBM DB2• Microsoft SQL Server 2005• Firebird• ODBCThe <strong>Django</strong> versions and ORM features supported by <strong>the</strong>se unofficial backends vary considerably. Queries regarding<strong>the</strong> specific capabilities of <strong>the</strong>se unofficial backends, along with any support queries, should be directed to <strong>the</strong> supportchannels provided by each 3rd party project.In addition to a database backend, you’ll need to make sure your Python database bindings are installed.• If you’re using PostgreSQL, you’ll need <strong>the</strong> psycopg package. <strong>Django</strong> supports both version 1 and 2. (When youconfigure <strong>Django</strong>’s database layer, specify ei<strong>the</strong>r postgresql [for version 1] or postgresql_psycopg2[for version 2].) You might want to refer to our PostgreSQL notes for fur<strong>the</strong>r technical details specific to thisdatabase.If you’re on Windows, check out <strong>the</strong> unofficial compiled Windows version.• If you’re using MySQL, you’ll need MySQLdb, version 1.2.1p2 or higher. You will also want to read <strong>the</strong>database-specific notes for <strong>the</strong> MySQL backend.• If you’re using SQLite and Python 2.4, you’ll need pysqlite. Use version 2.0.3 or higher. Python 2.5 ships withan SQLite wrapper in <strong>the</strong> standard library, so you don’t need to install anything extra in that case. Please read<strong>the</strong> SQLite backend notes.• If you’re using Oracle, you’ll need a copy of cx_Oracle, but please read <strong>the</strong> database-specific notes for <strong>the</strong>Oracle backend for important information regarding supported versions of both Oracle and cx_Oracle.• If you’re using an unofficial 3rd party backend, please consult <strong>the</strong> documentation provided for any additionalrequirements.If you plan to use <strong>Django</strong>’s manage.py syncdb command to automatically create database tables for your models,you’ll need to ensure that <strong>Django</strong> has permission to create and alter tables in <strong>the</strong> database you’re using; if you planto manually create <strong>the</strong> tables, you can simply grant <strong>Django</strong> SELECT, INSERT, UPDATE and DELETE permissions.On some databases, <strong>Django</strong> will need ALTER TABLE privileges during syncdb but won’t issue ALTER TABLEstatements on a table once syncdb has created it.If you’re using <strong>Django</strong>’s testing framework to test database queries, <strong>Django</strong> will need permission to create a testdatabase.3.1.4 Remove any old versions of <strong>Django</strong>If you are upgrading your installation of <strong>Django</strong> from a previous version, you will need to uninstall <strong>the</strong> old <strong>Django</strong>version before installing <strong>the</strong> new version.If you installed <strong>Django</strong> using setup.py install, uninstalling is as simple as deleting <strong>the</strong> django directory fromyour Python site-packages.48 Chapter 3. Using <strong>Django</strong>
<strong>Django</strong> <strong>Documentation</strong>, Release 1.2If you installed <strong>Django</strong> from a Python egg, remove <strong>the</strong> <strong>Django</strong> .egg file, and remove <strong>the</strong> reference to <strong>the</strong> egg in <strong>the</strong>file named easy-install.pth. This file should also be located in your site-packages directory.Where are my site-packages stored?The location of <strong>the</strong> site-packages directory depends on <strong>the</strong> operating system, and <strong>the</strong> location in which Pythonwas installed. To find out your system’s site-packages location, execute <strong>the</strong> following:python -c "from distutils.sysconfig import get_python_lib; print get_python_lib()"(Note that this should be run from a shell prompt, not a Python interactive prompt.)3.1.5 Install <strong>the</strong> <strong>Django</strong> codeInstallation instructions are slightly different depending on whe<strong>the</strong>r you’re installing a distribution-specific package,downloading <strong>the</strong> latest official release, or fetching <strong>the</strong> latest development version.It’s easy, no matter which way you choose.Installing a distribution-specific packageCheck <strong>the</strong> distribution specific notes to see if your platform/distribution provides official <strong>Django</strong> packages/installers.Distribution-provided packages will typically allow for automatic installation of dependencies and easy upgrade paths.Installing an official release1. Download <strong>the</strong> latest release from our download page.2. Untar <strong>the</strong> downloaded file (e.g. tar xzvf <strong>Django</strong>-NNN.tar.gz, where NNN is <strong>the</strong> version number of <strong>the</strong>latest release). If you’re using Windows, you can download <strong>the</strong> command-line tool bsdtar to do this, or you canuse a GUI-based tool such as 7-zip.3. Change into <strong>the</strong> directory created in step 2 (e.g. cd <strong>Django</strong>-NNN).4. If you’re using Linux, Mac OS X or some o<strong>the</strong>r flavor of Unix, enter <strong>the</strong> command sudo python setup.pyinstall at <strong>the</strong> shell prompt. If you’re using Windows, start up a command shell with administrator privilegesand run <strong>the</strong> command setup.py install.These commands will install <strong>Django</strong> in your Python installation’s site-packages directory.Installing <strong>the</strong> development versionTracking <strong>Django</strong> developmentIf you decide to use <strong>the</strong> latest development version of <strong>Django</strong>, you’ll want to pay close attention to <strong>the</strong> developmenttimeline, and you’ll want to keep an eye on <strong>the</strong> list of backwards-incompatible changes. This will help you stay on topof any new features you might want to use, as well as any changes you’ll need to make to your code when updatingyour copy of <strong>Django</strong>. (For stable releases, any necessary changes are documented in <strong>the</strong> release notes.)If you’d like to be able to update your <strong>Django</strong> code occasionally with <strong>the</strong> latest bug fixes and improvements, follow<strong>the</strong>se instructions:3.1. How to install <strong>Django</strong> 49
<strong>Django</strong> <strong>Documentation</strong>, Release 1.21. Make sure that you have Subversion installed, and that you can run its commands from a shell. (Enter svnhelp at a shell prompt to test this.)2. Check out <strong>Django</strong>’s main development branch (<strong>the</strong> ‘trunk’) like so:svn co http://code.djangoproject.com/svn/django/trunk/ django-trunk3. Next, make sure that <strong>the</strong> Python interpreter can load <strong>Django</strong>’s code. There are various ways of accomplishingthis. One of <strong>the</strong> most convenient, on Linux, Mac OSX or o<strong>the</strong>r Unix-like systems, is to use a symbolic link:ln -s WORKING-DIR/django-trunk/django SITE-PACKAGES-DIR/django(In <strong>the</strong> above line, change SITE-PACKAGES-DIR to match <strong>the</strong> location of your system’s site-packagesdirectory, as explained in <strong>the</strong> “Where are my site-packages stored?” section above. Change WORKING-DIR to match <strong>the</strong> full path to your new django-trunk directory.)Alternatively, you can define your PYTHONPATH environment variable so that it includes <strong>the</strong> django-trunkdirectory. This is perhaps <strong>the</strong> most convenient solution on Windows systems, which don’t support symboliclinks. (Environment variables can be defined on Windows systems from <strong>the</strong> Control Panel.)What about Apache and mod_python?If you take <strong>the</strong> approach of setting PYTHONPATH, you’ll need to remember to do <strong>the</strong> same thing in yourApache configuration once you deploy your production site. Do this by setting PythonPath in your Apacheconfiguration file.More information about deployment is available, of course, in our How to use <strong>Django</strong> with mod_python documentation.4. On Unix-like systems, create a symbolic link to <strong>the</strong> file django-trunk/django/bin/django-admin.pyin a directory on your system path, such as /usr/local/bin. For example:ln -s WORKING-DIR/django-trunk/django/bin/django-admin.py /usr/local/bin(In <strong>the</strong> above line, change WORKING-DIR to match <strong>the</strong> full path to your new django-trunk directory.)This simply lets you type django-admin.py from within any directory, ra<strong>the</strong>r than having to qualify <strong>the</strong>command with <strong>the</strong> full path to <strong>the</strong> file.On Windows systems, <strong>the</strong> same result can be achieved by copying <strong>the</strong> filedjango-trunk/django/bin/django-admin.py to somewhere on your system path, for exampleC:\Python24\Scripts.You don’t have to run python setup.py install, because you’ve already carried out <strong>the</strong> equivalent actions insteps 3 and 4.When you want to update your copy of <strong>the</strong> <strong>Django</strong> source code, just run <strong>the</strong> command svn update from within <strong>the</strong>django-trunk directory. When you do this, Subversion will automatically download any changes.3.2 Models and databasesA model is <strong>the</strong> single, definitive source of data about your data. It contains <strong>the</strong> essential fields and behaviors of <strong>the</strong>data you’re storing. Generally, each model maps to a single database table.50 Chapter 3. Using <strong>Django</strong>
<strong>Django</strong> <strong>Documentation</strong>, Release 1.23.2.1 ModelsA model is <strong>the</strong> single, definitive source of data about your data. It contains <strong>the</strong> essential fields and behaviors of <strong>the</strong>data you’re storing. Generally, each model maps to a single database table.The basics:• Each model is a Python class that subclasses django.db.models.Model.• Each attribute of <strong>the</strong> model represents a database field.• With all of this, <strong>Django</strong> gives you an automatically-generated database-access API; see Making queries.See Also:A companion to this document is <strong>the</strong> official repository of model examples. (In <strong>the</strong> <strong>Django</strong> source distribution, <strong>the</strong>seexamples are in <strong>the</strong> tests/modeltests directory.)Quick exampleThis example model defines a Person, which has a first_name and last_name:from django.db import modelsclass Person(models.Model):first_name = models.CharField(max_length=30)last_name = models.CharField(max_length=30)first_name and last_name are fields of <strong>the</strong> model. Each field is specified as a class attribute, and each attributemaps to a database column.The above Person model would create a database table like this:CREATE TABLE myapp_person ("id" serial NOT NULL PRIMARY KEY,"first_name" varchar(30) NOT NULL,"last_name" varchar(30) NOT NULL);Some technical notes:• The name of <strong>the</strong> table, myapp_person, is automatically derived from some model metadata but can be overridden.See Table names for more details..• An id field is added automatically, but this behavior can be overridden. See Automatic primary key fields.• The CREATE TABLE SQL in this example is formatted using PostgreSQL syntax, but it’s worth noting <strong>Django</strong>uses SQL tailored to <strong>the</strong> database backend specified in your settings file.Using modelsOnce you have defined your models, you need to tell <strong>Django</strong> you’re going to use those models. Do this by editingyour settings file and changing <strong>the</strong> INSTALLED_APPS setting to add <strong>the</strong> name of <strong>the</strong> module that contains yourmodels.py.For example, if <strong>the</strong> models for your application live in <strong>the</strong> module mysite.myapp.models (<strong>the</strong> package structurethat is created for an application by <strong>the</strong> manage.py startapp script), INSTALLED_APPS should read, in part:3.2. Models and databases 51
<strong>Django</strong> <strong>Documentation</strong>, Release 1.2INSTALLED_APPS = (#...’mysite.myapp’,#...)When you add new apps to INSTALLED_APPS, be sure to run manage.py syncdb.FieldsThe most important part of a model – and <strong>the</strong> only required part of a model – is <strong>the</strong> list of database fields it defines.Fields are specified by class attributes.Example:class Musician(models.Model):first_name = models.CharField(max_length=50)last_name = models.CharField(max_length=50)instrument = models.CharField(max_length=100)class Album(models.Model):artist = models.ForeignKey(Musician)name = models.CharField(max_length=100)release_date = models.DateField()num_stars = models.IntegerField()Field typesEach field in your model should be an instance of <strong>the</strong> appropriate Field class. <strong>Django</strong> uses <strong>the</strong> field class types todetermine a few things:• The database column type (e.g. INTEGER, VARCHAR).• The widget to use in <strong>Django</strong>’s admin interface, if you care to use it (e.g.).,• The minimal validation requirements, used in <strong>Django</strong>’s admin and in automatically-generated forms.<strong>Django</strong> ships with dozens of built-in field types; you can find <strong>the</strong> complete list in <strong>the</strong> model field reference. You caneasily write your own fields if <strong>Django</strong>’s built-in ones don’t do <strong>the</strong> trick; see Writing custom model fields.Field optionsEach field takes a certain set of field-specific arguments (documented in <strong>the</strong> model field reference). For example,CharField (and its subclasses) require a max_length argument which specifies <strong>the</strong> size of <strong>the</strong> VARCHAR databasefield used to store <strong>the</strong> data.There’s also a set of common arguments available to all field types. All are optional. They’re fully explained in <strong>the</strong>reference, but here’s a quick summary of <strong>the</strong> most often-used ones:null If True, <strong>Django</strong> will store empty values as NULL in <strong>the</strong> database. Default is False.blank If True, <strong>the</strong> field is allowed to be blank. Default is False.Note that this is different than null. null is purely database-related, whereas blank is validation-related. Ifa field has blank=True, validation on <strong>Django</strong>’s admin site will allow entry of an empty value. If a field hasblank=False, <strong>the</strong> field will be required.52 Chapter 3. Using <strong>Django</strong>
<strong>Django</strong> <strong>Documentation</strong>, Release 1.2choices An iterable (e.g., a list or tuple) of 2-tuples to use as choices for this field. If this is given, <strong>Django</strong>’s adminwill use a select box instead of <strong>the</strong> standard text field and will limit choices to <strong>the</strong> choices given.A choices list looks like this:YEAR_IN_SCHOOL_CHOICES = ((u’FR’, u’Freshman’),(u’SO’, u’Sophomore’),(u’JR’, u’Junior’),(u’SR’, u’Senior’),(u’GR’, u’Graduate’),)The first element in each tuple is <strong>the</strong> value that will be stored in <strong>the</strong> database, <strong>the</strong> second element will bedisplayed by <strong>the</strong> admin interface, or in a ModelChoiceField. Given an instance of a model object, <strong>the</strong> displayvalue for a choices field can be accessed using <strong>the</strong> get_FOO_display method. For example:from django.db import modelsclass Person(models.Model):GENDER_CHOICES = ((u’M’, u’Male’),(u’F’, u’Female’),)name = models.CharField(max_length=60)gender = models.CharField(max_length=2, choices=GENDER_CHOICES)>>> p = Person(name="Fred Flinstone", gender="M")>>> p.save()>>> p.genderu’M’>>> p.get_gender_display()u’Male’default The default value for <strong>the</strong> field. This can be a value or a callable object. If callable it will be called everytime a new object is created.help_text Extra “help” text to be displayed under <strong>the</strong> field on <strong>the</strong> object’s admin form. It’s useful for documentationeven if your object doesn’t have an admin form.primary_key If True, this field is <strong>the</strong> primary key for <strong>the</strong> model.If you don’t specify primary_key=True for any fields in your model, <strong>Django</strong> will automatically add anIntegerField to hold <strong>the</strong> primary key, so you don’t need to set primary_key=True on any of yourfields unless you want to override <strong>the</strong> default primary-key behavior. For more, see Automatic primary key fields.unique If True, this field must be unique throughout <strong>the</strong> table.Again, <strong>the</strong>se are just short descriptions of <strong>the</strong> most common field options. Full details can be found in <strong>the</strong> commonmodel field option reference.Automatic primary key fieldsBy default, <strong>Django</strong> gives each model <strong>the</strong> following field:id = models.AutoField(primary_key=True)This is an auto-incrementing primary key.3.2. Models and databases 53
<strong>Django</strong> <strong>Documentation</strong>, Release 1.2If you’d like to specify a custom primary key, just specify primary_key=True on one of your fields. If <strong>Django</strong>sees you’ve explicitly set Field.primary_key, it won’t add <strong>the</strong> automatic id column.Each model requires exactly one field to have primary_key=True.Verbose field namesEach field type, except for ForeignKey, ManyToManyField and OneToOneField, takes an optional firstpositional argument – a verbose name. If <strong>the</strong> verbose name isn’t given, <strong>Django</strong> will automatically create it using <strong>the</strong>field’s attribute name, converting underscores to spaces.In this example, <strong>the</strong> verbose name is "person’s first name":first_name = models.CharField("person’s first name", max_length=30)In this example, <strong>the</strong> verbose name is "first name":first_name = models.CharField(max_length=30)ForeignKey, ManyToManyField and OneToOneField require <strong>the</strong> first argument to be a model class, so use<strong>the</strong> verbose_name keyword argument:poll = models.ForeignKey(Poll, verbose_name="<strong>the</strong> related poll")sites = models.ManyToManyField(Site, verbose_name="list of sites")place = models.OneToOneField(Place, verbose_name="related place")The convention is not to capitalize <strong>the</strong> first letter of <strong>the</strong> verbose_name. <strong>Django</strong> will automatically capitalize <strong>the</strong>first letter where it needs to.RelationshipsClearly, <strong>the</strong> power of relational databases lies in relating tables to each o<strong>the</strong>r. <strong>Django</strong> offers ways to define <strong>the</strong> threemost common types of database relationships: many-to-one, many-to-many and one-to-one.Many-to-one relationships To define a many-to-one relationship, use ForeignKey. You use it just like any o<strong>the</strong>rField type: by including it as a class attribute of your model.ForeignKey requires a positional argument: <strong>the</strong> class to which <strong>the</strong> model is related.For example, if a Car model has a Manufacturer – that is, a Manufacturer makes multiple cars but each Caronly has one Manufacturer – use <strong>the</strong> following definitions:class Manufacturer(models.Model):# ...class Car(models.Model):manufacturer = models.ForeignKey(Manufacturer)# ...You can also create recursive relationships (an object with a many-to-one relationship to itself) and relationships tomodels not yet defined; see <strong>the</strong> model field reference for details.It’s suggested, but not required, that <strong>the</strong> name of a ForeignKey field (manufacturer in <strong>the</strong> example above) be<strong>the</strong> name of <strong>the</strong> model, lowercase. You can, of course, call <strong>the</strong> field whatever you want. For example:class Car(models.Model):company_that_makes_it = models.ForeignKey(Manufacturer)# ...54 Chapter 3. Using <strong>Django</strong>
<strong>Django</strong> <strong>Documentation</strong>, Release 1.2def __unicode__(self):return self.nameclass Group(models.Model):name = models.CharField(max_length=128)members = models.ManyToManyField(Person, through=’Membership’)def __unicode__(self):return self.nameclass Membership(models.Model):person = models.ForeignKey(Person)group = models.ForeignKey(Group)date_joined = models.DateField()invite_reason = models.CharField(max_length=64)When you set up <strong>the</strong> intermediary model, you explicitly specify foreign keys to <strong>the</strong> models that are involved in <strong>the</strong>ManyToMany relation. This explicit declaration defines how <strong>the</strong> two models are related.There are a few restrictions on <strong>the</strong> intermediate model:• Your intermediate model must contain one - and only one - foreign key to <strong>the</strong> target model (this would bePerson in our example). If you have more than one foreign key, a validation error will be raised.• Your intermediate model must contain one - and only one - foreign key to <strong>the</strong> source model (this would beGroup in our example). If you have more than one foreign key, a validation error will be raised.• The only exception to this is a model which has a many-to-many relationship to itself, through an intermediarymodel. In this case, two foreign keys to <strong>the</strong> same model are permitted, but <strong>the</strong>y will be treated as <strong>the</strong> two(different) sides of <strong>the</strong> many-to-many relation.• When defining a many-to-many relationship from a model to itself, using an intermediary model, you must usesymmetrical=False (see <strong>the</strong> model field reference).Now that you have set up your ManyToManyField to use your intermediary model (Membership, in this case),you’re ready to start creating some many-to-many relationships. You do this by creating instances of <strong>the</strong> intermediatemodel:>>> ringo = Person.objects.create(name="Ringo Starr")>>> paul = Person.objects.create(name="Paul McCartney")>>> beatles = Group.objects.create(name="The Beatles")>>> m1 = Membership(person=ringo, group=beatles,... date_joined=date(1962, 8, 16),... invite_reason= "Needed a new drummer.")>>> m1.save()>>> beatles.members.all()[]>>> ringo.group_set.all()[]>>> m2 = Membership.objects.create(person=paul, group=beatles,... date_joined=date(1960, 8, 1),... invite_reason= "Wanted to form a band.")>>> beatles.members.all()[, ]Unlike normal many-to-many fields, you can’t use add, create, or assignment (i.e., beatles.members =[...]) to create relationships:# THIS WILL NOT WORK>>> beatles.members.add(john)56 Chapter 3. Using <strong>Django</strong>
<strong>Django</strong> <strong>Documentation</strong>, Release 1.2# NEITHER WILL THIS>>> beatles.members.create(name="George Harrison")# AND NEITHER WILL THIS>>> beatles.members = [john, paul, ringo, george]Why? You can’t just create a relationship between a Person and a Group - you need to specify all <strong>the</strong> detail for <strong>the</strong>relationship required by <strong>the</strong> Membership model. The simple add, create and assignment calls don’t provide away to specify this extra detail. As a result, <strong>the</strong>y are disabled for many-to-many relationships that use an intermediatemodel. The only way to create this type of relationship is to create instances of <strong>the</strong> intermediate model.The remove() method is disabled for similar reasons. However, <strong>the</strong> clear() method can be used to remove allmany-to-many relationships for an instance:# Beatles have broken up>>> beatles.members.clear()Once you have established <strong>the</strong> many-to-many relationships by creating instances of your intermediate model, you canissue queries. Just as with normal many-to-many relationships, you can query using <strong>the</strong> attributes of <strong>the</strong> many-tomany-relatedmodel:# Find all <strong>the</strong> groups with a member whose name starts with ’Paul’>>> Group.objects.filter(members__name__startswith=’Paul’)[]As you are using an intermediate model, you can also query on its attributes:# Find all <strong>the</strong> members of <strong>the</strong> Beatles that joined after 1 Jan 1961>>> Person.objects.filter(... group__name=’The Beatles’,... membership__date_joined__gt=date(1961,1,1))[
<strong>Django</strong> <strong>Documentation</strong>, Release 1.2Models across filesIt’s perfectly OK to relate a model to one from ano<strong>the</strong>r app. To do this, import <strong>the</strong> related model at <strong>the</strong> top of <strong>the</strong>model that holds your model. Then, just refer to <strong>the</strong> o<strong>the</strong>r model class wherever needed. For example:from geography.models import ZipCodeclass Restaurant(models.Model):# ...zip_code = models.ForeignKey(ZipCode)Field name restrictions<strong>Django</strong> places only two restrictions on model field names:1. A field name cannot be a Python reserved word, because that would result in a Python syntax error. For example:class Example(models.Model):pass = models.IntegerField() # ’pass’ is a reserved word!2. A field name cannot contain more than one underscore in a row, due to <strong>the</strong> way <strong>Django</strong>’s query lookup syntaxworks. For example:class Example(models.Model):foo__bar = models.IntegerField() # ’foo__bar’ has two underscores!These limitations can be worked around, though, because your field name doesn’t necessarily have to match yourdatabase column name. See <strong>the</strong> db_column option.SQL reserved words, such as join, where or select, are allowed as model field names, because <strong>Django</strong> escapes alldatabase table names and column names in every underlying SQL query. It uses <strong>the</strong> quoting syntax of your particulardatabase engine.Custom field typesNew in version 1.0: Please, see <strong>the</strong> release notes If one of <strong>the</strong> existing model fields cannot be used to fit your purposes,or if you wish to take advantage of some less common database column types, you can create your own field class.Full coverage of creating your own fields is provided in Writing custom model fields.Meta optionsGive your model metadata by using an inner class Meta, like so:class Ox(models.Model):horn_length = models.IntegerField()class Meta:ordering = ["horn_length"]verbose_name_plural = "oxen"Model metadata is “anything that’s not a field”, such as ordering options (ordering), database table name(db_table), or human-readable singular and plural names (verbose_name and verbose_name_plural).None are required, and adding class Meta to a model is completely optional.A complete list of all possible Meta options can be found in <strong>the</strong> model option reference.58 Chapter 3. Using <strong>Django</strong>
<strong>Django</strong> <strong>Documentation</strong>, Release 1.2Model methodsDefine custom methods on a model to add custom “row-level” functionality to your objects. Whereas Managermethods are intended to do “table-wide” things, model methods should act on a particular model instance.This is a valuable technique for keeping business logic in one place – <strong>the</strong> model.For example, this model has a few custom methods:from django.contrib.localflavor.us.models import USStateFieldclass Person(models.Model):first_name = models.CharField(max_length=50)last_name = models.CharField(max_length=50)birth_date = models.DateField()address = models.CharField(max_length=100)city = models.CharField(max_length=50)state = USStateField() # Yes, this is America-centric...def baby_boomer_status(self):"Returns <strong>the</strong> person’s baby-boomer status."import datetimeif datetime.date(1945, 8, 1)
<strong>Django</strong> <strong>Documentation</strong>, Release 1.2A classic use-case for overriding <strong>the</strong> built-in methods is if you want something to happen whenever you save an object.For example (see save() for documentation of <strong>the</strong> parameters it accepts):class Blog(models.Model):name = models.CharField(max_length=100)tagline = models.TextField()def save(self, *args, **kwargs):do_something()super(Blog, self).save(*args, **kwargs) # Call <strong>the</strong> "real" save() method.do_something_else()You can also prevent saving:class Blog(models.Model):name = models.CharField(max_length=100)tagline = models.TextField()def save(self, *args, **kwargs):if self.name == "Yoko Ono’s blog":return # Yoko shall never have her own blog!else:super(Blog, self).save(*args, **kwargs) # Call <strong>the</strong> "real" save() method.It’s important to remember to call <strong>the</strong> superclass method – that’s that super(Blog, self).save(*args,**kwargs) business – to ensure that <strong>the</strong> object still gets saved into <strong>the</strong> database. If you forget to call <strong>the</strong> superclassmethod, <strong>the</strong> default behavior won’t happen and <strong>the</strong> database won’t get touched.It’s also important that you pass through <strong>the</strong> arguments that can be passed to <strong>the</strong> model method – that’s what <strong>the</strong>*args, **kwargs bit does. <strong>Django</strong> will, from time to time, extend <strong>the</strong> capabilities of built-in model methods,adding new arguments. If you use *args, **kwargs in your method definitions, you are guaranteed that yourcode will automatically support those arguments when <strong>the</strong>y are added.Executing custom SQLAno<strong>the</strong>r common pattern is writing custom SQL statements in model methods and module-level methods. For moredetails on using raw SQL, see <strong>the</strong> documentation on using raw SQL.Model inheritanceNew in version 1.0: Please, see <strong>the</strong> release notes Model inheritance in <strong>Django</strong> works almost identically to <strong>the</strong> waynormal class inheritance works in Python. The only decision you have to make is whe<strong>the</strong>r you want <strong>the</strong> parentmodels to be models in <strong>the</strong>ir own right (with <strong>the</strong>ir own database tables), or if <strong>the</strong> parents are just holders of commoninformation that will only be visible through <strong>the</strong> child models.There are three styles of inheritance that are possible in <strong>Django</strong>.1. Often, you will just want to use <strong>the</strong> parent class to hold information that you don’t want to have to type out foreach child model. This class isn’t going to ever be used in isolation, so Abstract base classes are what you’reafter.2. If you’re subclassing an existing model (perhaps something from ano<strong>the</strong>r application entirely) and want eachmodel to have its own database table, Multi-table inheritance is <strong>the</strong> way to go.3. Finally, if you only want to modify <strong>the</strong> Python-level behaviour of a model, without changing <strong>the</strong> models fieldsin any way, you can use Proxy models.60 Chapter 3. Using <strong>Django</strong>
<strong>Django</strong> <strong>Documentation</strong>, Release 1.2Abstract base classesAbstract base classes are useful when you want to put some common information into a number of o<strong>the</strong>r models. Youwrite your base class and put abstract=True in <strong>the</strong> Meta class. This model will <strong>the</strong>n not be used to create anydatabase table. Instead, when it is used as a base class for o<strong>the</strong>r models, its fields will be added to those of <strong>the</strong> childclass. It is an error to have fields in <strong>the</strong> abstract base class with <strong>the</strong> same name as those in <strong>the</strong> child (and <strong>Django</strong> willraise an exception).An example:class CommonInfo(models.Model):name = models.CharField(max_length=100)age = models.PositiveIntegerField()class Meta:abstract = Trueclass Student(CommonInfo):home_group = models.CharField(max_length=5)The Student model will have three fields: name, age and home_group. The CommonInfo model cannot beused as a normal <strong>Django</strong> model, since it is an abstract base class. It does not generate a database table or have amanager, and cannot be instantiated or saved directly.For many uses, this type of model inheritance will be exactly what you want. It provides a way to factor out commoninformation at <strong>the</strong> Python level, whilst still only creating one database table per child model at <strong>the</strong> database level.Meta inheritance When an abstract base class is created, <strong>Django</strong> makes any Meta inner class you declared in <strong>the</strong>base class available as an attribute. If a child class does not declare its own Meta class, it will inherit <strong>the</strong> parent’s Meta.If <strong>the</strong> child wants to extend <strong>the</strong> parent’s Meta class, it can subclass it. For example:class CommonInfo(models.Model):...class Meta:abstract = Trueordering = [’name’]class Student(CommonInfo):...class Meta(CommonInfo.Meta):db_table = ’student_info’<strong>Django</strong> does make one adjustment to <strong>the</strong> Meta class of an abstract base class: before installing <strong>the</strong> Meta attribute,it sets abstract=False. This means that children of abstract base classes don’t automatically become abstractclasses <strong>the</strong>mselves. Of course, you can make an abstract base class that inherits from ano<strong>the</strong>r abstract base class. Youjust need to remember to explicitly set abstract=True each time.Some attributes won’t make sense to include in <strong>the</strong> Meta class of an abstract base class. For example, includingdb_table would mean that all <strong>the</strong> child classes (<strong>the</strong> ones that don’t specify <strong>the</strong>ir own Meta) would use <strong>the</strong> samedatabase table, which is almost certainly not what you want.Be careful with related_name If you are using <strong>the</strong> related_name attribute on a ForeignKey orManyToManyField, you must always specify a unique reverse name for <strong>the</strong> field. This would normally cause aproblem in abstract base classes, since <strong>the</strong> fields on this class are included into each of <strong>the</strong> child classes, with exactly<strong>the</strong> same values for <strong>the</strong> attributes (including related_name) each time. Changed in version 1.2: Please, see <strong>the</strong>release notes To work around this problem, when you are using related_name in an abstract base class (only), partof <strong>the</strong> name should contain ’%(app_label)s’ and ’%(class)s’.3.2. Models and databases 61
<strong>Django</strong> <strong>Documentation</strong>, Release 1.2• ’%(class)s’ is replaced by <strong>the</strong> lower-cased name of <strong>the</strong> child class that <strong>the</strong> field is used in.• ’%(app_label)s’ is replaced by <strong>the</strong> lower-cased name of <strong>the</strong> app <strong>the</strong> child class is contained within. Eachinstalled application name must be unique and <strong>the</strong> model class names within each app must also be unique,<strong>the</strong>refore <strong>the</strong> resulting name will end up being different.For example, given an app common/models.py:class Base(models.Model):m2m = models.ManyToManyField(O<strong>the</strong>rModel, related_name="%(app_label)s_%(class)s_related")class Meta:abstract = Trueclass ChildA(Base):passclass ChildB(Base):passAlong with ano<strong>the</strong>r app rare/models.py:from common.models import Baseclass ChildB(Base):passThe reverse name of <strong>the</strong> commmon.ChildA.m2m field will be common_childa_related, whilst <strong>the</strong> reversename of <strong>the</strong> common.ChildB.m2m field will be common_childb_related, and finally <strong>the</strong> reverse name of <strong>the</strong>rare.ChildB.m2m field will be rare_childb_related. It is up to you how you use <strong>the</strong> ’%(class)s’ and’%(app_label)s portion to construct your related name, but if you forget to use it, <strong>Django</strong> will raise errors whenyou validate your models (or run syncdb).If you don’t specify a related_name attribute for a field in an abstract base class, <strong>the</strong> default reverse name will be<strong>the</strong> name of <strong>the</strong> child class followed by ’_set’, just as it normally would be if you’d declared <strong>the</strong> field directly on<strong>the</strong> child class. For example, in <strong>the</strong> above code, if <strong>the</strong> related_name attribute was omitted, <strong>the</strong> reverse name for<strong>the</strong> m2m field would be childa_set in <strong>the</strong> ChildA case and childb_set for <strong>the</strong> ChildB field.Multi-table inheritanceThe second type of model inheritance supported by <strong>Django</strong> is when each model in <strong>the</strong> hierarchy is a model all byitself. Each model corresponds to its own database table and can be queried and created individually. The inheritancerelationship introduces links between <strong>the</strong> child model and each of its parents (via an automatically-createdOneToOneField). For example:class Place(models.Model):name = models.CharField(max_length=50)address = models.CharField(max_length=80)class Restaurant(Place):serves_hot_dogs = models.BooleanField()serves_pizza = models.BooleanField()All of <strong>the</strong> fields of Place will also be available in Restaurant, although <strong>the</strong> data will reside in a different databasetable. So <strong>the</strong>se are both possible:>>> Place.objects.filter(name="Bob’s Cafe")>>> Restaurant.objects.filter(name="Bob’s Cafe")62 Chapter 3. Using <strong>Django</strong>
<strong>Django</strong> <strong>Documentation</strong>, Release 1.2If you have a Place that is also a Restaurant, you can get from <strong>the</strong> Place object to <strong>the</strong> Restaurant objectby using <strong>the</strong> lower-case version of <strong>the</strong> model name:>>> p = Place.objects.get(id=12)# If p is a Restaurant object, this will give <strong>the</strong> child class:>>> p.restaurantHowever, if p in <strong>the</strong> above example was not a Restaurant (it had been created directly as a Place object or was<strong>the</strong> parent of some o<strong>the</strong>r class), referring to p.restaurant would raise a Restaurant.DoesNotExist exception.Meta and multi-table inheritance In <strong>the</strong> multi-table inheritance situation, it doesn’t make sense for a child class toinherit from its parent’s Meta class. All <strong>the</strong> Meta options have already been applied to <strong>the</strong> parent class and applying<strong>the</strong>m again would normally only lead to contradictory behavior (this is in contrast with <strong>the</strong> abstract base class case,where <strong>the</strong> base class doesn’t exist in its own right).So a child model does not have access to its parent’s Meta class. However, <strong>the</strong>re are a few limited cases where <strong>the</strong>child inherits behavior from <strong>the</strong> parent: if <strong>the</strong> child does not specify an ordering attribute or a get_latest_byattribute, it will inherit <strong>the</strong>se from its parent.If <strong>the</strong> parent has an ordering and you don’t want <strong>the</strong> child to have any natural ordering, you can explicitly disable it:class ChildModel(ParentModel):...class Meta:# Remove parent’s ordering effectordering = []Inheritance and reverse relations Because multi-table inheritance uses an implicit OneToOneField to link <strong>the</strong>child and <strong>the</strong> parent, it’s possible to move from <strong>the</strong> parent down to <strong>the</strong> child, as in <strong>the</strong> above example. However, thisuses up <strong>the</strong> name that is <strong>the</strong> default related_name value for ForeignKey and ManyToManyField relations.If you are putting those types of relations on a subclass of ano<strong>the</strong>r model, you must specify <strong>the</strong> related_nameattribute on each such field. If you forget, <strong>Django</strong> will raise an error when you run validate or syncdb.For example, using <strong>the</strong> above Place class again, let’s create ano<strong>the</strong>r subclass with a ManyToManyField:class Supplier(Place):# Must specify related_name on all relations.customers = models.ManyToManyField(Restaurant, related_name=’provider’)Specifying <strong>the</strong> parent link field As mentioned, <strong>Django</strong> will automatically create a OneToOneField linking yourchild class back any non-abstract parent models. If you want to control <strong>the</strong> name of <strong>the</strong> attribute linking back to <strong>the</strong>parent, you can create your own OneToOneField and set parent_link=True to indicate that your field is <strong>the</strong>link back to <strong>the</strong> parent class.Proxy modelsNew in version 1.1: Please, see <strong>the</strong> release notes When using multi-table inheritance, a new database table is createdfor each subclass of a model. This is usually <strong>the</strong> desired behavior, since <strong>the</strong> subclass needs a place to store anyadditional data fields that are not present on <strong>the</strong> base class. Sometimes, however, you only want to change <strong>the</strong> Pythonbehavior of a model – perhaps to change <strong>the</strong> default manager, or add a new method.This is what proxy model inheritance is for: creating a proxy for <strong>the</strong> original model. You can create, delete and updateinstances of <strong>the</strong> proxy model and all <strong>the</strong> data will be saved as if you were using <strong>the</strong> original (non-proxied) model. The3.2. Models and databases 63
<strong>Django</strong> <strong>Documentation</strong>, Release 1.2difference is that you can change things like <strong>the</strong> default model ordering or <strong>the</strong> default manager in <strong>the</strong> proxy, withouthaving to alter <strong>the</strong> original.Proxy models are declared like normal models. You tell <strong>Django</strong> that it’s a proxy model by setting <strong>the</strong> proxy attributeof <strong>the</strong> Meta class to True.For example, suppose you want to add a method to <strong>the</strong> standard User model that will be used in your templates. Youcan do it like this:from django.contrib.auth.models import Userclass MyUser(User):class Meta:proxy = Truedef do_something(self):...The MyUser class operates on <strong>the</strong> same database table as its parent User class. In particular, any new instances ofUser will also be accessible through MyUser, and vice-versa:>>> u = User.objects.create(username="foobar")>>> MyUser.objects.get(username="foobar")You could also use a proxy model to define a different default ordering on a model. The standard User model has noordering defined on it (intentionally; sorting is expensive and we don’t want to do it all <strong>the</strong> time when we fetch users).You might want to regularly order by <strong>the</strong> username attribute when you use <strong>the</strong> proxy. This is easy:class OrderedUser(User):class Meta:ordering = ["username"]proxy = TrueNow normal User queries will be unordered and OrderedUser queries will be ordered by username.QuerySets still return <strong>the</strong> model that was requested There is no way to have <strong>Django</strong> return, say, a MyUserobject whenever you query for User objects. A queryset for User objects will return those types of objects. Thewhole point of proxy objects is that code relying on <strong>the</strong> original User will use those and your own code can use <strong>the</strong>extensions you included (that no o<strong>the</strong>r code is relying on anyway). It is not a way to replace <strong>the</strong> User (or any o<strong>the</strong>r)model everywhere with something of your own creation.Base class restrictions A proxy model must inherit from exactly one non-abstract model class. You can’t inheritfrom multiple non-abstract models as <strong>the</strong> proxy model doesn’t provide any connection between <strong>the</strong> rows in <strong>the</strong> differentdatabase tables. A proxy model can inherit from any number of abstract model classes, providing <strong>the</strong>y do not defineany model fields.Proxy models inherit any Meta options that <strong>the</strong>y don’t define from <strong>the</strong>ir non-abstract model parent (<strong>the</strong> model <strong>the</strong>yare proxying for).Proxy model managers If you don’t specify any model managers on a proxy model, it inherits <strong>the</strong> managers fromits model parents. If you define a manager on <strong>the</strong> proxy model, it will become <strong>the</strong> default, although any managersdefined on <strong>the</strong> parent classes will still be available.Continuing our example from above, you could change <strong>the</strong> default manager used when you query <strong>the</strong> User modellike this:64 Chapter 3. Using <strong>Django</strong>
<strong>Django</strong> <strong>Documentation</strong>, Release 1.2class NewManager(models.Manager):...class MyUser(User):objects = NewManager()class Meta:proxy = TrueIf you wanted to add a new manager to <strong>the</strong> Proxy, without replacing <strong>the</strong> existing default, you can use <strong>the</strong> techniquesdescribed in <strong>the</strong> custom manager documentation: create a base class containing <strong>the</strong> new managers and inherit thatafter <strong>the</strong> primary base class:# Create an abstract class for <strong>the</strong> new manager.class ExtraManagers(models.Model):secondary = NewManager()class Meta:abstract = Trueclass MyUser(User, ExtraManagers):class Meta:proxy = TrueYou probably won’t need to do this very often, but, when you do, it’s possible.Differences between proxy inheritance and unmanaged models Proxy model inheritance might look fairly similarto creating an unmanaged model, using <strong>the</strong> managed attribute on a model’s Meta class. The two alternatives are notquite <strong>the</strong> same and it’s worth considering which one you should use.One difference is that you can (and, in fact, must unless you want an empty model) specify model fields on modelswith Meta.managed=False. You could, with careful setting of Meta.db_table create an unmanaged modelthat shadowed an existing model and add Python methods to it. However, that would be very repetitive and fragile asyou need to keep both copies synchronized if you make any changes.The o<strong>the</strong>r difference that is more important for proxy models, is how model managers are handled. Proxy models areintended to behave exactly like <strong>the</strong> model <strong>the</strong>y are proxying for. So <strong>the</strong>y inherit <strong>the</strong> parent model’s managers, including<strong>the</strong> default manager. In <strong>the</strong> normal multi-table model inheritance case, children do not inherit managers from <strong>the</strong>irparents as <strong>the</strong> custom managers aren’t always appropriate when extra fields are involved. The manager documentationhas more details about this latter case.When <strong>the</strong>se two features were implemented, attempts were made to squash <strong>the</strong>m into a single option. It turned out thatinteractions with inheritance, in general, and managers, in particular, made <strong>the</strong> API very complicated and potentiallydifficult to understand and use. It turned out that two options were needed in any case, so <strong>the</strong> current separation arose.So, <strong>the</strong> general rules are:1. If you are mirroring an existing model or database table and don’t want all <strong>the</strong> original database table columns,use Meta.managed=False. That option is normally useful for modeling database views and tables not under<strong>the</strong> control of <strong>Django</strong>.2. If you are wanting to change <strong>the</strong> Python-only behavior of a model, but keep all <strong>the</strong> same fields as in <strong>the</strong> original,use Meta.proxy=True. This sets things up so that <strong>the</strong> proxy model is an exact copy of <strong>the</strong> storage structureof <strong>the</strong> original model when data is saved.3.2. Models and databases 65
<strong>Django</strong> <strong>Documentation</strong>, Release 1.2Multiple inheritanceJust as with Python’s subclassing, it’s possible for a <strong>Django</strong> model to inherit from multiple parent models. Keep inmind that normal Python name resolution rules apply. The first base class that a particular name (e.g. Meta) appearsin will be <strong>the</strong> one that is used; for example, this means that if multiple parents contain a Meta class, only <strong>the</strong> first oneis going to be used, and all o<strong>the</strong>rs will be ignored.Generally, you won’t need to inherit from multiple parents. The main use-case where this is useful is for “mix-in”classes: adding a particular extra field or method to every class that inherits <strong>the</strong> mix-in. Try to keep your inheritancehierarchies as simple and straightforward as possible so that you won’t have to struggle to work out where a particularpiece of information is coming from.Field name “hiding” is not permittedIn normal Python class inheritance, it is permissible for a child class to override any attribute from <strong>the</strong> parent class. In<strong>Django</strong>, this is not permitted for attributes that are Field instances (at least, not at <strong>the</strong> moment). If a base class hasa field called author, you cannot create ano<strong>the</strong>r model field called author in any class that inherits from that baseclass.Overriding fields in a parent model leads to difficulties in areas such as initialising new instances (specifying whichfield is being initialized in Model.__init__) and serialization. These are features which normal Python classinheritance doesn’t have to deal with in quite <strong>the</strong> same way, so <strong>the</strong> difference between <strong>Django</strong> model inheritance andPython class inheritance isn’t arbitrary.This restriction only applies to attributes which are Field instances. Normal Python attributes can be overridden ifyou wish. It also only applies to <strong>the</strong> name of <strong>the</strong> attribute as Python sees it: if you are manually specifying <strong>the</strong> databasecolumn name, you can have <strong>the</strong> same column name appearing in both a child and an ancestor model for multi-tableinheritance (<strong>the</strong>y are columns in two different database tables).<strong>Django</strong> will raise a FieldError if you override any model field in any ancestor model.3.2.2 Making queriesOnce you’ve created your data models, <strong>Django</strong> automatically gives you a database-abstraction API that lets you create,retrieve, update and delete objects. This document explains how to use this API. Refer to <strong>the</strong> data model reference forfull details of all <strong>the</strong> various model lookup options.Throughout this guide (and in <strong>the</strong> reference), we’ll refer to <strong>the</strong> following models, which comprise a Weblog application:class Blog(models.Model):name = models.CharField(max_length=100)tagline = models.TextField()def __unicode__(self):return self.nameclass Author(models.Model):name = models.CharField(max_length=50)email = models.EmailField()def __unicode__(self):return self.nameclass Entry(models.Model):blog = models.ForeignKey(Blog)66 Chapter 3. Using <strong>Django</strong>
<strong>Django</strong> <strong>Documentation</strong>, Release 1.2headline = models.CharField(max_length=255)body_text = models.TextField()pub_date = models.DateTimeField()authors = models.ManyToManyField(Author)n_comments = models.IntegerField()n_pingbacks = models.IntegerField()rating = models.IntegerField()def __unicode__(self):return self.headlineCreating objectsTo represent database-table data in Python objects, <strong>Django</strong> uses an intuitive system: A model class represents adatabase table, and an instance of that class represents a particular record in <strong>the</strong> database table.To create an object, instantiate it using keyword arguments to <strong>the</strong> model class, <strong>the</strong>n call save() to save it to <strong>the</strong>database.You import <strong>the</strong> model class from wherever it lives on <strong>the</strong> Python path, as you may expect. (We point this out herebecause previous <strong>Django</strong> versions required funky model importing.)Assuming models live in a file mysite/blog/models.py, here’s an example:>>> from blog.models import Blog>>> b = Blog(name=’Beatles Blog’, tagline=’All <strong>the</strong> latest Beatles news.’)>>> b.save()This performs an INSERT SQL statement behind <strong>the</strong> scenes. <strong>Django</strong> doesn’t hit <strong>the</strong> database until you explicitly callsave().The save() method has no return value.See Also:save() takes a number of advanced options not described here. See <strong>the</strong> documentation for save() for completedetails.To create an object and save it all in one step see <strong>the</strong> ‘create()‘ method.Saving changes to objectsTo save changes to an object that’s already in <strong>the</strong> database, use save().Given a Blog instance b5 that has already been saved to <strong>the</strong> database, this example changes its name and updates itsrecord in <strong>the</strong> database:>> b5.name = ’New name’>> b5.save()This performs an UPDATE SQL statement behind <strong>the</strong> scenes. <strong>Django</strong> doesn’t hit <strong>the</strong> database until you explicitly callsave().Saving ForeignKey and ManyToManyField fieldsUpdating a ForeignKey field works exactly <strong>the</strong> same way as saving a normal field; simply assign an object of <strong>the</strong>right type to <strong>the</strong> field in question. This example updates <strong>the</strong> blog attribute of an Entry instance entry:3.2. Models and databases 67
<strong>Django</strong> <strong>Documentation</strong>, Release 1.2>>> from blog.models import Entry>>> entry = Entry.objects.get(pk=1)>>> cheese_blog = Blog.objects.get(name="Cheddar Talk")>>> entry.blog = cheese_blog>>> entry.save()Updating a ManyToManyField works a little differently; use <strong>the</strong> add() method on <strong>the</strong> field to add a record to <strong>the</strong>relation. This example adds <strong>the</strong> Author instance joe to <strong>the</strong> entry object:>>> from blog.models import Author>>> joe = Author.objects.create(name="Joe")>>> entry.authors.add(joe)<strong>Django</strong> will complain if you try to assign or add an object of <strong>the</strong> wrong type.Retrieving objectsTo retrieve objects from your database, you construct a QuerySet via a Manager on your model class.A QuerySet represents a collection of objects from your database. It can have zero, one or many filters – criteria thatnarrow down <strong>the</strong> collection based on given parameters. In SQL terms, a QuerySet equates to a SELECT statement,and a filter is a limiting clause such as WHERE or LIMIT.You get a QuerySet by using your model’s Manager. Each model has at least one Manager, and it’s calledobjects by default. Access it directly via <strong>the</strong> model class, like so:>>> Blog.objects>>> b = Blog(name=’Foo’, tagline=’Bar’)>>> b.objectsTraceback:...AttributeError: "Manager isn’t accessible via Blog instances."Note: Managers are accessible only via model classes, ra<strong>the</strong>r than from model instances, to enforce a separationbetween “table-level” operations and “record-level” operations.The Manager is <strong>the</strong> main source of QuerySets for a model. It acts as a “root” QuerySet that describes all objectsin <strong>the</strong> model’s database table. For example, Blog.objects is <strong>the</strong> initial QuerySet that contains all Blog objectsin <strong>the</strong> database.Retrieving all objectsThe simplest way to retrieve objects from a table is to get all of <strong>the</strong>m. To do this, use <strong>the</strong> all() method on aManager:>>> all_entries = Entry.objects.all()The all() method returns a QuerySet of all <strong>the</strong> objects in <strong>the</strong> database.(If Entry.objects is a QuerySet, why can’t we just do Entry.objects? That’s because Entry.objects,<strong>the</strong> root QuerySet, is a special case that cannot be evaluated. The all() method returns a QuerySet that can beevaluated.)68 Chapter 3. Using <strong>Django</strong>
<strong>Django</strong> <strong>Documentation</strong>, Release 1.2Retrieving specific objects with filtersThe root QuerySet provided by <strong>the</strong> Manager describes all objects in <strong>the</strong> database table. Usually, though, you’llneed to select only a subset of <strong>the</strong> complete set of objects.To create such a subset, you refine <strong>the</strong> initial QuerySet, adding filter conditions. The two most common ways torefine a QuerySet are:filter(**kwargs) Returns a new QuerySet containing objects that match <strong>the</strong> given lookup parameters.exclude(**kwargs) Returns a new QuerySet containing objects that do not match <strong>the</strong> given lookup parameters.The lookup parameters (**kwargs in <strong>the</strong> above function definitions) should be in <strong>the</strong> format described in Fieldlookups below.For example, to get a QuerySet of blog entries from <strong>the</strong> year 2006, use filter() like so:Entry.objects.filter(pub_date__year=2006)We don’t have to add an all() – Entry.objects.all().filter(...). That would still work, but you onlyneed all() when you want all objects from <strong>the</strong> root QuerySet.Chaining filters The result of refining a QuerySet is itself a QuerySet, so it’s possible to chain refinementstoge<strong>the</strong>r. For example:>>> Entry.objects.filter(... headline__startswith=’What’... ).exclude(... pub_date__gte=datetime.now()... ).filter(... pub_date__gte=datetime(2005, 1, 1)... )This takes <strong>the</strong> initial QuerySet of all entries in <strong>the</strong> database, adds a filter, <strong>the</strong>n an exclusion, <strong>the</strong>n ano<strong>the</strong>r filter. Thefinal result is a QuerySet containing all entries with a headline that starts with “What”, that were published betweenJanuary 1, 2005, and <strong>the</strong> current day.Filtered QuerySets are unique Each time you refine a QuerySet, you get a brand-new QuerySet that is in noway bound to <strong>the</strong> previous QuerySet. Each refinement creates a separate and distinct QuerySet that can be stored,used and reused.Example:>> q1 = Entry.objects.filter(headline__startswith="What")>> q2 = q1.exclude(pub_date__gte=datetime.now())>> q3 = q1.filter(pub_date__gte=datetime.now())These three QuerySets are separate. The first is a base QuerySet containing all entries that contain a headlinestarting with “What”. The second is a subset of <strong>the</strong> first, with an additional criteria that excludes records whosepub_date is greater than now. The third is a subset of <strong>the</strong> first, with an additional criteria that selects only <strong>the</strong>records whose pub_date is greater than now. The initial QuerySet (q1) is unaffected by <strong>the</strong> refinement process.QuerySets are lazy QuerySets are lazy – <strong>the</strong> act of creating a QuerySet doesn’t involve any database activity.You can stack filters toge<strong>the</strong>r all day long, and <strong>Django</strong> won’t actually run <strong>the</strong> query until <strong>the</strong> QuerySet is evaluated.Take a look at this example:3.2. Models and databases 69
<strong>Django</strong> <strong>Documentation</strong>, Release 1.2>>> q = Entry.objects.filter(headline__startswith="What")>>> q = q.filter(pub_date__lte=datetime.now())>>> q = q.exclude(body_text__icontains="food")>>> print qThough this looks like three database hits, in fact it hits <strong>the</strong> database only once, at <strong>the</strong> last line (print q). In general,<strong>the</strong> results of a QuerySet aren’t fetched from <strong>the</strong> database until you “ask” for <strong>the</strong>m. When you do, <strong>the</strong> QuerySetis evaluated by accessing <strong>the</strong> database. For more details on exactly when evaluation takes place, see When QuerySetsare evaluated.Retrieving a single object with get.filter() will always give you a QuerySet, even if only a single object matches <strong>the</strong> query - in this case, it willbe a QuerySet containing a single element.If you know <strong>the</strong>re is only one object that matches your query, you can use <strong>the</strong> get() method on a Manager whichreturns <strong>the</strong> object directly:>>> one_entry = Entry.objects.get(pk=1)You can use any query expression with get(), just like with filter() - again, see Field lookups below.Note that <strong>the</strong>re is a difference between using .get(), and using .filter() with a slice of [0]. If <strong>the</strong>re are noresults that match <strong>the</strong> query, .get() will raise a DoesNotExist exception. This exception is an attribute of <strong>the</strong>model class that <strong>the</strong> query is being performed on - so in <strong>the</strong> code above, if <strong>the</strong>re is no Entry object with a primarykey of 1, <strong>Django</strong> will raise Entry.DoesNotExist.Similarly, <strong>Django</strong> will complain if more than one item matches <strong>the</strong> get() query.MultipleObjectsReturned, which again is an attribute of <strong>the</strong> model class itself.In this case, it will raiseO<strong>the</strong>r QuerySet methodsMost of <strong>the</strong> time you’ll use all(), get(), filter() and exclude() when you need to look up objects from<strong>the</strong> database. However, that’s far from all <strong>the</strong>re is; see <strong>the</strong> QuerySet API Reference for a complete list of all <strong>the</strong> variousQuerySet methods.Limiting QuerySetsUse a subset of Python’s array-slicing syntax to limit your QuerySet to a certain number of results. This is <strong>the</strong>equivalent of SQL’s LIMIT and OFFSET clauses.For example, this returns <strong>the</strong> first 5 objects (LIMIT 5):>>> Entry.objects.all()[:5]This returns <strong>the</strong> sixth through tenth objects (OFFSET 5 LIMIT 5):>>> Entry.objects.all()[5:10]Negative indexing (i.e. Entry.objects.all()[-1]) is not supported.Generally, slicing a QuerySet returns a new QuerySet – it doesn’t evaluate <strong>the</strong> query. An exception is if you use<strong>the</strong> “step” parameter of Python slice syntax. For example, this would actually execute <strong>the</strong> query in order to return alist of every second object of <strong>the</strong> first 10:70 Chapter 3. Using <strong>Django</strong>
<strong>Django</strong> <strong>Documentation</strong>, Release 1.2>>> Entry.objects.all()[:10:2]To retrieve a single object ra<strong>the</strong>r than a list (e.g. SELECT foo FROM bar LIMIT 1), use a simple index insteadof a slice. For example, this returns <strong>the</strong> first Entry in <strong>the</strong> database, after ordering entries alphabetically by headline:>>> Entry.objects.order_by(’headline’)[0]This is roughly equivalent to:>>> Entry.objects.order_by(’headline’)[0:1].get()Note, however, that <strong>the</strong> first of <strong>the</strong>se will raise IndexError while <strong>the</strong> second will raise DoesNotExist if noobjects match <strong>the</strong> given criteria. See get() for more details.Field lookupsField lookups are how you specify <strong>the</strong> meat of an SQL WHERE clause. They’re specified as keyword arguments to <strong>the</strong>QuerySet methods filter(), exclude() and get().Basic lookups keyword arguments take <strong>the</strong> form field__lookuptype=value. (That’s a double-underscore).For example:>>> Entry.objects.filter(pub_date__lte=’2006-01-01’)translates (roughly) into <strong>the</strong> following SQL:SELECT * FROM blog_entry WHERE pub_date >> Entry.objects.get(headline__exact="Man bites dog")Would generate SQL along <strong>the</strong>se lines:SELECT ... WHERE headline = ’Man bites dog’;If you don’t provide a lookup type – that is, if your keyword argument doesn’t contain a double underscore –<strong>the</strong> lookup type is assumed to be exact.For example, <strong>the</strong> following two statements are equivalent:>>> Blog.objects.get(id__exact=14) # Explicit form>>> Blog.objects.get(id=14) # __exact is impliedThis is for convenience, because exact lookups are <strong>the</strong> common case.iexact A case-insensitive match. So, <strong>the</strong> query:3.2. Models and databases 71
<strong>Django</strong> <strong>Documentation</strong>, Release 1.2>>> Blog.objects.get(name__iexact="beatles blog")Would match a Blog titled “Beatles Blog”, “beatles blog”, or even “BeAtlES blOG”.contains Case-sensitive containment test. For example:Entry.objects.get(headline__contains=’Lennon’)Roughly translates to this SQL:SELECT ... WHERE headline LIKE ’%Lennon%’;Note this will match <strong>the</strong> headline ’Today Lennon honored’ but not ’today lennon honored’.There’s also a case-insensitive version, icontains.startswith, endswith Starts-with and ends-with search, respectively. There are also case-insensitive versionscalled istartswith and iendswith.Again, this only scratches <strong>the</strong> surface. A complete reference can be found in <strong>the</strong> field lookup reference.Lookups that span relationships<strong>Django</strong> offers a powerful and intuitive way to “follow” relationships in lookups, taking care of <strong>the</strong> SQL JOINs foryou automatically, behind <strong>the</strong> scenes. To span a relationship, just use <strong>the</strong> field name of related fields across models,separated by double underscores, until you get to <strong>the</strong> field you want.This example retrieves all Entry objects with a Blog whose name is ’Beatles Blog’:>>> Entry.objects.filter(blog__name__exact=’Beatles Blog’)This spanning can be as deep as you’d like.It works backwards, too. To refer to a “reverse” relationship, just use <strong>the</strong> lowercase name of <strong>the</strong> model.This example retrieves all Blog objects which have at least one Entry whose headline contains ’Lennon’:>>> Blog.objects.filter(entry__headline__contains=’Lennon’)If you are filtering across multiple relationships and one of <strong>the</strong> intermediate models doesn’t have a value that meets<strong>the</strong> filter condition, <strong>Django</strong> will treat it as if <strong>the</strong>re is an empty (all values are NULL), but valid, object <strong>the</strong>re. All thismeans is that no error will be raised. For example, in this filter:Blog.objects.filter(entry__authors__name=’Lennon’)(if <strong>the</strong>re was a related Author model), if <strong>the</strong>re was no author associated with an entry, it would be treated as if<strong>the</strong>re was also no name attached, ra<strong>the</strong>r than raising an error because of <strong>the</strong> missing author. Usually this is exactlywhat you want to have happen. The only case where it might be confusing is if you are using isnull. Thus:Blog.objects.filter(entry__authors__name__isnull=True)will return Blog objects that have an empty name on <strong>the</strong> author and also those which have an empty author on<strong>the</strong> entry. If you don’t want those latter objects, you could write:Blog.objects.filter(entry__authors__isnull=False,entry__authors__name__isnull=True)72 Chapter 3. Using <strong>Django</strong>
<strong>Django</strong> <strong>Documentation</strong>, Release 1.2Spanning multi-valued relationships New in version 1.0: Please, see <strong>the</strong> release notes When you are filtering anobject based on a ManyToManyField or a reverse ForeignKey, <strong>the</strong>re are two different sorts of filter you maybe interested in. Consider <strong>the</strong> Blog/Entry relationship (Blog to Entry is a one-to-many relation). We might beinterested in finding blogs that have an entry which has both “Lennon” in <strong>the</strong> headline and was published in 2008. Orwe might want to find blogs that have an entry with “Lennon” in <strong>the</strong> headline as well as an entry that was publishedin 2008. Since <strong>the</strong>re are multiple entries associated with a single Blog, both of <strong>the</strong>se queries are possible and makesense in some situations.The same type of situation arises with a ManyToManyField. For example, if an Entry has a ManyToManyFieldcalled tags, we might want to find entries linked to tags called “music” and “bands” or we might want an entry thatcontains a tag with a name of “music” and a status of “public”.To handle both of <strong>the</strong>se situations, <strong>Django</strong> has a consistent way of processing filter() and exclude() calls. Everythinginside a single filter() call is applied simultaneously to filter out items matching all those requirements.Successive filter() calls fur<strong>the</strong>r restrict <strong>the</strong> set of objects, but for multi-valued relations, <strong>the</strong>y apply to any objectlinked to <strong>the</strong> primary model, not necessarily those objects that were selected by an earlier filter() call.That may sound a bit confusing, so hopefully an example will clarify. To select all blogs that contain entries withboth “Lennon” in <strong>the</strong> headline and that were published in 2008 (<strong>the</strong> same entry satisfying both conditions), we wouldwrite:Blog.objects.filter(entry__headline__contains=’Lennon’,entry__pub_date__year=2008)To select all blogs that contain an entry with “Lennon” in <strong>the</strong> headline as well as an entry that was published in 2008,we would write:Blog.objects.filter(entry__headline__contains=’Lennon’).filter(entry__pub_date__year=2008)In this second example, <strong>the</strong> first filter restricted <strong>the</strong> queryset to all those blogs linked to that particular type of entry.The second filter restricted <strong>the</strong> set of blogs fur<strong>the</strong>r to those that are also linked to <strong>the</strong> second type of entry. The entriesselect by <strong>the</strong> second filter may or may not be <strong>the</strong> same as <strong>the</strong> entries in <strong>the</strong> first filter. We are filtering <strong>the</strong> Blog itemswith each filter statement, not <strong>the</strong> Entry items.All of this behavior also applies to exclude(): all <strong>the</strong> conditions in a single exclude() statement apply to a singleinstance (if those conditions are talking about <strong>the</strong> same multi-valued relation). Conditions in subsequent filter()or exclude() calls that refer to <strong>the</strong> same relation may end up filtering on different linked objects.Filters can reference fields on <strong>the</strong> modelNew in version 1.1: Please, see <strong>the</strong> release notes In <strong>the</strong> examples given so far, we have constructed filters that compare<strong>the</strong> value of a model field with a constant. But what if you want to compare <strong>the</strong> value of a model field with ano<strong>the</strong>rfield on <strong>the</strong> same model?<strong>Django</strong> provides <strong>the</strong> F() object to allow such comparisons. Instances of F() act as a reference to a model field withina query. These references can <strong>the</strong>n be used in query filters to compare <strong>the</strong> values of two different fields on <strong>the</strong> samemodel instance.For example, to find a list of all blog entries that have had more comments than pingbacks, we construct an F() objectto reference <strong>the</strong> comment count, and use that F() object in <strong>the</strong> query:>>> from django.db.models import F>>> Entry.objects.filter(n_comments__gt=F(’n_pingbacks’))<strong>Django</strong> supports <strong>the</strong> use of addition, subtraction, multiplication, division and modulo arithmetic with F() objects,both with constants and with o<strong>the</strong>r F() objects. To find all <strong>the</strong> blog entries with more than twice as many commentsas pingbacks, we modify <strong>the</strong> query:3.2. Models and databases 73
<strong>Django</strong> <strong>Documentation</strong>, Release 1.2>>> Entry.objects.filter(n_comments__gt=F(’n_pingbacks’) * 2)To find all <strong>the</strong> entries where <strong>the</strong> rating of <strong>the</strong> entry is less than <strong>the</strong> sum of <strong>the</strong> pingback count and comment count, wewould issue <strong>the</strong> query:>>> Entry.objects.filter(rating__lt=F(’n_comments’) + F(’n_pingbacks’))You can also use <strong>the</strong> double underscore notation to span relationships in an F() object. An F() object with a doubleunderscore will introduce any joins needed to access <strong>the</strong> related object. For example, to retrieve all <strong>the</strong> entries where<strong>the</strong> author’s name is <strong>the</strong> same as <strong>the</strong> blog name, we could issue <strong>the</strong> query:>>> Entry.objects.filter(authors__name=F(’blog__name’))The pk lookup shortcutFor convenience, <strong>Django</strong> provides a pk lookup shortcut, which stands for “primary key”.In <strong>the</strong> example Blog model, <strong>the</strong> primary key is <strong>the</strong> id field, so <strong>the</strong>se three statements are equivalent:>>> Blog.objects.get(id__exact=14) # Explicit form>>> Blog.objects.get(id=14) # __exact is implied>>> Blog.objects.get(pk=14) # pk implies id__exactThe use of pk isn’t limited to __exact queries – any query term can be combined with pk to perform a query on <strong>the</strong>primary key of a model:# Get blogs entries with id 1, 4 and 7>>> Blog.objects.filter(pk__in=[1,4,7])# Get all blog entries with id > 14>>> Blog.objects.filter(pk__gt=14)pk lookups also work across joins. For example, <strong>the</strong>se three statements are equivalent:>>> Entry.objects.filter(blog__id__exact=3) # Explicit form>>> Entry.objects.filter(blog__id=3) # __exact is implied>>> Entry.objects.filter(blog__pk=3) # __pk implies __id__exactEscaping percent signs and underscores in LIKE statementsThe field lookups that equate to LIKE SQL statements (iexact, contains, icontains, startswith,istartswith, endswith and iendswith) will automatically escape <strong>the</strong> two special characters used in LIKEstatements – <strong>the</strong> percent sign and <strong>the</strong> underscore. (In a LIKE statement, <strong>the</strong> percent sign signifies a multiple-characterwildcard and <strong>the</strong> underscore signifies a single-character wildcard.)This means things should work intuitively, so <strong>the</strong> abstraction doesn’t leak. For example, to retrieve all <strong>the</strong> entries thatcontain a percent sign, just use <strong>the</strong> percent sign as any o<strong>the</strong>r character:>>> Entry.objects.filter(headline__contains=’%’)<strong>Django</strong> takes care of <strong>the</strong> quoting for you; <strong>the</strong> resulting SQL will look something like this:SELECT ... WHERE headline LIKE ’%\%%’;Same goes for underscores. Both percentage signs and underscores are handled for you transparently.74 Chapter 3. Using <strong>Django</strong>
<strong>Django</strong> <strong>Documentation</strong>, Release 1.2Caching and QuerySetsEach QuerySet contains a cache, to minimize database access. It’s important to understand how it works, in orderto write <strong>the</strong> most efficient code.In a newly created QuerySet, <strong>the</strong> cache is empty. The first time a QuerySet is evaluated – and, hence, a databasequery happens – <strong>Django</strong> saves <strong>the</strong> query results in <strong>the</strong> QuerySet‘s cache and returns <strong>the</strong> results that have beenexplicitly requested (e.g., <strong>the</strong> next element, if <strong>the</strong> QuerySet is being iterated over). Subsequent evaluations of <strong>the</strong>QuerySet reuse <strong>the</strong> cached results.Keep this caching behavior in mind, because it may bite you if you don’t use your QuerySets correctly. For example,<strong>the</strong> following will create two QuerySets, evaluate <strong>the</strong>m, and throw <strong>the</strong>m away:>>> print [e.headline for e in Entry.objects.all()]>>> print [e.pub_date for e in Entry.objects.all()]That means <strong>the</strong> same database query will be executed twice, effectively doubling your database load. Also, <strong>the</strong>re’sa possibility <strong>the</strong> two lists may not include <strong>the</strong> same database records, because an Entry may have been added ordeleted in <strong>the</strong> split second between <strong>the</strong> two requests.To avoid this problem, simply save <strong>the</strong> QuerySet and reuse it:>>> queryset = Entry.objects.all()>>> print [p.headline for p in queryset] # Evaluate <strong>the</strong> query set.>>> print [p.pub_date for p in queryset] # Re-use <strong>the</strong> cache from <strong>the</strong> evaluation.Complex lookups with Q objectsKeyword argument queries – in filter(), etc. – are “AND”ed toge<strong>the</strong>r. If you need to execute more complexqueries (for example, queries with OR statements), you can use Q objects.A Q object (django.db.models.Q) is an object used to encapsulate a collection of keyword arguments. Thesekeyword arguments are specified as in “Field lookups” above.For example, this Q object encapsulates a single LIKE query:Q(question__startswith=’What’)Q objects can be combined using <strong>the</strong> & and | operators. When an operator is used on two Q objects, it yields a new Qobject.For example, this statement yields a single Q object that represents <strong>the</strong> “OR” of two "question__startswith"queries:Q(question__startswith=’Who’) | Q(question__startswith=’What’)This is equivalent to <strong>the</strong> following SQL WHERE clause:WHERE question LIKE ’Who%’ OR question LIKE ’What%’You can compose statements of arbitrary complexity by combining Q objects with <strong>the</strong> & and | operators and useparen<strong>the</strong>tical grouping. Also, Q objects can be negated using <strong>the</strong> ~ operator, allowing for combined lookups thatcombine both a normal query and a negated (NOT) query:Q(question__startswith=’Who’) | ~Q(pub_date__year=2005)Each lookup function that takes keyword-arguments (e.g. filter(), exclude(), get()) can also be passedone or more Q objects as positional (not-named) arguments. If you provide multiple Q object arguments to a lookupfunction, <strong>the</strong> arguments will be “AND”ed toge<strong>the</strong>r. For example:3.2. Models and databases 75
<strong>Django</strong> <strong>Documentation</strong>, Release 1.2Poll.objects.get(Q(question__startswith=’Who’),Q(pub_date=date(2005, 5, 2)) | Q(pub_date=date(2005, 5, 6)))... roughly translates into <strong>the</strong> SQL:SELECT * from polls WHERE question LIKE ’Who%’AND (pub_date = ’2005-05-02’ OR pub_date = ’2005-05-06’)Lookup functions can mix <strong>the</strong> use of Q objects and keyword arguments. All arguments provided to a lookup function(be <strong>the</strong>y keyword arguments or Q objects) are “AND”ed toge<strong>the</strong>r. However, if a Q object is provided, it must precede<strong>the</strong> definition of any keyword arguments. For example:Poll.objects.get(Q(pub_date=date(2005, 5, 2)) | Q(pub_date=date(2005, 5, 6)),question__startswith=’Who’)... would be a valid query, equivalent to <strong>the</strong> previous example; but:# INVALID QUERYPoll.objects.get(question__startswith=’Who’,Q(pub_date=date(2005, 5, 2)) | Q(pub_date=date(2005, 5, 6)))... would not be valid.See Also:The OR lookups examples in <strong>the</strong> <strong>Django</strong> unit tests show some possible uses of Q.Comparing objectsTo compare two model instances, just use <strong>the</strong> standard Python comparison operator, <strong>the</strong> double equals sign: ==.Behind <strong>the</strong> scenes, that compares <strong>the</strong> primary key values of two models.Using <strong>the</strong> Entry example above, <strong>the</strong> following two statements are equivalent:>>> some_entry == o<strong>the</strong>r_entry>>> some_entry.id == o<strong>the</strong>r_entry.idIf a model’s primary key isn’t called id, no problem. Comparisons will always use <strong>the</strong> primary key, whatever it’scalled. For example, if a model’s primary key field is called name, <strong>the</strong>se two statements are equivalent:>>> some_obj == o<strong>the</strong>r_obj>>> some_obj.name == o<strong>the</strong>r_obj.nameDeleting objectsThe delete method, conveniently, is named delete(). This method immediately deletes <strong>the</strong> object and has no returnvalue. Example:e.delete()You can also delete objects in bulk. Every QuerySet has a delete() method, which deletes all members of thatQuerySet.For example, this deletes all Entry objects with a pub_date year of 2005:76 Chapter 3. Using <strong>Django</strong>
<strong>Django</strong> <strong>Documentation</strong>, Release 1.2Entry.objects.filter(pub_date__year=2005).delete()Keep in mind that this will, whenever possible, be executed purely in SQL, and so <strong>the</strong> delete() methods of individualobject instances will not necessarily be called during <strong>the</strong> process. If you’ve provided a custom delete()method on a model class and want to ensure that it is called, you will need to “manually” delete instances of that model(e.g., by iterating over a QuerySet and calling delete() on each object individually) ra<strong>the</strong>r than using <strong>the</strong> bulkdelete() method of a QuerySet.When <strong>Django</strong> deletes an object, it emulates <strong>the</strong> behavior of <strong>the</strong> SQL constraint ON DELETE CASCADE – in o<strong>the</strong>rwords, any objects which had foreign keys pointing at <strong>the</strong> object to be deleted will be deleted along with it. Forexample:b = Blog.objects.get(pk=1)# This will delete <strong>the</strong> Blog and all of its Entry objects.b.delete()Note that delete() is <strong>the</strong> only QuerySet method that is not exposed on a Manager itself. This is a safetymechanism to prevent you from accidentally requesting Entry.objects.delete(), and deleting all <strong>the</strong> entries.If you do want to delete all <strong>the</strong> objects, <strong>the</strong>n you have to explicitly request a complete query set:Entry.objects.all().delete()Updating multiple objects at onceNew in version 1.0: Please, see <strong>the</strong> release notes Sometimes you want to set a field to a particular value for all <strong>the</strong>objects in a QuerySet. You can do this with <strong>the</strong> update() method. For example:# Update all <strong>the</strong> headlines with pub_date in 2007.Entry.objects.filter(pub_date__year=2007).update(headline=’Everything is <strong>the</strong> same’)You can only set non-relation fields and ForeignKey fields using this method. To update a non-relation field, provide<strong>the</strong> new value as a constant. To update ForeignKey fields, set <strong>the</strong> new value to be <strong>the</strong> new model instance you wantto point to. For example:>>> b = Blog.objects.get(pk=1)# Change every Entry so that it belongs to this Blog.>>> Entry.objects.all().update(blog=b)The update() method is applied instantly and returns <strong>the</strong> number of rows affected by <strong>the</strong> query. The only restrictionon <strong>the</strong> QuerySet that is updated is that it can only access one database table, <strong>the</strong> model’s main table. You can filterbased on related fields, but you can only update columns in <strong>the</strong> model’s main table. Example:>>> b = Blog.objects.get(pk=1)# Update all <strong>the</strong> headlines belonging to this Blog.>>> Entry.objects.select_related().filter(blog=b).update(headline=’Everything is <strong>the</strong> same’)Be aware that <strong>the</strong> update() method is converted directly to an SQL statement. It is a bulk operation for directupdates. It doesn’t run any save() methods on your models, or emit <strong>the</strong> pre_save or post_save signals (whichare a consequence of calling save()). If you want to save every item in a QuerySet and make sure that <strong>the</strong> save()method is called on each instance, you don’t need any special function to handle that. Just loop over <strong>the</strong>m and callsave():for item in my_queryset:item.save()3.2. Models and databases 77
<strong>Django</strong> <strong>Documentation</strong>, Release 1.2New in version 1.1: Please, see <strong>the</strong> release notes Calls to update can also use F() objects to update one field based on<strong>the</strong> value of ano<strong>the</strong>r field in <strong>the</strong> model. This is especially useful for incrementing counters based upon <strong>the</strong>ir currentvalue. For example, to increment <strong>the</strong> pingback count for every entry in <strong>the</strong> blog:>>> Entry.objects.all().update(n_pingbacks=F(’n_pingbacks’) + 1)However, unlike F() objects in filter and exclude clauses, you can’t introduce joins when you use F() objects in anupdate – you can only reference fields local to <strong>the</strong> model being updated. If you attempt to introduce a join with anF() object, a FieldError will be raised:# THIS WILL RAISE A FieldError>>> Entry.objects.update(headline=F(’blog__name’))Related objectsWhen you define a relationship in a model (i.e., a ForeignKey, OneToOneField, or ManyToManyField),instances of that model will have a convenient API to access <strong>the</strong> related object(s).Using <strong>the</strong> models at <strong>the</strong> top of this page, for example, an Entry object e can get its associated Blog object byaccessing <strong>the</strong> blog attribute: e.blog.(Behind <strong>the</strong> scenes, this functionality is implemented by Python descriptors. This shouldn’t really matter to you, butwe point it out here for <strong>the</strong> curious.)<strong>Django</strong> also creates API accessors for <strong>the</strong> “o<strong>the</strong>r” side of <strong>the</strong> relationship – <strong>the</strong> link from <strong>the</strong> related model to <strong>the</strong>model that defines <strong>the</strong> relationship. For example, a Blog object b has access to a list of all related Entry objects via<strong>the</strong> entry_set attribute: b.entry_set.all().All examples in this section use <strong>the</strong> sample Blog, Author and Entry models defined at <strong>the</strong> top of this page.One-to-many relationshipsForward If a model has a ForeignKey, instances of that model will have access to <strong>the</strong> related (foreign) object viaa simple attribute of <strong>the</strong> model.Example:>>> e = Entry.objects.get(id=2)>>> e.blog # Returns <strong>the</strong> related Blog object.You can get and set via a foreign-key attribute. As you may expect, changes to <strong>the</strong> foreign key aren’t saved to <strong>the</strong>database until you call save(). Example:>>> e = Entry.objects.get(id=2)>>> e.blog = some_blog>>> e.save()If a ForeignKey field has null=True set (i.e., it allows NULL values), you can assign None to it. Example:>>> e = Entry.objects.get(id=2)>>> e.blog = None>>> e.save() # "UPDATE blog_entry SET blog_id = NULL ...;"Forward access to one-to-many relationships is cached <strong>the</strong> first time <strong>the</strong> related object is accessed. Subsequent accessesto <strong>the</strong> foreign key on <strong>the</strong> same object instance are cached. Example:78 Chapter 3. Using <strong>Django</strong>
<strong>Django</strong> <strong>Documentation</strong>, Release 1.2>>> e = Entry.objects.get(id=2)>>> print e.blog # Hits <strong>the</strong> database to retrieve <strong>the</strong> associated Blog.>>> print e.blog # Doesn’t hit <strong>the</strong> database; uses cached version.Note that <strong>the</strong> select_related() QuerySet method recursively prepopulates <strong>the</strong> cache of all one-to-many relationshipsahead of time. Example:>>> e = Entry.objects.select_related().get(id=2)>>> print e.blog # Doesn’t hit <strong>the</strong> database; uses cached version.>>> print e.blog # Doesn’t hit <strong>the</strong> database; uses cached version.Following relationships “backward” If a model has a ForeignKey, instances of <strong>the</strong> foreign-key model will haveaccess to a Manager that returns all instances of <strong>the</strong> first model. By default, this Manager is named FOO_set,where FOO is <strong>the</strong> source model name, lowercased. This Manager returns QuerySets, which can be filtered andmanipulated as described in <strong>the</strong> “Retrieving objects” section above.Example:>>> b = Blog.objects.get(id=1)>>> b.entry_set.all() # Returns all Entry objects related to Blog.# b.entry_set is a Manager that returns QuerySets.>>> b.entry_set.filter(headline__contains=’Lennon’)>>> b.entry_set.count()You can override <strong>the</strong> FOO_set name by setting <strong>the</strong> related_name parameter in <strong>the</strong> ForeignKey()definition. For example, if <strong>the</strong> Entry model was altered to blog = ForeignKey(Blog,related_name=’entries’), <strong>the</strong> above example code would look like this:>>> b = Blog.objects.get(id=1)>>> b.entries.all() # Returns all Entry objects related to Blog.# b.entries is a Manager that returns QuerySets.>>> b.entries.filter(headline__contains=’Lennon’)>>> b.entries.count()You cannot access a reverse ForeignKey Manager from <strong>the</strong> class; it must be accessed from an instance:>>> Blog.entry_setTraceback:...AttributeError: "Manager must be accessed via instance".In addition to <strong>the</strong> QuerySet methods defined in “Retrieving objects” above, <strong>the</strong> ForeignKey Manager has additionalmethods used to handle <strong>the</strong> set of related objects. A synopsis of each is below, and complete details can befound in <strong>the</strong> related objects reference.add(obj1, obj2, ...) Adds <strong>the</strong> specified model objects to <strong>the</strong> related object set.create(**kwargs) Creates a new object, saves it and puts it in <strong>the</strong> related object set. Returns <strong>the</strong> newly createdobject.remove(obj1, obj2, ...) Removes <strong>the</strong> specified model objects from <strong>the</strong> related object set.clear() Removes all objects from <strong>the</strong> related object set.To assign <strong>the</strong> members of a related set in one fell swoop, just assign to it from any iterable object. The iterable cancontain object instances, or just a list of primary key values. For example:3.2. Models and databases 79
<strong>Django</strong> <strong>Documentation</strong>, Release 1.2b = Blog.objects.get(id=1)b.entry_set = [e1, e2]In this example, e1 and e2 can be full Entry instances, or integer primary key values.If <strong>the</strong> clear() method is available, any pre-existing objects will be removed from <strong>the</strong> entry_set before allobjects in <strong>the</strong> iterable (in this case, a list) are added to <strong>the</strong> set. If <strong>the</strong> clear() method is not available, all objects in<strong>the</strong> iterable will be added without removing any existing elements.Each “reverse” operation described in this section has an immediate effect on <strong>the</strong> database. Every addition, creationand deletion is immediately and automatically saved to <strong>the</strong> database.Many-to-many relationshipsBoth ends of a many-to-many relationship get automatic API access to <strong>the</strong> o<strong>the</strong>r end.“backward” one-to-many relationship, above.The API works just as aThe only difference is in <strong>the</strong> attribute naming: The model that defines <strong>the</strong> ManyToManyField uses <strong>the</strong> attributename of that field itself, whereas <strong>the</strong> “reverse” model uses <strong>the</strong> lowercased model name of <strong>the</strong> original model, plus’_set’ (just like reverse one-to-many relationships).An example makes this easier to understand:e = Entry.objects.get(id=3)e.authors.all() # Returns all Author objects for this Entry.e.authors.count()e.authors.filter(name__contains=’John’)a = Author.objects.get(id=5)a.entry_set.all() # Returns all Entry objects for this Author.Like ForeignKey, ManyToManyField can specify related_name. In <strong>the</strong> above example, if <strong>the</strong>ManyToManyField in Entry had specified related_name=’entries’, <strong>the</strong>n each Author instance wouldhave an entries attribute instead of entry_set.One-to-one relationshipsOne-to-one relationships are very similar to many-to-one relationships. If you define a OneToOneField on yourmodel, instances of that model will have access to <strong>the</strong> related object via a simple attribute of <strong>the</strong> model.For example:class EntryDetail(models.Model):entry = models.OneToOneField(Entry)details = models.TextField()ed = EntryDetail.objects.get(id=2)ed.entry # Returns <strong>the</strong> related Entry object.The difference comes in “reverse” queries. The related model in a one-to-one relationship also has access to aManager object, but that Manager represents a single object, ra<strong>the</strong>r than a collection of objects:e = Entry.objects.get(id=2)e.entrydetail # returns <strong>the</strong> related EntryDetail objectIf no object has been assigned to this relationship, <strong>Django</strong> will raise a DoesNotExist exception.Instances can be assigned to <strong>the</strong> reverse relationship in <strong>the</strong> same way as you would assign <strong>the</strong> forward relationship:80 Chapter 3. Using <strong>Django</strong>
<strong>Django</strong> <strong>Documentation</strong>, Release 1.2e.entrydetail = edHow are <strong>the</strong> backward relationships possible?O<strong>the</strong>r object-relational mappers require you to define relationships on both sides. The <strong>Django</strong> developers believe thisis a violation of <strong>the</strong> DRY (Don’t Repeat Yourself) principle, so <strong>Django</strong> only requires you to define <strong>the</strong> relationship onone end.But how is this possible, given that a model class doesn’t know which o<strong>the</strong>r model classes are related to it until thoseo<strong>the</strong>r model classes are loaded?The answer lies in <strong>the</strong> INSTALLED_APPS setting. The first time any model is loaded, <strong>Django</strong> iterates over everymodel in INSTALLED_APPS and creates <strong>the</strong> backward relationships in memory as needed. Essentially, one of <strong>the</strong>functions of INSTALLED_APPS is to tell <strong>Django</strong> <strong>the</strong> entire model domain.Queries over related objectsQueries involving related objects follow <strong>the</strong> same rules as queries involving normal value fields. When specifying <strong>the</strong>value for a query to match, you may use ei<strong>the</strong>r an object instance itself, or <strong>the</strong> primary key value for <strong>the</strong> object.For example, if you have a Blog object b with id=5, <strong>the</strong> following three queries would be identical:Entry.objects.filter(blog=b) # Query using object instanceEntry.objects.filter(blog=b.id) # Query using id from instanceEntry.objects.filter(blog=5) # Query using id directlyFalling back to raw SQLIf you find yourself needing to write an SQL query that is too complex for <strong>Django</strong>’s database-mapper to handle, youcan fall back on writing SQL by hand. <strong>Django</strong> has a couple of options for writing raw SQL queries; see Performingraw SQL queries.Finally, it’s important to note that <strong>the</strong> <strong>Django</strong> database layer is merely an interface to your database. You can accessyour database via o<strong>the</strong>r tools, programming languages or database frameworks; <strong>the</strong>re’s nothing <strong>Django</strong>-specific aboutyour database.3.2.3 AggregationNew in version 1.1: Please, see <strong>the</strong> release notes The topic guide on <strong>Django</strong>’s database-abstraction API described <strong>the</strong>way that you can use <strong>Django</strong> queries that create, retrieve, update and delete individual objects. However, sometimesyou will need to retrieve values that are derived by summarizing or aggregating a collection of objects. This topicguide describes <strong>the</strong> ways that aggregate values can be generated and returned using <strong>Django</strong> queries.Throughout this guide, we’ll refer to <strong>the</strong> following models. These models are used to track <strong>the</strong> inventory for a seriesof online bookstores:class Author(models.Model):name = models.CharField(max_length=100)age = models.IntegerField()friends = models.ManyToManyField(’self’, blank=True)class Publisher(models.Model):name = models.CharField(max_length=300)3.2. Models and databases 81
<strong>Django</strong> <strong>Documentation</strong>, Release 1.2num_awards = models.IntegerField()class Book(models.Model):isbn = models.CharField(max_length=9)name = models.CharField(max_length=300)pages = models.IntegerField()price = models.DecimalField(max_digits=10, decimal_places=2)rating = models.FloatField()authors = models.ManyToManyField(Author)publisher = models.ForeignKey(Publisher)pubdate = models.DateField()class Store(models.Model):name = models.CharField(max_length=300)books = models.ManyToManyField(Book)Generating aggregates over a QuerySet<strong>Django</strong> provides two ways to generate aggregates. The first way is to generate summary values over an entireQuerySet. For example, say you wanted to calculate <strong>the</strong> average price of all books available for sale. <strong>Django</strong>’squery syntax provides a means for describing <strong>the</strong> set of all books:>>> Book.objects.all()What we need is a way to calculate summary values over <strong>the</strong> objects that belong to this QuerySet. This is done byappending an aggregate() clause onto <strong>the</strong> QuerySet:>>> from django.db.models import Avg>>> Book.objects.all().aggregate(Avg(’price’)){’price__avg’: 34.35}The all() is redundant in this example, so this could be simplified to:>>> Book.objects.aggregate(Avg(’price’)){’price__avg’: 34.35}The argument to <strong>the</strong> aggregate() clause describes <strong>the</strong> aggregate value that we want to compute - in this case, <strong>the</strong>average of <strong>the</strong> price field on <strong>the</strong> Book model. A list of <strong>the</strong> aggregate functions that are available can be found in <strong>the</strong>QuerySet reference.aggregate() is a terminal clause for a QuerySet that, when invoked, returns a dictionary of name-value pairs.The name is an identifier for <strong>the</strong> aggregate value; <strong>the</strong> value is <strong>the</strong> computed aggregate. The name is automaticallygenerated from <strong>the</strong> name of <strong>the</strong> field and <strong>the</strong> aggregate function. If you want to manually specify a name for <strong>the</strong>aggregate value, you can do so by providing that name when you specify <strong>the</strong> aggregate clause:>>> Book.objects.aggregate(average_price=Avg(’price’)){’average_price’: 34.35}If you want to generate more than one aggregate, you just add ano<strong>the</strong>r argument to <strong>the</strong> aggregate() clause. So, ifwe also wanted to know <strong>the</strong> maximum and minimum price of all books, we would issue <strong>the</strong> query:>>> from django.db.models import Avg, Max, Min, Count>>> Book.objects.aggregate(Avg(’price’), Max(’price’), Min(’price’)){’price__avg’: 34.35, ’price__max’: Decimal(’81.20’), ’price__min’: Decimal(’12.99’)}82 Chapter 3. Using <strong>Django</strong>
<strong>Django</strong> <strong>Documentation</strong>, Release 1.2Generating aggregates for each item in a QuerySetThe second way to generate summary values is to generate an independent summary for each object in a QuerySet.For example, if you are retrieving a list of books, you may want to know how many authors contributed to each book.Each Book has a many-to-many relationship with <strong>the</strong> Author; we want to summarize this relationship for each bookin <strong>the</strong> QuerySet.Per-object summaries can be generated using <strong>the</strong> annotate() clause. When an annotate() clause is specified,each object in <strong>the</strong> QuerySet will be annotated with <strong>the</strong> specified values.The syntax for <strong>the</strong>se annotations is identical to that used for <strong>the</strong> aggregate() clause. Each argument toannotate() describes an aggregate that is to be calculated. For example, to annotate Books with <strong>the</strong> numberof authors:# Build an annotated queryset>>> q = Book.objects.annotate(Count(’authors’))# Interrogate <strong>the</strong> first object in <strong>the</strong> queryset>>> q[0]>>> q[0].authors__count2# Interrogate <strong>the</strong> second object in <strong>the</strong> queryset>>> q[1]>>> q[1].authors__count1As with aggregate(), <strong>the</strong> name for <strong>the</strong> annotation is automatically derived from <strong>the</strong> name of <strong>the</strong> aggregate functionand <strong>the</strong> name of <strong>the</strong> field being aggregated. You can override this default name by providing an alias when you specify<strong>the</strong> annotation:>>> q = Book.objects.annotate(num_authors=Count(’authors’))>>> q[0].num_authors2>>> q[1].num_authors1Unlike aggregate(), annotate() is not a terminal clause. The output of <strong>the</strong> annotate() clause isa QuerySet; this QuerySet can be modified using any o<strong>the</strong>r QuerySet operation, including filter(),order_by, or even additional calls to annotate().Joins and aggregatesSo far, we have dealt with aggregates over fields that belong to <strong>the</strong> model being queried. However, sometimes <strong>the</strong>value you want to aggregate will belong to a model that is related to <strong>the</strong> model you are querying.When specifying <strong>the</strong> field to be aggregated in an aggregate function, <strong>Django</strong> will allow you to use <strong>the</strong> same doubleunderscore notation that is used when referring to related fields in filters. <strong>Django</strong> will <strong>the</strong>n handle any table joins thatare required to retrieve and aggregate <strong>the</strong> related value.For example, to find <strong>the</strong> price range of books offered in each store, you could use <strong>the</strong> annotation:>>> Store.objects.annotate(min_price=Min(’books__price’), max_price=Max(’books__price’))This tells <strong>Django</strong> to retrieve <strong>the</strong> Store model, join (through <strong>the</strong> many-to-many relationship) with <strong>the</strong> Book model, andaggregate on <strong>the</strong> price field of <strong>the</strong> book model to produce a minimum and maximum value.The same rules apply to <strong>the</strong> aggregate() clause. If you wanted to know <strong>the</strong> lowest and highest price of any bookthat is available for sale in a store, you could use <strong>the</strong> aggregate:3.2. Models and databases 83
<strong>Django</strong> <strong>Documentation</strong>, Release 1.2>>> Store.objects.aggregate(min_price=Min(’books__price’), max_price=Max(’books__price’))Join chains can be as deep as you require. For example, to extract <strong>the</strong> age of <strong>the</strong> youngest author of any book availablefor sale, you could issue <strong>the</strong> query:>>> Store.objects.aggregate(youngest_age=Min(’books__authors__age’))Aggregations and o<strong>the</strong>r QuerySet clausesfilter() and exclude()Aggregates can also participate in filters. Any filter() (or exclude()) applied to normal model fields will have<strong>the</strong> effect of constraining <strong>the</strong> objects that are considered for aggregation.When used with an annotate() clause, a filter has <strong>the</strong> effect of constraining <strong>the</strong> objects for which an annotation iscalculated. For example, you can generate an annotated list of all books that have a title starting with “<strong>Django</strong>” using<strong>the</strong> query:>>> Book.objects.filter(name__startswith="<strong>Django</strong>").annotate(num_authors=Count(’authors’))When used with an aggregate() clause, a filter has <strong>the</strong> effect of constraining <strong>the</strong> objects over which <strong>the</strong> aggregateis calculated. For example, you can generate <strong>the</strong> average price of all books with a title that starts with “<strong>Django</strong>” using<strong>the</strong> query:>>> Book.objects.filter(name__startswith="<strong>Django</strong>").aggregate(Avg(’price’))Filtering on annotations Annotated values can also be filtered. The alias for <strong>the</strong> annotation can be used infilter() and exclude() clauses in <strong>the</strong> same way as any o<strong>the</strong>r model field.For example, to generate a list of books that have more than one author, you can issue <strong>the</strong> query:>>> Book.objects.annotate(num_authors=Count(’authors’)).filter(num_authors__gt=1)This query generates an annotated result set, and <strong>the</strong>n generates a filter based upon that annotation.Order of annotate() and filter() clauses When developing a complex query that involves bothannotate() and filter() clauses, particular attention should be paid to <strong>the</strong> order in which <strong>the</strong> clauses areapplied to <strong>the</strong> QuerySet.When an annotate() clause is applied to a query, <strong>the</strong> annotation is computed over <strong>the</strong> state of <strong>the</strong> query up to <strong>the</strong>point where <strong>the</strong> annotation is requested. The practical implication of this is that filter() and annotate() arenot commutative operations – that is, <strong>the</strong>re is a difference between <strong>the</strong> query:>>> Publisher.objects.annotate(num_books=Count(’book’)).filter(book__rating__gt=3.0)and <strong>the</strong> query:>>> Publisher.objects.filter(book__rating__gt=3.0).annotate(num_books=Count(’book’))Both queries will return a list of Publishers that have at least one good book (i.e., a book with a rating exceeding 3.0).However, <strong>the</strong> annotation in <strong>the</strong> first query will provide <strong>the</strong> total number of all books published by <strong>the</strong> publisher; <strong>the</strong>second query will only include good books in <strong>the</strong> annotated count. In <strong>the</strong> first query, <strong>the</strong> annotation precedes <strong>the</strong> filter,so <strong>the</strong> filter has no effect on <strong>the</strong> annotation. In <strong>the</strong> second query, <strong>the</strong> filter preceeds <strong>the</strong> annotation, and as a result, <strong>the</strong>filter constrains <strong>the</strong> objects considered when calculating <strong>the</strong> annotation.84 Chapter 3. Using <strong>Django</strong>
<strong>Django</strong> <strong>Documentation</strong>, Release 1.2order_by()Annotations can be used as a basis for ordering. When you define an order_by() clause, <strong>the</strong> aggregates you providecan reference any alias defined as part of an annotate() clause in <strong>the</strong> query.For example, to order a QuerySet of books by <strong>the</strong> number of authors that have contributed to <strong>the</strong> book, you coulduse <strong>the</strong> following query:>>> Book.objects.annotate(num_authors=Count(’authors’)).order_by(’num_authors’)values()Ordinarily, annotations are generated on a per-object basis - an annotated QuerySet will return one result for eachobject in <strong>the</strong> original QuerySet. However, when a values() clause is used to constrain <strong>the</strong> columns that arereturned in <strong>the</strong> result set, <strong>the</strong> method for evaluating annotations is slightly different. Instead of returning an annotatedresult for each result in <strong>the</strong> original QuerySet, <strong>the</strong> original results are grouped according to <strong>the</strong> unique combinationsof <strong>the</strong> fields specified in <strong>the</strong> values() clause. An annotation is <strong>the</strong>n provided for each unique group; <strong>the</strong> annotationis computed over all members of <strong>the</strong> group.For example, consider an author query that attempts to find out <strong>the</strong> average rating of books written by each author:>>> Author.objects.annotate(average_rating=Avg(’book__rating’))This will return one result for each author in <strong>the</strong> database, annotated with <strong>the</strong>ir average book rating.However, <strong>the</strong> result will be slightly different if you use a values() clause:>>> Author.objects.values(’name’).annotate(average_rating=Avg(’book__rating’))In this example, <strong>the</strong> authors will be grouped by name, so you will only get an annotated result for each unique authorname. This means if you have two authors with <strong>the</strong> same name, <strong>the</strong>ir results will be merged into a single result in <strong>the</strong>output of <strong>the</strong> query; <strong>the</strong> average will be computed as <strong>the</strong> average over <strong>the</strong> books written by both authors.Order of annotate() and values() clauses As with <strong>the</strong> filter() clause, <strong>the</strong> order in which annotate()and values() clauses are applied to a query is significant. If <strong>the</strong> values() clause precedes <strong>the</strong> annotate(),<strong>the</strong> annotation will be computed using <strong>the</strong> grouping described by <strong>the</strong> values() clause.However, if <strong>the</strong> annotate() clause precedes <strong>the</strong> values() clause, <strong>the</strong> annotations will be generated over <strong>the</strong>entire query set. In this case, <strong>the</strong> values() clause only constrains <strong>the</strong> fields that are generated on output.For example, if we reverse <strong>the</strong> order of <strong>the</strong> values() and annotate() clause from our previous example:>>> Author.objects.annotate(average_rating=Avg(’book__rating’)).values(’name’, ’average_rating’)This will now yield one unique result for each author; however, only <strong>the</strong> author’s name and <strong>the</strong> average_ratingannotation will be returned in <strong>the</strong> output data.You should also note that average_rating has been explicitly included in <strong>the</strong> list of values to be returned. This isrequired because of <strong>the</strong> ordering of <strong>the</strong> values() and annotate() clause.If <strong>the</strong> values() clause precedes <strong>the</strong> annotate() clause, any annotations will be automatically added to <strong>the</strong> resultset. However, if <strong>the</strong> values() clause is applied after <strong>the</strong> annotate() clause, you need to explicitly include <strong>the</strong>aggregate column.3.2. Models and databases 85
<strong>Django</strong> <strong>Documentation</strong>, Release 1.2Interaction with default ordering or order_by() Fields that are mentioned in <strong>the</strong> order_by() part of aqueryset (or which are used in <strong>the</strong> default ordering on a model) are used when selecting <strong>the</strong> output data, even if <strong>the</strong>yare not o<strong>the</strong>rwise specified in <strong>the</strong> values() call. These extra fields are used to group “like” results toge<strong>the</strong>r and <strong>the</strong>ycan make o<strong>the</strong>rwise identical result rows appear to be separate. This shows up, particularly, when counting things.By way of example, suppose you have a model like this:class Item(models.Model):name = models.CharField(max_length=10)data = models.IntegerField()class Meta:ordering = ["name"]The important part here is <strong>the</strong> default ordering on <strong>the</strong> name field. If you want to count how many times each distinctdata value appears, you might try this:# Warning: not quite correct!Item.objects.values("data").annotate(Count("id"))...which will group <strong>the</strong> Item objects by <strong>the</strong>ir common data values and <strong>the</strong>n count <strong>the</strong> number of id values in eachgroup. Except that it won’t quite work. The default ordering by name will also play a part in <strong>the</strong> grouping, so thisquery will group by distinct (data, name) pairs, which isn’t what you want. Instead, you should construct thisqueryset:Item.objects.values("data").annotate(Count("id")).order_by()...clearing any ordering in <strong>the</strong> query. You could also order by, say, data without any harmful effects, since that isalready playing a role in <strong>the</strong> query.This behavior is <strong>the</strong> same as that noted in <strong>the</strong> queryset documentation for distinct() and <strong>the</strong> general rule is <strong>the</strong>same: normally you won’t want extra columns playing a part in <strong>the</strong> result, so clear out <strong>the</strong> ordering, or at least makesure it’s restricted only to those fields you also select in a values() call.Note: You might reasonably ask why <strong>Django</strong> doesn’t remove <strong>the</strong> extraneous columns for you. The main reason isconsistency with distinct() and o<strong>the</strong>r places: <strong>Django</strong> never removes ordering constraints that you have specified(and we can’t change those o<strong>the</strong>r methods’ behavior, as that would violate our API stability policy).Aggregating annotationsYou can also generate an aggregate on <strong>the</strong> result of an annotation. When you define an aggregate() clause, <strong>the</strong>aggregates you provide can reference any alias defined as part of an annotate() clause in <strong>the</strong> query.For example, if you wanted to calculate <strong>the</strong> average number of authors per book you first annotate <strong>the</strong> set of bookswith <strong>the</strong> author count, <strong>the</strong>n aggregate that author count, referencing <strong>the</strong> annotation field:>>> Book.objects.annotate(num_authors=Count(’authors’)).aggregate(Avg(’num_authors’)){’num_authors__avg’: 1.66}3.2.4 Managersclass ManagerA Manager is <strong>the</strong> interface through which database query operations are provided to <strong>Django</strong> models. At least oneManager exists for every model in a <strong>Django</strong> application.86 Chapter 3. Using <strong>Django</strong>
<strong>Django</strong> <strong>Documentation</strong>, Release 1.2The way Manager classes work is documented in Making queries; this document specifically touches on modeloptions that customize Manager behavior.Manager namesBy default, <strong>Django</strong> adds a Manager with <strong>the</strong> name objects to every <strong>Django</strong> model class. However, if youwant to use objects as a field name, or if you want to use a name o<strong>the</strong>r than objects for <strong>the</strong> Manager, youcan rename it on a per-model basis. To rename <strong>the</strong> Manager for a given class, define a class attribute of typemodels.Manager() on that model. For example:from django.db import modelsclass Person(models.Model):#...people = models.Manager()Using this example model, Person.objects will generate an AttributeError exception, butPerson.people.all() will provide a list of all Person objects.Custom ManagersYou can use a custom Manager in a particular model by extending <strong>the</strong> base Manager class and instantiating yourcustom Manager in your model.There are two reasons you might want to customize a Manager: to add extra Manager methods, and/or to modify<strong>the</strong> initial QuerySet <strong>the</strong> Manager returns.Adding extra Manager methodsAdding extra Manager methods is <strong>the</strong> preferred way to add “table-level” functionality to your models. (For “rowlevel”functionality – i.e., functions that act on a single instance of a model object – use Model methods, not customManager methods.)A custom Manager method can return anything you want. It doesn’t have to return a QuerySet.For example, this custom Manager offers a method with_counts(), which returns a list of all OpinionPollobjects, each with an extra num_responses attribute that is <strong>the</strong> result of an aggregate query:class PollManager(models.Manager):def with_counts(self):from django.db import connectioncursor = connection.cursor()cursor.execute("""SELECT p.id, p.question, p.poll_date, COUNT(*)FROM polls_opinionpoll p, polls_response rWHERE p.id = r.poll_idGROUP BY 1, 2, 3ORDER BY 3 DESC""")result_list = []for row in cursor.fetchall():p = self.model(id=row[0], question=row[1], poll_date=row[2])p.num_responses = row[3]result_list.append(p)return result_listclass OpinionPoll(models.Model):3.2. Models and databases 87
<strong>Django</strong> <strong>Documentation</strong>, Release 1.2question = models.CharField(max_length=200)poll_date = models.DateField()objects = PollManager()class Response(models.Model):poll = models.ForeignKey(Poll)person_name = models.CharField(max_length=50)response = models.TextField()With this example, you’d use OpinionPoll.objects.with_counts() to return that list of OpinionPollobjects with num_responses attributes.Ano<strong>the</strong>r thing to note about this example is that Manager methods can access self.model to get <strong>the</strong> model classto which <strong>the</strong>y’re attached.Modifying initial Manager QuerySetsA Manager‘s base QuerySet returns all objects in <strong>the</strong> system. For example, using this model:class Book(models.Model):title = models.CharField(max_length=100)author = models.CharField(max_length=50)...<strong>the</strong> statement Book.objects.all() will return all books in <strong>the</strong> database.You can override a Manager‘s base QuerySet by overriding <strong>the</strong> Manager.get_query_set() method.get_query_set() should return a QuerySet with <strong>the</strong> properties you require.For example, <strong>the</strong> following model has two Managers – one that returns all objects, and one that returns only <strong>the</strong>books by Roald Dahl:# First, define <strong>the</strong> Manager subclass.class DahlBookManager(models.Manager):def get_query_set(self):return super(DahlBookManager, self).get_query_set().filter(author=’Roald Dahl’)# Then hook it into <strong>the</strong> Book model explicitly.class Book(models.Model):title = models.CharField(max_length=100)author = models.CharField(max_length=50)objects = models.Manager() # The default manager.dahl_objects = DahlBookManager() # The Dahl-specific manager.With this sample model, Book.objects.all() will return all books in <strong>the</strong> database, butBook.dahl_objects.all() will only return <strong>the</strong> ones written by Roald Dahl.Of course, because get_query_set() returns a QuerySet object, you can use filter(), exclude() andall <strong>the</strong> o<strong>the</strong>r QuerySet methods on it. So <strong>the</strong>se statements are all legal:Book.dahl_objects.all()Book.dahl_objects.filter(title=’Matilda’)Book.dahl_objects.count()This example also pointed out ano<strong>the</strong>r interesting technique: using multiple managers on <strong>the</strong> same model. You canattach as many Manager() instances to a model as you’d like. This is an easy way to define common “filters” foryour models.For example:88 Chapter 3. Using <strong>Django</strong>
<strong>Django</strong> <strong>Documentation</strong>, Release 1.2class MaleManager(models.Manager):def get_query_set(self):return super(MaleManager, self).get_query_set().filter(sex=’M’)class FemaleManager(models.Manager):def get_query_set(self):return super(FemaleManager, self).get_query_set().filter(sex=’F’)class Person(models.Model):first_name = models.CharField(max_length=50)last_name = models.CharField(max_length=50)sex = models.CharField(max_length=1, choices=((’M’, ’Male’), (’F’, ’Female’)))people = models.Manager()men = MaleManager()women = FemaleManager()This example allows you to request Person.men.all(), Person.women.all(), andPerson.people.all(), yielding predictable results.If you use custom Manager objects, take note that <strong>the</strong> first Manager <strong>Django</strong> encounters (in <strong>the</strong> order in which<strong>the</strong>y’re defined in <strong>the</strong> model) has a special status. <strong>Django</strong> interprets <strong>the</strong> first Manager defined in a class as <strong>the</strong>“default” Manager, and several parts of <strong>Django</strong> (including dumpdata) will use that Manager exclusively for thatmodel. As a result, it’s a good idea to be careful in your choice of default manager in order to avoid a situation whereoverriding get_query_set() results in an inability to retrieve objects you’d like to work with.Using managers for related object access By default, <strong>Django</strong> uses an instance of a “plain” manager class whenaccessing related objects (i.e. choice.poll), not <strong>the</strong> default manager on <strong>the</strong> related object. This is because <strong>Django</strong>needs to be able to retrieve <strong>the</strong> related object, even if it would o<strong>the</strong>rwise be filtered out (and hence be inaccessible) by<strong>the</strong> default manager.If <strong>the</strong> normal plain manager class (django.db.models.Manager) is not appropriate for your circumstances, youcan force <strong>Django</strong> to use <strong>the</strong> same class as <strong>the</strong> default manager for your model by setting <strong>the</strong> use_for_related_fieldsattribute on <strong>the</strong> manager class. This is documented fully below.Custom managers and model inheritanceClass inheritance and model managers aren’t quite a perfect match for each o<strong>the</strong>r. Managers are often specific to <strong>the</strong>classes <strong>the</strong>y are defined on and inheriting <strong>the</strong>m in subclasses isn’t necessarily a good idea. Also, because <strong>the</strong> firstmanager declared is <strong>the</strong> default manager, it is important to allow that to be controlled. So here’s how <strong>Django</strong> handlescustom managers and model inheritance:1. Managers defined on non-abstract base classes are not inherited by child classes. If you want to reuse a managerfrom a non-abstract base, redeclare it explicitly on <strong>the</strong> child class. These sorts of managers are likely to be fairlyspecific to <strong>the</strong> class <strong>the</strong>y are defined on, so inheriting <strong>the</strong>m can often lead to unexpected results (particularly asfar as <strong>the</strong> default manager goes). Therefore, <strong>the</strong>y aren’t passed onto child classes.2. Managers from abstract base classes are always inherited by <strong>the</strong> child class, using Python’s normal name resolutionorder (names on <strong>the</strong> child class override all o<strong>the</strong>rs; <strong>the</strong>n come names on <strong>the</strong> first parent class, and so on).Abstract base classes are designed to capture information and behavior that is common to <strong>the</strong>ir child classes.Defining common managers is an appropriate part of this common information.3. The default manager on a class is ei<strong>the</strong>r <strong>the</strong> first manager declared on <strong>the</strong> class, if that exists, or <strong>the</strong> defaultmanager of <strong>the</strong> first abstract base class in <strong>the</strong> parent hierarchy, if that exists. If no default manager is explicitlydeclared, <strong>Django</strong>’s normal default manager is used.3.2. Models and databases 89
<strong>Django</strong> <strong>Documentation</strong>, Release 1.2These rules provide <strong>the</strong> necessary flexibility if you want to install a collection of custom managers on a group ofmodels, via an abstract base class, but still customize <strong>the</strong> default manager. For example, suppose you have this baseclass:class AbstractBase(models.Model):...objects = CustomManager()class Meta:abstract = TrueIf you use this directly in a subclass, objects will be <strong>the</strong> default manager if you declare no managers in <strong>the</strong> baseclass:class ChildA(AbstractBase):...# This class has CustomManager as <strong>the</strong> default manager.If you want to inherit from AbstractBase, but provide a different default manager, you can provide <strong>the</strong> defaultmanager on <strong>the</strong> child class:class ChildB(AbstractBase):...# An explicit default manager.default_manager = O<strong>the</strong>rManager()Here, default_manager is <strong>the</strong> default. The objects manager is still available, since it’s inherited. It just isn’tused as <strong>the</strong> default.Finally for this example, suppose you want to add extra managers to <strong>the</strong> child class, but still use <strong>the</strong> default fromAbstractBase. You can’t add <strong>the</strong> new manager directly in <strong>the</strong> child class, as that would override <strong>the</strong> default andyou would have to also explicitly include all <strong>the</strong> managers from <strong>the</strong> abstract base class. The solution is to put <strong>the</strong> extramanagers in ano<strong>the</strong>r base class and introduce it into <strong>the</strong> inheritance hierarchy after <strong>the</strong> defaults:class ExtraManager(models.Model):extra_manager = O<strong>the</strong>rManager()class Meta:abstract = Trueclass ChildC(AbstractBase, ExtraManager):...# Default manager is CustomManager, but O<strong>the</strong>rManager is# also available via <strong>the</strong> "extra_manager" attribute.Controlling Automatic Manager TypesThis document has already mentioned a couple of places where <strong>Django</strong> creates a manager class for you: defaultmanagers and <strong>the</strong> “plain” manager used to access related objects. There are o<strong>the</strong>r places in <strong>the</strong> implementation of<strong>Django</strong> where temporary plain managers are needed. Those automatically created managers will normally be instancesof <strong>the</strong> django.db.models.Manager class. Throughout this section, we will use <strong>the</strong> term “automatic manager”to mean a manager that <strong>Django</strong> creates for you – ei<strong>the</strong>r as a default manager on a model with no managers, or to usetemporarily when accessing related objects.Sometimes this default class won’t be <strong>the</strong> right choice. One example is in <strong>the</strong> django.contrib.gis applicationthat ships with <strong>Django</strong> itself. All gis models must use a special manager class (GeoManager) because <strong>the</strong>y need aspecial queryset (GeoQuerySet) to be used for interacting with <strong>the</strong> database. It turns out that models which requirea special manager like this need to use <strong>the</strong> same manager class wherever an automatic manager is created.90 Chapter 3. Using <strong>Django</strong>
<strong>Django</strong> <strong>Documentation</strong>, Release 1.2<strong>Django</strong> provides a way for custom manager developers to say that <strong>the</strong>ir manager class should be used for automaticmanagers whenever it is <strong>the</strong> default manager on a model. This is done by setting <strong>the</strong> use_for_related_fieldsattribute on <strong>the</strong> manager class:class MyManager(models.Manager):use_for_related_fields = True...If this attribute is set on <strong>the</strong> default manager for a model (only <strong>the</strong> default manager is considered in <strong>the</strong>se situations),<strong>Django</strong> will use that class whenever it needs to automatically create a manager for <strong>the</strong> class. O<strong>the</strong>rwise, it will usedjango.db.models.Manager.Historical NoteGiven <strong>the</strong> purpose for which it’s used, <strong>the</strong> name of this attribute (use_for_related_fields) might seem a littleodd. Originally, <strong>the</strong> attribute only controlled <strong>the</strong> type of manager used for related field access, which is where <strong>the</strong>name came from. As it became clear <strong>the</strong> concept was more broadly useful, <strong>the</strong> name hasn’t been changed. This isprimarily so that existing code will continue to work in future <strong>Django</strong> versions.Writing Correct Managers For Use In Automatic Manager InstancesAs already suggested by <strong>the</strong> django.contrib.gis example, above, <strong>the</strong> use_for_related_fields feature is primarilyfor managers that need to return a custom QuerySet subclass. In providing this functionality in your manager,<strong>the</strong>re are a couple of things to remember.Do not filter away any results in this type of manager subclass One reason an automatic manager is used is toaccess objects that are related to from some o<strong>the</strong>r model. In those situations, <strong>Django</strong> has to be able to see all <strong>the</strong>objects for <strong>the</strong> model it is fetching, so that anything which is referred to can be retrieved.If you override <strong>the</strong> get_query_set() method and filter out any rows, <strong>Django</strong> will return incorrect results. Don’tdo that. A manager that filters results in get_query_set() is not appropriate for use as an automatic manager.Set use_for_related_fields when you define <strong>the</strong> class The use_for_related_fields attribute mustbe set on <strong>the</strong> manager class, object not on an instance of <strong>the</strong> class. The earlier example shows <strong>the</strong> correct way to setit, whereas <strong>the</strong> following will not work:# BAD: Incorrect codeclass MyManager(models.Manager):...# Sets <strong>the</strong> attribute on an instance of MyManager. <strong>Django</strong> will# ignore this setting.mgr = MyManager()mgr.use_for_related_fields = Trueclass MyModel(models.Model):...objects = mgr# End of incorrect code.You also shouldn’t change <strong>the</strong> attribute on <strong>the</strong> class object after it has been used in a model, since <strong>the</strong> attribute’s valueis processed when <strong>the</strong> model class is created and not subsequently reread. Set <strong>the</strong> attribute on <strong>the</strong> manager class whenit is first defined, as in <strong>the</strong> initial example of this section and everything will work smoothly.3.2. Models and databases 91
<strong>Django</strong> <strong>Documentation</strong>, Release 1.23.2.5 Performing raw SQL queriesWhen <strong>the</strong> model query APIs don’t go far enough, you can fall back to writing raw SQL. <strong>Django</strong> gives you two waysof performing raw SQL queries: you can use Manager.raw() to perform raw queries and return model instances,or you can avoid <strong>the</strong> model layer entirely and execute custom SQL directly.Performing raw queriesNew in version 1.2: Please, see <strong>the</strong> release notes The raw() manager method can be used to perform raw SQLqueries that return model instances:Manager.raw(raw_query, params=None, translations=None)This method method takes a raw SQL query, executes it, and returns a RawQuerySet instance. This RawQuerySetinstance can be iterated over just like an normal QuerySet to provide object instances.This is best illustrated with an example. Suppose you’ve got <strong>the</strong> following model:class Person(models.Model):first_name = models.CharField(...)last_name = models.CharField(...)birth_date = models.DateField(...)You could <strong>the</strong>n execute custom SQL like so:>>> for p in Person.objects.raw(’SELECT * FROM myapp_person’):... print pJohn SmithJane JonesModel table namesWhere’d <strong>the</strong> name of <strong>the</strong> Person table come from in that example?By default, <strong>Django</strong> figures out a database table name by joining <strong>the</strong> model’s “app label” – <strong>the</strong> name you used inmanage.py startapp – to <strong>the</strong> model’s class name, with an underscore between <strong>the</strong>m. In <strong>the</strong> example we’veassumed that <strong>the</strong> Person model lives in an app named myapp, so its table would be myapp_person.For more details check out <strong>the</strong> documentation for <strong>the</strong> db_table option, which also lets you manually set <strong>the</strong> databasetable name.Of course, this example isn’t very exciting – it’s exactly <strong>the</strong> same as running Person.objects.all(). However,raw() has a bunch of o<strong>the</strong>r options that make it very powerful.Mapping query fields to model fieldsraw() automatically maps fields in <strong>the</strong> query to fields on <strong>the</strong> model.The order of fields in your query doesn’t matter. In o<strong>the</strong>r words, both of <strong>the</strong> following queries work identically:>>> Person.objects.raw(’SELECT id, first_name, last_name, birth_date FROM myapp_person’)...>>> Person.objects.raw(’SELECT last_name, birth_date, first_name, id FROM myapp_person’)...Matching is done by name. This means that you can use SQL’s AS clauses to map fields in <strong>the</strong> query to model fields.So if you had some o<strong>the</strong>r table that had Person data in it, you could easily map it into Person instances:92 Chapter 3. Using <strong>Django</strong>
<strong>Django</strong> <strong>Documentation</strong>, Release 1.2>>> Person.objects.raw(’’’SELECT first AS first_name,... last AS last_name,... bd AS birth_date,... pk as id,... FROM some_o<strong>the</strong>r_table’’’)As long as <strong>the</strong> names match, <strong>the</strong> model instances will be created correctly.Alternatively, you can map fields in <strong>the</strong> query to model fields using <strong>the</strong> translations argument to raw(). Thisis a dictionary mapping names of fields in <strong>the</strong> query to names of fields on <strong>the</strong> model. For example, <strong>the</strong> above querycould also be written:>>> name_map = {’first’: ’first_name’, ’last’: ’last_name’, ’bd’: ’birth_date’, ’pk’: ’id’}>>> Person.objects.raw(’SELECT * FROM some_o<strong>the</strong>r_table’, translations=name_map)Index lookupsraw() supports indexing, so if you need only <strong>the</strong> first result you can write:>>> first_person = Person.objects.raw(’SELECT * from myapp_person’)[0]However, <strong>the</strong> indexing and slicing are not performed at <strong>the</strong> database level. If you have a big amount of Personobjects in your database, it is more efficient to limit <strong>the</strong> query at <strong>the</strong> SQL level:>>> first_person = Person.objects.raw(’SELECT * from myapp_person LIMIT 1’)[0]Deferring model fieldsFields may also be left out:>>> people = Person.objects.raw(’SELECT id, first_name FROM myapp_person’)The Person objects returned by this query will be deferred model instances (see defer()). This means that <strong>the</strong>fields that are omitted from <strong>the</strong> query will be loaded on demand. For example:>>> for p in Person.objects.raw(’SELECT id, first_name FROM myapp_person’):... print p.first_name, # This will be retrieved by <strong>the</strong> original query... print p.last_name # This will be retrieved on demand...John SmithJane JonesFrom outward appearances, this looks like <strong>the</strong> query has retrieved both <strong>the</strong> first name and last name. However, thisexample actually issued 3 queries. Only <strong>the</strong> first names were retrieved by <strong>the</strong> raw() query – <strong>the</strong> last names were bothretrieved on demand when <strong>the</strong>y were printed.There is only one field that you can’t leave out - <strong>the</strong> primary key field. <strong>Django</strong> uses <strong>the</strong> primary key to identify modelinstances, so it must always be included in a raw query. An InvalidQuery exception will be raised if you forget toinclude <strong>the</strong> primary key.Adding annotationsYou can also execute queries containing fields that aren’t defined on <strong>the</strong> model. For example, we could use PostgreSQL’sage() function to get a list of people with <strong>the</strong>ir ages calculated by <strong>the</strong> database:3.2. Models and databases 93
<strong>Django</strong> <strong>Documentation</strong>, Release 1.2>>> people = Person.objects.raw(’SELECT *, age(birth_date) AS age FROM myapp_person’)>>> for p in people:... print "%s is %s." % (p.first_name, p.age)John is 37.Jane is 42....Passing parameters into raw()If you need to perform parameterized queries, you can use <strong>the</strong> params argument to raw():>>> lname = ’Doe’>>> Person.objects.raw(’SELECT * FROM myapp_person WHERE last_name = %s’, [lname])params is a list of parameters. You’ll use %s placeholders in <strong>the</strong> query string (regardless of your database engine);<strong>the</strong>y’ll be replaced with parameters from <strong>the</strong> params list.Warning: Do not use string formatting on raw queries!It’s tempting to write <strong>the</strong> above query as:>>> query = ’SELECT * FROM myapp_person WHERE last_name = %s’ % lname>>> Person.objects.raw(query)Don’t.Using <strong>the</strong> params list completely protects you from SQL injection attacks, a common exploit where attackersinject arbitrary SQL into your database. If you use string interpolation, sooner or later you’ll fall victim to SQLinjection. As long as you remember to always use <strong>the</strong> params list you’ll be protected.Executing custom SQL directlySometimes even Manager.raw() isn’t quite enough: you might need to perform queries that don’t map cleanly tomodels, or directly execute UPDATE, INSERT, or DELETE queries.In <strong>the</strong>se cases, you can always access <strong>the</strong> database directly, routing around <strong>the</strong> model layer entirely.The object django.db.connection represents <strong>the</strong> default database connection, anddjango.db.transaction represents <strong>the</strong> default database transaction. To use <strong>the</strong> database connection,call connection.cursor() to get a cursor object. Then, call cursor.execute(sql, [params]) toexecute <strong>the</strong> SQL and cursor.fetchone() or cursor.fetchall() to return <strong>the</strong> resulting rows. Afterperforming a data changing operation, you should <strong>the</strong>n call transaction.commit_unless_managed() toensure your changes are committed to <strong>the</strong> database. If your query is purely a data retrieval operation, no commit isrequired. For example:def my_custom_sql():from django.db import connection, transactioncursor = connection.cursor()# Data modifying operation - commit requiredcursor.execute("UPDATE bar SET foo = 1 WHERE baz = %s", [self.baz])transaction.commit_unless_managed()# Data retrieval operation - no commit requiredcursor.execute("SELECT foo FROM bar WHERE baz = %s", [self.baz])row = cursor.fetchone()94 Chapter 3. Using <strong>Django</strong>
<strong>Django</strong> <strong>Documentation</strong>, Release 1.2return rowIf you are using more than one database you can use django.db.connections to obtain <strong>the</strong> connection (andcursor) for a specific database. django.db.connections is a dictionary-like object that allows you to retrieve aspecific connection using it’s alias:from django.db import connectionscursor = connections[’my_db_alias’].cursor()Transactions and raw SQLIf you are using transaction decorators (such as commit_on_success) to wrap your views and provide transactioncontrol, you don’t have to make a manual call to transaction.commit_unless_managed() – youcan manually commit if you want to, but you aren’t required to, since <strong>the</strong> decorator will commit for you. However,if you don’t manually commit your changes, you will need to manually mark <strong>the</strong> transaction as dirty, usingtransaction.set_dirty():@commit_on_successdef my_custom_sql_view(request, value):from django.db import connection, transactioncursor = connection.cursor()# Data modifying operationcursor.execute("UPDATE bar SET foo = 1 WHERE baz = %s", [value])# Since we modified data, mark <strong>the</strong> transaction as dirtytransaction.set_dirty()# Data retrieval operation. This doesn’t dirty <strong>the</strong> transaction,# so no call to set_dirty() is required.cursor.execute("SELECT foo FROM bar WHERE baz = %s", [value])row = cursor.fetchone()return render_to_response(’template.html’, {’row’: row})The call to set_dirty() is made automatically when you use <strong>the</strong> <strong>Django</strong> ORM to make data modifying databasecalls. However, when you use raw SQL, <strong>Django</strong> has no way of knowing if your SQL modifies data or not. The manualcall to set_dirty() ensures that <strong>Django</strong> knows that <strong>the</strong>re are modifications that must be committed.Connections and cursorsconnection and cursor mostly implement <strong>the</strong> standard Python DB-API (except when it comes to transactionhandling). If you’re not familiar with <strong>the</strong> Python DB-API, note that <strong>the</strong> SQL statement in cursor.execute() usesplaceholders, "%s", ra<strong>the</strong>r than adding parameters directly within <strong>the</strong> SQL. If you use this technique, <strong>the</strong> underlyingdatabase library will automatically add quotes and escaping to your parameter(s) as necessary. (Also note that <strong>Django</strong>expects <strong>the</strong> "%s" placeholder, not <strong>the</strong> "?" placeholder, which is used by <strong>the</strong> SQLite Python bindings. This is for <strong>the</strong>sake of consistency and sanity.)3.2.6 Managing database transactions<strong>Django</strong> gives you a few ways to control how database transactions are managed, if you’re using a database that supportstransactions.3.2. Models and databases 95
<strong>Django</strong> <strong>Documentation</strong>, Release 1.2<strong>Django</strong>’s default transaction behavior<strong>Django</strong>’s default behavior is to run with an open transaction which it commits automatically when any built-in, dataalteringmodel function is called. For example, if you call model.save() or model.delete(), <strong>the</strong> change willbe committed immediately.This is much like <strong>the</strong> auto-commit setting for most databases. As soon as you perform an action that needs to writeto <strong>the</strong> database, <strong>Django</strong> produces <strong>the</strong> INSERT/UPDATE/DELETE statements and <strong>the</strong>n does <strong>the</strong> COMMIT. There’s noimplicit ROLLBACK.Tying transactions to HTTP requestsThe recommended way to handle transactions in Web requests is to tie <strong>the</strong>m to <strong>the</strong> request and response phases via<strong>Django</strong>’s TransactionMiddleware.It works like this: When a request starts, <strong>Django</strong> starts a transaction. If <strong>the</strong> response is produced without problems,<strong>Django</strong> commits any pending transactions. If <strong>the</strong> view function produces an exception, <strong>Django</strong> rolls back any pendingtransactions.To activate this feature, just add <strong>the</strong> TransactionMiddleware middleware to your MIDDLEWARE_CLASSESsetting:MIDDLEWARE_CLASSES = (’django.middleware.cache.UpdateCacheMiddleware’,’django.contrib.sessions.middleware.SessionMiddleware’,’django.middleware.common.CommonMiddleware’,’django.middleware.transaction.TransactionMiddleware’,’django.middleware.cache.FetchFromCacheMiddleware’,)The order is quite important. The transaction middleware applies not only to view functions, but also for all middlewaremodules that come after it. So if you use <strong>the</strong> session middleware after <strong>the</strong> transaction middleware, session creationwill be part of <strong>the</strong> transaction.The various cache middlewares are an exception: CacheMiddleware, UpdateCacheMiddleware, andFetchFromCacheMiddleware are never affected. Even when using database caching, <strong>Django</strong>’s cache backenduses its own database cursor (which is mapped to its own database connection internally).Controlling transaction management in viewsFor most people, implicit request-based transactions work wonderfully. However, if you need more fine-grainedcontrol over how transactions are managed, you can use Python decorators to change <strong>the</strong> way transactions are handledby a particular view function. All of <strong>the</strong> decorators take an option using parameter which should be <strong>the</strong> alias for adatabase connection for which <strong>the</strong> behavior applies to. If no alias is specified <strong>the</strong>n <strong>the</strong> "default" database is used.Note: Although <strong>the</strong> examples below use view functions as examples, <strong>the</strong>se decorators can be applied to non-viewfunctions as well.django.db.transaction.autocommitUse <strong>the</strong> autocommit decorator to switch a view function to <strong>Django</strong>’s default commit behavior, regardless of <strong>the</strong>global transaction setting.Example:96 Chapter 3. Using <strong>Django</strong>
<strong>Django</strong> <strong>Documentation</strong>, Release 1.2from django.db import transaction@transaction.autocommitdef viewfunc(request):....@transaction.autocommit(using="my_o<strong>the</strong>r_database")def viewfunc2(request):....Within viewfunc(), transactions will be committed as soon as you call model.save(), model.delete(),or any o<strong>the</strong>r function that writes to <strong>the</strong> database. viewfunc2() will have this same behavior, but for <strong>the</strong>"my_o<strong>the</strong>r_database" connection.django.db.transaction.commit_on_successUse <strong>the</strong> commit_on_success decorator to use a single transaction for all <strong>the</strong> work done in a function:from django.db import transaction@transaction.commit_on_successdef viewfunc(request):....@transaction.commit_on_success(using="my_o<strong>the</strong>r_database")def viewfunc2(request):....If <strong>the</strong> function returns successfully, <strong>the</strong>n <strong>Django</strong> will commit all work done within <strong>the</strong> function at that point. If <strong>the</strong>function raises an exception, though, <strong>Django</strong> will roll back <strong>the</strong> transaction.django.db.transaction.commit_manuallyUse <strong>the</strong> commit_manually decorator if you need full control over transactions. It tells <strong>Django</strong> you’ll be managing<strong>the</strong> transaction on your own.If your view changes data and doesn’t commit() or rollback(), <strong>Django</strong> will raise aTransactionManagementError exception.Manual transaction management looks like this:from django.db import transaction@transaction.commit_manuallydef viewfunc(request):...# You can commit/rollback however and whenever you wanttransaction.commit()...# But you’ve got to remember to do it yourself!try:...except:transaction.rollback()else:3.2. Models and databases 97
<strong>Django</strong> <strong>Documentation</strong>, Release 1.2transaction.commit()@transaction.commit_manually(using="my_o<strong>the</strong>r_database")def viewfunc2(request):....An important note to users of earlier <strong>Django</strong> releases:The database connection.commit() and connection.rollback() methods (called db.commit() anddb.rollback() in 0.91 and earlier) no longer exist. They’ve been replaced by transaction.commit() andtransaction.rollback().How to globally deactivate transaction managementControl freaks can totally disable all transaction management by setting DISABLE_TRANSACTION_MANAGEMENTto True in <strong>the</strong> <strong>Django</strong> settings file.If you do this, <strong>Django</strong> won’t provide any automatic transaction management whatsoever. Middleware will no longerimplicitly commit transactions, and you’ll need to roll management yourself. This even requires you to commitchanges done by middleware somewhere else.Thus, this is best used in situations where you want to run your own transaction-controlling middleware or do somethingreally strange. In almost all situations, you’ll be better off using <strong>the</strong> default behavior, or <strong>the</strong> transaction middleware,and only modify selected functions as needed.SavepointsA savepoint is a marker within a transaction that enables you to roll back part of a transaction, ra<strong>the</strong>r than <strong>the</strong> fulltransaction. Savepoints are available to <strong>the</strong> PostgreSQL 8 and Oracle backends. O<strong>the</strong>r backends will provide <strong>the</strong>savepoint functions, but <strong>the</strong>y are empty operations - <strong>the</strong>y won’t actually do anything.Savepoints aren’t especially useful if you are using <strong>the</strong> default autocommit behaviour of <strong>Django</strong>. However, ifyou are using commit_on_success or commit_manually, each open transaction will build up a series ofdatabase operations, awaiting a commit or rollback. If you issue a rollback, <strong>the</strong> entire transaction is rolled back.Savepoints provide <strong>the</strong> ability to perform a fine-grained rollback, ra<strong>the</strong>r than <strong>the</strong> full rollback that would be performedby transaction.rollback().Each of <strong>the</strong>se functions takes a using argument which should be <strong>the</strong> name of a database for which <strong>the</strong> behaviorapplies. If no using argument is provided <strong>the</strong>n <strong>the</strong> "default" database is used.Savepoints are controlled by three methods on <strong>the</strong> transaction object:transaction.savepoint(using=None)Creates a new savepoint. This marks a point in <strong>the</strong> transaction that is known to be in a “good” state.Returns <strong>the</strong> savepoint ID (sid).transaction.savepoint_commit(sid, using=None)Updates <strong>the</strong> savepoint to include any operations that have been performed since <strong>the</strong> savepoint was created, orsince <strong>the</strong> last commit.transaction.savepoint_rollback(sid, using=None)Rolls <strong>the</strong> transaction back to <strong>the</strong> last point at which <strong>the</strong> savepoint was committed.The following example demonstrates <strong>the</strong> use of savepoints:98 Chapter 3. Using <strong>Django</strong>
<strong>Django</strong> <strong>Documentation</strong>, Release 1.2from django.db import transaction@transaction.commit_manuallydef viewfunc(request):a.save()# open transaction now contains a.save()sid = transaction.savepoint()b.save()# open transaction now contains a.save() and b.save()if want_to_keep_b:transaction.savepoint_commit(sid)# open transaction still contains a.save() and b.save()else:transaction.savepoint_rollback(sid)# open transaction now contains only a.save()transaction.commit()Transactions in MySQLIf you’re using MySQL, your tables may or may not support transactions; it depends on your MySQL version and <strong>the</strong>table types you’re using. (By “table types,” we mean something like “InnoDB” or “MyISAM”.) MySQL transactionpeculiarities are outside <strong>the</strong> scope of this article, but <strong>the</strong> MySQL site has information on MySQL transactions.If your MySQL setup does not support transactions, <strong>the</strong>n <strong>Django</strong> will function in auto-commit mode: Statements willbe executed and committed as soon as <strong>the</strong>y’re called. If your MySQL setup does support transactions, <strong>Django</strong> willhandle transactions as explained in this document.Handling exceptions within PostgreSQL transactionsWhen a call to a PostgreSQL cursor raises an exception (typically IntegrityError), all subsequent SQL in <strong>the</strong>same transaction will fail with <strong>the</strong> error “current transaction is aborted, queries ignored until end of transaction block”.Whilst simple use of save() is unlikely to raise an exception in PostgreSQL, <strong>the</strong>re are more advanced usage patternswhich might, such as saving objects with unique fields, saving using <strong>the</strong> force_insert/force_update flag, or invokingcustom SQL.There are several ways to recover from this sort of error.Transaction rollbackThe first option is to roll back <strong>the</strong> entire transaction. For example:a.save() # Succeeds, but may be undone by transaction rollbacktry:b.save() # Could throw exceptionexcept IntegrityError:transaction.rollback()c.save() # Succeeds, but a.save() may have been undoneCalling transaction.rollback() rolls back <strong>the</strong> entire transaction. Any uncommitted database operations willbe lost. In this example, <strong>the</strong> changes made by a.save() would be lost, even though that operation raised no erroritself.3.2. Models and databases 99
<strong>Django</strong> <strong>Documentation</strong>, Release 1.2Savepoint rollbackIf you are using PostgreSQL 8 or later, you can use savepoints to control <strong>the</strong> extent of a rollback. Before performinga database operation that could fail, you can set or update <strong>the</strong> savepoint; that way, if <strong>the</strong> operation fails, you can rollback <strong>the</strong> single offending operation, ra<strong>the</strong>r than <strong>the</strong> entire transaction. For example:a.save() # Succeeds, and never undone by savepoint rollbacktry:sid = transaction.savepoint()b.save() # Could throw exceptiontransaction.savepoint_commit(sid)except IntegrityError:transaction.savepoint_rollback(sid)c.save() # Succeeds, and a.save() is never undoneIn this example, a.save() will not be undone in <strong>the</strong> case where b.save() raises an exception.Database-level autocommitNew in version 1.1: Please, see <strong>the</strong> release notes With PostgreSQL 8.2 or later, <strong>the</strong>re is an advanced option to runPostgreSQL with database-level autocommit. If you use this option, <strong>the</strong>re is no constantly open transaction, so it isalways possible to continue after catching an exception. For example:a.save() # succeedstry:b.save() # Could throw exceptionexcept IntegrityError:passc.save() # succeedsNote: This is not <strong>the</strong> same as <strong>the</strong> autocommit decorator. When using database level autocommit <strong>the</strong>re is no databasetransaction at all. The autocommit decorator still uses transactions, automatically committing each transactionwhen a database modifying operation occurs.3.2.7 Multiple databasesNew in version 1.2: Please, see <strong>the</strong> release notes This topic guide describes <strong>Django</strong>’s support for interacting withmultiple databases. Most of <strong>the</strong> rest of <strong>Django</strong>’s documentation assumes you are interacting with a single database. Ifyou want to interact with multiple databases, you’ll need to take some additional steps.Defining your databasesThe first step to using more than one database with <strong>Django</strong> is to tell <strong>Django</strong> about <strong>the</strong> database servers you’ll beusing. This is done using <strong>the</strong> DATABASES setting. This setting maps database aliases, which are a way to refer to aspecific database throughout <strong>Django</strong>, to a dictionary of settings for that specific connection. The settings in <strong>the</strong> innerdictionaries are described fully in <strong>the</strong> DATABASES documentation.Databases can have any alias you choose. However, <strong>the</strong> alias default has special significance. <strong>Django</strong> uses <strong>the</strong>database with <strong>the</strong> alias of default when no o<strong>the</strong>r database has been selected. If you don’t have a defaultdatabase, you need to be careful to always specify <strong>the</strong> database that you want to use.The following is an example settings.py snippet defining two databases – a default PostgreSQL database and aMySQL database called users:100 Chapter 3. Using <strong>Django</strong>
<strong>Django</strong> <strong>Documentation</strong>, Release 1.2DATABASES = {’default’: {’NAME’: ’app_data’,’ENGINE’: ’django.db.backends.postgresql_psycopg2’,’USER’: ’postgres_user’,’PASSWORD’: ’s3krit’},’users’: {’NAME’: ’user_data’,’ENGINE’: ’django.db.backends.mysql’,’USER’: ’mysql_user’,’PASSWORD’: ’priv4te’}}If you attempt to access a database that you haven’t defined in your DATABASES setting, <strong>Django</strong> will raise adjango.db.utils.ConnectionDoesNotExist exception.Synchronizing your databasesThe syncdb management command operates on one database at a time. By default, it operates on <strong>the</strong> defaultdatabase, but by providing a --database argument, you can tell syncdb to synchronize a different database. So, tosynchronize all models onto all databases in our example, you would need to call:$ ./manage.py syncdb$ ./manage.py syncdb --database=usersIf you don’t want every application to be synchronized onto a particular database, you can define a database routerthat implements a policy constraining <strong>the</strong> availability of particular models.Alternatively, if you want fine-grained control of synchronization, you can pipe all or part of <strong>the</strong> output of sqlallfor a particular application directly into your database prompt, like this:$ ./manage.py sqlall sales | ./manage.py dbshellUsing o<strong>the</strong>r management commandsThe o<strong>the</strong>r django-admin.py commands that interact with <strong>the</strong> database operate in <strong>the</strong> same way as syncdb – <strong>the</strong>yonly ever operate on one database at a time, using --database to control <strong>the</strong> database used.Automatic database routingThe easiest way to use multiple databases is to set up a database routing scheme. The default routing scheme ensuresthat objects remain ‘sticky’ to <strong>the</strong>ir original database (i.e., an object retrieved from <strong>the</strong> foo database will be saved on<strong>the</strong> same database). The default routing scheme ensures that if a database isn’t specified, all queries fall back to <strong>the</strong>default database.You don’t have to do anything to activate <strong>the</strong> default routing scheme – it is provided ‘out of <strong>the</strong> box’ on every <strong>Django</strong>project. However, if you want to implement more interesting database allocation behaviors, you can define and installyour own database routers.Database routersA database Router is a class that provides up to four methods:3.2. Models and databases 101
<strong>Django</strong> <strong>Documentation</strong>, Release 1.2db_for_read(model, **hints)Suggest <strong>the</strong> database that should be used for read operations for objects of type model.If a database operation is able to provide any additional information that might assist in selecting a database, itwill be provided in <strong>the</strong> hints dictionary. Details on valid hints are provided below.Returns None if <strong>the</strong>re is no suggestion.db_for_write(model, **hints)Suggest <strong>the</strong> database that should be used for writes of objects of type Model.If a database operation is able to provide any additional information that might assist in selecting a database, itwill be provided in <strong>the</strong> hints dictionary. Details on valid hints are provided below.Returns None if <strong>the</strong>re is no suggestion.allow_relation(obj1, obj2, **hints)Return True if a relation between obj1 and obj2 should be allowed, False if <strong>the</strong> relation should be prevented, orNone if <strong>the</strong> router has no opinion. This is purely a validation operation, used by foreign key and many to manyoperations to determine if a relation should be allowed between two objects.allow_syncdb(db, model)Determine if <strong>the</strong> model should be synchronized onto <strong>the</strong> database with alias db. Return True if <strong>the</strong> modelshould be synchronized, False if it should not be synchronized, or None if <strong>the</strong> router has no opinion. Thismethod can be used to determine <strong>the</strong> availability of a model on a given database.A router doesn’t have to provide all <strong>the</strong>se methods - it omit one or more of <strong>the</strong>m. If one of <strong>the</strong> methods is omitted,<strong>Django</strong> will skip that router when performing <strong>the</strong> relevant check.HintsThe hints received by <strong>the</strong> database router can be used to decide which database should receive a given request.At present, <strong>the</strong> only hint that will be provided is instance, an object instance that is related to <strong>the</strong> read or writeoperation that is underway. This might be <strong>the</strong> instance that is being saved, or it might be an instance that is beingadded in a many-to-many relation. In some cases, no instance hint will be provided at all. The router checks for <strong>the</strong>existence of an instance hint, and determine if that hint should be used to alter routing behavior.Using routersDatabase routers are installed using <strong>the</strong> DATABASE_ROUTERS setting. This setting defines a list of class names, eachspecifying a router that should be used by <strong>the</strong> master router (django.db.router).The master router is used by <strong>Django</strong>’s database operations to allocate database usage. Whenever a query needs to knowwhich database to use, it calls <strong>the</strong> master router, providing a model and a hint (if available). <strong>Django</strong> <strong>the</strong>n tries eachrouter in turn until a database suggestion can be found. If no suggestion can be found, it tries <strong>the</strong> current _state.dbof <strong>the</strong> hint instance. If a hint instance wasn’t provided, or <strong>the</strong> instance doesn’t currently have database state, <strong>the</strong> masterrouter will allocate <strong>the</strong> default database.An exampleExample purposes only!This example is intended as a demonstration of how <strong>the</strong> router infrastructure can be used to alter database usage. Itintentionally ignores some complex issues in order to demonstrate how routers are used.This example won’t work if any of <strong>the</strong> models in myapp contain relationships to models outside of <strong>the</strong> o<strong>the</strong>rdatabase. Cross-database relationships introduce referential integrity problems that <strong>Django</strong> can’t currently handle.102 Chapter 3. Using <strong>Django</strong>
<strong>Django</strong> <strong>Documentation</strong>, Release 1.2The master/slave configuration described is also flawed – it doesn’t provide any solution for handling replication lag(i.e., query inconsistencies introduced because of <strong>the</strong> time taken for a write to propagate to <strong>the</strong> slaves). It also doesn’tconsider <strong>the</strong> interaction of transactions with <strong>the</strong> database utilization strategy.So - what does this mean in practice? Say you want myapp to exist on <strong>the</strong> o<strong>the</strong>r database, and you want all o<strong>the</strong>rmodels in a master/slave relationship between <strong>the</strong> databases master, slave1 and slave2. To implement this, youwould need 2 routers:class MyAppRouter(object):"""A router to control all database operations on models in<strong>the</strong> myapp application"""def db_for_read(self, model, **hints):"Point all operations on myapp models to ’o<strong>the</strong>r’"if model._meta.app_label == ’myapp’:return ’o<strong>the</strong>r’return Nonedef db_for_write(self, model, **hints):"Point all operations on myapp models to ’o<strong>the</strong>r’"if model._meta.app_label == ’myapp’:return ’o<strong>the</strong>r’return Nonedef allow_relation(self, obj1, obj2, **hints):"Allow any relation if a model in myapp is involved"if obj1._meta.app_label == ’myapp’ or obj2._meta.app_label == ’myapp’:return Truereturn Nonedef allow_syncdb(self, db, model):"Make sure <strong>the</strong> myapp app only appears on <strong>the</strong> ’o<strong>the</strong>r’ db"if db == ’o<strong>the</strong>r’:return model._meta.app_label == ’myapp’elif model._meta.app_label == ’myapp’:return Falsereturn Noneclass MasterSlaveRouter(object):"""A router that sets up a simple master/slave configuration"""def db_for_read(self, model, **hints):"Point all read operations to a random slave"return random.choice([’slave1’,’slave2’])def db_for_write(self, model, **hints):"Point all write operations to <strong>the</strong> master"return ’master’def allow_relation(self, obj1, obj2, **hints):"Allow any relation between two objects in <strong>the</strong> db pool"db_list = (’master’,’slave1’,’slave2’)if obj1._state.db in db_list and obj2._state.db in db_list:return Truereturn Nonedef allow_syncdb(self, db, model):"Explicitly put all models on all databases."3.2. Models and databases 103
<strong>Django</strong> <strong>Documentation</strong>, Release 1.2return TrueThen, in your settings file, add <strong>the</strong> following (substituting path.to. with <strong>the</strong> actual python path to <strong>the</strong> modulewhere you define <strong>the</strong> routers):DATABASE_ROUTERS = [’path.to.MyAppRouter’, ’path.to.MasterSlaveRouter’]The order in which routers are processed is significant. Routers will be queried in <strong>the</strong> order <strong>the</strong> arelisted in <strong>the</strong> DATABASE_ROUTERS setting . In this example, <strong>the</strong> MyAppRouter is processed before <strong>the</strong>MasterSlaveRouter, and as a result, decisions concerning <strong>the</strong> models in myapp are processed beforeany o<strong>the</strong>r decision is made. If <strong>the</strong> DATABASE_ROUTERS setting listed <strong>the</strong> two routers in <strong>the</strong> o<strong>the</strong>r order,MasterSlaveRouter.allow_syncdb() would be processed first. The catch-all nature of <strong>the</strong> MasterSlaveRouterimplementation would mean that all models would be available on all databases.With this setup installed, lets run some <strong>Django</strong> code:>>> # This retrieval will be performed on <strong>the</strong> ’credentials’ database>>> fred = User.objects.get(username=’fred’)>>> fred.first_name = ’Frederick’>>> # This save will also be directed to ’credentials’>>> fred.save()>>> # These retrieval will be randomly allocated to a slave database>>> dna = Person.objects.get(name=’Douglas Adams’)>>> # A new object has no database allocation when created>>> mh = Book(title=’Mostly Harmless’)>>> # This assignment will consult <strong>the</strong> router, and set mh onto>>> # <strong>the</strong> same database as <strong>the</strong> author object>>> mh.author = dna>>> # This save will force <strong>the</strong> ’mh’ instance onto <strong>the</strong> master database...>>> mh.save()>>> # ... but if we re-retrieve <strong>the</strong> object, it will come back on a slave>>> mh = Book.objects.get(title=’Mostly Harmless’)Manually selecting a database<strong>Django</strong> also provides an API that allows you to maintain complete control over database usage in your code. Amanually specified database allocation will take priority over a database allocated by a router.Manually selecting a database for a QuerySetYou can select <strong>the</strong> database for a QuerySet at any point in <strong>the</strong> QuerySet “chain.” Just call using() on <strong>the</strong>QuerySet to get ano<strong>the</strong>r QuerySet that uses <strong>the</strong> specified database.using() takes a single argument: <strong>the</strong> alias of <strong>the</strong> database on which you want to run <strong>the</strong> query. For example:>>> # This will run on <strong>the</strong> ’default’ database.>>> Author.objects.all()>>> # So will this.>>> Author.objects.using(’default’).all()104 Chapter 3. Using <strong>Django</strong>
<strong>Django</strong> <strong>Documentation</strong>, Release 1.2>>> # This will run on <strong>the</strong> ’o<strong>the</strong>r’ database.>>> Author.objects.using(’o<strong>the</strong>r’).all()Selecting a database for save()Use <strong>the</strong> using keyword to Model.save() to specify to which database <strong>the</strong> data should be saved.For example, to save an object to <strong>the</strong> legacy_users database, you’d use this:>>> my_object.save(using=’legacy_users’)If you don’t specify using, <strong>the</strong> save() method will save into <strong>the</strong> default database allocated by <strong>the</strong> routers.Moving an object from one database to ano<strong>the</strong>r If you’ve saved an instance to one database, it might be temptingto use save(using=...) as a way to migrate <strong>the</strong> instance to a new database. However, if you don’t takeappropriate steps, this could have some unexpected consequences.Consider <strong>the</strong> following example:>>> p = Person(name=’Fred’)>>> p.save(using=’first’) # (statement 1)>>> p.save(using=’second’) # (statement 2)In statement 1, a new Person object is saved to <strong>the</strong> first database. At this time, p doesn’t have a primary key, so<strong>Django</strong> issues a SQL INSERT statement. This creates a primary key, and <strong>Django</strong> assigns that primary key to p.When <strong>the</strong> save occurs in statement 2, p already has a primary key value, and <strong>Django</strong> will attempt to use that primarykey on <strong>the</strong> new database. If <strong>the</strong> primary key value isn’t in use in <strong>the</strong> second database, <strong>the</strong>n you won’t have anyproblems – <strong>the</strong> object will be copied to <strong>the</strong> new database.However, if <strong>the</strong> primary key of p is already in use on <strong>the</strong> second database, <strong>the</strong> existing object in <strong>the</strong> second databasewill be overridden when p is saved.You can avoid this in two ways. First, you can clear <strong>the</strong> primary key of <strong>the</strong> instance. If an object has no primary key,<strong>Django</strong> will treat it as a new object, avoiding any loss of data on <strong>the</strong> second database:>>> p = Person(name=’Fred’)>>> p.save(using=’first’)>>> p.pk = None # Clear <strong>the</strong> primary key.>>> p.save(using=’second’) # Write a completely new object.The second option is to use <strong>the</strong> force_insert option to save() to ensure that <strong>Django</strong> does a SQL INSERT:>>> p = Person(name=’Fred’)>>> p.save(using=’first’)>>> p.save(using=’second’, force_insert=True)This will ensure that <strong>the</strong> person named Fred will have <strong>the</strong> same primary key on both databases. If that primary key isalready in use when you try to save onto <strong>the</strong> second database, an error will be raised.Selecting a database to delete fromBy default, a call to delete an existing object will be executed on <strong>the</strong> same database that was used to retrieve <strong>the</strong> objectin <strong>the</strong> first place:3.2. Models and databases 105
<strong>Django</strong> <strong>Documentation</strong>, Release 1.2>>> u = User.objects.using(’legacy_users’).get(username=’fred’)>>> u.delete() # will delete from <strong>the</strong> ‘legacy_users‘ databaseTo specify <strong>the</strong> database from which a model will be deleted, pass a using keyword argument to <strong>the</strong>Model.delete() method. This argument works just like <strong>the</strong> using keyword argument to save().For example, if you’re migrating a user from <strong>the</strong> legacy_users database to <strong>the</strong> new_users database, you mightuse <strong>the</strong>se commands:>>> user_obj.save(using=’new_users’)>>> user_obj.delete(using=’legacy_users’)Using managers with multiple databasesUse <strong>the</strong> db_manager() method on managers to give managers access to a non-default database.For example, say you have a custom manager method that touches <strong>the</strong> database –User.objects.create_user(). Because create_user() is a manager method, not a QuerySetmethod, you can’t do User.objects.using(’new_users’).create_user(). (The create_user()method is only available on User.objects, <strong>the</strong> manager, not on QuerySet objects derived from <strong>the</strong> manager.)The solution is to use db_manager(), like this:User.objects.db_manager(’new_users’).create_user(...)db_manager() returns a copy of <strong>the</strong> manager bound to <strong>the</strong> database you specify.Using get_query_set() with multiple databases If you’re overriding get_query_set() on your manager,be sure to ei<strong>the</strong>r call <strong>the</strong> method on <strong>the</strong> parent (using super()) or do <strong>the</strong> appropriate handling of <strong>the</strong> _db attributeon <strong>the</strong> manager (a string containing <strong>the</strong> name of <strong>the</strong> database to use).For example, if you want to return a custom QuerySet class from <strong>the</strong> get_query_set method, you could do this:class MyManager(models.Manager):def get_query_set(self):qs = CustomQuerySet(self.model)if self._db is not None:qs = qs.using(self._db)return qsExposing multiple databases in <strong>Django</strong>’s admin interface<strong>Django</strong>’s admin doesn’t have any explicit support for multiple databases. If you want to provide an admin interface fora model on a database o<strong>the</strong>r than that that specified by your router chain, you’ll need to write custom ModelAdminclasses that will direct <strong>the</strong> admin to use a specific database for content.ModelAdmin objects have four methods that require customization for multiple-database support:class MultiDBModelAdmin(admin.ModelAdmin):# A handy constant for <strong>the</strong> name of <strong>the</strong> alternate database.using = ’o<strong>the</strong>r’def save_model(self, request, obj, form, change):# Tell <strong>Django</strong> to save objects to <strong>the</strong> ’o<strong>the</strong>r’ database.obj.save(using=self.using)def queryset(self, request):106 Chapter 3. Using <strong>Django</strong>
<strong>Django</strong> <strong>Documentation</strong>, Release 1.2# Tell <strong>Django</strong> to look for objects on <strong>the</strong> ’o<strong>the</strong>r’ database.return super(MultiDBModelAdmin, self).queryset(request).using(self.using)def formfield_for_foreignkey(self, db_field, request=None, **kwargs):# Tell <strong>Django</strong> to populate ForeignKey widgets using a query# on <strong>the</strong> ’o<strong>the</strong>r’ database.return super(MultiDBModelAdmin, self).formfield_for_foreignkey(db_field, request=request, usidef formfield_for_manytomany(self, db_field, request=None, **kwargs):# Tell <strong>Django</strong> to populate ManyToMany widgets using a query# on <strong>the</strong> ’o<strong>the</strong>r’ database.return super(MultiDBModelAdmin, self).formfield_for_manytomany(db_field, request=request, usiThe implementation provided here implements a multi-database strategy where all objects of a given type are storedon a specific database (e.g., all User objects are in <strong>the</strong> o<strong>the</strong>r database). If your usage of multiple databases is morecomplex, your ModelAdmin will need to reflect that strategy.Inlines can be handled in a similar fashion. They require three customized methods:class MultiDBTabularInline(admin.TabularInline):using = ’o<strong>the</strong>r’def queryset(self, request):# Tell <strong>Django</strong> to look for inline objects on <strong>the</strong> ’o<strong>the</strong>r’ database.return super(MultiDBTabularInline, self).queryset(request).using(self.using)def formfield_for_foreignkey(self, db_field, request=None, **kwargs):# Tell <strong>Django</strong> to populate ForeignKey widgets using a query# on <strong>the</strong> ’o<strong>the</strong>r’ database.return super(MultiDBTabularInline, self).formfield_for_foreignkey(db_field, request=request,def formfield_for_manytomany(self, db_field, request=None, **kwargs):# Tell <strong>Django</strong> to populate ManyToMany widgets using a query# on <strong>the</strong> ’o<strong>the</strong>r’ database.return super(MultiDBTabularInline, self).formfield_for_manytomany(db_field, request=request,Once you’ve written your model admin definitions, <strong>the</strong>y can be registered with any Admin instance:from django.contrib import admin# Specialize <strong>the</strong> multi-db admin objects for use with specific models.class BookInline(MultiDBTabularInline):model = Bookclass PublisherAdmin(MultiDBModelAdmin):inlines = [BookInline]admin.site.register(Author, MultiDBModelAdmin)admin.site.register(Publisher, PublisherAdmin)o<strong>the</strong>rsite = admin.Site(’o<strong>the</strong>rsite’)o<strong>the</strong>rsite.register(Publisher, MultiDBModelAdmin)This example sets up two admin sites. On <strong>the</strong> first site, <strong>the</strong> Author and Publisher objects are exposed;Publisher objects have an tabular inline showing books published by that publisher. The second site exposesjust publishers, without <strong>the</strong> inlines.3.2. Models and databases 107
<strong>Django</strong> <strong>Documentation</strong>, Release 1.2Using raw cursors with multiple databasesIf you are using more than one database you can use django.db.connections to obtain <strong>the</strong> connection (andcursor) for a specific database. django.db.connections is a dictionary-like object that allows you to retrieve aspecific connection using it’s alias:from django.db import connectionscursor = connections[’my_db_alias’].cursor()Limitations of multiple databasesCross-database relations<strong>Django</strong> doesn’t currently provide any support for foreign key or many-to-many relationships spanning multipledatabases. If you have used a router to partition models to different databases, any foreign key and many-to-manyrelationships defined by those models must be internal to a single database.This is because of referential integrity. In order to maintain a relationship between two objects, <strong>Django</strong> needs to knowthat <strong>the</strong> primary key of <strong>the</strong> related object is valid. If <strong>the</strong> primary key is stored on a separate database, it’s not possibleto easily evaluate <strong>the</strong> validity of a primary key.If you’re using Postgres, Oracle, or MySQL with InnoDB, this is enforced at <strong>the</strong> database integrity level – databaselevel key constraints prevent <strong>the</strong> creation of relations that can’t be validated.However, if you’re using SQLite or MySQL with MyISAM tables, <strong>the</strong>re is no enforced referential integrity; as aresult, you may be able to ‘fake’ cross database foreign keys. However, this configuration is not officially supportedby <strong>Django</strong>.3.2.8 Database access optimization<strong>Django</strong>’s database layer provides various ways to help developers get <strong>the</strong> most out of <strong>the</strong>ir databases. This documentga<strong>the</strong>rs toge<strong>the</strong>r links to <strong>the</strong> relevant documentation, and adds various tips, organized under a number of headings thatoutline <strong>the</strong> steps to take when attempting to optimize your database usage.Profile firstAs general programming practice, this goes without saying. Find out what queries you are doing and what <strong>the</strong>y arecosting you. You may also want to use an external project like django-debug-toolbar, or a tool that monitors yourdatabase directly.Remember that you may be optimizing for speed or memory or both, depending on your requirements. Sometimesoptimizing for one will be detrimental to <strong>the</strong> o<strong>the</strong>r, but sometimes <strong>the</strong>y will help each o<strong>the</strong>r. Also, work that is done by<strong>the</strong> database process might not have <strong>the</strong> same cost (to you) as <strong>the</strong> same amount of work done in your Python process.It is up to you to decide what your priorities are, where <strong>the</strong> balance must lie, and profile all of <strong>the</strong>se as required sincethis will depend on your application and server.With everything that follows, remember to profile after every change to ensure that <strong>the</strong> change is a benefit, and a bigenough benefit given <strong>the</strong> decrease in readability of your code. All of <strong>the</strong> suggestions below come with <strong>the</strong> caveat thatin your circumstances <strong>the</strong> general principle might not apply, or might even be reversed.Use standard DB optimization techniques...including:108 Chapter 3. Using <strong>Django</strong>
<strong>Django</strong> <strong>Documentation</strong>, Release 1.2• Indexes. This is a number one priority, after you have determined from profiling what indexes should be added.Use django.db.models.Field.db_index to add <strong>the</strong>se from <strong>Django</strong>.• Appropriate use of field types.We will assume you have done <strong>the</strong> obvious things above. The rest of this document focuses on how to use <strong>Django</strong>in such a way that you are not doing unnecessary work. This document also does not address o<strong>the</strong>r optimizationtechniques that apply to all expensive operations, such as general purpose caching.Understand QuerySetsUnderstanding QuerySets is vital to getting good performance with simple code. In particular:Understand QuerySet evaluationTo avoid performance problems, it is important to understand:• that QuerySets are lazy.• when <strong>the</strong>y are evaluated.• how <strong>the</strong> data is held in memory.Understand cached attributesAs well as caching of <strong>the</strong> whole QuerySet, <strong>the</strong>re is caching of <strong>the</strong> result of attributes on ORM objects. In general,attributes that are not callable will be cached. For example, assuming <strong>the</strong> example Weblog models:>>> entry = Entry.objects.get(id=1)>>> entry.blog # Blog object is retrieved at this point>>> entry.blog # cached version, no DB accessBut in general, callable attributes cause DB lookups every time:>>> entry = Entry.objects.get(id=1)>>> entry.authors.all() # query performed>>> entry.authors.all() # query performed againBe careful when reading template code - <strong>the</strong> template system does not allow use of paren<strong>the</strong>ses, but will call callablesautomatically, hiding <strong>the</strong> above distinction.Be careful with your own custom properties - it is up to you to implement caching.Use <strong>the</strong> with template tagTo make use of <strong>the</strong> caching behaviour of QuerySet, you may need to use <strong>the</strong> with template tag.Use iterator()When you have a lot of objects, <strong>the</strong> caching behaviour of <strong>the</strong> QuerySet can cause a large amount of memory to beused. In this case, iterator() may help.3.2. Models and databases 109
<strong>Django</strong> <strong>Documentation</strong>, Release 1.2Do database work in <strong>the</strong> database ra<strong>the</strong>r than in PythonFor instance:• At <strong>the</strong> most basic level, use filter and exclude to do filtering in <strong>the</strong> database.• Use F() object query expressions to do filtering against o<strong>the</strong>r fields within <strong>the</strong> same model.• Use annotate to do aggregation in <strong>the</strong> database.If <strong>the</strong>se aren’t enough to generate <strong>the</strong> SQL you need:Use QuerySet.extra()A less portable but more powerful method is extra(), which allows some SQL to be explicitly added to <strong>the</strong> query.If that still isn’t powerful enough:Use raw SQLWrite your own custom SQL to retrieve data or populate models. Use django.db.connection.queries tofind out what <strong>Django</strong> is writing for you and start from <strong>the</strong>re.Retrieve everything at once if you know you will need itHitting <strong>the</strong> database multiple times for different parts of a single ‘set’ of data that you will need all parts of is, ingeneral, less efficient than retrieving it all in one query. This is particularly important if you have a query that isexecuted in a loop, and could <strong>the</strong>refore end up doing many database queries, when only one was needed. So:Use QuerySet.select_related()Understand QuerySet.select_related() thoroughly, and use it:• in view code,• and in managers and default managers where appropriate. Be aware when your manager is and is not used;sometimes this is tricky so don’t make assumptions.Don’t retrieve things you don’t needUse QuerySet.values() and values_list()When you just want a dict or list of values, and don’t need ORM model objects, make appropriate usage ofvalues(). These can be useful for replacing model objects in template code - as long as <strong>the</strong> dicts you supply have<strong>the</strong> same attributes as those used in <strong>the</strong> template, you are fine.Use QuerySet.defer() and only()Use defer() and only() if <strong>the</strong>re are database columns you know that you won’t need (or won’t need in mostcases) to avoid loading <strong>the</strong>m. Note that if you do use <strong>the</strong>m, <strong>the</strong> ORM will have to go and get <strong>the</strong>m in a separate query,making this a pessimization if you use it inappropriately.110 Chapter 3. Using <strong>Django</strong>
<strong>Django</strong> <strong>Documentation</strong>, Release 1.2Use QuerySet.count()...if you only want <strong>the</strong> count, ra<strong>the</strong>r than doing len(queryset).Use QuerySet.exists()...if you only want to find out if at least one result exists, ra<strong>the</strong>r than if queryset.But:Don’t overuse count() and exists()If you are going to need o<strong>the</strong>r data from <strong>the</strong> QuerySet, just evaluate it.For example, assuming an Email class that has a body attribute and a many-to-many relation to User, <strong>the</strong> followingtemplate code is optimal:{% if display_inbox %}{% with user.emails.all as emails %}{% if emails %}You have {{ emails|length }} email(s){% for email in emails %}{{ email.body }}{% endfor %}{% else %}No messages today.{% endif %}{% endwith %}{% endif %}It is optimal because:1. Since QuerySets are lazy, this does no database if ‘display_inbox’ is False.2. Use of with means that we store user.emails.all in a variable for later use, allowing its cache to bere-used.3. The line {% if emails %} causes QuerySet.__nonzero__() to be called, which causes <strong>the</strong>user.emails.all() query to be run on <strong>the</strong> database, and at <strong>the</strong> least <strong>the</strong> first line to be turned into anORM object. If <strong>the</strong>re aren’t any results, it will return False, o<strong>the</strong>rwise True.4. The use of {{ emails|length }} calls QuerySet.__len__(), filling out <strong>the</strong> rest of <strong>the</strong> cache withoutdoing ano<strong>the</strong>r query.5. The for loop iterates over <strong>the</strong> already filled cache.In total, this code does ei<strong>the</strong>r one or zero database queries. The only deliberate optimization performed is <strong>the</strong> use of <strong>the</strong>with tag. Using QuerySet.exists() or QuerySet.count() at any point would cause additional queries.Use QuerySet.update() and delete()Ra<strong>the</strong>r than retrieve a load of objects, set some values, and save <strong>the</strong>m individual, use a bulk SQL UPDATE statement,via QuerySet.update(). Similarly, do bulk deletes where possible.Note, however, that <strong>the</strong>se bulk update methods cannot call <strong>the</strong> save() or delete() methods of individual instances,which means that any custom behaviour you have added for <strong>the</strong>se methods will not be executed, including anythingdriven from <strong>the</strong> normal database object signals.3.2. Models and databases 111
<strong>Django</strong> <strong>Documentation</strong>, Release 1.2Use foreign key values directlyIf you only need a foreign key value, use <strong>the</strong> foreign key value that is already on <strong>the</strong> object you’ve got, ra<strong>the</strong>r thangetting <strong>the</strong> whole related object and taking its primary key. i.e. do:entry.blog_idinstead of:entry.blog.id3.3 Handling HTTP requestsInformation on handling HTTP requests in <strong>Django</strong>:3.3.1 URL dispatcherA clean, elegant URL scheme is an important detail in a high-quality Web application. <strong>Django</strong> lets you design URLshowever you want, with no framework limitations.There’s no .php or .cgi required, and certainly none of that 0,2097,1-1-1928,00 nonsense.See Cool URIs don’t change, by World Wide Web creator Tim Berners-Lee, for excellent arguments on why URLsshould be clean and usable.OverviewTo design URLs for an app, you create a Python module informally called a URLconf (URL configuration). Thismodule is pure Python code and is a simple mapping between URL patterns (as simple regular expressions) to Pythoncallback functions (your views).This mapping can be as short or as long as needed. It can reference o<strong>the</strong>r mappings. And, because it’s pure Pythoncode, it can be constructed dynamically.How <strong>Django</strong> processes a requestWhen a user requests a page from your <strong>Django</strong>-powered site, this is <strong>the</strong> algorithm <strong>the</strong> system follows to determinewhich Python code to execute:1. <strong>Django</strong> determines <strong>the</strong> root URLconf module to use. Ordinarily, this is <strong>the</strong> value of <strong>the</strong> ROOT_URLCONFsetting, but if <strong>the</strong> incoming HttpRequest object has an attribute called urlconf (set by middleware requestprocessing), its value will be used in place of <strong>the</strong> ROOT_URLCONF setting.2. <strong>Django</strong> loads that Python module and looks for <strong>the</strong> variable urlpatterns. This should be a Python list, in<strong>the</strong> format returned by <strong>the</strong> function django.conf.urls.defaults.patterns().3. <strong>Django</strong> runs through each URL pattern, in order, and stops at <strong>the</strong> first one that matches <strong>the</strong> requested URL.4. Once one of <strong>the</strong> regexes matches, <strong>Django</strong> imports and calls <strong>the</strong> given view, which is a simple Python function.The view gets passed an HttpRequest as its first argument and any values captured in <strong>the</strong> regex as remainingarguments.112 Chapter 3. Using <strong>Django</strong>
<strong>Django</strong> <strong>Documentation</strong>, Release 1.2ExampleHere’s a sample URLconf:from django.conf.urls.defaults import *urlpatterns = patterns(’’,(r’^articles/2003/$’, ’news.views.special_case_2003’),(r’^articles/(\d{4})/$’, ’news.views.year_archive’),(r’^articles/(\d{4})/(\d{2})/$’, ’news.views.month_archive’),(r’^articles/(\d{4})/(\d{2})/(\d+)/$’, ’news.views.article_detail’),)Notes:• from django.conf.urls.defaults import * makes <strong>the</strong> patterns() function available.• To capture a value from <strong>the</strong> URL, just put paren<strong>the</strong>sis around it.• There’s no need to add a leading slash, because every URL has that. For example, it’s ^articles, not^/articles.• The ’r’ in front of each regular expression string is optional but recommended. It tells Python that a string is“raw” – that nothing in <strong>the</strong> string should be escaped. See Dive Into Python’s explanation.Example requests:• A request to /articles/2005/03/ would match <strong>the</strong> third entry in <strong>the</strong> list. <strong>Django</strong> would call <strong>the</strong> functionnews.views.month_archive(request, ’2005’, ’03’).• /articles/2005/3/ would not match any URL patterns, because <strong>the</strong> third entry in <strong>the</strong> list requires twodigits for <strong>the</strong> month.• /articles/2003/ would match <strong>the</strong> first pattern in <strong>the</strong> list, not <strong>the</strong> second one, because <strong>the</strong> patterns aretested in order, and <strong>the</strong> first one is <strong>the</strong> first test to pass. Feel free to exploit <strong>the</strong> ordering to insert special caseslike this.• /articles/2003 would not match any of <strong>the</strong>se patterns, because each pattern requires that <strong>the</strong> URL endwith a slash.• /articles/2003/03/3/ would match <strong>the</strong> final pattern. <strong>Django</strong> would call <strong>the</strong> functionnews.views.article_detail(request, ’2003’, ’03’, ’3’).Named groupsThe above example used simple, non-named regular-expression groups (via paren<strong>the</strong>sis) to capture bits of <strong>the</strong> URL andpass <strong>the</strong>m as positional arguments to a view. In more advanced usage, it’s possible to use named regular-expressiongroups to capture URL bits and pass <strong>the</strong>m as keyword arguments to a view.In Python regular expressions, <strong>the</strong> syntax for named regular-expression groups is (?Ppattern), wherename is <strong>the</strong> name of <strong>the</strong> group and pattern is some pattern to match.Here’s <strong>the</strong> above example URLconf, rewritten to use named groups:urlpatterns = patterns(’’,(r’^articles/2003/$’, ’news.views.special_case_2003’),(r’^articles/(?P\d{4})/$’, ’news.views.year_archive’),(r’^articles/(?P\d{4})/(?P\d{2})/$’, ’news.views.month_archive’),(r’^articles/(?P\d{4})/(?P\d{2})/(?P\d+)/$’, ’news.views.article_detail’),)3.3. Handling HTTP requests 113
<strong>Django</strong> <strong>Documentation</strong>, Release 1.2This accomplishes exactly <strong>the</strong> same thing as <strong>the</strong> previous example, with one subtle difference: The captured valuesare passed to view functions as keyword arguments ra<strong>the</strong>r than positional arguments. For example:• A request to /articles/2005/03/ would call <strong>the</strong> function news.views.month_archive(request,year=’2005’, month=’03’), instead of news.views.month_archive(request, ’2005’,’03’).• A request to /articles/2003/03/3/ would call <strong>the</strong> function news.views.article_detail(request,year=’2003’, month=’03’, day=’3’).In practice, this means your URLconfs are slightly more explicit and less prone to argument-order bugs – and you canreorder <strong>the</strong> arguments in your views’ function definitions. Of course, <strong>the</strong>se benefits come at <strong>the</strong> cost of brevity; somedevelopers find <strong>the</strong> named-group syntax ugly and too verbose.The matching/grouping algorithmHere’s <strong>the</strong> algorithm <strong>the</strong> URLconf parser follows, with respect to named groups vs. non-named groups in a regularexpression:If <strong>the</strong>re are any named arguments, it will use those, ignoring non-named arguments. O<strong>the</strong>rwise, it will pass all nonnamedarguments as positional arguments.In both cases, it will pass any extra keyword arguments as keyword arguments. See “Passing extra options to viewfunctions” below.What <strong>the</strong> URLconf searches againstThe URLconf searches against <strong>the</strong> requested URL, as a normal Python string. This does not include GET or POSTparameters, or <strong>the</strong> domain name.For example, in a request to http://www.example.com/myapp/, <strong>the</strong> URLconf will look for myapp/.In a request to http://www.example.com/myapp/?page=3, <strong>the</strong> URLconf will look for myapp/.The URLconf doesn’t look at <strong>the</strong> request method. In o<strong>the</strong>r words, all request methods – POST, GET, HEAD, etc. – willbe routed to <strong>the</strong> same function for <strong>the</strong> same URL.Syntax of <strong>the</strong> urlpatterns variableurlpatterns should be a Python list, in <strong>the</strong> format returned by <strong>the</strong> functiondjango.conf.urls.defaults.patterns(). Always use patterns() to create <strong>the</strong> urlpatternsvariable.Convention is to use from django.conf.urls.defaults import * at <strong>the</strong> top of your URLconf. Thisgives your module access to <strong>the</strong>se objects:patternspatterns(prefix, pattern_description, ...)A function that takes a prefix, and an arbitrary number of URL patterns, and returns a list of URL patterns in <strong>the</strong> format<strong>Django</strong> needs.The first argument to patterns() is a string prefix. See The view prefix below.The remaining arguments should be tuples in this format:114 Chapter 3. Using <strong>Django</strong>
<strong>Django</strong> <strong>Documentation</strong>, Release 1.2(regular expression, Python callback function [, optional dictionary [, optional name]])...where optional dictionary and optional name are optional. (See Passing extra options to view functionsbelow.)Note: Because patterns() is a function call, it accepts a maximum of 255 arguments (URL patterns, in this case).This is a limit for all Python function calls. This is rarely a problem in practice, because you’ll typically structure yourURL patterns modularly by using include() sections. However, on <strong>the</strong> off-chance you do hit <strong>the</strong> 255-argument limit,realize that patterns() returns a Python list, so you can split up <strong>the</strong> construction of <strong>the</strong> list.urlpatterns = patterns(’’,...)urlpatterns += patterns(’’,...)Python lists have unlimited size, so <strong>the</strong>re’s no limit to how many URL patterns you can construct. The only limit isthat you can only create 254 at a time (<strong>the</strong> 255th argument is <strong>the</strong> initial prefix argument).urlNew in version 1.0: Please, see <strong>the</strong> release notesurl(regex, view, kwargs=None, name=None, prefix=’‘)You can use <strong>the</strong> url() function, instead of a tuple, as an argument to patterns(). This is convenient if you wantto specify a name without <strong>the</strong> optional extra arguments dictionary. For example:urlpatterns = patterns(’’,url(r’^index/$’, index_view, name="main-view"),...)This function takes five arguments, most of which are optional:url(regex, view, kwargs=None, name=None, prefix=’’)See Naming URL patterns for why <strong>the</strong> name parameter is useful.The prefix parameter has <strong>the</strong> same meaning as <strong>the</strong> first argument to patterns() and is only relevant when you’repassing a string as <strong>the</strong> view parameter.handler404handler404A callable, or a string representing <strong>the</strong> full Python import path to <strong>the</strong> view that should be called if none of <strong>the</strong> URLpatterns match.By default, this is ’django.views.defaults.page_not_found’. That default value should suffice.Changed in version 1.2: Previous versions of <strong>Django</strong> only accepted strings representing import paths.3.3. Handling HTTP requests 115
<strong>Django</strong> <strong>Documentation</strong>, Release 1.2handler500handler500A callable, or a string representing <strong>the</strong> full Python import path to <strong>the</strong> view that should be called in case of server errors.Server errors happen when you have runtime errors in view code.By default, this is ’django.views.defaults.server_error’. That default value should suffice. Changedin version 1.2: Previous versions of <strong>Django</strong> only accepted strings representing import paths.includeinclude()A function that takes a full Python import path to ano<strong>the</strong>r URLconf module that should be “included” in this place.New in version 1.1: Please, see <strong>the</strong> release notes include() also accepts as an argument an iterable that returnsURL patterns.See Including o<strong>the</strong>r URLconfs below.Notes on capturing text in URLsEach captured argument is sent to <strong>the</strong> view as a plain Python string, regardless of what sort of match <strong>the</strong> regularexpression makes. For example, in this URLconf line:(r’^articles/(?P\d{4})/$’, ’news.views.year_archive’),...<strong>the</strong> year argument to news.views.year_archive() will be a string, not an integer, even though <strong>the</strong> \d{4}will only match integer strings.A convenient trick is to specify default parameters for your views’ arguments. Here’s an example URLconf and view:# URLconfurlpatterns = patterns(’’,(r’^blog/$’, ’blog.views.page’),(r’^blog/page(?P\d+)/$’, ’blog.views.page’),)# View (in blog/views.py)def page(request, num="1"):# Output <strong>the</strong> appropriate page of blog entries, according to num.In <strong>the</strong> above example, both URL patterns point to <strong>the</strong> same view – blog.views.page – but <strong>the</strong> first pattern doesn’tcapture anything from <strong>the</strong> URL. If <strong>the</strong> first pattern matches, <strong>the</strong> page() function will use its default argument fornum, "1". If <strong>the</strong> second pattern matches, page() will use whatever num value was captured by <strong>the</strong> regex.PerformanceEach regular expression in a urlpatterns is compiled <strong>the</strong> first time it’s accessed. This makes <strong>the</strong> system blazinglyfast.The view prefixYou can specify a common prefix in your patterns() call, to cut down on code duplication.116 Chapter 3. Using <strong>Django</strong>
<strong>Django</strong> <strong>Documentation</strong>, Release 1.2Here’s <strong>the</strong> example URLconf from <strong>the</strong> <strong>Django</strong> overview:from django.conf.urls.defaults import *urlpatterns = patterns(’’,(r’^articles/(\d{4})/$’, ’news.views.year_archive’),(r’^articles/(\d{4})/(\d{2})/$’, ’news.views.month_archive’),(r’^articles/(\d{4})/(\d{2})/(\d+)/$’, ’news.views.article_detail’),)In this example, each view has a common prefix – ’news.views’. Instead of typing that out for each entry inurlpatterns, you can use <strong>the</strong> first argument to <strong>the</strong> patterns() function to specify a prefix to apply to eachview function.With this in mind, <strong>the</strong> above example can be written more concisely as:from django.conf.urls.defaults import *urlpatterns = patterns(’news.views’,(r’^articles/(\d{4})/$’, ’year_archive’),(r’^articles/(\d{4})/(\d{2})/$’, ’month_archive’),(r’^articles/(\d{4})/(\d{2})/(\d+)/$’, ’article_detail’),)Note that you don’t put a trailing dot (".") in <strong>the</strong> prefix. <strong>Django</strong> puts that in automatically.Multiple view prefixesIn practice, you’ll probably end up mixing and matching views to <strong>the</strong> point where <strong>the</strong> views in your urlpatternswon’t have a common prefix. However, you can still take advantage of <strong>the</strong> view prefix shortcut to remove duplication.Just add multiple patterns() objects toge<strong>the</strong>r, like this:Old:from django.conf.urls.defaults import *urlpatterns = patterns(’’,(r’^$’, ’django.views.generic.date_based.archive_index’),(r’^(?P\d{4})/(?P[a-z]{3})/$’, ’django.views.generic.date_based.archive_month’),(r’^tag/(?P\w+)/$’, ’weblog.views.tag’),)New:from django.conf.urls.defaults import *urlpatterns = patterns(’django.views.generic.date_based’,(r’^$’, ’archive_index’),(r’^(?P\d{4})/(?P[a-z]{3})/$’,’archive_month’),)urlpatterns += patterns(’weblog.views’,(r’^tag/(?P\w+)/$’, ’tag’),)3.3. Handling HTTP requests 117
<strong>Django</strong> <strong>Documentation</strong>, Release 1.2Including o<strong>the</strong>r URLconfsAt any point, your urlpatterns can “include” o<strong>the</strong>r URLconf modules. This essentially “roots” a set of URLsbelow o<strong>the</strong>r ones.For example, here’s <strong>the</strong> URLconf for <strong>the</strong> <strong>Django</strong> Web site itself. It includes a number of o<strong>the</strong>r URLconfs:from django.conf.urls.defaults import *urlpatterns = patterns(’’,(r’^weblog/’, include(’django_website.apps.blog.urls.blog’)),(r’^documentation/’, include(’django_website.apps.docs.urls.docs’)),(r’^comments/’, include(’django.contrib.comments.urls’)),)Note that <strong>the</strong> regular expressions in this example don’t have a $ (end-of-string match character) but do include atrailing slash. Whenever <strong>Django</strong> encounters include(), it chops off whatever part of <strong>the</strong> URL matched up to thatpoint and sends <strong>the</strong> remaining string to <strong>the</strong> included URLconf for fur<strong>the</strong>r processing. New in version 1.1: Please,see <strong>the</strong> release notes Ano<strong>the</strong>r possibility is to include additional URL patterns not by specifying <strong>the</strong> URLconf Pythonmodule defining <strong>the</strong>m as <strong>the</strong> include argument but by using directly <strong>the</strong> pattern list as returned by patterns instead. Forexample:from django.conf.urls.defaults import *extra_patterns = patterns(’’,url(r’reports/(?P\d+)/$’, ’credit.views.report’, name=’credit-reports’),url(r’charge/$’, ’credit.views.charge’, name=’credit-charge’),)urlpatterns = patterns(’’,url(r’^$’, ’apps.main.views.homepage’, name=’site-homepage’),(r’^help/’, include(’apps.help.urls’)),(r’^credit/’, include(extra_patterns)),)This approach can be seen in use when you deploy an instance of <strong>the</strong> <strong>Django</strong> Admin application. The <strong>Django</strong> Adminis deployed as instances of a AdminSite; each AdminSite instance has an attribute urls that returns <strong>the</strong> urlpatterns available to that instance. It is this attribute that you include() into your projects urlpatterns whenyou deploy <strong>the</strong> admin instance.Captured parametersAn included URLconf receives any captured parameters from parent URLconfs, so <strong>the</strong> following example is valid:# In settings/urls/main.pyurlpatterns = patterns(’’,(r’^(?P\w+)/blog/’, include(’foo.urls.blog’)),)# In foo/urls/blog.pyurlpatterns = patterns(’foo.views’,(r’^$’, ’blog.index’),(r’^archive/$’, ’blog.archive’),)In <strong>the</strong> above example, <strong>the</strong> captured "username" variable is passed to <strong>the</strong> included URLconf, as expected.118 Chapter 3. Using <strong>Django</strong>
<strong>Django</strong> <strong>Documentation</strong>, Release 1.2Defining URL NamespacesWhen you need to deploy multiple instances of a single application, it can be helpful to be able to differentiatebetween instances. This is especially important when using named URL patterns, since multiple instances of a singleapplication will share named URLs. Namespaces provide a way to tell <strong>the</strong>se named URLs apart.A URL namespace comes in two parts, both of which are strings:• An application namespace. This describes <strong>the</strong> name of <strong>the</strong> application that is being deployed. Every instanceof a single application will have <strong>the</strong> same application namespace. For example, <strong>Django</strong>’s admin application has<strong>the</strong> somewhat predictable application namespace of admin.• An instance namespace. This identifies a specific instance of an application. Instance namespaces shouldbe unique across your entire project. However, an instance namespace can be <strong>the</strong> same as <strong>the</strong> applicationnamespace. This is used to specify a default instance of an application. For example, <strong>the</strong> default <strong>Django</strong> Admininstance has an instance namespace of admin.URL Namespaces can be specified in two ways.Firstly, you can provide <strong>the</strong> application and instance namespace as arguments to include() when you constructyour URL patterns. For example,:(r’^help/’, include(’apps.help.urls’, namespace=’foo’, app_name=’bar’)),This will include <strong>the</strong> URLs defined in apps.help.urls into <strong>the</strong> application namespace bar, with <strong>the</strong> instancenamespace foo.Secondly, you can include an object that contains embedded namespace data. If you include() a patternsobject, that object will be added to <strong>the</strong> global namespace. However, you can also include() an object that containsa 3-tuple containing:(, , )This will include <strong>the</strong> nominated URL patterns into <strong>the</strong> given application and instance namespace. For example, <strong>the</strong>urls attribute of <strong>Django</strong>’s AdminSite object returns a 3-tuple that contains all <strong>the</strong> patterns in an admin site, plus<strong>the</strong> name of <strong>the</strong> admin instance, and <strong>the</strong> application namespace admin.Once you have defined namespaced URLs, you can reverse <strong>the</strong>m. For details on reversing namespaced urls, see <strong>the</strong>documentation on reversing namespaced URLs.Passing extra options to view functionsURLconfs have a hook that lets you pass extra arguments to your view functions, as a Python dictionary.Any URLconf tuple can have an optional third element, which should be a dictionary of extra keyword arguments topass to <strong>the</strong> view function.For example:urlpatterns = patterns(’blog.views’,(r’^blog/(?P\d{4})/$’, ’year_archive’, {’foo’: ’bar’}),)In this example, for a request to /blog/2005/, <strong>Django</strong> will call <strong>the</strong> blog.views.year_archive() view,passing it <strong>the</strong>se keyword arguments:year=’2005’, foo=’bar’This technique is used in generic views and in <strong>the</strong> syndication framework to pass metadata and options to views.3.3. Handling HTTP requests 119
<strong>Django</strong> <strong>Documentation</strong>, Release 1.2Dealing with conflictsIt’s possible to have a URL pattern which captures named keyword arguments, and also passes arguments with <strong>the</strong>same names in its dictionary of extra arguments. When this happens, <strong>the</strong> arguments in <strong>the</strong> dictionary will be usedinstead of <strong>the</strong> arguments captured in <strong>the</strong> URL.Passing extra options to include()Similarly, you can pass extra options to include(). When you pass extra options to include(), each line in <strong>the</strong>included URLconf will be passed <strong>the</strong> extra options.For example, <strong>the</strong>se two URLconf sets are functionally identical:Set one:# main.pyurlpatterns = patterns(’’,(r’^blog/’, include(’inner’), {’blogid’: 3}),)# inner.pyurlpatterns = patterns(’’,(r’^archive/$’, ’mysite.views.archive’),(r’^about/$’, ’mysite.views.about’),)Set two:# main.pyurlpatterns = patterns(’’,(r’^blog/’, include(’inner’)),)# inner.pyurlpatterns = patterns(’’,(r’^archive/$’, ’mysite.views.archive’, {’blogid’: 3}),(r’^about/$’, ’mysite.views.about’, {’blogid’: 3}),)Note that extra options will always be passed to every line in <strong>the</strong> included URLconf, regardless of whe<strong>the</strong>r <strong>the</strong> line’sview actually accepts those options as valid. For this reason, this technique is only useful if you’re certain that everyview in <strong>the</strong> included URLconf accepts <strong>the</strong> extra options you’re passing.Passing callable objects instead of stringsSome developers find it more natural to pass <strong>the</strong> actual Python function object ra<strong>the</strong>r than a string containing <strong>the</strong> pathto its module. This alternative is supported – you can pass any callable object as <strong>the</strong> view.For example, given this URLconf in “string” notation:urlpatterns = patterns(’’,(r’^archive/$’, ’mysite.views.archive’),(r’^about/$’, ’mysite.views.about’),(r’^contact/$’, ’mysite.views.contact’),)You can accomplish <strong>the</strong> same thing by passing objects ra<strong>the</strong>r than strings. Just be sure to import <strong>the</strong> objects:120 Chapter 3. Using <strong>Django</strong>
<strong>Django</strong> <strong>Documentation</strong>, Release 1.2from mysite.views import archive, about, contacturlpatterns = patterns(’’,(r’^archive/$’, archive),(r’^about/$’, about),(r’^contact/$’, contact),)The following example is functionally identical. It’s just a bit more compact because it imports <strong>the</strong> module thatcontains <strong>the</strong> views, ra<strong>the</strong>r than importing each view individually:from mysite import viewsurlpatterns = patterns(’’,(r’^archive/$’, views.archive),(r’^about/$’, views.about),(r’^contact/$’, views.contact),)The style you use is up to you.Note that if you use this technique – passing objects ra<strong>the</strong>r than strings – <strong>the</strong> view prefix (as explained in “The viewprefix” above) will have no effect.Naming URL patternsNew in version 1.0: Please, see <strong>the</strong> release notes It’s fairly common to use <strong>the</strong> same view function in multiple URLpatterns in your URLconf. For example, <strong>the</strong>se two URL patterns both point to <strong>the</strong> archive view:urlpatterns = patterns(’’,(r’^archive/(\d{4})/$’, archive),(r’^archive-summary/(\d{4})/$’, archive, {’summary’: True}),)This is completely valid, but it leads to problems when you try to do reverse URL matching (through <strong>the</strong>permalink() decorator or <strong>the</strong> url template tag). Continuing this example, if you wanted to retrieve <strong>the</strong> URLfor <strong>the</strong> archive view, <strong>Django</strong>’s reverse URL matcher would get confused, because two URLpatterns point at thatview.To solve this problem, <strong>Django</strong> supports named URL patterns. That is, you can give a name to a URL pattern in orderto distinguish it from o<strong>the</strong>r patterns using <strong>the</strong> same view and parameters. Then, you can use this name in reverse URLmatching.Here’s <strong>the</strong> above example, rewritten to use named URL patterns:urlpatterns = patterns(’’,url(r’^archive/(\d{4})/$’, archive, name="full-archive"),url(r’^archive-summary/(\d{4})/$’, archive, {’summary’: True}, "arch-summary"),)With <strong>the</strong>se names in place (full-archive and arch-summary), you can target each pattern individually byusing its name:{% url arch-summary 1945 %}{% url full-archive 2007 %}Even though both URL patterns refer to <strong>the</strong> archive view here, using <strong>the</strong> name parameter to url() allows you totell <strong>the</strong>m apart in templates.3.3. Handling HTTP requests 121
<strong>Django</strong> <strong>Documentation</strong>, Release 1.2The string used for <strong>the</strong> URL name can contain any characters you like. You are not restricted to valid Python names.Note: When you name your URL patterns, make sure you use names that are unlikely to clash with any o<strong>the</strong>rapplication’s choice of names. If you call your URL pattern comment, and ano<strong>the</strong>r application does <strong>the</strong> same thing,<strong>the</strong>re’s no guarantee which URL will be inserted into your template when you use this name.Putting a prefix on your URL names, perhaps derived from <strong>the</strong> application name, will decrease <strong>the</strong> chances of collision.We recommend something like myapp-comment instead of comment.URL namespacesNew in version 1.1: Please, see <strong>the</strong> release notes Namespaced URLs are specified using <strong>the</strong> : operator. For example,<strong>the</strong> main index page of <strong>the</strong> admin application is referenced using admin:index. This indicates a namespace ofadmin, and a named URL of index.Namespaces can also be nested. The named URL foo:bar:whiz would look for a pattern named whiz in <strong>the</strong>namespace bar that is itself defined within <strong>the</strong> top-level namespace foo.When given a namespaced URL (e.g. myapp:index) to resolve, <strong>Django</strong> splits <strong>the</strong> fully qualified name into parts,and <strong>the</strong>n tries <strong>the</strong> following lookup:1. First, <strong>Django</strong> looks for a matching application namespace (in this example, myapp). This will yield a list ofinstances of that application.2. If <strong>the</strong>re is a current application defined, <strong>Django</strong> finds and returns <strong>the</strong> URL resolver for that instance. The currentapplication can be specified as an attribute on <strong>the</strong> template context - applications that expect to have multipledeployments should set <strong>the</strong> current_app attribute on any Context or RequestContext that is used torender a template.The current application can also be specified manually as an argument to <strong>the</strong> reverse() function.3. If <strong>the</strong>re is no current application. <strong>Django</strong> looks for a default application instance. The default applicationinstance is <strong>the</strong> instance that has an instance namespace matching <strong>the</strong> application namespace (in this example, aninstance of <strong>the</strong> myapp called myapp).4. If <strong>the</strong>re is no default application instance, <strong>Django</strong> will pick <strong>the</strong> last deployed instance of <strong>the</strong> application, whateverits instance name may be.5. If <strong>the</strong> provided namespace doesn’t match an application namespace in step 1, <strong>Django</strong> will attempt a direct lookupof <strong>the</strong> namespace as an instance namespace.If <strong>the</strong>re are nested namespaces, <strong>the</strong>se steps are repeated for each part of <strong>the</strong> namespace until only <strong>the</strong> view name isunresolved. The view name will <strong>the</strong>n be resolved into a URL in <strong>the</strong> namespace that has been found.To show this resolution strategy in action, consider an example of two instances of myapp: one called foo, and onecalled bar. myapp has a main index page with a URL named index. Using this setup, <strong>the</strong> following lookups arepossible:• If one of <strong>the</strong> instances is current - say, if we were rendering a utility page in <strong>the</strong> instance bar - myapp:indexwill resolve to <strong>the</strong> index page of <strong>the</strong> instance bar.• If <strong>the</strong>re is no current instance - say, if we were rendering a page somewhere else on <strong>the</strong> site - myapp:indexwill resolve to <strong>the</strong> last registered instance of myapp. Since <strong>the</strong>re is no default instance, <strong>the</strong> last instance ofmyapp that is registered will be used. This could be foo or bar, depending on <strong>the</strong> order <strong>the</strong>y are introducedinto <strong>the</strong> urlpatterns of <strong>the</strong> project.• foo:index will always resolve to <strong>the</strong> index page of <strong>the</strong> instance foo.If <strong>the</strong>re was also a default instance - i.e., an instance named myapp - <strong>the</strong> following would happen:122 Chapter 3. Using <strong>Django</strong>
<strong>Django</strong> <strong>Documentation</strong>, Release 1.2• If one of <strong>the</strong> instances is current - say, if we were rendering a utility page in <strong>the</strong> instance bar - myapp:indexwill resolve to <strong>the</strong> index page of <strong>the</strong> instance bar.• If <strong>the</strong>re is no current instance - say, if we were rendering a page somewhere else on <strong>the</strong> site - myapp:indexwill resolve to <strong>the</strong> index page of <strong>the</strong> default instance.• foo:index will again resolve to <strong>the</strong> index page of <strong>the</strong> instance foo.Utility methodsreverse()If you need to use something similar to <strong>the</strong> url template tag in your code, <strong>Django</strong> provides <strong>the</strong> following method (in<strong>the</strong> django.core.urlresolvers module):reverse(viewname, urlconf=None, args=None, kwargs=None, current_app=None)viewname is ei<strong>the</strong>r <strong>the</strong> function name (ei<strong>the</strong>r a function reference, or <strong>the</strong> string version of <strong>the</strong> name, if you usedthat form in urlpatterns) or <strong>the</strong> URL pattern name. Normally, you won’t need to worry about <strong>the</strong> urlconfparameter and will only pass in <strong>the</strong> positional and keyword arguments to use in <strong>the</strong> URL matching. For example:from django.core.urlresolvers import reversedef myview(request):return HttpResponseRedirect(reverse(’arch-summary’, args=[1945]))The reverse() function can reverse a large variety of regular expression patterns for URLs, but not every possibleone. The main restriction at <strong>the</strong> moment is that <strong>the</strong> pattern cannot contain alternative choices using <strong>the</strong> vertical bar("|") character. You can quite happily use such patterns for matching against incoming URLs and sending <strong>the</strong>m offto views, but you cannot reverse such patterns. New in version 1.1: Please, see <strong>the</strong> release notes The current_appargument allows you to provide a hint to <strong>the</strong> resolver indicating <strong>the</strong> application to which <strong>the</strong> currently executing viewbelongs. This current_app argument is used as a hint to resolve application namespaces into URLs on specificapplication instances, according to <strong>the</strong> namespaced URL resolution strategy.Make sure your views are all correct.As part of working out which URL names map to which patterns, <strong>the</strong> reverse() function has to import all of yourURLconf files and examine <strong>the</strong> name of each view. This involves importing each view function. If <strong>the</strong>re are any errorswhilst importing any of your view functions, it will cause reverse() to raise an error, even if that view function isnot <strong>the</strong> one you are trying to reverse.Make sure that any views you reference in your URLconf files exist and can be imported correctly. Do not includelines that reference views you haven’t written yet, because those views will not be importable.resolve()The django.core.urlresolvers.resolve() function can be used for resolving URL paths to <strong>the</strong> correspondingview functions. It has <strong>the</strong> following signature:resolve(path, urlconf=None)path is <strong>the</strong> URL path you want to resolve. As with reverse(), you don’t need to worry about <strong>the</strong> urlconfparameter. The function returns <strong>the</strong> triple (view function, arguments, keyword arguments).If <strong>the</strong> URL does not resolve, <strong>the</strong> function raises an Http404 exception.For example, it can be used for testing if a view would raise a Http404 error before redirecting to it:3.3. Handling HTTP requests 123
<strong>Django</strong> <strong>Documentation</strong>, Release 1.2from urlparse import urlparsefrom django.core.urlresolvers import resolvefrom django.http import HttpResponseRedirect, Http404def myview(request):next = request.META.get(’HTTP_REFERER’, None) or ’/’response = HttpResponseRedirect(next)# modify <strong>the</strong> request and response as required, e.g. change locale# and set corresponding locale cookieview, args, kwargs = resolve(urlparse(next)[2])kwargs[’request’] = requesttry:view(*args, **kwargs)except Http404:return HttpResponseRedirect(’/’)return responsepermalink()The django.db.models.permalink() decorator is useful for writing short methods that return a full URLpath. For example, a model’s get_absolute_url() method. See django.db.models.permalink() formore.get_script_prefix()get_script_prefix()New in version 1.0: Please, see <strong>the</strong> release notes Normally, you should always use reverse() or permalink()to define URLs within your application. However, if your application constructs part of <strong>the</strong> URL hierarchy itself,you may occasionally need to generate URLs. In that case, you need to be able to find <strong>the</strong> base URL of <strong>the</strong><strong>Django</strong> project within its web server (normally, reverse() takes care of this for you). In that case, you cancall get_script_prefix(), which will return <strong>the</strong> script prefix portion of <strong>the</strong> URL for your <strong>Django</strong> project.If your <strong>Django</strong> project is at <strong>the</strong> root of its webserver, this is always "/", but it can be changed, for instance by usingdjango.root (see How to use <strong>Django</strong> with Apache and mod_python).3.3.2 Writing ViewsA view function, or view for short, is simply a Python function that takes a Web request and returns a Web response.This response can be <strong>the</strong> HTML contents of a Web page, or a redirect, or a 404 error, or an XML document, or animage . . . or anything, really. The view itself contains whatever arbitrary logic is necessary to return that response.This code can live anywhere you want, as long as it’s on your Python path. There’s no o<strong>the</strong>r requirement–no “magic,”so to speak. For <strong>the</strong> sake of putting <strong>the</strong> code somewhere, let’s create a file called views.py in <strong>the</strong> mysite directory,which you created in <strong>the</strong> previous chapter.A simple viewHere’s a view that returns <strong>the</strong> current date and time, as an HTML document:124 Chapter 3. Using <strong>Django</strong>
<strong>Django</strong> <strong>Documentation</strong>, Release 1.2from django.http import HttpResponseimport datetimedef current_datetime(request):now = datetime.datetime.now()html = "It is now %s." % nowreturn HttpResponse(html)Let’s step through this code one line at a time:• First, we import <strong>the</strong> class HttpResponse from <strong>the</strong> django.http module, along with Python’s datetimelibrary.• Next, we define a function called current_datetime. This is <strong>the</strong> view function. Each view function takesan HttpRequest object as its first parameter, which is typically named request.Note that <strong>the</strong> name of <strong>the</strong> view function doesn’t matter; it doesn’t have to be named in a certain way in order for<strong>Django</strong> to recognize it. We’re calling it current_datetime here, because that name clearly indicates whatit does.• The view returns an HttpResponse object that contains <strong>the</strong> generated response. Each view function is responsiblefor returning an HttpResponse object. (There are exceptions, but we’ll get to those later.)<strong>Django</strong>’s Time Zone<strong>Django</strong> includes a TIME_ZONE setting that defaults to America/Chicago. This probably isn’t where you live, soyou might want to change it in your settings file.Mapping URLs to ViewsSo, to recap, this view function returns an HTML page that includes <strong>the</strong> current date and time. To display this view ata particular URL, you’ll need to create a URLconf ; see URL dispatcher for instructions.Returning errorsReturning HTTP error codes in <strong>Django</strong> is easy. There are subclasses of HttpResponse for a number of commonHTTP status codes o<strong>the</strong>r than 200 (which means “OK”). You can find <strong>the</strong> full list of available subclasses in <strong>the</strong> request/responsedocumentation. Just return an instance of one of those subclasses instead of a normal HttpResponsein order to signify an error. For example:def my_view(request):# ...if foo:return HttpResponseNotFound(’Page not found’)else:return HttpResponse(’Page was found’)There isn’t a specialized subclass for every possible HTTP response code, since many of <strong>the</strong>m aren’t going to be thatcommon. However, as documented in <strong>the</strong> HttpResponse documentation, you can also pass <strong>the</strong> HTTP status codeinto <strong>the</strong> constructor for HttpResponse to create a return class for any status code you like. For example:def my_view(request):# ...# Return a "created" (201) response code.return HttpResponse(status=201)3.3. Handling HTTP requests 125
<strong>Django</strong> <strong>Documentation</strong>, Release 1.2Because 404 errors are by far <strong>the</strong> most common HTTP error, <strong>the</strong>re’s an easier way to handle those errors.The Http404 exceptionclass django.http.Http404When you return an error such as HttpResponseNotFound, you’re responsible for defining <strong>the</strong> HTML of <strong>the</strong>resulting error page:return HttpResponseNotFound(’Page not found’)For convenience, and because it’s a good idea to have a consistent 404 error page across your site, <strong>Django</strong> providesan Http404 exception. If you raise Http404 at any point in a view function, <strong>Django</strong> will catch it and return <strong>the</strong>standard error page for your application, along with an HTTP error code 404.Example usage:from django.http import Http404def detail(request, poll_id):try:p = Poll.objects.get(pk=poll_id)except Poll.DoesNotExist:raise Http404return render_to_response(’polls/detail.html’, {’poll’: p})In order to use <strong>the</strong> Http404 exception to its fullest, you should create a template that is displayed when a 404 erroris raised. This template should be called 404.html and located in <strong>the</strong> top level of your template tree.Customizing error viewsThe 404 (page not found) viewWhen you raise an Http404 exception, <strong>Django</strong> loads a special view devoted to handling 404 errors. By default, it’s<strong>the</strong> view django.views.defaults.page_not_found, which loads and renders <strong>the</strong> template 404.html.This means you need to define a 404.html template in your root template directory. This template will be used forall 404 errors.This page_not_found view should suffice for 99% of Web applications, but if you want to override <strong>the</strong> 404 view,you can specify handler404 in your URLconf, like so:handler404 = ’mysite.views.my_custom_404_view’Behind <strong>the</strong> scenes, <strong>Django</strong> determines <strong>the</strong> 404 view by looking for handler404. By default, URLconfs contain <strong>the</strong>following line:from django.conf.urls.defaults import *That takes care of setting handler404 in <strong>the</strong> current module. As youcan see in django/conf/urls/defaults.py, handler404 is set to’django.views.defaults.page_not_found’ by default.Three things to note about 404 views:• The 404 view is also called if <strong>Django</strong> doesn’t find a match after checking every regular expression in <strong>the</strong>URLconf.126 Chapter 3. Using <strong>Django</strong>
<strong>Django</strong> <strong>Documentation</strong>, Release 1.2• If you don’t define your own 404 view – and simply use <strong>the</strong> default, which is recommended – you still haveone obligation: you must create a 404.html template in <strong>the</strong> root of your template directory. The default 404view will use that template for all 404 errors. The default 404 view will pass one variable to <strong>the</strong> template:request_path, which is <strong>the</strong> URL that resulted in <strong>the</strong> 404.• The 404 view is passed a RequestContext and will have access to variables supplied by yourTEMPLATE_CONTEXT_PROCESSORS setting (e.g., MEDIA_URL).• If DEBUG is set to True (in your settings module), <strong>the</strong>n your 404 view will never be used, and <strong>the</strong> tracebackwill be displayed instead.The 500 (server error) viewSimilarly, <strong>Django</strong> executes special-case behavior in <strong>the</strong> case of runtime errors in view code. If a view results in anexception, <strong>Django</strong> will, by default, call <strong>the</strong> view django.views.defaults.server_error, which loads andrenders <strong>the</strong> template 500.html.This means you need to define a 500.html template in your root template directory. This template will be used forall server errors. The default 500 view passes no variables to this template and is rendered with an empty Contextto lessen <strong>the</strong> chance of additional errors.This server_error view should suffice for 99% of Web applications, but if you want to override <strong>the</strong> view, you canspecify handler500 in your URLconf, like so:handler500 = ’mysite.views.my_custom_error_view’Behind <strong>the</strong> scenes, <strong>Django</strong> determines <strong>the</strong> error view by looking for handler500. By default, URLconfs contain<strong>the</strong> following line:from django.conf.urls.defaults import *That takes care of setting handler500 in <strong>the</strong> current module. As youcan see in django/conf/urls/defaults.py, handler500 is set to’django.views.defaults.server_error’ by default.3.3.3 File UploadsNew in version 1.0: Please, see <strong>the</strong> release notes When <strong>Django</strong> handles a file upload, <strong>the</strong> file data ends up placed inrequest.FILES (for more on <strong>the</strong> request object see <strong>the</strong> documentation for request and response objects). Thisdocument explains how files are stored on disk and in memory, and how to customize <strong>the</strong> default behavior.Basic file uploadsConsider a simple form containing a FileField:from django import formsclass UploadFileForm(forms.Form):title = forms.CharField(max_length=50)file = forms.FileField()A view handling this form will receive <strong>the</strong> file data in request.FILES, which is a dictionary containing a key foreach FileField (or ImageField, or o<strong>the</strong>r FileField subclass) in <strong>the</strong> form. So <strong>the</strong> data from <strong>the</strong> above formwould be accessible as request.FILES[’file’].3.3. Handling HTTP requests 127
<strong>Django</strong> <strong>Documentation</strong>, Release 1.2Note that request.FILES will only contain data if <strong>the</strong> request method was POST and <strong>the</strong> that posted <strong>the</strong>request has <strong>the</strong> attribute enctype="multipart/form-data". O<strong>the</strong>rwise, request.FILES will be empty.Most of <strong>the</strong> time, you’ll simply pass <strong>the</strong> file data from request into <strong>the</strong> form as described in Binding uploaded filesto a form. This would look something like:from django.http import HttpResponseRedirectfrom django.shortcuts import render_to_response# Imaginary function to handle an uploaded file.from somewhere import handle_uploaded_filedef upload_file(request):if request.method == ’POST’:form = UploadFileForm(request.POST, request.FILES)if form.is_valid():handle_uploaded_file(request.FILES[’file’])return HttpResponseRedirect(’/success/url/’)else:form = UploadFileForm()return render_to_response(’upload.html’, {’form’: form})Notice that we have to pass request.FILES into <strong>the</strong> form’s constructor; this is how file data gets bound into aform.Handling uploaded filesThe final piece of <strong>the</strong> puzzle is handling <strong>the</strong> actual file data from request.FILES. Each entry in this dictionary isan UploadedFile object – a simple wrapper around an uploaded file. You’ll usually use one of <strong>the</strong>se methods toaccess <strong>the</strong> uploaded content:UploadedFile.read() <strong>Read</strong> <strong>the</strong> entire uploaded data from <strong>the</strong> file. Be careful with this method: if <strong>the</strong> uploadedfile is huge it can overwhelm your system if you try to read it into memory. You’ll probably want to usechunks() instead; see below.UploadedFile.multiple_chunks() Returns True if <strong>the</strong> uploaded file is big enough to require reading inmultiple chunks. By default this will be any file larger than 2.5 megabytes, but that’s configurable; see below.UploadedFile.chunks() A generator returning chunks of <strong>the</strong> file. If multiple_chunks() is True, youshould use this method in a loop instead of read().In practice, it’s often easiest simply to use chunks() all <strong>the</strong> time; see <strong>the</strong> example below.UploadedFile.name The name of <strong>the</strong> uploaded file (e.g. my_file.txt).UploadedFile.size The size, in bytes, of <strong>the</strong> uploaded file.There are a few o<strong>the</strong>r methods and attributes available on UploadedFile objects; see UploadedFile objects for acomplete reference.Putting it all toge<strong>the</strong>r, here’s a common way you might handle an uploaded file:def handle_uploaded_file(f):destination = open(’some/file/name.txt’, ’wb+’)for chunk in f.chunks():destination.write(chunk)destination.close()Looping over UploadedFile.chunks() instead of using read() ensures that large files don’t overwhelm yoursystem’s memory.128 Chapter 3. Using <strong>Django</strong>
<strong>Django</strong> <strong>Documentation</strong>, Release 1.2Where uploaded data is storedBefore you save uploaded files, <strong>the</strong> data needs to be stored somewhere.By default, if an uploaded file is smaller than 2.5 megabytes, <strong>Django</strong> will hold <strong>the</strong> entire contents of <strong>the</strong> upload inmemory. This means that saving <strong>the</strong> file involves only a read from memory and a write to disk and thus is very fast.However, if an uploaded file is too large, <strong>Django</strong> will write <strong>the</strong> uploaded file to a temporary file stored in your system’stemporary directory. On a Unix-like platform this means you can expect <strong>Django</strong> to generate a file called somethinglike /tmp/tmpzfp6I6.upload. If an upload is large enough, you can watch this file grow in size as <strong>Django</strong>streams <strong>the</strong> data onto disk.These specifics – 2.5 megabytes; /tmp; etc. – are simply “reasonable defaults”. <strong>Read</strong> on for details on how you cancustomize or completely replace upload behavior.Changing upload handler behaviorThree settings control <strong>Django</strong>’s file upload behavior:FILE_UPLOAD_MAX_MEMORY_SIZE The maximum size, in bytes, for files that will be uploaded into memory.Files larger than FILE_UPLOAD_MAX_MEMORY_SIZE will be streamed to disk.Defaults to 2.5 megabytes.FILE_UPLOAD_TEMP_DIR The directory where uploaded files larger thanFILE_UPLOAD_MAX_MEMORY_SIZE will be stored.Defaults to your system’s standard temporary directory (i.e. /tmp on most Unix-like systems).FILE_UPLOAD_PERMISSIONS The numeric mode (i.e. 0644) to set newly uploaded files to. For more informationabout what <strong>the</strong>se modes mean, see <strong>the</strong> documentation for os.chmodIf this isn’t given or is None, you’ll get operating-system dependent behavior. On most platforms, temporaryfiles will have a mode of 0600, and files saved from memory will be saved using <strong>the</strong> system’s standard umask.Warning: If you’re not familiar with file modes, please note that <strong>the</strong> leading 0 is very important: it indicatesan octal number, which is <strong>the</strong> way that modes must be specified. If you try to use 644, you’ll get totallyincorrect behavior.Always prefix <strong>the</strong> mode with a 0.FILE_UPLOAD_HANDLERS The actual handlers for uploaded files. Changing this setting allows complete customization– even replacement – of <strong>Django</strong>’s upload process. See upload handlers, below, for details.Defaults to:("django.core.files.uploadhandler.MemoryFileUploadHandler","django.core.files.uploadhandler.TemporaryFileUploadHandler",)Which means “try to upload to memory first, <strong>the</strong>n fall back to temporary files.”UploadedFile objectsclass UploadedFileIn addition to those inherited from File, all UploadedFile objects define <strong>the</strong> following methods/attributes:3.3. Handling HTTP requests 129
<strong>Django</strong> <strong>Documentation</strong>, Release 1.2UploadedFile.content_type The content-type header uploaded with <strong>the</strong> file (e.g. text/plain orapplication/pdf). Like any data supplied by <strong>the</strong> user, you shouldn’t trust that <strong>the</strong> uploaded file is actuallythis type. You’ll still need to validate that <strong>the</strong> file contains <strong>the</strong> content that <strong>the</strong> content-type header claims– “trust but verify.”UploadedFile.charset For text/* content-types, <strong>the</strong> character set (i.e. utf8) supplied by <strong>the</strong> browser.Again, “trust but verify” is <strong>the</strong> best policy here.UploadedFile.temporary_file_path() Only files uploaded onto disk will have this method; it returns <strong>the</strong>full path to <strong>the</strong> temporary uploaded file.Note: Like regular Python files, you can read <strong>the</strong> file line-by-line simply by iterating over <strong>the</strong> uploaded file:for line in uploadedfile:do_something_with(line)However, unlike standard Python files, UploadedFile only understands \n (also known as “Unix-style”) lineendings. If you know that you need to handle uploaded files with different line endings, you’ll need to do so in yourview.Upload HandlersWhen a user uploads a file, <strong>Django</strong> passes off <strong>the</strong> file data to an upload handler – a small class that handles file data asit gets uploaded. Upload handlers are initially defined in <strong>the</strong> FILE_UPLOAD_HANDLERS setting, which defaults to:("django.core.files.uploadhandler.MemoryFileUploadHandler","django.core.files.uploadhandler.TemporaryFileUploadHandler",)Toge<strong>the</strong>r <strong>the</strong> MemoryFileUploadHandler and TemporaryFileUploadHandler provide <strong>Django</strong>’s defaultfile upload behavior of reading small files into memory and large ones onto disk.You can write custom handlers that customize how <strong>Django</strong> handles files. You could, for example, use custom handlersto enforce user-level quotas, compress data on <strong>the</strong> fly, render progress bars, and even send data to ano<strong>the</strong>r storagelocation directly without storing it locally.Modifying upload handlers on <strong>the</strong> flySometimes particular views require different upload behavior. In <strong>the</strong>se cases, you can override upload handlers on aper-request basis by modifying request.upload_handlers. By default, this list will contain <strong>the</strong> upload handlersgiven by FILE_UPLOAD_HANDLERS, but you can modify <strong>the</strong> list as you would any o<strong>the</strong>r list.For instance, suppose you’ve written a ProgressBarUploadHandler that provides feedback on upload progressto some sort of AJAX widget. You’d add this handler to your upload handlers like this:request.upload_handlers.insert(0, ProgressBarUploadHandler())You’d probably want to use list.insert() in this case (instead of append()) because a progress bar handlerwould need to run before any o<strong>the</strong>r handlers. Remember, <strong>the</strong> upload handlers are processed in order.If you want to replace <strong>the</strong> upload handlers completely, you can just assign a new list:request.upload_handlers = [ProgressBarUploadHandler()]Note: You can only modify upload handlers before accessing request.POST or request.FILES – itdoesn’t make sense to change upload handlers after upload handling has already started. If you try to modify130 Chapter 3. Using <strong>Django</strong>
<strong>Django</strong> <strong>Documentation</strong>, Release 1.2request.upload_handlers after reading from request.POST or request.FILES <strong>Django</strong> will throw anerror.Thus, you should always modify uploading handlers as early in your view as possible.Also, request.POST is accessed by CsrfViewMiddleware which is enabled by default. This means you willprobably need to use csrf_exempt() on your view to allow you to change <strong>the</strong> upload handlers. Assuming youdo need CSRF protection, you will <strong>the</strong>n need to use csrf_protect() on <strong>the</strong> function that actually processes <strong>the</strong>request. Note that this means that <strong>the</strong> handlers may start receiving <strong>the</strong> file upload before <strong>the</strong> CSRF checks have beendone. Example code:from django.views.decorators.csrf import csrf_exempt, csrf_protect@csrf_exemptdef upload_file_view(request):request.upload_handlers.insert(0, ProgressBarUploadHandler())return _upload_file_view(request)@csrf_protectdef _upload_file_view(request):... # Process requestWriting custom upload handlersAll file upload handlers should be subclasses of django.core.files.uploadhandler.FileUploadHandler.You can define upload handlers wherever you wish.Required methodsCustom file upload handlers must define <strong>the</strong> following methods:FileUploadHandler.receive_data_chunk(self, raw_data, start) Receives a “chunk” of datafrom <strong>the</strong> file upload.raw_data is a byte string containing <strong>the</strong> uploaded data.start is <strong>the</strong> position in <strong>the</strong> file where this raw_data chunk begins.The data you return will get fed into <strong>the</strong> subsequent upload handlers’ receive_data_chunk methods. Inthis way, one handler can be a “filter” for o<strong>the</strong>r handlers.Return None from receive_data_chunk to sort-circuit remaining upload handlers from getting thischunk.. This is useful if you’re storing <strong>the</strong> uploaded data yourself and don’t want future handlers to store acopy of <strong>the</strong> data.If you raise a StopUpload or a SkipFile exception, <strong>the</strong> upload will abort or <strong>the</strong> file will be completelyskipped.FileUploadHandler.file_complete(self, file_size) Called when a file has finished uploading.The handler should return an UploadedFile object that will be stored in request.FILES. Handlers mayalso return None to indicate that <strong>the</strong> UploadedFile object should come from subsequent upload handlers.Optional methodsCustom upload handlers may also define any of <strong>the</strong> following optional methods or attributes:FileUploadHandler.chunk_size Size, in bytes, of <strong>the</strong> “chunks” <strong>Django</strong> should store into memoryand feed into <strong>the</strong> handler. That is, this attribute controls <strong>the</strong> size of chunks fed intoFileUploadHandler.receive_data_chunk.3.3. Handling HTTP requests 131
<strong>Django</strong> <strong>Documentation</strong>, Release 1.2For maximum performance <strong>the</strong> chunk sizes should be divisible by 4 and should not exceed 2 GB (2 31 bytes) insize. When <strong>the</strong>re are multiple chunk sizes provided by multiple handlers, <strong>Django</strong> will use <strong>the</strong> smallest chunksize defined by any handler.The default is 64*2 10 bytes, or 64 KB.FileUploadHandler.new_file(self, field_name, file_name, content_type, content_length, charsCallback signaling that a new file upload is starting. This is called before any data has been fed to any uploadhandlers.field_name is a string name of <strong>the</strong> file field.file_name is <strong>the</strong> unicode filename that was provided by <strong>the</strong> browser.content_type is <strong>the</strong> MIME type provided by <strong>the</strong> browser – E.g. ’image/jpeg’.content_length is <strong>the</strong> length of <strong>the</strong> image given by <strong>the</strong> browser. Sometimes this won’t be provided andwill be None.charset is <strong>the</strong> character set (i.e. utf8) given by <strong>the</strong> browser. Like content_length, this sometimeswon’t be provided.This method may raise a StopFutureHandlers exception to prevent future handlers from handling this file.FileUploadHandler.upload_complete(self) Callback signaling that <strong>the</strong> entire upload (all files) hascompleted.FileUploadHandler.handle_raw_input(self, input_data, META, content_length, boundary, encodiAllows <strong>the</strong> handler to completely override <strong>the</strong> parsing of <strong>the</strong> raw HTTP input.input_data is a file-like object that supports read()-ing.META is <strong>the</strong> same object as request.META.content_length is <strong>the</strong> length of <strong>the</strong> data in input_data. Don’t read more than content_lengthbytes from input_data.boundary is <strong>the</strong> MIME boundary for this request.encoding is <strong>the</strong> encoding of <strong>the</strong> request.Return None if you want upload handling to continue, or a tuple of (POST, FILES) if you want to return<strong>the</strong> new data structures suitable for <strong>the</strong> request directly.3.3.4 <strong>Django</strong> shortcut functionsThe package django.shortcuts collects helper functions and classes that “span” multiple levels of MVC. Ino<strong>the</strong>r words, <strong>the</strong>se functions/classes introduce controlled coupling for convenience’s sake.render_to_responserender_to_response(template[, dictionary][, context_instance][, mimetype])Renders a given template with a given context dictionary and returns an HttpResponse object with thatrendered text.Required argumentstemplate The full name of a template to use or sequence of template names. If a sequence is given, <strong>the</strong> firsttemplate that exists will be used. See <strong>the</strong> template loader documentation for more information on how templatesare found.132 Chapter 3. Using <strong>Django</strong>
<strong>Django</strong> <strong>Documentation</strong>, Release 1.2Optional argumentsdictionary A dictionary of values to add to <strong>the</strong> template context. By default, this is an empty dictionary. If avalue in <strong>the</strong> dictionary is callable, <strong>the</strong> view will call it just before rendering <strong>the</strong> template.context_instance The context instance to render <strong>the</strong> template with. By default, <strong>the</strong> template will be renderedwith a Context instance (filled with values from dictionary). If you need to use context processors, render<strong>the</strong> template with a RequestContext instance instead. Your code might look something like this:return render_to_response(’my_template.html’,my_data_dictionary,context_instance=RequestContext(request))mimetype The MIME type to use for <strong>the</strong> resulting document. Defaults to <strong>the</strong> value of <strong>the</strong>DEFAULT_CONTENT_TYPE setting.ExampleThe following example renders <strong>the</strong> template myapp/index.html with <strong>the</strong> MIME typeapplication/xhtml+xml:from django.shortcuts import render_to_responsedef my_view(request):# View code here...return render_to_response(’myapp/index.html’, {"foo": "bar"},mimetype="application/xhtml+xml")This example is equivalent to:from django.http import HttpResponsefrom django.template import Context, loaderdef my_view(request):# View code here...t = loader.get_template(’myapp/template.html’)c = Context({’foo’: ’bar’})return HttpResponse(t.render(c),mimetype="application/xhtml+xml")redirectredirect(to[, permanent=False], *args, **kwargs)New in version 1.1: Please, see <strong>the</strong> release notes Returns an HttpResponseRedirect to <strong>the</strong> appropriateURL for <strong>the</strong> arguments passed.The arguments could be:•A model: <strong>the</strong> model’s get_absolute_url() function will be called.•A view name, possibly with arguments: urlresolvers.reverse() will be used to reverse-resolve <strong>the</strong> name.•A URL, which will be used as-is for <strong>the</strong> redirect location.By default issues a temporary redirect; pass permanent=True to issue a permanent redirect3.3. Handling HTTP requests 133
<strong>Django</strong> <strong>Documentation</strong>, Release 1.2ExamplesYou can use <strong>the</strong> redirect() function in a number of ways.1. By passing some object; that object’s get_absolute_url() method will be called to figure out <strong>the</strong> redirectURL:def my_view(request):...object = MyModel.objects.get(...)return redirect(object)2. By passing <strong>the</strong> name of a view and optionally some positional or keyword arguments; <strong>the</strong> URL will be reverseresolved using <strong>the</strong> reverse() method:def my_view(request):...return redirect(’some-view-name’, foo=’bar’)3. By passing a hardcoded URL to redirect to:def my_view(request):...return redirect(’/some/url/’)This also works with full URLs:def my_view(request):...return redirect(’http://example.com/’)By default, redirect() returns a temporary redirect. All of <strong>the</strong> above forms accept a permanent argument; if setto True a permanent redirect will be returned:def my_view(request):...object = MyModel.objects.get(...)return redirect(object, permanent=True)get_object_or_404get_object_or_404(klass, *args, **kwargs)Calls get() on a given model manager, but it raises Http404 instead of <strong>the</strong> model’s DoesNotExist exception.Required argumentsklass A Model, Manager or QuerySet instance from which to get <strong>the</strong> object.**kwargs Lookup parameters, which should be in <strong>the</strong> format accepted by get() and filter().ExampleThe following example gets <strong>the</strong> object with <strong>the</strong> primary key of 1 from MyModel:134 Chapter 3. Using <strong>Django</strong>
<strong>Django</strong> <strong>Documentation</strong>, Release 1.2from django.shortcuts import get_object_or_404def my_view(request):my_object = get_object_or_404(MyModel, pk=1)This example is equivalent to:from django.http import Http404def my_view(request):try:my_object = MyModel.objects.get(pk=1)except MyModel.DoesNotExist:raise Http404Note: As with get(), a MultipleObjectsReturned exception will be raised if more than one object is found.get_list_or_404get_list_or_404(klass, *args, **kwargs)Returns <strong>the</strong> result of filter() on a given model manager, raising Http404 if <strong>the</strong> resulting list is empty.Required argumentsklass A Model, Manager or QuerySet instance from which to get <strong>the</strong> list.**kwargs Lookup parameters, which should be in <strong>the</strong> format accepted by get() and filter().ExampleThe following example gets all published objects from MyModel:from django.shortcuts import get_list_or_404def my_view(request):my_objects = get_list_or_404(MyModel, published=True)This example is equivalent to:from django.http import Http404def my_view(request):my_objects = list(MyModel.objects.filter(published=True))if not my_objects:raise Http4043.3.5 Generic viewsSee Generic views.3.3. Handling HTTP requests 135
<strong>Django</strong> <strong>Documentation</strong>, Release 1.23.3.6 MiddlewareMiddleware is a framework of hooks into <strong>Django</strong>’s request/response processing. It’s a light, low-level “plugin” systemfor globally altering <strong>Django</strong>’s input and/or output.Each middleware component is responsible for doing some specific function. For example, <strong>Django</strong> includes a middlewarecomponent, XViewMiddleware, that adds an "X-View" HTTP header to every response to a HEAD request.This document explains how middleware works, how you activate middleware, and how to write your own middleware.<strong>Django</strong> ships with some built-in middleware you can use right out of <strong>the</strong> box; <strong>the</strong>y’re documented in <strong>the</strong> built-inmiddleware reference.Activating middlewareTo activate a middleware component, add it to <strong>the</strong> MIDDLEWARE_CLASSES list in your <strong>Django</strong> settings. InMIDDLEWARE_CLASSES, each middleware component is represented by a string: <strong>the</strong> full Python path to <strong>the</strong> middleware’sclass name. For example, here’s <strong>the</strong> default MIDDLEWARE_CLASSES created by django-admin.pystartproject:MIDDLEWARE_CLASSES = (’django.middleware.common.CommonMiddleware’,’django.contrib.sessions.middleware.SessionMiddleware’,’django.middleware.csrf.CsrfViewMiddleware’,’django.contrib.auth.middleware.Au<strong>the</strong>nticationMiddleware’,’django.contrib.messages.middleware.MessageMiddleware’,)During <strong>the</strong> request phases (process_request() and process_view() middleware), <strong>Django</strong> appliesmiddleware in <strong>the</strong> order it’s defined in MIDDLEWARE_CLASSES, top-down. During <strong>the</strong> response phases(process_response() and process_exception() middleware), <strong>the</strong> classes are applied in reverse order,from <strong>the</strong> bottom up. You can think of it like an onion: each middleware class is a “layer” that wraps <strong>the</strong> view:136 Chapter 3. Using <strong>Django</strong>
<strong>Django</strong> <strong>Documentation</strong>, Release 1.2A <strong>Django</strong> installation doesn’t require any middleware – e.g., MIDDLEWARE_CLASSES can be empty, if you’d like –but it’s strongly suggested that you at least use CommonMiddleware.Writing your own middlewareWriting your own middleware is easy. Each middleware component is a single Python class that defines one or moreof <strong>the</strong> following methods:process_requestprocess_request(self, request)request is an HttpRequest object. This method is called on each request, before <strong>Django</strong> decides which view toexecute.process_request() should return ei<strong>the</strong>r None or an HttpResponse object. If it returns None, <strong>Django</strong> willcontinue processing this request, executing any o<strong>the</strong>r middleware and, <strong>the</strong>n, <strong>the</strong> appropriate view. If it returns anHttpResponse object, <strong>Django</strong> won’t bo<strong>the</strong>r calling ANY o<strong>the</strong>r request, view or exception middleware, or <strong>the</strong>appropriate view; it’ll return that HttpResponse. Response middleware is always called on every response.3.3. Handling HTTP requests 137
<strong>Django</strong> <strong>Documentation</strong>, Release 1.2process_viewprocess_view(self, request, view_func, view_args, view_kwargs)request is an HttpRequest object. view_func is <strong>the</strong> Python function that <strong>Django</strong> is about to use. (It’s <strong>the</strong>actual function object, not <strong>the</strong> name of <strong>the</strong> function as a string.) view_args is a list of positional arguments thatwill be passed to <strong>the</strong> view, and view_kwargs is a dictionary of keyword arguments that will be passed to <strong>the</strong> view.Nei<strong>the</strong>r view_args nor view_kwargs include <strong>the</strong> first view argument (request).process_view() is called just before <strong>Django</strong> calls <strong>the</strong> view. It should return ei<strong>the</strong>r None or an HttpResponseobject. If it returns None, <strong>Django</strong> will continue processing this request, executing any o<strong>the</strong>r process_view()middleware and, <strong>the</strong>n, <strong>the</strong> appropriate view. If it returns an HttpResponse object, <strong>Django</strong> won’t bo<strong>the</strong>r calling ANYo<strong>the</strong>r request, view or exception middleware, or <strong>the</strong> appropriate view; it’ll return that HttpResponse. Responsemiddleware is always called on every response.process_responseprocess_response(self, request, response)request is an HttpRequest object. response is <strong>the</strong> HttpResponse object returned by a <strong>Django</strong> view.process_response() must return an HttpResponse object. It could alter <strong>the</strong> given response, or it couldcreate and return a brand-new HttpResponse.Unlike <strong>the</strong> process_request() and process_view() methods, <strong>the</strong> process_response() method isalways called, even if <strong>the</strong> process_request() and process_view() methods of <strong>the</strong> same middlewareclass were skipped because an earlier middleware method returned an HttpResponse (this means that yourprocess_response() method cannot rely on setup done in process_request(), for example). In addition,during <strong>the</strong> response phase <strong>the</strong> classes are applied in reverse order, from <strong>the</strong> bottom up. This means classesdefined at <strong>the</strong> end of MIDDLEWARE_CLASSES will be run first.process_exceptionprocess_exception(self, request, exception)request is an HttpRequest object. exception is an Exception object raised by <strong>the</strong> view function.<strong>Django</strong> calls process_exception() when a view raises an exception. process_exception() should returnei<strong>the</strong>r None or an HttpResponse object. If it returns an HttpResponse object, <strong>the</strong> response will be returned to<strong>the</strong> browser. O<strong>the</strong>rwise, default exception handling kicks in.Again, middleware are run in reverse order during <strong>the</strong> response phase, which includes process_exception. If anexception middleware return a response, <strong>the</strong> middleware classes above that middleware will not be called at all.__init__Most middleware classes won’t need an initializer since middleware classes are essentially placeholders for <strong>the</strong>process_* methods. If you do need some global state you may use __init__ to set up. However, keep inmind a couple of caveats:• <strong>Django</strong> initializes your middleware without any arguments, so you can’t define __init__ as requiring anyarguments.• Unlike <strong>the</strong> process_* methods which get called once per request, __init__ gets called only once, when<strong>the</strong> Web server starts up.138 Chapter 3. Using <strong>Django</strong>
<strong>Django</strong> <strong>Documentation</strong>, Release 1.2Marking middleware as unused It’s sometimes useful to determine at run-time whe<strong>the</strong>r a pieceof middleware should be used. In <strong>the</strong>se cases, your middleware’s __init__ method may raisedjango.core.exceptions.MiddlewareNotUsed. <strong>Django</strong> will <strong>the</strong>n remove that piece of middleware from<strong>the</strong> middleware process.Guidelines• Middleware classes don’t have to subclass anything.• The middleware class can live anywhere on your Python path.MIDDLEWARE_CLASSES setting includes <strong>the</strong> path to it.• Feel free to look at <strong>Django</strong>’s available middleware for examples.All <strong>Django</strong> cares about is that <strong>the</strong>• If you write a middleware component that you think would be useful to o<strong>the</strong>r people, contribute to <strong>the</strong> community!Let us know, and we’ll consider adding it to <strong>Django</strong>.3.3.7 How to use sessions<strong>Django</strong> provides full support for anonymous sessions. The session framework lets you store and retrieve arbitrary dataon a per-site-visitor basis. It stores data on <strong>the</strong> server side and abstracts <strong>the</strong> sending and receiving of cookies. Cookiescontain a session ID – not <strong>the</strong> data itself.Enabling sessionsSessions are implemented via a piece of middleware.To enable session functionality, do <strong>the</strong> following:• Edit <strong>the</strong> MIDDLEWARE_CLASSES setting and make sure MIDDLEWARE_CLASSES contains’django.contrib.sessions.middleware.SessionMiddleware’. The default settings.pycreated by django-admin.py startproject has SessionMiddleware activated.If you don’t want to use sessions, you might as well remove <strong>the</strong> SessionMiddleware line fromMIDDLEWARE_CLASSES and ’django.contrib.sessions’ from your INSTALLED_APPS. It’ll save you asmall bit of overhead.Configuring <strong>the</strong> session engineNew in version 1.0: Please, see <strong>the</strong> release notes By default, <strong>Django</strong> stores sessions in your database (using <strong>the</strong>model django.contrib.sessions.models.Session). Though this is convenient, in some setups it’s fasterto store session data elsewhere, so <strong>Django</strong> can be configured to store session data on your filesystem or in your cache.Using database-backed sessionsIf you want to use a database-backed session, you need to add ’django.contrib.sessions’ to yourINSTALLED_APPS setting.Once you have configured your installation, run manage.py syncdb to install <strong>the</strong> single database table that storessession data.3.3. Handling HTTP requests 139
<strong>Django</strong> <strong>Documentation</strong>, Release 1.2Using cached sessionsFor better performance, you may want to use a cache-based session backend. Changed in version 1.1: <strong>Django</strong> 1.0 didnot include <strong>the</strong> cached_db session backend. To store session data using <strong>Django</strong>’s cache system, you’ll first need tomake sure you’ve configured your cache; see <strong>the</strong> cache documentation for details.Warning: You should only use cache-based sessions if you’re using <strong>the</strong> Memcached cache backend. The localmemorycache backend doesn’t retain data long enough to be a good choice, and it’ll be faster to use file or databasesessions directly instead of sending everything through <strong>the</strong> file or database cache backends.Once your cache is configured, you’ve got two choices for how to store data in <strong>the</strong> cache:• Set SESSION_ENGINE to "django.contrib.sessions.backends.cache" for a simple cachingsession store. Session data will be stored directly your cache. However, session data may not be persistent:cached data can be evicted if <strong>the</strong> cache fills up or if <strong>the</strong> cache server is restarted.• For persistent, cached data, set SESSION_ENGINE to "django.contrib.sessions.backends.cached_db".This uses a write-through cache – every write to <strong>the</strong> cache will also be written to <strong>the</strong> database. Session readsonly use <strong>the</strong> database if <strong>the</strong> data is not already in <strong>the</strong> cache.Both session stores are quite fast, but <strong>the</strong> simple cache is faster because it disregards persistence. In most cases, <strong>the</strong>cached_db backend will be fast enough, but if you need that last bit of performance, and are willing to let sessiondata be expunged from time to time, <strong>the</strong> cache backend is for you.If you use <strong>the</strong> cached_db session backend, you also need to follow <strong>the</strong> configuration instructions for <strong>the</strong> usingdatabase-backed sessions.Using file-based sessionsTo use file-based sessions, set <strong>the</strong> SESSION_ENGINE setting to "django.contrib.sessions.backends.file".You might also want to set <strong>the</strong> SESSION_FILE_PATH setting (which defaults to output fromtempfile.gettempdir(), most likely /tmp) to control where <strong>Django</strong> stores session files. Be sure tocheck that your Web server has permissions to read and write to this location.Using sessions in viewsWhen SessionMiddleware is activated, each HttpRequest object – <strong>the</strong> first argument to any <strong>Django</strong> viewfunction – will have a session attribute, which is a dictionary-like object. You can read it and write to it.A session object has <strong>the</strong> following standard dictionary methods:• __getitem__(key)Example: fav_color = request.session[’fav_color’]• __setitem__(key, value)Example: request.session[’fav_color’] = ’blue’• __delitem__(key)Example: del request.session[’fav_color’]. This raises KeyError if <strong>the</strong> given key isn’t alreadyin <strong>the</strong> session.• __contains__(key)Example: ’fav_color’ in request.session140 Chapter 3. Using <strong>Django</strong>
<strong>Django</strong> <strong>Documentation</strong>, Release 1.2• get(key, default=None)Example: fav_color = request.session.get(’fav_color’, ’red’)• keys()• items()• setdefault()• clear()New in version 1.0: setdefault() and clear() are new in this version. It also has <strong>the</strong>se methods:• flush() New in version 1.0: Please, see <strong>the</strong> release notes Delete <strong>the</strong> current session data from <strong>the</strong> sessionand regenerate <strong>the</strong> session key value that is sent back to <strong>the</strong> user in <strong>the</strong> cookie. This is used if you wantto ensure that <strong>the</strong> previous session data can’t be accessed again from <strong>the</strong> user’s browser (for example, <strong>the</strong>django.contrib.auth.logout() function calls it).• set_test_cookie()Sets a test cookie to determine whe<strong>the</strong>r <strong>the</strong> user’s browser supports cookies. Due to <strong>the</strong> way cookies work, youwon’t be able to test this until <strong>the</strong> user’s next page request. See Setting test cookies below for more information.• test_cookie_worked()Returns ei<strong>the</strong>r True or False, depending on whe<strong>the</strong>r <strong>the</strong> user’s browser accepted <strong>the</strong> test cookie. Due to<strong>the</strong> way cookies work, you’ll have to call set_test_cookie() on a previous, separate page request. SeeSetting test cookies below for more information.• delete_test_cookie()Deletes <strong>the</strong> test cookie. Use this to clean up after yourself.• set_expiry(value) New in version 1.0: Please, see <strong>the</strong> release notes Sets <strong>the</strong> expiration time for <strong>the</strong>session. You can pass a number of different values:– If value is an integer, <strong>the</strong> session will expire after that many seconds of inactivity. For example, callingrequest.session.set_expiry(300) would make <strong>the</strong> session expire in 5 minutes.– If value is a datetime or timedelta object, <strong>the</strong> session will expire at that specific date/time.– If value is 0, <strong>the</strong> user’s session cookie will expire when <strong>the</strong> user’s Web browser is closed.– If value is None, <strong>the</strong> session reverts to using <strong>the</strong> global session expiry policy.<strong>Read</strong>ing a session is not considered activity for expiration purposes. Session expiration is computed from <strong>the</strong>last time <strong>the</strong> session was modified.• get_expiry_age() New in version 1.0: Please, see <strong>the</strong> release notes Returns <strong>the</strong> number of seconds untilthis session expires. For sessions with no custom expiration (or those set to expire at browser close), this willequal settings.SESSION_COOKIE_AGE.• get_expiry_date() New in version 1.0: Please, see <strong>the</strong> release notes Returns <strong>the</strong> date this session willexpire. For sessions with no custom expiration (or those set to expire at browser close), this will equal <strong>the</strong> datesettings.SESSION_COOKIE_AGE seconds from now.• get_expire_at_browser_close() New in version 1.0: Please, see <strong>the</strong> release notes Returns ei<strong>the</strong>rTrue or False, depending on whe<strong>the</strong>r <strong>the</strong> user’s session cookie will expire when <strong>the</strong> user’s Web browser isclosed.You can edit request.session at any point in your view. You can edit it multiple times.3.3. Handling HTTP requests 141
<strong>Django</strong> <strong>Documentation</strong>, Release 1.2Session object guidelines• Use normal Python strings as dictionary keys on request.session. This is more of a convention than ahard-and-fast rule.• Session dictionary keys that begin with an underscore are reserved for internal use by <strong>Django</strong>.• Don’t override request.session with a new object, and don’t access or set its attributes. Use it like aPython dictionary.ExamplesThis simplistic view sets a has_commented variable to True after a user posts a comment. It doesn’t let a user posta comment more than once:def post_comment(request, new_comment):if request.session.get(’has_commented’, False):return HttpResponse("You’ve already commented.")c = comments.Comment(comment=new_comment)c.save()request.session[’has_commented’] = Truereturn HttpResponse(’Thanks for your comment!’)This simplistic view logs in a “member” of <strong>the</strong> site:def login(request):m = Member.objects.get(username=request.POST[’username’])if m.password == request.POST[’password’]:request.session[’member_id’] = m.idreturn HttpResponse("You’re logged in.")else:return HttpResponse("Your username and password didn’t match.")...And this one logs a member out, according to login() above:def logout(request):try:del request.session[’member_id’]except KeyError:passreturn HttpResponse("You’re logged out.")The standard django.contrib.auth.logout() function actually does a bit more than this to prevent inadvertentdata leakage. It calls request.session.flush(). We are using this example as a demonstration of how towork with session objects, not as a full logout() implementation.Setting test cookiesAs a convenience, <strong>Django</strong> provides an easy way to test whe<strong>the</strong>r <strong>the</strong> user’s browser acceptscookies. Just call request.session.set_test_cookie() in a view, and callrequest.session.test_cookie_worked() in a subsequent view – not in <strong>the</strong> same view call.This awkward split between set_test_cookie() and test_cookie_worked() is necessary due to <strong>the</strong> waycookies work. When you set a cookie, you can’t actually tell whe<strong>the</strong>r a browser accepted it until <strong>the</strong> browser’s nextrequest.142 Chapter 3. Using <strong>Django</strong>
<strong>Django</strong> <strong>Documentation</strong>, Release 1.2It’s good practice to use delete_test_cookie() to clean up after yourself. Do this after you’ve verified that <strong>the</strong>test cookie worked.Here’s a typical usage example:def login(request):if request.method == ’POST’:if request.session.test_cookie_worked():request.session.delete_test_cookie()return HttpResponse("You’re logged in.")else:return HttpResponse("Please enable cookies and try again.")request.session.set_test_cookie()return render_to_response(’foo/login_form.html’)Using sessions out of viewsNew in version 1.0: Please, see <strong>the</strong> release notes An API is available to manipulate session data outside of a view:>>> from django.contrib.sessions.backends.db import SessionStore>>> s = SessionStore(session_key=’2b1189a188b44ad18c35e113ac6ceead’)>>> s[’last_login’] = datetime.datetime(2005, 8, 20, 13, 35, 10)>>> s[’last_login’]datetime.datetime(2005, 8, 20, 13, 35, 0)>>> s.save()If you’re using <strong>the</strong> django.contrib.sessions.backends.db backend, each session is just a normal <strong>Django</strong>model. The Session model is defined in django/contrib/sessions/models.py. Because it’s a normalmodel, you can access sessions using <strong>the</strong> normal <strong>Django</strong> database API:>>> from django.contrib.sessions.models import Session>>> s = Session.objects.get(pk=’2b1189a188b44ad18c35e113ac6ceead’)>>> s.expire_datedatetime.datetime(2005, 8, 20, 13, 35, 12)Note that you’ll need to call get_decoded() to get <strong>the</strong> session dictionary. This is necessary because <strong>the</strong> dictionaryis stored in an encoded format:>>> s.session_data’KGRwMQpTJ19hdXRoX3VzZXJfaWQnCnAyCkkxCnMuMTExY2ZjODI2Yj...’>>> s.get_decoded(){’user_id’: 42}When sessions are savedBy default, <strong>Django</strong> only saves to <strong>the</strong> session database when <strong>the</strong> session has been modified – that is if any of itsdictionary values have been assigned or deleted:# Session is modified.request.session[’foo’] = ’bar’# Session is modified.del request.session[’foo’]# Session is modified.request.session[’foo’] = {}3.3. Handling HTTP requests 143
<strong>Django</strong> <strong>Documentation</strong>, Release 1.2# Gotcha: Session is NOT modified, because this alters# request.session[’foo’] instead of request.session.request.session[’foo’][’bar’] = ’baz’In <strong>the</strong> last case of <strong>the</strong> above example, we can tell <strong>the</strong> session object explicitly that it has been modified by setting <strong>the</strong>modified attribute on <strong>the</strong> session object:request.session.modified = TrueTo change this default behavior, set <strong>the</strong> SESSION_SAVE_EVERY_REQUEST setting to True. IfSESSION_SAVE_EVERY_REQUEST is True, <strong>Django</strong> will save <strong>the</strong> session to <strong>the</strong> database on every single request.Note that <strong>the</strong> session cookie is only sent when a session has been created or modified. IfSESSION_SAVE_EVERY_REQUEST is True, <strong>the</strong> session cookie will be sent on every request.Similarly, <strong>the</strong> expires part of a session cookie is updated each time <strong>the</strong> session cookie is sent.Browser-length sessions vs. persistent sessionsYou can control whe<strong>the</strong>r <strong>the</strong> session framework uses browser-length sessions vs.SESSION_EXPIRE_AT_BROWSER_CLOSE setting.persistent sessions with <strong>the</strong>By default, SESSION_EXPIRE_AT_BROWSER_CLOSE is set to False, which means session cookies will be storedin users’ browsers for as long as SESSION_COOKIE_AGE. Use this if you don’t want people to have to log in everytime <strong>the</strong>y open a browser.If SESSION_EXPIRE_AT_BROWSER_CLOSE is set to True, <strong>Django</strong> will use browser-length cookies – cookiesthat expire as soon as <strong>the</strong> user closes his or her browser. Use this if you want people to have to log in every time<strong>the</strong>y open a browser. New in version 1.0: Please, see <strong>the</strong> release notes This setting is a global default and can beoverwritten at a per-session level by explicitly calling request.session.set_expiry() as described above inusing sessions in views.Clearing <strong>the</strong> session tableIf you’re using <strong>the</strong> database backend, note that session data can accumulate in <strong>the</strong> django_session database tableand <strong>Django</strong> does not provide automatic purging. Therefore, it’s your job to purge expired sessions on a regular basis.To understand this problem, consider what happens when a user uses a session. When a user logs in, <strong>Django</strong> adds arow to <strong>the</strong> django_session database table. <strong>Django</strong> updates this row each time <strong>the</strong> session data changes. If <strong>the</strong>user logs out manually, <strong>Django</strong> deletes <strong>the</strong> row. But if <strong>the</strong> user does not log out, <strong>the</strong> row never gets deleted.<strong>Django</strong> provides a sample clean-up script: django-admin.py cleanup. That script deletes any session in <strong>the</strong>session table whose expire_date is in <strong>the</strong> past – but your application may have different requirements.SettingsA few <strong>Django</strong> settings give you control over session behavior:SESSION_ENGINENew in version 1.0: Please, see <strong>the</strong> release notesChanged in version 1.1: The cached_db backend was addedDefault: django.contrib.sessions.backends.dbControls where <strong>Django</strong> stores session data. Valid values are:• ’django.contrib.sessions.backends.db’144 Chapter 3. Using <strong>Django</strong>
<strong>Django</strong> <strong>Documentation</strong>, Release 1.2• ’django.contrib.sessions.backends.file’• ’django.contrib.sessions.backends.cache’• ’django.contrib.sessions.backends.cached_db’See configuring <strong>the</strong> session engine for more details.SESSION_FILE_PATHNew in version 1.0: Please, see <strong>the</strong> release notes Default: /tmp/If you’re using file-based session storage, this sets <strong>the</strong> directory in which <strong>Django</strong> will store session data.SESSION_COOKIE_AGEDefault: 1209600 (2 weeks, in seconds)The age of session cookies, in seconds.SESSION_COOKIE_DOMAINDefault: NoneThe domain to use for session cookies. Set this to a string such as ".lawrence.com" (note <strong>the</strong> leading dot!) forcross-domain cookies, or use None for a standard domain cookie.SESSION_COOKIE_NAMEDefault: ’sessionid’The name of <strong>the</strong> cookie to use for sessions. This can be whatever you want.SESSION_COOKIE_PATHNew in version 1.0: Please, see <strong>the</strong> release notes Default: ’/’The path set on <strong>the</strong> session cookie. This should ei<strong>the</strong>r match <strong>the</strong> URL path of your <strong>Django</strong> installation or be parent ofthat path.This is useful if you have multiple <strong>Django</strong> instances running under <strong>the</strong> same hostname. They can use different cookiepaths, and each instance will only see its own session cookie.SESSION_COOKIE_SECUREDefault: FalseWhe<strong>the</strong>r to use a secure cookie for <strong>the</strong> session cookie. If this is set to True, <strong>the</strong> cookie will be marked as “secure,”which means browsers may ensure that <strong>the</strong> cookie is only sent under an HTTPS connection.3.3. Handling HTTP requests 145
<strong>Django</strong> <strong>Documentation</strong>, Release 1.2SESSION_EXPIRE_AT_BROWSER_CLOSEDefault: FalseWhe<strong>the</strong>r to expire <strong>the</strong> session when <strong>the</strong> user closes his or her browser. See “Browser-length sessions vs. persistentsessions” above.SESSION_SAVE_EVERY_REQUESTDefault: FalseWhe<strong>the</strong>r to save <strong>the</strong> session data on every request. If this is False (default), <strong>the</strong>n <strong>the</strong> session data will only be savedif it has been modified – that is, if any of its dictionary values have been assigned or deleted.Technical details• The session dictionary should accept any pickleable Python object. See <strong>the</strong> pickle module for more information.• Session data is stored in a database table named django_session .• <strong>Django</strong> only sends a cookie if it needs to. If you don’t set any session data, it won’t send a session cookie.Session IDs in URLsThe <strong>Django</strong> sessions framework is entirely, and solely, cookie-based. It does not fall back to putting session IDs inURLs as a last resort, as PHP does. This is an intentional design decision. Not only does that behavior make URLsugly, it makes your site vulnerable to session-ID <strong>the</strong>ft via <strong>the</strong> “Referer” header.3.4 Working with formsAbout this documentThis document provides an introduction to <strong>Django</strong>’s form handling features. For a more detailed look at specific areasof <strong>the</strong> forms API, see The Forms API, Form fields, and Form and field validation.django.forms is <strong>Django</strong>’s form-handling library.While it is possible to process form submissions just using <strong>Django</strong>’s HttpRequest class, using <strong>the</strong> form librarytakes care of a number of common form-related tasks. Using it, you can:1. Display an HTML form with automatically generated form widgets.2. Check submitted data against a set of validation rules.3. Redisplay a form in <strong>the</strong> case of validation errors.4. Convert submitted form data to <strong>the</strong> relevant Python data types.3.4.1 OverviewThe library deals with <strong>the</strong>se concepts:146 Chapter 3. Using <strong>Django</strong>
<strong>Django</strong> <strong>Documentation</strong>, Release 1.2Widget A class that corresponds to an HTML form widget, e.g. or . Thishandles rendering of <strong>the</strong> widget as HTML.Field A class that is responsible for doing validation, e.g. an EmailField that makes sure its data is a valid e-mailaddress.FormA collection of fields that knows how to validate itself and display itself as HTML.Form Media The CSS and JavaScript resources that are required to render a form.The library is decoupled from <strong>the</strong> o<strong>the</strong>r <strong>Django</strong> components, such as <strong>the</strong> database layer, views and templates. It reliesonly on <strong>Django</strong> settings, a couple of django.utils helper functions and <strong>Django</strong>’s internationalization hooks (butyou’re not required to be using internationalization features to use this library).3.4.2 Form objectsA Form object encapsulates a sequence of form fields and a collection of validation rules that must be fulfilled in orderfor <strong>the</strong> form to be accepted. Form classes are created as subclasses of django.forms.Form and make use of adeclarative style that you’ll be familiar with if you’ve used <strong>Django</strong>’s database models.For example, consider a form used to implement “contact me” functionality on a personal Web site:from django import formsclass ContactForm(forms.Form):subject = forms.CharField(max_length=100)message = forms.CharField()sender = forms.EmailField()cc_myself = forms.BooleanField(required=False)A form is composed of Field objects. In this case, our form has four fields: subject, message, sender andcc_myself. CharField, EmailField and BooleanField are just three of <strong>the</strong> available field types; a full listcan be found in Form fields.If your form is going to be used to directly add or edit a <strong>Django</strong> model, you can use a ModelForm to avoid duplicatingyour model description.Using a form in a viewThe standard pattern for processing a form in a view looks like this:def contact(request):if request.method == ’POST’: # If <strong>the</strong> form has been submitted...form = ContactForm(request.POST) # A form bound to <strong>the</strong> POST dataif form.is_valid(): # All validation rules pass# Process <strong>the</strong> data in form.cleaned_data# ...return HttpResponseRedirect(’/thanks/’) # Redirect after POSTelse:form = ContactForm() # An unbound formreturn render_to_response(’contact.html’, {’form’: form,})There are three code paths here:1. If <strong>the</strong> form has not been submitted, an unbound instance of ContactForm is created and passed to <strong>the</strong> template.3.4. Working with forms 147
<strong>Django</strong> <strong>Documentation</strong>, Release 1.22. If <strong>the</strong> form has been submitted, a bound instance of <strong>the</strong> form is created using request.POST. If <strong>the</strong> submitteddata is valid, it is processed and <strong>the</strong> user is re-directed to a “thanks” page.3. If <strong>the</strong> form has been submitted but is invalid, <strong>the</strong> bound form instance is passed on to <strong>the</strong> template.Changed in version 1.0: The cleaned_data attribute was called clean_data in earlier releases. The distinctionbetween bound and unbound forms is important. An unbound form does not have any data associated with it; whenrendered to <strong>the</strong> user, it will be empty or will contain default values. A bound form does have submitted data, and hencecan be used to tell if that data is valid. If an invalid bound form is rendered it can include inline error messages telling<strong>the</strong> user where <strong>the</strong>y went wrong.See Bound and unbound forms for fur<strong>the</strong>r information on <strong>the</strong> differences between bound and unbound forms.Handling file uploads with a formTo see how to handle file uploads with your form see Binding uploaded files to a form for more information.Processing <strong>the</strong> data from a formOnce is_valid() returns True, you can process <strong>the</strong> form submission safe in <strong>the</strong> knowledge that it conformsto <strong>the</strong> validation rules defined by your form. While you could access request.POST directly at this point, it isbetter to access form.cleaned_data. This data has not only been validated but will also be converted in to <strong>the</strong>relevant Python types for you. In <strong>the</strong> above example, cc_myself will be a boolean value. Likewise, fields such asIntegerField and FloatField convert values to a Python int and float respectively.Extending <strong>the</strong> above example, here’s how <strong>the</strong> form data could be processed:if form.is_valid():subject = form.cleaned_data[’subject’]message = form.cleaned_data[’message’]sender = form.cleaned_data[’sender’]cc_myself = form.cleaned_data[’cc_myself’]recipients = [’info@example.com’]if cc_myself:recipients.append(sender)from django.core.mail import send_mailsend_mail(subject, message, sender, recipients)return HttpResponseRedirect(’/thanks/’) # Redirect after POSTFor more on sending e-mail from <strong>Django</strong>, see Sending e-mail.Displaying a form using a templateForms are designed to work with <strong>the</strong> <strong>Django</strong> template language. In <strong>the</strong> above example, we passed our ContactForminstance to <strong>the</strong> template using <strong>the</strong> context variable form. Here’s a simple example template:{{ form.as_p }}The form only outputs its own fields; it is up to you to provide <strong>the</strong> surrounding tags and <strong>the</strong> submit button.form.as_p will output <strong>the</strong> form with each form field and accompanying label wrapped in a paragraph. Here’s <strong>the</strong>output for our example template:148 Chapter 3. Using <strong>Django</strong>
<strong>Django</strong> <strong>Documentation</strong>, Release 1.2Subject:Message:Sender:Cc myself:Note that each form field has an ID attribute set to id_, which is referenced by <strong>the</strong> accompanyinglabel tag. This is important for ensuring forms are accessible to assistive technology such as screen reader software.You can also customize <strong>the</strong> way in which labels and ids are generated.You can also use form.as_table to output table rows (you’ll need to provide your own tags) andform.as_ul to output list items.Customizing <strong>the</strong> form templateIf <strong>the</strong> default generated HTML is not to your taste, you can completely customize <strong>the</strong> way a form is presented using<strong>the</strong> <strong>Django</strong> template language. Extending <strong>the</strong> above example:{{ form.non_field_errors }}{{ form.subject.errors }}E-mail subject:{{ form.subject }}{{ form.message.errors }}Your message:{{ form.message }}{{ form.sender.errors }}Your email address:{{ form.sender }}{{ form.cc_myself.errors }}CC yourself?{{ form.cc_myself }}Each named form-field can be output to <strong>the</strong> template using {{ form.name_of_field }}, which will produce<strong>the</strong> HTML needed to display <strong>the</strong> form widget. Using {{ form.name_of_field.errors }} displays a list ofform errors, rendered as an unordered list. This might look like:Sender is required.3.4. Working with forms 149
<strong>Django</strong> <strong>Documentation</strong>, Release 1.2The list has a CSS class of errorlist to allow you to style its appearance. If you wish to fur<strong>the</strong>r customize <strong>the</strong>display of errors you can do so by looping over <strong>the</strong>m:{% if form.subject.errors %}{% for error in form.subject.errors %}{{ error|escape }}{% endfor %}{% endif %}Looping over <strong>the</strong> form’s fieldsIf you’re using <strong>the</strong> same HTML for each of your form fields, you can reduce duplicate code by looping through eachfield in turn using a {% for %} loop:{% for field in form %}{{ field.errors }}{{ field.label_tag }}: {{ field }}{% endfor %}Within this loop, {{ field }} is an instance of BoundField. BoundField also has <strong>the</strong> following attributes,which can be useful in your templates:{{ field.label }} The label of <strong>the</strong> field, e.g. E-mail address.{{ field.label_tag }} The field’s label wrapped in <strong>the</strong> appropriate HTML tag, e.g. E-mail address{{ field.html_name }} The name of <strong>the</strong> field that will be used in <strong>the</strong> input element’s name field. This takes<strong>the</strong> form prefix into account, if it has been set.{{ field.help_text }} Any help text that has been associated with <strong>the</strong> field.{{ field.errors }} Outputs a containing any validation errors correspondingto this field. You can customize <strong>the</strong> presentation of <strong>the</strong> errors with a {% for error infield.errors %} loop. In this case, each object in <strong>the</strong> loop is a simple string containing <strong>the</strong> error message.field.is_hidden This attribute is True if <strong>the</strong> form field is a hidden field and False o<strong>the</strong>rwise. It’s not particularlyuseful as a template variable, but could be useful in conditional tests such as:{% if field.is_hidden %}{# Do something special #}{% endif %}Looping over hidden and visible fieldsIf you’re manually laying out a form in a template, as opposed to relying on <strong>Django</strong>’s default form layout, you mightwant to treat fields differently than non-hidden fields. For example, because hiddenfields don’t display anything, putting error messages “next to” <strong>the</strong> field could cause confusion for your users – so errorsfor those fields should be handled differently.150 Chapter 3. Using <strong>Django</strong>
<strong>Django</strong> <strong>Documentation</strong>, Release 1.2<strong>Django</strong> provides two methods on a form that allow you to loop over <strong>the</strong> hidden and visible fields independently:hidden_fields() and visible_fields(). Here’s a modification of an earlier example that uses <strong>the</strong>se twomethods:{% for field in form.visible_fields %}{# Include <strong>the</strong> hidden fields in <strong>the</strong> form #}{% if forloop.first %}{% for hidden in form.hidden_fields %}{{ hidden }}{% endfor %}{% endif %}{{ field.errors }}{{ field.label_tag }}: {{ field }}{% endfor %}This example does not handle any errors in <strong>the</strong> hidden fields. Usually, an error in a hidden field is a sign of formtampering, since normal form interaction won’t alter <strong>the</strong>m. However, you could easily insert some error displays forthose form errors, as well. New in version 1.1: The hidden_fields and visible_fields methods are new in<strong>Django</strong> 1.1.Reusable form templatesIf your site uses <strong>the</strong> same rendering logic for forms in multiple places, you can reduce duplication by saving <strong>the</strong> form’sloop in a standalone template and using <strong>the</strong> include tag to reuse it in o<strong>the</strong>r templates:{% include "form_snippet.html" %}# In form_snippet.html:{% for field in form %}{{ field.errors }}{{ field.label_tag }}: {{ field }}{% endfor %}If <strong>the</strong> form object passed to a template has a different name within <strong>the</strong> context, you can alias it using <strong>the</strong> with tag:{% with comment_form as form %}{% include "form_snippet.html" %}{% endwith %}If you find yourself doing this often, you might consider creating a custom inclusion tag.3.4. Working with forms 151
<strong>Django</strong> <strong>Documentation</strong>, Release 1.23.4.3 Fur<strong>the</strong>r topicsThis covers <strong>the</strong> basics, but forms can do a whole lot more:Creating forms from modelsModelFormclass ModelFormIf you’re building a database-driven app, chances are you’ll have forms that map closely to <strong>Django</strong> models. Forinstance, you might have a BlogComment model, and you want to create a form that lets people submit comments.In this case, it would be redundant to define <strong>the</strong> field types in your form, because you’ve already defined <strong>the</strong> fields inyour model.For this reason, <strong>Django</strong> provides a helper class that let you create a Form class from a <strong>Django</strong> model.For example:>>> from django.forms import ModelForm# Create <strong>the</strong> form class.>>> class ArticleForm(ModelForm):... class Meta:... model = Article# Creating a form to add an article.>>> form = ArticleForm()# Creating a form to change an existing article.>>> article = Article.objects.get(pk=1)>>> form = ArticleForm(instance=article)Field types The generated Form class will have a form field for every model field. Each model field has a correspondingdefault form field. For example, a CharField on a model is represented as a CharField on a form. Amodel ManyToManyField is represented as a MultipleChoiceField. Here is <strong>the</strong> full list of conversions:152 Chapter 3. Using <strong>Django</strong>
<strong>Django</strong> <strong>Documentation</strong>, Release 1.2Model fieldForm fieldAutoFieldNot represented in <strong>the</strong> formBigIntegerField IntegerField with min_value set to -9223372036854775808 andmax_value set to 9223372036854775807.BooleanFieldBooleanFieldCharFieldCharField with max_length set to <strong>the</strong> model field’s max_lengthCommaSeparatedIntegerField CharFieldDateFieldDateFieldDateTimeField DateTimeFieldDecimalFieldDecimalFieldEmailFieldEmailFieldFileFieldFileFieldFilePathField CharFieldFloatFieldFloatFieldForeignKeyModelChoiceField (see below)ImageFieldImageFieldIntegerFieldIntegerFieldIPAddressField IPAddressFieldManyToManyField ModelMultipleChoiceField (see below)NullBooleanField CharFieldPhoneNumberField USPhoneNumberField (from django.contrib.localflavor.us)PositiveIntegerField IntegerFieldPositiveSmallIntegerField IntegerFieldSlugFieldSlugFieldSmallIntegerField IntegerFieldTextFieldCharField with widget=forms.TextareaTimeFieldTimeFieldURLFieldURLField with verify_exists set to <strong>the</strong> model field’s verify_existsXMLFieldCharField with widget=forms.TextareaNew in version 1.0: The FloatField form field and DecimalField model and form fields are new in <strong>Django</strong>1.0.New in version 1.2: The BigIntegerField is new in <strong>Django</strong> 1.2. As you might expect, <strong>the</strong> ForeignKeyand ManyToManyField model field types are special cases:• ForeignKey is represented by django.forms.ModelChoiceField, which is a ChoiceField whosechoices are a model QuerySet.• ManyToManyField is represented by django.forms.ModelMultipleChoiceField, which is aMultipleChoiceField whose choices are a model QuerySet.In addition, each generated form field has attributes set as follows:• If <strong>the</strong> model field has blank=True, <strong>the</strong>n required is set to False on <strong>the</strong> form field.required=True.O<strong>the</strong>rwise,• The form field’s label is set to <strong>the</strong> verbose_name of <strong>the</strong> model field, with <strong>the</strong> first character capitalized.• The form field’s help_text is set to <strong>the</strong> help_text of <strong>the</strong> model field.• If <strong>the</strong> model field has choices set, <strong>the</strong>n <strong>the</strong> form field’s widget will be set to Select, with choices comingfrom <strong>the</strong> model field’s choices. The choices will normally include <strong>the</strong> blank choice which is selected bydefault. If <strong>the</strong> field is required, this forces <strong>the</strong> user to make a selection. The blank choice will not be includedif <strong>the</strong> model field has blank=False and an explicit default value (<strong>the</strong> default value will be initiallyselected instead).Finally, note that you can override <strong>the</strong> form field used for a given model field. See Overriding <strong>the</strong> default field typesor widgets below.3.4. Working with forms 153
<strong>Django</strong> <strong>Documentation</strong>, Release 1.2A full exampleConsider this set of models:from django.db import modelsfrom django.forms import ModelFormTITLE_CHOICES = ((’MR’, ’Mr.’),(’MRS’, ’Mrs.’),(’MS’, ’Ms.’),)class Author(models.Model):name = models.CharField(max_length=100)title = models.CharField(max_length=3, choices=TITLE_CHOICES)birth_date = models.DateField(blank=True, null=True)def __unicode__(self):return self.nameclass Book(models.Model):name = models.CharField(max_length=100)authors = models.ManyToManyField(Author)class AuthorForm(ModelForm):class Meta:model = Authorclass BookForm(ModelForm):class Meta:model = BookWith <strong>the</strong>se models, <strong>the</strong> ModelForm subclasses above would be roughly equivalent to this (<strong>the</strong> only difference being<strong>the</strong> save() method, which we’ll discuss in a moment.):class AuthorForm(forms.Form):name = forms.CharField(max_length=100)title = forms.CharField(max_length=3,widget=forms.Select(choices=TITLE_CHOICES))birth_date = forms.DateField(required=False)class BookForm(forms.Form):name = forms.CharField(max_length=100)authors = forms.ModelMultipleChoiceField(queryset=Author.objects.all())The is_valid() method and errors Changed in version 1.2: Please, see <strong>the</strong> release notes The first time youcall is_valid() or access <strong>the</strong> errors attribute of a ModelForm has always triggered form validation, but asof <strong>Django</strong> 1.2, it will also trigger model validation. This has <strong>the</strong> side-effect of cleaning <strong>the</strong> model you pass to <strong>the</strong>ModelForm constructor. For instance, calling is_valid() on your form will convert any date fields on yourmodel to actual date objects.The save() method Every form produced by ModelForm also has a save() method. This method createsand saves a database object from <strong>the</strong> data bound to <strong>the</strong> form. A subclass of ModelForm can accept an existingmodel instance as <strong>the</strong> keyword argument instance; if this is supplied, save() will update that instance. If it’s notsupplied, save() will create a new instance of <strong>the</strong> specified model:154 Chapter 3. Using <strong>Django</strong>
<strong>Django</strong> <strong>Documentation</strong>, Release 1.2# Create a form instance from POST data.>>> f = ArticleForm(request.POST)# Save a new Article object from <strong>the</strong> form’s data.>>> new_article = f.save()# Create a form to edit an existing Article.>>> a = Article.objects.get(pk=1)>>> f = ArticleForm(instance=a)>>> f.save()# Create a form to edit an existing Article, but use# POST data to populate <strong>the</strong> form.>>> a = Article.objects.get(pk=1)>>> f = ArticleForm(request.POST, instance=a)>>> f.save()Note that save() will raise a ValueError if <strong>the</strong> data in <strong>the</strong> form doesn’t validate – i.e., if form.errors evaluates toTrue.This save() method accepts an optional commit keyword argument, which accepts ei<strong>the</strong>r True or False. If youcall save() with commit=False, <strong>the</strong>n it will return an object that hasn’t yet been saved to <strong>the</strong> database. In thiscase, it’s up to you to call save() on <strong>the</strong> resulting model instance. This is useful if you want to do custom processingon <strong>the</strong> object before saving it, or if you want to use one of <strong>the</strong> specialized model saving options. commit is True bydefault.Ano<strong>the</strong>r side effect of using commit=False is seen when your model has a many-to-many relation with ano<strong>the</strong>rmodel. If your model has a many-to-many relation and you specify commit=False when you save a form, <strong>Django</strong>cannot immediately save <strong>the</strong> form data for <strong>the</strong> many-to-many relation. This is because it isn’t possible to save manyto-manydata for an instance until <strong>the</strong> instance exists in <strong>the</strong> database.To work around this problem, every time you save a form using commit=False, <strong>Django</strong> adds a save_m2m()method to your ModelForm subclass. After you’ve manually saved <strong>the</strong> instance produced by <strong>the</strong> form, you caninvoke save_m2m() to save <strong>the</strong> many-to-many form data. For example:# Create a form instance with POST data.>>> f = AuthorForm(request.POST)# Create, but don’t save <strong>the</strong> new author instance.>>> new_author = f.save(commit=False)# Modify <strong>the</strong> author in some way.>>> new_author.some_field = ’some_value’# Save <strong>the</strong> new instance.>>> new_author.save()# Now, save <strong>the</strong> many-to-many data for <strong>the</strong> form.>>> f.save_m2m()Calling save_m2m() is only required if you use save(commit=False). When you use a simple save() on aform, all data – including many-to-many data – is saved without <strong>the</strong> need for any additional method calls. For example:# Create a form instance with POST data.>>> a = Author()>>> f = AuthorForm(request.POST, instance=a)# Create and save <strong>the</strong> new author instance. There’s no need to do anything else.>>> new_author = f.save()3.4. Working with forms 155
<strong>Django</strong> <strong>Documentation</strong>, Release 1.2O<strong>the</strong>r than <strong>the</strong> save() and save_m2m() methods, a ModelForm works exactly <strong>the</strong> same way as any o<strong>the</strong>r formsform. For example, <strong>the</strong> is_valid() method is used to check for validity, <strong>the</strong> is_multipart() method is usedto determine whe<strong>the</strong>r a form requires multipart file upload (and hence whe<strong>the</strong>r request.FILES must be passed to<strong>the</strong> form), etc. See Binding uploaded files to a form for more information.Using a subset of fields on <strong>the</strong> form In some cases, you may not want all <strong>the</strong> model fields to appear on <strong>the</strong> generatedform. There are three ways of telling ModelForm to use only a subset of <strong>the</strong> model fields:1. Set editable=False on <strong>the</strong> model field. As a result, any form created from <strong>the</strong> model via ModelForm willnot include that field.2. Use <strong>the</strong> fields attribute of <strong>the</strong> ModelForm‘s inner Meta class. This attribute, if given, should be a list offield names to include in <strong>the</strong> form. Changed in version 1.1: Please, see <strong>the</strong> release notes The form will render<strong>the</strong> fields in <strong>the</strong> same order <strong>the</strong>y are specified in <strong>the</strong> fields attribute.3. Use <strong>the</strong> exclude attribute of <strong>the</strong> ModelForm‘s inner Meta class. This attribute, if given, should be a list offield names to exclude from <strong>the</strong> form.For example, if you want a form for <strong>the</strong> Author model (defined above) that includes only <strong>the</strong> name and titlefields, you would specify fields or exclude like this:class PartialAuthorForm(ModelForm):class Meta:model = Authorfields = (’name’, ’title’)class PartialAuthorForm(ModelForm):class Meta:model = Authorexclude = (’birth_date’,)Since <strong>the</strong> Author model has only 3 fields, ‘name’, ‘title’, and ‘birth_date’, <strong>the</strong> forms above will contain exactly <strong>the</strong>same fields.Note: If you specify fields or exclude when creating a form with ModelForm, <strong>the</strong>n <strong>the</strong> fields that are not in <strong>the</strong>resulting form will not be set by <strong>the</strong> form’s save() method. <strong>Django</strong> will prevent any attempt to save an incompletemodel, so if <strong>the</strong> model does not allow <strong>the</strong> missing fields to be empty, and does not provide a default value for <strong>the</strong>missing fields, any attempt to save() a ModelForm with missing fields will fail. To avoid this failure, you mustinstantiate your model with initial values for <strong>the</strong> missing, but required fields:author = Author(title=’Mr’)form = PartialAuthorForm(request.POST, instance=author)form.save()Alternatively, you can use save(commit=False) and manually set any extra required fields:form = PartialAuthorForm(request.POST)author = form.save(commit=False)author.title = ’Mr’author.save()See <strong>the</strong> section on saving forms for more details on using save(commit=False).Overriding <strong>the</strong> default field types or widgets New in version 1.2: The widgets attribute is new in <strong>Django</strong> 1.2.The default field types, as described in <strong>the</strong> Field types table above, are sensible defaults. If you have a DateFieldin your model, chances are you’d want that to be represented as a DateField in your form. But ModelForm givesyou <strong>the</strong> flexibility of changing <strong>the</strong> form field type and widget for a given model field.156 Chapter 3. Using <strong>Django</strong>
<strong>Django</strong> <strong>Documentation</strong>, Release 1.2To specify a custom widget for a field, use <strong>the</strong> widgets attribute of <strong>the</strong> inner Meta class. This should be a dictionarymapping field names to widget classes or instances.For example, if you want <strong>the</strong> a CharField for <strong>the</strong> name attribute of Author to be represented by a instead of its default , you can override <strong>the</strong> field’s widget:from django.forms import ModelForm, Textareaclass AuthorForm(ModelForm):class Meta:model = Authorfields = (’name’, ’title’, ’birth_date’)widgets = {’name’: Textarea(attrs={’cols’: 80, ’rows’: 20}),}The widgets dictionary accepts ei<strong>the</strong>r widget instances (e.g., Textarea(...)) or classes (e.g., Textarea).If you want to fur<strong>the</strong>r customize a field – including its type, label, etc. – you can do this by declaratively specifyingfields like you would in a regular Form. Declared fields will override <strong>the</strong> default ones generated by using <strong>the</strong> modelattribute.For example, if you wanted to use MyDateFormField for <strong>the</strong> pub_date field, you could do <strong>the</strong> following:class ArticleForm(ModelForm):pub_date = MyDateFormField()class Meta:model = ArticleIf you want to override a field’s default label, <strong>the</strong>n specify <strong>the</strong> label parameter when declaring <strong>the</strong> form field:>>> class ArticleForm(ModelForm):... pub_date = DateField(label=’Publication date’)...... class Meta:... model = ArticleNote: If you explicitly instantiate a form field like this, <strong>Django</strong> assumes that you want to completely define itsbehavior; <strong>the</strong>refore, default attributes (such as max_length or required) are not drawn from <strong>the</strong> correspondingmodel. If you want to maintain <strong>the</strong> behavior specified in <strong>the</strong> model, you must set <strong>the</strong> relevant arguments explicitlywhen declaring <strong>the</strong> form field.For example, if <strong>the</strong> Article model looks like this:class Article(models.Model):headline = models.CharField(max_length=200, null=True, blank=True,help_text="Use puns liberally")content = models.TextField()and you want to do some custom validation for headline, while keeping <strong>the</strong> blank and help_text values asspecified, you might define ArticleForm like this:class ArticleForm(ModelForm):headline = MyFormField(max_length=200, required=False,help_text="Use puns liberally")class Meta:model = Article3.4. Working with forms 157
<strong>Django</strong> <strong>Documentation</strong>, Release 1.2See <strong>the</strong> form field documentation for more information on fields and <strong>the</strong>ir arguments.Changing <strong>the</strong> order of fields New in version 1.1: Please, see <strong>the</strong> release notes By default, a ModelForm willrender fields in <strong>the</strong> same order that <strong>the</strong>y are defined on <strong>the</strong> model, with ManyToManyField instances appearinglast. If you want to change <strong>the</strong> order in which fields are rendered, you can use <strong>the</strong> fields attribute on <strong>the</strong> Metaclass.The fields attribute defines <strong>the</strong> subset of model fields that will be rendered, and <strong>the</strong> order in which <strong>the</strong>y will berendered. For example given this model:class Book(models.Model):author = models.ForeignKey(Author)title = models.CharField(max_length=100)<strong>the</strong> author field would be rendered first. If we wanted <strong>the</strong> title field to be rendered first, we could specify <strong>the</strong>following ModelForm:>>> class BookForm(ModelForm):... class Meta:... model = Book... fields = (’title’, ’author’)Overriding <strong>the</strong> clean() method You can override <strong>the</strong> clean() method on a model form to provide additionalvalidation in <strong>the</strong> same way you can on a normal form.In this regard, model forms have two specific characteristics when compared to forms:By default <strong>the</strong> clean() method validates <strong>the</strong> uniqueness of fields that are marked as unique, unique_toge<strong>the</strong>ror unique_for_date|month|year on <strong>the</strong> model. Therefore, if you would like to override <strong>the</strong> clean() methodand maintain <strong>the</strong> default validation, you must call <strong>the</strong> parent class’s clean() method.Also, a model form instance bound to a model object will contain a self.instance attribute that gives model formmethods access to that specific model instance.Form inheritance As with basic forms, you can extend and reuse ModelForms by inheriting <strong>the</strong>m. This is usefulif you need to declare extra fields or extra methods on a parent class for use in a number of forms derived from models.For example, using <strong>the</strong> previous ArticleForm class:>>> class EnhancedArticleForm(ArticleForm):... def clean_pub_date(self):... ...This creates a form that behaves identically to ArticleForm, except <strong>the</strong>re’s some extra validation and cleaning for<strong>the</strong> pub_date field.You can also subclass <strong>the</strong> parent’s Meta inner class if you want to change <strong>the</strong> Meta.fields or Meta.excludeslists:>>> class RestrictedArticleForm(EnhancedArticleForm):... class Meta(ArticleForm.Meta):... exclude = (’body’,)This adds <strong>the</strong> extra method from <strong>the</strong> EnhancedArticleForm and modifies <strong>the</strong> original ArticleForm.Meta toremove one field.There are a couple of things to note, however.158 Chapter 3. Using <strong>Django</strong>
<strong>Django</strong> <strong>Documentation</strong>, Release 1.2• Normal Python name resolution rules apply. If you have multiple base classes that declare a Meta inner class,only <strong>the</strong> first one will be used. This means <strong>the</strong> child’s Meta, if it exists, o<strong>the</strong>rwise <strong>the</strong> Meta of <strong>the</strong> first parent,etc.• For technical reasons, a subclass cannot inherit from both a ModelForm and a Form simultaneously.Chances are <strong>the</strong>se notes won’t affect you unless you’re trying to do something tricky with subclassing.Interaction with model validation As part of its validation process, ModelForm will call <strong>the</strong> clean() methodof each field on your model that has a corresponding field on your form. If you have excluded any model fields,validation will not be run on those fields. See <strong>the</strong> form validation documentation for more on how field cleaning andvalidation work. Also, your model’s clean() method will be called before any uniqueness checks are made. SeeValidating objects for more information on <strong>the</strong> model’s clean() hook.Model formsetsLike regular formsets, <strong>Django</strong> provides a couple of enhanced formset classes that make it easy to work with <strong>Django</strong>models. Let’s reuse <strong>the</strong> Author model from above:>>> from django.forms.models import modelformset_factory>>> AuthorFormSet = modelformset_factory(Author)This will create a formset that is capable of working with <strong>the</strong> data associated with <strong>the</strong> Author model. It works justlike a regular formset:>>> formset = AuthorFormSet()>>> print formset
<strong>Django</strong> <strong>Documentation</strong>, Release 1.2Then, pass your BaseAuthorFormSet class to <strong>the</strong> factory function:>>> AuthorFormSet = modelformset_factory(Author, formset=BaseAuthorFormSet)If you want to return a formset that doesn’t include any pre-existing instances of <strong>the</strong> model, you can specify an emptyQuerySet:>>> AuthorFormSet(queryset=Author.objects.none())Controlling which fields are used with fields and exclude By default, a model formset uses all fields in <strong>the</strong>model that are not marked with editable=False. However, this can be overridden at <strong>the</strong> formset level:>>> AuthorFormSet = modelformset_factory(Author, fields=(’name’, ’title’))Using fields restricts <strong>the</strong> formset to use only <strong>the</strong> given fields. Alternatively, you can take an “opt-out” approach,specifying which fields to exclude:>>> AuthorFormSet = modelformset_factory(Author, exclude=(’birth_date’,))Saving objects in <strong>the</strong> formset<strong>the</strong> formset’s save() method:As with a ModelForm, you can save <strong>the</strong> data as a model object. This is done with# Create a formset instance with POST data.>>> formset = AuthorFormSet(request.POST)# Assuming all is valid, save <strong>the</strong> data.>>> instances = formset.save()The save() method returns <strong>the</strong> instances that have been saved to <strong>the</strong> database. If a given instance’s data didn’t changein <strong>the</strong> bound data, <strong>the</strong> instance won’t be saved to <strong>the</strong> database and won’t be included in <strong>the</strong> return value (instances,in <strong>the</strong> above example).Pass commit=False to return <strong>the</strong> unsaved model instances:# don’t save to <strong>the</strong> database>>> instances = formset.save(commit=False)>>> for instance in instances:... # do something with instance... instance.save()This gives you <strong>the</strong> ability to attach data to <strong>the</strong> instances before saving <strong>the</strong>m to <strong>the</strong> database. If your formset containsa ManyToManyField, you’ll also need to call formset.save_m2m() to ensure <strong>the</strong> many-to-many relationshipsare saved properly.Limiting <strong>the</strong> number of editable objects Changed in version 1.2: Please, see <strong>the</strong> release notes As with regularformsets, you can use <strong>the</strong> max_num and extra parameters to modelformset_factory to limit <strong>the</strong> number ofextra forms displayed.max_num does not prevent existing objects from being displayed:>>> Author.objects.order_by(’name’)[, , ]>>> AuthorFormSet = modelformset_factory(Author, max_num=1)>>> formset = AuthorFormSet(queryset=Author.objects.order_by(’name’))>>> [x.name for x in formset.get_queryset()][u’Charles Baudelaire’, u’Paul Verlaine’, u’Walt Whitman’]160 Chapter 3. Using <strong>Django</strong>
<strong>Django</strong> <strong>Documentation</strong>, Release 1.2If <strong>the</strong> value of max_num is greater than <strong>the</strong> number of existing related objects, up to extra additional blank formswill be added to <strong>the</strong> formset, so long as <strong>the</strong> total number of forms does not exceed max_num:>>> AuthorFormSet = modelformset_factory(Author, max_num=4, extra=2)>>> formset = AuthorFormSet(queryset=Author.objects.order_by(’name’))>>> for form in formset.forms:... print form.as_table()Name:
<strong>Django</strong> <strong>Documentation</strong>, Release 1.2formset.save()# Do something.else:formset = AuthorFormSet(queryset=Author.objects.filter(name__startswith=’O’))return render_to_response("manage_authors.html", {"formset": formset,})Note that we pass <strong>the</strong> queryset argument in both <strong>the</strong> POST and GET cases in this example.Using <strong>the</strong> formset in <strong>the</strong> templateFirst, you can let <strong>the</strong> formset do most of <strong>the</strong> work:{{ formset }}There are three ways to render a formset in a <strong>Django</strong> template.Second, you can manually render <strong>the</strong> formset, but let <strong>the</strong> form deal with itself:{{ formset.management_form }}{% for form in formset.forms %}{{ form }}{% endfor %}When you manually render <strong>the</strong> forms yourself, be sure to render <strong>the</strong> management form as shown above. See <strong>the</strong>management form documentation.Third, you can manually render each field:{{ formset.management_form }}{% for form in formset.forms %}{% for field in form %}{{ field.label_tag }}: {{ field }}{% endfor %}{% endfor %}If you opt to use this third method and you don’t iterate over <strong>the</strong> fields with a {% for %} loop, you’ll need to render<strong>the</strong> primary key field. For example, if you were rendering <strong>the</strong> name and age fields of a model:{{ formset.management_form }}{% for form in formset.forms %}{{ form.id }}{{ form.name }}{{ form.age }}{% endfor %}Notice how we need to explicitly render {{ form.id }}. This ensures that <strong>the</strong> model formset, in <strong>the</strong> POST case,will work correctly. (This example assumes a primary key named id. If you’ve explicitly defined your own primarykey that isn’t called id, make sure it gets rendered.)162 Chapter 3. Using <strong>Django</strong>
<strong>Django</strong> <strong>Documentation</strong>, Release 1.2Inline formsetsInline formsets is a small abstraction layer on top of model formsets. These simplify <strong>the</strong> case of working with relatedobjects via a foreign key. Suppose you have <strong>the</strong>se two models:class Author(models.Model):name = models.CharField(max_length=100)class Book(models.Model):author = models.ForeignKey(Author)title = models.CharField(max_length=100)If you want to create a formset that allows you to edit books belonging to a particular author, you could do this:>>> from django.forms.models import inlineformset_factory>>> BookFormSet = inlineformset_factory(Author, Book)>>> author = Author.objects.get(name=u’Mike Royko’)>>> formset = BookFormSet(instance=author)Note: inlineformset_factory uses modelformset_factory and marks can_delete=True.More than one foreign key to <strong>the</strong> same model If your model contains more than one foreign key to <strong>the</strong> samemodel, you’ll need to resolve <strong>the</strong> ambiguity manually using fk_name. For example, consider <strong>the</strong> following model:class Friendship(models.Model):from_friend = models.ForeignKey(Friend)to_friend = models.ForeignKey(Friend)length_in_months = models.IntegerField()To resolve this, you can use fk_name to inlineformset_factory:>>> FriendshipFormSet = inlineformset_factory(Friend, Friendship, fk_name="from_friend")Using an inline formset in a viewmodel. Here’s how you can do that:You may want to provide a view that allows a user to edit <strong>the</strong> related objects of adef manage_books(request, author_id):author = Author.objects.get(pk=author_id)BookInlineFormSet = inlineformset_factory(Author, Book)if request.method == "POST":formset = BookInlineFormSet(request.POST, request.FILES, instance=author)if formset.is_valid():formset.save()# Do something.else:formset = BookInlineFormSet(instance=author)return render_to_response("manage_books.html", {"formset": formset,})Notice how we pass instance in both <strong>the</strong> POST and GET cases.3.4. Working with forms 163
<strong>Django</strong> <strong>Documentation</strong>, Release 1.2FormsetsA formset is a layer of abstraction to working with multiple forms on <strong>the</strong> same page. It can be best compared to a datagrid. Let’s say you have <strong>the</strong> following form:>>> from django import forms>>> class ArticleForm(forms.Form):... title = forms.CharField()... pub_date = forms.DateField()You might want to allow <strong>the</strong> user to create several articles at once. To create a formset out of an ArticleForm youwould do:>>> from django.forms.formsets import formset_factory>>> ArticleFormSet = formset_factory(ArticleForm)You now have created a formset named ArticleFormSet. The formset gives you <strong>the</strong> ability to iterate over <strong>the</strong>forms in <strong>the</strong> formset and display <strong>the</strong>m as you would with a regular form:>>> formset = ArticleFormSet()>>> for form in formset.forms:... print form.as_table()Title:
<strong>Django</strong> <strong>Documentation</strong>, Release 1.2Limiting <strong>the</strong> maximum number of formsThe max_num parameter to formset_factory gives you <strong>the</strong> ability to limit <strong>the</strong> maximum number of empty forms<strong>the</strong> formset will display:>>> ArticleFormSet = formset_factory(ArticleForm, extra=2, max_num=1)>>> formset = ArticleFormset()>>> for form in formset.forms:... print form.as_table()Title:
<strong>Django</strong> <strong>Documentation</strong>, Release 1.2>>> data = {... ’form-0-title’: u’Test’,... ’form-0-pub_date’: u’’,... }>>> formset = ArticleFormSet(data)Traceback (most recent call last):...django.forms.util.ValidationError: [u’ManagementForm data is missing or has been tampered with’]It is used to keep track of how many form instances are being displayed. If you are adding new forms via JavaScript,you should increment <strong>the</strong> count fields in this form as well.The management form is available as an attribute of <strong>the</strong> formset itself. When rendering a formset in a template, youcan include all <strong>the</strong> management data by rendering {{ my_formset.management_form }} (substituting <strong>the</strong>name of your formset as appropriate). New in version 1.1: Please, see <strong>the</strong> release notestotal_form_count and initial_form_count BaseFormSet has a couple of methods that are closelyrelated to <strong>the</strong> ManagementForm, total_form_count and initial_form_count.total_form_count returns <strong>the</strong> total number of forms in this formset. initial_form_count returns <strong>the</strong>number of forms in <strong>the</strong> formset that were pre-filled, and is also used to determine how many forms are required. Youwill probably never need to override ei<strong>the</strong>r of <strong>the</strong>se methods, so please be sure you understand what <strong>the</strong>y do beforedoing so. New in version 1.2: Please, see <strong>the</strong> release notesempty_form BaseFormSet provides an additional attribute empty_form which returns a form instance witha prefix of __prefix__ for easier use in dynamic forms with JavaScript.Custom formset validation A formset has a clean method similar to <strong>the</strong> one on a Form class. This is where youdefine your own validation that works at <strong>the</strong> formset level:>>> from django.forms.formsets import BaseFormSet>>> class BaseArticleFormSet(BaseFormSet):... def clean(self):... """Checks that no two articles have <strong>the</strong> same title."""... if any(self.errors):... # Don’t bo<strong>the</strong>r validating <strong>the</strong> formset unless each form is valid on its own... return... titles = []... for i in range(0, self.total_form_count()):... form = self.forms[i]... title = form.cleaned_data[’title’]... if title in titles:... raise forms.ValidationError, "Articles in a set must have distinct titles."... titles.append(title)>>> ArticleFormSet = formset_factory(ArticleForm, formset=BaseArticleFormSet)>>> data = {... ’form-TOTAL_FORMS’: u’2’,... ’form-INITIAL_FORMS’: u’0’,... ’form-MAX_NUM_FORMS’: u’’,... ’form-0-title’: u’Test’,... ’form-0-pub_date’: u’16 June 1904’,... ’form-1-title’: u’Test’,... ’form-1-pub_date’: u’23 June 1912’,... }166 Chapter 3. Using <strong>Django</strong>
<strong>Django</strong> <strong>Documentation</strong>, Release 1.2>>> formset = ArticleFormSet(data)>>> formset.is_valid()False>>> formset.errors[{}, {}]>>> formset.non_form_errors()[u’Articles in a set must have distinct titles.’]The formset clean method is called after all <strong>the</strong> Form.clean methods have been called. The errors will be foundusing <strong>the</strong> non_form_errors() method on <strong>the</strong> formset.Dealing with ordering and deletion of formsCommon use cases with a formset is dealing with ordering and deletion of <strong>the</strong> form instances. This has been dealtwith for you. The formset_factory provides two optional parameters can_order and can_delete that willdo <strong>the</strong> extra work of adding <strong>the</strong> extra fields and providing simpler ways of getting to that data.can_orderDefault: FalseLets create a formset with <strong>the</strong> ability to order:>>> ArticleFormSet = formset_factory(ArticleForm, can_order=True)>>> formset = ArticleFormSet(initial=[... {’title’: u’Article #1’, ’pub_date’: datetime.date(2008, 5, 10)},... {’title’: u’Article #2’, ’pub_date’: datetime.date(2008, 5, 11)},... ])>>> for form in formset.forms:... print form.as_table()Title:
<strong>Django</strong> <strong>Documentation</strong>, Release 1.2>>> formset = ArticleFormSet(data, initial=[... {’title’: u’Article #1’, ’pub_date’: datetime.date(2008, 5, 10)},... {’title’: u’Article #2’, ’pub_date’: datetime.date(2008, 5, 11)},... ])>>> formset.is_valid()True>>> for form in formset.ordered_forms:... print form.cleaned_data{’pub_date’: datetime.date(2008, 5, 1), ’ORDER’: 0, ’title’: u’Article #3’}{’pub_date’: datetime.date(2008, 5, 11), ’ORDER’: 1, ’title’: u’Article #2’}{’pub_date’: datetime.date(2008, 5, 10), ’ORDER’: 2, ’title’: u’Article #1’}can_deleteDefault: FalseLets create a formset with <strong>the</strong> ability to delete:>>> ArticleFormSet = formset_factory(ArticleForm, can_delete=True)>>> formset = ArticleFormSet(initial=[... {’title’: u’Article #1’, ’pub_date’: datetime.date(2008, 5, 10)},... {’title’: u’Article #2’, ’pub_date’: datetime.date(2008, 5, 11)},... ])>>> for form in formset.forms:.... print form.as_table()
<strong>Django</strong> <strong>Documentation</strong>, Release 1.2[{’DELETE’: True, ’pub_date’: datetime.date(2008, 5, 10), ’title’: u’Article #1’}]Adding additional fields to a formsetIf you need to add additional fields to <strong>the</strong> formset this can be easily accomplished. The formset base class providesan add_fields method. You can simply override this method to add your own fields or even redefine <strong>the</strong> defaultfields/attributes of <strong>the</strong> order and deletion fields:>>> class BaseArticleFormSet(BaseFormSet):... def add_fields(self, form, index):... super(BaseArticleFormSet, self).add_fields(form, index)... form.fields["my_field"] = forms.CharField()>>> ArticleFormSet = formset_factory(ArticleForm, formset=BaseArticleFormSet)>>> formset = ArticleFormSet()>>> for form in formset.forms:... print form.as_table()Title:
<strong>Django</strong> <strong>Documentation</strong>, Release 1.2The above ends up calling <strong>the</strong> as_table method on <strong>the</strong> formset class.Using more than one formset in a view You are able to use more than one formset in a view if you like. Formsetsborrow much of its behavior from forms. With that said you are able to use prefix to prefix formset form fieldnames with a given value to allow more than one formset to be sent to a view without name clashing. Lets take a lookat how this might be accomplished:def manage_articles(request):ArticleFormSet = formset_factory(ArticleForm)BookFormSet = formset_factory(BookForm)if request.method == ’POST’:article_formset = ArticleFormSet(request.POST, request.FILES, prefix=’articles’)book_formset = BookFormSet(request.POST, request.FILES, prefix=’books’)if article_formset.is_valid() and book_formset.is_valid():# do something with <strong>the</strong> cleaned_data on <strong>the</strong> formsets.passelse:article_formset = ArticleFormSet(prefix=’articles’)book_formset = BookFormSet(prefix=’books’)return render_to_response(’manage_articles.html’, {’article_formset’: article_formset,’book_formset’: book_formset,})You would <strong>the</strong>n render <strong>the</strong> formsets as normal. It is important to point out that you need to pass prefix on both <strong>the</strong>POST and non-POST cases so that it is rendered and processed correctly.Form MediaRendering an attractive and easy-to-use Web form requires more than just HTML - it also requires CSS stylesheets,and if you want to use fancy “Web2.0” widgets, you may also need to include some JavaScript on each page. Theexact combination of CSS and JavaScript that is required for any given page will depend upon <strong>the</strong> widgets that are inuse on that page.This is where <strong>Django</strong> media definitions come in. <strong>Django</strong> allows you to associate different media files with <strong>the</strong> formsand widgets that require that media. For example, if you want to use a calendar to render DateFields, you can definea custom Calendar widget. This widget can <strong>the</strong>n be associated with <strong>the</strong> CSS and JavaScript that is required to render<strong>the</strong> calendar. When <strong>the</strong> Calendar widget is used on a form, <strong>Django</strong> is able to identify <strong>the</strong> CSS and JavaScript files thatare required, and provide <strong>the</strong> list of file names in a form suitable for easy inclusion on your Web page.Media and <strong>Django</strong> AdminThe <strong>Django</strong> Admin application defines a number of customized widgets for calendars, filtered selections, and so on.These widgets define media requirements, and <strong>the</strong> <strong>Django</strong> Admin uses <strong>the</strong> custom widgets in place of <strong>the</strong> <strong>Django</strong>defaults. The Admin templates will only include those media files that are required to render <strong>the</strong> widgets on any givenpage.If you like <strong>the</strong> widgets that <strong>the</strong> <strong>Django</strong> Admin application uses, feel free to use <strong>the</strong>m in your own application! They’reall stored in django.contrib.admin.widgets.Which JavaScript toolkit?Many JavaScript toolkits exist, and many of <strong>the</strong>m include widgets (such as calendar widgets) that can be used toenhance your application. <strong>Django</strong> has deliberately avoided blessing any one JavaScript toolkit. Each toolkit has its170 Chapter 3. Using <strong>Django</strong>
<strong>Django</strong> <strong>Documentation</strong>, Release 1.2own relative strengths and weaknesses - use whichever toolkit suits your requirements. <strong>Django</strong> is able to integratewith any JavaScript toolkit.Media as a static definitionThe easiest way to define media is as a static definition. Using this method, <strong>the</strong> media declaration is an inner class.The properties of <strong>the</strong> inner class define <strong>the</strong> media requirements.Here’s a simple example:class CalendarWidget(forms.TextInput):class Media:css = {’all’: (’pretty.css’,)}js = (’animations.js’, ’actions.js’)This code defines a CalendarWidget, which will be based on TextInput. Every time <strong>the</strong> CalendarWidgetis used on a form, that form will be directed to include <strong>the</strong> CSS file pretty.css, and <strong>the</strong> JavaScript filesanimations.js and actions.js.This static media definition is converted at runtime into a widget property named media. The media for a Calendar-Widget instance can be retrieved through this property:>>> w = CalendarWidget()>>> print w.mediaHere’s a list of all possible Media options. There are no required options.cssA dictionary describing <strong>the</strong> CSS files required for various forms of output media.The values in <strong>the</strong> dictionary should be a tuple/list of file names. See <strong>the</strong> section on media paths for details of how tospecify paths to media files. The keys in <strong>the</strong> dictionary are <strong>the</strong> output media types. These are <strong>the</strong> same types acceptedby CSS files in media declarations: ‘all’, ‘aural’, ‘braille’, ‘embossed’, ‘handheld’, ‘print’, ‘projection’, ‘screen’, ‘tty’and ‘tv’. If you need to have different stylesheets for different media types, provide a list of CSS files for each outputmedium. The following example would provide two CSS options – one for <strong>the</strong> screen, and one for print:class Media:css = {’screen’: (’pretty.css’,),’print’: (’newspaper.css’,)}If a group of CSS files are appropriate for multiple output media types, <strong>the</strong> dictionary key can be a comma separatedlist of output media types. In <strong>the</strong> following example, TV’s and projectors will have <strong>the</strong> same media requirements:class Media:css = {’screen’: (’pretty.css’,),’tv,projector’: (’lo_res.css’,),’print’: (’newspaper.css’,)}If this last CSS definition were to be rendered, it would become <strong>the</strong> following HTML:3.4. Working with forms 171
<strong>Django</strong> <strong>Documentation</strong>, Release 1.2
<strong>Django</strong> <strong>Documentation</strong>, Release 1.2class CalendarWidget(forms.TextInput):def _media(self):return forms.Media(css={’all’: (’pretty.css’,)},js=(’animations.js’, ’actions.js’))media = property(_media)See <strong>the</strong> section on Media objects for more details on how to construct return values for dynamic media properties.Paths in media definitionsPaths used to specify media can be ei<strong>the</strong>r relative or absolute. If a path starts with ‘/’, ‘http://‘ or ‘https://‘,it will be interpreted as an absolute path, and left as-is. All o<strong>the</strong>r paths will be prepended with <strong>the</strong> value ofsettings.MEDIA_URL. For example, if <strong>the</strong> MEDIA_URL for your site was http://media.example.com/:class CalendarWidget(forms.TextInput):class Media:css = {’all’: (’/css/pretty.css’,),}js = (’animations.js’, ’http://o<strong>the</strong>rsite.com/actions.js’)>>> w = CalendarWidget()>>> print w.mediaMedia objectsWhen you interrogate <strong>the</strong> media attribute of a widget or form, <strong>the</strong> value that is returned is a forms.Media object.As we have already seen, <strong>the</strong> string representation of a Media object is <strong>the</strong> HTML required to include media in <strong>the</strong> block of your HTML page.However, Media objects have some o<strong>the</strong>r interesting properties.Media subsets If you only want media of a particular type, you can use <strong>the</strong> subscript operator to filter out a mediumof interest. For example:>>> w = CalendarWidget()>>> print w.media>>> print w.media[’css’]When you use <strong>the</strong> subscript operator, <strong>the</strong> value that is returned is a new Media object – but one that only contains <strong>the</strong>media of interest.Combining media objects Media objects can also be added toge<strong>the</strong>r. When two media objects are added, <strong>the</strong>resulting Media object contains <strong>the</strong> union of <strong>the</strong> media from both files:3.4. Working with forms 173
<strong>Django</strong> <strong>Documentation</strong>, Release 1.2>>> class CalendarWidget(forms.TextInput):... class Media:... css = {... ’all’: (’pretty.css’,)... }... js = (’animations.js’, ’actions.js’)>>> class O<strong>the</strong>rWidget(forms.TextInput):... class Media:... js = (’whizbang.js’,)>>> w1 = CalendarWidget()>>> w2 = O<strong>the</strong>rWidget()>>> print w1.media + w2.mediaMedia on FormsWidgets aren’t <strong>the</strong> only objects that can have media definitions – forms can also define media. The rules for mediadefinitions on forms are <strong>the</strong> same as <strong>the</strong> rules for widgets: declarations can be static or dynamic; path and inheritancerules for those declarations are exactly <strong>the</strong> same.Regardless of whe<strong>the</strong>r you define a media declaration, all Form objects have a media property. The default value forthis property is <strong>the</strong> result of adding <strong>the</strong> media definitions for all widgets that are part of <strong>the</strong> form:>>> class ContactForm(forms.Form):... date = DateField(widget=CalendarWidget)... name = CharField(max_length=40, widget=O<strong>the</strong>rWidget)>>> f = ContactForm()>>> f.mediaIf you want to associate additional media with a form – for example, CSS for form layout – simply add a mediadeclaration to <strong>the</strong> form:>>> class ContactForm(forms.Form):... date = DateField(widget=CalendarWidget)... name = CharField(max_length=40, widget=O<strong>the</strong>rWidget)...... class Media:... css = {... ’all’: (’layout.css’,)... }>>> f = ContactForm()>>> f.media174 Chapter 3. Using <strong>Django</strong>
<strong>Django</strong> <strong>Documentation</strong>, Release 1.2See Also:The Forms Reference Covers <strong>the</strong> full API reference, including form fields, form widgets, and form and field validation.3.5 Creating forms from models3.5.1 ModelFormclass ModelFormIf you’re building a database-driven app, chances are you’ll have forms that map closely to <strong>Django</strong> models. Forinstance, you might have a BlogComment model, and you want to create a form that lets people submit comments.In this case, it would be redundant to define <strong>the</strong> field types in your form, because you’ve already defined <strong>the</strong> fields inyour model.For this reason, <strong>Django</strong> provides a helper class that let you create a Form class from a <strong>Django</strong> model.For example:>>> from django.forms import ModelForm# Create <strong>the</strong> form class.>>> class ArticleForm(ModelForm):... class Meta:... model = Article# Creating a form to add an article.>>> form = ArticleForm()# Creating a form to change an existing article.>>> article = Article.objects.get(pk=1)>>> form = ArticleForm(instance=article)Field typesThe generated Form class will have a form field for every model field. Each model field has a corresponding defaultform field. For example, a CharField on a model is represented as a CharField on a form. A modelManyToManyField is represented as a MultipleChoiceField. Here is <strong>the</strong> full list of conversions:3.5. Creating forms from models 175
<strong>Django</strong> <strong>Documentation</strong>, Release 1.2Model fieldForm fieldAutoFieldNot represented in <strong>the</strong> formBigIntegerField IntegerField with min_value set to -9223372036854775808 andmax_value set to 9223372036854775807.BooleanFieldBooleanFieldCharFieldCharField with max_length set to <strong>the</strong> model field’s max_lengthCommaSeparatedIntegerField CharFieldDateFieldDateFieldDateTimeField DateTimeFieldDecimalFieldDecimalFieldEmailFieldEmailFieldFileFieldFileFieldFilePathField CharFieldFloatFieldFloatFieldForeignKeyModelChoiceField (see below)ImageFieldImageFieldIntegerFieldIntegerFieldIPAddressField IPAddressFieldManyToManyField ModelMultipleChoiceField (see below)NullBooleanField CharFieldPhoneNumberField USPhoneNumberField (from django.contrib.localflavor.us)PositiveIntegerField IntegerFieldPositiveSmallIntegerField IntegerFieldSlugFieldSlugFieldSmallIntegerField IntegerFieldTextFieldCharField with widget=forms.TextareaTimeFieldTimeFieldURLFieldURLField with verify_exists set to <strong>the</strong> model field’s verify_existsXMLFieldCharField with widget=forms.TextareaNew in version 1.0: The FloatField form field and DecimalField model and form fields are new in <strong>Django</strong>1.0.New in version 1.2: The BigIntegerField is new in <strong>Django</strong> 1.2. As you might expect, <strong>the</strong> ForeignKeyand ManyToManyField model field types are special cases:• ForeignKey is represented by django.forms.ModelChoiceField, which is a ChoiceField whosechoices are a model QuerySet.• ManyToManyField is represented by django.forms.ModelMultipleChoiceField, which is aMultipleChoiceField whose choices are a model QuerySet.In addition, each generated form field has attributes set as follows:• If <strong>the</strong> model field has blank=True, <strong>the</strong>n required is set to False on <strong>the</strong> form field.required=True.O<strong>the</strong>rwise,• The form field’s label is set to <strong>the</strong> verbose_name of <strong>the</strong> model field, with <strong>the</strong> first character capitalized.• The form field’s help_text is set to <strong>the</strong> help_text of <strong>the</strong> model field.• If <strong>the</strong> model field has choices set, <strong>the</strong>n <strong>the</strong> form field’s widget will be set to Select, with choices comingfrom <strong>the</strong> model field’s choices. The choices will normally include <strong>the</strong> blank choice which is selected bydefault. If <strong>the</strong> field is required, this forces <strong>the</strong> user to make a selection. The blank choice will not be includedif <strong>the</strong> model field has blank=False and an explicit default value (<strong>the</strong> default value will be initiallyselected instead).Finally, note that you can override <strong>the</strong> form field used for a given model field. See Overriding <strong>the</strong> default field typesor widgets below.176 Chapter 3. Using <strong>Django</strong>
<strong>Django</strong> <strong>Documentation</strong>, Release 1.2A full exampleConsider this set of models:from django.db import modelsfrom django.forms import ModelFormTITLE_CHOICES = ((’MR’, ’Mr.’),(’MRS’, ’Mrs.’),(’MS’, ’Ms.’),)class Author(models.Model):name = models.CharField(max_length=100)title = models.CharField(max_length=3, choices=TITLE_CHOICES)birth_date = models.DateField(blank=True, null=True)def __unicode__(self):return self.nameclass Book(models.Model):name = models.CharField(max_length=100)authors = models.ManyToManyField(Author)class AuthorForm(ModelForm):class Meta:model = Authorclass BookForm(ModelForm):class Meta:model = BookWith <strong>the</strong>se models, <strong>the</strong> ModelForm subclasses above would be roughly equivalent to this (<strong>the</strong> only difference being<strong>the</strong> save() method, which we’ll discuss in a moment.):class AuthorForm(forms.Form):name = forms.CharField(max_length=100)title = forms.CharField(max_length=3,widget=forms.Select(choices=TITLE_CHOICES))birth_date = forms.DateField(required=False)class BookForm(forms.Form):name = forms.CharField(max_length=100)authors = forms.ModelMultipleChoiceField(queryset=Author.objects.all())The is_valid() method and errorsChanged in version 1.2: Please, see <strong>the</strong> release notes The first time you call is_valid() or access <strong>the</strong> errorsattribute of a ModelForm has always triggered form validation, but as of <strong>Django</strong> 1.2, it will also trigger modelvalidation. This has <strong>the</strong> side-effect of cleaning <strong>the</strong> model you pass to <strong>the</strong> ModelForm constructor. For instance,calling is_valid() on your form will convert any date fields on your model to actual date objects.3.5. Creating forms from models 177
<strong>Django</strong> <strong>Documentation</strong>, Release 1.2The save() methodEvery form produced by ModelForm also has a save() method. This method creates and saves a database objectfrom <strong>the</strong> data bound to <strong>the</strong> form. A subclass of ModelForm can accept an existing model instance as <strong>the</strong> keywordargument instance; if this is supplied, save() will update that instance. If it’s not supplied, save() will createa new instance of <strong>the</strong> specified model:# Create a form instance from POST data.>>> f = ArticleForm(request.POST)# Save a new Article object from <strong>the</strong> form’s data.>>> new_article = f.save()# Create a form to edit an existing Article.>>> a = Article.objects.get(pk=1)>>> f = ArticleForm(instance=a)>>> f.save()# Create a form to edit an existing Article, but use# POST data to populate <strong>the</strong> form.>>> a = Article.objects.get(pk=1)>>> f = ArticleForm(request.POST, instance=a)>>> f.save()Note that save() will raise a ValueError if <strong>the</strong> data in <strong>the</strong> form doesn’t validate – i.e., if form.errors evaluates toTrue.This save() method accepts an optional commit keyword argument, which accepts ei<strong>the</strong>r True or False. If youcall save() with commit=False, <strong>the</strong>n it will return an object that hasn’t yet been saved to <strong>the</strong> database. In thiscase, it’s up to you to call save() on <strong>the</strong> resulting model instance. This is useful if you want to do custom processingon <strong>the</strong> object before saving it, or if you want to use one of <strong>the</strong> specialized model saving options. commit is True bydefault.Ano<strong>the</strong>r side effect of using commit=False is seen when your model has a many-to-many relation with ano<strong>the</strong>rmodel. If your model has a many-to-many relation and you specify commit=False when you save a form, <strong>Django</strong>cannot immediately save <strong>the</strong> form data for <strong>the</strong> many-to-many relation. This is because it isn’t possible to save manyto-manydata for an instance until <strong>the</strong> instance exists in <strong>the</strong> database.To work around this problem, every time you save a form using commit=False, <strong>Django</strong> adds a save_m2m()method to your ModelForm subclass. After you’ve manually saved <strong>the</strong> instance produced by <strong>the</strong> form, you caninvoke save_m2m() to save <strong>the</strong> many-to-many form data. For example:# Create a form instance with POST data.>>> f = AuthorForm(request.POST)# Create, but don’t save <strong>the</strong> new author instance.>>> new_author = f.save(commit=False)# Modify <strong>the</strong> author in some way.>>> new_author.some_field = ’some_value’# Save <strong>the</strong> new instance.>>> new_author.save()# Now, save <strong>the</strong> many-to-many data for <strong>the</strong> form.>>> f.save_m2m()Calling save_m2m() is only required if you use save(commit=False). When you use a simple save() on aform, all data – including many-to-many data – is saved without <strong>the</strong> need for any additional method calls. For example:178 Chapter 3. Using <strong>Django</strong>
<strong>Django</strong> <strong>Documentation</strong>, Release 1.2# Create a form instance with POST data.>>> a = Author()>>> f = AuthorForm(request.POST, instance=a)# Create and save <strong>the</strong> new author instance. There’s no need to do anything else.>>> new_author = f.save()O<strong>the</strong>r than <strong>the</strong> save() and save_m2m() methods, a ModelForm works exactly <strong>the</strong> same way as any o<strong>the</strong>r formsform. For example, <strong>the</strong> is_valid() method is used to check for validity, <strong>the</strong> is_multipart() method is usedto determine whe<strong>the</strong>r a form requires multipart file upload (and hence whe<strong>the</strong>r request.FILES must be passed to<strong>the</strong> form), etc. See Binding uploaded files to a form for more information.Using a subset of fields on <strong>the</strong> formIn some cases, you may not want all <strong>the</strong> model fields to appear on <strong>the</strong> generated form. There are three ways of tellingModelForm to use only a subset of <strong>the</strong> model fields:1. Set editable=False on <strong>the</strong> model field. As a result, any form created from <strong>the</strong> model via ModelForm willnot include that field.2. Use <strong>the</strong> fields attribute of <strong>the</strong> ModelForm‘s inner Meta class. This attribute, if given, should be a list offield names to include in <strong>the</strong> form. Changed in version 1.1: Please, see <strong>the</strong> release notes The form will render<strong>the</strong> fields in <strong>the</strong> same order <strong>the</strong>y are specified in <strong>the</strong> fields attribute.3. Use <strong>the</strong> exclude attribute of <strong>the</strong> ModelForm‘s inner Meta class. This attribute, if given, should be a list offield names to exclude from <strong>the</strong> form.For example, if you want a form for <strong>the</strong> Author model (defined above) that includes only <strong>the</strong> name and titlefields, you would specify fields or exclude like this:class PartialAuthorForm(ModelForm):class Meta:model = Authorfields = (’name’, ’title’)class PartialAuthorForm(ModelForm):class Meta:model = Authorexclude = (’birth_date’,)Since <strong>the</strong> Author model has only 3 fields, ‘name’, ‘title’, and ‘birth_date’, <strong>the</strong> forms above will contain exactly <strong>the</strong>same fields.Note: If you specify fields or exclude when creating a form with ModelForm, <strong>the</strong>n <strong>the</strong> fields that are not in <strong>the</strong>resulting form will not be set by <strong>the</strong> form’s save() method. <strong>Django</strong> will prevent any attempt to save an incompletemodel, so if <strong>the</strong> model does not allow <strong>the</strong> missing fields to be empty, and does not provide a default value for <strong>the</strong>missing fields, any attempt to save() a ModelForm with missing fields will fail. To avoid this failure, you mustinstantiate your model with initial values for <strong>the</strong> missing, but required fields:author = Author(title=’Mr’)form = PartialAuthorForm(request.POST, instance=author)form.save()Alternatively, you can use save(commit=False) and manually set any extra required fields:form = PartialAuthorForm(request.POST)author = form.save(commit=False)3.5. Creating forms from models 179
<strong>Django</strong> <strong>Documentation</strong>, Release 1.2author.title = ’Mr’author.save()See <strong>the</strong> section on saving forms for more details on using save(commit=False).Overriding <strong>the</strong> default field types or widgetsNew in version 1.2: The widgets attribute is new in <strong>Django</strong> 1.2. The default field types, as described in <strong>the</strong> Fieldtypes table above, are sensible defaults. If you have a DateField in your model, chances are you’d want that to berepresented as a DateField in your form. But ModelForm gives you <strong>the</strong> flexibility of changing <strong>the</strong> form field typeand widget for a given model field.To specify a custom widget for a field, use <strong>the</strong> widgets attribute of <strong>the</strong> inner Meta class. This should be a dictionarymapping field names to widget classes or instances.For example, if you want <strong>the</strong> a CharField for <strong>the</strong> name attribute of Author to be represented by a instead of its default , you can override <strong>the</strong> field’s widget:from django.forms import ModelForm, Textareaclass AuthorForm(ModelForm):class Meta:model = Authorfields = (’name’, ’title’, ’birth_date’)widgets = {’name’: Textarea(attrs={’cols’: 80, ’rows’: 20}),}The widgets dictionary accepts ei<strong>the</strong>r widget instances (e.g., Textarea(...)) or classes (e.g., Textarea).If you want to fur<strong>the</strong>r customize a field – including its type, label, etc. – you can do this by declaratively specifyingfields like you would in a regular Form. Declared fields will override <strong>the</strong> default ones generated by using <strong>the</strong> modelattribute.For example, if you wanted to use MyDateFormField for <strong>the</strong> pub_date field, you could do <strong>the</strong> following:class ArticleForm(ModelForm):pub_date = MyDateFormField()class Meta:model = ArticleIf you want to override a field’s default label, <strong>the</strong>n specify <strong>the</strong> label parameter when declaring <strong>the</strong> form field:>>> class ArticleForm(ModelForm):... pub_date = DateField(label=’Publication date’)...... class Meta:... model = ArticleNote: If you explicitly instantiate a form field like this, <strong>Django</strong> assumes that you want to completely define itsbehavior; <strong>the</strong>refore, default attributes (such as max_length or required) are not drawn from <strong>the</strong> correspondingmodel. If you want to maintain <strong>the</strong> behavior specified in <strong>the</strong> model, you must set <strong>the</strong> relevant arguments explicitlywhen declaring <strong>the</strong> form field.For example, if <strong>the</strong> Article model looks like this:180 Chapter 3. Using <strong>Django</strong>
<strong>Django</strong> <strong>Documentation</strong>, Release 1.2class Article(models.Model):headline = models.CharField(max_length=200, null=True, blank=True,help_text="Use puns liberally")content = models.TextField()and you want to do some custom validation for headline, while keeping <strong>the</strong> blank and help_text values asspecified, you might define ArticleForm like this:class ArticleForm(ModelForm):headline = MyFormField(max_length=200, required=False,help_text="Use puns liberally")class Meta:model = ArticleSee <strong>the</strong> form field documentation for more information on fields and <strong>the</strong>ir arguments.Changing <strong>the</strong> order of fieldsNew in version 1.1: Please, see <strong>the</strong> release notes By default, a ModelForm will render fields in <strong>the</strong> same order that<strong>the</strong>y are defined on <strong>the</strong> model, with ManyToManyField instances appearing last. If you want to change <strong>the</strong> order inwhich fields are rendered, you can use <strong>the</strong> fields attribute on <strong>the</strong> Meta class.The fields attribute defines <strong>the</strong> subset of model fields that will be rendered, and <strong>the</strong> order in which <strong>the</strong>y will berendered. For example given this model:class Book(models.Model):author = models.ForeignKey(Author)title = models.CharField(max_length=100)<strong>the</strong> author field would be rendered first. If we wanted <strong>the</strong> title field to be rendered first, we could specify <strong>the</strong>following ModelForm:>>> class BookForm(ModelForm):... class Meta:... model = Book... fields = (’title’, ’author’)Overriding <strong>the</strong> clean() methodYou can override <strong>the</strong> clean() method on a model form to provide additional validation in <strong>the</strong> same way you can ona normal form.In this regard, model forms have two specific characteristics when compared to forms:By default <strong>the</strong> clean() method validates <strong>the</strong> uniqueness of fields that are marked as unique, unique_toge<strong>the</strong>ror unique_for_date|month|year on <strong>the</strong> model. Therefore, if you would like to override <strong>the</strong> clean() methodand maintain <strong>the</strong> default validation, you must call <strong>the</strong> parent class’s clean() method.Also, a model form instance bound to a model object will contain a self.instance attribute that gives model formmethods access to that specific model instance.Form inheritanceAs with basic forms, you can extend and reuse ModelForms by inheriting <strong>the</strong>m. This is useful if you need to declareextra fields or extra methods on a parent class for use in a number of forms derived from models. For example, using3.5. Creating forms from models 181
<strong>Django</strong> <strong>Documentation</strong>, Release 1.2<strong>the</strong> previous ArticleForm class:>>> class EnhancedArticleForm(ArticleForm):... def clean_pub_date(self):... ...This creates a form that behaves identically to ArticleForm, except <strong>the</strong>re’s some extra validation and cleaning for<strong>the</strong> pub_date field.You can also subclass <strong>the</strong> parent’s Meta inner class if you want to change <strong>the</strong> Meta.fields or Meta.excludeslists:>>> class RestrictedArticleForm(EnhancedArticleForm):... class Meta(ArticleForm.Meta):... exclude = (’body’,)This adds <strong>the</strong> extra method from <strong>the</strong> EnhancedArticleForm and modifies <strong>the</strong> original ArticleForm.Meta toremove one field.There are a couple of things to note, however.• Normal Python name resolution rules apply. If you have multiple base classes that declare a Meta inner class,only <strong>the</strong> first one will be used. This means <strong>the</strong> child’s Meta, if it exists, o<strong>the</strong>rwise <strong>the</strong> Meta of <strong>the</strong> first parent,etc.• For technical reasons, a subclass cannot inherit from both a ModelForm and a Form simultaneously.Chances are <strong>the</strong>se notes won’t affect you unless you’re trying to do something tricky with subclassing.Interaction with model validationAs part of its validation process, ModelForm will call <strong>the</strong> clean() method of each field on your model that has acorresponding field on your form. If you have excluded any model fields, validation will not be run on those fields. See<strong>the</strong> form validation documentation for more on how field cleaning and validation work. Also, your model’s clean()method will be called before any uniqueness checks are made. See Validating objects for more information on <strong>the</strong>model’s clean() hook.3.5.2 Model formsetsLike regular formsets, <strong>Django</strong> provides a couple of enhanced formset classes that make it easy to work with <strong>Django</strong>models. Let’s reuse <strong>the</strong> Author model from above:>>> from django.forms.models import modelformset_factory>>> AuthorFormSet = modelformset_factory(Author)This will create a formset that is capable of working with <strong>the</strong> data associated with <strong>the</strong> Author model. It works justlike a regular formset:>>> formset = AuthorFormSet()>>> print formset
<strong>Django</strong> <strong>Documentation</strong>, Release 1.2Birth date:
<strong>Django</strong> <strong>Documentation</strong>, Release 1.2The save() method returns <strong>the</strong> instances that have been saved to <strong>the</strong> database. If a given instance’s data didn’t changein <strong>the</strong> bound data, <strong>the</strong> instance won’t be saved to <strong>the</strong> database and won’t be included in <strong>the</strong> return value (instances,in <strong>the</strong> above example).Pass commit=False to return <strong>the</strong> unsaved model instances:# don’t save to <strong>the</strong> database>>> instances = formset.save(commit=False)>>> for instance in instances:... # do something with instance... instance.save()This gives you <strong>the</strong> ability to attach data to <strong>the</strong> instances before saving <strong>the</strong>m to <strong>the</strong> database. If your formset containsa ManyToManyField, you’ll also need to call formset.save_m2m() to ensure <strong>the</strong> many-to-many relationshipsare saved properly.Limiting <strong>the</strong> number of editable objectsChanged in version 1.2: Please, see <strong>the</strong> release notes As with regular formsets, you can use <strong>the</strong> max_num and extraparameters to modelformset_factory to limit <strong>the</strong> number of extra forms displayed.max_num does not prevent existing objects from being displayed:>>> Author.objects.order_by(’name’)[, , ]>>> AuthorFormSet = modelformset_factory(Author, max_num=1)>>> formset = AuthorFormSet(queryset=Author.objects.order_by(’name’))>>> [x.name for x in formset.get_queryset()][u’Charles Baudelaire’, u’Paul Verlaine’, u’Walt Whitman’]If <strong>the</strong> value of max_num is greater than <strong>the</strong> number of existing related objects, up to extra additional blank formswill be added to <strong>the</strong> formset, so long as <strong>the</strong> total number of forms does not exceed max_num:>>> AuthorFormSet = modelformset_factory(Author, max_num=4, extra=2)>>> formset = AuthorFormSet(queryset=Author.objects.order_by(’name’))>>> for form in formset.forms:... print form.as_table()Name:
<strong>Django</strong> <strong>Documentation</strong>, Release 1.2formset = AuthorFormSet()return render_to_response("manage_authors.html", {"formset": formset,})As you can see, <strong>the</strong> view logic of a model formset isn’t drastically different than that of a “normal” formset. The onlydifference is that we call formset.save() to save <strong>the</strong> data into <strong>the</strong> database. (This was described above, in Savingobjects in <strong>the</strong> formset.)Overiding clean() on a model_formsetJust like with ModelForms, by default <strong>the</strong> clean() method of a model_formset will validate that none of<strong>the</strong> items in <strong>the</strong> formset violate <strong>the</strong> unique constraints on your model (ei<strong>the</strong>r unique, unique_toge<strong>the</strong>r orunique_for_date|month|year). If you want to overide <strong>the</strong> clean() method on a model_formset andmaintain this validation, you must call <strong>the</strong> parent class’s clean method:class MyModelFormSet(BaseModelFormSet):def clean(self):super(MyModelFormSet, self).clean()# example custom validation across forms in <strong>the</strong> formset:for form in self.forms:# your custom formset validationUsing a custom querysetAs stated earlier, you can override <strong>the</strong> default queryset used by <strong>the</strong> model formset:def manage_authors(request):AuthorFormSet = modelformset_factory(Author)if request.method == "POST":formset = AuthorFormSet(request.POST, request.FILES,queryset=Author.objects.filter(name__startswith=’O’))if formset.is_valid():formset.save()# Do something.else:formset = AuthorFormSet(queryset=Author.objects.filter(name__startswith=’O’))return render_to_response("manage_authors.html", {"formset": formset,})Note that we pass <strong>the</strong> queryset argument in both <strong>the</strong> POST and GET cases in this example.Using <strong>the</strong> formset in <strong>the</strong> templateThere are three ways to render a formset in a <strong>Django</strong> template.First, you can let <strong>the</strong> formset do most of <strong>the</strong> work:{{ formset }}Second, you can manually render <strong>the</strong> formset, but let <strong>the</strong> form deal with itself:3.5. Creating forms from models 185
<strong>Django</strong> <strong>Documentation</strong>, Release 1.2{{ formset.management_form }}{% for form in formset.forms %}{{ form }}{% endfor %}When you manually render <strong>the</strong> forms yourself, be sure to render <strong>the</strong> management form as shown above. See <strong>the</strong>management form documentation.Third, you can manually render each field:{{ formset.management_form }}{% for form in formset.forms %}{% for field in form %}{{ field.label_tag }}: {{ field }}{% endfor %}{% endfor %}If you opt to use this third method and you don’t iterate over <strong>the</strong> fields with a {% for %} loop, you’ll need to render<strong>the</strong> primary key field. For example, if you were rendering <strong>the</strong> name and age fields of a model:{{ formset.management_form }}{% for form in formset.forms %}{{ form.id }}{{ form.name }}{{ form.age }}{% endfor %}Notice how we need to explicitly render {{ form.id }}. This ensures that <strong>the</strong> model formset, in <strong>the</strong> POST case,will work correctly. (This example assumes a primary key named id. If you’ve explicitly defined your own primarykey that isn’t called id, make sure it gets rendered.)3.5.3 Inline formsetsInline formsets is a small abstraction layer on top of model formsets. These simplify <strong>the</strong> case of working with relatedobjects via a foreign key. Suppose you have <strong>the</strong>se two models:class Author(models.Model):name = models.CharField(max_length=100)class Book(models.Model):author = models.ForeignKey(Author)title = models.CharField(max_length=100)If you want to create a formset that allows you to edit books belonging to a particular author, you could do this:>>> from django.forms.models import inlineformset_factory>>> BookFormSet = inlineformset_factory(Author, Book)>>> author = Author.objects.get(name=u’Mike Royko’)>>> formset = BookFormSet(instance=author)186 Chapter 3. Using <strong>Django</strong>
<strong>Django</strong> <strong>Documentation</strong>, Release 1.2Note: inlineformset_factory uses modelformset_factory and marks can_delete=True.More than one foreign key to <strong>the</strong> same modelIf your model contains more than one foreign key to <strong>the</strong> same model, you’ll need to resolve <strong>the</strong> ambiguity manuallyusing fk_name. For example, consider <strong>the</strong> following model:class Friendship(models.Model):from_friend = models.ForeignKey(Friend)to_friend = models.ForeignKey(Friend)length_in_months = models.IntegerField()To resolve this, you can use fk_name to inlineformset_factory:>>> FriendshipFormSet = inlineformset_factory(Friend, Friendship, fk_name="from_friend")Using an inline formset in a viewYou may want to provide a view that allows a user to edit <strong>the</strong> related objects of a model. Here’s how you can do that:def manage_books(request, author_id):author = Author.objects.get(pk=author_id)BookInlineFormSet = inlineformset_factory(Author, Book)if request.method == "POST":formset = BookInlineFormSet(request.POST, request.FILES, instance=author)if formset.is_valid():formset.save()# Do something.else:formset = BookInlineFormSet(instance=author)return render_to_response("manage_books.html", {"formset": formset,})Notice how we pass instance in both <strong>the</strong> POST and GET cases.3.6 The <strong>Django</strong> template languageAbout this documentThis document explains <strong>the</strong> language syntax of <strong>the</strong> <strong>Django</strong> template system. If you’re looking for a more technicalperspective on how it works and how to extend it, see The <strong>Django</strong> template language: For Python programmers.<strong>Django</strong>’s template language is designed to strike a balance between power and ease. It’s designed to feel comfortableto those used to working with HTML. If you have any exposure to o<strong>the</strong>r text-based template languages, such as Smartyor CheetahTemplate, you should feel right at home with <strong>Django</strong>’s templates.Philosophy3.6. The <strong>Django</strong> template language 187
<strong>Django</strong> <strong>Documentation</strong>, Release 1.2If you have a background in programming, or if you’re used to languages like PHP which mix programming codedirectly into HTML, you’ll want to bear in mind that <strong>the</strong> <strong>Django</strong> template system is not simply Python embedded intoHTML. This is by design: <strong>the</strong> template system is meant to express presentation, not program logic.The <strong>Django</strong> template system provides tags which function similarly to some programming constructs – an if tag forboolean tests, a for tag for looping, etc. – but <strong>the</strong>se are not simply executed as <strong>the</strong> corresponding Python code, and<strong>the</strong> template system will not execute arbitrary Python expressions. Only <strong>the</strong> tags, filters and syntax listed below aresupported by default (although you can add your own extensions to <strong>the</strong> template language as needed).3.6.1 TemplatesA template is simply a text file. It can generate any text-based format (HTML, XML, CSV, etc.).A template contains variables, which get replaced with values when <strong>the</strong> template is evaluated, and tags, which control<strong>the</strong> logic of <strong>the</strong> template.Below is a minimal template that illustrates a few basics. Each element will be explained later in this document.:{% extends "base_generic.html" %}{% block title %}{{ section.title }}{% endblock %}{% block content %}{{ section.title }}{% for story in story_list %}{{ story.headline|upper }}{{ story.tease|truncatewords:"100" }}{% endfor %}{% endblock %}PhilosophyWhy use a text-based template instead of an XML-based one (like Zope’s TAL)? We wanted <strong>Django</strong>’s template languageto be usable for more than just XML/HTML templates. At World Online, we use it for e-mails, JavaScript andCSV. You can use <strong>the</strong> template language for any text-based format.Oh, and one more thing: Making humans edit XML is sadistic!3.6.2 VariablesVariables look like this: {{ variable }}. When <strong>the</strong> template engine encounters a variable, it evaluates thatvariable and replaces it with <strong>the</strong> result.Use a dot (.) to access attributes of a variable.Behind <strong>the</strong> scenesTechnically, when <strong>the</strong> template system encounters a dot, it tries <strong>the</strong> following lookups, in this order:• Dictionary lookup188 Chapter 3. Using <strong>Django</strong>
<strong>Django</strong> <strong>Documentation</strong>, Release 1.2• Attribute lookup• Method call• List-index lookupIn <strong>the</strong> above example, {{ section.title }} will be replaced with <strong>the</strong> title attribute of <strong>the</strong> section object.If you use a variable that doesn’t exist, <strong>the</strong> template system will insert <strong>the</strong> value of <strong>the</strong>TEMPLATE_STRING_IF_INVALID setting, which is set to ” (<strong>the</strong> empty string) by default.3.6.3 FiltersYou can modify variables for display by using filters.Filters look like this: {{ name|lower }}. This displays <strong>the</strong> value of <strong>the</strong> {{ name }} variable after beingfiltered through <strong>the</strong> lower filter, which converts text to lowercase. Use a pipe (|) to apply a filter.Filters can be “chained.” The output of one filter is applied to <strong>the</strong> next. {{ text|escape|linebreaks }} is acommon idiom for escaping text contents, <strong>the</strong>n converting line breaks to tags.Some filters take arguments. A filter argument looks like this: {{ bio|truncatewords:30 }}. This willdisplay <strong>the</strong> first 30 words of <strong>the</strong> bio variable.Filter arguments that contain spaces must be quoted; for example, to join a list with commas and spaced you’d use {{list|join:", " }}.<strong>Django</strong> provides about thirty built-in template filters. You can read all about <strong>the</strong>m in <strong>the</strong> built-in filter reference. Togive you a taste of what’s available, here are some of <strong>the</strong> more commonly used template filters:default If a variable is false or empty, use given default. O<strong>the</strong>rwise, use <strong>the</strong> value of <strong>the</strong> variableFor example:{{ value|default:"nothing" }}If value isn’t provided or is empty, <strong>the</strong> above will display “nothing”.length Returns <strong>the</strong> length of <strong>the</strong> value. This works for both strings and lists; for example:{{ value|length }}If value is [’a’, ’b’, ’c’, ’d’], <strong>the</strong> output will be 4.striptags Strips all [X]HTML tags. For example:{{ value|striptags }}If value is "Joel is a slug", <strong>the</strong> output will be"Joel is a slug".Again, <strong>the</strong>se are just a few examples; see <strong>the</strong> built-in filter reference for <strong>the</strong> complete list.You can also create your own custom template filters; see Custom template tags and filters.See Also:<strong>Django</strong>’s admin interface can include a complete reference of all template tags and filters available for a given site.See The <strong>Django</strong> admin documentation generator.3.6. The <strong>Django</strong> template language 189
<strong>Django</strong> <strong>Documentation</strong>, Release 1.23.6.4 TagsTags look like this: {% tag %}. Tags are more complex than variables: Some create text in <strong>the</strong> output, some controlflow by performing loops or logic, and some load external information into <strong>the</strong> template to be used by later variables.Some tags require beginning and ending tags (i.e. {% tag %} ... tag contents ... {% endtag%}).<strong>Django</strong> ships with about two dozen built-in template tags. You can read all about <strong>the</strong>m in <strong>the</strong> built-in tag reference.To give you a taste of what’s available, here are some of <strong>the</strong> more commonly used tags:for Loop over each item in an array. For example, to display a list of athletes provided in athlete_list:{% for athlete in athlete_list %}{{ athlete.name }}{% endfor %}if and else Evaluates a variable, and if that variable is “true” <strong>the</strong> contents of <strong>the</strong> block are displayed:{% if athlete_list %}Number of athletes: {{ athlete_list|length }}{% else %}No athletes.{% endif %}In <strong>the</strong> above, if athlete_list is not empty, <strong>the</strong> number of athletes will be displayed by <strong>the</strong> {{athlete_list|length }} variable.You can also use filters and various operators in <strong>the</strong> if tag:{% if athlete_list|length > 1 %}Team: {% for athlete in athlete_list %} ... {% endfor %}{% else %}Athlete: {{ athlete_list.0.name }}{% endif %}block and extends Set up template inheritance (see below), a powerful way of cutting down on “boilerplate” intemplates.Again, <strong>the</strong> above is only a selection of <strong>the</strong> whole list; see <strong>the</strong> built-in tag reference for <strong>the</strong> complete list.You can also create your own custom template tags; see Custom template tags and filters.See Also:<strong>Django</strong>’s admin interface can include a complete reference of all template tags and filters available for a given site.See The <strong>Django</strong> admin documentation generator.3.6.5 CommentsTo comment-out part of a line in a template, use <strong>the</strong> comment syntax: {# #}.For example, this template would render as ’hello’:{# greeting #}helloA comment can contain any template code, invalid or not. For example:190 Chapter 3. Using <strong>Django</strong>
<strong>Django</strong> <strong>Documentation</strong>, Release 1.2{# {% if foo %}bar{% else %} #}This syntax can only be used for single-line comments (no newlines are permitted between <strong>the</strong> {# and #} delimiters).If you need to comment out a multiline portion of <strong>the</strong> template, see <strong>the</strong> comment tag.3.6.6 Template inheritanceThe most powerful – and thus <strong>the</strong> most complex – part of <strong>Django</strong>’s template engine is template inheritance. Templateinheritance allows you to build a base “skeleton” template that contains all <strong>the</strong> common elements of your site anddefines blocks that child templates can override.It’s easiest to understand template inheritance by starting with an example:{% block title %}My amazing site{% endblock %}{% block sidebar %}HomeBlog{% endblock %}{% block content %}{% endblock %}This template, which we’ll call base.html, defines a simple HTML skeleton document that you might use for asimple two-column page. It’s <strong>the</strong> job of “child” templates to fill <strong>the</strong> empty blocks with content.In this example, <strong>the</strong> {% block %} tag defines three blocks that child templates can fill in. All <strong>the</strong> block tag doesis to tell <strong>the</strong> template engine that a child template may override those portions of <strong>the</strong> template.A child template might look like this:{% extends "base.html" %}{% block title %}My amazing blog{% endblock %}{% block content %}{% for entry in blog_entries %}{{ entry.title }}{{ entry.body }}{% endfor %}{% endblock %}The {% extends %} tag is <strong>the</strong> key here. It tells <strong>the</strong> template engine that this template “extends” ano<strong>the</strong>r template.When <strong>the</strong> template system evaluates this template, first it locates <strong>the</strong> parent – in this case, “base.html”.3.6. The <strong>Django</strong> template language 191
<strong>Django</strong> <strong>Documentation</strong>, Release 1.2At that point, <strong>the</strong> template engine will notice <strong>the</strong> three {% block %} tags in base.html and replace those blockswith <strong>the</strong> contents of <strong>the</strong> child template. Depending on <strong>the</strong> value of blog_entries, <strong>the</strong> output might look like:My amazing blogHomeBlogEntry oneThis is my first entry.Entry twoThis is my second entry.Note that since <strong>the</strong> child template didn’t define <strong>the</strong> sidebar block, <strong>the</strong> value from <strong>the</strong> parent template is used instead.Content within a {% block %} tag in a parent template is always used as a fallback.You can use as many levels of inheritance as needed. One common way of using inheritance is <strong>the</strong> following three-levelapproach:• Create a base.html template that holds <strong>the</strong> main look-and-feel of your site.• Create a base_SECTIONNAME.html template for each “section” of your site. For example,base_news.html, base_sports.html. These templates all extend base.html and include sectionspecificstyles/design.• Create individual templates for each type of page, such as a news article or blog entry. These templates extend<strong>the</strong> appropriate section template.This approach maximizes code reuse and makes it easy to add items to shared content areas, such as section-widenavigation.Here are some tips for working with inheritance:• If you use {% extends %} in a template, it must be <strong>the</strong> first template tag in that template. Template inheritancewon’t work, o<strong>the</strong>rwise.• More {% block %} tags in your base templates are better. Remember, child templates don’t have to defineall parent blocks, so you can fill in reasonable defaults in a number of blocks, <strong>the</strong>n only define <strong>the</strong> ones you needlater. It’s better to have more hooks than fewer hooks.• If you find yourself duplicating content in a number of templates, it probably means you should move thatcontent to a {% block %} in a parent template.• If you need to get <strong>the</strong> content of <strong>the</strong> block from <strong>the</strong> parent template, <strong>the</strong> {{ block.super }} variable willdo <strong>the</strong> trick. This is useful if you want to add to <strong>the</strong> contents of a parent block instead of completely overriding192 Chapter 3. Using <strong>Django</strong>
<strong>Django</strong> <strong>Documentation</strong>, Release 1.2it. Data inserted using {{ block.super }} will not be automatically escaped (see <strong>the</strong> next section), sinceit was already escaped, if necessary, in <strong>the</strong> parent template.• For extra readability, you can optionally give a name to your {% endblock %} tag. For example:{% block content %}...{% endblock content %}In larger templates, this technique helps you see which {% block %} tags are being closed.Finally, note that you can’t define multiple {% block %} tags with <strong>the</strong> same name in <strong>the</strong> same template. Thislimitation exists because a block tag works in “both” directions. That is, a block tag doesn’t just provide a hole to fill– it also defines <strong>the</strong> content that fills <strong>the</strong> hole in <strong>the</strong> parent. If <strong>the</strong>re were two similarly-named {% block %} tags ina template, that template’s parent wouldn’t know which one of <strong>the</strong> blocks’ content to use.3.6.7 Automatic HTML escapingNew in version 1.0: Please, see <strong>the</strong> release notes When generating HTML from templates, <strong>the</strong>re’s always a risk that avariable will include characters that affect <strong>the</strong> resulting HTML. For example, consider this template fragment:Hello, {{ name }}.At first, this seems like a harmless way to display a user’s name, but consider what would happen if <strong>the</strong> user enteredhis name as this:alert(’hello’)With this name value, <strong>the</strong> template would be rendered as:Hello, alert(’hello’)...which means <strong>the</strong> browser would pop-up a JavaScript alert box!Similarly, what if <strong>the</strong> name contained a ’
<strong>Django</strong> <strong>Documentation</strong>, Release 1.2• > is converted to >• ’ (single quote) is converted to '• " (double quote) is converted to "• & is converted to &Again, we stress that this behavior is on by default. If you’re using <strong>Django</strong>’s template system, you’re protected.How to turn it offIf you don’t want data to be auto-escaped, on a per-site, per-template level or per-variable level, you can turn it off inseveral ways.Why would you want to turn it off? Because sometimes, template variables contain data that you intend to be renderedas raw HTML, in which case you don’t want <strong>the</strong>ir contents to be escaped. For example, you might store a blob ofHTML in your database and want to embed that directly into your template. Or, you might be using <strong>Django</strong>’s templatesystem to produce text that is not HTML – like an e-mail message, for instance.For individual variablesTo disable auto-escaping for an individual variable, use <strong>the</strong> safe filter:This will be escaped: {{ data }}This will not be escaped: {{ data|safe }}Think of safe as shorthand for safe from fur<strong>the</strong>r escaping or can be safely interpreted as HTML. In this example, ifdata contains ’’, <strong>the</strong> output will be:This will be escaped: <b>This will not be escaped: For template blocksTo control auto-escaping for a template, wrap <strong>the</strong> template (or just a particular section of <strong>the</strong> template) in <strong>the</strong>autoescape tag, like so:{% autoescape off %}Hello {{ name }}{% endautoescape %}The autoescape tag takes ei<strong>the</strong>r on or off as its argument. At times, you might want to force auto-escaping whenit would o<strong>the</strong>rwise be disabled. Here is an example template:Auto-escaping is on by default. Hello {{ name }}{% autoescape off %}This will not be auto-escaped: {{ data }}.Nor this: {{ o<strong>the</strong>r_data }}{% autoescape on %}Auto-escaping applies again: {{ name }}{% endautoescape %}{% endautoescape %}194 Chapter 3. Using <strong>Django</strong>
<strong>Django</strong> <strong>Documentation</strong>, Release 1.2The auto-escaping tag passes its effect onto templates that extend <strong>the</strong> current one as well as templates included via <strong>the</strong>include tag, just like all block tags. For example:# base.html{% autoescape off %}{% block title %}{% endblock %}{% block content %}{% endblock %}{% endautoescape %}# child.html{% extends "base.html" %}{% block title %}This & that{% endblock %}{% block content %}{{ greeting }}{% endblock %}Because auto-escaping is turned off in <strong>the</strong> base template, it will also be turned off in <strong>the</strong> child template, resulting in<strong>the</strong> following rendered HTML when <strong>the</strong> greeting variable contains <strong>the</strong> string Hello!:This & thatHello!NotesGenerally, template authors don’t need to worry about auto-escaping very much. Developers on <strong>the</strong> Python side(people writing views and custom filters) need to think about <strong>the</strong> cases in which data shouldn’t be escaped, and markdata appropriately, so things Just Work in <strong>the</strong> template.If you’re creating a template that might be used in situations where you’re not sure whe<strong>the</strong>r auto-escaping is enabled,<strong>the</strong>n add an escape filter to any variable that needs escaping. When auto-escaping is on, <strong>the</strong>re’s no danger of <strong>the</strong>escape filter double-escaping data – <strong>the</strong> escape filter does not affect auto-escaped variables.String literals and automatic escapingAs we mentioned earlier, filter arguments can be strings:{{ data|default:"This is a string literal." }}All string literals are inserted without any automatic escaping into <strong>the</strong> template – <strong>the</strong>y act as if <strong>the</strong>y were all passedthrough <strong>the</strong> safe filter. The reasoning behind this is that <strong>the</strong> template author is in control of what goes into <strong>the</strong> stringliteral, so <strong>the</strong>y can make sure <strong>the</strong> text is correctly escaped when <strong>the</strong> template is written.This means you would write{{ data|default:"3 < 2" }}...ra<strong>the</strong>r than{{ data|default:"3 < 2" }}
<strong>Django</strong> <strong>Documentation</strong>, Release 1.23.6.8 Custom tag and filter librariesCertain applications provide custom tag and filter libraries. To access <strong>the</strong>m in a template, use <strong>the</strong> {% load %} tag:{% load comments %}{% comment_form for blogs.entries entry.id with is_public yes %}In <strong>the</strong> above, <strong>the</strong> load tag loads <strong>the</strong> comments tag library, which <strong>the</strong>n makes <strong>the</strong> comment_form tag available foruse. Consult <strong>the</strong> documentation area in your admin to find <strong>the</strong> list of custom libraries in your installation.The {% load %} tag can take multiple library names, separated by spaces. Example:{% load comments i18n %}See Custom template tags and filters for information on writing your own custom template libraries.Custom libraries and template inheritanceWhen you load a custom tag or filter library, <strong>the</strong> tags/filters are only made available to <strong>the</strong> current template – not anyparent or child templates along <strong>the</strong> template-inheritance path.For example, if a template foo.html has {% load comments %}, a child template (e.g., one that has {%extends "foo.html" %}) will not have access to <strong>the</strong> comments template tags and filters. The child template isresponsible for its own {% load comments %}.This is a feature for <strong>the</strong> sake of maintainability and sanity.3.7 Generic viewsWriting Web applications can be monotonous, because we repeat certain patterns again and again. <strong>Django</strong> tries to takeaway some of that monotony at <strong>the</strong> model and template layers, but Web developers also experience this boredom at<strong>the</strong> view level.<strong>Django</strong>’s generic views were developed to ease that pain. They take certain common idioms and patterns found inview development and abstract <strong>the</strong>m so that you can quickly write common views of data without having to write toomuch code.We can recognize certain common tasks, like displaying a list of objects, and write code that displays a list of anyobject. Then <strong>the</strong> model in question can be passed as an extra argument to <strong>the</strong> URLconf.<strong>Django</strong> ships with generic views to do <strong>the</strong> following:• Perform common “simple” tasks: redirect to a different page and render a given template.• Display list and detail pages for a single object. If we were creating an application to manage conferences <strong>the</strong>na talk_list view and a registered_user_list view would be examples of list views. A single talkpage is an example of what we call a “detail” view.• Present date-based objects in year/month/day archive pages, associated detail, and “latest” pages. The <strong>Django</strong>Weblog’s (http://www.djangoproject.com/weblog/) year, month, and day archives are built with <strong>the</strong>se, as wouldbe a typical newspaper’s archives.• Allow users to create, update, and delete objects – with or without authorization.Taken toge<strong>the</strong>r, <strong>the</strong>se views provide easy interfaces to perform <strong>the</strong> most common tasks developers encounter.196 Chapter 3. Using <strong>Django</strong>
<strong>Django</strong> <strong>Documentation</strong>, Release 1.23.7.1 Using generic viewsAll of <strong>the</strong>se views are used by creating configuration dictionaries in your URLconf files and passing those dictionariesas <strong>the</strong> third member of <strong>the</strong> URLconf tuple for a given pattern.For example, here’s a simple URLconf you could use to present a static “about” page:from django.conf.urls.defaults import *from django.views.generic.simple import direct_to_templateurlpatterns = patterns(’’,(’^about/$’, direct_to_template, {’template’: ’about.html’}))Though this might seem a bit “magical” at first glance – look, a view with no code! –, actually <strong>the</strong>direct_to_template view simply grabs information from <strong>the</strong> extra-parameters dictionary and uses that informationwhen rendering <strong>the</strong> view.Because this generic view – and all <strong>the</strong> o<strong>the</strong>rs – is a regular view function like any o<strong>the</strong>r, we can reuse it inside ourown views. As an example, let’s extend our “about” example to map URLs of <strong>the</strong> form /about// tostatically rendered about/.html. We’ll do this by first modifying <strong>the</strong> URLconf to point to a viewfunction:from django.conf.urls.defaults import *from django.views.generic.simple import direct_to_templatefrom books.views import about_pagesurlpatterns = patterns(’’,(’^about/$’, direct_to_template, {’template’: ’about.html’}),(’^about/(\w+)/$’, about_pages),)Next, we’ll write <strong>the</strong> about_pages view:from django.http import Http404from django.template import TemplateDoesNotExistfrom django.views.generic.simple import direct_to_templatedef about_pages(request, page):try:return direct_to_template(request, template="about/%s.html" % page)except TemplateDoesNotExist:raise Http404()Here we’re treating direct_to_template like any o<strong>the</strong>r function. Since it returns an HttpResponse, wecan simply return it as-is. The only slightly tricky business here is dealing with missing templates. We don’t wanta nonexistent template to cause a server error, so we catch TemplateDoesNotExist exceptions and return 404errors instead.Is <strong>the</strong>re a security vulnerability here?Sharp-eyed readers may have noticed a possible security hole: we’re constructing <strong>the</strong> template name using interpolatedcontent from <strong>the</strong> browser (template="about/%s.html" % page). At first glance, this looks like a classicdirectory traversal vulnerability. But is it really?3.7. Generic views 197
<strong>Django</strong> <strong>Documentation</strong>, Release 1.2Not exactly. Yes, a maliciously crafted value of page could cause directory traversal, but although page is takenfrom <strong>the</strong> request URL, not every value will be accepted. The key is in <strong>the</strong> URLconf: we’re using <strong>the</strong> regular expression\w+ to match <strong>the</strong> page part of <strong>the</strong> URL, and \w only accepts letters and numbers. Thus, any malicious characters(dots and slashes, here) will be rejected by <strong>the</strong> URL resolver before <strong>the</strong>y reach <strong>the</strong> view itself.3.7.2 Generic views of objectsThe direct_to_template certainly is useful, but <strong>Django</strong>’s generic views really shine when it comes to presentingviews on your database content. Because it’s such a common task, <strong>Django</strong> comes with a handful of built-in genericviews that make generating list and detail views of objects incredibly easy.Let’s take a look at one of <strong>the</strong>se generic views: <strong>the</strong> “object list” view. We’ll be using <strong>the</strong>se models:# models.pyfrom django.db import modelsclass Publisher(models.Model):name = models.CharField(max_length=30)address = models.CharField(max_length=50)city = models.CharField(max_length=60)state_province = models.CharField(max_length=30)country = models.CharField(max_length=50)website = models.URLField()def __unicode__(self):return self.nameclass Meta:ordering = ["-name"]class Book(models.Model):title = models.CharField(max_length=100)authors = models.ManyToManyField(’Author’)publisher = models.ForeignKey(Publisher)publication_date = models.DateField()To build a list page of all publishers, we’d use a URLconf along <strong>the</strong>se lines:from django.conf.urls.defaults import *from django.views.generic import list_detailfrom books.models import Publisherpublisher_info = {"queryset" : Publisher.objects.all(),}urlpatterns = patterns(’’,(r’^publishers/$’, list_detail.object_list, publisher_info))That’s all <strong>the</strong> Python code we need to write. We still need to write a template, however. We could explicitly tell <strong>the</strong>object_list view which template to use by including a template_name key in <strong>the</strong> extra arguments dictionary,but in <strong>the</strong> absence of an explicit template <strong>Django</strong> will infer one from <strong>the</strong> object’s name. In this case, <strong>the</strong> inferredtemplate will be "books/publisher_list.html" – <strong>the</strong> “books” part comes from <strong>the</strong> name of <strong>the</strong> app thatdefines <strong>the</strong> model, while <strong>the</strong> “publisher” bit is just <strong>the</strong> lowercased version of <strong>the</strong> model’s name.198 Chapter 3. Using <strong>Django</strong>
<strong>Django</strong> <strong>Documentation</strong>, Release 1.2This template will be rendered against a context containing a variable called object_list that contains all <strong>the</strong>publisher objects. A very simple template might look like <strong>the</strong> following:{% extends "base.html" %}{% block content %}Publishers{% for publisher in object_list %}{{ publisher.name }}{% endfor %}{% endblock %}That’s really all <strong>the</strong>re is to it. All <strong>the</strong> cool features of generic views come from changing <strong>the</strong> “info” dictionary passedto <strong>the</strong> generic view. The generic views reference documents all <strong>the</strong> generic views and all <strong>the</strong>ir options in detail; <strong>the</strong>rest of this document will consider some of <strong>the</strong> common ways you might customize and extend generic views.3.7.3 Extending generic viewsThere’s no question that using generic views can speed up development substantially. In most projects, however, <strong>the</strong>recomes a moment when <strong>the</strong> generic views no longer suffice. Indeed, <strong>the</strong> most common question asked by new <strong>Django</strong>developers is how to make generic views handle a wider array of situations.Luckily, in nearly every one of <strong>the</strong>se cases, <strong>the</strong>re are ways to simply extend generic views to handle a larger array ofuse cases. These situations usually fall into a handful of patterns dealt with in <strong>the</strong> sections that follow.Making “friendly” template contextsYou might have noticed that our sample publisher list template stores all <strong>the</strong> books in a variable namedobject_list. While this works just fine, it isn’t all that “friendly” to template authors: <strong>the</strong>y have to “just know”that <strong>the</strong>y’re dealing with publishers here. A better name for that variable would be publisher_list; that variable’scontent is pretty obvious.We can change <strong>the</strong> name of that variable easily with <strong>the</strong> template_object_name argument:publisher_info = {"queryset" : Publisher.objects.all(),"template_object_name" : "publisher",}urlpatterns = patterns(’’,(r’^publishers/$’, list_detail.object_list, publisher_info))Providing a useful template_object_name is always a good idea. Your coworkers who design templates willthank you.Adding extra contextOften you simply need to present some extra information beyond that provided by <strong>the</strong> generic view. For example,think of showing a list of all <strong>the</strong> books on each publisher detail page. The object_detail generic view provides<strong>the</strong> publisher to <strong>the</strong> context, but it seems <strong>the</strong>re’s no way to get additional information in that template.3.7. Generic views 199
<strong>Django</strong> <strong>Documentation</strong>, Release 1.2But <strong>the</strong>re is: all generic views take an extra optional parameter, extra_context. This is a dictionary of extraobjects that will be added to <strong>the</strong> template’s context. So, to provide <strong>the</strong> list of all books on <strong>the</strong> detail detail view, we’duse an info dict like this:from books.models import Publisher, Bookpublisher_info = {"queryset" : Publisher.objects.all(),"template_object_name" : "publisher","extra_context" : {"book_list" : Book.objects.all()}}This would populate a {{ book_list }} variable in <strong>the</strong> template context. This pattern can be used to pass anyinformation down into <strong>the</strong> template for <strong>the</strong> generic view. It’s very handy.However, <strong>the</strong>re’s actually a subtle bug here – can you spot it?The problem has to do with when <strong>the</strong> queries in extra_context are evaluated. Because this example putsBook.objects.all() in <strong>the</strong> URLconf, it will be evaluated only once (when <strong>the</strong> URLconf is first loaded). Onceyou add or remove books, you’ll notice that <strong>the</strong> generic view doesn’t reflect those changes until you reload <strong>the</strong> Webserver (see Caching and QuerySets for more information about when QuerySets are cached and evaluated).Note: This problem doesn’t apply to <strong>the</strong> queryset generic view argument. Since <strong>Django</strong> knows that particularQuerySet should never be cached, <strong>the</strong> generic view takes care of clearing <strong>the</strong> cache when each view is rendered.The solution is to use a callback in extra_context instead of a value. Any callable (i.e., a function) that’s passedto extra_context will be evaluated when <strong>the</strong> view is rendered (instead of only once). You could do this with anexplicitly defined function:def get_books():return Book.objects.all()publisher_info = {"queryset" : Publisher.objects.all(),"template_object_name" : "publisher","extra_context" : {"book_list" : get_books}}or you could use a less obvious but shorter version that relies on <strong>the</strong> fact that Book.objects.all is itself a callable:publisher_info = {"queryset" : Publisher.objects.all(),"template_object_name" : "publisher","extra_context" : {"book_list" : Book.objects.all}}Notice <strong>the</strong> lack of paren<strong>the</strong>ses after Book.objects.all; this references <strong>the</strong> function without actually calling it(which <strong>the</strong> generic view will do later).Viewing subsets of objectsNow let’s take a closer look at this queryset key we’ve been using all along. Most generic views take one of<strong>the</strong>se queryset arguments – it’s how <strong>the</strong> view knows which set of objects to display (see Making queries for moreinformation about QuerySet objects, and see <strong>the</strong> generic views reference for <strong>the</strong> complete details).To pick a simple example, we might want to order a list of books by publication date, with <strong>the</strong> most recent first:200 Chapter 3. Using <strong>Django</strong>
<strong>Django</strong> <strong>Documentation</strong>, Release 1.2book_info = {"queryset" : Book.objects.all().order_by("-publication_date"),}urlpatterns = patterns(’’,(r’^publishers/$’, list_detail.object_list, publisher_info),(r’^books/$’, list_detail.object_list, book_info),)That’s a pretty simple example, but it illustrates <strong>the</strong> idea nicely. Of course, you’ll usually want to do more than justreorder objects. If you want to present a list of books by a particular publisher, you can use <strong>the</strong> same technique:acme_books = {"queryset": Book.objects.filter(publisher__name="Acme Publishing"),"template_name" : "books/acme_list.html"}urlpatterns = patterns(’’,(r’^publishers/$’, list_detail.object_list, publisher_info),(r’^books/acme/$’, list_detail.object_list, acme_books),)Notice that along with a filtered queryset, we’re also using a custom template name. If we didn’t, <strong>the</strong> generic viewwould use <strong>the</strong> same template as <strong>the</strong> “vanilla” object list, which might not be what we want.Also notice that this isn’t a very elegant way of doing publisher-specific books. If we want to add ano<strong>the</strong>r publisherpage, we’d need ano<strong>the</strong>r handful of lines in <strong>the</strong> URLconf, and more than a few publishers would get unreasonable.We’ll deal with this problem in <strong>the</strong> next section.Note: If you get a 404 when requesting /books/acme/, check to ensure you actually have a Publisher with <strong>the</strong>name ‘ACME Publishing’. Generic views have an allow_empty parameter for this case. See <strong>the</strong> generic viewsreference for more details.Complex filtering with wrapper functionsAno<strong>the</strong>r common need is to filter down <strong>the</strong> objects given in a list page by some key in <strong>the</strong> URL. Earlier we hard-coded<strong>the</strong> publisher’s name in <strong>the</strong> URLconf, but what if we wanted to write a view that displayed all <strong>the</strong> books by somearbitrary publisher? We can “wrap” <strong>the</strong> object_list generic view to avoid writing a lot of code by hand. As usual,we’ll start by writing a URLconf:from books.views import books_by_publisherurlpatterns = patterns(’’,(r’^publishers/$’, list_detail.object_list, publisher_info),(r’^books/(\w+)/$’, books_by_publisher),)Next, we’ll write <strong>the</strong> books_by_publisher view itself:from django.http import Http404from django.views.generic import list_detailfrom books.models import Book, Publisherdef books_by_publisher(request, name):# Look up <strong>the</strong> publisher (and raise a 404 if it can’t be found).3.7. Generic views 201
<strong>Django</strong> <strong>Documentation</strong>, Release 1.2try:publisher = Publisher.objects.get(name__iexact=name)except Publisher.DoesNotExist:raise Http404# Use <strong>the</strong> object_list view for <strong>the</strong> heavy lifting.return list_detail.object_list(request,queryset = Book.objects.filter(publisher=publisher),template_name = "books/books_by_publisher.html",template_object_name = "books",extra_context = {"publisher" : publisher})This works because <strong>the</strong>re’s really nothing special about generic views – <strong>the</strong>y’re just Python functions. Like any viewfunction, generic views expect a certain set of arguments and return HttpResponse objects. Thus, it’s incrediblyeasy to wrap a small function around a generic view that does additional work before (or after; see <strong>the</strong> next section)handing things off to <strong>the</strong> generic view.Note: Notice that in <strong>the</strong> preceding example we passed <strong>the</strong> current publisher being displayed in <strong>the</strong> extra_context.This is usually a good idea in wrappers of this nature; it lets <strong>the</strong> template know which “parent” object is currently beingbrowsed.Performing extra workThe last common pattern we’ll look at involves doing some extra work before or after calling <strong>the</strong> generic view.Imagine we had a last_accessed field on our Author object that we were using to keep track of <strong>the</strong> last timeanybody looked at that author:# models.pyclass Author(models.Model):salutation = models.CharField(max_length=10)first_name = models.CharField(max_length=30)last_name = models.CharField(max_length=40)email = models.EmailField()headshot = models.ImageField(upload_to=’/tmp’)last_accessed = models.DateTimeField()The generic object_detail view, of course, wouldn’t know anything about this field, but once again we couldeasily write a custom view to keep that field updated.First, we’d need to add an author detail bit in <strong>the</strong> URLconf to point to a custom view:from books.views import author_detailurlpatterns = patterns(’’,#...(r’^authors/(?P\d+)/$’, author_detail),)Then we’d write our wrapper function:import datetimefrom books.models import Authorfrom django.views.generic import list_detail202 Chapter 3. Using <strong>Django</strong>
<strong>Django</strong> <strong>Documentation</strong>, Release 1.2from django.shortcuts import get_object_or_404def author_detail(request, author_id):# Look up <strong>the</strong> Author (and raise a 404 if she’s not found)author = get_object_or_404(Author, pk=author_id)# Record <strong>the</strong> last accessed dateauthor.last_accessed = datetime.datetime.now()author.save()# Show <strong>the</strong> detail pagereturn list_detail.object_detail(request,queryset = Author.objects.all(),object_id = author_id,)Note: This code won’t actually work unless you create a books/author_detail.html template.We can use a similar idiom to alter <strong>the</strong> response returned by <strong>the</strong> generic view. If we wanted to provide a downloadableplain-text version of <strong>the</strong> list of authors, we could use a view like this:def author_list_plaintext(request):response = list_detail.object_list(request,queryset = Author.objects.all(),mimetype = "text/plain",template_name = "books/author_list.txt")response["Content-Disposition"] = "attachment; filename=authors.txt"return responseThis works because <strong>the</strong> generic views return simple HttpResponse objects that can be treated like dictionaries toset HTTP headers. This Content-Disposition business, by <strong>the</strong> way, instructs <strong>the</strong> browser to download and save<strong>the</strong> page instead of displaying it in <strong>the</strong> browser.3.8 Managing filesNew in version 1.0: Please, see <strong>the</strong> release notes This document describes <strong>Django</strong>’s file access APIs.By default, <strong>Django</strong> stores files locally, using <strong>the</strong> MEDIA_ROOT and MEDIA_URL settings. The examples belowassume that you’re using <strong>the</strong>se defaults.However, <strong>Django</strong> provides ways to write custom file storage systems that allow you to completely customize whereand how <strong>Django</strong> stores files. The second half of this document describes how <strong>the</strong>se storage systems work.3.8.1 Using files in modelsWhen you use a FileField or ImageField, <strong>Django</strong> provides a set of APIs you can use to deal with that file.Consider <strong>the</strong> following model, using an ImageField to store a photo:class Car(models.Model):name = models.CharField(max_length=255)3.8. Managing files 203
<strong>Django</strong> <strong>Documentation</strong>, Release 1.2price = models.DecimalField(max_digits=5, decimal_places=2)photo = models.ImageField(upload_to=’cars’)Any Car instance will have a photo attribute that you can use to get at <strong>the</strong> details of <strong>the</strong> attached photo:>>> car = Car.objects.get(name="57 Chevy")>>> car.photo>>> car.photo.nameu’cars/chevy.jpg’>>> car.photo.pathu’/media/cars/chevy.jpg’>>> car.photo.urlu’http://media.example.com/cars/chevy.jpg’This object – car.photo in <strong>the</strong> example – is a File object, which means it has all <strong>the</strong> methods and attributesdescribed below.3.8.2 The File objectInternally, <strong>Django</strong> uses a django.core.files.File instance any time it needs to represent a file. This object isa thin wrapper around Python’s built-in file object with some <strong>Django</strong>-specific additions.Most of <strong>the</strong> time you’ll simply use a File that <strong>Django</strong>’s given you (i.e. a file attached to a model as above, or perhapsan uploaded file).If you need to construct a File yourself, <strong>the</strong> easiest way is to create one using a Python built-in file object:>>> from django.core.files import File# Create a Python file object using open()>>> f = open(’/tmp/hello.world’, ’w’)>>> myfile = File(f)Now you can use any of <strong>the</strong> documented attributes and methods of <strong>the</strong> File class.3.8.3 File storageBehind <strong>the</strong> scenes, <strong>Django</strong> delegates decisions about how and where to store files to a file storage system. This is <strong>the</strong>object that actually understands things like file systems, opening and reading files, etc.<strong>Django</strong>’s default file storage is given by <strong>the</strong> DEFAULT_FILE_STORAGE setting; if you don’t explicitly provide astorage system, this is <strong>the</strong> one that will be used.See below for details of <strong>the</strong> built-in default file storage system, and see Writing a custom storage system for informationon writing your own file storage system.Storage objectsThough most of <strong>the</strong> time you’ll want to use a File object (which delegates to <strong>the</strong> proper storage for that file), you canuse file storage systems directly. You can create an instance of some custom file storage class, or – often more useful– you can use <strong>the</strong> global default storage system:>>> from django.core.files.storage import default_storage>>> from django.core.files.base import ContentFile204 Chapter 3. Using <strong>Django</strong>
<strong>Django</strong> <strong>Documentation</strong>, Release 1.2>>> path = default_storage.save(’/path/to/file’, ContentFile(’new content’))>>> pathu’/path/to/file’>>> default_storage.size(path)11>>> default_storage.open(path).read()’new content’>>> default_storage.delete(path)>>> default_storage.exists(path)FalseSee File storage API for <strong>the</strong> file storage API.The built-in filesystem storage class<strong>Django</strong> ships with a built-in FileSystemStorage class (defined in django.core.files.storage) whichimplements basic local filesystem file storage. Its initializer takes two arguments:ArgumentDescriptionlocation Optional. Absolute path to <strong>the</strong> directory that will hold <strong>the</strong> files. If omitted, it will be set to <strong>the</strong> valueof your MEDIA_ROOT setting.base_url Optional. URL that serves <strong>the</strong> files stored at this location. If omitted, it will default to <strong>the</strong> value ofyour MEDIA_URL setting.For example, <strong>the</strong> following code will store uploaded files under /media/photos regardless of what yourMEDIA_ROOT setting is:from django.db import modelsfrom django.core.files.storage import FileSystemStoragefs = FileSystemStorage(location=’/media/photos’)class Car(models.Model):...photo = models.ImageField(storage=fs)Custom storage systems work <strong>the</strong> same way: you can pass <strong>the</strong>m in as <strong>the</strong> storage argument to a FileField.3.9 Testing <strong>Django</strong> applicationsAutomated testing is an extremely useful bug-killing tool for <strong>the</strong> modern Web developer. You can use a collection oftests – a test suite – to solve, or avoid, a number of problems:• When you’re writing new code, you can use tests to validate your code works as expected.• When you’re refactoring or modifying old code, you can use tests to ensure your changes haven’t affected yourapplication’s behavior unexpectedly.Testing a Web application is a complex task, because a Web application is made of several layers of logic – fromHTTP-level request handling, to form validation and processing, to template rendering. With <strong>Django</strong>’s test-executionframework and assorted utilities, you can simulate requests, insert test data, inspect your application’s output andgenerally verify your code is doing what it should be doing.The best part is, it’s really easy.3.9. Testing <strong>Django</strong> applications 205
<strong>Django</strong> <strong>Documentation</strong>, Release 1.2This document is split into two primary sections. First, we explain how to write tests with <strong>Django</strong>. Then, we explainhow to run <strong>the</strong>m.3.9.1 Writing testsThere are two primary ways to write tests with <strong>Django</strong>, corresponding to <strong>the</strong> two test frameworks that ship in <strong>the</strong>Python standard library. The two frameworks are:• Doctests – tests that are embedded in your functions’ docstrings and are written in a way that emulates a sessionof <strong>the</strong> Python interactive interpreter. For example:def my_func(a_list, idx):""">>> a = [’larry’, ’curly’, ’moe’]>>> my_func(a, 0)’larry’>>> my_func(a, 1)’curly’"""return a_list[idx]• Unit tests – tests that are expressed as methods on a Python class that subclasses unittest.TestCase. Forexample:import unittestclass MyFuncTestCase(unittest.TestCase):def testBasic(self):a = [’larry’, ’curly’, ’moe’]self.assertEquals(my_func(a, 0), ’larry’)self.assertEquals(my_func(a, 1), ’curly’)You can choose <strong>the</strong> test framework you like, depending on which syntax you prefer, or you can mix and match, usingone framework for some of your code and <strong>the</strong> o<strong>the</strong>r framework for o<strong>the</strong>r code. You can also use any o<strong>the</strong>r Python testframeworks, as we’ll explain in a bit.Writing doctestsDoctests use Python’s standard doctest module, which searches your docstrings for statements that resemble a sessionof <strong>the</strong> Python interactive interpreter. A full explanation of how doctest works is out of <strong>the</strong> scope of this document;read Python’s official documentation for <strong>the</strong> details.What’s a docstring?A good explanation of docstrings (and some guidelines for using <strong>the</strong>m effectively) can be found in PEP 257:A docstring is a string literal that occurs as <strong>the</strong> first statement in a module, function, class, or methoddefinition. Such a docstring becomes <strong>the</strong> __doc__ special attribute of that object.For example, this function has a docstring that describes what it does:def add_two(num):"Return <strong>the</strong> result of adding two to <strong>the</strong> provided number."return num + 2Because tests often make great documentation, putting tests directly in your docstrings is an effective way to documentand test your code.206 Chapter 3. Using <strong>Django</strong>
<strong>Django</strong> <strong>Documentation</strong>, Release 1.2For a given <strong>Django</strong> application, <strong>the</strong> test runner looks for doctests in two places:• The models.py file. You can define module-level doctests and/or a doctest for individual models. It’s commonpractice to put application-level doctests in <strong>the</strong> module docstring and model-level doctests in <strong>the</strong> modeldocstrings.• A file called tests.py in <strong>the</strong> application directory – i.e., <strong>the</strong> directory that holds models.py. This file is ahook for any and all doctests you want to write that aren’t necessarily related to models.Here is an example model doctest:# models.pyfrom django.db import modelsclass Animal(models.Model):"""An animal that knows how to make noise# Create some animals>>> lion = Animal.objects.create(name="lion", sound="roar")>>> cat = Animal.objects.create(name="cat", sound="meow")# Make ’em speak>>> lion.speak()’The lion says "roar"’>>> cat.speak()’The cat says "meow"’"""name = models.CharField(max_length=20)sound = models.CharField(max_length=20)def speak(self):return ’The %s says "%s"’ % (self.name, self.sound)When you run your tests, <strong>the</strong> test runner will find this docstring, notice that portions of it look like an interactivePython session, and execute those lines while checking that <strong>the</strong> results match.In <strong>the</strong> case of model tests, note that <strong>the</strong> test runner takes care of creating its own test database. That is, any test thataccesses a database – by creating and saving model instances, for example – will not affect your production database.However, <strong>the</strong> database is not refreshed between doctests, so if your doctest requires a certain state you should considerflushing <strong>the</strong> database or loading a fixture. (See <strong>the</strong> section on fixtures, below, for more on this.) Note that to use thisfeature, <strong>the</strong> database user <strong>Django</strong> is connecting as must have CREATE DATABASE rights.For more details about how doctest works, see <strong>the</strong> standard library documentation for doctest.Writing unit testsLike doctests, <strong>Django</strong>’s unit tests use a standard library module: unittest. This module uses a different way of definingtests, taking a class-based approach.As with doctests, for a given <strong>Django</strong> application, <strong>the</strong> test runner looks for unit tests in two places:• The models.py file. The test runner looks for any subclass of unittest.TestCase in this module.• A file called tests.py in <strong>the</strong> application directory – i.e., <strong>the</strong> directory that holds models.py. Again, <strong>the</strong>test runner looks for any subclass of unittest.TestCase in this module.This example unittest.TestCase subclass is equivalent to <strong>the</strong> example given in <strong>the</strong> doctest section above:3.9. Testing <strong>Django</strong> applications 207
<strong>Django</strong> <strong>Documentation</strong>, Release 1.2import unittestfrom myapp.models import Animalclass AnimalTestCase(unittest.TestCase):def setUp(self):self.lion = Animal.objects.create(name="lion", sound="roar")self.cat = Animal.objects.create(name="cat", sound="meow")def testSpeaking(self):self.assertEquals(self.lion.speak(), ’The lion says "roar"’)self.assertEquals(self.cat.speak(), ’The cat says "meow"’)When you run your tests, <strong>the</strong> default behavior of <strong>the</strong> test utility is to find all <strong>the</strong> test cases (that is, subclasses ofunittest.TestCase) in models.py and tests.py, automatically build a test suite out of those test cases,and run that suite.There is a second way to define <strong>the</strong> test suite for a module: if you define a function called suite() in ei<strong>the</strong>rmodels.py or tests.py, <strong>the</strong> <strong>Django</strong> test runner will use that function to construct <strong>the</strong> test suite for that module.This follows <strong>the</strong> suggested organization for unit tests. See <strong>the</strong> Python documentation for more details on how toconstruct a complex test suite.For more details about unittest, see <strong>the</strong> standard library unittest documentation.Which should I use?Because <strong>Django</strong> supports both of <strong>the</strong> standard Python test frameworks, it’s up to you and your tastes to decide whichone to use. You can even decide to use both.For developers new to testing, however, this choice can seem confusing. Here, <strong>the</strong>n, are a few key differences to helpyou decide which approach is right for you:• If you’ve been using Python for a while, doctest will probably feel more “pythonic”. It’s designed to makewriting tests as easy as possible, so it requires no overhead of writing classes or methods. You simply put testsin docstrings. This has <strong>the</strong> added advantage of serving as documentation (and correct documentation, at that!).If you’re just getting started with testing, using doctests will probably get you started faster.• The unittest framework will probably feel very familiar to developers coming from Java. unittest isinspired by Java’s JUnit, so you’ll feel at home with this method if you’ve used JUnit or any test frameworkinspired by JUnit.• If you need to write a bunch of tests that share similar code, <strong>the</strong>n you’ll appreciate <strong>the</strong> unittest framework’sorganization around classes and methods. This makes it easy to abstract common tasks into common methods.The framework also supports explicit setup and/or cleanup routines, which give you a high level of control over<strong>the</strong> environment in which your test cases are run.Again, remember that you can use both systems side-by-side (even in <strong>the</strong> same app). In <strong>the</strong> end, most projects willeventually end up using both. Each shines in different circumstances.3.9.2 Running testsOnce you’ve written tests, run <strong>the</strong>m using <strong>the</strong> test command of your project’s manage.py utility:$ ./manage.py testBy default, this will run every test in every application in INSTALLED_APPS. If you only want to run tests fora particular application, add <strong>the</strong> application name to <strong>the</strong> command line. For example, if your INSTALLED_APPS208 Chapter 3. Using <strong>Django</strong>
<strong>Django</strong> <strong>Documentation</strong>, Release 1.2contains ’myproject.polls’ and ’myproject.animals’, you can run <strong>the</strong> myproject.animals unittests alone with this command:$ ./manage.py test animalsNote that we used animals, not myproject.animals. New in version 1.0: You can now choose which test torun. You can be even more specific by naming an individual test case. To run a single test case in an application (forexample, <strong>the</strong> AnimalTestCase described in <strong>the</strong> “Writing unit tests” section), add <strong>the</strong> name of <strong>the</strong> test case to <strong>the</strong>label on <strong>the</strong> command line:$ ./manage.py test animals.AnimalTestCaseAnd it gets even more granular than that! To run a single test method inside a test case, add <strong>the</strong> name of <strong>the</strong> test methodto <strong>the</strong> label:$ ./manage.py test animals.AnimalTestCase.testFluffyAnimalsNew in version 1.2: The ability to select individual doctests was added. You can use <strong>the</strong> same rules if you’re usingdoctests. <strong>Django</strong> will use <strong>the</strong> test label as a path to <strong>the</strong> test method or class that you want to run. If your models.pyor tests.py has a function with a doctest, or class with a class-level doctest, you can invoke that test by appending<strong>the</strong> name of <strong>the</strong> test method or class to <strong>the</strong> label:$ ./manage.py test animals.classifyIf you want to run <strong>the</strong> doctest for a specific method in a class, add <strong>the</strong> name of <strong>the</strong> method to <strong>the</strong> label:$ ./manage.py test animals.Classifier.runIf you’re using a __test__ dictionary to specify doctests for a module, <strong>Django</strong> will use <strong>the</strong> label as a key in <strong>the</strong>__test__ dictionary for defined in models.py and tests.py. New in version 1.2: You can now trigger agraceful exit from a test run by pressing Ctrl-C. If you press Ctrl-C while <strong>the</strong> tests are running, <strong>the</strong> test runnerwill wait for <strong>the</strong> currently running test to complete and <strong>the</strong>n exit gracefully. During a graceful exit <strong>the</strong> test runnerwill output details of any test failures, report on how many tests were run and how many errors and failures wereencountered, and destroy any test databases as usual. Thus pressing Ctrl-C can be very useful if you forget topass <strong>the</strong> --failfast option, notice that some tests are unexpectedly failing, and want to get details on <strong>the</strong> failureswithout waiting for <strong>the</strong> full test run to complete.If you do not want to wait for <strong>the</strong> currently running test to finish, you can press Ctrl-C a second time and <strong>the</strong> testrun will halt immediately, but not gracefully. No details of <strong>the</strong> tests run before <strong>the</strong> interruption will be reported, andany test databases created by <strong>the</strong> run will not be destroyed.Test with warnings enabledIt is a good idea to run your tests with python -Wall manage.py test. This will allow you to catch anydeprecation warnings that might be in your code. <strong>Django</strong> (as well as many o<strong>the</strong>r libraries) use warnings to flag whenfeatures are deprecated. It can also flag areas in your code that are not strictly wrong, but may benefit from a betterimplementation.Running tests outside <strong>the</strong> test runnerIf you want to run tests outside of ./manage.py test – for example, from a shell prompt – you will need to setup <strong>the</strong> test environment first. <strong>Django</strong> provides a convenience method to do this:>>> from django.test.utils import setup_test_environment>>> setup_test_environment()3.9. Testing <strong>Django</strong> applications 209
<strong>Django</strong> <strong>Documentation</strong>, Release 1.2This convenience method sets up <strong>the</strong> test database, and puts o<strong>the</strong>r <strong>Django</strong> features into modes that allow for repeatabletesting.The call to setup_test_environment() is made automatically as part of <strong>the</strong> setup of ./manage.py test. Youonly need to manually invoke this method if you’re not using running your tests via <strong>Django</strong>’s test runner.The test databaseTests that require a database (namely, model tests) will not use your “real” (production) database. Separate, blankdatabases are created for <strong>the</strong> tests.Regardless of whe<strong>the</strong>r <strong>the</strong> tests pass or fail, <strong>the</strong> test databases are destroyed when all <strong>the</strong> tests have been executed.By default <strong>the</strong> test databases get <strong>the</strong>ir names by prepending test_ to <strong>the</strong> value of <strong>the</strong> NAME settings for <strong>the</strong> databasesdefined in DATABASES. When using <strong>the</strong> SQLite database engine <strong>the</strong> tests will by default use an in-memory database(i.e., <strong>the</strong> database will be created in memory, bypassing <strong>the</strong> filesystem entirely!). If you want to use a different databasename, specify TEST_NAME in <strong>the</strong> dictionary for any given database in DATABASES.Aside from using a separate database, <strong>the</strong> test runner will o<strong>the</strong>rwise use all of <strong>the</strong> same database settings you have inyour settings file: ENGINE, USER, HOST, etc. The test database is created by <strong>the</strong> user specified by USER, so you’llneed to make sure that <strong>the</strong> given user account has sufficient privileges to create a new database on <strong>the</strong> system. New inversion 1.0: Please, see <strong>the</strong> release notes For fine-grained control over <strong>the</strong> character encoding of your test database,use <strong>the</strong> TEST_CHARSET option. If you’re using MySQL, you can also use <strong>the</strong> TEST_COLLATION option to control<strong>the</strong> particular collation used by <strong>the</strong> test database. See <strong>the</strong> settings documentation for details of <strong>the</strong>se advanced settings.Testing master/slave configurationsNew in version 1.2: Please, see <strong>the</strong> release notes If you’re testing a multiple database configuration with master/slavereplication, this strategy of creating test databases poses a problem. When <strong>the</strong> test databases are created, <strong>the</strong>re won’tbe any replication, and as a result, data created on <strong>the</strong> master won’t be seen on <strong>the</strong> slave.To compensate for this, <strong>Django</strong> allows you to define that a database is a test mirror. Consider <strong>the</strong> following (simplified)example database configuration:DATABASES = {’default’: {’ENGINE’: ’django.db.backends.mysql’,’NAME’: ’myproject’,’HOST’: ’dbmaster’,# ... plus some o<strong>the</strong>r settings},’slave’: {’ENGINE’: ’django.db.backends.mysql’,’NAME’: ’myproject’,’HOST’: ’dbslave’,’TEST_MIRROR’: ’default’# ... plus some o<strong>the</strong>r settings}}In this setup, we have two database servers: dbmaster, described by <strong>the</strong> database alias default, and dbslavedescribed by <strong>the</strong> alias slave. As you might expect, dbslave has been configured by <strong>the</strong> database administrator asa read slave of dbmaster, so in normal activity, any write to default will appear on slave.If <strong>Django</strong> created two independent test databases, this would break any tests that expected replication to occur. However,<strong>the</strong> slave database has been configured as a test mirror (using <strong>the</strong> TEST_MIRROR setting), indicating thatunder testing, slave should be treated as a mirror of default.210 Chapter 3. Using <strong>Django</strong>
<strong>Django</strong> <strong>Documentation</strong>, Release 1.2When <strong>the</strong> test environment is configured, a test version of slave will not be created. Instead <strong>the</strong> connection to slavewill be redirected to point at default. As a result, writes to default will appear on slave – but because <strong>the</strong>y areactually <strong>the</strong> same database, not because <strong>the</strong>re is data replication between <strong>the</strong> two databases.Controlling creation order for test databasesNew in version 1.2.4: Please, see <strong>the</strong> release notes By default, <strong>Django</strong> will always create <strong>the</strong> default database first.However, no guarantees are made on <strong>the</strong> creation order of any o<strong>the</strong>r databases in your test setup.If your database configuration requires a specific creation order, you can specify <strong>the</strong> dependencies that exist using <strong>the</strong>TEST_DEPENDENCIES setting. Consider <strong>the</strong> following (simplified) example database configuration:DATABASES = {’default’: {# ... db settings’TEST_DEPENDENCIES’: [’diamonds’]},’diamonds’: {# ... db settings},’clubs’: {# ... db settings’TEST_DEPENDENCIES’: [’diamonds’]},’spades’: {# ... db settings’TEST_DEPENDENCIES’: [’diamonds’,’hearts’]},’hearts’: {# ... db settings’TEST_DEPENDENCIES’: [’diamonds’,’clubs’]}}Under this configuration, <strong>the</strong> diamonds database will be created first, as it is <strong>the</strong> only database alias without dependencies.The default‘ and clubs alias will be created next (although <strong>the</strong> order of creation of this pair is notguaranteed); <strong>the</strong>n hearts; and finally spades.If <strong>the</strong>re are any circular dependencies in <strong>the</strong> TEST_DEPENDENCIES definition, an ImproperlyConfiguredexception will be raised.O<strong>the</strong>r test conditionsRegardless of <strong>the</strong> value of <strong>the</strong> DEBUG setting in your configuration file, all <strong>Django</strong> tests run with DEBUG=False. Thisis to ensure that <strong>the</strong> observed output of your code matches what will be seen in a production setting.Understanding <strong>the</strong> test outputWhen you run your tests, you’ll see a number of messages as <strong>the</strong> test runner prepares itself. You can control <strong>the</strong> levelof detail of <strong>the</strong>se messages with <strong>the</strong> verbosity option on <strong>the</strong> command line:Creating test database...Creating table myapp_animalCreating table myapp_mineralLoading ’initial_data’ fixtures...No fixtures found.3.9. Testing <strong>Django</strong> applications 211
<strong>Django</strong> <strong>Documentation</strong>, Release 1.2This tells you that <strong>the</strong> test runner is creating a test database, as described in <strong>the</strong> previous section.Once <strong>the</strong> test database has been created, <strong>Django</strong> will run your tests. If everything goes well, you’ll see something likethis:----------------------------------------------------------------------Ran 22 tests in 0.221sOKIf <strong>the</strong>re are test failures, however, you’ll see full details about which tests failed:======================================================================FAIL: Doctest: ellington.core.throttle.models----------------------------------------------------------------------Traceback (most recent call last):File "/dev/django/test/doctest.py", line 2153, in runTestraise self.failureException(self.format_failure(new.getvalue()))AssertionError: Failed doctest test for myapp.modelsFile "/dev/myapp/models.py", line 0, in models----------------------------------------------------------------------File "/dev/myapp/models.py", line 14, in myapp.modelsFailed example:throttle.check("actor A", "action one", limit=2, hours=1)Expected:TrueGot:False----------------------------------------------------------------------Ran 2 tests in 0.048sFAILED (failures=1)A full explanation of this error output is beyond <strong>the</strong> scope of this document, but it’s pretty intuitive. You can consult<strong>the</strong> documentation of Python’s unittest library for details.Note that <strong>the</strong> return code for <strong>the</strong> test-runner script is <strong>the</strong> total number of failed and erroneous tests. If all <strong>the</strong> tests pass,<strong>the</strong> return code is 0. This feature is useful if you’re using <strong>the</strong> test-runner script in a shell script and need to test forsuccess or failure at that level.3.9.3 Testing tools<strong>Django</strong> provides a small set of tools that come in handy when writing tests.The test clientThe test client is a Python class that acts as a dummy Web browser, allowing you to test your views and interact withyour <strong>Django</strong>-powered application programmatically.Some of <strong>the</strong> things you can do with <strong>the</strong> test client are:• Simulate GET and POST requests on a URL and observe <strong>the</strong> response – everything from low-level HTTP (resul<strong>the</strong>aders and status codes) to page content.• Test that <strong>the</strong> correct view is executed for a given URL.212 Chapter 3. Using <strong>Django</strong>
<strong>Django</strong> <strong>Documentation</strong>, Release 1.2• Test that a given request is rendered by a given <strong>Django</strong> template, with a template context that contains certainvalues.Note that <strong>the</strong> test client is not intended to be a replacement for Twill, Selenium, or o<strong>the</strong>r “in-browser” frameworks.<strong>Django</strong>’s test client has a different focus. In short:• Use <strong>Django</strong>’s test client to establish that <strong>the</strong> correct view is being called and that <strong>the</strong> view is collecting <strong>the</strong>correct context data.• Use in-browser frameworks such as Twill and Selenium to test rendered HTML and <strong>the</strong> behavior of Web pages,namely JavaScript functionality.A comprehensive test suite should use a combination of both test types.Overview and a quick exampleTo use <strong>the</strong> test client, instantiate django.test.client.Client and retrieve Web pages:>>> from django.test.client import Client>>> c = Client()>>> response = c.post(’/login/’, {’username’: ’john’, ’password’: ’smith’})>>> response.status_code200>>> response = c.get(’/customer/details/’)>>> response.content’
<strong>Django</strong> <strong>Documentation</strong>, Release 1.2>>> from django.test import Client>>> csrf_client = Client(enforce_csrf_checks=True)Making requestsUse <strong>the</strong> django.test.client.Client class to make requests. It requires no arguments at time of construction:class ClientOnce you have a Client instance, you can call any of <strong>the</strong> following methods:get(path, data={}, follow=False, **extra)Makes a GET request on <strong>the</strong> provided path and returns a Response object, which is documented below.The key-value pairs in <strong>the</strong> data dictionary are used to create a GET data payload. For example:>>> c = Client()>>> c.get(’/customers/details/’, {’name’: ’fred’, ’age’: 7})...will result in <strong>the</strong> evaluation of a GET request equivalent to:/customers/details/?name=fred&age=7The extra keyword arguments parameter can be used to specify headers to be sent in <strong>the</strong> request. Forexample:>>> c = Client()>>> c.get(’/customers/details/’, {’name’: ’fred’, ’age’: 7},... HTTP_X_REQUESTED_WITH=’XMLHttpRequest’)...will send <strong>the</strong> HTTP header HTTP_X_REQUESTED_WITH to <strong>the</strong> details view, which is a good way totest code paths that use <strong>the</strong> django.http.HttpRequest.is_ajax() method. New in version 1.1:Please, see <strong>the</strong> release notes If you already have <strong>the</strong> GET arguments in URL-encoded form, you can usethat encoding instead of using <strong>the</strong> data argument. For example, <strong>the</strong> previous GET request could also beposed as:>>> c = Client()>>> c.get(’/customers/details/?name=fred&age=7’)If you provide a URL with both an encoded GET data and a data argument, <strong>the</strong> data argument will takeprecedence.If you set follow to True <strong>the</strong> client will follow any redirects and a redirect_chain attribute willbe set in <strong>the</strong> response object containing tuples of <strong>the</strong> intermediate urls and status codes.If you had an url /redirect_me/ that redirected to /next/, that redirected to /final/, this is whatyou’d see:>>> response = c.get(’/redirect_me/’, follow=True)>>> response.redirect_chain[(u’http://testserver/next/’, 302), (u’http://testserver/final/’, 302)]post(path, data={}, content_type=MULTIPART_CONTENT, follow=False, **extra)Makes a POST request on <strong>the</strong> provided path and returns a Response object, which is documentedbelow.The key-value pairs in <strong>the</strong> data dictionary are used to submit POST data. For example:>>> c = Client()>>> c.post(’/login/’, {’name’: ’fred’, ’passwd’: ’secret’})214 Chapter 3. Using <strong>Django</strong>
<strong>Django</strong> <strong>Documentation</strong>, Release 1.2...will result in <strong>the</strong> evaluation of a POST request to this URL:/login/...with this POST data:name=fred&passwd=secretIf you provide content_type (e.g., text/xml for an XML payload), <strong>the</strong> contents of data will besent as-is in <strong>the</strong> POST request, using content_type in <strong>the</strong> HTTP Content-Type header.If you don’t provide a value for content_type, <strong>the</strong> values in data will be transmitted with a contenttype of multipart/form-data. In this case, <strong>the</strong> key-value pairs in data will be encoded as amultipart message and used to create <strong>the</strong> POST data payload.To submit multiple values for a given key – for example, to specify <strong>the</strong> selections for a – provide <strong>the</strong> values as a list or tuple for <strong>the</strong> required key. For example, this value of datawould submit three selected values for <strong>the</strong> field named choices:{’choices’: (’a’, ’b’, ’d’)}Submitting files is a special case. To POST a file, you need only provide <strong>the</strong> file field name as a key, and afile handle to <strong>the</strong> file you wish to upload as a value. For example:>>> c = Client()>>> f = open(’wishlist.doc’)>>> c.post(’/customers/wishes/’, {’name’: ’fred’, ’attachment’: f})>>> f.close()(The name attachment here is not relevant; use whatever name your file-processing code expects.)Note that if you wish to use <strong>the</strong> same file handle for multiple post() calls <strong>the</strong>n you will need to manuallyreset <strong>the</strong> file pointer between posts. The easiest way to do this is to manually close <strong>the</strong> file after it has beenprovided to post(), as demonstrated above.You should also ensure that <strong>the</strong> file is opened in a way that allows <strong>the</strong> data to be read. If your file containsbinary data such as an image, this means you will need to open <strong>the</strong> file in rb (read binary) mode.The extra argument acts <strong>the</strong> same as for Client.get(). Changed in version 1.1: Please, see <strong>the</strong>release notes If <strong>the</strong> URL you request with a POST contains encoded parameters, <strong>the</strong>se parameters will bemade available in <strong>the</strong> request.GET data. For example, if you were to make <strong>the</strong> request:>>> c.post(’/login/?visitor=true’, {’name’: ’fred’, ’passwd’: ’secret’})... <strong>the</strong> view handling this request could interrogate request.POST to retrieve <strong>the</strong> username and password,and could interrogate request.GET to determine if <strong>the</strong> user was a visitor.If you set follow to True <strong>the</strong> client will follow any redirects and a redirect_chain attribute willbe set in <strong>the</strong> response object containing tuples of <strong>the</strong> intermediate urls and status codes.head(path, data={}, follow=False, **extra)New in version 1.1: Please, see <strong>the</strong> release notes Makes a HEAD request on <strong>the</strong> provided path and returnsa Response object. Useful for testing RESTful interfaces. Acts just like Client.get() except it doesnot return a message body.If you set follow to True <strong>the</strong> client will follow any redirects and a redirect_chain attribute willbe set in <strong>the</strong> response object containing tuples of <strong>the</strong> intermediate urls and status codes.options(path, data={}, follow=False, **extra)New in version 1.1: Please, see <strong>the</strong> release notes Makes an OPTIONS request on <strong>the</strong> provided path andreturns a Response object. Useful for testing RESTful interfaces.3.9. Testing <strong>Django</strong> applications 215
<strong>Django</strong> <strong>Documentation</strong>, Release 1.2If you set follow to True <strong>the</strong> client will follow any redirects and a redirect_chain attribute willbe set in <strong>the</strong> response object containing tuples of <strong>the</strong> intermediate urls and status codes.The extra argument acts <strong>the</strong> same as for Client.get().put(path, data={}, content_type=MULTIPART_CONTENT, follow=False, **extra)New in version 1.1: Please, see <strong>the</strong> release notes Makes a PUT request on <strong>the</strong> provided path and returnsa Response object. Useful for testing RESTful interfaces. Acts just like Client.post() except with<strong>the</strong> PUT request method.If you set follow to True <strong>the</strong> client will follow any redirects and a redirect_chain attribute willbe set in <strong>the</strong> response object containing tuples of <strong>the</strong> intermediate urls and status codes.delete(path, follow=False, **extra)New in version 1.1: Please, see <strong>the</strong> release notes Makes an DELETE request on <strong>the</strong> provided path andreturns a Response object. Useful for testing RESTful interfaces.If you set follow to True <strong>the</strong> client will follow any redirects and a redirect_chain attribute willbe set in <strong>the</strong> response object containing tuples of <strong>the</strong> intermediate urls and status codes.The extra argument acts <strong>the</strong> same as for Client.get().login(**credentials)New in version 1.0: Please, see <strong>the</strong> release notes If your site uses <strong>Django</strong>’s au<strong>the</strong>ntication system and youdeal with logging in users, you can use <strong>the</strong> test client’s login() method to simulate <strong>the</strong> effect of a userlogging into <strong>the</strong> site.After you call this method, <strong>the</strong> test client will have all <strong>the</strong> cookies and session data required to pass anylogin-based tests that may form part of a view.The format of <strong>the</strong> credentials argument depends on which au<strong>the</strong>ntication backend you’re using(which is configured by your AUTHENTICATION_BACKENDS setting). If you’re using <strong>the</strong> standardau<strong>the</strong>ntication backend provided by <strong>Django</strong> (ModelBackend), credentials should be <strong>the</strong> user’susername and password, provided as keyword arguments:>>> c = Client()>>> c.login(username=’fred’, password=’secret’)# Now you can access a view that’s only available to logged-in users.If you’re using a different au<strong>the</strong>ntication backend, this method may require different credentials. It requireswhichever credentials are required by your backend’s au<strong>the</strong>nticate() method.login() returns True if it <strong>the</strong> credentials were accepted and login was successful.Finally, you’ll need to remember to create user accounts before you can use this method. As we explainedabove, <strong>the</strong> test runner is executed using a test database, which contains no users by default. As a result,user accounts that are valid on your production site will not work under test conditions. You’ll need tocreate users as part of <strong>the</strong> test suite – ei<strong>the</strong>r manually (using <strong>the</strong> <strong>Django</strong> model API) or with a test fixture.Remember that if you want your test user to have a password, you can’t set <strong>the</strong> user’s password by setting<strong>the</strong> password attribute directly – you must use <strong>the</strong> set_password() function to store a correctly hashedpassword. Alternatively, you can use <strong>the</strong> create_user() helper method to create a new user with acorrectly hashed password.logout()New in version 1.0: Please, see <strong>the</strong> release notes If your site uses <strong>Django</strong>’s au<strong>the</strong>ntication system, <strong>the</strong>logout() method can be used to simulate <strong>the</strong> effect of a user logging out of your site.After you call this method, <strong>the</strong> test client will have all <strong>the</strong> cookies and session data cleared to defaults.Subsequent requests will appear to come from an AnonymousUser.216 Chapter 3. Using <strong>Django</strong>
<strong>Django</strong> <strong>Documentation</strong>, Release 1.2Testing responsesThe get() and post() methods both return a Response object. This Response object is not <strong>the</strong> same as <strong>the</strong>HttpResponse object returned <strong>Django</strong> views; <strong>the</strong> test response object has some additional data useful for test codeto verify.Specifically, a Response object has <strong>the</strong> following attributes:class ResponseclientThe test client that was used to make <strong>the</strong> request that resulted in <strong>the</strong> response.contentThe body of <strong>the</strong> response, as a string. This is <strong>the</strong> final page content as rendered by <strong>the</strong> view, or any errormessage.contextThe template Context instance that was used to render <strong>the</strong> template that produced <strong>the</strong> response content.If <strong>the</strong> rendered page used multiple templates, <strong>the</strong>n context will be a list of Context objects, in <strong>the</strong>order in which <strong>the</strong>y were rendered. New in version 1.1: Please, see <strong>the</strong> release notes Regardless of <strong>the</strong>number of templates used during rendering, you can retrieve context values using <strong>the</strong> [] operator. Forexample, <strong>the</strong> context variable name could be retrieved using:>>> response = client.get(’/foo/’)>>> response.context[’name’]’Arthur’requestThe request data that stimulated <strong>the</strong> response.status_codeThe HTTP status of <strong>the</strong> response, as an integer. See RFC2616 for a full list of HTTP status codes.templateThe Template instance that was used to render <strong>the</strong> final content.<strong>the</strong> template’s file name, if <strong>the</strong> template was loaded from a file.’admin/index.html’.)Use template.name to get(The name is a string such asIf <strong>the</strong> rendered page used multiple templates – e.g., using template inheritance – <strong>the</strong>n template will bea list of Template instances, in <strong>the</strong> order in which <strong>the</strong>y were rendered.You can also use dictionary syntax on <strong>the</strong> response object to query <strong>the</strong> value of any settings in <strong>the</strong> HTTP headers. Forexample, you could determine <strong>the</strong> content type of a response using response[’Content-Type’].ExceptionsIf you point <strong>the</strong> test client at a view that raises an exception, that exception will be visible in <strong>the</strong> test case. You can<strong>the</strong>n use a standard try...except block or unittest.TestCase.assertRaises() to test for exceptions.The only exceptions that are not visible to <strong>the</strong> test client are Http404, PermissionDenied and SystemExit.<strong>Django</strong> catches <strong>the</strong>se exceptions internally and converts <strong>the</strong>m into <strong>the</strong> appropriate HTTP response codes. In <strong>the</strong>secases, you can check response.status_code in your test.3.9. Testing <strong>Django</strong> applications 217
<strong>Django</strong> <strong>Documentation</strong>, Release 1.2Persistent stateThe test client is stateful. If a response returns a cookie, <strong>the</strong>n that cookie will be stored in <strong>the</strong> test client and sent withall subsequent get() and post() requests.Expiration policies for <strong>the</strong>se cookies are not followed. If you want a cookie to expire, ei<strong>the</strong>r delete it manually orcreate a new Client instance (which will effectively delete all cookies).A test client has two attributes that store persistent state information. You can access <strong>the</strong>se properties as part of a testcondition.Client.cookiesA Python SimpleCookie object, containing <strong>the</strong> current values of all <strong>the</strong> client cookies. See <strong>the</strong> Cookiemodule documentation for more.Client.sessionA dictionary-like object containing session information. See <strong>the</strong> session documentation for full details.To modify <strong>the</strong> session and <strong>the</strong>n save it, it must be stored in a variable first (because a new SessionStore iscreated every time this property is accessed):def test_something(self):session = self.client.sessionsession[’somekey’] = ’test’session.save()ExampleThe following is a simple unit test using <strong>the</strong> test client:import unittestfrom django.test.client import Clientclass SimpleTest(unittest.TestCase):def setUp(self):# Every test needs a client.self.client = Client()def test_details(self):# Issue a GET request.response = self.client.get(’/customer/details/’)# Check that <strong>the</strong> response is 200 OK.self.failUnlessEqual(response.status_code, 200)# Check that <strong>the</strong> rendered context contains 5 customers.self.failUnlessEqual(len(response.context[’customers’]), 5)TestCaseNormal Python unit test classes extend a base class of unittest.TestCase. <strong>Django</strong> provides an extension of thisbase class:class TestCaseThis class provides some additional capabilities that can be useful for testing Web sites.218 Chapter 3. Using <strong>Django</strong>
<strong>Django</strong> <strong>Documentation</strong>, Release 1.2Converting a normal unittest.TestCase to a <strong>Django</strong> TestCase is easy: just change <strong>the</strong> base class of yourtest from unittest.TestCase to django.test.TestCase. All of <strong>the</strong> standard Python unit test functionalitywill continue to be available, but it will be augmented with some useful additions. New in version 1.1: Please, see <strong>the</strong>release notesclass TransactionTestCase<strong>Django</strong> TestCase classes make use of database transaction facilities, if available, to speed up <strong>the</strong> process of resetting<strong>the</strong> database to a known state at <strong>the</strong> beginning of each test. A consequence of this, however, is that <strong>the</strong> effects oftransaction commit and rollback cannot be tested by a <strong>Django</strong> TestCase class. If your test requires testing of suchtransactional behavior, you should use a <strong>Django</strong> TransactionTestCase.TransactionTestCase and TestCase are identical except for <strong>the</strong> manner in which <strong>the</strong> database is reset toa known state and <strong>the</strong> ability for test code to test <strong>the</strong> effects of commit and rollback. A TransactionTestCaseresets <strong>the</strong> database before <strong>the</strong> test runs by truncating all tables and reloading initial data. A TransactionTestCasemay call commit and rollback and observe <strong>the</strong> effects of <strong>the</strong>se calls on <strong>the</strong> database.A TestCase, on <strong>the</strong> o<strong>the</strong>r hand, does not truncate tables and reload initial data at <strong>the</strong> beginning of a test. Instead, itencloses <strong>the</strong> test code in a database transaction that is rolled back at <strong>the</strong> end of <strong>the</strong> test. It also prevents <strong>the</strong> code undertest from issuing any commit or rollback operations on <strong>the</strong> database, to ensure that <strong>the</strong> rollback at <strong>the</strong> end of <strong>the</strong> testrestores <strong>the</strong> database to its initial state. In order to guarantee that all TestCase code starts with a clean database,<strong>the</strong> <strong>Django</strong> test runner runs all TestCase tests first, before any o<strong>the</strong>r tests (e.g. doctests) that may alter <strong>the</strong> databasewithout restoring it to its original state.When running on a database that does not support rollback (e.g. MySQL with <strong>the</strong> MyISAM storage engine),TestCase falls back to initializing <strong>the</strong> database by truncating tables and reloading initial data.Note: The TestCase use of rollback to un-do <strong>the</strong> effects of <strong>the</strong> test code may reveal previously-undetected errorsin test code. For example, test code that assumes primary keys values will be assigned starting at one may findthat assumption no longer holds true when rollbacks instead of table truncation are being used to reset <strong>the</strong> database.Similarly, <strong>the</strong> reordering of tests so that all TestCase classes run first may reveal unexpected dependencies on testcase ordering. In such cases a quick fix is to switch <strong>the</strong> TestCase to a TransactionTestCase. A betterlong-term fix, that allows <strong>the</strong> test to take advantage of <strong>the</strong> speed benefit of TestCase, is to fix <strong>the</strong> underlying testproblem.Default test clientNew in version 1.0: Please, see <strong>the</strong> release notesTestCase.clientEvery test case in a django.test.TestCase instance has access to an instance of a <strong>Django</strong> test client. This clientcan be accessed as self.client. This client is recreated for each test, so you don’t have to worry about state (suchas cookies) carrying over from one test to ano<strong>the</strong>r.This means, instead of instantiating a Client in each test:import unittestfrom django.test.client import Clientclass SimpleTest(unittest.TestCase):def test_details(self):client = Client()response = client.get(’/customer/details/’)self.failUnlessEqual(response.status_code, 200)def test_index(self):3.9. Testing <strong>Django</strong> applications 219
<strong>Django</strong> <strong>Documentation</strong>, Release 1.2client = Client()response = client.get(’/customer/index/’)self.failUnlessEqual(response.status_code, 200)...you can just refer to self.client, like so:from django.test import TestCaseclass SimpleTest(TestCase):def test_details(self):response = self.client.get(’/customer/details/’)self.failUnlessEqual(response.status_code, 200)def test_index(self):response = self.client.get(’/customer/index/’)self.failUnlessEqual(response.status_code, 200)Fixture loadingTestCase.fixturesA test case for a database-backed Web site isn’t much use if <strong>the</strong>re isn’t any data in <strong>the</strong> database. To make it easy to puttest data into <strong>the</strong> database, <strong>Django</strong>’s custom TestCase class provides a way of loading fixtures.A fixture is a collection of data that <strong>Django</strong> knows how to import into a database. For example, if your site has useraccounts, you might set up a fixture of fake user accounts in order to populate your database during tests.The most straightforward way of creating a fixture is to use <strong>the</strong> manage.py dumpdata command. This assumesyou already have some data in your database. See <strong>the</strong> dumpdata documentation for more details.Note: If you’ve ever run manage.py syncdb, you’ve already used a fixture without even knowing it! When youcall syncdb in <strong>the</strong> database for <strong>the</strong> first time, <strong>Django</strong> installs a fixture called initial_data. This gives you a wayof populating a new database with any initial data, such as a default set of categories.Fixtures with o<strong>the</strong>r names can always be installed manually using <strong>the</strong> manage.py loaddata command.Once you’ve created a fixture and placed it in a fixtures directory in one of your INSTALLED_APPS, you canuse it in your unit tests by specifying a fixtures class attribute on your django.test.TestCase subclass:from django.test import TestCasefrom myapp.models import Animalclass AnimalTestCase(TestCase):fixtures = [’mammals.json’, ’birds’]def setUp(self):# Test definitions as before.call_setup_methods()def testFluffyAnimals(self):# A test that uses <strong>the</strong> fixtures.call_some_test_code()Here’s specifically what will happen:• At <strong>the</strong> start of each test case, before setUp() is run, <strong>Django</strong> will flush <strong>the</strong> database, returning <strong>the</strong> database to<strong>the</strong> state it was in directly after syncdb was called.220 Chapter 3. Using <strong>Django</strong>
<strong>Django</strong> <strong>Documentation</strong>, Release 1.2• Then, all <strong>the</strong> named fixtures are installed. In this example, <strong>Django</strong> will install any JSON fixture namedmammals, followed by any fixture named birds. See <strong>the</strong> loaddata documentation for more details ondefining and installing fixtures.This flush/load procedure is repeated for each test in <strong>the</strong> test case, so you can be certain that <strong>the</strong> outcome of a test willnot be affected by ano<strong>the</strong>r test, or by <strong>the</strong> order of test execution.URLconf configurationNew in version 1.0: Please, see <strong>the</strong> release notesTestCase.urlsIf your application provides views, you may want to include tests that use <strong>the</strong> test client to exercise those views.However, an end user is free to deploy <strong>the</strong> views in your application at any URL of <strong>the</strong>ir choosing. This means thatyour tests can’t rely upon <strong>the</strong> fact that your views will be available at a particular URL.In order to provide a reliable URL space for your test, django.test.TestCase provides <strong>the</strong> ability to customize<strong>the</strong> URLconf configuration for <strong>the</strong> duration of <strong>the</strong> execution of a test suite. If your TestCase instance defines anurls attribute, <strong>the</strong> TestCase will use <strong>the</strong> value of that attribute as <strong>the</strong> ROOT_URLCONF for <strong>the</strong> duration of thattest.For example:from django.test import TestCaseclass TestMyViews(TestCase):urls = ’myapp.test_urls’def testIndexPageView(self):# Here you’d test your view using ‘‘Client‘‘.call_some_test_code()This test case will use <strong>the</strong> contents of myapp.test_urls as <strong>the</strong> URLconf for <strong>the</strong> duration of <strong>the</strong> test case.Multi-database supportTestCase.multi_dbNew in version 1.2: Please, see <strong>the</strong> release notes <strong>Django</strong> sets up a test database corresponding to every database thatis defined in <strong>the</strong> DATABASES definition in your settings file. However, a big part of <strong>the</strong> time taken to run a <strong>Django</strong>TestCase is consumed by <strong>the</strong> call to flush that ensures that you have a clean database at <strong>the</strong> start of each test run.If you have multiple databases, multiple flushes are required (one for each database), which can be a time consumingactivity – especially if your tests don’t need to test multi-database activity.As an optimization, <strong>Django</strong> only flushes <strong>the</strong> default database at <strong>the</strong> start of each test run. If your setup containsmultiple databases, and you have a test that requires every database to be clean, you can use <strong>the</strong> multi_db attributeon <strong>the</strong> test suite to request a full flush.For example:class TestMyViews(TestCase):multi_db = Truedef testIndexPageView(self):call_some_test_code()This test case will flush all <strong>the</strong> test databases before running testIndexPageView.3.9. Testing <strong>Django</strong> applications 221
<strong>Django</strong> <strong>Documentation</strong>, Release 1.2Emptying <strong>the</strong> test outboxNew in version 1.0: Please, see <strong>the</strong> release notes If you use <strong>Django</strong>’s custom TestCase class, <strong>the</strong> test runner willclear <strong>the</strong> contents of <strong>the</strong> test e-mail outbox at <strong>the</strong> start of each test case.For more detail on e-mail services during tests, see E-mail services.AssertionsNew in version 1.0: Please, see <strong>the</strong> release notesChanged in version 1.2: Addded msg_prefix argument.As Python’s normal unittest.TestCase class implements assertion methods such as assertTrue andassertEquals, <strong>Django</strong>’s custom TestCase class provides a number of custom assertion methods that are usefulfor testing Web applications:The failure messages given by <strong>the</strong> assertion methods can be customized with <strong>the</strong> msg_prefix argument. This stringwill be prefixed to any failure message generated by <strong>the</strong> assertion. This allows you to provide additional details thatmay help you to identify <strong>the</strong> location and cause of an failure in your test suite.TestCase.assertContains(response, text, count=None, status_code=200, msg_prefix=’‘)Asserts that a Response instance produced <strong>the</strong> given status_code and that text appears in <strong>the</strong> contentof <strong>the</strong> response. If count is provided, text must occur exactly count times in <strong>the</strong> response.TestCase.assertNotContains(response, text, status_code=200, msg_prefix=’‘)Asserts that a Response instance produced <strong>the</strong> given status_code and that text does not appears in <strong>the</strong>content of <strong>the</strong> response.TestCase.assertFormError(response, form, field, errors, msg_prefix=’‘)Asserts that a field on a form raises <strong>the</strong> provided list of errors when rendered on <strong>the</strong> form.form is <strong>the</strong> name <strong>the</strong> Form instance was given in <strong>the</strong> template context.field is <strong>the</strong> name of <strong>the</strong> field on <strong>the</strong> form to check. If field has a value of None, non-field errors (errorsyou can access via form.non_field_errors()) will be checked.errors is an error string, or a list of error strings, that are expected as a result of form validation.TestCase.assertTemplateUsed(response, template_name, msg_prefix=’‘)Asserts that <strong>the</strong> template with <strong>the</strong> given name was used in rendering <strong>the</strong> response.The name is a string such as ’admin/index.html’.TestCase.assertTemplateNotUsed(response, template_name, msg_prefix=’‘)Asserts that <strong>the</strong> template with <strong>the</strong> given name was not used in rendering <strong>the</strong> response.TestCase.assertRedirects(response, expected_url, status_code=302, target_status_code=200,msg_prefix=’‘)Asserts that <strong>the</strong> response return a status_code redirect status, it redirected to expected_url (includingany GET data), and <strong>the</strong> final page was received with target_status_code. New in version1.1: Please, see <strong>the</strong> release notes If your request used <strong>the</strong> follow argument, <strong>the</strong> expected_url andtarget_status_code will be <strong>the</strong> url and status code for <strong>the</strong> final point of <strong>the</strong> redirect chain.E-mail servicesNew in version 1.0: Please, see <strong>the</strong> release notes If any of your <strong>Django</strong> views send e-mail using <strong>Django</strong>’s e-mailfunctionality, you probably don’t want to send e-mail each time you run a test using that view. For this reason,<strong>Django</strong>’s test runner automatically redirects all <strong>Django</strong>-sent e-mail to a dummy outbox. This lets you test every aspectof sending e-mail – from <strong>the</strong> number of messages sent to <strong>the</strong> contents of each message – without actually sending <strong>the</strong>messages.222 Chapter 3. Using <strong>Django</strong>
<strong>Django</strong> <strong>Documentation</strong>, Release 1.2The test runner accomplishes this by transparently replacing <strong>the</strong> normal email backend with a testing backend. (Don’tworry – this has no effect on any o<strong>the</strong>r e-mail senders outside of <strong>Django</strong>, such as your machine’s mail server, if you’rerunning one.)django.core.mail.outboxDuring test running, each outgoing e-mail is saved in django.core.mail.outbox. This is a simple list of allEmailMessage instances that have been sent. The outbox attribute is a special attribute that is created only when<strong>the</strong> locmem e-mail backend is used. It doesn’t normally exist as part of <strong>the</strong> django.core.mail module and youcan’t import it directly. The code below shows how to access this attribute correctly.Here’s an example test that examines django.core.mail.outbox for length and contents:from django.core import mailfrom django.test import TestCaseclass EmailTest(TestCase):def test_send_email(self):# Send message.mail.send_mail(’Subject here’, ’Here is <strong>the</strong> message.’,’from@example.com’, [’to@example.com’],fail_silently=False)# Test that one message has been sent.self.assertEquals(len(mail.outbox), 1)# Verify that <strong>the</strong> subject of <strong>the</strong> first message is correct.self.assertEquals(mail.outbox[0].subject, ’Subject here’)As noted previously, <strong>the</strong> test outbox is emptied at <strong>the</strong> start of every test in a <strong>Django</strong> TestCase. To empty <strong>the</strong> outboxmanually, assign <strong>the</strong> empty list to mail.outbox:from django.core import mail# Empty <strong>the</strong> test outboxmail.outbox = []3.9.4 Using different testing frameworksClearly, doctest and unittest are not <strong>the</strong> only Python testing frameworks. While <strong>Django</strong> doesn’t provide explicitsupport for alternative frameworks, it does provide a way to invoke tests constructed for an alternative framework asif <strong>the</strong>y were normal <strong>Django</strong> tests.When you run ./manage.py test, <strong>Django</strong> looks at <strong>the</strong> TEST_RUNNER setting to determine what to do. Bydefault, TEST_RUNNER points to ’django.test.simple.<strong>Django</strong>TestSuiteRunner’. This class defines<strong>the</strong> default <strong>Django</strong> testing behavior. This behavior involves:1. Performing global pre-test setup.2. Looking for unit tests and doctests in <strong>the</strong> models.py and tests.py files in each installed application.3. Creating <strong>the</strong> test databases.4. Running syncdb to install models and initial data into <strong>the</strong> test databases.5. Running <strong>the</strong> unit tests and doctests that are found.6. Destroying <strong>the</strong> test databases.7. Performing global post-test teardown.3.9. Testing <strong>Django</strong> applications 223
<strong>Django</strong> <strong>Documentation</strong>, Release 1.2If you define your own test runner class and point TEST_RUNNER at that class, <strong>Django</strong> will execute your test runnerwhenever you run ./manage.py test. In this way, it is possible to use any test framework that can be executedfrom Python code, or to modify <strong>the</strong> <strong>Django</strong> test execution process to satisfy whatever testing requirements you mayhave.Defining a test runnerChanged in version 1.2: Prior to 1.2, test runners were a single function, not a class. A test runner is a class defininga run_tests() method. <strong>Django</strong> ships with a <strong>Django</strong>TestSuiteRunner class that defines <strong>the</strong> default <strong>Django</strong>testing behavior. This class defines <strong>the</strong> run_tests() entry point, plus a selection of o<strong>the</strong>r methods that are used toby run_tests() to set up, execute and tear down <strong>the</strong> test suite.class <strong>Django</strong>TestSuiteRunner(verbosity=1, interactive=True, failfast=True, **kwargs)verbosity determines <strong>the</strong> amount of notification and debug information that will be printed to <strong>the</strong> console;0 is no output, 1 is normal output, and 2 is verbose output.If interactive is True, <strong>the</strong> test suite has permission to ask <strong>the</strong> user for instructions when <strong>the</strong> test suite isexecuted. An example of this behavior would be asking for permission to delete an existing test database. Ifinteractive is False, <strong>the</strong> test suite must be able to run without any manual intervention.If failfast is True, <strong>the</strong> test suite will stop running after <strong>the</strong> first test failure is detected.<strong>Django</strong> will, from time to time, extend <strong>the</strong> capabilities of <strong>the</strong> test runner by adding new arguments. The**kwargs declaration allows for this expansion. If you subclass <strong>Django</strong>TestSuiteRunner or write yourown test runner, ensure accept and handle <strong>the</strong> **kwargs parameter.<strong>Django</strong>TestSuiteRunner.run_tests(test_labels, extra_tests=None, **kwargs)Run <strong>the</strong> test suite.test_labels is a list of strings describing <strong>the</strong> tests to be run. A test label can take one of three forms:•app.TestCase.test_method – Run a single test method in a test case.•app.TestCase – Run all <strong>the</strong> test methods in a test case.•app – Search for and run all tests in <strong>the</strong> named application.If test_labels has a value of None, <strong>the</strong> test runner should run search for tests in all <strong>the</strong> applications inINSTALLED_APPS.extra_tests is a list of extra TestCase instances to add to <strong>the</strong> suite that is executed by <strong>the</strong> test runner.These extra tests are run in addition to those discovered in <strong>the</strong> modules listed in test_labels.This method should return <strong>the</strong> number of tests that failed.<strong>Django</strong>TestSuiteRunner.setup_test_environment(**kwargs)Sets up <strong>the</strong> test environment ready for testing.<strong>Django</strong>TestSuiteRunner.build_suite(test_labels, extra_tests=None, **kwargs)Constructs a test suite that matches <strong>the</strong> test labels provided.test_labels is a list of strings describing <strong>the</strong> tests to be run. A test label can take one of three forms:•app.TestCase.test_method – Run a single test method in a test case.•app.TestCase – Run all <strong>the</strong> test methods in a test case.•app – Search for and run all tests in <strong>the</strong> named application.If test_labels has a value of None, <strong>the</strong> test runner should run search for tests in all <strong>the</strong> applications inINSTALLED_APPS.224 Chapter 3. Using <strong>Django</strong>
<strong>Django</strong> <strong>Documentation</strong>, Release 1.2extra_tests is a list of extra TestCase instances to add to <strong>the</strong> suite that is executed by <strong>the</strong> test runner.These extra tests are run in addition to those discovered in <strong>the</strong> modules listed in test_labels.Returns a TestSuite instance ready to be run.<strong>Django</strong>TestSuiteRunner.setup_databases(**kwargs)Creates <strong>the</strong> test databases.Returns a data structure that provides enough detail to undo <strong>the</strong> changes that have been made. This data will beprovided to <strong>the</strong> teardown_databases() function at <strong>the</strong> conclusion of testing.<strong>Django</strong>TestSuiteRunner.run_suite(suite, **kwargs)Runs <strong>the</strong> test suite.Returns <strong>the</strong> result produced by <strong>the</strong> running <strong>the</strong> test suite.<strong>Django</strong>TestSuiteRunner.teardown_databases(old_config, **kwargs)Destroys <strong>the</strong> test databases, restoring pre-test conditions.old_config is a data structure defining <strong>the</strong> changes in <strong>the</strong> database configuration that need to be reversed. Itis <strong>the</strong> return value of <strong>the</strong> setup_databases() method.<strong>Django</strong>TestSuiteRunner.teardown_test_environment(**kwargs)Restores <strong>the</strong> pre-test environment.<strong>Django</strong>TestSuiteRunner.suite_result(suite, result, **kwargs)Computes and returns a return code based on a test suite, and <strong>the</strong> result from that test suite.Testing utilitiesTo assist in <strong>the</strong> creation of your own test runner, <strong>Django</strong> provides a number of utility methods in <strong>the</strong>django.test.utils module.setup_test_environment()Performs any global pre-test setup, such as <strong>the</strong> installing <strong>the</strong> instrumentation of <strong>the</strong> template rendering systemand setting up <strong>the</strong> dummy SMTPConnection.teardown_test_environment()Performs any global post-test teardown, such as removing <strong>the</strong> black magic hooks into <strong>the</strong> template system andrestoring normal e-mail services.The creation module of <strong>the</strong> database backend (connection.creation) also provides some utilities that can beuseful during testing.create_test_db(verbosity=1, autoclobber=False)Creates a new test database and runs syncdb against it.verbosity has <strong>the</strong> same behavior as in run_tests().autoclobber describes <strong>the</strong> behavior that will occur if a database with <strong>the</strong> same name as <strong>the</strong> test database isdiscovered:•If autoclobber is False, <strong>the</strong> user will be asked to approve destroying <strong>the</strong> existing database.sys.exit is called if <strong>the</strong> user does not approve.•If autoclobber is True, <strong>the</strong> database will be destroyed without consulting <strong>the</strong> user.Returns <strong>the</strong> name of <strong>the</strong> test database that it created.create_test_db() has <strong>the</strong> side effect of modifying <strong>the</strong> value of NAME in DATABASES to match <strong>the</strong> nameof <strong>the</strong> test database. Changed in version 1.0: create_test_db() now returns <strong>the</strong> name of <strong>the</strong> test database.3.9. Testing <strong>Django</strong> applications 225
<strong>Django</strong> <strong>Documentation</strong>, Release 1.2destroy_test_db(old_database_name, verbosity=1)Destroys <strong>the</strong> database whose name is in stored in NAME in <strong>the</strong> DATABASES, and sets NAME to use <strong>the</strong> providedname.verbosity has <strong>the</strong> same behavior as in run_tests().3.10 User au<strong>the</strong>ntication in <strong>Django</strong><strong>Django</strong> comes with a user au<strong>the</strong>ntication system. It handles user accounts, groups, permissions and cookie-based usersessions. This document explains how things work.3.10.1 OverviewThe auth system consists of:• Users• Permissions: Binary (yes/no) flags designating whe<strong>the</strong>r a user may perform a certain task.• Groups: A generic way of applying labels and permissions to more than one user.• Messages: A simple way to queue messages for given users.Deprecated since version 1.2: The Messages component of <strong>the</strong> auth system will be removed in <strong>Django</strong> 1.4.3.10.2 InstallationAu<strong>the</strong>ntication support is bundled as a <strong>Django</strong> application in django.contrib.auth. To install it, do <strong>the</strong> following:1. Put ’django.contrib.auth’ and ’django.contrib.contenttypes’ in yourINSTALLED_APPS setting. (The Permission model in django.contrib.auth depends ondjango.contrib.contenttypes.)2. Run <strong>the</strong> command manage.py syncdb.Note that <strong>the</strong> default settings.py file created by django-admin.py startproject includes’django.contrib.auth’ and ’django.contrib.contenttypes’ in INSTALLED_APPS for convenience.If your INSTALLED_APPS already contains <strong>the</strong>se apps, feel free to run manage.py syncdb again; youcan run that command as many times as you’d like, and each time it’ll only install what’s needed.The syncdb command creates <strong>the</strong> necessary database tables, creates permission objects for all installed apps thatneed ‘em, and prompts you to create a superuser account <strong>the</strong> first time you run it.Once you’ve taken those steps, that’s it.3.10.3 Usersclass models.User226 Chapter 3. Using <strong>Django</strong>
<strong>Django</strong> <strong>Documentation</strong>, Release 1.2API referenceFieldsclass models.UserUser objects have <strong>the</strong> following fields:usernameRequired. 30 characters or fewer. Alphanumeric characters only (letters, digits and underscores). Changedin version 1.2: Usernames may now contain @, +, . and - characters.first_nameOptional. 30 characters or fewer.last_nameOptional. 30 characters or fewer.emailOptional. E-mail address.passwordRequired. A hash of, and metadata about, <strong>the</strong> password. (<strong>Django</strong> doesn’t store <strong>the</strong> raw password.) Rawpasswords can be arbitrarily long and can contain any character. See <strong>the</strong> “Passwords” section below.is_staffBoolean. Designates whe<strong>the</strong>r this user can access <strong>the</strong> admin site.is_activeBoolean. Designates whe<strong>the</strong>r this user account should be considered active. We recommend that you setthis flag to False instead of deleting accounts; that way, if your applications have any foreign keys tousers, <strong>the</strong> foreign keys won’t break.This doesn’t necessarily control whe<strong>the</strong>r or not <strong>the</strong> user can log in. Au<strong>the</strong>ntication backends aren’t requiredto check for <strong>the</strong> is_active flag, so if you want to reject a login based on is_active being False,it’s up to you to check that in your own login view. However, <strong>the</strong> Au<strong>the</strong>nticationForm used by <strong>the</strong>login() view does perform this check, as do <strong>the</strong> permission-checking methods such as has_perm()and <strong>the</strong> au<strong>the</strong>ntication in <strong>the</strong> <strong>Django</strong> admin. All of those functions/methods will return False for inactiveusers.is_superuserBoolean. Designates that this user has all permissions without explicitly assigning <strong>the</strong>m.last_loginA datetime of <strong>the</strong> user’s last login. Is set to <strong>the</strong> current date/time by default.date_joinedA datetime designating when <strong>the</strong> account was created. Is set to <strong>the</strong> current date/time by default when <strong>the</strong>account is created.Methodsclass models.UserUser objects have two many-to-many fields: models.User. groups and user_permissions. User objectscan access <strong>the</strong>ir related objects in <strong>the</strong> same way as any o<strong>the</strong>r <strong>Django</strong> model:myuser.groups = [group_list]myuser.groups.add(group, group, ...)myuser.groups.remove(group, group, ...)myuser.groups.clear()3.10. User au<strong>the</strong>ntication in <strong>Django</strong> 227
<strong>Django</strong> <strong>Documentation</strong>, Release 1.2myuser.user_permissions = [permission_list]myuser.user_permissions.add(permission, permission, ...)myuser.user_permissions.remove(permission, permission, ...)myuser.user_permissions.clear()In addition to those automatic API methods, User objects have <strong>the</strong> following custom methods:is_anonymous()Always returns False. This is a way of differentiating User and AnonymousUser objects. Generally,you should prefer using is_au<strong>the</strong>nticated() to this method.is_au<strong>the</strong>nticated()Always returns True. This is a way to tell if <strong>the</strong> user has been au<strong>the</strong>nticated. This does not imply anypermissions, and doesn’t check if <strong>the</strong> user is active - it only indicates that <strong>the</strong> user has provided a validusername and password.get_full_name()Returns <strong>the</strong> first_name plus <strong>the</strong> last_name, with a space in between.set_password(raw_password)Sets <strong>the</strong> user’s password to <strong>the</strong> given raw string, taking care of <strong>the</strong> password hashing. Doesn’t save <strong>the</strong>User object.check_password(raw_password)Returns True if <strong>the</strong> given raw string is <strong>the</strong> correct password for <strong>the</strong> user. (This takes care of <strong>the</strong> passwordhashing in making <strong>the</strong> comparison.)set_unusable_password()New in version 1.0: Please, see <strong>the</strong> release notes Marks <strong>the</strong> user as having no password set. This isn’t<strong>the</strong> same as having a blank string for a password. check_password() for this user will never returnTrue. Doesn’t save <strong>the</strong> User object.You may need this if au<strong>the</strong>ntication for your application takes place against an existing external sourcesuch as an LDAP directory.has_usable_password()New in version 1.0: Please, see <strong>the</strong> release notes Returns False if set_unusable_password() hasbeen called for this user.get_group_permissions(obj=None)Returns a set of permission strings that <strong>the</strong> user has, through his/her groups. New in version 1.2: Please,see <strong>the</strong> release notes If obj is passed in, only returns <strong>the</strong> group permissions for this specific object.get_all_permissions(obj=None)Returns a set of permission strings that <strong>the</strong> user has, both through group and user permissions. New inversion 1.2: Please, see <strong>the</strong> release notes If obj is passed in, only returns <strong>the</strong> permissions for this specificobject.has_perm(perm, obj=None)Returns True if <strong>the</strong> user has <strong>the</strong> specified permission, where perm is in <strong>the</strong> format ".". (see permissions section below). If <strong>the</strong> user is inactive, thismethod will always return False. New in version 1.2: Please, see <strong>the</strong> release notes If obj is passed in,this method won’t check for a permission for <strong>the</strong> model, but for this specific object.has_perms(perm_list, obj=None)Returns True if <strong>the</strong> user has each of <strong>the</strong> specified permissions, where each perm is in <strong>the</strong> format ".". If <strong>the</strong> user is inactive, this method will always return False.New in version 1.2: Please, see <strong>the</strong> release notes If obj is passed in, this method won’t check for permissionsfor <strong>the</strong> model, but for <strong>the</strong> specific object.228 Chapter 3. Using <strong>Django</strong>
<strong>Django</strong> <strong>Documentation</strong>, Release 1.2has_module_perms(package_name)Returns True if <strong>the</strong> user has any permissions in <strong>the</strong> given package (<strong>the</strong> <strong>Django</strong> app label). If <strong>the</strong> user isinactive, this method will always return False.get_and_delete_messages()Returns a list of Message objects in <strong>the</strong> user’s queue and deletes <strong>the</strong> messages from <strong>the</strong> queue.email_user(subject, message, from_email=None)Sends an e-mail to <strong>the</strong> user. If from_email is None, <strong>Django</strong> uses <strong>the</strong> DEFAULT_FROM_EMAIL.get_profile()Returns a site-specific profile for this user. Raises django.contrib.auth.models.SiteProfileNotAvailableif <strong>the</strong> current site doesn’t allow profiles. For information on how to define a site-specific user profile, see<strong>the</strong> section on storing additional user information below.Manager functionsclass models.UserManagerThe User model has a custom manager that has <strong>the</strong> following helper functions:create_user(username, email, password=None)Creates, saves and returns a User.The username and password are set as given. The domain portion of email is automatically converedto lowercase, and <strong>the</strong> returned User object will have is_active set to True.If no password is provided, set_unusable_password() will be called.See Creating users for example usage.make_random_password(length=10, allowed_chars=’abcdefghjkmnpqrstuvwxyzABCDEFGHJKLMNPQRSTUVWXYZ2345Returns a random password with <strong>the</strong> given length and given string of allowed characters. (Note that <strong>the</strong>default value of allowed_chars doesn’t contain letters that can cause user confusion, including:•i, l, I, and 1 (lowercase letter i, lowercase letter L, uppercase letter i, and <strong>the</strong> number one)•o, O, and 0 (uppercase letter o, lowercase letter o, and zero)Basic usageCreating usersThe most basic way to create users is to use <strong>the</strong> create_user() helper function that comes with <strong>Django</strong>:>>> from django.contrib.auth.models import User>>> user = User.objects.create_user(’john’, ’lennon@<strong>the</strong>beatles.com’, ’johnpassword’)# At this point, user is a User object that has already been saved# to <strong>the</strong> database. You can continue to change its attributes# if you want to change o<strong>the</strong>r fields.>>> user.is_staff = True>>> user.save()You can also create users using <strong>the</strong> <strong>Django</strong> admin site. Assuming you’ve enabled <strong>the</strong> admin site and hooked it to <strong>the</strong>URL /admin/, <strong>the</strong> “Add user” page is at /admin/auth/user/add/. You should also see a link to “Users” in<strong>the</strong> “Auth” section of <strong>the</strong> main admin index page. The “Add user” admin page is different than standard admin pagesin that it requires you to choose a username and password before allowing you to edit <strong>the</strong> rest of <strong>the</strong> user’s fields.3.10. User au<strong>the</strong>ntication in <strong>Django</strong> 229
<strong>Django</strong> <strong>Documentation</strong>, Release 1.2Also note: if you want your own user account to be able to create users using <strong>the</strong> <strong>Django</strong> admin site, you’ll need togive yourself permission to add users and change users (i.e., <strong>the</strong> “Add user” and “Change user” permissions). If youraccount has permission to add users but not to change <strong>the</strong>m, you won’t be able to add users. Why? Because if youhave permission to add users, you have <strong>the</strong> power to create superusers, which can <strong>the</strong>n, in turn, change o<strong>the</strong>r users. So<strong>Django</strong> requires add and change permissions as a slight security measure.Changing passwordsNew in version 1.2: The manage.py changepassword command was added. manage.pychangepassword *username* offers a method of changing a User’s password from <strong>the</strong> command line.It prompts you to change <strong>the</strong> password of a given user which you must enter twice. If <strong>the</strong>y both match, <strong>the</strong> newpassword will be changed immediately. If you do not supply a user, <strong>the</strong> command will attempt to change <strong>the</strong> passwordwhose username matches <strong>the</strong> current user.You can also change a password programmatically, using set_password():>>> from django.contrib.auth.models import User>>> u = User.objects.get(username__exact=’john’)>>> u.set_password(’new password’)>>> u.save()Don’t set <strong>the</strong> password attribute directly unless you know what you’re doing. This is explained in <strong>the</strong> next section.PasswordsThe password attribute of a User object is a string in this format:hashtype$salt$hashThat’s hashtype, salt and hash, separated by <strong>the</strong> dollar-sign character.Hashtype is ei<strong>the</strong>r sha1 (default), md5 or crypt – <strong>the</strong> algorithm used to perform a one-way hash of <strong>the</strong> password.Salt is a random string used to salt <strong>the</strong> raw password to create <strong>the</strong> hash. Note that <strong>the</strong> crypt method is only supportedon platforms that have <strong>the</strong> standard Python crypt module available. New in version 1.0: Support for <strong>the</strong> cryptmodule is new in <strong>Django</strong> 1.0. For example:sha1$a1976$a36cc8cbf81742a8fb52e221aaeab48ed7f58ab4The set_password() and check_password() functions handle <strong>the</strong> setting and checking of <strong>the</strong>se values behind<strong>the</strong> scenes.Previous <strong>Django</strong> versions, such as 0.90, used simple MD5 hashes without password salts. For backwards compatibility,those are still supported; <strong>the</strong>y’ll be converted automatically to <strong>the</strong> new style <strong>the</strong> first time check_password()works correctly for a given user.Anonymous usersclass models.AnonymousUserdjango.contrib.auth.models.AnonymousUser is a class that implements <strong>the</strong>django.contrib.auth.models.User interface, with <strong>the</strong>se differences:•id is always None.•is_staff and is_superuser are always False.•is_active is always False.230 Chapter 3. Using <strong>Django</strong>
<strong>Django</strong> <strong>Documentation</strong>, Release 1.2•groups and user_permissions are always empty.•is_anonymous() returns True instead of False.•is_au<strong>the</strong>nticated() returns False instead of True.•set_password(), check_password(), save(), delete(), set_groups() andset_permissions() raise NotImplementedError.In practice, you probably won’t need to use AnonymousUser objects on your own, but <strong>the</strong>y’re used by Web requests,as explained in <strong>the</strong> next section.Creating superusersNew in version 1.0: The manage.py createsuperuser command is new. manage.py syncdb prompts youto create a superuser <strong>the</strong> first time you run it after adding ’django.contrib.auth’ to your INSTALLED_APPS.If you need to create a superuser at a later date, you can use a command line utility:manage.py createsuperuser --username=joe --email=joe@example.comYou will be prompted for a password. After you enter one, <strong>the</strong> user will be created immediately. If you leave off <strong>the</strong>--username or <strong>the</strong> --email options, it will prompt you for those values.If you’re using an older release of <strong>Django</strong>, <strong>the</strong> old way of creating a superuser on <strong>the</strong> command line still works:python /path/to/django/contrib/auth/create_superuser.py...where /path/to is <strong>the</strong> path to <strong>the</strong> <strong>Django</strong> codebase on your filesystem. The manage.py command is preferredbecause it figures out <strong>the</strong> correct path and environment for you.Storing additional information about usersIf you’d like to store additional information related to your users, <strong>Django</strong> provides a method to specify a site-specificrelated model – termed a “user profile” – for this purpose.To make use of this feature, define a model with fields for <strong>the</strong> additional information you’d like to store, or additionalmethods you’d like to have available, and also add a OneToOneField from your model to <strong>the</strong> User model. Thiswill ensure only one instance of your model can be created for each User.To indicate that this model is <strong>the</strong> user profile model for a given site, fill in <strong>the</strong> setting AUTH_PROFILE_MODULE witha string consisting of <strong>the</strong> following items, separated by a dot:1. The name of <strong>the</strong> application (case sensitive) in which <strong>the</strong> user profile model is defined (in o<strong>the</strong>r words, <strong>the</strong> namewhich was passed to manage.py startapp to create <strong>the</strong> application).2. The name of <strong>the</strong> model (not case sensitive) class.For example, if <strong>the</strong> profile model was a class named UserProfile and was defined inside an application namedaccounts, <strong>the</strong> appropriate setting would be:AUTH_PROFILE_MODULE = ’accounts.UserProfile’When a user profile model has been defined and specified in this manner, each User object will have a method –get_profile() – which returns <strong>the</strong> instance of <strong>the</strong> user profile model associated with that User.The method get_profile() does not create <strong>the</strong> profile, if it does not exist. You need to register a handler for<strong>the</strong> signal django.db.models.signals.post_save on <strong>the</strong> User model, and, in <strong>the</strong> handler, if created=True,create <strong>the</strong> associated user profile.For more information, see Chapter 12 of <strong>the</strong> <strong>Django</strong> book.3.10. User au<strong>the</strong>ntication in <strong>Django</strong> 231
<strong>Django</strong> <strong>Documentation</strong>, Release 1.23.10.4 Au<strong>the</strong>ntication in Web requestsUntil now, this document has dealt with <strong>the</strong> low-level APIs for manipulating au<strong>the</strong>ntication-related objects. On ahigher level, <strong>Django</strong> can hook this au<strong>the</strong>ntication framework into its system of request objects.First, install <strong>the</strong> SessionMiddleware and Au<strong>the</strong>nticationMiddleware middlewares by adding <strong>the</strong>m toyour MIDDLEWARE_CLASSES setting. See <strong>the</strong> session documentation for more information.Once you have those middlewares installed, you’ll be able to access request.user in views. request.userwill give you a User object representing <strong>the</strong> currently logged-in user. If a user isn’t currently logged in,request.user will be set to an instance of AnonymousUser (see <strong>the</strong> previous section). You can tell <strong>the</strong>mapart with is_au<strong>the</strong>nticated(), like so:if request.user.is_au<strong>the</strong>nticated():# Do something for au<strong>the</strong>nticated users.else:# Do something for anonymous users.How to log a user in<strong>Django</strong> provides two functions in django.contrib.auth: au<strong>the</strong>nticate() and login().au<strong>the</strong>nticate()To au<strong>the</strong>nticate a given username and password, use au<strong>the</strong>nticate(). It takes two keyword arguments,username and password, and it returns a User object if <strong>the</strong> password is valid for <strong>the</strong> given username. If<strong>the</strong> password is invalid, au<strong>the</strong>nticate() returns None. Example:from django.contrib.auth import au<strong>the</strong>nticateuser = au<strong>the</strong>nticate(username=’john’, password=’secret’)if user is not None:if user.is_active:print "You provided a correct username and password!"else:print "Your account has been disabled!"else:print "Your username and password were incorrect."login()To log a user in, in a view, use login(). It takes an HttpRequest object and a User object. login()saves <strong>the</strong> user’s ID in <strong>the</strong> session, using <strong>Django</strong>’s session framework, so, as mentioned above, you’ll need tomake sure to have <strong>the</strong> session middleware installed.This example shows how you might use both au<strong>the</strong>nticate() and login():from django.contrib.auth import au<strong>the</strong>nticate, logindef my_view(request):username = request.POST[’username’]password = request.POST[’password’]user = au<strong>the</strong>nticate(username=username, password=password)if user is not None:if user.is_active:login(request, user)# Redirect to a success page.else:# Return a ’disabled account’ error messageelse:# Return an ’invalid login’ error message.232 Chapter 3. Using <strong>Django</strong>
<strong>Django</strong> <strong>Documentation</strong>, Release 1.2Calling au<strong>the</strong>nticate() firstWhen you’re manually logging a user in, you must call au<strong>the</strong>nticate() before you call login().au<strong>the</strong>nticate() sets an attribute on <strong>the</strong> User noting which au<strong>the</strong>ntication backend successfully au<strong>the</strong>nticatedthat user (see <strong>the</strong> backends documentation for details), and this information is needed later during <strong>the</strong> login process.Manually checking a user’s passwordcheck_password()If you’d like to manually au<strong>the</strong>nticate a user by comparing a plain-text password to <strong>the</strong> hashed password in<strong>the</strong> database, use <strong>the</strong> convenience function django.contrib.auth.models.check_password(). Ittakes two arguments: <strong>the</strong> plain-text password to check, and <strong>the</strong> full value of a user’s password field in <strong>the</strong>database to check against, and returns True if <strong>the</strong>y match, False o<strong>the</strong>rwise.How to log a user outlogout()To log out a user who has been logged in via django.contrib.auth.login(), usedjango.contrib.auth.logout() within your view. It takes an HttpRequest object and hasno return value. Example:from django.contrib.auth import logoutdef logout_view(request):logout(request)# Redirect to a success page.Note that logout() doesn’t throw any errors if <strong>the</strong> user wasn’t logged in. Changed in version 1.0: Callinglogout() now cleans session data. When you call logout(), <strong>the</strong> session data for <strong>the</strong> current requestis completely cleaned out. All existing data is removed. This is to prevent ano<strong>the</strong>r person from using <strong>the</strong>same Web browser to log in and have access to <strong>the</strong> previous user’s session data. If you want to put anythinginto <strong>the</strong> session that will be available to <strong>the</strong> user immediately after logging out, do that after callingdjango.contrib.auth.logout().Limiting access to logged-in usersThe raw wayThe simple, raw way to limit access to pages is to check request.user.is_au<strong>the</strong>nticated() and ei<strong>the</strong>rredirect to a login page:from django.http import HttpResponseRedirectdef my_view(request):if not request.user.is_au<strong>the</strong>nticated():return HttpResponseRedirect(’/login/?next=%s’ % request.path)# ......or display an error message:3.10. User au<strong>the</strong>ntication in <strong>Django</strong> 233
<strong>Django</strong> <strong>Documentation</strong>, Release 1.2def my_view(request):if not request.user.is_au<strong>the</strong>nticated():return render_to_response(’myapp/login_error.html’)# ...The login_required decoratordecorators.login_required([redirect_field_name=REDIRECT_FIELD_NAME])As a shortcut, you can use <strong>the</strong> convenient login_required() decorator:from django.contrib.auth.decorators import login_required@login_requireddef my_view(request):...login_required() does <strong>the</strong> following:•If <strong>the</strong> user isn’t logged in, redirect to settings.LOGIN_URL, passing <strong>the</strong> current absolute path in <strong>the</strong>query string. Example: /accounts/login/?next=/polls/3/.•If <strong>the</strong> user is logged in, execute <strong>the</strong> view normally. The view code is free to assume <strong>the</strong> user is logged in.By default, <strong>the</strong> path that <strong>the</strong> user should be redirected to upon successful au<strong>the</strong>ntication is stored in aquery string parameter called "next". If you would prefer to use a different name for this parameter,login_required() takes an optional redirect_field_name parameter:from django.contrib.auth.decorators import login_required@login_required(redirect_field_name=’my_redirect_field’)def my_view(request):...If you provide a value to redirect_field_name, you will most likely need to customize your logintemplate as well, since <strong>the</strong> template context variable which stores <strong>the</strong> redirect path will use <strong>the</strong> value ofredirect_field_name as it’s key ra<strong>the</strong>r than "next" (<strong>the</strong> default).Note that you’ll need to map <strong>the</strong> appropriate <strong>Django</strong> view to settings.LOGIN_URL. For example, using <strong>the</strong>defaults, add <strong>the</strong> following line to your URLconf:(r’^accounts/login/$’, ’django.contrib.auth.views.login’),views.login(request[, template_name, redirect_field_name, au<strong>the</strong>ntication_form])Here’s what django.contrib.auth.views.login does:•If called via GET, it displays a login form that POSTs to <strong>the</strong> same URL. More on this in a bit.•If called via POST, it tries to log <strong>the</strong> user in. If login is successful, <strong>the</strong> view redirects to <strong>the</strong> URL specifiedin next. If next isn’t provided, it redirects to settings.LOGIN_REDIRECT_URL (which defaultsto /accounts/profile/). If login isn’t successful, it redisplays <strong>the</strong> login form.It’s your responsibility to provide <strong>the</strong> login form in a template called registration/login.html bydefault. This template gets passed four template context variables:•form: A Form object representing <strong>the</strong> login form. See <strong>the</strong> forms documentation for more on Formobjects.•next: The URL to redirect to after successful login. This may contain a query string, too.234 Chapter 3. Using <strong>Django</strong>
<strong>Django</strong> <strong>Documentation</strong>, Release 1.2•site: The current Site, according to <strong>the</strong> SITE_ID setting. If you don’t have <strong>the</strong> site frameworkinstalled, this will be set to an instance of RequestSite, which derives <strong>the</strong> site name and domain from<strong>the</strong> current HttpRequest.•site_name: An alias for site.name. If you don’t have <strong>the</strong> site framework installed, this will be set to<strong>the</strong> value of request.META[’SERVER_NAME’]. For more on sites, see The “sites” framework.If you’d prefer not to call <strong>the</strong> template registration/login.html, you can pass <strong>the</strong> template_nameparameter via <strong>the</strong> extra arguments to <strong>the</strong> view in your URLconf. For example, this URLconf line would usemyapp/login.html instead:(r’^accounts/login/$’, ’django.contrib.auth.views.login’, {’template_name’: ’myapp/login.html’})You can also specify <strong>the</strong> name of <strong>the</strong> GET field which contains <strong>the</strong> URL to redirect to after login by passingredirect_field_name to <strong>the</strong> view. By default, <strong>the</strong> field is called next.Here’s a sample registration/login.html template you can use as a starting point. It assumes youhave a base.html template that defines a content block:{% extends "base.html" %}{% block content %}{% if form.errors %}Your username and password didn’t match. Please try again.{% endif %}{% csrf_token %}{{ form.username.label_tag }}{{ form.username }}{{ form.password.label_tag }}{{ form.password }}{% endblock %}New in version 1.2: Please, see <strong>the</strong> release notes If you are using alternate au<strong>the</strong>ntication (see O<strong>the</strong>r au<strong>the</strong>nticationsources) you can pass a custom au<strong>the</strong>ntication form to <strong>the</strong> login view via <strong>the</strong> au<strong>the</strong>ntication_formparameter. This form must accept a request keyword argument in its __init__ method, and provide aget_user method which returns <strong>the</strong> au<strong>the</strong>nticated user object (this method is only ever called after successfulform validation).O<strong>the</strong>r built-in viewsIn addition to <strong>the</strong> login() view, <strong>the</strong> au<strong>the</strong>ntication system includes a few o<strong>the</strong>r useful built-in views located indjango.contrib.auth.views:views.logout(request[, next_page, template_name, redirect_field_name])Logs a user out.3.10. User au<strong>the</strong>ntication in <strong>Django</strong> 235
<strong>Django</strong> <strong>Documentation</strong>, Release 1.2Optional arguments:•next_page: The URL to redirect to after logout.•template_name: The full name of a template to display after logging <strong>the</strong> user out. This will default toregistration/logged_out.html if no argument is supplied.•redirect_field_name: The name of a GET field containing <strong>the</strong> URL to redirect to after log out.Overrides next_page if <strong>the</strong> given GET parameter is passed.Template context:•title: The string “Logged out”, localized.views.logout_<strong>the</strong>n_login(request[, login_url])Logs a user out, <strong>the</strong>n redirects to <strong>the</strong> login page.Optional arguments:•login_url: The URL of <strong>the</strong> login page to redirect to. This will default to settings.LOGIN_URL ifnot supplied.views.password_change(request[, template_name, post_change_redirect, password_change_form])Allows a user to change <strong>the</strong>ir password.Optional arguments:•template_name: The full name of a template to use for displaying <strong>the</strong> password change form. Thiswill default to registration/password_change_form.html if not supplied.•post_change_redirect: The URL to redirect to after a successful password change.•New in version 1.2: Please, see <strong>the</strong> release notes password_change_form: A custom “change password”form which must accept a user keyword argument. The form is responsible for actually changing<strong>the</strong> user’s password.Template context:•form: The password change form.views.password_change_done(request[, template_name])The page shown after a user has changed <strong>the</strong>ir password.Optional arguments:•template_name: The full name of a template to use. This will default toregistration/password_change_done.html if not supplied.views.password_reset(request[, is_admin_site, template_name, email_template_name, password_reset_form,token_generator, post_reset_redirect])Allows a user to reset <strong>the</strong>ir password by generating a one-time use link that can be used to reset <strong>the</strong> password,and sending that link to <strong>the</strong> user’s registered e-mail address.Optional arguments:•template_name: The full name of a template to use for displaying <strong>the</strong> password reset form. This willdefault to registration/password_reset_form.html if not supplied.•email_template_name: The full name of a template to use for generating <strong>the</strong> e-mail with <strong>the</strong> newpassword. This will default to registration/password_reset_email.html if not supplied.•password_reset_form: Form that will be used to set <strong>the</strong> password. Defaults toPasswordResetForm.236 Chapter 3. Using <strong>Django</strong>
<strong>Django</strong> <strong>Documentation</strong>, Release 1.2•token_generator: Instance of <strong>the</strong> class to check <strong>the</strong> password.This will default to default_token_generator, it’s an instance ofdjango.contrib.auth.tokens.PasswordResetTokenGenerator.•post_reset_redirect: The URL to redirect to after a successful password change.Template context:•form: The form for resetting <strong>the</strong> user’s password.views.password_reset_done(request[, template_name])The page shown after a user has reset <strong>the</strong>ir password.Optional arguments:•template_name: The full name of a template to use. This will default toregistration/password_reset_done.html if not supplied.views.redirect_to_login(next[, login_url, redirect_field_name])Redirects to <strong>the</strong> login page, and <strong>the</strong>n back to ano<strong>the</strong>r URL after a successful login.Required arguments:•next: The URL to redirect to after a successful login.Optional arguments:•login_url: The URL of <strong>the</strong> login page to redirect to. This will default to settings.LOGIN_URL ifnot supplied.•redirect_field_name: The name of a GET field containing <strong>the</strong> URL to redirect to after log out.Overrides next if <strong>the</strong> given GET parameter is passed.password_reset_confirm(request[, uidb36, token, template_name, token_generator,set_password_form, post_reset_redirect])Presents a form for entering a new password.Optional arguments:•uidb36: The user’s id encoded in base 36. This will default to None.•token: Token to check that <strong>the</strong> password is valid. This will default to None.•template_name: The full name of a template to display <strong>the</strong> confirm password view. Default value isregistration/password_reset_confirm.html.•token_generator: Instance of <strong>the</strong> class to check <strong>the</strong> password.This will default to default_token_generator, it’s an instance ofdjango.contrib.auth.tokens.PasswordResetTokenGenerator.•set_password_form: Form that will be used to set <strong>the</strong> password. This will default toSetPasswordForm.•post_reset_redirect: URL to redirect after <strong>the</strong> password reset done. This will default to None.password_reset_complete(request[, template_name])Presents a view which informs <strong>the</strong> user that <strong>the</strong> password has been successfully changed.Optional arguments:•template_name: The full name of a template to display <strong>the</strong> view. This will default toregistration/password_reset_complete.html.3.10. User au<strong>the</strong>ntication in <strong>Django</strong> 237
<strong>Django</strong> <strong>Documentation</strong>, Release 1.2Built-in formsIf you don’t want to use <strong>the</strong> built-in views, but want <strong>the</strong> convenience of not having to write forms for this functionality,<strong>the</strong> au<strong>the</strong>ntication system provides several built-in forms located in django.contrib.auth.forms:class AdminPasswordChangeFormA form used in <strong>the</strong> admin interface to change a user’s password.class Au<strong>the</strong>nticationFormA form for logging a user in.class PasswordChangeFormA form for allowing a user to change <strong>the</strong>ir password.class PasswordResetFormA form for generating and e-mailing a one-time use link to reset a user’s password.class SetPasswordFormA form that lets a user change his/her password without entering <strong>the</strong> old password.class UserChangeFormA form used in <strong>the</strong> admin interface to change a user’s information and permissions.class UserCreationFormA form for creating a new user.Limiting access to logged-in users that pass a testTo limit access based on certain permissions or some o<strong>the</strong>r test, you’d do essentially <strong>the</strong> same thing as described in <strong>the</strong>previous section.The simple way is to run your test on request.user in <strong>the</strong> view directly. For example, this view checks to makesure <strong>the</strong> user is logged in and has <strong>the</strong> permission polls.can_vote:def my_view(request):if not request.user.has_perm(’polls.can_vote’):return HttpResponse("You can’t vote in this poll.")# ...decorators.user_passes_test()As a shortcut, you can use <strong>the</strong> convenient user_passes_test decorator:from django.contrib.auth.decorators import user_passes_test@user_passes_test(lambda u: u.has_perm(’polls.can_vote’))def my_view(request):...We’re using this particular test as a relatively simple example. However, if you just want to test whe<strong>the</strong>r apermission is available to a user, you can use <strong>the</strong> permission_required() decorator, described later inthis document.user_passes_test() takes a required argument: a callable that takes a User object and returns True if<strong>the</strong> user is allowed to view <strong>the</strong> page. Note that user_passes_test() does not automatically check that <strong>the</strong>User is not anonymous.user_passes_test() takes an optional login_url argument, which lets you specify <strong>the</strong> URL for yourlogin page (settings.LOGIN_URL by default).For example:238 Chapter 3. Using <strong>Django</strong>
<strong>Django</strong> <strong>Documentation</strong>, Release 1.2from django.contrib.auth.decorators import user_passes_test@user_passes_test(lambda u: u.has_perm(’polls.can_vote’), login_url=’/login/’)def my_view(request):...The permission_required decoratordecorators.permission_required()It’s a relatively common task to check whe<strong>the</strong>r a user has a particular permission. For that reason, <strong>Django</strong>provides a shortcut for that case: <strong>the</strong> permission_required() decorator. Using this decorator, <strong>the</strong> earlierexample can be written as:from django.contrib.auth.decorators import permission_required@permission_required(’polls.can_vote’)def my_view(request):...As for <strong>the</strong> User.has_perm() method, permission names take <strong>the</strong> form "." (i.e. polls.can_vote for a permission on a model in <strong>the</strong> polls application).Note that permission_required() also takes an optional login_url parameter. Example:from django.contrib.auth.decorators import permission_required@permission_required(’polls.can_vote’, login_url=’/loginpage/’)def my_view(request):...As in <strong>the</strong> login_required() decorator, login_url defaults to settings.LOGIN_URL.Limiting access to generic viewsTo limit access to a generic view, write a thin wrapper around <strong>the</strong> view, and point your URLconf to your wrapperinstead of <strong>the</strong> generic view itself. For example:from django.views.generic.date_based import object_detail@login_requireddef limited_object_detail(*args, **kwargs):return object_detail(*args, **kwargs)3.10.5 Permissions<strong>Django</strong> comes with a simple permissions system. It provides a way to assign permissions to specific users and groupsof users.It’s used by <strong>the</strong> <strong>Django</strong> admin site, but you’re welcome to use it in your own code.The <strong>Django</strong> admin site uses permissions as follows:• Access to view <strong>the</strong> “add” form and add an object is limited to users with <strong>the</strong> “add” permission for that type ofobject.3.10. User au<strong>the</strong>ntication in <strong>Django</strong> 239
<strong>Django</strong> <strong>Documentation</strong>, Release 1.2• Access to view <strong>the</strong> change list, view <strong>the</strong> “change” form and change an object is limited to users with <strong>the</strong> “change”permission for that type of object.• Access to delete an object is limited to users with <strong>the</strong> “delete” permission for that type of object.Permissions are set globally per type of object, not per specific object instance. For example, it’s possible to say “Marymay change news stories,” but it’s not currently possible to say “Mary may change news stories, but only <strong>the</strong> ones shecreated herself” or “Mary may only change news stories that have a certain status, publication date or ID.” The latterfunctionality is something <strong>Django</strong> developers are currently discussing.Default permissionsWhen django.contrib.auth is listed in your INSTALLED_APPS setting, it will ensure that three default permissions– add, change and delete – are created for each <strong>Django</strong> model defined in one of your installed applications.These permissions will be created when you run manage.py syncdb; <strong>the</strong> first time you run syncdb afteradding django.contrib.auth to INSTALLED_APPS, <strong>the</strong> default permissions will be created for all previouslyinstalledmodels, as well as for any new models being installed at that time. Afterward, it will create default permissionsfor new models each time you run manage.py syncdb.Assuming you have an application with an app_label foo and a model named Bar, to test for basic permissionsyou should use:• add: user.has_perm(’foo.add_bar’)• change: user.has_perm(’foo.change_bar’)• delete: user.has_perm(’foo.delete_bar’)Custom permissionsTo create custom permissions for a given model object, use <strong>the</strong> permissions model Meta attribute.This example Task model creates three custom permissions, i.e., actions users can or cannot do with Task instances,specific to your appication:class Task(models.Model):...class Meta:permissions = (("can_view", "Can see available tasks"),("can_change_status", "Can change <strong>the</strong> status of tasks"),("can_close", "Can remove a task by setting its status as closed"),)The only thing this does is create those extra permissions when you run manage.py syncdb. Your code is incharge of checking <strong>the</strong> value of <strong>the</strong>se permissions when an user is trying to access <strong>the</strong> functionality provided by <strong>the</strong>application (viewing tasks, changing <strong>the</strong> status of tasks, closing tasks.)API referenceclass models.PermissionJust like users, permissions are implemented in a <strong>Django</strong> model that lives in django/contrib/auth/models.py.240 Chapter 3. Using <strong>Django</strong>
<strong>Django</strong> <strong>Documentation</strong>, Release 1.2FieldsPermission objects have <strong>the</strong> following fields:models.Permission.nameRequired. 50 characters or fewer. Example: ’Can vote’.models.Permission.content_typeRequired. A reference to <strong>the</strong> django_content_type database table, which contains a record for eachinstalled <strong>Django</strong> model.models.Permission.codenameRequired. 100 characters or fewer. Example: ’can_vote’.MethodsPermission objects have <strong>the</strong> standard data-access methods like any o<strong>the</strong>r <strong>Django</strong> model.3.10.6 Au<strong>the</strong>ntication data in templatesThe currently logged-in user and his/her permissions are made available in <strong>the</strong> template context when you useRequestContext.TechnicalityTechnically, <strong>the</strong>se variables are only made available in <strong>the</strong> template context if youuse RequestContext and your TEMPLATE_CONTEXT_PROCESSORS setting contains"django.contrib.auth.context_processors.auth", which is default. For more, see <strong>the</strong> RequestContextdocs.UsersWhen rendering a template RequestContext, <strong>the</strong> currently logged-in user, ei<strong>the</strong>r a User instance or anAnonymousUser instance, is stored in <strong>the</strong> template variable {{ user }}:{% if user.is_au<strong>the</strong>nticated %}Welcome, {{ user.username }}. Thanks for logging in.{% else %}Welcome, new user. Please log in.{% endif %}This template context variable is not available if a RequestContext is not being used.PermissionsThe currently logged-in user’s permissions are stored in <strong>the</strong> template variable {{ perms }}. This is an instance ofdjango.core.context_processors.PermWrapper, which is a template-friendly proxy of permissions.In <strong>the</strong> {{ perms }} object, single-attribute lookup is a proxy to User.has_module_perms. This examplewould display True if <strong>the</strong> logged-in user had any permissions in <strong>the</strong> foo app:{{ perms.foo }}3.10. User au<strong>the</strong>ntication in <strong>Django</strong> 241
<strong>Django</strong> <strong>Documentation</strong>, Release 1.2Two-level-attribute lookup is a proxy to User.has_perm. This example would display True if <strong>the</strong> logged-in userhad <strong>the</strong> permission foo.can_vote:{{ perms.foo.can_vote }}Thus, you can check permissions in template {% if %} statements:{% if perms.foo %}You have permission to do something in <strong>the</strong> foo app.{% if perms.foo.can_vote %}You can vote!{% endif %}{% if perms.foo.can_drive %}You can drive!{% endif %}{% else %}You don’t have permission to do anything in <strong>the</strong> foo app.{% endif %}3.10.7 GroupsGroups are a generic way of categorizing users so you can apply permissions, or some o<strong>the</strong>r label, to those users. Auser can belong to any number of groups.A user in a group automatically has <strong>the</strong> permissions granted to that group. For example, if <strong>the</strong> group Site editorshas <strong>the</strong> permission can_edit_home_page, any user in that group will have that permission.Beyond permissions, groups are a convenient way to categorize users to give <strong>the</strong>m some label, or extended functionality.For example, you could create a group ’Special users’, and you could write code that could, say, give <strong>the</strong>maccess to a members-only portion of your site, or send <strong>the</strong>m members-only e-mail messages.3.10.8 MessagesDeprecated since version 1.2: This functionality will be removed in <strong>Django</strong> 1.4. You should use <strong>the</strong> messages frameworkfor all new projects and begin to update your existing code immediately. The message system is a lightweightway to queue messages for given users.A message is associated with a User. There’s no concept of expiration or timestamps.Messages are used by <strong>the</strong> <strong>Django</strong> admin after successful actions. For example, "The poll Foo was createdsuccessfully." is a message.The API is simple:models.User.message_set.create(message)To create a new message, use user_obj.message_set.create(message=’message_text’).To retrieve/delete messages, use user_obj.get_and_delete_messages(), which returns a list ofMessage objects in <strong>the</strong> user’s queue (if any) and deletes <strong>the</strong> messages from <strong>the</strong> queue.In this example view, <strong>the</strong> system saves a message for <strong>the</strong> user after creating a playlist:def create_playlist(request, songs):# Create <strong>the</strong> playlist with <strong>the</strong> given songs.# ...request.user.message_set.create(message="Your playlist was added successfully.")return render_to_response("playlists/create.html",context_instance=RequestContext(request))242 Chapter 3. Using <strong>Django</strong>
<strong>Django</strong> <strong>Documentation</strong>, Release 1.2When you use RequestContext, <strong>the</strong> currently logged-in user and his/her messages are made available in <strong>the</strong>template context as <strong>the</strong> template variable {{ messages }}. Here’s an example of template code that displaysmessages:{% if messages %}{% for message in messages %}{{ message }}{% endfor %}{% endif %}Changed in version 1.2: The messages template variable uses a backwards compatible method in <strong>the</strong> messagesframework to retrieve messages from both <strong>the</strong> user Message model and from <strong>the</strong> new framework. Unlike in previousrevisions, <strong>the</strong> messages will not be erased unless <strong>the</strong>y are actually displayed. Finally, note that this messagesframework only works with users in <strong>the</strong> user database. To send messages to anonymous users, use <strong>the</strong> messagesframework.3.10.9 O<strong>the</strong>r au<strong>the</strong>ntication sourcesThe au<strong>the</strong>ntication that comes with <strong>Django</strong> is good enough for most common cases, but you may have <strong>the</strong> need to hookinto ano<strong>the</strong>r au<strong>the</strong>ntication source – that is, ano<strong>the</strong>r source of usernames and passwords or au<strong>the</strong>ntication methods.For example, your company may already have an LDAP setup that stores a username and password for every employee.It’d be a hassle for both <strong>the</strong> network administrator and <strong>the</strong> users <strong>the</strong>mselves if users had separate accounts in LDAPand <strong>the</strong> <strong>Django</strong>-based applications.So, to handle situations like this, <strong>the</strong> <strong>Django</strong> au<strong>the</strong>ntication system lets you plug in o<strong>the</strong>r au<strong>the</strong>ntication sources. Youcan override <strong>Django</strong>’s default database-based scheme, or you can use <strong>the</strong> default system in tandem with o<strong>the</strong>r systems.See <strong>the</strong> au<strong>the</strong>ntication backend reference for information on <strong>the</strong> au<strong>the</strong>ntication backends included with <strong>Django</strong>.Specifying au<strong>the</strong>ntication backendsBehind <strong>the</strong> scenes, <strong>Django</strong> maintains a list of “au<strong>the</strong>ntication backends” that it checks for au<strong>the</strong>ntication. Whensomebody calls django.contrib.auth.au<strong>the</strong>nticate() – as described in How to log a user in above –<strong>Django</strong> tries au<strong>the</strong>nticating across all of its au<strong>the</strong>ntication backends. If <strong>the</strong> first au<strong>the</strong>ntication method fails, <strong>Django</strong>tries <strong>the</strong> second one, and so on, until all backends have been attempted.The list of au<strong>the</strong>ntication backends to use is specified in <strong>the</strong> AUTHENTICATION_BACKENDS setting. This shouldbe a tuple of Python path names that point to Python classes that know how to au<strong>the</strong>nticate. These classes can beanywhere on your Python path.By default, AUTHENTICATION_BACKENDS is set to:(’django.contrib.auth.backends.ModelBackend’,)That’s <strong>the</strong> basic au<strong>the</strong>ntication scheme that checks <strong>the</strong> <strong>Django</strong> users database.The order of AUTHENTICATION_BACKENDS matters, so if <strong>the</strong> same username and password is valid in multiplebackends, <strong>Django</strong> will stop processing at <strong>the</strong> first positive match.Note: Once a user has au<strong>the</strong>nticated, <strong>Django</strong> stores which backend was used to au<strong>the</strong>nticate <strong>the</strong> user in <strong>the</strong> user’ssession, and re-uses <strong>the</strong> same backend for subsequent au<strong>the</strong>ntication attempts for that user. This effectively meansthat au<strong>the</strong>ntication sources are cached, so if you change AUTHENTICATION_BACKENDS, you’ll need to clear outsession data if you need to force users to re-au<strong>the</strong>nticate using different methods. A simple way to do that is simply toexecute Session.objects.all().delete().3.10. User au<strong>the</strong>ntication in <strong>Django</strong> 243
<strong>Django</strong> <strong>Documentation</strong>, Release 1.2Writing an au<strong>the</strong>ntication backendAn au<strong>the</strong>ntication backend is a class that implements two methods: get_user(user_id) andau<strong>the</strong>nticate(**credentials).The get_user method takes a user_id – which could be a username, database ID or whatever – and returns aUser object.The au<strong>the</strong>nticate method takes credentials as keyword arguments. Most of <strong>the</strong> time, it’ll just look like this:class MyBackend:def au<strong>the</strong>nticate(self, username=None, password=None):# Check <strong>the</strong> username/password and return a User.But it could also au<strong>the</strong>nticate a token, like so:class MyBackend:def au<strong>the</strong>nticate(self, token=None):# Check <strong>the</strong> token and return a User.Ei<strong>the</strong>r way, au<strong>the</strong>nticate should check <strong>the</strong> credentials it gets, and it should return a User object that matchesthose credentials, if <strong>the</strong> credentials are valid. If <strong>the</strong>y’re not valid, it should return None.The <strong>Django</strong> admin system is tightly coupled to <strong>the</strong> <strong>Django</strong> User object described at <strong>the</strong> beginning of this document.For now, <strong>the</strong> best way to deal with this is to create a <strong>Django</strong> User object for each user that exists for your backend(e.g., in your LDAP directory, your external SQL database, etc.) You can ei<strong>the</strong>r write a script to do this in advance, oryour au<strong>the</strong>nticate method can do it <strong>the</strong> first time a user logs in.Here’s an example backend that au<strong>the</strong>nticates against a username and password variable defined in yoursettings.py file and creates a <strong>Django</strong> User object <strong>the</strong> first time a user au<strong>the</strong>nticates:from django.conf import settingsfrom django.contrib.auth.models import User, check_passwordclass SettingsBackend:"""Au<strong>the</strong>nticate against <strong>the</strong> settings ADMIN_LOGIN and ADMIN_PASSWORD.Use <strong>the</strong> login name, and a hash of <strong>the</strong> password. For example:ADMIN_LOGIN = ’admin’ADMIN_PASSWORD = ’sha1$4e987$afbcf42e21bd417fb71db8c66b321e9fc33051de’"""def au<strong>the</strong>nticate(self, username=None, password=None):login_valid = (settings.ADMIN_LOGIN == username)pwd_valid = check_password(password, settings.ADMIN_PASSWORD)if login_valid and pwd_valid:try:user = User.objects.get(username=username)except User.DoesNotExist:# Create a new user. Note that we can set password# to anything, because it won’t be checked; <strong>the</strong> password# from settings.py will.user = User(username=username, password=’get from settings.py’)user.is_staff = Trueuser.is_superuser = Trueuser.save()244 Chapter 3. Using <strong>Django</strong>
<strong>Django</strong> <strong>Documentation</strong>, Release 1.2return userreturn Nonedef get_user(self, user_id):try:return User.objects.get(pk=user_id)except User.DoesNotExist:return NoneHandling authorization in custom backendsCustom auth backends can provide <strong>the</strong>ir own permissions.The user model will delegate permission lookup functions (get_group_permissions(),get_all_permissions(), has_perm(), and has_module_perms()) to any au<strong>the</strong>ntication backendthat implements <strong>the</strong>se functions.The permissions given to <strong>the</strong> user will be <strong>the</strong> superset of all permissions returned by all backends. That is, <strong>Django</strong>grants a permission to a user that any one backend grants.The simple backend above could implement permissions for <strong>the</strong> magic admin fairly simply:class SettingsBackend:# ...def has_perm(self, user_obj, perm):if user_obj.username == settings.ADMIN_LOGIN:return Trueelse:return FalseThis gives full permissions to <strong>the</strong> user granted access in <strong>the</strong> above example. Notice that <strong>the</strong> backend auth functionsall take <strong>the</strong> user object as an argument, and <strong>the</strong>y also accept <strong>the</strong> same arguments given to <strong>the</strong> associateddjango.contrib.auth.models.User functions.A full authorization implementation can be found in django/contrib/auth/backends.py, which is <strong>the</strong> default backendand queries <strong>the</strong> auth_permission table most of <strong>the</strong> time.Authorization for anonymous usersChanged in version 1.2: Please, see <strong>the</strong> release notes An anonymous user is one that is not au<strong>the</strong>nticated i.e. <strong>the</strong>yhave provided no valid au<strong>the</strong>ntication details. However, that does not necessarily mean <strong>the</strong>y are not authorized to doanything. At <strong>the</strong> most basic level, most Web sites authorize anonymous users to browse most of <strong>the</strong> site, and manyallow anonymous posting of comments etc.<strong>Django</strong>’s permission framework does not have a place to store permissions for anonymous users. However, it has afoundation that allows custom au<strong>the</strong>ntication backends to specify authorization for anonymous users. This is especiallyuseful for <strong>the</strong> authors of re-usable apps, who can delegate all questions of authorization to <strong>the</strong> auth backend, ra<strong>the</strong>rthan needing settings, for example, to control anonymous access.To enable this in your own backend, you must set <strong>the</strong> class attribute supports_anonymous_userto True. (This precaution is to maintain compatibility with backends that assume that all user objectsare actual instances of <strong>the</strong> django.contrib.auth.models.User class). With this in place,django.contrib.auth.models.AnonymousUser will delegate all <strong>the</strong> relevant permission methods to <strong>the</strong>au<strong>the</strong>ntication backends.3.10. User au<strong>the</strong>ntication in <strong>Django</strong> 245
<strong>Django</strong> <strong>Documentation</strong>, Release 1.2A nonexistent supports_anonymous_user attribute will raise a hidden PendingDeprecationWarning ifused in <strong>Django</strong> 1.2. In <strong>Django</strong> 1.3, this warning will be upgraded to a DeprecationWarning, which will bedisplayed loudly. Additionally supports_anonymous_user will be set to False. <strong>Django</strong> 1.4 will assume thatevery backend supports anonymous users being passed to <strong>the</strong> authorization methods.Handling object permissions<strong>Django</strong>’s permission framework has a foundation for object permissions, though <strong>the</strong>re is no implementation for it in<strong>the</strong> core. That means that checking for object permissions will always return False or an empty list (depending on<strong>the</strong> check performed).To enable object permissions in your own au<strong>the</strong>ntication backend you’ll just have to allow passing an obj parameterto <strong>the</strong> permission methods and set <strong>the</strong> supports_object_permissions class attribute to True.A nonexistent supports_object_permissions will raise a hidden PendingDeprecationWarningif used in <strong>Django</strong> 1.2. In <strong>Django</strong> 1.3, this warning will be upgraded to a DeprecationWarning,which will be displayed loudly. Additionally supports_object_permissions will be set to False.<strong>Django</strong> 1.4 will assume that every backend supports object permissions and won’t check for <strong>the</strong> existence ofsupports_object_permissions, which means not supporting obj as a parameter will raise a TypeError.3.11 <strong>Django</strong>’s cache frameworkA fundamental trade-off in dynamic Web sites is, well, <strong>the</strong>y’re dynamic. Each time a user requests a page, <strong>the</strong> Webserver makes all sorts of calculations – from database queries to template rendering to business logic – to create <strong>the</strong>page that your site’s visitor sees. This is a lot more expensive, from a processing-overhead perspective, than yourstandard read-a-file-off-<strong>the</strong>-filesystem server arrangement.For most Web applications, this overhead isn’t a big deal. Most Web applications aren’t washingtonpost.com orslashdot.org; <strong>the</strong>y’re simply small- to medium-sized sites with so-so traffic. But for medium- to high-traffic sites, it’sessential to cut as much overhead as possible.That’s where caching comes in.To cache something is to save <strong>the</strong> result of an expensive calculation so that you don’t have to perform <strong>the</strong> calculationnext time. Here’s some pseudocode explaining how this would work for a dynamically generated Web page:given a URL, try finding that page in <strong>the</strong> cacheif <strong>the</strong> page is in <strong>the</strong> cache:return <strong>the</strong> cached pageelse:generate <strong>the</strong> pagesave <strong>the</strong> generated page in <strong>the</strong> cache (for next time)return <strong>the</strong> generated page<strong>Django</strong> comes with a robust cache system that lets you save dynamic pages so <strong>the</strong>y don’t have to be calculated foreach request. For convenience, <strong>Django</strong> offers different levels of cache granularity: You can cache <strong>the</strong> output of specificviews, you can cache only <strong>the</strong> pieces that are difficult to produce, or you can cache your entire site.<strong>Django</strong> also works well with “upstream” caches, such as Squid and browser-based caches. These are <strong>the</strong> types ofcaches that you don’t directly control but to which you can provide hints (via HTTP headers) about which parts ofyour site should be cached, and how.246 Chapter 3. Using <strong>Django</strong>
<strong>Django</strong> <strong>Documentation</strong>, Release 1.23.11.1 Setting up <strong>the</strong> cacheThe cache system requires a small amount of setup. Namely, you have to tell it where your cached data should live –whe<strong>the</strong>r in a database, on <strong>the</strong> filesystem or directly in memory. This is an important decision that affects your cache’sperformance; yes, some cache types are faster than o<strong>the</strong>rs.Your cache preference goes in <strong>the</strong> CACHE_BACKEND setting in your settings file. Here’s an explanation of all availablevalues for CACHE_BACKEND.MemcachedBy far <strong>the</strong> fastest, most efficient type of cache available to <strong>Django</strong>, Memcached is an entirely memory-based cacheframework originally developed to handle high loads at LiveJournal.com and subsequently open-sourced by DangaInteractive. It’s used by sites such as Facebook and Wikipedia to reduce database access and dramatically increase siteperformance.Memcached is available for free at http://memcached.org/. It runs as a daemon and is allotted a specified amount ofRAM. All it does is provide a fast interface for adding, retrieving and deleting arbitrary data in <strong>the</strong> cache. All data isstored directly in memory, so <strong>the</strong>re’s no overhead of database or filesystem usage.After installing Memcached itself, you’ll need to install python-memcached, which provides Python bindings toMemcached. This is available at ftp://ftp.tummy.com/pub/python-memcached/ Changed in version 1.2: In <strong>Django</strong> 1.0and 1.1, you could also use cmemcache as a binding. However, support for this library was deprecated in 1.2 dueto a lack of maintenance on <strong>the</strong> cmemcache library itself. Support for cmemcache will be removed completely in<strong>Django</strong> 1.4. To use Memcached with <strong>Django</strong>, set CACHE_BACKEND to memcached://ip:port/, where ip is<strong>the</strong> IP address of <strong>the</strong> Memcached daemon and port is <strong>the</strong> port on which Memcached is running.In this example, Memcached is running on localhost (127.0.0.1) port 11211:CACHE_BACKEND = ’memcached://127.0.0.1:11211/’One excellent feature of Memcached is its ability to share cache over multiple servers. This means you can runMemcached daemons on multiple machines, and <strong>the</strong> program will treat <strong>the</strong> group of machines as a single cache,without <strong>the</strong> need to duplicate cache values on each machine. To take advantage of this feature, include all serveraddresses in CACHE_BACKEND, separated by semicolons.In this example, <strong>the</strong> cache is shared over Memcached instances running on IP address 172.19.26.240 and172.19.26.242, both on port 11211:CACHE_BACKEND = ’memcached://172.19.26.240:11211;172.19.26.242:11211/’In <strong>the</strong> following example, <strong>the</strong> cache is shared over Memcached instances running on <strong>the</strong> IP addresses 172.19.26.240(port 11211), 172.19.26.242 (port 11212), and 172.19.26.244 (port 11213):CACHE_BACKEND = ’memcached://172.19.26.240:11211;172.19.26.242:11212;172.19.26.244:11213/’A final point about Memcached is that memory-based caching has one disadvantage: Because <strong>the</strong> cached data is storedin memory, <strong>the</strong> data will be lost if your server crashes. Clearly, memory isn’t intended for permanent data storage, sodon’t rely on memory-based caching as your only data storage. Without a doubt, none of <strong>the</strong> <strong>Django</strong> caching backendsshould be used for permanent storage – <strong>the</strong>y’re all intended to be solutions for caching, not storage – but we point thisout here because memory-based caching is particularly temporary.Database cachingTo use a database table as your cache backend, first create a cache table in your database by running this command:3.11. <strong>Django</strong>’s cache framework 247
<strong>Django</strong> <strong>Documentation</strong>, Release 1.2python manage.py createcachetable [cache_table_name]...where [cache_table_name] is <strong>the</strong> name of <strong>the</strong> database table to create. (This name can be whatever you want,as long as it’s a valid table name that’s not already being used in your database.) This command creates a single tablein your database that is in <strong>the</strong> proper format that <strong>Django</strong>’s database-cache system expects.Once you’ve created that database table, set your CACHE_BACKEND setting to "db://tablename", wheretablename is <strong>the</strong> name of <strong>the</strong> database table. In this example, <strong>the</strong> cache table’s name is my_cache_table:CACHE_BACKEND = ’db://my_cache_table’The database caching backend uses <strong>the</strong> same database as specified in your settings file. You can’t use a differentdatabase backend for your cache table.Database caching works best if you’ve got a fast, well-indexed database server.Database caching and multiple databasesIf you use database caching with multiple databases, you’ll also need to set up routing instructions for your databasecache table. For <strong>the</strong> purposes of routing, <strong>the</strong> database cache table appears as a model named CacheEntry, in anapplication named django_cache. This model won’t appear in <strong>the</strong> models cache, but <strong>the</strong> model details can be usedfor routing purposes.For example, <strong>the</strong> following router would direct all cache read operations to cache_slave, and all write operationsto cache_master. The cache table will only be synchronized onto cache_master:class CacheRouter(object):"""A router to control all database cache operations"""def db_for_read(self, model, **hints):"All cache read operations go to <strong>the</strong> slave"if model._meta.app_label in (’django_cache’,):return ’cache_slave’return Nonedef db_for_write(self, model, **hints):"All cache write operations go to master"if model._meta.app_label in (’django_cache’,):return ’cache_master’return Nonedef allow_syncdb(self, db, model):"Only synchronize <strong>the</strong> cache model on master"if model._meta.app_label in (’django_cache’,):return db == ’cache_master’return NoneIf you don’t specify routing directions for <strong>the</strong> database cache model, <strong>the</strong> cache backend will use <strong>the</strong> defaultdatabase.Of course, if you don’t use <strong>the</strong> database cache backend, you don’t need to worry about providing routing instructionsfor <strong>the</strong> database cache model.Filesystem cachingTo store cached items on a filesystem, use <strong>the</strong> "file://" cache type for CACHE_BACKEND. For example, to storecached data in /var/tmp/django_cache, use this setting:248 Chapter 3. Using <strong>Django</strong>
<strong>Django</strong> <strong>Documentation</strong>, Release 1.2CACHE_BACKEND = ’file:///var/tmp/django_cache’Note that <strong>the</strong>re are three forward slashes toward <strong>the</strong> beginning of that example. The first two are for file://, and<strong>the</strong> third is <strong>the</strong> first character of <strong>the</strong> directory path, /var/tmp/django_cache. If you’re on Windows, put <strong>the</strong>drive letter after <strong>the</strong> file://, like this:file://c:/foo/barThe directory path should be absolute – that is, it should start at <strong>the</strong> root of your filesystem. It doesn’t matter whe<strong>the</strong>ryou put a slash at <strong>the</strong> end of <strong>the</strong> setting.Make sure <strong>the</strong> directory pointed-to by this setting exists and is readable and writable by <strong>the</strong> system user under whichyour Web server runs. Continuing <strong>the</strong> above example, if your server runs as <strong>the</strong> user apache, make sure <strong>the</strong> directory/var/tmp/django_cache exists and is readable and writable by <strong>the</strong> user apache.Each cache value will be stored as a separate file whose contents are <strong>the</strong> cache data saved in a serialized (“pickled”)format, using Python’s pickle module. Each file’s name is <strong>the</strong> cache key, escaped for safe filesystem use.Local-memory cachingIf you want <strong>the</strong> speed advantages of in-memory caching but don’t have <strong>the</strong> capability of running Memcached, consider<strong>the</strong> local-memory cache backend. This cache is multi-process and thread-safe. To use it, set CACHE_BACKEND to"locmem://". For example:CACHE_BACKEND = ’locmem://’Note that each process will have its own private cache instance, which means no cross-process caching is possible.This obviously also means <strong>the</strong> local memory cache isn’t particularly memory-efficient, so it’s probably not a goodchoice for production environments. It’s nice for development.Dummy caching (for development)Finally, <strong>Django</strong> comes with a “dummy” cache that doesn’t actually cache – it just implements <strong>the</strong> cache interfacewithout doing anything.This is useful if you have a production site that uses heavy-duty caching in various places but a development/testenvironment where you don’t want to cache and don’t want to have to change your code to special-case <strong>the</strong> latter. Toactivate dummy caching, set CACHE_BACKEND like so:CACHE_BACKEND = ’dummy://’Using a custom cache backendNew in version 1.0: Please, see <strong>the</strong> release notes While <strong>Django</strong> includes support for a number of cache backendsout-of-<strong>the</strong>-box, sometimes you might want to use a customized cache backend. To use an external cache backend with<strong>Django</strong>, use a Python import path as <strong>the</strong> scheme portion (<strong>the</strong> part before <strong>the</strong> initial colon) of <strong>the</strong> CACHE_BACKENDURI, like so:CACHE_BACKEND = ’path.to.backend://’If you’re building your own backend, you can use <strong>the</strong> standard cache backends as reference implementations. You’llfind <strong>the</strong> code in <strong>the</strong> django/core/cache/backends/ directory of <strong>the</strong> <strong>Django</strong> source.Note: Without a really compelling reason, such as a host that doesn’t support <strong>the</strong>m, you should stick to <strong>the</strong> cachebackends included with <strong>Django</strong>. They’ve been well-tested and are easy to use.3.11. <strong>Django</strong>’s cache framework 249
<strong>Django</strong> <strong>Documentation</strong>, Release 1.2CACHE_BACKEND argumentsEach cache backend may take arguments. They’re given in query-string style on <strong>the</strong> CACHE_BACKEND setting. Validarguments are as follows:• timeout: The default timeout, in seconds, to use for <strong>the</strong> cache. This argument defaults to 300 seconds (5minutes).• max_entries: For <strong>the</strong> locmem, filesystem and database backends, <strong>the</strong> maximum number of entriesallowed in <strong>the</strong> cache before old values are deleted. This argument defaults to 300.• cull_frequency: The fraction of entries that are culled when max_entries is reached. The actual ratiois 1/cull_frequency, so set cull_frequency=2 to cull half of <strong>the</strong> entries when max_entries isreached.A value of 0 for cull_frequency means that <strong>the</strong> entire cache will be dumped when max_entries isreached. This makes culling much faster at <strong>the</strong> expense of more cache misses.In this example, timeout is set to 60:CACHE_BACKEND = "memcached://127.0.0.1:11211/?timeout=60"In this example, timeout is 30 and max_entries is 400:CACHE_BACKEND = "locmem://?timeout=30&max_entries=400"Invalid arguments are silently ignored, as are invalid values of known arguments.3.11.2 The per-site cacheChanged in version 1.0: (previous versions of <strong>Django</strong> only provided a single CacheMiddleware instead of<strong>the</strong> two pieces described below). Once <strong>the</strong> cache is set up, <strong>the</strong> simplest way to use caching is to cacheyour entire site. You’ll need to add ’django.middleware.cache.UpdateCacheMiddleware’ and’django.middleware.cache.FetchFromCacheMiddleware’ to your MIDDLEWARE_CLASSES setting,as in this example:MIDDLEWARE_CLASSES = (’django.middleware.cache.UpdateCacheMiddleware’,’django.middleware.common.CommonMiddleware’,’django.middleware.cache.FetchFromCacheMiddleware’,)Note: No, that’s not a typo: <strong>the</strong> “update” middleware must be first in <strong>the</strong> list, and <strong>the</strong> “fetch” middleware must belast. The details are a bit obscure, but see Order of MIDDLEWARE_CLASSES below if you’d like <strong>the</strong> full story.Then, add <strong>the</strong> following required settings to your <strong>Django</strong> settings file:• CACHE_MIDDLEWARE_SECONDS – The number of seconds each page should be cached.• CACHE_MIDDLEWARE_KEY_PREFIX – If <strong>the</strong> cache is shared across multiple sites using <strong>the</strong> same <strong>Django</strong>installation, set this to <strong>the</strong> name of <strong>the</strong> site, or some o<strong>the</strong>r string that is unique to this <strong>Django</strong> instance, to preventkey collisions. Use an empty string if you don’t care.The cache middleware caches every page that doesn’t have GET or POST parameters. Optionally, if <strong>the</strong>CACHE_MIDDLEWARE_ANONYMOUS_ONLY setting is True, only anonymous requests (i.e., not those made bya logged-in user) will be cached. This is a simple and effective way of disabling caching for any user-specific pages(include <strong>Django</strong>’s admin interface). Note that if you use CACHE_MIDDLEWARE_ANONYMOUS_ONLY, you shouldmake sure you’ve activated Au<strong>the</strong>nticationMiddleware.250 Chapter 3. Using <strong>Django</strong>
<strong>Django</strong> <strong>Documentation</strong>, Release 1.2Additionally, <strong>the</strong> cache middleware automatically sets a few headers in each HttpResponse:• Sets <strong>the</strong> Last-Modified header to <strong>the</strong> current date/time when a fresh (uncached) version of <strong>the</strong> page isrequested.• Sets <strong>the</strong> Expires header to <strong>the</strong> current date/time plus <strong>the</strong> defined CACHE_MIDDLEWARE_SECONDS.• Sets <strong>the</strong> Cache-Control header to give a max age for <strong>the</strong> page – again, from <strong>the</strong>CACHE_MIDDLEWARE_SECONDS setting.See Middleware for more on middleware. New in version 1.0: Please, see <strong>the</strong> release notes If a view setsits own cache expiry time (i.e. it has a max-age section in its Cache-Control header) <strong>the</strong>n <strong>the</strong> pagewill be cached until <strong>the</strong> expiry time, ra<strong>the</strong>r than CACHE_MIDDLEWARE_SECONDS. Using <strong>the</strong> decorators indjango.views.decorators.cache you can easily set a view’s expiry time (using <strong>the</strong> cache_controldecorator) or disable caching for a view (using <strong>the</strong> never_cache decorator). See <strong>the</strong> using o<strong>the</strong>r headers sectionfor more on <strong>the</strong>se decorators. New in version 1.2: Please, see <strong>the</strong> release notes If USE_I18N is set to True <strong>the</strong>n <strong>the</strong>generated cache key will include <strong>the</strong> name of <strong>the</strong> active language. This allows you to easily cache multilingual siteswithout having to create <strong>the</strong> cache key yourself.See Deployment of translations for more on how <strong>Django</strong> discovers <strong>the</strong> active language.3.11.3 The per-view cacheA more granular way to use <strong>the</strong> caching framework is by caching <strong>the</strong> output of individual views.django.views.decorators.cache defines a cache_page decorator that will automatically cache <strong>the</strong> view’sresponse for you. It’s easy to use:from django.views.decorators.cache import cache_page@cache_page(60 * 15)def my_view(request):...cache_page takes a single argument: <strong>the</strong> cache timeout, in seconds. In <strong>the</strong> above example, <strong>the</strong> result of <strong>the</strong>my_view() view will be cached for 15 minutes. (Note that we’ve written it as 60 * 15 for <strong>the</strong> purpose of readability.60 * 15 will be evaluated to 900 – that is, 15 minutes multiplied by 60 seconds per minute.)The per-view cache, like <strong>the</strong> per-site cache, is keyed off of <strong>the</strong> URL. If multiple URLs point at <strong>the</strong> same view, eachURL will be cached separately. Continuing <strong>the</strong> my_view example, if your URLconf looks like this:urlpatterns = (’’,(r’^foo/(\d{1,2})/$’, my_view),)<strong>the</strong>n requests to /foo/1/ and /foo/23/ will be cached separately, as you may expect. But once a particular URL(e.g., /foo/23/) has been requested, subsequent requests to that URL will use <strong>the</strong> cache.cache_page can also take an optional keyword argument, key_prefix, which works in <strong>the</strong> same way as <strong>the</strong>CACHE_MIDDLEWARE_KEY_PREFIX setting for <strong>the</strong> middleware. It can be used like this:@cache_page(60 * 15, key_prefix="site1")def my_view(request):...Specifying per-view cache in <strong>the</strong> URLconfThe examples in <strong>the</strong> previous section have hard-coded <strong>the</strong> fact that <strong>the</strong> view is cached, because cache_page alters<strong>the</strong> my_view function in place. This approach couples your view to <strong>the</strong> cache system, which is not ideal for several3.11. <strong>Django</strong>’s cache framework 251
<strong>Django</strong> <strong>Documentation</strong>, Release 1.2reasons. For instance, you might want to reuse <strong>the</strong> view functions on ano<strong>the</strong>r, cache-less site, or you might want todistribute <strong>the</strong> views to people who might want to use <strong>the</strong>m without being cached. The solution to <strong>the</strong>se problems is tospecify <strong>the</strong> per-view cache in <strong>the</strong> URLconf ra<strong>the</strong>r than next to <strong>the</strong> view functions <strong>the</strong>mselves.Doing so is easy: simply wrap <strong>the</strong> view function with cache_page when you refer to it in <strong>the</strong> URLconf. Here’s <strong>the</strong>old URLconf from earlier:urlpatterns = (’’,(r’^foo/(\d{1,2})/$’, my_view),)Here’s <strong>the</strong> same thing, with my_view wrapped in cache_page:from django.views.decorators.cache import cache_pageurlpatterns = (’’,(r’^foo/(\d{1,2})/$’, cache_page(my_view, 60 * 15)),)If you take this approach, don’t forget to import cache_page within your URLconf.3.11.4 Template fragment cachingNew in version 1.0: Please, see <strong>the</strong> release notes If you’re after even more control, you can also cache templatefragments using <strong>the</strong> cache template tag. To give your template access to this tag, put {% load cache %} near<strong>the</strong> top of your template.The {% cache %} template tag caches <strong>the</strong> contents of <strong>the</strong> block for a given amount of time. It takes at least twoarguments: <strong>the</strong> cache timeout, in seconds, and <strong>the</strong> name to give <strong>the</strong> cache fragment. For example:{% load cache %}{% cache 500 sidebar %}.. sidebar ..{% endcache %}Sometimes you might want to cache multiple copies of a fragment depending on some dynamic data that appearsinside <strong>the</strong> fragment. For example, you might want a separate cached copy of <strong>the</strong> sidebar used in <strong>the</strong> previous examplefor every user of your site. Do this by passing additional arguments to <strong>the</strong> {% cache %} template tag to uniquelyidentify <strong>the</strong> cache fragment:{% load cache %}{% cache 500 sidebar request.user.username %}.. sidebar for logged in user ..{% endcache %}It’s perfectly fine to specify more than one argument to identify <strong>the</strong> fragment. Simply pass as many arguments to {%cache %} as you need.If USE_I18N is set to True <strong>the</strong> per-site middleware cache will respect <strong>the</strong> active language. For <strong>the</strong> cache templatetag you could use one of <strong>the</strong> translation-specific variables available in templates to archieve <strong>the</strong> same result:{% load i18n %}{% load cache %}{% get_current_language as LANGUAGE_CODE %}{% cache 600 welcome LANGUAGE_CODE %}{% trans "Welcome to example.com" %}{% endcache %}252 Chapter 3. Using <strong>Django</strong>
<strong>Django</strong> <strong>Documentation</strong>, Release 1.2The cache timeout can be a template variable, as long as <strong>the</strong> template variable resolves to an integer value. For example,if <strong>the</strong> template variable my_timeout is set to <strong>the</strong> value 600, <strong>the</strong>n <strong>the</strong> following two examples are equivalent:{% cache 600 sidebar %} ... {% endcache %}{% cache my_timeout sidebar %} ... {% endcache %}This feature is useful in avoiding repetition in templates. You can set <strong>the</strong> timeout in a variable, in one place, and justreuse that value.3.11.5 The low-level cache APISometimes, caching an entire rendered page doesn’t gain you very much and is, in fact, inconvenient overkill.Perhaps, for instance, your site includes a view whose results depend on several expensive queries, <strong>the</strong> results of whichchange at different intervals. In this case, it would not be ideal to use <strong>the</strong> full-page caching that <strong>the</strong> per-site or per-viewcache strategies offer, because you wouldn’t want to cache <strong>the</strong> entire result (since some of <strong>the</strong> data changes often), butyou’d still want to cache <strong>the</strong> results that rarely change.For cases like this, <strong>Django</strong> exposes a simple, low-level cache API. You can use this API to store objects in <strong>the</strong> cachewith any level of granularity you like. You can cache any Python object that can be pickled safely: strings, dictionaries,lists of model objects, and so forth. (Most common Python objects can be pickled; refer to <strong>the</strong> Python documentationfor more information about pickling.)The cache module, django.core.cache, has a cache object that’s automatically created from <strong>the</strong>CACHE_BACKEND setting:>>> from django.core.cache import cacheThe basic interface is set(key, value, timeout) and get(key):>>> cache.set(’my_key’, ’hello, world!’, 30)>>> cache.get(’my_key’)’hello, world!’The timeout argument is optional and defaults to <strong>the</strong> timeout argument in <strong>the</strong> CACHE_BACKEND setting (explainedabove). It’s <strong>the</strong> number of seconds <strong>the</strong> value should be stored in <strong>the</strong> cache.If <strong>the</strong> object doesn’t exist in <strong>the</strong> cache, cache.get() returns None:# Wait 30 seconds for ’my_key’ to expire...>>> cache.get(’my_key’)NoneWe advise against storing <strong>the</strong> literal value None in <strong>the</strong> cache, because you won’t be able to distinguish between yourstored None value and a cache miss signified by a return value of None.cache.get() can take a default argument. This specifies which value to return if <strong>the</strong> object doesn’t exist in <strong>the</strong>cache:>>> cache.get(’my_key’, ’has expired’)’has expired’New in version 1.0: Please, see <strong>the</strong> release notes To add a key only if it doesn’t already exist, use <strong>the</strong> add() method.It takes <strong>the</strong> same parameters as set(), but it will not attempt to update <strong>the</strong> cache if <strong>the</strong> key specified is alreadypresent:>>> cache.set(’add_key’, ’Initial value’)>>> cache.add(’add_key’, ’New value’)3.11. <strong>Django</strong>’s cache framework 253
<strong>Django</strong> <strong>Documentation</strong>, Release 1.2>>> cache.get(’add_key’)’Initial value’If you need to know whe<strong>the</strong>r add() stored a value in <strong>the</strong> cache, you can check <strong>the</strong> return value. It will return Trueif <strong>the</strong> value was stored, False o<strong>the</strong>rwise.There’s also a get_many() interface that only hits <strong>the</strong> cache once. get_many() returns a dictionary with all <strong>the</strong>keys you asked for that actually exist in <strong>the</strong> cache (and haven’t expired):>>> cache.set(’a’, 1)>>> cache.set(’b’, 2)>>> cache.set(’c’, 3)>>> cache.get_many([’a’, ’b’, ’c’]){’a’: 1, ’b’: 2, ’c’: 3}New in version 1.2: Please, see <strong>the</strong> release notes To set multiple values more efficiently, use set_many() to pass adictionary of key-value pairs:>>> cache.set_many({’a’: 1, ’b’: 2, ’c’: 3})>>> cache.get_many([’a’, ’b’, ’c’]){’a’: 1, ’b’: 2, ’c’: 3}Like cache.set(), set_many() takes an optional timeout parameter.You can delete keys explicitly with delete(). This is an easy way of clearing <strong>the</strong> cache for a particular object:>>> cache.delete(’a’)New in version 1.2: Please, see <strong>the</strong> release notes If you want to clear a bunch of keys at once, delete_many() cantake a list of keys to be cleared:>>> cache.delete_many([’a’, ’b’, ’c’])New in version 1.2: Please, see <strong>the</strong> release notes Finally, if you want to delete all <strong>the</strong> keys in <strong>the</strong> cache, usecache.clear(). Be careful with this; clear() will remove everything from <strong>the</strong> cache, not just <strong>the</strong> keys setby your application.>>> cache.clear()New in version 1.1: Please, see <strong>the</strong> release notes You can also increment or decrement a key that already exists using<strong>the</strong> incr() or decr() methods, respectively. By default, <strong>the</strong> existing cache value will incremented or decrementedby 1. O<strong>the</strong>r increment/decrement values can be specified by providing an argument to <strong>the</strong> increment/decrement call.A ValueError will be raised if you attempt to increment or decrement a nonexistent cache key.:>>> cache.set(’num’, 1)>>> cache.incr(’num’)2>>> cache.incr(’num’, 10)12>>> cache.decr(’num’)11>>> cache.decr(’num’, 5)6Note: incr()/decr() methods are not guaranteed to be atomic. On those backends that support atomic increment/decrement(most notably, <strong>the</strong> memcached backend), increment and decrement operations will be atomic.However, if <strong>the</strong> backend doesn’t natively provide an increment/decrement operation, it will be implemented using atwo-step retrieve/update.254 Chapter 3. Using <strong>Django</strong>
<strong>Django</strong> <strong>Documentation</strong>, Release 1.2Cache key warningsNew in version Development version. Memcached, <strong>the</strong> most commonly-used production cache backend, does notallow cache keys longer than 250 characters or containing whitespace or control characters, and using such keys willcause an exception. To encourage cache-portable code and minimize unpleasant surprises, <strong>the</strong> o<strong>the</strong>r built-in cachebackends issue a warning (django.core.cache.backends.base.CacheKeyWarning) if a key is used thatwould cause an error on memcached.If you are using a production backend that can accept a wider range of keys (a custom backend, or one of<strong>the</strong> non-memcached built-in backends), and want to use this wider range without warnings, you can silenceCacheKeyWarning with this code in <strong>the</strong> management module of one of your INSTALLED_APPS:import warningsfrom django.core.cache import CacheKeyWarningwarnings.simplefilter("ignore", CacheKeyWarning)If you want to instead provide custom key validation logic for one of <strong>the</strong> built-in backends, you can subclass it, overridejust <strong>the</strong> validate_key method, and follow <strong>the</strong> instructions for using a custom cache backend. For instance, to dothis for <strong>the</strong> locmem backend, put this code in a module:from django.core.cache.backends.locmem import CacheClass as LocMemCacheClassclass CacheClass(LocMemCacheClass):def validate_key(self, key):"""Custom validation, raising exceptions or warnings as needed."""# ......and use <strong>the</strong> dotted Python path to this module as <strong>the</strong> scheme portion of your CACHE_BACKEND.3.11.6 Upstream cachesSo far, this document has focused on caching your own data. But ano<strong>the</strong>r type of caching is relevant to Web development,too: caching performed by “upstream” caches. These are systems that cache pages for users even before <strong>the</strong>request reaches your Web site.Here are a few examples of upstream caches:• Your ISP may cache certain pages, so if you requested a page from http://example.com/, your ISP would sendyou <strong>the</strong> page without having to access example.com directly. The maintainers of example.com have no knowledgeof this caching; <strong>the</strong> ISP sits between example.com and your Web browser, handling all of <strong>the</strong> cachingtransparently.• Your <strong>Django</strong> Web site may sit behind a proxy cache, such as Squid Web Proxy Cache (http://www.squidcache.org/),that caches pages for performance. In this case, each request first would be handled by <strong>the</strong> proxy,and it would be passed to your application only if needed.• Your Web browser caches pages, too. If a Web page sends out <strong>the</strong> appropriate headers, your browser will use<strong>the</strong> local cached copy for subsequent requests to that page, without even contacting <strong>the</strong> Web page again to seewhe<strong>the</strong>r it has changed.Upstream caching is a nice efficiency boost, but <strong>the</strong>re’s a danger to it: Many Web pages’ contents differ based onau<strong>the</strong>ntication and a host of o<strong>the</strong>r variables, and cache systems that blindly save pages based purely on URLs couldexpose incorrect or sensitive data to subsequent visitors to those pages.For example, say you operate a Web e-mail system, and <strong>the</strong> contents of <strong>the</strong> “inbox” page obviously depend on whichuser is logged in. If an ISP blindly cached your site, <strong>the</strong>n <strong>the</strong> first user who logged in through that ISP would have hisuser-specific inbox page cached for subsequent visitors to <strong>the</strong> site. That’s not cool.3.11. <strong>Django</strong>’s cache framework 255
<strong>Django</strong> <strong>Documentation</strong>, Release 1.2Fortunately, HTTP provides a solution to this problem. A number of HTTP headers exist to instruct upstream caches todiffer <strong>the</strong>ir cache contents depending on designated variables, and to tell caching mechanisms not to cache particularpages. We’ll look at some of <strong>the</strong>se headers in <strong>the</strong> sections that follow.3.11.7 Using Vary headersThe Vary header defines which request headers a cache mechanism should take into account when building its cachekey. For example, if <strong>the</strong> contents of a Web page depend on a user’s language preference, <strong>the</strong> page is said to “vary onlanguage.”By default, <strong>Django</strong>’s cache system creates its cache keys using <strong>the</strong> requested path (e.g.,"/stories/2005/jun/23/bank_robbed/"). This means every request to that URL will use <strong>the</strong> samecached version, regardless of user-agent differences such as cookies or language preferences. However, if this pageproduces different content based on some difference in request headers – such as a cookie, or a language, or auser-agent – you’ll need to use <strong>the</strong> Vary header to tell caching mechanisms that <strong>the</strong> page output depends on thosethings.To do this in <strong>Django</strong>, use <strong>the</strong> convenient vary_on_headers view decorator, like so:from django.views.decorators.vary import vary_on_headers@vary_on_headers(’User-Agent’)def my_view(request):# ...In this case, a caching mechanism (such as <strong>Django</strong>’s own cache middleware) will cache a separate version of <strong>the</strong> pagefor each unique user-agent.The advantage to using <strong>the</strong> vary_on_headers decorator ra<strong>the</strong>r than manually setting <strong>the</strong> Vary header (usingsomething like response[’Vary’] = ’user-agent’) is that <strong>the</strong> decorator adds to <strong>the</strong> Vary header (whichmay already exist), ra<strong>the</strong>r than setting it from scratch and potentially overriding anything that was already in <strong>the</strong>re.You can pass multiple headers to vary_on_headers():@vary_on_headers(’User-Agent’, ’Cookie’)def my_view(request):# ...This tells upstream caches to vary on both, which means each combination of user-agent and cookie will get its owncache value. For example, a request with <strong>the</strong> user-agent Mozilla and <strong>the</strong> cookie value foo=bar will be considereddifferent from a request with <strong>the</strong> user-agent Mozilla and <strong>the</strong> cookie value foo=ham.Because varying on cookie is so common, <strong>the</strong>re’s a vary_on_cookie decorator. These two views are equivalent:@vary_on_cookiedef my_view(request):# ...@vary_on_headers(’Cookie’)def my_view(request):# ...The headers you pass to vary_on_headers are not case sensitive; "User-Agent" is <strong>the</strong> same thing as"user-agent".You can also use a helper function, django.utils.cache.patch_vary_headers, directly. This functionsets, or adds to, <strong>the</strong> Vary header. For example:256 Chapter 3. Using <strong>Django</strong>
<strong>Django</strong> <strong>Documentation</strong>, Release 1.2from django.utils.cache import patch_vary_headersdef my_view(request):# ...response = render_to_response(’template_name’, context)patch_vary_headers(response, [’Cookie’])return responsepatch_vary_headers takes an HttpResponse instance as its first argument and a list/tuple of case-insensitiveheader names as its second argument.For more on Vary headers, see <strong>the</strong> official Vary spec.3.11.8 Controlling cache: Using o<strong>the</strong>r headersO<strong>the</strong>r problems with caching are <strong>the</strong> privacy of data and <strong>the</strong> question of where data should be stored in a cascade ofcaches.A user usually faces two kinds of caches: his or her own browser cache (a private cache) and his or her provider’scache (a public cache). A public cache is used by multiple users and controlled by someone else. This poses problemswith sensitive data–you don’t want, say, your bank account number stored in a public cache. So Web applications needa way to tell caches which data is private and which is public.The solution is to indicate a page’s cache should be “private.” To do this in <strong>Django</strong>, use <strong>the</strong> cache_control viewdecorator. Example:from django.views.decorators.cache import cache_control@cache_control(private=True)def my_view(request):# ...This decorator takes care of sending out <strong>the</strong> appropriate HTTP header behind <strong>the</strong> scenes.There are a few o<strong>the</strong>r ways to control cache parameters. For example, HTTP allows applications to do <strong>the</strong> following:• Define <strong>the</strong> maximum time a page should be cached.• Specify whe<strong>the</strong>r a cache should always check for newer versions, only delivering <strong>the</strong> cached content when <strong>the</strong>reare no changes. (Some caches might deliver cached content even if <strong>the</strong> server page changed, simply because <strong>the</strong>cache copy isn’t yet expired.)In <strong>Django</strong>, use <strong>the</strong> cache_control view decorator to specify <strong>the</strong>se cache parameters. In this example,cache_control tells caches to revalidate <strong>the</strong> cache on every access and to store cached versions for, at most,3,600 seconds:from django.views.decorators.cache import cache_control@cache_control(must_revalidate=True, max_age=3600)def my_view(request):# ...Any valid Cache-Control HTTP directive is valid in cache_control(). Here’s a full list:• public=True• private=True• no_cache=True• no_transform=True3.11. <strong>Django</strong>’s cache framework 257
<strong>Django</strong> <strong>Documentation</strong>, Release 1.2• must_revalidate=True• proxy_revalidate=True• max_age=num_seconds• s_maxage=num_secondsFor explanation of Cache-Control HTTP directives, see <strong>the</strong> Cache-Control spec.(Note that <strong>the</strong> caching middleware already sets <strong>the</strong> cache header’s max-age with <strong>the</strong> value of <strong>the</strong>CACHE_MIDDLEWARE_SECONDS setting. If you use a custom max_age in a cache_control decorator, <strong>the</strong>decorator will take precedence, and <strong>the</strong> header values will be merged correctly.)If you want to use headers to disable caching altoge<strong>the</strong>r, django.views.decorators.cache.never_cacheis a view decorator that adds headers to ensure <strong>the</strong> response won’t be cached by browsers or o<strong>the</strong>r caches. Example:from django.views.decorators.cache import never_cache@never_cachedef myview(request):# ...3.11.9 O<strong>the</strong>r optimizations<strong>Django</strong> comes with a few o<strong>the</strong>r pieces of middleware that can help optimize your site’s performance:• django.middleware.http.ConditionalGetMiddleware adds support for modern browsers toconditionally GET responses based on <strong>the</strong> ETag and Last-Modified headers.• django.middleware.gzip.GZipMiddleware compresses responses for all moderns browsers, savingbandwidth and transfer time.3.11.10 Order of MIDDLEWARE_CLASSESIf you use caching middleware, it’s important to put each half in <strong>the</strong> right place within <strong>the</strong> MIDDLEWARE_CLASSESsetting. That’s because <strong>the</strong> cache middleware needs to know which headers by which to vary <strong>the</strong> cache storage.Middleware always adds something to <strong>the</strong> Vary response header when it can.UpdateCacheMiddleware runs during <strong>the</strong> response phase, where middleware is run in reverse order, so an item at<strong>the</strong> top of <strong>the</strong> list runs last during <strong>the</strong> response phase. Thus, you need to make sure that UpdateCacheMiddlewareappears before any o<strong>the</strong>r middleware that might add something to <strong>the</strong> Vary header. The following middleware modulesdo so:• SessionMiddleware adds Cookie• GZipMiddleware adds Accept-Encoding• LocaleMiddleware adds Accept-LanguageFetchFromCacheMiddleware, on <strong>the</strong> o<strong>the</strong>r hand, runs during <strong>the</strong> request phase, where middleware is appliedfirst-to-last, so an item at <strong>the</strong> top of <strong>the</strong> list runs first during <strong>the</strong> request phase. The FetchFromCacheMiddlewarealso needs to run after o<strong>the</strong>r middleware updates <strong>the</strong> Vary header, so FetchFromCacheMiddleware must beafter any item that does so.258 Chapter 3. Using <strong>Django</strong>
<strong>Django</strong> <strong>Documentation</strong>, Release 1.23.12 Conditional View ProcessingNew in version 1.1: Please, see <strong>the</strong> release notes HTTP clients can send a number of headers to tell <strong>the</strong> server aboutcopies of a resource that <strong>the</strong>y have already seen. This is commonly used when retrieving a Web page (using an HTTPGET request) to avoid sending all <strong>the</strong> data for something <strong>the</strong> client has already retrieved. However, <strong>the</strong> same headerscan be used for all HTTP methods (POST, PUT, DELETE, etc).For each page (response) that <strong>Django</strong> sends back from a view, it might provide two HTTP headers: <strong>the</strong> ETag headerand <strong>the</strong> Last-Modified header. These headers are optional on HTTP responses. They can be set by your viewfunction, or you can rely on <strong>the</strong> CommonMiddleware middleware to set <strong>the</strong> ETag header.When <strong>the</strong> client next requests <strong>the</strong> same resource, it might send along a header such as If-modified-since, containing<strong>the</strong> date of <strong>the</strong> last modification time it was sent, or If-none-match, containing <strong>the</strong> ETag it was sent. If <strong>the</strong> currentversion of <strong>the</strong> page matches <strong>the</strong> ETag sent by <strong>the</strong> client, or if <strong>the</strong> resource has not been modified, a 304 status codecan be sent back, instead of a full response, telling <strong>the</strong> client that nothing has changed.When you need more fine-grained control you may use per-view conditional processing functions.3.12.1 The condition decoratorSometimes (in fact, quite often) you can create functions to rapidly compute <strong>the</strong> ETag value or <strong>the</strong> last-modified timefor a resource, without needing to do all <strong>the</strong> computations needed to construct <strong>the</strong> full view. <strong>Django</strong> can <strong>the</strong>n use <strong>the</strong>sefunctions to provide an “early bailout” option for <strong>the</strong> view processing. Telling <strong>the</strong> client that <strong>the</strong> content has not beenmodified since <strong>the</strong> last request, perhaps.These two functions are passed as parameters <strong>the</strong> django.views.decorators.http.condition decorator.This decorator uses <strong>the</strong> two functions (you only need to supply one, if you can’t compute both quantities easily andquickly) to work out if <strong>the</strong> headers in <strong>the</strong> HTTP request match those on <strong>the</strong> resource. If <strong>the</strong>y don’t match, a new copyof <strong>the</strong> resource must be computed and your normal view is called.The condition decorator’s signature looks like this:condition(etag_func=None, last_modified_func=None)The two functions, to compute <strong>the</strong> ETag and <strong>the</strong> last modified time, will be passed <strong>the</strong> incoming request objectand <strong>the</strong> same parameters, in <strong>the</strong> same order, as <strong>the</strong> view function <strong>the</strong>y are helping to wrap. The function passedlast_modified_func should return a standard datetime value specifying <strong>the</strong> last time <strong>the</strong> resource was modified,or None if <strong>the</strong> resource doesn’t exist. The function passed to <strong>the</strong> etag decorator should return a string representing<strong>the</strong> Etag for <strong>the</strong> resource, or None if it doesn’t exist.Using this feature usefully is probably best explained with an example. Suppose you have this pair of models, representinga simple blog system:import datetimefrom django.db import modelsclass Blog(models.Model):...class Entry(models.Model):blog = models.ForeignKey(Blog)published = models.DateTimeField(default=datetime.datetime.now)...If <strong>the</strong> front page, displaying <strong>the</strong> latest blog entries, only changes when you add a new blog entry, you can compute <strong>the</strong>last modified time very quickly. You need <strong>the</strong> latest published date for every entry associated with that blog. Oneway to do this would be:3.12. Conditional View Processing 259
<strong>Django</strong> <strong>Documentation</strong>, Release 1.2def latest_entry(request, blog_id):return Entry.objects.filter(blog=blog_id).latest("published").publishedYou can <strong>the</strong>n use this function to provide early detection of an unchanged page for your front page view:from django.views.decorators.http import condition@condition(last_modified_func=latest_entry)def front_page(request, blog_id):...3.12.2 Shortcuts for only computing one valueAs a general rule, if you can provide functions to compute both <strong>the</strong> ETag and <strong>the</strong> last modified time, you should doso. You don’t know which headers any given HTTP client will send you, so be prepared to handle both. However,sometimes only one value is easy to compute and <strong>Django</strong> provides decorators that handle only ETag or only lastmodifiedcomputations.The django.views.decorators.http.etag and django.views.decorators.http.last_modifieddecorators are passed <strong>the</strong> same type of functions as <strong>the</strong> condition decorator. Their signatures are:etag(etag_func)last_modified(last_modified_func)We could write <strong>the</strong> earlier example, which only uses a last-modified function, using one of <strong>the</strong>se decorators:@last_modified(latest_entry)def front_page(request, blog_id):......or:def front_page(request, blog_id):...front_page = last_modified(latest_entry)(front_page)Use condition when testing both conditionsIt might look nicer to some people to try and chain <strong>the</strong> etag and last_modified decorators if you want to testboth preconditions. However, this would lead to incorrect behavior.# Bad code. Don’t do this!@etag(etag_func)@last_modified(last_modified_func)def my_view(request):# ...# End of bad code.The first decorator doesn’t know anything about <strong>the</strong> second and might answer that <strong>the</strong> response is not modified even if<strong>the</strong> second decorators would determine o<strong>the</strong>rwise. The condition decorator uses both callback functions simultaneouslyto work out <strong>the</strong> right action to take.260 Chapter 3. Using <strong>Django</strong>
<strong>Django</strong> <strong>Documentation</strong>, Release 1.23.12.3 Using <strong>the</strong> decorators with o<strong>the</strong>r HTTP methodsThe condition decorator is useful for more than only GET and HEAD requests (HEAD requests are <strong>the</strong> same as GETin this situation). It can be used also to be used to provide checking for POST, PUT and DELETE requests. In <strong>the</strong>sesituations, <strong>the</strong> idea isn’t to return a “not modified” response, but to tell <strong>the</strong> client that <strong>the</strong> resource <strong>the</strong>y are trying tochange has been altered in <strong>the</strong> meantime.For example, consider <strong>the</strong> following exchange between <strong>the</strong> client and server:1. Client requests /foo/.2. Server responds with some content with an ETag of "abcd1234".3. Client sends an HTTP PUT request to /foo/ to update <strong>the</strong> resource. It also sends an If-Match:"abcd1234" header to specify <strong>the</strong> version it is trying to update.4. Server checks to see if <strong>the</strong> resource has changed, by computing <strong>the</strong> ETag <strong>the</strong> same way it does for a GETrequest (using <strong>the</strong> same function). If <strong>the</strong> resource has changed, it will return a 412 status code code, meaning“precondition failed”.5. Client sends a GET request to /foo/, after receiving a 412 response, to retrieve an updated version of <strong>the</strong>content before updating it.The important thing this example shows is that <strong>the</strong> same functions can be used to compute <strong>the</strong> ETag and last modificationvalues in all situations. In fact, you should use <strong>the</strong> same functions, so that <strong>the</strong> same values are returned everytime.3.12.4 Comparison with middleware conditional processingYou may notice that <strong>Django</strong> already provides simple and straightforward conditional GET handling via <strong>the</strong>django.middleware.http.ConditionalGetMiddleware and CommonMiddleware. Whilst certainlybeing easy to use and suitable for many situations, those pieces of middleware functionality have limitations for advancedusage:• They are applied globally to all views in your project• They don’t save you from generating <strong>the</strong> response itself, which may be expensive• They are only appropriate for HTTP GET requests.You should choose <strong>the</strong> most appropriate tool for your particular problem here. If you have a way to compute ETagsand modification times quickly and if some view takes a while to generate <strong>the</strong> content, you should consider using<strong>the</strong> condition decorator described in this document. If everything already runs fairly quickly, stick to using <strong>the</strong>middleware and <strong>the</strong> amount of network traffic sent back to <strong>the</strong> clients will still be reduced if <strong>the</strong> view hasn’t changed.3.13 Sending e-mailAlthough Python makes sending e-mail relatively easy via <strong>the</strong> smtplib library, <strong>Django</strong> provides a couple of lightwrappers over it. These wrappers are provided to make sending e-mail extra quick, to make it easy to test e-mailsending during development, and to provide support for platforms that can’t use SMTP.The code lives in <strong>the</strong> django.core.mail module.3.13.1 Quick exampleIn two lines:3.13. Sending e-mail 261
<strong>Django</strong> <strong>Documentation</strong>, Release 1.2from django.core.mail import send_mailsend_mail(’Subject here’, ’Here is <strong>the</strong> message.’, ’from@example.com’,[’to@example.com’], fail_silently=False)Mail is sent using <strong>the</strong> SMTP host and port specified in <strong>the</strong> EMAIL_HOST and EMAIL_PORT settings. TheEMAIL_HOST_USER and EMAIL_HOST_PASSWORD settings, if set, are used to au<strong>the</strong>nticate to <strong>the</strong> SMTP server,and <strong>the</strong> EMAIL_USE_TLS setting controls whe<strong>the</strong>r a secure connection is used.Note: The character set of e-mail sent with django.core.mail will be set to <strong>the</strong> value of yourDEFAULT_CHARSET setting.3.13.2 send_mail()send_mail(subject, message, from_email, recipient_list, fail_silently=False, auth_user=None,auth_password=None, connection=None)The simplest way to send e-mail is using django.core.mail.send_mail().The subject, message, from_email and recipient_list parameters are required.• subject: A string.• message: A string.• from_email: A string.• recipient_list: A list of strings, each an e-mail address. Each member of recipient_list will see<strong>the</strong> o<strong>the</strong>r recipients in <strong>the</strong> “To:” field of <strong>the</strong> e-mail message.• fail_silently: A boolean. If it’s False, send_mail will raise an smtplib.SMTPException. See<strong>the</strong> smtplib docs for a list of possible exceptions, all of which are subclasses of SMTPException.• auth_user: The optional username to use to au<strong>the</strong>nticate to <strong>the</strong> SMTP server. If this isn’t provided, <strong>Django</strong>will use <strong>the</strong> value of <strong>the</strong> EMAIL_HOST_USER setting.• auth_password: The optional password to use to au<strong>the</strong>nticate to <strong>the</strong> SMTP server. If this isn’t provided,<strong>Django</strong> will use <strong>the</strong> value of <strong>the</strong> EMAIL_HOST_PASSWORD setting.• connection: The optional e-mail backend to use to send <strong>the</strong> mail. If unspecified, an instance of <strong>the</strong> defaultbackend will be used. See <strong>the</strong> documentation on E-mail backends for more details.3.13.3 send_mass_mail()send_mass_mail(datatuple, fail_silently=False, auth_user=None, auth_password=None, connection=None)django.core.mail.send_mass_mail() is intended to handle mass e-mailing.datatuple is a tuple in which each element is in this format:(subject, message, from_email, recipient_list)fail_silently, auth_user and auth_password have <strong>the</strong> same functions as in send_mail().Each separate element of datatuple results in a separate e-mail message. As in send_mail(), recipients in <strong>the</strong>same recipient_list will all see <strong>the</strong> o<strong>the</strong>r addresses in <strong>the</strong> e-mail messages’ “To:” field.262 Chapter 3. Using <strong>Django</strong>
<strong>Django</strong> <strong>Documentation</strong>, Release 1.2For example, <strong>the</strong> following code would send two different messages to two different sets of recipients; however, onlyone connection to <strong>the</strong> mail server would be opened:message1 = (’Subject here’, ’Here is <strong>the</strong> message’, ’from@example.com, [’first@example.com’, ’o<strong>the</strong>r@exmessage2 = (’Ano<strong>the</strong>r Subject’, ’Here is ano<strong>the</strong>r message’, ’from@example.com’, [’second@test.com’])send_mass_mail((message1, message2), fail_silently=False)send_mass_mail() vs. send_mail()The main difference between send_mass_mail() and send_mail() is that send_mail() opens a connectionto <strong>the</strong> mail server each time it’s executed, while send_mass_mail() uses a single connection for all of itsmessages. This makes send_mass_mail() slightly more efficient.3.13.4 mail_admins()mail_admins(subject, message, fail_silently=False, connection=None)django.core.mail.mail_admins() is a shortcut for sending an e-mail to <strong>the</strong> site admins, as defined in <strong>the</strong>ADMINS setting.mail_admins() prefixes <strong>the</strong> subject with <strong>the</strong> value of <strong>the</strong> EMAIL_SUBJECT_PREFIX setting, which is"[<strong>Django</strong>] " by default.The “From:” header of <strong>the</strong> e-mail will be <strong>the</strong> value of <strong>the</strong> SERVER_EMAIL setting.This method exists for convenience and readability.3.13.5 mail_managers()mail_managers(subject, message, fail_silently=False, connection=None)django.core.mail.mail_managers() is just like mail_admins(), except it sends an e-mail to <strong>the</strong> sitemanagers, as defined in <strong>the</strong> MANAGERS setting.3.13.6 ExamplesThis sends a single e-mail to john@example.com and jane@example.com, with <strong>the</strong>m both appearing in <strong>the</strong> “To:”:send_mail(’Subject’, ’Message.’, ’from@example.com’,[’john@example.com’, ’jane@example.com’])This sends a message to john@example.com and jane@example.com, with <strong>the</strong>m both receiving a separate e-mail:datatuple = ((’Subject’, ’Message.’, ’from@example.com’, [’john@example.com’]),(’Subject’, ’Message.’, ’from@example.com’, [’jane@example.com’]),)send_mass_mail(datatuple)3.13.7 Preventing header injectionHeader injection is a security exploit in which an attacker inserts extra e-mail headers to control <strong>the</strong> “To:” and “From:”in e-mail messages that your scripts generate.3.13. Sending e-mail 263
<strong>Django</strong> <strong>Documentation</strong>, Release 1.2The <strong>Django</strong> e-mail functions outlined above all protect against header injection by forbidding newlines in headervalues. If any subject, from_email or recipient_list contains a newline (in ei<strong>the</strong>r Unix, Windows or Macstyle), <strong>the</strong> e-mail function (e.g. send_mail()) will raise django.core.mail.BadHeaderError (a subclassof ValueError) and, hence, will not send <strong>the</strong> e-mail. It’s your responsibility to validate all data before passing it to<strong>the</strong> e-mail functions.If a message contains headers at <strong>the</strong> start of <strong>the</strong> string, <strong>the</strong> headers will simply be printed as <strong>the</strong> first bit of <strong>the</strong> e-mailmessage.Here’s an example view that takes a subject, message and from_email from <strong>the</strong> request’s POST data, sendsthat to admin@example.com and redirects to “/contact/thanks/” when it’s done:from django.core.mail import send_mail, BadHeaderErrordef send_email(request):subject = request.POST.get(’subject’, ’’)message = request.POST.get(’message’, ’’)from_email = request.POST.get(’from_email’, ’’)if subject and message and from_email:try:send_mail(subject, message, from_email, [’admin@example.com’])except BadHeaderError:return HttpResponse(’Invalid header found.’)return HttpResponseRedirect(’/contact/thanks/’)else:# In reality we’d use a form class# to get proper validation errors.return HttpResponse(’Make sure all fields are entered and valid.’)3.13.8 The EmailMessage classNew in version 1.0: Please, see <strong>the</strong> release notes <strong>Django</strong>’s send_mail() and send_mass_mail() functions areactually thin wrappers that make use of <strong>the</strong> EmailMessage class.Not all features of <strong>the</strong> EmailMessage class are available through <strong>the</strong> send_mail() and related wrapper functions.If you wish to use advanced features, such as BCC’ed recipients, file attachments, or multi-part e-mail, you’ll need tocreate EmailMessage instances directly.Note: This is a design feature. send_mail() and related functions were originally <strong>the</strong> only interface <strong>Django</strong>provided. However, <strong>the</strong> list of parameters <strong>the</strong>y accepted was slowly growing over time. It made sense to move to amore object-oriented design for e-mail messages and retain <strong>the</strong> original functions only for backwards compatibility.EmailMessage is responsible for creating <strong>the</strong> e-mail message itself. The e-mail backend is <strong>the</strong>n responsible forsending <strong>the</strong> e-mail.For convenience, EmailMessage provides a simple send() method for sending a single e-mail. If you need tosend multiple messages, <strong>the</strong> e-mail backend API provides an alternative.EmailMessage Objectsclass EmailMessageThe EmailMessage class is initialized with <strong>the</strong> following parameters (in <strong>the</strong> given order, if positional arguments areused). All parameters are optional and can be set at any time prior to calling <strong>the</strong> send() method.• subject: The subject line of <strong>the</strong> e-mail.264 Chapter 3. Using <strong>Django</strong>
<strong>Django</strong> <strong>Documentation</strong>, Release 1.2• body: The body text. This should be a plain text message.• from_email: The sender’s address. Both fred@example.com and Fred forms are legal. If omitted, <strong>the</strong> DEFAULT_FROM_EMAIL setting is used.• to: A list or tuple of recipient addresses.• bcc: A list or tuple of addresses used in <strong>the</strong> “Bcc” header when sending <strong>the</strong> e-mail.• connection: An e-mail backend instance. Use this parameter if you want to use <strong>the</strong> same connection formultiple messages. If omitted, a new connection is created when send() is called.• attachments: A list of attachments to put on <strong>the</strong> message. These can be ei<strong>the</strong>remail.MIMEBase.MIMEBase instances, or (filename, content, mimetype) triples.• headers: A dictionary of extra headers to put on <strong>the</strong> message. The keys are <strong>the</strong> header name, values are <strong>the</strong>header values. It’s up to <strong>the</strong> caller to ensure header names and values are in <strong>the</strong> correct format for an e-mailmessage.For example:email = EmailMessage(’Hello’, ’Body goes here’, ’from@example.com’,[’to1@example.com’, ’to2@example.com’], [’bcc@example.com’],headers = {’Reply-To’: ’ano<strong>the</strong>r@example.com’})The class has <strong>the</strong> following methods:• send(fail_silently=False) sends <strong>the</strong> message. If a connection was specified when <strong>the</strong> e-mail wasconstructed, that connection will be used. O<strong>the</strong>rwise, an instance of <strong>the</strong> default backend will be instantiated andused. If <strong>the</strong> keyword argument fail_silently is True, exceptions raised while sending <strong>the</strong> message willbe quashed.• message() constructs a django.core.mail.SafeMIMEText object (a subclass of Python’semail.MIMEText.MIMEText class) or a django.core.mail.SafeMIMEMultipart object holding<strong>the</strong> message to be sent. If you ever need to extend <strong>the</strong> EmailMessage class, you’ll probably want tooverride this method to put <strong>the</strong> content you want into <strong>the</strong> MIME object.• recipients() returns a list of all <strong>the</strong> recipients of <strong>the</strong> message, whe<strong>the</strong>r <strong>the</strong>y’re recorded in <strong>the</strong> to or bccattributes. This is ano<strong>the</strong>r method you might need to override when subclassing, because <strong>the</strong> SMTP server needsto be told <strong>the</strong> full list of recipients when <strong>the</strong> message is sent. If you add ano<strong>the</strong>r way to specify recipients inyour class, <strong>the</strong>y need to be returned from this method as well.• attach() creates a new file attachment and adds it to <strong>the</strong> message. There are two ways to call attach():– You can pass it a single argument that is an email.MIMEBase.MIMEBase instance. This will beinserted directly into <strong>the</strong> resulting message.– Alternatively, you can pass attach() three arguments: filename, content and mimetype.filename is <strong>the</strong> name of <strong>the</strong> file attachment as it will appear in <strong>the</strong> e-mail, content is <strong>the</strong> data that willbe contained inside <strong>the</strong> attachment and mimetype is <strong>the</strong> optional MIME type for <strong>the</strong> attachment. If youomit mimetype, <strong>the</strong> MIME content type will be guessed from <strong>the</strong> filename of <strong>the</strong> attachment.For example:message.attach(’design.png’, img_data, ’image/png’)• attach_file() creates a new attachment using a file from your filesystem. Call it with <strong>the</strong> path of <strong>the</strong> file toattach and, optionally, <strong>the</strong> MIME type to use for <strong>the</strong> attachment. If <strong>the</strong> MIME type is omitted, it will be guessedfrom <strong>the</strong> filename. The simplest use would be:message.attach_file(’/images/wea<strong>the</strong>r_map.png’)3.13. Sending e-mail 265
<strong>Django</strong> <strong>Documentation</strong>, Release 1.2Sending alternative content typesIt can be useful to include multiple versions of <strong>the</strong> content in an e-mail; <strong>the</strong> classic example is to send both text andHTML versions of a message. With <strong>Django</strong>’s e-mail library, you can do this using <strong>the</strong> EmailMultiAlternativesclass. This subclass of EmailMessage has an attach_alternative() method for including extra versions of<strong>the</strong> message body in <strong>the</strong> e-mail. All <strong>the</strong> o<strong>the</strong>r methods (including <strong>the</strong> class initialization) are inherited directly fromEmailMessage.To send a text and HTML combination, you could write:from django.core.mail import EmailMultiAlternativessubject, from_email, to = ’hello’, ’from@example.com’, ’to@example.com’text_content = ’This is an important message.’html_content = ’This is an important message.’msg = EmailMultiAlternatives(subject, text_content, from_email, [to])msg.attach_alternative(html_content, "text/html")msg.send()By default, <strong>the</strong> MIME type of <strong>the</strong> body parameter in an EmailMessage is "text/plain". It is good practiceto leave this alone, because it guarantees that any recipient will be able to read <strong>the</strong> e-mail, regardless of <strong>the</strong>ir mailclient. However, if you are confident that your recipients can handle an alternative content type, you can use <strong>the</strong>content_subtype attribute on <strong>the</strong> EmailMessage class to change <strong>the</strong> main content type. The major type willalways be "text", but you can change <strong>the</strong> subtype. For example:msg = EmailMessage(subject, html_content, from_email, [to])msg.content_subtype = "html" # Main content is now text/htmlmsg.send()3.13.9 E-Mail BackendsNew in version 1.2: Please, see <strong>the</strong> release notes The actual sending of an e-mail is handled by <strong>the</strong> e-mail backend.The e-mail backend class has <strong>the</strong> following methods:• open() instantiates an long-lived e-mail-sending connection.• close() closes <strong>the</strong> current e-mail-sending connection.• send_messages(email_messages) sends a list of EmailMessage objects. If <strong>the</strong> connection is notopen, this call will implicitly open <strong>the</strong> connection, and close <strong>the</strong> connection afterwards. If <strong>the</strong> connection isalready open, it will be left open after mail has been sent.Obtaining an instance of an e-mail backendThe get_connection() function in django.core.mail returns an instance of <strong>the</strong> e-mail backend that youcan use.get_connection(backend=None, fail_silently=False, *args, **kwargs)By default, a call to get_connection() will return an instance of <strong>the</strong> e-mail backend specified inEMAIL_BACKEND. If you specify <strong>the</strong> backend argument, an instance of that backend will be instantiated.The fail_silently argument controls how <strong>the</strong> backend should handle errors. If fail_silently is True,exceptions during <strong>the</strong> e-mail sending process will be silently ignored.All o<strong>the</strong>r arguments are passed directly to <strong>the</strong> constructor of <strong>the</strong> e-mail backend.266 Chapter 3. Using <strong>Django</strong>
<strong>Django</strong> <strong>Documentation</strong>, Release 1.2<strong>Django</strong> ships with several e-mail sending backends. With <strong>the</strong> exception of <strong>the</strong> SMTP backend (which is <strong>the</strong> default),<strong>the</strong>se backends are only useful during testing and development. If you have special e-mail sending requirements, youcan write your own e-mail backend.SMTP backendThis is <strong>the</strong> default backend. E-mail will be sent through a SMTP server. The server address and au<strong>the</strong>nticationcredentials are set in <strong>the</strong> EMAIL_HOST, EMAIL_PORT, EMAIL_HOST_USER, EMAIL_HOST_PASSWORD andEMAIL_USE_TLS settings in your settings file.The SMTP backend is <strong>the</strong> default configuration inherited by <strong>Django</strong>. If you want to specify it explicitly, put <strong>the</strong>following in your settings:EMAIL_BACKEND = ’django.core.mail.backends.smtp.EmailBackend’SMTPConnection objectsPrior to version 1.2, <strong>Django</strong> provided a SMTPConnection class. This class provided a way to directly control <strong>the</strong>use of SMTP to send e-mail. This class has been deprecated in favor of <strong>the</strong> generic e-mail backend API.For backwards compatibility SMTPConnection is still available in django.core.mail as an alias for <strong>the</strong> SMTPbackend. New code should use get_connection() instead.Console backendInstead of sending out real e-mails <strong>the</strong> console backend just writes <strong>the</strong> e-mails that would be send to <strong>the</strong> standardoutput. By default, <strong>the</strong> console backend writes to stdout. You can use a different stream-like object by providing<strong>the</strong> stream keyword argument when constructing <strong>the</strong> connection.To specify this backend, put <strong>the</strong> following in your settings:EMAIL_BACKEND = ’django.core.mail.backends.console.EmailBackend’This backend is not intended for use in production – it is provided as a convenience that can be used during development.File backendThe file backend writes e-mails to a file. A new file is created for each new session that is opened on this backend. Thedirectory to which <strong>the</strong> files are written is ei<strong>the</strong>r taken from <strong>the</strong> EMAIL_FILE_PATH setting or from <strong>the</strong> file_pathkeyword when creating a connection with get_connection().To specify this backend, put <strong>the</strong> following in your settings:EMAIL_BACKEND = ’django.core.mail.backends.filebased.EmailBackend’EMAIL_FILE_PATH = ’/tmp/app-messages’ # change this to a proper locationThis backend is not intended for use in production – it is provided as a convenience that can be used during development.3.13. Sending e-mail 267
<strong>Django</strong> <strong>Documentation</strong>, Release 1.2In-memory backendThe ’locmem’ backend stores messages in a special attribute of <strong>the</strong> django.core.mail module. The outboxattribute is created when <strong>the</strong> first message is sent. It’s a list with an EmailMessage instance for each message thatwould be send.To specify this backend, put <strong>the</strong> following in your settings:EMAIL_BACKEND = ’django.core.mail.backends.locmem.EmailBackend’This backend is not intended for use in production – it is provided as a convenience that can be used during developmentand testing.Dummy backendAs <strong>the</strong> name suggests <strong>the</strong> dummy backend does nothing with your messages. To specify this backend, put <strong>the</strong> followingin your settings:EMAIL_BACKEND = ’django.core.mail.backends.dummy.EmailBackend’This backend is not intended for use in production – it is provided as a convenience that can be used during development.Defining a custom e-mail backendIf you need to change how e-mails are sent you can write your own e-mail backend. The EMAIL_BACKEND settingin your settings file is <strong>the</strong>n <strong>the</strong> Python import path for your backend class.Custom e-mail backends should subclass BaseEmailBackend that is located in <strong>the</strong>django.core.mail.backends.base module. A custom e-mail backend must implement <strong>the</strong>send_messages(email_messages) method. This method receives a list of EmailMessage instancesand returns <strong>the</strong> number of successfully delivered messages. If your backend has any concept of a persistent session orconnection, you should also implement <strong>the</strong> open() and close() methods. Refer to smtp.EmailBackend fora reference implementation.Sending multiple e-mailsEstablishing and closing an SMTP connection (or any o<strong>the</strong>r network connection, for that matter) is an expensiveprocess. If you have a lot of e-mails to send, it makes sense to reuse an SMTP connection, ra<strong>the</strong>r than creating anddestroying a connection every time you want to send an e-mail.There are two ways you tell an e-mail backend to reuse a connection.Firstly, you can use <strong>the</strong> send_messages() method. send_messages() takes a list of EmailMessage instances(or subclasses), and sends <strong>the</strong>m all using a single connection.For example, if you have a function called get_notification_email() that returns a list of EmailMessageobjects representing some periodic e-mail you wish to send out, you could send <strong>the</strong>se e-mails using a single call tosend_messages:from django.core import mailconnection = mail.get_connection()messages = get_notification_email()connection.send_messages(messages)# Use default e-mail connection268 Chapter 3. Using <strong>Django</strong>
<strong>Django</strong> <strong>Documentation</strong>, Release 1.2In this example, <strong>the</strong> call to send_messages() opens a connection on <strong>the</strong> backend, sends <strong>the</strong> list of messages, and<strong>the</strong>n closes <strong>the</strong> connection again.The second approach is to use <strong>the</strong> open() and close() methods on <strong>the</strong> e-mail backend to manually control <strong>the</strong>connection. send_messages() will not manually open or close <strong>the</strong> connection if it is already open, so if youmanually open <strong>the</strong> connection, you can control when it is closed. For example:from django.core import mailconnection = mail.get_connection()# Manually open <strong>the</strong> connectionconnection.open()# Construct an e-mail message that uses <strong>the</strong> connectionemail1 = mail.EmailMessage(’Hello’, ’Body goes here’, ’from@example.com’,[’to1@example.com’], connection=connection)email1.send() # Send <strong>the</strong> e-mail# Construct two more messagesemail2 = mail.EmailMessage(’Hello’, ’Body goes here’, ’from@example.com’,[’to2@example.com’])email3 = mail.EmailMessage(’Hello’, ’Body goes here’, ’from@example.com’,[’to3@example.com’])# Send <strong>the</strong> two e-mails in a single call -connection.send_messages([email2, email3])# The connection was already open so send_messages() doesn’t close it.# We need to manually close <strong>the</strong> connection.connection.close()3.13.10 Testing e-mail sendingThere are times when you do not want <strong>Django</strong> to send e-mails at all. For example, while developing a Web site, youprobably don’t want to send out thousands of e-mails – but you may want to validate that e-mails will be sent to <strong>the</strong>right people under <strong>the</strong> right conditions, and that those e-mails will contain <strong>the</strong> correct content.The easiest way to test your project’s use of e-mail is to use <strong>the</strong> console e-mail backend. This backend redirects alle-mail to stdout, allowing you to inspect <strong>the</strong> content of mail.The file e-mail backend can also be useful during development – this backend dumps <strong>the</strong> contents of every SMTPconnection to a file that can be inspected at your leisure.Ano<strong>the</strong>r approach is to use a “dumb” SMTP server that receives <strong>the</strong> e-mails locally and displays <strong>the</strong>m to <strong>the</strong> terminal,but does not actually send anything. Python has a built-in way to accomplish this with a single command:python -m smtpd -n -c DebuggingServer localhost:1025This command will start a simple SMTP server listening on port 1025 of localhost. This server simply prints to standardoutput all e-mail headers and <strong>the</strong> e-mail body. You <strong>the</strong>n only need to set <strong>the</strong> EMAIL_HOST and EMAIL_PORTaccordingly, and you are set.For a more detailed discussion of testing and processing of e-mails locally, see <strong>the</strong> Python documentation on <strong>the</strong> SMTPServer.3.13.11 SMTPConnectionclass SMTPConnection3.13. Sending e-mail 269
<strong>Django</strong> <strong>Documentation</strong>, Release 1.2Deprecated since version 1.2. The SMTPConnection class has been deprecated in favor of <strong>the</strong> generic e-mailbackend API.For backwards compatibility SMTPConnection is still available in django.core.mail as an alias for <strong>the</strong> SMTPbackend. New code should use get_connection() instead.3.14 Internationalization and localization3.14.1 Overview<strong>Django</strong> has full support for internationalization of text in code and templates, and format localization of dates andnumbers. Here’s how it works.Essentially, <strong>Django</strong> does two things:• It allows developers and template authors to specify which parts of <strong>the</strong>ir apps should be translatable.• It uses <strong>the</strong>se hooks to translate Web apps for particular users according to <strong>the</strong>ir language preferences.The complete process can be seen as divided in three stages. It is also possible to identify an identical number of roleswith very well defined responsibilities associated with each of <strong>the</strong>se tasks (although it’s perfectly normal if you findyourself performing more than one of <strong>the</strong>se roles):• For application authors wishing to make sure <strong>the</strong>ir <strong>Django</strong> apps can be used in different locales: Internationalization.• For translators wanting to translate <strong>Django</strong> apps: Localization.• For system administrators/final users setting up internationalized apps or developers integrating third party apps:Deployment of translations.InternationalizationOverviewThe goal of internationalization is to allow a single Web application to offer its content and functionality in multiplelanguages and locales.For text translations, you, <strong>the</strong> <strong>Django</strong> developer, can accomplish this goal by adding a minimal amount of hooks to yourPython and templates. These hooks are called translation strings. They tell <strong>Django</strong>: “This text should be translatedinto <strong>the</strong> end user’s language, if a translation for this text is available in that language.” It’s your responsibility to marktranslatable strings; <strong>the</strong> system can only translate strings it knows about.<strong>Django</strong> takes care of using <strong>the</strong>se hooks to translate Web apps, on <strong>the</strong> fly, according to users’ language preferences.Specifying translation strings: In Python codeStandard translation Specify a translation string by using <strong>the</strong> function ugettext(). It’s convention to importthis as a shorter alias, _, to save typing.Note: Python’s standard library gettext module installs _() into <strong>the</strong> global namespace, as an alias forgettext(). In <strong>Django</strong>, we have chosen not to follow this practice, for a couple of reasons:270 Chapter 3. Using <strong>Django</strong>
<strong>Django</strong> <strong>Documentation</strong>, Release 1.21. For international character set (Unicode) support, ugettext() is more useful than gettext(). Sometimes,you should be using ugettext_lazy() as <strong>the</strong> default translation method for a particular file. Without _()in <strong>the</strong> global namespace, <strong>the</strong> developer has to think about which is <strong>the</strong> most appropriate translation function.2. The underscore character (_) is used to represent “<strong>the</strong> previous result” in Python’s interactive shell and doctesttests. Installing a global _() function causes interference. Explicitly importing ugettext() as _() avoidsthis problem.In this example, <strong>the</strong> text "Welcome to my site." is marked as a translation string:from django.utils.translation import ugettext as _def my_view(request):output = _("Welcome to my site.")return HttpResponse(output)Obviously, you could code this without using <strong>the</strong> alias. This example is identical to <strong>the</strong> previous one:from django.utils.translation import ugettextdef my_view(request):output = ugettext("Welcome to my site.")return HttpResponse(output)Translation works on computed values. This example is identical to <strong>the</strong> previous two:def my_view(request):words = [’Welcome’, ’to’, ’my’, ’site.’]output = _(’ ’.join(words))return HttpResponse(output)Translation works on variables. Again, here’s an identical example:def my_view(request):sentence = ’Welcome to my site.’output = _(sentence)return HttpResponse(output)(The caveat with using variables or computed values, as in <strong>the</strong> previous two examples, is that <strong>Django</strong>’s translationstring-detectingutility, django-admin.py makemessages, won’t be able to find <strong>the</strong>se strings. More onmakemessages later.)The strings you pass to _() or ugettext() can take placeholders, specified with Python’s standard named-stringinterpolation syntax. Example:def my_view(request, m, d):output = _(’Today is %(month)s %(day)s.’) % {’month’: m, ’day’: d}return HttpResponse(output)This technique lets language-specific translations reorder <strong>the</strong> placeholder text. For example, an English translationmay be "Today is November 26.", while a Spanish translation may be "Hoy es 26 de Noviembre."– with <strong>the</strong> <strong>the</strong> month and <strong>the</strong> day placeholders swapped.For this reason, you should use named-string interpolation (e.g., %(day)s) instead of positional interpolation (e.g.,%s or %d) whenever you have more than a single parameter. If you used positional interpolation, translations wouldn’tbe able to reorder placeholder text.Marking strings as no-op Use <strong>the</strong> function django.utils.translation.ugettext_noop() to mark astring as a translation string without translating it. The string is later translated from a variable.3.14. Internationalization and localization 271
<strong>Django</strong> <strong>Documentation</strong>, Release 1.2Use this if you have constant strings that should be stored in <strong>the</strong> source language because <strong>the</strong>y are exchanged oversystems or users – such as strings in a database – but should be translated at <strong>the</strong> last possible point in time, such aswhen <strong>the</strong> string is presented to <strong>the</strong> user.Use <strong>the</strong> function django.utils.translation.ungettext() to specify pluralized mes-Pluralizationsages.ungettext takes three arguments: <strong>the</strong> singular translation string, <strong>the</strong> plural translation string and <strong>the</strong> number ofobjects.This function is useful when you need your <strong>Django</strong> application to be localizable to languages where <strong>the</strong> number andcomplexity of plural forms is greater than <strong>the</strong> two forms used in English (‘object’ for <strong>the</strong> singular and ‘objects’ for all<strong>the</strong> cases where count is different from zero, irrespective of its value.)For example:from django.utils.translation import ungettextdef hello_world(request, count):page = ungettext(’<strong>the</strong>re is %(count)d object’, ’<strong>the</strong>re are %(count)d objects’, count) % {’count’: count,}return HttpResponse(page)In this example <strong>the</strong> number of objects is passed to <strong>the</strong> translation languages as <strong>the</strong> count variable.Lets see a slightly more complex usage example:from django.utils.translation import ungettextcount = Report.objects.count()if count == 1:name = Report._meta.verbose_nameelse:name = Report._meta.verbose_name_pluraltext = ungettext(’There is %(count)d %(name)s available.’,’There are %(count)d %(name)s available.’,count) % {’count’: count,’name’: name}Here we reuse localizable, hopefully already translated literals (contained in <strong>the</strong> verbose_name andverbose_name_plural model Meta options) for o<strong>the</strong>r parts of <strong>the</strong> sentence so all of it is consistently basedon <strong>the</strong> cardinality of <strong>the</strong> elements at play.Note: When using this technique, make sure you use a single name for every extrapolated variable included in <strong>the</strong>literal. In <strong>the</strong> example above note how we used <strong>the</strong> name Python variable in both translation strings. This examplewould fail:from django.utils.translation import ungettextfrom myapp.models import Reportcount = Report.objects.count()d = {’count’: count,’name’: Report._meta.verbose_name,272 Chapter 3. Using <strong>Django</strong>
<strong>Django</strong> <strong>Documentation</strong>, Release 1.2’plural_name’: Report._meta.verbose_name_plural}text = ungettext(’There is %(count)d %(name)s available.’,’There are %(count)d %(plural_name)s available.’,count) % dYou would get a a format specification for argument ’name’, as in ’msgstr[0]’,doesn’t exist in ’msgid’ error when running django-admin.py compilemessages.Lazy translation Use <strong>the</strong> function django.utils.translation.ugettext_lazy() to translate stringslazily – when <strong>the</strong> value is accessed ra<strong>the</strong>r than when <strong>the</strong> ugettext_lazy() function is called.For example, to translate a model’s help_text, do <strong>the</strong> following:from django.utils.translation import ugettext_lazyclass MyThing(models.Model):name = models.CharField(help_text=ugettext_lazy(’This is <strong>the</strong> help text’))In this example, ugettext_lazy() stores a lazy reference to <strong>the</strong> string – not <strong>the</strong> actual translation. The translationitself will be done when <strong>the</strong> string is used in a string context, such as template rendering on <strong>the</strong> <strong>Django</strong> admin site.The result of a ugettext_lazy() call can be used wherever you would use a unicode string (an object with typeunicode) in Python. If you try to use it where a bytestring (a str object) is expected, things will not work asexpected, since a ugettext_lazy() object doesn’t know how to convert itself to a bytestring. You can’t use aunicode string inside a bytestring, ei<strong>the</strong>r, so this is consistent with normal Python behavior. For example:# This is fine: putting a unicode proxy into a unicode string.u"Hello %s" % ugettext_lazy("people")# This will not work, since you cannot insert a unicode object# into a bytestring (nor can you insert our unicode proxy <strong>the</strong>re)"Hello %s" % ugettext_lazy("people")If you ever see output that looks like "hello ", you have tried to insert<strong>the</strong> result of ugettext_lazy() into a bytestring. That’s a bug in your code.If you don’t like <strong>the</strong> verbose name ugettext_lazy, you can just alias it as _ (underscore), like so:from django.utils.translation import ugettext_lazy as _class MyThing(models.Model):name = models.CharField(help_text=_(’This is <strong>the</strong> help text’))Always use lazy translations in <strong>Django</strong> models. Field names and table names should be marked for translation(o<strong>the</strong>rwise, <strong>the</strong>y won’t be translated in <strong>the</strong> admin interface). This means writing explicit verbose_name andverbose_name_plural options in <strong>the</strong> Meta class, though, ra<strong>the</strong>r than relying on <strong>Django</strong>’s default determinationof verbose_name and verbose_name_plural by looking at <strong>the</strong> model’s class name:from django.utils.translation import ugettext_lazy as _class MyThing(models.Model):name = models.CharField(_(’name’), help_text=_(’This is <strong>the</strong> help text’))class Meta:verbose_name = _(’my thing’)verbose_name_plural = _(’mythings’)3.14. Internationalization and localization 273
<strong>Django</strong> <strong>Documentation</strong>, Release 1.2Working with lazy translation objects Using ugettext_lazy() and ungettext_lazy() to mark stringsin models and utility functions is a common operation. When you’re working with <strong>the</strong>se objects elsewhere in yourcode, you should ensure that you don’t accidentally convert <strong>the</strong>m to strings, because <strong>the</strong>y should be converted as lateas possible (so that <strong>the</strong> correct locale is in effect). This necessitates <strong>the</strong> use of a couple of helper functions.Joining strings: string_concat() Standard Python string joins (”.join([...])) will not work on lists containinglazy translation objects. Instead, you can use django.utils.translation.string_concat(), whichcreates a lazy object that concatenates its contents and converts <strong>the</strong>m to strings only when <strong>the</strong> result is included in astring. For example:from django.utils.translation import string_concat...name = ugettext_lazy(u’John Lennon’)instrument = ugettext_lazy(u’guitar’)result = string_concat(name, ’: ’, instrument)In this case, <strong>the</strong> lazy translations in result will only be converted to strings when result itself is used in a string(usually at template rendering time).The allow_lazy() decorator <strong>Django</strong> offers many utility functions (particularly in django.utils) that take astring as <strong>the</strong>ir first argument and do something to that string. These functions are used by template filters as well asdirectly in o<strong>the</strong>r code.If you write your own similar functions and deal with translations, you’ll face <strong>the</strong> problem of what to do when <strong>the</strong> firstargument is a lazy translation object. You don’t want to convert it to a string immediately, because you might be usingthis function outside of a view (and hence <strong>the</strong> current thread’s locale setting will not be correct).For cases like this, use <strong>the</strong> django.utils.functional.allow_lazy() decorator. It modifies <strong>the</strong> functionso that if it’s called with a lazy translation as <strong>the</strong> first argument, <strong>the</strong> function evaluation is delayed until it needs to beconverted to a string.For example:from django.utils.functional import allow_lazydef fancy_utility_function(s, ...):# Do some conversion on string ’s’...fancy_utility_function = allow_lazy(fancy_utility_function, unicode)The allow_lazy() decorator takes, in addition to <strong>the</strong> function to decorate, a number of extra arguments (*args)specifying <strong>the</strong> type(s) that <strong>the</strong> original function can return. Usually, it’s enough to include unicode here and ensurethat your function returns only Unicode strings.Using this decorator means you can write your function and assume that <strong>the</strong> input is a proper string, <strong>the</strong>n add supportfor lazy translation objects at <strong>the</strong> end.Specifying translation strings: In template codeTranslations in <strong>Django</strong> templates uses two template tags and a slightly different syntax than in Python code. To giveyour template access to <strong>the</strong>se tags, put {% load i18n %} toward <strong>the</strong> top of your template.trans template tag The {% trans %} template tag translates ei<strong>the</strong>r a constant string (enclosed in single ordouble quotes) or variable content:274 Chapter 3. Using <strong>Django</strong>
<strong>Django</strong> <strong>Documentation</strong>, Release 1.2{% trans "This is <strong>the</strong> title." %}{% trans myvar %}If <strong>the</strong> noop option is present, variable lookup still takes place but <strong>the</strong> translation is skipped. This is useful when“stubbing out” content that will require translation in <strong>the</strong> future:{% trans "myvar" noop %}Internally, inline translations use an ugettext call.In case a template var (myvar above) is passed to <strong>the</strong> tag, <strong>the</strong> tag will first resolve such variable to a string at run-timeand <strong>the</strong>n look up that string in <strong>the</strong> message catalogs.It’s not possible to mix a template variable inside a string within {% trans %}. If your translations require stringswith variables (placeholders), use {% blocktrans %} instead.blocktrans template tag Contrarily to <strong>the</strong> trans tag, <strong>the</strong> blocktrans tag allows you to mark complexsentences consisting of literals and variable content for translation by making use of placeholders:{% blocktrans %}This string will have {{ value }} inside.{% endblocktrans %}To translate a template expression – say, accessing object attributes or using template filters – you need to bind <strong>the</strong>expression to a local variable for use within <strong>the</strong> translation block. Examples:{% blocktrans with article.price as amount %}That will cost $ {{ amount }}.{% endblocktrans %}{% blocktrans with value|filter as myvar %}This will have {{ myvar }} inside.{% endblocktrans %}If you need to bind more than one expression inside a blocktrans tag, separate <strong>the</strong> pieces with and:{% blocktrans with book|title as book_t and author|title as author_t %}This is {{ book_t }} by {{ author_t }}{% endblocktrans %}This tag also provides for pluralization. To use it:• Designate and bind a counter value with <strong>the</strong> name count. This value will be <strong>the</strong> one used to select <strong>the</strong> rightplural form.• Specify both <strong>the</strong> singular and plural forms separating <strong>the</strong>m with <strong>the</strong> {% plural %} tag within <strong>the</strong> {%blocktrans %} and {% endblocktrans %} tags.An example:{% blocktrans count list|length as counter %}There is only one {{ name }} object.{% plural %}There are {{ counter }} {{ name }} objects.{% endblocktrans %}A more complex example:{% blocktrans with article.price as amount count i.length as years %}That will cost $ {{ amount }} per year.{% plural %}3.14. Internationalization and localization 275
<strong>Django</strong> <strong>Documentation</strong>, Release 1.2That will cost $ {{ amount }} per {{ years }} years.{% endblocktrans %}When you use both <strong>the</strong> pluralization feature and bind values to local variables in addition to <strong>the</strong> counter value, keepin mind that <strong>the</strong> blocktrans construct is internally converted to an ungettext call. This means <strong>the</strong> same notesregarding ungettext variables apply.O<strong>the</strong>r tagsEach RequestContext has access to three translation-specific variables:• LANGUAGES is a list of tuples in which <strong>the</strong> first element is <strong>the</strong> language code and <strong>the</strong> second is <strong>the</strong> languagename (translated into <strong>the</strong> currently active locale).• LANGUAGE_CODE is <strong>the</strong> current user’s preferred language, as a string. Example: en-us. (See How <strong>Django</strong>discovers language preference.)• LANGUAGE_BIDI is <strong>the</strong> current locale’s direction. If True, it’s a right-to-left language, e.g.: Hebrew, Arabic.If False it’s a left-to-right language, e.g.: English, French, German etc.If you don’t use <strong>the</strong> RequestContext extension, you can get those values with three tags:{% get_current_language as LANGUAGE_CODE %}{% get_available_languages as LANGUAGES %}{% get_current_language_bidi as LANGUAGE_BIDI %}These tags also require a {% load i18n %}.Translation hooks are also available within any template block tag that accepts constant strings. In those cases, justuse _() syntax to specify a translation string:{% some_special_tag _("Page not found") value|yesno:_("yes,no") %}In this case, both <strong>the</strong> tag and <strong>the</strong> filter will see <strong>the</strong> already-translated string, so <strong>the</strong>y don’t need to be aware of translations.Note: In this example, <strong>the</strong> translation infrastructure will be passed <strong>the</strong> string "yes,no", not <strong>the</strong> individual strings"yes" and "no". The translated string will need to contain <strong>the</strong> comma so that <strong>the</strong> filter parsing code knows howto split up <strong>the</strong> arguments. For example, a German translator might translate <strong>the</strong> string "yes,no" as "ja,nein"(keeping <strong>the</strong> comma intact).Specifying translation strings: In JavaScript codeAdding translations to JavaScript poses some problems:• JavaScript code doesn’t have access to a gettext implementation.• JavaScript code doesn’t have access to .po or .mo files; <strong>the</strong>y need to be delivered by <strong>the</strong> server.• The translation catalogs for JavaScript should be kept as small as possible.<strong>Django</strong> provides an integrated solution for <strong>the</strong>se problems: It passes <strong>the</strong> translations into JavaScript, so you can callgettext, etc., from within JavaScript.The javascript_catalog viewjavascript_catalog(request, domain=’djangojs’, packages=None)276 Chapter 3. Using <strong>Django</strong>
<strong>Django</strong> <strong>Documentation</strong>, Release 1.2The main solution to <strong>the</strong>se problems is <strong>the</strong> django.views.i18n.javascript_catalog() view, which sendsout a JavaScript code library with functions that mimic <strong>the</strong> gettext interface, plus an array of translation strings.Those translation strings are taken from <strong>the</strong> application, project or <strong>Django</strong> core, according to what you specify in ei<strong>the</strong>r<strong>the</strong> info_dict or <strong>the</strong> URL.You hook it up like this:js_info_dict = {’packages’: (’your.app.package’,),}urlpatterns = patterns(’’,(r’^jsi18n/$’, ’django.views.i18n.javascript_catalog’, js_info_dict),)Each string in packages should be in Python dotted-package syntax (<strong>the</strong> same format as <strong>the</strong> strings inINSTALLED_APPS) and should refer to a package that contains a locale directory. If you specify multiple packages,all those catalogs are merged into one catalog. This is useful if you have JavaScript that uses strings fromdifferent applications.By default, <strong>the</strong> view uses <strong>the</strong> djangojs gettext domain. This can be changed by altering <strong>the</strong> domain argument.You can make <strong>the</strong> view dynamic by putting <strong>the</strong> packages into <strong>the</strong> URL pattern:urlpatterns = patterns(’’,(r’^jsi18n/(?P\S+?)/$’, ’django.views.i18n.javascript_catalog’),)With this, you specify <strong>the</strong> packages as a list of package names delimited by ‘+’ signs in <strong>the</strong> URL. This is especially usefulif your pages use code from different apps and this changes often and you don’t want to pull in one big catalog file.As a security measure, <strong>the</strong>se values can only be ei<strong>the</strong>r django.conf or any package from <strong>the</strong> INSTALLED_APPSsetting.Using <strong>the</strong> JavaScript translation catalogTo use <strong>the</strong> catalog, just pull in <strong>the</strong> dynamically generated script like this:This uses reverse URL lookup to find <strong>the</strong> URL of <strong>the</strong> JavaScript catalog view. When <strong>the</strong> catalog is loaded, yourJavaScript code can use <strong>the</strong> standard gettext interface to access it:document.write(gettext(’this is to be translated’));There is also an ngettext interface:var object_cnt = 1 // or 0, or 2, or 3, ...s = ngettext(’literal for <strong>the</strong> singular case’,’literal for <strong>the</strong> plural case’, object_cnt);and even a string interpolation function:function interpolate(fmt, obj, named);The interpolation syntax is borrowed from Python, so <strong>the</strong> interpolate function supports both positional and namedinterpolation:• Positional interpolation: obj contains a JavaScript Array object whose elements values are <strong>the</strong>n sequentiallyinterpolated in <strong>the</strong>ir corresponding fmt placeholders in <strong>the</strong> same order <strong>the</strong>y appear. For example:3.14. Internationalization and localization 277
<strong>Django</strong> <strong>Documentation</strong>, Release 1.2fmts = ngettext(’There is %s object. Remaining: %s’,’There are %s objects. Remaining: %s’, 11);s = interpolate(fmts, [11, 20]);// s is ’There are 11 objects. Remaining: 20’• Named interpolation: This mode is selected by passing <strong>the</strong> optional boolean named parameter as true. objcontains a JavaScript object or associative array. For example:d = {count: 10,total: 50};fmts = ngettext(’Total: %(total)s, <strong>the</strong>re is %(count)s object’,’<strong>the</strong>re are %(count)s of a total of %(total)s objects’, d.count);s = interpolate(fmts, d, true);You shouldn’t go over <strong>the</strong> top with string interpolation, though: this is still JavaScript, so <strong>the</strong> code has to make repeatedregular-expression substitutions. This isn’t as fast as string interpolation in Python, so keep it to those cases where youreally need it (for example, in conjunction with ngettext to produce proper pluralizations).The set_language redirect viewset_language(request)As a convenience, <strong>Django</strong> comes with a view, django.views.i18n.set_language(), that sets a user’s languagepreference and redirects back to <strong>the</strong> previous page.Activate this view by adding <strong>the</strong> following line to your URLconf:(r’^i18n/’, include(’django.conf.urls.i18n’)),(Note that this example makes <strong>the</strong> view available at /i18n/setlang/.)The view expects to be called via <strong>the</strong> POST method, with a language parameter set in request. If session support isenabled, <strong>the</strong> view saves <strong>the</strong> language choice in <strong>the</strong> user’s session. O<strong>the</strong>rwise, it saves <strong>the</strong> language choice in a cookiethat is by default named django_language. (The name can be changed through <strong>the</strong> LANGUAGE_COOKIE_NAMEsetting.)After setting <strong>the</strong> language choice, <strong>Django</strong> redirects <strong>the</strong> user, following this algorithm:• <strong>Django</strong> looks for a next parameter in <strong>the</strong> POST data.• If that doesn’t exist, or is empty, <strong>Django</strong> tries <strong>the</strong> URL in <strong>the</strong> Referrer header.• If that’s empty – say, if a user’s browser suppresses that header – <strong>the</strong>n <strong>the</strong> user will be redirected to / (<strong>the</strong> siteroot) as a fallback.Here’s example HTML template code:{% csrf_token %}{% for lang in LANGUAGES %}{{ lang.1 }}{% endfor %}278 Chapter 3. Using <strong>Django</strong>
<strong>Django</strong> <strong>Documentation</strong>, Release 1.2LocalizationThis document covers two localization-related topics: Creating language files and locale aware date, time and numbersinput/output in formsSee Also:The Using internationalization in your own projects document included with <strong>the</strong> <strong>Django</strong> HOW-TO documents collection.How to create language filesOnce <strong>the</strong> string literals of an application have been tagged for later translation, <strong>the</strong> translation <strong>the</strong>mselves need to bewritten (or obtained). Here’s how that works.Locale restrictions<strong>Django</strong> does not support localizing your application into a locale for which <strong>Django</strong> itself has not been translated. Inthis case, it will ignore your translation files. If you were to try this and <strong>Django</strong> supported it, you would inevitably seea mixture of translated strings (from your application) and English strings (from <strong>Django</strong> itself). If you want to supporta locale for your application that is not already part of <strong>Django</strong>, you’ll need to make at least a minimal translation of<strong>the</strong> <strong>Django</strong> core.A good starting point is to copy <strong>the</strong> <strong>Django</strong> English .po file and to translate at least some translation strings.Message files The first step is to create a message file for a new language. A message file is a plain-text file,representing a single language, that contains all available translation strings and how <strong>the</strong>y should be represented in <strong>the</strong>given language. Message files have a .po file extension.<strong>Django</strong> comes with a tool, django-admin.py makemessages, that automates <strong>the</strong> creation and upkeep of <strong>the</strong>sefiles.A note to <strong>Django</strong> veteransThe old tool bin/make-messages.py has been moved to <strong>the</strong> command django-admin.py makemessagesto provide consistency throughout <strong>Django</strong>.Gettext utilitiesThe makemessages command (and compilemessages discussed later) use commands from <strong>the</strong> GNU gettexttoolset: xgettext, msgfmt, msgmerge and msguniq. Changed in version 1.2: Please, see <strong>the</strong> release notes Theminimum version of <strong>the</strong> gettext utilities supported is 0.15.To create or update a message file, run this command:django-admin.py makemessages -l de...where de is <strong>the</strong> language code for <strong>the</strong> message file you want to create. The language code, in this case, is in localeformat. For example, it’s pt_BR for Brazilian Portuguese and de_AT for Austrian German.The script should be run from one of two places:• The root directory of your <strong>Django</strong> project.• The root directory of your <strong>Django</strong> app.3.14. Internationalization and localization 279
<strong>Django</strong> <strong>Documentation</strong>, Release 1.2The script runs over your project source tree or your application source tree and pulls out all strings marked for translation.It creates (or updates) a message file in <strong>the</strong> directory locale/LANG/LC_MESSAGES. In <strong>the</strong> de example,<strong>the</strong> file will be locale/de/LC_MESSAGES/django.po.By default django-admin.py makemessages examines every file that has <strong>the</strong> .html file extension. In caseyou want to override that default, use <strong>the</strong> --extension or -e option to specify <strong>the</strong> file extensions to examine:django-admin.py makemessages -l de -e txtSeparate multiple extensions with commas and/or use -e or --extension multiple times:django-admin.py makemessages -l de -e html,txt -e xmlWhen creating message files from JavaScript source code you need to use <strong>the</strong> special ‘djangojs’ domain, not -e js.No gettext?If you don’t have <strong>the</strong> gettext utilities installed, django-admin.py makemessages will create emptyfiles. If that’s <strong>the</strong> case, ei<strong>the</strong>r install <strong>the</strong> gettext utilities or just copy <strong>the</strong> English message file(locale/en/LC_MESSAGES/django.po) if available and use it as a starting point; it’s just an empty translationfile.Working on Windows?If you’re using Windows and need to install <strong>the</strong> GNU gettext utilities so django-admin makemessages workssee gettext on Windows for more information.The format of .po files is straightforward. Each .po file contains a small bit of metadata, such as <strong>the</strong> translationmaintainer’s contact information, but <strong>the</strong> bulk of <strong>the</strong> file is a list of messages – simple mappings between translationstrings and <strong>the</strong> actual translated text for <strong>the</strong> particular language.For example, if your <strong>Django</strong> app contained a translation string for <strong>the</strong> text "Welcome to my site.", like so:_("Welcome to my site.")...<strong>the</strong>n django-admin.py makemessages will have created a .po file containing <strong>the</strong> following snippet – amessage:#: path/to/python/module.py:23msgid "Welcome to my site."msgstr ""A quick explanation:• msgid is <strong>the</strong> translation string, which appears in <strong>the</strong> source. Don’t change it.• msgstr is where you put <strong>the</strong> language-specific translation. It starts out empty, so it’s your responsibility tochange it. Make sure you keep <strong>the</strong> quotes around your translation.• As a convenience, each message includes, in <strong>the</strong> form of a comment line prefixed with # and located above <strong>the</strong>msgid line, <strong>the</strong> filename and line number from which <strong>the</strong> translation string was gleaned.Long messages are a special case. There, <strong>the</strong> first string directly after <strong>the</strong> msgstr (or msgid) is an empty string. Then<strong>the</strong> content itself will be written over <strong>the</strong> next few lines as one string per line. Those strings are directly concatenated.Don’t forget trailing spaces within <strong>the</strong> strings; o<strong>the</strong>rwise, <strong>the</strong>y’ll be tacked toge<strong>the</strong>r without whitespace!Mind your charset280 Chapter 3. Using <strong>Django</strong>
<strong>Django</strong> <strong>Documentation</strong>, Release 1.2When creating a PO file with your favorite text editor, first edit <strong>the</strong> charset line (search for "CHARSET") and set it to<strong>the</strong> charset you’ll be using to edit <strong>the</strong> content. Due to <strong>the</strong> way <strong>the</strong> gettext tools work internally and because we wantto allow non-ASCII source strings in <strong>Django</strong>’s core and your applications, you must use UTF-8 as <strong>the</strong> encoding foryour PO file. This means that everybody will be using <strong>the</strong> same encoding, which is important when <strong>Django</strong> processes<strong>the</strong> PO files.To reexamine all source code and templates for new translation strings and update all message files for all languages,run this:django-admin.py makemessages -aCompiling message files After you create your message file – and each time you make changes to it – you’llneed to compile it into a more efficient form, for use by gettext. Do this with <strong>the</strong> django-admin.pycompilemessages utility.This tool runs over all available .po files and creates .mo files, which are binary files optimized for use by gettext.In <strong>the</strong> same directory from which you ran django-admin.py makemessages, run django-admin.pycompilemessages like this:django-admin.py compilemessagesThat’s it. Your translations are ready for use.A note to <strong>Django</strong> veteransThe old tool bin/compile-messages.py has been moved to <strong>the</strong> command django-admin.pycompilemessages to provide consistency throughout <strong>Django</strong>.Working on Windows?If you’re using Windows and need to install <strong>the</strong> GNU gettext utilities so django-admin compilemessagesworks see gettext on Windows for more information..po files: Encoding and BOM usage.<strong>Django</strong> only supports .po files encoded in UTF-8 and without any BOM (Byte Order Mark) so if your text editoradds such marks to <strong>the</strong> beginning of files by default <strong>the</strong>n you will need to reconfigure it.Creating message files from JavaScript source codeYou create and update <strong>the</strong> message files <strong>the</strong> same way as <strong>the</strong> o<strong>the</strong>r <strong>Django</strong> message files – with <strong>the</strong>django-admin.py makemessages tool. The only difference is you need to provide a -d djangojs parameter,like this:django-admin.py makemessages -d djangojs -l deThis would create or update <strong>the</strong> message file for JavaScript for German. After updating message files, just rundjango-admin.py compilemessages <strong>the</strong> same way as you do with normal <strong>Django</strong> message files.3.14. Internationalization and localization 281
<strong>Django</strong> <strong>Documentation</strong>, Release 1.2gettext on WindowsThis is only needed for people who ei<strong>the</strong>r want to extract message IDs or compile message files (.po). Translationwork itself just involves editing existing files of this type, but if you want to create your own message files, or want totest or compile a changed message file, you will need <strong>the</strong> gettext utilities:• Download <strong>the</strong> following zip files from <strong>the</strong> GNOME servers http://ftp.gnome.org/pub/gnome/binaries/win32/dependencies/or from one of its mirrors– gettext-runtime-X.zip– gettext-tools-X.zipX is <strong>the</strong> version number, we are requiring 0.15 or higher.• Extract <strong>the</strong> contents of <strong>the</strong> bin\ directories in both files to <strong>the</strong> same folder on your system (i.e. C:\ProgramFiles\gettext-utils)• Update <strong>the</strong> system PATH:– Control Panel > System > Advanced > Environment Variables.– In <strong>the</strong> System variables list, click Path, click Edit.– Add ;C:\Program Files\gettext-utils\bin at <strong>the</strong> end of <strong>the</strong> Variable value field.You may also use gettext binaries you have obtained elsewhere, so long as <strong>the</strong> xgettext --version commandworks properly. Do not attempt to use <strong>Django</strong> translation utilities with a gettext package if <strong>the</strong> commandxgettext --version entered at a Windows command prompt causes a popup window saying “xgettext.exe hasgenerated errors and will be closed by Windows”.Format localizationNew in version 1.2: Please, see <strong>the</strong> release notes <strong>Django</strong>’s formatting system is disabled by default. To enable it, it’snecessary to set USE_L10N = True in your settings file.Note: The default settings.py file created by django-admin.py startproject includes USE_L10N =True for convenience.When using <strong>Django</strong>’s formatting system, dates and numbers on templates will be displayed using <strong>the</strong> format specifiedfor <strong>the</strong> current locale. Two users accessing <strong>the</strong> same content, but in different language, will see date and number fieldsformatted in different ways, depending on <strong>the</strong> format for <strong>the</strong>ir current locale.<strong>Django</strong> will also use localized formats when parsing data in forms. That means <strong>Django</strong> uses different formats fordifferent locales when guessing <strong>the</strong> format used by <strong>the</strong> user when inputting data on forms.Note: <strong>Django</strong> uses different formats for displaying data to those it uses for parsing data. Most notably, <strong>the</strong> formats forparsing dates can’t use <strong>the</strong> %a (abbreviated weekday name), %A (full weekday name), %b (abbreviated month name),%B (full month name), or %p (AM/PM).To enable a form field to localize input and output data simply use its localize argument:class CashRegisterForm(forms.Form):product = forms.CharField()revenue = forms.DecimalField(max_digits=4, decimal_places=2, localize=True)282 Chapter 3. Using <strong>Django</strong>
<strong>Django</strong> <strong>Documentation</strong>, Release 1.2Creating custom format files <strong>Django</strong> provides format definitions for many locales, but sometimes you might wantto create your own, because a format files doesn’t exist for your locale, or because you want to overwrite some of <strong>the</strong>values.To use custom formats, first thing to do, is to specify <strong>the</strong> path where you’ll place format files. To do that, just set yourFORMAT_MODULE_PATH setting to <strong>the</strong> path (in <strong>the</strong> format ’foo.bar.baz) where format files will exists.Files are not placed directly in this directory, but in a directory named as <strong>the</strong> locale, and must be named formats.py.To customize <strong>the</strong> English formats, a structure like this would be needed:mysite/formats/__init__.pyen/__init__.pyformats.pywhere formats.py contains custom format definitions. For example:THOUSAND_SEPARATOR = ’ ’to use a space as a thousand separator, instead of <strong>the</strong> default for English, a comma.Deployment of translationsIf you don’t need internationalization<strong>Django</strong>’s internationalization hooks are on by default, and that means <strong>the</strong>re’s a bit of i18n-related overhead in certainplaces of <strong>the</strong> framework. If you don’t use internationalization, you should take <strong>the</strong> two seconds to set USE_I18N =False in your settings file. If USE_I18N is set to False, <strong>the</strong>n <strong>Django</strong> will make some optimizations so as not toload <strong>the</strong> internationalization machinery.You’ll probably also want to remove ’django.core.context_processors.i18n’ from yourTEMPLATE_CONTEXT_PROCESSORS setting.Note: There is also an independent but related USE_L10N setting that controls if <strong>Django</strong> should implement formatlocalization.If USE_L10N is set to True, <strong>Django</strong> will handle numbers times, and dates in <strong>the</strong> format of <strong>the</strong> current locale. Thatincludes representation of <strong>the</strong>se field types on templates and allowed input formats for dates, times on model forms.See Format localization for more details.If you do need internationalizationHow <strong>Django</strong> discovers language preference Once you’ve prepared your translations – or, if you just want to use<strong>the</strong> translations that come with <strong>Django</strong> – you’ll just need to activate translation for your app.Behind <strong>the</strong> scenes, <strong>Django</strong> has a very flexible model of deciding which language should be used – installation-wide,for a particular user, or both.To set an installation-wide language preference, set LANGUAGE_CODE. <strong>Django</strong> uses this language as <strong>the</strong> defaulttranslation – <strong>the</strong> final attempt if no o<strong>the</strong>r translator finds a translation.If all you want to do is run <strong>Django</strong> with your native language, and a language file is available for it, all you need to dois set LANGUAGE_CODE.3.14. Internationalization and localization 283
<strong>Django</strong> <strong>Documentation</strong>, Release 1.2If you want to let each individual user specify which language he or she prefers, use LocaleMiddleware.LocaleMiddleware enables language selection based on data from <strong>the</strong> request. It customizes content for eachuser.To use LocaleMiddleware, add ’django.middleware.locale.LocaleMiddleware’ to yourMIDDLEWARE_CLASSES setting. Because middleware order matters, you should follow <strong>the</strong>se guidelines:• Make sure it’s one of <strong>the</strong> first middlewares installed.• It should come after SessionMiddleware, because LocaleMiddleware makes use of session data.• If you use CacheMiddleware, put LocaleMiddleware after it.For example, your MIDDLEWARE_CLASSES might look like this:MIDDLEWARE_CLASSES = (’django.contrib.sessions.middleware.SessionMiddleware’,’django.middleware.locale.LocaleMiddleware’,’django.middleware.common.CommonMiddleware’,)(For more on middleware, see <strong>the</strong> middleware documentation.)LocaleMiddleware tries to determine <strong>the</strong> user’s language preference by following this algorithm:Notes:• First, it looks for a django_language key in <strong>the</strong> current user’s session.• Failing that, it looks for a cookie. Changed in version 1.0: Please, see <strong>the</strong> release notes In <strong>Django</strong> version 0.96and before, <strong>the</strong> cookie’s name is hard-coded to django_language. In <strong>Django</strong> 1,0, The cookie name is setby <strong>the</strong> LANGUAGE_COOKIE_NAME setting. (The default name is django_language.)• Failing that, it looks at <strong>the</strong> Accept-Language HTTP header. This header is sent by your browser and tells<strong>the</strong> server which language(s) you prefer, in order by priority. <strong>Django</strong> tries each language in <strong>the</strong> header until itfinds one with available translations.• Failing that, it uses <strong>the</strong> global LANGUAGE_CODE setting.• In each of <strong>the</strong>se places, <strong>the</strong> language preference is expected to be in <strong>the</strong> standard language format, as a string.For example, Brazilian Portuguese is pt-br.• If a base language is available but <strong>the</strong> sublanguage specified is not, <strong>Django</strong> uses <strong>the</strong> base language. For example,if a user specifies de-at (Austrian German) but <strong>Django</strong> only has de available, <strong>Django</strong> uses de.• Only languages listed in <strong>the</strong> LANGUAGES setting can be selected. If you want to restrict <strong>the</strong> language selection toa subset of provided languages (because your application doesn’t provide all those languages), set LANGUAGESto a list of languages. For example:LANGUAGES = ((’de’, _(’German’)),(’en’, _(’English’)),)This example restricts languages that are available for automatic selection to German and English (and anysublanguage, like de-ch or en-us).• If you define a custom LANGUAGES setting, as explained in <strong>the</strong> previous bullet, it’s OK to mark<strong>the</strong> languages as translation strings – but use a “dummy” ugettext() function, not <strong>the</strong> one indjango.utils.translation. You should never import django.utils.translation from withinyour settings file, because that module in itself depends on <strong>the</strong> settings, and that would cause a circular import.The solution is to use a “dummy” ugettext() function. Here’s a sample settings file:284 Chapter 3. Using <strong>Django</strong>
<strong>Django</strong> <strong>Documentation</strong>, Release 1.2ugettext = lambda s: sLANGUAGES = ((’de’, ugettext(’German’)),(’en’, ugettext(’English’)),)With this arrangement, django-admin.py makemessages will still find and mark <strong>the</strong>se strings for translation,but <strong>the</strong> translation won’t happen at runtime – so you’ll have to remember to wrap <strong>the</strong> languages in <strong>the</strong>real ugettext() in any code that uses LANGUAGES at runtime.• The LocaleMiddleware can only select languages for which <strong>the</strong>re is a <strong>Django</strong>-provided base translation.If you want to provide translations for your application that aren’t already in <strong>the</strong> set of translations in <strong>Django</strong>’ssource tree, you’ll want to provide at least a basic one as described in <strong>the</strong> Locale restrictions note.Once LocaleMiddleware determines <strong>the</strong> user’s preference, it makes this preference available asrequest.LANGUAGE_CODE for each HttpRequest. Feel free to read this value in your view code. Here’s asimple example:def hello_world(request, count):if request.LANGUAGE_CODE == ’de-at’:return HttpResponse("You prefer to read Austrian German.")else:return HttpResponse("You prefer to read ano<strong>the</strong>r language.")Note that, with static (middleware-less) translation, <strong>the</strong> language is in settings.LANGUAGE_CODE, while withdynamic (middleware) translation, it’s in request.LANGUAGE_CODE.How <strong>Django</strong> discovers translations As described in Using internationalization in your own projects, at runtime,<strong>Django</strong> looks for translations by following this algorithm:• First, it looks for a locale directory in <strong>the</strong> directory containing your settings file.• Second, it looks for a locale directory in <strong>the</strong> project directory.• Third, it looks for a locale directory in each of <strong>the</strong> installed apps. It does this in <strong>the</strong> reverse order of IN-STALLED_APPS• Finally, it checks <strong>the</strong> <strong>Django</strong>-provided base translation in django/conf/locale.In all cases <strong>the</strong> name of <strong>the</strong> directory containing <strong>the</strong> translation is expected to be named using locale name notation.E.g. de, pt_BR, es_AR, etc.For more general information about <strong>the</strong> topic, see <strong>the</strong> GNU gettext documentation and <strong>the</strong> Wikipedia article.3.14.2 GlossaryFirst lets define some terms that will help us to handle a common language:locale name A locale name, ei<strong>the</strong>r a language specification of <strong>the</strong> form ll or a combined language and countryspecification of <strong>the</strong> form ll_CC. Examples: it, de_AT, es, pt_BR. Note <strong>the</strong> underscore in some of <strong>the</strong>mand <strong>the</strong> case of <strong>the</strong> part located to its right.language code Represents <strong>the</strong> name of a language. Browsers send <strong>the</strong> names of <strong>the</strong> languages <strong>the</strong>y accept in <strong>the</strong>Accept-Language HTTP header using this format. Examples: it, de-at, es, pt-br. Note <strong>the</strong> - separator.message file A message file is a plain-text file, representing a single language, that contains all available translationstrings and how <strong>the</strong>y should be represented in <strong>the</strong> given language. Message files have a .po file extension.3.14. Internationalization and localization 285
<strong>Django</strong> <strong>Documentation</strong>, Release 1.2translation string A literal that can be translated.3.14.3 Specialties of <strong>Django</strong> translation<strong>Django</strong>’s translation machinery uses <strong>the</strong> standard gettext module that comes with Python. If you know gettext,you might note <strong>the</strong>se specialties in <strong>the</strong> way <strong>Django</strong> does translation:• The string domain is django or djangojs. This string domain is used to differentiate between different programsthat store <strong>the</strong>ir data in a common message-file library (usually /usr/share/locale/). The djangodomain is used for python and template translation strings and is loaded into <strong>the</strong> global translation catalogs.The djangojs domain is only used for JavaScript translation catalogs to make sure that those are as small aspossible.• <strong>Django</strong> doesn’t use xgettext alone. It uses Python wrappers around xgettext and msgfmt. This is mostlyfor convenience.<strong>Django</strong> technical message IDsChanged in version 1.2: Starting with <strong>Django</strong> 1.2, technical message IDs are being replaced by Format localization<strong>Django</strong> uses technical message IDs to translate date formats and time formats. Technical message IDs are translationstrings and can be easily recognized; <strong>the</strong>y’re all upper case. You don’t translate <strong>the</strong> message ID as with o<strong>the</strong>r translationstrings, you provide <strong>the</strong> correct local variant on <strong>the</strong> provided English value. The format is identical to <strong>the</strong> format stringsused by <strong>the</strong> now template tag.For example, with DATETIME_FORMAT (or DATE_FORMAT or TIME_FORMAT), this would be <strong>the</strong> format stringthat you want to use in your language. A <strong>Django</strong> contributor localizing it to Spanish probably would provide a "j NY P" “translation” for it in <strong>the</strong> relevant django.po file:msgid "DATETIME_FORMAT"msgstr "j N Y P"3.15 PaginationChanged in version 1.0: Pagination facilities have been almost fully reworked. <strong>Django</strong> provides a few classes that helpyou manage paginated data – that is, data that’s split across several pages, with “Previous/Next” links. These classeslive in django/core/paginator.py.3.15.1 ExampleGive Paginator a list of objects, plus <strong>the</strong> number of items you’d like to have on each page, and it gives you methodsfor accessing <strong>the</strong> items for each page:>>> from django.core.paginator import Paginator>>> objects = [’john’, ’paul’, ’george’, ’ringo’]>>> p = Paginator(objects, 2)>>> p.count4>>> p.num_pages2>>> p.page_range[1, 2]286 Chapter 3. Using <strong>Django</strong>
<strong>Django</strong> <strong>Documentation</strong>, Release 1.2>>> page1 = p.page(1)>>> page1>>> page1.object_list[’john’, ’paul’]>>> page2 = p.page(2)>>> page2.object_list[’george’, ’ringo’]>>> page2.has_next()False>>> page2.has_previous()True>>> page2.has_o<strong>the</strong>r_pages()True>>> page2.next_page_number()3>>> page2.previous_page_number()1>>> page2.start_index() # The 1-based index of <strong>the</strong> first item on this page3>>> page2.end_index() # The 1-based index of <strong>the</strong> last item on this page4>>> p.page(0)Traceback (most recent call last):...EmptyPage: That page number is less than 1>>> p.page(3)Traceback (most recent call last):...EmptyPage: That page contains no resultsNote: Note that you can give Paginator a list/tuple, a <strong>Django</strong> QuerySet, or any o<strong>the</strong>r object with a count()or __len__() method. When determining <strong>the</strong> number of objects contained in <strong>the</strong> passed object, Paginator willfirst try calling count(), <strong>the</strong>n fallback to using len() if <strong>the</strong> passed object has no count() method. This allowsobjects such as <strong>Django</strong>’s QuerySet to use a more efficient count() method when available.3.15.2 Using Paginator in a viewHere’s a slightly more complex example using Paginator in a view to paginate a queryset. We give both <strong>the</strong>view and <strong>the</strong> accompanying template to show how you can display <strong>the</strong> results. This example assumes you have aContacts model that has already been imported.The view function looks like this:from django.core.paginator import Paginator, InvalidPage, EmptyPagedef listing(request):contact_list = Contacts.objects.all()paginator = Paginator(contact_list, 25) # Show 25 contacts per page# Make sure page request is an int. If not, deliver first page.try:page = int(request.GET.get(’page’, ’1’))3.15. Pagination 287
<strong>Django</strong> <strong>Documentation</strong>, Release 1.2except ValueError:page = 1# If page request (9999) is out of range, deliver last page of results.try:contacts = paginator.page(page)except (EmptyPage, InvalidPage):contacts = paginator.page(paginator.num_pages)return render_to_response(’list.html’, {"contacts": contacts})In <strong>the</strong> template list.html, you’ll want to include navigation between pages along with any interesting informationfrom <strong>the</strong> objects <strong>the</strong>mselves:{% for contact in contacts.object_list %}{# Each "contact" is a Contact model object. #}{{ contact.full_name|upper }}...{% endfor %}{% if contacts.has_previous %}previous{% endif %}Page {{ contacts.number }} of {{ contacts.paginator.num_pages }}.{% if contacts.has_next %}next{% endif %}3.15.3 Paginator objectsThe Paginator class has this constructor:class Paginator(object_list, per_page, orphans=0, allow_empty_first_page=True)Required argumentsobject_list A list, tuple, <strong>Django</strong> QuerySet, or o<strong>the</strong>r sliceable object with a count() or __len__() method.per_page The maximum number of items to include on a page, not including orphans (see <strong>the</strong> orphans optionalargument below).Optional argumentsorphans The minimum number of items allowed on <strong>the</strong> last page, defaults to zero. Use this when you don’t wantto have a last page with very few items. If <strong>the</strong> last page would normally have a number of items less than orequal to orphans, <strong>the</strong>n those items will be added to <strong>the</strong> previous page (which becomes <strong>the</strong> last page) instead288 Chapter 3. Using <strong>Django</strong>
<strong>Django</strong> <strong>Documentation</strong>, Release 1.2of leaving <strong>the</strong> items on a page by <strong>the</strong>mselves. For example, with 23 items, per_page=10, and orphans=3,<strong>the</strong>re will be two pages; <strong>the</strong> first page with 10 items and <strong>the</strong> second (and last) page with 13 items.allow_empty_first_page Whe<strong>the</strong>r or not <strong>the</strong> first page is allowed to be empty. If False and object_listis empty, <strong>the</strong>n an EmptyPage error will be raised.MethodsPaginator.page(number)Returns a Page object with <strong>the</strong> given 1-based index. Raises InvalidPage if <strong>the</strong> given page number doesn’texist.AttributesPaginator.countThe total number of objects, across all pages.Note: When determining <strong>the</strong> number of objects contained in object_list, Paginator will first try callingobject_list.count(). If object_list has no count() method, <strong>the</strong>n Paginator will fallback tousing object_list.__len__(). This allows objects, such as <strong>Django</strong>’s QuerySet, to use a more efficientcount() method when available.Paginator.num_pagesThe total number of pages.Paginator.page_rangeA 1-based range of page numbers, e.g., [1, 2, 3, 4].3.15.4 InvalidPage exceptionsThe page() method raises InvalidPage if <strong>the</strong> requested page is invalid (i.e., not an integer) or contains no objects.Generally, it’s enough to trap <strong>the</strong> InvalidPage exception, but if you’d like more granularity, you can trap ei<strong>the</strong>r of<strong>the</strong> following exceptions:PageNotAnInteger Raised when page() is given a value that isn’t an integer.EmptyPage Raised when page() is given a valid value but no objects exist on that page.Both of <strong>the</strong> exceptions are subclasses of InvalidPage, so you can handle <strong>the</strong>m both with a simple exceptInvalidPage.3.15.5 Page objectsclass Page(object_list, number, paginator)You usually won’t construct Pages by hand – you’ll get <strong>the</strong>m using Paginator.page().MethodsPage.has_next()Returns True if <strong>the</strong>re’s a next page.3.15. Pagination 289
<strong>Django</strong> <strong>Documentation</strong>, Release 1.2Page.has_previous()Returns True if <strong>the</strong>re’s a previous page.Page.has_o<strong>the</strong>r_pages()Returns True if <strong>the</strong>re’s a next or previous page.Page.next_page_number()Returns <strong>the</strong> next page number. Note that this is “dumb” and will return <strong>the</strong> next page number regardless ofwhe<strong>the</strong>r a subsequent page exists.Page.previous_page_number()Returns <strong>the</strong> previous page number. Note that this is “dumb” and will return <strong>the</strong> previous page number regardlessof whe<strong>the</strong>r a previous page exists.Page.start_index()Returns <strong>the</strong> 1-based index of <strong>the</strong> first object on <strong>the</strong> page, relative to all of <strong>the</strong> objects in <strong>the</strong> paginator’s list.For example, when paginating a list of 5 objects with 2 objects per page, <strong>the</strong> second page’s start_index()would return 3.Page.end_index()Returns <strong>the</strong> 1-based index of <strong>the</strong> last object on <strong>the</strong> page, relative to all of <strong>the</strong> objects in <strong>the</strong> paginator’s list. Forexample, when paginating a list of 5 objects with 2 objects per page, <strong>the</strong> second page’s end_index() wouldreturn 4.AttributesPage.object_listThe list of objects on this page.Page.numberThe 1-based page number for this page.Page.paginatorThe associated Paginator object.3.16 Serializing <strong>Django</strong> objects<strong>Django</strong>’s serialization framework provides a mechanism for “translating” <strong>Django</strong> objects into o<strong>the</strong>r formats. Usually<strong>the</strong>se o<strong>the</strong>r formats will be text-based and used for sending <strong>Django</strong> objects over a wire, but it’s possible for a serializerto handle any format (text-based or not).See Also:If you just want to get some data from your tables into a serialized form, you could use <strong>the</strong> dumpdata managementcommand.3.16.1 Serializing dataAt <strong>the</strong> highest level, serializing data is a very simple operation:from django.core import serializersdata = serializers.serialize("xml", SomeModel.objects.all())The arguments to <strong>the</strong> serialize function are <strong>the</strong> format to serialize <strong>the</strong> data to (see Serialization formats) and aQuerySet to serialize. (Actually, <strong>the</strong> second argument can be any iterator that yields <strong>Django</strong> objects, but it’ll almostalways be a QuerySet).290 Chapter 3. Using <strong>Django</strong>
<strong>Django</strong> <strong>Documentation</strong>, Release 1.2You can also use a serializer object directly:XMLSerializer = serializers.get_serializer("xml")xml_serializer = XMLSerializer()xml_serializer.serialize(queryset)data = xml_serializer.getvalue()This is useful if you want to serialize data directly to a file-like object (which includes an HttpResponse):out = open("file.xml", "w")xml_serializer.serialize(SomeModel.objects.all(), stream=out)Subset of fieldsIf you only want a subset of fields to be serialized, you can specify a fields argument to <strong>the</strong> serializer:from django.core import serializersdata = serializers.serialize(’xml’, SomeModel.objects.all(), fields=(’name’,’size’))In this example, only <strong>the</strong> name and size attributes of each model will be serialized.Note: Depending on your model, you may find that it is not possible to deserialize a model that only serializes asubset of its fields. If a serialized object doesn’t specify all <strong>the</strong> fields that are required by a model, <strong>the</strong> deserializer willnot be able to save deserialized instances.Inherited ModelsIf you have a model that is defined using an abstract base class, you don’t have to do anything special to serialize thatmodel. Just call <strong>the</strong> serializer on <strong>the</strong> object (or objects) that you want to serialize, and <strong>the</strong> output will be a completerepresentation of <strong>the</strong> serialized object.However, if you have a model that uses multi-table inheritance, you also need to serialize all of <strong>the</strong> base classes for <strong>the</strong>model. This is because only <strong>the</strong> fields that are locally defined on <strong>the</strong> model will be serialized. For example, consider<strong>the</strong> following models:class Place(models.Model):name = models.CharField(max_length=50)class Restaurant(Place):serves_hot_dogs = models.BooleanField()If you only serialize <strong>the</strong> Restaurant model:data = serializers.serialize(’xml’, Restaurant.objects.all())<strong>the</strong> fields on <strong>the</strong> serialized output will only contain <strong>the</strong> serves_hot_dogs attribute. The name attribute of <strong>the</strong> base classwill be ignored.In order to fully serialize your Restaurant instances, you will need to serialize <strong>the</strong> Place models as well:all_objects = list(Restaurant.objects.all()) + list(Place.objects.all())data = serializers.serialize(’xml’, all_objects)3.16. Serializing <strong>Django</strong> objects 291
<strong>Django</strong> <strong>Documentation</strong>, Release 1.23.16.2 Deserializing dataDeserializing data is also a fairly simple operation:for obj in serializers.deserialize("xml", data):do_something_with(obj)As you can see, <strong>the</strong> deserialize function takes <strong>the</strong> same format argument as serialize, a string or stream ofdata, and returns an iterator.However, here it gets slightly complicated. The objects returned by <strong>the</strong> deserialize iterator aren’t simple <strong>Django</strong>objects. Instead, <strong>the</strong>y are special DeserializedObject instances that wrap a created – but unsaved – object andany associated relationship data.Calling DeserializedObject.save() saves <strong>the</strong> object to <strong>the</strong> database.This ensures that deserializing is a non-destructive operation even if <strong>the</strong> data in your serialized representation doesn’tmatch what’s currently in <strong>the</strong> database. Usually, working with <strong>the</strong>se DeserializedObject instances looks somethinglike:for deserialized_object in serializers.deserialize("xml", data):if object_should_be_saved(deserialized_object):deserialized_object.save()In o<strong>the</strong>r words, <strong>the</strong> usual use is to examine <strong>the</strong> deserialized objects to make sure that <strong>the</strong>y are “appropriate” for savingbefore doing so. Of course, if you trust your data source you could just save <strong>the</strong> object and move on.The <strong>Django</strong> object itself can be inspected as deserialized_object.object.3.16.3 Serialization formats<strong>Django</strong> supports a number of serialization formats, some of which require you to install third-party Python modules:IdentifierxmljsonyamlInformationSerializes to and from a simple XML dialect.Serializes to and from JSON (using a version of simplejson bundled with <strong>Django</strong>).Serializes to YAML (YAML Ain’t a Markup Language). This serializer is only available if PyYAMLis installed.Notes for specific serialization formatsjsonIf you’re using UTF-8 (or any o<strong>the</strong>r non-ASCII encoding) data with <strong>the</strong> JSON serializer, you must passensure_ascii=False as a parameter to <strong>the</strong> serialize() call. O<strong>the</strong>rwise, <strong>the</strong> output won’t be encoded correctly.For example:json_serializer = serializers.get_serializer("json")()json_serializer.serialize(queryset, ensure_ascii=False, stream=response)The <strong>Django</strong> source code includes <strong>the</strong> simplejson module. However, if you’re using Python 2.6 or later (which includesa builtin version of <strong>the</strong> module), <strong>Django</strong> will use <strong>the</strong> builtin json module automatically. If you have a system installedversion that includes <strong>the</strong> C-based speedup extension, or your system version is more recent than <strong>the</strong> version shippedwith <strong>Django</strong> (currently, 2.0.7), <strong>the</strong> system version will be used instead of <strong>the</strong> version included with <strong>Django</strong>.292 Chapter 3. Using <strong>Django</strong>
<strong>Django</strong> <strong>Documentation</strong>, Release 1.2Be aware that if you’re serializing using that module directly, not all <strong>Django</strong> output can be passed unmodified tosimplejson. In particular, lazy translation objects need a special encoder written for <strong>the</strong>m. Something like this willwork:from django.utils.functional import Promisefrom django.utils.encoding import force_unicodeclass LazyEncoder(simplejson.JSONEncoder):def default(self, obj):if isinstance(obj, Promise):return force_unicode(obj)return super(LazyEncoder, self).default(obj)3.16.4 Natural keysNew in version 1.2: Please, see <strong>the</strong> release notes The default serialization strategy for foreign keys and many-to-manyrelations is to serialize <strong>the</strong> value of <strong>the</strong> primary key(s) of <strong>the</strong> objects in <strong>the</strong> relation. This strategy works well for mosttypes of object, but it can cause difficulty in some circumstances.Consider <strong>the</strong> case of a list of objects that have foreign key on ContentType. If you’re going to serialize an objectthat refers to a content type, you need to have a way to refer to that content type. Content Types are automaticallycreated by <strong>Django</strong> as part of <strong>the</strong> database synchronization process, so you don’t need to include content types in afixture or o<strong>the</strong>r serialized data. As a result, <strong>the</strong> primary key of any given content type isn’t easy to predict - it willdepend on how and when syncdb was executed to create <strong>the</strong> content types.There is also <strong>the</strong> matter of convenience. An integer id isn’t always <strong>the</strong> most convenient way to refer to an object;sometimes, a more natural reference would be helpful.It is for <strong>the</strong>se reasons that <strong>Django</strong> provides natural keys. A natural key is a tuple of values that can be used to uniquelyidentify an object instance without using <strong>the</strong> primary key value.Deserialization of natural keysConsider <strong>the</strong> following two models:from django.db import modelsclass Person(models.Model):first_name = models.CharField(max_length=100)last_name = models.CharField(max_length=100)birthdate = models.DateField()class Meta:unique_toge<strong>the</strong>r = ((’first_name’, ’last_name’),)class Book(models.Model):name = models.CharField(max_length=100)author = models.ForeignKey(Person)Ordinarily, serialized data for Book would use an integer to refer to <strong>the</strong> author. For example, in JSON, a Book mightbe serialized as:...{"pk": 1,"model": "store.book",3.16. Serializing <strong>Django</strong> objects 293
<strong>Django</strong> <strong>Documentation</strong>, Release 1.2}..."fields": {"name": "Mostly Harmless","author": 42}This isn’t a particularly natural way to refer to an author. It requires that you know <strong>the</strong> primary key value for <strong>the</strong>author; it also requires that this primary key value is stable and predictable.However, if we add natural key handling to Person, <strong>the</strong> fixture becomes much more humane. To add natural keyhandling, you define a default Manager for Person with a get_by_natural_key() method. In <strong>the</strong> case of aPerson, a good natural key might be <strong>the</strong> pair of first and last name:from django.db import modelsclass PersonManager(models.Manager):def get_by_natural_key(self, first_name, last_name):return self.get(first_name=first_name, last_name=last_name)class Person(models.Model):objects = PersonManager()first_name = models.CharField(max_length=100)last_name = models.CharField(max_length=100)birthdate = models.DateField()class Meta:unique_toge<strong>the</strong>r = ((’first_name’, ’last_name’),)Now books can use that natural key to refer to Person objects:...{"pk": 1,"model": "store.book","fields": {"name": "Mostly Harmless","author": ["Douglas", "Adams"]}}...When you try to load this serialized data, <strong>Django</strong> will use <strong>the</strong> get_by_natural_key() method to resolve["Douglas", "Adams"] into <strong>the</strong> primary key of an actual Person object.Note: Whatever fields you use for a natural key must be able to uniquely identify an object. This will usually meanthat your model will have a uniqueness clause (ei<strong>the</strong>r unique=True on a single field, or unique_toge<strong>the</strong>r overmultiple fields) for <strong>the</strong> field or fields in your natural key. However, uniqueness doesn’t need to be enforced at <strong>the</strong>database level. If you are certain that a set of fields will be effectively unique, you can still use those fields as a naturalkey.Serialization of natural keysSo how do you get <strong>Django</strong> to emit a natural key when serializing an object? Firstly, you need to add ano<strong>the</strong>r method– this time to <strong>the</strong> model itself:294 Chapter 3. Using <strong>Django</strong>
<strong>Django</strong> <strong>Documentation</strong>, Release 1.2class Person(models.Model):objects = PersonManager()first_name = models.CharField(max_length=100)last_name = models.CharField(max_length=100)birthdate = models.DateField()def natural_key(self):return (self.first_name, self.last_name)class Meta:unique_toge<strong>the</strong>r = ((’first_name’, ’last_name’),)That method should always return a natural key tuple – in this example, (first name, last name). Then,when you call serializers.serialize(), you provide a use_natural_keys=True argument:>>> serializers.serialize(’json’, [book1, book2], indent=2, use_natural_keys=True)When use_natural_keys=True is specified, <strong>Django</strong> will use <strong>the</strong> natural_key() method to serialize anyreference to objects of <strong>the</strong> type that defines <strong>the</strong> method.If you are using dumpdata to generate serialized data, you use <strong>the</strong> –natural command line flag to generate naturalkeys.Note: You don’t need to define both natural_key() and get_by_natural_key(). If you don’t want <strong>Django</strong>to output natural keys during serialization, but you want to retain <strong>the</strong> ability to load natural keys, <strong>the</strong>n you can opt tonot implement <strong>the</strong> natural_key() method.Conversely, if (for some strange reason) you want <strong>Django</strong> to output natural keys during serialization, but not be ableto load those key values, just don’t define <strong>the</strong> get_by_natural_key() method.Dependencies during serializationSince natural keys rely on database lookups to resolve references, it is important that data exists before it is referenced.You can’t make a forward reference with natural keys - <strong>the</strong> data you are referencing must exist before you include anatural key reference to that data.To accommodate this limitation, calls to dumpdata that use <strong>the</strong> --natural option will serialize any model with anatural_key() method before it serializes normal key objects.However, this may not always be enough. If your natural key refers to ano<strong>the</strong>r object (by using a foreign key or naturalkey to ano<strong>the</strong>r object as part of a natural key), <strong>the</strong>n you need to be able to ensure that <strong>the</strong> objects on which a naturalkey depends occur in <strong>the</strong> serialized data before <strong>the</strong> natural key requires <strong>the</strong>m.To control this ordering, you can define dependencies on your natural_key() methods. You do this by setting adependencies attribute on <strong>the</strong> natural_key() method itself.For example, consider <strong>the</strong> Permission model in contrib.auth. The following is a simplified version of <strong>the</strong>Permission model:class Permission(models.Model):name = models.CharField(max_length=50)content_type = models.ForeignKey(ContentType)codename = models.CharField(max_length=100)# ...3.16. Serializing <strong>Django</strong> objects 295
<strong>Django</strong> <strong>Documentation</strong>, Release 1.2def natural_key(self):return (self.codename,) + self.content_type.natural_key()The natural key for a Permission is a combination of <strong>the</strong> codename for <strong>the</strong> Permission, and <strong>the</strong> ContentTypeto which <strong>the</strong> Permission applies. This means that ContentType must be serialized before Permission. Todefine this dependency, we add one extra line:class Permission(models.Model):# ...def natural_key(self):return (self.codename,) + self.content_type.natural_key()natural_key.dependencies = [’contenttypes.contenttype’]This definition ensures that ContentType models are serialized before Permission models. In turn, any objectreferencing Permission will be serialized after both ContentType and Permission.3.17 <strong>Django</strong> settingsA <strong>Django</strong> settings file contains all <strong>the</strong> configuration of your <strong>Django</strong> installation. This document explains how settingswork and which settings are available.3.17.1 The basicsA settings file is just a Python module with module-level variables.Here are a couple of example settings:DEBUG = FalseDEFAULT_FROM_EMAIL = ’webmaster@example.com’TEMPLATE_DIRS = (’/home/templates/mike’, ’/home/templates/john’)Because a settings file is a Python module, <strong>the</strong> following apply:• It doesn’t allow for Python syntax errors.• It can assign settings dynamically using normal Python syntax. For example:MY_SETTING = [str(i) for i in range(30)]• It can import values from o<strong>the</strong>r settings files.3.17.2 Designating <strong>the</strong> settingsWhen you use <strong>Django</strong>, you have to tell it which settings you’re using. Do this by using an environment variable,DJANGO_SETTINGS_MODULE.The value of DJANGO_SETTINGS_MODULE should be in Python path syntax, e.g. mysite.settings. Note that<strong>the</strong> settings module should be on <strong>the</strong> Python import search path.The django-admin.py utilityWhen using django-admin.py, you can ei<strong>the</strong>r set <strong>the</strong> environment variable once, or explicitly pass in <strong>the</strong> settingsmodule each time you run <strong>the</strong> utility.Example (Unix Bash shell):296 Chapter 3. Using <strong>Django</strong>
<strong>Django</strong> <strong>Documentation</strong>, Release 1.2export DJANGO_SETTINGS_MODULE=mysite.settingsdjango-admin.py runserverExample (Windows shell):set DJANGO_SETTINGS_MODULE=mysite.settingsdjango-admin.py runserverUse <strong>the</strong> --settings command-line argument to specify <strong>the</strong> settings manually:django-admin.py runserver --settings=mysite.settingsOn <strong>the</strong> server (mod_python)In your live server environment, you’ll need to tell Apache/mod_python which settings file to use. Do that withSetEnv:SetHandler python-programPythonHandler django.core.handlers.modpythonSetEnv DJANGO_SETTINGS_MODULE mysite.settings<strong>Read</strong> <strong>the</strong> <strong>Django</strong> mod_python documentation for more information.3.17.3 Default settingsA <strong>Django</strong> settings file doesn’t have to define any settings if it doesn’t need to. Each setting has a sensible default value.These defaults live in <strong>the</strong> module django/conf/global_settings.py.Here’s <strong>the</strong> algorithm <strong>Django</strong> uses in compiling settings:• Load settings from global_settings.py.• Load settings from <strong>the</strong> specified settings file, overriding <strong>the</strong> global settings as necessary.Note that a settings file should not import from global_settings, because that’s redundant.Seeing which settings you’ve changedThere’s an easy way to view which of your settings deviate from <strong>the</strong> default settings. The command pythonmanage.py diffsettings displays differences between <strong>the</strong> current settings file and <strong>Django</strong>’s default settings.For more, see <strong>the</strong> diffsettings documentation.3.17.4 Using settings in Python codeIn your <strong>Django</strong> apps, use settings by importing <strong>the</strong> object django.conf.settings. Example:from django.conf import settingsif settings.DEBUG:# Do somethingNote that django.conf.settings isn’t a module – it’s an object. So importing individual settings is not possible:3.17. <strong>Django</strong> settings 297
<strong>Django</strong> <strong>Documentation</strong>, Release 1.2from django.conf.settings import DEBUG# This won’t work.Also note that your code should not import from ei<strong>the</strong>r global_settings or your own settings file.django.conf.settings abstracts <strong>the</strong> concepts of default settings and site-specific settings; it presents a singleinterface. It also decouples <strong>the</strong> code that uses settings from <strong>the</strong> location of your settings.3.17.5 Altering settings at runtimeYou shouldn’t alter settings in your applications at runtime. For example, don’t do this in a view:from django.conf import settingssettings.DEBUG = True# Don’t do this!The only place you should assign to settings is in a settings file.3.17.6 SecurityBecause a settings file contains sensitive information, such as <strong>the</strong> database password, you should make every attemptto limit access to it. For example, change its file permissions so that only you and your Web server’s user can read it.This is especially important in a shared-hosting environment.3.17.7 Available settingsFor a full list of available settings, see <strong>the</strong> settings reference.3.17.8 Creating your own settingsThere’s nothing stopping you from creating your own settings, for your own <strong>Django</strong> apps. Just follow <strong>the</strong>se conventions:• Setting names are in all uppercase.• Don’t reinvent an already-existing setting.For settings that are sequences, <strong>Django</strong> itself uses tuples, ra<strong>the</strong>r than lists, but this is only a convention.3.17.9 Using settings without setting DJANGO_SETTINGS_MODULEIn some cases, you might want to bypass <strong>the</strong> DJANGO_SETTINGS_MODULE environment variable. For example, ifyou’re using <strong>the</strong> template system by itself, you likely don’t want to have to set up an environment variable pointing toa settings module.In <strong>the</strong>se cases, you can configure <strong>Django</strong>’s settings manually. Do this by calling:django.conf.settings.configure(default_settings, **settings)Example:from django.conf import settingssettings.configure(DEBUG=True, TEMPLATE_DEBUG=True,TEMPLATE_DIRS=(’/home/web-apps/myapp’, ’/home/web-apps/base’))298 Chapter 3. Using <strong>Django</strong>
<strong>Django</strong> <strong>Documentation</strong>, Release 1.2Pass configure() as many keyword arguments as you’d like, with each keyword argument representing a settingand its value. Each argument name should be all uppercase, with <strong>the</strong> same name as <strong>the</strong> settings described above. If aparticular setting is not passed to configure() and is needed at some later point, <strong>Django</strong> will use <strong>the</strong> default settingvalue.Configuring <strong>Django</strong> in this fashion is mostly necessary – and, indeed, recommended – when you’re using a piece of<strong>the</strong> framework inside a larger application.Consequently, when configured via settings.configure(), <strong>Django</strong> will not make any modifications to <strong>the</strong>process environment variables (see <strong>the</strong> documentation of TIME_ZONE for why this would normally occur). It’sassumed that you’re already in full control of your environment in <strong>the</strong>se cases.Custom default settingsIf you’d like default values to come from somewhere o<strong>the</strong>r than django.conf.global_settings, you can passin a module or class that provides <strong>the</strong> default settings as <strong>the</strong> default_settings argument (or as <strong>the</strong> first positionalargument) in <strong>the</strong> call to configure().In this example, default settings are taken from myapp_defaults, and <strong>the</strong> DEBUG setting is set to True, regardlessof its value in myapp_defaults:from django.conf import settingsfrom myapp import myapp_defaultssettings.configure(default_settings=myapp_defaults, DEBUG=True)The following example, which uses myapp_defaults as a positional argument, is equivalent:settings.configure(myapp_defaults, DEBUG = True)Normally, you will not need to override <strong>the</strong> defaults in this fashion. The <strong>Django</strong> defaults are sufficiently tame that youcan safely use <strong>the</strong>m. Be aware that if you do pass in a new default module, it entirely replaces <strong>the</strong> <strong>Django</strong> defaults,so you must specify a value for every possible setting that might be used in that code you are importing. Check indjango.conf.settings.global_settings for <strong>the</strong> full list.Ei<strong>the</strong>r configure() or DJANGO_SETTINGS_MODULE is requiredIf you’re not setting <strong>the</strong> DJANGO_SETTINGS_MODULE environment variable, you must call configure() at somepoint before using any code that reads settings.If you don’t set DJANGO_SETTINGS_MODULE and don’t call configure(), <strong>Django</strong> will raise an ImportErrorexception <strong>the</strong> first time a setting is accessed.If you set DJANGO_SETTINGS_MODULE, access settings values somehow, <strong>the</strong>n call configure(), <strong>Django</strong> willraise a RuntimeError indicating that settings have already been configured.Also, it’s an error to call configure() more than once, or to call configure() after any setting has beenaccessed.It boils down to this: Use exactly one of ei<strong>the</strong>r configure() or DJANGO_SETTINGS_MODULE. Not both, andnot nei<strong>the</strong>r.3.18 Signals<strong>Django</strong> includes a “signal dispatcher” which helps allow decoupled applications get notified when actions occur elsewherein <strong>the</strong> framework. In a nutshell, signals allow certain senders to notify a set of receivers that some action has3.18. Signals 299
<strong>Django</strong> <strong>Documentation</strong>, Release 1.2taken place. They’re especially useful when many pieces of code may be interested in <strong>the</strong> same events.<strong>Django</strong> provides a set of built-in signals that let user code get notified by <strong>Django</strong> itself of certain actions. These includesome useful notifications:• django.db.models.signals.pre_save & django.db.models.signals.post_saveSent before or after a model’s save() method is called.• django.db.models.signals.pre_delete & django.db.models.signals.post_deleteSent before or after a model’s delete() method is called.• django.db.models.signals.m2m_changedSent when a ManyToManyField on a model is changed.• django.core.signals.request_started & django.core.signals.request_finishedSent when <strong>Django</strong> starts or finishes an HTTP request.See <strong>the</strong> built-in signal documentation for a complete list, and a complete explanation of each signal.You can also define and send your own custom signals; see below.3.18.1 Listening to signalsTo receive a signal, you need to register a receiver function that gets called when <strong>the</strong> signal is sent by using <strong>the</strong>Signal.connect() method:Signal.connect(receiver[, sender=None, weak=True, dispatch_uid=None])Parameters• receiver – The callback function which will be connected to this signal. See Receiver functionsfor more information.• sender – Specifies a particular sender to receive signals from. See Connecting to signalssent by specific senders for more information.• weak – <strong>Django</strong> stores signal handlers as weak references by default. Thus, if your receiveris a local function, it may be garbage collected. To prevent this, pass weak=False whenyou call <strong>the</strong> signal’s connect() method.• dispatch_uid – A unique identifier for a signal receiver in cases where duplicate signalsmay be sent. See Preventing duplicate signals for more information.Let’s see how this works by registering a signal that gets called after each HTTP request is finished. We’ll be connectingto <strong>the</strong> request_finished signal.Receiver functionsFirst, we need to define a receiver function. A receiver can be any Python function or method:def my_callback(sender, **kwargs):print "Request finished!"Notice that <strong>the</strong> function takes a sender argument, along with wildcard keyword arguments (**kwargs); all signalhandlers must take <strong>the</strong>se arguments.We’ll look at senders a bit later, but right now look at <strong>the</strong> **kwargs argument. All signals send keyword arguments,and may change those keyword arguments at any time. In <strong>the</strong> case of request_finished, it’s documented assending no arguments, which means we might be tempted to write our signal handling as my_callback(sender).300 Chapter 3. Using <strong>Django</strong>
<strong>Django</strong> <strong>Documentation</strong>, Release 1.2This would be wrong – in fact, <strong>Django</strong> will throw an error if you do so. That’s because at any point arguments couldget added to <strong>the</strong> signal and your receiver must be able to handle those new arguments.Connecting receiver functionsNext, we’ll need to connect our receiver to <strong>the</strong> signal:from django.core.signals import request_finishedrequest_finished.connect(my_callback)Now, our my_callback function will be called each time a request finishes.Where should this code live?You can put signal handling and registration code anywhere you like. However, you’ll need to make sure that <strong>the</strong>module it’s in gets imported early on so that <strong>the</strong> signal handling gets registered before any signals need to be sent. Thismakes your app’s models.py a good place to put registration of signal handlers.Connecting to signals sent by specific sendersSome signals get sent many times, but you’ll only be interested in receiving a certain subset of those signals. Forexample, consider <strong>the</strong> django.db.models.signals.pre_save signal sent before a model gets saved. Mostof <strong>the</strong> time, you don’t need to know when any model gets saved – just when one specific model is saved.In <strong>the</strong>se cases, you can register to receive signals sent only by particular senders. In <strong>the</strong> case ofdjango.db.models.signals.pre_save, <strong>the</strong> sender will be <strong>the</strong> model class being saved, so you can indicatethat you only want signals sent by some model:from django.db.models.signals import pre_savefrom myapp.models import MyModeldef my_handler(sender, **kwargs):...pre_save.connect(my_handler, sender=MyModel)The my_handler function will only be called when an instance of MyModel is saved.Different signals use different objects as <strong>the</strong>ir senders; you’ll need to consult <strong>the</strong> built-in signal documentation fordetails of each particular signal.Preventing duplicate signalsIn some circumstances, <strong>the</strong> module in which you are connecting signals may be imported multiple times. This cancause your receiver function to be registered more than once, and thus called multiples times for a single signal event.If this behavior is problematic (such as when using signals to send an e-mail whenever a model is saved), pass a uniqueidentifier as <strong>the</strong> dispatch_uid argument to identify your receiver function. This identifier will usually be a string,although any hashable object will suffice. The end result is that your receiver function will only be bound to <strong>the</strong> signalonce for each unique dispatch_uid value.from django.core.signals import request_finishedrequest_finished.connect(my_callback, dispatch_uid="my_unique_identifier")3.18. Signals 301
<strong>Django</strong> <strong>Documentation</strong>, Release 1.23.18.2 Defining and sending signalsYour applications can take advantage of <strong>the</strong> signal infrastructure and provide its own signals.Defining signalsclass Signal([providing_args=list])All signals are django.dispatch.Signal instances. The providing_args is a list of <strong>the</strong> names of arguments<strong>the</strong> signal will provide to listeners.For example:import django.dispatchpizza_done = django.dispatch.Signal(providing_args=["toppings", "size"])This declares a pizza_done signal that will provide receivers with toppings and size arguments.Remember that you’re allowed to change this list of arguments at any time, so getting <strong>the</strong> API right on <strong>the</strong> first try isn’tnecessary.Sending signalsThere are two ways to send send signals in <strong>Django</strong>.Signal.send(sender, **kwargs)Signal.send_robust(sender, **kwargs)To send a signal, call ei<strong>the</strong>r Signal.send() or Signal.send_robust(). You must provide <strong>the</strong> senderargument, and may provide as many o<strong>the</strong>r keyword arguments as you like.For example, here’s how sending our pizza_done signal might look:class PizzaStore(object):...def send_pizza(self, toppings, size):pizza_done.send(sender=self, toppings=toppings, size=size)...], repre-Both send() and send_robust() return a list of tuple pairs [(receiver, response), ...senting <strong>the</strong> list of called receiver functions and <strong>the</strong>ir response values.send() differs from send_robust() in how exceptions raised by receiver functions are handled. send() doesnot catch any exceptions raised by receivers; it simply allows errors to propagate. Thus not all receivers may benotified of a signal in <strong>the</strong> face of an error.send_robust() catches all errors derived from Python’s Exception class, and ensures all receivers are notifiedof <strong>the</strong> signal. If an error occurs, <strong>the</strong> error instance is returned in <strong>the</strong> tuple pair for <strong>the</strong> receiver that raised <strong>the</strong> error.3.18.3 Disconnecting signalsSignal.disconnect([receiver=None, sender=None, weak=True, dispatch_uid=None])302 Chapter 3. Using <strong>Django</strong>
<strong>Django</strong> <strong>Documentation</strong>, Release 1.2To disconnect a receiver from a signal, call Signal.disconnect().Signal.connect().The arguments are as described inThe receiver argument indicates <strong>the</strong> registered receiver to disconnect. It may be None if dispatch_uid is used toidentify <strong>the</strong> receiver.3.18. Signals 303
<strong>Django</strong> <strong>Documentation</strong>, Release 1.2304 Chapter 3. Using <strong>Django</strong>
CHAPTERFOUR“HOW-TO” GUIDESHere you’ll find short answers to “How do I....?” types of questions. These how-to guides don’t cover topics in depth– you’ll find that material in <strong>the</strong> Using <strong>Django</strong> and <strong>the</strong> API Reference. However, <strong>the</strong>se guides will help you quicklyaccomplish common tasks.4.1 Au<strong>the</strong>nticating against <strong>Django</strong>’s user database from ApacheSince keeping multiple au<strong>the</strong>ntication databases in sync is a common problem when dealing with Apache, you canconfiguring Apache to au<strong>the</strong>nticate against <strong>Django</strong>’s au<strong>the</strong>ntication system directly. For example, you could:• Serve static/media files directly from Apache only to au<strong>the</strong>nticated users.• Au<strong>the</strong>nticate access to a Subversion repository against <strong>Django</strong> users with a certain permission.• Allow certain users to connect to a WebDAV share created with mod_dav.4.1.1 Configuring ApacheTo check against <strong>Django</strong>’s authorization database from a Apache configuration file, you’ll need to use mod_python’sPythonAu<strong>the</strong>nHandler directive along with <strong>the</strong> standard Auth* and Require directives:AuthType BasicAuthName "example.com"Require valid-userSetEnv DJANGO_SETTINGS_MODULE mysite.settingsPythonAu<strong>the</strong>nHandler django.contrib.auth.handlers.modpythonUsing <strong>the</strong> au<strong>the</strong>ntication handler with Apache 2.2If you’re using Apache 2.2, you’ll need to take a couple extra steps.You’ll need to ensure that mod_auth_basic and mod_authz_user are loaded. These might be compiled staticallyinto Apache, or you might need to use LoadModule to load <strong>the</strong>m dynamically (as shown in <strong>the</strong> example at <strong>the</strong>bottom of this note).You’ll also need to insert configuration directives that prevent Apache from trying to use o<strong>the</strong>r au<strong>the</strong>ntication modules,as well as specifying <strong>the</strong> AuthUserFile directive and pointing it to /dev/null. Depending on which o<strong>the</strong>rau<strong>the</strong>ntication modules you have loaded, you might need one or more of <strong>the</strong> following directives:305
<strong>Django</strong> <strong>Documentation</strong>, Release 1.2AuthBasicAuthoritative OffAuthDefaultAuthoritative OffAuthzLDAPAuthoritative OffAuthzDBMAuthoritative OffAuthzDefaultAuthoritative OffAuthzGroupFileAuthoritative OffAuthzOwnerAuthoritative OffAuthzUserAuthoritative OffA complete configuration, with differences between Apache 2.0 and Apache 2.2 marked in bold, would look somethinglike:LoadModule auth_basic_module modules/mod_auth_basic.soLoadModule authz_user_module modules/mod_authz_user.so...AuthType BasicAuthName "example.com"AuthUserFile /dev/nullAuthBasicAuthoritative OffRequire valid-userSetEnv DJANGO_SETTINGS_MODULE mysite.settingsPythonAu<strong>the</strong>nHandler django.contrib.auth.handlers.modpythonBy default, <strong>the</strong> au<strong>the</strong>ntication handler will limit access to <strong>the</strong> /example/ location to users marked as staff members.You can use a set of PythonOption directives to modify this behavior:PythonOption Explanation<strong>Django</strong>RequireStaffStatus If set to on only “staff” users (i.e. those with <strong>the</strong> is_staff flag set) will be allowed.Defaults to on.<strong>Django</strong>RequireSuperuserStatusIf set to on only superusers (i.e. those with <strong>the</strong> is_superuser flag set) will beallowed.Defaults to off.<strong>Django</strong>PermissionNameThe name of a permission to require for access. See custom permissions for moreinformation.By default no specific permission will be required.Note that sometimes SetEnv doesn’t play well in this mod_python configuration, for reasons unknown. Ifyou’re having problems getting mod_python to recognize your DJANGO_SETTINGS_MODULE, you can set it usingPythonOption instead of SetEnv. Therefore, <strong>the</strong>se two Apache directives are equivalent:SetEnv DJANGO_SETTINGS_MODULE mysite.settingsPythonOption DJANGO_SETTINGS_MODULE mysite.settings4.2 Au<strong>the</strong>ntication using REMOTE_USERThis document describes how to make use of external au<strong>the</strong>ntication sources (where <strong>the</strong> Web server sets <strong>the</strong>REMOTE_USER environment variable) in your <strong>Django</strong> applications. This type of au<strong>the</strong>ntication solution is typicallyseen on intranet sites, with single sign-on solutions such as IIS and Integrated Windows Au<strong>the</strong>ntication or Apache andmod_authnz_ldap, CAS, Cosign, WebAuth, mod_auth_sspi, etc.306 Chapter 4. “How-to” guides
<strong>Django</strong> <strong>Documentation</strong>, Release 1.2When <strong>the</strong> Web server takes care of au<strong>the</strong>ntication it typically sets <strong>the</strong> REMOTE_USER environment variable foruse in <strong>the</strong> underlying application. In <strong>Django</strong>, REMOTE_USER is made available in <strong>the</strong> request.META attribute.<strong>Django</strong> can be configured to make use of <strong>the</strong> REMOTE_USER value using <strong>the</strong> RemoteUserMiddleware andRemoteUserBackend classes found in django.contrib.auth.4.2.1 ConfigurationFirst, you must add <strong>the</strong> django.contrib.auth.middleware.RemoteUserMiddleware to <strong>the</strong>MIDDLEWARE_CLASSES setting after <strong>the</strong> django.contrib.auth.middleware.Au<strong>the</strong>nticationMiddleware:MIDDLEWARE_CLASSES = (...’django.contrib.auth.middleware.Au<strong>the</strong>nticationMiddleware’,’django.contrib.auth.middleware.RemoteUserMiddleware’,...)Next, you must replace <strong>the</strong> ModelBackend with RemoteUserBackend in <strong>the</strong> AUTHENTICATION_BACKENDSsetting:AUTHENTICATION_BACKENDS = (’django.contrib.auth.backends.RemoteUserBackend’,)With this setup, RemoteUserMiddleware will detect <strong>the</strong> username in request.META[’REMOTE_USER’]and will au<strong>the</strong>nticate and auto-login that user using <strong>the</strong> RemoteUserBackend.Note: Since <strong>the</strong> RemoteUserBackend inherits from ModelBackend, you will still have all of <strong>the</strong> same permissionschecking that is implemented in ModelBackend.If your au<strong>the</strong>ntication mechanism uses a custom HTTP header and not REMOTE_USER, you can subclassRemoteUserMiddleware and set <strong>the</strong> header attribute to <strong>the</strong> desired request.META key. For example:from django.contrib.auth.middleware import RemoteUserMiddlewareclass CustomHeaderMiddleware(RemoteUserMiddleware):header = ’HTTP_AUTHUSER’4.2.2 RemoteUserBackendclass django.contrib.auth.backends.RemoteUserBackendIf you need more control, you can create your own au<strong>the</strong>ntication backend that inherits from RemoteUserBackendand overrides certain parts:AttributesRemoteUserBackend.create_unknown_userTrue or False. Determines whe<strong>the</strong>r or not a User object is created if not already in <strong>the</strong> database. Defaultsto True.4.2. Au<strong>the</strong>ntication using REMOTE_USER 307
<strong>Django</strong> <strong>Documentation</strong>, Release 1.2MethodsRemoteUserBackend.clean_username(username)Performs any cleaning on <strong>the</strong> username (e.g. stripping LDAP DN information) prior to using it to get or createa User object. Returns <strong>the</strong> cleaned username.RemoteUserBackend.configure_user(user)Configures a newly created user. This method is called immediately after a new user is created, and can be usedto perform custom setup actions, such as setting <strong>the</strong> user’s groups based on attributes in an LDAP directory.Returns <strong>the</strong> user object.4.3 Writing custom django-admin commandsNew in version 1.0: Please, see <strong>the</strong> release notes Applications can register <strong>the</strong>ir own actions with manage.py. Forexample, you might want to add a manage.py action for a <strong>Django</strong> app that you’re distributing. In this document, wewill be building a custom closepoll command for <strong>the</strong> polls application from <strong>the</strong> tutorial.To do this, just add a management/commands directory to <strong>the</strong> application. Each Python module in that directorywill be auto-discovered and registered as a command that can be executed as an action when you run manage.py:polls/__init__.pymodels.pymanagement/__init__.pycommands/__init__.pyclosepoll.pytests.pyviews.pyIn this example, <strong>the</strong> closepoll command will be made available to any project that includes <strong>the</strong> polls applicationin INSTALLED_APPS.The closepoll.py module has only one requirement – it must define a class Command that extendsBaseCommand or one of its subclasses.Standalone scriptsCustom management commands are especially useful for running standalone scripts or for scripts that are periodicallyexecuted from <strong>the</strong> UNIX crontab or from Windows scheduled tasks control panel.To implement <strong>the</strong> command, edit polls/management/commands/closepoll.py to look like this:from django.core.management.base import BaseCommand, CommandErrorfrom example.polls.models import Pollclass Command(BaseCommand):args = ’’help = ’Closes <strong>the</strong> specified poll for voting’def handle(self, *args, **options):for poll_id in args:try:poll = Poll.objects.get(pk=int(poll_id))except Poll.DoesNotExist:308 Chapter 4. “How-to” guides
<strong>Django</strong> <strong>Documentation</strong>, Release 1.2raise CommandError(’Poll "%s" does not exist’ % poll_id)poll.opened = Falsepoll.save()print ’Successfully closed poll "%s"’ % poll_idThe new custom command can be called using python manage.py closepoll .The handle() method takes zero or more poll_ids and sets poll.opened to False for each one. If <strong>the</strong> userreferenced any nonexistant polls, a CommandError is raised. The poll.opened attribute does not exist in <strong>the</strong>tutorial and was added to polls.models.Poll for this example.The same closepoll could be easily modified to delete a given poll instead of closing it by accepting additionalcommand line options. These custom options must be added to option_list like this:from optparse import make_optionclass Command(BaseCommand):option_list = BaseCommand.option_list + (make_option(’--delete’,action=’store_true’,dest=’delete’,default=False,help=’Delete poll instead of closing it’),)# ...In addition to being able to add custom command line options, all management commands can accept some defaultoptions such as --verbosity and --traceback.4.3.1 Command objectsclass BaseCommandThe base class from which all management commands ultimately derive.Use this class if you want access to all of <strong>the</strong> mechanisms which parse <strong>the</strong> command-line arguments and work outwhat code to call in response; if you don’t need to change any of that behavior, consider using one of its subclasses.Subclassing <strong>the</strong> BaseCommand class requires that you implement <strong>the</strong> handle() method.AttributesAll attributes can be set in your derived class and can be used in BaseCommand‘s subclasses.BaseCommand.argsA string listing <strong>the</strong> arguments accepted by <strong>the</strong> command, suitable for use in help messages; e.g., a commandwhich takes a list of application names might set this to ‘’.BaseCommand.can_import_settingsA boolean indicating whe<strong>the</strong>r <strong>the</strong> command needs to be able to import <strong>Django</strong> settings; if True, execute()will verify that this is possible before proceeding. Default value is True.BaseCommand.helpA short description of <strong>the</strong> command, which will be printed in <strong>the</strong> help message when <strong>the</strong> user runs <strong>the</strong> commandpython manage.py help .4.3. Writing custom django-admin commands 309
<strong>Django</strong> <strong>Documentation</strong>, Release 1.2into <strong>the</strong> precise details of what Field can do later on; for now, suffice it to say that everything descends from Fieldand <strong>the</strong>n customizes key pieces of <strong>the</strong> class behavior.It’s important to realize that a <strong>Django</strong> field class is not what is stored in your model attributes. The model attributescontain normal Python objects. The field classes you define in a model are actually stored in <strong>the</strong> Meta class when<strong>the</strong> model class is created (<strong>the</strong> precise details of how this is done are unimportant here). This is because <strong>the</strong> fieldclasses aren’t necessary when you’re just creating and modifying attributes. Instead, <strong>the</strong>y provide <strong>the</strong> machinery forconverting between <strong>the</strong> attribute value and what is stored in <strong>the</strong> database or sent to <strong>the</strong> serializer.Keep this in mind when creating your own custom fields. The <strong>Django</strong> Field subclass you write provides <strong>the</strong> machineryfor converting between your Python instances and <strong>the</strong> database/serializer values in various ways (<strong>the</strong>re aredifferences between storing a value and using a value for lookups, for example). If this sounds a bit tricky, don’t worry– it will become clearer in <strong>the</strong> examples below. Just remember that you will often end up creating two classes whenyou want a custom field:• The first class is <strong>the</strong> Python object that your users will manipulate. They will assign it to <strong>the</strong> model attribute,<strong>the</strong>y will read from it for displaying purposes, things like that. This is <strong>the</strong> Hand class in our example.• The second class is <strong>the</strong> Field subclass. This is <strong>the</strong> class that knows how to convert your first class back andforth between its permanent storage form and <strong>the</strong> Python form.4.4.3 Writing a field subclassWhen planning your Field subclass, first give some thought to which existing Field class your new field is mostsimilar to. Can you subclass an existing <strong>Django</strong> field and save yourself some work? If not, you should subclass <strong>the</strong>Field class, from which everything is descended.Initializing your new field is a matter of separating out any arguments that are specific to your case from <strong>the</strong> commonarguments and passing <strong>the</strong> latter to <strong>the</strong> __init__() method of Field (or your parent class).In our example, we’ll call our field HandField. (It’s a good idea to call your Field subclassField, so it’s easily identifiable as a Field subclass.) It doesn’t behave like any existing field,so we’ll subclass directly from Field:from django.db import modelsclass HandField(models.Field):description = "A hand of cards (bridge style)"def __init__(self, *args, **kwargs):kwargs[’max_length’] = 104super(HandField, self).__init__(*args, **kwargs)Our HandField accepts most of <strong>the</strong> standard field options (see <strong>the</strong> list below), but we ensure it has a fixed length,since it only needs to hold 52 card values plus <strong>the</strong>ir suits; 104 characters in total.Note: Many of <strong>Django</strong>’s model fields accept options that <strong>the</strong>y don’t do anything with. For example, you can passboth editable and auto_now to a django.db.models.DateField and it will simply ignore <strong>the</strong> editableparameter (auto_now being set implies editable=False). No error is raised in this case.This behavior simplifies <strong>the</strong> field classes, because <strong>the</strong>y don’t need to check for options that aren’t necessary. They justpass all <strong>the</strong> options to <strong>the</strong> parent class and <strong>the</strong>n don’t use <strong>the</strong>m later on. It’s up to you whe<strong>the</strong>r you want your fields tobe more strict about <strong>the</strong> options <strong>the</strong>y select, or to use <strong>the</strong> simpler, more permissive behavior of <strong>the</strong> current fields.The __init__() method takes <strong>the</strong> following parameters:• verbose_name4.4. Writing custom model fields 313
<strong>Django</strong> <strong>Documentation</strong>, Release 1.2• name• primary_key• max_length• unique• blank• null• db_index• rel: Used for related fields (like ForeignKey). For advanced use only.• default• editable• serialize: If False, <strong>the</strong> field will not be serialized when <strong>the</strong> model is passed to <strong>Django</strong>’s serializers.Defaults to True.• unique_for_date• unique_for_month• unique_for_year• choices• help_text• db_column• db_tablespace: Currently only used with <strong>the</strong> Oracle backend and only for index creation. You can usuallyignore this option.• auto_created: True if <strong>the</strong> field was automatically created, as for <strong>the</strong> OneToOneField used by model inheritance.For advanced use only.All of <strong>the</strong> options without an explanation in <strong>the</strong> above list have <strong>the</strong> same meaning <strong>the</strong>y do for normal <strong>Django</strong> fields.See <strong>the</strong> field documentation for examples and details.The SubfieldBase metaclassAs we indicated in <strong>the</strong> introduction, field subclasses are often needed for two reasons: ei<strong>the</strong>r to take advantage of acustom database column type, or to handle complex Python types. Obviously, a combination of <strong>the</strong> two is also possible.If you’re only working with custom database column types and your model fields appear in Python as standard Pythontypes direct from <strong>the</strong> database backend, you don’t need to worry about this section.If you’re handling custom Python types, such as our Hand class, we need to make sure that when <strong>Django</strong> initializesan instance of our model and assigns a database value to our custom field attribute, we convert that value into <strong>the</strong>appropriate Python object. The details of how this happens internally are a little complex, but <strong>the</strong> code you need towrite in your Field class is simple: make sure your field subclass uses a special metaclass:class django.db.models.SubfieldBaseFor example:class HandField(models.Field):description = "A hand of cards (bridge style)"__metaclass__ = models.SubfieldBase314 Chapter 4. “How-to” guides
<strong>Django</strong> <strong>Documentation</strong>, Release 1.2def __init__(self, *args, **kwargs):# ...This ensures that <strong>the</strong> to_python() method, documented below, will always be called when <strong>the</strong> attribute is initialized.ModelForms and custom fieldsIf you use SubfieldBase, to_python() will be called every time an instance of <strong>the</strong> field is assigned a value.This means that whenever a value may be assigned to <strong>the</strong> field, you need to ensure that it will be of <strong>the</strong> correct datatype,or that you handle any exceptions.This is especially important if you use ModelForms. When saving a ModelForm, <strong>Django</strong> will use form values toinstantiate model instances. However, if <strong>the</strong> cleaned form data can’t be used as valid input to <strong>the</strong> field, <strong>the</strong> normal formvalidation process will break.Therefore, you must ensure that <strong>the</strong> form field used to represent your custom field performs whatever input validationand data cleaning is necessary to convert user-provided form input into a to_python()-compatible model field value.This may require writing a custom form field, and/or implementing <strong>the</strong> formfield() method on your field to returna form field class whose to_python() returns <strong>the</strong> correct datatype.Documenting your Custom Fieldclass django.db.models.FielddescriptionAs always, you should document your field type, so users will know what it is. In addition to providing a docstring forit, which is useful for developers, you can also allow users of <strong>the</strong> admin app to see a short description of <strong>the</strong> field typevia <strong>the</strong> django.contrib.admindocs application. To do this simply provide descriptive text in a description classattribute of your custom field. In <strong>the</strong> above example, <strong>the</strong> type description displayed by <strong>the</strong> admindocs applicationfor a HandField will be ‘A hand of cards (bridge style)’.Useful methodsOnce you’ve created your Field subclass and set up <strong>the</strong> __metaclass__, you might consider overriding a fewstandard methods, depending on your field’s behavior. The list of methods below is in approximately decreasing orderof importance, so start from <strong>the</strong> top.Custom database typesdb_type(self, connection)New in version 1.2: The connection argument was added to support multiple databases. Returns <strong>the</strong> databasecolumn data type for <strong>the</strong> Field, taking into account <strong>the</strong> connection object, and <strong>the</strong> settings associated with it.Say you’ve created a PostgreSQL custom type called mytype. You can use this field with <strong>Django</strong> by subclassingField and implementing <strong>the</strong> db_type() method, like so:from django.db import modelsclass MytypeField(models.Field):def db_type(self, connection):return ’mytype’4.4. Writing custom model fields 315
<strong>Django</strong> <strong>Documentation</strong>, Release 1.2Once you have MytypeField, you can use it in any model, just like any o<strong>the</strong>r Field type:class Person(models.Model):name = models.CharField(max_length=80)gender = models.CharField(max_length=1)something_else = MytypeField()If you aim to build a database-agnostic application, you should account for differences in database columntypes. For example, <strong>the</strong> date/time column type in PostgreSQL is called timestamp, while <strong>the</strong> same columnin MySQL is called datetime. The simplest way to handle this in a db_type() method is to check <strong>the</strong>connection.settings_dict[’ENGINE’] attribute.For example:class MyDateField(models.Field):def db_type(self, connection):if connection.settings_dict[’ENGINE’] == ’django.db.backends.mysql’:return ’datetime’else:return ’timestamp’The db_type() method is only called by <strong>Django</strong> when <strong>the</strong> framework constructs <strong>the</strong> CREATE TABLE statementsfor your application – that is, when you first create your tables. It’s not called at any o<strong>the</strong>r time, so it can afford toexecute slightly complex code, such as <strong>the</strong> connection.settings_dict check in <strong>the</strong> above example.Some database column types accept parameters, such as CHAR(25), where <strong>the</strong> parameter 25 represents <strong>the</strong> maximumcolumn length. In cases like <strong>the</strong>se, it’s more flexible if <strong>the</strong> parameter is specified in <strong>the</strong> model ra<strong>the</strong>rthan being hard-coded in <strong>the</strong> db_type() method. For example, it wouldn’t make much sense to have aCharMaxlength25Field, shown here:# This is a silly example of hard-coded parameters.class CharMaxlength25Field(models.Field):def db_type(self, connection):return ’char(25)’# In <strong>the</strong> model:class MyModel(models.Model):# ...my_field = CharMaxlength25Field()The better way of doing this would be to make <strong>the</strong> parameter specifiable at run time – i.e., when <strong>the</strong> class is instantiated.To do that, just implement django.db.models.Field.__init__(), like so:# This is a much more flexible example.class BetterCharField(models.Field):def __init__(self, max_length, *args, **kwargs):self.max_length = max_lengthsuper(BetterCharField, self).__init__(*args, **kwargs)def db_type(self, connection):return ’char(%s)’ % self.max_length# In <strong>the</strong> model:class MyModel(models.Model):# ...my_field = BetterCharField(25)Finally, if your column requires truly complex SQL setup, return None from db_type(). This will cause <strong>Django</strong>’sSQL creation code to skip over this field. You are <strong>the</strong>n responsible for creating <strong>the</strong> column in <strong>the</strong> right table in someo<strong>the</strong>r way, of course, but this gives you a way to tell <strong>Django</strong> to get out of <strong>the</strong> way.316 Chapter 4. “How-to” guides
<strong>Django</strong> <strong>Documentation</strong>, Release 1.2Converting database values to Python objectsto_python(self, value)Converts a value as returned by your database (or a serializer) to a Python object.The default implementation simply returns value, for <strong>the</strong> common case in which <strong>the</strong> database backend alreadyreturns data in <strong>the</strong> correct format (as a Python string, for example).If your custom Field class deals with data structures that are more complex than strings, dates, integers or floats, <strong>the</strong>nyou’ll need to override this method. As a general rule, <strong>the</strong> method should deal gracefully with any of <strong>the</strong> followingarguments:• An instance of <strong>the</strong> correct type (e.g., Hand in our ongoing example).• A string (e.g., from a deserializer).• Whatever <strong>the</strong> database returns for <strong>the</strong> column type you’re using.In our HandField class, we’re storing <strong>the</strong> data as a VARCHAR field in <strong>the</strong> database, so we need to be able to processstrings and Hand instances in to_python():import reclass HandField(models.Field):# ...def to_python(self, value):if isinstance(value, Hand):return value# The string case.p1 = re.compile(’.{26}’)p2 = re.compile(’..’)args = [p2.findall(x) for x in p1.findall(value)]return Hand(*args)Notice that we always return a Hand instance from this method. That’s <strong>the</strong> Python object type we want to store in <strong>the</strong>model’s attribute.Remember: If your custom field needs <strong>the</strong> to_python() method to be called when it is created, you should beusing The SubfieldBase metaclass mentioned earlier. O<strong>the</strong>rwise to_python() won’t be called automatically.Converting Python objects to query valuesget_prep_value(self, value)New in version 1.2: This method was factored out of get_db_prep_value() This is <strong>the</strong> reverse ofto_python() when working with <strong>the</strong> database backends (as opposed to serialization). The value parameter is<strong>the</strong> current value of <strong>the</strong> model’s attribute (a field has no reference to its containing model, so it cannot retrieve <strong>the</strong>value itself), and <strong>the</strong> method should return data in a format that has been prepared for use as a parameter in a query.This conversion should not include any database-specific conversions. If database-specific conversions are required,<strong>the</strong>y should be made in <strong>the</strong> call to get_db_prep_value().For example:class HandField(models.Field):# ...4.4. Writing custom model fields 317
<strong>Django</strong> <strong>Documentation</strong>, Release 1.2def get_prep_value(self, value):return ’’.join([’’.join(l) for l in (value.north,value.east, value.south, value.west)])Converting query values to database valuesget_db_prep_value(self, value, connection, prepared=False)New in version 1.2: The connection and prepared arguments were added to support multiple databases. Somedata types (for example, dates) need to be in a specific format before <strong>the</strong>y can be used by a database backend.get_db_prep_value() is <strong>the</strong> method where those conversions should be made. The specific connection thatwill be used for <strong>the</strong> query is passed as <strong>the</strong> connection parameter. This allows you to use backend-specific conversionlogic if it is required.The prepared argument describes whe<strong>the</strong>r or not <strong>the</strong> value has already been passed through get_prep_value()conversions. When prepared is False, <strong>the</strong> default implementation of get_db_prep_value() will callget_prep_value() to do initial data conversions before performing any database-specific processing.get_db_prep_save(self, value, connection)New in version 1.2: The connection argument was added to support multiple databases. Same as <strong>the</strong>above, but called when <strong>the</strong> Field value must be saved to <strong>the</strong> database. As <strong>the</strong> default implementation just callsget_db_prep_value, you shouldn’t need to implement this method unless your custom field needs a specialconversion when being saved that is not <strong>the</strong> same as <strong>the</strong> conversion used for normal query parameters (which isimplemented by get_db_prep_value).Preprocessing values before savingpre_save(self, model_instance, add)This method is called just prior to get_db_prep_save() and should return <strong>the</strong> value of <strong>the</strong> appropriate attributefrom model_instance for this field. The attribute name is in self.attname (this is set up by Field). If <strong>the</strong>model is being saved to <strong>the</strong> database for <strong>the</strong> first time, <strong>the</strong> add parameter will be True, o<strong>the</strong>rwise it will be False.You only need to override this method if you want to preprocess <strong>the</strong> value somehow, just before saving. For example,<strong>Django</strong>’s DateTimeField uses this method to set <strong>the</strong> attribute correctly in <strong>the</strong> case of auto_now orauto_now_add.If you do override this method, you must return <strong>the</strong> value of <strong>the</strong> attribute at <strong>the</strong> end. You should also update <strong>the</strong> model’sattribute if you make any changes to <strong>the</strong> value so that code holding references to <strong>the</strong> model will always see <strong>the</strong> correctvalue.Preparing values for use in database lookupsAs with value conversions, preparing a value for database lookups is a two phase process.get_prep_lookup(self, lookup_type, value)New in version 1.2: This method was factored out of get_db_prep_lookup() get_prep_lookup() performs<strong>the</strong> first phase of lookup preparation, performing generic data validity checksPrepares <strong>the</strong> value for passing to <strong>the</strong> database when used in a lookup (a WHERE constraint in SQL). Thelookup_type will be one of <strong>the</strong> valid <strong>Django</strong> filter lookups: exact, iexact, contains, icontains, gt,gte, lt, lte, in, startswith, istartswith, endswith, iendswith, range, year, month, day,isnull, search, regex, and iregex.318 Chapter 4. “How-to” guides
<strong>Django</strong> <strong>Documentation</strong>, Release 1.2Your method must be prepared to handle all of <strong>the</strong>se lookup_type values and should raise ei<strong>the</strong>r a ValueErrorif <strong>the</strong> value is of <strong>the</strong> wrong sort (a list when you were expecting an object, for example) or a TypeError if yourfield does not support that type of lookup. For many fields, you can get by with handling <strong>the</strong> lookup types that needspecial handling for your field and pass <strong>the</strong> rest to <strong>the</strong> get_db_prep_lookup() method of <strong>the</strong> parent class.If you needed to implement get_db_prep_save(), you will usually need to implement get_prep_lookup().If you don’t, get_prep_value will be called by <strong>the</strong> default implementation, to manage exact, gt, gte, lt, lte,in and range lookups.You may also want to implement this method to limit <strong>the</strong> lookup types that could be used with your custom field type.Note that, for range and in lookups, get_prep_lookup will receive a list of objects (presumably of <strong>the</strong> righttype) and will need to convert <strong>the</strong>m to a list of things of <strong>the</strong> right type for passing to <strong>the</strong> database. Most of <strong>the</strong> time,you can reuse get_prep_value(), or at least factor out some common pieces.For example, <strong>the</strong> following code implements get_prep_lookup to limit <strong>the</strong> accepted lookup types to exact andin:class HandField(models.Field):# ...def get_prep_lookup(self, lookup_type, value):# We only handle ’exact’ and ’in’. All o<strong>the</strong>rs are errors.if lookup_type == ’exact’:return self.get_prep_value(value)elif lookup_type == ’in’:return [self.get_prep_value(v) for v in value]else:raise TypeError(’Lookup type %r not supported.’ % lookup_type)get_db_prep_lookup(self, lookup_type, value, connection, prepared=False)New in version 1.2: The connection and prepared arguments were added to support multiple databases. Performsany database-specific data conversions required by a lookup. As with get_db_prep_value(), <strong>the</strong> specificconnection that will be used for <strong>the</strong> query is passed as <strong>the</strong> connection parameter. The prepared argumentdescribes whe<strong>the</strong>r <strong>the</strong> value has already been prepared with get_prep_lookup().Specifying <strong>the</strong> form field for a model fieldformfield(self, form_class=forms.CharField, **kwargs)Returns <strong>the</strong> default form field to use when this field is displayed in a model. This method is called by <strong>the</strong> ModelFormhelper.All of <strong>the</strong> kwargs dictionary is passed directly to <strong>the</strong> form field’s Field__init__() method. Normally, all youneed to do is set up a good default for <strong>the</strong> form_class argument and <strong>the</strong>n delegate fur<strong>the</strong>r handling to <strong>the</strong> parentclass. This might require you to write a custom form field (and even a form widget). See <strong>the</strong> forms documentationfor information about this, and take a look at <strong>the</strong> code in django.contrib.localflavor for some examples ofcustom widgets.Continuing our ongoing example, we can write <strong>the</strong> formfield() method as:class HandField(models.Field):# ...def formfield(self, **kwargs):# This is a fairly standard way to set up some defaults# while letting <strong>the</strong> caller override <strong>the</strong>m.defaults = {’form_class’: MyFormField}4.4. Writing custom model fields 319
<strong>Django</strong> <strong>Documentation</strong>, Release 1.2defaults.update(kwargs)return super(HandField, self).formfield(**defaults)This assumes we’ve imported a MyFormField field class (which has its own default widget). This document doesn’tcover <strong>the</strong> details of writing custom form fields.Emulating built-in field typesget_internal_type(self )Returns a string giving <strong>the</strong> name of <strong>the</strong> Field subclass we are emulating at <strong>the</strong> database level. This is used todetermine <strong>the</strong> type of database column for simple cases.If you have created a db_type() method, you don’t need to worry about get_internal_type() – it won’t beused much. Sometimes, though, your database storage is similar in type to some o<strong>the</strong>r field, so you can use that o<strong>the</strong>rfield’s logic to create <strong>the</strong> right column.For example:class HandField(models.Field):# ...def get_internal_type(self):return ’CharField’No matter which database backend we are using, this will mean that syncdb and o<strong>the</strong>r SQL commands create <strong>the</strong>right column type for storing a string.If get_internal_type() returns a string that is not known to <strong>Django</strong> for <strong>the</strong> database backend you are using– that is, it doesn’t appear in django.db.backends..creation.DATA_TYPES – <strong>the</strong> string willstill be used by <strong>the</strong> serializer, but <strong>the</strong> default db_type() method will return None. See <strong>the</strong> documentation ofdb_type() for reasons why this might be useful. Putting a descriptive string in as <strong>the</strong> type of <strong>the</strong> field for <strong>the</strong>serializer is a useful idea if you’re ever going to be using <strong>the</strong> serializer output in some o<strong>the</strong>r place, outside of <strong>Django</strong>.Converting field data for serializationvalue_to_string(self, obj)This method is used by <strong>the</strong> serializers to convert <strong>the</strong> field into a string for output. CallingField._get_val_from_obj(obj)() is <strong>the</strong> best way to get <strong>the</strong> value to serialize. For example, since ourHandField uses strings for its data storage anyway, we can reuse some existing conversion code:class HandField(models.Field):# ...def value_to_string(self, obj):value = self._get_val_from_obj(obj)return self.get_db_prep_value(value)Some general adviceWriting a custom field can be a tricky process, particularly if you’re doing complex conversions between your Pythontypes and your database and serialization formats. Here are a couple of tips to make things go more smoothly:320 Chapter 4. “How-to” guides
<strong>Django</strong> <strong>Documentation</strong>, Release 1.21. Look at <strong>the</strong> existing <strong>Django</strong> fields (in django/db/models/fields/__init__.py) for inspiration. Tryto find a field that’s similar to what you want and extend it a little bit, instead of creating an entirely new fieldfrom scratch.2. Put a __str__() or __unicode__() method on <strong>the</strong> class you’re wrapping up as a field. There are a lot ofplaces where <strong>the</strong> default behavior of <strong>the</strong> field code is to call force_unicode() on <strong>the</strong> value. (In our examplesin this document, value would be a Hand instance, not a HandField). So if your __unicode__() methodautomatically converts to <strong>the</strong> string form of your Python object, you can save yourself a lot of work.4.4.4 Writing a FileField subclassIn addition to <strong>the</strong> above methods, fields that deal with files have a few o<strong>the</strong>r special requirements which must betaken into account. The majority of <strong>the</strong> mechanics provided by FileField, such as controlling database storage andretrieval, can remain unchanged, leaving subclasses to deal with <strong>the</strong> challenge of supporting a particular type of file.<strong>Django</strong> provides a File class, which is used as a proxy to <strong>the</strong> file’s contents and operations. Thiscan be subclassed to customize how <strong>the</strong> file is accessed, and what methods are available. It lives atdjango.db.models.fields.files, and its default behavior is explained in <strong>the</strong> file documentation.Once a subclass of File is created, <strong>the</strong> new FileField subclass must be told to use it. To do so, simply assign <strong>the</strong>new File subclass to <strong>the</strong> special attr_class attribute of <strong>the</strong> FileField subclass.A few suggestionsIn addition to <strong>the</strong> above details, <strong>the</strong>re are a few guidelines which can greatly improve <strong>the</strong> efficiency and readability of<strong>the</strong> field’s code.1. The source for <strong>Django</strong>’s own ImageField (in django/db/models/fields/files.py) is a great exampleof how to subclass FileField to support a particular type of file, as it incorporates all of <strong>the</strong> techniquesdescribed above.2. Cache file attributes wherever possible. Since files may be stored in remote storage systems, retrieving <strong>the</strong>mmay cost extra time, or even money, that isn’t always necessary. Once a file is retrieved to obtain some dataabout its content, cache as much of that data as possible to reduce <strong>the</strong> number of times <strong>the</strong> file must be retrievedon subsequent calls for that information.4.5 Custom template tags and filters4.5.1 Introduction<strong>Django</strong>’s template system comes with a wide variety of built-in tags and filters designed to address <strong>the</strong> presentationlogic needs of your application. Never<strong>the</strong>less, you may find yourself needing functionality that is not covered by <strong>the</strong>core set of template primitives. You can extend <strong>the</strong> template engine by defining custom tags and filters using Python,and <strong>the</strong>n make <strong>the</strong>m available to your templates using <strong>the</strong> {% load %} tag.Code layoutCustom template tags and filters must live inside a <strong>Django</strong> app. If <strong>the</strong>y relate to an existing app it makes sense tobundle <strong>the</strong>m <strong>the</strong>re; o<strong>the</strong>rwise, you should create a new app to hold <strong>the</strong>m.The app should contain a templatetags directory, at <strong>the</strong> same level as models.py, views.py, etc. If thisdoesn’t already exist, create it - don’t forget <strong>the</strong> __init__.py file to ensure <strong>the</strong> directory is treated as a Pythonpackage.4.5. Custom template tags and filters 321
<strong>Django</strong> <strong>Documentation</strong>, Release 1.2Your custom tags and filters will live in a module inside <strong>the</strong> templatetags directory. The name of <strong>the</strong> module fileis <strong>the</strong> name you’ll use to load <strong>the</strong> tags later, so be careful to pick a name that won’t clash with custom tags and filtersin ano<strong>the</strong>r app.For example, if your custom tags/filters are in a file called poll_extras.py, your app layout might look like this:polls/models.pytemplatetags/__init__.pypoll_extras.pyviews.pyAnd in your template you would use <strong>the</strong> following:{% load poll_extras %}The app that contains <strong>the</strong> custom tags must be in INSTALLED_APPS in order for <strong>the</strong> {% load %} tag to work.This is a security feature: It allows you to host Python code for many template libraries on a single host machinewithout enabling access to all of <strong>the</strong>m for every <strong>Django</strong> installation.There’s no limit on how many modules you put in <strong>the</strong> templatetags package. Just keep in mind that a {% load%} statement will load tags/filters for <strong>the</strong> given Python module name, not <strong>the</strong> name of <strong>the</strong> app.To be a valid tag library, <strong>the</strong> module must contain a module-level variable named register that is atemplate.Library instance, in which all <strong>the</strong> tags and filters are registered. So, near <strong>the</strong> top of your module,put <strong>the</strong> following:from django import templateregister = template.Library()Behind <strong>the</strong> scenesFor a ton of examples, read <strong>the</strong> source code for <strong>Django</strong>’s default filters and tags. They’re indjango/template/defaultfilters.py and django/template/defaulttags.py, respectively.Writing custom template filtersCustom filters are just Python functions that take one or two arguments:• The value of <strong>the</strong> variable (input) – not necessarily a string.• The value of <strong>the</strong> argument – this can have a default value, or be left out altoge<strong>the</strong>r.For example, in <strong>the</strong> filter {{ var|foo:"bar" }}, <strong>the</strong> filter foo would be passed <strong>the</strong> variable var and <strong>the</strong> argument"bar".Filter functions should always return something. They shouldn’t raise exceptions. They should fail silently. In case oferror, <strong>the</strong>y should return ei<strong>the</strong>r <strong>the</strong> original input or an empty string – whichever makes more sense.Here’s an example filter definition:def cut(value, arg):"Removes all values of arg from <strong>the</strong> given string"return value.replace(arg, ’’)And here’s an example of how that filter would be used:322 Chapter 4. “How-to” guides
<strong>Django</strong> <strong>Documentation</strong>, Release 1.2{{ somevariable|cut:"0" }}Most filters don’t take arguments. In this case, just leave <strong>the</strong> argument out of your function. Example:def lower(value): # Only one argument."Converts a string into all lowercase"return value.lower()Template filters that expect stringsIf you’re writing a template filter that only expects a string as <strong>the</strong> first argument, you should use <strong>the</strong> decoratorstringfilter. This will convert an object to its string value before being passed to your function:from django.template.defaultfilters import stringfilter@stringfilterdef lower(value):return value.lower()This way, you’ll be able to pass, say, an integer to this filter, and it won’t cause an AttributeError (becauseintegers don’t have lower() methods).Registering custom filtersOnce you’ve written your filter definition, you need to register it with your Library instance, to make it available to<strong>Django</strong>’s template language:register.filter(’cut’, cut)register.filter(’lower’, lower)The Library.filter() method takes two arguments:1. The name of <strong>the</strong> filter – a string.2. The compilation function – a Python function (not <strong>the</strong> name of <strong>the</strong> function as a string).You can use register.filter() as a decorator instead:@register.filter(name=’cut’)@stringfilterdef cut(value, arg):return value.replace(arg, ’’)@register.filter@stringfilterdef lower(value):return value.lower()If you leave off <strong>the</strong> name argument, as in <strong>the</strong> second example above, <strong>Django</strong> will use <strong>the</strong> function’s name as <strong>the</strong> filtername.Filters and auto-escapingNew in version 1.0: Please, see <strong>the</strong> release notes When writing a custom filter, give some thought to how <strong>the</strong> filterwill interact with <strong>Django</strong>’s auto-escaping behavior. Note that three types of strings can be passed around inside <strong>the</strong>template code:4.5. Custom template tags and filters 323
<strong>Django</strong> <strong>Documentation</strong>, Release 1.2• Raw strings are <strong>the</strong> native Python str or unicode types. On output, <strong>the</strong>y’re escaped if auto-escaping is ineffect and presented unchanged, o<strong>the</strong>rwise.• Safe strings are strings that have been marked safe from fur<strong>the</strong>r escaping at output time. Any necessary escapinghas already been done. They’re commonly used for output that contains raw HTML that is intended to beinterpreted as-is on <strong>the</strong> client side.Internally, <strong>the</strong>se strings are of type SafeString or SafeUnicode. They share a common base class ofSafeData, so you can test for <strong>the</strong>m using code like:if isinstance(value, SafeData):# Do something with <strong>the</strong> "safe" string.• Strings marked as “needing escaping” are always escaped on output, regardless of whe<strong>the</strong>r <strong>the</strong>y are in anautoescape block or not. These strings are only escaped once, however, even if auto-escaping applies.Internally, <strong>the</strong>se strings are of type EscapeString or EscapeUnicode. Generally you don’t have to worryabout <strong>the</strong>se; <strong>the</strong>y exist for <strong>the</strong> implementation of <strong>the</strong> escape filter.Template filter code falls into one of two situations:1. Your filter does not introduce any HTML-unsafe characters (, ’, " or &) into <strong>the</strong> result that were not alreadypresent. In this case, you can let <strong>Django</strong> take care of all <strong>the</strong> auto-escaping handling for you. All you need to dois put <strong>the</strong> is_safe attribute on your filter function and set it to True, like so:@register.filterdef myfilter(value):return valuemyfilter.is_safe = TrueThis attribute tells <strong>Django</strong> that if a “safe” string is passed into your filter, <strong>the</strong> result will still be “safe” and if anon-safe string is passed in, <strong>Django</strong> will automatically escape it, if necessary.You can think of this as meaning “this filter is safe – it doesn’t introduce any possibility of unsafe HTML.”The reason is_safe is necessary is because <strong>the</strong>re are plenty of normal string operations that will turn aSafeData object back into a normal str or unicode object and, ra<strong>the</strong>r than try to catch <strong>the</strong>m all, whichwould be very difficult, <strong>Django</strong> repairs <strong>the</strong> damage after <strong>the</strong> filter has completed.For example, suppose you have a filter that adds <strong>the</strong> string xx to <strong>the</strong> end of any input. Since this introducesno dangerous HTML characters to <strong>the</strong> result (aside from any that were already present), you should mark yourfilter with is_safe:@register.filterdef add_xx(value):return ’%sxx’ % valueadd_xx.is_safe = TrueWhen this filter is used in a template where auto-escaping is enabled, <strong>Django</strong> will escape <strong>the</strong> output whenever<strong>the</strong> input is not already marked as “safe”.By default, is_safe defaults to False, and you can omit it from any filters where it isn’t required.Be careful when deciding if your filter really does leave safe strings as safe. If you’re removing characters, youmight inadvertently leave unbalanced HTML tags or entities in <strong>the</strong> result. For example, removing a > from <strong>the</strong>input might turn into
<strong>Django</strong> <strong>Documentation</strong>, Release 1.2Marking a filter is_safe will coerce <strong>the</strong> filter’s return value to a string. If your filter should return a boolean oro<strong>the</strong>r non-string value, marking it is_safe will probably have unintended consequences (such as convertinga boolean False to <strong>the</strong> string ‘False’).2. Alternatively, your filter code can manually take care of any necessary escaping. This is necessary when you’reintroducing new HTML markup into <strong>the</strong> result. You want to mark <strong>the</strong> output as safe from fur<strong>the</strong>r escaping sothat your HTML markup isn’t escaped fur<strong>the</strong>r, so you’ll need to handle <strong>the</strong> input yourself.To mark <strong>the</strong> output as a safe string, use django.utils.safestring.mark_safe().Be careful, though. You need to do more than just mark <strong>the</strong> output as safe. You need to ensure it really is safe,and what you do depends on whe<strong>the</strong>r auto-escaping is in effect. The idea is to write filters than can operate intemplates where auto-escaping is ei<strong>the</strong>r on or off in order to make things easier for your template authors.In order for your filter to know <strong>the</strong> current auto-escaping state, set <strong>the</strong> needs_autoescape attribute to Trueon your function. (If you don’t specify this attribute, it defaults to False). This attribute tells <strong>Django</strong> thatyour filter function wants to be passed an extra keyword argument, called autoescape, that is True if autoescapingis in effect and False o<strong>the</strong>rwise.For example, let’s write a filter that emphasizes <strong>the</strong> first character of a string:from django.utils.html import conditional_escapefrom django.utils.safestring import mark_safedef initial_letter_filter(text, autoescape=None):first, o<strong>the</strong>r = text[0], text[1:]if autoescape:esc = conditional_escapeelse:esc = lambda x: xresult = ’%s%s’ % (esc(first), esc(o<strong>the</strong>r))return mark_safe(result)initial_letter_filter.needs_autoescape = TrueThe needs_autoescape attribute on <strong>the</strong> filter function and <strong>the</strong> autoescape keyword argument mean thatour function will know whe<strong>the</strong>r automatic escaping is in effect when <strong>the</strong> filter is called. We use autoescape todecide whe<strong>the</strong>r <strong>the</strong> input data needs to be passed through django.utils.html.conditional_escapeor not. (In <strong>the</strong> latter case, we just use <strong>the</strong> identity function as <strong>the</strong> “escape” function.) Theconditional_escape() function is like escape() except it only escapes input that is not a SafeDatainstance. If a SafeData instance is passed to conditional_escape(), <strong>the</strong> data is returned unchanged.Finally, in <strong>the</strong> above example, we remember to mark <strong>the</strong> result as safe so that our HTML is inserted directly into<strong>the</strong> template without fur<strong>the</strong>r escaping.There’s no need to worry about <strong>the</strong> is_safe attribute in this case (although including it wouldn’t hurt anything).Whenever you manually handle <strong>the</strong> auto-escaping issues and return a safe string, <strong>the</strong> is_safe attributewon’t change anything ei<strong>the</strong>r way.Writing custom template tagsTags are more complex than filters, because tags can do anything.A quick overviewAbove, this document explained that <strong>the</strong> template system works in a two-step process: compiling and rendering. Todefine a custom template tag, you specify how <strong>the</strong> compilation works and how <strong>the</strong> rendering works.4.5. Custom template tags and filters 325
<strong>Django</strong> <strong>Documentation</strong>, Release 1.2When <strong>Django</strong> compiles a template, it splits <strong>the</strong> raw template text into ‘’nodes’‘. Each node is an instance ofdjango.template.Node and has a render() method. A compiled template is, simply, a list of Node objects.When you call render() on a compiled template object, <strong>the</strong> template calls render() on each Node in itsnode list, with <strong>the</strong> given context. The results are all concatenated toge<strong>the</strong>r to form <strong>the</strong> output of <strong>the</strong> template.Thus, to define a custom template tag, you specify how <strong>the</strong> raw template tag is converted into a Node (<strong>the</strong> compilationfunction), and what <strong>the</strong> node’s render() method does.Writing <strong>the</strong> compilation functionFor each template tag <strong>the</strong> template parser encounters, it calls a Python function with <strong>the</strong> tag contents and <strong>the</strong> parserobject itself. This function is responsible for returning a Node instance based on <strong>the</strong> contents of <strong>the</strong> tag.For example, let’s write a template tag, {% current_time %}, that displays <strong>the</strong> current date/time, formattedaccording to a parameter given in <strong>the</strong> tag, in strftime syntax. It’s a good idea to decide <strong>the</strong> tag syntax before anythingelse. In our case, let’s say <strong>the</strong> tag should be used like this:The time is {% current_time "%Y-%m-%d %I:%M %p" %}.The parser for this function should grab <strong>the</strong> parameter and create a Node object:from django import templatedef do_current_time(parser, token):try:# split_contents() knows not to split quoted strings.tag_name, format_string = token.split_contents()except ValueError:raise template.TemplateSyntaxError, "%r tag requires a single argument" % token.contents.spliif not (format_string[0] == format_string[-1] and format_string[0] in (’"’, "’")):raise template.TemplateSyntaxError, "%r tag’s argument should be in quotes" % tag_namereturn CurrentTimeNode(format_string[1:-1])Notes:• parser is <strong>the</strong> template parser object. We don’t need it in this example.• token.contents is a string of <strong>the</strong> raw contents of <strong>the</strong> tag."%Y-%m-%d %I:%M %p"’.In our example, it’s ’current_time• The token.split_contents() method separates <strong>the</strong> arguments on spaces while keeping quotedstrings toge<strong>the</strong>r. The more straightforward token.contents.split() wouldn’t be as robust, as itwould naively split on all spaces, including those within quoted strings. It’s a good idea to always usetoken.split_contents().• This function is responsible for raising django.template.TemplateSyntaxError, with helpful messages,for any syntax error.• The TemplateSyntaxError exceptions use <strong>the</strong> tag_name variable. Don’t hard-code <strong>the</strong> tag’s name inyour error messages, because that couples <strong>the</strong> tag’s name to your function. token.contents.split()[0]will ‘’always” be <strong>the</strong> name of your tag – even when <strong>the</strong> tag has no arguments.• The function returns a CurrentTimeNode with everything <strong>the</strong> node needs to know about this tag. In this case,it just passes <strong>the</strong> argument – "%Y-%m-%d %I:%M %p". The leading and trailing quotes from <strong>the</strong> template tagare removed in format_string[1:-1].• The parsing is very low-level. The <strong>Django</strong> developers have experimented with writing small frameworks ontop of this parsing system, using techniques such as EBNF grammars, but those experiments made <strong>the</strong> templateengine too slow. It’s low-level because that’s fastest.326 Chapter 4. “How-to” guides
<strong>Django</strong> <strong>Documentation</strong>, Release 1.2Writing <strong>the</strong> rendererThe second step in writing custom tags is to define a Node subclass that has a render() method.Continuing <strong>the</strong> above example, we need to define CurrentTimeNode:from django import templateimport datetimeclass CurrentTimeNode(template.Node):def __init__(self, format_string):self.format_string = format_stringdef render(self, context):return datetime.datetime.now().strftime(self.format_string)Notes:• __init__() gets <strong>the</strong> format_string from do_current_time(). Always pass any options/parameters/argumentsto a Node via its __init__().• The render() method is where <strong>the</strong> work actually happens.• render() should never raise TemplateSyntaxError or any o<strong>the</strong>r exception. It should fail silently, justas template filters should.Ultimately, this decoupling of compilation and rendering results in an efficient template system, because a templatecan render multiple contexts without having to be parsed multiple times.Auto-escaping considerationsNew in version 1.0: Please, see <strong>the</strong> release notes The output from template tags is not automatically run through <strong>the</strong>auto-escaping filters. However, <strong>the</strong>re are still a couple of things you should keep in mind when writing a template tag.If <strong>the</strong> render() function of your template stores <strong>the</strong> result in a context variable (ra<strong>the</strong>r than returning <strong>the</strong> result in astring), it should take care to call mark_safe() if appropriate. When <strong>the</strong> variable is ultimately rendered, it will beaffected by <strong>the</strong> auto-escape setting in effect at <strong>the</strong> time, so content that should be safe from fur<strong>the</strong>r escaping needs tobe marked as such.Also, if your template tag creates a new context for performing some sub-rendering, set <strong>the</strong> auto-escape attribute to<strong>the</strong> current context’s value. The __init__ method for <strong>the</strong> Context class takes a parameter called autoescapethat you can use for this purpose. For example:def render(self, context):# ...new_context = Context({’var’: obj}, autoescape=context.autoescape)# ... Do something with new_context ...This is not a very common situation, but it’s useful if you’re rendering a template yourself. For example:def render(self, context):t = template.loader.get_template(’small_fragment.html’)return t.render(Context({’var’: obj}, autoescape=context.autoescape))If we had neglected to pass in <strong>the</strong> current context.autoescape value to our new Context in this example, <strong>the</strong>results would have always been automatically escaped, which may not be <strong>the</strong> desired behavior if <strong>the</strong> template tag isused inside a {% autoescape off %} block.4.5. Custom template tags and filters 327
<strong>Django</strong> <strong>Documentation</strong>, Release 1.2Thread-safety considerationsNew in version 1.2: Please, see <strong>the</strong> release notes Once a node is parsed, its render method may be called anynumber of times. Since <strong>Django</strong> is sometimes run in multi-threaded environments, a single node may be simultaneouslyrendering with different contexts in response to two separate requests. Therefore, it’s important to make sure yourtemplate tags are thread safe.To make sure your template tags are thread safe, you should never store state information on <strong>the</strong> node itself. For example,<strong>Django</strong> provides a builtin cycle template tag that cycles among a list of given strings each time it’s rendered:{% for o in some_list %}
<strong>Django</strong> <strong>Documentation</strong>, Release 1.2information. The easiest way to do this is to always use self as <strong>the</strong> key into render_context. If you’re keepingtrack of several state variables, make render_context[self] a dictionary.Registering <strong>the</strong> tagFinally, register <strong>the</strong> tag with your module’s Library instance, as explained in “Writing custom template filters”above. Example:register.tag(’current_time’, do_current_time)The tag() method takes two arguments:1. The name of <strong>the</strong> template tag – a string. If this is left out, <strong>the</strong> name of <strong>the</strong> compilation function will be used.2. The compilation function – a Python function (not <strong>the</strong> name of <strong>the</strong> function as a string).As with filter registration, it is also possible to use this as a decorator:@register.tag(name="current_time")def do_current_time(parser, token):# ...@register.tagdef shout(parser, token):# ...If you leave off <strong>the</strong> name argument, as in <strong>the</strong> second example above, <strong>Django</strong> will use <strong>the</strong> function’s name as <strong>the</strong> tagname.Passing template variables to <strong>the</strong> tagAlthough you can pass any number of arguments to a template tag using token.split_contents(), <strong>the</strong> argumentsare all unpacked as string literals. A little more work is required in order to pass dynamic content (a templatevariable) to a template tag as an argument.While <strong>the</strong> previous examples have formatted <strong>the</strong> current time into a string and returned <strong>the</strong> string, suppose you wantedto pass in a DateTimeField from an object and have <strong>the</strong> template tag format that date-time:This post was last updated at {% format_time blog_entry.date_updated "%Y-%m-%d %I:%M %p" %}.Initially, token.split_contents() will return three values:1. The tag name format_time.2. The string “blog_entry.date_updated” (without <strong>the</strong> surrounding quotes).3. The formatting string “%Y-%m-%d %I:%M %p”. The return value from split_contents() will include<strong>the</strong> leading and trailing quotes for string literals like this.Now your tag should begin to look like this:from django import templatedef do_format_time(parser, token):try:# split_contents() knows not to split quoted strings.tag_name, date_to_be_formatted, format_string = token.split_contents()except ValueError:raise template.TemplateSyntaxError, "%r tag requires exactly two arguments" % token.contents.4.5. Custom template tags and filters 329
<strong>Django</strong> <strong>Documentation</strong>, Release 1.2if not (format_string[0] == format_string[-1] and format_string[0] in (’"’, "’")):raise template.TemplateSyntaxError, "%r tag’s argument should be in quotes" % tag_namereturn FormatTimeNode(date_to_be_formatted, format_string[1:-1])Changed in version 1.0: Variable resolution has changed in <strong>the</strong> 1.0 release of <strong>Django</strong>.template.resolve_variable() has been deprecated in favor of a new template.Variable class.You also have to change <strong>the</strong> renderer to retrieve <strong>the</strong> actual contents of <strong>the</strong> date_updated property of <strong>the</strong>blog_entry object. This can be accomplished by using <strong>the</strong> Variable() class in django.template.To use <strong>the</strong> Variable class, simply instantiate it with <strong>the</strong> name of <strong>the</strong> variable to be resolved, and <strong>the</strong>n callvariable.resolve(context). So, for example:class FormatTimeNode(template.Node):def __init__(self, date_to_be_formatted, format_string):self.date_to_be_formatted = template.Variable(date_to_be_formatted)self.format_string = format_stringdef render(self, context):try:actual_date = self.date_to_be_formatted.resolve(context)return actual_date.strftime(self.format_string)except template.VariableDoesNotExist:return ’’Variable resolution will throw a VariableDoesNotExist exception if it cannot resolve <strong>the</strong> string passed to it in<strong>the</strong> current context of <strong>the</strong> page.Shortcut for simple tagsMany template tags take a number of arguments – strings or a template variables – and return a string after doing someprocessing based solely on <strong>the</strong> input argument and some external information. For example, <strong>the</strong> current_time tagwe wrote above is of this variety: we give it a format string, it returns <strong>the</strong> time as a string.To ease <strong>the</strong> creation of <strong>the</strong> types of tags, <strong>Django</strong> provides a helper function, simple_tag. This function, which isa method of django.template.Library, takes a function that accepts any number of arguments, wraps it in arender function and <strong>the</strong> o<strong>the</strong>r necessary bits mentioned above and registers it with <strong>the</strong> template system.Our earlier current_time function could thus be written like this:def current_time(format_string):return datetime.datetime.now().strftime(format_string)register.simple_tag(current_time)The decorator syntax also works:@register.simple_tagdef current_time(format_string):...A couple of things to note about <strong>the</strong> simple_tag helper function:• Checking for <strong>the</strong> required number of arguments, etc., has already been done by <strong>the</strong> time our function is called,so we don’t need to do that.• The quotes around <strong>the</strong> argument (if any) have already been stripped away, so we just receive a plain string.• If <strong>the</strong> argument was a template variable, our function is passed <strong>the</strong> current value of <strong>the</strong> variable, not <strong>the</strong> variableitself.330 Chapter 4. “How-to” guides
<strong>Django</strong> <strong>Documentation</strong>, Release 1.2When your template tag does not need access to <strong>the</strong> current context, writing a function to work with <strong>the</strong> input valuesand using <strong>the</strong> simple_tag helper is <strong>the</strong> easiest way to create a new tag.Inclusion tagsAno<strong>the</strong>r common type of template tag is <strong>the</strong> type that displays some data by rendering ano<strong>the</strong>r template. For example,<strong>Django</strong>’s admin interface uses custom template tags to display <strong>the</strong> buttons along <strong>the</strong> bottom of <strong>the</strong> “add/change” formpages. Those buttons always look <strong>the</strong> same, but <strong>the</strong> link targets change depending on <strong>the</strong> object being edited – so<strong>the</strong>y’re a perfect case for using a small template that is filled with details from <strong>the</strong> current object. (In <strong>the</strong> admin’s case,this is <strong>the</strong> submit_row tag.)These sorts of tags are called “inclusion tags”.Writing inclusion tags is probably best demonstrated by example. Let’s write a tag that outputs a list of choices for agiven Poll object, such as was created in <strong>the</strong> tutorials. We’ll use <strong>the</strong> tag like this:{% show_results poll %}...and <strong>the</strong> output will be something like this:First choiceSecond choiceThird choiceFirst, define <strong>the</strong> function that takes <strong>the</strong> argument and produces a dictionary of data for <strong>the</strong> result. The important poin<strong>the</strong>re is we only need to return a dictionary, not anything more complex. This will be used as a template context for <strong>the</strong>template fragment. Example:def show_results(poll):choices = poll.choice_set.all()return {’choices’: choices}Next, create <strong>the</strong> template used to render <strong>the</strong> tag’s output. This template is a fixed feature of <strong>the</strong> tag: <strong>the</strong> tag writerspecifies it, not <strong>the</strong> template designer. Following our example, <strong>the</strong> template is very simple:{% for choice in choices %} {{ choice }} {% endfor %}Now, create and register <strong>the</strong> inclusion tag by calling <strong>the</strong> inclusion_tag() method on a Library object. Followingour example, if <strong>the</strong> above template is in a file called results.html in a directory that’s searched by <strong>the</strong>template loader, we’d register <strong>the</strong> tag like this:# Here, register is a django.template.Library instance, as beforeregister.inclusion_tag(’results.html’)(show_results)As always, decorator syntax works as well, so we could have written:@register.inclusion_tag(’results.html’)def show_results(poll):......when first creating <strong>the</strong> function.Sometimes, your inclusion tags might require a large number of arguments, making it a pain for template authors topass in all <strong>the</strong> arguments and remember <strong>the</strong>ir order. To solve this, <strong>Django</strong> provides a takes_context option for4.5. Custom template tags and filters 331
<strong>Django</strong> <strong>Documentation</strong>, Release 1.2inclusion tags. If you specify takes_context in creating a template tag, <strong>the</strong> tag will have no required arguments,and <strong>the</strong> underlying Python function will have one argument – <strong>the</strong> template context as of when <strong>the</strong> tag was called.For example, say you’re writing an inclusion tag that will always be used in a context that contains home_link andhome_title variables that point back to <strong>the</strong> main page. Here’s what <strong>the</strong> Python function would look like:# The first argument *must* be called "context" here.def jump_link(context):return {’link’: context[’home_link’],’title’: context[’home_title’],}# Register <strong>the</strong> custom tag as an inclusion tag with takes_context=True.register.inclusion_tag(’link.html’, takes_context=True)(jump_link)(Note that <strong>the</strong> first parameter to <strong>the</strong> function must be called context.)In that register.inclusion_tag() line, we specified takes_context=True and <strong>the</strong> name of <strong>the</strong> template.Here’s what <strong>the</strong> template link.html might look like:Jump directly to {{ title }}.Then, any time you want to use that custom tag, load its library and call it without any arguments, like so:{% jump_link %}Note that when you’re using takes_context=True, <strong>the</strong>re’s no need to pass arguments to <strong>the</strong> template tag. Itautomatically gets access to <strong>the</strong> context.The takes_context parameter defaults to False. When it’s set to True, <strong>the</strong> tag is passed <strong>the</strong> context object, as inthis example. That’s <strong>the</strong> only difference between this case and <strong>the</strong> previous inclusion_tag example.Setting a variable in <strong>the</strong> contextThe above examples simply output a value. Generally, it’s more flexible if your template tags set template variablesinstead of outputting values. That way, template authors can reuse <strong>the</strong> values that your template tags create.To set a variable in <strong>the</strong> context, just use dictionary assignment on <strong>the</strong> context object in <strong>the</strong> render() method. Here’san updated version of CurrentTimeNode that sets a template variable current_time instead of outputting it:class CurrentTimeNode2(template.Node):def __init__(self, format_string):self.format_string = format_stringdef render(self, context):context[’current_time’] = datetime.datetime.now().strftime(self.format_string)return ’’Note that render() returns <strong>the</strong> empty string. render() should always return string output. If all <strong>the</strong> template tagdoes is set a variable, render() should return <strong>the</strong> empty string.Here’s how you’d use this new version of <strong>the</strong> tag:{% current_time "%Y-%M-%d %I:%M %p" %}The time is {{ current_time }}.Variable scope in contextAny variable set in <strong>the</strong> context will only be available in <strong>the</strong> same block of <strong>the</strong> template in which it was assigned.This behaviour is intentional; it provides a scope for variables so that <strong>the</strong>y don’t conflict with context in o<strong>the</strong>r blocks.332 Chapter 4. “How-to” guides
<strong>Django</strong> <strong>Documentation</strong>, Release 1.2But, <strong>the</strong>re’s a problem with CurrentTimeNode2: The variable name current_time is hard-coded. Thismeans you’ll need to make sure your template doesn’t use {{ current_time }} anywhere else, because <strong>the</strong>{% current_time %} will blindly overwrite that variable’s value. A cleaner solution is to make <strong>the</strong> template tagspecify <strong>the</strong> name of <strong>the</strong> output variable, like so:{% current_time "%Y-%M-%d %I:%M %p" as my_current_time %}The current time is {{ my_current_time }}.To do that, you’ll need to refactor both <strong>the</strong> compilation function and Node class, like so:class CurrentTimeNode3(template.Node):def __init__(self, format_string, var_name):self.format_string = format_stringself.var_name = var_namedef render(self, context):context[self.var_name] = datetime.datetime.now().strftime(self.format_string)return ’’import redef do_current_time(parser, token):# This version uses a regular expression to parse tag contents.try:# Splitting by None == splitting by spaces.tag_name, arg = token.contents.split(None, 1)except ValueError:raise template.TemplateSyntaxError, "%r tag requires arguments" % token.contents.split()[0]m = re.search(r’(.*?) as (\w+)’, arg)if not m:raise template.TemplateSyntaxError, "%r tag had invalid arguments" % tag_nameformat_string, var_name = m.groups()if not (format_string[0] == format_string[-1] and format_string[0] in (’"’, "’")):raise template.TemplateSyntaxError, "%r tag’s argument should be in quotes" % tag_namereturn CurrentTimeNode3(format_string[1:-1], var_name)The difference here is that do_current_time() grabs <strong>the</strong> format string and <strong>the</strong> variable name, passing both toCurrentTimeNode3.Parsing until ano<strong>the</strong>r block tagTemplate tags can work in tandem. For instance, <strong>the</strong> standard {% comment %} tag hides everything until {%endcomment %}. To create a template tag such as this, use parser.parse() in your compilation function.Here’s how <strong>the</strong> standard {% comment %} tag is implemented:def do_comment(parser, token):nodelist = parser.parse((’endcomment’,))parser.delete_first_token()return CommentNode()class CommentNode(template.Node):def render(self, context):return ’’parser.parse() takes a tuple of names of block tags ‘’to parse until’‘. It returns an instance ofdjango.template.NodeList, which is a list of all Node objects that <strong>the</strong> parser encountered ‘’before” it encounteredany of <strong>the</strong> tags named in <strong>the</strong> tuple.In "nodelist = parser.parse((’endcomment’,))" in <strong>the</strong> above example, nodelist is a list of4.5. Custom template tags and filters 333
<strong>Django</strong> <strong>Documentation</strong>, Release 1.2all nodes between <strong>the</strong> {% comment %} and {% endcomment %}, not counting {% comment %} and {%endcomment %} <strong>the</strong>mselves.After parser.parse() is called, <strong>the</strong> parser hasn’t yet “consumed” <strong>the</strong> {% endcomment %} tag, so <strong>the</strong> codeneeds to explicitly call parser.delete_first_token().CommentNode.render() simply returns an empty string. Anything between {% comment %} and {%endcomment %} is ignored.Parsing until ano<strong>the</strong>r block tag, and saving contentsIn <strong>the</strong> previous example, do_comment() discarded everything between {% comment %} and {% endcomment%}. Instead of doing that, it’s possible to do something with <strong>the</strong> code between block tags.For example, here’s a custom template tag, {% upper %}, that capitalizes everything between itself and {%endupper %}.Usage:{% upper %}This will appear in uppercase, {{ your_name }}.{% endupper %}As in <strong>the</strong> previous example, we’ll use parser.parse(). But this time, we pass <strong>the</strong> resulting nodelist to <strong>the</strong>Node:def do_upper(parser, token):nodelist = parser.parse((’endupper’,))parser.delete_first_token()return UpperNode(nodelist)class UpperNode(template.Node):def __init__(self, nodelist):self.nodelist = nodelistdef render(self, context):output = self.nodelist.render(context)return output.upper()The only new concept here is <strong>the</strong> self.nodelist.render(context) in UpperNode.render().For more examples of complex rendering, see <strong>the</strong> source code for {% if %}, {% for %}, {% ifequal %} and{% ifchanged %}. They live in django/template/defaulttags.py.4.6 Writing a custom storage systemIf you need to provide custom file storage – a common example is storing files on some remote system – you can doso by defining a custom storage class. You’ll need to follow <strong>the</strong>se steps:1. Your custom storage system must be a subclass of django.core.files.storage.Storage:from django.core.files.storage import Storageclass MyStorage(Storage):...2. <strong>Django</strong> must be able to instantiate your storage system without any arguments. This means that any settingsshould be taken from django.conf.settings:334 Chapter 4. “How-to” guides
<strong>Django</strong> <strong>Documentation</strong>, Release 1.2from django.conf import settingsfrom django.core.files.storage import Storageclass MyStorage(Storage):def __init__(self, option=None):if not option:option = settings.CUSTOM_STORAGE_OPTIONS...3. Your storage class must implement <strong>the</strong> _open() and _save() methods, along with any o<strong>the</strong>r methods appropriateto your storage class. See below for more on <strong>the</strong>se methods.In addition, if your class provides local file storage, it must override <strong>the</strong> path() method.Your custom storage system may override any of <strong>the</strong> storage methods explained in File storage API, but you mustimplement <strong>the</strong> following methods:• Storage.delete()• Storage.exists()• Storage.listdir()• Storage.size()• Storage.url()You’ll also usually want to use hooks specifically designed for custom storage objects. These are:4.6.1 _open(name, mode=’rb’)Required.Called by Storage.open(), this is <strong>the</strong> actual mechanism <strong>the</strong> storage class uses to open <strong>the</strong> file. This must returna File object, though in most cases, you’ll want to return some subclass here that implements logic specific to <strong>the</strong>backend storage system.4.6.2 _save(name, content)Called by Storage.save(). The name will already have gone through get_valid_name() andget_available_name(), and <strong>the</strong> content will be a File object itself.Should return <strong>the</strong> actual name of name of <strong>the</strong> file saved (usually <strong>the</strong> name passed in, but if <strong>the</strong> storage needs to change<strong>the</strong> file name return <strong>the</strong> new name instead).get_valid_name(name)Returns a filename suitable for use with <strong>the</strong> underlying storage system. The name argument passed to this method is<strong>the</strong> original filename sent to <strong>the</strong> server, after having any path information removed. Override this to customize hownon-standard characters are converted to safe filenames.The code provided on Storage retains only alpha-numeric characters, periods and underscores from <strong>the</strong> originalfilename, removing everything else.4.6. Writing a custom storage system 335
<strong>Django</strong> <strong>Documentation</strong>, Release 1.2get_available_name(name)Returns a filename that is available in <strong>the</strong> storage mechanism, possibly taking <strong>the</strong> provided filename into account. Thename argument passed to this method will have already cleaned to a filename valid for <strong>the</strong> storage system, accordingto <strong>the</strong> get_valid_name() method described above.The code provided on Storage simply appends "_1", "_2", etc. to <strong>the</strong> filename until it finds one that’s availablein <strong>the</strong> destination directory.4.7 Deploying <strong>Django</strong><strong>Django</strong>’s chock-full of shortcuts to make Web developer’s lives easier, but all those tools are of no use if you can’teasily deploy your sites. Since <strong>Django</strong>’s inception, ease of deployment has been a major goal. There’s a number ofgood ways to easily deploy <strong>Django</strong>:4.7.1 How to use <strong>Django</strong> with Apache and mod_wsgiDeploying <strong>Django</strong> with Apache and mod_wsgi is <strong>the</strong> recommended way to get <strong>Django</strong> into production.mod_wsgi is an Apache module which can be used to host any Python application which supports <strong>the</strong> Python WSGIinterface, including <strong>Django</strong>. <strong>Django</strong> will work with any version of Apache which supports mod_wsgi.The official mod_wsgi documentation is fantastic; it’s your source for all <strong>the</strong> details about how to use mod_wsgi.You’ll probably want to start with <strong>the</strong> installation and configuration documentation.Basic ConfigurationOnce you’ve got mod_wsgi installed and activated, edit your httpd.conf file and add:WSGIScriptAlias / /path/to/mysite/apache/django.wsgiThe first bit above is <strong>the</strong> url you want to be serving your application at (/ indicates <strong>the</strong> root url), and <strong>the</strong> second is <strong>the</strong>location of a “WSGI file” – see below – on your system, usually inside of your project. This tells Apache to serve anyrequest below <strong>the</strong> given URL using <strong>the</strong> WSGI application defined by that file.Next we’ll need to actually create this WSGI application, so create <strong>the</strong> file mentioned in <strong>the</strong> second part ofWSGIScriptAlias and add:import osimport sysos.environ[’DJANGO_SETTINGS_MODULE’] = ’mysite.settings’import django.core.handlers.wsgiapplication = django.core.handlers.wsgi.WSGIHandler()If your project is not on your PYTHONPATH by default you can add:path = ’/usr/local/django’if path not in sys.path:sys.path.append(path)just above <strong>the</strong> final import line to place your project on <strong>the</strong> path. Remember to replace ‘mysite.settings’ with yourcorrect settings file, and ‘/usr/local/django’ with your own project’s location.336 Chapter 4. “How-to” guides
<strong>Django</strong> <strong>Documentation</strong>, Release 1.2Serving media files<strong>Django</strong> doesn’t serve media files itself; it leaves that job to whichever Web server you choose.We recommend using a separate Web server – i.e., one that’s not also running <strong>Django</strong> – for serving media. Here aresome good choices:• lighttpd• Nginx• TUX• A stripped-down version of Apache• CherokeeIf, however, you have no option but to serve media files on <strong>the</strong> same Apache VirtualHost as <strong>Django</strong>, you can setup Apache to serve some URLs as static media, and o<strong>the</strong>rs using <strong>the</strong> mod_wsgi interface to <strong>Django</strong>.This example sets up <strong>Django</strong> at <strong>the</strong> site root, but explicitly serves robots.txt, favicon.ico, any CSS file, andanything in <strong>the</strong> /media/ URL space as a static file. All o<strong>the</strong>r URLs will be served using mod_wsgi:Alias /robots.txt /usr/local/wsgi/static/robots.txtAlias /favicon.ico /usr/local/wsgi/static/favicon.icoAliasMatch /([^/]*\.css) /usr/local/wsgi/static/styles/$1Alias /media/ /usr/local/wsgi/static/media/Order deny,allowAllow from allWSGIScriptAlias / /usr/local/wsgi/scripts/django.wsgiOrder allow,denyAllow from allMore details on configuring a mod_wsgi site to serve static files can be found in <strong>the</strong> mod_wsgi documentation onhosting static files.DetailsFor more details, see <strong>the</strong> mod_wsgi documentation on <strong>Django</strong> integration, which explains <strong>the</strong> above in more detail,and walks through all <strong>the</strong> various options you’ve got when deploying under mod_wsgi.4.7.2 How to use <strong>Django</strong> with Apache and mod_pythonWarning: Support for mod_python will be deprecated in a future release of <strong>Django</strong>. If you are configuring a newdeployment, you are strongly encouraged to consider using mod_wsgi or any of <strong>the</strong> o<strong>the</strong>r supported backends.The mod_python module for Apache can be used to deploy <strong>Django</strong> to a production server, although it has been mostlysuperseded by <strong>the</strong> simpler mod_wsgi deployment option.4.7. Deploying <strong>Django</strong> 337
<strong>Django</strong> <strong>Documentation</strong>, Release 1.2mod_python is similar to (and inspired by) mod_perl : It embeds Python within Apache and loads Python code intomemory when <strong>the</strong> server starts. Code stays in memory throughout <strong>the</strong> life of an Apache process, which leads tosignificant performance gains over o<strong>the</strong>r server arrangements.<strong>Django</strong> requires Apache 2.x and mod_python 3.x, and you should use Apache’s prefork MPM, as opposed to <strong>the</strong>worker MPM.See Also:• Apache is a big, complex animal, and this document only scratches <strong>the</strong> surface of what Apache can do. If youneed more advanced information about Apache, <strong>the</strong>re’s no better source than Apache’s own official documentation• You may also be interested in How to use <strong>Django</strong> with FastCGI, SCGI, or AJP.Basic configurationTo configure <strong>Django</strong> with mod_python, first make sure you have Apache installed, with <strong>the</strong> mod_python moduleactivated.Then edit your httpd.conf file and add <strong>the</strong> following:SetHandler python-programPythonHandler django.core.handlers.modpythonSetEnv DJANGO_SETTINGS_MODULE mysite.settingsPythonOption django.root /mysitePythonDebug On...and replace mysite.settings with <strong>the</strong> Python import path to your <strong>Django</strong> project’s settings file.This tells Apache: “Use mod_python for any URL at or under ‘/mysite/’, using <strong>the</strong> <strong>Django</strong> mod_python handler.” Itpasses <strong>the</strong> value of DJANGO_SETTINGS_MODULE so mod_python knows which settings to use. New in version1.0: The PythonOption django.root ... is new in this version. Because mod_python does not know weare serving this site from underneath <strong>the</strong> /mysite/ prefix, this value needs to be passed through to <strong>the</strong> mod_pythonhandler in <strong>Django</strong>, via <strong>the</strong> PythonOption django.root ... line. The value set on that line (<strong>the</strong> last item)should match <strong>the</strong> string given in <strong>the</strong> directive. The effect of this is that <strong>Django</strong> will automaticallystrip <strong>the</strong> /mysite string from <strong>the</strong> front of any URLs before matching <strong>the</strong>m against your URLconf patterns. If youlater move your site to live under /mysite2, you will not have to change anything except <strong>the</strong> django.root optionin <strong>the</strong> config file.When using django.root you should make sure that what’s left, after <strong>the</strong> prefix has been removed, begins witha slash. Your URLconf patterns that are expecting an initial slash will <strong>the</strong>n work correctly. In <strong>the</strong> above example,since we want to send things like /mysite/admin/ to /admin/, we need to remove <strong>the</strong> string /mysite from<strong>the</strong> beginning, so that is <strong>the</strong> django.root value. It would be an error to use /mysite/ (with a trailing slash) inthis case.Note that we’re using <strong>the</strong> directive, not <strong>the</strong> directive. The latter is used for pointing atplaces on your filesystem, whereas points at places in <strong>the</strong> URL structure of a Web site. would be meaningless here.Also, if your <strong>Django</strong> project is not on <strong>the</strong> default PYTHONPATH for your computer, you’ll have to tell mod_pythonwhere your project can be found:SetHandler python-programPythonHandler django.core.handlers.modpythonSetEnv DJANGO_SETTINGS_MODULE mysite.settings338 Chapter 4. “How-to” guides
<strong>Django</strong> <strong>Documentation</strong>, Release 1.2PythonOption django.root /mysitePythonDebug OnPythonPath "[’/path/to/project’] + sys.path"The value you use for PythonPath should include <strong>the</strong> parent directories of all <strong>the</strong> modules you are going to importin your application. It should also include <strong>the</strong> parent directory of <strong>the</strong> DJANGO_SETTINGS_MODULE location. Thisis exactly <strong>the</strong> same situation as setting <strong>the</strong> Python path for interactive usage. Whenever you try to import something,Python will run through all <strong>the</strong> directories in sys.path in turn, from first to last, and try to import from each directoryuntil one succeeds.Make sure that your Python source files’ permissions are set such that <strong>the</strong> Apache user (usually named apache orhttpd on most systems) will have read access to <strong>the</strong> files.An example might make this clearer. Suppose you have some applications under /usr/local/django-apps/(for example, /usr/local/django-apps/weblog/ and so forth), your settings file is at/var/www/mysite/settings.py and you have specified DJANGO_SETTINGS_MODULE as in <strong>the</strong> aboveexample. In this case, you would need to write your PythonPath directive as:PythonPath "[’/usr/local/django-apps/’, ’/var/www’] + sys.path"With this path, import weblog and import mysite.settings will both work. If you had importblogroll in your code somewhere and blogroll lived under <strong>the</strong> weblog/ directory, you would also needto add /usr/local/django-apps/weblog/ to your PythonPath. Remember: <strong>the</strong> parent directories ofanything you import directly must be on <strong>the</strong> Python path.Note: If you’re using Windows, we still recommended that you use forward slashes in <strong>the</strong> pathnames, even thoughWindows normally uses <strong>the</strong> backslash character as its native separator. Apache knows how to convert from <strong>the</strong> forwardslash format to <strong>the</strong> native format, so this approach is portable and easier to read. (It avoids tricky problems with havingto double-escape backslashes.)This is valid even on a Windows system:PythonPath "[’c:/path/to/project’] + sys.path"You can also add directives such as PythonAutoReload Off for performance. See <strong>the</strong> mod_python documentationfor a full list of options.Note that you should set PythonDebug Off on a production server. If you leave PythonDebug On, your userswould see ugly (and revealing) Python tracebacks if something goes wrong within mod_python.Restart Apache, and any request to /mysite/ or below will be served by <strong>Django</strong>. Note that <strong>Django</strong>’s URLconfswon’t trim <strong>the</strong> “/mysite/” – <strong>the</strong>y get passed <strong>the</strong> full URL.When deploying <strong>Django</strong> sites on mod_python, you’ll need to restart Apache each time you make changes to yourPython code.Multiple <strong>Django</strong> installations on <strong>the</strong> same ApacheIt’s entirely possible to run multiple <strong>Django</strong> installations on <strong>the</strong> same Apache instance. Just use VirtualHost forthat, like so:NameVirtualHost *ServerName www.example.com# ...4.7. Deploying <strong>Django</strong> 339
<strong>Django</strong> <strong>Documentation</strong>, Release 1.2SetEnv DJANGO_SETTINGS_MODULE mysite.settingsServerName www2.example.com# ...SetEnv DJANGO_SETTINGS_MODULE mysite.o<strong>the</strong>r_settingsIf you need to put two <strong>Django</strong> installations within <strong>the</strong> same VirtualHost (or in different VirtualHost blocksthat share <strong>the</strong> same server name), you’ll need to take a special precaution to ensure mod_python’s cache doesn’t messthings up. Use <strong>the</strong> PythonInterpreter directive to give different directives separate interpreters:ServerName www.example.com# ...SetEnv DJANGO_SETTINGS_MODULE mysite.settingsPythonInterpreter mysiteSetEnv DJANGO_SETTINGS_MODULE mysite.o<strong>the</strong>r_settingsPythonInterpreter o<strong>the</strong>rsiteThe values of PythonInterpreter don’t really matter, as long as <strong>the</strong>y’re different between <strong>the</strong> two Locationblocks.Running a development server with mod_pythonIf you use mod_python for your development server, you can avoid <strong>the</strong> hassle of having to restart <strong>the</strong> server each timeyou make code changes. Just set MaxRequestsPerChild 1 in your httpd.conf file to force Apache to reloadeverything for each request. But don’t do that on a production server, or we’ll revoke your <strong>Django</strong> privileges.If you’re <strong>the</strong> type of programmer who debugs using scattered print statements, note that output to stdout will notappear in <strong>the</strong> Apache log and can even cause response errors.If you have <strong>the</strong> need to print debugging information in a mod_python setup, you have a few options. You can print tostderr explicitly, like so:print >> sys.stderr, ’debug text’sys.stderr.flush()(note that stderr is buffered, so calling flush is necessary if you wish debugging information to be displayedpromptly.)A more compact approach is to use an assertion:assert False, ’debug text’Ano<strong>the</strong>r alternative is to add debugging information to <strong>the</strong> template of your page.Serving media files<strong>Django</strong> doesn’t serve media files itself; it leaves that job to whichever Web server you choose.340 Chapter 4. “How-to” guides
<strong>Django</strong> <strong>Documentation</strong>, Release 1.2We recommend using a separate Web server – i.e., one that’s not also running <strong>Django</strong> – for serving media. Here aresome good choices:• lighttpd• Nginx• TUX• A stripped-down version of Apache• CherokeeIf, however, you have no option but to serve media files on <strong>the</strong> same Apache VirtualHost as <strong>Django</strong>, here’s howyou can turn off mod_python for a particular part of <strong>the</strong> site:SetHandler NoneJust change Location to <strong>the</strong> root URL of your media files. You can also use to match aregular expression.This example sets up <strong>Django</strong> at <strong>the</strong> site root but explicitly disables <strong>Django</strong> for <strong>the</strong> media subdirectory and any URLthat ends with .jpg, .gif or .png:SetHandler python-programPythonHandler django.core.handlers.modpythonSetEnv DJANGO_SETTINGS_MODULE mysite.settingsSetHandler NoneSetHandler NoneServing <strong>the</strong> admin filesNote that <strong>the</strong> <strong>Django</strong> development server automagically serves admin media files, but this is not <strong>the</strong> case when youuse any o<strong>the</strong>r server arrangement. You’re responsible for setting up Apache, or whichever media server you’re using,to serve <strong>the</strong> admin files.The admin files live in (django/contrib/admin/media) of <strong>the</strong> <strong>Django</strong> distribution.Here are two recommended approaches:1. Create a symbolic link to <strong>the</strong> admin media files from within your document root. This way, all of your <strong>Django</strong>relatedfiles – code and templates – stay in one place, and you’ll still be able to svn update your code to get<strong>the</strong> latest admin templates, if <strong>the</strong>y change.2. Or, copy <strong>the</strong> admin media files so that <strong>the</strong>y live within your Apache document root.Using “eggs” with mod_pythonIf you installed <strong>Django</strong> from a Python egg or are using eggs in your <strong>Django</strong> project, some extra configuration isrequired. Create an extra file in your project (or somewhere else) that contains something like <strong>the</strong> following:4.7. Deploying <strong>Django</strong> 341
<strong>Django</strong> <strong>Documentation</strong>, Release 1.2import osos.environ[’PYTHON_EGG_CACHE’] = ’/some/directory’Here, /some/directory is a directory that <strong>the</strong> Apache Web server process can write to. It will be used as <strong>the</strong>location for any unpacking of code <strong>the</strong> eggs need to do.Then you have to tell mod_python to import this file before doing anything else. This is done using <strong>the</strong> PythonImportdirective to mod_python. You need to ensure that you have specified <strong>the</strong> PythonInterpreter directive tomod_python as described above (you need to do this even if you aren’t serving multiple installations in this case).Then add <strong>the</strong> PythonImport line in <strong>the</strong> main server configuration (i.e., outside <strong>the</strong> Location or VirtualHostsections). For example:PythonInterpreter my_djangoPythonImport /path/to/my/project/file.py my_djangoNote that you can use an absolute path here (or a normal dotted import path), as described in <strong>the</strong> mod_python manual.We use an absolute path in <strong>the</strong> above example because if any Python path modifications are required to access yourproject, <strong>the</strong>y will not have been done at <strong>the</strong> time <strong>the</strong> PythonImport line is processed.Error handlingWhen you use Apache/mod_python, errors will be caught by <strong>Django</strong> – in o<strong>the</strong>r words, <strong>the</strong>y won’t propagate to <strong>the</strong>Apache level and won’t appear in <strong>the</strong> Apache error_log.The exception for this is if something is really wonky in your <strong>Django</strong> setup. In that case, you’ll see an “InternalServer Error” page in your browser and <strong>the</strong> full Python traceback in your Apache error_log file. The error_logtraceback is spread over multiple lines. (Yes, this is ugly and ra<strong>the</strong>r hard to read, but it’s how mod_python does things.)If you get a segmentation faultIf Apache causes a segmentation fault, <strong>the</strong>re are two probable causes, nei<strong>the</strong>r of which has to do with <strong>Django</strong> itself.1. It may be because your Python code is importing <strong>the</strong> “pyexpat” module, which may conflict with <strong>the</strong> versionembedded in Apache. For full information, see Expat Causing Apache Crash.2. It may be because you’re running mod_python and mod_php in <strong>the</strong> same Apache instance, with MySQL as yourdatabase backend. In some cases, this causes a known mod_python issue due to version conflicts in PHP and<strong>the</strong> Python MySQL backend. There’s full information in <strong>the</strong> mod_python FAQ entry.If you continue to have problems setting up mod_python, a good thing to do is get a barebones mod_python siteworking, without <strong>the</strong> <strong>Django</strong> framework. This is an easy way to isolate mod_python-specific problems. Gettingmod_python Working details this procedure.The next step should be to edit your test code and add an import of any <strong>Django</strong>-specific code you’re using – yourviews, your models, your URLconf, your RSS configuration, etc. Put <strong>the</strong>se imports in your test handler function andaccess your test URL in a browser. If this causes a crash, you’ve confirmed it’s <strong>the</strong> importing of <strong>Django</strong> code thatcauses <strong>the</strong> problem. Gradually reduce <strong>the</strong> set of imports until it stops crashing, so as to find <strong>the</strong> specific module thatcauses <strong>the</strong> problem. Drop down fur<strong>the</strong>r into modules and look into <strong>the</strong>ir imports, as necessary.If you get a UnicodeEncodeErrorIf you’re taking advantage of <strong>the</strong> internationalization features of <strong>Django</strong> (see Internationalization and localization)and you intend to allow users to upload files, you must ensure that <strong>the</strong> environment used to start Apacheis configured to accept non-ASCII file names. If your environment is not correctly configured, you will trigger342 Chapter 4. “How-to” guides
<strong>Django</strong> <strong>Documentation</strong>, Release 1.2UnicodeEncodeError exceptions when calling functions like os.path() on filenames that contain non-ASCIIcharacters.To avoid <strong>the</strong>se problems, <strong>the</strong> environment used to start Apache should contain settings analogous to <strong>the</strong> following:export LANG=’en_US.UTF-8’export LC_ALL=’en_US.UTF-8’Consult <strong>the</strong> documentation for your operating system for <strong>the</strong> appropriate syntax and location to put <strong>the</strong>se configurationitems; /etc/apache2/envvars is a common location on Unix platforms. Once you have added <strong>the</strong>se statementsto your environment, restart Apache.4.7.3 How to use <strong>Django</strong> with FastCGI, SCGI, or AJPAlthough <strong>the</strong> current preferred setup for running <strong>Django</strong> is Apache with mod_wsgi, many people use shared hosting,on which protocols such as FastCGI, SCGI or AJP are <strong>the</strong> only viable options. In some setups, <strong>the</strong>se protocols mayprovide better performance than mod_wsgi.NoteThis document primarily focuses on FastCGI. O<strong>the</strong>r protocols, such as SCGI and AJP, are also supported, through <strong>the</strong>flup Python package. See <strong>the</strong> Protocols section below for specifics about SCGI and AJP.Essentially, FastCGI is an efficient way of letting an external application serve pages to a Web server. The Web serverdelegates <strong>the</strong> incoming Web requests (via a socket) to FastCGI, which executes <strong>the</strong> code and passes <strong>the</strong> response backto <strong>the</strong> Web server, which, in turn, passes it back to <strong>the</strong> client’s Web browser.Like mod_python, FastCGI allows code to stay in memory, allowing requests to be served with no startup time. Unlikemod_python (or mod_perl), a FastCGI process doesn’t run inside <strong>the</strong> Web server process, but in a separate, persistentprocess.Why run code in a separate process?The traditional mod_* arrangements in Apache embed various scripting languages (most notably PHP, Python andPerl) inside <strong>the</strong> process space of your Web server. Although this lowers startup time – because code doesn’t have tobe read off disk for every request – it comes at <strong>the</strong> cost of memory use. For mod_python, for example, every Apacheprocess gets its own Python interpreter, which uses up a considerable amount of RAM.Due to <strong>the</strong> nature of FastCGI, it’s even possible to have processes that run under a different user account than <strong>the</strong> Webserver process. That’s a nice security benefit on shared systems, because it means you can secure your code from o<strong>the</strong>rusers.Prerequisite: flupBefore you can start using FastCGI with <strong>Django</strong>, you’ll need to install flup, a Python library for dealing with FastCGI.Version 0.5 or newer should work fine.Starting your FastCGI serverFastCGI operates on a client-server model, and in most cases you’ll be starting <strong>the</strong> FastCGI process on your own. YourWeb server (be it Apache, lighttpd, or o<strong>the</strong>rwise) only contacts your <strong>Django</strong>-FastCGI process when <strong>the</strong> server needsa dynamic page to be loaded. Because <strong>the</strong> daemon is already running with <strong>the</strong> code in memory, it’s able to serve <strong>the</strong>response very quickly.4.7. Deploying <strong>Django</strong> 343
<strong>Django</strong> <strong>Documentation</strong>, Release 1.2NoteIf you’re on a shared hosting system, you’ll probably be forced to use Web server-managed FastCGI processes. See<strong>the</strong> section below on running <strong>Django</strong> with Web server-managed processes for more information.A Web server can connect to a FastCGI server in one of two ways: It can use ei<strong>the</strong>r a Unix domain socket (a “namedpipe” on Win32 systems), or it can use a TCP socket. What you choose is a manner of preference; a TCP socket isusually easier due to permissions issues.To start your server, first change into <strong>the</strong> directory of your project (wherever your manage.py is), and <strong>the</strong>n run <strong>the</strong>runfcgi command:./manage.py runfcgi [options]If you specify help as <strong>the</strong> only option after runfcgi, it’ll display a list of all <strong>the</strong> available options.You’ll need to specify ei<strong>the</strong>r a socket, a protocol or both host and port. Then, when you set up your Webserver, you’ll just need to point it at <strong>the</strong> host/port or socket you specified when starting <strong>the</strong> FastCGI server. See <strong>the</strong>examples, below.Protocols<strong>Django</strong> supports all <strong>the</strong> protocols that flup does, namely fastcgi, SCGI and AJP1.3 (<strong>the</strong> Apache JServ Protocol, version1.3). Select your preferred protocol by using <strong>the</strong> protocol= option with ./manage.pyrunfcgi – where may be one of: fcgi (<strong>the</strong> default), scgi or ajp. For example:./manage.py runfcgi protocol=scgiExamplesRunning a threaded server on a TCP port:./manage.py runfcgi method=threaded host=127.0.0.1 port=3033Running a preforked server on a Unix domain socket:./manage.py runfcgi method=prefork socket=/home/user/mysite.sock pidfile=django.pidSocket security<strong>Django</strong>’s default umask requires that <strong>the</strong> webserver and <strong>the</strong> <strong>Django</strong> fastcgi process be run with <strong>the</strong> same group anduser. For increased security, you can run <strong>the</strong>m under <strong>the</strong> same group but as different users. If you do this, you willneed to set <strong>the</strong> umask to 0002 using <strong>the</strong> umask argument to runfcgi.Run without daemonizing (backgrounding) <strong>the</strong> process (good for debugging):./manage.py runfcgi daemonize=false socket=/tmp/mysite.sock maxrequests=1Stopping <strong>the</strong> FastCGI daemonIf you have <strong>the</strong> process running in <strong>the</strong> foreground, it’s easy enough to stop it: Simply hitting Ctrl-C will stop andquit <strong>the</strong> FastCGI server. However, when you’re dealing with background processes, you’ll need to resort to <strong>the</strong> Unixkill command.344 Chapter 4. “How-to” guides
<strong>Django</strong> <strong>Documentation</strong>, Release 1.2If you specify <strong>the</strong> pidfile option to runfcgi, you can kill <strong>the</strong> running FastCGI daemon like this:kill ‘cat $PIDFILE‘...where $PIDFILE is <strong>the</strong> pidfile you specified.To easily restart your FastCGI daemon on Unix, try this small shell script:#!/bin/bash# Replace <strong>the</strong>se three settings.PROJDIR="/home/user/myproject"PIDFILE="$PROJDIR/mysite.pid"SOCKET="$PROJDIR/mysite.sock"cd $PROJDIRif [ -f $PIDFILE ]; <strong>the</strong>nkill ‘cat -- $PIDFILE‘rm -f -- $PIDFILEfiexec /usr/bin/env - \PYTHONPATH="../python:.." \./manage.py runfcgi socket=$SOCKET pidfile=$PIDFILEApache setupTo use <strong>Django</strong> with Apache and FastCGI, you’ll need Apache installed and configured, with mod_fastcgi installed andenabled. Consult <strong>the</strong> Apache documentation for instructions.Once you’ve got that set up, point Apache at your <strong>Django</strong> FastCGI instance by editing <strong>the</strong> httpd.conf (Apacheconfiguration) file. You’ll need to do two things:• Use <strong>the</strong> FastCGIExternalServer directive to specify <strong>the</strong> location of your FastCGI server.• Use mod_rewrite to point URLs at FastCGI as appropriate.Specifying <strong>the</strong> location of <strong>the</strong> FastCGI serverThe FastCGIExternalServer directive tells Apache how to find your FastCGI server. As <strong>the</strong> FastCGIExternalServerdocs explain, you can specify ei<strong>the</strong>r a socket or a host. Here are examples of both:# Connect to FastCGI via a socket / named pipe.FastCGIExternalServer /home/user/public_html/mysite.fcgi -socket /home/user/mysite.sock# Connect to FastCGI via a TCP host/port.FastCGIExternalServer /home/user/public_html/mysite.fcgi -host 127.0.0.1:3033In ei<strong>the</strong>r case, <strong>the</strong> file /home/user/public_html/mysite.fcgi doesn’t actually have to exist. It’s just a URLused by <strong>the</strong> Web server internally – a hook for signifying which requests at a URL should be handled by FastCGI.(More on this in <strong>the</strong> next section.)Using mod_rewrite to point URLs at FastCGIThe second step is telling Apache to use FastCGI for URLs that match a certain pattern. To do this, use <strong>the</strong> mod_rewritemodule and rewrite URLs to mysite.fcgi (or whatever you specified in <strong>the</strong> FastCGIExternalServer directive,as explained in <strong>the</strong> previous section).4.7. Deploying <strong>Django</strong> 345
<strong>Django</strong> <strong>Documentation</strong>, Release 1.2In this example, we tell Apache to use FastCGI to handle any request that doesn’t represent a file on <strong>the</strong> filesystem anddoesn’t start with /media/. This is probably <strong>the</strong> most common case, if you’re using <strong>Django</strong>’s admin site:ServerName example.comDocumentRoot /home/user/public_htmlAlias /media /home/user/python/django/contrib/admin/mediaRewriteEngine OnRewriteRule ^/(media.*)$ /$1 [QSA,L,PT]RewriteCond %{REQUEST_FILENAME} !-fRewriteRule ^/(.*)$ /mysite.fcgi/$1 [QSA,L]<strong>Django</strong> will automatically use <strong>the</strong> pre-rewrite version of <strong>the</strong> URL when constructing URLs with <strong>the</strong> {% url %}template tag (and similar methods).lighttpd setuplighttpd is a lightweight Web server commonly used for serving static files. It supports FastCGI natively and, thus, isa good choice for serving both static and dynamic pages, if your site doesn’t have any Apache-specific needs.Make sure mod_fastcgi is in your modules list, somewhere after mod_rewrite and mod_access, but not aftermod_accesslog. You’ll probably want mod_alias as well, for serving admin media.Add <strong>the</strong> following to your lighttpd config file:server.document-root = "/home/user/public_html"fastcgi.server = ("/mysite.fcgi" => ("main" => (# Use host / port instead of socket for TCP fastcgi# "host" => "127.0.0.1",# "port" => 3033,"socket" => "/home/user/mysite.sock","check-local" => "disable",)),)alias.url = ("/media" => "/home/user/django/contrib/admin/media/",)url.rewrite-once = ("^(/media.*)$" => "$1","^/favicon\.ico$" => "/media/favicon.ico","^(/.*)$" => "/mysite.fcgi$1",)Running multiple <strong>Django</strong> sites on one lighttpdlighttpd lets you use “conditional configuration” to allow configuration to be customized per host. To specify multipleFastCGI sites, just add a conditional block around your FastCGI config for each site:# If <strong>the</strong> hostname is ’www.example1.com’...$HTTP["host"] == "www.example1.com" {server.document-root = "/foo/site1"fastcgi.server = (346 Chapter 4. “How-to” guides
<strong>Django</strong> <strong>Documentation</strong>, Release 1.2}...)...# If <strong>the</strong> hostname is ’www.example2.com’...$HTTP["host"] == "www.example2.com" {server.document-root = "/foo/site2"fastcgi.server = (...)...}You can also run multiple <strong>Django</strong> installations on <strong>the</strong> same site simply by specifying multiple entries in <strong>the</strong>fastcgi.server directive. Add one FastCGI host for each.Cherokee setupCherokee is a very fast, flexible and easy to configure Web Server. It supports <strong>the</strong> widespread technologies nowadays:FastCGI, SCGI, PHP, CGI, SSI, TLS and SSL encrypted connections, Virtual hosts, Au<strong>the</strong>ntication, on <strong>the</strong> flyencoding, Load Balancing, Apache compatible log files, Data Base Balancer, Reverse HTTP Proxy and much more.The Cherokee project provides a documentation to setting up <strong>Django</strong> with Cherokee.Running <strong>Django</strong> on a shared-hosting provider with ApacheMany shared-hosting providers don’t allow you to run your own server daemons or edit <strong>the</strong> httpd.conf file. In<strong>the</strong>se cases, it’s still possible to run <strong>Django</strong> using Web server-spawned processes.NoteIf you’re using Web server-spawned processes, as explained in this section, <strong>the</strong>re’s no need for you to start <strong>the</strong> FastCGIserver on your own. Apache will spawn a number of processes, scaling as it needs to.In your Web root directory, add this to a file named .htaccess:AddHandler fastcgi-script .fcgiRewriteEngine OnRewriteCond %{REQUEST_FILENAME} !-fRewriteRule ^(.*)$ mysite.fcgi/$1 [QSA,L]Then, create a small script that tells Apache how to spawn your FastCGI program. Create a file mysite.fcgi andplace it in your Web directory, and be sure to make it executable:#!/usr/bin/pythonimport sys, os# Add a custom Python path.sys.path.insert(0, "/home/user/python")# Switch to <strong>the</strong> directory of your project. (Optional.)# os.chdir("/home/user/myproject")# Set <strong>the</strong> DJANGO_SETTINGS_MODULE environment variable.os.environ[’DJANGO_SETTINGS_MODULE’] = "myproject.settings"4.7. Deploying <strong>Django</strong> 347
<strong>Django</strong> <strong>Documentation</strong>, Release 1.2from django.core.servers.fastcgi import runfastcgirunfastcgi(method="threaded", daemonize="false")Restarting <strong>the</strong> spawned serverIf you change any Python code on your site, you’ll need to tell FastCGI <strong>the</strong> code has changed. But <strong>the</strong>re’s no need torestart Apache in this case. Ra<strong>the</strong>r, just reupload mysite.fcgi, or edit <strong>the</strong> file, so that <strong>the</strong> timestamp on <strong>the</strong> file willchange. When Apache sees <strong>the</strong> file has been updated, it will restart your <strong>Django</strong> application for you.If you have access to a command shell on a Unix system, you can accomplish this easily by using <strong>the</strong> touch command:touch mysite.fcgiServing admin media filesRegardless of <strong>the</strong> server and configuration you eventually decide to use, you will also need to give some thought tohow to serve <strong>the</strong> admin media files. The advice given in <strong>the</strong> modpython documentation is also applicable in <strong>the</strong> setupsdetailed above.Forcing <strong>the</strong> URL prefix to a particular valueBecause many of <strong>the</strong>se fastcgi-based solutions require rewriting <strong>the</strong> URL at some point inside <strong>the</strong> Web server, <strong>the</strong> pathinformation that <strong>Django</strong> sees may not resemble <strong>the</strong> original URL that was passed in. This is a problem if <strong>the</strong> <strong>Django</strong>application is being served from under a particular prefix and you want your URLs from <strong>the</strong> {% url %} tag to looklike <strong>the</strong> prefix, ra<strong>the</strong>r than <strong>the</strong> rewritten version, which might contain, for example, mysite.fcgi.<strong>Django</strong> makes a good attempt to work out what <strong>the</strong> real script name prefix should be. In particular, if <strong>the</strong> Web serversets <strong>the</strong> SCRIPT_URL (specific to Apache’s mod_rewrite), or REDIRECT_URL (set by a few servers, includingApache + mod_rewrite in some situations), <strong>Django</strong> will work out <strong>the</strong> original prefix automatically.In <strong>the</strong> cases where <strong>Django</strong> cannot work out <strong>the</strong> prefix correctly and where you want <strong>the</strong> original value to be usedin URLs, you can set <strong>the</strong> FORCE_SCRIPT_NAME setting in your main settings file. This sets <strong>the</strong> script nameuniformly for every URL served via that settings file. Thus you’ll need to use different settings files if you wantdifferent sets of URLs to have different script names in this case, but that is a rare situation.As an example of how to use it, if your <strong>Django</strong> configuration is serving all of <strong>the</strong> URLs under ’/’ and you wanted touse this setting, you would set FORCE_SCRIPT_NAME = ” in your settings file.If you’re new to deploying <strong>Django</strong> and/or Python, we’d recommend you try mod_wsgi first. In most cases it’ll be <strong>the</strong>easiest, fastest, and most stable deployment choice.See Also:• Chapter 12 of The <strong>Django</strong> Book discusses deployment and especially scaling in more detail.4.8 Error reporting via e-mailWhen you’re running a public site you should always turn off <strong>the</strong> DEBUG setting. That will make your server run muchfaster, and will also prevent malicious users from seeing details of your application that can be revealed by <strong>the</strong> errorpages.348 Chapter 4. “How-to” guides
<strong>Django</strong> <strong>Documentation</strong>, Release 1.2However, running with DEBUG set to False means you’ll never see errors generated by your site – everyone will justsee your public error pages. You need to keep track of errors that occur in deployed sites, so <strong>Django</strong> can be configuredto e-mail you details of those errors.4.8.1 Server errorsWhen DEBUG is False, <strong>Django</strong> will e-mail <strong>the</strong> users listed in <strong>the</strong> ADMINS setting whenever your code raises anunhandled exception and results in an internal server error (HTTP status code 500). This gives <strong>the</strong> administratorsimmediate notification of any errors. The ADMINS will get a description of <strong>the</strong> error, a complete Python traceback,and details about <strong>the</strong> HTTP request that caused <strong>the</strong> error.Note: In order to send e-mail, <strong>Django</strong> requires a few settings telling it how to connect to your mail server. At <strong>the</strong>very least, you’ll need to specify EMAIL_HOST and possibly EMAIL_HOST_USER and EMAIL_HOST_PASSWORD,though o<strong>the</strong>r settings may be also required depending on your mail server’s configuration. Consult <strong>the</strong> <strong>Django</strong> settingsdocumentation for a full list of email-related settings.By default, <strong>Django</strong> will send e-mail from root@localhost. However, some mail providers reject all e-mail from thisaddress. To use a different sender address, modify <strong>the</strong> SERVER_EMAIL setting.To disable this behavior, just remove all entries from <strong>the</strong> ADMINS setting.4.8.2 404 errors<strong>Django</strong> can also be configured to e-mail errors about broken links (404 “page not found” errors). <strong>Django</strong> sends e-mailsabout 404 errors when:• DEBUG is False• SEND_BROKEN_LINK_EMAILS is True• Your MIDDLEWARE_CLASSES setting includes CommonMiddleware (which it does by default).If those conditions are met, <strong>Django</strong> will e-mail <strong>the</strong> users listed in <strong>the</strong> MANAGERS setting whenever your code raises a404 and <strong>the</strong> request has a referer. (It doesn’t bo<strong>the</strong>r to e-mail for 404s that don’t have a referer – those are usually justpeople typing in broken URLs or broken Web ‘bots).You can tell <strong>Django</strong> to stop reporting particular 404s by tweaking <strong>the</strong> IGNORABLE_404_ENDS andIGNORABLE_404_STARTS settings. Both should be a tuple of strings. For example:IGNORABLE_404_ENDS = (’.php’, ’.cgi’)IGNORABLE_404_STARTS = (’/phpmyadmin/’,)In this example, a 404 to any URL ending with .php or .cgi will not be reported. Nei<strong>the</strong>r will any URL startingwith /phpmyadmin/.The best way to disable this behavior is to set SEND_BROKEN_LINK_EMAILS to False.See Also:You can also set up custom error reporting by writing a custom piece of exception middleware. If you do write customerror handling, it’s a good idea to emulate <strong>Django</strong>’s built-in error handling and only report/log errors if DEBUG isFalse.4.8. Error reporting via e-mail 349
<strong>Django</strong> <strong>Documentation</strong>, Release 1.24.9 Providing initial data for modelsIt’s sometimes useful to pre-populate your database with hard-coded data when you’re first setting up an app. There’sa couple of ways you can have <strong>Django</strong> automatically create this data: you can provide initial data via fixtures, or youcan provide initial data as SQL.In general, using a fixture is a cleaner method since it’s database-agnostic, but initial SQL is also quite a bit moreflexible.4.9.1 Providing initial data with fixturesA fixture is a collection of data that <strong>Django</strong> knows how to import into a database. The most straightforward way ofcreating a fixture if you’ve already got some data is to use <strong>the</strong> manage.py dumpdata command. Or, you can writefixtures by hand; fixtures can be written as XML, YAML, or JSON documents. The serialization documentation hasmore details about each of <strong>the</strong>se supported serialization formats.As an example, though, here’s what a fixture for a simple Person model might look like in JSON:[{"model": "myapp.person","pk": 1,"fields": {"first_name": "John","last_name": "Lennon"}},{"model": "myapp.person","pk": 2,"fields": {"first_name": "Paul","last_name": "McCartney"}}]And here’s that same fixture as YAML:- model: myapp.personpk: 1fields:first_name: Johnlast_name: Lennon- model: myapp.personpk: 2fields:first_name: Paullast_name: McCartneyYou’ll store this data in a fixtures directory inside your app.Loading data is easy: just call manage.py loaddata fixturename, where fixturename is <strong>the</strong> name of <strong>the</strong>fixture file you’ve created. Every time you run loaddata <strong>the</strong> data will be read from <strong>the</strong> fixture and re-loaded into<strong>the</strong> database. Note that this means that if you change one of <strong>the</strong> rows created by a fixture and <strong>the</strong>n run loaddataagain you’ll wipe out any changes you’ve made.350 Chapter 4. “How-to” guides
<strong>Django</strong> <strong>Documentation</strong>, Release 1.2Automatically loading initial data fixturesIf you create a fixture named initial_data.[xml/yaml/json], that fixture will be loaded every time you runsyncdb. This is extremely convenient, but be careful: remember that <strong>the</strong> data will be refreshed every time you runsyncdb. So don’t use initial_data for data you’ll want to edit.See Also:Fixtures are also used by <strong>the</strong> testing framework to help set up a consistent test environment.4.9.2 Providing initial SQL data<strong>Django</strong> provides a hook for passing <strong>the</strong> database arbitrary SQL that’s executed just after <strong>the</strong> CREATE TABLE statementswhen you run syncdb. You can use this hook to populate default records, or you could also create SQLfunctions, views, triggers, etc.The hook is simple: <strong>Django</strong> just looks for a file called sql/.sql, in your app directory, where is <strong>the</strong> model’s name in lowercase.So, if you had a Person model in an app called myapp, you could add arbitrary SQL to <strong>the</strong> file sql/person.sqlinside your myapp directory. Here’s an example of what <strong>the</strong> file might contain:INSERT INTO myapp_person (first_name, last_name) VALUES (’John’, ’Lennon’);INSERT INTO myapp_person (first_name, last_name) VALUES (’Paul’, ’McCartney’);Each SQL file, if given, is expected to contain valid SQL statements which will insert <strong>the</strong> desired data (e.g., properlyformattedINSERT statements separated by semicolons).The SQL files are read by <strong>the</strong> sqlcustom, sqlreset, sqlall and reset commands in manage.py. Refer to <strong>the</strong>manage.py documentation for more information.Note that if you have multiple SQL data files, <strong>the</strong>re’s no guarantee of <strong>the</strong> order in which <strong>the</strong>y’re executed. The onlything you can assume is that, by <strong>the</strong> time your custom data files are executed, all <strong>the</strong> database tables already will havebeen created.Database-backend-specific SQL dataThere’s also a hook for backend-specific SQL data. For example, you can have separateinitial-data files for PostgreSQL and MySQL. For each app, <strong>Django</strong> looks for a file called/sql/..sql, where is your app directory, is <strong>the</strong> model’s name in lowercase and is <strong>the</strong> last part of<strong>the</strong> module name provided for <strong>the</strong> ENGINE in your settings file (e.g., if you have defined adatabase with an ENGINE value of django.db.backends.postgresql, <strong>Django</strong> will look for/sql/.postgresql.sql).Backend-specific SQL data is executed before non-backend-specific SQL data. For example, if your app contains<strong>the</strong> files sql/person.sql and sql/person.postgresql.sql and you’re installing <strong>the</strong> app on PostgreSQL,<strong>Django</strong> will execute <strong>the</strong> contents of sql/person.postgresql.sql first, <strong>the</strong>n sql/person.sql.4.10 Using internationalization in your own projectsAt runtime, <strong>Django</strong> looks for translations by following this algorithm:• First, it looks for a locale directory in <strong>the</strong> directory containing your settings file.• Second, it looks for a locale directory in <strong>the</strong> project directory.4.10. Using internationalization in your own projects 351
<strong>Django</strong> <strong>Documentation</strong>, Release 1.2• Third, it looks for a locale directory in each of <strong>the</strong> installed apps. It does this in <strong>the</strong> reverse order of IN-STALLED_APPS• Finally, it checks <strong>the</strong> <strong>Django</strong>-provided base translation in django/conf/locale.In all cases <strong>the</strong> name of <strong>the</strong> directory containing <strong>the</strong> translation is expected to be named using locale name notation.E.g. de, pt_BR, es_AR, etc.This way, you can write applications that include <strong>the</strong>ir own translations, and you can override base translations inyour project path. Or, you can just build a big project out of several apps and put all translations into one big projectmessage file. The choice is yours.Note: If you’re using manually configured settings, as described in Using settings without settingDJANGO_SETTINGS_MODULE, <strong>the</strong> locale directory in <strong>the</strong> project directory will not be examined, since <strong>Django</strong>loses <strong>the</strong> ability to work out <strong>the</strong> location of <strong>the</strong> project directory. (<strong>Django</strong> normally uses <strong>the</strong> location of <strong>the</strong> settingsfile to determine this, and a settings file doesn’t exist if you’re manually configuring your settings.)All message file repositories are structured <strong>the</strong> same way. They are:• $APPPATH/locale//LC_MESSAGES/django.(po|mo)• $PROJECTPATH/locale//LC_MESSAGES/django.(po|mo)• All paths listed in LOCALE_PATHS in your settings file are searched in that order for/LC_MESSAGES/django.(po|mo)• $PYTHONPATH/django/conf/locale//LC_MESSAGES/django.(po|mo)To create message files, you use <strong>the</strong> django-admin.py makemessages tool. You only need to be in <strong>the</strong> samedirectory where <strong>the</strong> locale/ directory is located. And you use django-admin.py compilemessages toproduce <strong>the</strong> binary .mo files that are used by gettext. <strong>Read</strong> <strong>the</strong> Localization document for more details.You can also run django-admin.py compilemessages --settings=path.to.settings to make <strong>the</strong>compiler process all <strong>the</strong> directories in your LOCALE_PATHS setting.Application message files are a bit complicated to discover – <strong>the</strong>y need <strong>the</strong> LocaleMiddleware. If you don’t use<strong>the</strong> middleware, only <strong>the</strong> <strong>Django</strong> message files and project message files will be installed and available at runtime.Finally, you should give some thought to <strong>the</strong> structure of your translation files. If your applications need to be deliveredto o<strong>the</strong>r users and will be used in o<strong>the</strong>r projects, you might want to use app-specific translations. But using appspecifictranslations and project translations could produce weird problems with makemessages: It will traverseall directories below <strong>the</strong> current path and so might put message IDs into <strong>the</strong> project message file that are already inapplication message files.The easiest way out is to store applications that are not part of <strong>the</strong> project (and so carry <strong>the</strong>ir own translations) outside<strong>the</strong> project tree. That way, django-admin.py makemessages on <strong>the</strong> project level will only translate stringsthat are connected to your explicit project and not strings that are distributed independently.4.10.1 Using translations outside views and templatesWhile <strong>Django</strong> provides a rich set of i18n tools for use in views and templates, it does not restrict <strong>the</strong> usage to <strong>Django</strong>specificcode. The <strong>Django</strong> translation mechanisms can be used to translate arbitrary texts to any language that issupported by <strong>Django</strong> (as long as an appropriate translation catalog exists, of course). You can load a translationcatalog, activate it and translate text to language of your choice, but remember to switch back to original language,as activating a translation catalog is done on per-thread basis and such change will affect code running in <strong>the</strong> samethread.For example:352 Chapter 4. “How-to” guides
<strong>Django</strong> <strong>Documentation</strong>, Release 1.2from django.utils import translationdef welcome_translated(language):cur_language = translation.get_language()try:translation.activate(language)text = translation.ugettext(’welcome’)finally:translation.activate(cur_language)return textCalling this function with <strong>the</strong> value ‘de’ will give you "Willkommen", regardless of LANGUAGE_CODE and languageset by middleware.Functions of particular interest are django.utils.translation.get_language() which returns <strong>the</strong> languageused in <strong>the</strong> current thread, django.utils.translation.activate() which activates a translationcatalog for <strong>the</strong> current thread, and django.utils.translation.check_for_language() which checksif <strong>the</strong> given language is supported by <strong>Django</strong>.4.11 Running <strong>Django</strong> on JythonJython is an implementation of Python that runs on <strong>the</strong> Java platform (JVM). <strong>Django</strong> runs cleanly on Jython version2.5 or later, which means you can deploy <strong>Django</strong> on any Java platform.This document will get you up and running with <strong>Django</strong> on top of Jython.4.11.1 Installing Jython<strong>Django</strong> works with Jython versions 2.5b3 and higher. Download Jython at http://www.jython.org/.4.11.2 Creating a servlet containerIf you just want to experiment with <strong>Django</strong>, skip ahead to <strong>the</strong> next section; <strong>Django</strong> includes a lightweight Web serveryou can use for testing, so you won’t need to set up anything else until you’re ready to deploy <strong>Django</strong> in production.If you want to use <strong>Django</strong> on a production site, use a Java servlet container, such as Apache Tomcat. Full JavaEEapplications servers such as GlassFish or JBoss are also OK, if you need <strong>the</strong> extra features <strong>the</strong>y include.4.11.3 Installing <strong>Django</strong>The next step is to install <strong>Django</strong> itself. This is exactly <strong>the</strong> same as installing <strong>Django</strong> on standard Python, so seeRemove any old versions of <strong>Django</strong> and Install <strong>the</strong> <strong>Django</strong> code for instructions.4.11.4 Installing Jython platform support librariesThe django-jython project contains database backends and management commands for <strong>Django</strong>/Jython development.Note that <strong>the</strong> builtin <strong>Django</strong> backends won’t work on top of Jython.To install it, follow <strong>the</strong> installation instructions detailed on <strong>the</strong> project Web site. Also, read <strong>the</strong> database backendsdocumentation <strong>the</strong>re.4.11. Running <strong>Django</strong> on Jython 353
<strong>Django</strong> <strong>Documentation</strong>, Release 1.24.11.5 Differences with <strong>Django</strong> on JythonAt this point, <strong>Django</strong> on Jython should behave nearly identically to <strong>Django</strong> running on standard Python. However, area few differences to keep in mind:• Remember to use <strong>the</strong> jython command instead of python. The documentation uses python for consistancy,but if you’re using Jython you’ll want to mentally replace python with jython every time it occurs.• Similarly, you’ll need to use <strong>the</strong> JYTHONPATH environment variable instead of PYTHONPATH.4.12 Integrating <strong>Django</strong> with a legacy databaseWhile <strong>Django</strong> is best suited for developing new applications, it’s quite possible to integrate it into legacy databases.<strong>Django</strong> includes a couple of utilities to automate as much of this process as possible.This document assumes you know <strong>the</strong> <strong>Django</strong> basics, as covered in <strong>the</strong> tutorial.Once you’ve got <strong>Django</strong> set up, you’ll follow this general process to integrate with an existing database.4.12.1 Give <strong>Django</strong> your database parametersYou’ll need to tell <strong>Django</strong> what your database connection parameters are, and what <strong>the</strong> name of <strong>the</strong> database is. Dothat by editing <strong>the</strong> DATABASES setting and assigning values to <strong>the</strong> following keys for <strong>the</strong> ’default’ connection:• NAME• ENGINE• USER• PASSWORD• HOST• PORT4.12.2 Auto-generate <strong>the</strong> models<strong>Django</strong> comes with a utility called inspectdb that can create models by introspecting an existing database. You canview <strong>the</strong> output by running this command:python manage.py inspectdbSave this as a file by using standard Unix output redirection:python manage.py inspectdb > models.pyThis feature is meant as a shortcut, not as definitive model generation. See <strong>the</strong> documentation of inspectdbfor more information.Once you’ve cleaned up your models, name <strong>the</strong> file models.py and put it in <strong>the</strong> Python package that holds your app.Then add <strong>the</strong> app to your INSTALLED_APPS setting.354 Chapter 4. “How-to” guides
<strong>Django</strong> <strong>Documentation</strong>, Release 1.24.12.3 Install <strong>the</strong> core <strong>Django</strong> tablesNext, run <strong>the</strong> syncdb command to install any extra needed database records such as admin permissions and contenttypes:python manage.py syncdb4.12.4 Test and tweakThose are <strong>the</strong> basic steps – from here you’ll want to tweak <strong>the</strong> models <strong>Django</strong> generated until <strong>the</strong>y work <strong>the</strong> way you’dlike. Try accessing your data via <strong>the</strong> <strong>Django</strong> database API, and try editing objects via <strong>Django</strong>’s admin site, and edit<strong>the</strong> models file accordingly.4.13 Outputting CSV with <strong>Django</strong>This document explains how to output CSV (Comma Separated Values) dynamically using <strong>Django</strong> views. To do this,you can ei<strong>the</strong>r use <strong>the</strong> Python CSV library or <strong>the</strong> <strong>Django</strong> template system.4.13.1 Using <strong>the</strong> Python CSV libraryPython comes with a CSV library, csv. The key to using it with <strong>Django</strong> is that <strong>the</strong> csv module’s CSV-creationcapability acts on file-like objects, and <strong>Django</strong>’s HttpResponse objects are file-like objects.Here’s an example:import csvfrom django.http import HttpResponsedef some_view(request):# Create <strong>the</strong> HttpResponse object with <strong>the</strong> appropriate CSV header.response = HttpResponse(mimetype=’text/csv’)response[’Content-Disposition’] = ’attachment; filename=somefilename.csv’writer = csv.writer(response)writer.writerow([’First row’, ’Foo’, ’Bar’, ’Baz’])writer.writerow([’Second row’, ’A’, ’B’, ’C’, ’"Testing"’, "Here’s a quote"])return responseThe code and comments should be self-explanatory, but a few things deserve a mention:• The response gets a special MIME type, text/csv. This tells browsers that <strong>the</strong> document is a CSV file, ra<strong>the</strong>rthan an HTML file. If you leave this off, browsers will probably interpret <strong>the</strong> output as HTML, which will resultin ugly, scary gobbledygook in <strong>the</strong> browser window.• The response gets an additional Content-Disposition header, which contains <strong>the</strong> name of <strong>the</strong> CSV file.This filename is arbitrary; call it whatever you want. It’ll be used by browsers in <strong>the</strong> “Save as...” dialogue, etc.• Hooking into <strong>the</strong> CSV-generation API is easy: Just pass response as <strong>the</strong> first argument to csv.writer.The csv.writer function expects a file-like object, and HttpResponse objects fit <strong>the</strong> bill.• For each row in your CSV file, call writer.writerow, passing it an iterable object such as a list or tuple.• The CSV module takes care of quoting for you, so you don’t have to worry about escaping strings with quotesor commas in <strong>the</strong>m. Just pass writerow() your raw strings, and it’ll do <strong>the</strong> right thing.4.13. Outputting CSV with <strong>Django</strong> 355
<strong>Django</strong> <strong>Documentation</strong>, Release 1.2Handling UnicodePython’s csv module does not support Unicode input. Since <strong>Django</strong> uses Unicode internally this means strings readfrom sources such as HttpRequest are potentially problematic. There are a few options for handling this:• Manually encode all Unicode objects to a compatible encoding.• Use <strong>the</strong> UnicodeWriter class provided in <strong>the</strong> csv module’s examples section.• Use <strong>the</strong> python-unicodecsv module, which aims to be a drop-in replacement for csv that gracefully handlesUnicode.For more information, see <strong>the</strong> Python CSV File <strong>Read</strong>ing and Writing documentation.4.13.2 Using <strong>the</strong> template systemAlternatively, you can use <strong>the</strong> <strong>Django</strong> template system to generate CSV. This is lower-level than using <strong>the</strong> convenientPython csv module, but <strong>the</strong> solution is presented here for completeness.The idea here is to pass a list of items to your template, and have <strong>the</strong> template output <strong>the</strong> commas in a for loop.Here’s an example, which generates <strong>the</strong> same CSV file as above:from django.http import HttpResponsefrom django.template import loader, Contextdef some_view(request):# Create <strong>the</strong> HttpResponse object with <strong>the</strong> appropriate CSV header.response = HttpResponse(mimetype=’text/csv’)response[’Content-Disposition’] = ’attachment; filename=somefilename.csv’# The data is hard-coded here, but you could load it from a database or# some o<strong>the</strong>r source.csv_data = ((’First row’, ’Foo’, ’Bar’, ’Baz’),(’Second row’, ’A’, ’B’, ’C’, ’"Testing"’, "Here’s a quote"),)t = loader.get_template(’my_template_name.txt’)c = Context({’data’: csv_data,})response.write(t.render(c))return responseThe only difference between this example and <strong>the</strong> previous example is that this one uses template loading instead of<strong>the</strong> CSV module. The rest of <strong>the</strong> code – such as <strong>the</strong> mimetype=’text/csv’ – is <strong>the</strong> same.Then, create <strong>the</strong> template my_template_name.txt, with this template code:{% for row in data %}"{{ row.0|addslashes }}", "{{ row.1|addslashes }}", "{{ row.2|addslashes }}", "{{% endfor %}This template is quite basic. It just iterates over <strong>the</strong> given data and displays a line of CSV for each row. It uses <strong>the</strong>addslashes template filter to ensure <strong>the</strong>re aren’t any problems with quotes.356 Chapter 4. “How-to” guides
<strong>Django</strong> <strong>Documentation</strong>, Release 1.24.13.3 O<strong>the</strong>r text-based formatsNotice that <strong>the</strong>re isn’t very much specific to CSV here – just <strong>the</strong> specific output format. You can use ei<strong>the</strong>r of <strong>the</strong>setechniques to output any text-based format you can dream of. You can also use a similar technique to generate arbitrarybinary data; see Outputting PDFs with <strong>Django</strong> for an example.4.14 Outputting PDFs with <strong>Django</strong>This document explains how to output PDF files dynamically using <strong>Django</strong> views. This is made possible by <strong>the</strong>excellent, open-source ReportLab Python PDF library.The advantage of generating PDF files dynamically is that you can create customized PDFs for different purposes –say, for different users or different pieces of content.For example, <strong>Django</strong> was used at kusports.com to generate customized, printer-friendly NCAA tournament brackets,as PDF files, for people participating in a March Madness contest.4.14.1 Install ReportLabDownload and install <strong>the</strong> ReportLab library from http://www.reportlab.org/oss/rl-toolkit/download/. The user guide(not coincidentally, a PDF file) explains how to install it.Test your installation by importing it in <strong>the</strong> Python interactive interpreter:>>> import reportlabIf that command doesn’t raise any errors, <strong>the</strong> installation worked.4.14.2 Write your viewThe key to generating PDFs dynamically with <strong>Django</strong> is that <strong>the</strong> ReportLab API acts on file-like objects, and <strong>Django</strong>’sHttpResponse objects are file-like objects.Here’s a “Hello World” example:from reportlab.pdfgen import canvasfrom django.http import HttpResponsedef some_view(request):# Create <strong>the</strong> HttpResponse object with <strong>the</strong> appropriate PDF headers.response = HttpResponse(mimetype=’application/pdf’)response[’Content-Disposition’] = ’attachment; filename=somefilename.pdf’# Create <strong>the</strong> PDF object, using <strong>the</strong> response object as its "file."p = canvas.Canvas(response)# Draw things on <strong>the</strong> PDF. Here’s where <strong>the</strong> PDF generation happens.# See <strong>the</strong> ReportLab documentation for <strong>the</strong> full list of functionality.p.drawString(100, 100, "Hello world.")# Close <strong>the</strong> PDF object cleanly, and we’re done.p.showPage()p.save()return response4.14. Outputting PDFs with <strong>Django</strong> 357
<strong>Django</strong> <strong>Documentation</strong>, Release 1.2The code and comments should be self-explanatory, but a few things deserve a mention:• The response gets a special MIME type, application/pdf. This tells browsers that <strong>the</strong> document is a PDFfile, ra<strong>the</strong>r than an HTML file. If you leave this off, browsers will probably interpret <strong>the</strong> output as HTML, whichwould result in ugly, scary gobbledygook in <strong>the</strong> browser window.• The response gets an additional Content-Disposition header, which contains <strong>the</strong> name of <strong>the</strong> PDF file.This filename is arbitrary: Call it whatever you want. It’ll be used by browsers in <strong>the</strong> “Save as...” dialogue, etc.• The Content-Disposition header starts with ’attachment; ’ in this example. This forces Webbrowsers to pop-up a dialog box prompting/confirming how to handle <strong>the</strong> document even if a default is set on<strong>the</strong> machine. If you leave off ’attachment;’, browsers will handle <strong>the</strong> PDF using whatever program/plugin<strong>the</strong>y’ve been configured to use for PDFs. Here’s what that code would look like:response[’Content-Disposition’] = ’filename=somefilename.pdf’• Hooking into <strong>the</strong> ReportLab API is easy: Just pass response as <strong>the</strong> first argument to canvas.Canvas. TheCanvas class expects a file-like object, and HttpResponse objects fit <strong>the</strong> bill.• Note that all subsequent PDF-generation methods are called on <strong>the</strong> PDF object (in this case, p) – not onresponse.• Finally, it’s important to call showPage() and save() on <strong>the</strong> PDF file.4.14.3 Complex PDFsIf you’re creating a complex PDF document with ReportLab, consider using <strong>the</strong> cStringIO library as a temporaryholding place for your PDF file. The cStringIO library provides a file-like object interface that is particularly efficient.Here’s <strong>the</strong> above “Hello World” example rewritten to use cStringIO:# Fall back to StringIO in environments where cStringIO is not availabletry:from cStringIO import StringIOexcept ImportError:from StringIO import StringIOfrom reportlab.pdfgen import canvasfrom django.http import HttpResponsedef some_view(request):# Create <strong>the</strong> HttpResponse object with <strong>the</strong> appropriate PDF headers.response = HttpResponse(mimetype=’application/pdf’)response[’Content-Disposition’] = ’attachment; filename=somefilename.pdf’buffer = StringIO()# Create <strong>the</strong> PDF object, using <strong>the</strong> StringIO object as its "file."p = canvas.Canvas(buffer)# Draw things on <strong>the</strong> PDF. Here’s where <strong>the</strong> PDF generation happens.# See <strong>the</strong> ReportLab documentation for <strong>the</strong> full list of functionality.p.drawString(100, 100, "Hello world.")# Close <strong>the</strong> PDF object cleanly.p.showPage()p.save()# Get <strong>the</strong> value of <strong>the</strong> StringIO buffer and write it to <strong>the</strong> response.pdf = buffer.getvalue()buffer.close()358 Chapter 4. “How-to” guides
<strong>Django</strong> <strong>Documentation</strong>, Release 1.2response.write(pdf)return response4.14.4 Fur<strong>the</strong>r resources• PDFlib is ano<strong>the</strong>r PDF-generation library that has Python bindings. To use it with <strong>Django</strong>, just use <strong>the</strong> sameconcepts explained in this article.• Pisa XHTML2PDF is yet ano<strong>the</strong>r PDF-generation library. Pisa ships with an example of how to integrate Pisawith <strong>Django</strong>.• HTMLdoc is a command-line script that can convert HTML to PDF. It doesn’t have a Python interface, but youcan escape out to <strong>the</strong> shell using system or popen and retrieve <strong>the</strong> output in Python.4.14.5 O<strong>the</strong>r formatsNotice that <strong>the</strong>re isn’t a lot in <strong>the</strong>se examples that’s PDF-specific – just <strong>the</strong> bits using reportlab. You can use asimilar technique to generate any arbitrary format that you can find a Python library for. Also see Outputting CSV with<strong>Django</strong> for ano<strong>the</strong>r example and some techniques you can use when generated text-based formats.4.15 How to serve static files<strong>Django</strong> itself doesn’t serve static (media) files, such as images, style sheets, or video. It leaves that job to whicheverWeb server you choose.The reasoning here is that standard Web servers, such as Apache, lighttpd and Cherokee, are much more fine-tuned atserving static files than a Web application framework.With that said, <strong>Django</strong> does support static files during development. You can use <strong>the</strong>django.views.static.serve() view to serve media files.See Also:If you just need to serve <strong>the</strong> admin media from a nonstandard location, see <strong>the</strong> --adminmedia parameter torunserver.4.15.1 The big, fat disclaimerUsing this method is inefficient and insecure. Do not use this in a production setting. Use this only for development.For information on serving static files in an Apache production environment, see <strong>the</strong> <strong>Django</strong> mod_python documentation.4.15.2 How to do itHere’s <strong>the</strong> formal definition of <strong>the</strong> serve() view:def serve(request, path, document_root, show_indexes=False)To use it, just put this in your URLconf :(r’^site_media/(?P.*)$’, ’django.views.static.serve’,{’document_root’: ’/path/to/media’}),4.15. How to serve static files 359
<strong>Django</strong> <strong>Documentation</strong>, Release 1.2...where site_media is <strong>the</strong> URL where your media will be rooted, and /path/to/media is <strong>the</strong> filesystemroot for your media. This will call <strong>the</strong> serve() view, passing in <strong>the</strong> path from <strong>the</strong> URLconf and <strong>the</strong> (required)document_root parameter.Given <strong>the</strong> above URLconf:• The file /path/to/media/foo.jpg will be made available at <strong>the</strong> URL /site_media/foo.jpg.• The file /path/to/media/css/mystyles.css will be made available at <strong>the</strong> URL/site_media/css/mystyles.css.• The file /path/bar.jpg will not be accessible, because it doesn’t fall under <strong>the</strong> document root.Of course, it’s not compulsory to use a fixed string for <strong>the</strong> ’document_root’ value. You might wish to make thatan entry in your settings file and use <strong>the</strong> setting value <strong>the</strong>re. That will allow you and o<strong>the</strong>r developers working on <strong>the</strong>code to easily change <strong>the</strong> value as required. For example, if we have a line in settings.py that says:STATIC_DOC_ROOT = ’/path/to/media’...we could write <strong>the</strong> above URLconf entry as:from django.conf import settings...(r’^site_media/(?P.*)$’, ’django.views.static.serve’,{’document_root’: settings.STATIC_DOC_ROOT}),Be careful not to use <strong>the</strong> same path as your ADMIN_MEDIA_PREFIX (which defaults to /media/) as this willoverwrite your URLconf entry.4.15.3 Directory listingsOptionally, you can pass <strong>the</strong> show_indexes parameter to <strong>the</strong> serve() view. This is False by default. If it’sTrue, <strong>Django</strong> will display file listings for directories.For example:(r’^site_media/(?P.*)$’, ’django.views.static.serve’,{’document_root’: ’/path/to/media’, ’show_indexes’: True}),You can customize <strong>the</strong> index view by creating a template called static/directory_index.html. That templategets two objects in its context:• directory – <strong>the</strong> directory name (a string)• file_list – a list of file names (as strings) in <strong>the</strong> directoryHere’s <strong>the</strong> default static/directory_index.html template:
<strong>Django</strong> <strong>Documentation</strong>, Release 1.2{% endfor %}Changed in version 1.0.3: Prior to <strong>Django</strong> 1.0.3, <strong>the</strong>re was a bug in <strong>the</strong> view that provided directory listings. Thetemplate that was loaded had to be called static/directory_listing (with no .html extension). For backwardscompatibility with earlier versions, <strong>Django</strong> will still load templates with <strong>the</strong> older (no extension) name, but itwill prefer <strong>the</strong> directory_index.html version.4.15.4 Limiting use to DEBUG=TrueBecause URLconfs are just plain Python modules, you can use Python logic to make <strong>the</strong> static-media view availableonly in development mode. This is a handy trick to make sure <strong>the</strong> static-serving view doesn’t slip into a productionsetting by mistake.Do this by wrapping an if DEBUG statement around <strong>the</strong> django.views.static.serve() inclusion. Here’sa full example URLconf:from django.conf.urls.defaults import *from django.conf import settingsurlpatterns = patterns(’’,(r’^articles/2003/$’, ’news.views.special_case_2003’),(r’^articles/(?P\d{4})/$’, ’news.views.year_archive’),(r’^articles/(?P\d{4})/(?P\d{2})/$’, ’news.views.month_archive’),(r’^articles/(?P\d{4})/(?P\d{2})/(?P\d+)/$’, ’news.views.article_detail’),)if settings.DEBUG:urlpatterns += patterns(’’,(r’^site_media/(?P.*)$’, ’django.views.static.serve’, {’document_root’: ’/path/to/media)This code is straightforward. It imports <strong>the</strong> settings and checks <strong>the</strong> value of <strong>the</strong> DEBUG setting. If it evaluates to True,<strong>the</strong>n site_media will be associated with <strong>the</strong> django.views.static.serve view. If not, <strong>the</strong>n <strong>the</strong> view won’tbe made available.Of course, <strong>the</strong> catch here is that you’ll have to remember to set DEBUG=False in your production settings file. Butyou should be doing that anyway.See Also:The <strong>Django</strong> community aggregator, where we aggregate content from <strong>the</strong> global <strong>Django</strong> community. Many writers in<strong>the</strong> aggregator write this sort of how-to material.4.15. How to serve static files 361
<strong>Django</strong> <strong>Documentation</strong>, Release 1.2362 Chapter 4. “How-to” guides
CHAPTERFIVEDJANGO FAQ5.1 FAQ: General5.1.1 Why does this project exist?<strong>Django</strong> grew from a very practical need: World Online, a newspaper Web operation, is responsible for buildingintensive Web applications on journalism deadlines. In <strong>the</strong> fast-paced newsroom, World Online often has only amatter of hours to take a complicated Web application from concept to public launch.At <strong>the</strong> same time, <strong>the</strong> World Online Web developers have consistently been perfectionists when it comes to followingbest practices of Web development.In fall 2003, <strong>the</strong> World Online developers (Adrian Holovaty and Simon Willison) ditched PHP and began using Pythonto develop its Web sites. As <strong>the</strong>y built intensive, richly interactive sites such as Lawrence.com, <strong>the</strong>y began to extract ageneric Web development framework that let <strong>the</strong>m build Web applications more and more quickly. They tweaked thisframework constantly, adding improvements over two years.In summer 2005, World Online decided to open-source <strong>the</strong> resulting software, <strong>Django</strong>. <strong>Django</strong> would not be possiblewithout a whole host of open-source projects – Apache, Python, and PostgreSQL to name a few – and we’re thrilledto be able to give something back to <strong>the</strong> open-source community.5.1.2 What does “<strong>Django</strong>” mean, and how do you pronounce it?<strong>Django</strong> is named after <strong>Django</strong> Reinhardt, a gypsy jazz guitarist from <strong>the</strong> 1930s to early 1950s. To this day, he’sconsidered one of <strong>the</strong> best guitarists of all time.Listen to his music. You’ll like it.<strong>Django</strong> is pronounced JANG-oh. Rhymes with FANG-oh. The “D” is silent.We’ve also recorded an audio clip of <strong>the</strong> pronunciation.5.1.3 Is <strong>Django</strong> stable?Yes. World Online has been using <strong>Django</strong> for more than three years. Sites built on <strong>Django</strong> have wea<strong>the</strong>red trafficspikes of over one million hits an hour and a number of Slashdottings. Yes, it’s quite stable.363
<strong>Django</strong> <strong>Documentation</strong>, Release 1.25.1.4 Does <strong>Django</strong> scale?Yes. Compared to development time, hardware is cheap, and so <strong>Django</strong> is designed to take advantage of as muchhardware as you can throw at it.<strong>Django</strong> uses a “shared-nothing” architecture, which means you can add hardware at any level – database servers,caching servers or Web/application servers.The framework cleanly separates components such as its database layer and application layer. And it ships with asimple-yet-powerful cache framework.5.1.5 Who’s behind this?<strong>Django</strong> was originally developed at World Online, <strong>the</strong> Web department of a newspaper in Lawrence, Kansas, USA.<strong>Django</strong>’s now run by an international team of volunteers; you can read all about <strong>the</strong>m over at <strong>the</strong> list of committers5.1.6 Which sites use <strong>Django</strong>?The <strong>Django</strong> wiki features a consistently growing list of <strong>Django</strong>-powered sites. Feel free to add your <strong>Django</strong>-poweredsite to <strong>the</strong> list.5.1.7 <strong>Django</strong> appears to be a MVC framework, but you call <strong>the</strong> Controller <strong>the</strong> “view”,and <strong>the</strong> View <strong>the</strong> “template”. How come you don’t use <strong>the</strong> standard names?Well, <strong>the</strong> standard names are debatable.In our interpretation of MVC, <strong>the</strong> “view” describes <strong>the</strong> data that gets presented to <strong>the</strong> user. It’s not necessarily how<strong>the</strong> data looks, but which data is presented. The view describes which data you see, not how you see it. It’s a subtledistinction.So, in our case, a “view” is <strong>the</strong> Python callback function for a particular URL, because that callback function describeswhich data is presented.Fur<strong>the</strong>rmore, it’s sensible to separate content from presentation – which is where templates come in. In <strong>Django</strong>, a“view” describes which data is presented, but a view normally delegates to a template, which describes how <strong>the</strong> datais presented.Where does <strong>the</strong> “controller” fit in, <strong>the</strong>n? In <strong>Django</strong>’s case, it’s probably <strong>the</strong> framework itself: <strong>the</strong> machinery that sendsa request to <strong>the</strong> appropriate view, according to <strong>the</strong> <strong>Django</strong> URL configuration.If you’re hungry for acronyms, you might say that <strong>Django</strong> is a “MTV” framework – that is, “model”, “template”, and“view.” That breakdown makes much more sense.At <strong>the</strong> end of <strong>the</strong> day, of course, it comes down to getting stuff done. And, regardless of how things are named, <strong>Django</strong>gets stuff done in a way that’s most logical to us.5.1.8 does – why doesn’t <strong>Django</strong>?We’re well aware that <strong>the</strong>re are o<strong>the</strong>r awesome Web frameworks out <strong>the</strong>re, and we’re not averse to borrowing ideaswhere appropriate. However, <strong>Django</strong> was developed precisely because we were unhappy with <strong>the</strong> status quo, so pleasebe aware that “because does it” is not going to be sufficient reason to add a given feature to <strong>Django</strong>.364 Chapter 5. <strong>Django</strong> FAQ
<strong>Django</strong> <strong>Documentation</strong>, Release 1.25.1.9 Why did you write all of <strong>Django</strong> from scratch, instead of using o<strong>the</strong>r Pythonlibraries?When <strong>Django</strong> was originally written a couple of years ago, Adrian and Simon spent quite a bit of time exploring <strong>the</strong>various Python Web frameworks available.In our opinion, none of <strong>the</strong>m were completely up to snuff.We’re picky. You might even call us perfectionists. (With deadlines.)Over time, we stumbled across open-source libraries that did things we’d already implemented. It was reassuring tosee o<strong>the</strong>r people solving similar problems in similar ways, but it was too late to integrate outside code: We’d alreadywritten, tested and implemented our own framework bits in several production settings – and our own code met ourneeds delightfully.In most cases, however, we found that existing frameworks/tools inevitably had some sort of fundamental, fatal flawthat made us squeamish. No tool fit our philosophies 100%.Like we said: We’re picky.We’ve documented our philosophies on <strong>the</strong> design philosophies page.5.1.10 Is <strong>Django</strong> a content-management-system (CMS)?No, <strong>Django</strong> is not a CMS, or any sort of “turnkey product” in and of itself. It’s a Web framework; it’s a programmingtool that lets you build Web sites.For example, it doesn’t make much sense to compare <strong>Django</strong> to something like Drupal, because <strong>Django</strong> is somethingyou use to create things like Drupal.Of course, <strong>Django</strong>’s automatic admin site is fantastic and timesaving – but <strong>the</strong> admin site is one module of <strong>Django</strong> <strong>the</strong>framework. Fur<strong>the</strong>rmore, although <strong>Django</strong> has special conveniences for building “CMS-y” apps, that doesn’t meanit’s not just as appropriate for building “non-CMS-y” apps (whatever that means!).5.1.11 How can I download <strong>the</strong> <strong>Django</strong> documentation to read it offline?The <strong>Django</strong> docs are available in <strong>the</strong> docs directory of each <strong>Django</strong> tarball release. These docs are in reST (reStructuredText)format, and each text file corresponds to a Web page on <strong>the</strong> official <strong>Django</strong> site.Because <strong>the</strong> documentation is stored in revision control, you can browse documentation changes just like you canbrowse code changes.Technically, <strong>the</strong> docs on <strong>Django</strong>’s site are generated from <strong>the</strong> latest development versions of those reST documents,so <strong>the</strong> docs on <strong>the</strong> <strong>Django</strong> site may offer more information than <strong>the</strong> docs that come with <strong>the</strong> latest <strong>Django</strong> release.5.1.12 Where can I find <strong>Django</strong> developers for hire?Consult our developers for hire page for a list of <strong>Django</strong> developers who would be happy to help you.You might also be interested in posting a job to http://djangogigs.com/ . If you want to find <strong>Django</strong>-capable people inyour local area, try http://djangopeople.net/ .5.1. FAQ: General 365
<strong>Django</strong> <strong>Documentation</strong>, Release 1.25.2 FAQ: Installation5.2.1 How do I get started?1. Download <strong>the</strong> code.2. Install <strong>Django</strong> (read <strong>the</strong> installation guide).3. Walk through <strong>the</strong> tutorial.4. Check out <strong>the</strong> rest of <strong>the</strong> documentation, and ask questions if you run into trouble.5.2.2 What are <strong>Django</strong>’s prerequisites?<strong>Django</strong> requires Python, specifically any version of Python from 2.4 through 2.7. No o<strong>the</strong>r Python libraries are requiredfor basic <strong>Django</strong> usage.For a development environment – if you just want to experiment with <strong>Django</strong> – you don’t need to have a separate Webserver installed; <strong>Django</strong> comes with its own lightweight development server. For a production environment, <strong>Django</strong>follows <strong>the</strong> WSGI spec, which means it can run on a variety of server platforms. See Deploying <strong>Django</strong> for somepopular alternatives. Also, <strong>the</strong> server arrangements wiki page contains details for several deployment strategies.If you want to use <strong>Django</strong> with a database, which is probably <strong>the</strong> case, you’ll also need a database engine. PostgreSQLis recommended, because we’re PostgreSQL fans, and MySQL, SQLite 3, and Oracle are also supported.5.2.3 Do I lose anything by using Python 2.4 versus newer Python versions, suchas Python 2.5 or 2.6?Not in <strong>the</strong> core framework. Currently, <strong>Django</strong> itself officially supports any version of Python from 2.4 through 2.7,inclusive. However, newer versions of Python are often faster, have more features, and are better supported. Thirdpartyapplications for use with <strong>Django</strong> are, of course, free to set <strong>the</strong>ir own version requirements.Over <strong>the</strong> next year or two <strong>Django</strong> will begin dropping support for older Python versions as part of a migration whichwill end with <strong>Django</strong> running on Python 3 (see below for details).All else being equal, we recommend that you use <strong>the</strong> latest 2.x release (currently Python 2.7). This will let you takeadvantage of <strong>the</strong> numerous improvements and optimizations to <strong>the</strong> Python language since version 2.4, and will helpease <strong>the</strong> process of dropping support for older Python versions on <strong>the</strong> road to Python 3.5.2.4 Can I use <strong>Django</strong> with Python 2.3?<strong>Django</strong> 1.1 (and earlier) supported Python 2.3. <strong>Django</strong> 1.2 and newer does not. We highly recommend you upgradePython if at all possible, but <strong>Django</strong> 1.1 will continue to work on Python 2.3.5.2.5 Can I use <strong>Django</strong> with Python 3?Not at <strong>the</strong> moment. Python 3.0 introduced a number of backwards-incompatible changes to <strong>the</strong> Python language, andalthough <strong>the</strong>se changes are generally a good thing for Python’s future, it will be a while before most Python softwarecatches up and is able to run on Python 3.0. For larger Python-based software like <strong>Django</strong>, <strong>the</strong> transition is expected totake at least a year or two (since it involves dropping support for older Python releases and so must be done gradually).In <strong>the</strong> meantime, Python 2.x releases will be supported and provided with bug fixes and security updates by <strong>the</strong> Pythondevelopment team, so continuing to use a Python 2.x release during <strong>the</strong> transition should not present any risk.366 Chapter 5. <strong>Django</strong> FAQ
<strong>Django</strong> <strong>Documentation</strong>, Release 1.25.2.6 Will <strong>Django</strong> run under shared hosting (like TextDrive or Dreamhost)?See our <strong>Django</strong>-friendly Web hosts page.5.2.7 Should I use <strong>the</strong> stable version or development version?Generally, if you’re using code in production, you should be using a stable release. The <strong>Django</strong> project publishes afull stable release every nine months or so, with bugfix updates in between. These stable releases contain <strong>the</strong> API thatis covered by our backwards compatibility guarantees; if you write code against stable releases, you shouldn’t haveany problems upgrading when <strong>the</strong> next official version is released.5.3 FAQ: Using <strong>Django</strong>5.3.1 Why do I get an error about importing DJANGO_SETTINGS_MODULE?Make sure that:• The environment variable DJANGO_SETTINGS_MODULE is set to a fully-qualified Python module (i.e.“mysite.settings”).• Said module is on sys.path (import mysite.settings should work).• The module doesn’t contain syntax errors (of course).• If you’re using mod_python but not using <strong>Django</strong>’s request handler, you’ll need to work around a mod_pythonbug related to <strong>the</strong> use of SetEnv; before you import anything from <strong>Django</strong> you’ll need to do <strong>the</strong> following:os.environ.update(req.subprocess_env)(where req is <strong>the</strong> mod_python request object).5.3.2 I can’t stand your template language. Do I have to use it?We happen to think our template engine is <strong>the</strong> best thing since chunky bacon, but we recognize that choosing a templatelanguage runs close to religion. There’s nothing about <strong>Django</strong> that requires using <strong>the</strong> template language, so if you’reattached to ZPT, Cheetah, or whatever, feel free to use those.5.3.3 Do I have to use your model/database layer?Nope. Just like <strong>the</strong> template system, <strong>the</strong> model/database layer is decoupled from <strong>the</strong> rest of <strong>the</strong> framework.The one exception is: If you use a different database library, you won’t get to use <strong>Django</strong>’s automatically-generatedadmin site. That app is coupled to <strong>the</strong> <strong>Django</strong> database layer.5.3.4 How do I use image and file fields?Using a FileField or an ImageField in a model takes a few steps:1. In your settings file, you’ll need to define MEDIA_ROOT as <strong>the</strong> full path to a directory where you’d like <strong>Django</strong>to store uploaded files. (For performance, <strong>the</strong>se files are not stored in <strong>the</strong> database.) Define MEDIA_URL as <strong>the</strong>base public URL of that directory. Make sure that this directory is writable by <strong>the</strong> Web server’s user account.5.3. FAQ: Using <strong>Django</strong> 367
<strong>Django</strong> <strong>Documentation</strong>, Release 1.22. Add <strong>the</strong> FileField or ImageField to your model, making sure to define <strong>the</strong> upload_to option to tell<strong>Django</strong> to which subdirectory of MEDIA_ROOT it should upload files.3. All that will be stored in your database is a path to <strong>the</strong> file (relative to MEDIA_ROOT). You’ll most likelywant to use <strong>the</strong> convenience url attribute provided by <strong>Django</strong>. For example, if your ImageField is calledmug_shot, you can get <strong>the</strong> absolute path to your image in a template with {{ object.mug_shot.url}}.5.3.5 How do I make a variable available to all my templates?Sometimes your templates just all need <strong>the</strong> same thing. A common example would be dynamically-generated menus.At first glance, it seems logical to simply add a common dictionary to <strong>the</strong> template context.The correct solution is to use a RequestContext.RequestContext.Details on how to do this are here: Subclassing Context:5.4 FAQ: Getting Help5.4.1 How do I do X? Why doesn’t Y work? Where can I go to get help?If this FAQ doesn’t contain an answer to your question, you might want to try <strong>the</strong> django-users mailing list. Feel freeto ask any question related to installing, using, or debugging <strong>Django</strong>.If you prefer IRC, <strong>the</strong> #django IRC channel on <strong>the</strong> Freenode IRC network is an active community of helpful individualswho may be able to solve your problem.5.4.2 Why hasn’t my message appeared on django-users?django-users has a lot of subscribers. This is good for <strong>the</strong> community, as it means many people are available tocontribute answers to questions. Unfortunately, it also means that django-users is an attractive target for spammers.In order to combat <strong>the</strong> spam problem, when you join <strong>the</strong> django-users mailing list, we manually moderate <strong>the</strong> firstmessage you send to <strong>the</strong> list. This means that spammers get caught, but it also means that your first question to <strong>the</strong> listmight take a little longer to get answered. We apologize for any inconvenience that this policy may cause.5.4.3 Nobody on django-users answered my question! What should I do?Try making your question more specific, or provide a better example of your problem.As with most open-source mailing lists, <strong>the</strong> folks on django-users are volunteers. If nobody has answered yourquestion, it may be because nobody knows <strong>the</strong> answer, it may be because nobody can understand <strong>the</strong> question, or itmay be that everybody that can help is busy. One thing you might try is to ask <strong>the</strong> question on IRC – visit <strong>the</strong> #djangoIRC channel on <strong>the</strong> Freenode IRC network.You might notice we have a second mailing list, called django-developers – but please don’t e-mail support questionsto this mailing list. This list is for discussion of <strong>the</strong> development of <strong>Django</strong> itself. Asking a tech support question <strong>the</strong>reis considered quite impolite.5.4.4 I think I’ve found a bug! What should I do?Detailed instructions on how to handle a potential bug can be found in our Guide to contributing to <strong>Django</strong>.368 Chapter 5. <strong>Django</strong> FAQ
<strong>Django</strong> <strong>Documentation</strong>, Release 1.25.4.5 I think I’ve found a security problem! What should I do?If you think you’ve found a security problem with <strong>Django</strong>, please send a message to security@djangoproject.com. Thisis a private list only open to long-time, highly trusted <strong>Django</strong> developers, and its archives are not publicly readable.Due to <strong>the</strong> sensitive nature of security issues, we ask that if you think you have found a security problem, please don’tsend a message to one of <strong>the</strong> public mailing lists. <strong>Django</strong> has a policy for handling security issues; while a defect isoutstanding, we would like to minimize any damage that could be inflicted through public knowledge of that defect.5.5 FAQ: Databases and models5.5.1 How can I see <strong>the</strong> raw SQL queries <strong>Django</strong> is running?Make sure your <strong>Django</strong> DEBUG setting is set to True. Then, just do this:>>> from django.db import connection>>> connection.queries[{’sql’: ’SELECT polls_polls.id,polls_polls.question,polls_polls.pub_date FROM polls_polls’,’time’: ’0.002’}]connection.queries is only available if DEBUG is True. It’s a list of dictionaries in order of query execution.Each dictionary has <strong>the</strong> following:‘‘sql‘‘ -- The raw SQL statement‘‘time‘‘ -- How long <strong>the</strong> statement took to execute, in seconds.connection.queries includes all SQL statements – INSERTs, UPDATES, SELECTs, etc. Each time your apphits <strong>the</strong> database, <strong>the</strong> query will be recorded. Note that <strong>the</strong> raw SQL logged in connection.queries may notinclude parameter quoting. Parameter quoting is performed by <strong>the</strong> database-specific backend, and not all backendsprovide a way to retrieve <strong>the</strong> SQL after quoting. New in version 1.2: Please, see <strong>the</strong> release notes If you are usingmultiple databases, you can use <strong>the</strong> same interface on each member of <strong>the</strong> connections dictionary:>>> from django.db import connections>>> connections[’my_db_alias’].queries5.5.2 Can I use <strong>Django</strong> with a pre-existing database?Yes. See Integrating with a legacy database.5.5.3 If I make changes to a model, how do I update <strong>the</strong> database?If you don’t mind clearing data, your project’s manage.py utility has an option to reset <strong>the</strong> SQL for a particularapplication:manage.py reset appnameThis drops any tables associated with appname and recreates <strong>the</strong>m.If you do care about deleting data, you’ll have to execute <strong>the</strong> ALTER TABLE statements manually in your database.That’s <strong>the</strong> way we’ve always done it, because dealing with data is a very sensitive operation that we’ve wanted to avoidautomating. That said, <strong>the</strong>re’s some work being done to add partially automated database-upgrade functionality.5.5. FAQ: Databases and models 369
<strong>Django</strong> <strong>Documentation</strong>, Release 1.25.5.4 Do <strong>Django</strong> models support multiple-column primary keys?No. Only single-column primary keys are supported.But this isn’t an issue in practice, because <strong>the</strong>re’s nothing stopping you from adding o<strong>the</strong>r constraints (using <strong>the</strong>unique_toge<strong>the</strong>r model option or creating <strong>the</strong> constraint directly in your database), and enforcing <strong>the</strong> uniquenessat that level. Single-column primary keys are needed for things such as <strong>the</strong> admin interface to work; e.g., you need asimple way of being able to specify an object to edit or delete.5.5.5 How do I add database-specific options to my CREATE TABLE statements,such as specifying MyISAM as <strong>the</strong> table type?We try to avoid adding special cases in <strong>the</strong> <strong>Django</strong> code to accommodate all <strong>the</strong> database-specific options such astable type, etc. If you’d like to use any of <strong>the</strong>se options, create an SQL initial data file that contains ALTER TABLEstatements that do what you want to do. The initial data files are executed in your database after <strong>the</strong> CREATE TABLEstatements.For example, if you’re using MySQL and want your tables to use <strong>the</strong> MyISAM table type, create an initial data fileand put something like this in it:ALTER TABLE myapp_mytable ENGINE=MyISAM;As explained in <strong>the</strong> SQL initial data file documentation, this SQL file can contain arbitrary SQL, so you can make anysorts of changes you need to make.5.5.6 Why is <strong>Django</strong> leaking memory?<strong>Django</strong> isn’t known to leak memory. If you find your <strong>Django</strong> processes are allocating more and more memory, withno sign of releasing it, check to make sure your DEBUG setting is set to False. If DEBUG is True, <strong>the</strong>n <strong>Django</strong> savesa copy of every SQL statement it has executed.(The queries are saved in django.db.connection.queries. See How can I see <strong>the</strong> raw SQL queries <strong>Django</strong>is running?.)To fix <strong>the</strong> problem, set DEBUG to False.If you need to clear <strong>the</strong> query list manually at any point in your functions, just call reset_queries(), like this:from django import dbdb.reset_queries()5.6 FAQ: The admin5.6.1 I can’t log in. When I enter a valid username and password, it just brings up<strong>the</strong> login page again, with no error messages.The login cookie isn’t being set correctly, because <strong>the</strong> domain of <strong>the</strong> cookie sent out by <strong>Django</strong> doesn’t match <strong>the</strong>domain in your browser. Try <strong>the</strong>se two things:• Set <strong>the</strong> SESSION_COOKIE_DOMAIN setting in your admin config file to match your domain. For example,if you’re going to “http://www.example.com/admin/” in your browser, in “myproject.settings” you should setSESSION_COOKIE_DOMAIN = ’www.example.com’.370 Chapter 5. <strong>Django</strong> FAQ
<strong>Django</strong> <strong>Documentation</strong>, Release 1.2• Some browsers (Firefox?) don’t like to accept cookies from domains that don’t have dots in <strong>the</strong>m. If you’rerunning <strong>the</strong> admin site on “localhost” or ano<strong>the</strong>r domain that doesn’t have a dot in it, try going to “localhost.localdomain”or “127.0.0.1”. And set SESSION_COOKIE_DOMAIN accordingly.5.6.2 I can’t log in. When I enter a valid username and password, it brings up <strong>the</strong>login page again, with a “Please enter a correct username and password”error.If you’re sure your username and password are correct, make sure your user account has is_active and is_staffset to True. The admin site only allows access to users with those two fields both set to True.5.6.3 How can I prevent <strong>the</strong> cache middleware from caching <strong>the</strong> admin site?Set <strong>the</strong> CACHE_MIDDLEWARE_ANONYMOUS_ONLY setting to True. See <strong>the</strong> cache documentation for more information.5.6.4 How do I automatically set a field’s value to <strong>the</strong> user who last edited <strong>the</strong> objectin <strong>the</strong> admin?The ModelAdmin class provides customization hooks that allow you to transform an object as it saved, using detailsfrom <strong>the</strong> request. By extracting <strong>the</strong> current user from <strong>the</strong> request, and customizing <strong>the</strong> save_model() hook, youcan update an object to reflect <strong>the</strong> user that edited it. See <strong>the</strong> documentation on ModelAdmin methods for an example.5.6.5 How do I limit admin access so that objects can only be edited by <strong>the</strong> userswho created <strong>the</strong>m?The ModelAdmin class also provides customization hooks that allow you to control <strong>the</strong> visibility and editabilityof objects in <strong>the</strong> admin. Using <strong>the</strong> same trick of extracting <strong>the</strong> user from <strong>the</strong> request, <strong>the</strong> queryset() andhas_change_permission() can be used to control <strong>the</strong> visibility and editability of objects in <strong>the</strong> admin.5.6.6 My admin-site CSS and images showed up fine using <strong>the</strong> development server,but <strong>the</strong>y’re not displaying when using mod_python.See serving <strong>the</strong> admin files in <strong>the</strong> “How to use <strong>Django</strong> with mod_python” documentation.5.6.7 My “list_filter” contains a ManyToManyField, but <strong>the</strong> filter doesn’t display.<strong>Django</strong> won’t bo<strong>the</strong>r displaying <strong>the</strong> filter for a ManyToManyField if <strong>the</strong>re are fewer than two related objects.For example, if your list_filter includes sites, and <strong>the</strong>re’s only one site in your database, it won’t display a“Site” filter. In that case, filtering by site would be meaningless.5.6.8 How can I customize <strong>the</strong> functionality of <strong>the</strong> admin interface?You’ve got several options. If you want to piggyback on top of an add/change form that <strong>Django</strong> automatically generates,you can attach arbitrary JavaScript modules to <strong>the</strong> page via <strong>the</strong> model’s class Admin js parameter. Thatparameter is a list of URLs, as strings, pointing to JavaScript modules that will be included within <strong>the</strong> admin form viaa tag.5.6. FAQ: The admin 371
<strong>Django</strong> <strong>Documentation</strong>, Release 1.2If you want more flexibility than simply tweaking <strong>the</strong> auto-generated forms, feel free to write custom views for <strong>the</strong>admin. The admin is powered by <strong>Django</strong> itself, and you can write custom views that hook into <strong>the</strong> au<strong>the</strong>nticationsystem, check permissions and do whatever else <strong>the</strong>y need to do.If you want to customize <strong>the</strong> look-and-feel of <strong>the</strong> admin interface, read <strong>the</strong> next question.5.6.9 The dynamically-generated admin site is ugly! How can I change it?We like it, but if you don’t agree, you can modify <strong>the</strong> admin site’s presentation by editing <strong>the</strong> CSS stylesheet and/orassociated image files. The site is built using semantic HTML and plenty of CSS hooks, so any changes you’d like tomake should be possible by editing <strong>the</strong> stylesheet. We’ve got a guide to <strong>the</strong> CSS used in <strong>the</strong> admin to get you started.5.7 FAQ: Contributing code5.7.1 How can I get started contributing code to <strong>Django</strong>?Thanks for asking! We’ve written an entire document devoted to this question. It’s titled Contributing to <strong>Django</strong>.5.7.2 I submitted a bug fix in <strong>the</strong> ticket system several weeks ago. Why are youignoring my patch?Don’t worry: We’re not ignoring you!It’s important to understand <strong>the</strong>re is a difference between “a ticket is being ignored” and “a ticket has not been attendedto yet.” <strong>Django</strong>’s ticket system contains hundreds of open tickets, of various degrees of impact on end-userfunctionality, and <strong>Django</strong>’s developers have to review and prioritize.On top of that: <strong>the</strong> people who work on <strong>Django</strong> are all volunteers. As a result, <strong>the</strong> amount of time that we have towork on <strong>the</strong> framework is limited and will vary from week to week depending on our spare time. If we’re busy, wemay not be able to spend as much time on <strong>Django</strong> as we might want.The best way to make sure tickets do not get hung up on <strong>the</strong> way to checkin is to make it dead easy, even for someonewho may not be intimately familiar with that area of <strong>the</strong> code, to understand <strong>the</strong> problem and verify <strong>the</strong> fix:• Are <strong>the</strong>re clear instructions on how to reproduce <strong>the</strong> bug? If this touches a dependency (such as PIL), a contribmodule, or a specific database, are those instructions clear enough even for someone not familiar with it?• If <strong>the</strong>re are several patches attached to <strong>the</strong> ticket, is it clear what each one does, which ones can be ignored andwhich matter?• Does <strong>the</strong> patch include a unit test? If not, is <strong>the</strong>re a very clear explanation why not? A test expresses succinctlywhat <strong>the</strong> problem is, and shows that <strong>the</strong> patch actually fixes it.If your patch stands no chance of inclusion in <strong>Django</strong>, we won’t ignore it – we’ll just close <strong>the</strong> ticket. So if your ticketis still open, it doesn’t mean we’re ignoring you; it just means we haven’t had time to look at it yet.5.7.3 When and how might I remind <strong>the</strong> core team of a patch I care about?A polite, well-timed message to <strong>the</strong> mailing list is one way to get attention. To determine <strong>the</strong> right time, you need tokeep an eye on <strong>the</strong> schedule. If you post your message when <strong>the</strong> core developers are trying to hit a feature deadline ormanage a planning phase, you’re not going to get <strong>the</strong> sort of attention you require. However, if you draw attention to aticket when <strong>the</strong> core developers are paying particular attention to bugs – just before a bug fixing sprint, or in <strong>the</strong> leadup to a beta release for example – you’re much more likely to get a productive response.372 Chapter 5. <strong>Django</strong> FAQ
<strong>Django</strong> <strong>Documentation</strong>, Release 1.2Gentle IRC reminders can also work – again, strategically timed if possible. During a bug sprint would be a very goodtime, for example.Ano<strong>the</strong>r way to get traction is to pull several related tickets toge<strong>the</strong>r. When <strong>the</strong> core developers sit down to fix a bugin an area <strong>the</strong>y haven’t touched for a while, it can take a few minutes to remember all <strong>the</strong> fine details of how that areaof code works. If you collect several minor bug fixes toge<strong>the</strong>r into a similarly <strong>the</strong>med group, you make an attractivetarget, as <strong>the</strong> cost of coming up to speed on an area of code can be spread over multiple tickets.Please refrain from emailing core developers personally, or repeatedly raising <strong>the</strong> same issue over and over. This sortof behavior will not gain you any additional attention – certainly not <strong>the</strong> attention that you need in order to get yourpet bug addressed.5.7.4 But I’ve reminded you several times and you keep ignoring my patch!Seriously - we’re not ignoring you. If your patch stands no chance of inclusion in <strong>Django</strong>, we’ll close <strong>the</strong> ticket. Forall <strong>the</strong> o<strong>the</strong>r tickets, we need to prioritize our efforts, which means that some tickets will be addressed before o<strong>the</strong>rs.One of <strong>the</strong> criteria that is used to prioritize bug fixes is <strong>the</strong> number of people that will likely be affected by a givenbug. Bugs that have <strong>the</strong> potential to affect many people will generally get priority over those that are edge cases.Ano<strong>the</strong>r reason that bugs might be ignored for while is if <strong>the</strong> bug is a symptom of a larger problem. While we canspend time writing, testing and applying lots of little patches, sometimes <strong>the</strong> right solution is to rebuild. If a rebuild orrefactor of a particular component has been proposed or is underway, you may find that bugs affecting that componentwill not get as much attention. Again, this is just a matter of prioritizing scarce resources. By concentrating on <strong>the</strong>rebuild, we can close all <strong>the</strong> little bugs at once, and hopefully prevent o<strong>the</strong>r little bugs from appearing in <strong>the</strong> future.Whatever <strong>the</strong> reason, please keep in mind that while you may hit a particular bug regularly, it doesn’t necessarilyfollow that every single <strong>Django</strong> user will hit <strong>the</strong> same bug. Different users use <strong>Django</strong> in different ways, stressingdifferent parts of <strong>the</strong> code under different conditions. When we evaluate <strong>the</strong> relative priorities, we are generally tryingto consider <strong>the</strong> needs of <strong>the</strong> entire community, not just <strong>the</strong> severity for one particular user. This doesn’t mean that wethink your problem is unimportant – just that in <strong>the</strong> limited time we have available, we will always err on <strong>the</strong> side ofmaking 10 people happy ra<strong>the</strong>r than making 1 person happy.5.7. FAQ: Contributing code 373
<strong>Django</strong> <strong>Documentation</strong>, Release 1.2374 Chapter 5. <strong>Django</strong> FAQ
CHAPTERSIXAPI REFERENCE6.1 Au<strong>the</strong>ntication backendsThis document details <strong>the</strong> au<strong>the</strong>ntication backends that come with <strong>Django</strong>. For information on how to use <strong>the</strong>m andhow to write your own au<strong>the</strong>ntication backends, see <strong>the</strong> O<strong>the</strong>r au<strong>the</strong>ntication sources section of <strong>the</strong> User au<strong>the</strong>nticationguide.6.1.1 Available au<strong>the</strong>ntication backendsThe following backends are available in django.contrib.auth.backends:class ModelBackendThis is <strong>the</strong> default au<strong>the</strong>ntication backend used by <strong>Django</strong>. It au<strong>the</strong>nticates using usernames and passwordsstored in <strong>the</strong> User model.class RemoteUserBackendNew in version 1.1: Please, see <strong>the</strong> release notes Use this backend to take advantage of external-to-<strong>Django</strong>handledau<strong>the</strong>ntication. It au<strong>the</strong>nticates using usernames passed in request.META[’REMOTE_USER’].See <strong>the</strong> Au<strong>the</strong>nticating against REMOTE_USER documentation.6.2 contrib packages<strong>Django</strong> aims to follow Python’s “batteries included” philosophy. It ships with a variety of extra, optional tools thatsolve common Web-development problems.This code lives in django/contrib in <strong>the</strong> <strong>Django</strong> distribution. This document gives a rundown of <strong>the</strong> packages incontrib, along with any dependencies those packages have.NoteFor most of <strong>the</strong>se add-ons – specifically, <strong>the</strong> add-ons that include ei<strong>the</strong>r models or template tags – you’ll need to add <strong>the</strong>package name (e.g., ’django.contrib.admin’) to your INSTALLED_APPS setting and re-run manage.pysyncdb.6.2.1 The <strong>Django</strong> admin siteOne of <strong>the</strong> most powerful parts of <strong>Django</strong> is <strong>the</strong> automatic admin interface. It reads metadata in your model to providea powerful and production-ready interface that content producers can immediately use to start adding content to <strong>the</strong>375
<strong>Django</strong> <strong>Documentation</strong>, Release 1.2site. In this document, we discuss how to activate, use and customize <strong>Django</strong>’s admin interface.NoteThe admin site has been refactored significantly since <strong>Django</strong> 0.96. This document describes <strong>the</strong> newest version of<strong>the</strong> admin site, which allows for much richer customization. If you follow <strong>the</strong> development of <strong>Django</strong> itself, you mayhave heard this described as “newforms-admin.”OverviewThere are six steps in activating <strong>the</strong> <strong>Django</strong> admin site:1. Add ’django.contrib.admin’ to your INSTALLED_APPS setting.2. Admin has two dependencies - django.contrib.auth and django.contrib.contenttypes. If<strong>the</strong>se applications are not in your INSTALLED_APPS list, add <strong>the</strong>m.3. Determine which of your application’s models should be editable in <strong>the</strong> admin interface.4. For each of those models, optionally create a ModelAdmin class that encapsulates <strong>the</strong> customized adminfunctionality and options for that particular model.5. Instantiate an AdminSite and tell it about each of your models and ModelAdmin classes.6. Hook <strong>the</strong> AdminSite instance into your URLconf.O<strong>the</strong>r topicsAdmin actions New in version 1.1: Please, see <strong>the</strong> release notes The basic workflow of <strong>Django</strong>’s admin is, in anutshell, “select an object, <strong>the</strong>n change it.” This works well for a majority of use cases. However, if you need to make<strong>the</strong> same change to many objects at once, this workflow can be quite tedious.In <strong>the</strong>se cases, <strong>Django</strong>’s admin lets you write and register “actions” – simple functions that get called with a list ofobjects selected on <strong>the</strong> change list page.If you look at any change list in <strong>the</strong> admin, you’ll see this feature in action; <strong>Django</strong> ships with a “delete selectedobjects” action available to all models. For example, here’s <strong>the</strong> user module from <strong>Django</strong>’s built-indjango.contrib.auth app:376 Chapter 6. API Reference
<strong>Django</strong> <strong>Documentation</strong>, Release 1.2Warning: The “delete selected objects” action uses QuerySet.delete() for efficiency reasons, which hasan important caveat: your model’s delete() method will not be called.If you wish to override this behavior, simply write a custom action which accomplishes deletion in your preferredmanner – for example, by calling Model.delete() for each of <strong>the</strong> selected items.For more background on bulk deletion, see <strong>the</strong> documentation on object deletion.<strong>Read</strong> on to find out how to add your own actions to this list.Writing actionsThe easiest way to explain actions is by example, so let’s dive in.A common use case for admin actions is <strong>the</strong> bulk updating of a model. Imagine a simple news application with anArticle model:from django.db import modelsSTATUS_CHOICES = ((’d’, ’Draft’),(’p’, ’Published’),(’w’, ’Withdrawn’),)class Article(models.Model):title = models.CharField(max_length=100)body = models.TextField()status = models.CharField(max_length=1, choices=STATUS_CHOICES)def __unicode__(self):return self.titleA common task we might perform with a model like this is to update an article’s status from “draft” to “published”.We could easily do this in <strong>the</strong> admin one article at a time, but if we wanted to bulk-publish a group of articles, it’d betedious. So, let’s write an action that lets us change an article’s status to “published.”Writing action functions First, we’ll need to write a function that gets called when <strong>the</strong> action is trigged from <strong>the</strong>admin. Action functions are just regular functions that take three arguments:6.2. contrib packages 377
<strong>Django</strong> <strong>Documentation</strong>, Release 1.2• The current ModelAdmin• An HttpRequest representing <strong>the</strong> current request,• A QuerySet containing <strong>the</strong> set of objects selected by <strong>the</strong> user.Our publish-<strong>the</strong>se-articles function won’t need <strong>the</strong> ModelAdmin or <strong>the</strong> request object, but we will use <strong>the</strong> queryset:def make_published(modeladmin, request, queryset):queryset.update(status=’p’)Note: For <strong>the</strong> best performance, we’re using <strong>the</strong> queryset’s update method. O<strong>the</strong>r types of actions might need to dealwith each object individually; in <strong>the</strong>se cases we’d just iterate over <strong>the</strong> queryset:for obj in queryset:do_something_with(obj)That’s actually all <strong>the</strong>re is to writing an action! However, we’ll take one more optional-but-useful step and give <strong>the</strong>action a “nice” title in <strong>the</strong> admin. By default, this action would appear in <strong>the</strong> action list as “Make published” – <strong>the</strong>function name, with underscores replaced by spaces. That’s fine, but we can provide a better, more human-friendlyname by giving <strong>the</strong> make_published function a short_description attribute:def make_published(modeladmin, request, queryset):queryset.update(status=’p’)make_published.short_description = "Mark selected stories as published"Note: This might look familiar; <strong>the</strong> admin’s list_display option uses <strong>the</strong> same technique to provide humanreadabledescriptions for callback functions registered <strong>the</strong>re, too.Adding actions to <strong>the</strong> ModelAdmin Next, we’ll need to inform our ModelAdmin of <strong>the</strong> action. This works justlike any o<strong>the</strong>r configuration option. So, <strong>the</strong> complete admin.py with <strong>the</strong> action and its registration would look like:from django.contrib import adminfrom myapp.models import Articledef make_published(modeladmin, request, queryset):queryset.update(status=’p’)make_published.short_description = "Mark selected stories as published"class ArticleAdmin(admin.ModelAdmin):list_display = [’title’, ’status’]ordering = [’title’]actions = [make_published]admin.site.register(Article, ArticleAdmin)That code will give us an admin change list that looks something like this:378 Chapter 6. API Reference
<strong>Django</strong> <strong>Documentation</strong>, Release 1.2That’s really all <strong>the</strong>re is to it! If you’re itching to write your own actions, you now know enough to get started. Therest of this document just covers more advanced techniques.Advanced action techniquesoptions.There’s a couple of extra options and possibilities you can exploit for more advancedActions as ModelAdmin methods The example above shows <strong>the</strong> make_published action defined as a simplefunction. That’s perfectly fine, but it’s not perfect from a code design point of view: since <strong>the</strong> action is tightly coupledto <strong>the</strong> Article object, it makes sense to hook <strong>the</strong> action to <strong>the</strong> ArticleAdmin object itself.That’s easy enough to do:class ArticleAdmin(admin.ModelAdmin):...actions = [’make_published’]def make_published(self, request, queryset):queryset.update(status=’p’)make_published.short_description = "Mark selected stories as published"Notice first that we’ve moved make_published into a method and renamed <strong>the</strong> modeladmin parameter to self, andsecond that we’ve now put <strong>the</strong> string ’make_published’ in actions instead of a direct function reference. Thistells <strong>the</strong> ModelAdmin to look up <strong>the</strong> action as a method.Defining actions as methods gives <strong>the</strong> action more straightforward, idiomatic access to <strong>the</strong> ModelAdmin itself,allowing <strong>the</strong> action to call any of <strong>the</strong> methods provided by <strong>the</strong> admin. For example, we can use self to flash amessage to <strong>the</strong> user informing her that <strong>the</strong> action was successful:class ArticleAdmin(admin.ModelAdmin):...def make_published(self, request, queryset):rows_updated = queryset.update(status=’p’)if rows_updated == 1:message_bit = "1 story was"else:6.2. contrib packages 379
<strong>Django</strong> <strong>Documentation</strong>, Release 1.2message_bit = "%s stories were" % rows_updatedself.message_user(request, "%s successfully marked as published." % message_bit)This make <strong>the</strong> action match what <strong>the</strong> admin itself does after successfully performing an action:Actions that provide intermediate pages By default, after an action is performed <strong>the</strong> user is simply redirectedback to <strong>the</strong> original change list page. However, some actions, especially more complex ones, will need to returnintermediate pages. For example, <strong>the</strong> built-in delete action asks for confirmation before deleting <strong>the</strong> selected objects.To provide an intermediary page, simply return an HttpResponse (or subclass) from your action. For example,you might write a simple export function that uses <strong>Django</strong>’s serialization functions to dump some selected objects asJSON:from django.http import HttpResponsefrom django.core import serializersdef export_as_json(modeladmin, request, queryset):response = HttpResponse(mimetype="text/javascript")serializers.serialize("json", queryset, stream=response)return responseGenerally, something like <strong>the</strong> above isn’t considered a great idea. Most of <strong>the</strong> time, <strong>the</strong> best practice will be to returnan HttpResponseRedirect and redirect <strong>the</strong> user to a view you’ve written, passing <strong>the</strong> list of selected objects in<strong>the</strong> GET query string. This allows you to provide complex interaction logic on <strong>the</strong> intermediary pages. For example,if you wanted to provide a more complete export function, you’d want to let <strong>the</strong> user choose a format, and possibly alist of fields to include in <strong>the</strong> export. The best thing to do would be to write a small action that simply redirects to yourcustom export view:from django.contrib import adminfrom django.contrib.contenttypes.models import ContentTypefrom django.http import HttpResponseRedirectdef export_selected_objects(modeladmin, request, queryset):selected = request.POST.getlist(admin.ACTION_CHECKBOX_NAME)ct = ContentType.objects.get_for_model(queryset.model)return HttpResponseRedirect("/export/?ct=%s&ids=%s" % (ct.pk, ",".join(selected)))380 Chapter 6. API Reference
<strong>Django</strong> <strong>Documentation</strong>, Release 1.2As you can see, <strong>the</strong> action is <strong>the</strong> simple part; all <strong>the</strong> complex logic would belong in your export view. This would needto deal with objects of any type, hence <strong>the</strong> business with <strong>the</strong> ContentType.Writing this view is left as an exercise to <strong>the</strong> reader.Making actions available site-wideAdminSite.add_action(action[, name])Some actions are best if <strong>the</strong>y’re made available to any object in <strong>the</strong> admin site – <strong>the</strong> export action defined abovewould be a good candidate. You can make an action globally available using AdminSite.add_action().For example:from django.contrib import adminadmin.site.add_action(export_selected_objects)This makes <strong>the</strong> export_selected_objects action globally available as an action named “export_selected_objects”.You can explicitly give <strong>the</strong> action a name – good if you later want to programatically remove <strong>the</strong> action – bypassing a second argument to AdminSite.add_action():admin.site.add_action(export_selected_objects, ’export_selected’)Disabling actions Sometimes you need to disable certain actions – especially those registered site-wide – for particularobjects. There’s a few ways you can disable actions:Disabling a site-wide actionAdminSite.disable_action(name)If you need to disable a site-wide action you can call AdminSite.disable_action().For example, you can use this method to remove <strong>the</strong> built-in “delete selected objects” action:admin.site.disable_action(’delete_selected’)Once you’ve done <strong>the</strong> above, that action will no longer be available site-wide.If, however, you need to re-enable a globally-disabled action for one particular model, simply list it explicitly inyour ModelAdmin.actions list:# Globally disable delete selectedadmin.site.disable_action(’delete_selected’)# This ModelAdmin will not have delete_selected availableclass SomeModelAdmin(admin.ModelAdmin):actions = [’some_o<strong>the</strong>r_action’]...# This one willclass Ano<strong>the</strong>rModelAdmin(admin.ModelAdmin):actions = [’delete_selected’, ’a_third_action’]...Disabling all actions for a particular ModelAdmin If you want no bulk actions available for a givenModelAdmin, simply set ModelAdmin.actions to None:class MyModelAdmin(admin.ModelAdmin):actions = NoneThis tells <strong>the</strong> ModelAdmin to not display or allow any actions, including any site-wide actions.6.2. contrib packages 381
<strong>Django</strong> <strong>Documentation</strong>, Release 1.2Conditionally enabling or disabling actionsModelAdmin.get_actions(request)Finally, you can conditionally enable or disable actions on a per-request (and hence per-user basis) by overridingModelAdmin.get_actions().This returns a dictionary of actions allowed. The keys are action names, and <strong>the</strong> values are (function,name, short_description) tuples.Most of <strong>the</strong> time you’ll use this method to conditionally remove actions from <strong>the</strong> list ga<strong>the</strong>red by <strong>the</strong> superclass.For example, if I only wanted users whose names begin with ‘J’ to be able to delete objects in bulk, I could do<strong>the</strong> following:class MyModelAdmin(admin.ModelAdmin):...def get_actions(self, request):actions = super(MyModelAdmin, self).get_actions(request)if request.user.username[0].upper() != ’J’:del actions[’delete_selected’]return actionsThe <strong>Django</strong> admin documentation generator <strong>Django</strong>’s admindocs app pulls documentation from <strong>the</strong> docstringsof models, views, template tags, and template filters for any app in INSTALLED_APPS and makes that documentationavailable from <strong>the</strong> <strong>Django</strong> admin.In addition to providing offline documentation for all template tags and template filters that ship with <strong>Django</strong>, you mayutilize admindocs to quickly document your own code.OverviewTo activate <strong>the</strong> admindocs, you will need to do <strong>the</strong> following:• Add django.contrib.admindocs to your INSTALLED_APPS.• Add (r’^admin/doc/’, include(’django.contrib.admindocs.urls’)) to yoururlpatterns. Make sure it’s included before <strong>the</strong> r’^admin/’ entry, so that requests to /admin/doc/don’t get handled by <strong>the</strong> latter entry.• Install <strong>the</strong> docutils Python module (http://docutils.sf.net/).• Optional: Linking to templates requires <strong>the</strong> ADMIN_FOR setting to be configured.• Optional: Using <strong>the</strong> admindocs bookmarklets requires <strong>the</strong> XViewMiddleware to be installed.Once those steps are complete, you can start browsing <strong>the</strong> documentation by going to your admin interface and clicking<strong>the</strong> “<strong>Documentation</strong>” link in <strong>the</strong> upper right of <strong>the</strong> page.<strong>Documentation</strong> helperso<strong>the</strong>r components:<strong>Django</strong> ComponentModelsViewsTemplate tagsTemplate filtersTemplatesThe following special markup can be used in your docstrings to easily create hyperlinks toreStructuredText roles:model:‘appname.ModelName‘:view:‘appname.view_name‘:tag:‘tagname‘:filter:‘filtername‘:template:‘path/to/template.html‘382 Chapter 6. API Reference
<strong>Django</strong> <strong>Documentation</strong>, Release 1.2Model reference The models section of <strong>the</strong> admindocs page describes each model in <strong>the</strong> system along with all<strong>the</strong> fields and methods available on it. Relationships to o<strong>the</strong>r models appear as hyperlinks. Descriptions are pulledfrom help_text attributes on fields or from docstrings on model methods.A model with useful documentation might look like this:class BlogEntry(models.Model):"""Stores a single blog entry, related to :model:‘blog.Blog‘ and:model:‘auth.User‘."""slug = models.SlugField(help_text="A short label, generally used in URLs.")author = models.ForeignKey(User)blog = models.ForeignKey(Blog)...def publish(self):"""Makes <strong>the</strong> blog entry live on <strong>the</strong> site."""...View reference Each URL in your site has a separate entry in <strong>the</strong> admindocs page, and clicking on a given URLwill show you <strong>the</strong> corresponding view. Helpful things you can document in your view function docstrings include:• A short description of what <strong>the</strong> view does.• The context, or a list of variables available in <strong>the</strong> view’s template.• The name of <strong>the</strong> template or templates that are used for that view.For example:from myapp.models import MyModeldef my_view(request, slug):"""Display an individual :model:‘myapp.MyModel‘.**Context**‘‘RequestContext‘‘‘‘mymodel‘‘An instance of :model:‘myapp.MyModel‘.**Template:**:template:‘myapp/my_template.html‘"""return render_to_response(’myapp/my_template.html’, {’mymodel’: MyModel.objects.get(slug=slug)}, context_instance=RequestContext(request))Template tags and filters reference The tags and filters admindocs sections describe all <strong>the</strong> tags and filters thatcome with <strong>Django</strong> (in fact, <strong>the</strong> built-in tag reference and built-in filter reference documentation come directly fromthose pages). Any tags or filters that you create or are added by a third-party app will show up in <strong>the</strong>se sections aswell.6.2. contrib packages 383
<strong>Django</strong> <strong>Documentation</strong>, Release 1.2Template reference While admindocs does not include a place to document templates by <strong>the</strong>mselves, if you use<strong>the</strong> :template:‘path/to/template.html‘ syntax in a docstring <strong>the</strong> resulting page will verify <strong>the</strong> path ofthat template with <strong>Django</strong>’s template loaders. This can be a handy way to check if <strong>the</strong> specified template exists and toshow where on <strong>the</strong> filesystem that template is stored.Included BookmarkletsSeveral useful bookmarklets are available from <strong>the</strong> admindocs page:<strong>Documentation</strong> for this page Jumps you from any page to <strong>the</strong> documentation for <strong>the</strong> view that generates that page.Show object ID Shows <strong>the</strong> content-type and unique ID for pages that represent a single object.Edit this object Jumps to <strong>the</strong> admin page for pages that represent a single object.Using <strong>the</strong>se bookmarklets requires that you are ei<strong>the</strong>r logged into <strong>the</strong> <strong>Django</strong> admin as a User with is_staffset to True, or that <strong>the</strong> django.middleware.doc middleware and XViewMiddleware are installed and youare accessing <strong>the</strong> site from an IP address listed in INTERNAL_IPS.See Also:For information about serving <strong>the</strong> media files (images, JavaScript, and CSS) associated with <strong>the</strong> admin in production,see Serving media files.ModelAdmin objectsclass ModelAdminThe ModelAdmin class is <strong>the</strong> representation of a model in <strong>the</strong> admin interface. These are stored in a file namedadmin.py in your application. Let’s take a look at a very simple example of <strong>the</strong> ModelAdmin:from django.contrib import adminfrom myproject.myapp.models import Authorclass AuthorAdmin(admin.ModelAdmin):passadmin.site.register(Author, AuthorAdmin)Do you need a ModelAdmin object at all?In <strong>the</strong> preceding example, <strong>the</strong> ModelAdmin class doesn’t define any custom values (yet). As a result, <strong>the</strong> defaultadmin interface will be provided. If you are happy with <strong>the</strong> default admin interface, you don’t need to define aModelAdmin object at all – you can register <strong>the</strong> model class without providing a ModelAdmin description. Thepreceding example could be simplified to:from django.contrib import adminfrom myproject.myapp.models import Authoradmin.site.register(Author)ModelAdmin OptionsThe ModelAdmin is very flexible. It has several options for dealing with customizing <strong>the</strong> interface. All options aredefined on <strong>the</strong> ModelAdmin subclass:class AuthorAdmin(admin.ModelAdmin):date_hierarchy = ’pub_date’384 Chapter 6. API Reference
<strong>Django</strong> <strong>Documentation</strong>, Release 1.2ModelAdmin.date_hierarchySet date_hierarchy to <strong>the</strong> name of a DateField or DateTimeField in your model, and <strong>the</strong> change list pagewill include a date-based drilldown navigation by that field.Example:date_hierarchy = ’pub_date’ModelAdmin.formBy default a ModelForm is dynamically created for your model. It is used to create <strong>the</strong> form presented on both<strong>the</strong> add/change pages. You can easily provide your own ModelForm to override any default form behavior on <strong>the</strong>add/change pages.For an example see <strong>the</strong> section Adding custom validation to <strong>the</strong> admin.ModelAdmin.fieldsetsSet fieldsets to control <strong>the</strong> layout of admin “add” and “change” pages.fieldsets is a list of two-tuples, in which each two-tuple represents a on <strong>the</strong> admin form page. (A is a “section” of <strong>the</strong> form.)The two-tuples are in <strong>the</strong> format (name, field_options), where name is a string representing <strong>the</strong> title of<strong>the</strong> fieldset and field_options is a dictionary of information about <strong>the</strong> fieldset, including a list of fields to bedisplayed in it.A full example, taken from <strong>the</strong> django.contrib.flatpages.FlatPage model:class FlatPageAdmin(admin.ModelAdmin):fieldsets = ((None, {’fields’: (’url’, ’title’, ’content’, ’sites’)}),(’Advanced options’, {’classes’: (’collapse’,),’fields’: (’enable_comments’, ’registration_required’, ’template_name’)}),)This results in an admin page that looks like:6.2. contrib packages 385
<strong>Django</strong> <strong>Documentation</strong>, Release 1.2If fieldsets isn’t given, <strong>Django</strong> will default to displaying each field that isn’t an AutoField and haseditable=True, in a single fieldset, in <strong>the</strong> same order as <strong>the</strong> fields are defined in <strong>the</strong> model.The field_options dictionary can have <strong>the</strong> following keys:• fields A tuple of field names to display in this fieldset. This key is required.Example:{’fields’: (’first_name’, ’last_name’, ’address’, ’city’, ’state’),}To display multiple fields on <strong>the</strong> same line, wrap those fields in <strong>the</strong>ir own tuple. In this example, <strong>the</strong>first_name and last_name fields will display on <strong>the</strong> same line:{’fields’: ((’first_name’, ’last_name’), ’address’, ’city’, ’state’),}New in version 1.2: Please, see <strong>the</strong> release notes fields can contain values defined inModelAdmin.readonly_fields to be displayed as read-only.• classes A list containing extra CSS classes to apply to <strong>the</strong> fieldset.Example:{’classes’: [’wide’, ’extrapretty’],}Two useful classes defined by <strong>the</strong> default admin site stylesheet are collapse and wide. Fieldsets with<strong>the</strong> collapse style will be initially collapsed in <strong>the</strong> admin and replaced with a small “click to expand”386 Chapter 6. API Reference
<strong>Django</strong> <strong>Documentation</strong>, Release 1.2link. Fieldsets with <strong>the</strong> wide style will be given extra horizontal space.• description A string of optional extra text to be displayed at <strong>the</strong> top of each fieldset, under <strong>the</strong> heading of<strong>the</strong> fieldset.Note that this value is not HTML-escaped when it’s displayed in <strong>the</strong> admin interface. This lets you includeHTML if you so desire. Alternatively you can use plain text and django.utils.html.escape() toescape any HTML special characters.ModelAdmin.fieldsUse this option as an alternative to fieldsets if <strong>the</strong> layout does not matter and if you want to only show a subsetof <strong>the</strong> available fields in <strong>the</strong> form. For example, you could define a simpler version of <strong>the</strong> admin form for <strong>the</strong>django.contrib.flatpages.FlatPage model as follows:class FlatPageAdmin(admin.ModelAdmin):fields = (’url’, ’title’, ’content’)In <strong>the</strong> above example, only <strong>the</strong> fields ‘url’, ‘title’ and ‘content’ will be displayed, sequentially, in <strong>the</strong> form. New in version1.2: Please, see <strong>the</strong> release notes fields can contain values defined in ModelAdmin.readonly_fieldsto be displayed as read-only.NoteThis fields option should not be confused with <strong>the</strong> fields dictionary key that is within <strong>the</strong> fieldsets option,as described in <strong>the</strong> previous section.ModelAdmin.excludeThis attribute, if given, should be a list of field names to exclude from <strong>the</strong> form.For example, let’s consider <strong>the</strong> following model:class Author(models.Model):name = models.CharField(max_length=100)title = models.CharField(max_length=3)birth_date = models.DateField(blank=True, null=True)If you want a form for <strong>the</strong> Author model that includes only <strong>the</strong> name and title fields, you would specify fieldsor exclude like this:class AuthorAdmin(admin.ModelAdmin):fields = (’name’, ’title’)class AuthorAdmin(admin.ModelAdmin):exclude = (’birth_date’,)Since <strong>the</strong> Author model only has three fields, name, title, and birth_date, <strong>the</strong> forms resulting from <strong>the</strong> abovedeclarations will contain exactly <strong>the</strong> same fields.ModelAdmin.filter_horizontalUse a nifty unobtrusive JavaScript “filter” interface instead of <strong>the</strong> usability-challenged in <strong>the</strong> admin form. The value is a list of fields that should be displayed as a horizontal filter interface. Seefilter_vertical to use a vertical interface.ModelAdmin.filter_verticalSame as filter_horizontal, but is a vertical display of <strong>the</strong> filter interface.ModelAdmin.list_display6.2. contrib packages 387
<strong>Django</strong> <strong>Documentation</strong>, Release 1.2Set list_display to control which fields are displayed on <strong>the</strong> change list page of <strong>the</strong> admin.Example:list_display = (’first_name’, ’last_name’)If you don’t set list_display, <strong>the</strong> admin site will display a single column that displays <strong>the</strong> __unicode__()representation of each object.You have four possible values that can be used in list_display:• A field of <strong>the</strong> model. For example:class PersonAdmin(admin.ModelAdmin):list_display = (’first_name’, ’last_name’)• A callable that accepts one parameter for <strong>the</strong> model instance. For example:def upper_case_name(obj):return ("%s %s" % (obj.first_name, obj.last_name)).upper()upper_case_name.short_description = ’Name’class PersonAdmin(admin.ModelAdmin):list_display = (upper_case_name,)• A string representing an attribute on <strong>the</strong> ModelAdmin. This behaves same as <strong>the</strong> callable. For example:class PersonAdmin(admin.ModelAdmin):list_display = (’upper_case_name’,)def upper_case_name(self, obj):return ("%s %s" % (obj.first_name, obj.last_name)).upper()upper_case_name.short_description = ’Name’• A string representing an attribute on <strong>the</strong> model. This behaves almost <strong>the</strong> same as <strong>the</strong> callable, but self in thiscontext is <strong>the</strong> model instance. Here’s a full model example:class Person(models.Model):name = models.CharField(max_length=50)birthday = models.DateField()def decade_born_in(self):return self.birthday.strftime(’%Y’)[:3] + "0’s"decade_born_in.short_description = ’Birth decade’class PersonAdmin(admin.ModelAdmin):list_display = (’name’, ’decade_born_in’)A few special cases to note about list_display:• If <strong>the</strong> field is a ForeignKey, <strong>Django</strong> will display <strong>the</strong> __unicode__() of <strong>the</strong> related object.• ManyToManyField fields aren’t supported, because that would entail executing a separate SQL statementfor each row in <strong>the</strong> table. If you want to do this none<strong>the</strong>less, give your model a custom method, and add thatmethod’s name to list_display. (See below for more on custom methods in list_display.)• If <strong>the</strong> field is a BooleanField or NullBooleanField, <strong>Django</strong> will display a pretty “on” or “off” iconinstead of True or False.• If <strong>the</strong> string given is a method of <strong>the</strong> model, ModelAdmin or a callable, <strong>Django</strong> will HTML-escape <strong>the</strong> outputby default. If you’d ra<strong>the</strong>r not escape <strong>the</strong> output of <strong>the</strong> method, give <strong>the</strong> method an allow_tags attributewhose value is True.388 Chapter 6. API Reference
<strong>Django</strong> <strong>Documentation</strong>, Release 1.2Here’s a full example model:class Person(models.Model):first_name = models.CharField(max_length=50)last_name = models.CharField(max_length=50)color_code = models.CharField(max_length=6)def colored_name(self):return ’%s %s’ % (self.color_code, self.first_name, selcolored_name.allow_tags = Trueclass PersonAdmin(admin.ModelAdmin):list_display = (’first_name’, ’last_name’, ’colored_name’)• If <strong>the</strong> string given is a method of <strong>the</strong> model, ModelAdmin or a callable that returns True or False <strong>Django</strong> willdisplay a pretty “on” or “off” icon if you give <strong>the</strong> method a boolean attribute whose value is True.Here’s a full example model:class Person(models.Model):first_name = models.CharField(max_length=50)birthday = models.DateField()def born_in_fifties(self):return self.birthday.strftime(’%Y’)[:3] == ’195’born_in_fifties.boolean = Trueclass PersonAdmin(admin.ModelAdmin):list_display = (’name’, ’born_in_fifties’)• The __str__() and __unicode__() methods are just as valid in list_display as any o<strong>the</strong>r modelmethod, so it’s perfectly OK to do this:list_display = (’__unicode__’, ’some_o<strong>the</strong>r_field’)• Usually, elements of list_display that aren’t actual database fields can’t be used in sorting (because <strong>Django</strong>does all <strong>the</strong> sorting at <strong>the</strong> database level).However, if an element of list_display represents a certain database field, you can indicate this fact bysetting <strong>the</strong> admin_order_field attribute of <strong>the</strong> item.For example:class Person(models.Model):first_name = models.CharField(max_length=50)color_code = models.CharField(max_length=6)def colored_first_name(self):return ’%s’ % (self.color_code, self.first_name)colored_first_name.allow_tags = Truecolored_first_name.admin_order_field = ’first_name’class PersonAdmin(admin.ModelAdmin):list_display = (’first_name’, ’colored_first_name’)The above will tell <strong>Django</strong> to order by <strong>the</strong> first_name field when trying to sort by colored_first_namein <strong>the</strong> admin.ModelAdmin.list_display_links6.2. contrib packages 389
<strong>Django</strong> <strong>Documentation</strong>, Release 1.2Set list_display_links to control which fields in list_display should be linked to <strong>the</strong> “change” page foran object.By default, <strong>the</strong> change list page will link <strong>the</strong> first column – <strong>the</strong> first field specified in list_display – to<strong>the</strong> change page for each item. But list_display_links lets you change which columns are linked. Setlist_display_links to a list or tuple of field names (in <strong>the</strong> same format as list_display) to link.list_display_links can specify one or many field names. As long as <strong>the</strong> field names appear inlist_display, <strong>Django</strong> doesn’t care how many (or how few) fields are linked. The only requirement is: If youwant to use list_display_links, you must define list_display.In this example, <strong>the</strong> first_name and last_name fields will be linked on <strong>the</strong> change list page:class PersonAdmin(admin.ModelAdmin):list_display = (’first_name’, ’last_name’, ’birthday’)list_display_links = (’first_name’, ’last_name’)ModelAdmin.list_editableNew in version 1.1: Please, see <strong>the</strong> release notes Set list_editable to a list of field names on <strong>the</strong> model whichwill allow editing on <strong>the</strong> change list page. That is, fields listed in list_editable will be displayed as form widgetson <strong>the</strong> change list page, allowing users to edit and save multiple rows at once.Note: list_editable interacts with a couple of o<strong>the</strong>r options in particular ways; you should note <strong>the</strong> followingrules:• Any field in list_editable must also be in list_display. You can’t edit a field that’s not displayed!• The same field can’t be listed in both list_editable and list_display_links – a field can’t be botha form and a link.You’ll get a validation error if ei<strong>the</strong>r of <strong>the</strong>se rules are broken.ModelAdmin.list_filterSet list_filter to activate filters in <strong>the</strong> right sidebar of <strong>the</strong> change list page of <strong>the</strong> admin. This should bea list of field names, and each specified field should be ei<strong>the</strong>r a BooleanField, CharField, DateField,DateTimeField, IntegerField or ForeignKey.This example, taken from <strong>the</strong> django.contrib.auth.models.User model, shows how bothlist_display and list_filter work:class UserAdmin(admin.ModelAdmin):list_display = (’username’, ’email’, ’first_name’, ’last_name’, ’is_staff’)list_filter = (’is_staff’, ’is_superuser’)The above code results in an admin change list page that looks like this:390 Chapter 6. API Reference
<strong>Django</strong> <strong>Documentation</strong>, Release 1.2(This example also has search_fields defined. See below.)ModelAdmin.list_per_pageSet list_per_page to control how many items appear on each paginated admin change list page. By default, thisis set to 100.ModelAdmin.list_select_relatedSet list_select_related to tell <strong>Django</strong> to use select_related() in retrieving <strong>the</strong> list of objects on <strong>the</strong>admin change list page. This can save you a bunch of database queries.The value should be ei<strong>the</strong>r True or False. Default is False.Note that <strong>Django</strong> will use select_related(), regardless of this setting, if one of <strong>the</strong> list_display fields is aForeignKey.ModelAdmin.inlinesSee InlineModelAdmin objects below.ModelAdmin.orderingSet ordering to specify how objects on <strong>the</strong> admin change list page should be ordered. This should be a list or tuplein <strong>the</strong> same format as a model’s ordering parameter.If this isn’t provided, <strong>the</strong> <strong>Django</strong> admin will use <strong>the</strong> model’s default ordering.Note<strong>Django</strong> will only honor <strong>the</strong> first element in <strong>the</strong> list/tuple; any o<strong>the</strong>rs will be ignored.ModelAdmin.prepopulated_fieldsSet prepopulated_fields to a dictionary mapping field names to <strong>the</strong> fields it should prepopulate from:class ArticleAdmin(admin.ModelAdmin):prepopulated_fields = {"slug": ("title",)}When set, <strong>the</strong> given fields will use a bit of JavaScript to populate from <strong>the</strong> fields assigned. The main use for this functionalityis to automatically generate <strong>the</strong> value for SlugField fields from one or more o<strong>the</strong>r fields. The generatedvalue is produced by concatenating <strong>the</strong> values of <strong>the</strong> source fields, and <strong>the</strong>n by transforming that result into a validslug (e.g. substituting dashes for spaces).6.2. contrib packages 391
<strong>Django</strong> <strong>Documentation</strong>, Release 1.2prepopulated_fields doesn’t accept DateTimeField, ForeignKey, nor ManyToManyField fields.ModelAdmin.radio_fieldsBy default, <strong>Django</strong>’s admin uses a select-box interface () for fields that are ForeignKey or have choicesset. If a field is present in radio_fields, <strong>Django</strong> will use a radio-button interface instead. Assuming group is aForeignKey on <strong>the</strong> Person model:class PersonAdmin(admin.ModelAdmin):radio_fields = {"group": admin.VERTICAL}You have <strong>the</strong> choice of using HORIZONTAL or VERTICAL from <strong>the</strong> django.contrib.admin module.Don’t include a field in radio_fields unless it’s a ForeignKey or has choices set.ModelAdmin.raw_id_fieldsBy default, <strong>Django</strong>’s admin uses a select-box interface () for fields that are ForeignKey. Sometimes youdon’t want to incur <strong>the</strong> overhead of having to select all <strong>the</strong> related instances to display in <strong>the</strong> drop-down.raw_id_fields is a list of fields you would like to change into a Input widget for ei<strong>the</strong>r a ForeignKey orManyToManyField:class ArticleAdmin(admin.ModelAdmin):raw_id_fields = ("newspaper",)ModelAdmin.readonly_fieldsNew in version 1.2: Please, see <strong>the</strong> release notes By default <strong>the</strong> admin shows all fields as editable. Any fields in this option(which should be a list or tuple) will display its data as-is and non-editable. This option behaves nearly identicalto ModelAdmin.list_display. Usage is <strong>the</strong> same, however, when you specify ModelAdmin.fieldsor ModelAdmin.fieldsets <strong>the</strong> read-only fields must be present to be shown (<strong>the</strong>y are ignored o<strong>the</strong>rwise).If readonly_fields is used without defining explicit ordering through ModelAdmin.fields orModelAdmin.fieldsets <strong>the</strong>y will be added last after all editable fields.ModelAdmin.save_asSet save_as to enable a “save as” feature on admin change forms.Normally, objects have three save options: “Save”, “Save and continue editing” and “Save and add ano<strong>the</strong>r”. Ifsave_as is True, “Save and add ano<strong>the</strong>r” will be replaced by a “Save as” button.“Save as” means <strong>the</strong> object will be saved as a new object (with a new ID), ra<strong>the</strong>r than <strong>the</strong> old object.By default, save_as is set to False.ModelAdmin.save_on_topSet save_on_top to add save buttons across <strong>the</strong> top of your admin change forms.Normally, <strong>the</strong> save buttons appear only at <strong>the</strong> bottom of <strong>the</strong> forms. If you set save_on_top, <strong>the</strong> buttons will appearboth on <strong>the</strong> top and <strong>the</strong> bottom.By default, save_on_top is set to False.ModelAdmin.search_fieldsSet search_fields to enable a search box on <strong>the</strong> admin change list page. This should be set to a list of field namesthat will be searched whenever somebody submits a search query in that text box.These fields should be some kind of text field, such as CharField or TextField. You can also perform a relatedlookup on a ForeignKey or ManyToManyField with <strong>the</strong> lookup API “follow” notation:392 Chapter 6. API Reference
<strong>Django</strong> <strong>Documentation</strong>, Release 1.2search_fields = [’foreign_key__related_fieldname’]For example, if you have a blog entry with an author, <strong>the</strong> following definition would enable search blog entries by <strong>the</strong>email address of <strong>the</strong> author:search_fields = [’user__email’]When somebody does a search in <strong>the</strong> admin search box, <strong>Django</strong> splits <strong>the</strong> search query into words and returns allobjects that contain each of <strong>the</strong> words, case insensitive, where each word must be in at least one of search_fields.For example, if search_fields is set to [’first_name’, ’last_name’] and a user searches for johnlennon, <strong>Django</strong> will do <strong>the</strong> equivalent of this SQL WHERE clause:WHERE (first_name ILIKE ’%john%’ OR last_name ILIKE ’%john%’)AND (first_name ILIKE ’%lennon%’ OR last_name ILIKE ’%lennon%’)For faster and/or more restrictive searches, prefix <strong>the</strong> field name with an operator:^ Matches <strong>the</strong> beginning of <strong>the</strong> field. For example, if search_fields is set to [’^first_name’,’^last_name’] and a user searches for john lennon, <strong>Django</strong> will do <strong>the</strong> equivalent of this SQL WHEREclause:WHERE (first_name ILIKE ’john%’ OR last_name ILIKE ’john%’)AND (first_name ILIKE ’lennon%’ OR last_name ILIKE ’lennon%’)This query is more efficient than <strong>the</strong> normal ’%john%’ query, because <strong>the</strong> database only needs to check <strong>the</strong>beginning of a column’s data, ra<strong>the</strong>r than seeking through <strong>the</strong> entire column’s data. Plus, if <strong>the</strong> column has anindex on it, some databases may be able to use <strong>the</strong> index for this query, even though it’s a LIKE query.= Matches exactly, case-insensitive. For example, if search_fields is set to [’=first_name’,’=last_name’] and a user searches for john lennon, <strong>Django</strong> will do <strong>the</strong> equivalent of this SQL WHEREclause:WHERE (first_name ILIKE ’john’ OR last_name ILIKE ’john’)AND (first_name ILIKE ’lennon’ OR last_name ILIKE ’lennon’)Note that <strong>the</strong> query input is split by spaces, so, following this example, it’s currently not possible to search forall records in which first_name is exactly ’john winston’ (containing a space).@ Performs a full-text match. This is like <strong>the</strong> default search method but uses an index. Currently this is only availablefor MySQL.ModelAdmin.formfield_overridesNew in version 1.1: Please, see <strong>the</strong> release notes This provides a quick-and-dirty way to override some of <strong>the</strong> Fieldoptions for use in <strong>the</strong> admin. formfield_overrides is a dictionary mapping a field class to a dict of argumentsto pass to <strong>the</strong> field at construction time.Since that’s a bit abstract, let’s look at a concrete example. The most common use of formfield_overrides isto add a custom widget for a certain type of field. So, imagine we’ve written a RichTextEditorWidget that we’dlike to use for large text fields instead of <strong>the</strong> default . Here’s how we’d do that:from django.db import modelsfrom django.contrib import admin# Import our custom widget and our model from where <strong>the</strong>y’re definedfrom myapp.widgets import RichTextEditorWidgetfrom myapp.models import MyModelclass MyModelAdmin(admin.ModelAdmin):formfield_overrides = {6.2. contrib packages 393
<strong>Django</strong> <strong>Documentation</strong>, Release 1.2}models.TextField: {’widget’: RichTextEditorWidget},Note that <strong>the</strong> key in <strong>the</strong> dictionary is <strong>the</strong> actual field class, not a string. The value is ano<strong>the</strong>r dictionary; <strong>the</strong>se argumentswill be passed to __init__(). See The Forms API for details.Warning: If you want to use a custom widget with a relation field (i.e. ForeignKey or ManyToManyField),make sure you haven’t included that field’s name in raw_id_fields or radio_fields.formfield_overrides won’t let you change <strong>the</strong> widget on relation fields that have raw_id_fields orradio_fields set. That’s because raw_id_fields and radio_fields imply custom widgets of <strong>the</strong>irown.ModelAdmin.actionsNew in version 1.1: Please, see <strong>the</strong> release notes A list of actions to make available on <strong>the</strong> change list page. See Adminactions for details.ModelAdmin.actions_on_topModelAdmin.actions_on_bottomNew in version 1.1: Please, see <strong>the</strong> release notes Controls where on <strong>the</strong> page <strong>the</strong> actions bar appears. By default, <strong>the</strong>admin changelist displays actions at <strong>the</strong> top of <strong>the</strong> page (actions_on_top = True; actions_on_bottom= False).ModelAdmin.actions_selection_counterNew in version 1.2: Please, see <strong>the</strong> release notes Controls whe<strong>the</strong>r a selection counter is display next to <strong>the</strong> actiondropdown. By default, <strong>the</strong> admin changelist will display it (actions_selection_counter = True).Custom template options The Overriding Admin Templates section describes how to override or extend <strong>the</strong> defaultadmin templates. Use <strong>the</strong> following options to override <strong>the</strong> default templates used by <strong>the</strong> ModelAdmin views:ModelAdmin.add_form_templateNew in version 1.2: Please, see <strong>the</strong> release notes Path to a custom template, used by add_view().ModelAdmin.change_form_templatePath to a custom template, used by change_view().ModelAdmin.change_list_templatePath to a custom template, used by changelist_view().ModelAdmin.delete_confirmation_templatePath to a custom template, used by delete_view() for displaying a confirmation page when deleting one ormore objects.ModelAdmin.delete_selected_confirmation_templateNew in version 1.2: Please, see <strong>the</strong> release notes Path to a custom template, used by <strong>the</strong>delete_selected() action method for displaying a confirmation page when deleting one or more objects.See <strong>the</strong> actions documentation.ModelAdmin.object_history_templatePath to a custom template, used by history_view().ModelAdmin methodsModelAdmin.save_model(self, request, obj, form, change)394 Chapter 6. API Reference
<strong>Django</strong> <strong>Documentation</strong>, Release 1.2The save_model method is given <strong>the</strong> HttpRequest, a model instance, a ModelForm instance and a booleanvalue based on whe<strong>the</strong>r it is adding or changing <strong>the</strong> object. Here you can do any pre- or post-save operations.For example to attach request.user to <strong>the</strong> object prior to saving:class ArticleAdmin(admin.ModelAdmin):def save_model(self, request, obj, form, change):obj.user = request.userobj.save()ModelAdmin.save_formset(self, request, form, formset, change)The save_formset method is given <strong>the</strong> HttpRequest, <strong>the</strong> parent ModelForm instance and a boolean valuebased on whe<strong>the</strong>r it is adding or changing <strong>the</strong> parent object.For example to attach request.user to each changed formset model instance:class ArticleAdmin(admin.ModelAdmin):def save_formset(self, request, form, formset, change):instances = formset.save(commit=False)for instance in instances:instance.user = request.userinstance.save()formset.save_m2m()ModelAdmin.get_readonly_fields(self, request, obj=None)New in version 1.2: Please, see <strong>the</strong> release notes The get_readonly_fields method is given <strong>the</strong>HttpRequest and <strong>the</strong> obj being edited (or None on an add form) and is expected to return a list or tupleof field names that will be displayed as read-only, as described above in <strong>the</strong> ModelAdmin.readonly_fieldssection.ModelAdmin.get_urls(self )New in version 1.1: Please, see <strong>the</strong> release notes The get_urls method on a ModelAdmin returns <strong>the</strong> URLs tobe used for that ModelAdmin in <strong>the</strong> same way as a URLconf. Therefore you can extend <strong>the</strong>m as documented in URLdispatcher:class MyModelAdmin(admin.ModelAdmin):def get_urls(self):urls = super(MyModelAdmin, self).get_urls()my_urls = patterns(’’,(r’^my_view/$’, self.my_view))return my_urls + urlsNote: Notice that <strong>the</strong> custom patterns are included before <strong>the</strong> regular admin URLs: <strong>the</strong> admin URL patterns are verypermissive and will match nearly anything, so you’ll usually want to prepend your custom URLs to <strong>the</strong> built-in ones.However, <strong>the</strong> self.my_view function registered above suffers from two problems:• It will not perform any permission checks, so it will be accessible to <strong>the</strong> general public.• It will not provide any header details to prevent caching. This means if <strong>the</strong> page retrieves data from <strong>the</strong> database,and caching middleware is active, <strong>the</strong> page could show outdated information.Since this is usually not what you want, <strong>Django</strong> provides a convenience wrapper to check permissions and mark <strong>the</strong>view as non-cacheable. This wrapper is AdminSite.admin_view() (i.e. self.admin_site.admin_viewinside a ModelAdmin instance); use it like so:6.2. contrib packages 395
<strong>Django</strong> <strong>Documentation</strong>, Release 1.2class MyModelAdmin(admin.ModelAdmin):def get_urls(self):urls = super(MyModelAdmin, self).get_urls()my_urls = patterns(’’,(r’^my_view/$’, self.admin_site.admin_view(self.my_view)))return my_urls + urlsNotice <strong>the</strong> wrapped view in <strong>the</strong> fifth line above:(r’^my_view/$’, self.admin_site.admin_view(self.my_view))This wrapping will protect self.my_view from unauthorized access and will apply <strong>the</strong>django.views.decorators.cache.never_cache decorator to make sure it is not cached if <strong>the</strong> cachemiddleware is active.If <strong>the</strong> page is cacheable, but you still want <strong>the</strong> permission check to be performed, you can pass a cacheable=Trueargument to AdminSite.admin_view():(r’^my_view/$’, self.admin_site.admin_view(self.my_view, cacheable=True))ModelAdmin.formfield_for_foreignkey(self, db_field, request, **kwargs)New in version 1.1: Please, see <strong>the</strong> release notes The formfield_for_foreignkey method on a ModelAdminallows you to override <strong>the</strong> default formfield for a foreign key field. For example, to return a subset of objects for thisforeign key field based on <strong>the</strong> user:class MyModelAdmin(admin.ModelAdmin):def formfield_for_foreignkey(self, db_field, request, **kwargs):if db_field.name == "car":kwargs["queryset"] = Car.objects.filter(owner=request.user)return super(MyModelAdmin, self).formfield_for_foreignkey(db_field, request, **kwargs)This uses <strong>the</strong> HttpRequest instance to filter <strong>the</strong> Car foreign key field to only display <strong>the</strong> cars owned by <strong>the</strong> Userinstance.ModelAdmin.formfield_for_manytomany(self, db_field, request, **kwargs)New in version 1.1: Please, see <strong>the</strong> release notes Like <strong>the</strong> formfield_for_foreignkey method, <strong>the</strong>formfield_for_manytomany method can be overridden to change <strong>the</strong> default formfield for a many to manyfield. For example, if an owner can own multiple cars and cars can belong to multiple owners – a many to manyrelationship – you could filter <strong>the</strong> Car foreign key field to only display <strong>the</strong> cars owned by <strong>the</strong> User:class MyModelAdmin(admin.ModelAdmin):def formfield_for_manytomany(self, db_field, request, **kwargs):if db_field.name == "cars":kwargs["queryset"] = Car.objects.filter(owner=request.user)return super(MyModelAdmin, self).formfield_for_manytomany(db_field, request, **kwargs)ModelAdmin.queryset(self, request)The queryset method on a ModelAdmin returns a QuerySet of all model instances that can be edited by <strong>the</strong>admin site. One use case for overriding this method is to show objects owned by <strong>the</strong> logged-in user:class MyModelAdmin(admin.ModelAdmin):def queryset(self, request):qs = super(MyModelAdmin, self).queryset(request)if request.user.is_superuser:return qsreturn qs.filter(author=request.user)396 Chapter 6. API Reference
<strong>Django</strong> <strong>Documentation</strong>, Release 1.2ModelAdmin.message_user(request, message)Sends a message to <strong>the</strong> user. The default implementation creates a message using <strong>the</strong>django.contrib.messages backend. See <strong>the</strong> custom ModelAdmin example.O<strong>the</strong>r methodsModelAdmin.add_view(self, request, form_url=’‘, extra_context=None)<strong>Django</strong> view for <strong>the</strong> model instance addition page. See note below.ModelAdmin.change_view(self, request, object_id, extra_context=None)<strong>Django</strong> view for <strong>the</strong> model instance edition page. See note below.ModelAdmin.changelist_view(self, request, extra_context=None)<strong>Django</strong> view for <strong>the</strong> model instances change list/actions page. See note below.ModelAdmin.delete_view(self, request, object_id, extra_context=None)<strong>Django</strong> view for <strong>the</strong> model instance(s) deletion confirmation page. See note below.ModelAdmin.history_view(self, request, object_id, extra_context=None)<strong>Django</strong> view for <strong>the</strong> page that shows <strong>the</strong> modification history for a given model instance.Unlike <strong>the</strong> hook-type ModelAdmin methods detailed in <strong>the</strong> previous section, <strong>the</strong>se five methods are in reality designedto be invoked as <strong>Django</strong> views from <strong>the</strong> admin application URL dispatching handler to render <strong>the</strong> pages thatdeal with model instances CRUD operations. As a result, completely overriding <strong>the</strong>se methods will significantlychange <strong>the</strong> behavior of <strong>the</strong> admin application.One common reason for overriding <strong>the</strong>se methods is to augment <strong>the</strong> context data that is provided to <strong>the</strong> template thatrenders <strong>the</strong> view. In <strong>the</strong> following example, <strong>the</strong> change view is overridden so that <strong>the</strong> rendered template is providedsome extra mapping data that would not o<strong>the</strong>rwise be available:class MyModelAdmin(admin.ModelAdmin):# A template for a very customized change view:change_form_template = ’admin/myapp/extras/openstreetmap_change_form.html’def get_osm_info(self):# ...def change_view(self, request, object_id, extra_context=None):my_context = {’osm_data’: self.get_osm_info(),}return super(MyModelAdmin, self).change_view(request, object_id,extra_context=my_context)ModelAdmin media definitionsThere are times where you would like add a bit of CSS and/or JavaScript to <strong>the</strong> add/change views. This can beaccomplished by using a Media inner class on your ModelAdmin:class ArticleAdmin(admin.ModelAdmin):class Media:css = {"all": ("my_styles.css",)}js = ("my_code.js",)6.2. contrib packages 397
<strong>Django</strong> <strong>Documentation</strong>, Release 1.2Keep in mind that this will be prepended with MEDIA_URL. The same rules apply as regular media definitions onforms.<strong>Django</strong> admin Javascript makes use of <strong>the</strong> jQuery library. To avoid conflict with user scripts, <strong>Django</strong>’s jQuery isnamespaced as django.jQuery. If you want to use jQuery in your own admin JavaScript without including asecond copy, you can use <strong>the</strong> django.jQuery object on changelist and add/edit views.Adding custom validation to <strong>the</strong> adminAdding custom validation of data in <strong>the</strong> admin is quite easy. The automatic admin interface reuses django.forms,and <strong>the</strong> ModelAdmin class gives you <strong>the</strong> ability define your own form:class ArticleAdmin(admin.ModelAdmin):form = MyArticleAdminFormMyArticleAdminForm can be defined anywhere as long as you import where needed. Now within your form youcan add your own custom validation for any field:class MyArticleAdminForm(forms.ModelForm):class Meta:model = Articledef clean_name(self):# do something that validates your datareturn self.cleaned_data["name"]It is important you use a ModelForm here o<strong>the</strong>rwise things can break. See <strong>the</strong> forms documentation on customvalidation and, more specifically, <strong>the</strong> model form validation notes for more information.InlineModelAdmin objectsclass InlineModelAdminThe admin interface has <strong>the</strong> ability to edit models on <strong>the</strong> same page as a parent model. These are called inlines.Suppose you have <strong>the</strong>se two models:class Author(models.Model):name = models.CharField(max_length=100)class Book(models.Model):author = models.ForeignKey(Author)title = models.CharField(max_length=100)You can edit <strong>the</strong> books authored by an author on <strong>the</strong> author page. You add inlines to a model by specifying <strong>the</strong>m in aModelAdmin.inlines:class BookInline(admin.TabularInline):model = Bookclass AuthorAdmin(admin.ModelAdmin):inlines = [BookInline,]<strong>Django</strong> provides two subclasses of InlineModelAdmin and <strong>the</strong>y are:• TabularInline398 Chapter 6. API Reference
<strong>Django</strong> <strong>Documentation</strong>, Release 1.2• StackedInlineThe difference between <strong>the</strong>se two is merely <strong>the</strong> template used to render <strong>the</strong>m.InlineModelAdmin optionsThe InlineModelAdmin class is a subclass of ModelAdmin so it inherits all <strong>the</strong> same functionality as well assome of its own:InlineModelAdmin.modelThe model in which <strong>the</strong> inline is using. This is required.InlineModelAdmin.fk_nameThe name of <strong>the</strong> foreign key on <strong>the</strong> model. In most cases this will be dealt with automatically, but fk_namemust be specified explicitly if <strong>the</strong>re are more than one foreign key to <strong>the</strong> same parent model.InlineModelAdmin.formsetThis defaults to BaseInlineFormSet. Using your own formset can give you many possibilities of customization.Inlines are built around model formsets.InlineModelAdmin.formThe value for form defaults to ModelForm. This is what is passed through to inlineformset_factorywhen creating <strong>the</strong> formset for this inline.InlineModelAdmin.extraThis controls <strong>the</strong> number of extra forms <strong>the</strong> formset will display in addition to <strong>the</strong> initial forms. See <strong>the</strong> formsetsdocumentation for more information. New in version 1.2: Please, see <strong>the</strong> release notes For users withJavaScript-enabled browsers, an “Add ano<strong>the</strong>r” link is provided to enable any number of additional inlines to beadded in addition to those provided as a result of <strong>the</strong> extra argument.The dynamic link will not appear if <strong>the</strong> number of currently displayed forms exceeds max_num, or if <strong>the</strong> userdoes not have JavaScript enabled.InlineModelAdmin.max_numThis controls <strong>the</strong> maximum number of forms to show in <strong>the</strong> inline. This doesn’t directly correlate to <strong>the</strong> numberof objects, but can if <strong>the</strong> value is small enough. See Limiting <strong>the</strong> number of editable objects for more information.InlineModelAdmin.raw_id_fieldsBy default, <strong>Django</strong>’s admin uses a select-box interface () for fields that are ForeignKey. Sometimesyou don’t want to incur <strong>the</strong> overhead of having to select all <strong>the</strong> related instances to display in <strong>the</strong> drop-down.raw_id_fields is a list of fields you would like to change into a Input widget for ei<strong>the</strong>r a ForeignKeyor ManyToManyField:class BookInline(admin.TabularInline):model = Bookraw_id_fields = ("pages",)InlineModelAdmin.templateThe template used to render <strong>the</strong> inline on <strong>the</strong> page.InlineModelAdmin.verbose_nameAn override to <strong>the</strong> verbose_name found in <strong>the</strong> model’s inner Meta class.InlineModelAdmin.verbose_name_pluralAn override to <strong>the</strong> verbose_name_plural found in <strong>the</strong> model’s inner Meta class.InlineModelAdmin.can_deleteSpecifies whe<strong>the</strong>r or not inline objects can be deleted in <strong>the</strong> inline. Defaults to True.6.2. contrib packages 399
<strong>Django</strong> <strong>Documentation</strong>, Release 1.2Working with a model with two or more foreign keys to <strong>the</strong> same parent modelIt is sometimes possible to have more than one foreign key to <strong>the</strong> same model. Take this model for instance:class Friendship(models.Model):to_person = models.ForeignKey(Person, related_name="friends")from_person = models.ForeignKey(Person, related_name="from_friends")If you wanted to display an inline on <strong>the</strong> Person admin add/change pages you need to explicitly define <strong>the</strong> foreignkey since it is unable to do so automatically:class FriendshipInline(admin.TabularInline):model = Friendshipfk_name = "to_person"class PersonAdmin(admin.ModelAdmin):inlines = [FriendshipInline,]Working with Many-to-Many ModelsNew in version 1.2: Please, see <strong>the</strong> release notes By default, admin widgets for many-to-many relations will bedisplayed on whichever model contains <strong>the</strong> actual reference to <strong>the</strong> ManyToManyField. Depending on yourModelAdmin definition, each many-to-many field in your model will be represented by a standard HTML , a horizontal or vertical filter, or a raw_id_admin widget. However, it is also possible to to replace<strong>the</strong>se widgets with inlines.Suppose we have <strong>the</strong> following models:class Person(models.Model):name = models.CharField(max_length=128)class Group(models.Model):name = models.CharField(max_length=128)members = models.ManyToManyField(Person, related_name=’groups’)If you want to display many-to-many relations using an inline, you can do so by defining an InlineModelAdminobject for <strong>the</strong> relationship:class MembershipInline(admin.TabularInline):model = Group.members.throughclass PersonAdmin(admin.ModelAdmin):inlines = [MembershipInline,]class GroupAdmin(admin.ModelAdmin):inlines = [MembershipInline,]exclude = (’members’,)There are two features worth noting in this example.Firstly - <strong>the</strong> MembershipInline class references Group.members.through. The through attribute is areference to <strong>the</strong> model that manages <strong>the</strong> many-to-many relation. This model is automatically created by <strong>Django</strong> when400 Chapter 6. API Reference
<strong>Django</strong> <strong>Documentation</strong>, Release 1.2you define a many-to-many field.Secondly, <strong>the</strong> GroupAdmin must manually exclude <strong>the</strong> members field. <strong>Django</strong> displays an admin widget for amany-to-many field on <strong>the</strong> model that defines <strong>the</strong> relation (in this case, Group). If you want to use an inline model torepresent <strong>the</strong> many-to-many relationship, you must tell <strong>Django</strong>’s admin to not display this widget - o<strong>the</strong>rwise you willend up with two widgets on your admin page for managing <strong>the</strong> relation.In all o<strong>the</strong>r respects, <strong>the</strong> InlineModelAdmin is exactly <strong>the</strong> same as any o<strong>the</strong>r. You can customize <strong>the</strong> appearanceusing any of <strong>the</strong> normal ModelAdmin properties.Working with Many-to-Many Intermediary ModelsWhen you specify an intermediary model using <strong>the</strong> through argument to a ManyToManyField, <strong>the</strong> admin willnot display a widget by default. This is because each instance of that intermediary model requires more informationthan could be displayed in a single widget, and <strong>the</strong> layout required for multiple widgets will vary depending on <strong>the</strong>intermediate model.However, we still want to be able to edit that information inline. Fortunately, this is easy to do with inline adminmodels. Suppose we have <strong>the</strong> following models:class Person(models.Model):name = models.CharField(max_length=128)class Group(models.Model):name = models.CharField(max_length=128)members = models.ManyToManyField(Person, through=’Membership’)class Membership(models.Model):person = models.ForeignKey(Person)group = models.ForeignKey(Group)date_joined = models.DateField()invite_reason = models.CharField(max_length=64)The first step in displaying this intermediate model in <strong>the</strong> admin is to define an inline class for <strong>the</strong> Membershipmodel:class MembershipInline(admin.TabularInline):model = Membershipextra = 1This simple example uses <strong>the</strong> default InlineModelAdmin values for <strong>the</strong> Membership model, and limits <strong>the</strong> extraadd forms to one. This could be customized using any of <strong>the</strong> options available to InlineModelAdmin classes.Now create admin views for <strong>the</strong> Person and Group models:class PersonAdmin(admin.ModelAdmin):inlines = (MembershipInline,)class GroupAdmin(admin.ModelAdmin):inlines = (MembershipInline,)Finally, register your Person and Group models with <strong>the</strong> admin site:admin.site.register(Person, PersonAdmin)admin.site.register(Group, GroupAdmin)Now your admin site is set up to edit Membership objects inline from ei<strong>the</strong>r <strong>the</strong> Person or <strong>the</strong> Group detail pages.6.2. contrib packages 401
<strong>Django</strong> <strong>Documentation</strong>, Release 1.2Using generic relations as an inlineIt is possible to use an inline with generically related objects. Let’s say you have <strong>the</strong> following models:class Image(models.Model):image = models.ImageField(upload_to="images")content_type = models.ForeignKey(ContentType)object_id = models.PositiveIntegerField()content_object = generic.GenericForeignKey("content_type", "object_id")class Product(models.Model):name = models.CharField(max_length=100)If you want to allow editing and creating Image instance on <strong>the</strong> Product add/change views you can simplyuse GenericInlineModelAdmin provided by django.contrib.contenttypes.generic. In youradmin.py for this example app:from django.contrib import adminfrom django.contrib.contenttypes import genericfrom myproject.myapp.models import Image, Productclass ImageInline(generic.GenericTabularInline):model = Imageclass ProductAdmin(admin.ModelAdmin):inlines = [ImageInline,]admin.site.register(Product, ProductAdmin)django.contrib.contenttypes.generic provides both a GenericTabularInline andGenericStackedInline and behave just like any o<strong>the</strong>r inline. See <strong>the</strong> contenttypes documentation formore specific information.Overriding Admin TemplatesIt is relatively easy to override many of <strong>the</strong> templates which <strong>the</strong> admin module uses to generate <strong>the</strong> various pages ofan admin site. You can even override a few of <strong>the</strong>se templates for a specific app, or a specific model.Set up your projects admin template directoriesThe admin template files are located in <strong>the</strong> contrib/admin/templates/admin directory.In order to override one or more of <strong>the</strong>m, first create an admin directory in your project’s templates directory.This can be any of <strong>the</strong> directories you specified in TEMPLATE_DIRS.Within this admin directory, create sub-directories named after your app. Within <strong>the</strong>se app subdirectories create subdirectoriesnamed after your models. Note, that <strong>the</strong> admin app will lowercase <strong>the</strong> model name when looking for <strong>the</strong>directory, so make sure you name <strong>the</strong> directory in all lowercase if you are going to run your app on a case-sensitivefilesystem.To override an admin template for a specific app, copy and edit <strong>the</strong> template from <strong>the</strong>django/contrib/admin/templates/admin directory, and save it to one of <strong>the</strong> directories you justcreated.402 Chapter 6. API Reference
<strong>Django</strong> <strong>Documentation</strong>, Release 1.2For example, if we wanted to add a tool to <strong>the</strong> change list view for all <strong>the</strong> models in an app named my_app, we wouldcopy contrib/admin/templates/admin/change_list.html to <strong>the</strong> templates/admin/my_app/directory of our project, and make any necessary changes.If we wanted to add a tool to <strong>the</strong> change list view for only a specific model named ‘Page’, we would copy that samefile to <strong>the</strong> templates/admin/my_app/page directory of our project.Overriding vs. replacing an admin templateBecause of <strong>the</strong> modular design of <strong>the</strong> admin templates, it is usually nei<strong>the</strong>r necessary nor advisable to replace an entiretemplate. It is almost always better to override only <strong>the</strong> section of <strong>the</strong> template which you need to change.To continue <strong>the</strong> example above, we want to add a new link next to <strong>the</strong> History tool for <strong>the</strong> Page model. Afterlooking at change_form.html we determine that we only need to override <strong>the</strong> object-tools block. Thereforehere is our new change_form.html :{% extends "admin/change_form.html" %}{% load i18n %}{% block object-tools %}{% if change %}{% if not is_popup %}{% trans "History" %}My Link{% if has_absolute_url %}{% trans "View on site" %}{% endif%}{% endif %}{% endif %}{% endblock %}And that’s it! If we placed this file in <strong>the</strong> templates/admin/my_app directory, our link would appear on everymodel’s change form.Templates which may be overridden per app or modelNot every template in contrib/admin/templates/admin may be overridden per app or per model. The followingcan:• app_index.html• change_form.html• change_list.html• delete_confirmation.html• object_history.htmlFor those templates that cannot be overridden in this way, you may still override <strong>the</strong>m for your entire project. Justplace <strong>the</strong> new version in your templates/admin directory. This is particularly useful to create custom 404 and500 pages.Note: Some of <strong>the</strong> admin templates, such as change_list_request.html are used to render custom inclusiontags. These may be overridden, but in such cases you are probably better off creating your own version of <strong>the</strong> tag inquestion and giving it a different name. That way you can use it selectively.6.2. contrib packages 403
<strong>Django</strong> <strong>Documentation</strong>, Release 1.2Root and login templatesIf you wish to change <strong>the</strong> index, login or logout templates, you are better off creating your own AdminSite instance(see below), and changing <strong>the</strong> AdminSite.index_template , AdminSite.login_template orAdminSite.logout_template properties.AdminSite objectsclass AdminSite(name=None)A <strong>Django</strong> administrative site is represented by an instance of django.contrib.admin.sites.AdminSite;by default, an instance of this class is created as django.contrib.admin.site and you can register your modelsand ModelAdmin instances with it.If you’d like to set up your own administrative site with custom behavior, however, you’re free to subclass AdminSiteand override or add anything you like. Then, simply create an instance of your AdminSite subclass (<strong>the</strong> same wayyou’d instantiate any o<strong>the</strong>r Python class), and register your models and ModelAdmin subclasses with it instead ofusing <strong>the</strong> default. New in version 1.1: Please, see <strong>the</strong> release notes When constructing an instance of an AdminSite,you are able to provide a unique instance name using <strong>the</strong> name argument to <strong>the</strong> constructor. This instance nameis used to identify <strong>the</strong> instance, especially when reversing admin URLs. If no instance name is provided, a defaultinstance name of admin will be used.AdminSite attributesTemplates can override or extend base admin templates as described in Overriding Admin Templates.AdminSite.index_templatePath to a custom template that will be used by <strong>the</strong> admin site main index view.AdminSite.login_templatePath to a custom template that will be used by <strong>the</strong> admin site login view.AdminSite.logout_templateNew in version 1.2: Please, see <strong>the</strong> release notes Path to a custom template that will be used by <strong>the</strong> admin site logoutview.AdminSite.password_change_templateNew in version 1.2: Please, see <strong>the</strong> release notes Path to a custom template that will be used by <strong>the</strong> admin site passwordchange view.AdminSite.password_change_done_templateNew in version 1.2: Please, see <strong>the</strong> release notes Path to a custom template that will be used by <strong>the</strong> admin site passwordchange done view.Hooking AdminSite instances into your URLconfThe last step in setting up <strong>the</strong> <strong>Django</strong> admin is to hook your AdminSite instance into your URLconf. Do this bypointing a given URL at <strong>the</strong> AdminSite.urls method.In this example, we register <strong>the</strong> default AdminSite instance django.contrib.admin.site at <strong>the</strong> URL/admin/404 Chapter 6. API Reference
<strong>Django</strong> <strong>Documentation</strong>, Release 1.2# urls.pyfrom django.conf.urls.defaults import *from django.contrib import adminadmin.autodiscover()urlpatterns = patterns(’’,(r’^admin/’, include(admin.site.urls)),)Above we used admin.autodiscover() to automatically load <strong>the</strong> INSTALLED_APPS admin.py modules.In this example,/myadmin/we register <strong>the</strong> AdminSite instance myproject.admin.admin_site at <strong>the</strong> URL# urls.pyfrom django.conf.urls.defaults import *from myproject.admin import admin_siteurlpatterns = patterns(’’,(r’^myadmin/’, include(admin_site.urls)),)There is really no need to use autodiscover when using your own AdminSite instance since you will likely beimporting all <strong>the</strong> per-app admin.py modules in your myproject.admin module.Multiple admin sites in <strong>the</strong> same URLconfIt’s easy to create multiple instances of <strong>the</strong> admin site on <strong>the</strong> same <strong>Django</strong>-powered Web site. Just createmultiple instances of AdminSite and root each one at a different URL. Changed in version 1.1: Themethod for hooking AdminSite instances into urls has changed in <strong>Django</strong> 1.1. In this example, <strong>the</strong> URLs/basic-admin/ and /advanced-admin/ feature separate versions of <strong>the</strong> admin site – using <strong>the</strong> AdminSiteinstances myproject.admin.basic_site and myproject.admin.advanced_site, respectively:# urls.pyfrom django.conf.urls.defaults import *from myproject.admin import basic_site, advanced_siteurlpatterns = patterns(’’,(r’^basic-admin/’, include(basic_site.urls)),(r’^advanced-admin/’, include(advanced_site.urls)),)AdminSite instances take a single argument to <strong>the</strong>ir constructor, <strong>the</strong>ir name, which can be anything you like. Thisargument becomes <strong>the</strong> prefix to <strong>the</strong> URL names for <strong>the</strong> purposes of reversing <strong>the</strong>m. This is only necessary if you areusing more than one AdminSite.Adding views to admin sitesNew in version 1.1: Please, see <strong>the</strong> release notes Just like ModelAdmin, AdminSite provides a get_urls()method that can be overridden to define additional views for <strong>the</strong> site. To add a new view to your admin site, extend <strong>the</strong>base get_urls() method to include a pattern for your new view.Note: Any view you render that uses <strong>the</strong> admin templates, or extends <strong>the</strong> base admin template, should provide <strong>the</strong>current_app argument to RequestContext or Context when rendering <strong>the</strong> template. It should be set to ei<strong>the</strong>r6.2. contrib packages 405
<strong>Django</strong> <strong>Documentation</strong>, Release 1.2self.name if your view is on an AdminSite or self.admin_site.name if your view is on a ModelAdmin.Reversing Admin URLsNew in version 1.1: Please, see <strong>the</strong> release notes When an AdminSite is deployed, <strong>the</strong> views provided by that siteare accessible using <strong>Django</strong>’s URL reversing system.The AdminSite provides <strong>the</strong> following named URL patterns:Page URL name ParametersIndexindexLogoutlogoutPassword change password_changePassword change done password_change_donei18n javascript jsi18nApplication index page app_list app_labelEach ModelAdmin instance provides an additional set of named URLs:Page URL name ParametersChangelist {{ app_label }}_{{ model_name }}_changelistAdd {{ app_label }}_{{ model_name }}_addHistory {{ app_label }}_{{ model_name }}_history object_idDelete {{ app_label }}_{{ model_name }}_delete object_idChange {{ app_label }}_{{ model_name }}_change object_idThese named URLs are registered with <strong>the</strong> application namespace admin, and with an instance namespace correspondingto <strong>the</strong> name of <strong>the</strong> Site instance.So - if you wanted to get a reference to <strong>the</strong> Change view for a particular Choice object (from <strong>the</strong> polls application)in <strong>the</strong> default admin, you would call:>>> from django.core import urlresolvers>>> c = Choice.objects.get(...)>>> change_url = urlresolvers.reverse(’admin:polls_choice_change’, args=(c.id,))This will find <strong>the</strong> first registered instance of <strong>the</strong> admin application (whatever <strong>the</strong> instance name), and resolve to <strong>the</strong>view for changing poll.Choice instances in that instance.If you want to find a URL in a specific admin instance, provide <strong>the</strong> name of that instance as a current_app hintto <strong>the</strong> reverse call. For example, if you specifically wanted <strong>the</strong> admin view from <strong>the</strong> admin instance named custom,you would need to call:>>> change_url = urlresolvers.reverse(’custom:polls_choice_change’, args=(c.id,))For more details, see <strong>the</strong> documentation on reversing namespaced URLs.6.2.2 django.contrib.authSee User au<strong>the</strong>ntication in <strong>Django</strong>.6.2.3 <strong>Django</strong>’s comments framework<strong>Django</strong> includes a simple, yet customizable comments framework. The built-in comments framework can be used toattach comments to any model, so you can use it for comments on blog entries, photos, book chapters, or anythingelse.406 Chapter 6. API Reference
<strong>Django</strong> <strong>Documentation</strong>, Release 1.2Note: If you used to use <strong>Django</strong>’s older (undocumented) comments framework, you’ll need to upgrade. See <strong>the</strong>upgrade guide for instructions.Quick start guideTo get started using <strong>the</strong> comments app, follow <strong>the</strong>se steps:1. Install <strong>the</strong> comments framework by adding ’django.contrib.comments’ to INSTALLED_APPS.2. Run manage.py syncdb so that <strong>Django</strong> will create <strong>the</strong> comment tables.3. Add <strong>the</strong> comment app’s URLs to your project’s urls.py:urlpatterns = patterns(’’,...(r’^comments/’, include(’django.contrib.comments.urls’)),...)4. Use <strong>the</strong> comment template tags below to embed comments in your templates.You might also want to examine Comment settings.Comment template tagsYou’ll primarily interact with <strong>the</strong> comment system through a series of template tags that let you embed comments andgenerate forms for your users to post <strong>the</strong>m.Like all custom template tag libraries, you’ll need to load <strong>the</strong> custom tags before you can use <strong>the</strong>m:{% load comments %}Once loaded you can use <strong>the</strong> template tags below.Specifying which object comments are attached to<strong>Django</strong>’s comments are all “attached” to some parent object. This can be any instance of a <strong>Django</strong> model. Each of <strong>the</strong>tags below gives you a couple of different ways you can specify which object to attach to:1. Refer to <strong>the</strong> object directly – <strong>the</strong> more common method. Most of <strong>the</strong> time, you’ll have some object in <strong>the</strong>template’s context you want to attach <strong>the</strong> comment to; you can simply use that object.For example, in a blog entry page that has a variable named entry, you could use <strong>the</strong> following to load <strong>the</strong>number of comments:{% get_comment_count for entry as comment_count %}.2. Refer to <strong>the</strong> object by content-type and object id. You’d use this method if you, for some reason, don’t actuallyhave direct access to <strong>the</strong> object.Following <strong>the</strong> above example, if you knew <strong>the</strong> object ID was 14 but didn’t have access to <strong>the</strong> actual object, youcould do something like:{% get_comment_count for blog.entry 14 as comment_count %}In <strong>the</strong> above, blog.entry is <strong>the</strong> app label and (lower-cased) model name of <strong>the</strong> model class.6.2. contrib packages 407
<strong>Django</strong> <strong>Documentation</strong>, Release 1.2Displaying commentsTo display a list of comments, you can use <strong>the</strong> template tags render_comment_list or get_comment_list.Quickly rendering a comment listrender_comment_list:The easiest way to display a list of comments for some object is by using{% render_comment_list for [object] %}For example:{% render_comment_list for event %}This will render comments using a template named comments/list.html, a default version of which is includedwith <strong>Django</strong>.Rendering a custom comment listTo get <strong>the</strong> list of comments for some object, use get_comment_list:{% get_comment_list for [object] as [varname] %}For example:{% get_comment_list for event as comment_list %}{% for comment in comment_list %}...{% endfor %}This returns a list of Comment objects; see <strong>the</strong> comment model documentation for details.Linking to commentsNew in version 1.2: Please, see <strong>the</strong> release notes To provide a permalink to a specific comment, useget_comment_permalink:{% get_comment_permalink comment_obj [format_string] %}By default, <strong>the</strong> named anchor that will be appended to <strong>the</strong> URL will be <strong>the</strong> letter ‘c’ followed by <strong>the</strong> comment id, forexample ‘c82’. You may specify a custom format string if you wish to override this behavior:{% get_comment_permalink comment "#c%(id)s-by-%(user_name)s"%}The format string is a standard python format string. Valid mapping keys include any attributes of <strong>the</strong> comment object.Regardless of whe<strong>the</strong>r you specify a custom anchor pattern, you must supply a matching named anchor at a suitableplace in your template.For example:{% for comment in comment_list %}permalink for comment #{{ forloop.counter }}...{% endfor %}408 Chapter 6. API Reference
<strong>Django</strong> <strong>Documentation</strong>, Release 1.2Warning: There’s a known bug in Safari/Webkit which causes <strong>the</strong> named anchor to be forgotten following aredirect. The practical impact for comments is that <strong>the</strong> Safari/webkit browsers will arrive at <strong>the</strong> correct page butwill not scroll to <strong>the</strong> named anchor.Counting commentsTo count comments attached to an object, use get_comment_count:{% get_comment_count for [object] as [varname] %}For example:{% get_comment_count for event as comment_count %}This event has {{ comment_count }} comments.Displaying <strong>the</strong> comment post formTo show <strong>the</strong> form that users will use to post a comment,get_comment_formyou can use render_comment_form orQuickly rendering <strong>the</strong> comment form The easiest way to display a comment form is by usingrender_comment_form:{% render_comment_form for [object] %}For example:{% render_comment_form for event %}This will render comments using a template named comments/form.html, a default version of which is includedwith <strong>Django</strong>.Rendering a custom comment form If you want more control over <strong>the</strong> look and feel of <strong>the</strong> comment form, you useuse get_comment_form to get a form object that you can use in <strong>the</strong> template:{% get_comment_form for [object] as [varname] %}A complete form might look like:{% get_comment_form for event as form %}{{ form }}Be sure to read <strong>the</strong> notes on <strong>the</strong> comment form, below, for some special considerations you’ll need to make if you’reusing this approach.6.2. contrib packages 409
<strong>Django</strong> <strong>Documentation</strong>, Release 1.2Getting <strong>the</strong> comment form target You may have noticed that <strong>the</strong> above example uses ano<strong>the</strong>r template tag –comment_form_target – to actually get <strong>the</strong> action attribute of <strong>the</strong> form. This will always return <strong>the</strong> correctURL that comments should be posted to; you’ll always want to use it like above:Redirecting after <strong>the</strong> comment post To specify <strong>the</strong> URL you want to redirect to after <strong>the</strong> comment has been posted,you can include a hidden form input called next in your comment form. For example:Notes on <strong>the</strong> comment formThe form used by <strong>the</strong> comment system has a few important anti-spam attributes you should know about:• It contains a number of hidden fields that contain timestamps, information about <strong>the</strong> object <strong>the</strong> comment shouldbe attached to, and a “security hash” used to validate this information. If someone tampers with this data –something comment spammers will try – <strong>the</strong> comment submission will fail.If you’re rendering a custom comment form, you’ll need to make sure to pass <strong>the</strong>se values through unchanged.• The timestamp is used to ensure that “reply attacks” can’t continue very long. Users who wait too long betweenrequesting <strong>the</strong> form and posting a comment will have <strong>the</strong>ir submissions refused.• The comment form includes a “honeypot” field. It’s a trap: if any data is entered in that field, <strong>the</strong> comment willbe considered spam (spammers often automatically fill in all fields in an attempt to make valid submissions).The default form hides this field with a piece of CSS and fur<strong>the</strong>r labels it with a warning field; if you use <strong>the</strong>comment form with a custom template you should be sure to do <strong>the</strong> same.The comments app also depends on <strong>the</strong> more general Cross Site Request Forgery protection that comes with <strong>Django</strong>.As described in <strong>the</strong> documentation, it is best to use CsrfViewMiddleware. However, if you are not using that,you will need to use <strong>the</strong> csrf_protect decorator on any views that include <strong>the</strong> comment form, in order for thoseviews to be able to output <strong>the</strong> CSRF token and cookie.More informationThe built-in comment modelsclass Comment<strong>Django</strong>’s built-in comment model. Has <strong>the</strong> following fields:content_objectA GenericForeignKey attribute pointing to <strong>the</strong> object <strong>the</strong> comment is attached to. You can use thisto get at <strong>the</strong> related object (i.e. my_comment.content_object).Since this field is a GenericForeignKey, it’s actually syntactic sugar on top of two underlying attributes,described below.content_typeA ForeignKey to ContentType; this is <strong>the</strong> type of <strong>the</strong> object <strong>the</strong> comment is attached to.object_pkA TextField containing <strong>the</strong> primary key of <strong>the</strong> object <strong>the</strong> comment is attached to.siteA ForeignKey to <strong>the</strong> Site on which <strong>the</strong> comment was posted.410 Chapter 6. API Reference
<strong>Django</strong> <strong>Documentation</strong>, Release 1.2userA ForeignKey to <strong>the</strong> User who posted <strong>the</strong> comment. May be blank if <strong>the</strong> comment was posted by anunau<strong>the</strong>nticated user.user_nameThe name of <strong>the</strong> user who posted <strong>the</strong> comment.user_emailThe email of <strong>the</strong> user who posted <strong>the</strong> comment.user_urlThe URL entered by <strong>the</strong> person who posted <strong>the</strong> comment.commentThe actual content of <strong>the</strong> comment itself.submit_dateThe date <strong>the</strong> comment was submitted.ip_addressThe IP address of <strong>the</strong> user posting <strong>the</strong> comment.is_publicFalse if <strong>the</strong> comment is in moderation (see Generic comment moderation); If True, <strong>the</strong> comment willbe displayed on <strong>the</strong> site.is_removedTrue if <strong>the</strong> comment was removed. Used to keep track of removed comments instead of just deleting<strong>the</strong>m.Comment settingsThese settings configure <strong>the</strong> behavior of <strong>the</strong> comments framework:COMMENTS_HIDE_REMOVED If True (default), removed comments will be excluded from commentlists/counts (as taken from template tags). O<strong>the</strong>rwise, <strong>the</strong> template author is responsible for some sort of a “thiscomment has been removed by <strong>the</strong> site staff” message.COMMENT_MAX_LENGTH The maximum length of <strong>the</strong> comment field, in characters. Comments longer thanthis will be rejected. Defaults to 3000.COMMENTS_APP An app which provides customization of <strong>the</strong> comments framework. Use <strong>the</strong> same dotted-stringnotation as in INSTALLED_APPS. Your custom COMMENTS_APP must also be listed in INSTALLED_APPS.Signals sent by <strong>the</strong> comments appThe comment app sends a series of signals to allow for comment moderation and similar activities. See <strong>the</strong> introductionto signals for information about how to register for and receive <strong>the</strong>se signals.comment_will_be_posteddjango.contrib.comments.signals.comment_will_be_posted6.2. contrib packages 411
<strong>Django</strong> <strong>Documentation</strong>, Release 1.2Sent just before a comment will be saved, after it’s been sanity checked and submitted. This can be used to modify <strong>the</strong>comment (in place) with posting details or o<strong>the</strong>r such actions.If any receiver returns False <strong>the</strong> comment will be discarded and a 403 (not allowed) response will be returned.This signal is sent at more or less <strong>the</strong> same time (just before, actually) as <strong>the</strong> Comment object’s pre_save signal.Arguments sent with this signal:sender The comment model.comment The comment instance about to be posted. Note that it won’t have been saved into <strong>the</strong> database yet, so itwon’t have a primary key, and any relations might not work correctly yet.request The HttpRequest that posted <strong>the</strong> comment.comment_was_posteddjango.contrib.comments.signals.comment_was_postedSent just after <strong>the</strong> comment is saved.Arguments sent with this signal:sender The comment model.comment The comment instance that was posted. Note that it will have already been saved, so if you modify it you’llneed to call save() again.request The HttpRequest that posted <strong>the</strong> comment.comment_was_flaggeddjango.contrib.comments.signals.comment_was_flaggedSent after a comment was “flagged” in some way. Check <strong>the</strong> flag to see if this was a user requesting removal of acomment, a moderator approving/removing a comment, or some o<strong>the</strong>r custom user flag.Arguments sent with this signal:sender The comment model.comment The comment instance that was posted. Note that it will have already been saved, so if you modify it you’llneed to call save() again.flag The CommentFlag that’s been attached to <strong>the</strong> comment.created True if this is a new flag; False if it’s a duplicate flag.request The HttpRequest that posted <strong>the</strong> comment.Upgrading from <strong>Django</strong>’s previous comment systemPrior versions of <strong>Django</strong> included an outdated, undocumented comment system. Users who reverse-engineered thisframework will need to upgrade to use <strong>the</strong> new comment system; this guide explains how.The main changes from <strong>the</strong> old system are:• This new system is documented.• It uses modern <strong>Django</strong> features like forms and modelforms.• It has a single Comment model instead of separate FreeComment and Comment models.• Comments have “email” and “URL” fields.• No ratings, photos and karma. This should only effect World Online.412 Chapter 6. API Reference
<strong>Django</strong> <strong>Documentation</strong>, Release 1.2• The {% comment_form %} tag no longer exists. Instead, <strong>the</strong>re’s now two functions:{% get_comment_form %}, which returns a form for posting a new comment, and {%render_comment_form %}, which renders said form using <strong>the</strong> comments/form.html template.• The way comments are include in your URLconf have changed; you’ll need to replace:(r’^comments/’, include(’django.contrib.comments.urls.comments’)),with:(r’^comments/’, include(’django.contrib.comments.urls’)),Upgrading data The data models for <strong>Django</strong>’s comment system have changed, as have <strong>the</strong> table names. Beforeyou transfer your existing data into <strong>the</strong> new comments system, make sure that you have installed <strong>the</strong> new commentssystem as explained in <strong>the</strong> quick start guide. This will ensure that <strong>the</strong> new tables have been properly created.To transfer your data into <strong>the</strong> new comments system, you’ll need to directly run <strong>the</strong> following SQL:BEGIN;INSERT INTO django_comments(content_type_id, object_pk, site_id, user_name, user_email, user_url,comment, submit_date, ip_address, is_public, is_removed)SELECTcontent_type_id, object_id, site_id, person_name, ’’, ’’, comment,submit_date, ip_address, is_public, not approvedFROM comments_freecomment;INSERT INTO django_comments(content_type_id, object_pk, site_id, user_id, user_name, user_email,user_url, comment, submit_date, ip_address, is_public, is_removed)SELECTcontent_type_id, object_id, site_id, user_id, ’’, ’’, ’’, comment,submit_date, ip_address, is_public, is_removedFROM comments_comment;UPDATE django_comments SET user_name = (SELECT username FROM auth_userWHERE django_comments.user_id = auth_user.id) WHERE django_comments.user_id is not NULL;UPDATE django_comments SET user_email = (SELECT email FROM auth_userWHERE django_comments.user_id = auth_user.id) WHERE django_comments.user_id is not NULL;COMMIT;Customizing <strong>the</strong> comments frameworkIf <strong>the</strong> built-in comment framework doesn’t quite fit your needs, you can extend <strong>the</strong> comment app’s behavior to addcustom data and logic. The comments framework lets you extend <strong>the</strong> built-in comment model, <strong>the</strong> built-in commentform, and <strong>the</strong> various comment views.The COMMENTS_APP setting is where this customization begins. Set COMMENTS_APP to <strong>the</strong> name of <strong>the</strong> app you’dlike to use to provide custom behavior. You’ll use <strong>the</strong> same syntax as you’d use for INSTALLED_APPS, and <strong>the</strong> appgiven must also be in <strong>the</strong> INSTALLED_APPS list.For example, if you wanted to use an app named my_comment_app, your settings file would contain:6.2. contrib packages 413
<strong>Django</strong> <strong>Documentation</strong>, Release 1.2INSTALLED_APPS = [...’my_comment_app’,...]COMMENTS_APP = ’my_comment_app’The app named in COMMENTS_APP provides its custom behavior by defining some module-level functions in <strong>the</strong>app’s __init__.py. The complete list of <strong>the</strong>se functions can be found below, but first let’s look at a quick example.An example custom comments app One of <strong>the</strong> most common types of customization is modifying <strong>the</strong> set of fieldsprovided on <strong>the</strong> built-in comment model. For example, some sites that allow comments want <strong>the</strong> commentator toprovide a title for <strong>the</strong>ir comment; <strong>the</strong> built-in comment model has no field for that title.To make this kind of customization, we’ll need to do three things:1. Create a custom comment Model that adds on <strong>the</strong> “title” field.2. Create a custom comment Form that also adds this “title” field.3. Inform <strong>Django</strong> of <strong>the</strong>se objects by defining a few functions in a custom COMMENTS_APP.So, carrying on <strong>the</strong> example above, we’re dealing with a typical app structure in <strong>the</strong> my_custom_app directory:my_custom_app/__init__.pymodels.pyforms.pyIn <strong>the</strong> models.py we’ll define a CommentWithTitle model:from django.db import modelsfrom django.contrib.comments.models import Commentclass CommentWithTitle(Comment):title = models.CharField(max_length=300)Most custom comment models will subclass <strong>the</strong> Comment model. However, if you want to substantially remove orchange <strong>the</strong> fields available in <strong>the</strong> Comment model, but don’t want to rewrite <strong>the</strong> templates, you could try subclassingfrom BaseCommentAbstractModel.Next, we’ll define a custom comment form in forms.py. This is a little more tricky:we have to both create a form and override CommentForm.get_comment_model() andCommentForm.get_comment_create_data() to return deal with our custom title field:from django import formsfrom django.contrib.comments.forms import CommentFormfrom my_comment_app.models import CommentWithTitleclass CommentFormWithTitle(CommentForm):title = forms.CharField(max_length=300)def get_comment_model(self):# Use our custom comment model instead of <strong>the</strong> built-in one.return CommentWithTitledef get_comment_create_data(self):# Use <strong>the</strong> data of <strong>the</strong> superclass, and add in <strong>the</strong> title fielddata = super(CommentFormWithTitle, self).get_comment_create_data()414 Chapter 6. API Reference
<strong>Django</strong> <strong>Documentation</strong>, Release 1.2data[’title’] = self.cleaned_data[’title’]return data<strong>Django</strong> provides a couple of “helper” classes to make writing certain types of custom comment forms easier; seedjango.contrib.comments.forms for more.Finally, we’ll define a couple of methods in my_custom_app/__init__.py to point <strong>Django</strong> at <strong>the</strong>se classeswe’ve created:from my_comments_app.models import CommentWithTitlefrom my_comments_app.forms import CommentFormWithTitledef get_model():return CommentWithTitledef get_form():return CommentFormWithTitleWarning: Be careful not to create cyclic imports in your custom comments app. If you feel your commentconfiguration isn’t being used as defined – for example, if your comment moderation policy isn’t being applied –you may have a cyclic import problem.If you are having unexplained problems with comments behavior, check if your custom comments applicationimports (even indirectly) any module that itself imports <strong>Django</strong>’s comments module.The above process should take care of most common situations. For more advanced usage, <strong>the</strong>re are additional methodsyou can define. Those are explained in <strong>the</strong> next section.Custom comment app API The django.contrib.comments app defines <strong>the</strong> following methods; any customcomment app must define at least one of <strong>the</strong>m. All are optional, however.get_model()Return <strong>the</strong> Model class to use for comments. This model should inherit fromdjango.contrib.comments.models.BaseCommentAbstractModel, which defines necessarycore fields.The default implementation returns django.contrib.comments.models.Comment.get_form()Return <strong>the</strong> Form class you want to use for creating, validating, and saving your comment model. Your customcomment form should accept an additional first argument, target_object, which is <strong>the</strong> object <strong>the</strong> commentwill be attached to.The default implementation returns django.contrib.comments.forms.CommentForm.Note: The default comment form also includes a number of unobtrusive spam-prevention features (see Noteson <strong>the</strong> comment form). If replacing it with your own form, you may want to look at <strong>the</strong> source code for <strong>the</strong>built-in form and consider incorporating similar features.get_form_target()Return <strong>the</strong> URL for POSTing comments. This will be <strong>the</strong> attribute when rendering yourcomment form.The default implementation returns a reverse-resolved URL pointing to <strong>the</strong> post_comment() view.6.2. contrib packages 415
<strong>Django</strong> <strong>Documentation</strong>, Release 1.2Note: If you provide a custom comment model and/or form, but you want to use <strong>the</strong> defaultpost_comment() view, you will need to be aware that it requires <strong>the</strong> model and form to have certain additionalattributes and methods: see <strong>the</strong> post_comment() view documentation for details.get_flag_url()Return <strong>the</strong> URL for <strong>the</strong> “flag this comment” view.The default implementation returns a reverse-resolved URL pointing to <strong>the</strong>django.contrib.comments.views.moderation.flag() view.get_delete_url()Return <strong>the</strong> URL for <strong>the</strong> “delete this comment” view.The default implementation returns a reverse-resolved URL pointing to <strong>the</strong>django.contrib.comments.views.moderation.delete() view.get_approve_url()Return <strong>the</strong> URL for <strong>the</strong> “approve this comment from moderation” view.The default implementation returns a reverse-resolved URL pointing to <strong>the</strong>django.contrib.comments.views.moderation.approve() view.Comment form classesThe django.contrib.comments.forms module contains a handful of forms you’ll use when writing customviews dealing with comments, or when writing custom comment apps.class CommentFormThe main comment form representing <strong>the</strong> standard, built-in way of handling submitted comments. This is <strong>the</strong>class used by all <strong>the</strong> views django.contrib.comments to handle submitted comments.If you want to build custom views that are similar to <strong>Django</strong>’s built-in comment handling views, you’ll probablywant to use this form.Abstract comment forms for custom comment apps If you’re building a custom comment app, you might want toreplace some of <strong>the</strong> form logic but still rely on parts of <strong>the</strong> existing form.CommentForm is actually composed of a couple of abstract base class forms that you can subclass to reuse pieces of<strong>the</strong> form handling logic:class CommentSecurityFormHandles <strong>the</strong> anti-spoofing protection aspects of <strong>the</strong> comment form handling.This class contains <strong>the</strong> content_type and object_pk fields pointing to <strong>the</strong> object <strong>the</strong> comment is attachedto, along with a timestamp and a security_hash of all <strong>the</strong> form data. Toge<strong>the</strong>r, <strong>the</strong> timestamp and <strong>the</strong>security hash ensure that spammers can’t “replay” form submissions and flood you with comments.class CommentDetailsFormHandles <strong>the</strong> details of <strong>the</strong> comment itself.This class contains <strong>the</strong> name, email, url, and <strong>the</strong> comment field itself, along with <strong>the</strong> associated validationlogic.Generic comment moderation<strong>Django</strong>’s bundled comments application is extremely useful on its own, but <strong>the</strong> amount of comment spam circulatingon <strong>the</strong> Web today essentially makes it necessary to have some sort of automatic moderation system in416 Chapter 6. API Reference
<strong>Django</strong> <strong>Documentation</strong>, Release 1.2place for any application which makes use of comments. To make this easier to handle in a consistent fashion,django.contrib.comments.moderation provides a generic, extensible comment-moderation system whichcan be applied to any model or set of models which want to make use of <strong>Django</strong>’s comment system.Overview The entire system is contained within django.contrib.comments.moderation, and uses a twostepprocess to enable moderation for any given model:1. A subclass of CommentModerator is defined which specifies <strong>the</strong> moderation options <strong>the</strong> model wants toenable.2. The model is registered with <strong>the</strong> moderation system, passing in <strong>the</strong> model class and <strong>the</strong> class which specifies itsmoderation options.A simple example is <strong>the</strong> best illustration of this. Suppose we have <strong>the</strong> following model, which would represent entriesin a Weblog:from django.db import modelsclass Entry(models.Model):title = models.CharField(maxlength=250)body = models.TextField()pub_date = models.DateTimeField()enable_comments = models.BooleanField()Now, suppose that we want <strong>the</strong> following steps to be applied whenever a new comment is posted on an Entry:1. If <strong>the</strong> Entry‘s enable_comments field is False, <strong>the</strong> comment will simply be disallowed (i.e., immediatelydeleted).2. If <strong>the</strong> enable_comments field is True, <strong>the</strong> comment will be allowed to save.3. Once <strong>the</strong> comment is saved, an email should be sent to site staff notifying <strong>the</strong>m of <strong>the</strong> new comment.Accomplishing this is fairly straightforward and requires very little code:from django.contrib.comments.moderation import CommentModerator, moderatorclass EntryModerator(CommentModerator):email_notification = Trueenable_field = ’enable_comments’moderator.register(Entry, EntryModerator)The CommentModerator class pre-defines a number of useful moderation options which subclasses can enable ordisable as desired, and moderator knows how to work with <strong>the</strong>m to determine whe<strong>the</strong>r to allow a comment, whe<strong>the</strong>rto moderate a comment which will be allowed to post, and whe<strong>the</strong>r to email notifications of new comments.Built-in moderation optionsclass CommentModeratorMost common comment-moderation needs can be handled by subclassing CommentModerator and changing<strong>the</strong> values of pre-defined attributes; <strong>the</strong> full range of built-in options is as follows.auto_close_fieldIf this is set to <strong>the</strong> name of a DateField or DateTimeField on <strong>the</strong> model for which comments arebeing moderated, new comments for objects of that model will be disallowed (immediately deleted) whena certain number of days have passed after <strong>the</strong> date specified in that field. Must be used in conjunction withclose_after, which specifies <strong>the</strong> number of days past which comments should be disallowed. Defaultvalue is None.6.2. contrib packages 417
<strong>Django</strong> <strong>Documentation</strong>, Release 1.2auto_moderate_fieldLike auto_close_field, but instead of outright deleting new comments when <strong>the</strong> requisite numberof days have elapsed, it will simply set <strong>the</strong> is_public field of new comments to False before saving<strong>the</strong>m. Must be used in conjunction with moderate_after, which specifies <strong>the</strong> number of days pastwhich comments should be moderated. Default value is None.close_afterIf auto_close_field is used, this must specify <strong>the</strong> number of days past <strong>the</strong> value of <strong>the</strong> field specifiedby auto_close_field after which new comments for an object should be disallowed. Default valueis None.email_notificationIf True, any new comment on an object of this model which survives moderation (i.e., is not deleted) willgenerate an email to site staff. Default value is False.enable_fieldIf this is set to <strong>the</strong> name of a BooleanField on <strong>the</strong> model for which comments are being moderated,new comments on objects of that model will be disallowed (immediately deleted) whenever <strong>the</strong> value ofthat field is False on <strong>the</strong> object <strong>the</strong> comment would be attached to. Default value is None.moderate_afterIf auto_moderate_field is used, this must specify <strong>the</strong> number of days past <strong>the</strong> value of <strong>the</strong> fieldspecified by auto_moderate_field after which new comments for an object should be marked nonpublic.Default value is None.Simply subclassing CommentModerator and changing <strong>the</strong> values of <strong>the</strong>se options will automatically enable <strong>the</strong>various moderation methods for any models registered using <strong>the</strong> subclass.Adding custom moderation methods For situations where <strong>the</strong> built-in options listed above are not sufficient, subclassesof CommentModerator can also override <strong>the</strong> methods which actually perform <strong>the</strong> moderation, and applyany logic <strong>the</strong>y desire. CommentModerator defines three methods which determine how moderation will take place;each method will be called by <strong>the</strong> moderation system and passed two arguments: comment, which is <strong>the</strong> new commentbeing posted, content_object, which is <strong>the</strong> object <strong>the</strong> comment will be attached to, and request, whichis <strong>the</strong> HttpRequest in which <strong>the</strong> comment is being submitted:CommentModerator.allow(comment, content_object, request)Should return True if <strong>the</strong> comment should be allowed to post on <strong>the</strong> content object, and False o<strong>the</strong>rwise (inwhich case <strong>the</strong> comment will be immediately deleted).CommentModerator.email(comment, content_object, request)If email notification of <strong>the</strong> new comment should be sent to site staff or moderators, this method is responsiblefor sending <strong>the</strong> email.CommentModerator.moderate(comment, content_object, request)Should return True if <strong>the</strong> comment should be moderated (in which case its is_public field will be set toFalse before saving), and False o<strong>the</strong>rwise (in which case <strong>the</strong> is_public field will not be changed).Registering models for moderation The moderation system, represented bydjango.contrib.comments.moderation.moderator is an instance of <strong>the</strong> class Moderator, whichallows registration and “unregistration” of models via two methods:moderator.register(model_or_iterable, moderation_class)Takes two arguments: <strong>the</strong> first should be ei<strong>the</strong>r a model class or list of model classes, and <strong>the</strong> second shouldbe a subclass of CommentModerator, and register <strong>the</strong> model or models to be moderated using <strong>the</strong> optionsdefined in <strong>the</strong> CommentModerator subclass. If any of <strong>the</strong> models are already registered for moderation, <strong>the</strong>exception AlreadyModerated will be raised.418 Chapter 6. API Reference
<strong>Django</strong> <strong>Documentation</strong>, Release 1.2moderator.unregister(model_or_iterable)Takes one argument: a model class or list of model classes, and removes <strong>the</strong> model or models from <strong>the</strong> setof models which are being moderated. If any of <strong>the</strong> models are not currently being moderated, <strong>the</strong> exceptionNotModerated will be raised.Customizing <strong>the</strong> moderation system Most use cases will work easily with simple subclassing ofCommentModerator and registration with <strong>the</strong> provided Moderator instance, but customization of global moderationbehavior can be achieved by subclassing Moderator and instead registering models with an instance of <strong>the</strong>subclass.class ModeratorIn addition to <strong>the</strong> Moderator.register() and Moderator.unregister() methods detailed above,<strong>the</strong> following methods on Moderator can be overridden to achieve customized behavior:connect()Determines how moderation is set up globally. The base implementation in Moderator does this byattaching listeners to <strong>the</strong> comment_will_be_posted and comment_was_posted signals from<strong>the</strong> comment models.pre_save_moderation(sender, comment, request, **kwargs)In <strong>the</strong> base implementation, applies all pre-save moderation steps (such as determining whe<strong>the</strong>r <strong>the</strong> commentneeds to be deleted, or whe<strong>the</strong>r it needs to be marked as non-public or generate an email).post_save_moderation(sender, comment, request, **kwargs)In <strong>the</strong> base implementation, applies all post-save moderation steps (currently this consists entirely of deletingcomments which were disallowed).Example of using <strong>the</strong> in-built comments appFollow <strong>the</strong> first three steps of <strong>the</strong> quick start guide in <strong>the</strong> documentation.Now suppose, you have an app (blog) with a model (Post) to which you want to attach comments. Let us alsosuppose that you have a template called blog_detail.html where you want to display <strong>the</strong> comments list andcomment form.Template First, we should load <strong>the</strong> comment template tags in <strong>the</strong> blog_detail.html so that we can use it’sfunctionality. So just like all o<strong>the</strong>r custom template tag libraries:{% load comments %}Next, let us add <strong>the</strong> number of comments attached to <strong>the</strong> particular model instance of Post. For this we assume thata context variable object_pk is present which gives <strong>the</strong> id of <strong>the</strong> instance of Post.The usage of <strong>the</strong> get_comment_count tag is like below:{% get_comment_count for blog.post object_pk as comment_count %}{{ comment_count }} comments have been posted.If you have <strong>the</strong> instance (say entry) of <strong>the</strong> model (Post) available in <strong>the</strong> context, <strong>the</strong>n you can refer to it directly:{% get_comment_count for entry as comment_count %}{{ comment_count }} comments have been posted.New in version 1.2: Please, see <strong>the</strong> release notes Next, we can use <strong>the</strong> render_comment_list tag, to render allcomments to <strong>the</strong> given instance (entry) by using <strong>the</strong> comments/list.html template.{% render_comment_list for entry %}6.2. contrib packages 419
<strong>Django</strong> <strong>Documentation</strong>, Release 1.2<strong>Django</strong> will will look for <strong>the</strong> list.html under <strong>the</strong> following directories (for our example):comments/blog/post/list.htmlcomments/blog/list.htmlcomments/list.htmlTo get a list of comments, we make use of <strong>the</strong> get_comment_list tag. This tag’s usage is very similar to <strong>the</strong>get_comment_count tag. We need to remember that <strong>the</strong> get_comment_list returns a list of comments andhence we will have to iterate through <strong>the</strong>m to display <strong>the</strong>m:{% get_comment_list for blog.post object_pk as comment_list %}{% for comment in comment_list %}Posted by: {{ comment.user_name }} on {{ comment.submit_date }}...Comment: {{ comment.comment }}...{% endfor %}Finally, we display <strong>the</strong> comment form, enabling users to enter <strong>the</strong>ir comments. There are two ways of doing so. Thefirst is when you want to display <strong>the</strong> comments template available under your comments/form.html. The o<strong>the</strong>rmethod gives you a chance to customize <strong>the</strong> form.The first method makes use of <strong>the</strong> render_comment_form tag. It’s usage too is similar to <strong>the</strong> o<strong>the</strong>r three tags wehave discussed above:{% render_comment_form for entry %}It looks for <strong>the</strong> form.html under <strong>the</strong> following directories (for our example):comments/blog/post/form.htmlcomments/blog/form.htmlcomments/form.htmlSince we customize <strong>the</strong> form in <strong>the</strong> second method, we make use of ano<strong>the</strong>r tag called comment_form_target.This tag on rendering gives <strong>the</strong> URL where <strong>the</strong> comment form is posted. Without any customization,comment_form_target evaluates to /comments/post/. We use this tag in <strong>the</strong> form’s action attribute.The get_comment_form tag renders a form for a model instance by creating a context variable. One can iterateover <strong>the</strong> form object to get individual fields. This gives you fine-grain control over <strong>the</strong> form:{% for field in form %}{% ifequal field.name "comment" %}...{% endfor %}But let’s look at a simple example:{% get_comment_form for entry as form %}{{ form }}420 Chapter 6. API Reference
<strong>Django</strong> <strong>Documentation</strong>, Release 1.2Flagging If you want your users to be able to flag comments (say for profanity), you can just direct <strong>the</strong>m (by placinga link in your comment list) to /flag/{{ comment.id }}/. Similarly, a user with requisite permissions ("Canmoderate comments") can approve and delete comments. This can also be done through <strong>the</strong> admin as you’llsee later. You might also want to customize <strong>the</strong> following templates:• flag.html• flagged.html• approve.html• approved.html• delete.html• deleted.htmlfound under <strong>the</strong> directory structure we saw for form.html.Feeds Suppose you want to export a feed of <strong>the</strong> latest comments, you can use <strong>the</strong> in-built LatestCommentFeed.Just enable it in your project’s urls.py:from django.conf.urls.defaults import *from django.contrib.comments.feeds import LatestCommentFeedfeeds = {’latest’: LatestCommentFeed,}urlpatterns = patterns(’’,# ...(r’^feeds/(?P.*)/$’, ’django.contrib.syndication.views.feed’,{’feed_dict’: feeds}),# ...)Now you should have <strong>the</strong> latest comment feeds being served off /feeds/latest/.Moderation Now that we have <strong>the</strong> comments framework working, we might want to have some moderation setup toadminister <strong>the</strong> comments. The comments framework comes in-built with generic comment moderation. The commentmoderation has <strong>the</strong> following features (all of which or only certain can be enabled):• Enable comments for a particular model instance.• Close comments after a particular (user-defined) number of days.• Email new comments to <strong>the</strong> site-staff.To enable comment moderation, we subclass <strong>the</strong> CommentModerator and register it with <strong>the</strong> moderation featureswe want. Let us suppose we want to close comments after 7 days of posting and also send out an email to <strong>the</strong> site staff.In blog/models.py, we register a comment moderator in <strong>the</strong> following way:from django.contrib.comments.moderation import CommentModerator, moderatorfrom django.db import modelsclass Post(models.Model):title = models.CharField(max_length = 255)content = models.TextField()posted_date = models.DateTimeField()class PostModerator(CommentModerator):6.2. contrib packages 421
<strong>Django</strong> <strong>Documentation</strong>, Release 1.2email_notification = Trueauto_close_field = ’posted_date’# Close <strong>the</strong> comments after 7 days.close_after = 7moderator.register(Post, PostModerator)The generic comment moderation also has <strong>the</strong> facility to remove comments. These comments can <strong>the</strong>n be moderatedby any user who has access to <strong>the</strong> admin site and <strong>the</strong> Can moderate comments permission (can be set under<strong>the</strong> Users page in <strong>the</strong> admin).The moderator can Flag, Approve or Remove comments using <strong>the</strong> Action drop-down in <strong>the</strong> admin under <strong>the</strong>Comments page.Note: Only a super-user will be able to delete comments from <strong>the</strong> database. Remove Comments only sets <strong>the</strong>is_public attribute to False.6.2.4 The contenttypes framework<strong>Django</strong> includes a contenttypes application that can track all of <strong>the</strong> models installed in your <strong>Django</strong>-poweredproject, providing a high-level, generic interface for working with your models.OverviewAt <strong>the</strong> heart of <strong>the</strong> contenttypes application is <strong>the</strong> ContentType model, which lives atdjango.contrib.contenttypes.models.ContentType. Instances of ContentType representand store information about <strong>the</strong> models installed in your project, and new instances of ContentType areautomatically created whenever new models are installed.Instances of ContentType have methods for returning <strong>the</strong> model classes <strong>the</strong>y represent and for querying objectsfrom those models. ContentType also has a custom manager that adds methods for working with ContentTypeand for obtaining instances of ContentType for a particular model.Relations between your models and ContentType can also be used to enable “generic” relationships between aninstance of one of your models and instances of any model you have installed.Installing <strong>the</strong> contenttypes frameworkThe contenttypes framework is included in <strong>the</strong> default INSTALLED_APPS list created by django-admin.pystartproject, but if you’ve removed it or if you manually set up your INSTALLED_APPS list, you can enable itby adding ’django.contrib.contenttypes’ to your INSTALLED_APPS setting.It’s generally a good idea to have <strong>the</strong> contenttypes framework installed; several of <strong>Django</strong>’s o<strong>the</strong>r bundled applicationsrequire it:• The admin application uses it to log <strong>the</strong> history of each object added or changed through <strong>the</strong> admin interface.• <strong>Django</strong>’s au<strong>the</strong>ntication framework uses it to tie user permissions to specific models.• <strong>Django</strong>’s comments system (django.contrib.comments) uses it to “attach” comments to any installedmodel.422 Chapter 6. API Reference
<strong>Django</strong> <strong>Documentation</strong>, Release 1.2The ContentType modelclass models.ContentTypeEach instance of ContentType has three fields which, taken toge<strong>the</strong>r, uniquely describe an installed model:app_labelThe name of <strong>the</strong> application <strong>the</strong> model is part of. This is taken from <strong>the</strong> app_label attribute of <strong>the</strong> model,and includes only <strong>the</strong> last part of <strong>the</strong> application’s Python import path; “django.contrib.contenttypes”, forexample, becomes an app_label of “contenttypes”.modelThe name of <strong>the</strong> model class.nameThe human-readable name of <strong>the</strong> model. This is taken from <strong>the</strong> verbose_name attribute of <strong>the</strong> model.Let’s look at an example to see how this works. If you already have <strong>the</strong> contenttypes application installed, and <strong>the</strong>nadd <strong>the</strong> sites application to your INSTALLED_APPS setting and run manage.py syncdb to install it,<strong>the</strong> model django.contrib.sites.models.Site will be installed into your database. Along with it a newinstance of ContentType will be created with <strong>the</strong> following values:• app_label will be set to ’sites’ (<strong>the</strong> last part of <strong>the</strong> Python path “django.contrib.sites”).• model will be set to ’site’.• name will be set to ’site’.Methods on ContentType instancesclass models.ContentTypeEach ContentType instance has methods that allow you to get from a ContentType instance to <strong>the</strong> modelit represents, or to retrieve objects from that model:models.ContentType.get_object_for_this_type(**kwargs)Takes a set of valid lookup arguments for <strong>the</strong> model <strong>the</strong> ContentType represents, and does a get()lookup on that model, returning <strong>the</strong> corresponding object.models.ContentType.model_class()Returns <strong>the</strong> model class represented by this ContentType instance.For example, we could look up <strong>the</strong> ContentType for <strong>the</strong> User model:>>> from django.contrib.contenttypes.models import ContentType>>> user_type = ContentType.objects.get(app_label="auth", model="user")>>> user_typeAnd <strong>the</strong>n use it to query for a particular User, or to get access to <strong>the</strong> User model class:>>> user_type.model_class()>>> user_type.get_object_for_this_type(username=’Guido’)Toge<strong>the</strong>r, get_object_for_this_type() and model_class() enable two extremely important use cases:1. Using <strong>the</strong>se methods, you can write high-level generic code that performs queries on any installed model –instead of importing and using a single specific model class, you can pass an app_label and model into aContentType lookup at runtime, and <strong>the</strong>n work with <strong>the</strong> model class or retrieve objects from it.6.2. contrib packages 423
<strong>Django</strong> <strong>Documentation</strong>, Release 1.22. You can relate ano<strong>the</strong>r model to ContentType as a way of tying instances of it to particular model classes,and use <strong>the</strong>se methods to get access to those model classes.Several of <strong>Django</strong>’s bundled applications make use of <strong>the</strong> latter technique. For example, <strong>the</strong> permissionssystem >> from django.contrib.auth.models import User>>> user_type = ContentType.objects.get_for_model(User)>>> user_typeGeneric relationsAdding a foreign key from one of your own models to ContentType allows your model to effectively tie itself toano<strong>the</strong>r model class, as in <strong>the</strong> example of <strong>the</strong> Permission model above. But it’s possible to go one step fur<strong>the</strong>r anduse ContentType to enable truly generic (sometimes called “polymorphic”) relationships between models.A simple example is a tagging system, which might look like this:from django.db import modelsfrom django.contrib.contenttypes.models import ContentTypefrom django.contrib.contenttypes import genericclass TaggedItem(models.Model):tag = models.SlugField()content_type = models.ForeignKey(ContentType)object_id = models.PositiveIntegerField()content_object = generic.GenericForeignKey(’content_type’, ’object_id’)def __unicode__(self):return self.tagA normal ForeignKey can only “point to” one o<strong>the</strong>r model, which means that if <strong>the</strong> TaggedItem model useda ForeignKey it would have to choose one and only one model to store tags for. The contenttypes applicationprovides a special field type – django.contrib.contenttypes.generic.GenericForeignKey –which works around this and allows <strong>the</strong> relationship to be with any model. There are three parts to setting up aGenericForeignKey:424 Chapter 6. API Reference
<strong>Django</strong> <strong>Documentation</strong>, Release 1.21. Give your model a ForeignKey to ContentType.2. Give your model a field that can store a primary-key value from <strong>the</strong> models you’ll be relating to. (For mostmodels, this means an IntegerField or PositiveIntegerField.)This field must be of <strong>the</strong> same type as <strong>the</strong> primary key of <strong>the</strong> models that will be involved in <strong>the</strong> generic relation.For example, if you use IntegerField, you won’t be able to form a generic relation with a model that usesa CharField as a primary key.3. Give your model a GenericForeignKey, and pass it <strong>the</strong> names of <strong>the</strong> two fields described above. If<strong>the</strong>se fields are named “content_type” and “object_id”, you can omit this – those are <strong>the</strong> default field namesGenericForeignKey will look for.This will enable an API similar to <strong>the</strong> one used for a normal ForeignKey; each TaggedItem will have acontent_object field that returns <strong>the</strong> object it’s related to, and you can also assign to that field or use it whencreating a TaggedItem:>>> from django.contrib.auth.models import User>>> guido = User.objects.get(username=’Guido’)>>> t = TaggedItem(content_object=guido, tag=’bdfl’)>>> t.save()>>> t.content_objectDue to <strong>the</strong> way GenericForeignKey is implemented, you cannot use such fields directly with filters (filter()and exclude(), for example) via <strong>the</strong> database API. They aren’t normal field objects. These examples will not work:# This will fail>>> TaggedItem.objects.filter(content_object=guido)# This will also fail>>> TaggedItem.objects.get(content_object=guido)Reverse generic relationsIf you know which models you’ll be using most often, you can also add a “reverse” generic relationship to enable anadditional API. For example:class Bookmark(models.Model):url = models.URLField()tags = generic.GenericRelation(TaggedItem)Bookmark instances will each have a tags attribute, which can be used to retrieve <strong>the</strong>ir associated TaggedItems:>>> b = Bookmark(url=’http://www.djangoproject.com/’)>>> b.save()>>> t1 = TaggedItem(content_object=b, tag=’django’)>>> t1.save()>>> t2 = TaggedItem(content_object=b, tag=’python’)>>> t2.save()>>> b.tags.all()[, ]Just as django.contrib.contenttypes.generic.GenericForeignKey accepts <strong>the</strong> names of <strong>the</strong>content-type and object-ID fields as arguments, so too does GenericRelation; if <strong>the</strong> model which has <strong>the</strong>generic foreign key is using non-default names for those fields, you must pass <strong>the</strong> names of <strong>the</strong> fields when settingup a GenericRelation to it. For example, if <strong>the</strong> TaggedItem model referred to above used fields namedcontent_type_fk and object_primary_key to create its generic foreign key, <strong>the</strong>n a GenericRelationback to it would need to be defined like so:6.2. contrib packages 425
<strong>Django</strong> <strong>Documentation</strong>, Release 1.2tags = generic.GenericRelation(TaggedItem, content_type_field=’content_type_fk’, object_id_field=’objOf course, if you don’t add <strong>the</strong> reverse relationship, you can do <strong>the</strong> same types of lookups manually:>>> b = Bookmark.objects.get(url=’http://www.djangoproject.com/’)>>> bookmark_type = ContentType.objects.get_for_model(b)>>> TaggedItem.objects.filter(content_type__pk=bookmark_type.id,... object_id=b.id)[, ]Note that if <strong>the</strong> model in a GenericRelation uses a non-default value for ct_field or fk_field inits GenericForeignKey (e.g. <strong>the</strong> django.contrib.comments app uses ct_field="object_pk"),you’ll need to set content_type_field and/or object_id_field in <strong>the</strong> GenericRelation to match<strong>the</strong> ct_field and fk_field, respectively, in <strong>the</strong> GenericForeignKey:comments = generic.GenericRelation(Comment, object_id_field="object_pk")Note also, that if you delete an object that has a GenericRelation, any objects which have aGenericForeignKey pointing at it will be deleted as well. In <strong>the</strong> example above, this means that if a Bookmarkobject were deleted, any TaggedItem objects pointing at it would be deleted at <strong>the</strong> same time.Generic relations and aggregation<strong>Django</strong>’s database aggregation API doesn’t work with a GenericRelation. For example, you might be temptedto try something like:Bookmark.objects.aggregate(Count(’tags’))This will not work correctly, however. The generic relation adds extra filters to <strong>the</strong> queryset to ensure <strong>the</strong> correctcontent type, but <strong>the</strong> aggregate method doesn’t take <strong>the</strong>m into account. For now, if you need aggregates on genericrelations, you’ll need to calculate <strong>the</strong>m without using <strong>the</strong> aggregation API.Generic relations in forms and admindjango.contrib.contenttypes.generic provides both a GenericInlineFormSet andGenericInlineModelAdmin. This enables <strong>the</strong> use of generic relations in forms and <strong>the</strong> admin. See <strong>the</strong>model formset and admin documentation for more information.class generic.GenericInlineModelAdminThe GenericInlineModelAdmin class inherits all properties from an InlineModelAdmin class. However,it adds a couple of its own for working with <strong>the</strong> generic relation:ct_fieldThe name of <strong>the</strong> ContentType foreign key field on <strong>the</strong> model. Defaults to content_type.ct_fk_fieldThe name of <strong>the</strong> integer field that represents <strong>the</strong> ID of <strong>the</strong> related object. Defaults to object_id.6.2.5 Cross Site Request Forgery protectionThe CSRF middleware and template tag provides easy-to-use protection against Cross Site Request Forgeries. Thistype of attack occurs when a malicious Web site contains a link, a form button or some javascript that is intended toperform some action on your Web site, using <strong>the</strong> credentials of a logged-in user who visits <strong>the</strong> malicious site in <strong>the</strong>irbrowser. A related type of attack, ‘login CSRF’, where an attacking site tricks a user’s browser into logging into a sitewith someone else’s credentials, is also covered.426 Chapter 6. API Reference
<strong>Django</strong> <strong>Documentation</strong>, Release 1.2The first defense against CSRF attacks is to ensure that GET requests are side-effect free. POST requests can <strong>the</strong>nbe protected by following <strong>the</strong> steps below. New in version 1.2: The ‘contrib’ apps, including <strong>the</strong> admin, use <strong>the</strong>functionality described here. Because it is security related, a few things have been added to core functionality to allowthis to happen without any required upgrade steps.How to use itChanged in version 1.2: The template tag functionality (<strong>the</strong> recommended way to use this) was added in version 1.2.The previous method (still available) is described under Legacy method. To enable CSRF protection for your views,follow <strong>the</strong>se steps:1. Add <strong>the</strong> middleware ’django.middleware.csrf.CsrfViewMiddleware’ to your list of middlewareclasses, MIDDLEWARE_CLASSES. (It should come before CsrfResponseMiddleware if that is beingused, and before any view middleware that assume that CSRF attacks have been dealt with.)Alternatively, you can use <strong>the</strong> decorator django.views.decorators.csrf.csrf_protect on particularviews you want to protect (see below).2. In any template that uses a POST form, use <strong>the</strong> csrf_token tag inside <strong>the</strong> element if <strong>the</strong> form is foran internal URL, e.g.:{% csrf_token %}This should not be done for POST forms that target external URLs, since that would cause <strong>the</strong> CSRF token tobe leaked, leading to a vulnerability.3. In <strong>the</strong> corresponding view functions, ensure that <strong>the</strong> ’django.core.context_processors.csrf’context processor is being used. Usually, this can be done in one of two ways:(a) Use RequestContext, which always uses ’django.core.context_processors.csrf’ (no matterwhat your TEMPLATE_CONTEXT_PROCESSORS setting). If you are using generic views or contribapps, you are covered already, since <strong>the</strong>se apps use RequestContext throughout.(b) Manually import and use <strong>the</strong> processor to generate <strong>the</strong> CSRF token and add it to <strong>the</strong> template context. e.g.:from django.core.context_processors import csrffrom django.shortcuts import render_to_responsedef my_view(request):c = {}c.update(csrf(request))# ... view code herereturn render_to_response("a_template.html", c)You may want to write your own render_to_response wrapper that takes care of this step for you.The utility script extras/csrf_migration_helper.py can help to automate <strong>the</strong> finding of code and templatesthat may need to be upgraded. It contains full help on how to use it.The decorator methodRa<strong>the</strong>r than adding CsrfViewMiddleware as a blanket protection, you can use <strong>the</strong> csrf_protect decorator,which has exactly <strong>the</strong> same functionality, on particular views that need <strong>the</strong> protection. It must be used both on viewsthat insert <strong>the</strong> CSRF token in <strong>the</strong> output, and on those that accept <strong>the</strong> POST form data. (These are often <strong>the</strong> same viewfunction, but not always). It is used like this:6.2. contrib packages 427
<strong>Django</strong> <strong>Documentation</strong>, Release 1.2from django.views.decorators.csrf import csrf_protectfrom django.template import RequestContext@csrf_protectdef my_view(request):c = {}# ...return render_to_response("a_template.html", c,context_instance=RequestContext(request))Use of <strong>the</strong> decorator is not recommended by itself, since if you forget to use it, you will have a security hole. The‘belt and braces’ strategy of using both is fine, and will incur minimal overhead.Legacy methodIn <strong>Django</strong> 1.1, <strong>the</strong> template tag did not exist. Instead, a post-processing middleware that re-wrote POST forms toinclude <strong>the</strong> CSRF token was used. If you are upgrading a site from version 1.1 or earlier, please read this section and<strong>the</strong> Upgrading notes below. The post-processing middleware is still available as CsrfResponseMiddleware, andit can be used by following <strong>the</strong>se steps:1. Follow step 1 above to install CsrfViewMiddleware.2. Add ’django.middleware.csrf.CsrfResponseMiddleware’ to your MIDDLEWARE_CLASSESsetting.CsrfResponseMiddleware needs to process <strong>the</strong> response before things like compression or settingofETags happen to <strong>the</strong> response, so it must come after GZipMiddleware, CommonMiddleware andConditionalGetMiddleware in <strong>the</strong> list. It also must come after CsrfViewMiddleware.Use of <strong>the</strong> CsrfResponseMiddleware is not recommended because of <strong>the</strong> performance hit it imposes, and becauseof a potential security problem (see below). It can be used as an interim measure until applications have beenupdated to use <strong>the</strong> csrf_token tag. It is deprecated and will be removed in <strong>Django</strong> 1.4.<strong>Django</strong> 1.1 and earlier provided a single CsrfMiddleware class. This is also still available for backwards compatibility.It combines <strong>the</strong> functions of <strong>the</strong> two middleware.Note also that previous versions of <strong>the</strong>se classes depended on <strong>the</strong> sessions framework, but this dependency has nowbeen removed, with backward compatibility support so that upgrading will not produce any issues.Security of legacy method The post-processing CsrfResponseMiddleware adds <strong>the</strong> CSRF token to all POSTforms (unless <strong>the</strong> view has been decorated with csrf_response_exempt). If <strong>the</strong> POST form has an externaluntrusted site as its target, ra<strong>the</strong>r than an internal page, that site will be sent <strong>the</strong> CSRF token when <strong>the</strong> form is submitted.Armed with this leaked information, that site will <strong>the</strong>n be able to successfully launch a CSRF attack on your site againstthat user. The @csrf_response_exempt decorator can be used to fix this, but only if <strong>the</strong> page doesn’t also containinternal forms that require <strong>the</strong> token.Upgrading notesWhen upgrading to version 1.2 or later, you may have applications that rely on <strong>the</strong> old post-processing functionalityfor CSRF protection, or you may not have enabled any CSRF protection. This section outlines <strong>the</strong> steps necessary fora smooth upgrade, without having to fix all <strong>the</strong> applications to use <strong>the</strong> new template tag method immediately.First of all, <strong>the</strong> location of <strong>the</strong> middleware and related functions have changed. There are backwards compatible stubfiles so that old imports will continue to work for now, but <strong>the</strong>y are deprecated and will be removed in <strong>Django</strong> 1.4.The following changes have been made:428 Chapter 6. API Reference
<strong>Django</strong> <strong>Documentation</strong>, Release 1.2• Middleware have been moved to django.middleware.csrf• Decorators have been moved to django.views.decorators.csrfOlddjango.contrib.csrf.middleware.CsrfMiddlewaredjango.contrib.csrf.middleware.CsrfViewMiddlewaredjango.contrib.csrf.middleware.CsrfResponseMiddlewaredjango.contrib.csrf.middleware.csrf_exemptdjango.contrib.csrf.middleware.csrf_view_exemptdjango.contrib.csrf.middleware.csrf_response_exemptYou should update any imports, and also <strong>the</strong> paths in your MIDDLEWARE_CLASSES.Newdjango.middleware.csrf.CsrfMiddlewaredjango.middleware.csrf.CsrfViewMiddlewaredjango.middleware.csrf.CsrfResponseMiddlewaredjango.views.decorators.csrf.csrf_exemptdjango.views.decorators.csrf.csrf_view_exemptdjango.views.decorators.csrf.csrf_response_exemptIf you have CsrfMiddleware in your MIDDLEWARE_CLASSES, you will now have a working installation withCSRF protection. It is recommended at this point that you replace CsrfMiddleware with its two components,CsrfViewMiddleware and CsrfResponseMiddleware (in that order).If you do not have any of <strong>the</strong> middleware in your MIDDLEWARE_CLASSES, you will have a working installationbut without any CSRF protection for your views (just as you had before). It is strongly recommended to installCsrfViewMiddleware and CsrfResponseMiddleware, as described above.Note that contrib apps, such as <strong>the</strong> admin, have been updated to use <strong>the</strong> csrf_protect decorator, so that <strong>the</strong>yare secured even if you do not add <strong>the</strong> CsrfViewMiddleware to your settings. However, if you have suppliedcustomised templates to any of <strong>the</strong> view functions of contrib apps (whe<strong>the</strong>r explicitly via a keyword argument, orby overriding built-in templates), you MUST update <strong>the</strong>m to include <strong>the</strong> csrf_token template tag as describedabove, or <strong>the</strong>y will stop working. (If you cannot update <strong>the</strong>se templates for some reason, you will be forced to useCsrfResponseMiddleware for <strong>the</strong>se views to continue working).Note also, if you are using <strong>the</strong> comments app, and you are not going to add CsrfViewMiddleware to your settings(not recommended), you will need to add <strong>the</strong> csrf_protect decorator to any views that include <strong>the</strong> comment formsand target <strong>the</strong> comment views (usually using <strong>the</strong> comment_form_target template tag).Assuming you have followed <strong>the</strong> above, all views in your <strong>Django</strong> site will now be protected by <strong>the</strong>CsrfViewMiddleware. Contrib apps meet <strong>the</strong> requirements imposed by <strong>the</strong> CsrfViewMiddleware using<strong>the</strong> template tag, and o<strong>the</strong>r applications in your project will meet its requirements by virtue of <strong>the</strong>CsrfResponseMiddleware.The next step is to update all your applications to use <strong>the</strong> template tag, as described in How to use it, steps 2-3. Thiscan be done as soon as is practical. Any applications that are updated will now require <strong>Django</strong> 1.1.2 or later, since<strong>the</strong>y will use <strong>the</strong> CSRF template tag which was not available in earlier versions. (The template tag in 1.1.2 is actuallya no-op that exists solely to ease <strong>the</strong> transition to 1.2 — it allows apps to be created that have CSRF protection under1.2 without requiring users of <strong>the</strong> apps to upgrade to <strong>the</strong> <strong>Django</strong> 1.2.X series).The utility script extras/csrf_migration_helper.py can help to automate <strong>the</strong> finding of code and templatesthat may need to be upgraded. It contains full help on how to use it.Finally, once all applications are upgraded, CsrfResponseMiddleware can be removed from your settings.While CsrfResponseMiddleware is still in use, <strong>the</strong> csrf_response_exempt decorator, described in Exceptions,may be useful. The post-processing middleware imposes a performance hit and a potential vulnerability, andany views that have been upgraded to use <strong>the</strong> new template tag method no longer need it.ExceptionsNew in version 1.1: Please, see <strong>the</strong> release notesChanged in version 1.2: Import paths for <strong>the</strong> decorators below werechanged. To manually exclude a view function from being handled by ei<strong>the</strong>r of <strong>the</strong> two CSRF middleware, you canuse <strong>the</strong> csrf_exempt decorator, found in <strong>the</strong> django.views.decorators.csrf module. For example:6.2. contrib packages 429
<strong>Django</strong> <strong>Documentation</strong>, Release 1.2from django.views.decorators.csrf import csrf_exempt@csrf_exemptdef my_view(request):return HttpResponse(’Hello world’)Like <strong>the</strong> middleware, <strong>the</strong> csrf_exempt decorator is composed of two parts: a csrf_view_exempt decorator anda csrf_response_exempt decorator, found in <strong>the</strong> same module. These disable <strong>the</strong> view protection mechanism(CsrfViewMiddleware) and <strong>the</strong> response post-processing (CsrfResponseMiddleware) respectively. Theycan be used individually if required.You don’t have to worry about doing this for most AJAX views. Any request sent with “X-Requested-With: XML-HttpRequest” is automatically exempt. (See <strong>the</strong> How it works section.)SubdomainsBy default, CSRF cookies are specific to <strong>the</strong> subdomain <strong>the</strong>y are set for. This means that a form served from one subdomain(e.g. server1.example.com) will not be able to have a target on ano<strong>the</strong>r subdomain (e.g. server2.example.com).This restriction can be removed by setting CSRF_COOKIE_DOMAIN to be something like ".example.com".Please note that, with or without use of this setting, this CSRF protection mechanism is not safe against crosssubdomainattacks – see Limitations.Rejected requestsBy default, a ‘403 Forbidden’ response is sent to <strong>the</strong> user if an incoming request fails <strong>the</strong> checks performed byCsrfViewMiddleware. This should usually only be seen when <strong>the</strong>re is a genuine Cross Site Request Forgery, orwhen, due to a programming error, <strong>the</strong> CSRF token has not been included with a POST form.No logging is done, and <strong>the</strong> error message is not very friendly, so you may want to provide your own page for handlingthis condition. To do this, simply set <strong>the</strong> CSRF_FAILURE_VIEW setting to a dotted path to your own view function,which should have <strong>the</strong> following signature:def csrf_failure(request, reason="")where reason is a short message (intended for developers or logging, not for end users) indicating <strong>the</strong> reason <strong>the</strong>request was rejected.How it worksThe CSRF protection is based on <strong>the</strong> following things:1. A CSRF cookie that is set to a random value (a session independent nonce, as it is called), which o<strong>the</strong>r sites willnot have access to.This cookie is set by CsrfViewMiddleware. It is meant to be permanent, but since <strong>the</strong>reis no way to set a cookie that never expires, it is sent with every response that has calleddjango.middleware.csrf.get_token() (<strong>the</strong> function used internally to retrieve <strong>the</strong> CSRF token).2. A hidden form field with <strong>the</strong> name ‘csrfmiddlewaretoken’ present in all outgoing POST forms. The value of thisfield is <strong>the</strong> value of <strong>the</strong> CSRF cookie.This part is done by <strong>the</strong> template tag (and with <strong>the</strong> legacy method, it is done byCsrfResponseMiddleware).430 Chapter 6. API Reference
<strong>Django</strong> <strong>Documentation</strong>, Release 1.23. For all incoming POST requests, a CSRF cookie must be present, and <strong>the</strong> ‘csrfmiddlewaretoken’ field must bepresent and correct. If it isn’t, <strong>the</strong> user will get a 403 error.This check is done by CsrfViewMiddleware.4. In addition, for HTTPS requests, strict referer checking is done by CsrfViewMiddleware. This is necessaryto address a Man-In-The-Middle attack that is possible under HTTPS when using a session independent nonce,due to <strong>the</strong> fact that HTTP ‘Set-Cookie’ headers are (unfortunately) accepted by clients that are talking to a siteunder HTTPS. (Referer checking is not done for HTTP requests because <strong>the</strong> presence of <strong>the</strong> Referer header isnot reliable enough under HTTP.)This ensures that only forms that have originated from your Web site can be used to POST data back.It deliberately only targets HTTP POST requests (and <strong>the</strong> corresponding POST forms). GET requests ought never tohave any potentially dangerous side effects (see 9.1.1 Safe Methods, HTTP 1.1, RFC 2616), and so a CSRF attackwith a GET request ought to be harmless.CsrfResponseMiddleware checks <strong>the</strong> Content-Type before modifying <strong>the</strong> response, and only pages that areserved as ‘text/html’ or ‘application/xml+xhtml’ are modified.AJAXThe middleware tries to be smart about requests that come in via AJAX. Most modern JavaScript toolkits send an“X-Requested-With: XMLHttpRequest” HTTP header; <strong>the</strong>se requests are detected and automatically not handled bythis middleware. We can do this safely because, in <strong>the</strong> context of a browser, <strong>the</strong> header can only be added by usingXMLHttpRequest, and browsers already implement a same-domain policy for XMLHttpRequest.For <strong>the</strong> more recent browsers that relax this same-domain policy, custom headers like “X-Requested-With” are onlyallowed after <strong>the</strong> browser has done a ‘preflight’ check to <strong>the</strong> server to see if <strong>the</strong> cross-domain request is allowed, usinga strictly ‘opt in’ mechanism, so <strong>the</strong> exception for AJAX is still safe—if <strong>the</strong> developer has specifically opted in toallowing cross-site AJAX POST requests on a specific URL, <strong>the</strong>y obviously don’t want <strong>the</strong> middleware to disallowexactly that.CachingIf <strong>the</strong> csrf_token template tag is used by a template (or <strong>the</strong> get_token function is called some o<strong>the</strong>rway), CsrfViewMiddleware will add a cookie and a Vary: Cookie header to <strong>the</strong> response. Similarly,CsrfResponseMiddleware will send <strong>the</strong> Vary: Cookie header if it inserted a token. This means that <strong>the</strong>semiddleware will play well with <strong>the</strong> cache middleware if it is used as instructed (UpdateCacheMiddleware goesbefore all o<strong>the</strong>r middleware).However, if you use cache decorators on individual views, <strong>the</strong> CSRF middleware will not yet have been able toset <strong>the</strong> Vary header. In this case, on any views that will require a CSRF token to be inserted you should use <strong>the</strong>django.views.decorators.vary.vary_on_cookie() decorator first:from django.views.decorators.cache import cache_pagefrom django.views.decorators.vary import vary_on_cookie@cache_page(60 * 15)@vary_on_cookiedef my_view(request):# ...6.2. contrib packages 431
<strong>Django</strong> <strong>Documentation</strong>, Release 1.2TestingThe CsrfViewMiddleware will usually be a big hindrance to testing view functions, due to <strong>the</strong> need for <strong>the</strong> CSRFtoken which must be sent with every POST request. For this reason, <strong>Django</strong>’s HTTP client for tests has been modifiedto set a flag on requests which relaxes <strong>the</strong> middleware and <strong>the</strong> csrf_protect decorator so that <strong>the</strong>y no longerrejects requests. In every o<strong>the</strong>r respect (e.g. sending cookies etc.), <strong>the</strong>y behave <strong>the</strong> same.If, for some reason, you want <strong>the</strong> test client to perform CSRF checks, you can create an instance of <strong>the</strong> test client thatenforces CSRF checks:>>> from django.test import Client>>> csrf_client = Client(enforce_csrf_checks=True)LimitationsSubdomains within a site will be able to set cookies on <strong>the</strong> client for <strong>the</strong> whole domain. By setting <strong>the</strong> cookie and usinga corresponding token, subdomains will be able to circumvent <strong>the</strong> CSRF protection. The only way to avoid this is toensure that subdomains are controlled by trusted users (or, are at least unable to set cookies). Note that even withoutCSRF, <strong>the</strong>re are o<strong>the</strong>r vulnerabilities, such as session fixation, that make giving subdomains to untrusted parties a badidea, and <strong>the</strong>se vulnerabilities cannot easily be fixed with current browsers.If you are using CsrfResponseMiddleware and your app creates HTML pages and forms in some unusual way,(e.g. it sends fragments of HTML in JavaScript document.write statements) you might bypass <strong>the</strong> filter that adds<strong>the</strong> hidden field to <strong>the</strong> form, in which case form submission will always fail. You should use <strong>the</strong> template tag ordjango.middleware.csrf.get_token() to get <strong>the</strong> CSRF token and ensure it is included when your form issubmitted.Contrib and reusable appsBecause it is possible for <strong>the</strong> developer to turn off <strong>the</strong> CsrfViewMiddleware, all relevant views in contrib appsuse <strong>the</strong> csrf_protect decorator to ensure <strong>the</strong> security of <strong>the</strong>se applications against CSRF. It is recommended that<strong>the</strong> developers of o<strong>the</strong>r reusable apps that want <strong>the</strong> same guarantees also use <strong>the</strong> csrf_protect decorator on <strong>the</strong>irviews.6.2.6 DatabrowseDatabrowse is a <strong>Django</strong> application that lets you browse your data.As <strong>the</strong> <strong>Django</strong> admin dynamically creates an admin interface by introspecting your models, Databrowse dynamicallycreates a rich, browsable Web site by introspecting your models.NoteDatabrowse is very new and is currently under active development. It may change substantially before <strong>the</strong> next <strong>Django</strong>release.With that said, it’s easy to use, and it doesn’t require writing any code. So you can play around with it today, with verylittle investment in time or coding.How to use Databrowse1. Point <strong>Django</strong> at <strong>the</strong> default Databrowse templates. There are two ways to do this:432 Chapter 6. API Reference
<strong>Django</strong> <strong>Documentation</strong>, Release 1.2• Add ’django.contrib.databrowse’ to your INSTALLED_APPS setting. This will work if yourTEMPLATE_LOADERS setting includes <strong>the</strong> app_directories template loader (which is <strong>the</strong> case bydefault). See <strong>the</strong> template loader docs for more.• O<strong>the</strong>rwise, determine <strong>the</strong> full filesystem path to <strong>the</strong> django/contrib/databrowse/templatesdirectory, and add that directory to your TEMPLATE_DIRS setting.2. Register a number of models with <strong>the</strong> Databrowse site:from django.contrib import databrowsefrom myapp.models import SomeModel, SomeO<strong>the</strong>rModeldatabrowse.site.register(SomeModel)databrowse.site.register(SomeO<strong>the</strong>rModel)Note that you should register <strong>the</strong> model classes, not instances.It doesn’t matter where you put this, as long as it gets executed at some point. A good place for it is in yourURLconf file (urls.py).3. Change your URLconf to import <strong>the</strong> databrowse module:from django.contrib import databrowse...and add <strong>the</strong> following line to your URLconf:(r’^databrowse/(.*)’, databrowse.site.root),The prefix doesn’t matter – you can use databrowse/ or db/ or whatever you’d like.4. Run <strong>the</strong> <strong>Django</strong> server and visit /databrowse/ in your browser.Requiring user loginYou can restrict access to logged-in users with only a few extra lines of code. Simply add <strong>the</strong> following import to yourURLconf:from django.contrib.auth.decorators import login_requiredThen modify <strong>the</strong> URLconf so that <strong>the</strong> databrowse.site.root() view is decorated withdjango.contrib.auth.decorators.login_required():(r’^databrowse/(.*)’, login_required(databrowse.site.root)),If you haven’t already added support for user logins to your URLconf , as described in <strong>the</strong> user au<strong>the</strong>ntication docs,<strong>the</strong>n you will need to do so now with <strong>the</strong> following mapping:(r’^accounts/login/$’, ’django.contrib.auth.views.login’),The final step is to create <strong>the</strong> login form required by django.contrib.auth.views.login(). The userau<strong>the</strong>ntication docs provide full details and a sample template that can be used for this purpose.6.2.7 The flatpages app<strong>Django</strong> comes with an optional “flatpages” application. It lets you store simple “flat” HTML content in a database andhandles <strong>the</strong> management for you via <strong>Django</strong>’s admin interface and a Python API.A flatpage is a simple object with a URL, title and content. Use it for one-off, special-case pages, such as “About” or“Privacy Policy” pages, that you want to store in a database but for which you don’t want to develop a custom <strong>Django</strong>application.6.2. contrib packages 433
<strong>Django</strong> <strong>Documentation</strong>, Release 1.2A flatpage can use a custom template or a default, systemwide flatpage template. It can be associated with one, ormultiple, sites. New in version 1.0: Please, see <strong>the</strong> release notes The content field may optionally be left blank if youprefer to put your content in a custom template.Here are some examples of flatpages on <strong>Django</strong>-powered sites:• http://www.lawrence.com/about/contact/• http://www2.ljworld.com/site/rules/InstallationTo install <strong>the</strong> flatpages app, follow <strong>the</strong>se steps:1. Install <strong>the</strong> sites framework by adding ’django.contrib.sites’ to your INSTALLED_APPS setting,if it’s not already in <strong>the</strong>re.Also make sure you’ve correctly set SITE_ID to <strong>the</strong> ID of <strong>the</strong> site <strong>the</strong> settings file represents. This will usuallybe 1 (i.e. SITE_ID = 1, but if you’re using <strong>the</strong> sites framework to manage multiple sites, it could be <strong>the</strong> IDof a different site.2. Add ’django.contrib.flatpages’ to your INSTALLED_APPS setting.3. Add ’django.contrib.flatpages.middleware.FlatpageFallbackMiddleware’ to yourMIDDLEWARE_CLASSES setting.4. Run <strong>the</strong> command manage.py syncdb.How it worksmanage.py syncdb creates two tables in your database: django_flatpage anddjango_flatpage_sites. django_flatpage is a simple lookup table that simply maps a URL to atitle and bunch of text content. django_flatpage_sites associates a flatpage with a site.The FlatpageFallbackMiddleware does all of <strong>the</strong> work. Each time any <strong>Django</strong> application raises a 404 error,this middleware checks <strong>the</strong> flatpages database for <strong>the</strong> requested URL as a last resort. Specifically, it checks for aflatpage with <strong>the</strong> given URL with a site ID that corresponds to <strong>the</strong> SITE_ID setting.If it finds a match, it follows this algorithm:• If <strong>the</strong> flatpage has a custom template, it loads that template. O<strong>the</strong>rwise, it loads <strong>the</strong> templateflatpages/default.html.• It passes that template a single context variable, flatpage, which is <strong>the</strong> flatpage object.RequestContext in rendering <strong>the</strong> template.If it doesn’t find a match, <strong>the</strong> request continues to be processed as usual.The middleware only gets activated for 404s – not for 500s or responses of any o<strong>the</strong>r status code.Flatpages will not apply view middlewareIt usesBecause <strong>the</strong> FlatpageFallbackMiddleware is applied only after URL resolution has failed and produced a404, <strong>the</strong> response it returns will not apply any view middleware methods. Only requests which are successfully routedto a view via normal URL resolution apply view middleware.Note that <strong>the</strong> order of MIDDLEWARE_CLASSES matters. Generally, you can putFlatpageFallbackMiddleware at <strong>the</strong> end of <strong>the</strong> list, because it’s a last resort.For more on middleware, read <strong>the</strong> middleware docs.434 Chapter 6. API Reference
<strong>Django</strong> <strong>Documentation</strong>, Release 1.2Ensure that your 404 template worksNote that <strong>the</strong> FlatpageFallbackMiddleware only steps in once ano<strong>the</strong>r view has successfully produceda 404 response. If ano<strong>the</strong>r view or middleware class attempts to produce a 404 but ends up raising an exceptioninstead (such as a TemplateDoesNotExist exception if your site does not have an appropriate templateto use for HTTP 404 responses), <strong>the</strong> response will become an HTTP 500 (“Internal Server Error”) and <strong>the</strong>FlatpageFallbackMiddleware will not attempt to serve a flat page.How to add, change and delete flatpagesVia <strong>the</strong> admin interfaceIf you’ve activated <strong>the</strong> automatic <strong>Django</strong> admin interface, you should see a “Flatpages” section on <strong>the</strong> admin indexpage. Edit flatpages as you edit any o<strong>the</strong>r object in <strong>the</strong> system.Via <strong>the</strong> Python APIclass models.FlatPageFlatpages are represented by a standard <strong>Django</strong> model, which lives in django/contrib/flatpages/models.py. Youcan access flatpage objects via <strong>the</strong> <strong>Django</strong> database API.Flatpage templatesBy default, flatpages are rendered via <strong>the</strong> template flatpages/default.html, but you can override that for aparticular flatpage: in <strong>the</strong> admin, a collapsed fieldset titled “Advanced options” (clicking will expand it) contains afield for specifying a template name. If you’re creating a flat page via <strong>the</strong> Python API you can simply set <strong>the</strong> templatename as <strong>the</strong> field template_name on <strong>the</strong> FlatPage object.Creating <strong>the</strong> flatpages/default.html template is your responsibility; in your template directory, just create aflatpages directory containing a file default.html.Flatpage templates are passed a single context variable, flatpage, which is <strong>the</strong> flatpage object.Here’s a sample flatpages/default.html template:{{ flatpage.title }}{{ flatpage.content }}Since you’re already entering raw HTML into <strong>the</strong> admin page for a flatpage, both flatpage.title andflatpage.content are marked as not requiring automatic HTML escaping in <strong>the</strong> template.6.2.8 django.contrib.formtoolsA set of high-level abstractions for <strong>Django</strong> forms (django.forms).6.2. contrib packages 435
<strong>Django</strong> <strong>Documentation</strong>, Release 1.2Form preview<strong>Django</strong> comes with an optional “form preview” application that helps automate <strong>the</strong> following workflow:“Display an HTML form, force a preview, <strong>the</strong>n do something with <strong>the</strong> submission.”To force a preview of a form submission, all you have to do is write a short Python class.OverviewGiven a django.forms.Form subclass that you define, this application takes care of <strong>the</strong> following workflow:1. Displays <strong>the</strong> form as HTML on a Web page.2. Validates <strong>the</strong> form data when it’s submitted via POST. a. If it’s valid, displays a preview page. b. If it’s notvalid, redisplays <strong>the</strong> form with error messages.3. When <strong>the</strong> “confirmation” form is submitted from <strong>the</strong> preview page, calls a hook that you define – a done()method that gets passed <strong>the</strong> valid data.The framework enforces <strong>the</strong> required preview by passing a shared-secret hash to <strong>the</strong> preview page via hidden formfields. If somebody tweaks <strong>the</strong> form parameters on <strong>the</strong> preview page, <strong>the</strong> form submission will fail <strong>the</strong> hashcomparisontest.How to use FormPreview1. Point <strong>Django</strong> at <strong>the</strong> default FormPreview templates. There are two ways to do this:• Add ’django.contrib.formtools’ to your INSTALLED_APPS setting. This will work if yourTEMPLATE_LOADERS setting includes <strong>the</strong> app_directories template loader (which is <strong>the</strong> case bydefault). See <strong>the</strong> template loader docs for more.• O<strong>the</strong>rwise, determine <strong>the</strong> full filesystem path to <strong>the</strong> django/contrib/formtools/templatesdirectory, and add that directory to your TEMPLATE_DIRS setting.2. Create a FormPreview subclass that overrides <strong>the</strong> done() method:from django.contrib.formtools.preview import FormPreviewfrom myapp.models import SomeModelclass SomeModelFormPreview(FormPreview):def done(self, request, cleaned_data):# Do something with <strong>the</strong> cleaned_data, <strong>the</strong>n redirect# to a "success" page.return HttpResponseRedirect(’/form/success’)This method takes an HttpRequest object and a dictionary of <strong>the</strong> form data after it has been validated andcleaned. It should return an HttpResponseRedirect that is <strong>the</strong> end result of <strong>the</strong> form being submitted.3. Change your URLconf to point to an instance of your FormPreview subclass:from myapp.preview import SomeModelFormPreviewfrom myapp.forms import SomeModelFormfrom django import forms...and add <strong>the</strong> following line to <strong>the</strong> appropriate model in your URLconf:436 Chapter 6. API Reference
<strong>Django</strong> <strong>Documentation</strong>, Release 1.2(r’^post/$’, SomeModelFormPreview(SomeModelForm)),where SomeModelForm is a Form or ModelForm class for <strong>the</strong> model.4. Run <strong>the</strong> <strong>Django</strong> server and visit /post/ in your browser.FormPreview classesclass FormPreviewA FormPreview class is a simple Python class that represents <strong>the</strong> preview workflow. FormPreview classes mustsubclass django.contrib.formtools.preview.FormPreview and override <strong>the</strong> done() method. Theycan live anywhere in your codebase.FormPreview templatesBy default, <strong>the</strong> form is rendered via <strong>the</strong> template formtools/form.html, and <strong>the</strong> preview page is renderedvia <strong>the</strong> template formtools/preview.html. These values can be overridden for a particular formpreview by setting preview_template and form_template attributes on <strong>the</strong> FormPreview subclass. Seedjango/contrib/formtools/templates for <strong>the</strong> default templates.Advanced FormPreview methodsNew in version 1.2: Please, see <strong>the</strong> release notesFormPreview.process_preview()Given a validated form, performs any extra processing before displaying <strong>the</strong> preview page, and saves any extradata in context.By default, this method is empty. It is called after <strong>the</strong> form is validated, but before <strong>the</strong> context is modified withhash information and rendered.Form wizardNew in version 1.0: Please, see <strong>the</strong> release notes <strong>Django</strong> comes with an optional “form wizard” application that splitsforms across multiple Web pages. It maintains state in hashed HTML ‘’ fields, and <strong>the</strong>data isn’t processed server-side until <strong>the</strong> final form is submitted.You might want to use this if you have a lengthy form that would be too unwieldy for display on a single page. Thefirst page might ask <strong>the</strong> user for core information, <strong>the</strong> second page might ask for less important information, etc.The term “wizard,” in this context, is explained on Wikipedia.How it worksHere’s <strong>the</strong> basic workflow for how a user would use a wizard:1. The user visits <strong>the</strong> first page of <strong>the</strong> wizard, fills in <strong>the</strong> form and submits it.2. The server validates <strong>the</strong> data. If it’s invalid, <strong>the</strong> form is displayed again, with error messages. If it’s valid, <strong>the</strong>server calculates a secure hash of <strong>the</strong> data and presents <strong>the</strong> user with <strong>the</strong> next form, saving <strong>the</strong> validated dataand hash in ‘’ fields.3. Step 1 and 2 repeat, for every subsequent form in <strong>the</strong> wizard.6.2. contrib packages 437
<strong>Django</strong> <strong>Documentation</strong>, Release 1.24. Once <strong>the</strong> user has submitted all <strong>the</strong> forms and all <strong>the</strong> data has been validated, <strong>the</strong> wizard processes <strong>the</strong> data –saving it to <strong>the</strong> database, sending an e-mail, or whatever <strong>the</strong> application needs to do.UsageThis application handles as much machinery for you as possible. Generally, you just have to do <strong>the</strong>se things:1. Define a number of Form classes – one per wizard page.2. Create a FormWizard class that specifies what to do once all of your forms have been submitted and validated.This also lets you override some of <strong>the</strong> wizard’s behavior.3. Create some templates that render <strong>the</strong> forms. You can define a single, generic template to handle every one of<strong>the</strong> forms, or you can define a specific template for each form.4. Point your URLconf at your FormWizard class.Defining Form classesThe first step in creating a form wizard is to create <strong>the</strong> Form classes. These should be standarddjango.forms.Form classes, covered in <strong>the</strong> forms documentation. These classes can live anywhere in your codebase,but convention is to put <strong>the</strong>m in a file called forms.py in your application.For example, let’s write a “contact form” wizard, where <strong>the</strong> first page’s form collects <strong>the</strong> sender’s e-mail address andsubject, and <strong>the</strong> second page collects <strong>the</strong> message itself. Here’s what <strong>the</strong> forms.py might look like:from django import formsclass ContactForm1(forms.Form):subject = forms.CharField(max_length=100)sender = forms.EmailField()class ContactForm2(forms.Form):message = forms.CharField(widget=forms.Textarea)Important limitation: Because <strong>the</strong> wizard uses HTML hidden fields to store data between pages, you may not includea FileField in any form except <strong>the</strong> last one.Creating a FormWizard classThe next step is to create a django.contrib.formtools.wizard.FormWizard subclass. As with yourForm classes, this FormWizard class can live anywhere in your codebase, but convention is to put it in forms.py.The only requirement on this subclass is that it implement a done() method.FormWizard.done()This method specifies what should happen when <strong>the</strong> data for every form is submitted and validated. This methodis passed two arguments:•request – an HttpRequest object•form_list – a list of Form classesIn this simplistic example, ra<strong>the</strong>r than perform any database operation, <strong>the</strong> method simply renders a template of <strong>the</strong>validated data:438 Chapter 6. API Reference
<strong>Django</strong> <strong>Documentation</strong>, Release 1.2from django.shortcuts import render_to_responsefrom django.contrib.formtools.wizard import FormWizardclass ContactWizard(FormWizard):def done(self, request, form_list):return render_to_response(’done.html’, {’form_data’: [form.cleaned_data for form in form_list],})Note that this method will be called via POST, so it really ought to be a good Web citizen and redirect after processing<strong>the</strong> data. Here’s ano<strong>the</strong>r example:from django.http import HttpResponseRedirectfrom django.contrib.formtools.wizard import FormWizardclass ContactWizard(FormWizard):def done(self, request, form_list):do_something_with_<strong>the</strong>_form_data(form_list)return HttpResponseRedirect(’/page-to-redirect-to-when-done/’)See <strong>the</strong> section Advanced FormWizard methods below to learn about more FormWizard hooks.Creating templates for <strong>the</strong> formsNext, you’ll need to create a template that renders <strong>the</strong> wizard’s forms. By default, every form uses a template calledforms/wizard.html. (You can change this template name by overriding get_template(), which is documentedbelow. This hook also allows you to use a different template for each form.)This template expects <strong>the</strong> following context:• step_field – The name of <strong>the</strong> hidden field containing <strong>the</strong> step.• step0 – The current step (zero-based).• step – The current step (one-based).• step_count – The total number of steps.• form – The Form instance for <strong>the</strong> current step (ei<strong>the</strong>r empty or with errors).• previous_fields – A string representing every previous data field, plus hashes for completed forms, allin <strong>the</strong> form of hidden fields. Note that you’ll need to run this through <strong>the</strong> safe template filter, to preventauto-escaping, because it’s raw HTML.You can supply extra context to this template in two ways:• Set <strong>the</strong> extra_context attribute on your FormWizard subclass to a dictionary.• Pass a dictionary as a parameter named extra_context to your wizard’s URL pattern in your URLconf. SeeHooking <strong>the</strong> wizard into a URLconf .Here’s a full example template:{% extends "base.html" %}{% block content %}Step {{ step }} of {{ step_count }}{% csrf_token %}{{ form }}6.2. contrib packages 439
<strong>Django</strong> <strong>Documentation</strong>, Release 1.2{{ previous_fields|safe }}{% endblock %}Note that previous_fields, step_field and step0 are all required for <strong>the</strong> wizard to work properly.Hooking <strong>the</strong> wizard into a URLconfFinally, we need to specify which forms to use in <strong>the</strong> wizard, and <strong>the</strong>n deploy <strong>the</strong> new FormWizard object a URL inurls.py. The wizard takes a list of your Form objects as arguments when you instantiate <strong>the</strong> Wizard:from django.conf.urls.defaults import *from testapp.forms import ContactForm1, ContactForm2, ContactWizardurlpatterns = patterns(’’,(r’^contact/$’, ContactWizard([ContactForm1, ContactForm2])),)Advanced FormWizard methodsclass FormWizardAside from <strong>the</strong> done() method, FormWizard offers a few advanced method hooks that let you customizehow your wizard works.Some of <strong>the</strong>se methods take an argument step, which is a zero-based counter representing <strong>the</strong> current step of<strong>the</strong> wizard. (E.g., <strong>the</strong> first form is 0 and <strong>the</strong> second form is 1.)FormWizard.prefix_for_step()Given <strong>the</strong> step, returns a form prefix to use. By default, this simply uses <strong>the</strong> step itself. For more, see <strong>the</strong> formprefix documentation.Default implementation:def prefix_for_step(self, step):return str(step)FormWizard.render_hash_failure()Renders a template if <strong>the</strong> hash check fails. It’s rare that you’d need to override this.Default implementation:def render_hash_failure(self, request, step):return self.render(self.get_form(step), request, step,context={’wizard_error’:’We apologize, but your form has expired. Please’’ continue filling out <strong>the</strong> form from this page.’})FormWizard.security_hash()Calculates <strong>the</strong> security hash for <strong>the</strong> given request object and Form instance.By default, this uses an MD5 hash of <strong>the</strong> form data and your SECRET_KEY setting. It’s rare that somebodywould need to override this.Example:440 Chapter 6. API Reference
<strong>Django</strong> <strong>Documentation</strong>, Release 1.2def security_hash(self, request, form):return my_hash_function(request, form)FormWizard.parse_params()A hook for saving state from <strong>the</strong> request object and args / kwargs that were captured from <strong>the</strong> URL by yourURLconf.By default, this does nothing.Example:def parse_params(self, request, *args, **kwargs):self.my_state = args[0]FormWizard.get_template()Returns <strong>the</strong> name of <strong>the</strong> template that should be used for <strong>the</strong> given step.By default, this returns ’forms/wizard.html’, regardless of step.Example:def get_template(self, step):return ’myapp/wizard_%s.html’ % stepIf get_template() returns a list of strings, <strong>the</strong>n <strong>the</strong> wizard will use <strong>the</strong> template system’sselect_template() function. This means <strong>the</strong> system will use <strong>the</strong> first template that exists on <strong>the</strong> filesystem.For example:def get_template(self, step):return [’myapp/wizard_%s.html’ % step, ’myapp/wizard.html’]FormWizard.render_template()Renders <strong>the</strong> template for <strong>the</strong> given step, returning an HttpResponse object.Override this method if you want to add a custom context, return a different MIME type, etc. If you only needto override <strong>the</strong> template name, use get_template() instead.The template will be rendered with <strong>the</strong> context documented in <strong>the</strong> “Creating templates for <strong>the</strong> forms” sectionabove.FormWizard.process_step()Hook for modifying <strong>the</strong> wizard’s internal state, given a fully validated Form object. The Form is guaranteed tohave clean, valid data.This method should not modify any of that data. Ra<strong>the</strong>r, it might want to set self.extra_context ordynamically alter self.form_list, based on previously submitted forms.Note that this method is called every time a page is rendered for all submitted steps.The function signature:def process_step(self, request, form, step):# ...6.2.9 Geo<strong>Django</strong>New in version 1.0: Please, see <strong>the</strong> release notes Geo<strong>Django</strong> intends to be a world-class geographic Web framework.Its goal is to make it as easy as possible to build GIS Web applications and harness <strong>the</strong> power of spatially enabled data.6.2. contrib packages 441
<strong>Django</strong> <strong>Documentation</strong>, Release 1.2Geo<strong>Django</strong> TutorialIntroductionGeo<strong>Django</strong> is an add-on for <strong>Django</strong> that turns it into a world-class geographic Web framework. Geo<strong>Django</strong> strivesto make at as simple as possible to create geographic Web applications, like location-based services. Some featuresinclude:• <strong>Django</strong> model fields for OGC geometries.• Extensions to <strong>Django</strong>’s ORM for <strong>the</strong> querying and manipulation of spatial data.• Loosely-coupled, high-level Python interfaces for GIS geometry operations and data formats.• Editing of geometry fields inside <strong>the</strong> admin.This tutorial assumes a familiarity with <strong>Django</strong>; thus, if you’re brand new to <strong>Django</strong> please read through <strong>the</strong> regulartutorial to introduce yourself with basic <strong>Django</strong> concepts.Note: Geo<strong>Django</strong> has special prerequisites overwhat is required by <strong>Django</strong> – please consult <strong>the</strong> installation documentationfor more details.This tutorial will guide you through <strong>the</strong> creation of a geographic Web application for viewing <strong>the</strong> world borders.1Some of <strong>the</strong> code used in this tutorial is taken from and/or inspired by <strong>the</strong> Geo<strong>Django</strong> basic apps project. 2Note: Proceed through <strong>the</strong> tutorial sections sequentially for step-by-step instructions.Setting UpCreate a Spatial DatabaseNote: MySQL and Oracle users can skip this section because spatial types are already built into <strong>the</strong> database.First, a spatial database needs to be created for our project. If using PostgreSQL and PostGIS, <strong>the</strong>n <strong>the</strong> followingcommands will create <strong>the</strong> database from a spatial database template:$ createdb -T template_postgis geodjangoNote: This command must be issued by a database user that has permissions to create a database. Here is an exampleset of commands to create such a user:$ sudo su - postgres$ createuser --createdb geo$ exitReplace geo to correspond to <strong>the</strong> system login user name will be connecting to <strong>the</strong> database. For example, johndoeif that is <strong>the</strong> system user that will be running Geo<strong>Django</strong>.Users of SQLite and SpatiaLite should consult <strong>the</strong> instructions on how to create a SpatiaLite database.1 Special thanks to Bjørn Sandvik of <strong>the</strong>maticmapping.org for providing and maintaining this data set.2 Geo<strong>Django</strong> basic apps was written by Dane Springmeyer, Josh Livni, and Christopher Schmidt.442 Chapter 6. API Reference
<strong>Django</strong> <strong>Documentation</strong>, Release 1.2Create Geo<strong>Django</strong> ProjectUse <strong>the</strong> django-admin.py script like normal to create a geodjango project:$ django-admin.py startproject geodjangoWith <strong>the</strong> project initialized, now create a world <strong>Django</strong> application within <strong>the</strong> geodjango project:$ cd geodjango$ python manage.py startapp worldConfigure settings.py The geodjango project settings are stored in <strong>the</strong> settings.py file. Edit <strong>the</strong>database connection settings appropriately:DATABASES = {’default’: {’ENGINE’: ’django.contrib.gis.db.backends.postgis’,’NAME’: ’geodjango’,’USER’: ’geo’,}}Note: These database settings are for <strong>Django</strong> 1.2 and above.In addition, modify <strong>the</strong> INSTALLED_APPS setting to include django.contrib.admin,django.contrib.gis, and world (our newly created application):INSTALLED_APPS = (’django.contrib.auth’,’django.contrib.contenttypes’,’django.contrib.sessions’,’django.contrib.sites’,’django.contrib.admin’,’django.contrib.gis’,’world’)Geographic DataWorld Borders The world borders data is available in this zip file. Create a data directory in <strong>the</strong> world application,download <strong>the</strong> world borders data, and unzip. On GNU/Linux platforms <strong>the</strong> following commands should do it:$ mkdir world/data$ cd world/data$ wget http://<strong>the</strong>maticmapping.org/downloads/TM_WORLD_BORDERS-0.3.zip$ unzip TM_WORLD_BORDERS-0.3.zip$ cd ../..The world borders ZIP file contains a set of data files collectively known as an ESRI Shapefile, one of <strong>the</strong> most populargeospatial data formats. When unzipped <strong>the</strong> world borders data set includes files with <strong>the</strong> following extensions:• .shp: Holds <strong>the</strong> vector data for <strong>the</strong> world borders geometries.• .shx: Spatial index file for geometries stored in <strong>the</strong> .shp.• .dbf: Database file for holding non-geometric attribute data (e.g., integer and character fields).• .prj: Contains <strong>the</strong> spatial reference information for <strong>the</strong> geographic data stored in <strong>the</strong> shapefile.6.2. contrib packages 443
<strong>Django</strong> <strong>Documentation</strong>, Release 1.2Use ogrinfo to examine spatial datashapefiles (or o<strong>the</strong>r vector data sources):The GDAL ogrinfo utility is excellent for examining metadata about$ ogrinfo world/data/TM_WORLD_BORDERS-0.3.shpINFO: Open of ‘world/data/TM_WORLD_BORDERS-0.3.shp’using driver ‘ESRI Shapefile’ successful.1: TM_WORLD_BORDERS-0.3 (Polygon)Here ogrinfo is telling us that <strong>the</strong> shapefile has one layer, and that layer contains polygon data. To find out morewe’ll specify <strong>the</strong> layer name and use <strong>the</strong> -so option to get only important summary information:$ ogrinfo -so world/data/TM_WORLD_BORDERS-0.3.shp TM_WORLD_BORDERS-0.3INFO: Open of ‘world/data/TM_WORLD_BORDERS-0.3.shp’using driver ‘ESRI Shapefile’ successful.Layer name: TM_WORLD_BORDERS-0.3Geometry: PolygonFeature Count: 246Extent: (-180.000000, -90.000000) - (180.000000, 83.623596)Layer SRS WKT:GEOGCS["GCS_WGS_1984",DATUM["WGS_1984",SPHEROID["WGS_1984",6378137.0,298.257223563]],PRIMEM["Greenwich",0.0],UNIT["Degree",0.0174532925199433]]FIPS: String (2.0)ISO2: String (2.0)ISO3: String (3.0)UN: Integer (3.0)NAME: String (50.0)AREA: Integer (7.0)POP2005: Integer (10.0)REGION: Integer (3.0)SUBREGION: Integer (3.0)LON: Real (8.3)LAT: Real (7.3)This detailed summary information tells us <strong>the</strong> number of features in <strong>the</strong> layer (246), <strong>the</strong> geographical extent, <strong>the</strong>spatial reference system (“SRS WKT”), as well as detailed information for each attribute field. For example, FIPS:String (2.0) indicates that <strong>the</strong>re’s a FIPS character field with a maximum length of 2; similarly, LON: Real(8.3) is a floating-point field that holds a maximum of 8 digits up to three decimal places. Although this informationmay be found right on <strong>the</strong> world borders Web site, this shows you how to determine this information yourself whensuch metadata is not provided.Geographic ModelsDefining a Geographic Model Now that we’ve examined our world borders data set using ogrinfo, we can createa Geo<strong>Django</strong> model to represent this data:from django.contrib.gis.db import modelsclass WorldBorders(models.Model):# Regular <strong>Django</strong> fields corresponding to <strong>the</strong> attributes in <strong>the</strong># world borders shapefile.name = models.CharField(max_length=50)area = models.IntegerField()pop2005 = models.IntegerField(’Population 2005’)444 Chapter 6. API Reference
<strong>Django</strong> <strong>Documentation</strong>, Release 1.2fips = models.CharField(’FIPS Code’, max_length=2)iso2 = models.CharField(’2 Digit ISO’, max_length=2)iso3 = models.CharField(’3 Digit ISO’, max_length=3)un = models.IntegerField(’United Nations Code’)region = models.IntegerField(’Region Code’)subregion = models.IntegerField(’Sub-Region Code’)lon = models.FloatField()lat = models.FloatField()# Geo<strong>Django</strong>-specific: a geometry field (MultiPolygonField), and# overriding <strong>the</strong> default manager with a GeoManager instance.mpoly = models.MultiPolygonField()objects = models.GeoManager()# So <strong>the</strong> model is pluralized correctly in <strong>the</strong> admin.class Meta:verbose_name_plural = "World Borders"# Returns <strong>the</strong> string representation of <strong>the</strong> model.def __unicode__(self):return self.nameTwo important things to note:1. The models module is imported from django.contrib.gis.db.2. The model overrides its default manager with GeoManager; this is required to perform spatial queries.When declaring a geometry field on your model <strong>the</strong> default spatial reference system is WGS84 (meaning <strong>the</strong> SRIDis 4326) – in o<strong>the</strong>r words, <strong>the</strong> field coordinates are in longitude/latitude pairs in units of degrees. If you want <strong>the</strong>coordinate system to be different, <strong>the</strong>n SRID of <strong>the</strong> geometry field may be customized by setting <strong>the</strong> srid with aninteger corresponding to <strong>the</strong> coordinate system of your choice.Run syncdb After you’ve defined your model, it needs to be synced with <strong>the</strong> spatial database. First, let’s look at<strong>the</strong> SQL that will generate <strong>the</strong> table for <strong>the</strong> WorldBorders model:$ python manage.py sqlall worldThis management command should produce <strong>the</strong> following output:BEGIN;CREATE TABLE "world_worldborders" ("id" serial NOT NULL PRIMARY KEY,"name" varchar(50) NOT NULL,"area" integer NOT NULL,"pop2005" integer NOT NULL,"fips" varchar(2) NOT NULL,"iso2" varchar(2) NOT NULL,"iso3" varchar(3) NOT NULL,"un" integer NOT NULL,"region" integer NOT NULL,"subregion" integer NOT NULL,"lon" double precision NOT NULL,"lat" double precision NOT NULL);SELECT AddGeometryColumn(’world_worldborders’, ’mpoly’, 4326, ’MULTIPOLYGON’, 2);ALTER TABLE "world_worldborders" ALTER "mpoly" SET NOT NULL;6.2. contrib packages 445
<strong>Django</strong> <strong>Documentation</strong>, Release 1.2CREATE INDEX "world_worldborders_mpoly_id" ON "world_worldborders" USING GIST ( "mpoly" GIST_GEOMETRYCOMMIT;If satisfied, you may <strong>the</strong>n create this table in <strong>the</strong> database by running <strong>the</strong> syncdb management command:$ python manage.py syncdbCreating table world_worldbordersInstalling custom SQL for world.WorldBorders modelThe syncdb command may also prompt you to create an admin user; go ahead and do so (not required now, may bedone at any point in <strong>the</strong> future using <strong>the</strong> createsuperuser management command).Importing Spatial DataThis section will show you how to take <strong>the</strong> data from <strong>the</strong> world borders shapefile and import it into Geo<strong>Django</strong> modelsusing <strong>the</strong> LayerMapping data import utility. There are many different different ways to import data in to a spatialdatabase – besides <strong>the</strong> tools included within Geo<strong>Django</strong>, you may also use <strong>the</strong> following to populate your spatialdatabase:• ogr2ogr: Command-line utility, included with GDAL, that supports loading a multitude of vector data formatsinto <strong>the</strong> PostGIS, MySQL, and Oracle spatial databases.• shp2pgsql: This utility is included with PostGIS and only supports ESRI shapefiles.GDAL Interface Earlier we used <strong>the</strong> <strong>the</strong> ogrinfo to explore <strong>the</strong> contents of <strong>the</strong> world borders shapefile. Includedwithin Geo<strong>Django</strong> is an interface to GDAL’s powerful OGR library – in o<strong>the</strong>r words, you’ll be able explore all <strong>the</strong>vector data sources that OGR supports via a Pythonic API.First, invoke <strong>the</strong> <strong>Django</strong> shell:$ python manage.py shellIf <strong>the</strong> World Borders data was downloaded like earlier in <strong>the</strong> tutorial, <strong>the</strong>n we can determine <strong>the</strong> path using Python’sbuilt-in os module:>>> import os>>> from geodjango import world>>> world_shp = os.path.abspath(os.path.join(os.path.dirname(world.__file__),... ’data/TM_WORLD_BORDERS-0.3.shp’))Now, <strong>the</strong> world borders shapefile may be opened using Geo<strong>Django</strong>’s DataSource interface:>>> from django.contrib.gis.gdal import *>>> ds = DataSource(world_shp)>>> print ds/ ... /geodjango/world/data/TM_WORLD_BORDERS-0.3.shp (ESRI Shapefile)Data source objects can have different layers of geospatial features; however, shapefiles are only allowed to have onelayer:>>> print len(ds)1>>> lyr = ds[0]>>> print lyrTM_WORLD_BORDERS-0.3You can see what <strong>the</strong> geometry type of <strong>the</strong> layer is and how many features it contains:446 Chapter 6. API Reference
<strong>Django</strong> <strong>Documentation</strong>, Release 1.2>>> print lyr.geom_typePolygon>>> print len(lyr)246Note: Unfortunately <strong>the</strong> shapefile data format does not allow for greater specificity with regards to geometry types.This shapefile, like many o<strong>the</strong>rs, actually includes MultiPolygon geometries in its features. You need to watchout for this when creating your models as a Geo<strong>Django</strong> PolygonField will not accept a MultiPolygon typegeometry – thus a MultiPolygonField is used in our model’s definition instead.The Layer may also have a spatial reference system associated with it – if it does, <strong>the</strong> srs attribute will return aSpatialReference object:>>> srs = lyr.srs>>> print srsGEOGCS["GCS_WGS_1984",DATUM["WGS_1984",SPHEROID["WGS_1984",6378137.0,298.257223563]],PRIMEM["Greenwich",0.0],UNIT["Degree",0.0174532925199433]]>>> srs.proj4 # PROJ.4 representation’+proj=longlat +ellps=WGS84 +datum=WGS84 +no_defs ’Here we’ve noticed that <strong>the</strong> shapefile is in <strong>the</strong> popular WGS84 spatial reference system – in o<strong>the</strong>r words, <strong>the</strong> data usesunits of degrees longitude and latitude.In addition, shapefiles also support attribute fields that may contain additional data. Here are <strong>the</strong> fields on <strong>the</strong> WorldBorders layer:>>> print lyr.fields[’FIPS’, ’ISO2’, ’ISO3’, ’UN’, ’NAME’, ’AREA’, ’POP2005’, ’REGION’, ’SUBREGION’, ’LON’, ’LAT’]Here we are examining <strong>the</strong> OGR types (e.g., whe<strong>the</strong>r a field is an integer or a string) associated with each of <strong>the</strong> fields:>>> [fld.__name__ for fld in lyr.field_types][’OFTString’, ’OFTString’, ’OFTString’, ’OFTInteger’, ’OFTString’, ’OFTInteger’, ’OFTInteger’, ’OFTInYou can iterate over each feature in <strong>the</strong> layer and extract information from both <strong>the</strong> feature’s geometry (accessed via<strong>the</strong> geom attribute) as well as <strong>the</strong> feature’s attribute fields (whose values are accessed via get() method):>>> for feat in lyr:... print feat.get(’NAME’), feat.geom.num_points...Guernsey 18Jersey 26South Georgia South Sandwich Islands 338Taiwan 363Layer objects may be sliced:>>> lyr[0:2][, >> feat = lyr[234]>>> print feat.get(’NAME’)San Marino6.2. contrib packages 447
<strong>Django</strong> <strong>Documentation</strong>, Release 1.2Here <strong>the</strong> boundary geometry for San Marino is extracted and looking exported to WKT and GeoJSON:>>> geom = feat.geom>>> print geom.wktPOLYGON ((12.415798 43.957954,12.450554 ...>>> print geom.json{ "type": "Polygon", "coordinates": [ [ [ 12.415798, 43.957954 ], [ 12.450554, 43.979721 ], ...LayerMapping We’re going to dive right in – create a file called load.py inside <strong>the</strong> world application, andinsert <strong>the</strong> following:import osfrom django.contrib.gis.utils import LayerMappingfrom models import WorldBordersworld_mapping = {’fips’ : ’FIPS’,’iso2’ : ’ISO2’,’iso3’ : ’ISO3’,’un’ : ’UN’,’name’ : ’NAME’,’area’ : ’AREA’,’pop2005’ : ’POP2005’,’region’ : ’REGION’,’subregion’ : ’SUBREGION’,’lon’ : ’LON’,’lat’ : ’LAT’,’mpoly’ : ’MULTIPOLYGON’,}world_shp = os.path.abspath(os.path.join(os.path.dirname(__file__), ’data/TM_WORLD_BORDERS-0.3.shp’))def run(verbose=True):lm = LayerMapping(WorldBorders, world_shp, world_mapping,transform=False, encoding=’iso-8859-1’)lm.save(strict=True, verbose=verbose)A few notes about what’s going on:• Each key in <strong>the</strong> world_mapping dictionary corresponds to a field in <strong>the</strong> WorldBorders model, and <strong>the</strong>value is <strong>the</strong> name of <strong>the</strong> shapefile field that data will be loaded from.• The key mpoly for <strong>the</strong> geometry field is MULTIPOLYGON, <strong>the</strong> geometry type we wish to import as. Even ifsimple polygons are encountered in <strong>the</strong> shapefile <strong>the</strong>y will automatically be converted into collections prior toinsertion into <strong>the</strong> database.• The path to <strong>the</strong> shapefile is not absolute – in o<strong>the</strong>r words, if you move <strong>the</strong> world application (with datasubdirectory) to a different location, <strong>the</strong>n <strong>the</strong> script will still work.• The transform keyword is set to False because <strong>the</strong> data in <strong>the</strong> shapefile does not need to be converted – it’salready in WGS84 (SRID=4326).• The encoding keyword is set to <strong>the</strong> character encoding of string values in <strong>the</strong> shapefile. This ensures thatstring values are read and saved correctly from <strong>the</strong>ir original encoding system.Afterwards, invoke <strong>the</strong> <strong>Django</strong> shell from <strong>the</strong> geodjango project directory:$ python manage.py shell448 Chapter 6. API Reference
<strong>Django</strong> <strong>Documentation</strong>, Release 1.2Next, import <strong>the</strong> load module, call <strong>the</strong> run routine, and watch LayerMapping do <strong>the</strong> work:>>> from world import load>>> load.run()Try ogrinspect Now that you’ve seen how to define geographic models and import data with <strong>the</strong> LayerMappingdata import utility, it’s possible to fur<strong>the</strong>r automate this process with use of <strong>the</strong> ogrinspect management command.The ogrinspect command introspects a GDAL-supported vector data source (e.g., a shapefile) and generates amodel definition and LayerMapping dictionary automatically.The general usage of <strong>the</strong> command goes as follows:$ python manage.py ogrinspect [options] [options]Where data_source is <strong>the</strong> path to <strong>the</strong> GDAL-supported data source and model_name is <strong>the</strong> name to use for <strong>the</strong>model. Command-line options may be used to fur<strong>the</strong>r define how <strong>the</strong> model is generated.For example, <strong>the</strong> following command nearly reproduces <strong>the</strong> WorldBorders model and mapping dictionary createdabove, automatically:$ python manage.py ogrinspect world/data/TM_WORLD_BORDERS-0.3.shp WorldBorders --srid=4326 --mappingA few notes about <strong>the</strong> command-line options given above:• The --srid=4326 option sets <strong>the</strong> SRID for <strong>the</strong> geographic field.• The --mapping option tells ogrinspect to also generate a mapping dictionary for use withLayerMapping.• The --multi option is specified so that <strong>the</strong> geographic field is a MultiPolygonField instead of just aPolygonField.The command produces <strong>the</strong> following output, which may be copied directly into <strong>the</strong> models.py of a Geo<strong>Django</strong>application:# This is an auto-generated <strong>Django</strong> model module created by ogrinspect.from django.contrib.gis.db import modelsclass WorldBorders(models.Model):fips = models.CharField(max_length=2)iso2 = models.CharField(max_length=2)iso3 = models.CharField(max_length=3)un = models.IntegerField()name = models.CharField(max_length=50)area = models.IntegerField()pop2005 = models.IntegerField()region = models.IntegerField()subregion = models.IntegerField()lon = models.FloatField()lat = models.FloatField()geom = models.MultiPolygonField(srid=4326)objects = models.GeoManager()# Auto-generated ‘LayerMapping‘ dictionary for WorldBorders modelworldborders_mapping = {’fips’ : ’FIPS’,’iso2’ : ’ISO2’,’iso3’ : ’ISO3’,’un’ : ’UN’,’name’ : ’NAME’,6.2. contrib packages 449
<strong>Django</strong> <strong>Documentation</strong>, Release 1.2}’area’ : ’AREA’,’pop2005’ : ’POP2005’,’region’ : ’REGION’,’subregion’ : ’SUBREGION’,’lon’ : ’LON’,’lat’ : ’LAT’,’geom’ : ’MULTIPOLYGON’,Spatial QueriesSpatial Lookups Geo<strong>Django</strong> extends <strong>the</strong> <strong>Django</strong> ORM and allows <strong>the</strong> use of spatial lookups. Let’s do an examplewhere we find <strong>the</strong> WorldBorder model that contains a point. First, fire up <strong>the</strong> management shell:$ python manage.py shellNow, define a point of interest 3 :>>> pnt_wkt = ’POINT(-95.3385 29.7245)’The pnt_wkt string represents <strong>the</strong> point at -95.3385 degrees longitude, and 29.7245 degrees latitude. The geometryis in a format known as Well Known Text (WKT), an open standard issued by <strong>the</strong> Open Geospatial Consortium (OGC).4 Import <strong>the</strong> WorldBorders model, and perform a contains lookup using <strong>the</strong> pnt_wkt as <strong>the</strong> parameter:>>> from world.models import WorldBorders>>> qs = WorldBorders.objects.filter(mpoly__contains=pnt_wkt)>>> qs[]Here we retrieved a GeoQuerySet that has only one model: <strong>the</strong> one for <strong>the</strong> United States (which is what we wouldexpect). Similarly, a GEOS geometry object may also be used – here <strong>the</strong> intersects spatial lookup is combinedwith <strong>the</strong> get method to retrieve only <strong>the</strong> WorldBorders instance for San Marino instead of a queryset:>>> from django.contrib.gis.geos import Point>>> pnt = Point(12.4604, 43.9420)>>> sm = WorldBorders.objects.get(mpoly__intersects=pnt)>>> smThe contains and intersects lookups are just a subset of what’s available – <strong>the</strong> Geo<strong>Django</strong> Database APIdocumentation has more.Automatic Spatial Transformations When querying <strong>the</strong> spatial database Geo<strong>Django</strong> automatically transforms geometriesif <strong>the</strong>y’re in a different coordinate system. In <strong>the</strong> following example, <strong>the</strong> coordinate will be expressed interms of EPSG SRID 32140, a coordinate system specific to south Texas only and in units of meters and not degrees:>>> from django.contrib.gis.geos import *>>> pnt = Point(954158.1, 4215137.1, srid=32140)Note that pnt may also constructed with EWKT, an “extended” form of WKT that includes <strong>the</strong> SRID:>>> pnt = GEOSGeometry(’SRID=32140;POINT(954158.1 4215137.1)’)3 Here <strong>the</strong> point is for <strong>the</strong> University of Houston Law Center .4 Open Geospatial Consortium, Inc., OpenGIS Simple Feature Specification For SQL, Document 99-049.450 Chapter 6. API Reference
<strong>Django</strong> <strong>Documentation</strong>, Release 1.2When using Geo<strong>Django</strong>’s ORM, it will automatically wrap geometry values in transformation SQL, allowing <strong>the</strong>developer to work at a higher level of abstraction:>>> qs = WorldBorders.objects.filter(mpoly__intersects=pnt)>>> qs.query.as_sql() # Generating <strong>the</strong> SQL(’SELECT "world_worldborders"."id", "world_worldborders"."name", "world_worldborders"."area","world_worldborders"."pop2005", "world_worldborders"."fips", "world_worldborders"."iso2","world_worldborders"."iso3", "world_worldborders"."un", "world_worldborders"."region","world_worldborders"."subregion", "world_worldborders"."lon", "world_worldborders"."lat","world_worldborders"."mpoly" FROM "world_worldborders"WHERE ST_Intersects("world_worldborders"."mpoly", ST_Transform(%s, 4326))’,(,))>>> qs # printing evaluates <strong>the</strong> queryset[]Lazy Geometries Geometries come to Geo<strong>Django</strong> in a standardized textual representation. Upon access of <strong>the</strong>geometry field, Geo<strong>Django</strong> creates a GEOS geometry object , exposing powerful functionality, such asserialization properties for popular geospatial formats:>>> sm = WorldBorders.objects.get(name=’San Marino’)>>> sm.mpoly>>> sm.mpoly.wkt # WKTMULTIPOLYGON (((12.4157980000000006 43.9579540000000009, 12.4505540000000003 43.9797209999999978, ...>>> sm.mpoly.wkb # WKB (as Python binary buffer)>>> sm.mpoly.geojson # GeoJSON (requires GDAL)’{ "type": "MultiPolygon", "coordinates": [ [ [ [ 12.415798, 43.957954 ], [ 12.450554, 43.979721 ], .This includes access to all of <strong>the</strong> advanced geometric operations provided by <strong>the</strong> GEOS library:>>> pnt = Point(12.4604, 43.9420)>>> sm.mpoly.contains(pnt)True>>> pnt.contains(sm.mpoly)FalseGeoQuerySet MethodsPutting your data on <strong>the</strong> mapGoogleGeographic AdminGeo<strong>Django</strong> extends <strong>Django</strong>’s admin application to enable support for editing geometry fields.Basics Geo<strong>Django</strong> also supplements <strong>the</strong> <strong>Django</strong> admin by allowing users to create and modify geometries on aJavaScript slippy map (powered by OpenLayers).Let’s dive in again – create a file called admin.py inside <strong>the</strong> world application, and insert <strong>the</strong> following:from django.contrib.gis import adminfrom models import WorldBordersadmin.site.register(WorldBorders, admin.GeoModelAdmin)6.2. contrib packages 451
<strong>Django</strong> <strong>Documentation</strong>, Release 1.2Next, edit your urls.py in <strong>the</strong> geodjango project folder to look as follows:from django.conf.urls.defaults import *from django.contrib.gis import adminadmin.autodiscover()urlpatterns = patterns(’’,(r’^admin/’, include(admin.site.urls)),)Start up <strong>the</strong> <strong>Django</strong> development server:$ python manage.py runserverFinally, browse to http://localhost:8000/admin/, and log in with <strong>the</strong> admin user created after runningsyncdb. Browse to any of <strong>the</strong> WorldBorders entries – <strong>the</strong> borders may be edited by clicking on a polygon anddragging <strong>the</strong> vertexes to <strong>the</strong> desired position.OSMGeoAdmin With <strong>the</strong> OSMGeoAdmin, Geo<strong>Django</strong> uses a Open Street Map layer in <strong>the</strong> admin. This providesmore context (including street and thoroughfare details) than available with <strong>the</strong> GeoModelAdmin (which uses <strong>the</strong>Vector Map Level 0 WMS data set hosted at Metacarta).First, <strong>the</strong>re are some important requirements and limitations:• OSMGeoAdmin requires that <strong>the</strong> spherical mercator projection be added to <strong>the</strong> to be added to <strong>the</strong>spatial_ref_sys table (PostGIS 1.3 and below, only).• The PROJ.4 datum shifting files must be installed (see <strong>the</strong> PROJ.4 installation instructions for more details).If you meet <strong>the</strong>se requirements, <strong>the</strong>n just substitute in <strong>the</strong> OSMGeoAdmin option class in your admin.py file:admin.site.register(WorldBorders, admin.OSMGeoAdmin)Geo<strong>Django</strong> InstallationOverviewIn general, Geo<strong>Django</strong> installation requires:1. Python 2.4+ and <strong>Django</strong>2. Spatial Database3. Geospatial LibrariesDetails for each of <strong>the</strong> requirements and installation instructions are provided in <strong>the</strong> sections below. In addition,platform-specific instructions are available for:• Mac OS X• Ubuntu & Debian GNU/Linux• Windows XPUse <strong>the</strong> SourceBecause Geo<strong>Django</strong> takes advantage of <strong>the</strong> latest in <strong>the</strong> open source geospatial software technology, recent versionsof <strong>the</strong> libraries are necessary. If binary packages aren’t available for your platform, installation from source may452 Chapter 6. API Reference
<strong>Django</strong> <strong>Documentation</strong>, Release 1.2be required. When compiling <strong>the</strong> libraries from source, please follow <strong>the</strong> directions closely, especially if you’re abeginner.RequirementsPython 2.4+ Python 2.4 is <strong>the</strong> minimum version supported by <strong>Django</strong>, however Python 2.5+ is recommended because<strong>the</strong> ctypes module comes included; o<strong>the</strong>rwise, 2.4 users will need to download and install ctypes.<strong>Django</strong> Because Geo<strong>Django</strong> is included with <strong>Django</strong>, please refer to <strong>Django</strong>’s installation instructions for detailson how to install.Spatial Database PostgreSQL (with PostGIS), MySQL, Oracle, and SQLite (with SpatiaLite) are <strong>the</strong> spatialdatabases currently supported.Note: PostGIS is recommended, because it is <strong>the</strong> most mature and feature-rich open source spatial database.The geospatial libraries required for a Geo<strong>Django</strong> installation depends on <strong>the</strong> spatial database used. The followinglists <strong>the</strong> library requirements, supported versions, and any notes for each of <strong>the</strong> supported database backends:Database Library Requirements Supported NotesVersionsPostgreSQLGEOS, PROJ.4, PostGIS 8.1+ Requires PostGIS.MySQL GEOS 5.x Not OGC-compliant; limited functionality.Oracle GEOS 10.2, 11 XE not supported; not tested with 9.SQLite GEOS, GDAL, PROJ.4,SpatiaLite3.6.+ Requires SpatiaLite 2.3+, pysqlite2 2.5+, and<strong>Django</strong> 1.1.Geo<strong>Django</strong> uses and/or provides interfaces for <strong>the</strong> <strong>the</strong> following open source geospatial li-Geospatial Librariesbraries:Program Description Required Supported VersionsGEOS Geometry Engine Open Source Yes 3.2, 3.1, 3.0PROJ.4 Cartographic Projections library Yes (PostgreSQL and SQLite only) 4.7, 4.6, 4.5, 4.4GDAL Geospatial Data Abstraction Library No (but, required for SQLite) 1.7, 1.6, 1.5, 1.4GeoIP IP-based geolocation library No 1.4PostGIS Spatial extensions for PostgreSQL Yes (PostgreSQL only) 1.5, 1.4, 1.3SpatiaLite Spatial extensions for SQLite Yes (SQLite only) 2.4, 2.3Install GDALWhile GDAL is technically not required, it is recommended. Some features of Geo<strong>Django</strong> (including <strong>the</strong> LayerMappingdata import utility and <strong>the</strong> geographic admin) depend on its functionality.Note: The Geo<strong>Django</strong> interfaces to GEOS, GDAL, and GeoIP may be used independently of <strong>Django</strong>. In o<strong>the</strong>r words,no database or settings file required – just import <strong>the</strong>m as normal from django.contrib.gis.6.2. contrib packages 453
<strong>Django</strong> <strong>Documentation</strong>, Release 1.2Building from SourceWhen installing from source on UNIX and GNU/Linux systems, please follow <strong>the</strong> installation instructions carefully,and install <strong>the</strong> libraries in <strong>the</strong> given order. If using MySQL or Oracle as <strong>the</strong> spatial database, only GEOS is required.Note: On Linux platforms, it may be necessarry to run <strong>the</strong> ldconfig command after installing each library. Forexample:$ sudo make install$ sudo ldconfigNote: OS X users are required to install Apple Developer Tools in order to compile software from source. This istypically included on your OS X installation DVDs.GEOS GEOS is a C++ library for performing geometric operations, and is <strong>the</strong> default internal geometry representationused by Geo<strong>Django</strong> (it’s behind <strong>the</strong> “lazy” geometries). Specifically, <strong>the</strong> C API library is called (e.g.,libgeos_c.so) directly from Python using ctypes.First, download GEOS 3.2 from <strong>the</strong> refractions Web site and untar <strong>the</strong> source archive:$ wget http://download.osgeo.org/geos/geos-3.2.2.tar.bz2$ tar xjf geos-3.2.2.tar.bz2Next, change into <strong>the</strong> directory where GEOS was unpacked, run <strong>the</strong> configure script, compile, and install:$ cd geos-3.2.2$ ./configure$ make$ sudo make install$ cd ..TroubleshootingCan’t find GEOS LibraryWhen Geo<strong>Django</strong> can’t find GEOS, this error is raised:ImportError: Could not find <strong>the</strong> GEOS library (tried "geos_c"). Try setting GEOS_LIBRARY_PATH in yourThe most common solution is to properly configure your Library Environment Settings or set GEOS_LIBRARY_PATHin your settings.If using a binary package of GEOS (e.g., on Ubuntu 8.10), you may need to Install binutils.GEOS_LIBRARY_PATH If your GEOS library is in a non-standard location, or you don’t want to modify <strong>the</strong> system’slibrary path <strong>the</strong>n <strong>the</strong> GEOS_LIBRARY_PATH setting may be added to your <strong>Django</strong> settings file with <strong>the</strong> fullpath to <strong>the</strong> GEOS C library. For example:GEOS_LIBRARY_PATH = ’/home/bob/local/lib/libgeos_c.so’Note: The setting must be <strong>the</strong> full path to <strong>the</strong> C shared library; in o<strong>the</strong>r words you want to use libgeos_c.so, notlibgeos.so.454 Chapter 6. API Reference
<strong>Django</strong> <strong>Documentation</strong>, Release 1.2PROJ.4PROJ.4 is a library for converting geospatial data to different coordinate reference systems.First, download <strong>the</strong> PROJ.4 source code and datum shifting files 5 :$ wget http://download.osgeo.org/proj/proj-4.7.0.tar.gz$ wget http://download.osgeo.org/proj/proj-datumgrid-1.5.zipNext, untar <strong>the</strong> source code archive, and extract <strong>the</strong> datum shifting files in <strong>the</strong> nad subdirectory. This must be doneprior to configuration:$ tar xzf proj-4.7.0.tar.gz$ cd proj-4.7.0/nad$ unzip ../../proj-datumgrid-1.5.zip$ cd ..Finally, configure, make and install PROJ.4:$ ./configure$ make$ sudo make install$ cd ..PostGIS PostGIS adds geographic object support to PostgreSQL, turning it into a spatial database. GEOS andPROJ.4 should be installed prior to building PostGIS.Note: The psycopg2 module is required for use as <strong>the</strong> database adaptor when using Geo<strong>Django</strong> with PostGIS.First download <strong>the</strong> source archive, and extract:$ wget http://postgis.refractions.net/download/postgis-1.5.2.tar.gz$ tar xzf postgis-1.5.2.tar.gz$ cd postgis-1.5.2Next, configure, make and install PostGIS:$ ./configureFinally, make and install:$ make$ sudo make install$ cd ..Note: Geo<strong>Django</strong> does not automatically create a spatial database. Please consult <strong>the</strong> section on Creating a SpatialDatabase Template for PostGIS for more information.GDAL GDAL is an excellent open source geospatial library that has support for reading most vector and rasterspatial data formats. Currently, Geo<strong>Django</strong> only supports GDAL’s vector data capabilities 6 . GEOS and PROJ.4should be installed prior to building GDAL.First download <strong>the</strong> latest GDAL release version and untar <strong>the</strong> archive:5 The datum shifting files are needed for converting data to and from certain projections. For example, <strong>the</strong> PROJ.4 string for <strong>the</strong> Googleprojection (900913) requires <strong>the</strong> null grid file only included in <strong>the</strong> extra datum shifting files. It is easier to install <strong>the</strong> shifting files now, <strong>the</strong>n tohave debug a problem caused by <strong>the</strong>ir absence later.6 Specifically, Geo<strong>Django</strong> provides support for <strong>the</strong> OGR library, a component of GDAL.6.2. contrib packages 455
<strong>Django</strong> <strong>Documentation</strong>, Release 1.2$ wget http://download.osgeo.org/gdal/gdal-1.7.2.tar.gz$ tar xzf gdal-1.7.2.tar.gz$ cd gdal-1.7.2Configure, make and install:$ ./configure$ make # Go get some coffee, this takes a while.$ sudo make install$ cd ..Note: Because Geo<strong>Django</strong> has it’s own Python interface, <strong>the</strong> preceding instructions do not build GDAL’s ownPython bindings. The bindings may be built by adding <strong>the</strong> --with-python flag when running configure. SeeGDAL/OGR In Python for more information on GDAL’s bindings.If you have any problems, please see <strong>the</strong> troubleshooting section below for suggestions and solutions.TroubleshootingCan’t find GDAL LibraryWhen Geo<strong>Django</strong> can’t find <strong>the</strong> GDAL library, <strong>the</strong> HAS_GDAL flag will be false:>>> from django.contrib.gis import gdal>>> gdal.HAS_GDALFalseThe solution is to properly configure your Library Environment Settings or set GDAL_LIBRARY_PATH in your settings.GDAL_LIBRARY_PATH If your GDAL library is in a non-standard location, or you don’t want to modify <strong>the</strong>system’s library path <strong>the</strong>n <strong>the</strong> GDAL_LIBRARY_PATH setting may be added to your <strong>Django</strong> settings file with <strong>the</strong>full path to <strong>the</strong> GDAL library. For example:GDAL_LIBRARY_PATH = ’/home/sue/local/lib/libgdal.so’Can’t find GDAL data files (GDAL_DATA) When installed from source, GDAL versions 1.5.1 and below have anautoconf bug that places data in <strong>the</strong> wrong location. 7 This can lead to error messages like this:ERROR 4: Unable to open EPSG support file gcs.csv....OGRException: OGR failure.The solution is to set <strong>the</strong> GDAL_DATA environment variable to <strong>the</strong> location of <strong>the</strong> GDAL data files before invokingPython (typically /usr/local/share; use gdal-config --datadir to find out). For example:$ export GDAL_DATA=‘gdal-config --datadir‘$ python manage.py shellIf using Apache, you may need to add this environment variable to your configuration file:SetEnv GDAL_DATA /usr/local/share7 See GDAL ticket #2382.456 Chapter 6. API Reference
<strong>Django</strong> <strong>Documentation</strong>, Release 1.2SpatiaLiteNew in version 1.1: Please, see <strong>the</strong> release notesNote: Mac OS X users should follow <strong>the</strong> instructions in <strong>the</strong> KyngChaos Packages section, as it is much easier thanbuilding from source.SpatiaLite adds spatial support to SQLite, turning it into a full-featured spatial database. Because SpatiaLite hasspecial requirements, it typically requires SQLite and pysqlite2 (<strong>the</strong> Python SQLite DB-API adaptor) to be built fromsource. GEOS and PROJ.4 should be installed prior to building SpatiaLite.After installation is complete, don’t forget to read <strong>the</strong> post-installation docs on Creating a Spatial Database for SpatiaLite.SQLite Typically, SQLite packages are not compiled to include <strong>the</strong> R*Tree module – thus it must be compiled fromsource. First download <strong>the</strong> latest amalgamation source archive from <strong>the</strong> SQLite download page, and extract:$ wget http://sqlite.org/sqlite-amalgamation-3.6.23.1.tar.gz$ tar xzf sqlite-amalgamation-3.6.23.1.tar.gz$ cd sqlite-3.6.23.1Next, run <strong>the</strong> configure script – however <strong>the</strong> CFLAGS environment variable needs to be customized so that SQLiteknows to build <strong>the</strong> R*Tree module:$ CFLAGS="-DSQLITE_ENABLE_RTREE=1" ./configure$ make$ sudo make install$ cd ..Note: If using Ubuntu, installing a newer SQLite from source can be very difficult because it links to <strong>the</strong> existinglibsqlite3.so in /usr/lib which many o<strong>the</strong>r packages depend on. Unfortunately, <strong>the</strong> best solution at this timeis to overwrite <strong>the</strong> existing library by adding --prefix=/usr to <strong>the</strong> configure command.SpatiaLite Library (libspatialite) and Tools (spatialite) After SQLite has been built with <strong>the</strong> R*Treemodule enabled, get <strong>the</strong> latest SpatiaLite library source and tools bundle from <strong>the</strong> download page:$ wget http://www.gaia-gis.it/spatialite/libspatialite-amalgamation-2.3.1.tar.gz$ wget http://www.gaia-gis.it/spatialite/spatialite-tools-2.3.1.tar.gz$ tar xzf libspatialite-amalgamation-2.3.1.tar.gz$ tar xzf spatialite-tools-2.3.1.tar.gzPrior to attempting to build, please read <strong>the</strong> important notes below to see if customization of <strong>the</strong> configure commandis necessary. If not, <strong>the</strong>n run <strong>the</strong> configure script, make, and install for <strong>the</strong> SpatiaLite library:$ cd libspatialite-amalgamation-2.3.1$ ./configure # May need to modified, see notes below.$ make$ sudo make install$ cd ..Finally, do <strong>the</strong> same for <strong>the</strong> SpatiaLite tools:$ cd spatialite-tools-2.3.1$ ./configure # May need to modified, see notes below.$ make$ sudo make install$ cd ..6.2. contrib packages 457
<strong>Django</strong> <strong>Documentation</strong>, Release 1.2Note: If you’ve installed GEOS and PROJ.4 from binary packages, you will have to specify <strong>the</strong>ir paths when running<strong>the</strong> configure scripts for both <strong>the</strong> library and <strong>the</strong> tools (<strong>the</strong> configure scripts look, by default, in /usr/local).For example, on Debian/Ubuntu distributions that have GEOS and PROJ.4 packages, <strong>the</strong> command would be:$ ./configure --with-proj-include=/usr/include --with-proj-lib=/usr/lib --with-geos-include=/usr/inclNote: For Mac OS X users building from source, <strong>the</strong> SpatiaLite library and tools need to have <strong>the</strong>ir targetconfigured:$ ./configure --target=macosxpysqlite2 Because SpatiaLite must be loaded as an external extension, it requires <strong>the</strong> enable_load_extensionmethod, which is only available in versions 2.5+. Thus, download pysqlite2 2.6, and untar:$ wget http://pysqlite.googlecode.com/files/pysqlite-2.6.0.tar.gz$ tar xzf pysqlite-2.6.0.tar.gz$ cd pysqlite-2.6.0Next, use a text editor (e.g., emacs or vi) to edit <strong>the</strong> setup.cfg file to look like <strong>the</strong> following:[build_ext]#define=include_dirs=/usr/local/includelibrary_dirs=/usr/local/liblibraries=sqlite3#define=SQLITE_OMIT_LOAD_EXTENSIONNote: The important thing here is to make sure you comment out <strong>the</strong> <strong>the</strong>define=SQLITE_OMIT_LOAD_EXTENSION flag and that <strong>the</strong> include_dirs and library_dirs settingsare uncommented and set to <strong>the</strong> appropriate path if <strong>the</strong> SQLite header files and libraries are not in /usr/includeand /usr/lib, respectively.After modifying setup.cfg appropriately, <strong>the</strong>n run <strong>the</strong> setup.py script to build and install:$ sudo python setup.py installPost-InstallationCreating a Spatial Database Template for PostGIS Creating a spatial database with PostGIS is different thannormal because additional SQL must be loaded to enable spatial functionality. Because of <strong>the</strong> steps in this process,it’s better to create a database template that can be reused later.First, you need to be able to execute <strong>the</strong> commands as a privileged database user. For example, you can use <strong>the</strong>following to become <strong>the</strong> postgres user:$ sudo su - postgresNote: The location and name of <strong>the</strong> PostGIS SQL files (e.g., from POSTGIS_SQL_PATH below) depends on <strong>the</strong>version of PostGIS. PostGIS versions 1.3 and below use /contrib/lwpostgis.sql;458 Chapter 6. API Reference
<strong>Django</strong> <strong>Documentation</strong>, Release 1.2whereas version 1.4 uses /contrib/postgis.sql and version 1.5 uses/contrib/postgis-1.5/postgis.sql.The example below assumes PostGIS 1.5, thus you may need to modify POSTGIS_SQL_PATH and <strong>the</strong> name of <strong>the</strong>SQL file for <strong>the</strong> specific version of PostGIS you are using.Once you’re a database super user, <strong>the</strong>n you may execute <strong>the</strong> following commands to create a PostGIS spatial databasetemplate. If running Ubuntu 8.10 or Debian 5.0 (Lenny), please refer to <strong>the</strong>ir specific documentation for modificationsto <strong>the</strong>se commands:$ POSTGIS_SQL_PATH=‘pg_config --sharedir‘/contrib/postgis-1.5# Creating <strong>the</strong> template spatial database.$ createdb -E UTF8 template_postgis$ createlang -d template_postgis plpgsql # Adding PLPGSQL language support.# Allows non-superusers <strong>the</strong> ability to create from this template$ psql -d postgres -c "UPDATE pg_database SET datistemplate=’true’ WHERE datname=’template_postgis’;"# Loading <strong>the</strong> PostGIS SQL routines$ psql -d template_postgis -f $POSTGIS_SQL_PATH/postgis.sql$ psql -d template_postgis -f $POSTGIS_SQL_PATH/spatial_ref_sys.sql# Enabling users to alter spatial tables.$ psql -d template_postgis -c "GRANT ALL ON geometry_columns TO PUBLIC;"$ psql -d template_postgis -c "GRANT ALL ON geography_columns TO PUBLIC;"$ psql -d template_postgis -c "GRANT ALL ON spatial_ref_sys TO PUBLIC;"These commands may be placed in a shell script for later use; for convenience <strong>the</strong> following scripts are available:PostGIS Version Shell Script1.3 create_template_postgis-1.3.sh1.4 create_template_postgis-1.4.sh1.5 create_template_postgis-1.5.shAfterwards, you may create a spatial database by simply specifying template_postgis as <strong>the</strong> template to use (via<strong>the</strong> -T option):$ createdb -T template_postgis Note: While <strong>the</strong> createdb command does not require database super-user privileges, it must be executed by adatabase user that has permissions to create databases. You can create such a user with <strong>the</strong> following command:$ createuser --createdb Creating a Spatial Database for SpatiaLite After <strong>the</strong> SpatiaLite library and tools have been installed, it is now possibleto create spatial database for use with Geo<strong>Django</strong>. In order to do this, download <strong>the</strong> spatial database initializationSQL from <strong>the</strong> SpatiaLite Resources page:$ wget http://www.gaia-gis.it/spatialite/init_spatialite-2.3.sql.gz$ gunzip init_spatialite-2.3.sql.gzNow, <strong>the</strong> spatialite command can be used to initialize a spatial database:$ spatialite geodjango.db < init_spatialite-2.3.sqlNote: The parameter geodjango.db is <strong>the</strong> filename of <strong>the</strong> SQLite database you want to use. Use <strong>the</strong> same in <strong>the</strong>DATABASE_NAME inside your settings.py.6.2. contrib packages 459
<strong>Django</strong> <strong>Documentation</strong>, Release 1.2Add django.contrib.gis to INSTALLED_APPS Like o<strong>the</strong>r <strong>Django</strong> contrib applications, you will only needto add django.contrib.gis to INSTALLED_APPS in your settings. This is <strong>the</strong> so that gis templates can belocated – if not done, <strong>the</strong>n features such as <strong>the</strong> geographic admin or KML sitemaps will not function properly.Add Google Projection to spatial_ref_sys tableChanged in version 1.2: Please, see <strong>the</strong> release notesNote: If running PostGIS 1.4 and above, <strong>the</strong> entry is already included in <strong>the</strong> default spatial_ref_sys table. Youcan skip this step.In order to conduct database transformations to <strong>the</strong> so-called “Google” projection (a spherical mercator projectionused by Google Maps), an entry must be added to your spatial database’s spatial_ref_sys table. Invoke <strong>the</strong><strong>Django</strong> shell from your project and execute <strong>the</strong> add_srs_entry function:$ python manage shell>>> from django.contrib.gis.utils import add_srs_entry>>> add_srs_entry(900913)Note: In <strong>Django</strong> 1.1 <strong>the</strong> name of this function is add_postgis_srs.This adds an entry for <strong>the</strong> 900913 SRID to <strong>the</strong> spatial_ref_sys (or equivalent) table, making it possible for <strong>the</strong>spatial database to transform coordinates in this projection. You only need to execute this command once per spatialdatabase.TroubleshootingIf you can’t find <strong>the</strong> solution to your problem here <strong>the</strong>n participate in <strong>the</strong> community! You can:• Join <strong>the</strong> #geodjango IRC channel on FreeNode (may be accessed on <strong>the</strong> Web via Mibbit). Please be patientand polite – while you may not get an immediate response, someone will attempt to answer your question assoon as <strong>the</strong>y see it.• Ask your question on <strong>the</strong> Geo<strong>Django</strong> mailing list.• File a ticket on <strong>the</strong> <strong>Django</strong> trac if you think <strong>the</strong>re’s a bug. Make sure to provide a complete description of <strong>the</strong>problem, versions used, and specify <strong>the</strong> component as “GIS”.Library Environment Settings By far, <strong>the</strong> most common problem when installing Geo<strong>Django</strong> is that <strong>the</strong> externalshared libraries (e.g., for GEOS and GDAL) cannot be located. 8 Typically, <strong>the</strong> cause of this problem is that <strong>the</strong>operating system isn’t aware of <strong>the</strong> directory where <strong>the</strong> libraries built from source were installed.In general, <strong>the</strong> library path may be set on a per-user basis by setting an environment variable, or by configuring <strong>the</strong>library path for <strong>the</strong> entire system.LD_LIBRARY_PATH environment variable A user may set this environment variable to customize <strong>the</strong> librarypaths <strong>the</strong>y want to use. The typical library directory for software built from source is /usr/local/lib. Thus,/usr/local/lib needs to be included in <strong>the</strong> LD_LIBRARY_PATH variable. For example, <strong>the</strong> user could place<strong>the</strong> following in <strong>the</strong>ir bash profile:export LD_LIBRARY_PATH=/usr/local/lib8 Geo<strong>Django</strong> uses <strong>the</strong> find_library routine from ctypes.util to locate shared libraries.460 Chapter 6. API Reference
<strong>Django</strong> <strong>Documentation</strong>, Release 1.2Setting System Library Path On GNU/Linux systems, <strong>the</strong>re is typically a file in /etc/ld.so.conf, which mayinclude additional paths from files in ano<strong>the</strong>r directory, such as /etc/ld.so.conf.d. As <strong>the</strong> root user, add <strong>the</strong>custom library path (like /usr/local/lib) on a new line in ld.so.conf. This is one example of how to do so:$ sudo echo /usr/local/lib >> /etc/ld.so.conf$ sudo ldconfigFor OpenSolaris users, <strong>the</strong> system library path may be modified using <strong>the</strong> crle utility. Run crle with no options tosee <strong>the</strong> current configuration and use crle -l to set with <strong>the</strong> new library path. Be very careful when modifying <strong>the</strong>system library path:# crle -l $OLD_PATH:/usr/local/libInstall binutils Geo<strong>Django</strong> uses <strong>the</strong> find_library function (from <strong>the</strong> ctypes.util Python module) todiscover libraries. The find_library routine uses a program called objdump (part of <strong>the</strong> binutils package)to verify a shared library on GNU/Linux systems. Thus, if binutils is not installed on your Linux system <strong>the</strong>nPython’s ctypes may not be able to find your library even if your library path is set correctly and geospatial librarieswere built perfectly.The binutils package may be installed on Debian and Ubuntu systems using <strong>the</strong> following command:$ sudo apt-get install binutilsSimilarly, on Red Hat and CentOS systems:$ sudo yum install binutilsPlatform Specific InstructionsMac OS X Because of <strong>the</strong> variety of packaging systems available for OS X, users have several different options forinstalling Geo<strong>Django</strong>. These options are:• KyngChaos Packages• Fink• MacPorts• Building from SourceNote: Currently, <strong>the</strong> easiest and recommended approach for installing Geo<strong>Django</strong> on OS X is to use <strong>the</strong> KyngChaospackages.This section also includes instructions for installing an upgraded version of Python from packages provided by <strong>the</strong>Python Software Foundation, however, this is not required.Python Although OS X comes with Python installed, users can use framework installers (2.5 and 2.6 are available)provided by <strong>the</strong> Python Software Foundation. An advantage to using <strong>the</strong> installer is that OS X’s Python will remain“pristine” for internal operating system use.Note: You will need to modify <strong>the</strong> PATH environment variable in your .profile file so that <strong>the</strong> new version ofPython is used when python is entered at <strong>the</strong> command-line:export PATH=/Library/Frameworks/Python.framework/Versions/Current/bin:$PATH6.2. contrib packages 461
<strong>Django</strong> <strong>Documentation</strong>, Release 1.2KyngChaos Packages William Kyngesburye provides a number of geospatial library binary packages that make itsimple to get Geo<strong>Django</strong> installed on OS X without compiling <strong>the</strong>m from source. However, <strong>the</strong> Apple Developer Toolsare still necessary for compiling <strong>the</strong> Python database adapters psycopg2 (for PostGIS) and pysqlite2 (for SpatiaLite).Note: SpatiaLite users should consult <strong>the</strong> SpatiaLite section after installing <strong>the</strong> packages for additional instructions.Download <strong>the</strong> framework packages for:• UnixImageIO• PROJ• GEOS• SQLite3 (includes <strong>the</strong> SpatiaLite library)• GDALInstall <strong>the</strong> packages in <strong>the</strong> order <strong>the</strong>y are listed above, as <strong>the</strong> GDAL and SQLite packages require <strong>the</strong> packages listedbefore <strong>the</strong>m. Afterwards, you can also install <strong>the</strong> KyngChaos binary packages for PostgreSQL and PostGIS.After installing <strong>the</strong> binary packages, you’ll want to add <strong>the</strong> following to your .profile to be able to run <strong>the</strong> packageprograms from <strong>the</strong> command-line:export PATH=/Library/Frameworks/UnixImageIO.framework/Programs:$PATHexport PATH=/Library/Frameworks/PROJ.framework/Programs:$PATHexport PATH=/Library/Frameworks/GEOS.framework/Programs:$PATHexport PATH=/Library/Frameworks/SQLite3.framework/Programs:$PATHexport PATH=/Library/Frameworks/GDAL.framework/Programs:$PATHexport PATH=/usr/local/pgsql/bin:$PATHNote: Use of <strong>the</strong>se binaries requires <strong>Django</strong> 1.0.3 and above. If you are using a previous version of <strong>Django</strong> (like1.0.2), <strong>the</strong>n you will have to add <strong>the</strong> <strong>the</strong> following in your settings:GEOS_LIBRARY_PATH=’/Library/Frameworks/GEOS.framework/GEOS’GDAL_LIBRARY_PATH=’/Library/Frameworks/GDAL.framework/GDAL’psycopg2 After you’ve installed <strong>the</strong> KyngChaos binaries and modified your PATH, as described above, psycopg2may be installed using <strong>the</strong> following command:$ sudo python easy_install psycopg2Note: To use easy_install you’ll need to install Python’s setuptools.pysqlite2instead:Follow <strong>the</strong> pysqlite2 source install instructions, however, when editing <strong>the</strong> setup.cfg use <strong>the</strong> following[build_ext]#define=include_dirs=/Library/Frameworks/SQLite3.framework/unix/includelibrary_dirs=/Library/Frameworks/SQLite3.framework/unix/liblibraries=sqlite3#define=SQLITE_OMIT_LOAD_EXTENSION462 Chapter 6. API Reference
<strong>Django</strong> <strong>Documentation</strong>, Release 1.2SpatiaLite When Creating a Spatial Database for SpatiaLite, <strong>the</strong> spatialite program is required. However,instead of attempting to compile <strong>the</strong> SpatiaLite tools from source, download <strong>the</strong> SpatiaLite Binaries for OS X, andinstall spatialite in a location available in your PATH. For example:$ curl -O http://www.gaia-gis.it/spatialite/spatialite-tools-osx-x86-2.3.1.tar.gz$ tar xzf spatialite-tools-osx-x86-2.3.1.tar.gz$ cd spatialite-tools-osx-x86-2.3.1/bin$ sudo cp spatialite /Library/Frameworks/SQLite3.framework/ProgramsFinally, for Geo<strong>Django</strong> to be able to find <strong>the</strong> KyngChaos SpatiaLite library, add <strong>the</strong> following to your settings.py:SPATIALITE_LIBRARY_PATH=’/Library/Frameworks/SQLite3.framework/SQLite3’Fink Kurt Schwehr has been gracious enough to create Geo<strong>Django</strong> packages for users of <strong>the</strong> Fink package system.The following packages are available, depending on which version of Python you want to use:• django-gis-py26• django-gis-py25• django-gis-py24MacPorts MacPorts may be used to install Geo<strong>Django</strong> prerequisites on Macintosh computers running OS X. BecauseMacPorts still builds <strong>the</strong> software from source, <strong>the</strong> Apple Developer Tools are required.Summary:$ sudo port install postgresql83-server$ sudo port install geos$ sudo port install proj$ sudo port install postgis$ sudo port install gdal$ sudo port install libgeoipNote: You will also have to modify <strong>the</strong> PATH in your .profile so that <strong>the</strong> MacPorts programs are accessible from<strong>the</strong> command-line:export PATH=/opt/local/bin:/opt/local/lib/postgresql83/binIn addition, add <strong>the</strong> FALLBACK_DYLD_LIBRARY_PATH setting so that <strong>the</strong> libraries can be found by Python:export FALLBACK_DYLD_LIBRARY_PATH=/opt/local/lib:/opt/local/lib/postgresql83Ubuntu & Debian GNU/LinuxUbuntu8.04 and lower The 8.04 (and lower) versions of Ubuntu use GEOS v2.2.3 in <strong>the</strong>ir binary packages, which is incompatiblewith Geo<strong>Django</strong>. Thus, do not use <strong>the</strong> binary packages for GEOS or PostGIS and build some prerequisitesfrom source, per <strong>the</strong> instructions in this document; however, it is okay to use <strong>the</strong> PostgreSQL binary packages.For more details, please see <strong>the</strong> Debian instructions for 4.0 (Etch) below.6.2. contrib packages 463
<strong>Django</strong> <strong>Documentation</strong>, Release 1.28.10 Use <strong>the</strong> synaptic package manager to install <strong>the</strong> following packages:$ sudo apt-get install binutils libgdal1-1.5.0 postgresql-8.3-postgis postgresql-server-dev-8.3 pythoAfterwards, you may install <strong>Django</strong> with Python’s easy_install script (<strong>the</strong> Ubuntu package python-djangouses an older version missing several important bug fixes for Geo<strong>Django</strong>):$ sudo easy_install <strong>Django</strong>That’s it! For <strong>the</strong> curious, <strong>the</strong> required binary prerequisites packages are:• binutils: for ctypes to find libraries• postgresql-8.3• postgresql-server-dev-8.3: for pg_config• postgresql-8.3-postgis: for PostGIS 1.3.3• libgeos-3.0.0, and libgeos-c1: for GEOS 3.0.0• libgdal1-1.5.0: for GDAL 1.5.0 library• proj: for PROJ 4.6.0 – but no datum shifting files, see note below• python-psycopg2• python-setuptools: for easy_installOptional packages to consider:• libgeoip1: for GeoIP support• gdal-bin: for GDAL command line programs like ogr2ogr• python-gdal for GDAL’s own Python bindings – includes interfaces for raster manipulationNote: The Ubuntu proj package does not come with <strong>the</strong> datum shifting files installed, which will cause problemswith <strong>the</strong> geographic admin because <strong>the</strong> null datum grid is not available for transforming geometries to <strong>the</strong> sphericalmercator projection. A solution is to download <strong>the</strong> datum-shifting files, create <strong>the</strong> grid file, and install it yourself:$ wget http://download.osgeo.org/proj/proj-datumgrid-1.4.tar.gz$ mkdir nad$ cd nad$ tar xzf ../proj-datumgrid-1.4.tar.gz$ nad2bin null < null.lla$ sudo cp null /usr/share/projO<strong>the</strong>rwise, <strong>the</strong> Ubuntu proj package is fine for general use as long as you do not plan on doing any databasetransformation of geometries to <strong>the</strong> Google projection (900913).Note: The PostGIS SQL files are not placed <strong>the</strong> PostgreSQL share directory in <strong>the</strong> Ubuntu packages. Use <strong>the</strong>create_template_postgis-debian.sh script instead when Creating a Spatial Database Template for PostGIS.Debian4.0 (Etch) The situation here is <strong>the</strong> same as that of Ubuntu 8.04 and lower – in o<strong>the</strong>r words, some packages must bebuilt from source to work properly with Geo<strong>Django</strong>.464 Chapter 6. API Reference
<strong>Django</strong> <strong>Documentation</strong>, Release 1.2Binary Packages The following command will install acceptable binary packages, as well as <strong>the</strong> development toolsnecessary to build <strong>the</strong> rest of <strong>the</strong> requirements:$ sudo apt-get install binutils bzip2 gcc g++ flex make postgresql-8.1 postgresql-server-dev-8.1 pythRequired package information:• binutils: for ctypes to find libraries• bzip2: for decompressing <strong>the</strong> source packages• gcc, g++, make: GNU developer tools used to compile <strong>the</strong> libraries• flex: required to build PostGIS• postgresql-8.1• postgresql-server-dev-8.1: for pg_config• python-ctypes: Python 2.4 needs to have ctypes installed separately• python-psycopg2• python-setuptools: for easy_installOptional packages:• libgeoip: for GeoIP supportSource Packages You will still have to install GEOS, PROJ.4, PostGIS, and GDAL from source. Please follow <strong>the</strong>directions carefully.5.0 (Lenny) This version is comparable to Ubuntu 8.10, so <strong>the</strong> command is very similar:$ sudo apt-get install binutils libgdal1-1.5.0 postgresql-8.3 postgresql-8.3-postgis postgresql-serveThis assumes that you are using PostgreSQL version 8.3. Else, replace 8.3 in <strong>the</strong> above command with <strong>the</strong> appropriatePostgreSQL version.Note: Please read <strong>the</strong> note in <strong>the</strong> Ubuntu 8.10 install documentation about <strong>the</strong> proj package – it also applies herebecause <strong>the</strong> package does not include <strong>the</strong> datum shifting files.Post-installation Notes If <strong>the</strong> PostgreSQL database cluster was not initiated after installing, <strong>the</strong>n it can be created(and started) with <strong>the</strong> following command:$ sudo pg_createcluster --start 8.3 mainAfterwards, <strong>the</strong> /etc/init.d/postgresql-8.3 script should be used to manage <strong>the</strong> starting and stopping ofPostgreSQL.In addition, <strong>the</strong> SQL files for PostGIS are placed in a different location on Debian 5.0 . Thus when Creating a SpatialDatabase Template for PostGIS ei<strong>the</strong>r:• Create a symbolic link to <strong>the</strong>se files:$ sudo ln -s /usr/share/postgresql-8.3-postgis/{lwpostgis,spatial_ref_sys}.sql /usr/share/postgrIf not running PostgreSQL 8.3, <strong>the</strong>n replace 8.3 in <strong>the</strong> command above with <strong>the</strong> correct version.• Or use <strong>the</strong> create_template_postgis-debian.sh to create <strong>the</strong> spatial database.6.2. contrib packages 465
<strong>Django</strong> <strong>Documentation</strong>, Release 1.2Windows XPPython First, download <strong>the</strong> Python 2.6 installer from <strong>the</strong> Python Web site. Next, execute <strong>the</strong> installer and usedefaults, e.g., keep ‘Install for all users’ checked and <strong>the</strong> installation path set as C:\Python26.Note: You may already have a version of Python installed in C:\python as ESRI products sometimes install a copy<strong>the</strong>re. You should still install a fresh version of Python 2.6.PostgreSQLFirst, select a mirror and download <strong>the</strong> latest PostgreSQL 8.3 installer from <strong>the</strong> EnterpriseDB Web site.Note: PostgreSQL 8.3 is required because PostGIS is not available yet for 8.4.After downloading, simply click on <strong>the</strong> installer, follow <strong>the</strong> on-screen directions, and keep <strong>the</strong> default options (e.g.,keep <strong>the</strong> installation path as C:\Program Files\PostgreSQL\8.3).Note: This PostgreSQL installation process will create both a new windows user to be <strong>the</strong> ‘postgres service account’and a special ‘postgres superuser’ to own <strong>the</strong> database cluster. You will be prompted to set a password for both users(make sure to write <strong>the</strong>m down!). To see basic details on <strong>the</strong> ‘service user’ account right click on ‘My Computer’ andselect ‘Manage’ or go to: Control Panel -> Administrative Tools -> Computer Management -> System Tools -> LocalUsers and Groups.If installed successfully, <strong>the</strong> PostgreSQL server will run in <strong>the</strong> background each time <strong>the</strong> system as started as a Windowsservice. When finished, <strong>the</strong> installer should launch <strong>the</strong> Application Stack Builder (ASB) – use this to installPostGIS, see instructions below for more details. A ‘PostgreSQL 8.3’ start menu group should be created that containsshortcuts for <strong>the</strong> ASB and ‘Command Prompt’, which launches a terminal window in <strong>the</strong> PostgreSQL directory.PostGIS From <strong>the</strong> Application Stack Builder (Programs -> PostgreSQL 8.3), select ‘PostgreSQL Database Server8.3 on port 5432’ from <strong>the</strong> drop down menu. Next, select ‘PostGIS 1.3.6 for PostgreSQL 8.3’ from <strong>the</strong> ‘SpatialExtensions’ tree in <strong>the</strong> list. Select only <strong>the</strong> default options during install (do not uncheck <strong>the</strong> option to create a defaultPostGIS database).Note: You will be prompted to enter your ‘postgres superuser’ password in <strong>the</strong> ‘Database Connection Information’dialog.psycopg2 The psycopg2 Python module provides <strong>the</strong> interface between Python and <strong>the</strong> PostgreSQL database.Download <strong>the</strong> Windows installer (v2.0.10) and run using <strong>the</strong> default settings. 9Geo<strong>Django</strong> Installer Download <strong>the</strong> Geo<strong>Django</strong> Installer; this was created 10 to simplify <strong>the</strong> rest of <strong>the</strong> process forinstalling Geo<strong>Django</strong> on Windows platforms. The installer automatically installs <strong>Django</strong> 1.1, GDAL 1.6.0, PROJ 4.6.1(including datum grid files), and configures <strong>the</strong> necessary environment variables.Once <strong>the</strong> installer has completed, log out and log back in so that <strong>the</strong> modifications to <strong>the</strong> system environment variablestake effect, and you should be good to go.9 The psycopg2 Windows installers are packaged and maintained by Jason Erickson.10 The source code for <strong>the</strong> installer is available in <strong>the</strong> nsis_installer Geo<strong>Django</strong> mercurial repository.466 Chapter 6. API Reference
<strong>Django</strong> <strong>Documentation</strong>, Release 1.2Note: The installer modifies <strong>the</strong> system Path environment variable to include C:\ProgramFiles\PostgreSQL\8.3\bin and C:\Program Files\Geo<strong>Django</strong>\bin. This is required so that Pythonmay find <strong>the</strong> GEOS DLL provided by PostGIS and <strong>the</strong> GDAL DLL provided by <strong>the</strong> installer. The installer also sets<strong>the</strong> GDAL_DATA and PROJ_LIB environment variables.Geo<strong>Django</strong> Model APIThis document explores <strong>the</strong> details of <strong>the</strong> Geo<strong>Django</strong> Model API. Throughout this section, we’ll be using <strong>the</strong> followinggeographic model of a ZIP code as our example:from django.contrib.gis.db import modelsclass Zipcode(models.Model):code = models.CharField(max_length=5)poly = models.PolygonField()objects = models.GeoManager()Geometry Field TypesEach of <strong>the</strong> following geometry field types correspond with <strong>the</strong> OpenGIS Simple Features specification 11 .GeometryFieldclass GeometryFieldPointFieldclass PointFieldLineStringFieldclass LineStringFieldPolygonFieldclass PolygonFieldMultiPointFieldclass MultiPointFieldMultiLineStringFieldclass MultiLineStringFieldMultiPolygonFieldclass MultiPolygonFieldGeometryCollectionFieldclass GeometryCollectionField11 OpenGIS Consortium, Inc., Simple Feature Specification For SQL, Document 99-049 (May 5, 1999).6.2. contrib packages 467
<strong>Django</strong> <strong>Documentation</strong>, Release 1.2Geometry Field OptionsIn addition to <strong>the</strong> regular Field options available for <strong>Django</strong> model fields, geometry fields have <strong>the</strong> following additionaloptions. All are optional.sridGeometryField.sridSets <strong>the</strong> SRID 12 (Spatial Reference System Identity) of <strong>the</strong> geometry field to <strong>the</strong> given value. Defaults to 4326 (alsoknown as WGS84, units are in degrees of longitude and latitude).Selecting an SRID Choosing an appropriate SRID for your model is an important decision that <strong>the</strong> developer shouldconsider carefully. The SRID is an integer specifier that corresponds to <strong>the</strong> projection system that will be used tointerpret <strong>the</strong> data in <strong>the</strong> spatial database. 13 Projection systems give <strong>the</strong> context to <strong>the</strong> coordinates that specify alocation. Although <strong>the</strong> details of geodesy are beyond <strong>the</strong> scope of this documentation, <strong>the</strong> general problem is that <strong>the</strong>earth is spherical and representations of <strong>the</strong> earth (e.g., paper maps, Web maps) are not.Most people are familiar with using latitude and longitude to reference a location on <strong>the</strong> earth’s surface. However,latitude and longitude are angles, not distances. 14 In o<strong>the</strong>r words, while <strong>the</strong> shortest path between two points on a flatsurface is a straight line, <strong>the</strong> shortest path between two points on a curved surface (such as <strong>the</strong> earth) is an arc of agreat circle. 15 Thus, additional computation is required to obtain distances in planar units (e.g., kilometers and miles).Using a geographic coordinate system may introduce complications for <strong>the</strong> developer later on. For example, PostGISversions 1.4 and below do not have <strong>the</strong> capability to perform distance calculations between non-point geometries usinggeographic coordinate systems, e.g., constructing a query to find all points within 5 miles of a county boundary storedas WGS84. 16Portions of <strong>the</strong> earth’s surface may projected onto a two-dimensional, or Cartesian, plane. Projected coordinate systemsare especially convenient for region-specific applications, e.g., if you know that your database will only covergeometries in North Kansas, <strong>the</strong>n you may consider using projection system specific to that region. Moreover, projectedcoordinate systems are defined in Cartesian units (such as meters or feet), easing distance calculations.Note: If you wish to peform arbitrary distance queries using non-point geometries in WGS84, consider upgradingto PostGIS 1.5. For better performance, enable <strong>the</strong> GeometryField.geography keyword so that geographydatabase type is used instead.Additional Resources:• spatialreference.org: A <strong>Django</strong>-powered database of spatial reference systems.• The State Plane Coordinate System: A Web site covering <strong>the</strong> various projection systems used in <strong>the</strong> UnitedStates. Much of <strong>the</strong> U.S. spatial data encountered will be in one of <strong>the</strong>se coordinate systems ra<strong>the</strong>r than in ageographic coordinate system such as WGS84.spatial_indexGeometryField.spatial_index12 See id. at Ch. 2.3.8, p. 39 (Geometry Values and Spatial Reference Systems).13 Typically, SRID integer corresponds to an EPSG (European Petroleum Survey Group) identifier. However, it may also be associated withcustom projections defined in spatial database’s spatial reference systems table.14 Harvard Graduate School of Design, An Overview of Geodesy and Geographic Referencing Systems. This is an excellent resource for anoverview of principles relating to geographic and Cartesian coordinate systems.15 Terry A. Slocum, Robert B. McMaster, Fritz C. Kessler, & Hugh H. Howard, Thematic Cartography and Geographic Visualization (PrenticeHall, 2nd edition), at Ch. 7.1.3.16 This limitation does not apply to PostGIS 1.5. It should be noted that even in previous versions of PostGIS, this isn’t impossible usingGeo<strong>Django</strong>; you could for example, take a known point in a projected coordinate system, buffer it to <strong>the</strong> appropriate radius, and <strong>the</strong>n perform anintersection operation with <strong>the</strong> buffer transformed to <strong>the</strong> geographic coordinate system.468 Chapter 6. API Reference
<strong>Django</strong> <strong>Documentation</strong>, Release 1.2Defaults to True. Creates a spatial index for <strong>the</strong> given geometry field.Note: This is different from <strong>the</strong> db_index field option because spatial indexes are created in a different mannerthan regular database indexes. Specifically, spatial indexes are typically created using a variant of <strong>the</strong> R-Tree, whileregular database indexes typically use B-Trees.dimNew in version 1.2: Please, see <strong>the</strong> release notesGeometryField.dimThis option may be used for customizing <strong>the</strong> coordinate dimension of <strong>the</strong> geometry field. By default, it is set to 2, forrepresenting two-dimensional geometries. For spatial backends that support it, it may be set to 3 for three-dimensonalsupport.Note: At this time 3D support requires that GEOS 3.1 be installed, and is limited only to <strong>the</strong> PostGIS spatial backend.geographyNew in version 1.2: Please, see <strong>the</strong> release notesGeometryField.geographyIf set to True, this option will create a database column of type geography, ra<strong>the</strong>r than geometry. Please refer to <strong>the</strong>geography type section below for more details.Note: Geography support is limited only to PostGIS 1.5+, and will force <strong>the</strong> SRID to be 4326.Geography Type In PostGIS 1.5, <strong>the</strong> geography type was introduced – it provides provides native support for spatialfeatures represented with geographic coordinates (e.g., WGS84 longitude/latitude). 17 Unlike <strong>the</strong> plane used by ageometry type, <strong>the</strong> geography type uses a spherical representation of its data. Distance and measurement operationsperformed on a geography column automatically employ great circle arc calculations and return linear units. In o<strong>the</strong>rwords, when ST_Distance is called on two geographies, a value in meters is returned (as opposed to degrees ifcalled on a geometry column in WGS84).Because geography calculations involve more ma<strong>the</strong>matics, only a subset of <strong>the</strong> PostGIS spatial lookups are availablefor <strong>the</strong> geography type. Practically, this means that in addition to <strong>the</strong> distance lookups only <strong>the</strong> following additionalspatial lookups are available for geography columns:• bboverlaps• coveredby• covers• intersectsFor more information, <strong>the</strong> PostGIS documentation contains a helpful section on determining when to use geographydata type over geometry data type.GeoManagerclass GeoManager17 Please refer to <strong>the</strong> PostGIS Geography Type documentation for more details.6.2. contrib packages 469
<strong>Django</strong> <strong>Documentation</strong>, Release 1.2In order to conduct geographic queries, each geographic model requires a GeoManager model manager. This managerallows for <strong>the</strong> proper SQL construction for geographic queries; thus, without it, all geographic filters will fail. Itshould also be noted that GeoManager is required even if <strong>the</strong> model does not have a geographic field itself, e.g., in<strong>the</strong> case of a ForeignKey relation to a model with a geographic field. For example, if we had an Address modelwith a ForeignKey to our Zipcode model:from django.contrib.gis.db import modelsfrom django.contrib.localflavor.us.models import USStateFieldclass Address(models.Model):num = models.IntegerField()street = models.CharField(max_length=100)city = models.CharField(max_length=100)state = USStateField()zipcode = models.ForeignKey(Zipcode)objects = models.GeoManager()The geographic manager is needed to do spatial queries on related Zipcode objects, for example:qs = Address.objects.filter(zipcode__poly__contains=’POINT(-104.590948 38.319914)’)Geo<strong>Django</strong> Database APISpatial BackendsNew in version 1.2: Please, see <strong>the</strong> release notes In <strong>Django</strong> 1.2, support for multiple databases was introduced.In order to support multiple databases, Geo<strong>Django</strong> has segregated its functionality into full-fledged spatial databasebackends:• django.contrib.gis.db.backends.postgis• django.contrib.gis.db.backends.mysql• django.contrib.gis.db.backends.oracle• django.contrib.gis.db.backends.spatialiteDatabase Settings Backwards-Compatibility In <strong>Django</strong> 1.2, <strong>the</strong> way to specify databases in your settings waschanged. The old database settings format (e.g., <strong>the</strong> DATABASE_* settings) is backwards compatible with Geo<strong>Django</strong>,and will automatically use <strong>the</strong> appropriate spatial backend as long as django.contrib.gis is in yourINSTALLED_APPS. For example, if you have <strong>the</strong> following in your settings:DATABASE_ENGINE=’postgresql_psycopg2’...INSTALLED_APPS = (...’django.contrib.gis’,...)Then, django.contrib.gis.db.backends.postgis is automatically used as your spatial backend.MySQL Spatial Limitations MySQL’s spatial extensions only support bounding box operations (what MySQLcalls minimum bounding rectangles, or MBR). Specifically, MySQL does not conform to <strong>the</strong> OGC standard:470 Chapter 6. API Reference
<strong>Django</strong> <strong>Documentation</strong>, Release 1.2Currently, MySQL does not implement <strong>the</strong>se functions [Contains, Crosses, Disjoint,Intersects, Overlaps, Touches, Within] according to <strong>the</strong> specification. Those that are implementedreturn <strong>the</strong> same result as <strong>the</strong> corresponding MBR-based functions.In o<strong>the</strong>r words, while spatial lookups such as contains are available in Geo<strong>Django</strong> when using MySQL, <strong>the</strong> resultsreturned are really equivalent to what would be returned when using bbcontains on a different spatial backend.Warning: True spatial indexes (R-trees) are only supported with MyISAM tables on MySQL. a In o<strong>the</strong>r words,when using MySQL spatial extensions you have to choose between fast spatial lookups and <strong>the</strong> integrity of yourdata – MyISAM tables do not support transactions or foreign key constraints.a See Creating Spatial Indexes in <strong>the</strong> MySQL 5.1 Reference Manual:For MyISAM tables, SPATIAL INDEX creates an R-tree index. For storage engines that support nonspatial indexing of spatialcolumns, <strong>the</strong> engine creates a B-tree index. A B-tree index on spatial values will be useful for exact-value lookups, but not forrange scans.Creating and Saving Geographic ModelsHere is an example of how to create a geometry object (assuming <strong>the</strong> Zipcode model):>>> from zipcode.models import Zipcode>>> z = Zipcode(code=77096, poly=’POLYGON(( 10 10, 10 20, 20 20, 20 15, 10 10))’)>>> z.save()GEOSGeometry objects may also be used to save geometric models:>>> from django.contrib.gis.geos import GEOSGeometry>>> poly = GEOSGeometry(’POLYGON(( 10 10, 10 20, 20 20, 20 15, 10 10))’)>>> z = Zipcode(code=77096, poly=poly)>>> z.save()Moreover, if <strong>the</strong> GEOSGeometry is in a different coordinate system (has a different SRID value) than that of <strong>the</strong>field, <strong>the</strong>n it will be implicitly transformed into <strong>the</strong> SRID of <strong>the</strong> model’s field, using <strong>the</strong> spatial database’s transformprocedure:>>> poly_3084 = GEOSGeometry(’POLYGON(( 10 10, 10 20, 20 20, 20 15, 10 10))’, srid=3084) # SRID 3084>>> z = Zipcode(code=78212, poly=poly_3084)>>> z.save()>>> from django.db import connection>>> print connection.queries[-1][’sql’] # printing <strong>the</strong> last SQL statement executed (requires DEBUG=TrINSERT INTO "geoapp_zipcode" ("code", "poly") VALUES (78212, ST_Transform(ST_GeomFromWKB(’\\001 ... ’Thus, geometry parameters may be passed in using <strong>the</strong> GEOSGeometry object, WKT (Well Known Text 18 ), HEX-EWKB (PostGIS specific – a WKB geometry in hexadecimal 19 ), and GeoJSON 20 (requires GDAL). Essentially, if<strong>the</strong> input is not a GEOSGeometry object, <strong>the</strong> geometry field will attempt to create a GEOSGeometry instance from<strong>the</strong> input.For more information creating GEOSGeometry objects, refer to <strong>the</strong> GEOS tutorial.18 See Open Geospatial Consortium, Inc., OpenGIS Simple Feature Specification For SQL, Document 99-049 (May 5, 1999), at Ch. 3.2.5, p.3-11 (SQL Textual Representation of Geometry).19 See PostGIS EWKB, EWKT and Canonical Forms, PostGIS documentation at Ch. 4.1.2.20 See Howard Butler, Martin Daly, Allan Doyle, Tim Schaub, & Christopher Schmidt, The GeoJSON Format Specification, Revision 1.0 (June16, 2008).6.2. contrib packages 471
<strong>Django</strong> <strong>Documentation</strong>, Release 1.2Spatial LookupsGeo<strong>Django</strong>’s lookup types may be used with any manager method like filter(), exclude(), etc. However, <strong>the</strong>lookup types unique to Geo<strong>Django</strong> are only available on geometry fields. Filters on ‘normal’ fields (e.g. CharField)may be chained with those on geographic fields. Thus, geographic queries take <strong>the</strong> following general form (assuming<strong>the</strong> Zipcode model used in <strong>the</strong> Geo<strong>Django</strong> Model API):>>> qs = Zipcode.objects.filter(__=)>>> qs = Zipcode.objects.exclude(...)For example:>>> qs = Zipcode.objects.filter(poly__contains=pnt)In this case, poly is <strong>the</strong> geographic field, contains is <strong>the</strong> spatial lookup type, and pnt is <strong>the</strong> parameter (whichmay be a GEOSGeometry object or a string of GeoJSON , WKT, or HEXEWKB).A complete reference can be found in <strong>the</strong> spatial lookup reference.Note: Geo<strong>Django</strong> constructs spatial SQL with <strong>the</strong> GeoQuerySet, a subclass of QuerySet. The GeoManagerinstance attached to your model is what enables use of GeoQuerySet.Distance QueriesIntroduction Distance calculations with spatial data is tricky because, unfortunately, <strong>the</strong> Earth is not flat. Some distancequeries with fields in a geographic coordinate system may have to be expressed differently because of limitationsin PostGIS. Please see <strong>the</strong> Selecting an SRID section in <strong>the</strong> Geo<strong>Django</strong> Model API documentation for more details.Distance Lookups Availability: PostGIS, Oracle, SpatiaLiteThe following distance lookups are available:• distance_lt• distance_lte• distance_gt• distance_gte• dwithinNote: For measuring, ra<strong>the</strong>r than querying on distances, use <strong>the</strong> GeoQuerySet.distance() method.Distance lookups take a tuple parameter comprising:1. A geometry to base calculations from; and2. A number or Distance object containing <strong>the</strong> distance.If a Distance object is used, it may be expressed in any units (<strong>the</strong> SQL generated will use units converted to thoseof <strong>the</strong> field); o<strong>the</strong>rwise, numeric parameters are assumed to be in <strong>the</strong> units of <strong>the</strong> field.Note: For users of PostGIS 1.4 and below, <strong>the</strong> routine ST_Distance_Sphere is used by default for calculatingdistances on geographic coordinate systems (e.g., WGS84) – which may only be called with point geometries 21 .21 See PostGIS 1.4 documentation on ST_distance_sphere.472 Chapter 6. API Reference
<strong>Django</strong> <strong>Documentation</strong>, Release 1.2Thus, geographic distance lookups on traditional PostGIS geometry columns are only allowed on PointFieldmodel fields using a point for <strong>the</strong> geometry parameter.Note: In PostGIS 1.5, ST_Distance_Sphere does not limit <strong>the</strong> geometry types geographic distance queries areperformed with. 22 However, <strong>the</strong>se queries may take a long time, as great-circle distances must be calculated on <strong>the</strong>fly for every row in <strong>the</strong> query. This is because <strong>the</strong> spatial index on traditional geometry fields cannot be used.For much better performance on WGS84 distance queries, consider using geography columns in your database insteadbecause <strong>the</strong>y are able to use <strong>the</strong>ir spatial index in distance queries. You can tell Geo<strong>Django</strong> to use a geography columnby setting geography=True in your field definition.For example, let’s say we have a SouthTexasCity model (from <strong>the</strong> Geo<strong>Django</strong> distance tests ) on a projectedcoordinate system valid for cities in sou<strong>the</strong>rn Texas:from django.contrib.gis.db import modelsclass SouthTexasCity(models.Model):name = models.CharField(max_length=30)# A projected coordinate system (only valid for South Texas!)# is used, units are in meters.point = models.PointField(srid=32140)objects = models.GeoManager()Then distance queries may be performed as follows:>>> from django.contrib.gis.geos import *>>> from django.contrib.gis.measure import D # ‘‘D‘‘ is a shortcut for ‘‘Distance‘‘>>> from geoapp import SouthTexasCity# Distances will be calculated from this point, which does not have to be projected.>>> pnt = fromstr(’POINT(-96.876369 29.905320)’, srid=4326)# If numeric parameter, units of field (meters in this case) are assumed.>>> qs = SouthTexasCity.objects.filter(point__distance_lte=(pnt, 7000))# Find all Cities within 7 km, > 20 miles away, and > 100 chains away (an obscure unit)>>> qs = SouthTexasCity.objects.filter(point__distance_lte=(pnt, D(km=7)))>>> qs = SouthTexasCity.objects.filter(point__distance_gte=(pnt, D(mi=20)))>>> qs = SouthTexasCity.objects.filter(point__distance_gte=(pnt, D(chain=100)))Compatibility TablesSpatial Lookupsdatabase backend.The following table provides a summary of what spatial lookups are available for each spatialLookup Type PostGIS Oracle MySQL 23 SpatiaLitebbcontains X X Xbboverlaps X X Xcontained X X Xcontains X X X Xcontains_properly Xcoveredby X Xcovers X Xcrosses X XContinued on next page22 See PostGIS 1.5 documentation on ST_distance_sphere.23 Refer MySQL Spatial Limitations section for more details.6.2. contrib packages 473
<strong>Django</strong> <strong>Documentation</strong>, Release 1.2Table 6.1 – continued from previous pagedisjoint X X X Xdistance_gt X X Xdistance_gte X X Xdistance_lt X X Xdistance_lte X X Xdwithin X Xequals X X X Xexact X X X Xintersects X X X Xoverlaps X X X Xrelate X X Xsame_as X X X Xtouches X X X Xwithin X X X XleftXrightXoverlaps_left Xoverlaps_right Xoverlaps_above Xoverlaps_below Xstrictly_above Xstrictly_below XGeoQuerySet Methods The following table provides a summary of what GeoQuerySet methods are availableon each spatial backend. Please note that MySQL does not support any of <strong>the</strong>se methods, and is thus excluded from<strong>the</strong> table.Method PostGIS Oracle SpatiaLiteGeoQuerySet.area() X X XGeoQuerySet.centroid() X X XGeoQuerySet.collect() XGeoQuerySet.difference() X X XGeoQuerySet.distance() X X XGeoQuerySet.envelope() X XGeoQuerySet.extent() X XGeoQuerySet.extent3d() XGeoQuerySet.force_rhr() XGeoQuerySet.geohash() XGeoQuerySet.geojson() XGeoQuerySet.gml() X XGeoQuerySet.intersection() X X XGeoQuerySet.kml()XGeoQuerySet.length() X X XGeoQuerySet.make_line() XGeoQuerySet.mem_size() XGeoQuerySet.num_geom() X X XGeoQuerySet.num_points() X X XGeoQuerySet.perimeter() X XGeoQuerySet.point_on_surface() X X XGeoQuerySet.reverse_geom() X XGeoQuerySet.scale() X XContinued on next page474 Chapter 6. API Reference
<strong>Django</strong> <strong>Documentation</strong>, Release 1.2Table 6.2 – continued from previous pageGeoQuerySet.snap_to_grid() XGeoQuerySet.svg() X XGeoQuerySet.sym_difference() X X XGeoQuerySet.transform() X X XGeoQuerySet.translate() X XGeoQuerySet.union() X X XGeoQuerySet.unionagg() X X XGeoQuerySet API Referenceclass GeoQuerySet([model=None])Spatial LookupsJust like when using <strong>the</strong> <strong>the</strong> QuerySet API, interaction with GeoQuerySet by chaining filters. Instead of <strong>the</strong> regular<strong>Django</strong> Field lookups, <strong>the</strong> spatial lookups in this section are available for GeometryField.For an introduction, see <strong>the</strong> spatial lookups introduction. For an overview of what lookups are compatible with aparticular spatial backend, refer to <strong>the</strong> spatial lookup compatibility table.bbcontains Availability: PostGIS, MySQL, SpatiaLiteTests if <strong>the</strong> geometry field’s bounding box completely contains <strong>the</strong> lookup geometry’s bounding box.Example:Zipcode.objects.filter(poly__bbcontains=geom)BackendPostGISMySQLSpatiaLiteSQL Equivalentpoly ~ geomMBRContains(poly, geom)MbrContains(poly, geom)bboverlaps Availability: PostGIS, MySQL, SpatiaLiteTests if <strong>the</strong> geometry field’s bounding box overlaps <strong>the</strong> lookup geometry’s bounding box.Example:Zipcode.objects.filter(poly__bboverlaps=geom)BackendPostGISMySQLSpatiaLiteSQL Equivalentpoly && geomMBROverlaps(poly, geom)MbrOverlaps(poly, geom)contained Availability: PostGIS, MySQL, SpatiaLiteTests if <strong>the</strong> geometry field’s bounding box is completely contained by <strong>the</strong> lookup geometry’s bounding box.Example:Zipcode.objects.filter(poly__contained=geom)6.2. contrib packages 475
<strong>Django</strong> <strong>Documentation</strong>, Release 1.2BackendPostGISMySQLSpatiaLiteSQL Equivalentpoly @ geomMBRWithin(poly, geom)MbrWithin(poly, geom)contains Availability: PostGIS, Oracle, MySQL, SpatiaLiteTests if <strong>the</strong> geometry field spatially contains <strong>the</strong> lookup geometry.Example:Zipcode.objects.filter(poly__contains=geom)BackendPostGISOracleMySQLSpatiaLiteSQL EquivalentST_Contains(poly, geom)SDO_CONTAINS(poly, geom)MBRContains(poly, geom)Contains(poly, geom)contains_properly New in version 1.2: Please, see <strong>the</strong> release notes Availability: PostGISReturns true if <strong>the</strong> lookup geometry intersects <strong>the</strong> interior of <strong>the</strong> geometry field, but not <strong>the</strong> boundary (or exterior). 24Note: Requires PostGIS 1.4 and above.Example:Zipcode.objects.filter(poly__contains_properly=geom)BackendPostGISSQL EquivalentST_ContainsProperly(poly, geom)coveredby Availability: PostGIS, OracleTests if no point in <strong>the</strong> geometry field is outside <strong>the</strong> lookup geometry. 25Example:Zipcode.objects.filter(poly__coveredby=geom)BackendPostGISOracleSQL EquivalentST_CoveredBy(poly, geom)SDO_COVEREDBY(poly, geom)covers Availability: PostGIS, OracleTests if no point in <strong>the</strong> lookup geometry is outside <strong>the</strong> geometry field. 3Example:Zipcode.objects.filter(poly__covers=geom)BackendPostGISOracleSQL EquivalentST_Covers(poly, geom)SDO_COVERS(poly, geom)24 Refer to <strong>the</strong> PostGIS ST_ContainsProperly documentation for more details.25 For an explanation of this routine, read Quirks of <strong>the</strong> “Contains” Spatial Predicate by Martin Davis (a PostGIS developer).476 Chapter 6. API Reference
<strong>Django</strong> <strong>Documentation</strong>, Release 1.2crosses Availability: PostGIS, SpatiaLiteTests if <strong>the</strong> geometry field spatially crosses <strong>the</strong> lookup geometry.Example:Zipcode.objects.filter(poly__crosses=geom)BackendPostGISSpatiaLiteSQL EquivalentST_Crosses(poly, geom)Crosses(poly, geom)disjoint Availability: PostGIS, Oracle, MySQL, SpatiaLiteTests if <strong>the</strong> geometry field is spatially disjoint from <strong>the</strong> lookup geometry.Example:Zipcode.objects.filter(poly__disjoint=geom)Backend SQL EquivalentPostGIS ST_Disjoint(poly, geom)Oracle SDO_GEOM.RELATE(poly, ’DISJOINT’, geom, 0.05)MySQL MBRDisjoint(poly, geom)SpatiaLite Disjoint(poly, geom)equalsAvailability: PostGIS, Oracle, MySQL, SpatiaLiteexact, same_asAvailability: PostGIS, Oracle, MySQL, SpatiaLiteintersects Availability: PostGIS, Oracle, MySQL, SpatiaLiteTests if <strong>the</strong> geometry field spatially intersects <strong>the</strong> lookup geometry.Example:Zipcode.objects.filter(poly__intersects=geom)BackendPostGISOracleMySQLSpatiaLiteSQL EquivalentST_Intersects(poly, geom)SDO_OVERLAPBDYINTERSECT(poly, geom)MBRIntersects(poly, geom)Intersects(poly, geom)overlapsAvailability: PostGIS, Oracle, MySQL, SpatiaLiterelateAvailability: PostGIS, Oracle, SpatiaLiteTests if <strong>the</strong> geometry field is spatially related to <strong>the</strong> <strong>the</strong> lookup geometry by <strong>the</strong> values given in <strong>the</strong> given pattern. Thislookup requires a tuple parameter, (geom, pattern); <strong>the</strong> form of pattern will depend on <strong>the</strong> spatial backend:6.2. contrib packages 477
<strong>Django</strong> <strong>Documentation</strong>, Release 1.2PostGIS & SpatiaLite On <strong>the</strong>se spatial backends <strong>the</strong> intersection pattern is a string comprising nine characters,which define intersections between <strong>the</strong> interior, boundary, and exterior of <strong>the</strong> geometry field and <strong>the</strong> lookup geometry.The intersection pattern matrix may only use <strong>the</strong> following characters: 1, 2, T, F, or *. This lookup type allows usersto “fine tune” a specific geometric relationship consistent with <strong>the</strong> DE-9IM model. 26Example:# A tuple lookup parameter is used to specify <strong>the</strong> geometry and# <strong>the</strong> intersection pattern (<strong>the</strong> pattern here is for ’contains’).Zipcode.objects.filter(poly__relate(geom, ’T*T***FF*’))PostGIS SQL equivalent:SELECT ... WHERE ST_Relate(poly, geom, ’T*T***FF*’)SpatiaLite SQL equivalent:SELECT ... WHERE Relate(poly, geom, ’T*T***FF*’)Oracle Here <strong>the</strong> relation pattern is compreised at least one of <strong>the</strong> nine relation strings: TOUCH,OVERLAPBDYDISJOINT, OVERLAPBDYINTERSECT, EQUAL, INSIDE, COVEREDBY, CONTAINS, COVERS,ON, and ANYINTERACT. Multiple strings may be combined with <strong>the</strong> logical Boolean operator OR, for example,’inside+touch’. 27 The relation strings are case-insensitive.Example:Zipcode.objects.filter(poly__relate(geom, ’anyinteract’))Oracle SQL equivalent:SELECT ... WHERE SDO_RELATE(poly, geom, ’anyinteract’)touches Availability: PostGIS, Oracle, MySQL, SpatiaLiteTests if <strong>the</strong> geometry field spatially touches <strong>the</strong> lookup geometry.Example:Zipcode.objects.filter(poly__touches=geom)BackendPostGISMySQLOracleSpatiaLiteSQL EquivalentST_Touches(poly, geom)MBRTouches(poly, geom)SDO_TOUCH(poly, geom)Touches(poly, geom)withinAvailability: PostGIS, Oracle, MySQL, SpatiaLiteTests if <strong>the</strong> geometry field is spatially within <strong>the</strong> lookup geometry.Example:Zipcode.objects.filter(poly__within=geom)26 See OpenGIS Simple Feature Specification For SQL, at Ch. 2.1.13.2, p. 2-13 (The Dimensionally Extended Nine-Intersection Model).27 See SDO_RELATE documentation, from Ch. 11 of <strong>the</strong> Oracle Spatial User’s Guide and Manual.478 Chapter 6. API Reference
<strong>Django</strong> <strong>Documentation</strong>, Release 1.2BackendPostGISMySQLOracleSpatiaLiteSQL EquivalentST_Within(poly, geom)MBRWithin(poly, geom)SDO_INSIDE(poly, geom)Within(poly, geom)left Availability: PostGISTests if <strong>the</strong> geometry field’s bounding box is strictly to <strong>the</strong> left of <strong>the</strong> lookup geometry’s bounding box.Example:Zipcode.objects.filter(poly__left=geom)PostGIS equivalent:SELECT ... WHERE poly > geomoverlaps_left Availability: PostGISTests if <strong>the</strong> geometry field’s bounding box overlaps or is to <strong>the</strong> left of <strong>the</strong> lookup geometry’s bounding box.Example:Zipcode.objects.filter(poly__overlaps_left=geom)PostGIS equivalent:SELECT ... WHERE poly &< geomoverlaps_right Availability: PostGISTests if <strong>the</strong> geometry field’s bounding box overlaps or is to <strong>the</strong> right of <strong>the</strong> lookup geometry’s bounding box.Example:Zipcode.objects.filter(poly__overlaps_right=geom)PostGIS equivalent:SELECT ... WHERE poly &> geom6.2. contrib packages 479
<strong>Django</strong> <strong>Documentation</strong>, Release 1.2overlaps_above Availability: PostGISTests if <strong>the</strong> geometry field’s bounding box overlaps or is above <strong>the</strong> lookup geometry’s bounding box.Example:Zipcode.objects.filter(poly__overlaps_above=geom)PostGIS equivalent:SELECT ... WHERE poly |&> geomoverlaps_below Availability: PostGISTests if <strong>the</strong> geometry field’s bounding box overlaps or is below <strong>the</strong> lookup geometry’s bounding box.Example:Zipcode.objects.filter(poly__overlaps_below=geom)PostGIS equivalent:SELECT ... WHERE poly &> geomstrictly_below Availability: PostGISTests if <strong>the</strong> geometry field’s bounding box is strictly above <strong>the</strong> lookup geometry’s bounding box.Example:Zipcode.objects.filter(poly__strictly_above=geom)PostGIS equivalent:SELECT ... WHERE poly |>> geomDistance LookupsAvailability: PostGIS, Oracle, SpatiaLiteFor an overview on performing distance queries, please refer to <strong>the</strong> distance queries introduction.Distance lookups take <strong>the</strong> following form:__=(, [, ’spheroid’])480 Chapter 6. API Reference
<strong>Django</strong> <strong>Documentation</strong>, Release 1.2The value passed into a distance lookup is a tuple; <strong>the</strong> first two values are mandatory, and are <strong>the</strong> geometry to calculatedistances to, and a distance value (ei<strong>the</strong>r a number in units of <strong>the</strong> field or a Distance object). On everydistance lookup but dwithin, an optional third element, ’spheroid’, may be included to tell Geo<strong>Django</strong>to use <strong>the</strong> more accurate spheroid distance calculation functions on fields with a geodetic coordinate system (e.g.,ST_Distance_Spheroid would be used instead of ST_Distance_Sphere).distance_gt Returns models where <strong>the</strong> distance to <strong>the</strong> geometry field from <strong>the</strong> lookup geometry is greater than <strong>the</strong>given distance value.Example:Zipcode.objects.filter(poly__distance_gt=(geom, D(m=5)))Backend SQL EquivalentPostGIS ST_Distance(poly, geom) > 5Oracle SDO_GEOM.SDO_DISTANCE(poly, geom, 0.05) > 5SpatiaLite Distance(poly, geom) > 5distance_gte Returns models where <strong>the</strong> distance to <strong>the</strong> geometry field from <strong>the</strong> lookup geometry is greater than orequal to <strong>the</strong> given distance value.Example:Zipcode.objects.filter(poly__distance_gte=(geom, D(m=5)))Backend SQL EquivalentPostGIS ST_Distance(poly, geom) >= 5Oracle SDO_GEOM.SDO_DISTANCE(poly, geom, 0.05) >= 5SpatiaLite Distance(poly, geom) >= 5distance_lt Returns models where <strong>the</strong> distance to <strong>the</strong> geometry field from <strong>the</strong> lookup geometry is less than <strong>the</strong> givendistance value.Example:Zipcode.objects.filter(poly__distance_lt=(geom, D(m=5)))Backend SQL EquivalentPostGIS ST_Distance(poly, geom) < 5Oracle SDO_GEOM.SDO_DISTANCE(poly, geom, 0.05) < 5SpatiaLite Distance(poly, geom) < 5distance_lte Returns models where <strong>the</strong> distance to <strong>the</strong> geometry field from <strong>the</strong> lookup geometry is less than or equalto <strong>the</strong> given distance value.Example:Zipcode.objects.filter(poly__distance_lte=(geom, D(m=5)))Backend SQL EquivalentPostGIS ST_Distance(poly, geom)
<strong>Django</strong> <strong>Documentation</strong>, Release 1.2dwithin Returns models where <strong>the</strong> distance to <strong>the</strong> geometry field from <strong>the</strong> lookup geometry are within <strong>the</strong> givendistance from one ano<strong>the</strong>r.Example:Zipcode.objects.filter(poly__dwithin=(geom, D(m=5)))Backend SQL EquivalentPostGIS ST_DWithin(poly, geom, 5)Oracle SDO_WITHIN_DISTANCE(poly, geom, 5)Note: This lookup is not available on SpatiaLite.GeoQuerySet MethodsGeoQuerySet methods specify that a spatial operation be performed on each patial operation on each geographicfield in <strong>the</strong> queryset and store its output in a new attribute on <strong>the</strong> model (which is generally <strong>the</strong> name of <strong>the</strong>GeoQuerySet method).There are also aggregate GeoQuerySet methods which return a single value instead of a queryset. This section willdescribe <strong>the</strong> API and availability of every GeoQuerySet method available in Geo<strong>Django</strong>.Note: What methods are available depend on your spatial backend. See <strong>the</strong> compatibility table for more details.With a few exceptions, <strong>the</strong> following keyword arguments may be used with all GeoQuerySet methods:Keyword DescriptionArgumentfield_name By default, GeoQuerySet methods use <strong>the</strong> first geographic field encountered in <strong>the</strong> model. Thiskeyword should be used to specify ano<strong>the</strong>r geographic field (e.g., field_name=’point2’)when <strong>the</strong>re are multiple geographic fields in a model.On PostGIS, <strong>the</strong> field_name keyword may also be used on geometry fields in models that arerelated via a ForeignKey relation (e.g., field_name=’related__point’).model_att By default, GeoQuerySet methods typically attach <strong>the</strong>ir output in an attribute with <strong>the</strong> samename as <strong>the</strong> GeoQuerySet method. Setting this keyword with <strong>the</strong> desired attribute name willoverride this default behavior. For example, qs =Zipcode.objects.centroid(model_att=’c’) will attach <strong>the</strong> centroid of <strong>the</strong>Zipcode geometry field in a c attribute on every model ra<strong>the</strong>r than in a centroid attribute.This keyword is required if a method name clashes with an existing GeoQuerySet method – ifyou wanted to use <strong>the</strong> area() method on model with a PolygonField named area, forexample.MeasurementAvailability: PostGIS, Oracle, SpatiaLiteareaGeoQuerySet.area(**kwargs)Returns <strong>the</strong> area of <strong>the</strong> geographic field in an area attribute on each element of this GeoQuerySet.distanceGeoQuerySet.distance(geom, **kwargs)482 Chapter 6. API Reference
<strong>Django</strong> <strong>Documentation</strong>, Release 1.2This method takes a geometry as a parameter, and attaches a distance attribute to every model in <strong>the</strong> returnedqueryset that contains <strong>the</strong> distance (as a Distance object) to <strong>the</strong> given geometry.In <strong>the</strong> following example (taken from <strong>the</strong> Geo<strong>Django</strong> distance tests), <strong>the</strong> distance from <strong>the</strong> Tasmanian city of Hobartto every o<strong>the</strong>r PointField in <strong>the</strong> AustraliaCity queryset is calculated:>>> pnt = AustraliaCity.objects.get(name=’Hobart’).point>>> for city in AustraliaCity.objects.distance(pnt): print city.name, city.distanceWollongong 990071.220408 mShellharbour 972804.613941 mThirroul 1002334.36351 mMittagong 975691.632637 mBatemans Bay 834342.185561 mCanberra 598140.268959 mMelbourne 575337.765042 mSydney 1056978.87363 mHobart 0.0 mAdelaide 1162031.83522 mHillsdale 1049200.46122 mNote: Because <strong>the</strong> distance attribute is a Distance object, you can easily express <strong>the</strong> value in <strong>the</strong> units of yourchoice. For example, city.distance.mi is <strong>the</strong> distance value in miles and city.distance.km is <strong>the</strong> distancevalue in kilometers. See <strong>the</strong> Measurement Objects for usage details and <strong>the</strong> list of Supported units.lengthGeoQuerySet.length(**kwargs)Returns <strong>the</strong> length of <strong>the</strong> geometry field in a length attribute (a Distance object) on each model in <strong>the</strong> queryset.perimeterGeoQuerySet.perimeter(**kwargs)Returns <strong>the</strong> perimeter of <strong>the</strong> geometry field in a perimeter attribute (a Distance object) on each model in <strong>the</strong>queryset.Geometry Relationships The following methods take no arguments, and attach geometry objects each element of<strong>the</strong> GeoQuerySet that is <strong>the</strong> result of relationship function evaluated on <strong>the</strong> <strong>the</strong> geometry field.centroidGeoQuerySet.centroid(**kwargs)Availability: PostGIS, Oracle, SpatiaLiteReturns <strong>the</strong> centroid value for <strong>the</strong> geographic field in a centroid attribute on each element of <strong>the</strong>GeoQuerySet.envelopeGeoQuerySet.envelope(**kwargs)Availability: PostGIS, SpatiaLiteReturns a geometry representing <strong>the</strong> bounding box of <strong>the</strong> geometry field in an envelope attribute on each elementof <strong>the</strong> GeoQuerySet.6.2. contrib packages 483
<strong>Django</strong> <strong>Documentation</strong>, Release 1.2point_on_surfaceGeoQuerySet.point_on_surface(**kwargs)Availability: PostGIS, Oracle, SpatiaLiteReturns a Point geometry guaranteed to lie on <strong>the</strong> surface of <strong>the</strong> geometry field in a point_on_surface attributeon each element of <strong>the</strong> queryset; o<strong>the</strong>rwise sets with None.Geometry Editorsforce_rhrGeoQuerySet.force_rhr(**kwargs)New in version 1.2: Please, see <strong>the</strong> release notes Availability: PostGISReturns a modified version of <strong>the</strong> polygon/multipolygon in which all of <strong>the</strong> vertices follow <strong>the</strong> Right-Hand-Rule, andattaches as a force_rhr attribute on each element of <strong>the</strong> queryset.reverse_geomGeoQuerySet.reverse_geom(**kwargs)New in version 1.2: Please, see <strong>the</strong> release notes Availability: PostGIS, OracleReverse <strong>the</strong> coordinate order of <strong>the</strong> geometry field, and attaches as a reverse attribute on each element of <strong>the</strong>queryset.scaleGeoQuerySet.scale(x, y, z=0.0, **kwargs)Availability: PostGIS, SpatiaLitesnap_to_gridGeoQuerySet.snap_to_grid(*args, **kwargs)New in version 1.1: Please, see <strong>the</strong> release notes Snap all points of <strong>the</strong> input geometry to <strong>the</strong> grid. How <strong>the</strong> geometryis snapped to <strong>the</strong> grid depends on how many numeric (ei<strong>the</strong>r float, integer, or long) arguments are given.Number of Arguments Description1 A single size to snap bot <strong>the</strong> X and Y grids to.2 X and Y sizes to snap <strong>the</strong> grid to.4 X, Y sizes and <strong>the</strong> corresponding X, Y origins.transformGeoQuerySet.transform(srid=4326, **kwargs)Availability: PostGIS, Oracle, SpatiaLiteThe transform method transforms <strong>the</strong> geometry field of a model to <strong>the</strong> spatial reference system specified by <strong>the</strong>srid parameter. If no srid is given, <strong>the</strong>n 4326 (WGS84) is used by default.Note: Unlike o<strong>the</strong>r GeoQuerySet methods, transform stores its output “in-place”. In o<strong>the</strong>r words, no newattribute for <strong>the</strong> transformed geometry is placed on <strong>the</strong> models.Note: What spatial reference system an integer SRID corresponds to may depend on <strong>the</strong> spatial database used. Ino<strong>the</strong>r words, <strong>the</strong> SRID numbers used for Oracle are not necessarily <strong>the</strong> same as those used by PostGIS.Example:484 Chapter 6. API Reference
<strong>Django</strong> <strong>Documentation</strong>, Release 1.2>>> qs = Zipcode.objects.all().transform() # Transforms to WGS84>>> qs = Zipcode.objects.all().transform(32140) # Transforming to "NAD83 / Texas South Central">>> print qs[0].poly.srid32140>>> print qs[0].polyPOLYGON ((234055.1698884720099159 4937796.9232223574072123 ...translateGeoQuerySet.translate(x, y, z=0.0, **kwargs)Availability: PostGIS, SpatiaLiteTranslates <strong>the</strong> geometry field to a new location using <strong>the</strong> given numeric parameters as offsets.Geometry OperationsAvailability: PostGIS, Oracle, SpatiaLiteThe following methods all take a geometry as a parameter and attach a geometry to each element of <strong>the</strong>GeoQuerySet that is <strong>the</strong> result of <strong>the</strong> operation.differenceGeoQuerySet.difference(geom)Returns <strong>the</strong> spatial difference of <strong>the</strong> geographic field with <strong>the</strong> given geometry in a difference attribute on eachelement of <strong>the</strong> GeoQuerySet.intersectionGeoQuerySet.intersection(geom)Returns <strong>the</strong> spatial intersection of <strong>the</strong> geographic field with <strong>the</strong> given geometry in an intersection attribute oneach element of <strong>the</strong> GeoQuerySet.sym_differenceGeoQuerySet.sym_difference(geom)Returns <strong>the</strong> symmetric difference of <strong>the</strong> geographic field with <strong>the</strong> given geometry in a sym_difference attributeon each element of <strong>the</strong> GeoQuerySet.unionGeoQuerySet.union(geom)Returns <strong>the</strong> union of <strong>the</strong> geographic field with <strong>the</strong> given geometry in an union attribute on each element of <strong>the</strong>GeoQuerySet.Geometry Output The following GeoQuerySet methods will return an attribute that has <strong>the</strong> value of <strong>the</strong> geometryfield in each model converted to <strong>the</strong> requested output format.geohashGeoQuerySet.geohash(preceision=20, **kwargs)New in version 1.2: Please, see <strong>the</strong> release notes Attaches a geohash attribute to every model <strong>the</strong> <strong>the</strong> querysetcontaining <strong>the</strong> GeoHash representation of <strong>the</strong> geometry.6.2. contrib packages 485
<strong>Django</strong> <strong>Documentation</strong>, Release 1.2geojsonGeoQuerySet.geojson(**kwargs)New in version 1.1: Please, see <strong>the</strong> release notes Availability: PostGISAttaches a geojson attribute to every model in <strong>the</strong> queryset that contains <strong>the</strong> GeoJSON representation of <strong>the</strong> geometry.KeywordArgumentprecisioncrsbboxDescriptionIt may be used to specify <strong>the</strong> number of significant digits for <strong>the</strong> coordinates in <strong>the</strong> GeoJSONrepresentation – <strong>the</strong> default value is 8.Set this to True if you want <strong>the</strong> coordinate reference system to be included in <strong>the</strong> returnedGeoJSON.Set this to True if you want <strong>the</strong> bounding box to be included in <strong>the</strong> returned GeoJSON.gmlGeoQuerySet.gml(**kwargs)Availability: PostGIS, OracleAttaches a gml attribute to every model in <strong>the</strong> queryset that contains <strong>the</strong> Geographic Markup Language (GML)representation of <strong>the</strong> geometry.Example:>>> qs = Zipcode.objects.all().gml()>>> print qs[0].gml-147.78711,70.245363 ... -147.78711,70.245363>> qs = Zipcode.objects.all().kml()>>> print qs[0].kml-103.04135,36.217596,0 ... -103.04135,36.217596,0
<strong>Django</strong> <strong>Documentation</strong>, Release 1.2Availability: PostGIS, SpatiaLiteAttaches a svg attribute to every model in <strong>the</strong> queryset that contains <strong>the</strong> Scalable Vector Graphics (SVG) path data of<strong>the</strong> geometry fields.KeywordArgumentrelativeprecisionDescriptionIf set to True, <strong>the</strong> path data will be implemented in terms of relative moves. Defaults toFalse, meaning that absolute moves are used instead.This keyword may be used to specify <strong>the</strong> number of significant digits for <strong>the</strong> coordinates in <strong>the</strong>SVG representation – <strong>the</strong> default value is 8.Miscellaneousmem_sizeGeoQuerySet.mem_size(**kwargs)Availability: PostGISReturns <strong>the</strong> memory size (number of bytes) that <strong>the</strong> geometry field takes in a mem_size attribute on each element of<strong>the</strong> GeoQuerySet.num_geomGeoQuerySet.num_geom(**kwargs)Availability: PostGIS, Oracle, SpatiaLiteReturns <strong>the</strong> number of geometries in a num_geom attribute on each element of <strong>the</strong> GeoQuerySet if <strong>the</strong> geometryfield is a collection (e.g., a GEOMETRYCOLLECTION or MULTI* field); o<strong>the</strong>rwise sets with None.num_pointsGeoQuerySet.num_points(**kwargs)Availability: PostGIS, Oracle, SpatiaLiteReturns <strong>the</strong> number of points in <strong>the</strong> first linestring in <strong>the</strong> geometry field in a num_points attribute on each elementof <strong>the</strong> GeoQuerySet; o<strong>the</strong>rwise sets with None.Spatial AggregatesNew in version 1.1: Please, see <strong>the</strong> release notesAggregate MethodscollectGeoQuerySet.collect(**kwargs)New in version 1.1: Please, see <strong>the</strong> release notes Availability: PostGISReturns a GEOMETRYCOLLECTION or a MULTI geometry object from <strong>the</strong> geometry column. This is analagousto a simplified version of <strong>the</strong> GeoQuerySet.unionagg() method, except it can be several orders of magnitudefaster than peforming a union because it simply rolls up geometries into a collection or multi object, not caring aboutdissolving boundaries.6.2. contrib packages 487
<strong>Django</strong> <strong>Documentation</strong>, Release 1.2extentGeoQuerySet.extent(**kwargs)Availability: PostGIS, OracleReturns <strong>the</strong> extent of <strong>the</strong> GeoQuerySet as a four-tuple, comprising <strong>the</strong> lower left coordinate and <strong>the</strong> upper rightcoordinate.Example:>>> qs = City.objects.filter(name__in=(’Houston’, ’Dallas’))>>> print qs.extent()(-96.8016128540039, 29.7633724212646, -95.3631439208984, 32.782058715820)extent3dGeoQuerySet.extent3d(**kwargs)New in version 1.2: Please, see <strong>the</strong> release notes Availability: PostGISReturns <strong>the</strong> 3D extent of <strong>the</strong> GeoQuerySet as a six-tuple, comprising <strong>the</strong> lower left coordinate and upper rightcoordinate.Example:>>> qs = City.objects.filter(name__in=(’Houston’, ’Dallas’))>>> print qs.extent3d()(-96.8016128540039, 29.7633724212646, 0, -95.3631439208984, 32.782058715820, 0)make_lineGeoQuerySet.make_line(**kwargs)Availability: PostGISReturns a LineString constructed from <strong>the</strong> point field geometries in <strong>the</strong> GeoQuerySet. Currently, ordering <strong>the</strong>queryset has no effect.Example:>>> print City.objects.filter(name__in=(’Houston’, ’Dallas’)).make_line()LINESTRING (-95.3631510000000020 29.7633739999999989, -96.8016109999999941 32.7820570000000018)unionaggGeoQuerySet.unionagg(**kwargs)Availability: PostGIS, Oracle, SpatiaLiteThis method returns a GEOSGeometry object comprising <strong>the</strong> union of every geometry in <strong>the</strong> queryset. Please notethat use of unionagg is processor intensive and may take a significant amount of time on large querysets.Note: If <strong>the</strong> computation time for using this method is too expensive, consider using GeoQuerySet.collect()instead.Example:>>> u = Zipcode.objects.unionagg() # This may take a long time.>>> u = Zipcode.objects.filter(poly__within=bbox).unionagg() # A more sensible approach.KeywordArgumenttoleranceDescriptionThis keyword is for Oracle only. It is for <strong>the</strong> tolerance value used by <strong>the</strong> SDOAGGRTYPEprocedure; <strong>the</strong> Oracle documentation has more details.488 Chapter 6. API Reference
<strong>Django</strong> <strong>Documentation</strong>, Release 1.2Aggregate FunctionsExample:>>> from django.contrib.gis.db.models import Extent, Union>>> WorldBorders.objects.aggregate(Extent(’mpoly’), Union(’mpoly’))Collectclass Collect(geo_field)Returns <strong>the</strong> same as <strong>the</strong> GeoQuerySet.collect() aggregate method.Extentclass Extent(geo_field)Returns <strong>the</strong> same as <strong>the</strong> GeoQuerySet.extent() aggregate method.Extent3Dclass Extent3D(geo_field)New in version 1.2: Please, see <strong>the</strong> release notes Returns <strong>the</strong> same as <strong>the</strong> GeoQuerySet.extent3d() aggregatemethod.MakeLineclass MakeLine(geo_field)Returns <strong>the</strong> same as <strong>the</strong> GeoQuerySet.make_line() aggregate method.Unionclass Union(geo_field)Returns <strong>the</strong> same as <strong>the</strong> GeoQuerySet.union() aggregate method.Measurement ObjectsThe django.contrib.gis.measure module contains objects that allow for convenient representation of distanceand area units of measure. 28 Specifically, it implements two objects, Distance and Area – both of whichmay be accessed via <strong>the</strong> D and A convenience aliases, respectively.ExampleDistance objects may be instantiated using a keyword argument indicating <strong>the</strong> context of <strong>the</strong> units. In <strong>the</strong> examplebelow, two different distance objects are instantiated in units of kilometers (km) and miles (mi):>>> from django.contrib.gis.measure import Distance, D>>> d1 = Distance(km=5)>>> print d15.0 km>>> d2 = D(mi=5) # ‘D‘ is an alias for ‘Distance‘>>> print d25.0 miConversions are easy, just access <strong>the</strong> preferred unit attribute to get a converted distance quantity:28 Robert Coup is <strong>the</strong> initial author of <strong>the</strong> measure objects, and was inspired by Brian Beck’s work in geopy and Geoff Biggs’ PhD work ondimensioned units for robotics.6.2. contrib packages 489
<strong>Django</strong> <strong>Documentation</strong>, Release 1.2>>> print d1.mi # Converting 5 kilometers to miles3.10685596119>>> print d2.km # Converting 5 miles to kilometers8.04672Moreover, arithmetic operations may be performed between <strong>the</strong> distance objects:>>> print d1 + d2 # Adding 5 miles to 5 kilometers13.04672 km>>> print d2 - d1 # Subtracting 5 kilometers from 5 miles1.89314403881 miTwo Distance objects multiplied toge<strong>the</strong>r will yield an Area object, which uses squared units of measure:>>> a = d1 * d2 # Returns an Area object.>>> print a40.2336 sq_kmTo determine what <strong>the</strong> attribute abbreviation of a unit is, <strong>the</strong> unit_attname class method may be used:>>> print Distance.unit_attname(’US Survey Foot’)survey_ft>>> print Distance.unit_attname(’centimeter’)cmSupported unitsUnit AttributeFull name or alias(es)kmKilometre, KilometermiMilemMeter, MetreydYardftFoot, Foot (International)survey_ftU.S. Foot, US survey footinchInchescmCentimetermmMillimetre, MillimeterumMicrometer, Micrometrebritish_ft British foot (Sears 1922)british_yd British yard (Sears 1922)british_chain_sears British chain (Sears 1922)indian_ydIndian yard, Yard (Indian)sears_ydYard (Sears)clarke_ftClarke’s FootchainChainchain_benoitChain (Benoit)chain_searsChain (Sears)british_chain_benoit British chain (Benoit 1895 B)british_chain_sears_truncated British chain (Sears 1922 truncated)gold_coast_ftGold Coast footlinkLinklink_benoitLink (Benoit)link_searsLink (Sears)clarke_linkClarke’s linkContinued on next page490 Chapter 6. API Reference
<strong>Django</strong> <strong>Documentation</strong>, Release 1.2fathomrodnmnm_ukgerman_mTable 6.3 – continued from previous pageFathomRodNautical MileNautical Mile (UK)German legal metreNote: Area attributes are <strong>the</strong> same as Distance attributes, except <strong>the</strong>y are prefixed with sq_ (area units are squarein nature). For example, Area(sq_m=2) creates an Area object representing two square meters.Measurement APIDistanceclass Distance(**kwargs)To initialize a distance object, pass in a keyword corresponding to <strong>the</strong> desired unit attribute name set with desiredvalue. For example, <strong>the</strong> following creates a distance object representing 5 miles:>>> dist = Distance(mi=5)__getattr__(unit_att)Returns <strong>the</strong> distance value in units corresponding to <strong>the</strong> given unit attribute. For example:>>> print dist.km8.04672classmethod unit_attname(unit_name)Returns <strong>the</strong> distance unit attribute name for <strong>the</strong> given full unit name. For example:>>> Distance.unit_attname(’Mile’)’mi’class DAlias for Distance class.Areaclass Area(**kwargs)To initialize a distance object, pass in a keyword corresponding to <strong>the</strong> desired unit attribute name set with desiredvalue. For example, <strong>the</strong> following creates a distance object representing 5 square miles:>>> a = Area(sq_mi=5)__getattr__(unit_att)Returns <strong>the</strong> area value in units corresponding to <strong>the</strong> given unit attribute. For example:>>> print a.sq_km12.949940551680001classmethod unit_attname(unit_name)Returns <strong>the</strong> area unit attribute name for <strong>the</strong> given full unit name. For example:>>> Area.unit_attname(’Kilometer’)’sq_km’6.2. contrib packages 491
<strong>Django</strong> <strong>Documentation</strong>, Release 1.2class AAlias for Area class.GEOS APIBackgroundWhat is GEOS? GEOS stands for Geometry Engine - Open Source, and is a C++ library, ported from <strong>the</strong> JavaTopology Suite. GEOS implements <strong>the</strong> OpenGIS Simple Features for SQL spatial predicate functions and spatialoperators. GEOS, now an OSGeo project, was initially developed and maintained by Refractions Research of Victoria,Canada.FeaturesGeo<strong>Django</strong> implements a high-level Python wrapper for <strong>the</strong> GEOS library, its features include:• A BSD-licensed interface to <strong>the</strong> GEOS geometry routines, implemented purely in Python using ctypes.• Loosely-coupled to Geo<strong>Django</strong>. For example, GEOSGeometry objects may be used outside of a djangoproject/application. In o<strong>the</strong>r words, no need to have DJANGO_SETTINGS_MODULE set or use a database,etc.• Mutability: GEOSGeometry objects may be modified.• Cross-platform and tested; compatible with Windows, Linux, Solaris, and Mac OS X platforms.TutorialThis section contains a brief introduction and tutorial to using GEOSGeometry objects.Creating a Geometry GEOSGeometry objects may be created in a few ways. The first is to simply instantiate <strong>the</strong>object on some spatial input – <strong>the</strong> following are examples of creating <strong>the</strong> same geometry from WKT, HEX, WKB, andGeoJSON:>>> from django.contrib.gis.geos import GEOSGeometry>>> pnt = GEOSGeometry(’POINT(5 23)’) # WKT>>> pnt = GEOSGeometry(’010100000000000000000014400000000000003740’) # HEX>>> pnt = GEOSGeometry(buffer(’\x01\x01\x00\x00\x00\x00\x00\x00\x00\x00\x00\x14@\x00\x00\x00\x00\x00\>>> pnt = GEOSGeometry(’{ "type": "Point", "coordinates": [ 5.000000, 23.000000 ] }’) # GeoJSONAno<strong>the</strong>r option is to use <strong>the</strong> constructor for <strong>the</strong> specific geometry type that you wish to create. For example, a Pointobject may be created by passing in <strong>the</strong> X and Y coordinates into its constructor:>>> from django.contrib.gis.geos import Point>>> pnt = Point(5, 23)Finally, <strong>the</strong>re are fromstr() and fromfile() factory methods, which return a GEOSGeometry object from aninput string or a file:>>> from django.contrib.gis.geos import fromstr, fromfile>>> pnt = fromstr(’POINT(5 23)’)>>> pnt = fromfile(’/path/to/pnt.wkt’)>>> pnt = fromfile(open(’/path/to/pnt.wkt’))492 Chapter 6. API Reference
<strong>Django</strong> <strong>Documentation</strong>, Release 1.2Geometries are Pythonic GEOSGeometry objects are ‘Pythonic’, in o<strong>the</strong>r words components may be accessed,modified, and iterated over using standard Python conventions. For example, you can iterate over <strong>the</strong> coordinates in aPoint:>>> pnt = Point(5, 23)>>> [coord for coord in pnt][5.0, 23.0]With any geometry object, <strong>the</strong> GEOSGeometry.coords property may be used to get <strong>the</strong> geometry coordinates asa Python tuple:>>> pnt.coords(5.0, 23.0)You can get/set geometry components using standard Python indexing techniques. However, what is returned dependson <strong>the</strong> geometry type of <strong>the</strong> object. For example, indexing on a LineString returns a coordinate tuple:>>> from django.contrib.gis.geos import LineString>>> line = LineString((0, 0), (0, 50), (50, 50), (50, 0), (0, 0))>>> line[0](0.0, 0.0)>>> line[-2](50.0, 0.0)Whereas indexing on a Polygon will return <strong>the</strong> ring (a LinearRing object) corresponding to <strong>the</strong> index:>>> from django.contrib.gis.geos import Polygon>>> poly = Polygon( ((0.0, 0.0), (0.0, 50.0), (50.0, 50.0), (50.0, 0.0), (0.0, 0.0)) )>>> poly[0]>>> poly[0][-2] # second-to-last coordinate of external ring(50.0, 0.0)In addition, coordinates/components of <strong>the</strong> geometry may added or modified, just like a Python list:>>> line[0] = (1.0, 1.0)>>> line.pop()(0.0, 0.0)>>> line.append((1.0, 1.0))>>> line.coords((1.0, 1.0), (0.0, 50.0), (50.0, 50.0), (50.0, 0.0), (1.0, 1.0))Geometry ObjectsGEOSGeometryclass GEOSGeometry(geo_input[, srid=None])Parameters• geo_input (string or buffer) – Geometry input value• srid (integer) – spatial reference identifierThis is <strong>the</strong> base class for all GEOS geometry objects. It initializes on <strong>the</strong> given geo_input argument, and <strong>the</strong>nassumes <strong>the</strong> proper geometry subclass (e.g., GEOSGeometry(’POINT(1 1)’) will create a Point object).The following input formats, along with <strong>the</strong>ir corresponding Python types, are accepted:6.2. contrib packages 493
<strong>Django</strong> <strong>Documentation</strong>, Release 1.2FormatWKT / EWKTHEX / HEXEWKBWKB / EWKBGeoJSONInput Typestr or unicodestr or unicodebufferstr or unicodePropertiesGEOSGeometry.coordsReturns <strong>the</strong> coordinates of <strong>the</strong> geometry as a tuple.GEOSGeometry.emptyReturns whe<strong>the</strong>r or not <strong>the</strong> set of points in <strong>the</strong> geometry is empty.GEOSGeometry.geom_typeReturns a string corresponding to <strong>the</strong> type of geometry. For example:>>> pnt = GEOSGeometry(’POINT(5 23)’)>>> pnt.geom_type’Point’GEOSGeometry.geom_typeidReturns <strong>the</strong> GEOS geometry type identification number. The following table shows <strong>the</strong> value for each geometry type:GeometryIDPoint 0LineString 1LinearRing 2Polygon 3MultiPoint 4MultiLineString 5MultiPolygon 6GeometryCollection 7GEOSGeometry.num_coordsReturns <strong>the</strong> number of coordinates in <strong>the</strong> geometry.GEOSGeometry.num_geomReturns <strong>the</strong> number of geometries in this geometry. In o<strong>the</strong>r words, will return 1 on anything but geometry collections.GEOSGeometry.haszReturns a boolean indicating whe<strong>the</strong>r <strong>the</strong> geometry is three-dimensional.GEOSGeometry.ringReturns a boolean indicating whe<strong>the</strong>r <strong>the</strong> geometry is a LinearRing.GEOSGeometry.simpleReturns a boolean indicating whe<strong>the</strong>r <strong>the</strong> geometry is ‘simple’. A geometry is simple if and only if it does notintersect itself (except at boundary points). For example, a LineString object is not simple if it intersects itself.Thus, LinearRing and :class‘Polygon‘ objects are always simple because <strong>the</strong>y do cannot intersect <strong>the</strong>mselves, bydefinition.GEOSGeometry.validReturns a boolean indicating whe<strong>the</strong>r <strong>the</strong> geometry is valid.GEOSGeometry.srid494 Chapter 6. API Reference
<strong>Django</strong> <strong>Documentation</strong>, Release 1.2Property that may be used to retrieve or set <strong>the</strong> SRID associated with <strong>the</strong> geometry. For example:>>> pnt = Point(5, 23)>>> print pnt.sridNone>>> pnt.srid = 4326>>> pnt.srid4326Output Properties The properties in this section export <strong>the</strong> GEOSGeometry object into a different. This outputmay be in <strong>the</strong> form of a string, buffer, or even ano<strong>the</strong>r object.GEOSGeometry.ewktReturns <strong>the</strong> “extended” Well-Known Text of <strong>the</strong> geometry. This representation is specific to PostGIS and is a superset of <strong>the</strong> OGC WKT standard. 29 Essentially <strong>the</strong> SRID is prepended to <strong>the</strong> WKT representation, for exampleSRID=4326;POINT(5 23).Note: The output from this property does not include <strong>the</strong> 3dm, 3dz, and 4d information that PostGIS supports in itsEWKT representations.GEOSGeometry.hexReturns <strong>the</strong> WKB of this Geometry in hexadecimal form. Please note that <strong>the</strong> SRID and Z values are not included inthis representation because it is not a part of <strong>the</strong> OGC specification (use <strong>the</strong> GEOSGeometry.hexewkb propertyinstead).GEOSGeometry.hexewkbNew in version 1.2: Please, see <strong>the</strong> release notes Returns <strong>the</strong> EWKB of this Geometry in hexadecimal form. This isan extension of <strong>the</strong> WKB specification that includes SRID and Z values that are a part of this geometry.Note: GEOS 3.1 is required if you want valid 3D HEXEWKB.GEOSGeometry.jsonReturns <strong>the</strong> GeoJSON representation of <strong>the</strong> geometry.Note: Requires GDAL.GEOSGeometry.geojsonAlias for GEOSGeometry.json.GEOSGeometry.kmlReturns a KML (Keyhole Markup Language) representation of <strong>the</strong> geometry. This should only be used for geometrieswith an SRID of 4326 (WGS84), but this restriction is not enforced.GEOSGeometry.ogrReturns an OGRGeometry object correspondg to <strong>the</strong> GEOS geometry.Note: Requires GDAL.29 See PostGIS EWKB, EWKT and Canonical Forms, PostGIS documentation at Ch. 4.1.2.6.2. contrib packages 495
<strong>Django</strong> <strong>Documentation</strong>, Release 1.2GEOSGeometry.wkbReturns <strong>the</strong> WKB (Well-Known Binary) representation of this Geometry as a Python buffer. SRID and Z values arenot included, use <strong>the</strong> GEOSGeometry.ewkb property instead.GEOSGeometry.ewkbNew in version 1.2: Please, see <strong>the</strong> release notes Return <strong>the</strong> EWKB representation of this Geometry as a Python buffer.This is an extension of <strong>the</strong> WKB specification that includes any SRID and Z values that are a part of this geometry.Note: GEOS 3.1 is required if you want valid 3D EWKB.GEOSGeometry.wktReturns <strong>the</strong> Well-Known Text of <strong>the</strong> geometry (an OGC standard).Spatial Predicate Methods All of <strong>the</strong> following spatial predicate methods take ano<strong>the</strong>r GEOSGeometry instance(o<strong>the</strong>r) as a parameter, and return a boolean.GEOSGeometry.contains(o<strong>the</strong>r)Returns True if GEOSGeometry.within() is False.GEOSGeometry.crosses(o<strong>the</strong>r)Returns True if <strong>the</strong> DE-9IM intersection matrix for <strong>the</strong> two Geometries is T*T****** (for a point and a curve,apoint and an area or a line and an area) 0******** (for two curves).GEOSGeometry.disjoint(o<strong>the</strong>r)Returns True if <strong>the</strong> DE-9IM intersection matrix for <strong>the</strong> two geometries is FF*FF****.GEOSGeometry.equals(o<strong>the</strong>r)Returns True if <strong>the</strong> DE-9IM intersection matrix for <strong>the</strong> two geometries is T*F**FFF*.GEOSGeometry.equals_exact(o<strong>the</strong>r, tolerance=0)Returns true if <strong>the</strong> two geometries are exactly equal, up to a specified tolerance. The tolerance value should bea floating point number representing <strong>the</strong> error tolerance in <strong>the</strong> comparison, e.g., poly1.equals_exact(poly2,0.001) will compare equality to within one thousandth of a unit.GEOSGeometry.intersects(o<strong>the</strong>r)Returns True if GEOSGeometry.disjoint() is False.GEOSGeometry.overlaps(o<strong>the</strong>r)Returns true if <strong>the</strong> DE-9IM intersection matrix for <strong>the</strong> two geometries is T*T***T** (for two points or two surfaces)1*T***T** (for two curves).GEOSGeometry.relate_pattern(o<strong>the</strong>r, pattern)Returns True if <strong>the</strong> elements in <strong>the</strong> DE-9IM intersection matrix for this geometry and <strong>the</strong> o<strong>the</strong>r matches <strong>the</strong> givenpattern – a string of nine characters from <strong>the</strong> alphabet: {T, F, *, 0}.GEOSGeometry.touches(o<strong>the</strong>r)Returns True if <strong>the</strong> DE-9IM intersection matrix for <strong>the</strong> two geometries is FT*******, F**T***** orF***T****.GEOSGeometry.within(o<strong>the</strong>r)Returns True if <strong>the</strong> DE-9IM intersection matrix for <strong>the</strong> two geometries is T*F**F***.496 Chapter 6. API Reference
<strong>Django</strong> <strong>Documentation</strong>, Release 1.2Topological MethodsGEOSGeometry.buffer(width, quadsegs=8)Returns a GEOSGeometry that represents all points whose distance from this geometry is less than or equal to <strong>the</strong>given width. The optional quadsegs keyword sets <strong>the</strong> number of segments used to approximate a quarter circle(defaults is 8).GEOSGeometry.difference(o<strong>the</strong>r)Returns a GEOSGeometry representing <strong>the</strong> points making up this geometry that do not make up o<strong>the</strong>r.GEOSGeometry:intersection(o<strong>the</strong>r)Returns a GEOSGeometry representing <strong>the</strong> points shared by this geometry and o<strong>the</strong>r.GEOSGeometry.relate(o<strong>the</strong>r)Returns <strong>the</strong> DE-9IM intersection matrix (a string) representing <strong>the</strong> topological relationship between this geometry and<strong>the</strong> o<strong>the</strong>r.GEOSGeometry.simplify(tolerance=0.0, preserve_topology=False)Returns a new GEOSGeometry, simplified using <strong>the</strong> Douglas-Peucker algorithm to <strong>the</strong> specified tolerance. A highertolerance value implies less points in <strong>the</strong> output. If no tolerance is tolerance provided, it defaults to 0.By default, this function does not preserve topology - e.g., Polygon objects can be split, collapsed intolines or disappear. Polygon holes can be created or disappear, and lines can cross. By specifyingpreserve_topology=True, <strong>the</strong> result will have <strong>the</strong> same dimension and number of components as <strong>the</strong> input,however, this is significantly slower.GEOSGeometry.sym_difference(o<strong>the</strong>r)Returns a GEOSGeometry combining <strong>the</strong> points in this geometry not in o<strong>the</strong>r, and <strong>the</strong> points in o<strong>the</strong>r not in thisgeometry.GEOSGeometry.union(o<strong>the</strong>r)Returns a GEOSGeometry representing all <strong>the</strong> points in this geometry and <strong>the</strong> o<strong>the</strong>r.Topological PropertiesGEOSGeometry.boundaryReturns <strong>the</strong> boundary as a newly allocated Geometry object.GEOSGeometry.centroidReturns a Point object representing <strong>the</strong> geometric center of <strong>the</strong> geometry. The point is not guaranteed to be on <strong>the</strong>interior of <strong>the</strong> geometry.GEOSGeometry.convex_hullReturns <strong>the</strong> smallest Polygon that contains all <strong>the</strong> points in <strong>the</strong> geometry.GEOSGeometry.envelopeReturns a Polygon that represents <strong>the</strong> bounding envelope of this geometry.GEOSGeometry.point_on_surfaceComputes and returns a Point guaranteed to be on <strong>the</strong> interior of this geometry.O<strong>the</strong>r Properties & MethodsGEOSGeometry.areaThis property returns <strong>the</strong> area of <strong>the</strong> Geometry.GEOSGeometry.extent6.2. contrib packages 497
<strong>Django</strong> <strong>Documentation</strong>, Release 1.2This property returns <strong>the</strong> extent of this geometry as a 4-tuple, consisting of (xmin, ymin, xmax, ymax).GEOSGeometry.clone()This method returns a GEOSGeometry that is a clone of <strong>the</strong> original.GEOSGeometry.distance(geom)Returns <strong>the</strong> distance between <strong>the</strong> closest points on this geometry and <strong>the</strong> given geom (ano<strong>the</strong>r GEOSGeometryobject).Note: GEOS distance calculations are linear – in o<strong>the</strong>r words, GEOS does not perform a spherical calculation even if<strong>the</strong> SRID specifies a geographic coordinate system.GEOSGeometry.lengthReturns <strong>the</strong> length of this geometry (e.g., 0 for a Point, <strong>the</strong> length of a LineString, or <strong>the</strong> circumference of aPolygon).GEOSGeometry.preparedNew in version 1.1: Please, see <strong>the</strong> release notesNote: Support for prepared geometries requires GEOS 3.1.Returns a GEOS PreparedGeometry for <strong>the</strong> contents of this geometry. PreparedGeometry objects are optimizedfor <strong>the</strong> contains, intersects, and covers operations. Refer to <strong>the</strong> Prepared Geometries documentation for moreinformation.GEOSGeometry.srsReturns a SpatialReference object corresponding to <strong>the</strong> SRID of <strong>the</strong> geometry or None.Note: Requires GDAL.transform(ct, clone=False)Transforms <strong>the</strong> geometry according to <strong>the</strong> given coordinate transformation paramter (ct), which may be an integerSRID, spatial reference WKT string, a PROJ.4 string, a SpatialReference object, or a CoordTransformobject. By default, <strong>the</strong> geometry is transformed in-place and nothing is returned. However if <strong>the</strong> clone keyword isset, <strong>the</strong>n <strong>the</strong> geometry is not modified and a transformed clone of <strong>the</strong> geometry is returned instead.Note: Requires GDAL.Pointclass Point(x, y, z=None, srid=None)Point objects are instantiated using arguments that represent <strong>the</strong> component coordinates of <strong>the</strong> point or with asingle sequence coordinates. For example, <strong>the</strong> following are equivalent:>>> pnt = Point(5, 23)>>> pnt = Point([5, 23])LineString498 Chapter 6. API Reference
<strong>Django</strong> <strong>Documentation</strong>, Release 1.2class LineString(*args, **kwargs)LineString objects are instantiated using arguments that are ei<strong>the</strong>r a sequence of coordinates or Pointobjects. For example, <strong>the</strong> following are equivalent:>>> ls = LineString((0, 0), (1, 1))>>> ls = LineString(Point(0, 0), Point(1, 1))In addition, LineString objects may also be created by passing in a single sequence of coordinate or Pointobjects:>>> ls = LineString( ((0, 0), (1, 1)) )>>> ls = LineString( [Point(0, 0), Point(1, 1)] )LinearRingclass LinearRing(*args, **kwargs)LinearRing objects are constructed in <strong>the</strong> exact same way as LineString objects, however <strong>the</strong> coordinatesmust be closed, in o<strong>the</strong>r words, <strong>the</strong> first coordinates must be <strong>the</strong> same as <strong>the</strong> last coordinates. For example:>>> ls = LinearRing((0, 0), (0, 1), (1, 1), (0, 0))Notice that (0, 0) is <strong>the</strong> first and last coordinate – if <strong>the</strong>y were not equal, an error would be raised.Polygonclass Polygon(*args, **kwargs)Polygon objects may be instantiated by passing in one or more parameters that represent <strong>the</strong> rings of <strong>the</strong>polygon. The parameters must ei<strong>the</strong>r be LinearRing instances, or a sequence that may be used to construct aLinearRing:>>> ext_coords = ((0, 0), (0, 1), (1, 1), (1, 0), (0, 0))>>> int_coords = ((0.4, 0.4), (0.4, 0.6), (0.6, 0.6), (0.6, 0.4), (0.4, 0.4))>>> poly = Polygon(ext_coords, int_coords)>>> poly = Polygon(LinearRing(ext_coords), LinearRing(int_coords))classmethod from_bbox(bbox)New in version 1.1: Please, see <strong>the</strong> release notes Returns a polygon object from <strong>the</strong> given bounding-box, a4-tuple comprising (xmin, ymin, xmax, ymax).num_interior_ringsReturns <strong>the</strong> number of interior rings in this geometry.Geometry CollectionsMultiPointclass MultiPoint(*args, **kwargs)MultiPoint objects may be instantiated by passing in one or more Point objects as arguments, or a singlesequence of Point objects:>>> mp = MultiPoint(Point(0, 0), Point(1, 1))>>> mp = MultiPoint( (Point(0, 0), Point(1, 1)) )MultiLineString6.2. contrib packages 499
<strong>Django</strong> <strong>Documentation</strong>, Release 1.2class MultiLineString(*args, **kwargs)MultiLineString objects may be instantiated by passing in one or more LineString objects as arguments,or a single sequence of LineString objects:>>> ls1 = LineString((0, 0), (1, 1))>>> ls2 = LineString((2, 2), (3, 3))>>> mls = MultiLineString(ls1, ls2)>>> mls = MultiLineString([ls1, ls2])mergedNew in version 1.1: Please, see <strong>the</strong> release notes Returns a LineString representing <strong>the</strong> line merge of all <strong>the</strong>components in this MultiLineString.MultiPolygonclass MultiPolygon(*args, **kwargs)MultiPolygon objects may be instantiated by passing one or more Polygon objects as arguments, or asingle sequence of Polygon objects:>>> p1 = Polygon( ((0, 0), (0, 1), (1, 1), (0, 0)) )>>> p2 = Polygon( ((1, 1), (1, 2), (2, 2), (1, 1)) )>>> mp = MultiPolygon(p1, p2)>>> mp = MultiPolygon([p1, p2])cascaded_unionNew in version 1.1: Please, see <strong>the</strong> release notes Returns a Polygon that is <strong>the</strong> union of all of <strong>the</strong> componentpolygons in this collection. The algorithm employed is significantly more efficient (faster) than trying to union<strong>the</strong> geometries toge<strong>the</strong>r individually. 30Note: GEOS 3.1 is required to peform cascaded unions.GeometryCollectionclass GeometryCollection(*args, **kwargs)GeometryCollection objects may be instantiated by passing in one or more o<strong>the</strong>r GEOSGeometry asarguments, or a single sequence of GEOSGeometry objects:>>> poly = Polygon( ((0, 0), (0, 1), (1, 1), (0, 0)) )>>> gc = GeometryCollection(Point(0, 0), MultiPoint(Point(0, 0), Point(1, 1)), poly)>>> gc = GeometryCollection((Point(0, 0), MultiPoint(Point(0, 0), Point(1, 1)), poly))Prepared GeometriesIn order to obtain a prepared geometry, just access <strong>the</strong> GEOSGeometry.prepared property. Once you have aPreparedGeometry instance its spatial predicate methods, listed below, may be used with o<strong>the</strong>r GEOSGeometryobjects. An operation with a prepared geometry can be orders of magnitude faster – <strong>the</strong> more complex <strong>the</strong> geometrythat is prepared, <strong>the</strong> larger <strong>the</strong> speedup in <strong>the</strong> operation. For more information, please consult <strong>the</strong> GEOS wiki page onprepared geometries.Note: GEOS 3.1 is required in order to use prepared geometries.30 For more information, read Paul Ramsey’s blog post about (Much) Faster Unions in PostGIS 1.4 and Martin Davis’ blog post on Fast polygonmerging in JTS using Cascaded Union.500 Chapter 6. API Reference
<strong>Django</strong> <strong>Documentation</strong>, Release 1.2For example:>>> from django.contrib.gis.geos import Point, Polygon>>> poly = Polygon.from_bbox((0, 0, 5, 5))>>> prep_poly = poly.prepared>>> prep_poly.contains(Point(2.5, 2.5))TruePreparedGeometryclass PreparedGeometryAll methods on PreparedGeometry take an o<strong>the</strong>r argument, which must be a GEOSGeometry instance.contains(o<strong>the</strong>r)contains_properly(o<strong>the</strong>r)covers(o<strong>the</strong>r)intersects(o<strong>the</strong>r)Geometry Factoriesfromfile(file_h)Example:Parameters file_h (a Python file object or a string path to <strong>the</strong> file) – input file that contains spatialdataReturn type a GEOSGeometry corresponding to <strong>the</strong> spatial data in <strong>the</strong> file>>> from django.contrib.gis.geos import fromfile>>> g = fromfile(’/home/bob/geom.wkt’)fromstr(string[, srid=None])Example:Parameters• string (string) – string that contains spatial data• srid (integer) – spatial reference identifierReturn type a GEOSGeometry corresponding to <strong>the</strong> spatial data in <strong>the</strong> string>>> from django.contrib.gis.geos import fromstr>>> pnt = fromstr(’POINT(-90.5 29.5)’, srid=4326)I/O Objects<strong>Read</strong>er Objects The reader I/O classes simply return a GEOSGeometry instance from <strong>the</strong> WKB and/or WKTinput given to <strong>the</strong>ir read(geom) method.class WKB<strong>Read</strong>erExample:6.2. contrib packages 501
<strong>Django</strong> <strong>Documentation</strong>, Release 1.2>>> from django.contrib.gis.geos import WKB<strong>Read</strong>er>>> wkb_r = WKB<strong>Read</strong>er()>>> wkb_r.read(’0101000000000000000000F03F000000000000F03F’)class WKT<strong>Read</strong>erExample:>>> from django.contrib.gis.geos import WKT<strong>Read</strong>er>>> wkt_r = WKT<strong>Read</strong>er()>>> wkt_r.read(’POINT(1 1)’)Writer Objects All writer objects have a write(geom) method that returns ei<strong>the</strong>r <strong>the</strong> WKB or WKT of <strong>the</strong> givengeometry. In addition, WKBWriter objects also have properties that may be used to change <strong>the</strong> byte order, and orinclude <strong>the</strong> SRID and 3D values (in o<strong>the</strong>r words, EWKB).class WKBWriterWKBWriter provides <strong>the</strong> most control over its output. By default it returns OGC-compliant WKB when it’s writemethod is called. However, it has properties that allow for <strong>the</strong> creation of EWKB, a superset of <strong>the</strong> WKB standard thatincludes additional information.WKBWriter.write(geom)Returns <strong>the</strong> WKB of <strong>the</strong> given geometry as a Python buffer object. Example:>>> from django.contrib.gis.geos import Point, WKBWriter>>> pnt = Point(1, 1)>>> wkb_w = WKBWriter()>>> wkb_w.write(pnt)WKBWriter.write_hex(geom)Returns WKB of <strong>the</strong> geometry in hexadecimal. Example:>>> from django.contrib.gis.geos import Point, WKBWriter>>> pnt = Point(1, 1)>>> wkb_w = WKBWriter()>>> wkb_w.write_hex(pnt)’0101000000000000000000F03F000000000000F03F’WKBWriter.byteorderThis property may be be set to change <strong>the</strong> byte-order of <strong>the</strong> geometry representation.Byteorder Value Description0 Big Endian (e.g., compatible with RISC systems)1 Little Endian (e.g., compatible with x86 systems)Example:>>> from django.contrib.gis.geos import Point, WKBWriter>>> wkb_w = WKBWriter()>>> pnt = Point(1, 1)>>> wkb_w.write_hex(pnt)’0101000000000000000000F03F000000000000F03F’>>> wkb_w.byteorder = 0’00000000013FF00000000000003FF0000000000000’502 Chapter 6. API Reference
<strong>Django</strong> <strong>Documentation</strong>, Release 1.2WKBWriter.outdimThis property may be set to change <strong>the</strong> output dimension of <strong>the</strong> geometry representation. In o<strong>the</strong>r words, if you havea 3D geometry <strong>the</strong>n set to 3 so that <strong>the</strong> Z value is included in <strong>the</strong> WKB.Outdim Value Description2 The default, output 2D WKB.3 Output 3D EWKB.Example:>>> from django.contrib.gis.geos import Point, WKBWriter>>> wkb_w = WKBWriter()>>> wkb_w.outdim2>>> pnt = Point(1, 1, 1)>>> wkb_w.write_hex(pnt) # By default, no Z value included:’0101000000000000000000F03F000000000000F03F’>>> wkb_w.outdim = 3 # Tell writer to include Z values>>> wkb_w.write_hex(pnt)’0101000080000000000000F03F000000000000F03F000000000000F03F’WKBWriter.sridSet this property with a boolean to indicate whe<strong>the</strong>r <strong>the</strong> SRID of <strong>the</strong> geometry should be included with <strong>the</strong> WKBrepresentation. Example:>>> from django.contrib.gis.geos import Point, WKBWriter>>> wkb_w = WKBWriter()>>> pnt = Point(1, 1, srid=4326)>>> wkb_w.write_hex(pnt) # By default, no SRID included:’0101000000000000000000F03F000000000000F03F’>>> wkb_w.srid = True # Tell writer to include SRID>>> wkb_w.write_hex(pnt)’0101000020E6100000000000000000F03F000000000000F03F’class WKTWriterWKTWriter.write(geom)Returns <strong>the</strong> WKT of <strong>the</strong> given geometry. Example:>>> from django.contrib.gis.geos import Point, WKTWriter>>> pnt = Point(1, 1)>>> wkt_w = WKTWriter()>>> wkt_w.write(pnt)’POINT (1.0000000000000000 1.0000000000000000)’SettingsGEOS_LIBRARY_PATH A string specifying <strong>the</strong> location of <strong>the</strong> GEOS C library. Typically, this setting is onlyused if <strong>the</strong> GEOS C library is in a non-standard location (e.g., /home/bob/lib/libgeos_c.so).Note: The setting must be <strong>the</strong> full path to <strong>the</strong> C shared library; in o<strong>the</strong>r words you want to use libgeos_c.so, notlibgeos.so.6.2. contrib packages 503
<strong>Django</strong> <strong>Documentation</strong>, Release 1.2GDAL APIGDAL stands for Geospatial Data Abstraction Library, and is a veritable “swiss army knife” of GIS data functionality.A subset of GDAL is <strong>the</strong> OGR Simple Features Library, which specializes in reading and writing vector geographicdata in a variety of standard formats.Geo<strong>Django</strong> provides a high-level Python interface for some of <strong>the</strong> capabilities of OGR, including <strong>the</strong> reading andcoordinate transformation of vector spatial data.Note: Although <strong>the</strong> module is named gdal, Geo<strong>Django</strong> only supports some of <strong>the</strong> capabilities of OGR. Thus, noneof GDAL’s features with respect to raster (image) data are supported at this time.OverviewSample Data The GDAL/OGR tools described here are designed to help you read in your geospatial data, in orderfor most of <strong>the</strong>m to be useful you have to have some data to work with. If you’re starting out and don’t yet have anydata of your own to use, Geo<strong>Django</strong> comes with a number of simple data sets that you can use for testing. This snippetwill determine where <strong>the</strong>se sample files are installed on your computer:>>> import os>>> import django.contrib.gis>>> GIS_PATH = os.path.dirname(django.contrib.gis.__file__)>>> CITIES_PATH = os.path.join(GIS_PATH, ’tests/data/cities/cities.shp’)Vector Data Source ObjectsDataSource DataSource is a wrapper for <strong>the</strong> OGR data source object that supports reading data from a varietyof OGR-supported geospatial file formats and data sources using a simple, consistent interface. Each data source isrepresented by a DataSource object which contains one or more layers of data. Each layer, represented by a Layerobject, contains some number of geographic features (Feature), information about <strong>the</strong> type of features contained inthat layer (e.g. points, polygons, etc.), as well as <strong>the</strong> names and types of any additional fields (Field) of data thatmay be associated with each feature in that layer.class DataSource(ds_input)The constructor for DataSource just a single parameter: <strong>the</strong> path of <strong>the</strong> file you want to read. However, OGRalso supports a variety of more complex data sources, including databases, that may be accessed by passing aspecial name string instead of a path. For more information, see <strong>the</strong> OGR Vector Formats documentation. Thename property of a DataSource instance gives <strong>the</strong> OGR name of <strong>the</strong> underlying data source that it is using.Once you’ve created your DataSource, you can find out how many layers of data it contains by accessing<strong>the</strong> layer_count property, or (equivalently) by using <strong>the</strong> len() function. For information on accessing <strong>the</strong>layers of data <strong>the</strong>mselves, see <strong>the</strong> next section:>>> from django.contrib.gis.gdal import DataSource>>> ds = DataSource(CITIES_PATH)>>> ds.name # The exact filename may be different on your computer’/usr/local/lib/python2.6/site-packages/django/contrib/gis/tests/data/cities/cities.shp’>>> ds.layer_count # This file only contains one layer1layer_countReturns <strong>the</strong> number of layers in <strong>the</strong> data source.name504 Chapter 6. API Reference
<strong>Django</strong> <strong>Documentation</strong>, Release 1.2Returns <strong>the</strong> name of <strong>the</strong> data source.Layerclass LayerLayer is a wrapper for a layer of data in a DataSource object. You never create a Layer object directly.Instead, you retrieve <strong>the</strong>m from a DataSource object, which is essentially a standard Python container ofLayer objects. For example, you can access a specific layer by its index (e.g. ds[0] to access <strong>the</strong> first layer),or you can iterate over all <strong>the</strong> layers in <strong>the</strong> container in a for loop. The Layer itself acts as a container forgeometric features.Typically, all <strong>the</strong> features in a given layer have <strong>the</strong> same geometry type. The geom_type property of a layer isan OGRGeomType that identifies <strong>the</strong> feature type. We can use it to print out some basic information about eachlayer in a DataSource:>>> for layer in ds:... print ’Layer "%s": %i %ss’ % (layer.name, len(layer), layer.geom_type.name)...Layer "cities": 3 PointsThe example output is from <strong>the</strong> cities data source, loaded above, which evidently contains one layer, called"cities", which contains three point features. For simplicity, <strong>the</strong> examples below assume that you’ve storedthat layer in <strong>the</strong> variable layer:>>> layer = ds[0]nameReturns <strong>the</strong> name of this layer in <strong>the</strong> data source.>>> layer.name’cities’num_featReturns <strong>the</strong> number of features in <strong>the</strong> layer. Same as len(layer):>>> layer.num_feat3geom_typeReturns <strong>the</strong> geometry type of <strong>the</strong> layer, as an OGRGeomType object:>>> layer.geom_type.name’Point’num_fieldsReturns <strong>the</strong> number of fields in <strong>the</strong> layer, i.e <strong>the</strong> number of fields of data associated with each feature in <strong>the</strong>layer:>>> layer.num_fields4fieldsReturns a list of <strong>the</strong> names of each of <strong>the</strong> fields in this layer:>>> layer.fields[’Name’, ’Population’, ’Density’, ’Created’]6.2. contrib packages 505
<strong>Django</strong> <strong>Documentation</strong>, Release 1.2Returns a list of <strong>the</strong> data types of each of <strong>the</strong> fields in this layer. These are subclasses of Field, discussedbelow:>>> [ft.__name__ for ft in layer.field_types][’OFTString’, ’OFTReal’, ’OFTReal’, ’OFTDate’]field_widthsReturns a list of <strong>the</strong> maximum field widths for each of <strong>the</strong> fields in this layer:>>> layer.field_widths[80, 11, 24, 10]field_precisionsReturns a list of <strong>the</strong> numeric precisions for each of <strong>the</strong> fields in this layer. This is meaningless (and set to zero)for non-numeric fields:>>> layer.field_precisions[0, 0, 15, 0]extentReturns <strong>the</strong> spatial extent of this layer, as an Envelope object:>>> layer.extent.tuple(-104.609252, 29.763374, -95.23506, 38.971823)srsProperty that returns <strong>the</strong> SpatialReference associated with this layer:>>> print layer.srsGEOGCS["GCS_WGS_1984",DATUM["WGS_1984",SPHEROID["WGS_1984",6378137,298.257223563]],PRIMEM["Greenwich",0],UNIT["Degree",0.017453292519943295]]If <strong>the</strong> Layer has no spatial reference information associated with it, None is returned.spatial_filterNew in version 1.2: Please, see <strong>the</strong> release notes Property that may be used to retrieve or set a spatial filter forthis layer. A spatial filter can only be set with an OGRGeometry instance, a 4-tuple extent, or None. When setwith something o<strong>the</strong>r than None, only features that intersect <strong>the</strong> filter will be returned when iterating over <strong>the</strong>layer:>>> print layer.spatial_filterNone>>> print len(layer)3>>> [feat.get(’Name’) for feat in layer][’Pueblo’, ’Lawrence’, ’Houston’]>>> ks_extent = (-102.051, 36.99, -94.59, 40.00) # Extent for state of Kansas>>> layer.spatial_filter = ks_extent>>> len(layer)1>>> [feat.get(’Name’) for feat in layer][’Lawrence’]>>> layer.spatial_filter = None506 Chapter 6. API Reference
<strong>Django</strong> <strong>Documentation</strong>, Release 1.2>>> len(layer)3get_fields()A method that returns a list of <strong>the</strong> values of a given field for each feature in <strong>the</strong> layer:>>> layer.get_fields(’Name’)[’Pueblo’, ’Lawrence’, ’Houston’]get_geoms([geos=False])A method that returns a list containing <strong>the</strong> geometry of each feature in <strong>the</strong> layer. If <strong>the</strong> optional argument geosis set to True <strong>the</strong>n <strong>the</strong> geometries are converted to GEOSGeometry objects. O<strong>the</strong>rwise, <strong>the</strong>y are returned asOGRGeometry objects:>>> [pt.tuple for pt in layer.get_geoms()][(-104.609252, 38.255001), (-95.23506, 38.971823), (-95.363151, 29.763374)]test_capability(capability)Returns a boolean indicating whe<strong>the</strong>r this layer supports <strong>the</strong> given capability (a string). Examplesof valid capability strings include: ’Random<strong>Read</strong>’, ’SequentialWrite’, ’RandomWrite’,’FastSpatialFilter’, ’FastFeatureCount’, ’FastGetExtent’, ’CreateField’,’Transactions’, ’DeleteFeature’, and ’FastSetNextByIndex’.Featureclass FeatureFeature wraps an OGR feature. You never create a Feature object directly. Instead, you retrieve <strong>the</strong>m froma Layer object. Each feature consists of a geometry and a set of fields containing additional properties. Thegeometry of a field is accessible via its geom property, which returns an OGRGeometry object. A Featurebehaves like a standard Python container for its fields, which it returns as Field objects: you can access a fielddirectly by its index or name, or you can iterate over a feature’s fields, e.g. in a for loop.geomReturns <strong>the</strong> geometry for this feature, as an OGRGeometry object:>>> city.geom.tuple(-104.609252, 38.255001)getA method that returns <strong>the</strong> value of <strong>the</strong> given field (specified by name) for this feature, not a Field wrapperobject:>>> city.get(’Population’)102121geom_typeReturns <strong>the</strong> type of geometry for this feature, as an OGRGeomType object. This will be <strong>the</strong> same for all featuresin a given layer, and is equivalent to <strong>the</strong> Layer.geom_type property of <strong>the</strong> Layer‘ object <strong>the</strong> feature camefrom.num_fieldsReturns <strong>the</strong> number of fields of data associated with <strong>the</strong> feature. This will be <strong>the</strong> same for all features in a givenlayer, and is equivalent to <strong>the</strong> Layer.num_fields property of <strong>the</strong> Layer object <strong>the</strong> feature came from.fields6.2. contrib packages 507
<strong>Django</strong> <strong>Documentation</strong>, Release 1.2Returns a list of <strong>the</strong> names of <strong>the</strong> fields of data associated with <strong>the</strong> feature. This will be <strong>the</strong> same for all featuresin a given layer, and is equivalent to <strong>the</strong> Layer.fields property of <strong>the</strong> Layer object <strong>the</strong> feature came from.fidReturns <strong>the</strong> feature identifier within <strong>the</strong> layer:>>> city.fid0layer_nameReturns <strong>the</strong> name of <strong>the</strong> Layer that <strong>the</strong> feature came from. This will be <strong>the</strong> same for all features in a givenlayer:>>> city.layer_name’cities’indexA method that returns <strong>the</strong> index of <strong>the</strong> given field name. This will be <strong>the</strong> same for all features in a given layer:>>> city.index(’Population’)1Fieldclass FieldnameReturns <strong>the</strong> name of this field:>>> city[’Name’].name’Name’typeReturns <strong>the</strong> OGR type of this field, as an integer. The FIELD_CLASSES dictionary maps <strong>the</strong>se values ontosubclasses of Field:>>> city[’Density’].type2type_nameReturns a string with <strong>the</strong> name of <strong>the</strong> data type of this field:>>> city[’Name’].type_name’String’valueReturns <strong>the</strong> value of this field. The Field class itself returns <strong>the</strong> value as a string, but each subclass returns <strong>the</strong>value in <strong>the</strong> most appropriate form:>>> city[’Population’].value102121widthReturns <strong>the</strong> width of this field:508 Chapter 6. API Reference
<strong>Django</strong> <strong>Documentation</strong>, Release 1.2>>> city[’Name’].width80precisionReturns <strong>the</strong> numeric precision of this field. This is meaningless (and set to zero) for non-numeric fields:>>> city[’Density’].precision15as_double()Returns <strong>the</strong> value of <strong>the</strong> field as a double (float):>>> city[’Density’].as_double()874.7as_int()Returns <strong>the</strong> value of <strong>the</strong> field as an integer:>>> city[’Population’].as_int()102121as_string()Returns <strong>the</strong> value of <strong>the</strong> field as a string:>>> city[’Name’].as_string()’Pueblo’as_datetime()Returns <strong>the</strong> value of <strong>the</strong> field as a tuple of date and time components:>>> city[’Created’].as_datetime()(c_long(1999), c_long(5), c_long(23), c_long(0), c_long(0), c_long(0), c_long(0))Driverclass Driver(dr_input)The Driver class is used internally to wrap an OGR DataSource driver.driver_countReturns <strong>the</strong> number of OGR vector drivers currently registered.OGR GeometriesOGRGeometry OGRGeometry objects share similar functionality with GEOSGeometry objects, and are thinwrappers around OGR’s internal geometry representation. Thus, <strong>the</strong>y allow for more efficient access to data when usingDataSource. Unlike its GEOS counterpart, OGRGeometry supports spatial reference systems and coordinatetransformation:>>> from django.contrib.gis.gdal import OGRGeometry>>> polygon = OGRGeometry(’POLYGON((0 0, 5 0, 5 5, 0 5))’)class OGRGeometry(geom_input[, srs=None])This object is a wrapper for <strong>the</strong> OGR Geometry class. These objects are instantiated directly from <strong>the</strong> givengeom_input parameter, which may be a string containing WKT or HEX, a buffer containing WKB data, or6.2. contrib packages 509
<strong>Django</strong> <strong>Documentation</strong>, Release 1.2an OGRGeomType object. These objects are also returned from <strong>the</strong> Feature.geom attribute, when readingvector data from Layer (which is in turn a part of a DataSource).classmethod from_bbox(bbox)New in version 1.1: Please, see <strong>the</strong> release notes Constructs a Polygon from <strong>the</strong> given bounding-box (a4-tuple).__len__()Returns <strong>the</strong> number of points in a LineString, <strong>the</strong> number of rings in a Polygon, or <strong>the</strong> number of geometriesin a GeometryCollection. Not applicable to o<strong>the</strong>r geometry types.__iter__()Iterates over <strong>the</strong> points in a LineString, <strong>the</strong> rings in a Polygon, or <strong>the</strong> geometries in aGeometryCollection. Not applicable to o<strong>the</strong>r geometry types.__getitem__()Returns <strong>the</strong> point at <strong>the</strong> specified index for a LineString, <strong>the</strong> interior ring at <strong>the</strong> specified index for aPolygon, or <strong>the</strong> geometry at <strong>the</strong> specified index in a GeometryCollection. Not applicable to o<strong>the</strong>rgeometry types.dimensionReturns <strong>the</strong> number of coordinated dimensions of <strong>the</strong> geometry, i.e. 0 for points, 1 for lines, and so forth:>> polygon.dimension2coord_dimChanged in version 1.2: Please, see <strong>the</strong> release notes Returns or sets <strong>the</strong> coordinate dimension of this geometry.For example, <strong>the</strong> value would be 2 for two-dimensional geometries.Note: Setting this property is only available in versions 1.2 and above.geom_countReturns <strong>the</strong> number of elements in this geometry:>>> polygon.geom_count1point_countReturns <strong>the</strong> number of points used to describe this geometry:>>> polygon.point_count4num_pointsAlias for point_count.num_coordsAlias for point_count.geom_typeReturns <strong>the</strong> type of this geometry, as an OGRGeomType object.geom_name510 Chapter 6. API Reference
<strong>Django</strong> <strong>Documentation</strong>, Release 1.2Returns <strong>the</strong> name of <strong>the</strong> type of this geometry:>>> polygon.geom_name’POLYGON’areaReturns <strong>the</strong> area of this geometry, or 0 for geometries that do not contain an area:>>> polygon.area25.0envelopeReturns <strong>the</strong> envelope of this geometry, as an Envelope object.extentReturns <strong>the</strong> envelope of this geometry as a 4-tuple, instead of as an Envelope object:>>> point.extent(0.0, 0.0, 5.0, 5.0)srsThis property controls <strong>the</strong> spatial reference for this geometry, or None if no spatial reference system has beenassigned to it. If assigned, accessing this property returns a SpatialReference object. It may be set withano<strong>the</strong>r SpatialReference object, or any input that SpatialReference accepts. Example:>>> city.geom.srs.name’GCS_WGS_1984’sridReturns or sets <strong>the</strong> spatial reference identifier corresponding to SpatialReference of this geometry. ReturnsNone if <strong>the</strong>re is no spatial reference information associated with this geometry, or if an SRID cannot bedetermined.geosReturns a GEOSGeometry object corresponding to this geometry.gmlReturns a string representation of this geometry in GML format:>>> OGRGeometry(’POINT(1 2)’).gml’1,2’hexReturns a string representation of this geometry in HEX WKB format:>>> OGRGeometry(’POINT(1 2)’).hex’0101000000000000000000F03F0000000000000040’jsonReturns a string representation of this geometry in JSON format:>>> OGRGeometry(’POINT(1 2)’).json’{ "type": "Point", "coordinates": [ 1.000000, 2.000000 ] }’kml6.2. contrib packages 511
<strong>Django</strong> <strong>Documentation</strong>, Release 1.2New in version 1.1: Please, see <strong>the</strong> release notes Returns a string representation of this geometry in KMLformat.wkb_sizeReturns <strong>the</strong> size of <strong>the</strong> WKB buffer needed to hold a WKB representation of this geometry:>>> OGRGeometry(’POINT(1 2)’).wkb_size21wkbReturns a buffer containing a WKB representation of this geometry.wktReturns a string representation of this geometry in WKT format.ewktNew in version 1.2: Please, see <strong>the</strong> release notes Returns <strong>the</strong> EWKT representation of this geometry.clone()Returns a new OGRGeometry clone of this geometry object.close_rings()If <strong>the</strong>re are any rings within this geometry that have not been closed, this routine will do so by adding <strong>the</strong> startingpoint to <strong>the</strong> end:>>> triangle = OGRGeometry(’LINEARRING (0 0,0 1,1 0)’)>>> triangle.close_rings()>>> triangle.wkt’LINEARRING (0 0,0 1,1 0,0 0)’transform(coord_trans, clone=False)Transforms this geometry to a different spatial reference system. May take a CoordTransform object, aSpatialReference object, or any o<strong>the</strong>r input accepted by SpatialReference (including spatial referenceWKT and PROJ.4 strings, or an integer SRID). By default nothing is returned and <strong>the</strong> geometry istransformed in-place. However, if <strong>the</strong> clone keyword is set to True <strong>the</strong>n a transformed clone of this geometryis returned instead.intersects(o<strong>the</strong>r)Returns True if this geometry intersects <strong>the</strong> o<strong>the</strong>r, o<strong>the</strong>rwise returns False.equals(o<strong>the</strong>r)Returns True if this geometry is equivalent to <strong>the</strong> o<strong>the</strong>r, o<strong>the</strong>rwise returns False.disjoint(o<strong>the</strong>r)Returns True if this geometry is spatially disjoint to (i.e. does not intersect) <strong>the</strong> o<strong>the</strong>r, o<strong>the</strong>rwise returns False.touches(o<strong>the</strong>r)Returns True if this geometry touches <strong>the</strong> o<strong>the</strong>r, o<strong>the</strong>rwise returns False.crosses(o<strong>the</strong>r)Returns True if this geometry crosses <strong>the</strong> o<strong>the</strong>r, o<strong>the</strong>rwise returns False.within(o<strong>the</strong>r)Returns True if this geometry is contained within <strong>the</strong> o<strong>the</strong>r, o<strong>the</strong>rwise returns False.512 Chapter 6. API Reference
<strong>Django</strong> <strong>Documentation</strong>, Release 1.2contains(o<strong>the</strong>r)Returns True if this geometry contains <strong>the</strong> o<strong>the</strong>r, o<strong>the</strong>rwise returns False.overlaps(o<strong>the</strong>r)Returns True if this geometry overlaps <strong>the</strong> o<strong>the</strong>r, o<strong>the</strong>rwise returns False.boundary()The boundary of this geometry, as a new OGRGeometry object.convex_hullThe smallest convex polygon that contains this geometry, as a new OGRGeometry object.difference()Returns <strong>the</strong> region consisting of <strong>the</strong> difference of this geometry and <strong>the</strong> o<strong>the</strong>r, as a new OGRGeometry object.intersection()Returns <strong>the</strong> region consisting of <strong>the</strong> intersection of this geometry and <strong>the</strong> o<strong>the</strong>r, as a new OGRGeometry object.sym_difference()Returns <strong>the</strong> region consisting of <strong>the</strong> symmetric difference of this geometry and <strong>the</strong> o<strong>the</strong>r, as a newOGRGeometry object.union()Returns <strong>the</strong> region consisting of <strong>the</strong> union of this geometry and <strong>the</strong> o<strong>the</strong>r, as a new OGRGeometry object.tupleReturns <strong>the</strong> coordinates of a point geometry as a tuple, <strong>the</strong> coordinates of a line geometry as a tuple of tuples,and so forth:>>> OGRGeometry(’POINT (1 2)’).tuple(1.0, 2.0)>>> OGRGeometry(’LINESTRING (1 2,3 4)’).tuple((1.0, 2.0), (3.0, 4.0))coordsAn alias for tuple.class PointxReturns <strong>the</strong> X coordinate of this point:>>> OGRGeometry(’POINT (1 2)’).x1.0yReturns <strong>the</strong> Y coordinate of this point:>>> OGRGeometry(’POINT (1 2)’).y2.0zReturns <strong>the</strong> Z coordinate of this point, or None if <strong>the</strong> <strong>the</strong> point does not have a Z coordinate:6.2. contrib packages 513
<strong>Django</strong> <strong>Documentation</strong>, Release 1.2>>> OGRGeometry(’POINT (1 2 3)’).z3.0class LineStringxReturns a list of X coordinates in this line:>>> OGRGeometry(’LINESTRING (1 2,3 4)’).x[1.0, 3.0]yReturns a list of Y coordinates in this line:>>> OGRGeometry(’LINESTRING (1 2,3 4)’).y[2.0, 4.0]zReturns a list of Z coordinates in this line, or None if <strong>the</strong> line does not have Z coordinates:>>> OGRGeometry(’LINESTRING (1 2 3,4 5 6)’).z[3.0, 6.0]class PolygonshellReturns <strong>the</strong> shell or exterior ring of this polygon, as a LinearRing geometry.exterior_ringAn alias for shell.centroidReturns a Point representing <strong>the</strong> centroid of this polygon.class GeometryCollectionadd(geom)Adds a geometry to this geometry collection. Not applicable to o<strong>the</strong>r geometry types.OGRGeomTypeclass OGRGeomType(type_input)This class allows for <strong>the</strong> representation of an OGR geometry type in any of several ways:>>> from django.contrib.gis.gdal import OGRGeomType>>> gt1 = OGRGeomType(3) # Using an integer for <strong>the</strong> type>>> gt2 = OGRGeomType(’Polygon’) # Using a string>>> gt3 = OGRGeomType(’POLYGON’) # It’s case-insensitive>>> print gt1 == 3, gt1 == ’Polygon’ # Equivalence works w/non-OGRGeomType objectsTrue TruenameReturns a short-hand string form of <strong>the</strong> OGR Geometry type:514 Chapter 6. API Reference
<strong>Django</strong> <strong>Documentation</strong>, Release 1.2>>> gt1.name’Polygon’numReturns <strong>the</strong> number corresponding to <strong>the</strong> OGR geometry type:>>> gt1.num3djangoReturns <strong>the</strong> <strong>Django</strong> field type (a subclass of GeometryField) to use for storing this OGR type, or None if <strong>the</strong>reis no appropriate <strong>Django</strong> type:>>> gt1.django’PolygonField’Envelopeclass Envelope(*args)Represents an OGR Envelope structure that contains <strong>the</strong> minimum and maximum X, Y coordinates for a rectanglebounding box. The naming of <strong>the</strong> variables is compatible with <strong>the</strong> OGR Envelope C structure.min_xThe value of <strong>the</strong> minimum X coordinate.min_yThe value of <strong>the</strong> maximum X coordinate.max_xThe value of <strong>the</strong> minimum Y coordinate.max_yThe value of <strong>the</strong> maximum Y coordinate.urThe upper-right coordinate, as a tuple.llThe lower-left coordinate, as a tuple.tupleA tuple representing <strong>the</strong> envelope.wktA string representing this envelope as a polygon in WKT format.expand_to_include(self, *args)New in version 1.1: Please, see <strong>the</strong> release notesCoordinate System ObjectsSpatialReference6.2. contrib packages 515
<strong>Django</strong> <strong>Documentation</strong>, Release 1.2class SpatialReference(srs_input)Spatial reference objects are initialized on <strong>the</strong> given srs_input, which may be one of <strong>the</strong> following:•OGC Well Known Text (WKT) (a string)•EPSG code (integer or string)•PROJ.4 string•A shorthand string for well-known standards (’WGS84’, ’WGS72’, ’NAD27’, ’NAD83’)Example:>>> wgs84 = SpatialReference(’WGS84’) # shorthand string>>> wgs84 = SpatialReference(4326) # EPSG code>>> wgs84 = SpatialReference(’EPSG:4326’) # EPSG string>>> proj4 = ’+proj=longlat +ellps=WGS84 +datum=WGS84 +no_defs ’>>> wgs84 = SpatialReference(proj4) # PROJ.4 string>>> wgs84 = SpatialReference("""GEOGCS["WGS 84",DATUM["WGS_1984",SPHEROID["WGS 84",6378137,298.257223563,AUTHORITY["EPSG","7030"]],AUTHORITY["EPSG","6326"]],PRIMEM["Greenwich",0,AUTHORITY["EPSG","8901"]],UNIT["degree",0.01745329251994328,AUTHORITY["EPSG","9122"]],AUTHORITY["EPSG","4326"]]""") # OGC WKT__getitem__(target)Returns <strong>the</strong> value of <strong>the</strong> given string attribute node, None if <strong>the</strong> node doesn’t exist. Can also take a tuple as aparameter, (target, child), where child is <strong>the</strong> index of <strong>the</strong> attribute in <strong>the</strong> WKT. For example:>>> wkt = ’GEOGCS["WGS 84", DATUM["WGS_1984, ... AUTHORITY["EPSG","4326"]]’)>>> srs = SpatialReference(wkt) # could also use ’WGS84’, or 4326>>> print srs[’GEOGCS’]WGS 84>>> print srs[’DATUM’]WGS_1984>>> print srs[’AUTHORITY’]EPSG>>> print srs[’AUTHORITY’, 1] # The authority value4326>>> print srs[’TOWGS84’, 4] # <strong>the</strong> fourth value in this wkt0>>> print srs[’UNIT|AUTHORITY’] # For <strong>the</strong> units authority, have to use <strong>the</strong> pipe symbole.EPSG>>> print srs[’UNIT|AUTHORITY’, 1] # The authority value for <strong>the</strong> untis9122attr_value(target, index=0)The attribute value for <strong>the</strong> given target node (e.g. ’PROJCS’). The index keyword specifies an index of <strong>the</strong>child node to return.auth_name(target)Returns <strong>the</strong> authority name for <strong>the</strong> given string target node.auth_code(target)Returns <strong>the</strong> authority code for <strong>the</strong> given string target node.516 Chapter 6. API Reference
<strong>Django</strong> <strong>Documentation</strong>, Release 1.2clone()Returns a clone of this spatial reference object.identify_epsg()This method inspects <strong>the</strong> WKT of this SpatialReference, and will add EPSG authority nodes where an EPSGidentifier is applicable.from_esri()Morphs this SpatialReference from ESRI’s format to EPSGto_esri()Morphs this SpatialReference to ESRI’s format.validate()Checks to see if <strong>the</strong> given spatial reference is valid, if not an exception will be raised.import_epsg(epsg)Import spatial reference from EPSG code.import_proj(proj)Import spatial reference from PROJ.4 string.import_user_input(user_input)New in version 1.1: Please, see <strong>the</strong> release notesimport_wkt(wkt)Import spatial reference from WKT.import_xml(xml)Import spatial reference from XML.nameReturns <strong>the</strong> name of this Spatial Reference.sridReturns <strong>the</strong> SRID of top-level authority, or None if undefined.linear_nameReturns <strong>the</strong> name of <strong>the</strong> linear units.linear_unitsReturns <strong>the</strong> value of <strong>the</strong> linear units.angular_nameReturns <strong>the</strong> name of <strong>the</strong> angular units.”angular_unitsReturns <strong>the</strong> value of <strong>the</strong> angular units.unitsReturns a 2-tuple of <strong>the</strong> units value and <strong>the</strong> units name, and will automatically determines whe<strong>the</strong>r to return <strong>the</strong>linear or angular units.ellisoid6.2. contrib packages 517
<strong>Django</strong> <strong>Documentation</strong>, Release 1.2Returns a tuple of <strong>the</strong> ellipsoid parameters for this spatial reference: (semimajor axis, semiminor axis, andinverse flattening)semi_majorReturns <strong>the</strong> semi major axis of <strong>the</strong> ellipsoid for this spatial reference.semi_minorReturns <strong>the</strong> semi minor axis of <strong>the</strong> ellipsoid for this spatial reference.inverse_flatteningReturns <strong>the</strong> inverse flattening of <strong>the</strong> ellipsoid for this spatial reference.geographicReturns True if this spatial reference is geographic (root node is GEOGCS).localReturns True if this spatial reference is local (root node is LOCAL_CS).projectedReturns True if this spatial reference is a projected coordinate system (root node is PROJCS).wktReturns <strong>the</strong> WKT representation of this spatial reference.pretty_wktReturns <strong>the</strong> ‘pretty’ representation of <strong>the</strong> WKT.projReturns <strong>the</strong> PROJ.4 representation for this spatial reference.proj4Alias for SpatialReference.proj.xmlReturns <strong>the</strong> XML representation of this spatial reference.CoordTransformclass CoordTransform(source, target)Represents a coordinate system transform. It is initialized with two SpatialReference, representing <strong>the</strong> sourceand target coordinate systems, respectively. These objects should be used when performing <strong>the</strong> same coordinatetransformation repeatedly on different geometries:>>> ct = CoordTransform(SpatialReference(’WGS84’), SpatialReference(’NAD83’))>>> for feat in layer:... geom = feat.geom # getting clone of feature geometry... geom.transform(ct) # transformingSettingsGDAL_LIBRARY_PATH A string specifying <strong>the</strong> location of <strong>the</strong> GDAL library. Typically, this setting is only usedif <strong>the</strong> GDAL library is in a non-standard location (e.g., /home/john/lib/libgdal.so).518 Chapter 6. API Reference
<strong>Django</strong> <strong>Documentation</strong>, Release 1.2Geo<strong>Django</strong> UtilitiesThe django.contrib.gis.utils module contains various utilities that are useful in creating geospatial Webapplications.Geolocation with GeoIPThe GeoIP object is a ctypes wrapper for <strong>the</strong> MaxMind GeoIP C API. 31 This interface is a BSD-licensed alternativeto <strong>the</strong> GPL-licensed Python GeoIP interface provided by MaxMind.In order to perform IP-based geolocation, <strong>the</strong> GeoIP object requires <strong>the</strong> GeoIP C libary and ei<strong>the</strong>r <strong>the</strong> GeoIP Countryor City datasets in binary format (<strong>the</strong> CSV files will not work!). These datasets may be downloaded from MaxMind.Grab <strong>the</strong> GeoIP.dat.gz and GeoLiteCity.dat.gz and unzip <strong>the</strong>m in a directory corresponding to what youset GEOIP_PATH with in your settings. See <strong>the</strong> example and reference below for more details.ExampleAssuming you have <strong>the</strong> GeoIP C library installed, here is an example of its usage:>>> from django.contrib.gis.utils import GeoIP>>> g = GeoIP()>>> g.country(’google.com’){’country_code’: ’US’, ’country_name’: ’United States’}>>> g.city(’72.14.207.99’){’area_code’: 650,’city’: ’Mountain View’,’country_code’: ’US’,’country_code3’: ’USA’,’country_name’: ’United States’,’dma_code’: 807,’latitude’: 37.419200897216797,’longitude’: -122.05740356445312,’postal_code’: ’94043’,’region’: ’CA’}>>> g.lat_lon(’salon.com’)(37.789798736572266, -122.39420318603516)>>> g.lon_lat(’uh.edu’)(-95.415199279785156, 29.77549934387207)>>> g.geos(’24.124.1.80’).wkt’POINT (-95.2087020874023438 39.0392990112304688)’GeoIP SettingsGEOIP_PATH A string specifying <strong>the</strong> directory where <strong>the</strong> GeoIP data files are located. This setting is requiredunless manually specified with path keyword when initializing <strong>the</strong> GeoIP object.GEOIP_LIBRARY_PATH A string specifying <strong>the</strong> location of <strong>the</strong> GeoIP C library. Typically, this setting is onlyused if <strong>the</strong> GeoIP C library is in a non-standard location (e.g., /home/sue/lib/libGeoIP.so).GEOIP_COUNTRYThe basename to use for <strong>the</strong> GeoIP country data file. Defaults to ’GeoIP.dat’.GEOIP_CITYThe basename to use for <strong>the</strong> GeoIP city data file. Defaults to ’GeoLiteCity.dat’.31 GeoIP(R) is a registered trademark of MaxMind, LLC of Boston, Massachusetts.6.2. contrib packages 519
<strong>Django</strong> <strong>Documentation</strong>, Release 1.2GeoIP APIclass GeoIP([path=None, cache=0, country=None, city=None])The GeoIP object does not require any parameters to use <strong>the</strong> default settings. However, at <strong>the</strong> very least <strong>the</strong>GEOIP_PATH setting should be set with <strong>the</strong> path of <strong>the</strong> location of your GeoIP data sets. The following intializationkeywords may be used to customize any of <strong>the</strong> defaults.KeywordArgumentspathDescriptionBase directory to where GeoIP data is located or <strong>the</strong> full path to where <strong>the</strong> city or country datafiles (.dat) are located. Assumes that both <strong>the</strong> city and country data sets are located in thisdirectory; overrides <strong>the</strong> GEOIP_PATH settings attribute.cache The cache settings when opening up <strong>the</strong> GeoIP datasets, and may be an integer in (0, 1, 2, 4)corresponding to <strong>the</strong> GEOIP_STANDARD, GEOIP_MEMORY_CACHE,GEOIP_CHECK_CACHE, and GEOIP_INDEX_CACHE GeoIPOptions C API settings,respectively. Defaults to 0 (GEOIP_STANDARD).countrycityThe name of <strong>the</strong> GeoIP country data file. Defaults to GeoIP.dat. Setting this keywordoverrides <strong>the</strong> GEOIP_COUNTRY settings attribute.The name of <strong>the</strong> GeoIP city data file. Defaults to GeoLiteCity.dat. Setting this keywordoverrides <strong>the</strong> GEOIP_CITY settings attribute.GeoIP MethodsQuerying All <strong>the</strong> following querying routines may take ei<strong>the</strong>r a string IP address or a fully qualified domain name(FQDN). For example, both ’24.124.1.80’ and ’djangoproject.com’ would be valid query parameters.GeoIP.city(query)Returns a dictionary of city information for <strong>the</strong> given query. Some of <strong>the</strong> values in <strong>the</strong> dictionary may be undefined(None).GeoIPcountry(query)Returns a dictionary with <strong>the</strong> country code and country for <strong>the</strong> given query.GeoIP.country_code(query)Returns only <strong>the</strong> country code corresponding to <strong>the</strong> query.GeoIP.country_name(query)Returns only <strong>the</strong> country name corresponding to <strong>the</strong> query.Coordinate RetrievalGeoIP.coords(query)Returns a coordinate tuple of (longitude, latitude).GeoIP.lon_lat(query)Returns a coordinate tuple of (longitude, latitude).GeoIP.lat_lon(query)Returns a coordinate tuple of (latitude, longitude),GeoIP.geos(query)Returns a django.contrib.gis.geos.Point object corresponding to <strong>the</strong> query.520 Chapter 6. API Reference
<strong>Django</strong> <strong>Documentation</strong>, Release 1.2Database InformationGeoIP.country_infoThis property returns information about <strong>the</strong> GeoIP country database.GeoIP.city_infoThis property returns information about <strong>the</strong> GeoIP city database.GeoIP.infoThis property returns information about all GeoIP databases (both city and country).GeoIP-Python API compatibility methods These methods exist to ease compatibility with any code using Max-Mind’s existing Python API.classmethod GeoIP.open(path, cache)This classmethod instantiates <strong>the</strong> GeoIP object from <strong>the</strong> given database path and given cache setting.GeoIP.region_by_addr(query)GeoIP.region_by_name(query)GeoIP.record_by_addr(query)GeoIP.record_by_name(query)GeoIP.country_code_by_addr(query)GeoIP.country_code_by_name(query)GeoIP.country_name_by_addr(query)GeoIP.country_name_by_name(query)LayerMapping data import utilityThe LayerMapping class provides a way to map <strong>the</strong> contents of vector spatial data files (e.g. shapefiles) intotoGeo<strong>Django</strong> models.This utility grew out of <strong>the</strong> author’s personal needs to eliminate <strong>the</strong> code repetition that went into pulling geometriesand fields out of a vector layer, converting to ano<strong>the</strong>r coordinate system (e.g. WGS84), and <strong>the</strong>n inserting into aGeo<strong>Django</strong> model.Note: Use of LayerMapping requires GDAL.Warning: GIS data sources, like shapefiles, may be very large. If you find that LayerMapping is using toomuch memory, set DEBUG to False in your settings. When DEBUG is set to True, <strong>Django</strong> automatically logsevery SQL query – thus, when SQL statements contain geometries, it is easy to consume more memory than istypical.Example1. You need a GDAL-supported data source, like a shapefile (here we’re using a simple polygon shapefile,test_poly.shp, with three features):6.2. contrib packages 521
<strong>Django</strong> <strong>Documentation</strong>, Release 1.2>>> from django.contrib.gis.gdal import DataSource>>> ds = DataSource(’test_poly.shp’)>>> layer = ds[0]>>> print layer.fields # Exploring <strong>the</strong> fields in <strong>the</strong> layer, we only want <strong>the</strong> ’str’ field.[’float’, ’int’, ’str’]>>> print len(layer) # getting <strong>the</strong> number of features in <strong>the</strong> layer (should be 3)3>>> print layer.geom_type # Should be ’Polygon’Polygon>>> print layer.srs # WGS84 in WKTGEOGCS["GCS_WGS_1984",DATUM["WGS_1984",SPHEROID["WGS_1984",6378137,298.257223563]],PRIMEM["Greenwich",0],UNIT["Degree",0.017453292519943295]]2. Now we define our corresponding <strong>Django</strong> model (make sure to use syncdb):from django.contrib.gis.db import modelsclass TestGeo(models.Model):name = models.CharField(max_length=25) # corresponds to <strong>the</strong> ’str’ fieldpoly = models.PolygonField(srid=4269) # we want our model in a different SRIDobjects = models.GeoManager()def __unicode__(self):return ’Name: %s’ % self.name3. Use LayerMapping to extract all <strong>the</strong> features and place <strong>the</strong>m in <strong>the</strong> database:>>> from django.contrib.gis.utils import LayerMapping>>> from geoapp.models import TestGeo>>> mapping = {’name’ : ’str’, # The ’name’ model field maps to <strong>the</strong> ’str’ layer field.’poly’ : ’POLYGON’, # For geometry fields use OGC name.} # The mapping is a dictionary>>> lm = LayerMapping(TestGeo, ’test_poly.shp’, mapping)>>> lm.save(verbose=True) # Save <strong>the</strong> layermap, imports <strong>the</strong> data.Saved: Name: 1Saved: Name: 2Saved: Name: 3Here, LayerMapping just transformed <strong>the</strong> three geometries from <strong>the</strong> shapefile in <strong>the</strong>ir original spatial referencesystem (WGS84) to <strong>the</strong> spatial reference system of <strong>the</strong> Geo<strong>Django</strong> model (NAD83). If no spatial reference system isdefined for <strong>the</strong> layer, use <strong>the</strong> source_srs keyword with a SpatialReference object to specify one.LayerMapping APIclass LayerMapping(model, data_source, mapping[, layer=0, source_srs=None, encoding=None, transaction_mode=’commit_on_success’,transform=True, unique=True, using=’default’])The following are <strong>the</strong> arguments and keywords that may be used during instantiation of LayerMapping objects.ArgumentDescriptionmodel The geographic model, not an instance.data_source The path to <strong>the</strong> OGR-supported data source file (e.g., a shapefile). Also acceptsdjango.contrib.gis.gdal.DataSource instances.mapping A dictionary: keys are strings corresponding to <strong>the</strong> model field, and values correspond to string fieldnames for <strong>the</strong> OGR feature, or if <strong>the</strong> model field is a geographic <strong>the</strong>n it should correspond to <strong>the</strong>OGR geometry type, e.g., ’POINT’, ’LINESTRING’, ’POLYGON’.522 Chapter 6. API Reference
<strong>Django</strong> <strong>Documentation</strong>, Release 1.2KeywordArgumentslayer The index of <strong>the</strong> layer to use from <strong>the</strong> Data Source (defaults to 0)source_srs Use this to specify <strong>the</strong> source SRS manually (for example, some shapefiles don’t come with a‘.prj’ file). An integer SRID, WKT or PROJ.4 strings, anddjango.contrib.gis.gdal.SpatialReference objects are accepted.encoding Specifies <strong>the</strong> character set encoding of <strong>the</strong> strings in <strong>the</strong> OGR data source. For example,’latin-1’, ’utf-8’, and ’cp437’ are all valid encoding parameters.transaction_mode May be ’commit_on_success’ (default) or ’autocommit’.transform Setting this to False will disable coordinate transformations. In o<strong>the</strong>r words, geometries will beinserted into <strong>the</strong> database unmodified from <strong>the</strong>ir original state in <strong>the</strong> data source.unique Setting this to <strong>the</strong> name, or a tuple of names, from <strong>the</strong> given model will create models uniqueonly to <strong>the</strong> given name(s). Geometries will from each feature will be added into <strong>the</strong> collectionassociated with <strong>the</strong> unique model. Forces <strong>the</strong> transaction mode to be ’autocommit’.using New in version 1.2. Sets <strong>the</strong> database to use when importing spatial data. Default is ’default’save() Keyword ArgumentsLayerMapping.save([verbose=False, fid_range=False, step=False, progress=False, silent=False,stream=sys.stdout, strict=False])The save() method also accepts keywords. These keywords are used for controlling output logging, error handling,and for importing specific feature ranges.Save KeywordArgumentsfid_rangeprogresssilentstepstreamstrictverboseDescriptionMay be set with a slice or tuple of (begin, end) feature ID’s to map from <strong>the</strong> data source. Ino<strong>the</strong>r words, this keyword enables <strong>the</strong> user to selectively import a subset range of features in<strong>the</strong> geographic data source.When this keyword is set, status information will be printed giving <strong>the</strong> number of featuresprocessed and successfully saved. By default, progress information will be printed every 1000features processed, however, this default may be overridden by setting this keyword with aninteger for <strong>the</strong> desired interval.By default, non-fatal error notifications are printed to sys.stdout, but this keyword may beset to disable <strong>the</strong>se notifications.If set with an integer, transactions will occur at every step interval. For example, ifstep=1000, a commit would occur after <strong>the</strong> 1,000th feature, <strong>the</strong> 2,000th feature etc.Status information will be written to this file handle. Defaults to using sys.stdout, but anyobject with a write method is supported.Execution of <strong>the</strong> model mapping will cease upon <strong>the</strong> first error encountered. The default value(False) behavior is to attempt to continue.If set, information will be printed subsequent to each model save executed on <strong>the</strong> database.TroubleshootingRunning out of memory As noted in <strong>the</strong> warning at <strong>the</strong> top of this section, <strong>Django</strong> stores all SQL queries whenDEBUG=True. Set DEBUG=False in your settings, and this should stop excessive memory use when runningLayerMapping scripts.MySQL: max_allowed_packet errorMySQL:If you encounter <strong>the</strong> following error when using LayerMapping andOperationalError: (1153, "Got a packet bigger than ’max_allowed_packet’ bytes")6.2. contrib packages 523
<strong>Django</strong> <strong>Documentation</strong>, Release 1.2Then <strong>the</strong> solution is to increase <strong>the</strong> value of <strong>the</strong> max_allowed_packet setting in your MySQL configuration.For example, <strong>the</strong> default value may be something low like one megabyte – <strong>the</strong> setting may be modified in MySQL’sconfiguration file (my.cnf) in <strong>the</strong> [mysqld] section:max_allowed_packet = 10MOGR Inspectionogrinspectogrinspect(data_source, model_name[, **kwargs])mappingmapping(data_source[, geom_name=’geom’, layer_key=0, multi_geom=False])GeoIPInterface to <strong>the</strong> MaxMind GeoIP library for performing IP-based geolocation from Geo<strong>Django</strong>. See GeoIP referencedocumentation for more information.LayerMappingThe LayerMapping simplifies <strong>the</strong> process of importing spatial data and attributes into your Geo<strong>Django</strong> models.Geo<strong>Django</strong> Management Commandsinspectdbdjango-admin.py inspectdbWhen django.contrib.gis is in your INSTALLED_APPS, <strong>the</strong> inspectdb management command is overriddenwith one from Geo<strong>Django</strong>. The overridden command is spatially-aware, and places geometry fields in <strong>the</strong>auto-generated model definition, where appropriate.ogrinspect django-admin.py ogrinspectThe ogrinpsect management command will inspect <strong>the</strong> given OGR-compatible DataSource (e.g., a shapefile)and will output a Geo<strong>Django</strong> model with <strong>the</strong> given model name. There’s a detailed example of using ogrinspectin <strong>the</strong> tutorial.-blank Use a comma separated list of OGR field names to add <strong>the</strong> blank=True keyword option to <strong>the</strong> field definition.Set with true to apply to all applicable fields.-decimal Use a comma separated list of OGR float fields to generate DecimalField instead of <strong>the</strong> defaultFloatField. Set to true to apply to all OGR float fields.-geom-name Specifies <strong>the</strong> model attribute name to use for <strong>the</strong> geometry field. Defaults to ’geom’.524 Chapter 6. API Reference
<strong>Django</strong> <strong>Documentation</strong>, Release 1.2-layer The key for specifying which layer in <strong>the</strong> OGR DataSource source to use. Defaults to 0 (<strong>the</strong> first layer). Maybe an integer or a string identifier for <strong>the</strong> Layer.-mappingAutomatically generate a mapping dictionary for use with LayerMapping.-multi-geomWhen generating <strong>the</strong> geometry field, treat it as a geometry collection. For example, if this setting is enabled<strong>the</strong>n a MultiPolygonField will be placed in <strong>the</strong> generated model ra<strong>the</strong>r than PolygonField.-name-field Generates a __unicode__ routine on <strong>the</strong> model that will return <strong>the</strong> <strong>the</strong> given field name.-no-importsSuppresses <strong>the</strong> from django.contrib.gis.db import models import statement.-null Use a comma separated list of OGR field names to add <strong>the</strong> null=True keyword option to <strong>the</strong> field definition.Set with true to apply to all applicable fields.-sridThe SRID to use for <strong>the</strong> geometry field. If not set, ogrinspect attempts to automatically determine of <strong>the</strong>SRID of <strong>the</strong> data source.Geo<strong>Django</strong>’s admin siteGeoModelAdminclass GeoModelAdmindefault_lonThe default center longitude.default_latThe default center latitude.default_zoomThe default zoom level to use. Defaults to 18.extra_jsSequence of URLs to any extra JavaScript to include.map_templateOverride <strong>the</strong> template used to generate <strong>the</strong> JavaScript slippy map. Default is’gis/admin/openlayers.html’.map_widthWidth of <strong>the</strong> map, in pixels. Defaults to 600.map_heightHeight of <strong>the</strong> map, in pixels. Defaults to 400.openlayers_urlLink to <strong>the</strong> URL of <strong>the</strong> OpenLayers JavaScript. Defaults to ’http://openlayers.org/api/2.8/OpenLayers.js’.6.2. contrib packages 525
<strong>Django</strong> <strong>Documentation</strong>, Release 1.2modifiableDefaults to False. When set to to True, disables editing of existing geometry fields in <strong>the</strong> admin.Note: This is different from adding <strong>the</strong> geometry field to readonly_fields, which will only display <strong>the</strong>WKT of <strong>the</strong> geometry. Setting modifiable=False, actually displays <strong>the</strong> geometry in a map, but disables<strong>the</strong> ability to edit its vertices.OSMGeoAdminclass OSMGeoAdminA subclass of GeoModelAdmin that uses a spherical mercator projection with OpenStreetMap street data tiles.See <strong>the</strong> OSMGeoAdmin introduction in <strong>the</strong> tutorial for a usage example.Geographic FeedsGeo<strong>Django</strong> has its own Feed subclass that may embed location information in RSS/Atom feeds formatted accordingto ei<strong>the</strong>r <strong>the</strong> Simple GeoRSS or W3C Geo standards. Because Geo<strong>Django</strong>’s syndication API is a superset of <strong>Django</strong>’s,please consult <strong>Django</strong>’s syndication documentation for details on general usage.ExampleAPI ReferenceFeed Subclassclass FeedIn addition to methods provided by <strong>the</strong> django.contrib.syndication.feeds.Feed base class,Geo<strong>Django</strong>’s Feed class provides <strong>the</strong> following overrides. Note that <strong>the</strong>se overrides may be done in multipleways:from django.contrib.gis.feeds import Feedclass MyFeed(Feed):# First, as a class attribute.geometry = ...item_geometry = ...# Also a function with no argumentsdef geometry(self):...def item_geometry(self):...# And as a function with a single argumentdef geometry(self, obj):...def item_geometry(self, item):...geometry(obj)526 Chapter 6. API Reference
<strong>Django</strong> <strong>Documentation</strong>, Release 1.2Takes <strong>the</strong> object returned by get_object() and returns <strong>the</strong> feed’s geometry.GEOSGeometry instance, or can be a tuple to represent a point or a box. For example:Typically this is aclass ZipcodeFeed(Feed):def geometry(self, obj):# Can also return: ‘obj.poly‘, and ‘obj.poly.centroid‘.return obj.poly.extent # tuple like: (X0, Y0, X1, Y1).item_geometry(item)Set this to return <strong>the</strong> geometry for each item in <strong>the</strong> feed. This can be a GEOSGeometry instance, or a tuple thatrepresents a point coordinate or bounding box. For example:class ZipcodeFeed(Feed):def item_geometry(self, obj):# Returns <strong>the</strong> polygon.return obj.polySyndicationFeed Subclassessubclasses are available:class GeoRSSFeedclass GeoAtom1Feedclass W3CGeoFeedThe following django.utils.feedgenerator.SyndicationFeedNote: W3C Geo formatted feeds only support PointField geometries.Geographic SitemapsGoogle’s sitemap protocol has been recently extended to support geospatial content. 32 This includes <strong>the</strong> additionof <strong>the</strong> child element , which tells Google that <strong>the</strong> content located at <strong>the</strong> URL is geographic innature. 33ExampleReferenceKMLSitemapKMZSitemapGeoRSSSitemap32 Google, Inc., What is a Geo Sitemap?.33 Google, Inc., Submit Your Geo Content to Google.6.2. contrib packages 527
<strong>Django</strong> <strong>Documentation</strong>, Release 1.2Testing Geo<strong>Django</strong> AppsChanged in version 1.2: Please, see <strong>the</strong> release notes In <strong>Django</strong> 1.2, <strong>the</strong> addition of Spatial Backends simplified <strong>the</strong>process of testing Geo<strong>Django</strong> applications. Specifically, testing Geo<strong>Django</strong> applications is now <strong>the</strong> same as Testing<strong>Django</strong> applications.Included in this documentation are some additional notes and settings for PostGIS and SpatiaLite users.Note: <strong>Django</strong> 1.1 users are still required to use a custom TEST_RUNNER. See <strong>the</strong> Testing Geo<strong>Django</strong> Applicationsin 1.1 section for more details.PostGISSettingsNote: The settings below have sensible defaults, and shouldn’t require manual setting.POSTGIS_TEMPLATE New in version 1.1: Please, see <strong>the</strong> release notesChanged in version 1.2: Please, see <strong>the</strong>release notes This setting may be used to customize <strong>the</strong> name of <strong>the</strong> PostGIS template database to use. In <strong>Django</strong>versions 1.2 and above, it automatically defaults to ’template_postgis’ (<strong>the</strong> same name used in <strong>the</strong> installationdocumentation).Note: <strong>Django</strong> 1.1 users will still have to define <strong>the</strong> POSTGIS_TEMPLATE with a value, for example:POSTGIS_TEMPLATE=’template_postgis’POSTGIS_VERSION New in version 1.1: Please, see <strong>the</strong> release notes When Geo<strong>Django</strong>’s spatial backend initializeson PostGIS, it has to perform a SQL query to determine <strong>the</strong> version in order to figure out what features areavailable. Advanced users wishing to prevent this additional query may set <strong>the</strong> version manually using a 3-tuple of integersspecifying <strong>the</strong> major, minor, and subminor version numbers for PostGIS. For example, to configure for PostGIS1.5.2 you would use:POSTGIS_VERSION = (1, 5, 2)Obtaining Sufficient Privileges Depending on your configuration, this section describes several methods to configurea database user with sufficient privileges to run tests for Geo<strong>Django</strong> applications on PostgreSQL. If your spatialdatabase template was created like in <strong>the</strong> instructions, <strong>the</strong>n your testing database user only needs to have <strong>the</strong> ability tocreate databases. In o<strong>the</strong>r configurations, you may be required to use a database superuser.Create Database UserTo make database user with <strong>the</strong> ability to create databases, use <strong>the</strong> following command:$ createuser --createdb -R -S The -R -S flags indicate that we do not want <strong>the</strong> user to have <strong>the</strong> ability to create additional users (roles) or to be asuperuser, respectively.Alternatively, you may alter an existing user’s role from <strong>the</strong> SQL shell (assuming this is done from an existing superuseraccount):528 Chapter 6. API Reference
<strong>Django</strong> <strong>Documentation</strong>, Release 1.2postgres# ALTER ROLE CREATEDB NOSUPERUSER NOCREATEROLE;Create Database SuperuserThis may be done at <strong>the</strong> time <strong>the</strong> user is created, for example:$ createuser --superuser Or you may alter <strong>the</strong> user’s role from <strong>the</strong> SQL shell (assuming this is done from an existing superuser account):postgres# ALTER ROLE SUPERUSER;Create Local PostgreSQL Database1. Initialize database: initdb -D /path/to/user/db2. If <strong>the</strong>re’s already a Postgres instance on <strong>the</strong> machine, it will need to use a different TCP port than 5432. Editpostgresql.conf (in /path/to/user/db) to change <strong>the</strong> database port (e.g. port = 5433).3. Start this database pg_ctl -D /path/to/user/db startWindows On Windows platforms <strong>the</strong> pgAdmin III utility may also be used as a simple way to add superuser privilegesto your database user.By default, <strong>the</strong> PostGIS installer on Windows includes a template spatial database entitled template_postgis.SpatiaLiteNew in version 1.1: Please, see <strong>the</strong> release notes You will need to download <strong>the</strong> initialization SQL script for SpatiaLite:$ wget http://www.gaia-gis.it/spatialite/init_spatialite-2.3.zip$ unzip init_spatialite-2.3.zipIf init_spatialite-2.3.sql is in <strong>the</strong> same path as your project’s manage.py, <strong>the</strong>n all you have to do is:$ python manage.py testSettingsSPATIALITE_SQL New in version 1.1: Please, see <strong>the</strong> release notes By default, <strong>the</strong> Geo<strong>Django</strong> test runner looksfor <strong>the</strong> SpatiaLite SQL in <strong>the</strong> same directory where it was invoked (by default <strong>the</strong> same directory where manage.pyis located). If you want to use a different location, <strong>the</strong>n you may add <strong>the</strong> following to your settings:SPATIALITE_SQL=’/path/to/init_spatialite-2.3.sql’Testing Geo<strong>Django</strong> Applications in 1.1In <strong>Django</strong> 1.1, to accommodate <strong>the</strong> extra steps required to scaffalod a spatial database automatically, a test runnercustomized for Geo<strong>Django</strong> must be used. To use this runner, configure TEST_RUNNER as follows:TEST_RUNNER=’django.contrib.gis.tests.run_tests’6.2. contrib packages 529
<strong>Django</strong> <strong>Documentation</strong>, Release 1.2Note: In order to create a spatial database, <strong>the</strong> USER setting (or TEST_USER, if optionally defined on Oracle)requires elevated privileges. When using PostGIS or MySQL, <strong>the</strong> database user must have at least <strong>the</strong> ability to createdatabases. When testing on Oracle, <strong>the</strong> user should be a superuser.Geo<strong>Django</strong> TestsChanged in version 1.2.4: Please, see <strong>the</strong> release notes Geo<strong>Django</strong>’s test suite may be run in one of two ways, ei<strong>the</strong>rby itself or with <strong>the</strong> rest of <strong>Django</strong>’s Unit tests.Note: The TEST_RUNNER previously used to execute <strong>the</strong> Geo<strong>Django</strong> testsuite,:func:django.contrib.gis.tests.run_gis_tests, was deprecated in favor of <strong>the</strong>django.contrib.gis.tests.Geo<strong>Django</strong>TestSuiteRunner class.Run only Geo<strong>Django</strong> tests To run only <strong>the</strong> tests for Geo<strong>Django</strong>, <strong>the</strong> TEST_RUNNER setting must be changed touse <strong>the</strong> Geo<strong>Django</strong>TestSuiteRunner:TEST_RUNNER = ’django.contrib.gis.tests.Geo<strong>Django</strong>TestSuiteRunner’Exampleand user:First, you’ll need a bare-bones settings file, like below, that is customized with your spatial database nameTEST_RUNNER = ’django.contrib.gis.tests.Geo<strong>Django</strong>TestSuiteRunner’DATABASES = {’default’: {’ENGINE’: ’django.contrib.gis.db.backends.postgis’,’NAME’: ’a_spatial_database’,’USER’: ’db_user’}}Assuming <strong>the</strong> above is in a file called postgis.py that is in <strong>the</strong> <strong>the</strong> same directory as manage.py of your <strong>Django</strong>project, <strong>the</strong>n you may run <strong>the</strong> tests with <strong>the</strong> following command:$ python manage.py test --settings=postgisRun with runtests.py To have <strong>the</strong> Geo<strong>Django</strong> tests executed when running <strong>the</strong> <strong>Django</strong> test suite withruntests.py all of <strong>the</strong> databases in <strong>the</strong> settings file must be using one of <strong>the</strong> spatial database backends.Warning: Do not change <strong>the</strong> TEST_RUNNER setting when running <strong>the</strong> Geo<strong>Django</strong> tests with runtests.py.Example The following is an example bare-bones settings file with spatial backends that can be used to run <strong>the</strong>entire <strong>Django</strong> test suite, including those in django.contrib.gis:DATABASES = {’default’: {’ENGINE’: ’django.contrib.gis.db.backends.postgis’,’NAME’: ’geodjango’,530 Chapter 6. API Reference
<strong>Django</strong> <strong>Documentation</strong>, Release 1.2}’USER’: ’geodjango’,},’o<strong>the</strong>r’: {’ENGINE’: ’django.contrib.gis.db.backends.postgis’,’NAME’: ’o<strong>the</strong>r’,’USER’: ’geodjango’,}Assuming <strong>the</strong> settings above were in a postgis.py file in <strong>the</strong> same directory as runtests.py, <strong>the</strong>n all <strong>Django</strong>and Geo<strong>Django</strong> tests would be performed when executing <strong>the</strong> command:$ ./runtests.py --settings=postgisDeploying Geo<strong>Django</strong>Warning: Geo<strong>Django</strong> uses <strong>the</strong> GDAL geospatial library which is not thread safe at this time. Thus, it is highlyrecommended to not use threading when deploying – in o<strong>the</strong>r words, use a an appropriate configuration of Apacheor <strong>the</strong> prefork method when using FastCGI through ano<strong>the</strong>r Web server.ApacheIn this section <strong>the</strong>re are some example VirtualHost directives for when deploying using ei<strong>the</strong>r mod_python ormod_wsgi. At this time, we recommend mod_wsgi, as it is now officially recommended way to deploy <strong>Django</strong>applications with Apache. Moreover, if mod_python is used, <strong>the</strong>n a prefork version of Apache must also be used.As long as mod_wsgi is configured correctly, it does not matter whe<strong>the</strong>r <strong>the</strong> version of Apache is prefork or worker.Note: The Alias and Directory configurations in <strong>the</strong> <strong>the</strong> examples below use an example path to a system-wideinstallation folder of <strong>Django</strong>. Substitute in an appropriate location, if necessary, as it may be different than <strong>the</strong> path onyour system.mod_wsgiExample:WSGIDaemonProcess geodjango user=geo group=geo processes=5 threads=1WSGIProcessGroup geodjangoWSGIScriptAlias / /home/geo/geodjango/world.wsgiAlias /media/ "/usr/lib/python2.5/site-packages/django/contrib/admin/media/"Order allow,denyOptions IndexesAllow from allIndexOptions FancyIndexingWarning: If <strong>the</strong> WSGIDaemonProcess attribute threads is not set to 1, <strong>the</strong>n Apache may crash whenrunning your Geo<strong>Django</strong> application. Increase <strong>the</strong> number of processes instead.6.2. contrib packages 531
<strong>Django</strong> <strong>Documentation</strong>, Release 1.2For more information, please consult <strong>Django</strong>’s mod_wsgi documentation.mod_pythonExample:SetHandler mod_pythonPythonHandler django.core.handlers.modpythonSetEnv DJANGO_SETTINGS_MODULE world.settingsPythonDebug OnPythonPath "[’/var/www/apps’] + sys.path"Alias /media/ "/usr/lib/python2.5/site-packages/django/contrib/admin/media/"SetHandler NoneWarning: When using mod_python you must be using a prefork version of Apache, or else your Geo<strong>Django</strong>application may crash Apache.For more information, please consult <strong>Django</strong>’s mod_python documentation.LighttpdFastCGINginxFastCGI6.2.10 django.contrib.humanizeA set of <strong>Django</strong> template filters useful for adding a “human touch” to data.To activate <strong>the</strong>se filters, add ’django.contrib.humanize’ to your INSTALLED_APPS setting. Once you’vedone that, use {% load humanize %} in a template, and you’ll have access to <strong>the</strong> following filters.apnumberFor numbers 1-9, returns <strong>the</strong> number spelled out. O<strong>the</strong>rwise, returns <strong>the</strong> number. This follows Associated Press style.Examples:• 1 becomes one.• 2 becomes two.• 10 becomes 10.You can pass in ei<strong>the</strong>r an integer or a string representation of an integer.532 Chapter 6. API Reference
<strong>Django</strong> <strong>Documentation</strong>, Release 1.2intcommaConverts an integer to a string containing commas every three digits.Examples:• 4500 becomes 4,500.• 45000 becomes 45,000.• 450000 becomes 450,000.• 4500000 becomes 4,500,000.You can pass in ei<strong>the</strong>r an integer or a string representation of an integer.intwordConverts a large integer to a friendly text representation. Works best for numbers over 1 million.Examples:• 1000000 becomes 1.0 million.• 1200000 becomes 1.2 million.• 1200000000 becomes 1.2 billion.Values up to 1000000000000000 (one quadrillion) are supported.You can pass in ei<strong>the</strong>r an integer or a string representation of an integer.naturaldayNew in version 1.0: Please, see <strong>the</strong> release notes For dates that are <strong>the</strong> current day or within one day, return “today”,“tomorrow” or “yesterday”, as appropriate. O<strong>the</strong>rwise, format <strong>the</strong> date using <strong>the</strong> passed in format string.Argument: Date formatting string as described in <strong>the</strong> date tag.Examples (when ‘today’ is 17 Feb 2007):• 16 Feb 2007 becomes yesterday.• 17 Feb 2007 becomes today.• 18 Feb 2007 becomes tomorrow.• Any o<strong>the</strong>r day is formatted according to given argument or <strong>the</strong> DATE_FORMAT setting if no argument is given.ordinalConverts an integer to its ordinal as a string.Examples:• 1 becomes 1st.• 2 becomes 2nd.• 3 becomes 3rd.You can pass in ei<strong>the</strong>r an integer or a string representation of an integer.6.2. contrib packages 533
<strong>Django</strong> <strong>Documentation</strong>, Release 1.26.2.11 The “local flavor” add-onsFollowing its “batteries included” philosophy, <strong>Django</strong> comes with assorted pieces of code that are useful for particularcountries or cultures. These are called <strong>the</strong> “local flavor” add-ons and live in <strong>the</strong> django.contrib.localflavorpackage.Inside that package, country- or culture-specific code is organized into subpackages, named using ISO 3166 countrycodes.Most of <strong>the</strong> localflavor add-ons are localized form components deriving from <strong>the</strong> forms framework – for example,a USStateField that knows how to validate U.S. state abbreviations, and a FISocialSecurityNumber thatknows how to validate Finnish social security numbers.To use one of <strong>the</strong>se localized components, just import <strong>the</strong> relevant subpackage. For example, here’s how you cancreate a form with a field representing a French telephone number:from django import formsfrom django.contrib.localflavor.fr.forms import FRPhoneNumberFieldclass MyForm(forms.Form):my_french_phone_no = FRPhoneNumberField()Supported countriesCountries currently supported by localflavor are:• Argentina• Australia• Austria• Brazil• Canada• Chile• Czech• Finland• France• Germany• Iceland• India• Indonesia• Ireland• Italy• Japan• Kuwait• Mexico• The Ne<strong>the</strong>rlands• Norway534 Chapter 6. API Reference
<strong>Django</strong> <strong>Documentation</strong>, Release 1.2• Peru• Poland• Portugal• Romania• Slovakia• South Africa• Spain• Sweden• Switzerland• United Kingdom• United States of America• UruguayThe django.contrib.localflavor package also includes a generic subpackage, containing useful codethat is not specific to one particular country or culture. Currently, it defines date, datetime and split datetime inputfields based on those from forms, but with non-US default formats. Here’s an example of how to use <strong>the</strong>m:from django import formsfrom django.contrib.localflavor import genericclass MyForm(forms.Form):my_date_field = generic.forms.DateField()Adding flavorsWe’d love to add more of <strong>the</strong>se to <strong>Django</strong>, so please create a ticket with any code you’d like to contribute. One thingwe ask is that you please use Unicode objects (u’mystring’) for strings, ra<strong>the</strong>r than setting <strong>the</strong> encoding in <strong>the</strong> file.See any of <strong>the</strong> existing flavors for examples.Argentina (ar)class ar.forms.ARPostalCodeFieldA form field that validates input as ei<strong>the</strong>r a classic four-digit Argentinian postal code or a CPA.class ar.forms.ARDNIFieldA form field that validates input as a Documento Nacional de Identidad (DNI) number.class ar.forms.ARCUITFieldA form field that validates input as a Codigo Unico de Identificacion Tributaria (CUIT) number.class ar.forms.ARProvinceSelectA Select widget that uses a list of Argentina’s provinces and autonomous cities as its choices.Australia (au)class au.forms.AUPostCodeFieldA form field that validates input as an Australian postcode.6.2. contrib packages 535
<strong>Django</strong> <strong>Documentation</strong>, Release 1.2class au.forms.AUPhoneNumberFieldA form field that validates input as an Australian phone number. Valid numbers have ten digits.class au.forms.AUStateSelectA Select widget that uses a list of Australian states/territories as its choices.Austria (at)class at.forms.ATZipCodeFieldA form field that validates its input as an Austrian zip code.class at.forms.ATStateSelectA Select widget that uses a list of Austrian states as its choices.class at.forms.ATSocialSecurityNumberFieldA form field that validates its input as an Austrian social security number.Brazil (br)class br.forms.BRPhoneNumberFieldA form field that validates input as a Brazilian phone number, with <strong>the</strong> format XX-XXXX-XXXX.class br.forms.BRZipCodeFieldA form field that validates input as a Brazilian zip code, with <strong>the</strong> format XXXXX-XXX.class br.forms.BRStateSelectA Select widget that uses a list of Brazilian states/territories as its choices.class br.forms.BRCPFFieldA form field that validates input as Brazilian CPF.Input can ei<strong>the</strong>r be of <strong>the</strong> format XXX.XXX.XXX-VD or be a group of 11 digits.class br.forms.BRCNPJFieldA form field that validates input as Brazilian CNPJ.Input can ei<strong>the</strong>r be of <strong>the</strong> format XX.XXX.XXX/XXXX-XX or be a group of 14 digits.Canada (ca)class ca.forms.CAPhoneNumberFieldA form field that validates input as a Canadian phone number, with <strong>the</strong> format XXX-XXX-XXXX.class ca.forms.CAPostalCodeFieldA form field that validates input as a Canadian postal code, with <strong>the</strong> format XXX XXX.class ca.forms.CAProvinceFieldA form field that validates input as a Canadian province name or abbreviation.class ca.forms.CASocialInsuranceNumberFieldA form field that validates input as a Canadian Social Insurance Number (SIN). A valid number must have <strong>the</strong>format XXX-XXX-XXX and pass a Luhn mod-10 checksum.class ca.forms.CAProvinceSelectA Select widget that uses a list of Canadian provinces and territories as its choices.536 Chapter 6. API Reference
<strong>Django</strong> <strong>Documentation</strong>, Release 1.2Chile (cl)class cl.forms.CLRutFieldA form field that validates input as a Chilean national identification number (‘Rol Unico Tributario’ or RUT).The valid format is XX.XXX.XXX-X.class cl.forms.CLRegionSelectA Select widget that uses a list of Chilean regions (Regiones) as its choices.Czech (cz)class cz.forms.CZPostalCodeFieldA form field that validates input as a Czech postal code. Valid formats are XXXXX or XXX XX, where X is adigit.class cz.forms.CZBirthNumberFieldA form field that validates input as a Czech Birth Number. A valid number must be in format XXXXXX/XXXX(slash is optional).class cz.forms.CZICNumberFieldA form field that validates input as a Czech IC number field.class cz.forms.CZRegionSelectA Select widget that uses a list of Czech regions as its choices.Finland (fi)class fi.forms.FISocialSecurityNumberA form field that validates input as a Finnish social security number.class fi.forms.FIZipCodeFieldA form field that validates input as a Finnish zip code. Valid codes consist of five digits.class fi.forms.FIMunicipalitySelectA Select widget that uses a list of Finnish municipalities as its choices.France (fr)class fr.forms.FRPhoneNumberFieldA form field that validates input as a French local phone number. The correct format is 0X XX XX XX XX.0X.XX.XX.XX.XX and 0XXXXXXXXX validate but are corrected to 0X XX XX XX XX.class fr.forms.FRZipCodeFieldA form field that validates input as a French zip code. Valid codes consist of five digits.class fr.forms.FRDepartmentSelectA Select widget that uses a list of French departments as its choices.Germany (de)class de.forms.DEIdentityCardNumberFieldA form field that validates input as a German identity card number (Personalausweis). Valid numbers have <strong>the</strong>format XXXXXXXXXXX-XXXXXXX-XXXXXXX-X, with no group consisting entirely of zeroes.class de.forms.DEZipCodeFieldA form field that validates input as a German zip code. Valid codes consist of five digits.6.2. contrib packages 537
<strong>Django</strong> <strong>Documentation</strong>, Release 1.2class de.forms.DEStateSelectA Select widget that uses a list of German states as its choices.The Ne<strong>the</strong>rlands (nl)class nl.forms.NLPhoneNumberFieldA form field that validates input as a Dutch telephone number.class nl.forms.NLSofiNumberFieldA form field that validates input as a Dutch social security number (SoFI/BSN).class nl.forms.NLZipCodeFieldA form field that validates input as a Dutch zip code.class nl.forms.NLProvinceSelectA Select widget that uses a list of Dutch provinces as its list of choices.Iceland (is_)class is_.forms.ISIdNumberFieldA form field that validates input as an Icelandic identification number (kennitala). The format is XXXXXX-XXXX.class is_.forms.ISPhoneNumberFieldA form field that validates input as an Icelandtic phone number (seven digits with an optional hyphen or spaceafter <strong>the</strong> first three digits).class is_.forms.ISPostalCodeSelectA Select widget that uses a list of Icelandic postal codes as its choices.India (in_)class in.forms.INStateFieldA form field that validates input as an Indian state/territory name or abbreviation. Input is normalized to <strong>the</strong>standard two-letter vehicle registration abbreviation for <strong>the</strong> given state or territory.class in.forms.INZipCodeFieldA form field that validates input as an Indian zip code, with <strong>the</strong> format XXXXXXX.class in.forms.INStateSelectA Select widget that uses a list of Indian states/territories as its choices.Ireland (ie)class ie.forms.IECountySelectA Select widget that uses a list of Irish Counties as its choices.Indonesia (id)class id.forms.IDPostCodeFieldA form field that validates input as an Indonesian post code field.class id.forms.IDProvinceSelectA Select widget that uses a list of Indonesian provinces as its choices.538 Chapter 6. API Reference
<strong>Django</strong> <strong>Documentation</strong>, Release 1.2class id.forms.IDPhoneNumberFieldA form field that validates input as an Indonesian telephone number.class id.forms.IDLicensePlatePrefixSelectA Select widget that uses a list of Indonesian license plate prefix code as its choices.class id.forms.IDLicensePlateFieldA form field that validates input as an Indonesian vehicle license plate.class id.forms.IDNationalIdentityNumberFieldA form field that validates input as an Indonesian national identity number (NIK/KTP). The output will be in <strong>the</strong>format of ‘XX.XXXX.DDMMYY.XXXX’. Dots or spaces can be used in <strong>the</strong> input to break down <strong>the</strong> numbers.Italy (it)class it.forms.ITSocialSecurityNumberFieldA form field that validates input as an Italian social security number (codice fiscale).class it.forms.ITVatNumberFieldA form field that validates Italian VAT numbers (partita IVA).class it.forms.ITZipCodeFieldA form field that validates input as an Italian zip code. Valid codes must have five digits.class it.forms.ITProvinceSelectA Select widget that uses a list of Italian provinces as its choices.class it.forms.ITRegionSelectA Select widget that uses a list of Italian regions as its choices.Japan (jp)class jp.forms.JPPostalCodeFieldA form field that validates input as a Japanese postcode. It accepts seven digits, with or without a hyphen.class jp.forms.JPPrefectureSelectA Select widget that uses a list of Japanese prefectures as its choices.Kuwait (kw)class kw.forms.KWCivilIDNumberFieldA form field that validates input as a Kuwaiti Civil ID number. A valid Civil ID number must obey <strong>the</strong> followingrules:•The number consist of 12 digits.•The birthdate of <strong>the</strong> person is a valid date.•The calculated checksum equals to <strong>the</strong> last digit of <strong>the</strong> Civil ID.Mexico (mx)class mx.forms.MXStateSelectA Select widget that uses a list of Mexican states as its choices.6.2. contrib packages 539
<strong>Django</strong> <strong>Documentation</strong>, Release 1.2Norway (no)class no.forms.NOSocialSecurityNumberA form field that validates input as a Norwegian social security number (personnummer).class no.forms.NOZipCodeFieldA form field that validates input as a Norwegian zip code. Valid codes have four digits.class no.forms.NOMunicipalitySelectA Select widget that uses a list of Norwegian municipalities (fylker) as its choices.Peru (pe)class pe.forms.PEDNIFieldA form field that validates input as a DNI (Peruvian national identity) number.class pe.forms.PERUCFieldA form field that validates input as an RUC (Registro Unico de Contribuyentes) number. Valid RUC numbershave 11 digits.class pe.forms.PEDepartmentSelectA Select widget that uses a list of Peruvian Departments as its choices.Poland (pl)class pl.forms.PLPESELFieldA form field that validates input as a Polish national identification number (PESEL).class pl.forms.PLREGONFieldA form field that validates input as a Polish National Official Business Register Number (REGON),having ei<strong>the</strong>r seven or nine digits. The checksum algorithm used for REGONs is documented athttp://wipos.p.lodz.pl/zylla/ut/nip-rego.html.class pl.forms.PLPostalCodeFieldA form field that validates input as a Polish postal code. The valid format is XX-XXX, where X is a digit.class pl.forms.PLNIPFieldA form field that validates input as a Polish Tax Number (NIP). Valid formats are XXX-XXX-XX-XX or XX-XX-XXX-XXX. The checksum algorithm used for NIPs is documented at http://wipos.p.lodz.pl/zylla/ut/niprego.html.class pl.forms.PLCountySelectA Select widget that uses a list of Polish administrative units as its choices.class pl.forms.PLProvinceSelectA Select widget that uses a list of Polish voivodeships (administrative provinces) as its choices.Portugal (pt)class pt.forms.PTZipCodeFieldA form field that validates input as a Portuguese zip code.class pt.forms.PTPhoneNumberFieldA form field that validates input as a Portuguese phone number. Valid numbers have 9 digits (may includespaces) or start by 00 or + (international).540 Chapter 6. API Reference
<strong>Django</strong> <strong>Documentation</strong>, Release 1.2Romania (ro)class ro.forms.ROCIFFieldA form field that validates Romanian fiscal identification codes (CIF). The return value strips <strong>the</strong> leading RO, ifgiven.class ro.forms.ROCNPFieldA form field that validates Romanian personal numeric codes (CNP).class ro.forms.ROCountyFieldA form field that validates its input as a Romanian county (judet) name or abbreviation. It normalizes <strong>the</strong> inputto <strong>the</strong> standard vehicle registration abbreviation for <strong>the</strong> given county. This field will only accept names writtenwith diacritics; consider using ROCountySelect as an alternative.class ro.forms.ROCountySelectA Select widget that uses a list of Romanian counties (judete) as its choices.class ro.forms.ROIBANFieldA form field that validates its input as a Romanian International Bank Account Number (IBAN). The validformat is ROXX-XXXX-XXXX-XXXX-XXXX-XXXX, with or without hyphens.class ro.forms.ROPhoneNumberFieldA form field that validates Romanian phone numbers, short special numbers excluded.class ro.forms.ROPostalCodeFieldA form field that validates Romanian postal codes.Slovakia (sk)class sk.forms.SKPostalCodeFieldA form field that validates input as a Slovak postal code. Valid formats are XXXXX or XXX XX, where X is adigit.class sk.forms.SKDistrictSelectA Select widget that uses a list of Slovak districts as its choices.class sk.forms.SKRegionSelectA Select widget that uses a list of Slovak regions as its choices.South Africa (za)class za.forms.ZAIDFieldA form field that validates input as a South African ID number. Validation uses <strong>the</strong> Luhn checksum and asimplistic (i.e., not entirely accurate) check for birth date.class za.forms.ZAPostCodeFieldA form field that validates input as a South African postcode. Valid postcodes must have four digits.Spain (es)class es.forms.ESIdentityCardNumberFieldA form field that validates input as a Spanish NIF/NIE/CIF (Fiscal Identification Number) code.class es.forms.ESCCCFieldA form field that validates input as a Spanish bank account number (Codigo Cuenta Cliente or CCC). A validCCC number has <strong>the</strong> format EEEE-OOOO-CC-AAAAAAAAAA, where <strong>the</strong> E, O, C and A digits denote <strong>the</strong>6.2. contrib packages 541
<strong>Django</strong> <strong>Documentation</strong>, Release 1.2entity, office, checksum and account, respectively. The first checksum digit validates <strong>the</strong> entity and office. Thesecond checksum digit validates <strong>the</strong> account. It is also valid to use a space as a delimiter, or to use no delimiter.class es.forms.ESPhoneNumberFieldA form field that validates input as a Spanish phone number. Valid numbers have nine digits, <strong>the</strong> first of whichis 6, 8 or 9.class es.forms.ESPostalCodeFieldA form field that validates input as a Spanish postal code. Valid codes have five digits, <strong>the</strong> first two being in <strong>the</strong>range 01 to 52, representing <strong>the</strong> province.class es.forms.ESProvinceSelectA Select widget that uses a list of Spanish provinces as its choices.class es.forms.ESRegionSelectA Select widget that uses a list of Spanish regions as its choices.Sweden (se)class se.forms.SECountySelectA Select form widget that uses a list of <strong>the</strong> Swedish counties (län) as its choices.The cleaned value is <strong>the</strong> official county code – see http://en.wikipedia.org/wiki/Counties_of_Sweden for a list.class se.forms.SEOrganisationNumberA form field that validates input as a Swedish organisation number (organisationsnummer).It accepts <strong>the</strong> same input as SEPersonalIdentityField (for sole proprietorships (enskild firma). However, coordinationnumbers are not accepted.It also accepts ordinary Swedish organisation numbers with <strong>the</strong> format NNNNNNNNNN.The return value will be YYYYMMDDXXXX for sole proprietors, and NNNNNNNNNN for o<strong>the</strong>r organisations.class se.forms.SEPersonalIdentityNumberA form field that validates input as a Swedish personal identity number (personnummer).The correct formats are YYYYMMDD-XXXX, YYYYMMDDXXXX, YYMMDD-XXXX, YYMMDDXXXXand YYMMDD+XXXX.A + indicates that <strong>the</strong> person is older than 100 years, which will be taken into consideration when <strong>the</strong> date isvalidated.The checksum will be calculated and checked. The birth date is checked to be a valid date.By default, co-ordination numbers (samordningsnummer) will be accepted. To only allow real personal identitynumbers, pass <strong>the</strong> keyword argument coordination_number=False to <strong>the</strong> constructor.The cleaned value will always have <strong>the</strong> format YYYYMMDDXXXX.class se.forms.SEPostalCodeFieldA form field that validates input as a Swedish postal code (postnummer). Valid codes consist of five digits(XXXXX). The number can optionally be formatted with a space after <strong>the</strong> third digit (XXX XX).The cleaned value will never contain <strong>the</strong> space.Switzerland (ch)class ch.forms.CHIdentityCardNumberFieldA form field that validates input as a Swiss identity card number. A valid number must542 Chapter 6. API Reference
<strong>Django</strong> <strong>Documentation</strong>, Release 1.2confirm to <strong>the</strong> X1234567
<strong>Django</strong> <strong>Documentation</strong>, Release 1.2class us.models.USStateFieldA model field that forms represent as a forms.USStateField field and stores <strong>the</strong> two-letter U.S. stateabbreviation in <strong>the</strong> database.Uruguay (uy)class uy.forms.UYCIFieldA field that validates Uruguayan ‘Cedula de identidad’ (CI) numbers.class uy.forms.UYDepartamentSelectA Select widget that uses a list of Uruguayan departaments as its choices.6.2.12 django.contrib.markup<strong>Django</strong> provides template filters that implement <strong>the</strong> following markup languages:• textile – implements Textile – requires PyTextile• markdown – implements Markdown – requires Python-markdown• restructuredtext – implements reST (reStructured Text) – requires doc-utilsIn each case, <strong>the</strong> filter expects formatted markup as a string and returns a string representing <strong>the</strong> marked-up text. Forexample, <strong>the</strong> textile filter converts text that is marked-up in Textile format to HTML.To activate <strong>the</strong>se filters, add ’django.contrib.markup’ to your INSTALLED_APPS setting. Once you’vedone that, use {% load markup %} in a template, and you’ll have access to <strong>the</strong>se filters. For more documentation,read <strong>the</strong> source code in django/contrib/markup/templatetags/markup.py.reStructured TextWhen using <strong>the</strong> restructuredtext markup filter you can define aRESTRUCTUREDTEXT_FILTER_SETTINGS in your django settings to override <strong>the</strong> default writer settings.See <strong>the</strong> restructuredtext writer settings for details on what <strong>the</strong>se settings are.6.2.13 The messages framework<strong>Django</strong> provides full support for cookie- and session-based messaging, for both anonymous and au<strong>the</strong>nticated clients.The messages framework allows you to temporarily store messages in one request and retrieve <strong>the</strong>m for display in asubsequent request (usually <strong>the</strong> next one). Every message is tagged with a specific level that determines its priority(e.g., info, warning, or error). New in version 1.2: The messages framework was added.Enabling messagesMessages are implemented through a middleware class and corresponding context processor.To enable message functionality, do <strong>the</strong> following:• Edit <strong>the</strong> MIDDLEWARE_CLASSES setting and make sure it contains’django.contrib.messages.middleware.MessageMiddleware’.If you are using a storage backend that relies on sessions (<strong>the</strong> default),’django.contrib.sessions.middleware.SessionMiddleware’ must be enabled and appearbefore MessageMiddleware in your MIDDLEWARE_CLASSES.544 Chapter 6. API Reference
<strong>Django</strong> <strong>Documentation</strong>, Release 1.2• Edit <strong>the</strong> TEMPLATE_CONTEXT_PROCESSORS setting and make sure it contains’django.contrib.messages.context_processors.messages’.• Add ’django.contrib.messages’ to your INSTALLED_APPS settingThe default settings.py created by django-admin.py startproject hasMessageMiddleware activated and <strong>the</strong> django.contrib.messages app installed.Also, <strong>the</strong> default value for TEMPLATE_CONTEXT_PROCESSORS contains’django.contrib.messages.context_processors.messages’.If you don’t want to use messages, you can remove <strong>the</strong> MessageMiddleware line fromMIDDLEWARE_CLASSES, <strong>the</strong> messages context processor from TEMPLATE_CONTEXT_PROCESSORSand ’django.contrib.messages’ from your INSTALLED_APPS.Configuring <strong>the</strong> message engineStorage backendsThe messages framework can use different backends to store temporary messages. To change which backend is beingused, add a MESSAGE_STORAGE to your settings, referencing <strong>the</strong> module and class of <strong>the</strong> storage class. Forexample:MESSAGE_STORAGE = ’django.contrib.messages.storage.cookie.CookieStorage’The value should be <strong>the</strong> full path of <strong>the</strong> desired storage class.Four storage classes are included:’django.contrib.messages.storage.session.SessionStorage’ This class stores all messagesinside of <strong>the</strong> request’s session. It requires <strong>Django</strong>’s contrib.sessions application.’django.contrib.messages.storage.cookie.CookieStorage’ This class stores <strong>the</strong> message datain a cookie (signed with a secret hash to prevent manipulation) to persist notifications across requests. Oldmessages are dropped if <strong>the</strong> cookie data size would exceed 4096 bytes.’django.contrib.messages.storage.fallback.FallbackStorage’ This class first uses CookieStoragefor all messages, falling back to using SessionStorage for <strong>the</strong> messages that could not fit in a singlecookie.Since it is uses SessionStorage, it also requires <strong>Django</strong>’s contrib.session application.’django.contrib.messages.storage.user_messages.LegacyFallbackStorage’ This is <strong>the</strong>default temporary storage class.This class extends FallbackStorage and adds compatibility methods to to retrieve any messages stored in <strong>the</strong> userMessage model by code that has not yet been updated to use <strong>the</strong> new API. This storage is temporary (becauseit makes use of code that is pending deprecation) and will be removed in <strong>Django</strong> 1.4. At that time, <strong>the</strong> defaultstorage will become django.contrib.messages.storage.fallback.FallbackStorage. Formore information, see LegacyFallbackStorage below.To write your own storage class, subclass <strong>the</strong> BaseStorage class indjango.contrib.messages.storage.base and implement <strong>the</strong> _get and _store methods.LegacyFallbackStorage The LegacyFallbackStorage is a temporary tool to facilitate <strong>the</strong> transition from <strong>the</strong>deprecated user.message_set API and will be removed in <strong>Django</strong> 1.4 according to <strong>Django</strong>’s standard deprecationpolicy. For more information, see <strong>the</strong> full release process documentation.In addition to <strong>the</strong> functionality in <strong>the</strong> FallbackStorage, it adds a custom, read-only storage class that retrievesmessages from <strong>the</strong> user Message model. Any messages that were stored in <strong>the</strong> Message model (e.g., by code that6.2. contrib packages 545
<strong>Django</strong> <strong>Documentation</strong>, Release 1.2has not yet been updated to use <strong>the</strong> messages framework) will be retrieved first, followed by those stored in a cookieand in <strong>the</strong> session, if any. Since messages stored in <strong>the</strong> Message model do not have a concept of levels, <strong>the</strong>y will beassigned <strong>the</strong> INFO level by default.Message levelsThe messages framework is based on a configurable level architecture similar to that of <strong>the</strong> Python logging module.Message levels allow you to group messages by type so <strong>the</strong>y can be filtered or displayed differently in views andtemplates.The built-in levels (which can be imported from django.contrib.messages directly) are:ConstantDEBUGINFOSUCCESSWARNINGERRORPurposeDevelopment-related messages that will be ignored (or removed) in a production deploymentInformational messages for <strong>the</strong> userAn action was successful, e.g. “Your profile was updated successfully”A failure did not occur but may be imminentAn action was not successful or some o<strong>the</strong>r failure occurredThe MESSAGE_LEVEL setting can be used to change <strong>the</strong> minimum recorded level (or it can be changed per request).Attempts to add messages of a level less than this will be ignored.Message tagsMessage tags are a string representation of <strong>the</strong> message level plus any extra tags that were added directly in <strong>the</strong> view(see Adding extra message tags below for more details). Tags are stored in a string and are separated by spaces.Typically, message tags are used as CSS classes to customize message style based on message type. By default, eachlevel has a single tag that’s a lowercase version of its own constant:Level ConstantDEBUGINFOSUCCESSWARNINGERRORTagdebuginfosuccesswarningerrorTo change <strong>the</strong> default tags for a message level (ei<strong>the</strong>r built-in or custom), set <strong>the</strong> MESSAGE_TAGS setting to adictionary containing <strong>the</strong> levels you wish to change. As this extends <strong>the</strong> default tags, you only need to provide tags for<strong>the</strong> levels you wish to override:from django.contrib.messages import constants as messagesMESSAGE_TAGS = {messages.INFO: ’’,50: ’critical’,}Using messages in views and templatesAdding a messageTo add a message, call:from django.contrib import messagesmessages.add_message(request, messages.INFO, ’Hello world.’)546 Chapter 6. API Reference
<strong>Django</strong> <strong>Documentation</strong>, Release 1.2Some shortcut methods provide a standard way to add messages with commonly used tags (which are usually representedas HTML classes for <strong>the</strong> message):messages.debug(request, ’%s SQL statements were executed.’ % count)messages.info(request, ’Three credits remain in your account.’)messages.success(request, ’Profile details updated.’)messages.warning(request, ’Your account expires in three days.’)messages.error(request, ’Document deleted.’)Displaying messagesIn your template, use something like:{% if messages %}{% for message in messages %}{{ message }}{% endfor %}{% endif %}If you’re using <strong>the</strong> context processor, your template should be rendered with a RequestContext. O<strong>the</strong>rwise, ensuremessages is available to <strong>the</strong> template context.Creating custom message levelsMessages levels are nothing more than integers, so you can define your own level constants and use <strong>the</strong>m to createmore customized user feedback, e.g.:CRITICAL = 50def my_view(request):messages.add_message(request, CRITICAL, ’A serious error occurred.’)When creating custom message levels you should be careful to avoid overloading existing levels. The values for <strong>the</strong>Level Constant ValueDEBUG 10built-in levels are:INFO 20SUCCESS 25WARNING 30ERROR 40If you need to identify <strong>the</strong> custom levels in your HTML or CSS, you need to provide a mapping via <strong>the</strong> MES-SAGE_TAGS setting.Note: If you are creating a reusable application, it is recommended to use only <strong>the</strong> built-in message levels and notrely on any custom levels.Changing <strong>the</strong> minimum recorded level per-requestThe minimum recorded level can be set per request via <strong>the</strong> set_level method:6.2. contrib packages 547
<strong>Django</strong> <strong>Documentation</strong>, Release 1.2from django.contrib import messages# Change <strong>the</strong> messages level to ensure <strong>the</strong> debug message is added.messages.set_level(request, messages.DEBUG)messages.debug(request, ’Test message...’)# In ano<strong>the</strong>r request, record only messages with a level of WARNING and highermessages.set_level(request, messages.WARNING)messages.success(request, ’Your profile was updated.’) # ignoredmessages.warning(request, ’Your account is about to expire.’) # recorded# Set <strong>the</strong> messages level back to default.messages.set_level(request, None)Similarly, <strong>the</strong> current effective level can be retrieved with get_level:from django.contrib import messagescurrent_level = messages.get_level(request)For more information on how <strong>the</strong> minimum recorded level functions, see Message levels above.Adding extra message tagsFor more direct control over message tags, you can optionally provide a string containing extra tags to any of <strong>the</strong> addmethods:messages.add_message(request, messages.INFO, ’Over 9000!’,extra_tags=’dragonball’)messages.error(request, ’Email box full’, extra_tags=’email’)Extra tags are added before <strong>the</strong> default tag for that level and are space separated.Failing silently when <strong>the</strong> message framework is disabledIf you’re writing a reusable app (or o<strong>the</strong>r piece of code) and want to include messaging functionality, but don’twant to require your users to enable it if <strong>the</strong>y don’t want to, you may pass an additional keyword argumentfail_silently=True to any of <strong>the</strong> add_message family of methods. For example:messages.add_message(request, messages.SUCCESS, ’Profile details updated.’,fail_silently=True)messages.info(request, ’Hello world.’, fail_silently=True)Internally, <strong>Django</strong> uses this functionality in <strong>the</strong> create, update, and delete generic views so that <strong>the</strong>y work even if <strong>the</strong>message framework is disabled.Note: Setting fail_silently=True only hides <strong>the</strong> MessageFailure that would o<strong>the</strong>rwise occur when <strong>the</strong>messages framework disabled and one attempts to use one of <strong>the</strong> add_message family of methods. It does not hidefailures that may occur for o<strong>the</strong>r reasons.Expiration of messagesThe messages are marked to be cleared when <strong>the</strong> storage instance is iterated (and cleared when <strong>the</strong> response is processed).548 Chapter 6. API Reference
<strong>Django</strong> <strong>Documentation</strong>, Release 1.2To avoid <strong>the</strong> messages being cleared, you can set <strong>the</strong> messages storage to False after iterating:storage = messages.get_messages(request)for message in storage:do_something_with(message)storage.used = FalseBehavior of parallel requestsDue to <strong>the</strong> way cookies (and hence sessions) work, <strong>the</strong> behavior of any backends that make use of cookies orsessions is undefined when <strong>the</strong> same client makes multiple requests that set or get messages in parallel. Forexample, if a client initiates a request that creates a message in one window (or tab) and <strong>the</strong>n ano<strong>the</strong>r that fetchesany uniterated messages in ano<strong>the</strong>r window, before <strong>the</strong> first window redirects, <strong>the</strong> message may appear in <strong>the</strong> secondwindow instead of <strong>the</strong> first window where it may be expected.In short, when multiple simultaneous requests from <strong>the</strong> same client are involved, messages are not guaranteed to bedelivered to <strong>the</strong> same window that created <strong>the</strong>m nor, in some cases, at all. Note that this is typically not a problemin most applications and will become a non-issue in HTML5, where each window/tab will have its own browsingcontext.SettingsA few <strong>Django</strong> settings give you control over message behavior:MESSAGE_LEVELDefault: messages.INFOThis sets <strong>the</strong> minimum message that will be saved in <strong>the</strong> message storage. See Message levels above for more details.ImportantIf you override MESSAGE_LEVEL in your settings file and rely on any of <strong>the</strong> built-in constants, you must import <strong>the</strong>constants module directly to avoid <strong>the</strong> potential for circular imports, e.g.:from django.contrib.messages import constants as message_constantsMESSAGE_LEVEL = message_constants.DEBUGIf desired, you may specify <strong>the</strong> numeric values for <strong>the</strong> constants directly according to <strong>the</strong> values in <strong>the</strong> above constantstable.MESSAGE_STORAGEDefault: ’django.contrib.messages.storage.user_messages.LegacyFallbackStorage’Controls where <strong>Django</strong> stores message data. Valid values are:• ’django.contrib.messages.storage.fallback.FallbackStorage’• ’django.contrib.messages.storage.session.SessionStorage’• ’django.contrib.messages.storage.cookie.CookieStorage’• ’django.contrib.messages.storage.user_messages.LegacyFallbackStorage’6.2. contrib packages 549
<strong>Django</strong> <strong>Documentation</strong>, Release 1.2See Storage backends for more details.MESSAGE_TAGSDefault:{messages.DEBUG: ’debug’,messages.INFO: ’info’,messages.SUCCESS: ’success’,messages.WARNING: ’warning’,messages.ERROR: ’error’,}This sets <strong>the</strong> mapping of message level to message tag, which is typically rendered as a CSS class in HTML. If youspecify a value, it will extend <strong>the</strong> default. This means you only have to specify those values which you need to override.See Displaying messages above for more details.ImportantIf you override MESSAGE_TAGS in your settings file and rely on any of <strong>the</strong> built-in constants, you must import <strong>the</strong>constants module directly to avoid <strong>the</strong> potential for circular imports, e.g.:from django.contrib.messages import constants as message_constantsMESSAGE_TAGS = {message_constants.INFO: ’’}If desired, you may specify <strong>the</strong> numeric values for <strong>the</strong> constants directly according to <strong>the</strong> values in <strong>the</strong> above constantstable.6.2.14 The redirects app<strong>Django</strong> comes with an optional redirects application. It lets you store simple redirects in a database and handles <strong>the</strong>redirecting for you.InstallationTo install <strong>the</strong> redirects app, follow <strong>the</strong>se steps:1. Add ’django.contrib.redirects’ to your INSTALLED_APPS setting.2. Add ’django.contrib.redirects.middleware.RedirectFallbackMiddleware’ to yourMIDDLEWARE_CLASSES setting.3. Run <strong>the</strong> command manage.py syncdb.How it worksmanage.py syncdb creates a django_redirect table in your database. This is a simple lookup table withsite_id, old_path and new_path fields.The RedirectFallbackMiddleware does all of <strong>the</strong> work. Each time any <strong>Django</strong> application raises a 404 error,this middleware checks <strong>the</strong> redirects database for <strong>the</strong> requested URL as a last resort. Specifically, it checks for aredirect with <strong>the</strong> given old_path with a site ID that corresponds to <strong>the</strong> SITE_ID setting.• If it finds a match, and new_path is not empty, it redirects to new_path.550 Chapter 6. API Reference
<strong>Django</strong> <strong>Documentation</strong>, Release 1.2• If it finds a match, and new_path is empty, it sends a 410 (“Gone”) HTTP header and empty (content-less)response.• If it doesn’t find a match, <strong>the</strong> request continues to be processed as usual.The middleware only gets activated for 404s – not for 500s or responses of any o<strong>the</strong>r status code.Note that <strong>the</strong> order of MIDDLEWARE_CLASSES matters. Generally, you can putRedirectFallbackMiddleware at <strong>the</strong> end of <strong>the</strong> list, because it’s a last resort.For more on middleware, read <strong>the</strong> middleware docs.How to add, change and delete redirectsVia <strong>the</strong> admin interfaceIf you’ve activated <strong>the</strong> automatic <strong>Django</strong> admin interface, you should see a “Redirects” section on <strong>the</strong> admin indexpage. Edit redirects as you edit any o<strong>the</strong>r object in <strong>the</strong> system.Via <strong>the</strong> Python APIclass models.RedirectRedirects are represented by a standard <strong>Django</strong> model, which lives in django/contrib/redirects/models.py. Youcan access redirect objects via <strong>the</strong> <strong>Django</strong> database API.6.2.15 The sitemap framework<strong>Django</strong> comes with a high-level sitemap-generating framework that makes creating sitemap XML files easy.OverviewA sitemap is an XML file on your Web site that tells search-engine indexers how frequently your pages change andhow “important” certain pages are in relation to o<strong>the</strong>r pages on your site. This information helps search engines indexyour site.The <strong>Django</strong> sitemap framework automates <strong>the</strong> creation of this XML file by letting you express this information inPython code.It works much like <strong>Django</strong>’s syndication framework. To create a sitemap, just write a Sitemap class and point to itin your URLconf .InstallationTo install <strong>the</strong> sitemap app, follow <strong>the</strong>se steps:1. Add ’django.contrib.sitemaps’ to your INSTALLED_APPS setting.2. Make sure ’django.template.loaders.app_directories.Loader’ is in yourTEMPLATE_LOADERS setting. It’s in <strong>the</strong>re by default, so you’ll only need to change this if you’vechanged that setting.3. Make sure you’ve installed <strong>the</strong> sites framework.(Note: The sitemap application doesn’t install any database tables. The only reason it needs to go intoINSTALLED_APPS is so that <strong>the</strong> Loader() template loader can find <strong>the</strong> default templates.)6.2. contrib packages 551
<strong>Django</strong> <strong>Documentation</strong>, Release 1.2InitializationTo activate sitemap generation on your <strong>Django</strong> site, add this line to your URLconf :(r’^sitemap\.xml$’, ’django.contrib.sitemaps.views.sitemap’, {’sitemaps’: sitemaps})This tells <strong>Django</strong> to build a sitemap when a client accesses /sitemap.xml.The name of <strong>the</strong> sitemap file is not important, but <strong>the</strong> location is. Search engines will only index links in your sitemapfor <strong>the</strong> current URL level and below. For instance, if sitemap.xml lives in your root directory, it may reference anyURL in your site. However, if your sitemap lives at /content/sitemap.xml, it may only reference URLs thatbegin with /content/.The sitemap view takes an extra, required argument: {’sitemaps’: sitemaps}. sitemaps should be adictionary that maps a short section label (e.g., blog or news) to its Sitemap class (e.g., BlogSitemap orNewsSitemap). It may also map to an instance of a Sitemap class (e.g., BlogSitemap(some_var)).Sitemap classesA Sitemap class is a simple Python class that represents a “section” of entries in your sitemap. For example, oneSitemap class could represent all <strong>the</strong> entries of your Weblog, while ano<strong>the</strong>r could represent all of <strong>the</strong> events in yourevents calendar.In <strong>the</strong> simplest case, all <strong>the</strong>se sections get lumped toge<strong>the</strong>r into one sitemap.xml, but it’s also possible to use<strong>the</strong> framework to generate a sitemap index that references individual sitemap files, one per section. (See Creating asitemap index below.)Sitemap classes must subclass django.contrib.sitemaps.Sitemap. They can live anywhere in your codebase.A simple exampleLet’s assume you have a blog system, with an Entry model, and you want your sitemap to include all <strong>the</strong> links toyour individual blog entries. Here’s how your sitemap class might look:from django.contrib.sitemaps import Sitemapfrom blog.models import Entryclass BlogSitemap(Sitemap):changefreq = "never"priority = 0.5Note:def items(self):return Entry.objects.filter(is_draft=False)def lastmod(self, obj):return obj.pub_date• changefreq and priority are class attributes corresponding to and elements,respectively. They can be made callable as functions, as lastmod was in <strong>the</strong> example.• items() is simply a method that returns a list of objects. The objects returned will get passed to any callablemethods corresponding to a sitemap property (location, lastmod, changefreq, and priority).• lastmod should return a Python datetime object.552 Chapter 6. API Reference
<strong>Django</strong> <strong>Documentation</strong>, Release 1.2• There is no location method in this example, but you can provide it in order to specify <strong>the</strong> URL for yourobject. By default, location() calls get_absolute_url() on each object and returns <strong>the</strong> result.Sitemap class referenceclass SitemapA Sitemap class can define <strong>the</strong> following methods/attributes:itemsRequired. A method that returns a list of objects. The framework doesn’t care what type of objects <strong>the</strong>yare; all that matters is that <strong>the</strong>se objects get passed to <strong>the</strong> location(), lastmod(), changefreq()and priority() methods.locationOptional. Ei<strong>the</strong>r a method or attribute.If it’s a method, it should return <strong>the</strong> absolute path for a given object as returned by items().If it’s an attribute, its value should be a string representing an absolute path to use for every object returnedby items().In both cases, “absolute path” means a URL that doesn’t include <strong>the</strong> protocol or domain. Examples:•Good: ’/foo/bar/’•Bad: ’example.com/foo/bar/’•Bad: ’http://example.com/foo/bar/’If location isn’t provided, <strong>the</strong> framework will call <strong>the</strong> get_absolute_url() method on eachobject as returned by items().lastmodOptional. Ei<strong>the</strong>r a method or attribute.If it’s a method, it should take one argument – an object as returned by items() – and return that object’slast-modified date/time, as a Python datetime.datetime object.If it’s an attribute, its value should be a Python datetime.datetime object representing <strong>the</strong> lastmodifieddate/time for every object returned by items().changefreqOptional. Ei<strong>the</strong>r a method or attribute.If it’s a method, it should take one argument – an object as returned by items() – and return that object’schange frequency, as a Python string.If it’s an attribute, its value should be a string representing <strong>the</strong> change frequency of every object returnedby items().Possible values for changefreq, whe<strong>the</strong>r you use a method or attribute, are:•’always’•’hourly’•’daily’•’weekly’•’monthly’•’yearly’•’never’6.2. contrib packages 553
<strong>Django</strong> <strong>Documentation</strong>, Release 1.2priority()Optional. Ei<strong>the</strong>r a method or attribute.If it’s a method, it should take one argument – an object as returned by items() – and return that object’spriority, as ei<strong>the</strong>r a string or float.If it’s an attribute, its value should be ei<strong>the</strong>r a string or float representing <strong>the</strong> priority of every objectreturned by items().Example values for priority: 0.4, 1.0. The default priority of a page is 0.5. See <strong>the</strong> sitemaps.orgdocumentation for more.ShortcutsThe sitemap framework provides a couple convenience classes for common cases:class FlatPageSitemapThe django.contrib.sitemaps.FlatPageSitemap class looks at all publicly visible flatpagesdefined for <strong>the</strong> current SITE_ID (see <strong>the</strong> sites documentation) and creates an entry in <strong>the</strong> sitemap.These entries include only <strong>the</strong> location attribute – not lastmod, changefreq or priority.class GenericSitemapThe django.contrib.sitemaps.GenericSitemap class works with any generic views you alreadyhave. To use it, create an instance, passing in <strong>the</strong> same info_dict you pass to <strong>the</strong> generic views. Theonly requirement is that <strong>the</strong> dictionary have a queryset entry. It may also have a date_field entrythat specifies a date field for objects retrieved from <strong>the</strong> queryset. This will be used for <strong>the</strong> lastmod attributein <strong>the</strong> generated sitemap. You may also pass priority and changefreq keyword arguments to <strong>the</strong>GenericSitemap constructor to specify <strong>the</strong>se attributes for all URLs.ExampleHere’s an example of a URLconf using both:from django.conf.urls.defaults import *from django.contrib.sitemaps import FlatPageSitemap, GenericSitemapfrom blog.models import Entryinfo_dict = {’queryset’: Entry.objects.all(),’date_field’: ’pub_date’,}sitemaps = {’flatpages’: FlatPageSitemap,’blog’: GenericSitemap(info_dict, priority=0.6),}urlpatterns = patterns(’’,# some generic view using info_dict# ...)# <strong>the</strong> sitemap(r’^sitemap\.xml$’, ’django.contrib.sitemaps.views.sitemap’, {’sitemaps’: sitemaps})554 Chapter 6. API Reference
<strong>Django</strong> <strong>Documentation</strong>, Release 1.2Creating a sitemap indexThe sitemap framework also has <strong>the</strong> ability to create a sitemap index that references individual sitemap files, one pereach section defined in your sitemaps dictionary. The only differences in usage are:• You use two views in your URLconf: django.contrib.sitemaps.views.index() anddjango.contrib.sitemaps.views.sitemap().• The django.contrib.sitemaps.views.sitemap() view should take a section keyword argument.Here’s what <strong>the</strong> relevant URLconf lines would look like for <strong>the</strong> example above:(r’^sitemap\.xml$’, ’django.contrib.sitemaps.views.index’, {’sitemaps’: sitemaps}),(r’^sitemap-(?P.+)\.xml$’, ’django.contrib.sitemaps.views.sitemap’, {’sitemaps’: sitemaps}),This will automatically generate a sitemap.xml file that references both sitemap-flatpages.xml andsitemap-blog.xml. The Sitemap classes and <strong>the</strong> sitemaps dict don’t change at all.You should create an index file if one of your sitemaps has more than 50,000 URLs. In this case, <strong>Django</strong> will automaticallypaginate <strong>the</strong> sitemap, and <strong>the</strong> index will reflect that.Pinging GoogleYou may want to “ping” Google when your sitemap changes, to let it know to reindex your site. The sitemapsframework provides a function to do just that: django.contrib.sitemaps.ping_google().ping_google()ping_google() takes an optional argument, sitemap_url, which should be <strong>the</strong> absolute path to yoursite’s sitemap (e.g., ’/sitemap.xml’). If this argument isn’t provided, ping_google() will attempt tofigure out your sitemap by performing a reverse looking in your URLconf.ping_google() raises <strong>the</strong> exception django.contrib.sitemaps.SitemapNotFound if it cannotdetermine your sitemap URL.Register with Google first!The ping_google() command only works if you have registered your site with Google Webmaster Tools.One useful way to call ping_google() is from a model’s save() method:from django.contrib.sitemaps import ping_googleclass Entry(models.Model):# ...def save(self, force_insert=False, force_update=False):super(Entry, self).save(force_insert, force_update)try:ping_google()except Exception:# Bare ’except’ because we could get a variety# of HTTP-related exceptions.passA more efficient solution, however, would be to call ping_google() from a cron script, or some o<strong>the</strong>r scheduledtask. The function makes an HTTP request to Google’s servers, so you may not want to introduce that networkoverhead each time you call save().6.2. contrib packages 555
<strong>Django</strong> <strong>Documentation</strong>, Release 1.2Pinging Google via manage.pydjango-admin.py ping_googleNew in version 1.0: Please, see <strong>the</strong> release notes Once <strong>the</strong> sitemaps application is added to your project, you may alsoping Google using <strong>the</strong> ping_google management command:python manage.py ping_google [/sitemap.xml]6.2.16 The “sites” framework<strong>Django</strong> comes with an optional “sites” framework. It’s a hook for associating objects and functionality to particularWeb sites, and it’s a holding place for <strong>the</strong> domain names and “verbose” names of your <strong>Django</strong>-powered sites.Use it if your single <strong>Django</strong> installation powers more than one site and you need to differentiate between those sites insome way.The whole sites framework is based on a simple model:class django.contrib.sites.models.SiteThis model has domain and name fields. The SITE_ID setting specifies <strong>the</strong> database ID of <strong>the</strong> Site objectassociated with that particular settings file.How you use this is up to you, but <strong>Django</strong> uses it in a couple of ways automatically via simple conventions.Example usageWhy would you use sites? It’s best explained through examples.Associating content with multiple sitesThe <strong>Django</strong>-powered sites LJWorld.com and Lawrence.com are operated by <strong>the</strong> same news organization – <strong>the</strong>Lawrence Journal-World newspaper in Lawrence, Kansas. LJWorld.com focuses on news, while Lawrence.com focuseson local entertainment. But sometimes editors want to publish an article on both sites.The brain-dead way of solving <strong>the</strong> problem would be to require site producers to publish <strong>the</strong> same story twice: oncefor LJWorld.com and again for Lawrence.com. But that’s inefficient for site producers, and it’s redundant to storemultiple copies of <strong>the</strong> same story in <strong>the</strong> database.The better solution is simple: Both sites use <strong>the</strong> same article database, and an article is associated with one or moresites. In <strong>Django</strong> model terminology, that’s represented by a ManyToManyField in <strong>the</strong> Article model:from django.db import modelsfrom django.contrib.sites.models import Siteclass Article(models.Model):headline = models.CharField(max_length=200)# ...sites = models.ManyToManyField(Site)This accomplishes several things quite nicely:• It lets <strong>the</strong> site producers edit all content – on both sites – in a single interface (<strong>the</strong> <strong>Django</strong> admin).• It means <strong>the</strong> same story doesn’t have to be published twice in <strong>the</strong> database; it only has a single record in <strong>the</strong>database.556 Chapter 6. API Reference
<strong>Django</strong> <strong>Documentation</strong>, Release 1.2• It lets <strong>the</strong> site developers use <strong>the</strong> same <strong>Django</strong> view code for both sites. The view code that displays a givenstory just checks to make sure <strong>the</strong> requested story is on <strong>the</strong> current site. It looks something like this:from django.conf import settingsdef article_detail(request, article_id):try:a = Article.objects.get(id=article_id, sites__id__exact=settings.SITE_ID)except Article.DoesNotExist:raise Http404# ...Associating content with a single siteSimilarly, you can associate a model to <strong>the</strong> Site model in a many-to-one relationship, using ForeignKey.For example, if an article is only allowed on a single site, you’d use a model like this:from django.db import modelsfrom django.contrib.sites.models import Siteclass Article(models.Model):headline = models.CharField(max_length=200)# ...site = models.ForeignKey(Site)This has <strong>the</strong> same benefits as described in <strong>the</strong> last section.Hooking into <strong>the</strong> current site from viewsYou can use <strong>the</strong> sites framework in your <strong>Django</strong> views to do particular things based on <strong>the</strong> site in which <strong>the</strong> view isbeing called. For example:from django.conf import settingsdef my_view(request):if settings.SITE_ID == 3:# Do something.else:# Do something else.Of course, it’s ugly to hard-code <strong>the</strong> site IDs like that. This sort of hard-coding is best for hackish fixes that you needdone quickly. A slightly cleaner way of accomplishing <strong>the</strong> same thing is to check <strong>the</strong> current site’s domain:from django.conf import settingsfrom django.contrib.sites.models import Sitedef my_view(request):current_site = Site.objects.get(id=settings.SITE_ID)if current_site.domain == ’foo.com’:# Do somethingelse:# Do something else.The idiom of retrieving <strong>the</strong> Site object for <strong>the</strong> value of settings.SITE_ID is quite common, so <strong>the</strong> Sitemodel’s manager has a get_current() method. This example is equivalent to <strong>the</strong> previous one:6.2. contrib packages 557
<strong>Django</strong> <strong>Documentation</strong>, Release 1.2from django.contrib.sites.models import Sitedef my_view(request):current_site = Site.objects.get_current()if current_site.domain == ’foo.com’:# Do somethingelse:# Do something else.Changed in version Development version. For code which relies on getting <strong>the</strong> current domain but cannot be certainthat <strong>the</strong> sites framework will be installed for any given project, <strong>the</strong>re is a utility function get_current_site()that takes a request object as an argument and returns ei<strong>the</strong>r a Site instance (if <strong>the</strong> sites framework is installed) or aRequestSite instance (if it is not). This allows loose coupling with <strong>the</strong> sites framework and provides a usable fallbackfor cases where it is not installed.Getting <strong>the</strong> current domain for displayLJWorld.com and Lawrence.com both have e-mail alert functionality, which lets readers sign up to get notificationswhen news happens. It’s pretty basic: A reader signs up on a Web form, and he immediately gets an e-mail saying,“Thanks for your subscription.”It’d be inefficient and redundant to implement this signup-processing code twice, so <strong>the</strong> sites use <strong>the</strong> same code behind<strong>the</strong> scenes. But <strong>the</strong> “thank you for signing up” notice needs to be different for each site. By using Site objects, wecan abstract <strong>the</strong> “thank you” notice to use <strong>the</strong> values of <strong>the</strong> current site’s name and domain.Here’s an example of what <strong>the</strong> form-handling view looks like:from django.contrib.sites.models import Sitefrom django.core.mail import send_maildef register_for_newsletter(request):# Check form values, etc., and subscribe <strong>the</strong> user.# ...current_site = Site.objects.get_current()send_mail(’Thanks for subscribing to %s alerts’ % current_site.name,’Thanks for your subscription. We appreciate it.\n\n-The %s team.’ % current_site.name,’editor@%s’ % current_site.domain,[user.email])# ...On Lawrence.com, this e-mail has <strong>the</strong> subject line “Thanks for subscribing to lawrence.com alerts.” On LJWorld.com,<strong>the</strong> e-mail has <strong>the</strong> subject “Thanks for subscribing to LJWorld.com alerts.” Same goes for <strong>the</strong> e-mail’s message body.Note that an even more flexible (but more heavyweight) way of doing this would be to use <strong>Django</strong>’s template system.Assuming Lawrence.com and LJWorld.com have different template directories (TEMPLATE_DIRS), you couldsimply farm out to <strong>the</strong> template system like so:from django.core.mail import send_mailfrom django.template import loader, Contextdef register_for_newsletter(request):# Check form values, etc., and subscribe <strong>the</strong> user.# ...subject = loader.get_template(’alerts/subject.txt’).render(Context({}))message = loader.get_template(’alerts/message.txt’).render(Context({}))558 Chapter 6. API Reference
<strong>Django</strong> <strong>Documentation</strong>, Release 1.2send_mail(subject, message, ’editor@ljworld.com’, [user.email])# ...In this case, you’d have to create subject.txt and message.txt template files for both <strong>the</strong> LJWorld.com andLawrence.com template directories. That gives you more flexibility, but it’s also more complex.It’s a good idea to exploit <strong>the</strong> Site objects as much as possible, to remove unneeded complexity and redundancy.Getting <strong>the</strong> current domain for full URLs<strong>Django</strong>’s get_absolute_url() convention is nice for getting your objects’ URL without <strong>the</strong> domain name, butin some cases you might want to display <strong>the</strong> full URL – with http:// and <strong>the</strong> domain and everything – for an object.To do this, you can use <strong>the</strong> sites framework. A simple example:>>> from django.contrib.sites.models import Site>>> obj = MyModel.objects.get(id=3)>>> obj.get_absolute_url()’/mymodel/objects/3/’>>> Site.objects.get_current().domain’example.com’>>> ’http://%s%s’ % (Site.objects.get_current().domain, obj.get_absolute_url())’http://example.com/mymodel/objects/3/’Caching <strong>the</strong> current Site objectNew in version 1.0: Please, see <strong>the</strong> release notes As <strong>the</strong> current site is stored in <strong>the</strong> database, each call toSite.objects.get_current() could result in a database query. But <strong>Django</strong> is a little cleverer than that:on <strong>the</strong> first request, <strong>the</strong> current site is cached, and any subsequent call returns <strong>the</strong> cached data instead of hitting <strong>the</strong>database.If for any reason you want to force a database query,Site.objects.clear_cache():# First call; current site fetched from database.current_site = Site.objects.get_current()# ...# Second call; current site fetched from cache.current_site = Site.objects.get_current()# ...# Force a database query for <strong>the</strong> third call.Site.objects.clear_cache()current_site = Site.objects.get_current()you can tell <strong>Django</strong> to clear <strong>the</strong> cache usingThe CurrentSiteManagerclass django.contrib.sites.managers.CurrentSiteManagerIf Site plays a key role in your application, consider using <strong>the</strong> helpful CurrentSiteManager in your model(s).It’s a model manager that automatically filters its queries to include only objects associated with <strong>the</strong> current Site.Use CurrentSiteManager by adding it to your model explicitly. For example:6.2. contrib packages 559
<strong>Django</strong> <strong>Documentation</strong>, Release 1.2from django.db import modelsfrom django.contrib.sites.models import Sitefrom django.contrib.sites.managers import CurrentSiteManagerclass Photo(models.Model):photo = models.FileField(upload_to=’/home/photos’)photographer_name = models.CharField(max_length=100)pub_date = models.DateField()site = models.ForeignKey(Site)objects = models.Manager()on_site = CurrentSiteManager()With this model, Photo.objects.all() will return all Photo objects in <strong>the</strong> database, butPhoto.on_site.all() will return only <strong>the</strong> Photo objects associated with <strong>the</strong> current site, according to<strong>the</strong> SITE_ID setting.Put ano<strong>the</strong>r way, <strong>the</strong>se two statements are equivalent:Photo.objects.filter(site=settings.SITE_ID)Photo.on_site.all()How did CurrentSiteManager know which field of Photo was <strong>the</strong> Site? By default,CurrentSiteManager looks for a ei<strong>the</strong>r a ForeignKey called site or a ManyToManyField called sitesto filter on. If you use a field named something o<strong>the</strong>r than site or sites to identify which Site objects your objectis related to, <strong>the</strong>n you need to explicitly pass <strong>the</strong> custom field name as a parameter to CurrentSiteManager onyour model. The following model, which has a field called publish_on, demonstrates this:from django.db import modelsfrom django.contrib.sites.models import Sitefrom django.contrib.sites.managers import CurrentSiteManagerclass Photo(models.Model):photo = models.FileField(upload_to=’/home/photos’)photographer_name = models.CharField(max_length=100)pub_date = models.DateField()publish_on = models.ForeignKey(Site)objects = models.Manager()on_site = CurrentSiteManager(’publish_on’)If you attempt to use CurrentSiteManager and pass a field name that doesn’t exist, <strong>Django</strong> will raise aValueError.Finally, note that you’ll probably want to keep a normal (non-site-specific) Manager on your model, even if youuse CurrentSiteManager. As explained in <strong>the</strong> manager documentation, if you define a manager manually, <strong>the</strong>n<strong>Django</strong> won’t create <strong>the</strong> automatic objects = models.Manager() manager for you. Also note that certainparts of <strong>Django</strong> – namely, <strong>the</strong> <strong>Django</strong> admin site and generic views – use whichever manager is defined first in <strong>the</strong>model, so if you want your admin site to have access to all objects (not just site-specific ones), put objects =models.Manager() in your model, before you define CurrentSiteManager.How <strong>Django</strong> uses <strong>the</strong> sites frameworkAlthough it’s not required that you use <strong>the</strong> sites framework, it’s strongly encouraged, because <strong>Django</strong> takes advantageof it in a few places. Even if your <strong>Django</strong> installation is powering only a single site, you should take <strong>the</strong> two secondsto create <strong>the</strong> site object with your domain and name, and point to its ID in your SITE_ID setting.Here’s how <strong>Django</strong> uses <strong>the</strong> sites framework:560 Chapter 6. API Reference
<strong>Django</strong> <strong>Documentation</strong>, Release 1.2• In <strong>the</strong> redirects framework, each redirect object is associated with a particular site.searches for a redirect, it takes into account <strong>the</strong> current SITE_ID.When <strong>Django</strong>• In <strong>the</strong> comments framework, each comment is associated with a particular site. When a comment is posted, itsSite is set to <strong>the</strong> current SITE_ID, and when comments are listed via <strong>the</strong> appropriate template tag, only <strong>the</strong>comments for <strong>the</strong> current site are displayed.• In <strong>the</strong> flatpages framework, each flatpage is associated with a particular site. When a flatpage is created,you specify its Site, and <strong>the</strong> FlatpageFallbackMiddleware checks <strong>the</strong> current SITE_ID in retrievingflatpages to display.• In <strong>the</strong> syndication framework, <strong>the</strong> templates for title and description automatically have accessto a variable {{ site }}, which is <strong>the</strong> Site object representing <strong>the</strong> current site. Also, <strong>the</strong> hook for providingitem URLs will use <strong>the</strong> domain from <strong>the</strong> current Site object if you don’t specify a fully-qualified domain.• In <strong>the</strong> au<strong>the</strong>ntication framework, <strong>the</strong> django.contrib.auth.views.login() view passes<strong>the</strong> current Site name to <strong>the</strong> template as {{ site_name }}.• The shortcut view (django.views.defaults.shortcut()) uses <strong>the</strong> domain of <strong>the</strong> current Site objectwhen calculating an object’s URL.• In <strong>the</strong> admin framework, <strong>the</strong> “view on site” link uses <strong>the</strong> current Site to work out <strong>the</strong> domain for <strong>the</strong> site thatit will redirect to.RequestSite objectsNew in version 1.0: Please, see <strong>the</strong> release notes Some django.contrib applications take advantage of <strong>the</strong> sites frameworkbut are architected in a way that doesn’t require <strong>the</strong> sites framework to be installed in your database. (Somepeople don’t want to, or just aren’t able to install <strong>the</strong> extra database table that <strong>the</strong> sites framework requires.) For thosecases, <strong>the</strong> framework provides a RequestSite class, which can be used as a fallback when <strong>the</strong> database-backedsites framework is not available.A RequestSite object has a similar interface to a normal Site object, except its __init__() method takes anHttpRequest object. It’s able to deduce <strong>the</strong> domain and name by looking at <strong>the</strong> request’s domain. It has save()and delete() methods to match <strong>the</strong> interface of Site, but <strong>the</strong> methods raise NotImplementedError.6.2.17 The syndication feed framework<strong>Django</strong> comes with a high-level syndication-feed-generating framework that makes creating RSS and Atom feedseasy.To create any syndication feed, all you have to do is write a short Python class. You can create as many feeds as youwant.<strong>Django</strong> also comes with a lower-level feed-generating API. Use this if you want to generate feeds outside of a Webcontext, or in some o<strong>the</strong>r lower-level way.The high-level frameworkChanged in version 1.2: The high-level feeds framework was refactored in <strong>Django</strong> 1.2. The pre-1.2 interface stillexists, but it has been deprecated, and will be removed in <strong>Django</strong> 1.4. If you need to maintain an old-style <strong>Django</strong>feed, please consult <strong>the</strong> <strong>Django</strong> 1.1 documentation. For details on updating to use <strong>the</strong> new high-level feed framework,see <strong>the</strong> <strong>Django</strong> 1.2 release notes.6.2. contrib packages 561
<strong>Django</strong> <strong>Documentation</strong>, Release 1.2OverviewThe high-level feed-generating framework is supplied by <strong>the</strong> Feed class. To create a feed, write a Feed class andpoint to an instance of it in your URLconf .Feed classesA Feed class is a Python class that represents a syndication feed. A feed can be simple (e.g., a “site news” feed, ora basic feed displaying <strong>the</strong> latest entries of a blog) or more complex (e.g., a feed displaying all <strong>the</strong> blog entries in aparticular category, where <strong>the</strong> category is variable).Feed classes subclass django.contrib.syndication.views.Feed. They can live anywhere in your codebase.Instances of Feed classes are views which can be used in your URLconf .A simple exampleThis simple example, taken from chicagocrime.org, describes a feed of <strong>the</strong> latest five news items:from django.contrib.syndication.views import Feedfrom chicagocrime.models import NewsItemclass LatestEntriesFeed(Feed):title = "Chicagocrime.org site news"link = "/sitenews/"description = "Updates on changes and additions to chicagocrime.org."def items(self):return NewsItem.objects.order_by(’-pub_date’)[:5]def item_title(self, item):return item.titledef item_description(self, item):return item.descriptionTo connect a URL to this feed, put an instance of <strong>the</strong> Feed object in your URLconf . For example:from django.conf.urls.defaults import *from myproject.feeds import LatestEntriesFeedurlpatterns = patterns(’’,# ...(r’^latest/feed/$’, LatestEntriesFeed()),# ...)Note:• The Feed class subclasses django.contrib.syndication.views.Feed.• title, link and description correspond to <strong>the</strong> standard RSS , and elements, respectively.• items() is, simply, a method that returns a list of objects that should be included in <strong>the</strong> feed as elements.Although this example returns NewsItem objects using <strong>Django</strong>’s object-relational mapper, items()562 Chapter 6. API Reference
<strong>Django</strong> <strong>Documentation</strong>, Release 1.2doesn’t have to return model instances. Although you get a few bits of functionality “for free” by using <strong>Django</strong>models, items() can return any type of object you want.• If you’re creating an Atom feed, ra<strong>the</strong>r than an RSS feed, set <strong>the</strong> subtitle attribute instead of <strong>the</strong>description attribute. See Publishing Atom and RSS feeds in tandem, later, for an example.One thing is left to do. In an RSS feed, each has a , and . We need totell <strong>the</strong> framework what data to put into those elements.• For <strong>the</strong> contents of and , <strong>Django</strong> tries calling <strong>the</strong> methods item_title() anditem_description() on <strong>the</strong> Feed class. They are passed a single parameter, item, which is <strong>the</strong> objectitself. These are optional; by default, <strong>the</strong> unicode representation of <strong>the</strong> object is used for both.If you want to do any special formatting for ei<strong>the</strong>r <strong>the</strong> title or description, <strong>Django</strong> templates can be used instead.Their paths can be specified with <strong>the</strong> title_template and description_template attributes on <strong>the</strong>Feed class. The templates are rendered for each item and are passed two template context variables:– {{ obj }} – The current object (one of whichever objects you returned in items()).– {{ site }} – A django.contrib.sites.models.Site object representing <strong>the</strong> current site.This is useful for {{ site.domain }} or {{ site.name }}. If you do not have <strong>the</strong> <strong>Django</strong> sitesframework installed, this will be set to a django.contrib.sites.models.RequestSite object.See <strong>the</strong> RequestSite section of <strong>the</strong> sites framework documentation for more.See a complex example below that uses a description template.• To specify <strong>the</strong> contents of , you have two options. For each item in items(), <strong>Django</strong> first tries calling<strong>the</strong> item_link() method on <strong>the</strong> Feed class. In a similar way to <strong>the</strong> title and description, it is passed ita single parameter, item. If that method doesn’t exist, <strong>Django</strong> tries executing a get_absolute_url()method on that object. Both get_absolute_url() and item_link() should return <strong>the</strong> item’s URL asa normal Python string. As with get_absolute_url(), <strong>the</strong> result of item_link() will be includeddirectly in <strong>the</strong> URL, so you are responsible for doing all necessary URL quoting and conversion to ASCII inside<strong>the</strong> method itself.A complex exampleThe framework also supports more complex feeds, via arguments.For example, chicagocrime.org offers an RSS feed of recent crimes for every police beat in Chicago. It’d be sillyto create a separate Feed class for each police beat; that would violate <strong>the</strong> DRY principle and would couple data toprogramming logic. Instead, <strong>the</strong> syndication framework lets you access <strong>the</strong> arguments passed from your URLconf sofeeds can output items based on information in <strong>the</strong> feed’s URL.On chicagocrime.org, <strong>the</strong> police-beat feeds are accessible via URLs like this:• /beats/613/rss/ – Returns recent crimes for beat 613.• /beats/1424/rss/ – Returns recent crimes for beat 1424.These can be matched with a URLconf line such as:(r’^beats/(?P\d+)/rss/$’, BeatFeed()),Like a view, <strong>the</strong> arguments in <strong>the</strong> URL are passed to <strong>the</strong> get_object() method along with <strong>the</strong> request object.Changed in version 1.2: Prior to version 1.2, get_object() only accepted a bits argument. Here’s <strong>the</strong> code for<strong>the</strong>se beat-specific feeds:from django.contrib.syndication.views import FeedDoesNotExistfrom django.shortcuts import get_object_or_404class BeatFeed(Feed):6.2. contrib packages 563
<strong>Django</strong> <strong>Documentation</strong>, Release 1.2description_template = ’feeds/beat_description.html’def get_object(self, request, beat_id):return get_object_or_404(Beat, pk=beat_id)def title(self, obj):return "Chicagocrime.org: Crimes for beat %s" % obj.beatdef link(self, obj):return obj.get_absolute_url()def description(self, obj):return "Crimes recently reported in police beat %s" % obj.beatdef items(self, obj):return Crime.objects.filter(beat=obj).order_by(’-crime_date’)[:30]To generate <strong>the</strong> feed’s , and , <strong>Django</strong> uses <strong>the</strong> title(), link() anddescription() methods. In <strong>the</strong> previous example, <strong>the</strong>y were simple string class attributes, but this exampleillustrates that <strong>the</strong>y can be ei<strong>the</strong>r strings or methods. For each of title, link and description, <strong>Django</strong> followsthis algorithm:• First, it tries to call a method, passing <strong>the</strong> obj argument, where obj is <strong>the</strong> object returned by get_object().• Failing that, it tries to call a method with no arguments.• Failing that, it uses <strong>the</strong> class attribute.Also note that items() also follows <strong>the</strong> same algorithm – first, it tries items(obj)(), <strong>the</strong>n items(), <strong>the</strong>nfinally an items class attribute (which should be a list).We are using a template for <strong>the</strong> item descriptions. It can be very simple:{{ obj.description }}However, you are free to add formatting as desired.The ExampleFeed class below gives full documentation on methods and attributes of Feed classes.Specifying <strong>the</strong> type of feedBy default, feeds produced in this framework use RSS 2.0.To change that, add a feed_type attribute to your Feed class, like so:from django.utils.feedgenerator import Atom1Feedclass MyFeed(Feed):feed_type = Atom1FeedNote that you set feed_type to a class object, not an instance.Currently available feed types are:• django.utils.feedgenerator.Rss201rev2Feed (RSS 2.01. Default.)• django.utils.feedgenerator.RssUserland091Feed (RSS 0.91.)• django.utils.feedgenerator.Atom1Feed (Atom 1.0.)564 Chapter 6. API Reference
<strong>Django</strong> <strong>Documentation</strong>, Release 1.2EnclosuresTo specify enclosures, such as those used in creating podcast feeds, use <strong>the</strong> item_enclosure_url,item_enclosure_length and item_enclosure_mime_type hooks. See <strong>the</strong> ExampleFeed class belowfor usage examples.LanguageFeeds created by <strong>the</strong> syndication framework automatically include <strong>the</strong> appropriate tag (RSS 2.0) orxml:lang attribute (Atom). This comes directly from your LANGUAGE_CODE setting.URLsThe link method/attribute can return ei<strong>the</strong>r an absolute path (e.g. "/blog/") or a URL with <strong>the</strong> fully-qualifieddomain and protocol (e.g. "http://www.example.com/blog/"). If link doesn’t return <strong>the</strong> domain, <strong>the</strong>syndication framework will insert <strong>the</strong> domain of <strong>the</strong> current site, according to your SITE_ID setting.Atom feeds require a that defines <strong>the</strong> feed’s current location. The syndication frameworkpopulates this automatically, using <strong>the</strong> domain of <strong>the</strong> current site according to <strong>the</strong> SITE_ID setting.Publishing Atom and RSS feeds in tandemSome developers like to make available both Atom and RSS versions of <strong>the</strong>ir feeds. That’s easy to do with <strong>Django</strong>:Just create a subclass of your Feed class and set <strong>the</strong> feed_type to something different. Then update your URLconfto add <strong>the</strong> extra versions.Here’s a full example:from django.contrib.syndication.views import Feedfrom chicagocrime.models import NewsItemfrom django.utils.feedgenerator import Atom1Feedclass RssSiteNewsFeed(Feed):title = "Chicagocrime.org site news"link = "/sitenews/"description = "Updates on changes and additions to chicagocrime.org."def items(self):return NewsItem.objects.order_by(’-pub_date’)[:5]class AtomSiteNewsFeed(RssSiteNewsFeed):feed_type = Atom1Feedsubtitle = RssSiteNewsFeed.descriptionNote: In this example, <strong>the</strong> RSS feed uses a description while <strong>the</strong> Atom feed uses a subtitle. That’s becauseAtom feeds don’t provide for a feed-level “description,” but <strong>the</strong>y do provide for a “subtitle.”If you provide a description in your Feed class, <strong>Django</strong> will not automatically put that into <strong>the</strong> subtitleelement, because a subtitle and description are not necessarily <strong>the</strong> same thing. Instead, you should define a subtitleattribute.In <strong>the</strong> above example, we simply set <strong>the</strong> Atom feed’s subtitle to <strong>the</strong> RSS feed’s description, because it’squite short already.6.2. contrib packages 565
<strong>Django</strong> <strong>Documentation</strong>, Release 1.2And <strong>the</strong> accompanying URLconf:from django.conf.urls.defaults import *from myproject.feeds import RssSiteNewsFeed, AtomSiteNewsFeedurlpatterns = patterns(’’,# ...(r’^sitenews/rss/$’, RssSiteNewsFeed()),(r’^sitenews/atom/$’, AtomSiteNewsFeed()),# ...)Feed class referenceclass django.contrib.syndication.views.FeedThis example illustrates all possible attributes and methods for a Feed class:from django.contrib.syndication.views import Feedfrom django.utils import feedgeneratorclass ExampleFeed(Feed):# FEED TYPE -- Optional. This should be a class that subclasses# django.utils.feedgenerator.SyndicationFeed. This designates# which type of feed this should be: RSS 2.0, Atom 1.0, etc. If# you don’t specify feed_type, your feed will be RSS 2.0. This# should be a class, not an instance of <strong>the</strong> class.feed_type = feedgenerator.Rss201rev2Feed# TEMPLATE NAMES -- Optional. These should be strings# representing names of <strong>Django</strong> templates that <strong>the</strong> system should# use in rendering <strong>the</strong> title and description of your feed items.# Both are optional. If a template is not specified, <strong>the</strong># item_title() or item_description() methods are used instead.title_template = Nonedescription_template = None# TITLE -- One of <strong>the</strong> following three is required. The framework# looks for <strong>the</strong>m in this order.def title(self, obj):"""Takes <strong>the</strong> object returned by get_object() and returns <strong>the</strong>feed’s title as a normal Python string."""def title(self):"""Returns <strong>the</strong> feed’s title as a normal Python string."""title = ’foo’ # Hard-coded title.# LINK -- One of <strong>the</strong> following three is required. The framework# looks for <strong>the</strong>m in this order.566 Chapter 6. API Reference
<strong>Django</strong> <strong>Documentation</strong>, Release 1.2def link(self, obj):"""# Takes <strong>the</strong> object returned by get_object() and returns <strong>the</strong> feed’s# link as a normal Python string."""def link(self):"""Returns <strong>the</strong> feed’s link as a normal Python string."""link = ’/foo/bar/’ # Hard-coded link.# GUID -- One of <strong>the</strong> following three is optional. The framework looks# for <strong>the</strong>m in this order. This property is only used for Atom feeds# (where it is <strong>the</strong> feed-level ID element). If not provided, <strong>the</strong> feed# link is used as <strong>the</strong> ID.def feed_guid(self, obj):"""Takes <strong>the</strong> object returned by get_object() and returns <strong>the</strong> globallyunique ID for <strong>the</strong> feed as a normal Python string."""def feed_guid(self):"""Returns <strong>the</strong> feed’s globally unique ID as a normal Python string."""feed_guid = ’/foo/bar/1234’ # Hard-coded guid.# DESCRIPTION -- One of <strong>the</strong> following three is required. The framework# looks for <strong>the</strong>m in this order.def description(self, obj):"""Takes <strong>the</strong> object returned by get_object() and returns <strong>the</strong> feed’sdescription as a normal Python string."""def description(self):"""Returns <strong>the</strong> feed’s description as a normal Python string."""description = ’Foo bar baz.’ # Hard-coded description.# AUTHOR NAME --One of <strong>the</strong> following three is optional. The framework# looks for <strong>the</strong>m in this order.def author_name(self, obj):"""Takes <strong>the</strong> object returned by get_object() and returns <strong>the</strong> feed’sauthor’s name as a normal Python string."""def author_name(self):"""6.2. contrib packages 567
<strong>Django</strong> <strong>Documentation</strong>, Release 1.2Returns <strong>the</strong> feed’s author’s name as a normal Python string."""author_name = ’Sally Smith’ # Hard-coded author name.# AUTHOR E-MAIL --One of <strong>the</strong> following three is optional. The framework# looks for <strong>the</strong>m in this order.def author_email(self, obj):"""Takes <strong>the</strong> object returned by get_object() and returns <strong>the</strong> feed’sauthor’s e-mail as a normal Python string."""def author_email(self):"""Returns <strong>the</strong> feed’s author’s e-mail as a normal Python string."""author_email = ’test@example.com’ # Hard-coded author e-mail.# AUTHOR LINK --One of <strong>the</strong> following three is optional. The framework# looks for <strong>the</strong>m in this order. In each case, <strong>the</strong> URL should include# <strong>the</strong> "http://" and domain name.def author_link(self, obj):"""Takes <strong>the</strong> object returned by get_object() and returns <strong>the</strong> feed’sauthor’s URL as a normal Python string."""def author_link(self):"""Returns <strong>the</strong> feed’s author’s URL as a normal Python string."""author_link = ’http://www.example.com/’ # Hard-coded author URL.# CATEGORIES -- One of <strong>the</strong> following three is optional. The framework# looks for <strong>the</strong>m in this order. In each case, <strong>the</strong> method/attribute# should return an iterable object that returns strings.def categories(self, obj):"""Takes <strong>the</strong> object returned by get_object() and returns <strong>the</strong> feed’scategories as iterable over strings."""def categories(self):"""Returns <strong>the</strong> feed’s categories as iterable over strings."""categories = ("python", "django") # Hard-coded list of categories.# COPYRIGHT NOTICE -- One of <strong>the</strong> following three is optional. The# framework looks for <strong>the</strong>m in this order.568 Chapter 6. API Reference
<strong>Django</strong> <strong>Documentation</strong>, Release 1.2def feed_copyright(self, obj):"""Takes <strong>the</strong> object returned by get_object() and returns <strong>the</strong> feed’scopyright notice as a normal Python string."""def feed_copyright(self):"""Returns <strong>the</strong> feed’s copyright notice as a normal Python string."""feed_copyright = ’Copyright (c) 2007, Sally Smith’ # Hard-coded copyright notice.# TTL -- One of <strong>the</strong> following three is optional. The framework looks# for <strong>the</strong>m in this order. Ignored for Atom feeds.def ttl(self, obj):"""Takes <strong>the</strong> object returned by get_object() and returns <strong>the</strong> feed’sTTL (Time To Live) as a normal Python string."""def ttl(self):"""Returns <strong>the</strong> feed’s TTL as a normal Python string."""ttl = 600 # Hard-coded Time To Live.# ITEMS -- One of <strong>the</strong> following three is required. The framework looks# for <strong>the</strong>m in this order.def items(self, obj):"""Takes <strong>the</strong> object returned by get_object() and returns a list ofitems to publish in this feed."""def items(self):"""Returns a list of items to publish in this feed."""items = (’Item 1’, ’Item 2’) # Hard-coded items.# GET_OBJECT -- This is required for feeds that publish different data# for different URL parameters. (See "A complex example" above.)def get_object(self, request, *args, **kwargs):"""Takes <strong>the</strong> current request and <strong>the</strong> arguments from <strong>the</strong> URL, andreturns an object represented by this feed. Raisesdjango.core.exceptions.ObjectDoesNotExist on error."""# ITEM TITLE AND DESCRIPTION -- If title_template or# description_template are not defined, <strong>the</strong>se are used instead. Both are# optional, by default <strong>the</strong>y will use <strong>the</strong> unicode representation of <strong>the</strong>6.2. contrib packages 569
<strong>Django</strong> <strong>Documentation</strong>, Release 1.2# item.def item_title(self, item):"""Takes an item, as returned by items(), and returns <strong>the</strong> item’stitle as a normal Python string."""def item_title(self):"""Returns <strong>the</strong> title for every item in <strong>the</strong> feed."""item_title = ’Breaking News: Nothing Happening’ # Hard-coded title.def item_description(self, item):"""Takes an item, as returned by items(), and returns <strong>the</strong> item’sdescription as a normal Python string."""def item_description(self):"""Returns <strong>the</strong> description for every item in <strong>the</strong> feed."""item_description = ’A description of <strong>the</strong> item.’ # Hard-coded description.# ITEM LINK -- One of <strong>the</strong>se three is required. The framework looks for# <strong>the</strong>m in this order.# First, <strong>the</strong> framework tries <strong>the</strong> two methods below, in# order. Failing that, it falls back to <strong>the</strong> get_absolute_url()# method on each item returned by items().def item_link(self, item):"""Takes an item, as returned by items(), and returns <strong>the</strong> item’s URL."""def item_link(self):"""Returns <strong>the</strong> URL for every item in <strong>the</strong> feed."""# ITEM_GUID -- The following method is optional. If not provided, <strong>the</strong># item’s link is used by default.def item_guid(self, obj):"""Takes an item, as return by items(), and returns <strong>the</strong> item’s ID."""# ITEM AUTHOR NAME -- One of <strong>the</strong> following three is optional. The# framework looks for <strong>the</strong>m in this order.def item_author_name(self, item):"""570 Chapter 6. API Reference
<strong>Django</strong> <strong>Documentation</strong>, Release 1.2Takes an item, as returned by items(), and returns <strong>the</strong> item’sauthor’s name as a normal Python string."""def item_author_name(self):"""Returns <strong>the</strong> author name for every item in <strong>the</strong> feed."""item_author_name = ’Sally Smith’ # Hard-coded author name.# ITEM AUTHOR E-MAIL --One of <strong>the</strong> following three is optional. The# framework looks for <strong>the</strong>m in this order.## If you specify this, you must specify item_author_name.def item_author_email(self, obj):"""Takes an item, as returned by items(), and returns <strong>the</strong> item’sauthor’s e-mail as a normal Python string."""def item_author_email(self):"""Returns <strong>the</strong> author e-mail for every item in <strong>the</strong> feed."""item_author_email = ’test@example.com’ # Hard-coded author e-mail.# ITEM AUTHOR LINK -- One of <strong>the</strong> following three is optional. The# framework looks for <strong>the</strong>m in this order. In each case, <strong>the</strong> URL should# include <strong>the</strong> "http://" and domain name.## If you specify this, you must specify item_author_name.def item_author_link(self, obj):"""Takes an item, as returned by items(), and returns <strong>the</strong> item’sauthor’s URL as a normal Python string."""def item_author_link(self):"""Returns <strong>the</strong> author URL for every item in <strong>the</strong> feed."""item_author_link = ’http://www.example.com/’ # Hard-coded author URL.# ITEM ENCLOSURE URL -- One of <strong>the</strong>se three is required if you’re# publishing enclosures. The framework looks for <strong>the</strong>m in this order.def item_enclosure_url(self, item):"""Takes an item, as returned by items(), and returns <strong>the</strong> item’senclosure URL."""def item_enclosure_url(self):6.2. contrib packages 571
<strong>Django</strong> <strong>Documentation</strong>, Release 1.2"""Returns <strong>the</strong> enclosure URL for every item in <strong>the</strong> feed."""item_enclosure_url = "/foo/bar.mp3" # Hard-coded enclosure link.# ITEM ENCLOSURE LENGTH -- One of <strong>the</strong>se three is required if you’re# publishing enclosures. The framework looks for <strong>the</strong>m in this order.# In each case, <strong>the</strong> returned value should be ei<strong>the</strong>r an integer, or a# string representation of <strong>the</strong> integer, in bytes.def item_enclosure_length(self, item):"""Takes an item, as returned by items(), and returns <strong>the</strong> item’senclosure length."""def item_enclosure_length(self):"""Returns <strong>the</strong> enclosure length for every item in <strong>the</strong> feed."""item_enclosure_length = 32000 # Hard-coded enclosure length.# ITEM ENCLOSURE MIME TYPE -- One of <strong>the</strong>se three is required if you’re# publishing enclosures. The framework looks for <strong>the</strong>m in this order.def item_enclosure_mime_type(self, item):"""Takes an item, as returned by items(), and returns <strong>the</strong> item’senclosure MIME type."""def item_enclosure_mime_type(self):"""Returns <strong>the</strong> enclosure MIME type for every item in <strong>the</strong> feed."""item_enclosure_mime_type = "audio/mpeg" # Hard-coded enclosure MIME type.# ITEM PUBDATE -- It’s optional to use one of <strong>the</strong>se three. This is a# hook that specifies how to get <strong>the</strong> pubdate for a given item.# In each case, <strong>the</strong> method/attribute should return a Python# datetime.datetime object.def item_pubdate(self, item):"""Takes an item, as returned by items(), and returns <strong>the</strong> item’spubdate."""def item_pubdate(self):"""Returns <strong>the</strong> pubdate for every item in <strong>the</strong> feed."""item_pubdate = datetime.datetime(2005, 5, 3) # Hard-coded pubdate.572 Chapter 6. API Reference
<strong>Django</strong> <strong>Documentation</strong>, Release 1.2# ITEM CATEGORIES -- It’s optional to use one of <strong>the</strong>se three. This is# a hook that specifies how to get <strong>the</strong> list of categories for a given# item. In each case, <strong>the</strong> method/attribute should return an iterable# object that returns strings.def item_categories(self, item):"""Takes an item, as returned by items(), and returns <strong>the</strong> item’scategories."""def item_categories(self):"""Returns <strong>the</strong> categories for every item in <strong>the</strong> feed."""item_categories = ("python", "django") # Hard-coded categories.# ITEM COPYRIGHT NOTICE (only applicable to Atom feeds) -- One of <strong>the</strong># following three is optional. The framework looks for <strong>the</strong>m in this# order.def item_copyright(self, obj):"""Takes an item, as returned by items(), and returns <strong>the</strong> item’scopyright notice as a normal Python string."""def item_copyright(self):"""Returns <strong>the</strong> copyright notice for every item in <strong>the</strong> feed."""item_copyright = ’Copyright (c) 2007, Sally Smith’ # Hard-coded copyright notice.The low-level frameworkBehind <strong>the</strong> scenes, <strong>the</strong> high-level RSS framework uses a lower-level framework for generating feeds’ XML. Thisframework lives in a single module: django/utils/feedgenerator.py.You use this framework on your own, for lower-level feed generation. You can also create custom feed generatorsubclasses for use with <strong>the</strong> feed_type Feed option.SyndicationFeed classesThe feedgenerator module contains a base class:class django.utils.feedgenerator.SyndicationFeedand several subclasses:class django.utils.feedgenerator.RssUserland091Feedclass django.utils.feedgenerator.Rss201rev2Feedclass django.utils.feedgenerator.Atom1FeedEach of <strong>the</strong>se three classes knows how to render a certain type of feed as XML. They share this interface:6.2. contrib packages 573
<strong>Django</strong> <strong>Documentation</strong>, Release 1.2SyndicationFeed.__init__(**kwargs)Initialize <strong>the</strong> feed with <strong>the</strong> given dictionary of metadata, which applies to <strong>the</strong> entire feed. Required keywordarguments are:•title•link•descriptionThere’s also a bunch of o<strong>the</strong>r optional keywords:•language•author_email•author_name•author_link•subtitle•categories•feed_url•feed_copyright•feed_guid•ttlAny extra keyword arguments you pass to __init__ will be stored in self.feed for use with custom feedgenerators.All parameters should be Unicode objects, except categories, which should be a sequence of Unicodeobjects.SyndicationFeed.add_item(**kwargs)Add an item to <strong>the</strong> feed with <strong>the</strong> given parameters.Required keyword arguments are:•title•link•descriptionOptional keyword arguments are:•author_email•author_name•author_link•pubdate•comments•unique_id•enclosure•categories•item_copyright•ttl574 Chapter 6. API Reference
<strong>Django</strong> <strong>Documentation</strong>, Release 1.2Extra keyword arguments will be stored for custom feed generators.All parameters, if given, should be Unicode objects, except:•pubdate should be a Python datetime object.•enclosure should be an instance of feedgenerator.Enclosure.•categories should be a sequence of Unicode objects.SyndicationFeed.write(outfile, encoding)Outputs <strong>the</strong> feed in <strong>the</strong> given encoding to outfile, which is a file-like object.SyndicationFeed.writeString(encoding)Returns <strong>the</strong> feed as a string in <strong>the</strong> given encoding.For example, to create an Atom 1.0 feed and print it to standard output:>>> from django.utils import feedgenerator>>> from datetime import datetime>>> f = feedgenerator.Atom1Feed(... title=u"My Weblog",... link=u"http://www.example.com/",... description=u"In which I write about what I ate today.",... language=u"en",... author_name=u"Myself",... feed_url=u"http://example.com/atom.xml")>>> f.add_item(title=u"Hot dog today",... link=u"http://www.example.com/entries/1/",... pubdate=datetime.now(),... description=u"Today I had a Vienna Beef hot dog. It was pink, plump and perfect.")>>> print f.writeString(’UTF-8’)...Custom feed generatorsIf you need to produce a custom feed format, you’ve got a couple of options.If <strong>the</strong> feed format is totally custom, you’ll want to subclass SyndicationFeed and completely replace <strong>the</strong>write() and writeString() methods.However, if <strong>the</strong> feed format is a spin-off of RSS or Atom (i.e. GeoRSS, Apple’s iTunes podcast format, etc.), you’vegot a better choice. These types of feeds typically add extra elements and/or attributes to <strong>the</strong> underlying format, and<strong>the</strong>re are a set of methods that SyndicationFeed calls to get <strong>the</strong>se extra attributes. Thus, you can subclass <strong>the</strong>appropriate feed generator class (Atom1Feed or Rss201rev2Feed) and extend <strong>the</strong>se callbacks. They are:SyndicationFeed.root_attributes(self, ) Return a dict of attributes to add to <strong>the</strong> root feed element(feed/channel).SyndicationFeed.add_root_elements(self, handler) Callback to add elements inside <strong>the</strong> root feedelement (feed/channel). handler is an XMLGenerator from Python’s built-in SAX library; you’ll callmethods on it to add to <strong>the</strong> XML document in process.SyndicationFeed.item_attributes(self, item) Return a dict of attributes to add to eachitem (item/entry) element. The argument, item, is a dictionary of all <strong>the</strong> data passed toSyndicationFeed.add_item().6.2. contrib packages 575
<strong>Django</strong> <strong>Documentation</strong>, Release 1.2SyndicationFeed.add_item_elements(self, handler, item) Callback to add elements to eachitem (item/entry) element. handler and item are as above.Warning: If you override any of <strong>the</strong>se methods, be sure to call <strong>the</strong> superclass methods since <strong>the</strong>y add <strong>the</strong> requiredelements for each feed format.For example, you might start implementing an iTunes RSS feed generator like so:class iTunesFeed(Rss201rev2Feed):def root_attributes(self):attrs = super(iTunesFeed, self).root_attributes()attrs[’xmlns:itunes’] = ’http://www.itunes.com/dtds/podcast-1.0.dtd’return attrsdef add_root_elements(self, handler):super(iTunesFeed, self).add_root_elements(handler)handler.addQuickElement(’itunes:explicit’, ’clean’)Obviously <strong>the</strong>re’s a lot more work to be done for a complete custom feed class, but <strong>the</strong> above example should demonstrate<strong>the</strong> basic idea.6.2.18 django.contrib.webdesignThe django.contrib.webdesign package, part of <strong>the</strong> “django.contrib” add-ons, provides various <strong>Django</strong>helpers that are particularly useful to Web designers (as opposed to developers).At present, <strong>the</strong> package contains only a single template tag. If you have ideas for Web-designer-friendly functionalityin <strong>Django</strong>, please suggest <strong>the</strong>m.Template tagsTo use <strong>the</strong>se template tags, add ’django.contrib.webdesign’ to your INSTALLED_APPS setting. Onceyou’ve done that, use {% load webdesign %} in a template to give your template access to <strong>the</strong> tags.loremDisplays random “lorem ipsum” Latin text. This is useful for providing sample data in templates.Usage:{% lorem [count] [method] [random] %}The {% lorem %} tag can be used with zero, one, two or three arguments. The arguments are:ArgumentDescriptioncount A number (or variable) containing <strong>the</strong> number of paragraphs or words to generate (default is 1).method Ei<strong>the</strong>r w for words, p for HTML paragraphs or b for plain-text paragraph blocks (default is b).random The word random, which if given, does not use <strong>the</strong> common paragraph (“Lorem ipsum dolor sitamet...”) when generating text.Examples:• {% lorem %} will output <strong>the</strong> common “lorem ipsum” paragraph.• {% lorem 3 p %} will output <strong>the</strong> common “lorem ipsum” paragraph and two random paragraphs eachwrapped in HTML tags.576 Chapter 6. API Reference
<strong>Django</strong> <strong>Documentation</strong>, Release 1.2• {% lorem 2 w random %} will output two random Latin words.6.2.19 adminThe automatic <strong>Django</strong> administrative interface. For more information, see Tutorial 2 and <strong>the</strong> admin documentation.Requires <strong>the</strong> auth and contenttypes contrib packages to be installed.6.2.20 auth<strong>Django</strong>’s au<strong>the</strong>ntication framework.See User au<strong>the</strong>ntication in <strong>Django</strong>.6.2.21 commentsChanged in version 1.0: The comments application has been rewriten. See Upgrading from <strong>Django</strong>’s previous commentsystem for information on howto upgrade. A simple yet flexible comments system. See <strong>Django</strong>’s commentsframework.6.2.22 contenttypesA light framework for hooking into “types” of content, where each installed <strong>Django</strong> model is a separate content type.See <strong>the</strong> contenttypes documentation.6.2.23 csrfA middleware for preventing Cross Site Request ForgeriesSee <strong>the</strong> csrf documentation.6.2.24 flatpagesA framework for managing simple “flat” HTML content in a database.See <strong>the</strong> flatpages documentation.Requires <strong>the</strong> sites contrib package to be installed as well.6.2.25 formtoolsA set of high-level abstractions for <strong>Django</strong> forms (django.forms).django.contrib.formtools.previewAn abstraction of <strong>the</strong> following workflow:“Display an HTML form, force a preview, <strong>the</strong>n do something with <strong>the</strong> submission.”See <strong>the</strong> form preview documentation.6.2. contrib packages 577
<strong>Django</strong> <strong>Documentation</strong>, Release 1.2django.contrib.formtools.wizardSplits forms across multiple Web pages.See <strong>the</strong> form wizard documentation.6.2.26 gisA world-class geospatial framework built on top of <strong>Django</strong>, that enables storage, manipulation and display of spatialdata.See <strong>the</strong> Geo<strong>Django</strong> documentation for more.6.2.27 humanizeA set of <strong>Django</strong> template filters useful for adding a “human touch” to data.See <strong>the</strong> humanize documentation.6.2.28 localflavorA collection of various <strong>Django</strong> snippets that are useful only for a particular country or culture. For example,django.contrib.localflavor.us.forms contains a USZipCodeField that you can use to validate U.S.zip codes.See <strong>the</strong> localflavor documentation.6.2.29 markupA collection of template filters that implement common markup languagesSee <strong>the</strong> markup documentation.6.2.30 messagesChanged in version 1.2: The messages framework was added. A framework for storing and retrieving temporarycookie- or session-based messagesSee <strong>the</strong> messages documentation.6.2.31 redirectsA framework for managing redirects.See <strong>the</strong> redirects documentation.6.2.32 sessionsA framework for storing data in anonymous sessions.See <strong>the</strong> sessions documentation.578 Chapter 6. API Reference
<strong>Django</strong> <strong>Documentation</strong>, Release 1.26.2.33 sitesA light framework that lets you operate multiple Web sites off of <strong>the</strong> same database and <strong>Django</strong> installation. It givesyou hooks for associating objects to one or more sites.See <strong>the</strong> sites documentation.6.2.34 sitemapsA framework for generating Google sitemap XML files.See <strong>the</strong> sitemaps documentation.6.2.35 syndicationA framework for generating syndication feeds, in RSS and Atom, quite easily.See <strong>the</strong> syndication documentation.6.2.36 webdesignHelpers and utilities targeted primarily at Web designers ra<strong>the</strong>r than Web developers.See <strong>the</strong> Web design helpers documentation.6.2.37 O<strong>the</strong>r add-onsIf you have an idea for functionality to include in contrib, let us know! Code it up, and post it to <strong>the</strong> django-usersmailing list.6.3 Databases<strong>Django</strong> attempts to support as many features as possible on all database backends. However, not all database backendsare alike, and we’ve had to make design decisions on which features to support and which assumptions we can makesafely.This file describes some of <strong>the</strong> features that might be relevant to <strong>Django</strong> usage. Of course, it is not intended as areplacement for server-specific documentation or reference manuals.6.3.1 PostgreSQL notesPostgreSQL 8.2 to 8.2.4The implementation of <strong>the</strong> population statistics aggregates STDDEV_POP and VAR_POP that shipped with PostgreSQL8.2 to 8.2.4 are known to be faulty. Users of <strong>the</strong>se releases of PostgreSQL are advised to upgrade to Release8.2.5 or later. <strong>Django</strong> will raise a NotImplementedError if you attempt to use <strong>the</strong> StdDev(sample=False)or Variance(sample=False) aggregate with a database backend that falls within <strong>the</strong> affected release range.6.3. Databases 579
<strong>Django</strong> <strong>Documentation</strong>, Release 1.2Transaction handlingBy default, <strong>Django</strong> starts a transaction when a database connection is first used and commits <strong>the</strong> result at <strong>the</strong> end of<strong>the</strong> request/response handling. The PostgreSQL backends normally operate <strong>the</strong> same as any o<strong>the</strong>r <strong>Django</strong> backend inthis respect.Autocommit modeNew in version 1.1: Please, see <strong>the</strong> release notes If your application is particularly read-heavy and doesn’t make manydatabase writes, <strong>the</strong> overhead of a constantly open transaction can sometimes be noticeable. For those situations, ifyou’re using <strong>the</strong> postgresql_psycopg2 backend, you can configure <strong>Django</strong> to use “autocommit” behavior for<strong>the</strong> connection, meaning that each database operation will normally be in its own transaction, ra<strong>the</strong>r than having <strong>the</strong>transaction extend over multiple operations. In this case, you can still manually start a transaction if you’re doingsomething that requires consistency across multiple database operations. The autocommit behavior is enabled bysetting <strong>the</strong> autocommit key in <strong>the</strong> OPTIONS part of your database configuration in DATABASES:’OPTIONS’: {’autocommit’: True,}In this configuration, <strong>Django</strong> still ensures that delete() and update() queries run inside a single transaction, so thatei<strong>the</strong>r all <strong>the</strong> affected objects are changed or none of <strong>the</strong>m are.This is database-level autocommitThis functionality is not <strong>the</strong> same as <strong>the</strong> django.db.transaction.autocommit decorator. That decorator is a <strong>Django</strong>-levelimplementation that commits automatically after data changing operations. The feature enabled using <strong>the</strong> OPTIONSoption provides autocommit behavior at <strong>the</strong> database adapter level. It commits after every operation.If you are using this feature and performing an operation akin to delete or updating that requires multiple operations,you are strongly recommended to wrap you operations in manual transaction handling to ensure data consistency. Youshould also audit your existing code for any instances of this behavior before enabling this feature. It’s faster, but itprovides less automatic protection for multi-call operations.Indexes for varchar and text columnsNew in version 1.1.2: Please, see <strong>the</strong> release notes When specifying db_index=True on your model fields, <strong>Django</strong>typically outputs a single CREATE INDEX statement. However, if <strong>the</strong> database type for <strong>the</strong> field is ei<strong>the</strong>r varcharor text (e.g., used by CharField, FileField, and TextField), <strong>the</strong>n <strong>Django</strong> will create an additional indexthat uses an appropriate PostgreSQL operator class for <strong>the</strong> column. The extra index is necessary to correctly perfromlookups that use <strong>the</strong> LIKE operator in <strong>the</strong>ir SQL, as is done with <strong>the</strong> contains and startswith lookup types.6.3.2 MySQL notes<strong>Django</strong> expects <strong>the</strong> database to support transactions, referential integrity, and Unicode (UTF-8 encoding). Fortunately,MySQL has all <strong>the</strong>se features as available as far back as 3.23. While it may be possible to use 3.23 or 4.0, you’llprobably have less trouble if you use 4.1 or 5.0.580 Chapter 6. API Reference
<strong>Django</strong> <strong>Documentation</strong>, Release 1.2MySQL 4.1MySQL 4.1 has greatly improved support for character sets. It is possible to set different default character sets on <strong>the</strong>database, table, and column. Previous versions have only a server-wide character set setting. It’s also <strong>the</strong> first versionwhere <strong>the</strong> character set can be changed on <strong>the</strong> fly. 4.1 also has support for views, but <strong>Django</strong> currently doesn’t useviews.MySQL 5.0MySQL 5.0 adds <strong>the</strong> information_schema database, which contains detailed data on all database schema.<strong>Django</strong>’s inspectdb feature uses this information_schema if it’s available. 5.0 also has support for storedprocedures, but <strong>Django</strong> currently doesn’t use stored procedures.Storage enginesMySQL has several storage engines (previously called table types). You can change <strong>the</strong> default storage engine in <strong>the</strong>server configuration.The default engine is MyISAM 34 . The main drawback of MyISAM is that it doesn’t currently support transactions orforeign keys. On <strong>the</strong> plus side, it’s currently <strong>the</strong> only engine that supports full-text indexing and searching.The InnoDB engine is fully transactional and supports foreign key references.The BDB engine, like InnoDB, is also fully transactional and supports foreign key references. However, its use seemsto be deprecated.O<strong>the</strong>r storage engines, including SolidDB and Falcon, are on <strong>the</strong> horizon. For now, InnoDB is probably your bestchoice.MySQLdbMySQLdb is <strong>the</strong> Python interface to MySQL. Version 1.2.1p2 or later is required for full MySQL support in <strong>Django</strong>.Note: If you see ImportError: cannot import name ImmutableSet when trying to use <strong>Django</strong>, yourMySQLdb installation may contain an outdated sets.py file that conflicts with <strong>the</strong> built-in module of <strong>the</strong> same namefrom Python 2.4 and later. To fix this, verify that you have installed MySQLdb version 1.2.1p2 or newer, <strong>the</strong>n delete<strong>the</strong> sets.py file in <strong>the</strong> MySQLdb directory that was left by an earlier version.Creating your databaseYou can create your database using <strong>the</strong> command-line tools and this SQL:CREATE DATABASE CHARACTER SET utf8;This ensures all tables and columns will use UTF-8 by default.34 Unless this was changed by <strong>the</strong> packager of your MySQL package. We’ve had reports that <strong>the</strong> Windows Community Server installer sets upInnoDB as <strong>the</strong> default storage engine, for example.6.3. Databases 581
<strong>Django</strong> <strong>Documentation</strong>, Release 1.2Collation settingsThe collation setting for a column controls <strong>the</strong> order in which data is sorted as well as what strings compare as equal. Itcan be set on a database-wide level and also per-table and per-column. This is documented thoroughly in <strong>the</strong> MySQLdocumentation. In all cases, you set <strong>the</strong> collation by directly manipulating <strong>the</strong> database tables; <strong>Django</strong> doesn’t providea way to set this on <strong>the</strong> model definition.By default, with a UTF-8 database, MySQL will use <strong>the</strong> utf8_general_ci_swedish collation. This results inall string equality comparisons being done in a case-insensitive manner. That is, "Fred" and "freD" are consideredequal at <strong>the</strong> database level. If you have a unique constraint on a field, it would be illegal to try to insert both "aa" and"AA" into <strong>the</strong> same column, since <strong>the</strong>y compare as equal (and, hence, non-unique) with <strong>the</strong> default collation.In many cases, this default will not be a problem. However, if you really want case-sensitive comparisons on aparticular column or table, you would change <strong>the</strong> column or table to use <strong>the</strong> utf8_bin collation. The mainthing to be aware of in this case is that if you are using MySQLdb 1.2.2, <strong>the</strong> database backend in <strong>Django</strong> will<strong>the</strong>n return bytestrings (instead of unicode strings) for any character fields it receive from <strong>the</strong> database. This isa strong variation from <strong>Django</strong>’s normal practice of always returning unicode strings. It is up to you, <strong>the</strong> developer,to handle <strong>the</strong> fact that you will receive bytestrings if you configure your table(s) to use utf8_bin collation.<strong>Django</strong> itself should mostly work smoothly with such columns (except for <strong>the</strong> contrib.sessionsSession and contrib.admin LogEntry tables described below), but your code must be prepared to calldjango.utils.encoding.smart_unicode() at times if it really wants to work with consistent data –<strong>Django</strong> will not do this for you (<strong>the</strong> database backend layer and <strong>the</strong> model population layer are separated internally so<strong>the</strong> database layer doesn’t know it needs to make this conversion in this one particular case).If you’re using MySQLdb 1.2.1p2, <strong>Django</strong>’s standard CharField class will return unicode strings even withutf8_bin collation. However, TextField fields will be returned as an array.array instance (from Python’sstandard array module). There isn’t a lot <strong>Django</strong> can do about that, since, again, <strong>the</strong> information needed to make <strong>the</strong>necessary conversions isn’t available when <strong>the</strong> data is read in from <strong>the</strong> database. This problem was fixed in MySQLdb1.2.2, so if you want to use TextField with utf8_bin collation, upgrading to version 1.2.2 and <strong>the</strong>n dealing with<strong>the</strong> bytestrings (which shouldn’t be too difficult) as described above is <strong>the</strong> recommended solution.Should you decide to use utf8_bin collation for some of your tables with MySQLdb 1.2.1p2or 1.2.2, you should still use utf8_collation_ci_swedish (<strong>the</strong> default) collation for <strong>the</strong>django.contrib.sessions.models.Session table (usually called django_session) and <strong>the</strong>django.contrib.admin.models.LogEntry table (usually called django_admin_log). Those are <strong>the</strong>two standard tables that use TextField internally.Connecting to <strong>the</strong> databaseRefer to <strong>the</strong> settings documentation.Connection settings are used in this order:1. OPTIONS.2. NAME, USER, PASSWORD, HOST, PORT3. MySQL option files.In o<strong>the</strong>r words, if you set <strong>the</strong> name of <strong>the</strong> database in OPTIONS, this will take precedence over NAME, which wouldoverride anything in a MySQL option file.Here’s a sample configuration which uses a MySQL option file:# settings.pyDATABASES = {’default’: {’ENGINE’: ’django.db.backends.mysql’,582 Chapter 6. API Reference
<strong>Django</strong> <strong>Documentation</strong>, Release 1.2}}’OPTIONS’: {’read_default_file’: ’/path/to/my.cnf’,},# my.cnf[client]database = NAMEuser = USERpassword = PASSWORDdefault-character-set = utf8Several o<strong>the</strong>r MySQLdb connection options may be useful, such as ssl, use_unicode, init_command, andsql_mode. Consult <strong>the</strong> MySQLdb documentation for more details.Creating your tablesWhen <strong>Django</strong> generates <strong>the</strong> schema, it doesn’t specify a storage engine, so tables will be created with whatever defaultstorage engine your database server is configured for. The easiest solution is to set your database server’s defaultstorage engine to <strong>the</strong> desired engine.If you’re using a hosting service and can’t change your server’s default storage engine, you have a couple of options.• After <strong>the</strong> tables are created, execute an ALTER TABLE statement to convert a table to a new storage engine(such as InnoDB):ALTER TABLE ENGINE=INNODB;This can be tedious if you have a lot of tables.• Ano<strong>the</strong>r option is to use <strong>the</strong> init_command option for MySQLdb prior to creating your tables:’OPTIONS’: {’init_command’: ’SET storage_engine=INNODB’,}This sets <strong>the</strong> default storage engine upon connecting to <strong>the</strong> database. After your tables have been created, youshould remove this option.• Ano<strong>the</strong>r method for changing <strong>the</strong> storage engine is described in AlterModelOnSyncDB.Notes on specific fieldsBoolean fieldsChanged in version 1.2: Please, see <strong>the</strong> release notes In previous versions of <strong>Django</strong> when running under MySQLBooleanFields would return <strong>the</strong>ir data as ints, instead of true bools. See <strong>the</strong> release notes for a completedescription of <strong>the</strong> change.Character fieldsAny fields that are stored with VARCHAR column types have <strong>the</strong>ir max_length restricted to 255 charactersif you are using unique=True for <strong>the</strong> field. This affects CharField, SlugField andCommaSeparatedIntegerField.6.3. Databases 583
<strong>Django</strong> <strong>Documentation</strong>, Release 1.2Fur<strong>the</strong>rmore, if you are using a version of MySQL prior to 5.0.3, all of those column types have a maximum lengthrestriction of 255 characters, regardless of whe<strong>the</strong>r unique=True is specified or not.6.3.3 SQLite notesSQLite provides an excellent development alternative for applications that are predominantly read-only or require asmaller installation footprint. As with all database servers, though, <strong>the</strong>re are some differences that are specific toSQLite that you should be aware of.String matching for non-ASCII stringsSQLite doesn’t support case-insensitive matching for non-ASCII strings. Some possible workarounds for this aredocumented at sqlite.org, but <strong>the</strong>y are not utilised by <strong>the</strong> default SQLite backend in <strong>Django</strong>. Therefore, if you areusing <strong>the</strong> iexact lookup type in your queryset filters, be aware that it will not work as expected for non-ASCIIstrings.SQLite 3.3.6 or newer strongly recommendedVersions of SQLite 3.3.5 and older contains <strong>the</strong> following bugs:• A bug when handling ORDER BY parameters. This can cause problems when you use <strong>the</strong> select parameterfor <strong>the</strong> extra() QuerySet method. The bug can be identified by <strong>the</strong> error message OperationalError:ORDER BY terms must not be non-integer constants.• A bug when handling aggregation toge<strong>the</strong>r with DateFields and DecimalFields.SQLite 3.3.6 was released in April 2006, so most current binary distributions for different platforms include newerversion of SQLite usable from Python through ei<strong>the</strong>r <strong>the</strong> pysqlite2 or <strong>the</strong> sqlite3 modules.However, some platform/Python version combinations include older versions of SQLite (e.g. <strong>the</strong> official binary distributionof Python 2.5 for Windows, 2.5.4 as of this writing, includes SQLite 3.3.4). There are (as of <strong>Django</strong> 1.1) evensome tests in <strong>the</strong> <strong>Django</strong> test suite that will fail when run under this setup.As described below, this can be solved by downloading and installing a newer version of pysqlite2(pysqlite-2.x.x.win32-py2.5.exe in <strong>the</strong> described case) that includes and uses a newer version of SQLite.Python 2.6 for Windows ships with a version of SQLite that is not affected by <strong>the</strong>se issues.Version 3.5.9The Ubuntu “Intrepid Ibex” (8.10) SQLite 3.5.9-3 package contains a bug that causes problems with <strong>the</strong> evaluationof query expressions. If you are using Ubuntu “Intrepid Ibex”, you will need to update <strong>the</strong> package to version 3.5.9-3ubuntu1 or newer (recommended) or find an alternate source for SQLite packages, or install SQLite from source.At one time, Debian Lenny shipped with <strong>the</strong> same malfunctioning SQLite 3.5.9-3 package. However <strong>the</strong> Debianproject has subsequently issued updated versions of <strong>the</strong> SQLite package that correct <strong>the</strong>se bugs. If you find you aregetting unexpected results under Debian, ensure you have updated your SQLite package to 3.5.9-5 or later.The problem does not appear to exist with o<strong>the</strong>r versions of SQLite packaged with o<strong>the</strong>r operating systems.Version 3.6.2SQLite version 3.6.2 (released August 30, 2008) introduced a bug into SELECT DISTINCT handling that is triggeredby, amongst o<strong>the</strong>r things, <strong>Django</strong>’s DateQuerySet (returned by <strong>the</strong> dates() method on a queryset).584 Chapter 6. API Reference
<strong>Django</strong> <strong>Documentation</strong>, Release 1.2You should avoid using this version of SQLite with <strong>Django</strong>. Ei<strong>the</strong>r upgrade to 3.6.3 (released September 22, 2008) orlater, or downgrade to an earlier version of SQLite.Using newer versions of <strong>the</strong> SQLite DB-API 2.0 driverNew in version 1.1: Please, see <strong>the</strong> release notes For versions of Python 2.5 or newer that include sqlite3 in <strong>the</strong>standard library <strong>Django</strong> will now use a pysqlite2 interface in preference to sqlite3 if it finds one is available.This provides <strong>the</strong> ability to upgrade both <strong>the</strong> DB-API 2.0 interface or SQLite 3 itself to versions newer than <strong>the</strong> onesincluded with your particular Python binary distribution, if needed.“Database is locked” errorsSQLite is meant to be a lightweight database, and thus can’t support a high level of concurrency.OperationalError: database is locked errors indicate that your application is experiencing more concurrencythan sqlite can handle in default configuration. This error means that one thread or process has an exclusivelock on <strong>the</strong> database connection and ano<strong>the</strong>r thread timed out waiting for <strong>the</strong> lock <strong>the</strong> be released.Python’s SQLite wrapper has a default timeout value that determines how long <strong>the</strong> second thread is allowed to wait on<strong>the</strong> lock before it times out and raises <strong>the</strong> OperationalError: database is locked error.If you’re getting this error, you can solve it by:• Switching to ano<strong>the</strong>r database backend. At a certain point SQLite becomes too “lite” for real-world applications,and <strong>the</strong>se sorts of concurrency errors indicate you’ve reached that point.• Rewriting your code to reduce concurrency and ensure that database transactions are short-lived.• Increase <strong>the</strong> default timeout value by setting <strong>the</strong> timeout database option option:’OPTIONS’: {# ...’timeout’: 20,# ...}This will simply make SQLite wait a bit longer before throwing “database is locked” errors; it won’t really doanything to solve <strong>the</strong>m.6.3.4 Oracle notes<strong>Django</strong> supports Oracle Database Server versions 9i and higher. Oracle version 10g or later is required to use <strong>Django</strong>’sregex and iregex query operators. You will also need at least version 4.3.1 of <strong>the</strong> cx_Oracle Python driver.Note that due to a Unicode-corruption bug in cx_Oracle 5.0, that version of <strong>the</strong> driver should not be used with<strong>Django</strong>; cx_Oracle 5.0.1 resolved this issue, so if you’d like to use a more recent cx_Oracle, use version 5.0.1.cx_Oracle 5.0.1 or greater can optionally be compiled with <strong>the</strong> WITH_UNICODE environment variable. This isrecommended but not required.In order for <strong>the</strong> python manage.py syncdb command to work, your Oracle database user must have privilegesto run <strong>the</strong> following commands:• CREATE TABLE• CREATE SEQUENCE• CREATE PROCEDURE6.3. Databases 585
<strong>Django</strong> <strong>Documentation</strong>, Release 1.2• CREATE TRIGGERTo run <strong>Django</strong>’s test suite, <strong>the</strong> user needs <strong>the</strong>se additional privileges:• CREATE USER• DROP USER• CREATE TABLESPACE• DROP TABLESPACE• CONNECT WITH ADMIN OPTION• RESOURCE WITH ADMIN OPTIONConnecting to <strong>the</strong> databaseYour <strong>Django</strong> settings.py file should look something like this for Oracle:DATABASES = {’default’: {’ENGINE’: ’django.db.backends.oracle’,’NAME’: ’xe’,’USER’: ’a_user’,’PASSWORD’: ’a_password’,’HOST’: ’’,’PORT’: ’’,}}If you don’t use a tnsnames.ora file or a similar naming method that recognizes <strong>the</strong> SID (“xe” in this example),<strong>the</strong>n fill in both HOST and PORT like so:DATABASES = {’default’: {’ENGINE’: ’django.db.backends.oracle’,’NAME’: ’xe’,’USER’: ’a_user’,’PASSWORD’: ’a_password’,’HOST’: ’dbprod01ned.mycompany.com’,’PORT’: ’1540’,}}You should supply both HOST and PORT, or leave both as empty strings.Threaded optionIf you plan to run <strong>Django</strong> in a multithreaded environment (e.g. Apache in Windows using <strong>the</strong> default MPM module),<strong>the</strong>n you must set <strong>the</strong> threaded option of your Oracle database configuration to True:’OPTIONS’: {’threaded’: True,},Failure to do this may result in crashes and o<strong>the</strong>r odd behavior.586 Chapter 6. API Reference
<strong>Django</strong> <strong>Documentation</strong>, Release 1.2Tablespace optionsA common paradigm for optimizing performance in Oracle-based systems is <strong>the</strong> use of tablespaces to organize disklayout. The Oracle backend supports this use case by adding db_tablespace options to <strong>the</strong> Meta and Fieldclasses. (When you use a backend that lacks support for tablespaces, <strong>Django</strong> ignores <strong>the</strong>se options.)A tablespace can be specified for <strong>the</strong> table(s) generated by a model by supplying <strong>the</strong> db_tablespace option inside<strong>the</strong> model’s class Meta. Additionally, you can pass <strong>the</strong> db_tablespace option to a Field constructor tospecify an alternate tablespace for <strong>the</strong> Field‘s column index. If no index would be created for <strong>the</strong> column, <strong>the</strong>db_tablespace option is ignored:class TablespaceExample(models.Model):name = models.CharField(max_length=30, db_index=True, db_tablespace="indexes")data = models.CharField(max_length=255, db_index=True)edges = models.ManyToManyField(to="self", db_tablespace="indexes")class Meta:db_tablespace = "tables"In this example, <strong>the</strong> tables generated by <strong>the</strong> TablespaceExample model (i.e., <strong>the</strong> model table and <strong>the</strong> manyto-manytable) would be stored in <strong>the</strong> tables tablespace. The index for <strong>the</strong> name field and <strong>the</strong> indexes on <strong>the</strong>many-to-many table would be stored in <strong>the</strong> indexes tablespace. The data field would also generate an index, butno tablespace for it is specified, so it would be stored in <strong>the</strong> model tablespace tables by default. New in version 1.0:Please, see <strong>the</strong> release notes Use <strong>the</strong> DEFAULT_TABLESPACE and DEFAULT_INDEX_TABLESPACE settings tospecify default values for <strong>the</strong> db_tablespace options. These are useful for setting a tablespace for <strong>the</strong> built-in <strong>Django</strong>apps and o<strong>the</strong>r applications whose code you cannot control.<strong>Django</strong> does not create <strong>the</strong> tablespaces for you. Please refer to Oracle’s documentation for details on creating andmanaging tablespaces.Naming issuesOracle imposes a name length limit of 30 characters. To accommodate this, <strong>the</strong> backend truncates database identifiersto fit, replacing <strong>the</strong> final four characters of <strong>the</strong> truncated name with a repeatable MD5 hash value.When running syncdb, an ORA-06552 error may be encountered if certain Oracle keywords are used as <strong>the</strong> name ofa model field or <strong>the</strong> value of a db_column option. <strong>Django</strong> quotes all identifiers used in queries to prevent most suchproblems, but this error can still occur when an Oracle datatype is used as a column name. In particular, take care toavoid using <strong>the</strong> names date, timestamp, number or float as a field name.NULL and empty strings<strong>Django</strong> generally prefers to use <strong>the</strong> empty string (‘’) ra<strong>the</strong>r than NULL, but Oracle treats both identically. To getaround this, <strong>the</strong> Oracle backend coerces <strong>the</strong> null=True option on fields that have <strong>the</strong> empty string as a possiblevalue. When fetching from <strong>the</strong> database, it is assumed that a NULL value in one of <strong>the</strong>se fields really means <strong>the</strong> emptystring, and <strong>the</strong> data is silently converted to reflect this assumption.TextField limitationsThe Oracle backend stores TextFields as NCLOB columns. Oracle imposes some limitations on <strong>the</strong> usage of suchLOB columns in general:• LOB columns may not be used as primary keys.• LOB columns may not be used in indexes.6.3. Databases 587
<strong>Django</strong> <strong>Documentation</strong>, Release 1.2• LOB columns may not be used in a SELECT DISTINCT list. This means that attempting to use <strong>the</strong>QuerySet.distinct method on a model that includes TextField columns will result in an error whenrun against Oracle. As a workaround, use <strong>the</strong> QuerySet.defer method in conjunction with distinct()to prevent TextField columns from being included in <strong>the</strong> SELECT DISTINCT list.6.3.5 Using a 3rd-party database backendIn addition to <strong>the</strong> officially supported databases, <strong>the</strong>re are backends provided by 3rd parties that allow you to use o<strong>the</strong>rdatabases with <strong>Django</strong>:• Sybase SQL Anywhere• IBM DB2• Microsoft SQL Server 2005• Firebird• ODBCThe <strong>Django</strong> versions and ORM features supported by <strong>the</strong>se unofficial backends vary considerably. Queries regarding<strong>the</strong> specific capabilities of <strong>the</strong>se unofficial backends, along with any support queries, should be directed to <strong>the</strong> supportchannels provided by each 3rd party project.6.4 django-admin.py and manage.pydjango-admin.py is <strong>Django</strong>’s command-line utility for administrative tasks. This document outlines all it can do.In addition, manage.py is automatically created in each <strong>Django</strong> project. manage.py is a thin wrapper arounddjango-admin.py that takes care of two things for you before delegating to django-admin.py:• It puts your project’s package on sys.path.• It sets <strong>the</strong> DJANGO_SETTINGS_MODULE environment variable so that it points to your project’ssettings.py file.The django-admin.py script should be on your system path if you installed <strong>Django</strong> via its setup.py utility. Ifit’s not on your path, you can find it in site-packages/django/bin within your Python installation. Considersymlinking it from some place on your path, such as /usr/local/bin.For Windows users, who do not have symlinking functionality available, you can copy django-admin.py to alocation on your existing path or edit <strong>the</strong> PATH settings (under Settings - Control Panel - System -Advanced - Environment...) to point to its installed location.Generally, when working on a single <strong>Django</strong> project, it’s easier to use manage.py. Use django-admin.py withDJANGO_SETTINGS_MODULE, or <strong>the</strong> --settings command line option, if you need to switch between multiple<strong>Django</strong> settings files.The command-line examples throughout this document use django-admin.py to be consistent, but any examplecan use manage.py just as well.6.4.1 Usagedjango-admin.py [options]manage.py [options]588 Chapter 6. API Reference
<strong>Django</strong> <strong>Documentation</strong>, Release 1.2command should be one of <strong>the</strong> commands listed in this document. options, which is optional, should be zero ormore of <strong>the</strong> options available for <strong>the</strong> given command.Getting runtime help-helpRun django-admin.py help to display a list of all available commands. Run django-admin.py help to display a description of <strong>the</strong> given command and a list of its available options.App namesMany commands take a list of “app names.” An “app name” is <strong>the</strong> basename of <strong>the</strong> package containing your models.For example, if your INSTALLED_APPS contains <strong>the</strong> string ’mysite.blog’, <strong>the</strong> app name is blog.Determining <strong>the</strong> version-versionRun django-admin.py --version to display <strong>the</strong> current <strong>Django</strong> version.Examples of output:0.950.960.97-pre-SVN-6069Displaying debug outputUse --verbosity to specify <strong>the</strong> amount of notification and debug information that django-admin.py shouldprint to <strong>the</strong> console. For more details, see <strong>the</strong> documentation for <strong>the</strong> --verbosity option.6.4.2 Available commandscleanupdjango-admin.py cleanupNew in version 1.0: Please, see <strong>the</strong> release notes Can be run as a cronjob or directly to clean out old data from <strong>the</strong>database (only expired sessions at <strong>the</strong> moment).compilemessagesdjango-admin.py compilemessagesChanged in version 1.0: Before 1.0 this was <strong>the</strong> “bin/compile-messages.py” command. Compiles .po files created withmakemessages to .mo files for use with <strong>the</strong> builtin gettext support. See Internationalization and localization.Use <strong>the</strong> --locale option to specify <strong>the</strong> locale to process. If not provided, all locales are processed.Example usage:6.4. django-admin.py and manage.py 589
<strong>Django</strong> <strong>Documentation</strong>, Release 1.2django-admin.py compilemessages --locale=br_PTcreatecachetabledjango-admin.py createcachetableCreates a cache table named tablename for use with <strong>the</strong> database cache backend. See <strong>Django</strong>’s cache frameworkfor more information. New in version 1.2: Please, see <strong>the</strong> release notes The --database option can be used tospecify <strong>the</strong> database onto which <strong>the</strong> cachetable will be installed.dbshelldjango-admin.py dbshellRuns <strong>the</strong> command-line client for <strong>the</strong> database engine specified in your ENGINE setting, with <strong>the</strong> connection parametersspecified in your USER, PASSWORD, etc., settings.• For PostgreSQL, this runs <strong>the</strong> psql command-line client.• For MySQL, this runs <strong>the</strong> mysql command-line client.• For SQLite, this runs <strong>the</strong> sqlite3 command-line client.This command assumes <strong>the</strong> programs are on your PATH so that a simple call to <strong>the</strong> program name (psql, mysql,sqlite3) will find <strong>the</strong> program in <strong>the</strong> right place. There’s no way to specify <strong>the</strong> location of <strong>the</strong> program manually.New in version 1.2: Please, see <strong>the</strong> release notes The --database option can be used to specify <strong>the</strong> database ontowhich to open a shell.diffsettingsdjango-admin.py diffsettingsDisplays differences between <strong>the</strong> current settings file and <strong>Django</strong>’s default settings.Settings that don’t appear in <strong>the</strong> defaults are followed by "###". For example, <strong>the</strong> default settings don’t defineROOT_URLCONF, so ROOT_URLCONF is followed by "###" in <strong>the</strong> output of diffsettings.Note that <strong>Django</strong>’s default settings live in django/conf/global_settings.py, if you’re ever curious to see<strong>the</strong> full list of defaults.dumpdata django-admin.py dumpdataOutputs to standard output all data in <strong>the</strong> database associated with <strong>the</strong> named application(s).If no application name is provided, all installed applications will be dumped.The output of dumpdata can be used as input for loaddata.Note that dumpdata uses <strong>the</strong> default manager on <strong>the</strong> model for selecting <strong>the</strong> records to dump. If you’re using acustom manager as <strong>the</strong> default manager and it filters some of <strong>the</strong> available records, not all of <strong>the</strong> objects will bedumped.-format By default, dumpdata will format its output in JSON, but you can use <strong>the</strong> --format option to specify ano<strong>the</strong>rformat. Currently supported formats are listed in Serialization formats.590 Chapter 6. API Reference
<strong>Django</strong> <strong>Documentation</strong>, Release 1.2-indent By default, dumpdata will output all data on a single line. This isn’t easy for humans to read, so you can use<strong>the</strong> --indent option to pretty-print <strong>the</strong> output with a number of indentation spaces. New in version 1.0: Please,see <strong>the</strong> release notes The --exclude option may be provided to prevent specific applications from being dumped.New in version 1.1: Please, see <strong>the</strong> release notes In addition to specifying application names, you can provide a listof individual models, in <strong>the</strong> form of appname.Model. If you specify a model name to dumpdata, <strong>the</strong> dumpedoutput will be restricted to that model, ra<strong>the</strong>r than <strong>the</strong> entire application. You can also mix application names andmodel names. New in version 1.2: Please, see <strong>the</strong> release notes The --database option can be used to specify <strong>the</strong>database onto which <strong>the</strong> data will be loaded.-naturalNew in version 1.2: Please, see <strong>the</strong> release notes Use natural keys to represent any foreign key and many-to-manyrelationship with a model that provides a natural key definition. If you are dumping contrib.auth Permissionobjects or contrib.contenttypes ContentType objects, you should probably be using this flag.flushdjango-admin.py flushReturns <strong>the</strong> database to <strong>the</strong> state it was in immediately after syncdb was executed. This means that all data will beremoved from <strong>the</strong> database, any post-synchronization handlers will be re-executed, and <strong>the</strong> initial_data fixturewill be re-installed.The --noinput option may be provided to suppress all user prompts. New in version 1.2: Please, see <strong>the</strong> releasenotes The --database option may be used to specify <strong>the</strong> database to flush.inspectdbdjango-admin.py inspectdbIntrospects <strong>the</strong> database tables in <strong>the</strong> database pointed-to by <strong>the</strong> NAME setting and outputs a <strong>Django</strong> model module (amodels.py file) to standard output.Use this if you have a legacy database with which you’d like to use <strong>Django</strong>. The script will inspect <strong>the</strong> database andcreate a model for each table within it.As you might expect, <strong>the</strong> created models will have an attribute for every field in <strong>the</strong> table. Note that inspectdb hasa few special cases in its field-name output:• If inspectdb cannot map a column’s type to a model field type, it’ll use TextField and will insert <strong>the</strong>Python comment ’This field type is a guess.’ next to <strong>the</strong> field in <strong>the</strong> generated model.• If <strong>the</strong> database column name is a Python reserved word (such as ’pass’, ’class’ or ’for’), inspectdbwill append ’_field’ to <strong>the</strong> attribute name. For example, if a table has a column ’for’, <strong>the</strong> generated modelwill have a field ’for_field’, with <strong>the</strong> db_column attribute set to ’for’. inspectdb will insert <strong>the</strong>Python comment ’Field renamed because it was a Python reserved word.’ next to <strong>the</strong>field.This feature is meant as a shortcut, not as definitive model generation. After you run it, you’ll want to look over<strong>the</strong> generated models yourself to make customizations. In particular, you’ll need to rearrange models’ order, so thatmodels that refer to o<strong>the</strong>r models are ordered properly.Primary keys are automatically introspected for PostgreSQL, MySQL and SQLite, in which case <strong>Django</strong> puts in <strong>the</strong>primary_key=True where needed.6.4. django-admin.py and manage.py 591
<strong>Django</strong> <strong>Documentation</strong>, Release 1.2inspectdb works with PostgreSQL, MySQL and SQLite. Foreign-key detection only works in PostgreSQL andwith certain types of MySQL tables. New in version 1.2: Please, see <strong>the</strong> release notes The --database option maybe used to specify <strong>the</strong> database to introspect.loaddata django-admin.py loaddataSearches for and loads <strong>the</strong> contents of <strong>the</strong> named fixture into <strong>the</strong> database. New in version 1.2: Please, see <strong>the</strong> releasenotes The --database option can be used to specify <strong>the</strong> database onto which <strong>the</strong> data will be loaded.What’s a “fixture”?A fixture is a collection of files that contain <strong>the</strong> serialized contents of <strong>the</strong> database. Each fixture has a unique name,and <strong>the</strong> files that comprise <strong>the</strong> fixture can be distributed over multiple directories, in multiple applications.<strong>Django</strong> will search in three locations for fixtures:1. In <strong>the</strong> fixtures directory of every installed application2. In any directory named in <strong>the</strong> FIXTURE_DIRS setting3. In <strong>the</strong> literal path named by <strong>the</strong> fixture<strong>Django</strong> will load any and all fixtures it finds in <strong>the</strong>se locations that match <strong>the</strong> provided fixture names.If <strong>the</strong> named fixture has a file extension, only fixtures of that type will be loaded. For example:django-admin.py loaddata mydata.jsonwould only load JSON fixtures called mydata. The fixture extension must correspond to <strong>the</strong> registered name of aserializer (e.g., json or xml).If you omit <strong>the</strong> extensions, <strong>Django</strong> will search all available fixture types for a matching fixture. For example:django-admin.py loaddata mydatawould look for any fixture of any fixture type called mydata. If a fixture directory contained mydata.json, thatfixture would be loaded as a JSON fixture.The fixtures that are named can include directory components. These directories will be included in <strong>the</strong> search path.For example:django-admin.py loaddata foo/bar/mydata.jsonwould search /fixtures/foo/bar/mydata.json for each installed application,/foo/bar/mydata.json for each directory in FIXTURE_DIRS, and <strong>the</strong> literal pathfoo/bar/mydata.json.When fixture files are processed, <strong>the</strong> data is saved to <strong>the</strong> database as is. Model defined save methods and pre_savesignals are not called.Note that <strong>the</strong> order in which fixture files are processed is undefined. However, all fixture data is installed as a singletransaction, so data in one fixture can reference data in ano<strong>the</strong>r fixture. If <strong>the</strong> database backend supports row-levelconstraints, <strong>the</strong>se constraints will be checked at <strong>the</strong> end of <strong>the</strong> transaction.The dumpdata command can be used to generate input for loaddata.592 Chapter 6. API Reference
<strong>Django</strong> <strong>Documentation</strong>, Release 1.2Compressed fixturesFixtures may be compressed in zip, gz, or bz2 format. For example:django-admin.py loaddata mydata.jsonwould look for any of mydata.json, mydata.json.zip, mydata.json.gz, or mydata.json.bz2. Thefirst file contained within a zip-compressed archive is used.Note that if two fixtures with <strong>the</strong> same name but different fixture type are discovered (for example, if mydata.jsonand mydata.xml.gz were found in <strong>the</strong> same fixture directory), fixture installation will be aborted, and any datainstalled in <strong>the</strong> call to loaddata will be removed from <strong>the</strong> database.MySQL and FixturesUnfortunately, MySQL isn’t capable of completely supporting all <strong>the</strong> features of <strong>Django</strong> fixtures. If you use MyISAMtables, MySQL doesn’t support transactions or constraints, so you won’t get a rollback if multiple transaction filesare found, or validation of fixture data. If you use InnoDB tables, you won’t be able to have any forward referencesin your data files - MySQL doesn’t provide a mechanism to defer checking of row constraints until a transaction iscommitted.Database-specific fixturesIf you are in a multi-database setup, you may have fixture data that you want to load onto one database, but not ontoano<strong>the</strong>r. In this situation, you can add database identifier into . If your DATABASES setting has a ‘master’ databasedefined, you can define <strong>the</strong> fixture mydata.master.json or mydata.master.json.gz. This fixture willonly be loaded if you have specified that you want to load data onto <strong>the</strong> master database.makemessagesdjango-admin.py makemessagesChanged in version 1.0: Before 1.0 this was <strong>the</strong> bin/make-messages.py command. Runs over <strong>the</strong> entire sourcetree of <strong>the</strong> current directory and pulls out all strings marked for translation. It creates (or updates) a message filein <strong>the</strong> conf/locale (in <strong>the</strong> django tree) or locale (for project and application) directory. After making changes to <strong>the</strong>messages files you need to compile <strong>the</strong>m with compilemessages for use with <strong>the</strong> builtin gettext support. See <strong>the</strong>i18n documentation for details.-allUse <strong>the</strong> --all or -a option to update <strong>the</strong> message files for all available languages.Example usage:django-admin.py makemessages --all-extensionUse <strong>the</strong> --extension or -e option to specify a list of file extensions to examine (default: ”.html”).Example usage:django-admin.py makemessages --locale=de --extension xhtmlSeparate multiple extensions with commas or use -e or –extension multiple times:6.4. django-admin.py and manage.py 593
<strong>Django</strong> <strong>Documentation</strong>, Release 1.2django-admin.py makemessages --locale=de --extension=html,txt --extension xmlUse <strong>the</strong> --locale option to specify <strong>the</strong> locale to process.Example usage:django-admin.py makemessages --locale=br_PT-domainUse <strong>the</strong> --domain or -d option to change <strong>the</strong> domain of <strong>the</strong> messages files. Currently supported:• django for all *.py and *.html files (default)• djangojs for *.js files-symlinksNew in version 1.2: Please, see <strong>the</strong> release notes Use <strong>the</strong> --symlinks or -s option to follow symlinks to directorieswhen looking for new translation strings.Example usage:django-admin.py makemessages --locale=de --symlinks-ignoreUse <strong>the</strong> --ignore or -i option to ignore files or directories matching <strong>the</strong> given glob-style pattern. Use multipletimes to ignore more.These patterns are used by default: ’CVS’, ’.*’, ’*~’Example usage:django-admin.py makemessages --locale=en_US --ignore=apps/* --ignore=secret/*.html-no-default-ignoreUse <strong>the</strong> --no-default-ignore option to disable <strong>the</strong> default values of --ignore.reset django-admin.py resetExecutes <strong>the</strong> equivalent of sqlreset for <strong>the</strong> given app name(s).The --noinput option may be provided to suppress all user prompts. New in version 1.2: Please, see <strong>the</strong> releasenotes The --database option can be used to specify <strong>the</strong> alias of <strong>the</strong> database to reset.runfcgi [options]django-admin.py runfcgiStarts a set of FastCGI processes suitable for use with any Web server that supports <strong>the</strong> FastCGI protocol. See <strong>the</strong>FastCGI deployment documentation for details. Requires <strong>the</strong> Python FastCGI module from flup.The options accepted by this command are passed to <strong>the</strong> FastCGI library and don’t use <strong>the</strong> ’--’ prefix as is usual foro<strong>the</strong>r <strong>Django</strong> management commands.protocol594 Chapter 6. API Reference
<strong>Django</strong> <strong>Documentation</strong>, Release 1.2protocol=PROTOCOLProtocol to use. PROTOCOL can be fcgi, scgi, ajp, etc. (default is fcgi)hosthost=HOSTNAMEHostname to listen on.portport=PORTNUMPort to listen on.socketsocket=FILEUNIX socket to listen on.methodmethod=IMPLPossible values: prefork or threaded (default prefork)maxrequestsmaxrequests=NUMBERNumber of requests a child handles before it is killed and a new child is forked (0 means no limit).maxsparemaxspare=NUMBERMax number of spare processes / threads.minspareminspare=NUMBERMin number of spare processes / threads.maxchildrenmaxchildren=NUMBERHard limit number of processes / threads.daemonizedaemonize=BOOLWhe<strong>the</strong>r to detach from terminal.pidfilepidfile=FILEWrite <strong>the</strong> spawned process-id to file FILE.workdirworkdir=DIRECTORYChange to directory DIRECTORY when daemonizing.debug6.4. django-admin.py and manage.py 595
<strong>Django</strong> <strong>Documentation</strong>, Release 1.2debug=BOOLSet to true to enable flup tracebacks.outlogoutlog=FILEWrite stdout to <strong>the</strong> FILE file.errlogerrlog=FILEWrite stderr to <strong>the</strong> FILE file.umaskumask=UMASKUmask to use when daemonizing. The value is interpeted as an octal number (default value is 022).Example usage:django-admin.py runfcgi socket=/tmp/fcgi.sock method=prefork daemonize=true \pidfile=/var/run/django-fcgi.pidRun a FastCGI server as a daemon and write <strong>the</strong> spawned PID in a file.runserver [port or ipaddr:port]django-admin.py runserverStarts a lightweight development Web server on <strong>the</strong> local machine. By default, <strong>the</strong> server runs on port 8000 on <strong>the</strong> IPaddress 127.0.0.1. You can pass in an IP address and port number explicitly.If you run this script as a user with normal privileges (recommended), you might not have access to start a port on alow port number. Low port numbers are reserved for <strong>the</strong> superuser (root).DO NOT USE THIS SERVER IN A PRODUCTION SETTING. It has not gone through security audits or performancetests. (And that’s how it’s gonna stay. We’re in <strong>the</strong> business of making Web frameworks, not Web servers, so improvingthis server to be able to handle a production environment is outside <strong>the</strong> scope of <strong>Django</strong>.)The development server automatically reloads Python code for each request, as needed. You don’t need to restart <strong>the</strong>server for code changes to take effect.When you start <strong>the</strong> server, and each time you change Python code while <strong>the</strong> server is running, <strong>the</strong> server will validateall of your installed models. (See <strong>the</strong> validate command below.) If <strong>the</strong> validator finds errors, it will print <strong>the</strong>m tostandard output, but it won’t stop <strong>the</strong> server.You can run as many servers as you want, as long as <strong>the</strong>y’re on separate ports. Just execute django-admin.pyrunserver more than once.Note that <strong>the</strong> default IP address, 127.0.0.1, is not accessible from o<strong>the</strong>r machines on your network. To make yourdevelopment server viewable to o<strong>the</strong>r machines on <strong>the</strong> network, use its own IP address (e.g. 192.168.2.1) or0.0.0.0.-adminmediaUse <strong>the</strong> --adminmedia option to tell <strong>Django</strong> where to find <strong>the</strong> various CSS and JavaScript files for <strong>the</strong> <strong>Django</strong>admin interface. Normally, <strong>the</strong> development server serves <strong>the</strong>se files out of <strong>the</strong> <strong>Django</strong> source tree magically, butyou’d want to use this if you made any changes to those files for your own site.Example usage:596 Chapter 6. API Reference
<strong>Django</strong> <strong>Documentation</strong>, Release 1.2django-admin.py runserver --adminmedia=/tmp/new-admin-style/-noreloadUse <strong>the</strong> --noreload option to disable <strong>the</strong> use of <strong>the</strong> auto-reloader. This means any Python code changes you makewhile <strong>the</strong> server is running will not take effect if <strong>the</strong> particular Python modules have already been loaded into memory.Example usage:django-admin.py runserver --noreloadExamples of using different ports and addressesPort 8000 on IP address 127.0.0.1:django-admin.py runserverPort 8000 on IP address 1.2.3.4:django-admin.py runserver 1.2.3.4:8000Port 7000 on IP address 127.0.0.1:django-admin.py runserver 7000Port 7000 on IP address 1.2.3.4:django-admin.py runserver 1.2.3.4:7000Serving static files with <strong>the</strong> development serverBy default, <strong>the</strong> development server doesn’t serve any static files for your site (such as CSS files, images, things underMEDIA_URL and so forth). If you want to configure <strong>Django</strong> to serve static media, read How to serve static files.shelldjango-admin.py shellStarts <strong>the</strong> Python interactive interpreter.<strong>Django</strong> will use IPython, if it’s installed. If you have IPython installed and want to force use of <strong>the</strong> “plain” Pythoninterpreter, use <strong>the</strong> --plain option, like so:django-admin.py shell --plainsql django-admin.py sqlPrints <strong>the</strong> CREATE TABLE SQL statements for <strong>the</strong> given app name(s). New in version 1.2: Please, see <strong>the</strong> releasenotes The --database option can be used to specify <strong>the</strong> database for which to print <strong>the</strong> SQL.6.4. django-admin.py and manage.py 597
<strong>Django</strong> <strong>Documentation</strong>, Release 1.2sqlall django-admin.py sqlallPrints <strong>the</strong> CREATE TABLE and initial-data SQL statements for <strong>the</strong> given app name(s).Refer to <strong>the</strong> description of sqlcustom for an explanation of how to specify initial data. New in version 1.2: Please,see <strong>the</strong> release notes The --database option can be used to specify <strong>the</strong> database for which to print <strong>the</strong> SQL.sqlclear django-admin.py sqlclearPrints <strong>the</strong> DROP TABLE SQL statements for <strong>the</strong> given app name(s). New in version 1.2: Please, see <strong>the</strong> release notesThe --database option can be used to specify <strong>the</strong> database for which to print <strong>the</strong> SQL.sqlcustom django-admin.py sqlcustomPrints <strong>the</strong> custom SQL statements for <strong>the</strong> given app name(s).For each model in each specified app, this command looks for <strong>the</strong> file /sql/.sql,where is <strong>the</strong> given app name and is <strong>the</strong> model’s name in lowercase. For example, if youhave an app news that includes a Story model, sqlcustom will attempt to read a file news/sql/story.sqland append it to <strong>the</strong> output of this command.Each of <strong>the</strong> SQL files, if given, is expected to contain valid SQL. The SQL files are piped directly into <strong>the</strong> database afterall of <strong>the</strong> models’ table-creation statements have been executed. Use this SQL hook to make any table modifications,or insert any SQL functions into <strong>the</strong> database.Note that <strong>the</strong> order in which <strong>the</strong> SQL files are processed is undefined. New in version 1.2: Please, see <strong>the</strong> releasenotes The --database option can be used to specify <strong>the</strong> database for which to print <strong>the</strong> SQL.sqlflushdjango-admin.py sqlflushPrints <strong>the</strong> SQL statements that would be executed for <strong>the</strong> flush command. New in version 1.2: Please, see <strong>the</strong>release notes The --database option can be used to specify <strong>the</strong> database for which to print <strong>the</strong> SQL.sqlindexes django-admin.py sqlindexesPrints <strong>the</strong> CREATE INDEX SQL statements for <strong>the</strong> given app name(s). New in version 1.2: Please, see <strong>the</strong> releasenotes The --database option can be used to specify <strong>the</strong> database for which to print <strong>the</strong> SQL.sqlreset django-admin.py sqlresetPrints <strong>the</strong> DROP TABLE SQL, <strong>the</strong>n <strong>the</strong> CREATE TABLE SQL, for <strong>the</strong> given app name(s). New in version 1.2: Please,see <strong>the</strong> release notes The --database option can be used to specify <strong>the</strong> database for which to print <strong>the</strong> SQL.598 Chapter 6. API Reference
<strong>Django</strong> <strong>Documentation</strong>, Release 1.2sqlsequencereset django-admin.py sqlsequenceresetPrints <strong>the</strong> SQL statements for resetting sequences for <strong>the</strong> given app name(s).Sequences are indexes used by some database engines to track <strong>the</strong> next available number for automatically incrementedfields.Use this command to generate SQL which will fix cases where a sequence is out of sync with its automaticallyincremented field data. New in version 1.2: Please, see <strong>the</strong> release notes The --database option can be used tospecify <strong>the</strong> database for which to print <strong>the</strong> SQL.startapp django-admin.py startappCreates a <strong>Django</strong> app directory structure for <strong>the</strong> given app name in <strong>the</strong> current directory.startproject django-admin.py startprojectCreates a <strong>Django</strong> project directory structure for <strong>the</strong> given project name in <strong>the</strong> current directory.This command is disabled when <strong>the</strong> --settings option to django-admin.py is used, or when <strong>the</strong> environmentvariable DJANGO_SETTINGS_MODULE has been set. To re-enable it in <strong>the</strong>se situations, ei<strong>the</strong>r omit <strong>the</strong>--settings option or unset DJANGO_SETTINGS_MODULE.syncdbdjango-admin.py syncdbCreates <strong>the</strong> database tables for all apps in INSTALLED_APPS whose tables have not already been created.Use this command when you’ve added new applications to your project and want to install <strong>the</strong>m in <strong>the</strong> database. Thisincludes any apps shipped with <strong>Django</strong> that might be in INSTALLED_APPS by default. When you start a new project,run this command to install <strong>the</strong> default apps.Syncdb will not alter existing tablessyncdb will only create tables for models which have not yet been installed. It will never issue ALTER TABLEstatements to match changes made to a model class after installation. Changes to model classes and database schemasoften involve some form of ambiguity and, in those cases, <strong>Django</strong> would have to guess at <strong>the</strong> correct changes to make.There is a risk that critical data would be lost in <strong>the</strong> process.If you have made changes to a model and wish to alter <strong>the</strong> database tables to match, use <strong>the</strong> sql command to display<strong>the</strong> new SQL structure and compare that to your existing table schema to work out <strong>the</strong> changes.If you’re installing <strong>the</strong> django.contrib.auth application, syncdb will give you <strong>the</strong> option of creating a superuserimmediately.syncdb will also search for and install any fixture named initial_data with an appropriate extension (e.g. jsonor xml). See <strong>the</strong> documentation for loaddata for details on <strong>the</strong> specification of fixture data files.6.4. django-admin.py and manage.py 599
<strong>Django</strong> <strong>Documentation</strong>, Release 1.2–noinputThe --noinput option may be provided to suppress all user prompts. New in version 1.2: Please, see <strong>the</strong> releasenotes The --database option can be used to specify <strong>the</strong> database to synchronize.test django-admin.py testRuns tests for all installed models. See Testing <strong>Django</strong> applications for more information. New in version 1.2: Please,see <strong>the</strong> release notes-failfastUse <strong>the</strong> --failfast option to stop running tests and report <strong>the</strong> failure immediately after a test fails.testserver django-admin.py testserverNew in version 1.0: Please, see <strong>the</strong> release notes Runs a <strong>Django</strong> development server (as in runserver) using datafrom <strong>the</strong> given fixture(s).For example, this command:django-admin.py testserver mydata.json...would perform <strong>the</strong> following steps:1. Create a test database, as described in Testing <strong>Django</strong> applications.2. Populate <strong>the</strong> test database with fixture data from <strong>the</strong> given fixtures. (For more on fixtures, see <strong>the</strong> documentationfor loaddata above.)3. Runs <strong>the</strong> <strong>Django</strong> development server (as in runserver), pointed at this newly created test database instead ofyour production database.This is useful in a number of ways:• When you’re writing unit tests of how your views act with certain fixture data, you can use testserver tointeract with <strong>the</strong> views in a Web browser, manually.• Let’s say you’re developing your <strong>Django</strong> application and have a “pristine” copy of a database that you’d like tointeract with. You can dump your database to a fixture (using <strong>the</strong> dumpdata command, explained above), <strong>the</strong>nuse testserver to run your Web application with that data. With this arrangement, you have <strong>the</strong> flexibilityof messing up your data in any way, knowing that whatever data changes you’re making are only being made toa test database.Note that this server does not automatically detect changes to your Python source code (as runserver does). Itdoes, however, detect changes to templates.-addrport [port number or ipaddr:port]Use --addrport to specify a different port, or IP address and port, from <strong>the</strong> default of 127.0.0.1:8000. This valuefollows exactly <strong>the</strong> same format and serves exactly <strong>the</strong> same function as <strong>the</strong> argument to <strong>the</strong> runserver command.Examples:To run <strong>the</strong> test server on port 7000 with fixture1 and fixture2:600 Chapter 6. API Reference
<strong>Django</strong> <strong>Documentation</strong>, Release 1.2django-admin.py testserver --addrport 7000 fixture1 fixture2django-admin.py testserver fixture1 fixture2 --addrport 7000(The above statements are equivalent. We include both of <strong>the</strong>m to demonstrate that it doesn’t matter whe<strong>the</strong>r <strong>the</strong>options come before or after <strong>the</strong> fixture arguments.)To run on 1.2.3.4:7000 with a test fixture:django-admin.py testserver --addrport 1.2.3.4:7000 testvalidatedjango-admin.py validateValidates all installed models (according to <strong>the</strong> INSTALLED_APPS setting) and prints validation errors to standardoutput.6.4.3 Commands provided by applicationsSome commands are only available when <strong>the</strong> django.contrib application that implements <strong>the</strong>m has beenenabled. This section describes <strong>the</strong>m grouped by <strong>the</strong>ir application.django.contrib.authchangepassworddjango-admin.py changepasswordNew in version 1.2: Please, see <strong>the</strong> release notes This command is only available if <strong>Django</strong>’s au<strong>the</strong>ntication system(django.contrib.auth) is installed.Allows changing a user’s password. It prompts you to enter twice <strong>the</strong> password of <strong>the</strong> user given as parameter. If <strong>the</strong>yboth match, <strong>the</strong> new password will be changed immediately. If you do not supply a user, <strong>the</strong> command will attempt tochange <strong>the</strong> password whose username matches <strong>the</strong> current user.Example usage:django-admin.py changepassword ringocreatesuperuserdjango-admin.py createsuperuserNew in version 1.0: Please, see <strong>the</strong> release notes This command is only available if <strong>Django</strong>’s au<strong>the</strong>ntication system(django.contrib.auth) is installed.Creates a superuser account (a user who has all permissions). This is useful if you need to create an initial superuseraccount but did not do so during syncdb, or if you need to programmatically generate superuser accounts for yoursite(s).When run interactively, this command will prompt for a password for <strong>the</strong> new superuser account. When run noninteractively,no password will be set, and <strong>the</strong> superuser account will not be able to log in until a password has beenmanually set for it.-username6.4. django-admin.py and manage.py 601
<strong>Django</strong> <strong>Documentation</strong>, Release 1.2-emailThe username and e-mail address for <strong>the</strong> new account can be supplied by using <strong>the</strong> --username and --emailarguments on <strong>the</strong> command line. If ei<strong>the</strong>r of those is not supplied, createsuperuser will prompt for it whenrunning interactively.django.contrib.gisogrinspectThis command is only available if Geo<strong>Django</strong> (django.contrib.gis) is installed.Please refer to its description in <strong>the</strong> Geo<strong>Django</strong> documentation.django.contrib.sitemapsping_googleThis command is only available if <strong>the</strong> Sitemaps framework (django.contrib.sitemaps) is installed.Please refer to its description in <strong>the</strong> Sitemaps documentation.6.4.4 Default optionsAlthough some commands may allow <strong>the</strong>ir own custom options, every command allows for <strong>the</strong> following options:-pythonpathExample usage:django-admin.py syncdb --pythonpath=’/home/djangoprojects/myproject’Adds <strong>the</strong> given filesystem path to <strong>the</strong> Python import search path. If this isn’t provided, django-admin.py will use<strong>the</strong> PYTHONPATH environment variable.Note that this option is unnecessary in manage.py, because it takes care of setting <strong>the</strong> Python path for you.-settingsExample usage:django-admin.py syncdb --settings=mysite.settingsExplicitly specifies <strong>the</strong> settings module to use. The settings module should be in Python package syntax, e.g.mysite.settings. If this isn’t provided, django-admin.py will use <strong>the</strong> DJANGO_SETTINGS_MODULEenvironment variable.Note that this option is unnecessary in manage.py, because it uses settings.py from <strong>the</strong> current project bydefault.-tracebackExample usage:django-admin.py syncdb --tracebackBy default, django-admin.py will show a simple error message whenever an error occurs. If you specify--traceback, django-admin.py will output a full stack trace whenever an exception is raised.602 Chapter 6. API Reference
<strong>Django</strong> <strong>Documentation</strong>, Release 1.2-verbosityExample usage:django-admin.py syncdb --verbosity 2Use --verbosity to specify <strong>the</strong> amount of notification and debug information that django-admin.py shouldprint to <strong>the</strong> console.• 0 means no output.• 1 means normal output (default).• 2 means verbose output.6.4.5 Common optionsThe following options are not available on every commands, but <strong>the</strong>y are common to a number of commands.-databaseNew in version 1.2: Please, see <strong>the</strong> release notes Used to specify <strong>the</strong> database on which a command will operate. Ifnot specified, this option will default to an alias of default.For example, to dump data from <strong>the</strong> database with <strong>the</strong> alias master:django-admin.py dumpdata --database=master-excludeExclude a specific application from <strong>the</strong> applications whose contents is output. For example, to specifically exclude <strong>the</strong>auth application from <strong>the</strong> output of dumpdata, you would call:django-admin.py dumpdata --exclude=authIf you want to exclude multiple applications, use multiple --exclude directives:django-admin.py dumpdata --exclude=auth --exclude=contenttypes-localeUse <strong>the</strong> --locale or -l option to specify <strong>the</strong> locale to process. If not provided all locales are processed.-noinputUse <strong>the</strong> --noinput option to suppress all user prompting, such as “Are you sure?” confirmation messages. This isuseful if django-admin.py is being executed as an unattended, automated script.6.4.6 Extra nicetiesSyntax coloringThe django-admin.py / manage.py commands will use pretty color-coded output if your terminal supportsANSI-colored output. It won’t use <strong>the</strong> color codes if you’re piping <strong>the</strong> command’s output to ano<strong>the</strong>r program.The colors used for syntax highlighting can be customized. <strong>Django</strong> ships with three color palettes:• dark, suited to terminals that show white text on a black background. This is <strong>the</strong> default palette.• light, suited to terminals that show black text on a white background.• nocolor, which disables syntax highlighting.6.4. django-admin.py and manage.py 603
<strong>Django</strong> <strong>Documentation</strong>, Release 1.2You select a palette by setting a DJANGO_COLORS environment variable to specify <strong>the</strong> palette you want to use. Forexample, to specify <strong>the</strong> light palette under a Unix or OS/X BASH shell, you would run <strong>the</strong> following at a commandprompt:export DJANGO_COLORS="light"You can also customize <strong>the</strong> colors that are used. <strong>Django</strong> specifies a number of roles in which color is used:• error - A major error.• notice - A minor error.• sql_field - The name of a model field in SQL.• sql_coltype - The type of a model field in SQL.• sql_keyword - A SQL keyword.• sql_table - The name of a model in SQL.• http_info - A 1XX HTTP Informational server response.• http_success - A 2XX HTTP Success server response.• http_not_modified - A 304 HTTP Not Modified server response.• http_redirect - A 3XX HTTP Redirect server response o<strong>the</strong>r than 304.• http_not_found - A 404 HTTP Not Found server response.• http_bad_request - A 4XX HTTP Bad Request server response o<strong>the</strong>r than 404.• http_server_error - A 5XX HTTP Server Error response.Each of <strong>the</strong>se roles can be assigned a specific foreground and background color, from <strong>the</strong> following list:• black• red• green• yellow• blue• magenta• cyan• whiteEach of <strong>the</strong>se colors can <strong>the</strong>n be modified by using <strong>the</strong> following display options:• bold• underscore• blink• reverse• concealA color specification follows one of <strong>the</strong> <strong>the</strong> following patterns:• role=fg• role=fg/bg604 Chapter 6. API Reference
<strong>Django</strong> <strong>Documentation</strong>, Release 1.2• role=fg,option,option• role=fg/bg,option,optionwhere role is <strong>the</strong> name of a valid color role, fg is <strong>the</strong> foreground color, bg is <strong>the</strong> background color and each optionis one of <strong>the</strong> color modifying options. Multiple color specifications are <strong>the</strong>n separated by semicolon. For example:export DJANGO_COLORS="error=yellow/blue,blink;notice=magenta"would specify that errors be displayed using blinking yellow on blue, and notices displayed using magenta. All o<strong>the</strong>rcolor roles would be left uncolored.Colors can also be specified by extending a base palette. If you put a palette name in a color specification, all <strong>the</strong>colors implied by that palette will be loaded. So:export DJANGO_COLORS="light;error=yellow/blue,blink;notice=magenta"would specify <strong>the</strong> use of all <strong>the</strong> colors in <strong>the</strong> light color palette, except for <strong>the</strong> colors for errors and notices whichwould be overridden as specified.Bash completionIf you use <strong>the</strong> Bash shell, consider installing <strong>the</strong> <strong>Django</strong> bash completion script, which lives inextras/django_bash_completion in <strong>the</strong> <strong>Django</strong> distribution. It enables tab-completion ofdjango-admin.py and manage.py commands, so you can, for instance...• Type django-admin.py.• Press [TAB] to see all available options.• Type sql, <strong>the</strong>n [TAB], to see all available options whose names start with sql.See Writing custom django-admin commands for how to add customized actions.6.5 Running management commands from your codedjango.core.management.call_command(name, *args, **options)To call a management command from code use call_command.name <strong>the</strong> name of <strong>the</strong> command to call.*args a list of arguments accepted by <strong>the</strong> command.**options named options accepted on <strong>the</strong> command-line.Examples:from django.core import managementmanagement.call_command(’flush’, verbosity=0, interactive=False)management.call_command(’loaddata’, ’test_data’, verbosity=0)6.6 <strong>Django</strong> Exceptions<strong>Django</strong> raises some <strong>Django</strong> specific exceptions as well as many standard Python exceptions.6.5. Running management commands from your code 605
<strong>Django</strong> <strong>Documentation</strong>, Release 1.26.6.1 <strong>Django</strong>-specific ExceptionsObjectDoesNotExist and DoesNotExistexception DoesNotExistexception ObjectDoesNotExistThe DoesNotExist exception is raised when an object is not found for <strong>the</strong> given parameters of a query.ObjectDoesNotExist is defined in django.core.exceptions. DoesNotExist is a subclass of<strong>the</strong> base ObjectDoesNotExist exception that is provided on every model class as a way of identifying <strong>the</strong>specific type of object that could not be found.See get() for fur<strong>the</strong>r information on ObjectDoesNotExist and DoesNotExist.MultipleObjectsReturnedexception MultipleObjectsReturnedThe MultipleObjectsReturned exception is raised by a query if only one object is expected, but multipleobjects are returned. A base version of this exception is provided in django.core.exceptions; eachmodel class contains a subclassed version that can be used to identify <strong>the</strong> specific object type that has returnedmultiple objects.See get() for fur<strong>the</strong>r information.SuspiciousOperationexception SuspiciousOperationThe SuspiciousOperation exception is raised when a user has performed an operation that should beconsidered suspicious from a security perspective, such as tampering with a session cookie.PermissionDeniedexception PermissionDeniedThe PermissionDenied exception is raised when a user does not have permission to perform <strong>the</strong> actionrequested.ViewDoesNotExistexception ViewDoesNotExistThe ViewDoesNotExist exception is raised by django.core.urlresolvers when a requested viewdoes not exist.MiddlewareNotUsedexception MiddlewareNotUsedThe MiddlewareNotUsed exception is raised when a middleware is not used in <strong>the</strong> server configuration.606 Chapter 6. API Reference
<strong>Django</strong> <strong>Documentation</strong>, Release 1.2ImproperlyConfiguredexception ImproperlyConfiguredThe ImproperlyConfigured exception is raised when <strong>Django</strong> is somehow improperly configured – forexample, if a value in settings.py is incorrect or unparseable.FieldErrorexception FieldErrorThe FieldError exception is raised when <strong>the</strong>re is a problem with a model field. This can happen for severalreasons:•A field in a model clashes with a field of <strong>the</strong> same name from an abstract base class•An infinite loop is caused by ordering•A keyword cannot be parsed from <strong>the</strong> filter parameters•A field cannot be determined from a keyword in <strong>the</strong> query parameters•A join is not permitted on <strong>the</strong> specified field•A field name is invalid•A query contains invalid order_by argumentsValidationErrorexception ValidationErrorThe ValidationError exception is raised when data fails form or model field validation. For more informationabout validation, see Form and Field Validation, Model Field Validation and <strong>the</strong> Validator Reference.6.6.2 Database Exceptions<strong>Django</strong> wraps <strong>the</strong> standard database exceptions DatabaseError and IntegrityError so that your <strong>Django</strong> codehas a guaranteed common implementation of <strong>the</strong>se classes. These database exceptions are provided in django.db.The <strong>Django</strong> wrappers for database exceptions behave exactly <strong>the</strong> same as <strong>the</strong> underlying database exceptions. SeePEP 249 - Python Database API Specification v2.0 for fur<strong>the</strong>r information.6.6.3 Python Exceptions<strong>Django</strong> raises built-in Python exceptions when appropriate as well. See <strong>the</strong> Python documentation for fur<strong>the</strong>r informationon <strong>the</strong> built-in exceptions.6.7 File handling6.7.1 The File objectThe django.core.files module and its submodules contain built-in classes for basic file handling in <strong>Django</strong>.6.7. File handling 607
<strong>Django</strong> <strong>Documentation</strong>, Release 1.2The File Classclass File(file_object)The File is a thin wrapper around Python’s built-in file object with some <strong>Django</strong>-specific additions. Internally,<strong>Django</strong> uses this class any time it needs to represent a file.File objects have <strong>the</strong> following attributes and methods:nameThe name of file including <strong>the</strong> relative path from MEDIA_ROOT.sizeThe size of <strong>the</strong> file in bytes.fileThe underlying Python file object passed to File.modeThe read/write mode for <strong>the</strong> file.open([mode=None])Open or reopen <strong>the</strong> file (which by definition also does File.seek(0)). The mode argument allows <strong>the</strong>same values as Python’s standard open().When reopening a file, mode will override whatever mode <strong>the</strong> file was originally opened with; Nonemeans to reopen with <strong>the</strong> original mode.read([num_bytes=None])<strong>Read</strong> content from <strong>the</strong> file. The optional size is <strong>the</strong> number of bytes to read; if not specified, <strong>the</strong> file willbe read to <strong>the</strong> end.__iter__()Iterate over <strong>the</strong> file yielding one line at a time.chunks([chunk_size=None])Iterate over <strong>the</strong> file yielding “chunks” of a given size. chunk_size defaults to 64 KB.This is especially useful with very large files since it allows <strong>the</strong>m to be streamed off disk and avoids storing<strong>the</strong> whole file in memory.multiple_chunks([chunk_size=None])Returns True if <strong>the</strong> file is large enough to require multiple chunks to access all of its content give somechunk_size.write([content])Writes <strong>the</strong> specified content string to <strong>the</strong> file. Depending on <strong>the</strong> storage system behind <strong>the</strong> scenes, thiscontent might not be fully committed until close() is called on <strong>the</strong> file.close()Close <strong>the</strong> file.In addition to <strong>the</strong> listed methods, File exposes <strong>the</strong> following attributes and methods of <strong>the</strong> underlying fileobject: encoding, fileno, flush, isatty, newlines, read, readinto, readlines, seek,softspace, tell, truncate, writelines, xreadlines.The ContentFile Classclass ContentFile(File)The ContentFile class inherits from File, but unlike File it operates on string content, ra<strong>the</strong>r than anactual file. For example:608 Chapter 6. API Reference
<strong>Django</strong> <strong>Documentation</strong>, Release 1.2from django.core.files.base import ContentFilef1 = ContentFile("my string content")f2 = ContentFile(u"my unicode content encoded as UTF-8".encode(’UTF-8’))The ImageFile Classclass ImageFile(file_object)<strong>Django</strong> provides a built-in class specifically for images. django.core.files.images.ImageFile inheritsall <strong>the</strong> attributes and methods of File, and additionally provides <strong>the</strong> following:widthWidth of <strong>the</strong> image in pixels.heightHeight of <strong>the</strong> image in pixels.Additional methods on files attached to objectsAny File that’s associated with an object (as with Car.photo, below) will also have a couple of extra methods:File.save(name, content[, save=True])Saves a new file with <strong>the</strong> file name and contents provided. This will not replace <strong>the</strong> existing file, but will createa new file and update <strong>the</strong> object to point to it. If save is True, <strong>the</strong> model’s save() method will be calledonce <strong>the</strong> file is saved. That is, <strong>the</strong>se two lines:>>> car.photo.save(’myphoto.jpg’, contents, save=False)>>> car.save()are <strong>the</strong> same as this one line:>>> car.photo.save(’myphoto.jpg’, contents, save=True)Note that <strong>the</strong> content argument must be an instance of ei<strong>the</strong>r File or of a subclass of File, such asContentFile.File.delete([save=True])Removes <strong>the</strong> file from <strong>the</strong> model instance and deletes <strong>the</strong> underlying file. If save is True, <strong>the</strong> model’s save()method will be called once <strong>the</strong> file is deleted.6.7.2 File storage APIGetting <strong>the</strong> current storage class<strong>Django</strong> provides two convenient ways to access <strong>the</strong> current storage class:class DefaultStorageDefaultStorage provides lazy access to <strong>the</strong> current default storage system as defined byDEFAULT_FILE_STORAGE. DefaultStorage uses get_storage_class() internally.get_storage_class([import_path=None])Returns a class or module which implements <strong>the</strong> storage API.When called without <strong>the</strong> import_path parameter get_storage_class will return <strong>the</strong> currentdefault storage system as defined by DEFAULT_FILE_STORAGE. If import_path is provided,6.7. File handling 609
<strong>Django</strong> <strong>Documentation</strong>, Release 1.2get_storage_class will attempt to import <strong>the</strong> class or module from <strong>the</strong> given path and will return it ifsuccessful. An exception will be raised if <strong>the</strong> import is unsuccessful.The FileSystemStorage Classclass FileSystemStorageThe FileSystemStorage class implements basic file storage on a local filesystem.Storage and provides implementations for all <strong>the</strong> public methods <strong>the</strong>reof.It inherits fromNote: The FileSystemStorage.delete method will not raise raise an exception if <strong>the</strong> given file namedoes not exist.The Storage Classclass StorageThe Storage class provides a standardized API for storing files, along with a set of default behaviors that allo<strong>the</strong>r storage systems can inherit or override as necessary.delete(name)Deletes <strong>the</strong> file referenced by name. If deletion is not supported on <strong>the</strong> targest storage system this willraise NotImplementedError insteadexists(name)Returns True if a file referened by <strong>the</strong> given name already exists in <strong>the</strong> storage system, or False if <strong>the</strong>name is available for a new file.get_available_name(name)Returns a filename based on <strong>the</strong> name parameter that’s free and available for new content to be written toon <strong>the</strong> target storage system.get_valid_name(name)Returns a filename based on <strong>the</strong> name parameter that’s suitable for use on <strong>the</strong> target storage system.listdir(path)Lists <strong>the</strong> contents of <strong>the</strong> specified path, returning a 2-tuple of lists; <strong>the</strong> first item being directories, <strong>the</strong>second item being files. For storage systems that aren’t able to provide such a listing, this will raise aNotImplementedError instead.open(name, mode=’rb’)Opens <strong>the</strong> file given by name. Note that although <strong>the</strong> returned file is guaranteed to be a File object, itmight actually be some subclass. In <strong>the</strong> case of remote file storage this means that reading/writing couldbe quite slow, so be warned.path(name)The local filesystem path where <strong>the</strong> file can be opened using Python’s standard open(). For storagesystems that aren’t accessible from <strong>the</strong> local filesystem, this will raise NotImplementedError instead.save(name, content)Saves a new file using <strong>the</strong> storage system, preferably with <strong>the</strong> name specified. If <strong>the</strong>re already exists a filewith this name name, <strong>the</strong> storage system may modify <strong>the</strong> filename as necessary to get a unique name. Theactual name of <strong>the</strong> stored file will be returned.The content argument must be an instance of django.core.files.File or of a subclass of File.610 Chapter 6. API Reference
<strong>Django</strong> <strong>Documentation</strong>, Release 1.2size(name)Returns <strong>the</strong> total size, in bytes, of <strong>the</strong> file referenced by name. For storage systems that aren’t able toreturn <strong>the</strong> file size this will raise NotImplementedError instead.url(name)Returns <strong>the</strong> URL where <strong>the</strong> contents of <strong>the</strong> file referenced by name can be accessed. For storage systemsthat don’t support access by URL this will raise NotImplementedError instead.6.8 FormsDetailed form API reference. For introductory material, see Working with forms.6.8.1 The Forms APIAbout this documentThis document covers <strong>the</strong> gritty details of <strong>Django</strong>’s forms API. You should read <strong>the</strong> introduction to working with formsfirst.Bound and unbound formsA Form instance is ei<strong>the</strong>r bound to a set of data, or unbound.• If it’s bound to a set of data, it’s capable of validating that data and rendering <strong>the</strong> form as HTML with <strong>the</strong> datadisplayed in <strong>the</strong> HTML.• If it’s unbound, it cannot do validation (because <strong>the</strong>re’s no data to validate!), but it can still render <strong>the</strong> blankform as HTML.class FormTo create an unbound Form instance, simply instantiate <strong>the</strong> class:>>> f = ContactForm()To bind data to a form, pass <strong>the</strong> data as a dictionary as <strong>the</strong> first parameter to your Form class constructor:>>> data = {’subject’: ’hello’,... ’message’: ’Hi <strong>the</strong>re’,... ’sender’: ’foo@example.com’,... ’cc_myself’: True}>>> f = ContactForm(data)In this dictionary, <strong>the</strong> keys are <strong>the</strong> field names, which correspond to <strong>the</strong> attributes in your Form class. The values are<strong>the</strong> data you’re trying to validate. These will usually be strings, but <strong>the</strong>re’s no requirement that <strong>the</strong>y be strings; <strong>the</strong>type of data you pass depends on <strong>the</strong> Field, as we’ll see in a moment.Form.is_boundIf you need to distinguish between bound and unbound form instances at runtime, check <strong>the</strong> value of <strong>the</strong> form’sis_bound attribute:6.8. Forms 611
<strong>Django</strong> <strong>Documentation</strong>, Release 1.2>>> f = ContactForm()>>> f.is_boundFalse>>> f = ContactForm({’subject’: ’hello’})>>> f.is_boundTrueNote that passing an empty dictionary creates a bound form with empty data:>>> f = ContactForm({})>>> f.is_boundTrueIf you have a bound Form instance and want to change <strong>the</strong> data somehow, or if you want to bind an unbound Forminstance to some data, create ano<strong>the</strong>r Form instance. There is no way to change data in a Form instance. Once aForm instance has been created, you should consider its data immutable, whe<strong>the</strong>r it has data or not.Using forms to validate dataForm.is_valid()The primary task of a Form object is to validate data. With a bound Form instance, call <strong>the</strong> is_valid() methodto run validation and return a boolean designating whe<strong>the</strong>r <strong>the</strong> data was valid:>>> data = {’subject’: ’hello’,... ’message’: ’Hi <strong>the</strong>re’,... ’sender’: ’foo@example.com’,... ’cc_myself’: True}>>> f = ContactForm(data)>>> f.is_valid()TrueLet’s try with some invalid data. In this case, subject is blank (an error, because all fields are required by default)and sender is not a valid e-mail address:>>> data = {’subject’: ’’,... ’message’: ’Hi <strong>the</strong>re’,... ’sender’: ’invalid e-mail address’,... ’cc_myself’: True}>>> f = ContactForm(data)>>> f.is_valid()FalseForm.errorsAccess <strong>the</strong> errors attribute to get a dictionary of error messages:>>> f.errors{’sender’: [u’Enter a valid e-mail address.’], ’subject’: [u’This field is required.’]}In this dictionary, <strong>the</strong> keys are <strong>the</strong> field names, and <strong>the</strong> values are lists of Unicode strings representing <strong>the</strong> errormessages. The error messages are stored in lists because a field can have multiple error messages.You can access errors without having to call is_valid() first. The form’s data will be validated <strong>the</strong> first timeei<strong>the</strong>r you call is_valid() or access errors.The validation routines will only get called once, regardless of how many times you access errors or callis_valid(). This means that if validation has side effects, those side effects will only be triggered once.612 Chapter 6. API Reference
<strong>Django</strong> <strong>Documentation</strong>, Release 1.2Behavior of unbound formsIt’s meaningless to validate a form with no data, but, for <strong>the</strong> record, here’s what happens with unbound forms:>>> f = ContactForm()>>> f.is_valid()False>>> f.errors{}Dynamic initial valuesForm.initialUse initial to declare <strong>the</strong> initial value of form fields at runtime. For example, you might want to fill in a usernamefield with <strong>the</strong> username of <strong>the</strong> current session.To accomplish this, use <strong>the</strong> initial argument to a Form. This argument, if given, should be a dictionary mappingfield names to initial values. Only include <strong>the</strong> fields for which you’re specifying an initial value; it’s not necessary toinclude every field in your form. For example:>>> f = ContactForm(initial={’subject’: ’Hi <strong>the</strong>re!’})These values are only displayed for unbound forms, and <strong>the</strong>y’re not used as fallback values if a particular value isn’tprovided.Note that if a Field defines initial and you include initial when instantiating <strong>the</strong> Form, <strong>the</strong>n <strong>the</strong> latterinitial will have precedence. In this example, initial is provided both at <strong>the</strong> field level and at <strong>the</strong> form instancelevel, and <strong>the</strong> latter gets precedence:>>> class CommentForm(forms.Form):... name = forms.CharField(initial=’class’)... url = forms.URLField()... comment = forms.CharField()>>> f = CommentForm(initial={’name’: ’instance’}, auto_id=False)>>> print fName:Url:Comment:Accessing “clean” dataForm.cleaned_dataEach field in a Form class is responsible not only for validating data, but also for “cleaning” it – normalizing it to aconsistent format. This is a nice feature, because it allows data for a particular field to be input in a variety of ways,always resulting in consistent output.For example, DateField normalizes input into a Python datetime.date object. Regardless of whe<strong>the</strong>r you passit a string in <strong>the</strong> format ’1994-07-15’, a datetime.date object, or a number of o<strong>the</strong>r formats, DateFieldwill always normalize it to a datetime.date object as long as it’s valid.Once you’ve created a Form instance with a set of data and validated it, you can access <strong>the</strong> clean data via itscleaned_data attribute:6.8. Forms 613
<strong>Django</strong> <strong>Documentation</strong>, Release 1.2>>> data = {’subject’: ’hello’,... ’message’: ’Hi <strong>the</strong>re’,... ’sender’: ’foo@example.com’,... ’cc_myself’: True}>>> f = ContactForm(data)>>> f.is_valid()True>>> f.cleaned_data{’cc_myself’: True, ’message’: u’Hi <strong>the</strong>re’, ’sender’: u’foo@example.com’, ’subject’: u’hello’}Changed in version 1.0: The cleaned_data attribute was called clean_data in earlier releases. Note that anytext-based field – such as CharField or EmailField – always cleans <strong>the</strong> input into a Unicode string. We’ll cover<strong>the</strong> encoding implications later in this document.If your data does not validate, your Form instance will not have a cleaned_data attribute:>>> data = {’subject’: ’’,... ’message’: ’Hi <strong>the</strong>re’,... ’sender’: ’invalid e-mail address’,... ’cc_myself’: True}>>> f = ContactForm(data)>>> f.is_valid()False>>> f.cleaned_dataTraceback (most recent call last):...AttributeError: ’ContactForm’ object has no attribute ’cleaned_data’cleaned_data will always only contain a key for fields defined in <strong>the</strong> Form, even if you pass extra data whenyou define <strong>the</strong> Form. In this example, we pass a bunch of extra fields to <strong>the</strong> ContactForm constructor, butcleaned_data contains only <strong>the</strong> form’s fields:>>> data = {’subject’: ’hello’,... ’message’: ’Hi <strong>the</strong>re’,... ’sender’: ’foo@example.com’,... ’cc_myself’: True,... ’extra_field_1’: ’foo’,... ’extra_field_2’: ’bar’,... ’extra_field_3’: ’baz’}>>> f = ContactForm(data)>>> f.is_valid()True>>> f.cleaned_data # Doesn’t contain extra_field_1, etc.{’cc_myself’: True, ’message’: u’Hi <strong>the</strong>re’, ’sender’: u’foo@example.com’, ’subject’: u’hello’}cleaned_data will include a key and value for all fields defined in <strong>the</strong> Form, even if <strong>the</strong> data didn’t include a valuefor fields that are not required. In this example, <strong>the</strong> data dictionary doesn’t include a value for <strong>the</strong> nick_name field,but cleaned_data includes it, with an empty value:>>> class OptionalPersonForm(Form):... first_name = CharField()... last_name = CharField()... nick_name = CharField(required=False)>>> data = {’first_name’: u’John’, ’last_name’: u’Lennon’}>>> f = OptionalPersonForm(data)>>> f.is_valid()True>>> f.cleaned_data{’nick_name’: u’’, ’first_name’: u’John’, ’last_name’: u’Lennon’}614 Chapter 6. API Reference
<strong>Django</strong> <strong>Documentation</strong>, Release 1.2In this above example, <strong>the</strong> cleaned_data value for nick_name is set to an empty string, because nick_name isCharField, and CharFields treat empty values as an empty string. Each field type knows what its “blank” valueis – e.g., for DateField, it’s None instead of <strong>the</strong> empty string. For full details on each field’s behavior in this case,see <strong>the</strong> “Empty value” note for each field in <strong>the</strong> “Built-in Field classes” section below.You can write code to perform validation for particular form fields (based on <strong>the</strong>ir name) or for <strong>the</strong> form as a whole(considering combinations of various fields). More information about this is in Form and field validation.Outputting forms as HTMLThe second task of a Form object is to render itself as HTML. To do so, simply print it:>>> f = ContactForm()>>> print fSubject:
<strong>Django</strong> <strong>Documentation</strong>, Release 1.2as_p()Form.as_p()as_p() renders <strong>the</strong> form as a series of tags, with each containing one field:>>> f = ContactForm()>>> f.as_p()u’Subject: >> print f.as_p()Subject: >> f = ContactForm()>>> f.as_table()u’Subject:>> print f.as_table()Subject:
<strong>Django</strong> <strong>Documentation</strong>, Release 1.2class ContactForm(Form):error_css_class = ’error’required_css_class = ’required’# ... and <strong>the</strong> rest of your fields hereOnce you’ve done that, rows will be given "error" and/or "required" classes, as needed. The HTML will looksomething like:>>> f = ContactForm(data)>>> print f.as_table()Subject: ...Message: ...Sender: ...Cc myself: ...Configuring HTML tagsAn HTML tag designates which label text is associated with which form element. This small enhancementmakes forms more usable and more accessible to assistive devices. It’s always a good idea to use tags.By default, <strong>the</strong> form rendering methods include HTML id attributes on <strong>the</strong> form elements and corresponding tags around <strong>the</strong> labels. The id attribute values are generated by prepending id_ to <strong>the</strong> form field names.This behavior is configurable, though, if you want to change <strong>the</strong> id convention or remove HTML id attributes and tags entirely.Use <strong>the</strong> auto_id argument to <strong>the</strong> Form constructor to control <strong>the</strong> label and id behavior. This argument must beTrue, False or a string.If auto_id is False, <strong>the</strong>n <strong>the</strong> form output will not include tags nor id attributes:>>> f = ContactForm(auto_id=False)>>> print f.as_table()Subject:Message:Sender:Cc myself:>>> print f.as_ul()Subject: Message: Sender: Cc myself: >>> print f.as_p()Subject: Message: Sender: Cc myself: If auto_id is set to True, <strong>the</strong>n <strong>the</strong> form output will include tags and will simply use <strong>the</strong> field name as itsid for each form field:>>> f = ContactForm(auto_id=True)>>> print f.as_table()Subject:
<strong>Django</strong> <strong>Documentation</strong>, Release 1.2Subject: > f = ContactForm(auto_id=’id_for_%s’)>>> print f.as_table()Subject:>> print f.as_p()Subject: >> f = ContactForm(auto_id=’id_for_%s’, label_suffix=’ ->’)>>> print f.as_ul()Subject ->
<strong>Django</strong> <strong>Documentation</strong>, Release 1.2message, sender, cc_myself. To reorder <strong>the</strong> HTML output, just change <strong>the</strong> order in which those fields are listedin <strong>the</strong> class.How errors are displayedIf you render a bound Form object, <strong>the</strong> act of rendering will automatically run <strong>the</strong> form’s validation if it hasn’t alreadyhappened, and <strong>the</strong> HTML output will include <strong>the</strong> validation errors as a near <strong>the</strong> field.The particular positioning of <strong>the</strong> error messages depends on <strong>the</strong> output method you’re using:>>> data = {’subject’: ’’,... ’message’: ’Hi <strong>the</strong>re’,... ’sender’: ’invalid e-mail address’,... ’cc_myself’: True}>>> f = ContactForm(data, auto_id=False)>>> print f.as_table()Subject:This field is required.> print f.as_p()This field is required.Subject: Message: Enter a valid e-mail address.Sender: Cc myself: Customizing <strong>the</strong> error list formatBy default, forms use django.forms.util.ErrorList to format validation errors. If you’d like to use analternate class for displaying errors, you can pass that in at construction time:>>> from django.forms.util import ErrorList>>> class DivErrorList(ErrorList):... def __unicode__(self):... return self.as_divs()... def as_divs(self):... if not self: return u’’... return u’%s’ % ’’.join([u’%s’ % e f>>> f = ContactForm(data, auto_id=False, error_class=DivErrorList)>>> f.as_p()This field is required.Subject: Message: Enter a valid e-mail address.Sender: Cc myself: 6.8. Forms 619
<strong>Django</strong> <strong>Documentation</strong>, Release 1.2More granular outputThe as_p(), as_ul() and as_table() methods are simply shortcuts for lazy developers – <strong>the</strong>y’re not <strong>the</strong> onlyway a form object can be displayed.To display <strong>the</strong> HTML for a single field in your form, use dictionary lookup syntax using <strong>the</strong> field’s name as <strong>the</strong> key,and print <strong>the</strong> resulting object:>>> f = ContactForm()>>> print f[’subject’]>>> print f[’message’]>>> print f[’sender’]>>> print f[’cc_myself’]Call str() or unicode() on <strong>the</strong> field to get its rendered HTML as a string or Unicode object, respectively:>>> str(f[’subject’])’’>>> unicode(f[’subject’])u’’Form objects define a custom __iter__() method, which allows you to loop through <strong>the</strong>ir fields:>>> f = ContactForm()>>> for field in f: print fieldThe field-specific output honors <strong>the</strong> form object’s auto_id setting:>>> f = ContactForm(auto_id=False)>>> print f[’message’]>>> f = ContactForm(auto_id=’id_%s’)>>> print f[’message’]For a field’s list of errors, access <strong>the</strong> field’s errors attribute. This is a list-like object that is displayed as an HTML when printed:>>> data = {’subject’: ’hi’, ’message’: ’’, ’sender’: ’’, ’cc_myself’: ’’}>>> f = ContactForm(data, auto_id=False)>>> print f[’message’]>>> f[’message’].errors[u’This field is required.’]>>> print f[’message’].errorsThis field is required.>>> f[’subject’].errors[]>>> print f[’subject’].errors>>> str(f[’subject’].errors)’’620 Chapter 6. API Reference
<strong>Django</strong> <strong>Documentation</strong>, Release 1.2New in version 1.2: Please, see <strong>the</strong> release notes When you use <strong>Django</strong>’s rendering shortcuts, CSS classes are usedto indicate required form fields or fields that contain errors. If you’re manually rendering a form, you can access <strong>the</strong>seCSS classes using <strong>the</strong> css_classes method:>>> f = ContactForm(data)>>> f[’message’].css_classes()’required’If you want to provide some additional classes in addition to <strong>the</strong> error and required classes that may be required, youcan provide those classes as an argument:>>> f = ContactForm(data)>>> f[’message’].css_classes(’foo bar’)’foo bar required’Binding uploaded files to a formNew in version 1.0: Please, see <strong>the</strong> release notes Dealing with forms that have FileField and ImageField fieldsis a little more complicated than a normal form.Firstly, in order to upload files, you’ll need to make sure that your element correctly defines <strong>the</strong> enctypeas "multipart/form-data":Secondly, when you use <strong>the</strong> form, you need to bind <strong>the</strong> file data. File data is handled separately to normal form data,so when your form contains a FileField and ImageField, you will need to specify a second argument when youbind your form. So if we extend our ContactForm to include an ImageField called mugshot, we need to bind <strong>the</strong>file data containing <strong>the</strong> mugshot image:# Bound form with an image field>>> from django.core.files.uploadedfile import SimpleUploadedFile>>> data = {’subject’: ’hello’,... ’message’: ’Hi <strong>the</strong>re’,... ’sender’: ’foo@example.com’,... ’cc_myself’: True}>>> file_data = {’mugshot’: SimpleUploadedFile(’face.jpg’, )}>>> f = ContactFormWithMugshot(data, file_data)In practice, you will usually specify request.FILES as <strong>the</strong> source of file data (just like you use request.POSTas <strong>the</strong> source of form data):# Bound form with an image field, data from <strong>the</strong> request>>> f = ContactFormWithMugshot(request.POST, request.FILES)Constructing an unbound form is <strong>the</strong> same as always – just omit both form data and file data:# Unbound form with a image field>>> f = ContactFormWithMugshot()Testing for multipart formsIf you’re writing reusable views or templates, you may not know ahead of time whe<strong>the</strong>r your form is a multipart formor not. The is_multipart() method tells you whe<strong>the</strong>r <strong>the</strong> form requires multipart encoding for submission:6.8. Forms 621
<strong>Django</strong> <strong>Documentation</strong>, Release 1.2>>> f = ContactFormWithMugshot()>>> f.is_multipart()TrueHere’s an example of how you might use this in a template:{% if form.is_multipart %}{% else %}{% endif %}{{ form }}Subclassing formsIf you have multiple Form classes that share fields, you can use subclassing to remove redundancy.When you subclass a custom Form class, <strong>the</strong> resulting subclass will include all fields of <strong>the</strong> parent class(es), followedby <strong>the</strong> fields you define in <strong>the</strong> subclass.In this example, ContactFormWithPriority contains all <strong>the</strong> fields from ContactForm, plus an additionalfield, priority. The ContactForm fields are ordered first:>>> class ContactFormWithPriority(ContactForm):... priority = forms.CharField()>>> f = ContactFormWithPriority(auto_id=False)>>> print f.as_ul()Subject: Message: Sender: Cc myself: Priority: It’s possible to subclass multiple forms, treating forms as “mix-ins.” In this example, BeatleForm subclasses bothPersonForm and InstrumentForm (in that order), and its field list includes <strong>the</strong> fields from <strong>the</strong> parent classes:>>> class PersonForm(Form):... first_name = CharField()... last_name = CharField()>>> class InstrumentForm(Form):... instrument = CharField()>>> class BeatleForm(PersonForm, InstrumentForm):... haircut_type = CharField()>>> b = BeatleForm(auto_id=False)>>> print b.as_ul()First name: Last name: Instrument: Haircut type: Prefixes for formsForm.prefixYou can put several <strong>Django</strong> forms inside one tag. To give each Form its own namespace, use <strong>the</strong> prefixkeyword argument:622 Chapter 6. API Reference
<strong>Django</strong> <strong>Documentation</strong>, Release 1.2>>> mo<strong>the</strong>r = PersonForm(prefix="mo<strong>the</strong>r")>>> fa<strong>the</strong>r = PersonForm(prefix="fa<strong>the</strong>r")>>> print mo<strong>the</strong>r.as_ul()First name: > print fa<strong>the</strong>r.as_ul()First name: > from django import forms>>> f = forms.EmailField()>>> f.clean(’foo@example.com’)u’foo@example.com’>>> f.clean(u’foo@example.com’)u’foo@example.com’>>> f.clean(’invalid e-mail address’)Traceback (most recent call last):...ValidationError: [u’Enter a valid e-mail address.’]Core field argumentsEach Field class constructor takes at least <strong>the</strong>se arguments. Some Field classes take additional, field-specificarguments, but <strong>the</strong> following should always be accepted:requiredField.requiredBy default, each Field class assumes <strong>the</strong> value is required, so if you pass an empty value – ei<strong>the</strong>r None or <strong>the</strong> emptystring ("") – <strong>the</strong>n clean() will raise a ValidationError exception:>>> f = forms.CharField()>>> f.clean(’foo’)u’foo’>>> f.clean(’’)Traceback (most recent call last):...ValidationError: [u’This field is required.’]>>> f.clean(None)Traceback (most recent call last):...6.8. Forms 623
<strong>Django</strong> <strong>Documentation</strong>, Release 1.2ValidationError: [u’This field is required.’]>>> f.clean(’ ’)u’ ’>>> f.clean(0)u’0’>>> f.clean(True)u’True’>>> f.clean(False)u’False’To specify that a field is not required, pass required=False to <strong>the</strong> Field constructor:>>> f = forms.CharField(required=False)>>> f.clean(’foo’)u’foo’>>> f.clean(’’)u’’>>> f.clean(None)u’’>>> f.clean(0)u’0’>>> f.clean(True)u’True’>>> f.clean(False)u’False’If a Field has required=False and you pass clean() an empty value, <strong>the</strong>n clean() will return a normalizedempty value ra<strong>the</strong>r than raising ValidationError. For CharField, this will be a Unicode empty string. Foro<strong>the</strong>r Field classes, it might be None. (This varies from field to field.)labelField.labelThe label argument lets you specify <strong>the</strong> “human-friendly” label for this field. This is used when <strong>the</strong> Field isdisplayed in a Form.As explained in “Outputting forms as HTML” above, <strong>the</strong> default label for a Field is generated from <strong>the</strong> field name byconverting all underscores to spaces and upper-casing <strong>the</strong> first letter. Specify label if that default behavior doesn’tresult in an adequate label.Here’s a full example Form that implements label for two of its fields. We’ve specified auto_id=False tosimplify <strong>the</strong> output:>>> class CommentForm(forms.Form):... name = forms.CharField(label=’Your name’)... url = forms.URLField(label=’Your Web site’, required=False)... comment = forms.CharField()>>> f = CommentForm(auto_id=False)>>> print fYour name:Your Web site:Comment:initialField.initial624 Chapter 6. API Reference
<strong>Django</strong> <strong>Documentation</strong>, Release 1.2The initial argument lets you specify <strong>the</strong> initial value to use when rendering this Field in an unbound Form.To specify dynamic initial data, see <strong>the</strong> Form.initial parameter.The use-case for this is when you want to display an “empty” form in which a field is initialized to a particular value.For example:>>> class CommentForm(forms.Form):... name = forms.CharField(initial=’Your name’)... url = forms.URLField(initial=’http://’)... comment = forms.CharField()>>> f = CommentForm(auto_id=False)>>> print fName:Url:Comment:You may be thinking, why not just pass a dictionary of <strong>the</strong> initial values as data when displaying <strong>the</strong> form? Well, ifyou do that, you’ll trigger validation, and <strong>the</strong> HTML output will include any validation errors:>>> class CommentForm(forms.Form):... name = forms.CharField()... url = forms.URLField()... comment = forms.CharField()>>> default_data = {’name’: ’Your name’, ’url’: ’http://’}>>> f = CommentForm(default_data, auto_id=False)>>> print fName:Url:Enter a valid URL.>> class CommentForm(forms.Form):... name = forms.CharField(initial=’Your name’)... url = forms.URLField(initial=’http://’)... comment = forms.CharField()>>> data = {’name’: ’’, ’url’: ’’, ’comment’: ’Foo’}>>> f = CommentForm(data)>>> f.is_valid()False# The form does *not* fall back to using <strong>the</strong> initial values.>>> f.errors{’url’: [u’This field is required.’], ’name’: [u’This field is required.’]}Instead of a constant, you can also pass any callable:>>> import datetime>>> class DateForm(forms.Form):... day = forms.DateField(initial=datetime.date.today)>>> print DateForm()Day:The callable will be evaluated only when <strong>the</strong> unbound form is displayed, not when it is defined.6.8. Forms 625
<strong>Django</strong> <strong>Documentation</strong>, Release 1.2widgetField.widgetThe widget argument lets you specify a Widget class to use when rendering this Field. See Widgets for moreinformation.help_textField.help_textThe help_text argument lets you specify descriptive text for this Field. If you provide help_text, it will bedisplayed next to <strong>the</strong> Field when <strong>the</strong> Field is rendered by one of <strong>the</strong> convenience Form methods (e.g., as_ul()).Here’s a full example Form that implements help_text for two of its fields. We’ve specified auto_id=Falseto simplify <strong>the</strong> output:>>> class HelpTextContactForm(forms.Form):... subject = forms.CharField(max_length=100, help_text=’100 characters max.’)... message = forms.CharField()... sender = forms.EmailField(help_text=’A valid e-mail address, please.’)... cc_myself = forms.BooleanField(required=False)>>> f = HelpTextContactForm(auto_id=False)>>> print f.as_table()Subject:100 characters maxMessage:Sender:A valid e-mail address, please.Cc myself:>>> print f.as_ul()Subject: 100 characters max.Message: Sender: A valid e-mail address, please.Cc myself: >>> print f.as_p()Subject: 100 characters max.Message: Sender: A valid e-mail address, please.Cc myself: error_messagesNew in version 1.0: Please, see <strong>the</strong> release notesField.error_messagesThe error_messages argument lets you override <strong>the</strong> default messages that <strong>the</strong> field will raise. Pass in a dictionarywith keys matching <strong>the</strong> error messages you want to override. For example, here is <strong>the</strong> default error message:>>> generic = forms.CharField()>>> generic.clean(’’)Traceback (most recent call last):...ValidationError: [u’This field is required.’]And here is a custom error message:626 Chapter 6. API Reference
<strong>Django</strong> <strong>Documentation</strong>, Release 1.2>>> name = forms.CharField(error_messages={’required’: ’Please enter your name’})>>> name.clean(’’)Traceback (most recent call last):...ValidationError: [u’Please enter your name’]In <strong>the</strong> built-in Field classes section below, each Field defines <strong>the</strong> error message keys it uses.validatorsNew in version 1.2: Please, see <strong>the</strong> release notesField.validatorsThe validators argument lets you provide a list of validation functions for this field.See <strong>the</strong> validators documentation for more information.localizeNew in version 1.2: Please, see <strong>the</strong> release notesField.localizeThe localize argument enables <strong>the</strong> localization of form data, input as well as <strong>the</strong> rendered output.See <strong>the</strong> format localization documentation for more information.Built-in Field classesNaturally, <strong>the</strong> forms library comes with a set of Field classes that represent common validation needs. This sectiondocuments each built-in field.For each field, we describe <strong>the</strong> default widget used if you don’t specify widget. We also specify <strong>the</strong> value returnedwhen you provide an empty value (see <strong>the</strong> section on required above to understand what that means).BooleanFieldclass BooleanField(**kwargs)•Default widget: CheckboxInput•Empty value: False•Normalizes to: A Python True or False value.•Validates that <strong>the</strong> value is True (e.g. <strong>the</strong> check box is checked) if <strong>the</strong> field has required=True.•Error message keys: requiredChanged in version 1.0: The empty value for a CheckboxInput (and hence <strong>the</strong> standard BooleanField) haschanged to return False instead of None in <strong>the</strong> <strong>Django</strong> 1.0.Note: Since all Field subclasses have required=True by default, <strong>the</strong> validation condition here is important.If you want to include a boolean in your form that can be ei<strong>the</strong>r True or False (e.g. a checked or uncheckedcheckbox), you must remember to pass in required=False when creating <strong>the</strong> BooleanField.6.8. Forms 627
<strong>Django</strong> <strong>Documentation</strong>, Release 1.2CharFieldclass CharField(**kwargs)•Default widget: TextInput•Empty value: ” (an empty string)•Normalizes to: A Unicode object.•Validates max_length or min_length, if <strong>the</strong>y are provided. O<strong>the</strong>rwise, all inputs are valid.•Error message keys: required, max_length, min_lengthHas two optional arguments for validation:CharField.max_lengthCharField.min_lengthIf provided, <strong>the</strong>se arguments ensure that <strong>the</strong> string is at most or at least <strong>the</strong> given length.ChoiceFieldclass ChoiceField(**kwargs)•Default widget: Select•Empty value: ” (an empty string)•Normalizes to: A Unicode object.•Validates that <strong>the</strong> given value exists in <strong>the</strong> list of choices.•Error message keys: required, invalid_choiceTakes one extra required argument:ChoiceField.choicesAn iterable (e.g., a list or tuple) of 2-tuples to use as choices for this field. This argument accepts <strong>the</strong> sameformats as <strong>the</strong> choices argument to a model field. See <strong>the</strong> model field reference documentation on choices formore details.TypedChoiceFieldclass TypedChoiceField(**kwargs)Just like a ChoiceField, except TypedChoiceField takes an extra coerce argument.• Default widget: Select• Empty value: Whatever you’ve given as empty_value• Normalizes to: <strong>the</strong> value returned by <strong>the</strong> coerce argument.• Validates that <strong>the</strong> given value exists in <strong>the</strong> list of choices.• Error message keys: required, invalid_choiceTakes extra arguments:TypedChoiceField.coerceA function that takes one argument and returns a coerced value. Examples include <strong>the</strong> built-in int, float,bool and o<strong>the</strong>r types. Defaults to an identity function.628 Chapter 6. API Reference
<strong>Django</strong> <strong>Documentation</strong>, Release 1.2TypedChoiceField.empty_valueThe value to use to represent “empty.” Defaults to <strong>the</strong> empty string; None is ano<strong>the</strong>r common choice here.DateFieldclass DateField(**kwargs)•Default widget: DateInput•Empty value: None•Normalizes to: A Python datetime.date object.•Validates that <strong>the</strong> given value is ei<strong>the</strong>r a datetime.date, datetime.datetime or string formattedin a particular date format.•Error message keys: required, invalidTakes one optional argument:DateField.input_formatsA list of formats used to attempt to convert a string to a valid datetime.date object.If no input_formats argument is provided, <strong>the</strong> default input formats are:’%Y-%m-%d’, ’%m/%d/%Y’, ’%m/%d/%y’, # ’2006-10-25’, ’10/25/2006’, ’10/25/06’’%b %d %Y’, ’%b %d, %Y’, # ’Oct 25 2006’, ’Oct 25, 2006’’%d %b %Y’, ’%d %b, %Y’, # ’25 Oct 2006’, ’25 Oct, 2006’’%B %d %Y’, ’%B %d, %Y’, # ’October 25 2006’, ’October 25, 2006’’%d %B %Y’, ’%d %B, %Y’, # ’25 October 2006’, ’25 October, 2006’Changed in version 1.1: The DateField previously used a TextInput widget by default.DateInput widget.It now uses aDateTimeFieldclass DateTimeField(**kwargs)•Default widget: DateTimeInput•Empty value: None•Normalizes to: A Python datetime.datetime object.•Validates that <strong>the</strong> given value is ei<strong>the</strong>r a datetime.datetime, datetime.date or string formattedin a particular datetime format.•Error message keys: required, invalidTakes one optional argument:DateTimeField.input_formatsA list of formats used to attempt to convert a string to a valid datetime.datetime object.If no input_formats argument is provided, <strong>the</strong> default input formats are:’%Y-%m-%d %H:%M:%S’, # ’2006-10-25 14:30:59’’%Y-%m-%d %H:%M’, # ’2006-10-25 14:30’’%Y-%m-%d’, # ’2006-10-25’’%m/%d/%Y %H:%M:%S’, # ’10/25/2006 14:30:59’’%m/%d/%Y %H:%M’, # ’10/25/2006 14:30’’%m/%d/%Y’, # ’10/25/2006’6.8. Forms 629
<strong>Django</strong> <strong>Documentation</strong>, Release 1.2’%m/%d/%y %H:%M:%S’, # ’10/25/06 14:30:59’’%m/%d/%y %H:%M’, # ’10/25/06 14:30’’%m/%d/%y’, # ’10/25/06’Changed in version 1.0: The DateTimeField used to use a TextInput widget by default. This has now changed.DecimalFieldNew in version 1.0: Please, see <strong>the</strong> release notesclass DecimalField(**kwargs)•Default widget: TextInput•Empty value: None•Normalizes to: A Python decimal.•Validates that <strong>the</strong> given value is a decimal. Leading and trailing whitespace is ignored.•Error message keys: required, invalid, max_value, min_value, max_digits,max_decimal_places, max_whole_digitsTakes four optional arguments:DecimalField.max_valueDecimalField.min_valueThese attributes define <strong>the</strong> limits for <strong>the</strong> fields value.DecimalField.max_digitsThe maximum number of digits (those before <strong>the</strong> decimal point plus those after <strong>the</strong> decimal point, with leadingzeros stripped) permitted in <strong>the</strong> value.DecimalField.decimal_placesThe maximum number of decimal places permitted.EmailFieldclass EmailField(**kwargs)•Default widget: TextInput•Empty value: ” (an empty string)•Normalizes to: A Unicode object.•Validates that <strong>the</strong> given value is a valid e-mail address, using a moderately complex regular expression.•Error message keys: required, invalidHas two optional arguments for validation, max_length and min_length. If provided, <strong>the</strong>se arguments ensurethat <strong>the</strong> string is at most or at least <strong>the</strong> given length. Changed in version 1.2: The EmailField previously did notrecognize e-mail addresses as valid that contained an IDN (Internationalized Domain Name; a domain containingunicode characters) domain part. This has now been corrected.FileFieldNew in version 1.0: Please, see <strong>the</strong> release notes630 Chapter 6. API Reference
<strong>Django</strong> <strong>Documentation</strong>, Release 1.2class FileField(**kwargs)•Default widget: FileInput•Empty value: None•Normalizes to: An UploadedFile object that wraps <strong>the</strong> file content and file name into a single object.•Validates that non-empty file data has been bound to <strong>the</strong> form.•Error message keys: required, invalid, missing, emptyTo learn more about <strong>the</strong> UploadedFile object, see <strong>the</strong> file uploads documentation.When you use a FileField in a form, you must also remember to bind <strong>the</strong> file data to <strong>the</strong> form.FilePathFieldNew in version 1.0: Please, see <strong>the</strong> release notesclass FilePathField(**kwargs)•Default widget: Select•Empty value: None•Normalizes to: A unicode object•Validates that <strong>the</strong> selected choice exists in <strong>the</strong> list of choices.•Error message keys: required, invalid_choiceThe field allows choosing from files inside a certain directory. It takes three extra arguments; only path is required:FilePathField.pathThe absolute path to <strong>the</strong> directory whose contents you want listed. This directory must exist.FilePathField.recursiveIf False (<strong>the</strong> default) only <strong>the</strong> direct contents of path will be offered as choices. If True, <strong>the</strong> directory willbe descended into recursively and all descendants will be listed as choices.FilePathField.matchA regular expression pattern; only files with names matching this expression will be allowed as choices.FloatField• Default widget: TextInput• Empty value: None• Normalizes to: A Python float.• Validates that <strong>the</strong> given value is an float. Leading and trailing whitespace is allowed, as in Python’s float()function.• Error message keys: required, invalid, max_value, min_valueTakes two optional arguments for validation, max_value and min_value. These control <strong>the</strong> range of valuespermitted in <strong>the</strong> field.6.8. Forms 631
<strong>Django</strong> <strong>Documentation</strong>, Release 1.2ImageFieldNew in version 1.0: Please, see <strong>the</strong> release notesclass ImageField(**kwargs)•Default widget: FileInput•Empty value: None•Normalizes to: An UploadedFile object that wraps <strong>the</strong> file content and file name into a single object.•Validates that file data has been bound to <strong>the</strong> form, and that <strong>the</strong> file is of an image format understood byPIL.•Error message keys: required, invalid, missing, empty, invalid_imageUsing an ImageField requires that <strong>the</strong> Python Imaging Library is installed.When you use an ImageField on a form, you must also remember to bind <strong>the</strong> file data to <strong>the</strong> form.IntegerFieldclass IntegerField(**kwargs)•Default widget: TextInput•Empty value: None•Normalizes to: A Python integer or long integer.•Validates that <strong>the</strong> given value is an integer. Leading and trailing whitespace is allowed, as in Python’sint() function.•Error message keys: required, invalid, max_value, min_valueTakes two optional arguments for validation:IntegerField.max_valueIntegerField.min_valueThese control <strong>the</strong> range of values permitted in <strong>the</strong> field.IPAddressFieldclass IPAddressField(**kwargs)•Default widget: TextInput•Empty value: ” (an empty string)•Normalizes to: A Unicode object.•Validates that <strong>the</strong> given value is a valid IPv4 address, using a regular expression.•Error message keys: required, invalid632 Chapter 6. API Reference
<strong>Django</strong> <strong>Documentation</strong>, Release 1.2MultipleChoiceFieldclass MultipleChoiceField(**kwargs)•Default widget: SelectMultiple•Empty value: [] (an empty list)•Normalizes to: A list of Unicode objects.•Validates that every value in <strong>the</strong> given list of values exists in <strong>the</strong> list of choices.•Error message keys: required, invalid_choice, invalid_listTakes one extra argument, choices, as for ChoiceField.NullBooleanFieldclass NullBooleanField(**kwargs)•Default widget: NullBooleanSelect•Empty value: None•Normalizes to: A Python True, False or None value.•Validates nothing (i.e., it never raises a ValidationError).RegexFieldclass RegexField(**kwargs)•Default widget: TextInput•Empty value: ” (an empty string)•Normalizes to: A Unicode object.•Validates that <strong>the</strong> given value matches against a certain regular expression.•Error message keys: required, invalidTakes one required argument:RegexField.regexA regular expression specified ei<strong>the</strong>r as a string or a compiled regular expression object.Also takes max_length and min_length, which work just as <strong>the</strong>y do for CharField.The optional argument error_message is also accepted for backwards compatibility. The preferred way to providean error message is to use <strong>the</strong> error_messages argument, passing a dictionary with ’invalid’ as a key and <strong>the</strong>error message as <strong>the</strong> value.SlugFieldclass SlugField(**kwargs)•Default widget: TextInput•Empty value: ” (an empty string)•Normalizes to: A Unicode object.6.8. Forms 633
<strong>Django</strong> <strong>Documentation</strong>, Release 1.2•Validates that <strong>the</strong> given value contains only letters, numbers, underscores, and hyphens.•Error messages: required, invalidThis field is intended for use in representing a model SlugField in forms.TimeFieldclass TimeField(**kwargs)•Default widget: TextInput•Empty value: None•Normalizes to: A Python datetime.time object.•Validates that <strong>the</strong> given value is ei<strong>the</strong>r a datetime.time or string formatted in a particular time format.•Error message keys: required, invalidTakes one optional argument:TimeField.input_formatsA list of formats used to attempt to convert a string to a valid datetime.time object.If no input_formats argument is provided, <strong>the</strong> default input formats are:’%H:%M:%S’, # ’14:30:59’’%H:%M’, # ’14:30’URLFieldclass URLField(**kwargs)•Default widget: TextInput•Empty value: ” (an empty string)•Normalizes to: A Unicode object.•Validates that <strong>the</strong> given value is a valid URL.•Error message keys: required, invalid, invalid_linkTakes <strong>the</strong> following optional arguments:URLField.max_lengthURLField.min_lengthSame as CharField.max_length and CharField.min_length.URLField.verify_existsIf True, <strong>the</strong> validator will attempt to load <strong>the</strong> given URL, raising ValidationError if <strong>the</strong> page gives a 404.Defaults to False.URLField.validator_user_agentString used as <strong>the</strong> user-agent used when checking for a URL’s existence.URL_VALIDATOR_USER_AGENT setting.Defaults to <strong>the</strong> value of <strong>the</strong>Changed in version 1.2: The URLField previously did not recognize URLs as valid that contained an IDN (InternationalizedDomain Name; a domain name containing unicode characters) domain name. This has now been corrected.634 Chapter 6. API Reference
<strong>Django</strong> <strong>Documentation</strong>, Release 1.2Slightly complex built-in Field classesComboFieldclass ComboField(**kwargs)•Default widget: TextInput•Empty value: ” (an empty string)•Normalizes to: A Unicode object.•Validates that <strong>the</strong> given value against each of <strong>the</strong> fields specified as an argument to <strong>the</strong> ComboField.•Error message keys: required, invalidTakes one extra required argument:ComboField.fieldsThe list of fields that should be used to validate <strong>the</strong> field’s value (in <strong>the</strong> order in which <strong>the</strong>y are provided).>>> f = ComboField(fields=[CharField(max_length=20), EmailField()])>>> f.clean(’test@example.com’)u’test@example.com’>>> f.clean(’longemailaddress@example.com’)Traceback (most recent call last):...ValidationError: [u’Ensure this value has at most 20 characters (it has 28).’]MultiValueFieldclass MultiValueField(**kwargs)•Default widget: TextInput•Empty value: ” (an empty string)•Normalizes to: <strong>the</strong> type returned by <strong>the</strong> compress method of <strong>the</strong> subclass.•Validates that <strong>the</strong> given value against each of <strong>the</strong> fields specified as an argument to <strong>the</strong>MultiValueField.•Error message keys: required, invalidThis abstract field (must be subclassed) aggregates <strong>the</strong> logic of multiple fields. Subclasses should not have toimplement clean(). Instead, <strong>the</strong>y must implement compress(), which takes a list of valid values and returns a“compressed” version of those values – a single value. For example, SplitDateTimeField is a subclasswhich combines a time field and a date field into a datetime object.Takes one extra required argument:MultiValueField.fieldsA list of fields which are cleaned into a single field. Each value in clean is cleaned by <strong>the</strong> corresponding fieldin fields – <strong>the</strong> first value is cleaned by <strong>the</strong> first field, <strong>the</strong> second value is cleaned by <strong>the</strong> second field, etc.Once all fields are cleaned, <strong>the</strong> list of clean values is “compressed” into a single value.SplitDateTimeFieldclass SplitDateTimeField(**kwargs)6.8. Forms 635
<strong>Django</strong> <strong>Documentation</strong>, Release 1.2•Default widget: SplitDateTimeWidget•Empty value: None•Normalizes to: A Python datetime.datetime object.•Validates that <strong>the</strong> given value is a datetime.datetime or string formatted in a particular datetimeformat.•Error message keys: required, invalidTakes two optional arguments:SplitDateTimeField.input_date_formatsA list of formats used to attempt to convert a string to a valid datetime.date object.If no input_date_formats argument is provided, <strong>the</strong> default input formats for DateField are used.SplitDateTimeField.input_time_formatsA list of formats used to attempt to convert a string to a valid datetime.time object.If no input_time_formats argument is provided, <strong>the</strong> default input formats for TimeField are used.Changed in version 1.1: The SplitDateTimeField previously used two TextInput widgets by default. Theinput_date_formats and input_time_formats arguments are also new.Fields which handle relationshipsTwo fields are available for representing relationships between models: ModelChoiceField andModelMultipleChoiceField. Both of <strong>the</strong>se fields require a single queryset parameter that is used to create<strong>the</strong> choices for <strong>the</strong> field. Upon form validation, <strong>the</strong>se fields will place ei<strong>the</strong>r one model object (in <strong>the</strong> caseof ModelChoiceField) or multiple model objects (in <strong>the</strong> case of ModelMultipleChoiceField) into <strong>the</strong>cleaned_data dictionary of <strong>the</strong> form.ModelChoiceFieldclass ModelChoiceField(**kwargs)•Default widget: Select•Empty value: None•Normalizes to: A model instance.•Validates that <strong>the</strong> given id exists in <strong>the</strong> queryset.•Error message keys: required, invalid_choiceAllows <strong>the</strong> selection of a single model object, suitable for representing a foreign key. A single argument is required:ModelChoiceField.querysetA QuerySet of model objects from which <strong>the</strong> choices for <strong>the</strong> field will be derived, and which will be used tovalidate <strong>the</strong> user’s selection.ModelChoiceField also takes one optional argument:ModelChoiceField.empty_labelBy default <strong>the</strong> widget used by ModelChoiceField will have a an empty choice at <strong>the</strong> top of<strong>the</strong> list. You can change <strong>the</strong> text of this label (which is "---------" by default) with <strong>the</strong> empty_labelattribute, or you can disable <strong>the</strong> empty label entirely by setting empty_label to None:636 Chapter 6. API Reference
<strong>Django</strong> <strong>Documentation</strong>, Release 1.2# A custom empty labelfield1 = forms.ModelChoiceField(queryset=..., empty_label="(Nothing)")# No empty labelfield2 = forms.ModelChoiceField(queryset=..., empty_label=None)Note that if a ModelChoiceField is required and has a default initial value, no empty choice is created(regardless of <strong>the</strong> value of empty_label).The __unicode__ method of <strong>the</strong> model will be called to generate string representations of <strong>the</strong> objects foruse in <strong>the</strong> field’s choices; to provide customized representations, subclass ModelChoiceField and overridelabel_from_instance. This method will receive a model object, and should return a string suitable for representingit. For example:class MyModelChoiceField(ModelChoiceField):def label_from_instance(self, obj):return "My Object #%i" % obj.idModelMultipleChoiceFieldclass ModelMultipleChoiceField(**kwargs)•Default widget: SelectMultiple•Empty value: [] (an empty list)•Normalizes to: A list of model instances.•Validates that every id in <strong>the</strong> given list of values exists in <strong>the</strong> queryset.•Error message keys: required, list, invalid_choice, invalid_pk_valueAllows <strong>the</strong> selection of one or more model objects, suitable for representing a many-to-many relation. As withModelChoiceField, you can use label_from_instance to customize <strong>the</strong> object representations, andqueryset is a required parameter:ModelMultipleChoiceField.querysetA QuerySet of model objects from which <strong>the</strong> choices for <strong>the</strong> field will be derived, and which will be used tovalidate <strong>the</strong> user’s selection.Creating custom fieldsIf <strong>the</strong> built-in Field classes don’t meet your needs, you can easily create custom Field classes. To do this, justcreate a subclass of django.forms.Field. Its only requirements are that it implement a clean() methodand that its __init__() method accept <strong>the</strong> core arguments mentioned above (required, label, initial,widget, help_text).6.8.3 WidgetsA widget is <strong>Django</strong>’s representation of a HTML input element. The widget handles <strong>the</strong> rendering of <strong>the</strong> HTML, and<strong>the</strong> extraction of data from a GET/POST dictionary that corresponds to <strong>the</strong> widget.<strong>Django</strong> provides a representation of all <strong>the</strong> basic HTML widgets, plus some commonly used groups of widgets:class TextInputText input: 6.8. Forms 637
<strong>Django</strong> <strong>Documentation</strong>, Release 1.2class PasswordInputPassword input: Takes one optional argument:render_valueDetermines whe<strong>the</strong>r <strong>the</strong> widget will have a value filled in when <strong>the</strong> form is re-displayed after a validationerror (default is True).class HiddenInputHidden input: class MultipleHiddenInputMultiple widgets.class FileInputFile upload input: class DateInputNew in version 1.1: Please, see <strong>the</strong> release notes Date input as a simple text box: Takes one optional argument:formatThe format in which this field’s initial value will be displayed.If no format argument is provided, <strong>the</strong> default format is ’%Y-%m-%d’.class DateTimeInputNew in version 1.0: Please, see <strong>the</strong> release notes Date/time input as a simple text box: Takes one optional argument:formatThe format in which this field’s initial value will be displayed.If no format argument is provided, <strong>the</strong> default format is ’%Y-%m-%d %H:%M:%S’.class TimeInputTime input as a simple text box: Takes one optional argument:formatThe format in which this field’s initial value will be displayed.If no format argument is provided, <strong>the</strong> default format is ’%H:%M:%S’. Changed in version 1.1: The formatargument was not supported in <strong>Django</strong> 1.0.class TextareaText area: ...class CheckboxInputCheckbox: Takes one optional argument:check_testA callable that takes <strong>the</strong> value of <strong>the</strong> CheckBoxInput and returns True if <strong>the</strong> checkbox should be checkedfor that value.class SelectSelect widget: ...638 Chapter 6. API Reference
<strong>Django</strong> <strong>Documentation</strong>, Release 1.2Requires that your field provides choices.class NullBooleanSelectSelect widget with options ‘Unknown’, ‘Yes’ and ‘No’class SelectMultipleSelect widget allowing multiple selection: ...Requires that your field provides choices.class RadioSelectA list of radio buttons:...Requires that your field provides choices.class CheckboxSelectMultipleA list of checkboxes:...class MultiWidgetWrapper around multiple o<strong>the</strong>r widgetsclass SplitDateTimeWidgetWrapper around two widgets: DateInput for <strong>the</strong> date, and TimeInput for <strong>the</strong> time.Takes two optional arguments, date_format and time_format, which work just like <strong>the</strong> format argumentfor DateInput and TimeInput. Changed in version 1.1: The date_format and time_formatarguments were not supported in <strong>Django</strong> 1.0.class SelectDateWidgetWrapper around three select widgets: one each for month, day, and year. Note that this widget lives in a separatefile from <strong>the</strong> standard widgets.from django.forms.extras.widgets import SelectDateWidgetdate = forms.DateField(widget=SelectDateWidget())Specifying widgetsForm.widgetWhenever you specify a field on a form, <strong>Django</strong> will use a default widget that is appropriate to <strong>the</strong> type of data that isto be displayed. To find which widget is used on which field, see <strong>the</strong> documentation for <strong>the</strong> built-in Field classes.However, if you want to use a different widget for a field, you can - just use <strong>the</strong> ‘widget’ argument on <strong>the</strong> fielddefinition. For example:from django import formsclass CommentForm(forms.Form):name = forms.CharField()6.8. Forms 639
<strong>Django</strong> <strong>Documentation</strong>, Release 1.2url = forms.URLField()comment = forms.CharField(widget=forms.Textarea)This would specify a form with a comment that uses a larger Textarea widget, ra<strong>the</strong>r than <strong>the</strong> default TextInput widget.Customizing widget instancesWhen <strong>Django</strong> renders a widget as HTML, it only renders <strong>the</strong> bare minimum HTML - <strong>Django</strong> doesn’t add a classdefinition, or any o<strong>the</strong>r widget-specific attributes. This means that all ‘TextInput’ widgets will appear <strong>the</strong> same onyour Web page.If you want to make one widget look different to ano<strong>the</strong>r, you need to specify additional attributes for each widget.When you specify a widget, you can provide a list of attributes that will be added to <strong>the</strong> rendered HTML for <strong>the</strong> widget.For example, take <strong>the</strong> following simple form:class CommentForm(forms.Form):name = forms.CharField()url = forms.URLField()comment = forms.CharField()This form will include three default TextInput widgets, with default rendering - no CSS class, no extra attributes. Thismeans that <strong>the</strong> input boxes provided for each widget will be rendered exactly <strong>the</strong> same:>>> f = CommentForm(auto_id=False)>>> f.as_table()Name:Url:Comment:On a real Web page, you probably don’t want every widget to look <strong>the</strong> same. You might want a larger input elementfor <strong>the</strong> comment, and you might want <strong>the</strong> ‘name’ widget to have some special CSS class. To do this, you use <strong>the</strong>attrs argument when creating <strong>the</strong> widget:Widget.attrsFor example:class CommentForm(forms.Form):name = forms.CharField(widget=forms.TextInput(attrs={’class’:’special’}))url = forms.URLField()comment = forms.CharField(widget=forms.TextInput(attrs={’size’:’40’}))<strong>Django</strong> will <strong>the</strong>n include <strong>the</strong> extra attributes in <strong>the</strong> rendered output:>>> f = CommentForm(auto_id=False)>>> f.as_table()Name:Url:Comment:6.8.4 Form and field validationChanged in version 1.2: Please, see <strong>the</strong> release notes Form validation happens when <strong>the</strong> data is cleaned. If you wantto customize this process, <strong>the</strong>re are various places you can change, each one serving a different purpose. Three typesof cleaning methods are run during form processing. These are normally executed when you call <strong>the</strong> is_valid()640 Chapter 6. API Reference
<strong>Django</strong> <strong>Documentation</strong>, Release 1.2method on a form. There are o<strong>the</strong>r things that can trigger cleaning and validation (accessing <strong>the</strong> errors attribute orcalling full_clean() directly), but normally <strong>the</strong>y won’t be needed.In general, any cleaning method can raise ValidationError if <strong>the</strong>re is a problem with <strong>the</strong> data it is processing,passing <strong>the</strong> relevant error message to <strong>the</strong> ValidationError constructor. If no ValidationError is raised, <strong>the</strong>method should return <strong>the</strong> cleaned (normalized) data as a Python object.If you detect multiple errors during a cleaning method and wish to signal all of <strong>the</strong>m to <strong>the</strong> form submitter, it is possibleto pass a list of errors to <strong>the</strong> ValidationError constructor.Most validation can be done using validators - simple helpers that can be reused easily. Validators are simple functions(or callables) that take a single argument and raise ValidationError on invalid input. Validators are run after <strong>the</strong>field’s to_python and validate methods have been called.Validation of a Form is split into several steps, which can be customized or overridden:• The to_python() method on a Field is <strong>the</strong> first step in every validation. It coerces <strong>the</strong> value to correctdatatype and raises ValidationError if that is not possible. This method accepts <strong>the</strong> raw value from <strong>the</strong>widget and returns <strong>the</strong> converted value. For example, a FloatField will turn <strong>the</strong> data into a Python float orraise a ValidationError.• The validate() method on a Field handles field-specific validation that is not suitable for a validator, It takesa value that has been coerced to correct datatype and raises ValidationError on any error. This methoddoes not return anything and shouldn’t alter <strong>the</strong> value. You should override it to handle validation logic that youcan’t or don’t want to put in a validator.• The run_validators() method on a Field runs all of <strong>the</strong> field’s validators and aggregates all <strong>the</strong> errors intoa single ValidationError. You shouldn’t need to override this method.• The clean() method on a Field subclass. This is responsible for running to_python, validate andrun_validators in <strong>the</strong> correct order and propagating <strong>the</strong>ir errors. If, at any time, any of <strong>the</strong> methods raiseValidationError, <strong>the</strong> validation stops and that error is raised. This method returns <strong>the</strong> clean data, which is<strong>the</strong>n inserted into <strong>the</strong> cleaned_data dictionary of <strong>the</strong> form.• The clean_() method in a form subclass – where is replaced with <strong>the</strong> nameof <strong>the</strong> form field attribute. This method does any cleaning that is specific to that particular attribute, unrelatedto <strong>the</strong> type of field that it is. This method is not passed any parameters. You will need to look up <strong>the</strong> value of<strong>the</strong> field in self.cleaned_data and remember that it will be a Python object at this point, not <strong>the</strong> originalstring submitted in <strong>the</strong> form (it will be in cleaned_data because <strong>the</strong> general field clean() method, above,has already cleaned <strong>the</strong> data once).For example, if you wanted to validate that <strong>the</strong> contents of a CharField called serialnumber was unique,clean_serialnumber() would be <strong>the</strong> right place to do this. You don’t need a specific field (it’s just aCharField), but you want a formfield-specific piece of validation and, possibly, cleaning/normalizing <strong>the</strong>data.Just like <strong>the</strong> general field clean() method, above, this method should return <strong>the</strong> cleaned data, regardless ofwhe<strong>the</strong>r it changed anything or not.• The Form subclass’s clean() method. This method can perform any validation that requires access to multiplefields from <strong>the</strong> form at once. This is where you might put in things to check that if field A is supplied, field Bmust contain a valid e-mail address and <strong>the</strong> like. The data that this method returns is <strong>the</strong> final cleaned_dataattribute for <strong>the</strong> form, so don’t forget to return <strong>the</strong> full list of cleaned data if you override this method (by default,Form.clean() just returns self.cleaned_data).Note that any errors raised by your Form.clean() override will not be associated with any field in particular.They go into a special “field” (called __all__), which you can access via <strong>the</strong> non_field_errors()method if you need to. If you want to attach errors to a specific field in <strong>the</strong> form, you will need to access <strong>the</strong>_errors attribute on <strong>the</strong> form, which is described later.6.8. Forms 641
<strong>Django</strong> <strong>Documentation</strong>, Release 1.2Also note that <strong>the</strong>re are special considerations when overriding <strong>the</strong> clean() method of a ModelForm subclass.(see <strong>the</strong> ModelForm documentation for more information)These methods are run in <strong>the</strong> order given above, one field at a time. That is, for each field in <strong>the</strong> form (in<strong>the</strong> order <strong>the</strong>y are declared in <strong>the</strong> form definition), <strong>the</strong> Field.clean() method (or its override) is run, <strong>the</strong>nclean_(). Finally, once those two methods are run for every field, <strong>the</strong> Form.clean() method,or its override, is executed.Examples of each of <strong>the</strong>se methods are provided below.As mentioned, any of <strong>the</strong>se methods can raise a ValidationError. For any field, if <strong>the</strong> Field.clean() methodraises a ValidationError, any field-specific cleaning method is not called. However, <strong>the</strong> cleaning methods forall remaining fields are still executed.The clean() method for <strong>the</strong> Form class or subclass is always run. If that method raises a ValidationError,cleaned_data will be an empty dictionary.The previous paragraph means that if you are overriding Form.clean(), you should iterate throughself.cleaned_data.items(), possibly considering <strong>the</strong> _errors dictionary attribute on <strong>the</strong> form as well.In this way, you will already know which fields have passed <strong>the</strong>ir individual validation requirements.Form subclasses and modifying field errorsSometimes, in a form’s clean() method, you will want to add an error message to a particular field in <strong>the</strong> form. Thiswon’t always be appropriate and <strong>the</strong> more typical situation is to raise a ValidationError from Form.clean(),which is turned into a form-wide error that is available through <strong>the</strong> Form.non_field_errors() method.When you really do need to attach <strong>the</strong> error to a particular field, you should store (or amend) a key in <strong>the</strong>Form._errors attribute. This attribute is an instance of a django.forms.util.ErrorDict class. Essentially,though, it’s just a dictionary. There is a key in <strong>the</strong> dictionary for each field in <strong>the</strong> form that has an error. Eachvalue in <strong>the</strong> dictionary is a django.forms.util.ErrorList instance, which is a list that knows how to displayitself in different ways. So you can treat _errors as a dictionary mapping field names to lists.If you want to add a new error to a particular field, you should check whe<strong>the</strong>r <strong>the</strong> key already exists inself._errors or not. If not, create a new entry for <strong>the</strong> given key, holding an empty ErrorList instance.In ei<strong>the</strong>r case, you can <strong>the</strong>n append your error message to <strong>the</strong> list for <strong>the</strong> field name in question and it will be displayedwhen <strong>the</strong> form is displayed.There is an example of modifying self._errors in <strong>the</strong> following section.What’s in a name?You may be wondering why is this attribute called _errors and not errors. Normal Python practice is to prefixa name with an underscore if it’s not for external usage. In this case, you are subclassing <strong>the</strong> Form class, so you areessentially writing new internals. In effect, you are given permission to access some of <strong>the</strong> internals of Form.Of course, any code outside your form should never access _errors directly. The data is available to external codethrough <strong>the</strong> errors property, which populates _errors before returning it).Ano<strong>the</strong>r reason is purely historical: <strong>the</strong> attribute has been called _errors since <strong>the</strong> early days of <strong>the</strong> forms moduleand changing it now (particularly since errors is used for <strong>the</strong> read-only property name) would be inconvenient for anumber of reasons. You can use whichever explanation makes you feel more comfortable. The result is <strong>the</strong> same.Using validation in practiceThe previous sections explained how validation works in general for forms. Since it can sometimes be easier to putthings into place by seeing each feature in use, here are a series of small examples that use each of <strong>the</strong> previous642 Chapter 6. API Reference
<strong>Django</strong> <strong>Documentation</strong>, Release 1.2features.Using validatorsNew in version 1.2: Please, see <strong>the</strong> release notes <strong>Django</strong>’s form (and model) fields support use of simple utilityfunctions and classes known as validators. These can be passed to a field’s constructor, via <strong>the</strong> field’s validatorsargument, or defined on <strong>the</strong> Field class itself with <strong>the</strong> default_validators attribute.Simple validators can be used to validate values inside <strong>the</strong> field, let’s have a look at <strong>Django</strong>’s EmailField:class EmailField(CharField):default_error_messages = {’invalid’: _(u’Enter a valid e-mail address.’),}default_validators = [validators.validate_email]As you can see, EmailField is just a CharField with customized error message and a validator that validatese-mail addresses. This can also be done on field definition so:email = forms.EmailField()is equivalent to:email = forms.CharField(validators=[validators.validate_email],error_messages={’invalid’: _(u’Enter a valid e-mail address.’)})Form field default cleaningLet’s firstly create a custom form field that validates its input is a string containing comma-separated e-mail addresses.The full class looks like this:from django import formsfrom django.core.validators import validate_emailclass MultiEmailField(forms.Field):def to_python(self, value):"Normalize data to a list of strings."# Return an empty list if no input was given.if not value:return []return value.split(’,’)def validate(self, value):"Check if value consists only of valid emails."# Use <strong>the</strong> parent’s handling of required fields, etc.super(MultiEmailField, self).validate(value)for email in value:validate_email(email)Every form that uses this field will have <strong>the</strong>se methods run before anything else can be done with <strong>the</strong> field’s data. Thisis cleaning that is specific to this type of field, regardless of how it is subsequently used.Let’s create a simple ContactForm to demonstrate how you’d use this field:6.8. Forms 643
<strong>Django</strong> <strong>Documentation</strong>, Release 1.2class ContactForm(forms.Form):subject = forms.CharField(max_length=100)message = forms.CharField()sender = forms.EmailField()recipients = MultiEmailField()cc_myself = forms.BooleanField(required=False)Simply use MultiEmailField like any o<strong>the</strong>r form field. When <strong>the</strong> is_valid() method is called on <strong>the</strong> form,<strong>the</strong> MultiEmailField.clean() method will be run as part of <strong>the</strong> cleaning process and it will, in turn, call <strong>the</strong>custom to_python() and validate() methods.Cleaning a specific field attributeContinuing on from <strong>the</strong> previous example, suppose that in our ContactForm, we want to make sure that <strong>the</strong>recipients field always contains <strong>the</strong> address "fred@example.com". This is validation that is specific toour form, so we don’t want to put it into <strong>the</strong> general MultiEmailField class. Instead, we write a cleaning methodthat operates on <strong>the</strong> recipients field, like so:class ContactForm(forms.Form):# Everything as before....def clean_recipients(self):data = self.cleaned_data[’recipients’]if "fred@example.com" not in data:raise forms.ValidationError("You have forgotten about Fred!")# Always return <strong>the</strong> cleaned data, whe<strong>the</strong>r you have changed it or# not.return dataCleaning and validating fields that depend on each o<strong>the</strong>rSuppose we add ano<strong>the</strong>r requirement to our contact form: if <strong>the</strong> cc_myself field is True, <strong>the</strong> subject mustcontain <strong>the</strong> word "help". We are performing validation on more than one field at a time, so <strong>the</strong> form’s clean()method is a good spot to do this. Notice that we are talking about <strong>the</strong> clean() method on <strong>the</strong> form here, whereasearlier we were writing a clean() method on a field. It’s important to keep <strong>the</strong> field and form difference clear whenworking out where to validate things. Fields are single data points, forms are a collection of fields.By <strong>the</strong> time <strong>the</strong> form’s clean() method is called, all <strong>the</strong> individual field clean methods will have been run (<strong>the</strong>previous two sections), so self.cleaned_data will be populated with any data that has survived so far. So youalso need to remember to allow for <strong>the</strong> fact that <strong>the</strong> fields you are wanting to validate might not have survived <strong>the</strong>initial individual field checks.There are two way to report any errors from this step. Probably <strong>the</strong> most common method is to display <strong>the</strong> error at<strong>the</strong> top of <strong>the</strong> form. To create such an error, you can raise a ValidationError from <strong>the</strong> clean() method. Forexample:class ContactForm(forms.Form):# Everything as before....def clean(self):cleaned_data = self.cleaned_datacc_myself = cleaned_data.get("cc_myself")644 Chapter 6. API Reference
<strong>Django</strong> <strong>Documentation</strong>, Release 1.2subject = cleaned_data.get("subject")if cc_myself and subject:# Only do something if both fields are valid so far.if "help" not in subject:raise forms.ValidationError("Did not send for ’help’ in ""<strong>the</strong> subject despite CC’ing yourself.")# Always return <strong>the</strong> full collection of cleaned data.return cleaned_dataIn this code, if <strong>the</strong> validation error is raised, <strong>the</strong> form will display an error message at <strong>the</strong> top of <strong>the</strong> form (normally)describing <strong>the</strong> problem.The second approach might involve assigning <strong>the</strong> error message to one of <strong>the</strong> fields. In this case, let’s assign an errormessage to both <strong>the</strong> “subject” and “cc_myself” rows in <strong>the</strong> form display. Be careful when doing this in practice, sinceit can lead to confusing form output. We’re showing what is possible here and leaving it up to you and your designersto work out what works effectively in your particular situation. Our new code (replacing <strong>the</strong> previous sample) lookslike this:class ContactForm(forms.Form):# Everything as before....def clean(self):cleaned_data = self.cleaned_datacc_myself = cleaned_data.get("cc_myself")subject = cleaned_data.get("subject")if cc_myself and subject and "help" not in subject:# We know <strong>the</strong>se are not in self._errors now (see discussion# below).msg = u"Must put ’help’ in subject when cc’ing yourself."self._errors["cc_myself"] = self.error_class([msg])self._errors["subject"] = self.error_class([msg])# These fields are no longer valid. Remove <strong>the</strong>m from <strong>the</strong># cleaned data.del cleaned_data["cc_myself"]del cleaned_data["subject"]# Always return <strong>the</strong> full collection of cleaned data.return cleaned_dataAs you can see, this approach requires a bit more effort, not withstanding <strong>the</strong> extra design effort to create a sensibleform display. The details are worth noting, however. Firstly, earlier we mentioned that you might need tocheck if <strong>the</strong> field name keys already exist in <strong>the</strong> _errors dictionary. In this case, since we know <strong>the</strong> fields exist inself.cleaned_data, <strong>the</strong>y must have been valid when cleaned as individual fields, so <strong>the</strong>re will be no correspondingentries in _errors.Secondly, once we have decided that <strong>the</strong> combined data in <strong>the</strong> two fields we are considering aren’t valid, we mustremember to remove <strong>the</strong>m from <strong>the</strong> cleaned_data.In fact, <strong>Django</strong> will currently completely wipe out <strong>the</strong> cleaned_data dictionary if <strong>the</strong>re are any errors in <strong>the</strong> form.However, this behaviour may change in <strong>the</strong> future, so it’s not a bad idea to clean up after yourself in <strong>the</strong> first place.6.8. Forms 645
<strong>Django</strong> <strong>Documentation</strong>, Release 1.26.9 Generic viewsWriting Web applications can be monotonous, because we repeat certain patterns again and again. In <strong>Django</strong>, <strong>the</strong> mostcommon of <strong>the</strong>se patterns have been abstracted into “generic views” that let you quickly provide common views of anobject without actually needing to write any Python code.A general introduction to generic views can be found in <strong>the</strong> topic guide.This reference contains details of <strong>Django</strong>’s built-in generic views, along with a list of all keyword argumentsthat a generic view expects. Remember that arguments may ei<strong>the</strong>r come from <strong>the</strong> URL pattern or from <strong>the</strong>extra_context additional-information dictionary.Most generic views require <strong>the</strong> queryset key, which is a QuerySet instance; see Making queries for more informationabout QuerySet objects.6.9.1 “Simple” generic viewsThe django.views.generic.simple module contains simple views to handle a couple of common cases:rendering a template when no view logic is needed, and issuing a redirect.django.views.generic.simple.direct_to_templateDescription:Renders a given template, passing it a {{ params }} template variable, which is a dictionary of <strong>the</strong> parameterscaptured in <strong>the</strong> URL.Required arguments:• template: The full name of a template to use.Optional arguments:• extra_context: A dictionary of values to add to <strong>the</strong> template context. By default, this is an empty dictionary.If a value in <strong>the</strong> dictionary is callable, <strong>the</strong> generic view will call it just before rendering <strong>the</strong> template.• mimetype: The MIME type to use for <strong>the</strong> resulting document. Defaults to <strong>the</strong> value of <strong>the</strong>DEFAULT_CONTENT_TYPE setting.Example:Given <strong>the</strong> following URL patterns:urlpatterns = patterns(’django.views.generic.simple’,(r’^foo/$’,’direct_to_template’, {’template’: ’foo_index.html’}),(r’^foo/(?P\d+)/$’, ’direct_to_template’, {’template’: ’foo_detail.html’}),)... a request to /foo/ would render <strong>the</strong> template foo_index.html, and a request to /foo/15/ would render <strong>the</strong>foo_detail.html with a context variable {{ params.id }} that is set to 15.django.views.generic.simple.redirect_toDescription:Redirects to a given URL.646 Chapter 6. API Reference
<strong>Django</strong> <strong>Documentation</strong>, Release 1.2The given URL may contain dictionary-style string formatting, which will be interpolated against <strong>the</strong> parameterscaptured in <strong>the</strong> URL. Because keyword interpolation is always done (even if no arguments are passed in), any "%"characters in <strong>the</strong> URL must be written as "%%" so that Python will convert <strong>the</strong>m to a single percent sign on output.If <strong>the</strong> given URL is None, <strong>Django</strong> will return an HttpResponseGone (410).Required arguments:• url: The URL to redirect to, as a string. Or None to raise a 410 (Gone) HTTP error.Optional arguments:• permanent: Whe<strong>the</strong>r <strong>the</strong> redirect should be permanent. The only difference here is <strong>the</strong> HTTP status codereturned. If True, <strong>the</strong>n <strong>the</strong> redirect will use status code 301. If False, <strong>the</strong>n <strong>the</strong> redirect will use status code302. By default, permanent is True.New in version 1.1: The permanent keyword argument is new in <strong>Django</strong> 1.1. Example:This example issues a permanent redirect (HTTP status code 301) from /foo// to /bar//:urlpatterns = patterns(’django.views.generic.simple’,(’^foo/(?P\d+)/$’, ’redirect_to’, {’url’: ’/bar/%(id)s/’}),)This example issues a non-permanent redirect (HTTP status code 302) from /foo// to /bar//:urlpatterns = patterns(’django.views.generic.simple’,(’^foo/(?P\d+)/$’, ’redirect_to’, {’url’: ’/bar/%(id)s/’, ’permanent’: False}),)This example returns a 410 HTTP error for requests to /bar/:urlpatterns = patterns(’django.views.generic.simple’,(’^bar/$’, ’redirect_to’, {’url’: None}),)This example shows how "%" characters must be written in <strong>the</strong> URL in order to avoid confusion with Python’s stringformatting markers. If <strong>the</strong> redirect string is written as "%7Ejacob/" (with only a single %), an exception would beraised:urlpatterns = patterns(’django.views.generic.simple’,(’^bar/$’, ’redirect_to’, {’url’: ’%%7Ejacob.’}),)6.9.2 Date-based generic viewsDate-based generic views (in <strong>the</strong> module django.views.generic.date_based) are views for displaying drilldownpages for date-based data.django.views.generic.date_based.archive_indexDescription:A top-level index page showing <strong>the</strong> “latest” objects, by date. Objects with a date in <strong>the</strong> future are not included unlessyou set allow_future to True.Required arguments:• queryset: A QuerySet of objects for which <strong>the</strong> archive serves.6.9. Generic views 647
<strong>Django</strong> <strong>Documentation</strong>, Release 1.2• date_field: The name of <strong>the</strong> DateField or DateTimeField in <strong>the</strong> QuerySet‘s model that <strong>the</strong> datebasedarchive should use to determine <strong>the</strong> objects on <strong>the</strong> page.Optional arguments:• num_latest: The number of latest objects to send to <strong>the</strong> template context. By default, it’s 15.• template_name: The full name of a template to use in rendering <strong>the</strong> page. This lets you override<strong>the</strong> default template name (see below).• template_loader: The template loader to use when loading <strong>the</strong> template.django.template.loader.By default, it’s• extra_context: A dictionary of values to add to <strong>the</strong> template context. By default, this is anempty dictionary. If a value in <strong>the</strong> dictionary is callable, <strong>the</strong> generic view will call it just beforerendering <strong>the</strong> template.• allow_empty: A boolean specifying whe<strong>the</strong>r to display <strong>the</strong> page if no objects are available. Ifthis is False and no objects are available, <strong>the</strong> view will raise a 404 instead of displaying an emptypage. By default, this is True.• context_processors: A list of template-context processors to apply to <strong>the</strong> view’s template.• mimetype: The MIME type to use for <strong>the</strong> resulting document.DEFAULT_CONTENT_TYPE setting.Defaults to <strong>the</strong> value of <strong>the</strong>• allow_future: A boolean specifying whe<strong>the</strong>r to include “future” objects on this page, where“future” means objects in which <strong>the</strong> field specified in date_field is greater than <strong>the</strong> currentdate/time. By default, this is False.New in version 1.0: Please, see <strong>the</strong> release notesTemplate name:• template_object_name: Designates <strong>the</strong> name of <strong>the</strong> template variable to use in <strong>the</strong> templatecontext. By default, this is ’latest’.If template_name isn’t specified, this view will use <strong>the</strong> template /_archive.htmlby default, where:• is your model’s name in all lowercase.staffmember.For a model StaffMember, that’d be• is <strong>the</strong> right-most part of <strong>the</strong> full Python path to your model’s app. For example, if your modellives in apps/blog/models.py, that’d be blog.Template context:In addition to extra_context, <strong>the</strong> template’s context will be:• date_list: A DateQuerySet object containing all years that have have objects available accordingto queryset, represented as datetime.datetime objects. These are ordered in reverse.This is equivalent to queryset.dates(date_field, ’year’)[::-1].Changed in version 1.0: The behaviour depending on template_object_name is new in this version.• latest: The num_latest objects in <strong>the</strong> system, ordered descending by date_field. Forexample, if num_latest is 10, <strong>the</strong>n latest will be a list of <strong>the</strong> latest 10 objects in queryset.This variable’s name depends on <strong>the</strong> template_object_name parameter, which is ’latest’by default. If template_object_name is ’foo’, this variable’s name will be foo.648 Chapter 6. API Reference
<strong>Django</strong> <strong>Documentation</strong>, Release 1.2django.views.generic.date_based.archive_yearDescription:A yearly archive page showing all available months in a given year. Objects with a date in <strong>the</strong> future are not displayedunless you set allow_future to True.Required arguments:• year: The four-digit year for which <strong>the</strong> archive serves.• queryset: A QuerySet of objects for which <strong>the</strong> archive serves.• date_field: The name of <strong>the</strong> DateField or DateTimeField in <strong>the</strong> QuerySet‘s model that <strong>the</strong> datebasedarchive should use to determine <strong>the</strong> objects on <strong>the</strong> page.Optional arguments:• template_name: The full name of a template to use in rendering <strong>the</strong> page. This lets you override <strong>the</strong> defaulttemplate name (see below).• template_loader: The template loader to use when loading <strong>the</strong> template. By default, it’sdjango.template.loader.• extra_context: A dictionary of values to add to <strong>the</strong> template context. By default, this is an empty dictionary.If a value in <strong>the</strong> dictionary is callable, <strong>the</strong> generic view will call it just before rendering <strong>the</strong> template.• allow_empty: A boolean specifying whe<strong>the</strong>r to display <strong>the</strong> page if no objects are available. If this is Falseand no objects are available, <strong>the</strong> view will raise a 404 instead of displaying an empty page. By default, this isFalse.• context_processors: A list of template-context processors to apply to <strong>the</strong> view’s template.• template_object_name: Designates <strong>the</strong> name of <strong>the</strong> template variable to use in <strong>the</strong> template context. Bydefault, this is ’object’. The view will append ’_list’ to <strong>the</strong> value of this parameter in determining <strong>the</strong>variable’s name.• make_object_list: A boolean specifying whe<strong>the</strong>r to retrieve <strong>the</strong> full list of objects for this year and passthose to <strong>the</strong> template. If True, this list of objects will be made available to <strong>the</strong> template as object_list.(The name object_list may be different; see <strong>the</strong> docs for object_list in <strong>the</strong> “Template context” sectionbelow.) By default, this is False.• mimetype: The MIME type to use for <strong>the</strong> resulting document. Defaults to <strong>the</strong> value of <strong>the</strong>DEFAULT_CONTENT_TYPE setting.• allow_future: A boolean specifying whe<strong>the</strong>r to include “future” objects on this page, where “future” meansobjects in which <strong>the</strong> field specified in date_field is greater than <strong>the</strong> current date/time. By default, this isFalse.Template name:If template_name isn’t specified, this view will use <strong>the</strong> template /_archive_year.htmlby default.Template context:In addition to extra_context, <strong>the</strong> template’s context will be:• date_list: A DateQuerySet object containing all months that have have objects available according toqueryset, represented as datetime.datetime objects, in ascending order.• year: The given year, as a four-character string.6.9. Generic views 649
<strong>Django</strong> <strong>Documentation</strong>, Release 1.2• object_list: If <strong>the</strong> make_object_list parameter is True, this will be set to a list of objects availablefor <strong>the</strong> given year, ordered by <strong>the</strong> date field. This variable’s name depends on <strong>the</strong> template_object_nameparameter, which is ’object’ by default. If template_object_name is ’foo’, this variable’s namewill be foo_list.If make_object_list is False, object_list will be passed to <strong>the</strong> template as an empty list.django.views.generic.date_based.archive_monthDescription:A monthly archive page showing all objects in a given month. Objects with a date in <strong>the</strong> future are not displayed unlessyou set allow_future to True.Required arguments:• year: The four-digit year for which <strong>the</strong> archive serves (a string).• month: The month for which <strong>the</strong> archive serves, formatted according to <strong>the</strong> month_format argument.• queryset: A QuerySet of objects for which <strong>the</strong> archive serves.• date_field: The name of <strong>the</strong> DateField or DateTimeField in <strong>the</strong> QuerySet‘s model that <strong>the</strong> datebasedarchive should use to determine <strong>the</strong> objects on <strong>the</strong> page.Optional arguments:• month_format: A format string that regulates what format <strong>the</strong> month parameter uses. This should be in <strong>the</strong>syntax accepted by Python’s time.strftime. (See <strong>the</strong> strftime docs.) It’s set to "%b" by default, which isa three-letter month abbreviation. To change it to use numbers, use "%m".• template_name: The full name of a template to use in rendering <strong>the</strong> page. This lets you override <strong>the</strong> defaulttemplate name (see below).• template_loader: The template loader to use when loading <strong>the</strong> template. By default, it’sdjango.template.loader.• extra_context: A dictionary of values to add to <strong>the</strong> template context. By default, this is an empty dictionary.If a value in <strong>the</strong> dictionary is callable, <strong>the</strong> generic view will call it just before rendering <strong>the</strong> template.• allow_empty: A boolean specifying whe<strong>the</strong>r to display <strong>the</strong> page if no objects are available. If this is Falseand no objects are available, <strong>the</strong> view will raise a 404 instead of displaying an empty page. By default, this isFalse.• context_processors: A list of template-context processors to apply to <strong>the</strong> view’s template.• template_object_name: Designates <strong>the</strong> name of <strong>the</strong> template variable to use in <strong>the</strong> template context. Bydefault, this is ’object’. The view will append ’_list’ to <strong>the</strong> value of this parameter in determining <strong>the</strong>variable’s name.• mimetype: The MIME type to use for <strong>the</strong> resulting document. Defaults to <strong>the</strong> value of <strong>the</strong>DEFAULT_CONTENT_TYPE setting.• allow_future: A boolean specifying whe<strong>the</strong>r to include “future” objects on this page, where “future” meansobjects in which <strong>the</strong> field specified in date_field is greater than <strong>the</strong> current date/time. By default, this isFalse.Template name:If template_name isn’t specified, this view will use <strong>the</strong> template /_archive_month.htmlby default.650 Chapter 6. API Reference
<strong>Django</strong> <strong>Documentation</strong>, Release 1.2Template context: New in version 1.2: The inclusion of date_list in <strong>the</strong> template’s context is new. In addition toextra_context, <strong>the</strong> template’s context will be:• date_list: A DateQuerySet object containing all days that have have objects available in <strong>the</strong> givenmonth, according to queryset, represented as datetime.datetime objects, in ascending order.• month: A datetime.date object representing <strong>the</strong> given month.• next_month: A datetime.date object representing <strong>the</strong> first day of <strong>the</strong> next month. If <strong>the</strong> next month isin <strong>the</strong> future, this will be None.• previous_month: A datetime.date object representing <strong>the</strong> first day of <strong>the</strong> previous month. Unlikenext_month, this will never be None.• object_list: A list of objects available for <strong>the</strong> given month. This variable’s name depends on <strong>the</strong>template_object_name parameter, which is ’object’ by default. If template_object_name is’foo’, this variable’s name will be foo_list.django.views.generic.date_based.archive_weekDescription:A weekly archive page showing all objects in a given week. Objects with a date in <strong>the</strong> future are not displayed unlessyou set allow_future to True.Required arguments:• year: The four-digit year for which <strong>the</strong> archive serves (a string).• week: The week of <strong>the</strong> year for which <strong>the</strong> archive serves (a string). Weeks start with Sunday.• queryset: A QuerySet of objects for which <strong>the</strong> archive serves.• date_field: The name of <strong>the</strong> DateField or DateTimeField in <strong>the</strong> QuerySet‘s model that <strong>the</strong> datebasedarchive should use to determine <strong>the</strong> objects on <strong>the</strong> page.Optional arguments:• template_name: The full name of a template to use in rendering <strong>the</strong> page. This lets you override <strong>the</strong> defaulttemplate name (see below).• template_loader: The template loader to use when loading <strong>the</strong> template. By default, it’sdjango.template.loader.• extra_context: A dictionary of values to add to <strong>the</strong> template context. By default, this is an empty dictionary.If a value in <strong>the</strong> dictionary is callable, <strong>the</strong> generic view will call it just before rendering <strong>the</strong> template.• allow_empty: A boolean specifying whe<strong>the</strong>r to display <strong>the</strong> page if no objects are available. If this is Falseand no objects are available, <strong>the</strong> view will raise a 404 instead of displaying an empty page. By default, this isTrue.• context_processors: A list of template-context processors to apply to <strong>the</strong> view’s template.• template_object_name: Designates <strong>the</strong> name of <strong>the</strong> template variable to use in <strong>the</strong> template context. Bydefault, this is ’object’. The view will append ’_list’ to <strong>the</strong> value of this parameter in determining <strong>the</strong>variable’s name.• mimetype: The MIME type to use for <strong>the</strong> resulting document. Defaults to <strong>the</strong> value of <strong>the</strong>DEFAULT_CONTENT_TYPE setting.• allow_future: A boolean specifying whe<strong>the</strong>r to include “future” objects on this page, where “future” meansobjects in which <strong>the</strong> field specified in date_field is greater than <strong>the</strong> current date/time. By default, this isFalse.6.9. Generic views 651
<strong>Django</strong> <strong>Documentation</strong>, Release 1.2Template name:If template_name isn’t specified, this view will use <strong>the</strong> template /_archive_week.htmlby default.Template context:In addition to extra_context, <strong>the</strong> template’s context will be:• week: A datetime.date object representing <strong>the</strong> first day of <strong>the</strong> given week.• object_list: A list of objects available for <strong>the</strong> given week. This variable’s name depends on <strong>the</strong>template_object_name parameter, which is ’object’ by default. If template_object_name is’foo’, this variable’s name will be foo_list.django.views.generic.date_based.archive_dayDescription:A day archive page showing all objects in a given day. Days in <strong>the</strong> future throw a 404 error, regardless of whe<strong>the</strong>r anyobjects exist for future days, unless you set allow_future to True.Required arguments:• year: The four-digit year for which <strong>the</strong> archive serves (a string).• month: The month for which <strong>the</strong> archive serves, formatted according to <strong>the</strong> month_format argument.• day: The day for which <strong>the</strong> archive serves, formatted according to <strong>the</strong> day_format argument.• queryset: A QuerySet of objects for which <strong>the</strong> archive serves.• date_field: The name of <strong>the</strong> DateField or DateTimeField in <strong>the</strong> QuerySet‘s model that <strong>the</strong> datebasedarchive should use to determine <strong>the</strong> objects on <strong>the</strong> page.Optional arguments:• month_format: A format string that regulates what format <strong>the</strong> month parameter uses. This should be in <strong>the</strong>syntax accepted by Python’s time.strftime. (See <strong>the</strong> strftime docs.) It’s set to "%b" by default, which isa three-letter month abbreviation. To change it to use numbers, use "%m".• day_format: Like month_format, but for <strong>the</strong> day parameter. It defaults to "%d" (day of <strong>the</strong> month as adecimal number, 01-31).• template_name: The full name of a template to use in rendering <strong>the</strong> page. This lets you override <strong>the</strong> defaulttemplate name (see below).• template_loader: The template loader to use when loading <strong>the</strong> template. By default, it’sdjango.template.loader.• extra_context: A dictionary of values to add to <strong>the</strong> template context. By default, this is an empty dictionary.If a value in <strong>the</strong> dictionary is callable, <strong>the</strong> generic view will call it just before rendering <strong>the</strong> template.• allow_empty: A boolean specifying whe<strong>the</strong>r to display <strong>the</strong> page if no objects are available. If this is Falseand no objects are available, <strong>the</strong> view will raise a 404 instead of displaying an empty page. By default, this isFalse.• context_processors: A list of template-context processors to apply to <strong>the</strong> view’s template.• template_object_name: Designates <strong>the</strong> name of <strong>the</strong> template variable to use in <strong>the</strong> template context. Bydefault, this is ’object’. The view will append ’_list’ to <strong>the</strong> value of this parameter in determining <strong>the</strong>variable’s name.652 Chapter 6. API Reference
<strong>Django</strong> <strong>Documentation</strong>, Release 1.2• mimetype: The MIME type to use for <strong>the</strong> resulting document. Defaults to <strong>the</strong> value of <strong>the</strong>DEFAULT_CONTENT_TYPE setting.• allow_future: A boolean specifying whe<strong>the</strong>r to include “future” objects on this page, where “future” meansobjects in which <strong>the</strong> field specified in date_field is greater than <strong>the</strong> current date/time. By default, this isFalse.Template name:If template_name isn’t specified, this view will use <strong>the</strong> template /_archive_day.htmlby default.Template context:In addition to extra_context, <strong>the</strong> template’s context will be:• day: A datetime.date object representing <strong>the</strong> given day.• next_day: A datetime.date object representing <strong>the</strong> next day. If <strong>the</strong> next day is in <strong>the</strong> future, this will beNone.• previous_day: A datetime.date object representing <strong>the</strong> previous day. Unlike next_day, this willnever be None.• object_list: A list of objects available for <strong>the</strong> given day. This variable’s name depends on <strong>the</strong>template_object_name parameter, which is ’object’ by default. If template_object_name is’foo’, this variable’s name will be foo_list.django.views.generic.date_based.archive_todayDescription:A day archive page showing all objects for today. This is exactly <strong>the</strong> same as archive_day, except <strong>the</strong>year/month/day arguments are not used, and today’s date is used instead.django.views.generic.date_based.object_detailDescription:A page representing an individual object. If <strong>the</strong> object has a date value in <strong>the</strong> future, <strong>the</strong> view will throw a 404 errorby default, unless you set allow_future to True.Required arguments:• year: The object’s four-digit year (a string).• month: The object’s month , formatted according to <strong>the</strong> month_format argument.• day: The object’s day , formatted according to <strong>the</strong> day_format argument.• queryset: A QuerySet that contains <strong>the</strong> object.• date_field: The name of <strong>the</strong> DateField or DateTimeField in <strong>the</strong> QuerySet‘s model that <strong>the</strong>generic view should use to look up <strong>the</strong> object according to year, month and day.• Ei<strong>the</strong>r object_id or (slug and slug_field) is required.If you provide object_id, it should be <strong>the</strong> value of <strong>the</strong> primary-key field for <strong>the</strong> object being displayed onthis page.O<strong>the</strong>rwise, slug should be <strong>the</strong> slug of <strong>the</strong> given object, and slug_field should be <strong>the</strong> name of <strong>the</strong> slug fieldin <strong>the</strong> QuerySet‘s model. By default, slug_field is ’slug’.6.9. Generic views 653
<strong>Django</strong> <strong>Documentation</strong>, Release 1.2Optional arguments:• month_format: A format string that regulates what format <strong>the</strong> month parameter uses. This should be in <strong>the</strong>syntax accepted by Python’s time.strftime. (See <strong>the</strong> strftime docs.) It’s set to "%b" by default, which isa three-letter month abbreviation. To change it to use numbers, use "%m".• day_format: Like month_format, but for <strong>the</strong> day parameter. It defaults to "%d" (day of <strong>the</strong> month as adecimal number, 01-31).• template_name: The full name of a template to use in rendering <strong>the</strong> page. This lets you override <strong>the</strong> defaulttemplate name (see below).• template_name_field: The name of a field on <strong>the</strong> object whose value is <strong>the</strong> template name to use. Thislets you store template names in <strong>the</strong> data. In o<strong>the</strong>r words, if your object has a field ’<strong>the</strong>_template’ thatcontains a string ’foo.html’, and you set template_name_field to ’<strong>the</strong>_template’, <strong>the</strong>n <strong>the</strong>generic view for this object will use <strong>the</strong> template ’foo.html’.It’s a bit of a brain-bender, but it’s useful in some cases.• template_loader: The template loader to use when loading <strong>the</strong> template. By default, it’sdjango.template.loader.• extra_context: A dictionary of values to add to <strong>the</strong> template context. By default, this is an empty dictionary.If a value in <strong>the</strong> dictionary is callable, <strong>the</strong> generic view will call it just before rendering <strong>the</strong> template.• context_processors: A list of template-context processors to apply to <strong>the</strong> view’s template.• template_object_name: Designates <strong>the</strong> name of <strong>the</strong> template variable to use in <strong>the</strong> template context. Bydefault, this is ’object’.• mimetype: The MIME type to use for <strong>the</strong> resulting document. Defaults to <strong>the</strong> value of <strong>the</strong>DEFAULT_CONTENT_TYPE setting.• allow_future: A boolean specifying whe<strong>the</strong>r to include “future” objects on this page, where “future” meansobjects in which <strong>the</strong> field specified in date_field is greater than <strong>the</strong> current date/time. By default, this isFalse.Template name:If template_name isn’t specified, this view will use <strong>the</strong> template /_detail.htmlby default.Template context:In addition to extra_context, <strong>the</strong> template’s context will be:• object: The object. This variable’s name depends on <strong>the</strong> template_object_name parameter, which is’object’ by default. If template_object_name is ’foo’, this variable’s name will be foo.6.9.3 List/detail generic viewsThe list-detail generic-view framework (in <strong>the</strong> django.views.generic.list_detail module) is similar to<strong>the</strong> date-based one, except <strong>the</strong> former simply has two views: a list of objects and an individual object page.django.views.generic.list_detail.object_listDescription:A page representing a list of objects.Required arguments:654 Chapter 6. API Reference
<strong>Django</strong> <strong>Documentation</strong>, Release 1.2• queryset: A QuerySet that represents <strong>the</strong> objects.Optional arguments:• paginate_by: An integer specifying how many objects should be displayed per page. If this is given, <strong>the</strong>view will paginate objects with paginate_by objects per page. The view will expect ei<strong>the</strong>r a page querystring parameter (via GET) or a page variable specified in <strong>the</strong> URLconf. See Notes on pagination below.• page: The current page number, as an integer, or <strong>the</strong> string ’last’. This is 1-based. See Notes on paginationbelow.• template_name: The full name of a template to use in rendering <strong>the</strong> page. This lets you override <strong>the</strong> defaulttemplate name (see below).• template_loader: The template loader to use when loading <strong>the</strong> template. By default, it’sdjango.template.loader.• extra_context: A dictionary of values to add to <strong>the</strong> template context. By default, this is an empty dictionary.If a value in <strong>the</strong> dictionary is callable, <strong>the</strong> generic view will call it just before rendering <strong>the</strong> template.• allow_empty: A boolean specifying whe<strong>the</strong>r to display <strong>the</strong> page if no objects are available. If this is Falseand no objects are available, <strong>the</strong> view will raise a 404 instead of displaying an empty page. By default, this isTrue.• context_processors: A list of template-context processors to apply to <strong>the</strong> view’s template.• template_object_name: Designates <strong>the</strong> name of <strong>the</strong> template variable to use in <strong>the</strong> template context. Bydefault, this is ’object’. The view will append ’_list’ to <strong>the</strong> value of this parameter in determining <strong>the</strong>variable’s name.• mimetype: The MIME type to use for <strong>the</strong> resulting document. Defaults to <strong>the</strong> value of <strong>the</strong>DEFAULT_CONTENT_TYPE setting.Template name:If template_name isn’t specified, this view will use <strong>the</strong> template /_list.htmlby default.Template context: New in version 1.0: The paginator and page_obj context variables are new. In addition toextra_context, <strong>the</strong> template’s context will be:• object_list: The list of objects. This variable’s name depends on <strong>the</strong> template_object_name parameter,which is ’object’ by default. If template_object_name is ’foo’, this variable’s name willbe foo_list.• is_paginated: A boolean representing whe<strong>the</strong>r <strong>the</strong> results are paginated. Specifically, this is set to Falseif <strong>the</strong> number of available objects is less than or equal to paginate_by.If <strong>the</strong> results are paginated, <strong>the</strong> context will contain <strong>the</strong>se extra variables:• paginator: An instance of django.core.paginator.Paginator.• page_obj: An instance of django.core.paginator.Page.Notes on paginationIf paginate_by is specified, <strong>Django</strong> will paginate <strong>the</strong> results. You can specify <strong>the</strong> page number in <strong>the</strong> URL in oneof two ways:• Use <strong>the</strong> page parameter in <strong>the</strong> URLconf. For example, this is what your URLconf might look like:(r’^objects/page(?P[0-9]+)/$’, ’object_list’, dict(info_dict))6.9. Generic views 655
<strong>Django</strong> <strong>Documentation</strong>, Release 1.2• Pass <strong>the</strong> page number via <strong>the</strong> page query-string parameter. For example, a URL would look like this:/objects/?page=3• To loop over all <strong>the</strong> available page numbers, use <strong>the</strong> page_range variable. You can iterate over <strong>the</strong> listprovided by page_range to create a link to every page of results.These values and lists are 1-based, not 0-based, so <strong>the</strong> first page would be represented as page 1.For more on pagination, read <strong>the</strong> pagination documentation. New in version 1.0: Please, see <strong>the</strong> release notes As aspecial case, you are also permitted to use last as a value for page:/objects/?page=lastThis allows you to access <strong>the</strong> final page of results without first having to determine how many pages <strong>the</strong>re are.Note that page must be ei<strong>the</strong>r a valid page number or <strong>the</strong> value last; any o<strong>the</strong>r value for page will result in a 404error.django.views.generic.list_detail.object_detailA page representing an individual object.Description:A page representing an individual object.Required arguments:• queryset: A QuerySet that contains <strong>the</strong> object.• Ei<strong>the</strong>r object_id or (slug and slug_field) is required.If you provide object_id, it should be <strong>the</strong> value of <strong>the</strong> primary-key field for <strong>the</strong> object being displayed onthis page.O<strong>the</strong>rwise, slug should be <strong>the</strong> slug of <strong>the</strong> given object, and slug_field should be <strong>the</strong> name of <strong>the</strong> slug fieldin <strong>the</strong> QuerySet‘s model. By default, slug_field is ’slug’.Optional arguments:• template_name: The full name of a template to use in rendering <strong>the</strong> page. This lets you override <strong>the</strong> defaulttemplate name (see below).• template_name_field: The name of a field on <strong>the</strong> object whose value is <strong>the</strong> template name to use. Thislets you store template names in <strong>the</strong> data. In o<strong>the</strong>r words, if your object has a field ’<strong>the</strong>_template’ thatcontains a string ’foo.html’, and you set template_name_field to ’<strong>the</strong>_template’, <strong>the</strong>n <strong>the</strong>generic view for this object will use <strong>the</strong> template ’foo.html’.It’s a bit of a brain-bender, but it’s useful in some cases.• template_loader: The template loader to use when loading <strong>the</strong> template. By default, it’sdjango.template.loader.• extra_context: A dictionary of values to add to <strong>the</strong> template context. By default, this is an empty dictionary.If a value in <strong>the</strong> dictionary is callable, <strong>the</strong> generic view will call it just before rendering <strong>the</strong> template.• context_processors: A list of template-context processors to apply to <strong>the</strong> view’s template.• template_object_name: Designates <strong>the</strong> name of <strong>the</strong> template variable to use in <strong>the</strong> template context. Bydefault, this is ’object’.• mimetype: The MIME type to use for <strong>the</strong> resulting document. Defaults to <strong>the</strong> value of <strong>the</strong>DEFAULT_CONTENT_TYPE setting.656 Chapter 6. API Reference
<strong>Django</strong> <strong>Documentation</strong>, Release 1.2Template name:If template_name isn’t specified, this view will use <strong>the</strong> template /_detail.htmlby default.Template context:In addition to extra_context, <strong>the</strong> template’s context will be:• object: The object. This variable’s name depends on <strong>the</strong> template_object_name parameter, which is’object’ by default. If template_object_name is ’foo’, this variable’s name will be foo.6.9.4 Create/update/delete generic viewsThe django.views.generic.create_update module contains a set of functionsfor creating, editing and deleting objects. Changed in version 1.0: Please, see<strong>the</strong> release notes django.views.generic.create_update.create_object anddjango.views.generic.create_update.update_object now use <strong>the</strong> new forms library to buildand display <strong>the</strong> form.django.views.generic.create_update.create_objectDescription:A page that displays a form for creating an object, redisplaying <strong>the</strong> form with validation errors (if <strong>the</strong>re are any) andsaving <strong>the</strong> object.Required arguments:• Ei<strong>the</strong>r form_class or model is required.If you provide form_class, it should be a django.forms.ModelForm subclass. Use this argument whenyou need to customize <strong>the</strong> model’s form. See <strong>the</strong> ModelForm docs for more information.O<strong>the</strong>rwise, model should be a <strong>Django</strong> model class and <strong>the</strong> form used will be a standard ModelForm formodel.Optional arguments:• post_save_redirect: A URL to which <strong>the</strong> view will redirect after saving <strong>the</strong> object. By default, it’sobject.get_absolute_url().post_save_redirect may contain dictionary string formatting, which will be interpolated against <strong>the</strong>object’s field attributes. For example, you could use post_save_redirect="/polls/%(slug)s/".• login_required: A boolean that designates whe<strong>the</strong>r a user must be logged in, in order to see <strong>the</strong> page andsave changes. This hooks into <strong>the</strong> <strong>Django</strong> au<strong>the</strong>ntication system. By default, this is False.If this is True, and a non-logged-in user attempts to visit this page or save <strong>the</strong> form, <strong>Django</strong> will redirect <strong>the</strong>request to /accounts/login/.• template_name: The full name of a template to use in rendering <strong>the</strong> page. This lets you override <strong>the</strong> defaulttemplate name (see below).• template_loader: The template loader to use when loading <strong>the</strong> template. By default, it’sdjango.template.loader.• extra_context: A dictionary of values to add to <strong>the</strong> template context. By default, this is an empty dictionary.If a value in <strong>the</strong> dictionary is callable, <strong>the</strong> generic view will call it just before rendering <strong>the</strong> template.• context_processors: A list of template-context processors to apply to <strong>the</strong> view’s template.6.9. Generic views 657
<strong>Django</strong> <strong>Documentation</strong>, Release 1.2Template name:If template_name isn’t specified, this view will use <strong>the</strong> template /_form.htmlby default.Template context:In addition to extra_context, <strong>the</strong> template’s context will be:• form: A django.forms.ModelForm instance representing <strong>the</strong> form for creating <strong>the</strong> object. This lets yourefer to form fields easily in <strong>the</strong> template system.For example, if <strong>the</strong> model has two fields, name and address:{{ form.name.label_tag }} {{ form.name }}{{ form.address.label_tag }} {{ form.address }}See <strong>the</strong> forms documentation for more information about using Form objects in templates.django.views.generic.create_update.update_objectDescription:A page that displays a form for editing an existing object, redisplaying <strong>the</strong> form with validation errors (if <strong>the</strong>re areany) and saving changes to <strong>the</strong> object. This uses a form automatically generated from <strong>the</strong> object’s model class.Required arguments:• Ei<strong>the</strong>r form_class or model is required.If you provide form_class, it should be a django.forms.ModelForm subclass. Use this argument whenyou need to customize <strong>the</strong> model’s form. See <strong>the</strong> ModelForm docs for more information.O<strong>the</strong>rwise, model should be a <strong>Django</strong> model class and <strong>the</strong> form used will be a standard ModelForm formodel.• Ei<strong>the</strong>r object_id or (slug and slug_field) is required.If you provide object_id, it should be <strong>the</strong> value of <strong>the</strong> primary-key field for <strong>the</strong> object being displayed onthis page.O<strong>the</strong>rwise, slug should be <strong>the</strong> slug of <strong>the</strong> given object, and slug_field should be <strong>the</strong> name of <strong>the</strong> slug fieldin <strong>the</strong> QuerySet‘s model. By default, slug_field is ’slug’.Optional arguments:• post_save_redirect: A URL to which <strong>the</strong> view will redirect after saving <strong>the</strong> object. By default, it’sobject.get_absolute_url().post_save_redirect may contain dictionary string formatting, which will be interpolated against <strong>the</strong>object’s field attributes. For example, you could use post_save_redirect="/polls/%(slug)s/".• login_required: A boolean that designates whe<strong>the</strong>r a user must be logged in, in order to see <strong>the</strong> page andsave changes. This hooks into <strong>the</strong> <strong>Django</strong> au<strong>the</strong>ntication system. By default, this is False.If this is True, and a non-logged-in user attempts to visit this page or save <strong>the</strong> form, <strong>Django</strong> will redirect <strong>the</strong>request to /accounts/login/.• template_name: The full name of a template to use in rendering <strong>the</strong> page. This lets you override <strong>the</strong> defaulttemplate name (see below).658 Chapter 6. API Reference
<strong>Django</strong> <strong>Documentation</strong>, Release 1.2• template_loader: The template loader to use when loading <strong>the</strong> template. By default, it’sdjango.template.loader.• extra_context: A dictionary of values to add to <strong>the</strong> template context. By default, this is an empty dictionary.If a value in <strong>the</strong> dictionary is callable, <strong>the</strong> generic view will call it just before rendering <strong>the</strong> template.• context_processors: A list of template-context processors to apply to <strong>the</strong> view’s template.• template_object_name: Designates <strong>the</strong> name of <strong>the</strong> template variable to use in <strong>the</strong> template context. Bydefault, this is ’object’.Template name:If template_name isn’t specified, this view will use <strong>the</strong> template /_form.htmlby default.Template context:In addition to extra_context, <strong>the</strong> template’s context will be:• form: A django.forms.ModelForm instance representing <strong>the</strong> form for editing <strong>the</strong> object. This lets yourefer to form fields easily in <strong>the</strong> template system.For example, if <strong>the</strong> model has two fields, name and address:{{ form.name.label_tag }} {{ form.name }}{{ form.address.label_tag }} {{ form.address }}See <strong>the</strong> forms documentation for more information about using Form objects in templates.• object: The original object being edited. This variable’s name depends on <strong>the</strong> template_object_nameparameter, which is ’object’ by default. If template_object_name is ’foo’, this variable’s namewill be foo.django.views.generic.create_update.delete_objectDescription:A view that displays a confirmation page and deletes an existing object. The given object will only be deleted if <strong>the</strong>request method is POST. If this view is fetched via GET, it will display a confirmation page that should contain a formthat POSTs to <strong>the</strong> same URL.Required arguments:• model: The <strong>Django</strong> model class of <strong>the</strong> object that <strong>the</strong> form will create.• Ei<strong>the</strong>r object_id or (slug and slug_field) is required.If you provide object_id, it should be <strong>the</strong> value of <strong>the</strong> primary-key field for <strong>the</strong> object being displayed onthis page.O<strong>the</strong>rwise, slug should be <strong>the</strong> slug of <strong>the</strong> given object, and slug_field should be <strong>the</strong> name of <strong>the</strong> slug fieldin <strong>the</strong> QuerySet‘s model. By default, slug_field is ’slug’.• post_delete_redirect: A URL to which <strong>the</strong> view will redirect after deleting <strong>the</strong> object.Optional arguments:• login_required: A boolean that designates whe<strong>the</strong>r a user must be logged in, in order to see <strong>the</strong> page andsave changes. This hooks into <strong>the</strong> <strong>Django</strong> au<strong>the</strong>ntication system. By default, this is False.6.9. Generic views 659
<strong>Django</strong> <strong>Documentation</strong>, Release 1.2If this is True, and a non-logged-in user attempts to visit this page or save <strong>the</strong> form, <strong>Django</strong> will redirect <strong>the</strong>request to /accounts/login/.• template_name: The full name of a template to use in rendering <strong>the</strong> page. This lets you override <strong>the</strong> defaulttemplate name (see below).• template_loader: The template loader to use when loading <strong>the</strong> template. By default, it’sdjango.template.loader.• extra_context: A dictionary of values to add to <strong>the</strong> template context. By default, this is an empty dictionary.If a value in <strong>the</strong> dictionary is callable, <strong>the</strong> generic view will call it just before rendering <strong>the</strong> template.• context_processors: A list of template-context processors to apply to <strong>the</strong> view’s template.• template_object_name: Designates <strong>the</strong> name of <strong>the</strong> template variable to use in <strong>the</strong> template context. Bydefault, this is ’object’.Template name:If template_name isn’t specified, this view will use <strong>the</strong> template /_confirm_delete.htmlby default.Template context:In addition to extra_context, <strong>the</strong> template’s context will be:• object: The original object that’s about to be deleted. This variable’s name depends on <strong>the</strong>template_object_name parameter, which is ’object’ by default. If template_object_name is’foo’, this variable’s name will be foo.6.10 MiddlewareThis document explains all middleware components that come with <strong>Django</strong>. For information on how how to use <strong>the</strong>mand how to write your own middleware, see <strong>the</strong> middleware usage guide.6.10.1 Available middlewareCache middlewareclass UpdateCacheMiddlewareclass FetchFromCacheMiddlewareEnable <strong>the</strong> site-wide cache. If <strong>the</strong>se are enabled, each <strong>Django</strong>-powered page will be cached for as long as <strong>the</strong>CACHE_MIDDLEWARE_SECONDS setting defines. See <strong>the</strong> cache documentation.“Common” middlewareclass CommonMiddlewareAdds a few conveniences for perfectionists:• Forbids access to user agents in <strong>the</strong> DISALLOWED_USER_AGENTS setting, which should be a list of strings.• Performs URL rewriting based on <strong>the</strong> APPEND_SLASH and PREPEND_WWW settings.If APPEND_SLASH is True and <strong>the</strong> initial URL doesn’t end with a slash, and it is not found in <strong>the</strong> URLconf,<strong>the</strong>n a new URL is formed by appending a slash at <strong>the</strong> end. If this new URL is found in <strong>the</strong> URLconf, <strong>the</strong>n<strong>Django</strong> redirects <strong>the</strong> request to this new URL. O<strong>the</strong>rwise, <strong>the</strong> initial URL is processed as usual.660 Chapter 6. API Reference
<strong>Django</strong> <strong>Documentation</strong>, Release 1.2For example, foo.com/bar will be redirected to foo.com/bar/ if you don’t have a valid URL pattern forfoo.com/bar but do have a valid pattern for foo.com/bar/. Changed in version 1.0: The behavior ofAPPEND_SLASH has changed slightly in this version. It didn’t used to check whe<strong>the</strong>r <strong>the</strong> pattern was matchedin <strong>the</strong> URLconf. If PREPEND_WWW is True, URLs that lack a leading “www.” will be redirected to <strong>the</strong> sameURL with a leading “www.”Both of <strong>the</strong>se options are meant to normalize URLs. The philosophy is that each URL should exist in one,and only one, place. Technically a URL foo.com/bar is distinct from foo.com/bar/ – a search-engineindexer would treat <strong>the</strong>m as separate URLs – so it’s best practice to normalize URLs.• Sends broken link notification emails to MANAGERS if SEND_BROKEN_LINK_EMAILS is set to True.• Handles ETags based on <strong>the</strong> USE_ETAGS setting. If USE_ETAGS is set to True, <strong>Django</strong> will calculate an ETagfor each request by MD5-hashing <strong>the</strong> page content, and it’ll take care of sending Not Modified responses,if appropriate.View metadata middlewareclass XViewMiddlewareSends custom X-View HTTP headers to HEAD requests that come from IP addresses defined in <strong>the</strong> INTERNAL_IPSsetting. This is used by <strong>Django</strong>’s automatic documentation system.GZIP middlewareclass GZipMiddlewareCompresses content for browsers that understand gzip compression (all modern browsers).It is suggested to place this first in <strong>the</strong> middleware list, so that <strong>the</strong> compression of <strong>the</strong> response content is <strong>the</strong> last thingthat happens. Will not compress content bodies less than 200 bytes long, when <strong>the</strong> response code is something o<strong>the</strong>rthan 200, JavaScript files (for IE compatibility), or responses that have <strong>the</strong> Content-Encoding header alreadyspecified.Conditional GET middlewareclass ConditionalGetMiddlewareHandles conditional GET operations. If <strong>the</strong> response has a ETag or Last-Modified header, and <strong>the</strong> request hasIf-None-Match or If-Modified-Since, <strong>the</strong> response is replaced by an HttpNotModified.Also sets <strong>the</strong> Date and Content-Length response-headers.Reverse proxy middlewareclass SetRemoteAddrFromForwardedForChanged in version 1.1: Please, see <strong>the</strong> release notes This middleware was removed in <strong>Django</strong> 1.1. See <strong>the</strong> releasenotes for details.Locale middlewareclass LocaleMiddlewareEnables language selection based on data from <strong>the</strong> request. It customizes content for each user. See <strong>the</strong> internationalizationdocumentation.6.10. Middleware 661
<strong>Django</strong> <strong>Documentation</strong>, Release 1.2Message middlewareclass MessageMiddlewareNew in version 1.2: MessageMiddleware was added. Enables cookie- and session-based message support. See<strong>the</strong> messages documentation.Session middlewareclass SessionMiddlewareEnables session support. See <strong>the</strong> session documentation.Au<strong>the</strong>ntication middlewareclass Au<strong>the</strong>nticationMiddlewareAdds <strong>the</strong> user attribute, representing <strong>the</strong> currently-logged-in user, to every incoming HttpRequest object. SeeAu<strong>the</strong>ntication in Web requests.CSRF protection middlewareclass CsrfMiddlewareNew in version 1.0: Please, see <strong>the</strong> release notes Adds protection against Cross Site Request Forgeries by addinghidden form fields to POST forms and checking requests for <strong>the</strong> correct value. See <strong>the</strong> Cross Site Request Forgeryprotection documentation.Transaction middlewareclass TransactionMiddlewareBinds commit and rollback to <strong>the</strong> request/response phase. If a view function runs successfully, a commit is done. If itfails with an exception, a rollback is done.The order of this middleware in <strong>the</strong> stack is important: middleware modules running outside of it run with commiton-save- <strong>the</strong> default <strong>Django</strong> behavior. Middleware modules running inside it (coming later in <strong>the</strong> stack) will be under<strong>the</strong> same transaction control as <strong>the</strong> view functions.See <strong>the</strong> transaction management documentation.6.11 ModelsModel API reference. For introductory material, see Models.6.11.1 Model field referenceThis document contains all <strong>the</strong> gory details about all <strong>the</strong> field options and field types <strong>Django</strong>’s got to offer.See Also:If <strong>the</strong> built-in fields don’t do <strong>the</strong> trick, you can easily write your own custom model fields.662 Chapter 6. API Reference
<strong>Django</strong> <strong>Documentation</strong>, Release 1.2Note: Technically, <strong>the</strong>se models are defined in django.db.models.fields, but for convenience <strong>the</strong>y’re importedinto django.db.models; <strong>the</strong> standard convention is to use from django.db import models andrefer to fields as models.Field.Field optionsThe following arguments are available to all field types. All are optional.nullField.nullIf True, <strong>Django</strong> will store empty values as NULL in <strong>the</strong> database. Default is False.Note that empty string values will always get stored as empty strings, not as NULL. Only use null=True for nonstringfields such as integers, booleans and dates. For both types of fields, you will also need to set blank=True ifyou wish to permit empty values in forms, as <strong>the</strong> null parameter only affects database storage (see blank).Avoid using null on string-based fields such as CharField and TextField unless you have an excellent reason.If a string-based field has null=True, that means it has two possible values for “no data”: NULL, and <strong>the</strong> emptystring. In most cases, it’s redundant to have two possible values for “no data;” <strong>Django</strong> convention is to use <strong>the</strong> emptystring, not NULL.Note: When using <strong>the</strong> Oracle database backend, <strong>the</strong> null=True option will be coerced for string-based fields thathave <strong>the</strong> empty string as a possible value, and <strong>the</strong> value NULL will be stored to denote <strong>the</strong> empty string.blankField.blankIf True, <strong>the</strong> field is allowed to be blank. Default is False.Note that this is different than null. null is purely database-related, whereas blank is validation-related. Ifa field has blank=True, validation on <strong>Django</strong>’s admin site will allow entry of an empty value. If a field hasblank=False, <strong>the</strong> field will be required.choicesField.choicesAn iterable (e.g., a list or tuple) of 2-tuples to use as choices for this field.If this is given, <strong>Django</strong>’s admin will use a select box instead of <strong>the</strong> standard text field and will limit choices to <strong>the</strong>choices given.A choices list looks like this:YEAR_IN_SCHOOL_CHOICES = ((’FR’, ’Freshman’),(’SO’, ’Sophomore’),(’JR’, ’Junior’),(’SR’, ’Senior’),6.11. Models 663
<strong>Django</strong> <strong>Documentation</strong>, Release 1.2)(’GR’, ’Graduate’),The first element in each tuple is <strong>the</strong> actual value to be stored. The second element is <strong>the</strong> human-readable name for<strong>the</strong> option.The choices list can be defined ei<strong>the</strong>r as part of your model class:class Foo(models.Model):GENDER_CHOICES = ((’M’, ’Male’),(’F’, ’Female’),)gender = models.CharField(max_length=1, choices=GENDER_CHOICES)or outside your model class altoge<strong>the</strong>r:GENDER_CHOICES = ((’M’, ’Male’),(’F’, ’Female’),)class Foo(models.Model):gender = models.CharField(max_length=1, choices=GENDER_CHOICES)You can also collect your available choices into named groups that can be used for organizational purposes:MEDIA_CHOICES = ((’Audio’, ((’vinyl’, ’Vinyl’),(’cd’, ’CD’),)),(’Video’, ((’vhs’, ’VHS Tape’),(’dvd’, ’DVD’),)),(’unknown’, ’Unknown’),)The first element in each tuple is <strong>the</strong> name to apply to <strong>the</strong> group. The second element is an iterable of 2-tuples, wi<strong>the</strong>ach 2-tuple containing a value and a human-readable name for an option. Grouped options may be combined withungrouped options within a single list (such as <strong>the</strong> unknown option in this example).For each model field that has choices set, <strong>Django</strong> will add a method to retrieve <strong>the</strong> human-readable name for <strong>the</strong>field’s current value. See get_FOO_display() in <strong>the</strong> database API documentation.Finally, note that choices can be any iterable object – not necessarily a list or tuple. This lets you construct choicesdynamically. But if you find yourself hacking choices to be dynamic, you’re probably better off using a properdatabase table with a ForeignKey. choices is meant for static data that doesn’t change much, if ever.db_columnField.db_columnThe name of <strong>the</strong> database column to use for this field. If this isn’t given, <strong>Django</strong> will use <strong>the</strong> field’s name.If your database column name is an SQL reserved word, or contains characters that aren’t allowed in Python variablenames – notably, <strong>the</strong> hyphen – that’s OK. <strong>Django</strong> quotes column and table names behind <strong>the</strong> scenes.664 Chapter 6. API Reference
<strong>Django</strong> <strong>Documentation</strong>, Release 1.2db_indexField.db_indexIf True, djadmin:django-admin.py sqlindexes will output a CREATE INDEX statement for this field.db_tablespaceField.db_tablespaceNew in version 1.0: Please, see <strong>the</strong> release notes The name of <strong>the</strong> database tablespace to use for this field’s index,if this field is indexed. The default is <strong>the</strong> project’s DEFAULT_INDEX_TABLESPACE setting, if set, or <strong>the</strong>db_tablespace of <strong>the</strong> model, if any. If <strong>the</strong> backend doesn’t support tablespaces, this option is ignored.defaultField.defaultThe default value for <strong>the</strong> field. This can be a value or a callable object. If callable it will be called every time a newobject is created.editableField.editableIf False, <strong>the</strong> field will not be editable in <strong>the</strong> admin or via forms automatically generated from <strong>the</strong> model class.Default is True.error_messagesNew in version 1.2: Please, see <strong>the</strong> release notesField.error_messagesThe error_messages argument lets you override <strong>the</strong> default messages that <strong>the</strong> field will raise. Pass in a dictionarywith keys matching <strong>the</strong> error messages you want to override.help_textField.help_textExtra “help” text to be displayed under <strong>the</strong> field on <strong>the</strong> object’s admin form. It’s useful for documentation even if yourobject doesn’t have an admin form.Note that this value is not HTML-escaped when it’s displayed in <strong>the</strong> admin interface. This lets you include HTML inhelp_text if you so desire. For example:help_text="Please use <strong>the</strong> following format: YYYY-MM-DD."Alternatively you can use plain text and django.utils.html.escape() to escape any HTML special characters.6.11. Models 665
<strong>Django</strong> <strong>Documentation</strong>, Release 1.2primary_keyField.primary_keyIf True, this field is <strong>the</strong> primary key for <strong>the</strong> model.If you don’t specify primary_key=True for any fields in your model, <strong>Django</strong> will automatically add anIntegerField to hold <strong>the</strong> primary key, so you don’t need to set primary_key=True on any of your fieldsunless you want to override <strong>the</strong> default primary-key behavior. For more, see Automatic primary key fields.primary_key=True implies null=False and unique=True. Only one primary key is allowed on an object.uniqueField.uniqueIf True, this field must be unique throughout <strong>the</strong> table.This is enforced at <strong>the</strong> database level and at <strong>the</strong> <strong>Django</strong> admin-form level. If you try to save a model with a duplicatevalue in a unique field, a django.db.IntegrityError will be raised by <strong>the</strong> model’s save() method.This option is valid on all field types except ManyToManyField and FileField.unique_for_dateField.unique_for_dateSet this to <strong>the</strong> name of a DateField or DateTimeField to require that this field be unique for <strong>the</strong> value of <strong>the</strong>date field.For example, if you have a field title that has unique_for_date="pub_date", <strong>the</strong>n <strong>Django</strong> wouldn’t allow<strong>the</strong> entry of two records with <strong>the</strong> same title and pub_date.This is enforced at <strong>the</strong> <strong>Django</strong> admin-form level but not at <strong>the</strong> database level.unique_for_monthField.unique_for_monthLike unique_for_date, but requires <strong>the</strong> field to be unique with respect to <strong>the</strong> month.unique_for_yearField.unique_for_yearLike unique_for_date and unique_for_month.verbose_nameField.verbose_nameA human-readable name for <strong>the</strong> field. If <strong>the</strong> verbose name isn’t given, <strong>Django</strong> will automatically create it using <strong>the</strong>field’s attribute name, converting underscores to spaces. See Verbose field names.666 Chapter 6. API Reference
<strong>Django</strong> <strong>Documentation</strong>, Release 1.2validatorsNew in version 1.2: Please, see <strong>the</strong> release notesField.validatorsA list of validators to run for this field.See <strong>the</strong> validators documentation for more information.Field typesAutoFieldclass AutoField(**options)An IntegerField that automatically increments according to available IDs. You usually won’t need to use thisdirectly; a primary key field will automatically be added to your model if you don’t specify o<strong>the</strong>rwise. See Automaticprimary key fields.BigIntegerFieldNew in version 1.2: Please, see <strong>the</strong> release notesclass BigIntegerField([**options])A 64 bit integer, much like an IntegerField except that it is guaranteed to fit numbers from -9223372036854775808 to 9223372036854775807. The admin represents this as an (asingle-line input).BooleanFieldclass BooleanField(**options)A true/false field.The admin represents this as a checkbox. Changed in version 1.2: Please, see <strong>the</strong> release notesCharFieldclass CharField(max_length=None[, **options])A string field, for small- to large-sized strings.For large amounts of text, use TextField.The admin represents this as an (a single-line input).CharField has one extra required argument:CharField.max_lengthThe maximum length (in characters) of <strong>the</strong> field. The max_length is enforced at <strong>the</strong> database level and in<strong>Django</strong>’s validation.Note: If you are writing an application that must be portable to multiple database backends, you should be aware that<strong>the</strong>re are restrictions on max_length for some backends. Refer to <strong>the</strong> database backend notes for details.6.11. Models 667
<strong>Django</strong> <strong>Documentation</strong>, Release 1.2MySQL usersIf you are using this field with MySQLdb 1.2.2 and <strong>the</strong> utf8_bin collation (which is not <strong>the</strong> default), <strong>the</strong>re are someissues to be aware of. Refer to <strong>the</strong> MySQL database notes for details.CommaSeparatedIntegerFieldclass CommaSeparatedIntegerField(max_length=None[, **options])A field of integers separated by commas. As in CharField, <strong>the</strong> max_length argument is required and <strong>the</strong> noteabout database portability mentioned <strong>the</strong>re should be heeded.DateFieldclass DateField([auto_now=False, auto_now_add=False, **options])A date, represented in Python by a datetime.date instance. Has a few extra, optional arguments:DateField.auto_nowAutomatically set <strong>the</strong> field to now every time <strong>the</strong> object is saved. Useful for “last-modified” timestamps. Notethat <strong>the</strong> current date is always used; it’s not just a default value that you can override.DateField.auto_now_addAutomatically set <strong>the</strong> field to now when <strong>the</strong> object is first created. Useful for creation of timestamps. Note that<strong>the</strong> current date is always used; it’s not just a default value that you can override.The admin represents this as an with a JavaScript calendar, and a shortcut for “Today”.The JavaScript calendar will always start <strong>the</strong> week on a Sunday.Note: As currently implemented, setting auto_now or auto_add_now to True will cause <strong>the</strong> field to haveeditable=False and blank=True set.DateTimeFieldclass DateTimeField([auto_now=False, auto_now_add=False, **options])A date and time, represented in Python by a datetime.datetime instance. Takes <strong>the</strong> same extra arguments asDateField.The admin represents this as two fields, with JavaScript shortcuts.DecimalFieldNew in version 1.0: Please, see <strong>the</strong> release notesclass DecimalField(max_digits=None, decimal_places=None[, **options])A fixed-precision decimal number, represented in Python by a Decimal instance. Has two required arguments:DecimalField.max_digitsThe maximum number of digits allowed in <strong>the</strong> numberDecimalField.decimal_placesThe number of decimal places to store with <strong>the</strong> number668 Chapter 6. API Reference
<strong>Django</strong> <strong>Documentation</strong>, Release 1.2For example, to store numbers up to 999 with a resolution of 2 decimal places, you’d use:models.DecimalField(..., max_digits=5, decimal_places=2)And to store numbers up to approximately one billion with a resolution of 10 decimal places:models.DecimalField(..., max_digits=19, decimal_places=10)The admin represents this as an (a single-line input).EmailFieldclass EmailField([max_length=75, **options])A CharField that checks that <strong>the</strong> value is a valid e-mail address.FileFieldclass FileField(upload_to=None[, max_length=100, **options])A file-upload field.Note: The primary_key and unique arguments are not supported, and will raise a TypeError if used.Has one required argument:FileField.upload_toA local filesystem path that will be appended to your MEDIA_ROOT setting to determine <strong>the</strong> value of <strong>the</strong> urlattribute.This path may contain strftime formatting, which will be replaced by <strong>the</strong> date/time of <strong>the</strong> file upload (so thatuploaded files don’t fill up <strong>the</strong> given directory). Changed in version 1.0: Please, see <strong>the</strong> release notes This mayalso be a callable, such as a function, which will be called to obtain <strong>the</strong> upload path, including <strong>the</strong> filename.This callable must be able to accept two arguments, and return a Unix-style path (with forward slashes) to bepassed along to <strong>the</strong> storage system. The two arguments that will be passed are:ArgumentDescriptioninstanceAn instance of <strong>the</strong> model where <strong>the</strong> FileField is defined. More specifically, this is <strong>the</strong>particular instance where <strong>the</strong> current file is being attached.In most cases, this object will not have been saved to <strong>the</strong> database yet, so if it uses <strong>the</strong> defaultAutoField, it might not yet have a value for its primary key field.filenameThe filename that was originally given to <strong>the</strong> file. This may or may not be taken into accountwhen determining <strong>the</strong> final destination path.Also has one optional argument:FileField.storageNew in version 1.0: Please, see <strong>the</strong> release notes Optional. A storage object, which handles <strong>the</strong> storage andretrieval of your files. See Managing files for details on how to provide this object.The admin represents this field as an (a file-upload widget).Using a FileField or an ImageField (see below) in a model takes a few steps:1. In your settings file, you’ll need to define MEDIA_ROOT as <strong>the</strong> full path to a directory where you’d like <strong>Django</strong>to store uploaded files. (For performance, <strong>the</strong>se files are not stored in <strong>the</strong> database.) Define MEDIA_URL as <strong>the</strong>base public URL of that directory. Make sure that this directory is writable by <strong>the</strong> Web server’s user account.6.11. Models 669
<strong>Django</strong> <strong>Documentation</strong>, Release 1.22. Add <strong>the</strong> FileField or ImageField to your model, making sure to define <strong>the</strong> upload_to option to tell<strong>Django</strong> to which subdirectory of MEDIA_ROOT it should upload files.3. All that will be stored in your database is a path to <strong>the</strong> file (relative to MEDIA_ROOT). You’ll most likelywant to use <strong>the</strong> convenience url function provided by <strong>Django</strong>. For example, if your ImageField is calledmug_shot, you can get <strong>the</strong> absolute path to your image in a template with {{ object.mug_shot.url}}.For example, say your MEDIA_ROOT is set to ’/home/media’, and upload_to is set to’photos/%Y/%m/%d’. The ’%Y/%m/%d’ part of upload_to is strftime formatting; ’%Y’ is <strong>the</strong> fourdigityear, ’%m’ is <strong>the</strong> two-digit month and ’%d’ is <strong>the</strong> two-digit day. If you upload a file on Jan. 15, 2007, it will besaved in <strong>the</strong> directory /home/media/photos/2007/01/15.If you want to retrieve <strong>the</strong> upload file’s on-disk filename, or a URL that refers to that file, or <strong>the</strong> file’s size, you can use<strong>the</strong> name, url and size attributes; see Managing files.Note that whenever you deal with uploaded files, you should pay close attention to where you’re uploading <strong>the</strong>m andwhat type of files <strong>the</strong>y are, to avoid security holes. Validate all uploaded files so that you’re sure <strong>the</strong> files are what youthink <strong>the</strong>y are. For example, if you blindly let somebody upload files, without validation, to a directory that’s withinyour Web server’s document root, <strong>the</strong>n somebody could upload a CGI or PHP script and execute that script by visitingits URL on your site. Don’t allow that. New in version 1.0: The max_length argument was added in this version.By default, FileField instances are created as varchar(100) columns in your database. As with o<strong>the</strong>r fields,you can change <strong>the</strong> maximum length using <strong>the</strong> max_length argument.FileField and FieldFile When you access a FileField on a model, you are given an instance of FieldFile asa proxy for accessing <strong>the</strong> underlying file. This class has several methods that can be used to interact with file data:FieldFile.open(mode=’rb’)Behaves like <strong>the</strong> standard Python open() method and opens <strong>the</strong> file associated with this instance in <strong>the</strong> mode specifiedby mode.FieldFile.close()Behaves like <strong>the</strong> standard Python file.close() method and closes <strong>the</strong> file associated with this instance.FieldFile.save(name, content, save=True)This method takes a filename and file contents and passes <strong>the</strong>m to <strong>the</strong> storage class for <strong>the</strong> field, <strong>the</strong>n associates <strong>the</strong>stored file with <strong>the</strong> model field. If you want to manually associate file data with FileField instances on your model,<strong>the</strong> save() method is used to persist that file data.Takes two required arguments: name which is <strong>the</strong> name of <strong>the</strong> file, and content which is a file-like object containing<strong>the</strong> file’s contents. The optional save argument controls whe<strong>the</strong>r or not <strong>the</strong> instance is saved after <strong>the</strong> file has beenaltered. Defaults to True.FieldFile.delete(save=True)Deletes <strong>the</strong> file associated with this instance and clears all attributes on <strong>the</strong> field. Note: This method will close <strong>the</strong> fileif it happens to be open when delete() is called.The optional save argument controls whe<strong>the</strong>r or not <strong>the</strong> instance is saved after <strong>the</strong> file has been deleted. Defaults toTrue.FilePathFieldclass FilePathField(path=None[, match=None, recursive=False, max_length=100, **options])A CharField whose choices are limited to <strong>the</strong> filenames in a certain directory on <strong>the</strong> filesystem. Has three specialarguments, of which <strong>the</strong> first is required:670 Chapter 6. API Reference
<strong>Django</strong> <strong>Documentation</strong>, Release 1.2FilePathField.pathRequired. The absolute filesystem path to a directory from which this FilePathField should get its choices.Example: "/home/images".FilePathField.matchOptional. A regular expression, as a string, that FilePathField will use to filter filenames. Note that <strong>the</strong>regex will be applied to <strong>the</strong> base filename, not <strong>the</strong> full path. Example: "foo.*\.txt$", which will match afile called foo23.txt but not bar.txt or foo23.gif.FilePathField.recursiveOptional. Ei<strong>the</strong>r True or False. Default is False. Specifies whe<strong>the</strong>r all subdirectories of path should beincludedOf course, <strong>the</strong>se arguments can be used toge<strong>the</strong>r.The one potential gotcha is that match applies to <strong>the</strong> base filename, not <strong>the</strong> full path. So, this example:FilePathField(path="/home/images", match="foo.*", recursive=True)...will match /home/images/foo.gif but not /home/images/foo/bar.gif because <strong>the</strong> match applies to<strong>the</strong> base filename (foo.gif and bar.gif). New in version 1.0: The max_length argument was added in thisversion. By default, FilePathField instances are created as varchar(100) columns in your database. As witho<strong>the</strong>r fields, you can change <strong>the</strong> maximum length using <strong>the</strong> max_length argument.FloatFieldclass FloatField([**options])Changed in version 1.0: Please, see <strong>the</strong> release notes A floating-point number represented in Python by a floatinstance.The admin represents this as an (a single-line input).ImageFieldclass ImageField(upload_to=None[, height_field=None, width_field=None, max_length=100, **options])Inherits all attributes and methods from FileField, but also validates that <strong>the</strong> uploaded object is a valid image.In addition to <strong>the</strong> special attributes that are available for FileField, an ImageField also has height and widthattributes.To facilitate querying on those attributes, ImageField has two extra optional arguments:ImageField.height_fieldName of a model field which will be auto-populated with <strong>the</strong> height of <strong>the</strong> image each time <strong>the</strong> model instanceis saved.ImageField.width_fieldName of a model field which will be auto-populated with <strong>the</strong> width of <strong>the</strong> image each time <strong>the</strong> model instanceis saved.Requires <strong>the</strong> Python Imaging Library. New in version 1.0: The max_length argument was added in this version.By default, ImageField instances are created as varchar(100) columns in your database. As with o<strong>the</strong>r fields,you can change <strong>the</strong> maximum length using <strong>the</strong> max_length argument.6.11. Models 671
<strong>Django</strong> <strong>Documentation</strong>, Release 1.2IntegerFieldclass IntegerField([**options])An integer. The admin represents this as an (a single-line input).IPAddressFieldclass IPAddressField([**options])An IP address, in string format (e.g. “192.0.2.30”). The admin represents this as an (asingle-line input).NullBooleanFieldclass NullBooleanField([**options])Like a BooleanField, but allows NULL as one of <strong>the</strong> options. Use this instead of a BooleanField withnull=True. The admin represents this as a box with “Unknown”, “Yes” and “No” choices.PositiveIntegerFieldclass PositiveIntegerField([**options])Like an IntegerField, but must be positive.PositiveSmallIntegerFieldclass PositiveSmallIntegerField([**options])Like a PositiveIntegerField, but only allows values under a certain (database-dependent) point.SlugFieldclass SlugField([max_length=50, **options])Slug is a newspaper term. A slug is a short label for something, containing only letters, numbers, underscores orhyphens. They’re generally used in URLs.Like a CharField, you can specify max_length (read <strong>the</strong> note about database portability and max_length in thatsection, too). If max_length is not specified, <strong>Django</strong> will use a default length of 50.Implies setting Field.db_index to True.It is often useful to automatically prepopulate a SlugField based on <strong>the</strong> value of some o<strong>the</strong>r value. You can do thisautomatically in <strong>the</strong> admin using prepopulated_fields.SmallIntegerFieldclass SmallIntegerField([**options])Like an IntegerField, but only allows values under a certain (database-dependent) point.672 Chapter 6. API Reference
<strong>Django</strong> <strong>Documentation</strong>, Release 1.2TextFieldclass TextField([**options])A large text field. The admin represents this as a (a multi-line input).MySQL usersIf you are using this field with MySQLdb 1.2.1p2 and <strong>the</strong> utf8_bin collation (which is not <strong>the</strong> default), <strong>the</strong>re aresome issues to be aware of. Refer to <strong>the</strong> MySQL database notes for details.TimeFieldclass TimeField([auto_now=False, auto_now_add=False, **options])A time, represented in Python by a datetime.time instance. Accepts <strong>the</strong> same auto-population options asDateField.The admin represents this as an with some JavaScript shortcuts.URLFieldclass URLField([verify_exists=True, max_length=200, **options])A CharField for a URL. Has one extra optional argument:URLField.verify_existsIf True (<strong>the</strong> default), <strong>the</strong> URL given will be checked for existence (i.e., <strong>the</strong> URL actually loads and doesn’tgive a 404 response).Note that when you’re using <strong>the</strong> single-threaded development server, validating a URL being served by <strong>the</strong> sameserver will hang. This should not be a problem for multithreaded servers.The admin represents this as an (a single-line input).Like all CharField subclasses, URLField takes <strong>the</strong> optional max_length, a default of 200 is used.XMLFieldclass XMLField(schema_path=None[, **options])A TextField that checks that <strong>the</strong> value is valid XML that matches a given schema. Takes one required argument:schema_pathThe filesystem path to a RelaxNG schema against which to validate <strong>the</strong> field.Relationship fields<strong>Django</strong> also defines a set of fields that represent relations.6.11. Models 673
<strong>Django</strong> <strong>Documentation</strong>, Release 1.2ForeignKeyclass ForeignKey(o<strong>the</strong>rmodel[, **options])A many-to-one relationship. Requires a positional argument: <strong>the</strong> class to which <strong>the</strong> model is related. To create a recursiverelationship – an object that has a many-to-one relationship with itself – use models.ForeignKey(’self’).If you need to create a relationship on a model that has not yet been defined, you can use <strong>the</strong> name of <strong>the</strong> model,ra<strong>the</strong>r than <strong>the</strong> model object itself:class Car(models.Model):manufacturer = models.ForeignKey(’Manufacturer’)# ...class Manufacturer(models.Model):# ...New in version 1.0: Please, see <strong>the</strong> release notes To refer to models defined in ano<strong>the</strong>r application, you can explicitlyspecify a model with <strong>the</strong> full application label. For example, if <strong>the</strong> Manufacturer model above is defined in ano<strong>the</strong>rapplication called production, you’d need to use:class Car(models.Model):manufacturer = models.ForeignKey(’production.Manufacturer’)This sort of reference can be useful when resolving circular import dependencies between two applications.Database Representation Behind <strong>the</strong> scenes, <strong>Django</strong> appends "_id" to <strong>the</strong> field name to create its database columnname. In <strong>the</strong> above example, <strong>the</strong> database table for <strong>the</strong> Car model will have a manufacturer_id column. (Youcan change this explicitly by specifying db_column) However, your code should never have to deal with <strong>the</strong> databasecolumn name, unless you write custom SQL. You’ll always deal with <strong>the</strong> field names of your model object.Arguments ForeignKey accepts an extra set of arguments – all optional – that define <strong>the</strong> details of how <strong>the</strong>relation works.ForeignKey.limit_choices_toA dictionary of lookup arguments and values (see Making queries) that limit <strong>the</strong> available admin choices forthis object. Use this with functions from <strong>the</strong> Python datetime module to limit choices of objects by date. Forexample:limit_choices_to = {’pub_date__lte’: datetime.now}only allows <strong>the</strong> choice of related objects with a pub_date before <strong>the</strong> current date/time to be chosen.Instead of a dictionary this can also be a Q object for more complex queries. However, if limit_choices_tois a Q object <strong>the</strong>n it will only have an effect on <strong>the</strong> choices available in <strong>the</strong> admin when <strong>the</strong> field is not listed inraw_id_fields in <strong>the</strong> ModelAdmin for <strong>the</strong> model.ForeignKey.related_nameThe name to use for <strong>the</strong> relation from <strong>the</strong> related object back to this one. See <strong>the</strong> related objects documentationfor a full explanation and example. Note that you must set this value when defining relations on abstract models;and when you do so some special syntax is available.If you wish to suppress <strong>the</strong> provision of a backwards relation, you may simply provide a related_namewhich ends with a ’+’ character. For example:user = models.ForeignKey(User, related_name=’+’)will ensure that no backwards relation to this model is provided on <strong>the</strong> User model.674 Chapter 6. API Reference
<strong>Django</strong> <strong>Documentation</strong>, Release 1.2ForeignKey.to_fieldThe field on <strong>the</strong> related object that <strong>the</strong> relation is to. By default, <strong>Django</strong> uses <strong>the</strong> primary key of <strong>the</strong> relatedobject.ManyToManyFieldclass ManyToManyField(o<strong>the</strong>rmodel[, **options])A many-to-many relationship. Requires a positional argument: <strong>the</strong> class to which <strong>the</strong> model is related. This worksexactly <strong>the</strong> same as it does for ForeignKey, including all <strong>the</strong> options regarding recursive and lazy relationships.Database Representation Behind <strong>the</strong> scenes, <strong>Django</strong> creates an intermediary join table to represent <strong>the</strong> many-tomanyrelationship. By default, this table name is generated using <strong>the</strong> name of <strong>the</strong> many-to-many field and <strong>the</strong> modelthat contains it. Since some databases don’t support table names above a certain length, <strong>the</strong>se table names will beautomatically truncated to 64 characters and a uniqueness hash will be used. This means you might see table nameslike author_books_9cdf4; this is perfectly normal. You can manually provide <strong>the</strong> name of <strong>the</strong> join table using<strong>the</strong> db_table option.Argumentsfunctions.ManyToManyField accepts an extra set of arguments – all optional – that control how <strong>the</strong> relationshipManyToManyField.related_nameSame as ForeignKey.related_name.ManyToManyField.limit_choices_toSame as ForeignKey.limit_choices_to.limit_choices_to has no effect when used on a ManyToManyField with a custom intermediate tablespecified using <strong>the</strong> through parameter.ManyToManyField.symmetricalOnly used in <strong>the</strong> definition of ManyToManyFields on self. Consider <strong>the</strong> following model:class Person(models.Model):friends = models.ManyToManyField("self")When <strong>Django</strong> processes this model, it identifies that it has a ManyToManyField on itself, and as a result, itdoesn’t add a person_set attribute to <strong>the</strong> Person class. Instead, <strong>the</strong> ManyToManyField is assumed tobe symmetrical – that is, if I am your friend, <strong>the</strong>n you are my friend.If you do not want symmetry in many-to-many relationships with self, set symmetrical to False. Thiswill force <strong>Django</strong> to add <strong>the</strong> descriptor for <strong>the</strong> reverse relationship, allowing ManyToManyField relationshipsto be non-symmetrical.ManyToManyField.through<strong>Django</strong> will automatically generate a table to manage many-to-many relationships. However, if you want tomanually specify <strong>the</strong> intermediary table, you can use <strong>the</strong> through option to specify <strong>the</strong> <strong>Django</strong> model thatrepresents <strong>the</strong> intermediate table that you want to use.The most common use for this option is when you want to associate extra data with a many-to-many relationship.ManyToManyField.db_tableThe name of <strong>the</strong> table to create for storing <strong>the</strong> many-to-many data. If this is not provided, <strong>Django</strong> will assume adefault name based upon <strong>the</strong> names of <strong>the</strong> two tables being joined.6.11. Models 675
<strong>Django</strong> <strong>Documentation</strong>, Release 1.2OneToOneFieldclass OneToOneField(o<strong>the</strong>rmodel[, parent_link=False, **options])A one-to-one relationship. Conceptually, this is similar to a ForeignKey with unique=True, but <strong>the</strong> “reverse”side of <strong>the</strong> relation will directly return a single object.This is most useful as <strong>the</strong> primary key of a model which “extends” ano<strong>the</strong>r model in some way; Multi-table inheritanceis implemented by adding an implicit one-to-one relation from <strong>the</strong> child model to <strong>the</strong> parent model, for example.One positional argument is required: <strong>the</strong> class to which <strong>the</strong> model will be related. This works exactly <strong>the</strong> sameas it does for ForeignKey, including all <strong>the</strong> options regarding recursive and lazy relationships. Additionally,OneToOneField accepts all of <strong>the</strong> extra arguments accepted by ForeignKey, plus one extra argument:OneToOneField.parent_linkWhen True and used in a model which inherits from ano<strong>the</strong>r (concrete) model, indicates that this field shouldbe used as <strong>the</strong> link back to <strong>the</strong> parent class, ra<strong>the</strong>r than <strong>the</strong> extra OneToOneField which would normally beimplicitly created by subclassing.6.11.2 Related objects referenceclass RelatedManagerA “related manager” is a manager used in a one-to-many or many-to-many related context. This happens in twocases:•The “o<strong>the</strong>r side” of a ForeignKey relation. That is:class Reporter(models.Model):...class Article(models.Model):reporter = models.ForeignKey(Reporter)In <strong>the</strong> above example, <strong>the</strong> methods below will be available on <strong>the</strong> manager reporter.article_set.•Both sides of a ManyToManyField relation:class Topping(models.Model):...class Pizza(models.Model):toppings = models.ManyToManyField(Topping)In this example, <strong>the</strong> methods below will be available both on topping.pizza_set and onpizza.toppings.These related managers have some extra methods:add(obj1[, obj2, ...])Adds <strong>the</strong> specified model objects to <strong>the</strong> related object set.Example:>>> b = Blog.objects.get(id=1)>>> e = Entry.objects.get(id=234)>>> b.entry_set.add(e) # Associates Entry e with Blog b.create(**kwargs)Creates a new object, saves it and puts it in <strong>the</strong> related object set. Returns <strong>the</strong> newly created object:676 Chapter 6. API Reference
<strong>Django</strong> <strong>Documentation</strong>, Release 1.2>>> b = Blog.objects.get(id=1)>>> e = b.entry_set.create(... headline=’Hello’,... body_text=’Hi’,... pub_date=datetime.date(2005, 1, 1)... )# No need to call e.save() at this point -- it’s already been saved.This is equivalent to (but much simpler than):>>> b = Blog.objects.get(id=1)>>> e = Entry(... blog=b,... headline=’Hello’,... body_text=’Hi’,... pub_date=datetime.date(2005, 1, 1)... )>>> e.save(force_insert=True)Note that <strong>the</strong>re’s no need to specify <strong>the</strong> keyword argument of <strong>the</strong> model that defines <strong>the</strong> relationship. In<strong>the</strong> above example, we don’t pass <strong>the</strong> parameter blog to create(). <strong>Django</strong> figures out that <strong>the</strong> newEntry object’s blog field should be set to b.remove(obj1[, obj2, ...])Removes <strong>the</strong> specified model objects from <strong>the</strong> related object set:>>> b = Blog.objects.get(id=1)>>> e = Entry.objects.get(id=234)>>> b.entry_set.remove(e) # Disassociates Entry e from Blog b.In order to prevent database inconsistency, this method only exists on ForeignKey objects wherenull=True. If <strong>the</strong> related field can’t be set to None (NULL), <strong>the</strong>n an object can’t be removed froma relation without being added to ano<strong>the</strong>r. In <strong>the</strong> above example, removing e from b.entry_set() isequivalent to doing e.blog = None, and because <strong>the</strong> blog ForeignKey doesn’t have null=True,this is invalid.clear()Removes all objects from <strong>the</strong> related object set:>>> b = Blog.objects.get(id=1)>>> b.entry_set.clear()Note this doesn’t delete <strong>the</strong> related objects – it just disassociates <strong>the</strong>m.Just like remove(), clear() is only available on ForeignKeys where null=True.6.11.3 Model Meta optionsThis document explains all <strong>the</strong> possible metadata options that you can give your model in its internal class Meta.Available Meta optionsabstractOptions.abstract6.11. Models 677
<strong>Django</strong> <strong>Documentation</strong>, Release 1.2If True, this model will be an abstract base class.app_labelOptions.app_labelIf a model exists outside of <strong>the</strong> standard models.py (for instance, if <strong>the</strong> app’s models are in submodules ofmyapp.models), <strong>the</strong> model must define which app it is part of:app_label = ’myapp’db_tableOptions.db_tableThe name of <strong>the</strong> database table to use for <strong>the</strong> model:db_table = ’music_album’Table names To save you time, <strong>Django</strong> automatically derives <strong>the</strong> name of <strong>the</strong> database table from <strong>the</strong> name of yourmodel class and <strong>the</strong> app that contains it. A model’s database table name is constructed by joining <strong>the</strong> model’s “applabel” – <strong>the</strong> name you used in manage.py startapp – to <strong>the</strong> model’s class name, with an underscore between<strong>the</strong>m.For example, if you have an app bookstore (as created by manage.py startapp bookstore), a modeldefined as class Book will have a database table named bookstore_book.To override <strong>the</strong> database table name, use <strong>the</strong> db_table parameter in class Meta.If your database table name is an SQL reserved word, or contains characters that aren’t allowed in Python variablenames – notably, <strong>the</strong> hyphen – that’s OK. <strong>Django</strong> quotes column and table names behind <strong>the</strong> scenes.db_tablespaceOptions.db_tablespaceNew in version 1.0: Please, see <strong>the</strong> release notes The name of <strong>the</strong> database tablespace to use for <strong>the</strong> model. If <strong>the</strong>backend doesn’t support tablespaces, this option is ignored.get_latest_byOptions.get_latest_byThe name of a DateField or DateTimeField in <strong>the</strong> model. This specifies <strong>the</strong> default field to use in your modelManager‘s latest method.Example:get_latest_by = "order_date"See <strong>the</strong> docs for latest() for more.678 Chapter 6. API Reference
<strong>Django</strong> <strong>Documentation</strong>, Release 1.2managedOptions.managedNew in version 1.1: Please, see <strong>the</strong> release notes Defaults to True, meaning <strong>Django</strong> will create <strong>the</strong> appropriatedatabase tables in syncdb and remove <strong>the</strong>m as part of a reset management command. That is, <strong>Django</strong> manages<strong>the</strong> database tables’ lifecycles.If False, no database table creation or deletion operations will be performed for this model. This is useful if <strong>the</strong>model represents an existing table or a database view that has been created by some o<strong>the</strong>r means. This is <strong>the</strong> onlydifference when managed is False. All o<strong>the</strong>r aspects of model handling are exactly <strong>the</strong> same as normal. Thisincludes1. Adding an automatic primary key field to <strong>the</strong> model if you don’t declare it. To avoid confusion for later codereaders, it’s recommended to specify all <strong>the</strong> columns from <strong>the</strong> database table you are modeling when usingunmanaged models.2. If a model with managed=False contains a ManyToManyField that points to ano<strong>the</strong>r unmanaged model,<strong>the</strong>n <strong>the</strong> intermediate table for <strong>the</strong> many-to-many join will also not be created. However, a <strong>the</strong> intermediarytable between one managed and one unmanaged model will be created.If you need to change this default behavior, create <strong>the</strong> intermediary table as an explicit model (with managedset as needed) and use <strong>the</strong> ManyToManyField.through attribute to make <strong>the</strong> relation use your custommodel.For tests involving models with managed=False, it’s up to you to ensure <strong>the</strong> correct tables are created as part of <strong>the</strong>test setup.If you’re interested in changing <strong>the</strong> Python-level behavior of a model class, you could use managed=False andcreate a copy of an existing model. However, <strong>the</strong>re’s a better approach for that situation: Proxy models.order_with_respect_toOptions.order_with_respect_toMarks this object as “orderable” with respect to <strong>the</strong> given field. This is almost always used with related objects toallow <strong>the</strong>m to be ordered with respect to a parent object. For example, if an Answer relates to a Question object,and a question has more than one answer, and <strong>the</strong> order of answers matters, you’d do this:class Answer(models.Model):question = models.ForeignKey(Question)# ...class Meta:order_with_respect_to = ’question’When order_with_respect_to is set, two additional methods are provided to retrieve and to set <strong>the</strong> order of<strong>the</strong> related objects: get_RELATED_order() and set_RELATED_order(), where RELATED is <strong>the</strong> lowercasedmodel name. For example, assuming that a Question object has multiple related Answer objects, <strong>the</strong> list returnedcontains <strong>the</strong> primary keys of <strong>the</strong> related Answer objects:>>> question = Question.objects.get(id=1)>>> question.get_answer_order()[1, 2, 3]The order of a Question object’s related Answer objects can be set by passing in a list of Answer primary keys:>>> question.set_answer_order([3, 1, 2])6.11. Models 679
<strong>Django</strong> <strong>Documentation</strong>, Release 1.2The related objects also get two methods, get_next_in_order() and get_previous_in_order(), whichcan be used to access those objects in <strong>the</strong>ir proper order. Assuming <strong>the</strong> Answer objects are ordered by id:>>> answer = Answer.objects.get(id=2)>>> answer.get_next_in_order()>>> answer.get_previous_in_order()orderingOptions.orderingThe default ordering for <strong>the</strong> object, for use when obtaining lists of objects:ordering = [’-order_date’]This is a tuple or list of strings. Each string is a field name with an optional “-” prefix, which indicates descendingorder. Fields without a leading “-” will be ordered ascending. Use <strong>the</strong> string ”?” to order randomly.Note: Regardless of how many fields are in ordering, <strong>the</strong> admin site uses only <strong>the</strong> first field.For example, to order by a pub_date field ascending, use this:ordering = [’pub_date’]To order by pub_date descending, use this:ordering = [’-pub_date’]To order by pub_date descending, <strong>the</strong>n by author ascending, use this:ordering = [’-pub_date’, ’author’]permissionsOptions.permissionsExtra permissions to enter into <strong>the</strong> permissions table when creating this object. Add, delete and change permissionsare automatically created for each object that has admin set. This example specifies an extra permission,can_deliver_pizzas:permissions = (("can_deliver_pizzas", "Can deliver pizzas"),)This is a list or tuple of 2-tuples in <strong>the</strong> format (permission_code,human_readable_permission_name).proxyOptions.proxyNew in version 1.1: Please, see <strong>the</strong> release notes If set to True, a model which subclasses ano<strong>the</strong>r model will betreated as a proxy model.680 Chapter 6. API Reference
<strong>Django</strong> <strong>Documentation</strong>, Release 1.2unique_toge<strong>the</strong>rOptions.unique_toge<strong>the</strong>rSets of field names that, taken toge<strong>the</strong>r, must be unique:unique_toge<strong>the</strong>r = (("driver", "restaurant"),)This is a list of lists of fields that must be unique when considered toge<strong>the</strong>r. It’s used in <strong>the</strong> <strong>Django</strong> admin and is enforcedat <strong>the</strong> database level (i.e., <strong>the</strong> appropriate UNIQUE statements are included in <strong>the</strong> CREATE TABLE statement).New in version 1.0: Please, see <strong>the</strong> release notes For convenience, unique_toge<strong>the</strong>r can be a single list when dealingwith a single set of fields:unique_toge<strong>the</strong>r = ("driver", "restaurant")verbose_nameOptions.verbose_nameA human-readable name for <strong>the</strong> object, singular:verbose_name = "pizza"If this isn’t given, <strong>Django</strong> will use a munged version of <strong>the</strong> class name: CamelCase becomes camel case.verbose_name_pluralOptions.verbose_name_pluralThe plural name for <strong>the</strong> object:verbose_name_plural = "stories"If this isn’t given, <strong>Django</strong> will use verbose_name + "s".6.11.4 Model instance referenceThis document describes <strong>the</strong> details of <strong>the</strong> Model API. It builds on <strong>the</strong> material presented in <strong>the</strong> model and databasequery guides, so you’ll probably want to read and understand those documents before reading this one.Throughout this reference we’ll use <strong>the</strong> example Weblog models presented in <strong>the</strong> database query guide.Creating objectsTo create a new instance of a model, just instantiate it like any o<strong>the</strong>r Python class:class Model(**kwargs)The keyword arguments are simply <strong>the</strong> names of <strong>the</strong> fields you’ve defined on your model. Note that instantiating amodel in no way touches your database; for that, you need to save().6.11. Models 681
<strong>Django</strong> <strong>Documentation</strong>, Release 1.2Validating objectsNew in version 1.2: Please, see <strong>the</strong> release notes There are three steps involved in validating a model:1. Validate <strong>the</strong> model fields2. Validate <strong>the</strong> model as a whole3. Validate <strong>the</strong> field uniquenessAll three steps are performed when you call by a model’s full_clean() method.When you use a ModelForm, <strong>the</strong> call to is_valid() will perform <strong>the</strong>se validation steps for all <strong>the</strong> fields that areincluded on <strong>the</strong> form. (See <strong>the</strong> ModelForm documentation for more information.) You should only need to call amodel’s full_clean() method if you plan to handle validation errors yourself, or if you have excluded fields from<strong>the</strong> ModelForm that require validation.Model.full_clean(exclude=None)This method calls Model.clean_fields(), Model.clean(), and Model.validate_unique(), in thatorder and raises a ValidationError that has a message_dict attribute containing errors from all three stages.The optional exclude argument can be used to provide a list of field names that can be excluded from validationand cleaning. ModelForm uses this argument to exclude fields that aren’t present on your form from being validatedsince any errors raised could not be corrected by <strong>the</strong> user.Note that full_clean() will not be called automatically when you call your model’s save() method, nor as aresult of ModelForm validation. You’ll need to call it manually when you want to run model validation outside of aModelForm.Example:try:article.full_clean()except ValidationError, e:# Do something based on <strong>the</strong> errors contained in e.message_dict.# Display <strong>the</strong>m to a user, or handle <strong>the</strong>m programatically.The first step full_clean() performs is to clean each individual field.Model.clean_fields(exclude=None)This method will validate all fields on your model. The optional exclude argument lets you provide a list of fieldnames to exclude from validation. It will raise a ValidationError if any fields fail validation.The second step full_clean() performs is to call Model.clean(). This method should be overridden toperform custom validation on your model.Model.clean()This method should be used to provide custom model validation, and to modify attributes on your model if desired.For instance, you could use it to automatically provide a value for a field, or to do validation that requires access tomore than a single field:def clean(self):from django.core.exceptions import ValidationError# Don’t allow draft entries to have a pub_date.if self.status == ’draft’ and self.pub_date is not None:raise ValidationError(’Draft entries may not have a publication date.’)# Set <strong>the</strong> pub_date for published items if it hasn’t been set already.if self.status == ’published’ and self.pub_date is None:self.pub_date = datetime.datetime.now()682 Chapter 6. API Reference
<strong>Django</strong> <strong>Documentation</strong>, Release 1.2Any ValidationError raised by Model.clean() will be stored under a special key that is used for errors thatare tied to <strong>the</strong> entire model instead of to a specific field. You can access <strong>the</strong>se errors with NON_FIELD_ERRORS:from django.core.exceptions import ValidationError, NON_FIELD_ERRORStry:article.full_clean()except ValidationError, e:non_field_errors = e.message_dict[NON_FIELD_ERRORS]Finally, full_clean() will check any unique constraints on your model.Model.validate_unique(exclude=None)This method is similar to clean_fields, but validates all uniqueness constraints on your model instead of individualfield values. The optional exclude argument allows you to provide a list of field names to exclude fromvalidation. It will raise a ValidationError if any fields fail validation.Note that if you provide an exclude argument to validate_unique, any unique_toge<strong>the</strong>r constraint thatcontains one of <strong>the</strong> fields you provided will not be checked.Saving objectsTo save an object back to <strong>the</strong> database, call save():Model.save([force_insert=False, force_update=False, using=DEFAULT_DB_ALIAS])New in version 1.0: The force_insert and force_update arguments were added.New in version 1.2: Theusing argument was added. If you want customized saving behavior, you can override this save() method. SeeOverriding predefined model methods for more details.The model save process also has some subtleties; see <strong>the</strong> sections below.Auto-incrementing primary keysIf a model has an AutoField – an auto-incrementing primary key – <strong>the</strong>n that auto-incremented value will be calculatedand saved as an attribute on your object <strong>the</strong> first time you call save():>>> b2 = Blog(name=’Cheddar Talk’, tagline=’Thoughts on cheese.’)>>> b2.id # Returns None, because b doesn’t have an ID yet.>>> b2.save()>>> b2.id # Returns <strong>the</strong> ID of your new object.There’s no way to tell what <strong>the</strong> value of an ID will be before you call save(), because that value is calculated byyour database, not by <strong>Django</strong>.(For convenience, each model has an AutoField named id by default unless you explicitly specifyprimary_key=True on a field. See <strong>the</strong> documentation for AutoField for more details.The pk propertyModel.pkNew in version 1.0: Please, see <strong>the</strong> release notesRegardless of whe<strong>the</strong>r you define a primary key field yourself, or let <strong>Django</strong> supply one for you, each model will havea property called pk. It behaves like a normal attribute on <strong>the</strong> model, but is actually an alias for whichever attribute is<strong>the</strong> primary key field for <strong>the</strong> model. You can read and set this value, just as you would for any o<strong>the</strong>r attribute, and itwill update <strong>the</strong> correct field in <strong>the</strong> model.6.11. Models 683
<strong>Django</strong> <strong>Documentation</strong>, Release 1.2Explicitly specifying auto-primary-key values If a model has an AutoField but you want to define a new object’sID explicitly when saving, just define it explicitly before saving, ra<strong>the</strong>r than relying on <strong>the</strong> auto-assignment of<strong>the</strong> ID:>>> b3 = Blog(id=3, name=’Cheddar Talk’, tagline=’Thoughts on cheese.’)>>> b3.id # Returns 3.>>> b3.save()>>> b3.id # Returns 3.If you assign auto-primary-key values manually, make sure not to use an already-existing primary-key value! If youcreate a new object with an explicit primary-key value that already exists in <strong>the</strong> database, <strong>Django</strong> will assume you’rechanging <strong>the</strong> existing record ra<strong>the</strong>r than creating a new one.Given <strong>the</strong> above ’Cheddar Talk’ blog example, this example would override <strong>the</strong> previous record in <strong>the</strong> database:b4 = Blog(id=3, name=’Not Cheddar’, tagline=’Anything but cheese.’)b4.save() # Overrides <strong>the</strong> previous blog with ID=3!See How <strong>Django</strong> knows to UPDATE vs. INSERT, below, for <strong>the</strong> reason this happens.Explicitly specifying auto-primary-key values is mostly useful for bulk-saving objects, when you’re confident youwon’t have primary-key collision.What happens when you save?When you save an object, <strong>Django</strong> performs <strong>the</strong> following steps:1. Emit a pre-save signal. The signal django.db.models.signals.pre_save is sent, allowing anyfunctions listening for that signal to take some customized action.2. Pre-process <strong>the</strong> data. Each field on <strong>the</strong> object is asked to perform any automated data modification that <strong>the</strong>field may need to perform.Most fields do no pre-processing – <strong>the</strong> field data is kept as-is. Pre-processing is only used on fields that havespecial behavior. For example, if your model has a DateField with auto_now=True, <strong>the</strong> pre-save phasewill alter <strong>the</strong> data in <strong>the</strong> object to ensure that <strong>the</strong> date field contains <strong>the</strong> current date stamp. (Our documentationdoesn’t yet include a list of all <strong>the</strong> fields with this “special behavior.”)3. Prepare <strong>the</strong> data for <strong>the</strong> database. Each field is asked to provide its current value in a data type that can bewritten to <strong>the</strong> database.Most fields require no data preparation. Simple data types, such as integers and strings, are ‘ready to write’ as aPython object. However, more complex data types often require some modification.For example, DateFields use a Python datetime object to store data. Databases don’t store datetimeobjects, so <strong>the</strong> field value must be converted into an ISO-compliant date string for insertion into <strong>the</strong> database.4. Insert <strong>the</strong> data into <strong>the</strong> database. The pre-processed, prepared data is <strong>the</strong>n composed into an SQL statementfor insertion into <strong>the</strong> database.5. Emit a post-save signal. The signal django.db.models.signals.post_save is sent, allowing anyfunctions listening for that signal to take some customized action.How <strong>Django</strong> knows to UPDATE vs. INSERTYou may have noticed <strong>Django</strong> database objects use <strong>the</strong> same save() method for creating and changing objects.<strong>Django</strong> abstracts <strong>the</strong> need to use INSERT or UPDATE SQL statements. Specifically, when you call save(), <strong>Django</strong>follows this algorithm:684 Chapter 6. API Reference
<strong>Django</strong> <strong>Documentation</strong>, Release 1.2• If <strong>the</strong> object’s primary key attribute is set to a value that evaluates to True (i.e., a value o<strong>the</strong>r than None or<strong>the</strong> empty string), <strong>Django</strong> executes a SELECT query to determine whe<strong>the</strong>r a record with <strong>the</strong> given primary keyalready exists.• If <strong>the</strong> record with <strong>the</strong> given primary key does already exist, <strong>Django</strong> executes an UPDATE query.• If <strong>the</strong> object’s primary key attribute is not set, or if it’s set but a record doesn’t exist, <strong>Django</strong> executes anINSERT.The one gotcha here is that you should be careful not to specify a primary-key value explicitly when saving newobjects, if you cannot guarantee <strong>the</strong> primary-key value is unused. For more on this nuance, see Explicitly specifyingauto-primary-key values above and Forcing an INSERT or UPDATE below.Forcing an INSERT or UPDATE New in version 1.0: Please, see <strong>the</strong> release notes In some rare circumstances, it’snecessary to be able to force <strong>the</strong> save() method to perform an SQL INSERT and not fall back to doing an UPDATE.Or vice-versa: update, if possible, but not insert a new row. In <strong>the</strong>se cases you can pass <strong>the</strong> force_insert=Trueor force_update=True parameters to <strong>the</strong> save() method. Passing both parameters is an error, since you cannotboth insert and update at <strong>the</strong> same time.It should be very rare that you’ll need to use <strong>the</strong>se parameters. <strong>Django</strong> will almost always do <strong>the</strong> right thing and tryingto override that will lead to errors that are difficult to track down. This feature is for advanced use only.Updating attributes based on existing fieldsSometimes you’ll need to perform a simple arithmetic task on a field, such as incrementing or decrementing <strong>the</strong> currentvalue. The obvious way to achieve this is to do something like:>>> product = Product.objects.get(name=’Venezuelan Beaver Cheese’)>>> product.number_sold += 1>>> product.save()If <strong>the</strong> old number_sold value retrieved from <strong>the</strong> database was 10, <strong>the</strong>n <strong>the</strong> value of 11 will be written back to <strong>the</strong>database.This can be optimized slightly by expressing <strong>the</strong> update relative to <strong>the</strong> original field value, ra<strong>the</strong>r than as an explicitassignment of a new value. <strong>Django</strong> provides F() expressions as a way of performing this kind of relative update. UsingF() expressions, <strong>the</strong> previous example would be expressed as:>>> from django.db.models import F>>> product = Product.objects.get(name=’Venezuelan Beaver Cheese’)>>> product.number_sold = F(’number_sold’) + 1>>> product.save()This approach doesn’t use <strong>the</strong> initial value from <strong>the</strong> database. Instead, it makes <strong>the</strong> database do <strong>the</strong> update based onwhatever value is current at <strong>the</strong> time that <strong>the</strong> save() is executed.Once <strong>the</strong> object has been saved, you must reload <strong>the</strong> object in order to access <strong>the</strong> actual value that was applied to <strong>the</strong>updated field:>>> product = Products.objects.get(pk=product.pk)>>> print product.number_sold42For more details, see <strong>the</strong> documentation on F() expressions and <strong>the</strong>ir use in update queries.6.11. Models 685
<strong>Django</strong> <strong>Documentation</strong>, Release 1.2Deleting objectsModel.delete([using=DEFAULT_DB_ALIAS])New in version 1.2: The using argument was added. Issues a SQL DELETE for <strong>the</strong> object. This only deletes <strong>the</strong>object in <strong>the</strong> database; <strong>the</strong> Python instance will still be around, and will still have data in its fields.For more details, including how to delete objects in bulk, see Deleting objects.If you want customized deletion behavior, you can override this delete() method. See Overriding predefined modelmethods for more details.O<strong>the</strong>r model instance methodsA few object methods have special purposes.__str__Model.__str__()__str__() is a Python “magic method” that defines what should be returned if you call str() on <strong>the</strong> object.<strong>Django</strong> uses str(obj) (or <strong>the</strong> related function, unicode(obj) – see below) in a number of places, most notablyas <strong>the</strong> value displayed to render an object in <strong>the</strong> <strong>Django</strong> admin site and as <strong>the</strong> value inserted into a template when itdisplays an object. Thus, you should always return a nice, human-readable string for <strong>the</strong> object’s __str__. Althoughthis isn’t required, it’s strongly encouraged (see <strong>the</strong> description of __unicode__, below, before putting __str__methods everywhere).For example:class Person(models.Model):first_name = models.CharField(max_length=50)last_name = models.CharField(max_length=50)def __str__(self):# Note use of django.utils.encoding.smart_str() here because# first_name and last_name will be unicode strings.return smart_str(’%s %s’ % (self.first_name, self.last_name))__unicode__Model.__unicode__()The __unicode__() method is called whenever you call unicode() on an object. Since <strong>Django</strong>’s database backendswill return Unicode strings in your model’s attributes, you would normally want to write a __unicode__()method for your model. The example in <strong>the</strong> previous section could be written more simply as:class Person(models.Model):first_name = models.CharField(max_length=50)last_name = models.CharField(max_length=50)def __unicode__(self):return u’%s %s’ % (self.first_name, self.last_name)If you define a __unicode__() method on your model and not a __str__() method, <strong>Django</strong> will automaticallyprovide you with a __str__() that calls __unicode__() and <strong>the</strong>n converts <strong>the</strong> result correctly to a UTF-8686 Chapter 6. API Reference
<strong>Django</strong> <strong>Documentation</strong>, Release 1.2encoded string object. This is recommended development practice: define only __unicode__() and let <strong>Django</strong>take care of <strong>the</strong> conversion to string objects when required.get_absolute_urlModel.get_absolute_url()Define a get_absolute_url() method to tell <strong>Django</strong> how to calculate <strong>the</strong> URL for an object. For example:def get_absolute_url(self):return "/people/%i/" % self.id<strong>Django</strong> uses this in its admin interface. If an object defines get_absolute_url(), <strong>the</strong> object-editingpage will have a “View on site” link that will jump you directly to <strong>the</strong> object’s public view, according toget_absolute_url().Also, a couple of o<strong>the</strong>r bits of <strong>Django</strong>, such as <strong>the</strong> syndication feed framework, use get_absolute_url() as aconvenience to reward people who’ve defined <strong>the</strong> method.It’s good practice to use get_absolute_url() in templates, instead of hard-coding your objects’ URLs. Forexample, this template code is bad:{{ object.name }}But this template code is good:{{ object.name }}Note: The string you return from get_absolute_url() must contain only ASCII characters (required by <strong>the</strong>URI spec, RFC 2396) that have been URL-encoded, if necessary. Code and templates using get_absolute_url()should be able to use <strong>the</strong> result directly without needing to do any fur<strong>the</strong>r processing. You may wish to use <strong>the</strong>django.utils.encoding.iri_to_uri() function to help with this if you are using unicode strings a lot.The permalink decorator The problem with <strong>the</strong> way we wrote get_absolute_url() above is that it slightlyviolates <strong>the</strong> DRY principle: <strong>the</strong> URL for this object is defined both in <strong>the</strong> URLconf file and in <strong>the</strong> model.You can fur<strong>the</strong>r decouple your models from <strong>the</strong> URLconf using <strong>the</strong> permalink decorator:permalink()This decorator is passed <strong>the</strong> view function, a list of positional parameters and (optionally) a dictionary of namedparameters. <strong>Django</strong> <strong>the</strong>n works out <strong>the</strong> correct full URL path using <strong>the</strong> URLconf, substituting <strong>the</strong> parameters youhave given into <strong>the</strong> URL. For example, if your URLconf contained a line such as:(r’^people/(\d+)/$’, ’people.views.details’),...your model could have a get_absolute_url method that looked like this:from django.db import models@models.permalinkdef get_absolute_url(self):return (’people.views.details’, [str(self.id)])Similarly, if you had a URLconf entry that looked like:6.11. Models 687
<strong>Django</strong> <strong>Documentation</strong>, Release 1.2(r’/archive/(?P\d{4})/(?P\d{1,2})/(?P\d{1,2})/$’, archive_view)...you could reference this using permalink() as follows:@models.permalinkdef get_absolute_url(self):return (’archive_view’, (), {’year’: self.created.year,’month’: self.created.month,’day’: self.created.day})Notice that we specify an empty sequence for <strong>the</strong> second parameter in this case, because we only want to pass keywordparameters, not positional ones.In this way, you’re tying <strong>the</strong> model’s absolute path to <strong>the</strong> view that is used to display it, without repeating <strong>the</strong> URLinformation anywhere. You can still use <strong>the</strong> get_absolute_url method in templates, as before.In some cases, such as <strong>the</strong> use of generic views or <strong>the</strong> re-use of custom views for multiple models, specifying <strong>the</strong> viewfunction may confuse <strong>the</strong> reverse URL matcher (because multiple patterns point to <strong>the</strong> same view).For that problem, <strong>Django</strong> has named URL patterns. Using a named URL pattern, it’s possible to give a name to apattern, and <strong>the</strong>n reference <strong>the</strong> name ra<strong>the</strong>r than <strong>the</strong> view function. A named URL pattern is defined by replacing <strong>the</strong>pattern tuple by a call to <strong>the</strong> url function):from django.conf.urls.defaults import *url(r’^people/(\d+)/$’,’django.views.generic.list_detail.object_detail’,name=’people_view’),...and <strong>the</strong>n using that name to perform <strong>the</strong> reverse URL resolution instead of <strong>the</strong> view name:from django.db import models@models.permalinkdef get_absolute_url(self):return (’people_view’, [str(self.id)])More details on named URL patterns are in <strong>the</strong> URL dispatch documentation.Extra instance methodsIn addition to save(), delete(), a model object might get any or all of <strong>the</strong> following methods:Model.get_FOO_display()For every field that has choices set, <strong>the</strong> object will have a get_FOO_display() method, where FOO is <strong>the</strong> nameof <strong>the</strong> field. This method returns <strong>the</strong> “human-readable” value of <strong>the</strong> field. For example, in <strong>the</strong> following model:GENDER_CHOICES = ((’M’, ’Male’),(’F’, ’Female’),)class Person(models.Model):name = models.CharField(max_length=20)gender = models.CharField(max_length=1, choices=GENDER_CHOICES)...each Person instance will have a get_gender_display() method. Example:688 Chapter 6. API Reference
<strong>Django</strong> <strong>Documentation</strong>, Release 1.2>>> p = Person(name=’John’, gender=’M’)>>> p.save()>>> p.gender’M’>>> p.get_gender_display()’Male’Model.get_next_by_FOO(**kwargs)Model.get_previous_by_FOO(**kwargs)For every DateField and DateTimeField that does not have null=True, <strong>the</strong> object will haveget_next_by_FOO() and get_previous_by_FOO() methods, where FOO is <strong>the</strong> name of <strong>the</strong> field. Thisreturns <strong>the</strong> next and previous object with respect to <strong>the</strong> date field, raising <strong>the</strong> appropriate DoesNotExist exceptionwhen appropriate.Both methods accept optional keyword arguments, which should be in <strong>the</strong> format described in Field lookups.Note that in <strong>the</strong> case of identical date values, <strong>the</strong>se methods will use <strong>the</strong> ID as a fallback check. This guarantees thatno records are skipped or duplicated.6.11.5 QuerySet API referenceThis document describes <strong>the</strong> details of <strong>the</strong> QuerySet API. It builds on <strong>the</strong> material presented in <strong>the</strong> model anddatabase query guides, so you’ll probably want to read and understand those documents before reading this one.Throughout this reference we’ll use <strong>the</strong> example Weblog models presented in <strong>the</strong> database query guide.When QuerySets are evaluatedInternally, a QuerySet can be constructed, filtered, sliced, and generally passed around without actually hitting <strong>the</strong>database. No database activity actually occurs until you do something to evaluate <strong>the</strong> queryset.You can evaluate a QuerySet in <strong>the</strong> following ways:• Iteration. A QuerySet is iterable, and it executes its database query <strong>the</strong> first time you iterate over it. Forexample, this will print <strong>the</strong> headline of all entries in <strong>the</strong> database:for e in Entry.objects.all():print e.headline• Slicing. As explained in Limiting QuerySets, a QuerySet can be sliced, using Python’s array-slicing syntax.Usually slicing a QuerySet returns ano<strong>the</strong>r (unevaluated) QuerySet, but <strong>Django</strong> will execute <strong>the</strong> databasequery if you use <strong>the</strong> “step” parameter of slice syntax.• Pickling/Caching. See <strong>the</strong> following section for details of what is involved when pickling QuerySets. Theimportant thing for <strong>the</strong> purposes of this section is that <strong>the</strong> results are read from <strong>the</strong> database.• repr(). A QuerySet is evaluated when you call repr() on it. This is for convenience in <strong>the</strong> Python interactiveinterpreter, so you can immediately see your results when using <strong>the</strong> API interactively.• len(). A QuerySet is evaluated when you call len() on it. This, as you might expect, returns <strong>the</strong> length of<strong>the</strong> result list.Note: Don’t use len() on QuerySets if all you want to do is determine <strong>the</strong> number of records in <strong>the</strong> set.It’s much more efficient to handle a count at <strong>the</strong> database level, using SQL’s SELECT COUNT(*), and <strong>Django</strong>provides a count() method for precisely this reason. See count() below.• list(). Force evaluation of a QuerySet by calling list() on it. For example:6.11. Models 689
<strong>Django</strong> <strong>Documentation</strong>, Release 1.2entry_list = list(Entry.objects.all())Be warned, though, that this could have a large memory overhead, because <strong>Django</strong> will load each element of<strong>the</strong> list into memory. In contrast, iterating over a QuerySet will take advantage of your database to load dataand instantiate objects only as you need <strong>the</strong>m.• bool(). Testing a QuerySet in a boolean context, such as using bool(), or, and or an if statement, willcause <strong>the</strong> query to be executed. If <strong>the</strong>re is at least one result, <strong>the</strong> QuerySet is True, o<strong>the</strong>rwise False. Forexample:if Entry.objects.filter(headline="Test"):print "There is at least one Entry with <strong>the</strong> headline Test"Note: Don’t use this if all you want to do is determine if at least one result exists, and don’t need <strong>the</strong> actualobjects. It’s more efficient to use exists() (see below).Pickling QuerySetsIf you pickle a QuerySet, this will force all <strong>the</strong> results to be loaded into memory prior to pickling. Pickling is usuallyused as a precursor to caching and when <strong>the</strong> cached queryset is reloaded, you want <strong>the</strong> results to already be presentand ready for use (reading from <strong>the</strong> database can take some time, defeating <strong>the</strong> purpose of caching). This means thatwhen you unpickle a QuerySet, it contains <strong>the</strong> results at <strong>the</strong> moment it was pickled, ra<strong>the</strong>r than <strong>the</strong> results that arecurrently in <strong>the</strong> database.If you only want to pickle <strong>the</strong> necessary information to recreate <strong>the</strong> QuerySet from <strong>the</strong> database at a later time,pickle <strong>the</strong> query attribute of <strong>the</strong> QuerySet. You can <strong>the</strong>n recreate <strong>the</strong> original QuerySet (without any resultsloaded) using some code like this:>>> import pickle>>> query = pickle.loads(s) # Assuming ’s’ is <strong>the</strong> pickled string.>>> qs = MyModel.objects.all()>>> qs.query = query # Restore <strong>the</strong> original ’query’.The query attribute is an opaque object. It represents <strong>the</strong> internals of <strong>the</strong> query construction and is not part of <strong>the</strong>public API. However, it is safe (and fully supported) to pickle and unpickle <strong>the</strong> attribute’s contents as described here.You can’t share pickles between versionsPickles of QuerySets are only valid for <strong>the</strong> version of <strong>Django</strong> that was used to generate <strong>the</strong>m. If you generate a pickleusing <strong>Django</strong> version N, <strong>the</strong>re is no guarantee that pickle will be readable with <strong>Django</strong> version N+1. Pickles shouldnot be used as part of a long-term archival strategy.QuerySet APIThough you usually won’t create one manually – you’ll go through a Manager – here’s <strong>the</strong> formal declaration of aQuerySet:class QuerySet([model=None])Usually when you’ll interact with a QuerySet you’ll use it by chaining filters. To make this work, most QuerySetmethods return new querysets.690 Chapter 6. API Reference
<strong>Django</strong> <strong>Documentation</strong>, Release 1.2Methods that return new QuerySets<strong>Django</strong> provides a range of QuerySet refinement methods that modify ei<strong>the</strong>r <strong>the</strong> types of results returned by <strong>the</strong>QuerySet or <strong>the</strong> way its SQL query is executed.filterfilter(**kwargs)Returns a new QuerySet containing objects that match <strong>the</strong> given lookup parameters.The lookup parameters (**kwargs) should be in <strong>the</strong> format described in Field lookups below. Multiple parametersare joined via AND in <strong>the</strong> underlying SQL statement.excludeexclude(**kwargs)Returns a new QuerySet containing objects that do not match <strong>the</strong> given lookup parameters.The lookup parameters (**kwargs) should be in <strong>the</strong> format described in Field lookups below. Multiple parametersare joined via AND in <strong>the</strong> underlying SQL statement, and <strong>the</strong> whole thing is enclosed in a NOT().This example excludes all entries whose pub_date is later than 2005-1-3 AND whose headline is “Hello”:Entry.objects.exclude(pub_date__gt=datetime.date(2005, 1, 3), headline=’Hello’)In SQL terms, that evaluates to:SELECT ...WHERE NOT (pub_date > ’2005-1-3’ AND headline = ’Hello’)This example excludes all entries whose pub_date is later than 2005-1-3 OR whose headline is “Hello”:Entry.objects.exclude(pub_date__gt=datetime.date(2005, 1, 3)).exclude(headline=’Hello’)In SQL terms, that evaluates to:SELECT ...WHERE NOT pub_date > ’2005-1-3’AND NOT headline = ’Hello’Note <strong>the</strong> second example is more restrictive.annotateannotate(*args, **kwargs)New in version 1.1: Please, see <strong>the</strong> release notes Annotates each object in <strong>the</strong> QuerySet with <strong>the</strong> provided list ofaggregate values (averages, sums, etc) that have been computed over <strong>the</strong> objects that are related to <strong>the</strong> objects in <strong>the</strong>QuerySet. Each argument to annotate() is an annotation that will be added to each object in <strong>the</strong> QuerySetthat is returned.The aggregation functions that are provided by <strong>Django</strong> are described in Aggregation Functions below.Annotations specified using keyword arguments will use <strong>the</strong> keyword as <strong>the</strong> alias for <strong>the</strong> annotation. Anonymousarguments will have an alias generated for <strong>the</strong>m based upon <strong>the</strong> name of <strong>the</strong> aggregate function and <strong>the</strong> model fieldthat is being aggregated.For example, if you were manipulating a list of blogs, you may want to determine how many entries have been madein each blog:6.11. Models 691
<strong>Django</strong> <strong>Documentation</strong>, Release 1.2>>> q = Blog.objects.annotate(Count(’entry’))# The name of <strong>the</strong> first blog>>> q[0].name’Blogasaurus’# The number of entries on <strong>the</strong> first blog>>> q[0].entry__count42The Blog model doesn’t define an entry__count attribute by itself, but by using a keyword argument to specify<strong>the</strong> aggregate function, you can control <strong>the</strong> name of <strong>the</strong> annotation:>>> q = Blog.objects.annotate(number_of_entries=Count(’entry’))# The number of entries on <strong>the</strong> first blog, using <strong>the</strong> name provided>>> q[0].number_of_entries42For an in-depth discussion of aggregation, see <strong>the</strong> topic guide on Aggregation.order_byorder_by(*fields)By default, results returned by a QuerySet are ordered by <strong>the</strong> ordering tuple given by <strong>the</strong> ordering option in <strong>the</strong>model’s Meta. You can override this on a per-QuerySet basis by using <strong>the</strong> order_by method.Example:Entry.objects.filter(pub_date__year=2005).order_by(’-pub_date’, ’headline’)The result above will be ordered by pub_date descending, <strong>the</strong>n by headline ascending. The negative sign infront of "-pub_date" indicates descending order. Ascending order is implied. To order randomly, use "?", likeso:Entry.objects.order_by(’?’)Note: order_by(’?’) queries may be expensive and slow, depending on <strong>the</strong> database backend you’re using.To order by a field in a different model, use <strong>the</strong> same syntax as when you are querying across model relations. That is,<strong>the</strong> name of <strong>the</strong> field, followed by a double underscore (__), followed by <strong>the</strong> name of <strong>the</strong> field in <strong>the</strong> new model, andso on for as many models as you want to join. For example:Entry.objects.order_by(’blog__name’, ’headline’)If you try to order by a field that is a relation to ano<strong>the</strong>r model, <strong>Django</strong> will use <strong>the</strong> default ordering on <strong>the</strong> relatedmodel (or order by <strong>the</strong> related model’s primary key if <strong>the</strong>re is no Meta.ordering specified. For example:Entry.objects.order_by(’blog’)...is identical to:Entry.objects.order_by(’blog__id’)...since <strong>the</strong> Blog model has no default ordering specified.Be cautious when ordering by fields in related models if you are also using distinct().distinct() for an explanation of how related model ordering can change <strong>the</strong> expected results.See <strong>the</strong> note inIt is permissible to specify a multi-valued field to order <strong>the</strong> results by (for example, a ManyToMany field). Normallythis won’t be a sensible thing to do and it’s really an advanced usage feature. However, if you know that your queryset’sfiltering or available data implies that <strong>the</strong>re will only be one ordering piece of data for each of <strong>the</strong> main items you areselecting, <strong>the</strong> ordering may well be exactly what you want to do. Use ordering on multi-valued fields with care and692 Chapter 6. API Reference
<strong>Django</strong> <strong>Documentation</strong>, Release 1.2make sure <strong>the</strong> results are what you expect. New in version 1.0: Please, see <strong>the</strong> release notes The syntax for orderingacross related models has changed. See <strong>the</strong> <strong>Django</strong> 0.96 documentation for <strong>the</strong> old behaviour.There’s no way to specify whe<strong>the</strong>r ordering should be case sensitive. With respect to case-sensitivity, <strong>Django</strong> willorder results however your database backend normally orders <strong>the</strong>m.If you don’t want any ordering to be applied to a query, not even <strong>the</strong> default ordering, call order_by() with noparameters. New in version 1.1: Please, see <strong>the</strong> release notes You can tell if a query is ordered or not by checking <strong>the</strong>QuerySet.ordered attribute, which will be True if <strong>the</strong> QuerySet has been ordered in any way.reversereverse()New in version 1.0: Please, see <strong>the</strong> release notes Use <strong>the</strong> reverse() method to reverse <strong>the</strong> order in which a queryset’selements are returned. Calling reverse() a second time restores <strong>the</strong> ordering back to <strong>the</strong> normal direction.To retrieve <strong>the</strong> ‘’last” five items in a queryset, you could do this:my_queryset.reverse()[:5]Note that this is not quite <strong>the</strong> same as slicing from <strong>the</strong> end of a sequence in Python. The above example will return<strong>the</strong> last item first, <strong>the</strong>n <strong>the</strong> penultimate item and so on. If we had a Python sequence and looked at seq[-5:], wewould see <strong>the</strong> fifth-last item first. <strong>Django</strong> doesn’t support that mode of access (slicing from <strong>the</strong> end), because it’s notpossible to do it efficiently in SQL.Also, note that reverse() should generally only be called on a QuerySet which has a defined ordering (e.g.,when querying against a model which defines a default ordering, or when using order_by()). If no such orderingis defined for a given QuerySet, calling reverse() on it has no real effect (<strong>the</strong> ordering was undefined prior tocalling reverse(), and will remain undefined afterward).distinctdistinct()Returns a new QuerySet that uses SELECT DISTINCT in its SQL query. This eliminates duplicate rows from <strong>the</strong>query results.By default, a QuerySet will not eliminate duplicate rows. In practice, this is rarely a problem, because simplequeries such as Blog.objects.all() don’t introduce <strong>the</strong> possibility of duplicate result rows. However, if yourquery spans multiple tables, it’s possible to get duplicate results when a QuerySet is evaluated. That’s when you’duse distinct().Note: Any fields used in an order_by() call are included in <strong>the</strong> SQL SELECT columns. This can sometimes leadto unexpected results when used in conjunction with distinct(). If you order by fields from a related model, thosefields will be added to <strong>the</strong> selected columns and <strong>the</strong>y may make o<strong>the</strong>rwise duplicate rows appear to be distinct. Since<strong>the</strong> extra columns don’t appear in <strong>the</strong> returned results (<strong>the</strong>y are only <strong>the</strong>re to support ordering), it sometimes looks likenon-distinct results are being returned.Similarly, if you use a values() query to restrict <strong>the</strong> columns selected, <strong>the</strong> columns used in any order_by() (ordefault model ordering) will still be involved and may affect uniqueness of <strong>the</strong> results.The moral here is that if you are using distinct() be careful about ordering by related models. Similarly, whenusing distinct() and values() toge<strong>the</strong>r, be careful when ordering by fields not in <strong>the</strong> values() call.valuesvalues(*fields)6.11. Models 693
<strong>Django</strong> <strong>Documentation</strong>, Release 1.2Returns a ValuesQuerySet – a QuerySet that returns dictionaries when used as an iterable, ra<strong>the</strong>r than modelinstanceobjects.Each of those dictionaries represents an object, with <strong>the</strong> keys corresponding to <strong>the</strong> attribute names of model objects.This example compares <strong>the</strong> dictionaries of values() with <strong>the</strong> normal model objects:# This list contains a Blog object.>>> Blog.objects.filter(name__startswith=’Beatles’)[]# This list contains a dictionary.>>> Blog.objects.filter(name__startswith=’Beatles’).values()[{’id’: 1, ’name’: ’Beatles Blog’, ’tagline’: ’All <strong>the</strong> latest Beatles news.’}]values() takes optional positional arguments, *fields, which specify field names to which <strong>the</strong> SELECT shouldbe limited. If you specify <strong>the</strong> fields, each dictionary will contain only <strong>the</strong> field keys/values for <strong>the</strong> fields you specify.If you don’t specify <strong>the</strong> fields, each dictionary will contain a key and value for every field in <strong>the</strong> database table.Example:>>> Blog.objects.values()[{’id’: 1, ’name’: ’Beatles Blog’, ’tagline’: ’All <strong>the</strong> latest Beatles news.’}],>>> Blog.objects.values(’id’, ’name’)[{’id’: 1, ’name’: ’Beatles Blog’}]A couple of subtleties that are worth mentioning:• The values() method does not return anything for ManyToManyField attributes and will raise an error ifyou try to pass in this type of field to it.• If you have a field called foo that is a ForeignKey, <strong>the</strong> default values() call will return a dictionarykey called foo_id, since this is <strong>the</strong> name of <strong>the</strong> hidden model attribute that stores <strong>the</strong> actual value (<strong>the</strong> fooattribute refers to <strong>the</strong> related model). When you are calling values() and passing in field names, you can passin ei<strong>the</strong>r foo or foo_id and you will get back <strong>the</strong> same thing (<strong>the</strong> dictionary key will match <strong>the</strong> field nameyou passed in).For example:>>> Entry.objects.values()[{’blog_id’: 1, ’headline’: u’First Entry’, ...}, ...]>>> Entry.objects.values(’blog’)[{’blog’: 1}, ...]>>> Entry.objects.values(’blog_id’)[{’blog_id’: 1}, ...]• When using values() toge<strong>the</strong>r with distinct(), be aware that ordering can affect <strong>the</strong> results. See <strong>the</strong>note in distinct() for details.• If you use a values() clause after an extra() clause, any fields defined by a select argument in <strong>the</strong>extra() must be explicitly included in <strong>the</strong> values() clause. However, if <strong>the</strong> extra() clause is used after<strong>the</strong> values(), <strong>the</strong> fields added by <strong>the</strong> select will be included automatically.New in version 1.0: Please, see <strong>the</strong> release notes Previously, it was not possible to pass blog_id to values() in<strong>the</strong> above example, only blog.A ValuesQuerySet is useful when you know you’re only going to need values from a small number of <strong>the</strong> availablefields and you won’t need <strong>the</strong> functionality of a model instance object. It’s more efficient to select only <strong>the</strong> fields youneed to use.694 Chapter 6. API Reference
<strong>Django</strong> <strong>Documentation</strong>, Release 1.2Finally, note a ValuesQuerySet is a subclass of QuerySet, so it has all methods of QuerySet. You can callfilter() on it, or order_by(), or whatever. Yes, that means <strong>the</strong>se two calls are identical:Blog.objects.values().order_by(’id’)Blog.objects.order_by(’id’).values()The people who made <strong>Django</strong> prefer to put all <strong>the</strong> SQL-affecting methods first, followed (optionally) by any outputaffectingmethods (such as values()), but it doesn’t really matter. This is your chance to really flaunt your individualism.values_listvalues_list(*fields)New in version 1.0: Please, see <strong>the</strong> release notes This is similar to values() except that instead of returningdictionaries, it returns tuples when iterated over. Each tuple contains <strong>the</strong> value from <strong>the</strong> respective field passed into<strong>the</strong> values_list() call – so <strong>the</strong> first item is <strong>the</strong> first field, etc. For example:>>> Entry.objects.values_list(’id’, ’headline’)[(1, u’First entry’), ...]If you only pass in a single field, you can also pass in <strong>the</strong> flat parameter. If True, this will mean <strong>the</strong> returned resultsare single values, ra<strong>the</strong>r than one-tuples. An example should make <strong>the</strong> difference clearer:>>> Entry.objects.values_list(’id’).order_by(’id’)[(1,), (2,), (3,), ...]>>> Entry.objects.values_list(’id’, flat=True).order_by(’id’)[1, 2, 3, ...]It is an error to pass in flat when <strong>the</strong>re is more than one field.If you don’t pass any values to values_list(), it will return all <strong>the</strong> fields in <strong>the</strong> model, in <strong>the</strong> order <strong>the</strong>y weredeclared.datesdates(field, kind, order=’ASC’)Returns a DateQuerySet – a QuerySet that evaluates to a list of datetime.datetime objects representingall available dates of a particular kind within <strong>the</strong> contents of <strong>the</strong> QuerySet.field should be <strong>the</strong> name of a DateField or DateTimeField of your model.kind should be ei<strong>the</strong>r "year", "month" or "day". Each datetime.datetime object in <strong>the</strong> result list is“truncated” to <strong>the</strong> given type.• "year" returns a list of all distinct year values for <strong>the</strong> field.• "month" returns a list of all distinct year/month values for <strong>the</strong> field.• "day" returns a list of all distinct year/month/day values for <strong>the</strong> field.order, which defaults to ’ASC’, should be ei<strong>the</strong>r ’ASC’ or ’DESC’. This specifies how to order <strong>the</strong> results.Examples:>>> Entry.objects.dates(’pub_date’, ’year’)[datetime.datetime(2005, 1, 1)]>>> Entry.objects.dates(’pub_date’, ’month’)[datetime.datetime(2005, 2, 1), datetime.datetime(2005, 3, 1)]>>> Entry.objects.dates(’pub_date’, ’day’)[datetime.datetime(2005, 2, 20), datetime.datetime(2005, 3, 20)]>>> Entry.objects.dates(’pub_date’, ’day’, order=’DESC’)6.11. Models 695
<strong>Django</strong> <strong>Documentation</strong>, Release 1.2[datetime.datetime(2005, 3, 20), datetime.datetime(2005, 2, 20)]>>> Entry.objects.filter(headline__contains=’Lennon’).dates(’pub_date’, ’day’)[datetime.datetime(2005, 3, 20)]nonenone()New in version 1.0: Please, see <strong>the</strong> release notes Returns an EmptyQuerySet – a QuerySet that always evaluatesto an empty list. This can be used in cases where you know that you should return an empty result set and your calleris expecting a QuerySet object (instead of returning an empty list, for example.)Examples:>>> Entry.objects.none()[]allall()New in version 1.0: Please, see <strong>the</strong> release notes Returns a copy of <strong>the</strong> current QuerySet (or QuerySet subclassyou pass in). This can be useful in some situations where you might want to pass in ei<strong>the</strong>r a model manager or aQuerySet and do fur<strong>the</strong>r filtering on <strong>the</strong> result. You can safely call all() on ei<strong>the</strong>r object and <strong>the</strong>n you’ll definitelyhave a QuerySet to work with.select_relatedselect_related()Returns a QuerySet that will automatically “follow” foreign-key relationships, selecting that additional relatedobjectdata when it executes its query. This is a performance booster which results in (sometimes much) larger queriesbut means later use of foreign-key relationships won’t require database queries.The following examples illustrate <strong>the</strong> difference between plain lookups and select_related() lookups. Here’sstandard lookup:# Hits <strong>the</strong> database.e = Entry.objects.get(id=5)# Hits <strong>the</strong> database again to get <strong>the</strong> related Blog object.b = e.blogAnd here’s select_related lookup:# Hits <strong>the</strong> database.e = Entry.objects.select_related().get(id=5)# Doesn’t hit <strong>the</strong> database, because e.blog has been prepopulated# in <strong>the</strong> previous query.b = e.blogselect_related() follows foreign keys as far as possible. If you have <strong>the</strong> following models:class City(models.Model):# ...class Person(models.Model):# ...hometown = models.ForeignKey(City)696 Chapter 6. API Reference
<strong>Django</strong> <strong>Documentation</strong>, Release 1.2class Book(models.Model):# ...author = models.ForeignKey(Person)...<strong>the</strong>n a call to Book.objects.select_related().get(id=4) will cache <strong>the</strong> related Person and <strong>the</strong>related City:b = Book.objects.select_related().get(id=4)p = b.author# Doesn’t hit <strong>the</strong> database.c = p.hometown # Doesn’t hit <strong>the</strong> database.b = Book.objects.get(id=4) # No select_related() in this example.p = b.author# Hits <strong>the</strong> database.c = p.hometown # Hits <strong>the</strong> database.Note that, by default, select_related() does not follow foreign keys that have null=True.Usually, using select_related() can vastly improve performance because your app can avoid many databasecalls. However, in situations with deeply nested sets of relationships select_related() can sometimes end upfollowing “too many” relations, and can generate queries so large that <strong>the</strong>y end up being slow.In <strong>the</strong>se situations, you can use <strong>the</strong> depth argument to select_related() to control how many “levels” ofrelations select_related() will actually follow:b = Book.objects.select_related(depth=1).get(id=4)p = b.author# Doesn’t hit <strong>the</strong> database.c = p.hometown # Requires a database call.Sometimes you only want to access specific models that are related to your root model, not all of <strong>the</strong> related models.In <strong>the</strong>se cases, you can pass <strong>the</strong> related field names to select_related() and it will only follow those relations.You can even do this for models that are more than one relation away by separating <strong>the</strong> field names with doubleunderscores, just as for filters. For example, if you have this model:class Room(models.Model):# ...building = models.ForeignKey(...)class Group(models.Model):# ...teacher = models.ForeignKey(...)room = models.ForeignKey(Room)subject = models.ForeignKey(...)...and you only needed to work with <strong>the</strong> room and subject attributes, you could write this:g = Group.objects.select_related(’room’, ’subject’)This is also valid:g = Group.objects.select_related(’room__building’, ’subject’)...and would also pull in <strong>the</strong> building relation.You can refer to any ForeignKey or OneToOneField relation in <strong>the</strong> list of fields passed to select_related.Ths includes foreign keys that have null=True (unlike <strong>the</strong> default select_related() call). It’s an error touse both a list of fields and <strong>the</strong> depth parameter in <strong>the</strong> same select_related() call, since <strong>the</strong>y are conflictingoptions. New in version 1.0: Please, see <strong>the</strong> release notes Both <strong>the</strong> depth argument and <strong>the</strong> ability to specify fieldnames in <strong>the</strong> call to select_related() are new in <strong>Django</strong> version 1.0. Changed in version 1.2: Please, see<strong>the</strong> release notes You can also refer to <strong>the</strong> reverse direction of a OneToOneFields in <strong>the</strong> list of fields passed to6.11. Models 697
<strong>Django</strong> <strong>Documentation</strong>, Release 1.2select_related – that is, you can traverse a OneToOneField back to <strong>the</strong> object on which <strong>the</strong> field is defined.Instead of specifying <strong>the</strong> field name, use <strong>the</strong> related_name for <strong>the</strong> field on <strong>the</strong> related object.OneToOneFields will not be traversed in <strong>the</strong> reverse direction if you are performing a depth-basedselect_related.extraextra(select=None, where=None, params=None, tables=None, order_by=None, select_params=None)Sometimes, <strong>the</strong> <strong>Django</strong> query syntax by itself can’t easily express a complex WHERE clause. For <strong>the</strong>se edge cases,<strong>Django</strong> provides <strong>the</strong> extra() QuerySet modifier – a hook for injecting specific clauses into <strong>the</strong> SQL generated bya QuerySet.By definition, <strong>the</strong>se extra lookups may not be portable to different database engines (because you’re explicitly writingSQL code) and violate <strong>the</strong> DRY principle, so you should avoid <strong>the</strong>m if possible.Specify one or more of params, select, where or tables. None of <strong>the</strong> arguments is required, but you shoulduse at least one of <strong>the</strong>m.• select The select argument lets you put extra fields in <strong>the</strong> SELECT clause. It should be a dictionarymapping attribute names to SQL clauses to use to calculate that attribute.Example:Entry.objects.extra(select={’is_recent’: "pub_date > ’2006-01-01’"})As a result, each Entry object will have an extra attribute, is_recent, a boolean representing whe<strong>the</strong>r<strong>the</strong> entry’s pub_date is greater than Jan. 1, 2006.<strong>Django</strong> inserts <strong>the</strong> given SQL snippet directly into <strong>the</strong> SELECT statement, so <strong>the</strong> resulting SQL of <strong>the</strong>above example would be something like:SELECT blog_entry.*, (pub_date > ’2006-01-01’) AS is_recentFROM blog_entry;The next example is more advanced; it does a subquery to give each resulting Blog object anentry_count attribute, an integer count of associated Entry objects:Blog.objects.extra(select={’entry_count’: ’SELECT COUNT(*) FROM blog_entry WHERE blog_entry.blog_id = blog_blog},)(In this particular case, we’re exploiting <strong>the</strong> fact that <strong>the</strong> query will already contain <strong>the</strong> blog_blog tablein its FROM clause.)The resulting SQL of <strong>the</strong> above example would be:SELECT blog_blog.*, (SELECT COUNT(*) FROM blog_entry WHERE blog_entry.blog_id = blog_blog.idFROM blog_blog;Note that <strong>the</strong> paren<strong>the</strong>sis required by most database engines around subqueries are not required in <strong>Django</strong>’sselect clauses. Also note that some database backends, such as some MySQL versions, don’t supportsubqueries. New in version 1.0: Please, see <strong>the</strong> release notes In some rare cases, you might wish to pass parametersto <strong>the</strong> SQL fragments in extra(select=...). For this purpose, use <strong>the</strong> select_paramsparameter. Since select_params is a sequence and <strong>the</strong> select attribute is a dictionary, some careis required so that <strong>the</strong> parameters are matched up correctly with <strong>the</strong> extra select pieces. In this situation,you should use a django.utils.datastructures.SortedDict for <strong>the</strong> select value, not justa normal Python dictionary.698 Chapter 6. API Reference
<strong>Django</strong> <strong>Documentation</strong>, Release 1.2This will work, for example:Blog.objects.extra(select=SortedDict([(’a’, ’%s’), (’b’, ’%s’)]),select_params=(’one’, ’two’))The only thing to be careful about when using select parameters in extra() is to avoid using <strong>the</strong> substring"%%s" (that’s two percent characters before <strong>the</strong> s) in <strong>the</strong> select strings. <strong>Django</strong>’s tracking of parameterslooks for %s and an escaped % character like this isn’t detected. That will lead to incorrect results.• where / tables You can define explicit SQL WHERE clauses – perhaps to perform non-explicit joins – byusing where. You can manually add tables to <strong>the</strong> SQL FROM clause by using tables.where and tables both take a list of strings. All where parameters are “AND”ed to any o<strong>the</strong>r searchcriteria.Example:Entry.objects.extra(where=[’id IN (3, 4, 5, 20)’])...translates (roughly) into <strong>the</strong> following SQL:SELECT * FROM blog_entry WHERE id IN (3, 4, 5, 20);Be careful when using <strong>the</strong> tables parameter if you’re specifying tables that are already used in <strong>the</strong> query.When you add extra tables via <strong>the</strong> tables parameter, <strong>Django</strong> assumes you want that table included anextra time, if it is already included. That creates a problem, since <strong>the</strong> table name will <strong>the</strong>n be given analias. If a table appears multiple times in an SQL statement, <strong>the</strong> second and subsequent occurrences mustuse aliases so <strong>the</strong> database can tell <strong>the</strong>m apart. If you’re referring to <strong>the</strong> extra table you added in <strong>the</strong> extrawhere parameter this is going to cause errors.Normally you’ll only be adding extra tables that don’t already appear in <strong>the</strong> query. However, if <strong>the</strong> caseoutlined above does occur, <strong>the</strong>re are a few solutions. First, see if you can get by without including <strong>the</strong> extratable and use <strong>the</strong> one already in <strong>the</strong> query. If that isn’t possible, put your extra() call at <strong>the</strong> front of <strong>the</strong>queryset construction so that your table is <strong>the</strong> first use of that table. Finally, if all else fails, look at <strong>the</strong>query produced and rewrite your where addition to use <strong>the</strong> alias given to your extra table. The alias willbe <strong>the</strong> same each time you construct <strong>the</strong> queryset in <strong>the</strong> same way, so you can rely upon <strong>the</strong> alias name tonot change.• order_by If you need to order <strong>the</strong> resulting queryset using some of <strong>the</strong> new fields or tables you have includedvia extra() use <strong>the</strong> order_by parameter to extra() and pass in a sequence of strings. Thesestrings should ei<strong>the</strong>r be model fields (as in <strong>the</strong> normal order_by() method on querysets), of <strong>the</strong> formtable_name.column_name or an alias for a column that you specified in <strong>the</strong> select parameter toextra().For example:q = Entry.objects.extra(select={’is_recent’: "pub_date > ’2006-01-01’"})q = q.extra(order_by = [’-is_recent’])This would sort all <strong>the</strong> items for which is_recent is true to <strong>the</strong> front of <strong>the</strong> result set (True sorts beforeFalse in a descending ordering).This shows, by <strong>the</strong> way, that you can make multiple calls to extra() and it will behave as you expect(adding new constraints each time).• params The where parameter described above may use standard Python database string placeholders – ’%s’to indicate parameters <strong>the</strong> database engine should automatically quote. The params argument is a list ofany extra parameters to be substituted.Example:6.11. Models 699
<strong>Django</strong> <strong>Documentation</strong>, Release 1.2Entry.objects.extra(where=[’headline=%s’], params=[’Lennon’])Always use params instead of embedding values directly into where because params will ensurevalues are quoted correctly according to your particular backend. (For example, quotes will be escapedcorrectly.)Bad:Entry.objects.extra(where=["headline=’Lennon’"])Good:Entry.objects.extra(where=[’headline=%s’], params=[’Lennon’])deferdefer(*fields)New in version 1.1: Please, see <strong>the</strong> release notes In some complex data-modeling situations, your models mightcontain a lot of fields, some of which could contain a lot of data (for example, text fields), or require expensiveprocessing to convert <strong>the</strong>m to Python objects. If you are using <strong>the</strong> results of a queryset in some situation where youknow you don’t need those particular fields, you can tell <strong>Django</strong> not to retrieve <strong>the</strong>m from <strong>the</strong> database.This is done by passing <strong>the</strong> names of <strong>the</strong> fields to not load to defer():Entry.objects.defer("headline", "body")A queryset that has deferred fields will still return model instances. Each deferred field will be retrieved from <strong>the</strong>database if you access that field (one at a time, not all <strong>the</strong> deferred fields at once).You can make multiple calls to defer(). Each call adds new fields to <strong>the</strong> deferred set:# Defers both <strong>the</strong> body and headline fields.Entry.objects.defer("body").filter(rating=5).defer("headline")The order in which fields are added to <strong>the</strong> deferred set does not matter. Calling defer() with a field name that hasalready been deferred is harmless (<strong>the</strong> field will still be deferred).You can defer loading of fields in related models (if <strong>the</strong> related models are loading via select_related()) byusing <strong>the</strong> standard double-underscore notation to separate related fields:Blog.objects.select_related().defer("entry__headline", "entry__body")If you want to clear <strong>the</strong> set of deferred fields, pass None as a parameter to defer():# Load all fields immediately.my_queryset.defer(None)Some fields in a model won’t be deferred, even if you ask for <strong>the</strong>m. You can never defer <strong>the</strong> loading of <strong>the</strong> primarykey. If you are using select_related() to retrieve o<strong>the</strong>r models at <strong>the</strong> same time you shouldn’t defer <strong>the</strong> loadingof <strong>the</strong> field that connects from <strong>the</strong> primary model to <strong>the</strong> related one (at <strong>the</strong> moment, that doesn’t raise an error, but itwill eventually).Note: The defer() method (and its cousin, only(), below) are only for advanced use-cases. They provide anoptimization for when you have analyzed your queries closely and understand exactly what information you need andhave measured that <strong>the</strong> difference between returning <strong>the</strong> fields you need and <strong>the</strong> full set of fields for <strong>the</strong> model willbe significant. When you are initially developing your applications, don’t bo<strong>the</strong>r using defer(); leave it until yourquery construction has settled down and you understand where <strong>the</strong> hot-points are.700 Chapter 6. API Reference
<strong>Django</strong> <strong>Documentation</strong>, Release 1.2onlyonly(*fields)New in version 1.1: Please, see <strong>the</strong> release notes The only() method is more or less <strong>the</strong> opposite of defer(). Youcall it with <strong>the</strong> fields that should not be deferred when retrieving a model. If you have a model where almost all <strong>the</strong>fields need to be deferred, using only() to specify <strong>the</strong> complementary set of fields could result in simpler code.If you have a model with fields name, age and biography, <strong>the</strong> following two querysets are <strong>the</strong> same, in terms ofdeferred fields:Person.objects.defer("age", "biography")Person.objects.only("name")Whenever you call only() it replaces <strong>the</strong> set of fields to load immediately. The method’s name is mnemonic: onlythose fields are loaded immediately; <strong>the</strong> remainder are deferred. Thus, successive calls to only() result in only <strong>the</strong>final fields being considered:# This will defer all fields except <strong>the</strong> headline.Entry.objects.only("body", "rating").only("headline")Since defer() acts incrementally (adding fields to <strong>the</strong> deferred list), you can combine calls to only() anddefer() and things will behave logically:# Final result is that everything except "headline" is deferred.Entry.objects.only("headline", "body").defer("body")# Final result loads headline and body immediately (only() replaces any# existing set of fields).Entry.objects.defer("body").only("headline", "body")usingusing(alias)New in version 1.2: Please, see <strong>the</strong> release notes This method is for controlling which database <strong>the</strong> QuerySet willbe evaluated against if you are using more than one database. The only argument this method takes is <strong>the</strong> alias of adatabase, as defined in DATABASES.For example:# queries <strong>the</strong> database with <strong>the</strong> ’default’ alias.>>> Entry.objects.all()# queries <strong>the</strong> database with <strong>the</strong> ’backup’ alias>>> Entry.objects.using(’backup’)Methods that do not return QuerySetsThe following QuerySet methods evaluate <strong>the</strong> QuerySet and return something o<strong>the</strong>r than a QuerySet.These methods do not use a cache (see Caching and QuerySets). Ra<strong>the</strong>r, <strong>the</strong>y query <strong>the</strong> database each time <strong>the</strong>y’recalled.getget(**kwargs)Returns <strong>the</strong> object matching <strong>the</strong> given lookup parameters, which should be in <strong>the</strong> format described in Field lookups.get() raises MultipleObjectsReturned if more than one object was found. TheMultipleObjectsReturned exception is an attribute of <strong>the</strong> model class.6.11. Models 701
<strong>Django</strong> <strong>Documentation</strong>, Release 1.2get() raises a DoesNotExist exception if an object wasn’t found for <strong>the</strong> given parameters. This exception is alsoan attribute of <strong>the</strong> model class. Example:Entry.objects.get(id=’foo’) # raises Entry.DoesNotExistThe DoesNotExist exception inherits from django.core.exceptions.ObjectDoesNotExist, so youcan target multiple DoesNotExist exceptions. Example:from django.core.exceptions import ObjectDoesNotExisttry:e = Entry.objects.get(id=3)b = Blog.objects.get(id=1)except ObjectDoesNotExist:print "Ei<strong>the</strong>r <strong>the</strong> entry or blog doesn’t exist."createcreate(**kwargs)A convenience method for creating an object and saving it all in one step. Thus:p = Person.objects.create(first_name="Bruce", last_name="Springsteen")and:p = Person(first_name="Bruce", last_name="Springsteen")p.save(force_insert=True)are equivalent.The force_insert parameter is documented elsewhere, but all it means is that a new object will always be created.Normally you won’t need to worry about this. However, if your model contains a manual primary key value that youset and if that value already exists in <strong>the</strong> database, a call to create() will fail with an IntegrityError sinceprimary keys must be unique. So remember to be prepared to handle <strong>the</strong> exception if you are using manual primarykeys.get_or_createget_or_create(**kwargs)A convenience method for looking up an object with <strong>the</strong> given kwargs, creating one if necessary.Returns a tuple of (object, created), where object is <strong>the</strong> retrieved or created object and created is aboolean specifying whe<strong>the</strong>r a new object was created.This is meant as a shortcut to boilerplatish code and is mostly useful for data-import scripts. For example:try:obj = Person.objects.get(first_name=’John’, last_name=’Lennon’)except Person.DoesNotExist:obj = Person(first_name=’John’, last_name=’Lennon’, birthday=date(1940, 10, 9))obj.save()This pattern gets quite unwieldy as <strong>the</strong> number of fields in a model goes up. The above example can be rewritten usingget_or_create() like so:obj, created = Person.objects.get_or_create(first_name=’John’, last_name=’Lennon’,defaults={’birthday’: date(1940, 10, 9)})Any keyword arguments passed to get_or_create() – except an optional one called defaults – will be usedin a get() call. If an object is found, get_or_create() returns a tuple of that object and False. If an object is702 Chapter 6. API Reference
<strong>Django</strong> <strong>Documentation</strong>, Release 1.2not found, get_or_create() will instantiate and save a new object, returning a tuple of <strong>the</strong> new object and True.The new object will be created roughly according to this algorithm:defaults = kwargs.pop(’defaults’, {})params = dict([(k, v) for k, v in kwargs.items() if ’__’ not in k])params.update(defaults)obj = self.model(**params)obj.save()In English, that means start with any non-’defaults’ keyword argument that doesn’t contain a double underscore(which would indicate a non-exact lookup). Then add <strong>the</strong> contents of defaults, overriding any keys if necessary,and use <strong>the</strong> result as <strong>the</strong> keyword arguments to <strong>the</strong> model class. As hinted at above, this is a simplification of <strong>the</strong>algorithm that is used, but it contains all <strong>the</strong> pertinent details. The internal implementation has some more errorcheckingthan this and handles some extra edge-conditions; if you’re interested, read <strong>the</strong> code.If you have a field named defaults and want to use it as an exact lookup in get_or_create(), just use’defaults__exact’, like so:Foo.objects.get_or_create(defaults__exact=’bar’, defaults={’defaults’: ’baz’})The get_or_create() method has similar error behaviour to create() when you are using manually specifiedprimary keys. If an object needs to be created and <strong>the</strong> key already exists in <strong>the</strong> database, an IntegrityError willbe raised.Finally, a word on using get_or_create() in <strong>Django</strong> views. As mentioned earlier, get_or_create() ismostly useful in scripts that need to parse data and create new records if existing ones aren’t available. But if youneed to use get_or_create() in a view, please make sure to use it only in POST requests unless you have a goodreason not to. GET requests shouldn’t have any effect on data; use POST whenever a request to a page has a side effecton your data. For more, see Safe methods in <strong>the</strong> HTTP spec.countcount()Returns an integer representing <strong>the</strong> number of objects in <strong>the</strong> database matching <strong>the</strong> QuerySet. count() neverraises exceptions.Example:# Returns <strong>the</strong> total number of entries in <strong>the</strong> database.Entry.objects.count()# Returns <strong>the</strong> number of entries whose headline contains ’Lennon’Entry.objects.filter(headline__contains=’Lennon’).count()count() performs a SELECT COUNT(*) behind <strong>the</strong> scenes, so you should always use count() ra<strong>the</strong>r thanloading all of <strong>the</strong> record into Python objects and calling len() on <strong>the</strong> result (unless you need to load <strong>the</strong> objects intomemory anyway, in which case len() will be faster).Depending on which database you’re using (e.g. PostgreSQL vs. MySQL), count() may return a long integerinstead of a normal Python integer. This is an underlying implementation quirk that shouldn’t pose any real-worldproblems.in_bulkin_bulk(id_list)Takes a list of primary-key values and returns a dictionary mapping each primary-key value to an instance of <strong>the</strong> objectwith <strong>the</strong> given ID.Example:6.11. Models 703
<strong>Django</strong> <strong>Documentation</strong>, Release 1.2>>> Blog.objects.in_bulk([1]){1: }>>> Blog.objects.in_bulk([1, 2]){1: , 2: }>>> Blog.objects.in_bulk([]){}If you pass in_bulk() an empty list, you’ll get an empty dictionary.iteratoriterator()Evaluates <strong>the</strong> QuerySet (by performing <strong>the</strong> query) and returns an iterator over <strong>the</strong> results. A QuerySet typicallycaches its results internally so that repeated evaluations do not result in additional queries; iterator() will insteadread results directly, without doing any caching at <strong>the</strong> QuerySet level. For a QuerySet which returns a largenumber of objects, this often results in better performance and a significant reduction in memoryNote that using iterator() on a QuerySet which has already been evaluated will force it to evaluate again,repeating <strong>the</strong> query.latestlatest(field_name=None)Returns <strong>the</strong> latest object in <strong>the</strong> table, by date, using <strong>the</strong> field_name provided as <strong>the</strong> date field.This example returns <strong>the</strong> latest Entry in <strong>the</strong> table, according to <strong>the</strong> pub_date field:Entry.objects.latest(’pub_date’)If your model’s Meta specifies get_latest_by, you can leave off <strong>the</strong> field_name argument to latest().<strong>Django</strong> will use <strong>the</strong> field specified in get_latest_by by default.Like get(), latest() raises DoesNotExist if an object doesn’t exist with <strong>the</strong> given parameters.Note latest() exists purely for convenience and readability.aggregateaggregate(*args, **kwargs)New in version 1.1: Please, see <strong>the</strong> release notes Returns a dictionary of aggregate values (averages, sums, etc)calculated over <strong>the</strong> QuerySet. Each argument to aggregate() specifies a value that will be included in <strong>the</strong>dictionary that is returned.The aggregation functions that are provided by <strong>Django</strong> are described in Aggregation Functions below.Aggregates specified using keyword arguments will use <strong>the</strong> keyword as <strong>the</strong> name for <strong>the</strong> annotation. Anonymousarguments will have an name generated for <strong>the</strong>m based upon <strong>the</strong> name of <strong>the</strong> aggregate function and <strong>the</strong> model fieldthat is being aggregated.For example, if you were manipulating blog entries, you may want to know <strong>the</strong> number of authors that have contributedblog entries:>>> q = Blog.objects.aggregate(Count(’entry’)){’entry__count’: 16}By using a keyword argument to specify <strong>the</strong> aggregate function, you can control <strong>the</strong> name of <strong>the</strong> aggregation valuethat is returned:>>> q = Blog.objects.aggregate(number_of_entries=Count(’entry’)){’number_of_entries’: 16}704 Chapter 6. API Reference
<strong>Django</strong> <strong>Documentation</strong>, Release 1.2For an in-depth discussion of aggregation, see <strong>the</strong> topic guide on Aggregation.existsexists()New in version 1.2: Please, see <strong>the</strong> release notes Returns True if <strong>the</strong> QuerySet contains any results, and False ifnot. This tries to perform <strong>the</strong> query in <strong>the</strong> simplest and fastest way possible, but it does execute nearly <strong>the</strong> samequery. This means that calling QuerySet.exists() is faster than bool(some_query_set), but not bya large degree. If some_query_set has not yet been evaluated, but you know that it will be at some point,<strong>the</strong>n using some_query_set.exists() will do more overall work (an additional query) than simply usingbool(some_query_set).updateupdate(**kwargs)Performs an SQL update query for <strong>the</strong> specified fields, and returns <strong>the</strong> number of rows affected. The update()method is applied instantly and <strong>the</strong> only restriction on <strong>the</strong> QuerySet that is updated is that it can only updatecolumns in <strong>the</strong> model’s main table. Filtering based on related fields is still possible. You cannot call update() on aQuerySet that has had a slice taken or can o<strong>the</strong>rwise no longer be filtered.For example, if you wanted to update all <strong>the</strong> entries in a particular blog to use <strong>the</strong> same headline:>>> b = Blog.objects.get(pk=1)# Update all <strong>the</strong> headlines belonging to this Blog.>>> Entry.objects.select_related().filter(blog=b).update(headline=’Everything is <strong>the</strong> same’)The update() method does a bulk update and does not call any save() methods on your models, nor does it emit<strong>the</strong> pre_save or post_save signals (which are a consequence of calling save()).deletedelete()Performs an SQL delete query on all rows in <strong>the</strong> QuerySet. The delete() is applied instantly. You cannot calldelete() on a QuerySet that has had a slice taken or can o<strong>the</strong>rwise no longer be filtered.For example, to delete all <strong>the</strong> entries in a particular blog:>>> b = Blog.objects.get(pk=1)# Delete all <strong>the</strong> entries belonging to this Blog.>>> Entry.objects.filter(blog=b).delete()<strong>Django</strong> emulates <strong>the</strong> SQL constraint ON DELETE CASCADE – in o<strong>the</strong>r words, any objects with foreign keys pointingat <strong>the</strong> objects to be deleted will be deleted along with <strong>the</strong>m. For example:blogs = Blog.objects.all()# This will delete all Blogs and all of <strong>the</strong>ir Entry objects.blogs.delete()The delete() method does a bulk delete and does not call any delete() methods on your models. It does,however, emit <strong>the</strong> pre_delete and post_delete signals for all deleted objects (including cascaded deletions).Field lookupsField lookups are how you specify <strong>the</strong> meat of an SQL WHERE clause. They’re specified as keyword arguments to <strong>the</strong>QuerySet methods filter(), exclude() and get().6.11. Models 705
<strong>Django</strong> <strong>Documentation</strong>, Release 1.2For an introduction, see Field lookups.exact Exact match. If <strong>the</strong> value provided for comparison is None, it will be interpreted as an SQL NULL (See isnullfor more details).Examples:Entry.objects.get(id__exact=14)Entry.objects.get(id__exact=None)SQL equivalents:SELECT ... WHERE id = 14;SELECT ... WHERE id IS NULL;Changed in version 1.0: The semantics of id__exact=None have changed in <strong>Django</strong> 1.0. Previously, it was(intentionally) converted to WHERE id = NULL at <strong>the</strong> SQL level, which would never match anything. It has nowbeen changed to behave <strong>the</strong> same as id__isnull=True.MySQL comparisonsIn MySQL, a database table’s “collation” setting determines whe<strong>the</strong>r exact comparisons are case-sensitive. This isa database setting, not a <strong>Django</strong> setting. It’s possible to configure your MySQL tables to use case-sensitive comparisons,but some trade-offs are involved. For more information about this, see <strong>the</strong> collation section in <strong>the</strong> databasesdocumentation.iexact Case-insensitive exact match.Example:Blog.objects.get(name__iexact=’beatles blog’)SQL equivalent:SELECT ... WHERE name ILIKE ’beatles blog’;Note this will match ’Beatles Blog’, ’beatles blog’, ’BeAtLes BLoG’, etc.SQLite usersWhen using <strong>the</strong> SQLite backend and Unicode (non-ASCII) strings, bear in mind <strong>the</strong> database note about string comparisons.SQLite does not do case-insensitive matching for Unicode strings.containsExample:Case-sensitive containment test.Entry.objects.get(headline__contains=’Lennon’)SQL equivalent:SELECT ... WHERE headline LIKE ’%Lennon%’;Note this will match <strong>the</strong> headline ’Today Lennon honored’ but not ’today lennon honored’.SQLite doesn’t support case-sensitive LIKE statements; contains acts like icontains for SQLite.706 Chapter 6. API Reference
<strong>Django</strong> <strong>Documentation</strong>, Release 1.2icontains Case-insensitive containment test.Example:Entry.objects.get(headline__icontains=’Lennon’)SQL equivalent:SELECT ... WHERE headline ILIKE ’%Lennon%’;SQLite usersWhen using <strong>the</strong> SQLite backend and Unicode (non-ASCII) strings, bear in mind <strong>the</strong> database note about string comparisons.inIn a given list.Example:Entry.objects.filter(id__in=[1, 3, 4])SQL equivalent:SELECT ... WHERE id IN (1, 3, 4);You can also use a queryset to dynamically evaluate <strong>the</strong> list of values instead of providing a list of literal values:inner_qs = Blog.objects.filter(name__contains=’Cheddar’)entries = Entry.objects.filter(blog__in=inner_qs)This queryset will be evaluated as subselect statement:SELECT ... WHERE blog.id IN (SELECT id FROM ... WHERE NAME LIKE ’%Cheddar%’)The above code fragment could also be written as follows:inner_q = Blog.objects.filter(name__contains=’Cheddar’).values(’pk’).queryentries = Entry.objects.filter(blog__in=inner_q)Changed in version 1.1: In <strong>Django</strong> 1.0, only <strong>the</strong> latter piece of code is valid. This second form is a bit less readableand unnatural to write, since it accesses <strong>the</strong> internal query attribute and requires a ValuesQuerySet. If your codedoesn’t require compatibility with <strong>Django</strong> 1.0, use <strong>the</strong> first form, passing in a queryset directly.If you pass in a ValuesQuerySet or ValuesListQuerySet (<strong>the</strong> result of calling values() orvalues_list() on a queryset) as <strong>the</strong> value to an __in lookup, you need to ensure you are only extracting onefield in <strong>the</strong> result. For example, this will work (filtering on <strong>the</strong> blog names):inner_qs = Blog.objects.filter(name__contains=’Ch’).values(’name’)entries = Entry.objects.filter(blog__name__in=inner_qs)This example will raise an exception, since <strong>the</strong> inner query is trying to extract two field values, where only one isexpected:# Bad code! Will raise a TypeError.inner_qs = Blog.objects.filter(name__contains=’Ch’).values(’name’, ’id’)entries = Entry.objects.filter(blog__name__in=inner_qs)Warning: This query attribute should be considered an opaque internal attribute. It’s fine to use it like above,but its API may change between <strong>Django</strong> versions.6.11. Models 707
<strong>Django</strong> <strong>Documentation</strong>, Release 1.2Performance considerationsBe cautious about using nested queries and understand your database server’s performance characteristics (if in doubt,benchmark!). Some database backends, most notably MySQL, don’t optimize nested queries very well. It is moreefficient, in those cases, to extract a list of values and <strong>the</strong>n pass that into <strong>the</strong> second query. That is, execute two queriesinstead of one:values = Blog.objects.filter(name__contains=’Cheddar’).values_list(’pk’, flat=True)entries = Entry.objects.filter(blog__in=list(values))Note <strong>the</strong> list() call around <strong>the</strong> Blog QuerySet to force execution of <strong>the</strong> first query. Without it, a nested querywould be executed, because QuerySets are lazy.gt Greater than.Example:Entry.objects.filter(id__gt=4)SQL equivalent:SELECT ... WHERE id > 4;gteGreater than or equal to.ltLess than.lteLess than or equal to.startswithExample:Case-sensitive starts-with.Entry.objects.filter(headline__startswith=’Will’)SQL equivalent:SELECT ... WHERE headline LIKE ’Will%’;SQLite doesn’t support case-sensitive LIKE statements; startswith acts like istartswith for SQLite.istartswithExample:Case-insensitive starts-with.Entry.objects.filter(headline__istartswith=’will’)SQL equivalent:SELECT ... WHERE headline ILIKE ’Will%’;708 Chapter 6. API Reference
<strong>Django</strong> <strong>Documentation</strong>, Release 1.2SQLite usersWhen using <strong>the</strong> SQLite backend and Unicode (non-ASCII) strings, bear in mind <strong>the</strong> database note about string comparisons.endswithExample:Case-sensitive ends-with.Entry.objects.filter(headline__endswith=’cats’)SQL equivalent:SELECT ... WHERE headline LIKE ’%cats’;SQLite doesn’t support case-sensitive LIKE statements; endswith acts like iendswith for SQLite.iendswithExample:Case-insensitive ends-with.Entry.objects.filter(headline__iendswith=’will’)SQL equivalent:SELECT ... WHERE headline ILIKE ’%will’SQLite usersWhen using <strong>the</strong> SQLite backend and Unicode (non-ASCII) strings, bear in mind <strong>the</strong> database note about string comparisons.rangeExample:Range test (inclusive).start_date = datetime.date(2005, 1, 1)end_date = datetime.date(2005, 3, 31)Entry.objects.filter(pub_date__range=(start_date, end_date))SQL equivalent:SELECT ... WHERE pub_date BETWEEN ’2005-01-01’ and ’2005-03-31’;You can use range anywhere you can use BETWEEN in SQL – for dates, numbers and even characters.year For date/datetime fields, exact year match. Takes a four-digit year.Example:Entry.objects.filter(pub_date__year=2005)SQL equivalent:6.11. Models 709
<strong>Django</strong> <strong>Documentation</strong>, Release 1.2SELECT ... WHERE EXTRACT(’year’ FROM pub_date) = ’2005’;(The exact SQL syntax varies for each database engine.)month For date/datetime fields, exact month match. Takes an integer 1 (January) through 12 (December).Example:Entry.objects.filter(pub_date__month=12)SQL equivalent:SELECT ... WHERE EXTRACT(’month’ FROM pub_date) = ’12’;(The exact SQL syntax varies for each database engine.)day For date/datetime fields, exact day match.Example:Entry.objects.filter(pub_date__day=3)SQL equivalent:SELECT ... WHERE EXTRACT(’day’ FROM pub_date) = ’3’;(The exact SQL syntax varies for each database engine.)Note this will match any record with a pub_date on <strong>the</strong> third day of <strong>the</strong> month, such as January 3, July 3, etc.week_dayNew in version 1.1: Please, see <strong>the</strong> release notes For date/datetime fields, a ‘day of <strong>the</strong> week’ match.Takes an integer value representing <strong>the</strong> day of week from 1 (Sunday) to 7 (Saturday).Example:Entry.objects.filter(pub_date__week_day=2)(No equivalent SQL code fragment is included for this lookup because implementation of <strong>the</strong> relevant query variesamong different database engines.)Note this will match any record with a pub_date that falls on a Monday (day 2 of <strong>the</strong> week), regardless of <strong>the</strong> monthor year in which it occurs. Week days are indexed with day 1 being Sunday and day 7 being Saturday.isnull Takes ei<strong>the</strong>r True or False, which correspond to SQL queries of IS NULL and IS NOT NULL, respectively.Example:Entry.objects.filter(pub_date__isnull=True)SQL equivalent:SELECT ... WHERE pub_date IS NULL;710 Chapter 6. API Reference
<strong>Django</strong> <strong>Documentation</strong>, Release 1.2search A boolean full-text search, taking advantage of full-text indexing. This is like contains but is significantlyfaster due to full-text indexing.Example:Entry.objects.filter(headline__search="+<strong>Django</strong> -jazz Python")SQL equivalent:SELECT ... WHERE MATCH(tablename, headline) AGAINST (+<strong>Django</strong> -jazz Python IN BOOLEAN MODE);Note this is only available in MySQL and requires direct manipulation of <strong>the</strong> database to add <strong>the</strong> full-text index. Bydefault <strong>Django</strong> uses BOOLEAN MODE for full text searches. See <strong>the</strong> MySQL documentation for additional details.regexNew in version 1.0: Please, see <strong>the</strong> release notes Case-sensitive regular expression match.The regular expression syntax is that of <strong>the</strong> database backend in use. In <strong>the</strong> case of SQLite, which has no built inregular expression support, this feature is provided by a (Python) user-defined REGEXP function, and <strong>the</strong> regularexpression syntax is <strong>the</strong>refore that of Python’s re module.Example:Entry.objects.get(title__regex=r’^(An?|The) +’)SQL equivalents:SELECT ... WHERE title REGEXP BINARY ’^(An?|The) +’; -- MySQLSELECT ... WHERE REGEXP_LIKE(title, ’^(an?|<strong>the</strong>) +’, ’c’); -- OracleSELECT ... WHERE title ~ ’^(An?|The) +’; -- PostgreSQLSELECT ... WHERE title REGEXP ’^(An?|The) +’; -- SQLiteUsing raw strings (e.g., r’foo’ instead of ’foo’) for passing in <strong>the</strong> regular expression syntax is recommended.iregex New in version 1.0: Please, see <strong>the</strong> release notes Case-insensitive regular expression match.Example:Entry.objects.get(title__iregex=r’^(an?|<strong>the</strong>) +’)SQL equivalents:SELECT ... WHERE title REGEXP ’^(an?|<strong>the</strong>) +’; -- MySQLSELECT ... WHERE REGEXP_LIKE(title, ’^(an?|<strong>the</strong>) +’, ’i’); -- OracleSELECT ... WHERE title ~* ’^(an?|<strong>the</strong>) +’; -- PostgreSQLSELECT ... WHERE title REGEXP ’(?i)^(an?|<strong>the</strong>) +’; -- SQLiteAggregation FunctionsNew in version 1.1: Please, see <strong>the</strong> release notes <strong>Django</strong> provides <strong>the</strong> following aggregation functions in <strong>the</strong>django.db.models module. For details on how to use <strong>the</strong>se aggregate functions, see <strong>the</strong> topic guide on aggregation.6.11. Models 711
<strong>Django</strong> <strong>Documentation</strong>, Release 1.2Avgclass Avg(field)Returns <strong>the</strong> mean value of <strong>the</strong> given field.• Default alias: __avg• Return type: floatCountclass Count(field, distinct=False)Returns <strong>the</strong> number of objects that are related through <strong>the</strong> provided field.• Default alias: __count• Return type: integerHas one optional argument:distinctIf distinct=True, <strong>the</strong> count will only include unique instances. This has <strong>the</strong> SQL equivalent ofCOUNT(DISTINCT field). Default value is False.Maxclass Max(field)Returns <strong>the</strong> maximum value of <strong>the</strong> given field.• Default alias: __max• Return type: same as input fieldMinclass Min(field)Returns <strong>the</strong> minimum value of <strong>the</strong> given field.• Default alias: __min• Return type: same as input fieldStdDevclass StdDev(field, sample=False)Returns <strong>the</strong> standard deviation of <strong>the</strong> data in <strong>the</strong> provided field.• Default alias: __stddev• Return type: floatHas one optional argument:sampleBy default, StdDev returns <strong>the</strong> population standard deviation. However, if sample=True, <strong>the</strong> return valuewill be <strong>the</strong> sample standard deviation.SQLiteSQLite doesn’t provide StdDev out of <strong>the</strong> box. An implementation is available as an extension module for SQLite.Consult <strong>the</strong> SQlite documentation for instructions on obtaining and installing this extension.712 Chapter 6. API Reference
<strong>Django</strong> <strong>Documentation</strong>, Release 1.2Sumclass Sum(field)Computes <strong>the</strong> sum of all values of <strong>the</strong> given field.• Default alias: __sum• Return type: same as input fieldVarianceclass Variance(field, sample=False)Returns <strong>the</strong> variance of <strong>the</strong> data in <strong>the</strong> provided field.• Default alias: __variance• Return type: floatHas one optional argument:sampleBy default, Variance returns <strong>the</strong> population variance. However, if sample=True, <strong>the</strong> return value will be<strong>the</strong> sample variance.SQLiteSQLite doesn’t provide Variance out of <strong>the</strong> box. An implementation is available as an extension module for SQLite.Consult <strong>the</strong> SQlite documentation for instructions on obtaining and installing this extension.6.12 Request and response objects6.12.1 Quick overview<strong>Django</strong> uses request and response objects to pass state through <strong>the</strong> system.When a page is requested, <strong>Django</strong> creates an HttpRequest object that contains metadata about <strong>the</strong> request. Then<strong>Django</strong> loads <strong>the</strong> appropriate view, passing <strong>the</strong> HttpRequest as <strong>the</strong> first argument to <strong>the</strong> view function. Each viewis responsible for returning an HttpResponse object.This document explains <strong>the</strong> APIs for HttpRequest and HttpResponse objects.6.12.2 HttpRequest objectsclass HttpRequestAttributesAll attributes except session should be considered read-only.HttpRequest.pathA string representing <strong>the</strong> full path to <strong>the</strong> requested page, not including <strong>the</strong> domain.Example: "/music/bands/<strong>the</strong>_beatles/"6.12. Request and response objects 713
<strong>Django</strong> <strong>Documentation</strong>, Release 1.2HttpRequest.path_infoUnder some web server configurations, <strong>the</strong> portion of <strong>the</strong> URL after <strong>the</strong> host name is split up into a script prefixportion and a path info portion (this happens, for example, when using <strong>the</strong> django.root option with <strong>the</strong>modpython handler from Apache). The path_info attribute always contains <strong>the</strong> path info portion of <strong>the</strong> path,no matter what web server is being used. Using this instead of attr:~HttpRequest.path can make your code mucheasier to move between test and deployment servers.For example, if <strong>the</strong> django.root for your application is set to "/minfo", <strong>the</strong>npath might be "/minfo/music/bands/<strong>the</strong>_beatles/" and path_info would be"/music/bands/<strong>the</strong>_beatles/".HttpRequest.methodA string representing <strong>the</strong> HTTP method used in <strong>the</strong> request. This is guaranteed to be uppercase. Example:if request.method == ’GET’:do_something()elif request.method == ’POST’:do_something_else()HttpRequest.encodingA string representing <strong>the</strong> current encoding used to decode form submission data (or None, which means <strong>the</strong>DEFAULT_CHARSET setting is used). You can write to this attribute to change <strong>the</strong> encoding used when accessing<strong>the</strong> form data. Any subsequent attribute accesses (such as reading from GET or POST) will use <strong>the</strong> newencoding value. Useful if you know <strong>the</strong> form data is not in <strong>the</strong> DEFAULT_CHARSET encoding.HttpRequest.GETA dictionary-like object containing all given HTTP GET parameters. See <strong>the</strong> QueryDict documentationbelow.HttpRequest.POSTA dictionary-like object containing all given HTTP POST parameters. See <strong>the</strong> QueryDict documentationbelow.It’s possible that a request can come in via POST with an empty POST dictionary – if, say, a form is requestedvia <strong>the</strong> POST HTTP method but does not include form data. Therefore, you shouldn’t use if request.POSTto check for use of <strong>the</strong> POST method; instead, use if request.method == "POST" (see above).Note: POST does not include file-upload information. See FILES.HttpRequest.REQUESTFor convenience, a dictionary-like object that searches POST first, <strong>the</strong>n GET. Inspired by PHP’s $_REQUEST.For example, if GET = {"name": "john"} and POST = {"age": ’34’}, REQUEST["name"]would be "john", and REQUEST["age"] would be "34".It’s strongly suggested that you use GET and POST instead of REQUEST, because <strong>the</strong> former are more explicit.HttpRequest.COOKIESA standard Python dictionary containing all cookies. Keys and values are strings.HttpRequest.FILESA dictionary-like object containing all uploaded files. Each key in FILES is <strong>the</strong> name from <strong>the</strong> . Each value in FILES is an UploadedFile as described below.See Managing files for more information.Note that FILES will only contain data if <strong>the</strong> request method was POST and <strong>the</strong> that posted to <strong>the</strong>request had enctype="multipart/form-data". O<strong>the</strong>rwise, FILES will be a blank dictionary-like object.Changed in version 1.0: Please, see <strong>the</strong> release notes In previous versions of <strong>Django</strong>, request.FILEScontained simple dict objects representing uploaded files. This is no longer true – files are represented byUploadedFile objects.714 Chapter 6. API Reference
<strong>Django</strong> <strong>Documentation</strong>, Release 1.2These UploadedFile objects will emulate <strong>the</strong> old-style dict interface, but this is deprecated and will beremoved in <strong>the</strong> next release of <strong>Django</strong>.HttpRequest.METAA standard Python dictionary containing all available HTTP headers. Available headers depend on <strong>the</strong> clientand server, but here are some examples:•CONTENT_LENGTH•CONTENT_TYPE•HTTP_ACCEPT_ENCODING•HTTP_ACCEPT_LANGUAGE•HTTP_HOST – The HTTP Host header sent by <strong>the</strong> client.•HTTP_REFERER – The referring page, if any.•HTTP_USER_AGENT – The client’s user-agent string.•QUERY_STRING – The query string, as a single (unparsed) string.•REMOTE_ADDR – The IP address of <strong>the</strong> client.•REMOTE_HOST – The hostname of <strong>the</strong> client.•REMOTE_USER – The user au<strong>the</strong>nticated by <strong>the</strong> Web server, if any.•REQUEST_METHOD – A string such as "GET" or "POST".•SERVER_NAME – The hostname of <strong>the</strong> server.•SERVER_PORT – The port of <strong>the</strong> server.With <strong>the</strong> exception of CONTENT_LENGTH and CONTENT_TYPE, as given above, any HTTP headers in <strong>the</strong>request are converted to META keys by converting all characters to uppercase, replacing any hyphens withunderscores and adding an HTTP_ prefix to <strong>the</strong> name. So, for example, a header called X-Bender would bemapped to <strong>the</strong> META key HTTP_X_BENDER.HttpRequest.userA django.contrib.auth.models.User object representing <strong>the</strong> currently loggedinuser. If <strong>the</strong> user isn’t currently logged in, user will be set to an instance ofdjango.contrib.auth.models.AnonymousUser. You can tell <strong>the</strong>m apart withis_au<strong>the</strong>nticated(), like so:if request.user.is_au<strong>the</strong>nticated():# Do something for logged-in users.else:# Do something for anonymous users.user is only available if your <strong>Django</strong> installation has <strong>the</strong> Au<strong>the</strong>nticationMiddleware activated. Formore, see User au<strong>the</strong>ntication in <strong>Django</strong>.HttpRequest.sessionA readable-and-writable, dictionary-like object that represents <strong>the</strong> current session. This is only available if your<strong>Django</strong> installation has session support activated. See <strong>the</strong> session documentation for full details.HttpRequest.raw_post_dataThe raw HTTP POST data. This is only useful for advanced processing. Use POST instead.HttpRequest.urlconfNot defined by <strong>Django</strong> itself, but will be read if o<strong>the</strong>r code (e.g., a custom middleware class) sets it. Whenpresent, this will be used as <strong>the</strong> root URLconf for <strong>the</strong> current request, overriding <strong>the</strong> ROOT_URLCONF setting.See How <strong>Django</strong> processes a request for details.6.12. Request and response objects 715
<strong>Django</strong> <strong>Documentation</strong>, Release 1.2MethodsHttpRequest.get_host()Returns <strong>the</strong> originating host of <strong>the</strong> request using information from <strong>the</strong> HTTP_X_FORWARDED_HOST andHTTP_HOST headers (in that order). If <strong>the</strong>y don’t provide a value, <strong>the</strong> method uses a combination ofSERVER_NAME and SERVER_PORT as detailed in PEP 333.Example: "127.0.0.1:8000"Note: The get_host() method fails when <strong>the</strong> host is behind multiple proxies. One solution is to usemiddleware to rewrite <strong>the</strong> proxy headers, as in <strong>the</strong> following example:class MultipleProxyMiddleware(object):FORWARDED_FOR_FIELDS = [’HTTP_X_FORWARDED_FOR’,’HTTP_X_FORWARDED_HOST’,’HTTP_X_FORWARDED_SERVER’,]def process_request(self, request):"""Rewrites <strong>the</strong> proxy headers so that only <strong>the</strong> mostrecent proxy is used."""for field in self.FORWARDED_FOR_FIELDS:if field in request.META:if ’,’ in request.META[field]:parts = request.META[field].split(’,’)request.META[field] = parts[-1].strip()HttpRequest.get_full_path()Returns <strong>the</strong> path, plus an appended query string, if applicable.Example: "/music/bands/<strong>the</strong>_beatles/?print=true"HttpRequest.build_absolute_uri(location)Returns <strong>the</strong> absolute URI form of location.request.get_full_path().If no location is provided, <strong>the</strong> location will be set toIf <strong>the</strong> location is already an absolute URI, it will not be altered. O<strong>the</strong>rwise <strong>the</strong> absolute URI is built using <strong>the</strong>server variables available in this request.Example: "http://example.com/music/bands/<strong>the</strong>_beatles/?print=true"HttpRequest.is_secure()Returns True if <strong>the</strong> request is secure; that is, if it was made with HTTPS.HttpRequest.is_ajax()Returns True if <strong>the</strong> request was made via an XMLHttpRequest, by checking <strong>the</strong>HTTP_X_REQUESTED_WITH header for <strong>the</strong> string ’XMLHttpRequest’. Most modern JavaScriptlibraries send this header. If you write your own XMLHttpRequest call (on <strong>the</strong> browser side), you’ll have to setthis header manually if you want is_ajax() to work.6.12.3 UploadedFile objectsclass UploadedFile716 Chapter 6. API Reference
<strong>Django</strong> <strong>Documentation</strong>, Release 1.2AttributesUploadedFile.nameThe name of <strong>the</strong> uploaded file.UploadedFile.sizeThe size, in bytes, of <strong>the</strong> uploaded file.MethodsUploadedFile.chunks(chunk_size=None)Returns a generator that yields sequential chunks of data.UploadedFile.read(num_bytes=None)<strong>Read</strong> a number of bytes from <strong>the</strong> file.6.12.4 QueryDict objectsclass QueryDictIn an HttpRequest object, <strong>the</strong> GET and POST attributes are instances of django.http.QueryDict.QueryDict is a dictionary-like class customized to deal with multiple values for <strong>the</strong> same key. This is necessarybecause some HTML form elements, notably , pass multiple values for <strong>the</strong>same key.QueryDict instances are immutable, unless you create a copy() of <strong>the</strong>m. That means you can’t change attributesof request.POST and request.GET directly.MethodsQueryDict implements all <strong>the</strong> standard dictionary methods, because it’s a subclass of dictionary. Exceptions areoutlined here:QueryDict.__getitem__(key)Returns <strong>the</strong> value for <strong>the</strong> given key. If <strong>the</strong> key has more than one value, __getitem__() returns <strong>the</strong> lastvalue. Raises django.utils.datastructures.MultiValueDictKeyError if <strong>the</strong> key does notexist. (This is a subclass of Python’s standard KeyError, so you can stick to catching KeyError.)QueryDict.__setitem__(key, value)Sets <strong>the</strong> given key to [value] (a Python list whose single element is value). Note that this, as o<strong>the</strong>r dictionaryfunctions that have side effects, can only be called on a mutable QueryDict (one that was created viacopy()).QueryDict.__contains__(key)Returns True if <strong>the</strong> given key is set. This lets you do, e.g., if "foo" in request.GET.QueryDict.get(key, default)Uses <strong>the</strong> same logic as __getitem__() above, with a hook for returning a default value if <strong>the</strong> key doesn’texist.QueryDict.setdefault(key, default)Just like <strong>the</strong> standard dictionary setdefault() method, except it uses __setitem__() internally.QueryDict.update(o<strong>the</strong>r_dict)Takes ei<strong>the</strong>r a QueryDict or standard dictionary. Just like <strong>the</strong> standard dictionary update() method, exceptit appends to <strong>the</strong> current dictionary items ra<strong>the</strong>r than replacing <strong>the</strong>m. For example:6.12. Request and response objects 717
<strong>Django</strong> <strong>Documentation</strong>, Release 1.2>>> q = QueryDict(’a=1’)>>> q = q.copy() # to make it mutable>>> q.update({’a’: ’2’})>>> q.getlist(’a’)[u’1’, u’2’]>>> q[’a’] # returns <strong>the</strong> last[u’2’]QueryDict.items()Just like <strong>the</strong> standard dictionary items() method,__getitem__(). For example:except this uses <strong>the</strong> same last-value logic as>>> q = QueryDict(’a=1&a=2&a=3’)>>> q.items()[(u’a’, u’3’)]QueryDict.iteritems()Just like <strong>the</strong> standard dictionary iteritems() method. Like QueryDict.items() this uses <strong>the</strong> samelast-value logic as QueryDict.__getitem__().QueryDict.iterlists()Like QueryDict.iteritems() except it includes all values, as a list, for each member of <strong>the</strong> dictionary.QueryDict.values()Just like <strong>the</strong> standard dictionary values() method, except this uses <strong>the</strong> same last-value logic as__getitem__(). For example:>>> q = QueryDict(’a=1&a=2&a=3’)>>> q.values()[u’3’]QueryDict.itervalues()Just like QueryDict.values(), except an iterator.In addition, QueryDict has <strong>the</strong> following methods:QueryDict.copy()Returns a copy of <strong>the</strong> object, using copy.deepcopy() from <strong>the</strong> Python standard library. The copy will bemutable – that is, you can change its values.QueryDict.getlist(key)Returns <strong>the</strong> data with <strong>the</strong> requested key, as a Python list. Returns an empty list if <strong>the</strong> key doesn’t exist. It’sguaranteed to return a list of some sort.QueryDict.setlist(key, list_)Sets <strong>the</strong> given key to list_ (unlike __setitem__()).QueryDict.appendlist(key, item)Appends an item to <strong>the</strong> internal list associated with key.QueryDict.setlistdefault(key, default_list)Just like setdefault, except it takes a list of values instead of a single value.QueryDict.lists()Like items(), except it includes all values, as a list, for each member of <strong>the</strong> dictionary. For example:>>> q = QueryDict(’a=1&a=2&a=3’)>>> q.lists()[(u’a’, [u’1’, u’2’, u’3’])]718 Chapter 6. API Reference
<strong>Django</strong> <strong>Documentation</strong>, Release 1.2QueryDict.urlencode()Returns a string of <strong>the</strong> data in query-string format. Example: "a=2&b=3&b=5".6.12.5 HttpResponse objectsclass HttpResponseIn contrast to HttpRequest objects, which are created automatically by <strong>Django</strong>, HttpResponse objects are yourresponsibility. Each view you write is responsible for instantiating, populating and returning an HttpResponse.The HttpResponse class lives in <strong>the</strong> django.http module.UsagePassing stringsTypical usage is to pass <strong>the</strong> contents of <strong>the</strong> page, as a string, to <strong>the</strong> HttpResponse constructor:>>> response = HttpResponse("Here’s <strong>the</strong> text of <strong>the</strong> Web page.")>>> response = HttpResponse("Text only, please.", mimetype="text/plain")But if you want to add content incrementally, you can use response as a file-like object:>>> response = HttpResponse()>>> response.write("Here’s <strong>the</strong> text of <strong>the</strong> Web page.")>>> response.write("Here’s ano<strong>the</strong>r paragraph.")Passing iteratorsFinally, you can pass HttpResponse an iterator ra<strong>the</strong>r than passing it hard-coded strings. If you use this technique,follow <strong>the</strong>se guidelines:• The iterator should return strings.• If an HttpResponse has been initialized with an iterator as its content, you can’t use <strong>the</strong> class:HttpResponseinstance as a file-like object. Doing so will raise Exception.Setting headersTo set or remove a header in your response, treat it like a dictionary:>>> response = HttpResponse()>>> response[’Cache-Control’] = ’no-cache’>>> del response[’Cache-Control’]Note that unlike a dictionary, del doesn’t raise KeyError if <strong>the</strong> header doesn’t exist. New in version 1.1: Please,see <strong>the</strong> release notes HTTP headers cannot contain newlines. An attempt to set a header containing a newline character(CR or LF) will raise BadHeaderErrorTelling <strong>the</strong> browser to treat <strong>the</strong> response as a file attachmentTo tell <strong>the</strong> browser to treat <strong>the</strong> response as a file attachment, use <strong>the</strong> mimetype argument and set <strong>the</strong>Content-Disposition header. For example, this is how you might return a Microsoft Excel spreadsheet:6.12. Request and response objects 719
<strong>Django</strong> <strong>Documentation</strong>, Release 1.2>>> response = HttpResponse(my_data, mimetype=’application/vnd.ms-excel’)>>> response[’Content-Disposition’] = ’attachment; filename=foo.xls’There’s nothing <strong>Django</strong>-specific about <strong>the</strong> Content-Disposition header, but it’s easy to forget <strong>the</strong> syntax, sowe’ve included it here.AttributesHttpResponse.contentA normal Python string representing <strong>the</strong> content, encoded from a Unicode object if necessary.HttpResponse.status_codeThe HTTP Status code for <strong>the</strong> response.MethodsHttpResponse.__init__(content=’‘, mimetype=None, status=200, content_type=DEFAULT_CONTENT_TYPE)Instantiates an HttpResponse object with <strong>the</strong> given page content (a string) and MIME type.DEFAULT_CONTENT_TYPE is ’text/html’.content can be an iterator or a string. If it’s an iterator, it should return strings, and those strings will be joinedtoge<strong>the</strong>r to form <strong>the</strong> content of <strong>the</strong> response.status is <strong>the</strong> HTTP Status code for <strong>the</strong> response.content_type is an alias for mimetype. Historically, this parameter was only called mimetype, but sincethis is actually <strong>the</strong> value included in <strong>the</strong> HTTP Content-Type header, it can also include <strong>the</strong> character setencoding, which makes it more than just a MIME type specification. If mimetype is specified (not None),that value is used. O<strong>the</strong>rwise, content_type is used. If nei<strong>the</strong>r is given, <strong>the</strong> DEFAULT_CONTENT_TYPEsetting is used.HttpResponse.__setitem__(header, value)Sets <strong>the</strong> given header name to <strong>the</strong> given value. Both header and value should be strings.HttpResponse.__delitem__(header)Deletes <strong>the</strong> header with <strong>the</strong> given name. Fails silently if <strong>the</strong> header doesn’t exist. Case-insensitive.HttpResponse.__getitem__(header)Returns <strong>the</strong> value for <strong>the</strong> given header name. Case-insensitive.HttpResponse.has_header(header)Returns True or False based on a case-insensitive check for a header with <strong>the</strong> given name.HttpResponse.set_cookie(key, value=’‘, max_age=None, expires=None, path=’/’, domain=None, secure=None)Sets a cookie. The parameters are <strong>the</strong> same as in <strong>the</strong> cookie Morsel object in <strong>the</strong> Python standard library.•max_age should be a number of seconds, or None (default) if <strong>the</strong> cookie should last only as long as <strong>the</strong>client’s browser session.•expires should be a string in <strong>the</strong> format "Wdy, DD-Mon-YY HH:MM:SS GMT".•Use domain if you want to set a cross-domain cookie. For example, domain=".lawrence.com"will set a cookie that is readable by <strong>the</strong> domains www.lawrence.com, blogs.lawrence.com and calendars.lawrence.com.O<strong>the</strong>rwise, a cookie will only be readable by <strong>the</strong> domain that set it.HttpResponse.delete_cookie(key, path=’/’, domain=None)Deletes <strong>the</strong> cookie with <strong>the</strong> given key. Fails silently if <strong>the</strong> key doesn’t exist.The720 Chapter 6. API Reference
<strong>Django</strong> <strong>Documentation</strong>, Release 1.2Due to <strong>the</strong> way cookies work, path and domain should be <strong>the</strong> same values you used in set_cookie() –o<strong>the</strong>rwise <strong>the</strong> cookie may not be deleted.HttpResponse.write(content)This method makes an HttpResponse instance a file-like object.HttpResponse.flush()This method makes an HttpResponse instance a file-like object.HttpResponse.tell()This method makes an HttpResponse instance a file-like object.HttpResponse subclasses<strong>Django</strong> includes a number of HttpResponse subclasses that handle different types of HTTP responses.HttpResponse, <strong>the</strong>se subclasses live in django.http.class HttpResponseRedirectThe constructor takes a single argument – <strong>the</strong> path to redirect to. This can be a fully qualified URL (e.g.’http://www.yahoo.com/search/’) or an absolute path with no domain (e.g. ’/search/’). Notethat this returns an HTTP status code 302.class HttpResponsePermanentRedirectLike HttpResponseRedirect, but it returns a permanent redirect (HTTP status code 301) instead of a“found” redirect (status code 302).class HttpResponseNotModifiedThe constructor doesn’t take any arguments. Use this to designate that a page hasn’t been modified since <strong>the</strong>user’s last request (status code 304).class HttpResponseBadRequestActs just like HttpResponse but uses a 400 status code.class HttpResponseNotFoundActs just like HttpResponse but uses a 404 status code.class HttpResponseForbiddenActs just like HttpResponse but uses a 403 status code.class HttpResponseNotAllowedLike HttpResponse, but uses a 405 status code. Takes a single, required argument: a list of permittedmethods (e.g. [’GET’, ’POST’]).class HttpResponseGoneActs just like HttpResponse but uses a 410 status code.class HttpResponseServerErrorActs just like HttpResponse but uses a 500 status code.Like6.13 Settings• Available settings• Deprecated settings6.13. Settings 721
<strong>Django</strong> <strong>Documentation</strong>, Release 1.26.13.1 Available settingsHere’s a full list of all available settings, in alphabetical order, and <strong>the</strong>ir default values.ABSOLUTE_URL_OVERRIDESDefault: {} (Empty dictionary)A dictionary mapping "app_label.model_name" strings to functions that take a model object and return itsURL. This is a way of overriding get_absolute_url() methods on a per-installation basis. Example:ABSOLUTE_URL_OVERRIDES = {’blogs.weblog’: lambda o: "/blogs/%s/" % o.slug,’news.story’: lambda o: "/stories/%s/%s/" % (o.pub_year, o.slug),}Note that <strong>the</strong> model name used in this setting should be all lower-case, regardless of <strong>the</strong> case of <strong>the</strong> actual model classname.ADMIN_FORDefault: () (Empty tuple)Used for admin-site settings modules, this should be a tuple of settings modules (in <strong>the</strong> format ’foo.bar.baz’)for which this site is an admin.The admin site uses this in its automatically-introspected documentation of models, views and template tags.ADMIN_MEDIA_PREFIXDefault: ’/media/’The URL prefix for admin media – CSS, JavaScript and images used by <strong>the</strong> <strong>Django</strong> administrative interface. Makesure to use a trailing slash, and to have this be different from <strong>the</strong> MEDIA_URL setting (since <strong>the</strong> same URL cannot bemapped onto two different sets of files).ADMINSDefault: () (Empty tuple)A tuple that lists people who get code error notifications. When DEBUG=False and a view raises an exception,<strong>Django</strong> will e-mail <strong>the</strong>se people with <strong>the</strong> full exception information. Each member of <strong>the</strong> tuple should be a tuple of(Full name, e-mail address). Example:((’John’, ’john@example.com’), (’Mary’, ’mary@example.com’))Note that <strong>Django</strong> will e-mail all of <strong>the</strong>se people whenever an error happens. See Error reporting via e-mail for moreinformation.ALLOWED_INCLUDE_ROOTSDefault: () (Empty tuple)A tuple of strings representing allowed prefixes for <strong>the</strong> {% ssi %} template tag. This is a security measure, so thattemplate authors can’t access files that <strong>the</strong>y shouldn’t be accessing.722 Chapter 6. API Reference
<strong>Django</strong> <strong>Documentation</strong>, Release 1.2For example, if ALLOWED_INCLUDE_ROOTS is (’/home/html’, ’/var/www’), <strong>the</strong>n {% ssi/home/html/foo.txt %} would work, but {% ssi /etc/passwd %} wouldn’t.APPEND_SLASHDefault: TrueWhen set to True, if <strong>the</strong> request URL does not match any of <strong>the</strong> patterns in <strong>the</strong> URLconf and it doesn’t end in aslash, an HTTP redirect is issued to <strong>the</strong> same URL with a slash appended. Note that <strong>the</strong> redirect may cause any datasubmitted in a POST request to be lost.The APPEND_SLASH setting is only used if CommonMiddleware is installed (see Middleware).PREPEND_WWW.See alsoAUTHENTICATION_BACKENDSDefault: (’django.contrib.auth.backends.ModelBackend’,)A tuple of au<strong>the</strong>ntication backend classes (as strings) to use when attempting to au<strong>the</strong>nticate a user. See <strong>the</strong> au<strong>the</strong>nticationbackends documentation for details.AUTH_PROFILE_MODULEDefault: Not definedThe site-specific user profile model used by this site. See Storing additional information about users.CACHE_BACKENDDefault: ’locmem://’The cache backend to use. See <strong>Django</strong>’s cache framework.CACHE_MIDDLEWARE_ANONYMOUS_ONLYDefault: FalseIf <strong>the</strong> value of this setting is True, only anonymous requests (i.e., not those made by a logged-in user) will be cached.O<strong>the</strong>rwise, <strong>the</strong> middleware caches every page that doesn’t have GET or POST parameters.If you set <strong>the</strong> value of this setting to True, you should make sure you’ve activatedAu<strong>the</strong>nticationMiddleware.See <strong>the</strong> cache documentation for more information.CACHE_MIDDLEWARE_KEY_PREFIXDefault: ” (Empty string)The cache key prefix that <strong>the</strong> cache middleware should use. See <strong>Django</strong>’s cache framework.6.13. Settings 723
<strong>Django</strong> <strong>Documentation</strong>, Release 1.2CACHE_MIDDLEWARE_SECONDSDefault: 600The default number of seconds to cache a page when <strong>the</strong> caching middleware or cache_page() decorator is used.CSRF_COOKIE_DOMAINNew in version 1.2: Please, see <strong>the</strong> release notes Default: NoneThe domain to be used when setting <strong>the</strong> CSRF cookie. This can be useful for allowing cross-subdomain requests to beexluded from <strong>the</strong> normal cross site request forgery protection. It should be set to a string such as ".lawrence.com"to allow a POST request from a form on one subdomain to be accepted by accepted by a view served from ano<strong>the</strong>rsubdomain.CSRF_COOKIE_NAMENew in version 1.2: Please, see <strong>the</strong> release notes Default: ’csrftoken’The name of <strong>the</strong> cookie to use for <strong>the</strong> CSRF au<strong>the</strong>ntication token. This can be whatever you want. See Cross SiteRequest Forgery protection.CSRF_FAILURE_VIEWNew in version 1.2: Please, see <strong>the</strong> release notes Default: ’django.views.csrf.csrf_failure’A dotted path to <strong>the</strong> view function to be used when an incoming request is rejected by <strong>the</strong> CSRF protection. Thefunction should have this signature:def csrf_failure(request, reason="")where reason is a short message (intended for developers or logging, not for end users) indicating <strong>the</strong> reason <strong>the</strong>request was rejected. See Cross Site Request Forgery protection.DATABASESNew in version 1.2: Please, see <strong>the</strong> release notes Default: {} (Empty dictionary)A dictionary containing <strong>the</strong> settings for all databases to be used with <strong>Django</strong>. It is a nested dictionary whose contentsmaps database aliases to a dictionary containing <strong>the</strong> options for an individual database.The DATABASES setting must configure a default database; any number of additional databases may also bespecified.The simplest possible settings file is for a single-database setup using SQLite. This can be configured using <strong>the</strong>following:DATABASES = {’default’: {’ENGINE’: ’django.db.backends.sqlite3’,’NAME’: ’mydatabase’}}For o<strong>the</strong>r database backends, or more complex SQLite configurations, o<strong>the</strong>r options will be required. The followinginner options are available.724 Chapter 6. API Reference
<strong>Django</strong> <strong>Documentation</strong>, Release 1.2ENGINEDefault: ” (Empty string)The database backend to use. The built-in database backends are:• ’django.db.backends.postgresql_psycopg2’• ’django.db.backends.postgresql’• ’django.db.backends.mysql’• ’django.db.backends.sqlite3’• ’django.db.backends.oracle’You can use a database backend that doesn’t ship with <strong>Django</strong> by setting ENGINE to a fully-qualified path (i.e.mypackage.backends.whatever). Writing a whole new database backend from scratch is left as an exerciseto <strong>the</strong> reader; see <strong>the</strong> o<strong>the</strong>r backends for examples.Note: Prior to <strong>Django</strong> 1.2, you could use a short version of <strong>the</strong> backend name to reference <strong>the</strong> built-in databasebackends (e.g., you could use ’sqlite3’ to refer to <strong>the</strong> SQLite backend). This format has been deprecated, andwill be removed in <strong>Django</strong> 1.4.HOSTDefault: ” (Empty string)Which host to use when connecting to <strong>the</strong> database. An empty string means localhost. Not used with SQLite.If this value starts with a forward slash (’/’) and you’re using MySQL, MySQL will connect via a Unix socket to <strong>the</strong>specified socket. For example:"HOST": ’/var/run/mysql’If you’re using MySQL and this value doesn’t start with a forward slash, <strong>the</strong>n this value is assumed to be <strong>the</strong> host.If you’re using PostgreSQL, an empty string means to use a Unix domain socket for <strong>the</strong> connection, ra<strong>the</strong>r thana network connection to localhost. If you explicitly need to use a TCP/IP connection on <strong>the</strong> local machine withPostgreSQL, specify localhost here.NAMEDefault: ” (Empty string)The name of <strong>the</strong> database to use. For SQLite, it’s <strong>the</strong> full path to <strong>the</strong> database file. When specifying <strong>the</strong> path, alwaysuse forward slashes, even on Windows (e.g. C:/homes/user/mysite/sqlite3.db).OPTIONSDefault: {} (Empty dictionary)Extra parameters to use when connecting to <strong>the</strong> database. Available parameters vary depending on your databasebackend.Some information on available parameters can be found in <strong>the</strong> Database Backends documentation. For more information,consult your backend module’s own documentation.6.13. Settings 725
<strong>Django</strong> <strong>Documentation</strong>, Release 1.2PASSWORDDefault: ” (Empty string)The password to use when connecting to <strong>the</strong> database. Not used with SQLite.PORTDefault: ” (Empty string)The port to use when connecting to <strong>the</strong> database. An empty string means <strong>the</strong> default port. Not used with SQLite.USERDefault: ” (Empty string)The username to use when connecting to <strong>the</strong> database. Not used with SQLite.TEST_CHARSETDefault: NoneThe character set encoding used to create <strong>the</strong> test database. The value of this string is passed directly through to <strong>the</strong>database, so its format is backend-specific.Supported for <strong>the</strong> PostgreSQL (postgresql, postgresql_psycopg2) and MySQL (mysql) backends.TEST_COLLATIONDefault: NoneThe collation order to use when creating <strong>the</strong> test database. This value is passed directly to <strong>the</strong> backend, so its formatis backend-specific.Only supported for <strong>the</strong> mysql backend (see <strong>the</strong> MySQL manual for details).TEST_DEPENDENCIESNew in version 1.2.4: Please, see <strong>the</strong> release notes Default: [’default’], for all databases o<strong>the</strong>r than default,which has no dependencies.The creation-order dependencies of <strong>the</strong> database. See <strong>the</strong> documentation on controlling <strong>the</strong> creation order of testdatabases for details.TEST_MIRRORDefault: NoneThe alias of <strong>the</strong> database that this database should mirror during testing.This setting exists to allow for testing of master/slave configurations of multiple databases. See <strong>the</strong> documentation ontesting master/slave configurations for details.726 Chapter 6. API Reference
<strong>Django</strong> <strong>Documentation</strong>, Release 1.2TEST_NAMEDefault: NoneThe name of database to use when running <strong>the</strong> test suite.If <strong>the</strong> default value (None) is used with <strong>the</strong> SQLite database engine, <strong>the</strong> tests will use a memory resident database.For all o<strong>the</strong>r database engines <strong>the</strong> test database will use <strong>the</strong> name ’test_’ + DATABASE_NAME.See Testing <strong>Django</strong> applications.TEST_USERDefault: NoneThis is an Oracle-specific setting.The username to use when connecting to <strong>the</strong> Oracle database that will be used when running tests.DATABASE_ROUTERSNew in version 1.2: Please, see <strong>the</strong> release notes Default: [] (Empty list)The list of routers that will be used to determine which database to use when performing a database queries.See <strong>the</strong> documentation on automatic database routing in multi database configurations.DATE_FORMATDefault: ’N j, Y’ (e.g. Feb. 4, 2003)The default formatting to use for displaying date fields in any part of <strong>the</strong> system. Note that if USE_L10N is setto True, <strong>the</strong>n <strong>the</strong> locale-dictated format has higher precedence and will be applied instead. See allowed dateformat strings. Changed in version 1.2: This setting can now be overriden by setting USE_L10N to True. Seealso DATETIME_FORMAT, TIME_FORMAT and SHORT_DATE_FORMAT.DATE_INPUT_FORMATSNew in version 1.2: Please, see <strong>the</strong> release notes Default:(’%Y-%m-%d’, ’%m/%d/%Y’, ’%m/%d/%y’, ’%b %d %Y’,’%b %d, %Y’, ’%d %b %Y’, ’%d %b, %Y’, ’%B %d %Y’,’%B %d, %Y’, ’%d %B %Y’, ’%d %B, %Y’)A tuple of formats that will be accepted when inputting data on a date field. Formats will be tried in order, using <strong>the</strong>first valid. Note that <strong>the</strong>se format strings are specified in Python’s datetime module syntax, that is different from <strong>the</strong>one used by <strong>Django</strong> for formatting dates to be displayed.See also DATETIME_INPUT_FORMATS and TIME_INPUT_FORMATS.DATETIME_FORMATDefault: ’N j, Y, P’ (e.g. Feb.4, 2003, 4 p.m.)The default formatting to use for displaying datetime fields in any part of <strong>the</strong> system. Note that if USE_L10N is setto True, <strong>the</strong>n <strong>the</strong> locale-dictated format has higher precedence and will be applied instead. See allowed date6.13. Settings 727
<strong>Django</strong> <strong>Documentation</strong>, Release 1.2format strings. Changed in version 1.2: This setting can now be overriden by setting USE_L10N to True. Seealso DATE_FORMAT, TIME_FORMAT and SHORT_DATETIME_FORMAT.DATETIME_INPUT_FORMATSNew in version 1.2: Please, see <strong>the</strong> release notes Default:(’%Y-%m-%d %H:%M:%S’, ’%Y-%m-%d %H:%M’, ’%Y-%m-%d’,’%m/%d/%Y %H:%M:%S’, ’%m/%d/%Y %H:%M’, ’%m/%d/%Y’,’%m/%d/%y %H:%M:%S’, ’%m/%d/%y %H:%M’, ’%m/%d/%y’)A tuple of formats that will be accepted when inputting data on a datetime field. Formats will be tried in order, using<strong>the</strong> first valid. Note that <strong>the</strong>se format strings are specified in Python’s datetime module syntax, that is different from<strong>the</strong> one used by <strong>Django</strong> for formatting dates to be displayed.See also DATE_INPUT_FORMATS and TIME_INPUT_FORMATS.DEBUGDefault: FalseA boolean that turns on/off debug mode.If you define custom settings, django/views/debug.py has a HIDDEN_SETTINGS regular expression which will hidefrom <strong>the</strong> DEBUG view anything that contains ’SECRET’, ’PASSWORD’, ’PROFANITIES’, or ’SIGNATURE’.This allows untrusted users to be able to give backtraces without seeing sensitive (or offensive) settings.Still, note that <strong>the</strong>re are always going to be sections of your debug output that are inappropriate for public consumption.File paths, configuration options, and <strong>the</strong> like all give attackers extra information about your server.It is also important to remember that when running with DEBUG turned on, <strong>Django</strong> will remember every SQL query itexecutes. This is useful when you are debugging, but on a production server, it will rapidly consume memory.Never deploy a site into production with DEBUG turned on.DEBUG_PROPAGATE_EXCEPTIONSNew in version 1.0: Please, see <strong>the</strong> release notes Default: FalseIf set to True, <strong>Django</strong>’s normal exception handling of view functions will be suppressed, and exceptions will propagateupwards. This can be useful for some test setups, and should never be used on a live site.DECIMAL_SEPARATORNew in version 1.2: Please, see <strong>the</strong> release notes Default: ’.’ (Dot)Default decimal separator used when formatting decimal numbers.DEFAULT_CHARSETDefault: ’utf-8’Default charset to use for all HttpResponse objects, if a MIME type isn’t manually specified.DEFAULT_CONTENT_TYPE to construct <strong>the</strong> Content-Type header.Used with728 Chapter 6. API Reference
<strong>Django</strong> <strong>Documentation</strong>, Release 1.2DEFAULT_CONTENT_TYPEDefault: ’text/html’Default content type to use for all HttpResponse objects, if a MIME type isn’t manually specified. Used withDEFAULT_CHARSET to construct <strong>the</strong> Content-Type header.DEFAULT_FILE_STORAGEDefault: django.core.files.storage.FileSystemStorageDefault file storage class to be used for any file-related operations that don’t specify a particular storage system. SeeManaging files.DEFAULT_FROM_EMAILDefault: ’webmaster@localhost’Default e-mail address to use for various automated correspondence from <strong>the</strong> site manager(s).DEFAULT_INDEX_TABLESPACENew in version 1.0: Please, see <strong>the</strong> release notes Default: ” (Empty string)Default tablespace to use for indexes on fields that don’t specify one, if <strong>the</strong> backend supports it.DEFAULT_TABLESPACENew in version 1.0: Please, see <strong>the</strong> release notes Default: ” (Empty string)Default tablespace to use for models that don’t specify one, if <strong>the</strong> backend supports it.DISALLOWED_USER_AGENTSDefault: () (Empty tuple)List of compiled regular expression objects representing User-Agent strings that are not allowed to visit any page, systemwide.Use this for bad robots/crawlers. This is only used if CommonMiddleware is installed (see Middleware).EMAIL_BACKENDNew in version 1.2: Please, see <strong>the</strong> release notes Default: ’django.core.mail.backends.smtp.EmailBackend’The backend to use for sending emails. For <strong>the</strong> list of available backends see Sending e-mail.EMAIL_FILE_PATHNew in version 1.2: Please, see <strong>the</strong> release notes Default: Not definedThe directory used by <strong>the</strong> file email backend to store output files.6.13. Settings 729
<strong>Django</strong> <strong>Documentation</strong>, Release 1.2EMAIL_HOSTDefault: ’localhost’The host to use for sending e-mail.See also EMAIL_PORT.EMAIL_HOST_PASSWORDDefault: ” (Empty string)Password to use for <strong>the</strong> SMTP server defined in EMAIL_HOST. This setting is used in conjunction withEMAIL_HOST_USER when au<strong>the</strong>nticating to <strong>the</strong> SMTP server. If ei<strong>the</strong>r of <strong>the</strong>se settings is empty, <strong>Django</strong> won’tattempt au<strong>the</strong>ntication.See also EMAIL_HOST_USER.EMAIL_HOST_USERDefault: ” (Empty string)Username to use for <strong>the</strong> SMTP server defined in EMAIL_HOST. If empty, <strong>Django</strong> won’t attempt au<strong>the</strong>ntication.See also EMAIL_HOST_PASSWORD.EMAIL_PORTDefault: 25Port to use for <strong>the</strong> SMTP server defined in EMAIL_HOST.EMAIL_SUBJECT_PREFIXDefault: ’[<strong>Django</strong>] ’Subject-line prefix for e-mail messages sent with django.core.mail.mail_admins ordjango.core.mail.mail_managers. You’ll probably want to include <strong>the</strong> trailing space.EMAIL_USE_TLSNew in version 1.0: Please, see <strong>the</strong> release notes Default: FalseWhe<strong>the</strong>r to use a TLS (secure) connection when talking to <strong>the</strong> SMTP server.FILE_CHARSETNew in version 1.0: Please, see <strong>the</strong> release notes Default: ’utf-8’The character encoding used to decode any files read from disk. This includes template files and initial SQL data files.730 Chapter 6. API Reference
<strong>Django</strong> <strong>Documentation</strong>, Release 1.2FILE_UPLOAD_HANDLERSNew in version 1.0: Please, see <strong>the</strong> release notes Default:("django.core.files.uploadhandler.MemoryFileUploadHandler","django.core.files.uploadhandler.TemporaryFileUploadHandler",)A tuple of handlers to use for uploading. See Managing files for details.FILE_UPLOAD_MAX_MEMORY_SIZENew in version 1.0: Please, see <strong>the</strong> release notes Default: 2621440 (i.e. 2.5 MB).The maximum size (in bytes) that an upload will be before it gets streamed to <strong>the</strong> file system. See Managing files fordetails.FILE_UPLOAD_PERMISSIONSDefault: NoneThe numeric mode (i.e. 0644) to set newly uploaded files to. For more information about what <strong>the</strong>se modes mean,see <strong>the</strong> documentation for os.chmodIf this isn’t given or is None, you’ll get operating-system dependent behavior. On most platforms, temporary files willhave a mode of 0600, and files saved from memory will be saved using <strong>the</strong> system’s standard umask.Warning: Always prefix <strong>the</strong> mode with a 0.If you’re not familiar with file modes, please note that <strong>the</strong> leading 0 is very important: it indicates an octal number,which is <strong>the</strong> way that modes must be specified. If you try to use 644, you’ll get totally incorrect behavior.FILE_UPLOAD_TEMP_DIRNew in version 1.0: Please, see <strong>the</strong> release notes Default: NoneThe directory to store data temporarily while uploading files. If None, <strong>Django</strong> will use <strong>the</strong> standard temporarydirectory for <strong>the</strong> operating system. For example, this will default to ‘/tmp’ on *nix-style operating systems.See Managing files for details.FIRST_DAY_OF_WEEKNew in version 1.2: Please, see <strong>the</strong> release notes Default: 0 (Sunday)Number representing <strong>the</strong> first day of <strong>the</strong> week. This is especially useful when displaying a calendar. This value is onlyused when not using format internationalization, or when a format cannot be found for <strong>the</strong> current locale.The value must be an integer from 0 to 6, where 0 means Sunday, 1 means Monday and so on.FIXTURE_DIRSDefault: () (Empty tuple)List of locations of <strong>the</strong> fixture data files, in search order. Note that <strong>the</strong>se paths should use Unix-style forward slashes,even on Windows. See Testing <strong>Django</strong> applications.6.13. Settings 731
<strong>Django</strong> <strong>Documentation</strong>, Release 1.2FORCE_SCRIPT_NAMEDefault: NoneIf not None, this will be used as <strong>the</strong> value of <strong>the</strong> SCRIPT_NAME environment variable in any HTTP request. Thissetting can be used to override <strong>the</strong> server-provided value of SCRIPT_NAME, which may be a rewritten version of <strong>the</strong>preferred value or not supplied at all.FORMAT_MODULE_PATHNew in version 1.2: Please, see <strong>the</strong> release notes Default: NoneA full Python path to a Python package that contains format definitions for project locales. If not None, <strong>Django</strong> willcheck for a formats.py file, under <strong>the</strong> directory named as <strong>the</strong> current locale, and will use <strong>the</strong> formats defined onthis file.For example, if FORMAT_MODULE_PATH is set to mysite.formats, and current language is en (English),<strong>Django</strong> will expect a directory tree like:mysite/formats/__init__.pyen/__init__.pyformats.pyAvailable formats are DATE_FORMAT, TIME_FORMAT, DATETIME_FORMAT, YEAR_MONTH_FORMAT,MONTH_DAY_FORMAT, SHORT_DATE_FORMAT, SHORT_DATETIME_FORMAT, FIRST_DAY_OF_WEEK,DECIMAL_SEPARATOR, THOUSAND_SEPARATOR and NUMBER_GROUPING.IGNORABLE_404_ENDSDefault: (’mail.pl’, ’mailform.pl’, ’mail.cgi’, ’mailform.cgi’, ’favicon.ico’,’.php’)See also IGNORABLE_404_STARTS and Error reporting via e-mail.IGNORABLE_404_STARTSDefault: (’/cgi-bin/’, ’/_vti_bin’, ’/_vti_inf’)A tuple of strings that specify beginnings of URLs that should be ignored by <strong>the</strong> 404 e-mailer.SEND_BROKEN_LINK_EMAILS, IGNORABLE_404_ENDS and <strong>the</strong> Error reporting via e-mail.SeeINSTALLED_APPSDefault: () (Empty tuple)A tuple of strings designating all applications that are enabled in this <strong>Django</strong> installation. Each string should be a fullPython path to a Python package that contains a <strong>Django</strong> application, as created by django-admin.py startapp.App names must be unique732 Chapter 6. API Reference
<strong>Django</strong> <strong>Documentation</strong>, Release 1.2The application names (that is, <strong>the</strong> final dotted part of <strong>the</strong> path to <strong>the</strong> module containing models.py) definedin INSTALLED_APPS must be unique. For example, you can’t include both django.contrib.auth andmyproject.auth in INSTALLED_APPS.INTERNAL_IPSDefault: () (Empty tuple)A tuple of IP addresses, as strings, that:• See debug comments, when DEBUG is True• Receive X headers if <strong>the</strong> XViewMiddleware is installed (see Middleware)LANGUAGE_CODEDefault: ’en-us’A string representing <strong>the</strong> language code for this installation. This should be in standard language format. For example,U.S. English is "en-us". See Internationalization and localization.LANGUAGE_COOKIE_NAMENew in version 1.0: Please, see <strong>the</strong> release notes Default: ’django_language’The name of <strong>the</strong> cookie to use for <strong>the</strong> language cookie. This can be whatever you want (but should be different fromSESSION_COOKIE_NAME). See Internationalization and localization.LANGUAGESDefault: A tuple of all available languages. This list is continually growing and including a copy here wouldinevitably become rapidly out of date. You can see <strong>the</strong> current list of translated languages by looking indjango/conf/global_settings.py (or view <strong>the</strong> online source).The list is a tuple of two-tuples in <strong>the</strong> format (language code, language name), <strong>the</strong> language code partshould be a language name – for example, (’ja’, ’Japanese’). This specifies which languages are availablefor language selection. See Internationalization and localization.Generally, <strong>the</strong> default value should suffice. Only set this setting if you want to restrict language selection to a subsetof <strong>the</strong> <strong>Django</strong>-provided languages.If you define a custom LANGUAGES setting, it’s OK to mark <strong>the</strong> languages as translation strings (as in <strong>the</strong> default valuereferred to above) – but use a “dummy” gettext() function, not <strong>the</strong> one in django.utils.translation.You should never import django.utils.translation from within your settings file, because that module initself depends on <strong>the</strong> settings, and that would cause a circular import.The solution is to use a “dummy” gettext() function. Here’s a sample settings file:gettext = lambda s: sLANGUAGES = ((’de’, gettext(’German’)),(’en’, gettext(’English’)),)6.13. Settings 733
<strong>Django</strong> <strong>Documentation</strong>, Release 1.2With this arrangement, django-admin.py makemessages will still find and mark <strong>the</strong>se strings for translation,but <strong>the</strong> translation won’t happen at runtime – so you’ll have to remember to wrap <strong>the</strong> languages in <strong>the</strong> real gettext()in any code that uses LANGUAGES at runtime.LOCALE_PATHSDefault: () (Empty tuple)A tuple of directories where <strong>Django</strong> looks for translation files. See Using internationalization in your own projects.LOGIN_REDIRECT_URLNew in version 1.0: Please, see <strong>the</strong> release notes Default: ’/accounts/profile/’The URL where requests are redirected after login when <strong>the</strong> contrib.auth.login view gets no next parameter.This is used by <strong>the</strong> login_required() decorator, for example.LOGIN_URLNew in version 1.0: Please, see <strong>the</strong> release notes Default: ’/accounts/login/’The URL where requests are redirected for login, especially when using <strong>the</strong> login_required() decorator.LOGOUT_URLNew in version 1.0: Please, see <strong>the</strong> release notes Default: ’/accounts/logout/’LOGIN_URL counterpart.MANAGERSDefault: () (Empty tuple)A tuple in <strong>the</strong> same format as ADMINS that specifies who should get broken-link notifications whenSEND_BROKEN_LINK_EMAILS=True.MEDIA_ROOTDefault: ” (Empty string)Absolute path to <strong>the</strong> directory that holds media for this installation. Example:"/home/media/media.lawrence.com/" See also MEDIA_URL.MEDIA_URLDefault: ” (Empty string)URL that handles <strong>the</strong> media served from MEDIA_ROOT. Example: "http://media.lawrence.com"Note that this should have a trailing slash if it has a path component.Good: "http://www.example.com/static/" Bad: "http://www.example.com/static"734 Chapter 6. API Reference
<strong>Django</strong> <strong>Documentation</strong>, Release 1.2MESSAGE_LEVELNew in version 1.2: Please, see <strong>the</strong> release notes Default: messages.INFOSets <strong>the</strong> minimum message level that will be recorded by <strong>the</strong> messages framework. See <strong>the</strong> messages documentationfor more details.MESSAGE_STORAGENew in version 1.2: Please, see <strong>the</strong> release notes Default: ’django.contrib.messages.storage.user_messages.LegacyControls where <strong>Django</strong> stores message data. See <strong>the</strong> messages documentation for more details.MESSAGE_TAGSNew in version 1.2: Please, see <strong>the</strong> release notes Default:{messages.DEBUG: ’debug’,messages.INFO: ’info’,messages.SUCCESS: ’success’,messages.WARNING: ’warning’,messages.ERROR: ’error’,}Sets <strong>the</strong> mapping of message levels to message tags. See <strong>the</strong> messages documentation for more details.MIDDLEWARE_CLASSESDefault:(’django.middleware.common.CommonMiddleware’,’django.contrib.sessions.middleware.SessionMiddleware’,’django.middleware.csrf.CsrfViewMiddleware’,’django.contrib.auth.middleware.Au<strong>the</strong>nticationMiddleware’,’django.contrib.messages.middleware.MessageMiddleware’,)A tuple of middleware classes to use. See Middleware. Changed in version 1.2:’django.contrib.messages.middleware.MessageMiddleware’ was added to <strong>the</strong> default. Formore information, see <strong>the</strong> messages documentation.MONTH_DAY_FORMATDefault: ’F j’The default formatting to use for date fields on <strong>Django</strong> admin change-list pages – and, possibly, by o<strong>the</strong>r parts of <strong>the</strong>system – in cases when only <strong>the</strong> month and day are displayed.For example, when a <strong>Django</strong> admin change-list page is being filtered by a date drilldown, <strong>the</strong> header for a given daydisplays <strong>the</strong> day and month. Different locales have different formats. For example, U.S. English would say “January1,” whereas Spanish might say “1 Enero.”See allowed date format strings. See also DATE_FORMAT, DATETIME_FORMAT, TIME_FORMAT andYEAR_MONTH_FORMAT.6.13. Settings 735
<strong>Django</strong> <strong>Documentation</strong>, Release 1.2NUMBER_GROUPINGNew in version 1.2: Please, see <strong>the</strong> release notes Default: 0Number of digits grouped toge<strong>the</strong>r on <strong>the</strong> integer part of a number. Common use is to display a thousand separator.If this setting is 0, <strong>the</strong>n, no grouping will be applied to <strong>the</strong> number. If this setting is greater than 0 <strong>the</strong>n <strong>the</strong> settingTHOUSAND_SEPARATOR will be used as <strong>the</strong> separator between those groups.See also THOUSAND_SEPARATOR and USE_THOUSAND_SEPARATOR.PASSWORD_RESET_TIMEOUT_DAYSDefault: 3The number of days a password reset link is valid for.mechanism.Used by <strong>the</strong> django.contrib.auth password resetPREPEND_WWWDefault: FalseWhe<strong>the</strong>r to prepend <strong>the</strong> “www.” subdomain to URLs that don’t have it. This is only used if CommonMiddleware isinstalled (see Middleware). See also APPEND_SLASH.PROFANITIES_LISTA tuple of profanities, as strings, that will trigger a validation error when <strong>the</strong> hasNoProfanities validator iscalled.We don’t list <strong>the</strong> default values here, because that would be profane.django/conf/global_settings.py.To see <strong>the</strong> default values, see <strong>the</strong> fileRESTRUCTUREDTEXT_FILTER_SETTINGSDefault: {}A dictionary containing settings for <strong>the</strong> restructuredtext markup filter from <strong>the</strong> django.contrib.markup application.They override <strong>the</strong> default writer settings. See <strong>the</strong> Docutils restructuredtext writer settings docs for details.ROOT_URLCONFDefault: Not definedA string representing <strong>the</strong> full Python import path to your root URLconf. For example: "mydjangoapps.urls".Can be overridden on a per-request basis by setting <strong>the</strong> attribute urlconf on <strong>the</strong> incoming HttpRequest object.See How <strong>Django</strong> processes a request for details.SECRET_KEYDefault: ” (Empty string)A secret key for this particular <strong>Django</strong> installation. Used to provide a seed in secret-key hashing algorithms. Set thisto a random string – <strong>the</strong> longer, <strong>the</strong> better. django-admin.py startproject creates one automatically.736 Chapter 6. API Reference
<strong>Django</strong> <strong>Documentation</strong>, Release 1.2SEND_BROKEN_LINK_EMAILSDefault: FalseWhe<strong>the</strong>r to send an e-mail to <strong>the</strong> MANAGERS each time somebody visits a <strong>Django</strong>-powered page that is 404ed with anon-empty referer (i.e., a broken link). This is only used if CommonMiddleware is installed (see Middleware. Seealso IGNORABLE_404_STARTS, IGNORABLE_404_ENDS and Error reporting via e-mail.SERIALIZATION_MODULESDefault: Not defined.A dictionary of modules containing serializer definitions (provided as strings), keyed by a string identifier for thatserialization type. For example, to define a YAML serializer, use:SERIALIZATION_MODULES = { ’yaml’ : ’path.to.yaml_serializer’ }SERVER_EMAILDefault: ’root@localhost’The e-mail address that error messages come from, such as those sent to ADMINS and MANAGERS.SESSION_COOKIE_AGEDefault: 1209600 (2 weeks, in seconds)The age of session cookies, in seconds. See How to use sessions.SESSION_COOKIE_DOMAINDefault: NoneThe domain to use for session cookies. Set this to a string such as ".lawrence.com" for cross-domain cookies, oruse None for a standard domain cookie. See <strong>the</strong> How to use sessions.SESSION_COOKIE_NAMEDefault: ’sessionid’The name of <strong>the</strong> cookie to use for sessions. This can be whatever you want (but should be different fromLANGUAGE_COOKIE_NAME). See <strong>the</strong> How to use sessions.SESSION_COOKIE_PATHNew in version 1.0: Please, see <strong>the</strong> release notes Default: ’/’The path set on <strong>the</strong> session cookie. This should ei<strong>the</strong>r match <strong>the</strong> URL path of your <strong>Django</strong> installation or be parent ofthat path.This is useful if you have multiple <strong>Django</strong> instances running under <strong>the</strong> same hostname. They can use different cookiepaths, and each instance will only see its own session cookie.6.13. Settings 737
<strong>Django</strong> <strong>Documentation</strong>, Release 1.2SESSION_COOKIE_SECUREDefault: FalseWhe<strong>the</strong>r to use a secure cookie for <strong>the</strong> session cookie. If this is set to True, <strong>the</strong> cookie will be marked as “secure,”which means browsers may ensure that <strong>the</strong> cookie is only sent under an HTTPS connection. See <strong>the</strong> How to usesessions.SESSION_ENGINENew in version 1.0: Please, see <strong>the</strong> release notesChanged in version 1.1: The cached_db backend was addedDefault: django.contrib.sessions.backends.dbControls where <strong>Django</strong> stores session data. Valid values are:• ’django.contrib.sessions.backends.db’• ’django.contrib.sessions.backends.file’• ’django.contrib.sessions.backends.cache’• ’django.contrib.sessions.backends.cached_db’See How to use sessions.SESSION_EXPIRE_AT_BROWSER_CLOSEDefault: FalseWhe<strong>the</strong>r to expire <strong>the</strong> session when <strong>the</strong> user closes his or her browser. See <strong>the</strong> How to use sessions.SESSION_FILE_PATHNew in version 1.0: Please, see <strong>the</strong> release notes Default: NoneIf you’re using file-based session storage, this sets <strong>the</strong> directory in which <strong>Django</strong> will store session data. See How touse sessions. When <strong>the</strong> default value (None) is used, <strong>Django</strong> will use <strong>the</strong> standard temporary directory for <strong>the</strong> system.SESSION_SAVE_EVERY_REQUESTDefault: FalseWhe<strong>the</strong>r to save <strong>the</strong> session data on every request. See How to use sessions.SHORT_DATE_FORMATNew in version 1.2: Please, see <strong>the</strong> release notes Default: m/d/Y (e.g. 12/31/2003)An available formatting that can be used for displaying date fields on templates. Note that if USE_L10N is setto True, <strong>the</strong>n <strong>the</strong> corresponding locale-dictated format has higher precedence and will be applied. See alloweddate format strings.See also DATE_FORMAT and SHORT_DATETIME_FORMAT.738 Chapter 6. API Reference
<strong>Django</strong> <strong>Documentation</strong>, Release 1.2SHORT_DATETIME_FORMATNew in version 1.2: Please, see <strong>the</strong> release notes Default: m/d/Y P (e.g. 12/31/2003 4 p.m.)An available formatting that can be used for displaying datetime fields on templates. Note that if USE_L10N is setto True, <strong>the</strong>n <strong>the</strong> corresponding locale-dictated format has higher precedence and will be applied. See alloweddate format strings.See also DATE_FORMAT and SHORT_DATETIME_FORMAT.SITE_IDDefault: Not definedThe ID, as an integer, of <strong>the</strong> current site in <strong>the</strong> django_site database table. This is used so that application datacan hook into specific site(s) and a single database can manage content for multiple sites.See The “sites” framework.TEMPLATE_CONTEXT_PROCESSORSDefault:("django.contrib.auth.context_processors.auth","django.core.context_processors.debug","django.core.context_processors.i18n","django.core.context_processors.media","django.contrib.messages.context_processors.messages")A tuple of callables that are used to populate <strong>the</strong> context in RequestContext. These callables take a requestobject as <strong>the</strong>ir argument and return a dictionary of items to be merged into <strong>the</strong> context. Changed inversion 1.2: "django.contrib.messages.context_processors.messages" was added to <strong>the</strong> default.For more information, see <strong>the</strong> messages documentation.Changed in version 1.2: The auth context processorwas moved in this release from its old location django.core.context_processors.auth todjango.contrib.auth.context_processors.auth.TEMPLATE_DEBUGDefault: FalseA boolean that turns on/off template debug mode. If this is True, <strong>the</strong> fancy error page will display a detailed reportfor any TemplateSyntaxError. This report contains <strong>the</strong> relevant snippet of <strong>the</strong> template, with <strong>the</strong> appropriateline highlighted.Note that <strong>Django</strong> only displays fancy error pages if DEBUG is True, so you’ll want to set that to take advantage ofthis setting.See also DEBUG.TEMPLATE_DIRSDefault: () (Empty tuple)List of locations of <strong>the</strong> template source files, in search order. Note that <strong>the</strong>se paths should use Unix-style forwardslashes, even on Windows.See The <strong>Django</strong> template language.6.13. Settings 739
<strong>Django</strong> <strong>Documentation</strong>, Release 1.2TEMPLATE_LOADERSDefault:(’django.template.loaders.filesystem.Loader’,’django.template.loaders.app_directories.Loader’)A tuple of template loader classes, specified as strings. Each Loader class knows how to import templates from aparticular source. Optionally, a tuple can be used instead of a string. The first item in <strong>the</strong> tuple should be <strong>the</strong> Loader‘smodule, subsequent items are passed to <strong>the</strong> Loader during initialization. See The <strong>Django</strong> template language: ForPython programmers.TEMPLATE_STRING_IF_INVALIDDefault: ” (Empty string)Output, as a string, that <strong>the</strong> template system should use for invalid (e.g. misspelled) variables. See How invalidvariables are handled..TEST_RUNNERDefault: ’django.test.simple.<strong>Django</strong>TestSuiteRunner’ Changed in version 1.2: Prior to 1.2, testrunners were a function, not a class. The name of <strong>the</strong> class to use for starting <strong>the</strong> test suite. See Testing <strong>Django</strong>applications.THOUSAND_SEPARATORNew in version 1.2: Please, see <strong>the</strong> release notes Default , (Comma)Default thousand separator used when formatting numbers. This setting is used only when NUMBER_GROUPING andUSE_THOUSAND_SEPARATOR are set.See also NUMBER_GROUPING, DECIMAL_SEPARATOR and USE_THOUSAND_SEPARATOR.TIME_FORMATDefault: ’P’ (e.g. 4 p.m.)The default formatting to use for displaying time fields in any part of <strong>the</strong> system. Note that if USE_L10N is setto True, <strong>the</strong>n <strong>the</strong> locale-dictated format has higher precedence and will be applied instead. See allowed dateformat strings. Changed in version 1.2: This setting can now be overriden by setting USE_L10N to True. Seealso DATE_FORMAT and DATETIME_FORMAT.TIME_INPUT_FORMATSNew in version 1.2: Please, see <strong>the</strong> release notes Default: (’%H:%M:%S’, ’%H:%M’)A tuple of formats that will be accepted when inputting data on a time field. Formats will be tried in order, using <strong>the</strong>first valid. Note that <strong>the</strong>se format strings are specified in Python’s datetime module syntax, that is different from <strong>the</strong>one used by <strong>Django</strong> for formatting dates to be displayed.See also DATE_INPUT_FORMATS and DATETIME_INPUT_FORMATS.740 Chapter 6. API Reference
<strong>Django</strong> <strong>Documentation</strong>, Release 1.2TIME_ZONEDefault: ’America/Chicago’ Changed in version 1.2: None was added as an allowed value. A string representing<strong>the</strong> time zone for this installation, or None. See available choices. (Note that list of available choices lists more thanone on <strong>the</strong> same line; you’ll want to use just one of <strong>the</strong> choices for a given time zone. For instance, one line says’Europe/London GB GB-Eire’, but you should use <strong>the</strong> first bit of that – ’Europe/London’ – as yourTIME_ZONE setting.)Note that this is <strong>the</strong> time zone to which <strong>Django</strong> will convert all dates/times – not necessarily <strong>the</strong> timezone of <strong>the</strong> server.For example, one server may serve multiple <strong>Django</strong>-powered sites, each with a separate time-zone setting.Normally, <strong>Django</strong> sets <strong>the</strong> os.environ[’TZ’] variable to <strong>the</strong> time zone you specify in <strong>the</strong> TIME_ZONE setting.Thus, all your views and models will automatically operate in <strong>the</strong> correct time zone. However, <strong>Django</strong> won’t set <strong>the</strong>TZ environment variable under <strong>the</strong> following conditions:• If you’re using <strong>the</strong> manual configuration option as described in manually configuring settings, or• If you specify TIME_ZONE = None. This will cause <strong>Django</strong> to fall back to using <strong>the</strong> system timezone.If <strong>Django</strong> doesn’t set <strong>the</strong> TZ environment variable, it’s up to you to ensure your processes are running in <strong>the</strong> correctenvironment.Note: <strong>Django</strong> cannot reliably use alternate time zones in a Windows environment. If you’re running <strong>Django</strong> onWindows, this variable must be set to match <strong>the</strong> system timezone.URL_VALIDATOR_USER_AGENTDefault: <strong>Django</strong>/ (http://www.djangoproject.com/)The string to use as <strong>the</strong> User-Agent header when checking to see if URLs exist (see <strong>the</strong> verify_exists optionon URLField).USE_ETAGSDefault: FalseA boolean that specifies whe<strong>the</strong>r to output <strong>the</strong> “Etag” header. This saves bandwidth but slows down performance. Thisis only used if CommonMiddleware is installed (see Middleware).USE_I18NDefault: TrueA boolean that specifies whe<strong>the</strong>r <strong>Django</strong>’s internationalization system should be enabled. This provides an easy wayto turn it off, for performance. If this is set to False, <strong>Django</strong> will make some optimizations so as not to load <strong>the</strong>internationalization machinery.See also USE_L10NUSE_L10NNew in version 1.2: Please, see <strong>the</strong> release notes Default FalseA boolean that specifies if data will be localized by default or not. If this is set to True, e.g. <strong>Django</strong> will displaynumbers and dates using <strong>the</strong> format of <strong>the</strong> current locale.6.13. Settings 741
<strong>Django</strong> <strong>Documentation</strong>, Release 1.2See also USE_I18N and LANGUAGE_CODEUSE_THOUSAND_SEPARATORNew in version 1.2: Please, see <strong>the</strong> release notes Default FalseA boolean that specifies wheter to display numbers using a thousand separator. If this is set to True, <strong>Django</strong> willuse values from THOUSAND_SEPARATOR and NUMBER_GROUPING from current locale, to format <strong>the</strong> number.USE_L10N must be set to True, in order to format numbers.See also THOUSAND_SEPARATOR and NUMBER_GROUPING.YEAR_MONTH_FORMATDefault: ’F Y’The default formatting to use for date fields on <strong>Django</strong> admin change-list pages – and, possibly, by o<strong>the</strong>r parts of <strong>the</strong>system – in cases when only <strong>the</strong> year and month are displayed.For example, when a <strong>Django</strong> admin change-list page is being filtered by a date drilldown, <strong>the</strong> header for a givenmonth displays <strong>the</strong> month and <strong>the</strong> year. Different locales have different formats. For example, U.S. English would say“January 2006,” whereas ano<strong>the</strong>r locale might say “2006/January.”See allowed date format strings. See also DATE_FORMAT, DATETIME_FORMAT, TIME_FORMAT andMONTH_DAY_FORMAT.6.13.2 Deprecated settingsDATABASE_ENGINEDeprecated since version 1.2: This setting has been replaced by ENGINE in DATABASES.DATABASE_HOSTDeprecated since version 1.2: This setting has been replaced by HOST in DATABASES.DATABASE_NAMEDeprecated since version 1.2: This setting has been replaced by NAME in DATABASES.DATABASE_OPTIONSDeprecated since version 1.2: This setting has been replaced by OPTIONS in DATABASES.DATABASE_PASSWORDDeprecated since version 1.2: This setting has been replaced by PASSWORD in DATABASES.DATABASE_PORTDeprecated since version 1.2: This setting has been replaced by PORT in DATABASES.742 Chapter 6. API Reference
<strong>Django</strong> <strong>Documentation</strong>, Release 1.2DATABASE_USERDeprecated since version 1.2: This setting has been replaced by USER in DATABASES.TEST_DATABASE_CHARSETDeprecated since version 1.2: This setting has been replaced by TEST_CHARSET in DATABASES.TEST_DATABASE_COLLATIONDeprecated since version 1.2: This setting has been replaced by TEST_COLLATION in DATABASES.TEST_DATABASE_NAMEDeprecated since version 1.2: This setting has been replaced by TEST_NAME in DATABASES.6.14 SignalsA list of all <strong>the</strong> signals that <strong>Django</strong> sends.See Also:See <strong>the</strong> documentation on <strong>the</strong> signal dispatcher for information regarding how to register for and receive signals.The comment framework sends a set of comment-related signals.6.14.1 Model signalsThe django.db.models.signals module defines a set of signals sent by <strong>the</strong> module system.Warning: Many of <strong>the</strong>se signals are sent by various model methods like __init__() or save() that you canoverwrite in your own code.If you override <strong>the</strong>se methods on your model, you must call <strong>the</strong> parent class’ methods for this signals to be sent.Note also that <strong>Django</strong> stores signal handlers as weak references by default, so if your handler is a localfunction, it may be garbage collected. To prevent this, pass weak=False when you call <strong>the</strong> signal’sconnect().pre_initdjango.db.models.signals.pre_initWhenever you instantiate a <strong>Django</strong> model„ this signal is sent at <strong>the</strong> beginning of <strong>the</strong> model’s __init__() method.Arguments sent with this signal:sender The model class that just had an instance created.args A list of positional arguments passed to __init__():kwargs A dictionary of keyword arguments passed to __init__():.For example, <strong>the</strong> tutorial has this line:6.14. Signals 743
<strong>Django</strong> <strong>Documentation</strong>, Release 1.2p = Poll(question="What’s up?", pub_date=datetime.now())The arguments sent to a pre_init handler would be:Argument Valuesender Poll (<strong>the</strong> class itself)args [] (an empty list because <strong>the</strong>re were no positional arguments passed to __init__.)kwargs {’question’: "What’s up?", ’pub_date’: datetime.now()}post_initdjango.db.models.signals.post_initLike pre_init, but this one is sent when <strong>the</strong> __init__(): method finishes.Arguments sent with this signal:sender As above: <strong>the</strong> model class that just had an instance created.instance The actual instance of <strong>the</strong> model that’s just been created.pre_savedjango.db.models.signals.pre_saveThis is sent at <strong>the</strong> beginning of a model’s save() method.Arguments sent with this signal:sender The model class.instance The actual instance being saved.post_savedjango.db.models.signals.post_saveLike pre_save, but sent at <strong>the</strong> end of <strong>the</strong> save() method.Arguments sent with this signal:sender The model class.instance The actual instance being saved.created A boolean; True if a new record was created.pre_deletedjango.db.models.signals.pre_deleteSent at <strong>the</strong> beginning of a model’s delete() method.Arguments sent with this signal:sender The model class.instance The actual instance being deleted.744 Chapter 6. API Reference
<strong>Django</strong> <strong>Documentation</strong>, Release 1.2post_deletedjango.db.models.signals.post_deleteLike pre_delete, but sent at <strong>the</strong> end of <strong>the</strong> delete() method.Arguments sent with this signal:sender The model class.instance The actual instance being deleted.Note that <strong>the</strong> object will no longer be in <strong>the</strong> database, so be very careful what you do with this instance.m2m_changeddjango.db.models.signals.m2m_changedNew in version 1.2: Please, see <strong>the</strong> release notes Sent when a ManyToManyField is changed on a model instance.Strictly speaking, this is not a model signal since it is sent by <strong>the</strong> ManyToManyField, but since it complements<strong>the</strong> pre_save/post_save and pre_delete/post_delete when it comes to tracking changes to models, it isincluded here.Arguments sent with this signal:sender The intermediate model class describing <strong>the</strong> ManyToManyField. This class is automatically createdwhen a many-to-many field is defined; you can access it using <strong>the</strong> through attribute on <strong>the</strong> many-to-manyfield.instance The instance whose many-to-many relation is updated. This can be an instance of <strong>the</strong> sender, or of <strong>the</strong>class <strong>the</strong> ManyToManyField is related to.action A string indicating <strong>the</strong> type of update that is done on <strong>the</strong> relation. This can be one of <strong>the</strong> following:"pre_add" Sent before one or more objects are added to <strong>the</strong> relation"post_add" Sent after one or more objects are added to <strong>the</strong> relation"pre_remove" Sent after one or more objects are removed from <strong>the</strong> relation"post_remove" Sent after one or more objects are removed from <strong>the</strong> relation"pre_clear" Sent before <strong>the</strong> relation is cleared"post_clear" Sent after <strong>the</strong> relation is clearedreverse Indicates which side of <strong>the</strong> relation is updated (i.e., if it is <strong>the</strong> forward or reverse relation that is beingmodified).model The class of <strong>the</strong> objects that are added to, removed from or cleared from <strong>the</strong> relation.pk_set For <strong>the</strong> pre_add, post_add, pre_remove and post_remove actions, this is a list of primary keyvalues that have been added to or removed from <strong>the</strong> relation.For <strong>the</strong> pre_clear and post_clear actions, this is None.For example, if a Pizza can have multiple Topping objects, modeled like this:class Topping(models.Model):# ...class Pizza(models.Model):# ...toppings = models.ManyToManyField(Topping)6.14. Signals 745
<strong>Django</strong> <strong>Documentation</strong>, Release 1.2If we would do something like this:>>> p = Pizza.object.create(...)>>> t = Topping.objects.create(...)>>> p.toppings.add(t)<strong>the</strong> arguments sent to a m2m_changed handler would be:Argumentsenderinstanceactionreversemodelpk_setValuePizza.toppings.through (<strong>the</strong> intermediate m2m class)p (<strong>the</strong> Pizza instance being modified)"pre_add" (followed by a separate signal with "post_add")False (Pizza contains <strong>the</strong> ManyToManyField, so this call modifies <strong>the</strong> forward relation)Topping (<strong>the</strong> class of <strong>the</strong> objects added to <strong>the</strong> Pizza)[t.id] (since only Topping t was added to <strong>the</strong> relation)And if we would <strong>the</strong>n do something like this:>>> t.pizza_set.remove(p)<strong>the</strong> arguments sent to a m2m_changed handler would be:Argumentsenderinstanceactionreversemodelpk_setValuePizza.toppings.through (<strong>the</strong> intermediate m2m class)t (<strong>the</strong> Topping instance being modified)"pre_remove" (followed by a separate signal with "post_remove")True (Pizza contains <strong>the</strong> ManyToManyField, so this call modifies <strong>the</strong> reverse relation)Pizza (<strong>the</strong> class of <strong>the</strong> objects removed from <strong>the</strong> Topping)[p.id] (since only Pizza p was removed from <strong>the</strong> relation)class_prepareddjango.db.models.signals.class_preparedSent whenever a model class has been “prepared” – that is, once model has been defined and registered with <strong>Django</strong>’smodel system. <strong>Django</strong> uses this signal internally; it’s not generally used in third-party applications.Arguments that are sent with this signal:sender The model class which was just prepared.6.14.2 Management signalsSignals sent by django-admin.post_syncdbdjango.db.models.signals.post_syncdbSent by syncdb after it installs an application.Any handlers that listen to this signal need to be written in a particular place: a management module in one of yourINSTALLED_APPS. If handlers are registered anywhere else <strong>the</strong>y may not be loaded by syncdb.Arguments sent with this signal:sender The models module that was just installed. That is, if syncdb just installed an app called"foo.bar.myapp", sender will be <strong>the</strong> foo.bar.myapp.models module.746 Chapter 6. API Reference
<strong>Django</strong> <strong>Documentation</strong>, Release 1.2app Same as sender.created_models A list of <strong>the</strong> model classes from any app which syncdb has created so far.verbosity Indicates how much information manage.py is printing on screen. See <strong>the</strong> --verbosity flag fordetails.Functions which listen for post_syncdb should adjust what <strong>the</strong>y output to <strong>the</strong> screen based on <strong>the</strong> value ofthis argument.interactive If interactive is True, it’s safe to prompt <strong>the</strong> user to input things on <strong>the</strong> command line. Ifinteractive is False, functions which listen for this signal should not try to prompt for anything.For example, <strong>the</strong> django.contrib.auth app only prompts to create a superuser when interactive isTrue.6.14.3 Request/response signalsSignals sent by <strong>the</strong> core framework when processing a request.request_starteddjango.core.signals.request_startedSent when <strong>Django</strong> begins processing an HTTP request.Arguments sent with this signal:sender The handler class – i.e. django.core.handlers.modpython.ModPythonHandler ordjango.core.handlers.wsgi.WsgiHandler – that handled <strong>the</strong> request.request_finisheddjango.core.signals.request_finishedSent when <strong>Django</strong> finishes processing an HTTP request.Arguments sent with this signal:sender The handler class, as above.got_request_exceptiondjango.core.signals.got_request_exceptionThis signal is sent whenever <strong>Django</strong> encounters an exception while processing an incoming HTTP request.Arguments sent with this signal:sender The handler class, as above.request The HttpRequest object.6.14.4 Test signalsSignals only sent when running tests.6.14. Signals 747
<strong>Django</strong> <strong>Documentation</strong>, Release 1.2template_rendereddjango.test.signals.template_renderedSent when <strong>the</strong> test system renders a template. This signal is not emitted during normal operation of a <strong>Django</strong> server –it is only available during testing.Arguments sent with this signal:sender The Template object which was rendered.template Same as sendercontext The Context with which <strong>the</strong> template was rendered.6.14.5 Database WrappersSignals sent by <strong>the</strong> database wrapper when a database connection is initiated.connection_createddjango.db.backends.signals.connection_createdNew in version 1.1: Please, see <strong>the</strong> release notesChanged in version 1.2: The connection argument was added Sentwhen <strong>the</strong> database wrapper makes <strong>the</strong> initial connection to <strong>the</strong> database. This is particularly useful if you’d like tosend any post connection commands to <strong>the</strong> SQL backend.Arguments sent with this signal:sender The database wrapper class – i.e. :class: django.db.backends.postgresql_psycopg2.DatabaseWrapper or:class: django.db.backends.mysql.DatabaseWrapper, etc.connection The database connection that was opened. This can be used in a multiple-database configuration todifferentiate connection signals from different databases.6.15 Templates<strong>Django</strong>’s template engine provides a powerful mini-language for defining <strong>the</strong> user-facing layer of your application,encouraging a clean separation of application and presentation logic. Templates can be maintained by anyone with anunderstanding of HTML; no knowledge of Python is required.6.15.1 Built-in template tags and filtersThis document describes <strong>Django</strong>’s built-in template tags and filters. It is recommended that you use <strong>the</strong> automaticdocumentation, if available, as this will also include documentation for any custom tags or filters installed.Built-in tag referenceautoescapeNew in version 1.0: Please, see <strong>the</strong> release notes Control <strong>the</strong> current auto-escaping behavior. This tag takes ei<strong>the</strong>r onor off as an argument and that determines whe<strong>the</strong>r auto-escaping is in effect inside <strong>the</strong> block. The block is closedwith an endautoescape ending tag.748 Chapter 6. API Reference
<strong>Django</strong> <strong>Documentation</strong>, Release 1.2When auto-escaping is in effect, all variable content has HTML escaping applied to it before placing <strong>the</strong> result into<strong>the</strong> output (but after any filters have been applied). This is equivalent to manually applying <strong>the</strong> escape filter to eachvariable.The only exceptions are variables that are already marked as “safe” from escaping, ei<strong>the</strong>r by <strong>the</strong> code that populated<strong>the</strong> variable, or because it has had <strong>the</strong> safe or escape filters applied.Sample usage:{% autoescape on %}{{ body }}{% endautoescape %}blockDefine a block that can be overridden by child templates. See Template inheritance for more information.commentIgnore everything between {% comment %} and {% endcomment %}csrf_tokenNew in version 1.1.2: Please, see <strong>the</strong> release notes In <strong>the</strong> <strong>Django</strong> 1.1.X series, this is a no-op tag that returns an emptystring for future compatibility purposes. In <strong>Django</strong> 1.2 and later, it is used for CSRF protection, as described in <strong>the</strong>documentation for Cross Site Request Forgeries.cycleChanged in version 1.0: Cycle among <strong>the</strong> given strings or variables each time this tag is encountered. Within a loop,cycles among <strong>the</strong> given strings each time through <strong>the</strong> loop:{% for o in some_list %}...{% endfor %}You can use variables, too. For example, if you have two template variables, rowvalue1 and rowvalue2, you cancycle between <strong>the</strong>ir values like this:{% for o in some_list %}...{% endfor %}Yes, you can mix variables and strings:{% for o in some_list %}...{% endfor %}6.15. Templates 749
<strong>Django</strong> <strong>Documentation</strong>, Release 1.2In some cases you might want to refer to <strong>the</strong> next value of a cycle from outside of a loop. To do this, just give <strong>the</strong> {%cycle %} tag a name, using “as”, like this:{% cycle ’row1’ ’row2’ as rowcolors %}From <strong>the</strong>n on, you can insert <strong>the</strong> current value of <strong>the</strong> cycle wherever you’d like in your template:......You can use any number of values in a {% cycle %} tag, separated by spaces. Values enclosed in single (’) ordouble quotes (") are treated as string literals, while values without quotes are treated as template variables.Note that <strong>the</strong> variables included in <strong>the</strong> cycle will not be escaped. This is because template tags do not escape <strong>the</strong>ircontent. Any HTML or Javascript code contained in <strong>the</strong> printed variable will be rendered as-is, which could potentiallylead to security issues.If you need to escape <strong>the</strong> variables in <strong>the</strong> cycle, you must do so explicitly:{% filter force_escape %}{% cycle var1 var2 var3 %}{% endfilter %}For backwards compatibility, <strong>the</strong> {% cycle %} tag supports <strong>the</strong> much inferior old syntax from previous <strong>Django</strong>versions. You shouldn’t use this in any new projects, but for <strong>the</strong> sake of <strong>the</strong> people who are still using it, here’s whatit looks like:{% cycle row1,row2,row3 %}In this syntax, each value gets interpreted as a literal string, and <strong>the</strong>re’s no way to specify variable values. Or literalcommas. Or spaces. Did we mention you shouldn’t use this syntax in any new projects?debugOutput a whole load of debugging information, including <strong>the</strong> current context and imported modules.extendsSignal that this template extends a parent template.This tag can be used in two ways:• {% extends "base.html" %} (with quotes) uses <strong>the</strong> literal value "base.html" as <strong>the</strong> name of <strong>the</strong>parent template to extend.• {% extends variable %} uses <strong>the</strong> value of variable. If <strong>the</strong> variable evaluates to a string, <strong>Django</strong> willuse that string as <strong>the</strong> name of <strong>the</strong> parent template. If <strong>the</strong> variable evaluates to a Template object, <strong>Django</strong> willuse that object as <strong>the</strong> parent template.See Template inheritance for more information.filterFilter <strong>the</strong> contents of <strong>the</strong> variable through variable filters.Filters can also be piped through each o<strong>the</strong>r, and <strong>the</strong>y can have arguments – just like in variable syntax.Sample usage:750 Chapter 6. API Reference
<strong>Django</strong> <strong>Documentation</strong>, Release 1.2{% filter force_escape|lower %}This text will be HTML-escaped, and will appear in all lowercase.{% endfilter %}firstofOutputs <strong>the</strong> first variable passed that is not False, without escaping.Outputs nothing if all <strong>the</strong> passed variables are False.Sample usage:{% firstof var1 var2 var3 %}This is equivalent to:{% if var1 %}{{ var1|safe }}{% else %}{% if var2 %}{{ var2|safe }}{% else %}{% if var3 %}{{ var3|safe }}{% endif %}{% endif %}{% endif %}You can also use a literal string as a fallback value in case all passed variables are False:{% firstof var1 var2 var3 "fallback value" %}Note that <strong>the</strong> variables included in <strong>the</strong> firstof tag will not be escaped. This is because template tags do not escape<strong>the</strong>ir content. Any HTML or Javascript code contained in <strong>the</strong> printed variable will be rendered as-is, which couldpotentially lead to security issues.If you need to escape <strong>the</strong> variables in <strong>the</strong> firstof tag, you must do so explicitly:{% filter force_escape %}{% firstof var1 var2 var3 "fallback value" %}{% endfilter %}forLoop over each item in an array. For example, to display a list of athletes provided in athlete_list:{% for athlete in athlete_list %}{{ athlete.name }}{% endfor %}You can loop over a list in reverse by using {% for obj in list reversed %}. New in version 1.0: Please,see <strong>the</strong> release notes If you need to loop over a list of lists, you can unpack <strong>the</strong> values in each sub-list into individualvariables. For example, if your context contains a list of (x,y) coordinates called points, you could use <strong>the</strong> followingto output <strong>the</strong> list of points:{% for x, y in points %}There is a point at {{ x }},{{ y }}{% endfor %}6.15. Templates 751
<strong>Django</strong> <strong>Documentation</strong>, Release 1.2This can also be useful if you need to access <strong>the</strong> items in a dictionary. For example, if your context contained adictionary data, <strong>the</strong> following would display <strong>the</strong> keys and values of <strong>the</strong> dictionary:{% for key, value in data.items %}{{ key }}: {{ value }}{% endfor %}The for loop sets a number of variables available within <strong>the</strong> loop:Variableforloop.counterforloop.counter0forloop.revcounterforloop.revcounter0forloop.firstforloop.lastforloop.parentloopDescriptionThe current iteration of <strong>the</strong> loop (1-indexed)The current iteration of <strong>the</strong> loop (0-indexed)The number of iterations from <strong>the</strong> end of <strong>the</strong> loop (1-indexed)The number of iterations from <strong>the</strong> end of <strong>the</strong> loop (0-indexed)True if this is <strong>the</strong> first time through <strong>the</strong> loopTrue if this is <strong>the</strong> last time through <strong>the</strong> loopFor nested loops, this is <strong>the</strong> loop “above” <strong>the</strong> current onefor ... empty New in version 1.1: Please, see <strong>the</strong> release notes The for tag can take an optional {% empty %}clause that will be displayed if <strong>the</strong> given array is empty or could not be found:{% for athlete in athlete_list %}{{ athlete.name }}{% empty %}Sorry, no athlete in this list!{% endfor %}The above is equivalent to – but shorter, cleaner, and possibly faster than – <strong>the</strong> following:{% if athlete_list %}{% for athlete in athlete_list %}{{ athlete.name }}{% endfor %}{% else %}Sorry, no athletes in this list.{% endif %}ifThe {% if %} tag evaluates a variable, and if that variable is “true” (i.e. exists, is not empty, and is not a falseboolean value) <strong>the</strong> contents of <strong>the</strong> block are output:{% if athlete_list %}Number of athletes: {{ athlete_list|length }}{% else %}No athletes.{% endif %}In <strong>the</strong> above, if athlete_list is not empty, <strong>the</strong> number of athletes will be displayed by <strong>the</strong> {{athlete_list|length }} variable.As you can see, <strong>the</strong> if tag can take an optional {% else %} clause that will be displayed if <strong>the</strong> test fails.752 Chapter 6. API Reference
<strong>Django</strong> <strong>Documentation</strong>, Release 1.2Boolean operatorsif tags may use and, or or not to test a number of variables or to negate a given variable:{% if athlete_list and coach_list %}Both athletes and coaches are available.{% endif %}{% if not athlete_list %}There are no athletes.{% endif %}{% if athlete_list or coach_list %}There are some athletes or some coaches.{% endif %}{% if not athlete_list or coach_list %}There are no athletes or <strong>the</strong>re are some coaches (OK, sowriting English translations of boolean logic soundsstupid; it’s not our fault).{% endif %}{% if athlete_list and not coach_list %}There are some athletes and absolutely no coaches.{% endif %}Changed in version 1.2: Please, see <strong>the</strong> release notes Use of both and and or clauses within <strong>the</strong> same tag is allowed,with and having higher precedence than or e.g.:{% if athlete_list and coach_list or cheerleader_list %}will be interpreted like:if (athlete_list and coach_list) or cheerleader_listUse of actual brackets in <strong>the</strong> if tag is invalid syntax. If you need <strong>the</strong>m to indicate precedence, you should use nestedif tags. New in version 1.2: Please, see <strong>the</strong> release notes if tags may also use <strong>the</strong> operators ==, !=, , =and in which work as follows:== operator Equality. Example:{% if somevar == "x" %}This appears if variable somevar equals <strong>the</strong> string "x"{% endif %}!= operator Inequality. Example:{% if somevar != "x" %}This appears if variable somevar does not equal <strong>the</strong> string "x",or if somevar is not found in <strong>the</strong> context{% endif %}< operator Less than. Example:{% if somevar < 100 %}This appears if variable somevar is less than 100.{% endif %}6.15. Templates 753
<strong>Django</strong> <strong>Documentation</strong>, Release 1.2> operator Greater than. Example:{% if somevar > 0 %}This appears if variable somevar is greater than 0.{% endif %}= 1 %}This appears if variable somevar is greater than 1 or equal to 1.{% endif %}in operator Contained within. This operator is supported by many Python containers to test whe<strong>the</strong>r <strong>the</strong> givenvalue is in <strong>the</strong> container. The following are some examples of how x in y will be interpreted:{% if "bc" in "abcdef" %}This appears since "bc" is a substring of "abcdef"{% endif %}{% if "hello" in greetings %}If greetings is a list or set, one element of which is <strong>the</strong> string"hello", this will appear.{% endif %}{% if user in users %}If users is a QuerySet, this will appear if user is aninstance that belongs to <strong>the</strong> QuerySet.{% endif %}not in operatorNot contained within. This is <strong>the</strong> negation of <strong>the</strong> in operator.The comparison operators cannot be ‘chained’ like in Python or in ma<strong>the</strong>matical notation. For example, instead ofusing:{% if a > b > c %} (WRONG)you should use:{% if a > b and b > c %}FiltersYou can also use filters in <strong>the</strong> if expression. For example:{% if messages|length >= 100 %}You have lots of messages today!{% endif %}754 Chapter 6. API Reference
<strong>Django</strong> <strong>Documentation</strong>, Release 1.2Complex expressions All of <strong>the</strong> above can be combined to form complex expressions. For such expressions, it canbe important to know how <strong>the</strong> operators are grouped when <strong>the</strong> expression is evaluated - that is, <strong>the</strong> precedence rules.The precedence of <strong>the</strong> operators, from lowest to highest, is as follows:• or• and• not• in• ==, !=, ,‘‘=(This follows Python exactly). So, for example, <strong>the</strong> following complex if tag:{% if a == b or c == d and e %}...will be interpreted as:(a == b) or ((c == d) and e)If you need different precedence, you will need to use nested if tags. Sometimes that is better for clarity anyway, for<strong>the</strong> sake of those who do not know <strong>the</strong> precedence rules.ifchangedCheck if a value has changed from <strong>the</strong> last iteration of a loop.The ‘ifchanged’ block tag is used within a loop. It has two possible uses.1. Checks its own rendered contents against its previous state and only displays <strong>the</strong> content if it has changed. Forexample, this displays a list of days, only displaying <strong>the</strong> month if it changes:Archive for {{ year }}{% for date in days %}{% ifchanged %}{{ date|date:"F" }}{% endifchanged %}{{ date|date:"j" }}{% endfor %}2. If given a variable, check whe<strong>the</strong>r that variable has changed. For example, <strong>the</strong> following shows <strong>the</strong> date everytime it changes, but only shows <strong>the</strong> hour if both <strong>the</strong> hour and <strong>the</strong> date has changed:{% for date in days %}{% ifchanged date.date %} {{ date.date }} {% endifchanged %}{% ifchanged date.hour date.date %}{{ date.hour }}{% endifchanged %}{% endfor %}The ifchanged tag can also take an optional {% else %} clause that will be displayed if <strong>the</strong> value has notchanged:{% for match in matches %}
<strong>Django</strong> <strong>Documentation</strong>, Release 1.2">{{ match }}{% endfor %}ifequalOutput <strong>the</strong> contents of <strong>the</strong> block if <strong>the</strong> two arguments equal each o<strong>the</strong>r.Example:{% ifequal user.id comment.user_id %}...{% endifequal %}As in <strong>the</strong> {% if %} tag, an {% else %} clause is optional.The arguments can be hard-coded strings, so <strong>the</strong> following is valid:{% ifequal user.username "adrian" %}...{% endifequal %}It is only possible to compare an argument to template variables or strings. You cannot check for equality with Pythonobjects such as True or False. If you need to test if something is true or false, use <strong>the</strong> if tag instead. New inversion 1.2: An alternative to <strong>the</strong> ifequal tag is to use <strong>the</strong> if tag and <strong>the</strong> == operator.ifnotequalJust like ifequal, except it tests that <strong>the</strong> two arguments are not equal. New in version 1.2: An alternative to <strong>the</strong>ifnotequal tag is to use <strong>the</strong> if tag and <strong>the</strong> != operator.includeLoads a template and renders it with <strong>the</strong> current context. This is a way of “including” o<strong>the</strong>r templates within a template.The template name can ei<strong>the</strong>r be a variable or a hard-coded (quoted) string, in ei<strong>the</strong>r single or double quotes.This example includes <strong>the</strong> contents of <strong>the</strong> template "foo/bar.html":{% include "foo/bar.html" %}This example includes <strong>the</strong> contents of <strong>the</strong> template whose name is contained in <strong>the</strong> variable template_name:{% include template_name %}An included template is rendered with <strong>the</strong> context of <strong>the</strong> template that’s including it. This example produces <strong>the</strong> output"Hello, John":• Context: variable person is set to "john".• Template:{% include "name_snippet.html" %}• The name_snippet.html template:Hello, {{ person }}756 Chapter 6. API Reference
<strong>Django</strong> <strong>Documentation</strong>, Release 1.2See also: {% ssi %}.Note: The include tag should be considered as an implementation of “render this subtemplate and include <strong>the</strong>HTML”, not as “parse this subtemplate and include its contents as if it were part of <strong>the</strong> parent”. This means that <strong>the</strong>reis no shared state between included templates – each include is a completely independent rendering process.loadLoad a custom template tag set.See Custom tag and filter libraries for more information.nowDisplay <strong>the</strong> current date and/or time, according to <strong>the</strong> given string.Given format can be one of <strong>the</strong> predefined ones DATE_FORMAT, DATETIME_FORMAT, SHORT_DATE_FORMAT orSHORT_DATETIME_FORMAT, or a custom format, same as <strong>the</strong> date filter. Note that predefined formats may varydepending on <strong>the</strong> current locale.Example:It is {% now "jS F Y H:i" %}Note that you can backslash-escape a format string if you want to use <strong>the</strong> “raw” value. In this example, “f” is backslashescaped,because o<strong>the</strong>rwise “f” is a format string that displays <strong>the</strong> time. The “o” doesn’t need to be escaped, becauseit’s not a format character:It is <strong>the</strong> {% now "jS o\f F" %}This would display as “It is <strong>the</strong> 4th of September”.regroupRegroup a list of alike objects by a common attribute.This complex tag is best illustrated by use of an example: say that people is a list of people represented by dictionarieswith first_name, last_name, and gender keys:people = [{’first_name’: ’George’, ’last_name’: ’Bush’, ’gender’: ’Male’},{’first_name’: ’Bill’, ’last_name’: ’Clinton’, ’gender’: ’Male’},{’first_name’: ’Margaret’, ’last_name’: ’Thatcher’, ’gender’: ’Female’},{’first_name’: ’Condoleezza’, ’last_name’: ’Rice’, ’gender’: ’Female’},{’first_name’: ’Pat’, ’last_name’: ’Smith’, ’gender’: ’Unknown’},]...and you’d like to display a hierarchical list that is ordered by gender, like this:• Male:• Female:– George Bush– Bill Clinton6.15. Templates 757
<strong>Django</strong> <strong>Documentation</strong>, Release 1.2• Unknown:– Margaret Thatcher– Condoleezza Rice– Pat SmithYou can use <strong>the</strong> {% regroup %} tag to group <strong>the</strong> list of people by gender. The following snippet of template codewould accomplish this:{% regroup people by gender as gender_list %}{% for gender in gender_list %}{{ gender.grouper }}{% for item in gender.list %}{{ item.first_name }} {{ item.last_name }}{% endfor %}{% endfor %}Let’s walk through this example. {% regroup %} takes three arguments: <strong>the</strong> list you want to regroup, <strong>the</strong> attributeto group by, and <strong>the</strong> name of <strong>the</strong> resulting list. Here, we’re regrouping <strong>the</strong> people list by <strong>the</strong> gender attribute andcalling <strong>the</strong> result gender_list.{% regroup %} produces a list (in this case, gender_list) of group objects. Each group object has twoattributes:• grouper – <strong>the</strong> item that was grouped by (e.g., <strong>the</strong> string “Male” or “Female”).• list – a list of all items in this group (e.g., a list of all people with gender=’Male’).Note that {% regroup %} does not order its input! Our example relies on <strong>the</strong> fact that <strong>the</strong> people list was orderedby gender in <strong>the</strong> first place. If <strong>the</strong> people list did not order its members by gender, <strong>the</strong> regrouping would naivelydisplay more than one group for a single gender. For example, say <strong>the</strong> people list was set to this (note that <strong>the</strong> malesare not grouped toge<strong>the</strong>r):people = [{’first_name’: ’Bill’, ’last_name’: ’Clinton’, ’gender’: ’Male’},{’first_name’: ’Pat’, ’last_name’: ’Smith’, ’gender’: ’Unknown’},{’first_name’: ’Margaret’, ’last_name’: ’Thatcher’, ’gender’: ’Female’},{’first_name’: ’George’, ’last_name’: ’Bush’, ’gender’: ’Male’},{’first_name’: ’Condoleezza’, ’last_name’: ’Rice’, ’gender’: ’Female’},]With this input for people, <strong>the</strong> example {% regroup %} template code above would result in <strong>the</strong> followingoutput:• Male:• Unknown:• Female:– Bill Clinton– Pat Smith– Margaret Thatcher758 Chapter 6. API Reference
<strong>Django</strong> <strong>Documentation</strong>, Release 1.2• Male:• Female:– George Bush– Condoleezza RiceThe easiest solution to this gotcha is to make sure in your view code that <strong>the</strong> data is ordered according to how youwant to display it.Ano<strong>the</strong>r solution is to sort <strong>the</strong> data in <strong>the</strong> template using <strong>the</strong> dictsort filter, if your data is in a list of dictionaries:{% regroup people|dictsort:"gender" by gender as gender_list %}spacelessRemoves whitespace between HTML tags. This includes tab characters and newlines.Example usage:{% spaceless %}Foo{% endspaceless %}This example would return this HTML:FooOnly space between tags is removed – not space between tags and text. In this example, <strong>the</strong> space around Hellowon’t be stripped:{% spaceless %}Hello{% endspaceless %}ssiOutput <strong>the</strong> contents of a given file into <strong>the</strong> page.Like a simple “include” tag, {% ssi %} includes <strong>the</strong> contents of ano<strong>the</strong>r file – which must be specified using anabsolute path – in <strong>the</strong> current page:{% ssi /home/html/ljworld.com/includes/right_generic.html %}If <strong>the</strong> optional “parsed” parameter is given, <strong>the</strong> contents of <strong>the</strong> included file are evaluated as template code, within <strong>the</strong>current context:{% ssi /home/html/ljworld.com/includes/right_generic.html parsed %}Note that if you use {% ssi %}, you’ll need to define ALLOWED_INCLUDE_ROOTS in your <strong>Django</strong> settings, as asecurity measure.See also: {% include %}.6.15. Templates 759
<strong>Django</strong> <strong>Documentation</strong>, Release 1.2templatetagOutput one of <strong>the</strong> syntax characters used to compose template tags.Since <strong>the</strong> template system has no concept of “escaping”, to display one of <strong>the</strong> bits used in template tags, you must use<strong>the</strong> {% templatetag %} tag.The argument tells which template bit to output:Argument Outputsopenblock {%closeblock %}openvariable {{closevariable }}openbrace {closebrace }opencomment {#closecomment #}urlReturns an absolute path reference (a URL without <strong>the</strong> domain name) matching a given view function and optionalparameters. This is a way to output links without violating <strong>the</strong> DRY principle by having to hard-code URLs in yourtemplates:{% url path.to.some_view v1 v2 %}The first argument is a path to a view function in <strong>the</strong> format package.package.module.function. Additionalarguments are optional and should be space-separated values that will be used as arguments in <strong>the</strong> URL. The exampleabove shows passing positional arguments. Alternatively you may use keyword syntax:{% url path.to.some_view arg1=v1 arg2=v2 %}Do not mix both positional and keyword syntax in a single call. All arguments required by <strong>the</strong> URLconf should bepresent.For example, suppose you have a view, app_views.client, whose URLconf takes a client ID (here, client()is a method inside <strong>the</strong> views file app_views.py). The URLconf line might look like this:(’^client/(\d+)/$’, ’app_views.client’)If this app’s URLconf is included into <strong>the</strong> project’s URLconf under a path such as this:(’^clients/’, include(’project_name.app_name.urls’))...<strong>the</strong>n, in a template, you can create a link to this view like this:{% url app_views.client client.id %}The template tag will output <strong>the</strong> string /clients/client/123/. New in version 1.0: Please, see <strong>the</strong> releasenotes If you’re using named URL patterns, you can refer to <strong>the</strong> name of <strong>the</strong> pattern in <strong>the</strong> url tag instead of using <strong>the</strong>path to <strong>the</strong> view.Note that if <strong>the</strong> URL you’re reversing doesn’t exist, you’ll get an NoReverseMatch exception raised, which willcause your site to display an error page. New in version 1.0: Please, see <strong>the</strong> release notes If you’d like to retrieve aURL without displaying it, you can use a slightly different call:760 Chapter 6. API Reference
<strong>Django</strong> <strong>Documentation</strong>, Release 1.2{% url path.to.view arg arg2 as <strong>the</strong>_url %}I’m linking to {{ <strong>the</strong>_url }}This {% url ... as var %} syntax will not cause an error if <strong>the</strong> view is missing. In practice you’ll use this tolink to views that are optional:{% url path.to.view as <strong>the</strong>_url %}{% if <strong>the</strong>_url %}Link to optional stuff{% endif %}New in version 1.1: Please, see <strong>the</strong> release notes If you’d like to retrieve a namespaced URL, specify <strong>the</strong> fully qualifiedname:{% url myapp:view-name %}This will follow <strong>the</strong> normal namespaced URL resolution strategy, including using any hints provided by <strong>the</strong> contextas to <strong>the</strong> current application. Changed in version 1.2: Please, see <strong>the</strong> release notes For backwards compatibility, <strong>the</strong>{% url %} tag also supports <strong>the</strong> use of commas to separate arguments. You shouldn’t use this in any new projects,but for <strong>the</strong> sake of <strong>the</strong> people who are still using it, here’s what it looks like:{% url path.to.view arg,arg2 %}{% url path.to.view arg, arg2 %}This syntax doesn’t support <strong>the</strong> use of literal commas, or or equals signs. Did we mention you shouldn’t use thissyntax in any new projects?widthratioFor creating bar charts and such, this tag calculates <strong>the</strong> ratio of a given value to a maximum value, and <strong>the</strong>n appliesthat ratio to a constant.For example:Above, if this_value is 175 and max_value is 200, <strong>the</strong> image in <strong>the</strong> above example will be 88 pixels wide(because 175/200 = .875; .875 * 100 = 87.5 which is rounded up to 88).withNew in version 1.0: Please, see <strong>the</strong> release notes Caches a complex variable under a simpler name. This is usefulwhen accessing an “expensive” method (e.g., one that hits <strong>the</strong> database) multiple times.For example:{% with business.employees.count as total %}{{ total }} employee{{ total|pluralize }}{% endwith %}The populated variable (in <strong>the</strong> example above, total) is only available between <strong>the</strong> {% with %} and {%endwith %} tags.6.15. Templates 761
<strong>Django</strong> <strong>Documentation</strong>, Release 1.2Built-in filter referenceaddAdds <strong>the</strong> argument to <strong>the</strong> value.For example:{{ value|add:"2" }}If value is 4, <strong>the</strong>n <strong>the</strong> output will be 6. Changed in version 1.2: The following behavior didn’t exist in previous<strong>Django</strong> versions. This filter will first try to coerce both values to integers. If this fails, it’ll attempt to add <strong>the</strong> valuestoge<strong>the</strong>r anyway. This will work on some data types (strings, list, etc.) and fail on o<strong>the</strong>rs. If it fails, <strong>the</strong> result will bean empty string.For example, if we have:{{ first|add:second }}and first is [1, 2, 3] and second is [4, 5, 6], <strong>the</strong>n <strong>the</strong> output will be [1, 2, 3, 4, 5, 6].Warning:above.Strings that can be coerced to integers will be summed, not concatenated, as in <strong>the</strong> first exampleaddslashesAdds slashes before quotes. Useful for escaping strings in CSV, for example.For example:{{ value|addslashes }}If value is "I’m using <strong>Django</strong>", <strong>the</strong> output will be "I\’m using <strong>Django</strong>".capfirstCapitalizes <strong>the</strong> first character of <strong>the</strong> value.For example:{{ value|capfirst }}If value is "django", <strong>the</strong> output will be "<strong>Django</strong>".centerCenters <strong>the</strong> value in a field of a given width.For example:"{{ value|center:"15" }}"If value is "<strong>Django</strong>", <strong>the</strong> output will be " <strong>Django</strong> ".762 Chapter 6. API Reference
<strong>Django</strong> <strong>Documentation</strong>, Release 1.2cutRemoves all values of arg from <strong>the</strong> given string.For example:{{ value|cut:" "}}If value is "String with spaces", <strong>the</strong> output will be "Stringwithspaces".dateFormats a date according to <strong>the</strong> given format.Uses <strong>the</strong> same format as PHP’s date() function (http://php.net/date) with some custom extensions.Available format strings:Format characteraAbBcdDfFgGhHiIjlLmMnNOPrsStTuUwWyYDescription’a.m.’ or ’p.m.’ (Note that this is slightly different than PHP’s output, because this includes periods to ma’AM’ or ’PM’.Month, textual, 3 letters, lowercase.Not implemented.ISO 8601 Format.Day of <strong>the</strong> month, 2 digits with leading zeros.Day of <strong>the</strong> week, textual, 3 letters.Time, in 12-hour hours and minutes, with minutes left off if <strong>the</strong>y’re zero. Proprietary extension.Month, textual, long.Hour, 12-hour format without leading zeros.Hour, 24-hour format without leading zeros.Hour, 12-hour format.Hour, 24-hour format.Minutes.Not implemented.Day of <strong>the</strong> month without leading zeros.Day of <strong>the</strong> week, textual, long.Boolean for whe<strong>the</strong>r it’s a leap year.Month, 2 digits with leading zeros.Month, textual, 3 letters.Month without leading zeros.Month abbreviation in Associated Press style. Proprietary extension.Difference to Greenwich time in hours.Time, in 12-hour hours, minutes and ‘a.m.’/’p.m.’, with minutes left off if <strong>the</strong>y’re zero and <strong>the</strong> special-case strinRFC 2822 formatted date.Seconds, 2 digits with leading zeros.English ordinal suffix for day of <strong>the</strong> month, 2 characters.Number of days in <strong>the</strong> given month.Time zone of this machine.Microseconds.Seconds since <strong>the</strong> Unix Epoch (January 1 1970 00:00:00 UTC).Day of <strong>the</strong> week, digits without leading zeros.ISO-8601 week number of year, with weeks starting on Monday.Year, 2 digits.Year, 4 digits.Continued on next page6.15. Templates 763
<strong>Django</strong> <strong>Documentation</strong>, Release 1.2zZTable 6.4 – continued from previous pageDay of <strong>the</strong> year.Time zone offset in seconds. The offset for timezones west of UTC is always negative, and for those east of UTNew in version 1.2: Please, see <strong>the</strong> release notes The c and u format specification characters were added in <strong>Django</strong>1.2.For example:{{ value|date:"D d M Y" }}If value is a datetime object (e.g., <strong>the</strong> result of datetime.datetime.now()), <strong>the</strong> output will be <strong>the</strong> string’Wed 09 Jan 2008’.The format passed can be one of <strong>the</strong> predefined ones DATE_FORMAT, DATETIME_FORMAT,SHORT_DATE_FORMAT or SHORT_DATETIME_FORMAT, or a custom format that uses <strong>the</strong> format specifiersshown in <strong>the</strong> table above. Note that predefined formats may vary depending on <strong>the</strong> current locale.Assuming that USE_L10N is True and LANGUAGE_CODE is, for example, "es", <strong>the</strong>n for:{{ value|date:"SHORT_DATE_FORMAT" }}<strong>the</strong> output would be <strong>the</strong> string "09/01/2008" (<strong>the</strong> "SHORT_DATE_FORMAT" format specifier for <strong>the</strong> es localeas shipped with <strong>Django</strong> is "d/m/Y").When used without a format string:{{ value|date }}...<strong>the</strong> formatting string defined in <strong>the</strong> DATE_FORMAT setting will be used, without applying any localization. Changedin version 1.2: Predefined formats can now be influenced by <strong>the</strong> current locale.defaultIf value evaluates to False, use given default. O<strong>the</strong>rwise, use <strong>the</strong> value.For example:{{ value|default:"nothing" }}If value is "" (<strong>the</strong> empty string), <strong>the</strong> output will be nothing.default_if_noneIf (and only if) value is None, use given default. O<strong>the</strong>rwise, use <strong>the</strong> value.Note that if an empty string is given, <strong>the</strong> default value will not be used. Use <strong>the</strong> default filter if you want to fallbackfor empty strings.For example:{{ value|default_if_none:"nothing" }}If value is None, <strong>the</strong> output will be <strong>the</strong> string "nothing".764 Chapter 6. API Reference
<strong>Django</strong> <strong>Documentation</strong>, Release 1.2dictsortTakes a list of dictionaries and returns that list sorted by <strong>the</strong> key given in <strong>the</strong> argument.For example:{{ value|dictsort:"name" }}If value is:[]{’name’: ’zed’, ’age’: 19},{’name’: ’amy’, ’age’: 22},{’name’: ’joe’, ’age’: 31},<strong>the</strong>n <strong>the</strong> output would be:[]{’name’: ’amy’, ’age’: 22},{’name’: ’joe’, ’age’: 31},{’name’: ’zed’, ’age’: 19},dictsortreversedTakes a list of dictionaries and returns that list sorted in reverse order by <strong>the</strong> key given in <strong>the</strong> argument. This worksexactly <strong>the</strong> same as <strong>the</strong> above filter, but <strong>the</strong> returned value will be in reverse order.divisiblebyReturns True if <strong>the</strong> value is divisible by <strong>the</strong> argument.For example:{{ value|divisibleby:"3" }}If value is 21, <strong>the</strong> output would be True.escapeEscapes a string’s HTML. Specifically, it makes <strong>the</strong>se replacements:• < is converted to <• > is converted to >• ’ (single quote) is converted to '• " (double quote) is converted to "• & is converted to &The escaping is only applied when <strong>the</strong> string is output, so it does not matter where in a chained sequence of filters youput escape: it will always be applied as though it were <strong>the</strong> last filter. If you want escaping to be applied immediately,use <strong>the</strong> force_escape filter.6.15. Templates 765
<strong>Django</strong> <strong>Documentation</strong>, Release 1.2Applying escape to a variable that would normally have auto-escaping applied to <strong>the</strong> result will only result in oneround of escaping being done. So it is safe to use this function even in auto-escaping environments. If you wantmultiple escaping passes to be applied, use <strong>the</strong> force_escape filter. Changed in version 1.0: Due to auto-escaping,<strong>the</strong> behavior of this filter has changed slightly. The replacements are only made once, after all o<strong>the</strong>r filters are applied– including filters before and after it.escapejsNew in version 1.0: Please, see <strong>the</strong> release notes Escapes characters for use in JavaScript strings. This does notmake <strong>the</strong> string safe for use in HTML, but does protect you from syntax errors when using templates to generateJavaScript/JSON.For example:{{ value|escapejs }}If value is "testing\r\njavascript \’string" escaping", <strong>the</strong> outputwill be "testing\\u000D\\u000Ajavascript \\u0027string\\u0022\\u003Cb\\u003Eescaping\\u003C/b\\u003E".filesizeformatFormat <strong>the</strong> value like a ‘human-readable’ file size (i.e. ’13 KB’, ’4.1 MB’, ’102 bytes’, etc).For example:{{ value|filesizeformat }}If value is 123456789, <strong>the</strong> output would be 117.7 MB.firstReturns <strong>the</strong> first item in a list.For example:{{ value|first }}If value is <strong>the</strong> list [’a’, ’b’, ’c’], <strong>the</strong> output will be ’a’.fix_ampersandsChanged in version 1.0: This is rarely useful as ampersands are now automatically escaped. See escape for moreinformation. Replaces ampersands with & entities.For example:{{ value|fix_ampersands }}If value is Tom & Jerry, <strong>the</strong> output will be Tom & Jerry.766 Chapter 6. API Reference
<strong>Django</strong> <strong>Documentation</strong>, Release 1.2floatformatWhen used without an argument, rounds a floating-point number to one decimal place – but only if <strong>the</strong>re’s a decimalpart to be displayed. For example:value Template Output34.23234 {{ value|floatformat }} 34.234.00000 {{ value|floatformat }} 3434.26000 {{ value|floatformat }} 34.3If used with a numeric integer argument, floatformat rounds a number to that many decimal places. For example:value Template Output34.23234 {{ value|floatformat:3 }} 34.23234.00000 {{ value|floatformat:3 }} 34.00034.26000 {{ value|floatformat:3 }} 34.260If <strong>the</strong> argument passed to floatformat is negative, it will round a number to that many decimal places – but onlyif <strong>the</strong>re’s a decimal part to be displayed. For example:value Template Output34.23234 {{ value|floatformat:"-3" }} 34.23234.00000 {{ value|floatformat:"-3" }} 3434.26000 {{ value|floatformat:"-3" }} 34.260Using floatformat with no argument is equivalent to using floatformat with an argument of -1.force_escapeNew in version 1.0: Please, see <strong>the</strong> release notes Applies HTML escaping to a string (see <strong>the</strong> escape filter fordetails). This filter is applied immediately and returns a new, escaped string. This is useful in <strong>the</strong> rare cases where youneed multiple escaping or want to apply o<strong>the</strong>r filters to <strong>the</strong> escaped results. Normally, you want to use <strong>the</strong> escapefilter.get_digitGiven a whole number, returns <strong>the</strong> requested digit, where 1 is <strong>the</strong> right-most digit, 2 is <strong>the</strong> second-right-most digit,etc. Returns <strong>the</strong> original value for invalid input (if input or argument is not an integer, or if argument is less than 1).O<strong>the</strong>rwise, output is always an integer.For example:{{ value|get_digit:"2" }}If value is 123456789, <strong>the</strong> output will be 8.iriencodeConverts an IRI (Internationalized Resource Identifier) to a string that is suitable for including in a URL. This isnecessary if you’re trying to use strings containing non-ASCII characters in a URL.It’s safe to use this filter on a string that has already gone through <strong>the</strong> urlencode filter.For example:6.15. Templates 767
<strong>Django</strong> <strong>Documentation</strong>, Release 1.2{{ value|iriencode }}If value is "?test=1&me=2", <strong>the</strong> output will be "?test=1&me=2".joinJoins a list with a string, like Python’s str.join(list)For example:{{ value|join:" // " }}If value is <strong>the</strong> list [’a’, ’b’, ’c’], <strong>the</strong> output will be <strong>the</strong> string "a // b // c".lastNew in version 1.0: Please, see <strong>the</strong> release notes Returns <strong>the</strong> last item in a list.For example:{{ value|last }}If value is <strong>the</strong> list [’a’, ’b’, ’c’, ’d’], <strong>the</strong> output will be <strong>the</strong> string "d".lengthReturns <strong>the</strong> length of <strong>the</strong> value. This works for both strings and lists.For example:{{ value|length }}If value is [’a’, ’b’, ’c’, ’d’], <strong>the</strong> output will be 4.length_isReturns True if <strong>the</strong> value’s length is <strong>the</strong> argument, or False o<strong>the</strong>rwise.For example:{{ value|length_is:"4" }}If value is [’a’, ’b’, ’c’, ’d’], <strong>the</strong> output will be True.linebreaksReplaces line breaks in plain text with appropriate HTML; a single newline becomes an HTML line break ()and a new line followed by a blank line becomes a paragraph break ().For example:{{ value|linebreaks }}If value is Joel\nis a slug, <strong>the</strong> output will be Joelis a slug.768 Chapter 6. API Reference
<strong>Django</strong> <strong>Documentation</strong>, Release 1.2linebreaksbrConverts all newlines in a piece of plain text to HTML line breaks ().For example:{{ value|linebreaksbr }}If value is Joel\nis a slug, <strong>the</strong> output will be Joelis a slug.linenumbersDisplays text with line numbers.For example:{{ value|linenumbers }}If value is:onetwothree<strong>the</strong> output will be:1. one2. two3. threeljustLeft-aligns <strong>the</strong> value in a field of a given width.Argument: field sizeFor example:"{{ value|ljust:"10" }}"If value is <strong>Django</strong>, <strong>the</strong> output will be "<strong>Django</strong> ".lowerConverts a string into all lowercase.For example:{{ value|lower }}If value is Still MAD At Yoko, <strong>the</strong> output will be still mad at yoko.6.15. Templates 769
<strong>Django</strong> <strong>Documentation</strong>, Release 1.2make_listReturns <strong>the</strong> value turned into a list. For an integer, it’s a list of digits. For a string, it’s a list of characters.For example:{{ value|make_list }}If value is <strong>the</strong> string "Joel", <strong>the</strong> output would be <strong>the</strong> list [u’J’, u’o’, u’e’, u’l’]. If value is 123,<strong>the</strong> output will be <strong>the</strong> list [1, 2, 3].phone2numericConverts a phone number (possibly containing letters) to its numerical equivalent.The input doesn’t have to be a valid phone number. This will happily convert any string.For example:{{ value|phone2numeric }}If value is 800-COLLECT, <strong>the</strong> output will be 800-2655328.pluralizeReturns a plural suffix if <strong>the</strong> value is not 1. By default, this suffix is ’s’.Example:You have {{ num_messages }} message{{ num_messages|pluralize }}.If num_messages is 1, <strong>the</strong> output will be You have 1 message. If num_messages is 2 <strong>the</strong> output will beYou have 2 messages.For words that require a suffix o<strong>the</strong>r than ’s’, you can provide an alternate suffix as a parameter to <strong>the</strong> filter.Example:You have {{ num_walruses }} walrus{{ num_walruses|pluralize:"es" }}.For words that don’t pluralize by simple suffix, you can specify both a singular and plural suffix, separated by acomma.Example:You have {{ num_cherries }} cherr{{ num_cherries|pluralize:"y,ies" }}.pprintA wrapper around pprint.pprint – for debugging, really.randomReturns a random item from <strong>the</strong> given list.For example:770 Chapter 6. API Reference
<strong>Django</strong> <strong>Documentation</strong>, Release 1.2{{ value|random }}If value is <strong>the</strong> list [’a’, ’b’, ’c’, ’d’], <strong>the</strong> output could be "b".removetagsRemoves a space-separated list of [X]HTML tags from <strong>the</strong> output.For example:{{ value|removetags:"b span"|safe }}If value is "Joel is a slug" <strong>the</strong> output will be "Joelis a slug".Note that this filter is case-sensitive.If value is "Joel is a slug" <strong>the</strong> output will be"Joel is a slug".rjustRight-aligns <strong>the</strong> value in a field of a given width.Argument: field sizeFor example:"{{ value|rjust:"10" }}"If value is <strong>Django</strong>, <strong>the</strong> output will be " <strong>Django</strong>".safeMarks a string as not requiring fur<strong>the</strong>r HTML escaping prior to output. When autoescaping is off, this filter has noeffect.Note: If you are chaining filters, a filter applied after safe can make <strong>the</strong> contents unsafe again. For example, <strong>the</strong>following code prints <strong>the</strong> variable as is, unescaped:{{ var|safe|escape }}safeseqApplies <strong>the</strong> safe filter to each element of a sequence. Useful in conjunction with o<strong>the</strong>r filters that operate on sequences,such as join. For example:{{ some_list|safeseq|join:", " }}You couldn’t use <strong>the</strong> safe filter directly in this case, as it would first convert <strong>the</strong> variable into a string, ra<strong>the</strong>r thanworking with <strong>the</strong> individual elements of <strong>the</strong> sequence.6.15. Templates 771
<strong>Django</strong> <strong>Documentation</strong>, Release 1.2sliceReturns a slice of <strong>the</strong> list.Uses <strong>the</strong> same syntax as Python’s list slicing. See http://diveintopython.org/native_data_types/lists.html#odbchelper.list.slicefor an introduction.Example:{{ some_list|slice:":2" }}If some_list is [’a’, ’b’, ’c’], <strong>the</strong> output will be [’a’, ’b’].slugifyConverts to lowercase, removes non-word characters (alphanumerics and underscores) and converts spaces to hyphens.Also strips leading and trailing whitespace.For example:{{ value|slugify }}If value is "Joel is a slug", <strong>the</strong> output will be "joel-is-a-slug".stringformatFormats <strong>the</strong> variable according to <strong>the</strong> argument, a string formatting specifier. This specifier uses Python string formattingsyntax, with <strong>the</strong> exception that <strong>the</strong> leading “%” is dropped.See http://docs.python.org/library/stdtypes.html#string-formatting-operations for documentation of Python string formattingFor example:{{ value|stringformat:"s" }}If value is "Joel is a slug", <strong>the</strong> output will be "Joel is a slug".striptagsStrips all [X]HTML tags.For example:{{ value|striptags }}If value is "Joel is a slug", <strong>the</strong> output will be"Joel is a slug".timeFormats a time according to <strong>the</strong> given format.Given format can be <strong>the</strong> predefined one TIME_FORMAT, or a custom format, same as <strong>the</strong> date filter. Note that <strong>the</strong>predefined format is locale- dependant.772 Chapter 6. API Reference
<strong>Django</strong> <strong>Documentation</strong>, Release 1.2The time filter will only accept parameters in <strong>the</strong> format string that relate to <strong>the</strong> time of day, not <strong>the</strong> date (for obviousreasons). If you need to format a date, use <strong>the</strong> date filter.For example:{{ value|time:"H:i" }}If value is equivalent to datetime.datetime.now(), <strong>the</strong> output will be <strong>the</strong> string "01:23".Ano<strong>the</strong>r example:Assuming that USE_L10N is True and LANGUAGE_CODE is, for example, "de", <strong>the</strong>n for:{{ value|time:"TIME_FORMAT" }}<strong>the</strong> output will be <strong>the</strong> string "01:23:00" (The "TIME_FORMAT" format specifier for <strong>the</strong> de locale as shipped with<strong>Django</strong> is "H:i:s").When used without a format string:{{ value|time }}...<strong>the</strong> formatting string defined in <strong>the</strong> TIME_FORMAT setting will be used, without applying any localization. Changedin version 1.2: Predefined formats can now be influenced by <strong>the</strong> current locale.timesinceFormats a date as <strong>the</strong> time since that date (e.g., “4 days, 6 hours”).Takes an optional argument that is a variable containing <strong>the</strong> date to use as <strong>the</strong> comparison point (without<strong>the</strong> argument, <strong>the</strong> comparison point is now). For example, if blog_date is a date instance representingmidnight on 1 June 2006, and comment_date is a date instance for 08:00 on 1 June 2006, <strong>the</strong>n {{blog_date|timesince:comment_date }} would return “8 hours”.Comparing offset-naive and offset-aware datetimes will return an empty string.Minutes is <strong>the</strong> smallest unit used, and “0 minutes” will be returned for any date that is in <strong>the</strong> future relative to <strong>the</strong>comparison point.timeuntilSimilar to timesince, except that it measures <strong>the</strong> time from now until <strong>the</strong> given date or datetime. For example,if today is 1 June 2006 and conference_date is a date instance holding 29 June 2006, <strong>the</strong>n {{conference_date|timeuntil }} will return “4 weeks”.Takes an optional argument that is a variable containing <strong>the</strong> date to use as <strong>the</strong> comparison point (instead of now). Iffrom_date contains 22 June 2006, <strong>the</strong>n {{ conference_date|timeuntil:from_date }} will return “1week”.Comparing offset-naive and offset-aware datetimes will return an empty string.Minutes is <strong>the</strong> smallest unit used, and “0 minutes” will be returned for any date that is in <strong>the</strong> past relative to <strong>the</strong>comparison point.titleConverts a string into titlecase.6.15. Templates 773
<strong>Django</strong> <strong>Documentation</strong>, Release 1.2For example:{{ value|title }}If value is "my first post", <strong>the</strong> output will be "My First Post".truncatewordsTruncates a string after a certain number of words.Argument: Number of words to truncate afterFor example:{{ value|truncatewords:2 }}If value is "Joel is a slug", <strong>the</strong> output will be "Joel is ...".Newlines within <strong>the</strong> string will be removed.truncatewords_htmlSimilar to truncatewords, except that it is aware of HTML tags. Any tags that are opened in <strong>the</strong> string and notclosed before <strong>the</strong> truncation point, are closed immediately after <strong>the</strong> truncation.This is less efficient than truncatewords, so should only be used when it is being passed HTML text.For example:{{ value|truncatewords_html:2 }}If value is "Joel is a slug", <strong>the</strong> output will be "Joel is ...".Newlines in <strong>the</strong> HTML content will be preserved.unordered_listRecursively takes a self-nested list and returns an HTML unordered list – WITHOUT opening and closing tags. Changed in version 1.0: The format accepted by unordered_list has changed to be easier to understand.The list is assumed to be in <strong>the</strong> proper format. For example, if var contains [’States’, [’Kansas’,[’Lawrence’, ’Topeka’], ’Illinois’]], <strong>the</strong>n {{ var|unordered_list }} would return:StatesKansasLawrenceTopekaIllinoisNote: <strong>the</strong> previous more restrictive and verbose format is still supported: [’States’, [[’Kansas’,[[’Lawrence’, []], [’Topeka’, []]]], [’Illinois’, []]]],774 Chapter 6. API Reference
<strong>Django</strong> <strong>Documentation</strong>, Release 1.2upperConverts a string into all uppercase.For example:{{ value|upper }}If value is "Joel is a slug", <strong>the</strong> output will be "JOEL IS A SLUG".urlencodeEscapes a value for use in a URL.For example:{{ value|urlencode }}If value is "http://www.example.org/foo?a=b&c=d", <strong>the</strong> output will be"http%3A//www.example.org/foo%3Fa%3Db%26c%3Dd".urlizeConverts URLs in plain text into clickable links.Note that if urlize is applied to text that already contains HTML markup, things won’t work as expected. Applythis filter only to plain text.For example:{{ value|urlize }}If value is "Check out www.djangoproject.com", <strong>the</strong> output will be "Check out www.djangoproject.com".urlizetruncConverts URLs into clickable links, truncating URLs longer than <strong>the</strong> given character limit.As with urlize, this filter should only be applied to plain text.Argument: Length to truncate URLs toFor example:{{ value|urlizetrunc:15 }}If value is "Check out www.djangoproject.com", <strong>the</strong> output would be ’Check out www.djangopr...’.wordcountReturns <strong>the</strong> number of words.For example:6.15. Templates 775
<strong>Django</strong> <strong>Documentation</strong>, Release 1.2{{ value|wordcount }}If value is "Joel is a slug", <strong>the</strong> output will be 4.wordwrapWraps words at specified line length.Argument: number of characters at which to wrap <strong>the</strong> textFor example:{{ value|wordwrap:5 }}If value is Joel is a slug, <strong>the</strong> output would be:Joelis aslugyesnoGiven a string mapping values for true, false and (optionally) None, returns one of those strings according to <strong>the</strong> value:For example:{{ value|yesno:"yeah,no,maybe" }}Value Argument OutputsTrue "yeah,no,maybe" yeahFalse "yeah,no,maybe" noNone "yeah,no,maybe" maybeNone "yeah,no" "no" (converts None to False if no mapping for None is given)O<strong>the</strong>r tags and filter libraries<strong>Django</strong> comes with a couple of o<strong>the</strong>r template-tag libraries that you have to enable explicitly in yourINSTALLED_APPS setting and enable in your template with <strong>the</strong> {% load %} tag.django.contrib.humanizeA set of <strong>Django</strong> template filters useful for adding a “human touch” to data. See django.contrib.humanize.django.contrib.markupA collection of template filters that implement <strong>the</strong>se common markup languages:• Textile• Markdown• reST (reStructuredText)See <strong>the</strong> markup documentation.776 Chapter 6. API Reference
<strong>Django</strong> <strong>Documentation</strong>, Release 1.2django.contrib.webdesignA collection of template tags that can be useful while designing a Web site, such as a generator of Lorem Ipsum text.See django.contrib.webdesign.i18nProvides a couple of templatetags that allow specifying translatable text in <strong>Django</strong> templates. It is slightly differentfrom <strong>the</strong> libraries described above because you don’t need to add any application to <strong>the</strong> INSTALLED_APPS settingbut ra<strong>the</strong>r set USE_I18N to True, <strong>the</strong>n loading it with {% load i18n %}. See Specifying translation strings: Intemplate code.6.15.2 The <strong>Django</strong> template language: For Python programmersThis document explains <strong>the</strong> <strong>Django</strong> template system from a technical perspective – how it works and how to extend it.If you’re just looking for reference on <strong>the</strong> language syntax, see The <strong>Django</strong> template language.If you’re looking to use <strong>the</strong> <strong>Django</strong> template system as part of ano<strong>the</strong>r application – i.e., without <strong>the</strong> rest of <strong>the</strong>framework – make sure to read <strong>the</strong> configuration section later in this document.BasicsA template is a text document, or a normal Python string, that is marked-up using <strong>the</strong> <strong>Django</strong> template language. Atemplate can contain block tags or variables.A block tag is a symbol within a template that does something.This definition is deliberately vague. For example, a block tag can output content, serve as a control structure (an “if”statement or “for” loop), grab content from a database or enable access to o<strong>the</strong>r template tags.Block tags are surrounded by "{%" and "%}".Example template with block tags:{% if is_logged_in %}Thanks for logging in!{% else %}Please log in.{% endif %}A variable is a symbol within a template that outputs a value.Variable tags are surrounded by "{{" and "}}".Example template with variables:My first name is {{ first_name }}. My last name is {{ last_name }}.A context is a “variable name” -> “variable value” mapping that is passed to a template.A template renders a context by replacing <strong>the</strong> variable “holes” with values from <strong>the</strong> context and executing all blocktags.Using <strong>the</strong> template systemclass django.template.TemplateUsing <strong>the</strong> template system in Python is a two-step process:• First, you compile <strong>the</strong> raw template code into a Template object.6.15. Templates 777
<strong>Django</strong> <strong>Documentation</strong>, Release 1.2• Then, you call <strong>the</strong> render() method of <strong>the</strong> Template object with a given context.Compiling a stringThe easiest way to create a Template object is by instantiating it directly. The class lives atdjango.template.Template. The constructor takes one argument – <strong>the</strong> raw template code:>>> from django.template import Template>>> t = Template("My name is {{ my_name }}.")>>> print tBehind <strong>the</strong> scenesThe system only parses your raw template code once – when you create <strong>the</strong> Template object. From <strong>the</strong>n on, it’sstored internally as a “node” structure for performance.Even <strong>the</strong> parsing itself is quite fast. Most of <strong>the</strong> parsing happens via a single call to a single, short, regular expression.Rendering a contextrender(context)Once you have a compiled Template object, you can render a context – or multiple contexts – with it. The Contextclass lives at django.template.Context, and <strong>the</strong> constructor takes two (optional) arguments:• A dictionary mapping variable names to variable values.• The name of <strong>the</strong> current application. This application name is used to help resolve namespaced URLs. If you’renot using namespaced URLs, you can ignore this argument.Call <strong>the</strong> Template object’s render() method with <strong>the</strong> context to “fill” <strong>the</strong> template:>>> from django.template import Context, Template>>> t = Template("My name is {{ my_name }}.")>>> c = Context({"my_name": "Adrian"})>>> t.render(c)"My name is Adrian.">>> c = Context({"my_name": "Dolores"})>>> t.render(c)"My name is Dolores."Variable names must consist of any letter (A-Z), any digit (0-9), an underscore or a dot.Dots have a special meaning in template rendering. A dot in a variable name signifies lookup. Specifically, when <strong>the</strong>template system encounters a dot in a variable name, it tries <strong>the</strong> following lookups, in this order:• Dictionary lookup. Example: foo["bar"]• Attribute lookup. Example: foo.bar• Method call. Example: foo.bar()• List-index lookup. Example: foo[bar]778 Chapter 6. API Reference
<strong>Django</strong> <strong>Documentation</strong>, Release 1.2The template system uses <strong>the</strong> first lookup type that works. It’s short-circuit logic.Here are a few examples:>>> from django.template import Context, Template>>> t = Template("My name is {{ person.first_name }}.")>>> d = {"person": {"first_name": "Joe", "last_name": "Johnson"}}>>> t.render(Context(d))"My name is Joe.">>> class PersonClass: pass>>> p = PersonClass()>>> p.first_name = "Ron">>> p.last_name = "Nasty">>> t.render(Context({"person": p}))"My name is Ron.">>> class PersonClass2:... def first_name(self):... return "Samantha">>> p = PersonClass2()>>> t.render(Context({"person": p}))"My name is Samantha.">>> t = Template("The first stooge in <strong>the</strong> list is {{ stooges.0 }}.")>>> c = Context({"stooges": ["Larry", "Curly", "Moe"]})>>> t.render(c)"The first stooge in <strong>the</strong> list is Larry."Method lookups are slightly more complex than <strong>the</strong> o<strong>the</strong>r lookup types. Here are some things to keep in mind:• If, during <strong>the</strong> method lookup, a method raises an exception, <strong>the</strong> exception will be propagated, unless <strong>the</strong> exceptionhas an attribute silent_variable_failure whose value is True. If <strong>the</strong> exception does have asilent_variable_failure attribute, <strong>the</strong> variable will render as an empty string. Example:>>> t = Template("My name is {{ person.first_name }}.")>>> class PersonClass3:... def first_name(self):... raise AssertionError, "foo">>> p = PersonClass3()>>> t.render(Context({"person": p}))Traceback (most recent call last):...AssertionError: foo>>> class SilentAssertionError(Exception):... silent_variable_failure = True>>> class PersonClass4:... def first_name(self):... raise SilentAssertionError>>> p = PersonClass4()>>> t.render(Context({"person": p}))"My name is ."Note that django.core.exceptions.ObjectDoesNotExist, which is <strong>the</strong> base class for all <strong>Django</strong>database API DoesNotExist exceptions, has silent_variable_failure = True. So if you’re using<strong>Django</strong> templates with <strong>Django</strong> model objects, any DoesNotExist exception will fail silently.• A method call will only work if <strong>the</strong> method has no required arguments. O<strong>the</strong>rwise, <strong>the</strong> system will move to <strong>the</strong>next lookup type (list-index lookup).6.15. Templates 779
<strong>Django</strong> <strong>Documentation</strong>, Release 1.2• Obviously, some methods have side effects, and it’d be ei<strong>the</strong>r foolish or a security hole to allow <strong>the</strong> templatesystem to access <strong>the</strong>m.A good example is <strong>the</strong> delete() method on each <strong>Django</strong> model object. The template system shouldn’t beallowed to do something like this:I will now delete this valuable data. {{ data.delete }}To prevent this, set a function attribute alters_data on <strong>the</strong> method. The template system won’t execute amethod if <strong>the</strong> method has alters_data=True set. The dynamically-generated delete() and save()methods on <strong>Django</strong> model objects get alters_data=True automatically. Example:def sensitive_function(self):self.database_record.delete()sensitive_function.alters_data = TrueHow invalid variables are handled Generally, if a variable doesn’t exist, <strong>the</strong> template system inserts <strong>the</strong> value of<strong>the</strong> TEMPLATE_STRING_IF_INVALID setting, which is set to ” (<strong>the</strong> empty string) by default.Filters that are applied to an invalid variable will only be applied if TEMPLATE_STRING_IF_INVALID is set to ”(<strong>the</strong> empty string). If TEMPLATE_STRING_IF_INVALID is set to any o<strong>the</strong>r value, variable filters will be ignored.This behavior is slightly different for <strong>the</strong> if, for and regroup template tags. If an invalid variable is provided toone of <strong>the</strong>se template tags, <strong>the</strong> variable will be interpreted as None. Filters are always applied to invalid variableswithin <strong>the</strong>se template tags.If TEMPLATE_STRING_IF_INVALID contains a ’%s’, <strong>the</strong> format marker will be replaced with <strong>the</strong> name of <strong>the</strong>invalid variable.For debug purposes only!While TEMPLATE_STRING_IF_INVALID can be a useful debugging tool, it is a bad idea to turn it on as a ‘developmentdefault’.Many templates, including those in <strong>the</strong> Admin site, rely upon <strong>the</strong> silence of <strong>the</strong> template system when a non-existentvariable is encountered. If you assign a value o<strong>the</strong>r than ” to TEMPLATE_STRING_IF_INVALID, you will experiencerendering problems with <strong>the</strong>se templates and sites.Generally, TEMPLATE_STRING_IF_INVALID should only be enabled in order to debug a specific template problem,<strong>the</strong>n cleared once debugging is complete.Playing with Context objectsclass django.template.ContextMost of <strong>the</strong> time, you’ll instantiate Context objects by passing in a fully-populated dictionary to Context(). Butyou can add and delete items from a Context object once it’s been instantiated, too, using standard dictionary syntax:>>> c = Context({"foo": "bar"})>>> c[’foo’]’bar’>>> del c[’foo’]>>> c[’foo’]’’>>> c[’newvariable’] = ’hello’>>> c[’newvariable’]’hello’780 Chapter 6. API Reference
<strong>Django</strong> <strong>Documentation</strong>, Release 1.2pop()push()exception django.template.ContextPopExceptionA Context object is a stack. That is, you can push() and pop() it. If you pop() too much, it’ll raisedjango.template.ContextPopException:>>> c = Context()>>> c[’foo’] = ’first level’>>> c.push()>>> c[’foo’] = ’second level’>>> c[’foo’]’second level’>>> c.pop()>>> c[’foo’]’first level’>>> c[’foo’] = ’overwritten’>>> c[’foo’]’overwritten’>>> c.pop()Traceback (most recent call last):...django.template.ContextPopExceptionupdate(o<strong>the</strong>r_dict)In addition to push() and pop(), <strong>the</strong> Context object also defines an update() method. This works likepush() but takes a dictionary as an argument and pushes that dictionary onto <strong>the</strong> stack instead of an empty one.>>> c = Context()>>> c[’foo’] = ’first level’>>> c.update({’foo’: ’updated’}){’foo’: ’updated’}>>> c[’foo’]’updated’>>> c.pop(){’foo’: ’updated’}>>> c[’foo’]’first level’Using a Context as a stack comes in handy in some custom template tags, as you’ll see below.Subclassing Context: RequestContext<strong>Django</strong> comes with a special Context class, django.template.RequestContext, that acts slightly differentlythan <strong>the</strong> normal django.template.Context. The first difference is that it takes an HttpRequest as itsfirst argument. For example:c = RequestContext(request, {’foo’: ’bar’,})The second difference is that it automatically populates <strong>the</strong> context with a few variables, according to yourTEMPLATE_CONTEXT_PROCESSORS setting.The TEMPLATE_CONTEXT_PROCESSORS setting is a tuple of callables – called context processors – that takea request object as <strong>the</strong>ir argument and return a dictionary of items to be merged into <strong>the</strong> context. By default,TEMPLATE_CONTEXT_PROCESSORS is set to:6.15. Templates 781
<strong>Django</strong> <strong>Documentation</strong>, Release 1.2("django.contrib.auth.context_processors.auth","django.core.context_processors.debug","django.core.context_processors.i18n","django.core.context_processors.media","django.contrib.messages.context_processors.messages")New in version 1.2: In addition to <strong>the</strong>se, RequestContext always usesdjango.core.context_processors.csrf. This is a security related context processor required by <strong>the</strong>admin and o<strong>the</strong>r contrib apps, and, in case of accidental misconfiguration, it is deliberately hardcoded in and cannotbe turned off by <strong>the</strong> TEMPLATE_CONTEXT_PROCESSORS setting.New in version 1.2: The ’messages’ contextprocessor was added. For more information, see <strong>the</strong> messages documentation.Changed in version 1.2: The authcontext processor was moved in this release from its old location django.core.context_processors.authto django.contrib.auth.context_processors.auth. Each processor is applied in order. That means,if one processor adds a variable to <strong>the</strong> context and a second processor adds a variable with <strong>the</strong> same name, <strong>the</strong> secondwill override <strong>the</strong> first. The default processors are explained below.When context processors are appliedWhen you use RequestContext, <strong>the</strong> variables you supply directly are added first, followed any variables suppliedby context processors. This means that a context processor may overwrite a variable you’ve supplied, so take care toavoid variable names which overlap with those supplied by your context processors.Also, you can give RequestContext a list of additional processors, using <strong>the</strong> optional, third positional argument,processors. In this example, <strong>the</strong> RequestContext instance gets a ip_address variable:def ip_address_processor(request):return {’ip_address’: request.META[’REMOTE_ADDR’]}def some_view(request):# ...c = RequestContext(request, {’foo’: ’bar’,}, [ip_address_processor])return HttpResponse(t.render(c))Note: If you’re using <strong>Django</strong>’s render_to_response() shortcut to populate a template with <strong>the</strong> contents ofa dictionary, your template will be passed a Context instance by default (not a RequestContext). To use aRequestContext in your template rendering, pass an optional third argument to render_to_response(): aRequestContext instance. Your code might look like this:def some_view(request):# ...return render_to_response(’my_template.html’,my_data_dictionary,context_instance=RequestContext(request))Here’s what each of <strong>the</strong> default processors does:django.contrib.auth.context_processors.auth If TEMPLATE_CONTEXT_PROCESSORS contains this processor,every RequestContext will contain <strong>the</strong>se three variables:• user – An auth.User instance representing <strong>the</strong> currently logged-in user (or an AnonymousUser instance,if <strong>the</strong> client isn’t logged in).• messages – A list of messages (as strings) that have been set via <strong>the</strong> messages framework.782 Chapter 6. API Reference
<strong>Django</strong> <strong>Documentation</strong>, Release 1.2• perms – An instance of django.core.context_processors.PermWrapper, representing <strong>the</strong> permissionsthat <strong>the</strong> currently logged-in user has.Changed in version 1.2: This context processor was moved in this release fromdjango.core.context_processors.auth to its current location.Changed in version 1.2: Prior toversion 1.2, <strong>the</strong> messages variable was a lazy accessor for user.get_and_delete_messages(). It has beenchanged to include any messages added via <strong>the</strong> messages framework.django.core.context_processors.debug If TEMPLATE_CONTEXT_PROCESSORS contains this processor, everyRequestContext will contain <strong>the</strong>se two variables – but only if your DEBUG setting is set to True and <strong>the</strong> request’sIP address (request.META[’REMOTE_ADDR’]) is in <strong>the</strong> INTERNAL_IPS setting:• debug – True. You can use this in templates to test whe<strong>the</strong>r you’re in DEBUG mode.• sql_queries – A list of {’sql’: ..., ’time’: ...} dictionaries, representing every SQL querythat has happened so far during <strong>the</strong> request and how long it took. The list is in order by query.django.core.context_processors.i18n If TEMPLATE_CONTEXT_PROCESSORS contains this processor, everyRequestContext will contain <strong>the</strong>se two variables:• LANGUAGES – The value of <strong>the</strong> LANGUAGES setting.• LANGUAGE_CODE – request.LANGUAGE_CODE, if it exists. O<strong>the</strong>rwise, <strong>the</strong> value of <strong>the</strong>LANGUAGE_CODE setting.See Internationalization and localization for more.django.core.context_processors.media New in version 1.0: Please, see <strong>the</strong> release notes IfTEMPLATE_CONTEXT_PROCESSORS contains this processor, every RequestContext will contain a variableMEDIA_URL, providing <strong>the</strong> value of <strong>the</strong> MEDIA_URL setting.django.core.context_processors.csrf New in version 1.2: Please, see <strong>the</strong> release notes This processor adds a tokenthat is needed by <strong>the</strong> csrf_token template tag for protection against Cross Site Request Forgeries.django.core.context_processors.request If TEMPLATE_CONTEXT_PROCESSORS contains this processor, everyRequestContext will contain a variable request, which is <strong>the</strong> current HttpRequest. Note that this processoris not enabled by default; you’ll have to activate it.django.contrib.messages.context_processors.messages If TEMPLATE_CONTEXT_PROCESSORS contains thisprocessor, every RequestContext will contain a single additional variable:• messages – A list of messages (as strings) that have been set via <strong>the</strong> user model (usinguser.message_set.create) or through <strong>the</strong> messages framework.New in version 1.2: This template context variable was previously supplied by <strong>the</strong> ’auth’ context processor. Forbackwards compatibility <strong>the</strong> ’auth’ context processor will continue to supply <strong>the</strong> messages variable until <strong>Django</strong>1.4. If you use <strong>the</strong> messages variable, your project will work with ei<strong>the</strong>r (or both) context processors, but it isrecommended to add django.contrib.messages.context_processors.messages so your project willbe prepared for <strong>the</strong> future upgrade.6.15. Templates 783
<strong>Django</strong> <strong>Documentation</strong>, Release 1.2Writing your own context processors A context processor has a very simple interface: It’s just a Python functionthat takes one argument, an HttpRequest object, and returns a dictionary that gets added to <strong>the</strong> template context.Each context processor must return a dictionary.Custom context processors can live anywhere in your code base. All <strong>Django</strong> cares about is that your custom contextprocessors are pointed-to by your TEMPLATE_CONTEXT_PROCESSORS setting.Loading templatesGenerally, you’ll store templates in files on your filesystem ra<strong>the</strong>r than using <strong>the</strong> low-level Template API yourself.Save templates in a directory specified as a template directory.<strong>Django</strong> searches for template directories in a number of places, depending on your template-loader settings (see“Loader types” below), but <strong>the</strong> most basic way of specifying template directories is by using <strong>the</strong> TEMPLATE_DIRSsetting.The TEMPLATE_DIRS setting Tell <strong>Django</strong> what your template directories are by using <strong>the</strong> TEMPLATE_DIRSsetting in your settings file. This should be set to a list or tuple of strings that contain full paths to your templatedirectory(ies). Example:TEMPLATE_DIRS = ("/home/html/templates/lawrence.com","/home/html/templates/default",)Your templates can go anywhere you want, as long as <strong>the</strong> directories and templates are readable by <strong>the</strong> Web server.They can have any extension you want, such as .html or .txt, or <strong>the</strong>y can have no extension at all.Note that <strong>the</strong>se paths should use Unix-style forward slashes, even on Windows.The Python API<strong>Django</strong> has two ways to load templates from files:django.template.loader.get_template(template_name)get_template returns <strong>the</strong> compiled template (a Template object) for <strong>the</strong> template with <strong>the</strong> given name. If<strong>the</strong> template doesn’t exist, it raises django.template.TemplateDoesNotExist.django.template.loader.select_template(template_name_list)select_template is just like get_template, except it takes a list of template names. Of <strong>the</strong> list, itreturns <strong>the</strong> first template that exists.For example, if you call get_template(’story_detail.html’) and have <strong>the</strong> above TEMPLATE_DIRSsetting, here are <strong>the</strong> files <strong>Django</strong> will look for, in order:• /home/html/templates/lawrence.com/story_detail.html• /home/html/templates/default/story_detail.htmlIf you call select_template([’story_253_detail.html’, ’story_detail.html’]), here’s what<strong>Django</strong> will look for:• /home/html/templates/lawrence.com/story_253_detail.html• /home/html/templates/default/story_253_detail.html• /home/html/templates/lawrence.com/story_detail.html• /home/html/templates/default/story_detail.html784 Chapter 6. API Reference
<strong>Django</strong> <strong>Documentation</strong>, Release 1.2When <strong>Django</strong> finds a template that exists, it stops looking.TipYou can use select_template() for super-flexible “templatability.” For example, if you’vewritten a news story and want some stories to have custom templates, use something likeselect_template([’story_%s_detail.html’ % story.id, ’story_detail.html’]).That’ll allow you to use a custom template for an individual story, with a fallback template for stories that don’t havecustom templates.Using subdirectories It’s possible – and preferable – to organize templates in subdirectories of <strong>the</strong> template directory.The convention is to make a subdirectory for each <strong>Django</strong> app, with subdirectories within those subdirectories asneeded.Do this for your own sanity. Storing all templates in <strong>the</strong> root level of a single directory gets messy.To load a template that’s within a subdirectory, just use a slash, like so:get_template(’news/story_detail.html’)Using <strong>the</strong> same TEMPLATE_DIRS setting from above, this example get_template() call will attempt to load <strong>the</strong>following templates:• /home/html/templates/lawrence.com/news/story_detail.html• /home/html/templates/default/news/story_detail.htmlLoader types By default, <strong>Django</strong> uses a filesystem-based template loader, but <strong>Django</strong> comes with a few o<strong>the</strong>rtemplate loaders, which know how to load templates from o<strong>the</strong>r sources.Some of <strong>the</strong>se o<strong>the</strong>r loaders are disabled by default, but you can activate <strong>the</strong>m by editing your TEMPLATE_LOADERSsetting. TEMPLATE_LOADERS should be a tuple of strings, where each string represents a template loader. Here are<strong>the</strong> template loaders that come with <strong>Django</strong>:django.template.loaders.filesystem.Loader Loads templates from <strong>the</strong> filesystem, according toTEMPLATE_DIRS. This loader is enabled by default.django.template.loaders.app_directories.Loader Loads templates from <strong>Django</strong> apps on <strong>the</strong>filesystem. For each app in INSTALLED_APPS, <strong>the</strong> loader looks for a templates subdirectory. If <strong>the</strong>directory exists, <strong>Django</strong> looks for templates in <strong>the</strong>re.This means you can store templates with your individual apps. This also makes it easy to distribute <strong>Django</strong> appswith default templates.For example, for this setting:INSTALLED_APPS = (’myproject.polls’, ’myproject.music’)...<strong>the</strong>n get_template(’foo.html’) will look for templates in <strong>the</strong>se directories, in this order:• /path/to/myproject/polls/templates/foo.html• /path/to/myproject/music/templates/foo.htmlNote that <strong>the</strong> loader performs an optimization when it is first imported:INSTALLED_APPS packages have a templates subdirectory.This loader is enabled by default.It caches a list of which6.15. Templates 785
<strong>Django</strong> <strong>Documentation</strong>, Release 1.2django.template.loaders.eggs.Loader Just like app_directories above, but it loads templatesfrom Python eggs ra<strong>the</strong>r than from <strong>the</strong> filesystem.This loader is disabled by default.django.template.loaders.cached.Loader By default, <strong>the</strong> templating system will read and compile yourtemplates every time <strong>the</strong>y need to be rendered. While <strong>the</strong> <strong>Django</strong> templating system is quite fast, <strong>the</strong> overheadfrom reading and compiling templates can add up.The cached template loader is a class-based loader that you configure with a list of o<strong>the</strong>r loaders that it shouldwrap. The wrapped loaders are used to locate unknown templates when <strong>the</strong>y are first encountered. The cachedloader <strong>the</strong>n stores <strong>the</strong> compiled Template in memory. The cached Template instance is returned for subsequentrequests to load <strong>the</strong> same template.For example, to enable template caching with <strong>the</strong> filesystem and app_directories template loadersyou might use <strong>the</strong> following settings:TEMPLATE_LOADERS = ((’django.template.loaders.cached.Loader’, (’django.template.loaders.filesystem.Loader’,’django.template.loaders.app_directories.Loader’,)),)Note: All of <strong>the</strong> built-in <strong>Django</strong> template tags are safe to use with <strong>the</strong> cached loader, but if you’re using customtemplate tags that come from third party packages, or that you wrote yourself, you should ensure that <strong>the</strong> Nodeimplementation for each tag is thread-safe. For more information, see template tag thread safety considerations.This loader is disabled by default.<strong>Django</strong> uses <strong>the</strong> template loaders in order according to <strong>the</strong> TEMPLATE_LOADERS setting. It uses each loader until aloader finds a match.The render_to_string shortcutdjango.template.loader.render_to_string(template_name, dictionary=None, context_instance=None)To cut down on <strong>the</strong> repetitive nature of loading and rendering templates, <strong>Django</strong> provides a shortcut function whichlargely automates <strong>the</strong> process: render_to_string() in django.template.loader, which loads a template,renders it and returns <strong>the</strong> resulting string:from django.template.loader import render_to_stringrendered = render_to_string(’my_template.html’, { ’foo’: ’bar’ })The render_to_string shortcut takes one required argument – template_name, which should be <strong>the</strong> name of<strong>the</strong> template to load and render (or a list of template names, in which case <strong>Django</strong> will use <strong>the</strong> first template in <strong>the</strong> listthat exists) – and two optional arguments:dictionary A dictionary to be used as variables and values for <strong>the</strong> template’s context. This can also be passed as <strong>the</strong>second positional argument.context_instance An instance of Context or a subclass (e.g., an instance of RequestContext) to use as <strong>the</strong>template’s context. This can also be passed as <strong>the</strong> third positional argument.See also <strong>the</strong> render_to_response() shortcut, which calls render_to_string and feeds <strong>the</strong> result into anHttpResponse suitable for returning directly from a view.786 Chapter 6. API Reference
<strong>Django</strong> <strong>Documentation</strong>, Release 1.2Configuring <strong>the</strong> template system in standalone modeNote: This section is only of interest to people trying to use <strong>the</strong> template system as an output component in ano<strong>the</strong>rapplication. If you’re using <strong>the</strong> template system as part of a <strong>Django</strong> application, nothing here applies to you.Normally, <strong>Django</strong> will load all <strong>the</strong> configuration information it needs from its own default configuration file, combinedwith <strong>the</strong> settings in <strong>the</strong> module given in <strong>the</strong> DJANGO_SETTINGS_MODULE environment variable. But if you’re using<strong>the</strong> template system independently of <strong>the</strong> rest of <strong>Django</strong>, <strong>the</strong> environment variable approach isn’t very convenient,because you probably want to configure <strong>the</strong> template system in line with <strong>the</strong> rest of your application ra<strong>the</strong>r thandealing with settings files and pointing to <strong>the</strong>m via environment variables.To solve this problem, you need to use <strong>the</strong> manual configuration option described in Using settings without settingDJANGO_SETTINGS_MODULE. Simply import <strong>the</strong> appropriate pieces of <strong>the</strong> templating system and <strong>the</strong>n, beforeyou call any of <strong>the</strong> templating functions, call django.conf.settings.configure() with any settings youwish to specify. You might want to consider setting at least TEMPLATE_DIRS (if you’re going to use template loaders),DEFAULT_CHARSET (although <strong>the</strong> default of utf-8 is probably fine) and TEMPLATE_DEBUG. All availablesettings are described in <strong>the</strong> settings documentation, and any setting starting with TEMPLATE_ is of obvious interest.Using an alternative template languageNew in version 1.2: Please, see <strong>the</strong> release notes The <strong>Django</strong> Template and Loader classes implement asimple API for loading and rendering templates. By providing some simple wrapper classes that implement thisAPI we can use third party template systems like Jinja2 or Cheetah. This allows us to use third-party templatelibraries without giving up useful <strong>Django</strong> features like <strong>the</strong> <strong>Django</strong> Context object and handy shortcuts likerender_to_response().The core component of <strong>the</strong> <strong>Django</strong> templating system is <strong>the</strong> Template class. This class has a very simple interface:it has a constructor that takes a single positional argument specifying <strong>the</strong> template string, and a render() methodthat takes a Context object and returns a string containing <strong>the</strong> rendered response.Suppose we’re using a template language that defines a Template object with a render() method that takes adictionary ra<strong>the</strong>r than a Context object. We can write a simple wrapper that implements <strong>the</strong> <strong>Django</strong> Templateinterface:import some_template_languageclass Template(some_template_language.Template):def render(self, context):# flatten <strong>the</strong> <strong>Django</strong> Context into a single dictionary.context_dict = {}for d in context.dicts:context_dict.update(d)return super(Template, self).render(context_dict)That’s all that’s required to make our fictional Template class compatible with <strong>the</strong> <strong>Django</strong> loading and renderingsystem!The next step is to write a Loader class that returns instances of our custom template class instead of <strong>the</strong> defaultTemplate. Custom Loader classes should inherit from django.template.loader.BaseLoader and override<strong>the</strong> load_template_source() method, which takes a template_name argument, loads <strong>the</strong> templatefrom disk (or elsewhere), and returns a tuple: (template_string, template_origin).The load_template() method of <strong>the</strong> Loader class retrieves <strong>the</strong> template string by callingload_template_source(), instantiates a Template from <strong>the</strong> template source, and returns a tuple:(template, template_origin). Since this is <strong>the</strong> method that actually instantiates <strong>the</strong>Template, we’ll need to override it to use our custom template class instead. We can inherit from6.15. Templates 787
<strong>Django</strong> <strong>Documentation</strong>, Release 1.2<strong>the</strong> builtin django.template.loaders.app_directories.Loader to take advantage of <strong>the</strong>load_template_source() method implemented <strong>the</strong>re:from django.template.loaders import app_directoriesclass Loader(app_directories.Loader):is_usable = Truedef load_template(self, template_name, template_dirs=None):source, origin = self.load_template_source(template_name, template_dirs)template = Template(source)return template, originFinally, we need to modify our project settings, telling <strong>Django</strong> to use our custom loader. Now we can write all of ourtemplates in our alternative template language while continuing to use <strong>the</strong> rest of <strong>the</strong> <strong>Django</strong> templating system.See Also:For information on writing your own custom tags and filters, see Custom template tags and filters.6.16 Unicode dataNew in version 1.0: Please, see <strong>the</strong> release notes <strong>Django</strong> natively supports Unicode data everywhere. Providingyour database can somehow store <strong>the</strong> data, you can safely pass around Unicode strings to templates, models and <strong>the</strong>database.This document tells you what you need to know if you’re writing applications that use data or templates that areencoded in something o<strong>the</strong>r than ASCII.6.16.1 Creating <strong>the</strong> databaseMake sure your database is configured to be able to store arbitrary string data. Normally, this means giving it anencoding of UTF-8 or UTF-16. If you use a more restrictive encoding – for example, latin1 (iso8859-1) – you won’tbe able to store certain characters in <strong>the</strong> database, and information will be lost.• MySQL users, refer to <strong>the</strong> MySQL manual (section 9.1.3.2 for MySQL 5.1) for details on how to set or alter <strong>the</strong>database character set encoding.• PostgreSQL users, refer to <strong>the</strong> PostgreSQL manual (section 21.2.2 in PostgreSQL 8) for details on creatingdatabases with <strong>the</strong> correct encoding.• SQLite users, <strong>the</strong>re is nothing you need to do. SQLite always uses UTF-8 for internal encoding.All of <strong>Django</strong>’s database backends automatically convert Unicode strings into <strong>the</strong> appropriate encoding for talking to<strong>the</strong> database. They also automatically convert strings retrieved from <strong>the</strong> database into Python Unicode strings. Youdon’t even need to tell <strong>Django</strong> what encoding your database uses: that is handled transparently.For more, see <strong>the</strong> section “The database API” below.6.16.2 General string handlingWhenever you use strings with <strong>Django</strong> – e.g., in database lookups, template rendering or anywhere else – you havetwo choices for encoding those strings. You can use Unicode strings, or you can use normal strings (sometimes called“bytestrings”) that are encoded using UTF-8.Warning788 Chapter 6. API Reference
<strong>Django</strong> <strong>Documentation</strong>, Release 1.2A bytestring does not carry any information with it about its encoding. For that reason, we have to make an assumption,and <strong>Django</strong> assumes that all bytestrings are in UTF-8.If you pass a string to <strong>Django</strong> that has been encoded in some o<strong>the</strong>r format, things will go wrong in interesting ways.Usually, <strong>Django</strong> will raise a UnicodeDecodeError at some point.If your code only uses ASCII data, it’s safe to use your normal strings, passing <strong>the</strong>m around at will, because ASCII isa subset of UTF-8.Don’t be fooled into thinking that if your DEFAULT_CHARSET setting is set to something o<strong>the</strong>r than ’utf-8’ youcan use that o<strong>the</strong>r encoding in your bytestrings! DEFAULT_CHARSET only applies to <strong>the</strong> strings generated as <strong>the</strong>result of template rendering (and e-mail). <strong>Django</strong> will always assume UTF-8 encoding for internal bytestrings. Thereason for this is that <strong>the</strong> DEFAULT_CHARSET setting is not actually under your control (if you are <strong>the</strong> applicationdeveloper). It’s under <strong>the</strong> control of <strong>the</strong> person installing and using your application – and if that person chooses adifferent setting, your code must still continue to work. Ergo, it cannot rely on that setting.In most cases when <strong>Django</strong> is dealing with strings, it will convert <strong>the</strong>m to Unicode strings before doing anything else.So, as a general rule, if you pass in a bytestring, be prepared to receive a Unicode string back in <strong>the</strong> result.Translated stringsAside from Unicode strings and bytestrings, <strong>the</strong>re’s a third type of string-like object you may encounter when using<strong>Django</strong>. The framework’s internationalization features introduce <strong>the</strong> concept of a “lazy translation” – a string that hasbeen marked as translated but whose actual translation result isn’t determined until <strong>the</strong> object is used in a string. Thisfeature is useful in cases where <strong>the</strong> translation locale is unknown until <strong>the</strong> string is used, even though <strong>the</strong> string mighthave originally been created when <strong>the</strong> code was first imported.Normally, you won’t have to worry about lazy translations. Just be aware that if you examine an object and it claimsto be a django.utils.functional.__proxy__ object, it is a lazy translation. Calling unicode() with <strong>the</strong>lazy translation as <strong>the</strong> argument will generate a Unicode string in <strong>the</strong> current locale.For more details about lazy translation objects, refer to <strong>the</strong> internationalization documentation.Useful utility functionsBecause some string operations come up again and again, <strong>Django</strong> ships with a few useful functions that should makeworking with Unicode and bytestring objects a bit easier.Conversion functionsThe django.utils.encoding module contains a few functions that are handy for converting back and forthbetween Unicode and bytestrings.• smart_unicode(s, encoding=’utf-8’, strings_only=False, errors=’strict’)converts its input to a Unicode string. The encoding parameter specifies <strong>the</strong> input encoding. (For example,<strong>Django</strong> uses this internally when processing form input data, which might not be UTF-8 encoded.) Thestrings_only parameter, if set to True, will result in Python numbers, booleans and None not beingconverted to a string (<strong>the</strong>y keep <strong>the</strong>ir original types). The errors parameter takes any of <strong>the</strong> values that areaccepted by Python’s unicode() function for its error handling.If you pass smart_unicode() an object that has a __unicode__ method, it will use that method to do <strong>the</strong>conversion.• force_unicode(s, encoding=’utf-8’, strings_only=False, errors=’strict’)is identical to smart_unicode() in almost all cases. The difference is when <strong>the</strong> first argument is a6.16. Unicode data 789
<strong>Django</strong> <strong>Documentation</strong>, Release 1.2lazy translation instance. While smart_unicode() preserves lazy translations, force_unicode()forces those objects to a Unicode string (causing <strong>the</strong> translation to occur). Normally, you’ll want to usesmart_unicode(). However, force_unicode() is useful in template tags and filters that absolutelymust have a string to work with, not just something that can be converted to a string.• smart_str(s, encoding=’utf-8’, strings_only=False, errors=’strict’) is essentially<strong>the</strong> opposite of smart_unicode(). It forces <strong>the</strong> first argument to a bytestring. The strings_onlyparameter has <strong>the</strong> same behavior as for smart_unicode() and force_unicode(). This is slightly differentsemantics from Python’s builtin str() function, but <strong>the</strong> difference is needed in a few places within<strong>Django</strong>’s internals.Normally, you’ll only need to use smart_unicode(). Call it as early as possible on any input data that might beei<strong>the</strong>r Unicode or a bytestring, and from <strong>the</strong>n on, you can treat <strong>the</strong> result as always being Unicode.URI and IRI handlingWeb frameworks have to deal with URLs (which are a type of IRI). One requirement of URLs is that <strong>the</strong>y are encodedusing only ASCII characters. However, in an international environment, you might need to construct a URL from anIRI – very loosely speaking, a URI that can contain Unicode characters. Quoting and converting an IRI to URI can bea little tricky, so <strong>Django</strong> provides some assistance.• The function django.utils.encoding.iri_to_uri() implements <strong>the</strong> conversion from IRI to URI asrequired by <strong>the</strong> specification (RFC 3987).• The functions django.utils.http.urlquote() and django.utils.http.urlquote_plus()are versions of Python’s standard urllib.quote() and urllib.quote_plus() that work with non-ASCII characters. (The data is converted to UTF-8 prior to encoding.)These two groups of functions have slightly different purposes, and it’s important to keep <strong>the</strong>m straight. Normally,you would use urlquote() on <strong>the</strong> individual portions of <strong>the</strong> IRI or URI path so that any reserved characters suchas ‘&’ or ‘%’ are correctly encoded. Then, you apply iri_to_uri() to <strong>the</strong> full IRI and it converts any non-ASCIIcharacters to <strong>the</strong> correct encoded values.Note: Technically, it isn’t correct to say that iri_to_uri() implements <strong>the</strong> full algorithm in <strong>the</strong> IRI specification.It doesn’t (yet) perform <strong>the</strong> international domain name encoding portion of <strong>the</strong> algorithm.The iri_to_uri() function will not change ASCII characters that are o<strong>the</strong>rwise permitted in a URL. So, forexample, <strong>the</strong> character ‘%’ is not fur<strong>the</strong>r encoded when passed to iri_to_uri(). This means you can pass a fullURL to this function and it will not mess up <strong>the</strong> query string or anything like that.An example might clarify things here:>>> urlquote(u’Paris & Orléans’)u’Paris%20%26%20Orl%C3%A9ans’>>> iri_to_uri(u’/favorites/François/%s’ % urlquote(u’Paris & Orléans’))’/favorites/Fran%C3%A7ois/Paris%20%26%20Orl%C3%A9ans’If you look carefully, you can see that <strong>the</strong> portion that was generated by urlquote() in <strong>the</strong> second example was notdouble-quoted when passed to iri_to_uri(). This is a very important and useful feature. It means that you canconstruct your IRI without worrying about whe<strong>the</strong>r it contains non-ASCII characters and <strong>the</strong>n, right at <strong>the</strong> end, calliri_to_uri() on <strong>the</strong> result.The iri_to_uri() function is also idempotent, which means <strong>the</strong> following is always true:iri_to_uri(iri_to_uri(some_string)) = iri_to_uri(some_string)So you can safely call it multiple times on <strong>the</strong> same IRI without risking double-quoting problems.790 Chapter 6. API Reference
<strong>Django</strong> <strong>Documentation</strong>, Release 1.26.16.3 ModelsBecause all strings are returned from <strong>the</strong> database as Unicode strings, model fields that are character based (CharField,TextField, URLField, etc) will contain Unicode values when <strong>Django</strong> retrieves data from <strong>the</strong> database. This is always<strong>the</strong> case, even if <strong>the</strong> data could fit into an ASCII bytestring.You can pass in bytestrings when creating a model or populating a field, and <strong>Django</strong> will convert it to Unicode whenit needs to.Choosing between __str__() and __unicode__()One consequence of using Unicode by default is that you have to take some care when printing data from <strong>the</strong> model.In particular, ra<strong>the</strong>r than giving your model a __str__() method, we recommended you implement a__unicode__() method. In <strong>the</strong> __unicode__() method, you can quite safely return <strong>the</strong> values of all yourfields without having to worry about whe<strong>the</strong>r <strong>the</strong>y fit into a bytestring or not. (The way Python works, <strong>the</strong> result of__str__() is always a bytestring, even if you accidentally try to return a Unicode object).You can still create a __str__() method on your models if you want, of course, but you shouldn’t need to do thisunless you have a good reason. <strong>Django</strong>’s Model base class automatically provides a __str__() implementationthat calls __unicode__() and encodes <strong>the</strong> result into UTF-8. This means you’ll normally only need to implementa __unicode__() method and let <strong>Django</strong> handle <strong>the</strong> coercion to a bytestring when required.Taking care in get_absolute_url()URLs can only contain ASCII characters. If you’re constructing a URL from pieces of data that might be non-ASCII,be careful to encode <strong>the</strong> results in a way that is suitable for a URL. The django.db.models.permalink()decorator handles this for you automatically.If you’re constructing a URL manually (i.e., not using <strong>the</strong> permalink() decorator), you’ll need to take care of <strong>the</strong>encoding yourself. In this case, use <strong>the</strong> iri_to_uri() and urlquote() functions that were documented above.For example:from django.utils.encoding import iri_to_urifrom django.utils.http import urlquotedef get_absolute_url(self):url = u’/person/%s/?x=0&y=0’ % urlquote(self.location)return iri_to_uri(url)This function returns a correctly encoded URL even if self.location is something like “Jack visited Paris &Orléans”. (In fact, <strong>the</strong> iri_to_uri() call isn’t strictly necessary in <strong>the</strong> above example, because all <strong>the</strong> non-ASCIIcharacters would have been removed in quoting in <strong>the</strong> first line.)6.16.4 The database APIYou can pass ei<strong>the</strong>r Unicode strings or UTF-8 bytestrings as arguments to filter() methods and <strong>the</strong> like in <strong>the</strong>database API. The following two querysets are identical:qs = People.objects.filter(name__contains=u’Å’)qs = People.objects.filter(name__contains=’\xc3\x85’) # UTF-8 encoding of Å6.16. Unicode data 791
<strong>Django</strong> <strong>Documentation</strong>, Release 1.26.16.5 TemplatesYou can use ei<strong>the</strong>r Unicode or bytestrings when creating templates manually:from django.template import Templatet1 = Template(’This is a bytestring template.’)t2 = Template(u’This is a Unicode template.’)But <strong>the</strong> common case is to read templates from <strong>the</strong> filesystem, and this creates a slight complication: not all filesystemsstore <strong>the</strong>ir data encoded as UTF-8. If your template files are not stored with a UTF-8 encoding, set <strong>the</strong>FILE_CHARSET setting to <strong>the</strong> encoding of <strong>the</strong> files on disk. When <strong>Django</strong> reads in a template file, it will convert <strong>the</strong>data from this encoding to Unicode. (FILE_CHARSET is set to ’utf-8’ by default.)The DEFAULT_CHARSET setting controls <strong>the</strong> encoding of rendered templates. This is set to UTF-8 by default.Template tags and filtersA couple of tips to remember when writing your own template tags and filters:• Always return Unicode strings from a template tag’s render() method and from template filters.• Use force_unicode() in preference to smart_unicode() in <strong>the</strong>se places. Tag rendering and filter callsoccur as <strong>the</strong> template is being rendered, so <strong>the</strong>re is no advantage to postponing <strong>the</strong> conversion of lazy translationobjects into strings. It’s easier to work solely with Unicode strings at that point.6.16.6 E-mail<strong>Django</strong>’s e-mail framework (in django.core.mail) supports Unicode transparently. You can use Unicode datain <strong>the</strong> message bodies and any headers. However, you’re still obligated to respect <strong>the</strong> requirements of <strong>the</strong> e-mailspecifications, so, for example, e-mail addresses should use only ASCII characters.The following code example demonstrates that everything except e-mail addresses can be non-ASCII:from django.core.mail import EmailMessagesubject = u’My visit to Sør-Trøndelag’sender = u’Arnbjörg Ráðormsdóttir ’recipients = [’Fred
<strong>Django</strong> <strong>Documentation</strong>, Release 1.2def some_view(request):# We know that <strong>the</strong> data must be encoded as KOI8-R (for some reason).request.encoding = ’koi8-r’...You can even change <strong>the</strong> encoding after having accessed request.GET or request.POST, and all subsequentaccesses will use <strong>the</strong> new encoding.Most developers won’t need to worry about changing form encoding, but this is a useful feature for applications thattalk to legacy systems whose encoding you cannot control.<strong>Django</strong> does not decode <strong>the</strong> data of file uploads, because that data is normally treated as collections of bytes, ra<strong>the</strong>rthan strings. Any automatic decoding <strong>the</strong>re would alter <strong>the</strong> meaning of <strong>the</strong> stream of bytes.6.17 <strong>Django</strong> UtilsThis document covers all stable modules in django.utils. Most of <strong>the</strong> modules in django.utils are designedfor internal use and only <strong>the</strong> following parts can be considered stable and thus backwards compatible as per <strong>the</strong> internalrelease deprecation policy.6.17.1 django.utils.cacheThis module contains helper functions for controlling caching. It does so by managing <strong>the</strong> Vary header of responses.It includes functions to patch <strong>the</strong> header of response objects directly and decorators that change functions to do tha<strong>the</strong>ader-patching <strong>the</strong>mselves.For information on <strong>the</strong> Vary header, see RFC 2616 section 14.44.Essentially, <strong>the</strong> Vary HTTP header defines which headers a cache should take into account when building its cachekey. Requests with <strong>the</strong> same path but different header content for headers named in Vary need to get different cachekeys to prevent delivery of wrong content.For example, internationalization middleware would need to distinguish caches by <strong>the</strong> Accept-language header.patch_cache_control(response, **kwargs)This function patches <strong>the</strong> Cache-Control header by adding all keyword arguments to it. The transformation is asfollows:• All keyword parameter names are turned to lowercase, and underscores are converted to hyphens.• If <strong>the</strong> value of a parameter is True (exactly True, not just a true value), only <strong>the</strong> parameter name is added to<strong>the</strong> header.• All o<strong>the</strong>r parameters are added with <strong>the</strong>ir value, after applying str() to it.get_max_age(response)Returns <strong>the</strong> max-age from <strong>the</strong> response Cache-Control header as an integer (or None if it wasn’t found or wasn’t aninteger).patch_response_headers(response, cache_timeout=None)Adds some useful headers to <strong>the</strong> given HttpResponse object:• ETag• Last-Modified• Expires6.17. <strong>Django</strong> Utils 793
<strong>Django</strong> <strong>Documentation</strong>, Release 1.2• Cache-ControlEach header is only added if it isn’t already set.cache_timeout is in seconds. The CACHE_MIDDLEWARE_SECONDS setting is used by default.add_never_cache_headers(response)Adds headers to a response to indicate that a page should never be cached.patch_vary_headers(response, newheaders)Adds (or updates) <strong>the</strong> Vary header in <strong>the</strong> given HttpResponse object. newheaders is a list of header namesthat should be in Vary. Existing headers in Vary aren’t removed.get_cache_key(request, key_prefix=None)Returns a cache key based on <strong>the</strong> request path. It can be used in <strong>the</strong> request phase because it pulls <strong>the</strong> list of headersto take into account from <strong>the</strong> global path registry and uses those to build a cache key to check against.If <strong>the</strong>re is no headerlist stored, <strong>the</strong> page needs to be rebuilt, so this function returns None.learn_cache_key(request, response, cache_timeout=None, key_prefix=None)Learns what headers to take into account for some request path from <strong>the</strong> response object. It stores those headers in aglobal path registry so that later access to that path will know what headers to take into account without building <strong>the</strong>response object itself. The headers are named in <strong>the</strong> Vary header of <strong>the</strong> response, but we want to prevent responsegeneration.The list of headers to use for cache key generation is stored in <strong>the</strong> same cache as <strong>the</strong> pages <strong>the</strong>mselves. If <strong>the</strong> cacheages some data out of <strong>the</strong> cache, this just means that we have to build <strong>the</strong> response once to get at <strong>the</strong> Vary header andso at <strong>the</strong> list of headers to use for <strong>the</strong> cache key.6.17.2 SortedDictclass django.utils.datastructures.SortedDictMethodsExtra methods that SortedDict adds to <strong>the</strong> standard Python dict class.insert(index, key, value)Inserts <strong>the</strong> key, value pair before <strong>the</strong> item with <strong>the</strong> given index.value_for_index(index)Returns <strong>the</strong> value of <strong>the</strong> item at <strong>the</strong> given zero-based index.Creating new SortedDictCreating a new SortedDict must be done in a way where ordering is guaranteed. For example:SortedDict({’b’: 1, ’a’: 2, ’c’: 3})will not work. Passing in a basic Python dict could produce unreliable results. Instead do:SortedDict([(’b’, 1), (’a’, 2), (’c’, 3)])794 Chapter 6. API Reference
<strong>Django</strong> <strong>Documentation</strong>, Release 1.26.17.3 django.utils.encodingclass StrAndUnicodeA class whose __str__ returns its __unicode__ as a UTF-8 bytestring. Useful as a mix-in.smart_unicode(s, encoding=’utf-8’, strings_only=False, errors=’strict’)Returns a unicode object representing s. Treats bytestrings using <strong>the</strong> ‘encoding’ codec.If strings_only is True, don’t convert (some) non-string-like objects.is_protected_type(obj)Determine if <strong>the</strong> object instance is of a protected type.Objects of protected types are preserved as-is when passed to force_unicode(strings_only=True).force_unicode(s, encoding=’utf-8’, strings_only=False, errors=’strict’)Similar to smart_unicode, except that lazy instances are resolved to strings, ra<strong>the</strong>r than kept as lazy objects.If strings_only is True, don’t convert (some) non-string-like objects.smart_str(s, encoding=’utf-8’, strings_only=False, errors=’strict’)Returns a bytestring version of s, encoded as specified in encoding.If strings_only is True, don’t convert (some) non-string-like objects.iri_to_uri(iri)Convert an Internationalized Resource Identifier (IRI) portion to a URI portion that is suitable for inclusion in a URL.This is <strong>the</strong> algorithm from section 3.1 of RFC 3987. However, since we are assuming input is ei<strong>the</strong>r UTF-8 or unicodealready, we can simplify things a little from <strong>the</strong> full method.Returns an ASCII string containing <strong>the</strong> encoded result.6.17.4 django.utils.feedgeneratorSample usage:>>> from django.utils import feedgenerator>>> feed = feedgenerator.Rss201rev2Feed(... title=u"Poynter E-Media Tidbits",... link=u"http://www.poynter.org/column.asp?id=31",... description=u"A group Weblog by <strong>the</strong> sharpest minds in online media/journalism/publishing.",... language=u"en",... )>>> feed.add_item(... title="Hello",... link=u"http://www.holovaty.com/test/",... description="Testing."... )>>> fp = open(’test.rss’, ’w’)>>> feed.write(fp, ’utf-8’)>>> fp.close()For simplifying <strong>the</strong> selection of a generator use feedgenerator.DefaultFeed which is currentlyRss201rev2FeedFor definitions of <strong>the</strong> different versions of RSS, see: http://diveintomark.org/archives/2004/02/04/incompatible-rss6.17. <strong>Django</strong> Utils 795
<strong>Django</strong> <strong>Documentation</strong>, Release 1.2get_tag_uri(url, date)Creates a TagURI.See http://diveintomark.org/archives/2004/05/28/howto-atom-idSyndicationFeedclass SyndicationFeedBase class for all syndication feeds. Subclasses should provide write().Methodsadd_item(title, link, description[, author_email=None, author_name=None, author_link=None,pubdate=None, comments=None, unique_id=None, enclosure=None, categories=(),item_copyright=None, ttl=None, **kwargs])Adds an item to <strong>the</strong> feed. All args are expected to be Python unicode objects except pubdate, which is adatetime.datetime object, and enclosure, which is an instance of <strong>the</strong> Enclosure class.num_items()root_attributes()Return extra attributes to place on <strong>the</strong> root (i.e. feed/channel) element. Called from write().add_root_elements(handler)Add elements in <strong>the</strong> root (i.e. feed/channel) element. Called from write().item_attributes(item)Return extra attributes to place on each item (i.e. item/entry) element.add_item_elements(handler, item)Add elements on each item (i.e. item/entry) element.write(outfile, encoding)Outputs <strong>the</strong> feed in <strong>the</strong> given encoding to outfile, which is a file-like object. Subclasses should override this.writeString(encoding)Returns <strong>the</strong> feed in <strong>the</strong> given encoding as a string.latest_post_date()Returns <strong>the</strong> latest item’s pubdate. If none of <strong>the</strong>m have a pubdate, this returns <strong>the</strong> current date/time.Enclosureclass EnclosureRepresents an RSS enclosureRssFeedclass RssFeed(SyndicationFeed)796 Chapter 6. API Reference
<strong>Django</strong> <strong>Documentation</strong>, Release 1.2Rss201rev2Feedclass Rss201rev2Feed(RssFeed)Spec: http://blogs.law.harvard.edu/tech/rssAtom1Feedclass Atom1Feed(SyndicationFeed)Spec: http://atompub.org/2005/07/11/draft-ietf-atompub-format-10.html6.17.5 django.utils.httpurlquote(url, safe=’/’)A version of Python’s urllib.quote() function that can operate on unicode strings. The url is first UTF-8 encodedbefore quoting. The returned string can safely be used as part of an argument to a subsequent iri_to_uri() callwithout double-quoting occurring. Employs lazy execution.urlquote_plus(url, safe=’‘)A version of Python’s urllib.quote_plus() function that can operate on unicode strings. The url is first UTF-8 encodedbefore quoting. The returned string can safely be used as part of an argument to a subsequent iri_to_uri() call withoutdouble-quoting occurring. Employs lazy execution.urlencode(query, doseq=0)A version of Python’s urllib.urlencode() function that can operate on unicode strings. The parameters are first case toUTF-8 encoded strings and <strong>the</strong>n encoded as per normal.cookie_date(epoch_seconds=None)Formats <strong>the</strong> time to ensure compatibility with Netscape’s cookie standard.Accepts a floating point number expressed in seconds since <strong>the</strong> epoch, in UTC - such as that outputted bytime.time(). If set to None, defaults to <strong>the</strong> current time.Outputs a string in <strong>the</strong> format Wdy, DD-Mon-YYYY HH:MM:SS GMT.http_date(epoch_seconds=None)Formats <strong>the</strong> time to match <strong>the</strong> RFC 1123 date format as specified by HTTP RFC 2616 section 3.3.1.Accepts a floating point number expressed in seconds since <strong>the</strong> epoch, in UTC - such as that outputted bytime.time(). If set to None, defaults to <strong>the</strong> current time.Outputs a string in <strong>the</strong> format Wdy, DD Mon YYYY HH:MM:SS GMT.base36_to_int(s)Converted a base 36 string to an integerint_to_base36(i)Converts an integer to a base36 string6.17. <strong>Django</strong> Utils 797
<strong>Django</strong> <strong>Documentation</strong>, Release 1.26.17.6 django.utils.safestringFunctions and classes for working with “safe strings”: strings that can be displayed safely without fur<strong>the</strong>r escaping inHTML. Marking something as a “safe string” means that <strong>the</strong> producer of <strong>the</strong> string has already turned characters thatshould not be interpreted by <strong>the</strong> HTML engine (e.g. ‘
<strong>Django</strong> <strong>Documentation</strong>, Release 1.2string_concat(*strings)Lazy variant of string concatenation, needed for translations that are constructed from multiple parts.activate(language)Fetches <strong>the</strong> translation object for a given tuple of application name and language and installs it as <strong>the</strong> current translationobject for <strong>the</strong> current thread.deactivate()De-installs <strong>the</strong> currently active translation object so that fur<strong>the</strong>r _ calls will resolve against <strong>the</strong> default translationobject, again.deactivate_all()Makes <strong>the</strong> active translation object a NullTranslations() instance. This is useful when we want delayed translations toappear as <strong>the</strong> original string for some reason.get_language()Returns <strong>the</strong> currently selected language code.get_language_bidi()Returns selected language’s BiDi layout:• False = left-to-right layout• True = right-to-left layoutget_date_formats()Checks whe<strong>the</strong>r translation files provide a translation for some technical message ID to store date and time formats. Ifit doesn’t contain one, <strong>the</strong> formats provided in <strong>the</strong> settings will be used.get_language_from_request(request)Analyzes <strong>the</strong> request to find what language <strong>the</strong> user wants <strong>the</strong> system to show. Only languages listed in settings.LANGUAGESare taken into account. If <strong>the</strong> user requests a sublanguage where we have a main language,we send out <strong>the</strong> main language.to_locale(language)Turns a language name (en-us) into a locale name (en_US).templatize(src)Turns a <strong>Django</strong> template into something that is understood by xgettext. It does so by translating <strong>the</strong> <strong>Django</strong> translationtags into standard gettext function invocations.6.17.8 django.utils.tzinfoclass FixedOffsetFixed offset in minutes east from UTC.class LocalTimezoneProxy timezone information from time module.6.17. <strong>Django</strong> Utils 799
<strong>Django</strong> <strong>Documentation</strong>, Release 1.26.18 ValidatorsNew in version 1.2: Please, see <strong>the</strong> release notes6.18.1 Writing validatorsA validator is a callable that takes a value and raises a ValidationError if it doesn’t meet some criteria. Validatorscan be useful for re-using validation logic between different types of fields.For example, here’s a validator that only allows even numbers:from django.core.exceptions import ValidationErrordef validate_even(value):if value % 2 != 0:raise ValidationError(u’%s is not an even number’ % value)You can add this to a model field via <strong>the</strong> field’s validators argument:from django.db import modelsclass MyModel(models.Model):even_field = models.IntegerField(validators=[validate_even])Because values are converted to Python before validators are run, you can even use <strong>the</strong> same validator with forms:from django import formsclass MyForm(forms.Form):even_field = forms.IntegerField(validators=[validate_even])6.18.2 How validators are runSee <strong>the</strong> form validation for more information on how validators are run in forms, and Validating objects for how<strong>the</strong>y’re run in models. Note that validators will not be run automatically when you save a model, but if you areusing a ModelForm, it will run your validators on any fields that are included in your form. See <strong>the</strong> ModelFormdocumentation for information on how model validation interacts with forms.6.18.3 Built-in validatorsThe django.core.validators module contains a collection of callable validators for use with model and formfields. They’re used internally but are available for use with your own fields, too. They can be used in addition to, orin lieu of custom field.clean() methods.RegexValidatorclass RegexValidator(regex[, message=None, code=None])regexThe regular expression pattern to search for <strong>the</strong> provided value, or a pre-compiled regular expression.Raises a ValidationError with message and code if no match is found.800 Chapter 6. API Reference
<strong>Django</strong> <strong>Documentation</strong>, Release 1.2messageThe error message used by ValidationError if validation fails. If no message is specified, a generic"Enter a valid value" message is used. Default value: None.codeThe error code used by ValidationError if validation fails. If code is not specified, "invalid" isused. Default value: None.URLValidatorclass URLValidator([verify_exists=False, validator_user_agent=URL_VALIDATOR_USER_AGENT ])A RegexValidator that ensures a value looks like a URL and optionally verifies that <strong>the</strong> URL actually exists(i.e., doesn’t return a 404 status code). Raises an error code of ’invalid’ if it doesn’t look like a URL, anda code of ’invalid_link’ if it doesn’t exist.verify_existsDefault value: False. If set to True, this validator checks that <strong>the</strong> URL actually exists.validator_user_agentIf verify_exists is True, <strong>Django</strong> uses <strong>the</strong> value of validator_user_agent as <strong>the</strong> “User-agent”for <strong>the</strong> request. This defaults to settings.URL_VALIDATOR_USER_AGENT.validate_emailvalidate_emailA RegexValidator instance that ensures a value looks like an e-mail address.validate_slugvalidate_slugA RegexValidator instance that ensures a value consists of only letters, numbers, underscores or hyphens.validate_ipv4_addressvalidate_ipv4_addressA RegexValidator instance that ensures a value looks like an IPv4 address.validate_comma_separated_integer_listvalidate_comma_separated_integer_listA RegexValidator instance that ensures a value is a comma-separated list of integers.MaxValueValidatorclass MaxValueValidator(max_value)Raises a ValidationError with a code of ’max_value’ if value is greater than max_value.MinValueValidatorclass MinValueValidator(min_value)Raises a ValidationError with a code of ’min_value’ if value is less than min_value.6.18. Validators 801
<strong>Django</strong> <strong>Documentation</strong>, Release 1.2MaxLengthValidatorclass MaxLengthValidator(max_length)Raises a ValidationError with a code of ’max_length’ if <strong>the</strong> length of value is greater thanmax_length.MinLengthValidatorclass MinLengthValidator(min_length)Raises a ValidationError with a code of ’min_length’ if <strong>the</strong> length of value is less thanmin_length.802 Chapter 6. API Reference
CHAPTERSEVENMETA-DOCUMENTATION ANDMISCELLANY<strong>Documentation</strong> that we can’t find a more organized place for. Like that drawer in your kitchen with <strong>the</strong> scissors,batteries, duct tape, and o<strong>the</strong>r junk.7.1 API stabilityThe release of <strong>Django</strong> 1.0 comes with a promise of API stability and forwards-compatibility. In a nutshell, this meansthat code you develop against <strong>Django</strong> 1.0 will continue to work against 1.1 unchanged, and you should need to makeonly minor changes for any 1.X release.7.1.1 What “stable” meansIn this context, stable means:• All <strong>the</strong> public APIs – everything documented in <strong>the</strong> linked documents below, and all methods that don’t beginwith an underscore – will not be moved or renamed without providing backwards-compatible aliases.• If new features are added to <strong>the</strong>se APIs – which is quite possible – <strong>the</strong>y will not break or change <strong>the</strong> meaning ofexisting methods. In o<strong>the</strong>r words, “stable” does not (necessarily) mean “complete.”• If, for some reason, an API declared stable must be removed or replaced, it will be declared deprecated but willremain in <strong>the</strong> API for at least two minor version releases. Warnings will be issued when <strong>the</strong> deprecated methodis called.See Official releases for more details on how <strong>Django</strong>’s version numbering scheme works, and how features willbe deprecated.• We’ll only break backwards compatibility of <strong>the</strong>se APIs if a bug or security hole makes it completely unavoidable.7.1.2 Stable APIsIn general, everything covered in <strong>the</strong> documentation – with <strong>the</strong> exception of anything in <strong>the</strong> internals area is consideredstable as of 1.0. This includes <strong>the</strong>se APIs:• Authorization• Caching.803
<strong>Django</strong> <strong>Documentation</strong>, Release 1.2• Model definition, managers, querying and transactions• Sending e-mail.• File handling and storage• Forms• HTTP request/response handling, including file uploads, middleware, sessions, URL resolution, view, and shortcutAPIs.• Generic views.• Internationalization.• Pagination• Serialization• Signals• Templates, including <strong>the</strong> language, Python-level template APIs, and custom template tags and libraries. We mayadd new template tags in <strong>the</strong> future and <strong>the</strong> names may inadvertently clash with external template tags. Beforeadding any such tags, we’ll ensure that <strong>Django</strong> raises an error if it tries to load tags with duplicate names.• Testing• django-admin utility.• Built-in middleware• Request/response objects.• Settings. Note, though that while <strong>the</strong> list of built-in settings can be considered complete we may – and probablywill – add new settings in future versions. This is one of those places where “‘stable’ does not mean ‘complete.”’• Built-in signals. Like settings, we’ll probably add new signals in <strong>the</strong> future, but <strong>the</strong> existing ones won’t break.• Unicode handling.• Everything covered by <strong>the</strong> HOWTO guides.django.utilsMost of <strong>the</strong> modules in django.utils are designed for internal use. Only <strong>the</strong> following parts of django.utils canbe considered stable:• django.utils.cache• django.utils.datastructures.SortedDict – only this single class; <strong>the</strong> rest of <strong>the</strong> module is forinternal use.• django.utils.encoding• django.utils.feedgenerator• django.utils.http• django.utils.safestring• django.utils.translation• django.utils.tzinfo804 Chapter 7. Meta-documentation and miscellany
<strong>Django</strong> <strong>Documentation</strong>, Release 1.27.1.3 ExceptionsThere are a few exceptions to this stability and backwards-compatibility promise.Security fixesIf we become aware of a security problem – hopefully by someone following our security reporting policy – we’ll doeverything necessary to fix it. This might mean breaking backwards compatibility; security trumps <strong>the</strong> compatibilityguarantee.Contributed applications (django.contrib)While we’ll make every effort to keep <strong>the</strong>se APIs stable – and have no plans to break any contrib apps – this is an areathat will have more flux between releases. As <strong>the</strong> Web evolves, <strong>Django</strong> must evolve with it.However, any changes to contrib apps will come with an important guarantee: we’ll make sure it’s always possibleto use an older version of a contrib app if we need to make changes. Thus, if <strong>Django</strong> 1.5 ships with a backwardsincompatibledjango.contrib.flatpages, we’ll make sure you can still use <strong>the</strong> <strong>Django</strong> 1.4 version alongside<strong>Django</strong> 1.5. This will continue to allow for easy upgrades.Historically, apps in django.contrib have been more stable than <strong>the</strong> core, so in practice we probably won’t haveto ever make this exception. However, it’s worth noting if you’re building apps that depend on django.contrib.APIs marked as internalCertain APIs are explicitly marked as “internal” in a couple of ways:• Some documentation refers to internals and mentions <strong>the</strong>m as such. If <strong>the</strong> documentation says that something isinternal, we reserve <strong>the</strong> right to change it.• Functions, methods, and o<strong>the</strong>r objects prefixed by a leading underscore (_). This is <strong>the</strong> standard Python way ofindicating that something is private; if any method starts with a single _, it’s an internal API.7.2 Design philosophiesThis document explains some of <strong>the</strong> fundamental philosophies <strong>Django</strong>’s developers have used in creating <strong>the</strong> framework.Its goal is to explain <strong>the</strong> past and guide <strong>the</strong> future.7.2.1 OverallLoose couplingA fundamental goal of <strong>Django</strong>’s stack is loose coupling and tight cohesion. The various layers of <strong>the</strong> frameworkshouldn’t “know” about each o<strong>the</strong>r unless absolutely necessary.For example, <strong>the</strong> template system knows nothing about Web requests, <strong>the</strong> database layer knows nothing about datadisplay and <strong>the</strong> view system doesn’t care which template system a programmer uses.Although <strong>Django</strong> comes with a full stack for convenience, <strong>the</strong> pieces of <strong>the</strong> stack are independent of ano<strong>the</strong>r whereverpossible.7.2. Design philosophies 805
<strong>Django</strong> <strong>Documentation</strong>, Release 1.2Less code<strong>Django</strong> apps should use as little code as possible; <strong>the</strong>y should lack boilerplate. <strong>Django</strong> should take full advantage ofPython’s dynamic capabilities, such as introspection.Quick developmentThe point of a Web framework in <strong>the</strong> 21st century is to make <strong>the</strong> tedious aspects of Web development fast. <strong>Django</strong>should allow for incredibly quick Web development.Don’t repeat yourself (DRY)Every distinct concept and/or piece of data should live in one, and only one, place. Redundancy is bad. Normalizationis good.The framework, within reason, should deduce as much as possible from as little as possible.See Also:The discussion of DRY on <strong>the</strong> Portland Pattern RepositoryExplicit is better than implicitThis, a core Python principle, means <strong>Django</strong> shouldn’t do too much “magic.” Magic shouldn’t happen unless <strong>the</strong>re’sa really good reason for it. Magic is worth using only if it creates a huge convenience unattainable in o<strong>the</strong>r ways, andit isn’t implemented in a way that confuses developers who are trying to learn how to use <strong>the</strong> feature.ConsistencyThe framework should be consistent at all levels. Consistency applies to everything from low-level (<strong>the</strong> Python codingstyle used) to high-level (<strong>the</strong> “experience” of using <strong>Django</strong>).7.2.2 ModelsExplicit is better than implicitFields shouldn’t assume certain behaviors based solely on <strong>the</strong> name of <strong>the</strong> field. This requires too much knowledge of<strong>the</strong> system and is prone to errors. Instead, behaviors should be based on keyword arguments and, in some cases, on<strong>the</strong> type of <strong>the</strong> field.Include all relevant domain logicModels should encapsulate every aspect of an “object,” following Martin Fowler’s Active Record design pattern.This is why both <strong>the</strong> data represented by a model and information about it (its human-readable name, options likedefault ordering, etc.) are defined in <strong>the</strong> model class; all <strong>the</strong> information needed to understand a given model shouldbe stored in <strong>the</strong> model.7.2.3 Database APIThe core goals of <strong>the</strong> database API are:806 Chapter 7. Meta-documentation and miscellany
<strong>Django</strong> <strong>Documentation</strong>, Release 1.2SQL efficiencyIt should execute SQL statements as few times as possible, and it should optimize statements internally.This is why developers need to call save() explicitly, ra<strong>the</strong>r than <strong>the</strong> framework saving things behind <strong>the</strong> scenessilently.This is also why <strong>the</strong> select_related() QuerySet method exists. It’s an optional performance booster for <strong>the</strong>common case of selecting “every related object.”Terse, powerful syntaxThe database API should allow rich, expressive statements in as little syntax as possible. It should not rely on importingo<strong>the</strong>r modules or helper objects.Joins should be performed automatically, behind <strong>the</strong> scenes, when necessary.Every object should be able to access every related object, systemwide. This access should work both ways.Option to drop into raw SQL easily, when neededThe database API should realize it’s a shortcut but not necessarily an end-all-be-all. The framework should make iteasy to write custom SQL – entire statements, or just custom WHERE clauses as custom parameters to API calls.7.2.4 URL designLoose couplingURLs in a <strong>Django</strong> app should not be coupled to <strong>the</strong> underlying Python code. Tying URLs to Python function namesis a Bad And Ugly Thing.Along <strong>the</strong>se lines, <strong>the</strong> <strong>Django</strong> URL system should allow URLs for <strong>the</strong> same app to be different in different contexts.For example, one site may put stories at /stories/, while ano<strong>the</strong>r may use /news/.Infinite flexibilityURLs should be as flexible as possible. Any conceivable URL design should be allowed.Encourage best practicesThe framework should make it just as easy (or even easier) for a developer to design pretty URLs than ugly ones.File extensions in Web-page URLs should be avoided.Vignette-style commas in URLs deserve severe punishment.Definitive URLsTechnically, foo.com/bar and foo.com/bar/ are two different URLs, and search-engine robots (and some Webtraffic-analyzing tools) would treat <strong>the</strong>m as separate pages. <strong>Django</strong> should make an effort to “normalize” URLs so thatsearch-engine robots don’t get confused.This is <strong>the</strong> reasoning behind <strong>the</strong> APPEND_SLASH setting.7.2. Design philosophies 807
<strong>Django</strong> <strong>Documentation</strong>, Release 1.27.2.5 Template systemSeparate logic from presentationWe see a template system as a tool that controls presentation and presentation-related logic – and that’s it. The templatesystem shouldn’t support functionality that goes beyond this basic goal.If we wanted to put everything in templates, we’d be using PHP. Been <strong>the</strong>re, done that, wised up.Discourage redundancyThe majority of dynamic Web sites use some sort of common sitewide design – a common header, footer, navigationbar, etc. The <strong>Django</strong> template system should make it easy to store those elements in a single place, eliminatingduplicate code.This is <strong>the</strong> philosophy behind template inheritance.Be decoupled from HTMLThe template system shouldn’t be designed so that it only outputs HTML. It should be equally good at generatingo<strong>the</strong>r text-based formats, or just plain text.XML should not be used for template languagesUsing an XML engine to parse templates introduces a whole new world of human error in editing templates – andincurs an unacceptable level of overhead in template processing.Assume designer competenceThe template system shouldn’t be designed so that templates necessarily are displayed nicely in WYSIWYG editorssuch as Dreamweaver. That is too severe of a limitation and wouldn’t allow <strong>the</strong> syntax to be as nice as it is. <strong>Django</strong>expects template authors are comfortable editing HTML directly.Treat whitespace obviouslyThe template system shouldn’t do magic things with whitespace. If a template includes whitespace, <strong>the</strong> system shouldtreat <strong>the</strong> whitespace as it treats text – just display it. Any whitespace that’s not in a template tag should be displayed.Don’t invent a programming languageThe template system intentionally doesn’t allow <strong>the</strong> following:• Assignment to variables• Advanced logicThe goal is not to invent a programming language. The goal is to offer just enough programming-esque functionality,such as branching and looping, that is essential for making presentation-related decisions.The <strong>Django</strong> template system recognizes that templates are most often written by designers, not programmers, and<strong>the</strong>refore should not assume Python knowledge.808 Chapter 7. Meta-documentation and miscellany
<strong>Django</strong> <strong>Documentation</strong>, Release 1.2Safety and securityThe template system, out of <strong>the</strong> box, should forbid <strong>the</strong> inclusion of malicious code – such as commands that deletedatabase records.This is ano<strong>the</strong>r reason <strong>the</strong> template system doesn’t allow arbitrary Python code.ExtensibilityThe template system should recognize that advanced template authors may want to extend its technology.This is <strong>the</strong> philosophy behind custom template tags and filters.7.2.6 ViewsSimplicityWriting a view should be as simple as writing a Python function. Developers shouldn’t have to instantiate a class whena function will do.Use request objectsViews should have access to a request object – an object that stores metadata about <strong>the</strong> current request. The objectshould be passed directly to a view function, ra<strong>the</strong>r than <strong>the</strong> view function having to access <strong>the</strong> request data from aglobal variable. This makes it light, clean and easy to test views by passing in “fake” request objects.Loose couplingA view shouldn’t care about which template system <strong>the</strong> developer uses – or even whe<strong>the</strong>r a template system is used atall.Differentiate between GET and POSTGET and POST are distinct; developers should explicitly use one or <strong>the</strong> o<strong>the</strong>r. The framework should make it easy todistinguish between GET and POST data.7.3 Third-party distributions of <strong>Django</strong>Many third-party distributors are now providing versions of <strong>Django</strong> integrated with <strong>the</strong>ir package-management systems.These can make installation and upgrading much easier for users of <strong>Django</strong> since <strong>the</strong> integration includes <strong>the</strong>ability to automatically install dependencies (like database adapters) that <strong>Django</strong> requires.Typically, <strong>the</strong>se packages are based on <strong>the</strong> latest stable release of <strong>Django</strong>, so if you want to use <strong>the</strong> developmentversion of <strong>Django</strong> you’ll need to follow <strong>the</strong> instructions for installing <strong>the</strong> development version from our Subversionrepository.If you’re using Linux or a Unix installation, such as OpenSolaris, check with your distributor to see if <strong>the</strong>y alreadypackage <strong>Django</strong>. If you’re using a Linux distro and don’t know how to find out if a package is available, <strong>the</strong>n now is agood time to learn. The <strong>Django</strong> Wiki contains a list of Third Party Distributions to help you out.7.3. Third-party distributions of <strong>Django</strong> 809
<strong>Django</strong> <strong>Documentation</strong>, Release 1.27.3.1 For distributorsIf you’d like to package <strong>Django</strong> for distribution, we’d be happy to help out! Please join <strong>the</strong> django-developers mailinglist and introduce yourself.We also encourage all distributors to subscribe to <strong>the</strong> django-announce mailing list, which is a (very) low-traffic listfor announcing new releases of <strong>Django</strong> and important bugfixes.810 Chapter 7. Meta-documentation and miscellany
CHAPTEREIGHTGLOSSARYfield An attribute on a model; a given field usually maps directly to a single database column.See Models.generic view A higher-order view function that provides an abstract/generic implementation of a common idiom orpattern found in view development.See Generic views.model Models store your application’s data.See Models.MTV See <strong>Django</strong> appears to be a MVC framework, but you call <strong>the</strong> Controller <strong>the</strong> “view”, and <strong>the</strong> View <strong>the</strong> “template”.How come you don’t use <strong>the</strong> standard names?.MVCModel-view-controller; a software pattern. <strong>Django</strong> follows MVC to some extent.project A Python package – i.e. a directory of code – that contains all <strong>the</strong> settings for an instance of <strong>Django</strong>. Thiswould include database configuration, <strong>Django</strong>-specific options and application-specific settings.property Also known as “managed attributes”, and a feature of Python since version 2.2. From <strong>the</strong> property documentation:querysetslugProperties are a neat way to implement attributes whose usage resembles attribute access, but whoseimplementation uses method calls. [...] You could only do this by overriding __getattr__ and__setattr__; but overriding __setattr__ slows down all attribute assignments considerably,and overriding __getattr__ is always a bit tricky to get right. Properties let you do this painlessly,without having to override __getattr__ or __setattr__.An object representing some set of rows to be fetched from <strong>the</strong> database.See Making queries.A short label for something, containing only letters, numbers, underscores or hyphens. They’re generally usedin URLs. For example, in a typical blog entry URL:http://www.djangoproject.com/weblog/2008/apr/12/spring/<strong>the</strong> last bit (spring) is <strong>the</strong> slug.template A chunk of text that acts as formatting for representing data. A template helps to abstract <strong>the</strong> presentationof data from <strong>the</strong> data itself.See The <strong>Django</strong> template language.view A function responsible for rending a page.811
<strong>Django</strong> <strong>Documentation</strong>, Release 1.2812 Chapter 8. Glossary
CHAPTERNINERELEASE NOTESRelease notes for <strong>the</strong> official <strong>Django</strong> releases. Each release note will tell you what’s new in each version, and will alsodescribe any backwards-incompatible changes made in that version.For those upgrading to a new version of <strong>Django</strong>, you will need to check all <strong>the</strong> backwards-incompatible changes anddeprecated features for each ‘final’ release from <strong>the</strong> one after your current <strong>Django</strong> version, up to and including <strong>the</strong>new version.9.1 Final releases9.1.1 1.2 release<strong>Django</strong> 1.2.4 release notesWelcome to <strong>Django</strong> 1.2.4!This is <strong>the</strong> fourth “bugfix” release in <strong>the</strong> <strong>Django</strong> 1.2 series, improving <strong>the</strong> stability and performance of <strong>the</strong> <strong>Django</strong> 1.2codebase.<strong>Django</strong> 1.2.4 maintains backwards compatibility with <strong>Django</strong> 1.2.3, but contain a number of fixes and o<strong>the</strong>r improvements.<strong>Django</strong> 1.2.4 is a recommended upgrade for any development or deployment currently using or targeting<strong>Django</strong> 1.2.For full details on <strong>the</strong> new features, backwards incompatibilities, and deprecated features in <strong>the</strong> 1.2 branch, see <strong>the</strong><strong>Django</strong> 1.2 release notes.One new featureOrdinarily, a point release would not include new features, but in <strong>the</strong> case of <strong>Django</strong> 1.2.4, we have made an exceptionto this rule.One of <strong>the</strong> bugs fixed in <strong>Django</strong> 1.2.4 involves a set of circumstances whereby a running a test suite on a multipledatabase configuration could cause <strong>the</strong> original source database (i.e., <strong>the</strong> actual production database) to be dropped,causing catastrophic loss of data. In order to provide a fix for this problem, it was necessary to introduce a new setting– TEST_DEPENDENCIES – that allows you to define any creation order dependencies in your database configuration.Most users – even users with multiple-database configurations – need not be concerned about <strong>the</strong> data loss bug, or <strong>the</strong>manual configuration of TEST_DEPENDENCIES. See <strong>the</strong> original problem report documentation on controlling <strong>the</strong>creation order of test databases for details.813
<strong>Django</strong> <strong>Documentation</strong>, Release 1.2Geo<strong>Django</strong>The function-based TEST_RUNNER previously used to execute <strong>the</strong> Geo<strong>Django</strong> test suite,django.contrib.gis.tests.run_gis_tests(), was finally deprecated in favor of a class-basedtest runner, django.contrib.gis.tests.Geo<strong>Django</strong>TestSuiteRunner, added in this release.In addition, <strong>the</strong> Geo<strong>Django</strong> test suite is now included when running <strong>the</strong> <strong>Django</strong> test suite with runtests.py andusing spatial database backends.<strong>Django</strong> 1.2.2 release notesWelcome to <strong>Django</strong> 1.2.2!This is <strong>the</strong> second “bugfix” release in <strong>the</strong> <strong>Django</strong> 1.2 series, improving <strong>the</strong> stability and performance of <strong>the</strong> <strong>Django</strong>1.2 codebase.<strong>Django</strong> 1.2.2 maintains backwards compatibility with <strong>Django</strong> 1.2.1, but contain a number of fixes and o<strong>the</strong>r improvements.<strong>Django</strong> 1.2.2 is a recommended upgrade for any development or deployment currently using or targeting<strong>Django</strong> 1.2.For full details on <strong>the</strong> new features, backwards incompatibilities, and deprecated features in <strong>the</strong> 1.2 branch, see <strong>the</strong><strong>Django</strong> 1.2 release notes.One new featureOrdinarily, a point release would not include new features, but in <strong>the</strong> case of <strong>Django</strong> 1.2.2, we have made an exceptionto this rule.In order to test a bug fix that forms part of <strong>the</strong> 1.2.2 release, it was necessary to add a feature – <strong>the</strong>enforce_csrf_checks flag – to <strong>the</strong> test client. This flag forces <strong>the</strong> test client to perform full CSRF checkson forms. The default behavior of <strong>the</strong> test client hasn’t changed, but if you want to do CSRF checks with <strong>the</strong> testclient, it is now possible to do so.<strong>Django</strong> 1.2 release notesMay 17, 2010.Welcome to <strong>Django</strong> 1.2!Nearly a year in <strong>the</strong> making, <strong>Django</strong> 1.2 packs an impressive list of new features and lots of bug fixes. These releasenotes cover <strong>the</strong> new features, as well as important changes you’ll want to be aware of when upgrading from <strong>Django</strong>1.1 or older versions.Overview<strong>Django</strong> 1.2 introduces several large, important new features, including:• Support for multiple database connections in a single <strong>Django</strong> instance.• Model validation inspired by <strong>Django</strong>’s form validation.• Vastly improved protection against Cross-Site Request Forgery (CSRF).• A new user “messages” framework with support for cookie- and session-based message for both anonymousand au<strong>the</strong>nticated users.814 Chapter 9. Release notes
<strong>Django</strong> <strong>Documentation</strong>, Release 1.2• Hooks for object-level permissions, permissions for anonymous users, and more flexible username requirements.• Customization of e-mail sending via e-mail backends.• New “smart” if template tag which supports comparison operators.These are just <strong>the</strong> highlights; full details and a complete list of features may be found below.See Also:<strong>Django</strong> Advent covered <strong>the</strong> release of <strong>Django</strong> 1.2 with a series of articles and tutorials that cover some of <strong>the</strong> newfeatures in depth.Wherever possible <strong>the</strong>se features have been introduced in a backwards-compatible manner per our API stability policypolicy.However, a handful of features have changed in ways that, for some users, will be backwards-incompatible. The bigchanges are:• Support for Python 2.3 has been dropped. See <strong>the</strong> full notes below.• The new CSRF protection framework is not backwards-compatible with <strong>the</strong> old system. Users of <strong>the</strong> old systemwill not be affected until <strong>the</strong> old system is removed in <strong>Django</strong> 1.4.However, upgrading to <strong>the</strong> new CSRF protection framework requires a few important backwards-incompatiblechanges, detailed in CSRF Protection, below.• Authors of custom Field subclasses should be aware that a number of methods have had a change in prototype,detailed under get_db_prep_*() methods on Field, below.• The internals of template tags have changed somewhat; authors of custom template tags that need to store state(e.g. custom control flow tags) should ensure that <strong>the</strong>ir code follows <strong>the</strong> new rules for stateful template tags• The user_passes_test(), login_required(), and permission_required(), decorators fromdjango.contrib.auth only apply to functions and no longer work on methods. There’s a simple one-linefix detailed below.Again, <strong>the</strong>se are just <strong>the</strong> big features that will affect <strong>the</strong> most users. Users upgrading from previous versions of <strong>Django</strong>are heavily encouraged to consult <strong>the</strong> complete list of backwards-incompatible changes and <strong>the</strong> list of deprecatedfeatures.Python compatibilityWhile not a new feature, it’s important to note that <strong>Django</strong> 1.2 introduces <strong>the</strong> first shift in our Python compatibilitypolicy since <strong>Django</strong>’s initial public debut. Previous <strong>Django</strong> releases were tested and supported on 2.x Python versionsfrom 2.3 up; <strong>Django</strong> 1.2, however, drops official support for Python 2.3. As such, <strong>the</strong> minimum Python versionrequired for <strong>Django</strong> is now 2.4, and <strong>Django</strong> is tested and supported on Python 2.4, 2.5 and 2.6, and will be supportedon <strong>the</strong> as-yet-unreleased Python 2.7.This change should affect only a small number of <strong>Django</strong> users, as most operating-system vendors today are shippingPython 2.4 or newer as <strong>the</strong>ir default version. If you’re still using Python 2.3, however, you’ll need to stick to <strong>Django</strong>1.1 until you can upgrade; per our support policy, <strong>Django</strong> 1.1 will continue to receive security support until <strong>the</strong> releaseof <strong>Django</strong> 1.3.A roadmap for <strong>Django</strong>’s overall 2.x Python support, and eventual transition to Python 3.x, is currently being developed,and will be announced prior to <strong>the</strong> release of <strong>Django</strong> 1.3.What’s new in <strong>Django</strong> 1.29.1. Final releases 815
<strong>Django</strong> <strong>Documentation</strong>, Release 1.2Support for multiple databases <strong>Django</strong> 1.2 adds <strong>the</strong> ability to use more than one database in your <strong>Django</strong> project.Queries can be issued at a specific database with <strong>the</strong> using() method on QuerySet objects. Individual objects can besaved to a specific database by providing a using argument when you call save().Model validation Model instances now have support for validating <strong>the</strong>ir own data, and both model and form fieldsnow accept configurable lists of validators specifying reusable, encapsulated validation behavior. Note, however, thatvalidation must still be performed explicitly. Simply invoking a model instance’s save() method will not performany validation of <strong>the</strong> instance’s data.Improved CSRF protection <strong>Django</strong> now has much improved protection against Cross-Site Request Forgery (CSRF)attacks. This type of attack occurs when a malicious Web site contains a link, a form button or some JavaScript that isintended to perform some action on your Web site, using <strong>the</strong> credentials of a logged-in user who visits <strong>the</strong> malicioussite in <strong>the</strong>ir browser. A related type of attack, “login CSRF,” where an attacking site tricks a user’s browser into logginginto a site with someone else’s credentials, is also covered.Messages framework <strong>Django</strong> now includes a robust and configurable messages framework with built-in supportfor cookie- and session-based messaging, for both anonymous and au<strong>the</strong>nticated clients. The messages frameworkreplaces <strong>the</strong> deprecated user message API and allows you to temporarily store messages in one request and retrieve<strong>the</strong>m for display in a subsequent request (usually <strong>the</strong> next one).Object-level permissions A foundation for specifying permissions at <strong>the</strong> per-object level has been added. Although<strong>the</strong>re is no implementation of this in core, a custom au<strong>the</strong>ntication backend can provide this implementation and it willbe used by django.contrib.auth.models.User. See <strong>the</strong> au<strong>the</strong>ntication docs for more information.Permissions for anonymous users If you provide a custom auth backend with supports_anonymous_userset to True, AnonymousUser will check <strong>the</strong> backend for permissions, just like User already did. This is useful forcentralizing permission handling - apps can always delegate <strong>the</strong> question of whe<strong>the</strong>r something is allowed or not to<strong>the</strong> authorization/au<strong>the</strong>ntication backend. See <strong>the</strong> au<strong>the</strong>ntication docs for more details.Relaxed requirements for usernames The built-in User model’s username field now allows a wider range ofcharacters, including @, +, . and - characters.E-mail backends You can now configure <strong>the</strong> way that <strong>Django</strong> sends e-mail. Instead of using SMTP to send all e-mail, you can now choose a configurable e-mail backend to send messages. If your hosting provider uses a sandbox orsome o<strong>the</strong>r non-SMTP technique for sending mail, you can now construct an e-mail backend that will allow <strong>Django</strong>’sstandard mail sending methods to use those facilities.This also makes it easier to debug mail sending. <strong>Django</strong> ships with backend implementations that allow you to sende-mail to a file, to <strong>the</strong> console, or to memory. You can even configure all e-mail to be thrown away.“Smart” if tag The if tag has been upgraded to be much more powerful. First, we’ve added support for comparisonoperators. No longer will you have to type:{% ifnotequal a b %}...{% endifnotequal %}You can now do this:816 Chapter 9. Release notes
<strong>Django</strong> <strong>Documentation</strong>, Release 1.2{% if a != b %}...{% endif %}There’s really no reason to use {% ifequal %} or {% ifnotequal %} anymore, unless you’re <strong>the</strong> nostalgictype.The operators supported are ==, !=, , =, in and not in, all of which work like <strong>the</strong> Python operators, inaddition to and, or and not, which were already supported.Also, filters may now be used in <strong>the</strong> if expression. For example:{{ message }}Template caching In previous versions of <strong>Django</strong>, every time you rendered a template, it would be reloaded fromdisk. In <strong>Django</strong> 1.2, you can use a cached template loader to load templates once, <strong>the</strong>n cache <strong>the</strong> result for everysubsequent render. This can lead to a significant performance improvement if your templates are broken into lots ofsmaller subtemplates (using <strong>the</strong> {% extends %} or {% include %} tags).As a side effect, it is now much easier to support non-<strong>Django</strong> template languages. For more details, see <strong>the</strong> notes onsupporting non-<strong>Django</strong> template languages.Natural keys in fixtures Fixtures can now refer to remote objects using Natural keys. This lookup scheme isan alternative to <strong>the</strong> normal primary-key based object references in a fixture, improving readability and resolvingproblems referring to objects whose primary key value may not be predictable or known.Fast failure for tests Both <strong>the</strong> test subcommand of django-admin.py and <strong>the</strong> runtests.py script used torun <strong>Django</strong>’s own test suite now support a --failfast option. When specified, this option causes <strong>the</strong> test runner toexit after encountering a failure instead of continuing with <strong>the</strong> test run. In addition, <strong>the</strong> handling of Ctrl-C duringa test run has been improved to trigger a graceful exit from <strong>the</strong> test run that reports details of <strong>the</strong> tests that were runbefore <strong>the</strong> interruption.BigIntegerFieldModels can now use a 64-bit BigIntegerField type.Improved localization <strong>Django</strong>’s internationalization framework has been expanded with locale-aware formattingand form processing. That means, if enabled, dates and numbers on templates will be displayed using <strong>the</strong> formatspecified for <strong>the</strong> current locale. <strong>Django</strong> will also use localized formats when parsing data in forms. See Formatlocalization for more details.readonly_fields in ModelAdmin django.contrib.admin.ModelAdmin.readonly_fields hasbeen added to enable non-editable fields in add/change pages for models and inlines. Field and calculated values canbe displayed alongside editable fields.Customizable syntax highlighting You can now use a DJANGO_COLORS environment variable to modify or disable<strong>the</strong> colors used by django-admin.py to provide syntax highlighting.9.1. Final releases 817
<strong>Django</strong> <strong>Documentation</strong>, Release 1.2Syndication feeds as views Syndication feeds can now be used directly as views in your URLconf . This means thatyou can maintain complete control over <strong>the</strong> URL structure of your feeds. Like any o<strong>the</strong>r view, feeds views are passeda request object, so you can do anything you would normally do with a view, like user based access control, ormaking a feed a named URL.Geo<strong>Django</strong> The most significant new feature for Geo<strong>Django</strong> in 1.2 is support for multiple spatial databases. As aresult, <strong>the</strong> following spatial database backends are now included:• django.contrib.gis.db.backends.postgis• django.contrib.gis.db.backends.mysql• django.contrib.gis.db.backends.oracle• django.contrib.gis.db.backends.spatialiteGeo<strong>Django</strong> now supports <strong>the</strong> rich capabilities added in <strong>the</strong> PostGIS 1.5 release. New features include suppport for <strong>the</strong><strong>the</strong> geography type and enabling of distance queries with non-point geometries on geographic coordinate systems.Support for 3D geometry fields was added, and may be enabled by setting <strong>the</strong> dim keyword to 3 in yourGeometryField. The Extent3D aggregate and extent3d() GeoQuerySet method were added as a partof this feature.The following GeoQuerySet methods are new in 1.2:• force_rhr()• reverse_geom()• geohash()The GEOS interface was updated to use thread-safe C library functions when available on <strong>the</strong> platform.The GDAL interface now allows <strong>the</strong> user to set a spatial_filter on <strong>the</strong> features returned when iterating over aLayer.Finally, Geo<strong>Django</strong>’s documentation is now included with <strong>Django</strong>’s and is no longer hosted separately at geodjango.org.JavaScript-assisted handling of inline related objects in <strong>the</strong> admin If a user has JavaScript enabled in <strong>the</strong>irbrowser, <strong>the</strong> interface for inline objects in <strong>the</strong> admin now allows inline objects to be dynamically added and removed.Users without JavaScript-enabled browsers will see no change in <strong>the</strong> behavior of inline objects.New now template tag format specifier characters: c and u The argument to <strong>the</strong> now has gained two new formatcharacters: c to specify that a datetime value should be formatted in ISO 8601 format, and u that allows output of <strong>the</strong>microseconds part of a datetime or time value.These are also available in o<strong>the</strong>rs parts like <strong>the</strong> date and time template filters, <strong>the</strong> humanize template tag libraryand <strong>the</strong> new format localization framework.Backwards-incompatible changes in 1.2Wherever possible <strong>the</strong> new features above have been introduced in a backwards-compatible manner per our APIstability policy policy. This means that practically all existing code which worked with <strong>Django</strong> 1.1 will continue towork with <strong>Django</strong> 1.2; such code will, however, begin issuing warnings (see below for details).However, a handful of features have changed in ways that, for some users, will be immediately backwardsincompatible.Those changes are detailed below.818 Chapter 9. Release notes
<strong>Django</strong> <strong>Documentation</strong>, Release 1.2CSRF Protection We’ve made large changes to <strong>the</strong> way CSRF protection works, detailed in <strong>the</strong> CSRF documentaton.Here are <strong>the</strong> major changes you should be aware of:• CsrfResponseMiddleware and CsrfMiddleware have been deprecated and will be removed completelyin <strong>Django</strong> 1.4, in favor of a template tag that should be inserted into forms.• All contrib apps use a csrf_protect decorator to protect <strong>the</strong> view. This requires <strong>the</strong> use of <strong>the</strong>csrf_token template tag in <strong>the</strong> template. If you have used custom templates for contrib views, you MUSTREAD THE UPGRADE INSTRUCTIONS to fix those templates.• CsrfViewMiddleware is included in MIDDLEWARE_CLASSES by default. This turns on CSRF protectionby default, so views that accept POST requests need to be written to work with <strong>the</strong> middleware. Instructions onhow to do this are found in <strong>the</strong> CSRF docs.• All of <strong>the</strong> CSRF has moved from contrib to core (with backwards compatible imports in <strong>the</strong> old locations, whichare deprecated and will cease to be supported in <strong>Django</strong> 1.4).get_db_prep_*() methods on Field Prior to <strong>Django</strong> 1.2, a custom Field had <strong>the</strong> option of defining severalfunctions to support conversion of Python values into database-compatible values. A custom field might looksomething like:class CustomModelField(models.Field):# ...def db_type(self):# ...def get_db_prep_save(self, value):# ...def get_db_prep_value(self, value):# ...def get_db_prep_lookup(self, lookup_type, value):# ...In 1.2, <strong>the</strong>se three methods have undergone a change in prototype, and two extra methods have been introduced:class CustomModelField(models.Field):# ...def db_type(self, connection):# ...def get_prep_value(self, value):# ...def get_prep_lookup(self, lookup_type, value):# ...def get_db_prep_save(self, value, connection):# ...def get_db_prep_value(self, value, connection, prepared=False):# ...def get_db_prep_lookup(self, lookup_type, value, connection, prepared=False):# ...These changes are required to support multiple databases – db_type and get_db_prep_* can no longer make9.1. Final releases 819
<strong>Django</strong> <strong>Documentation</strong>, Release 1.2any assumptions regarding <strong>the</strong> database for which it is preparing. The connection argument now provides <strong>the</strong>preparation methods with <strong>the</strong> specific connection for which <strong>the</strong> value is being prepared.The two new methods exist to differentiate general data-preparation requirements from requirements that are databasespecific.The prepared argument is used to indicate to <strong>the</strong> database-preparation methods whe<strong>the</strong>r genericvalue preparation has been performed. If an unprepared (i.e., prepared=False) value is provided to <strong>the</strong>get_db_prep_*() calls, <strong>the</strong>y should invoke <strong>the</strong> corresponding get_prep_*() calls to perform generic datapreparation.We’ve provided conversion functions that will transparently convert functions adhering to <strong>the</strong> old prototype into functionscompatible with <strong>the</strong> new prototype. However, <strong>the</strong>se conversion functions will be removed in <strong>Django</strong> 1.4, so youshould upgrade your Field definitions to use <strong>the</strong> new prototype as soon as possible.If your get_db_prep_*() methods made no use of <strong>the</strong> database connection, you should be able to upgradeby renaming get_db_prep_value() to get_prep_value() and get_db_prep_lookup() toget_prep_lookup(). If you require database specific conversions, <strong>the</strong>n you will need to provide an implementationget_db_prep_* that uses <strong>the</strong> connection argument to resolve database-specific values.Stateful template tags Template tags that store rendering state on <strong>the</strong>ir Node subclass have always been vulnerableto thread-safety and o<strong>the</strong>r issues; as of <strong>Django</strong> 1.2, however, <strong>the</strong>y may also cause problems when used with <strong>the</strong> newcached template loader.All of <strong>the</strong> built-in <strong>Django</strong> template tags are safe to use with <strong>the</strong> cached loader, but if you’re using custom templatetags that come from third party packages, or from your own code, you should ensure that <strong>the</strong> Node implementationfor each tag is thread-safe. For more information, see template tag thread safety considerations.You may also need to update your templates if you were relying on <strong>the</strong> implementation of <strong>Django</strong>’s template tags notbeing thread safe. The cycle tag is <strong>the</strong> most likely to be affected in this way, especially when used in conjunctionwith <strong>the</strong> include tag. Consider <strong>the</strong> following template fragment:{% for object in object_list %}{% include "subtemplate.html" %}{% endfor %}with a subtemplate.html that reads:{% cycle ’even’ ’odd’ %}Using <strong>the</strong> non-thread-safe, pre-<strong>Django</strong> 1.2 renderer, this would output:even odd even odd ...Using <strong>the</strong> thread-safe <strong>Django</strong> 1.2 renderer, you will instead get:even even even even ...This is because each rendering of <strong>the</strong> include tag is an independent rendering. When <strong>the</strong> cycle tag was not threadsafe, <strong>the</strong> state of <strong>the</strong> cycle tag would leak between multiple renderings of <strong>the</strong> same include. Now that <strong>the</strong> cycletag is thread safe, this leakage no longer occurs.user_passes_test, login_required and permission_requireddjango.contrib.auth.decorators provides <strong>the</strong> decorators login_required,permission_required and user_passes_test. Previously it was possible to use <strong>the</strong>se decoratorsboth on functions (where <strong>the</strong> first argument is ‘request’) and on methods (where <strong>the</strong> first argument is ‘self’, and <strong>the</strong>second argument is ‘request’). Unfortunately, flaws were discovered in <strong>the</strong> code supporting this: it only works inlimited circumstances, and produces errors that are very difficult to debug when it does not work.820 Chapter 9. Release notes
<strong>Django</strong> <strong>Documentation</strong>, Release 1.2For this reason, <strong>the</strong> ‘auto adapt’ behavior has been removed, and if you are using <strong>the</strong>se decorators on methods, youwill need to manually apply django.utils.decorators.method_decorator() to convert <strong>the</strong> decoratorto one that works with methods. For example, you would change code from this:class MyClass(object):to this:@login_requireddef my_view(self, request):passfrom django.utils.decorators import method_decoratorclass MyClass(object):or:@method_decorator(login_required)def my_view(self, request):passfrom django.utils.decorators import method_decoratorlogin_required_m = method_decorator(login_required)class MyClass(object):@login_required_mdef my_view(self, request):passFor those of you who’ve been following <strong>the</strong> development trunk, this change also applies to o<strong>the</strong>r decoratorsintroduced since 1.1, including csrf_protect, cache_control and anything created usingdecorator_from_middleware.if tag changes Due to new features in <strong>the</strong> if template tag, it no longer accepts ‘and’, ‘or’ and ‘not’ as valid variablenames. Previously, <strong>the</strong>se strings could be used as variable names. Now, <strong>the</strong> keyword status is always enforced, andtemplate code such as {% if not %} or {% if and %} will throw a TemplateSyntaxError. Also, in isa new keyword and so is not a valid variable name in this tag.LazyObject LazyObject is an undocumented-but-often-used utility class used for lazily wrapping o<strong>the</strong>r objectsof unknown type.In <strong>Django</strong> 1.1 and earlier, it handled introspection in a non-standard way, depending on wrapped objects implementinga public method named get_all_members(). Since this could easily lead to name clashes, it has been changed touse <strong>the</strong> standard Python introspection method, involving __members__ and __dir__().If you used LazyObject in your own code and implemented <strong>the</strong> get_all_members() method for wrappedobjects, you’ll need to make a couple of changes:First, if your class does not have special requirements for introspection (i.e., you have not implemented__getattr__() or o<strong>the</strong>r methods that allow for attributes not discoverable by normal mechanisms), you can simplyremove <strong>the</strong> get_all_members() method. The default implementation on LazyObject will do <strong>the</strong> right thing.If you have more complex requirements for introspection, first rename <strong>the</strong> get_all_members() method to__dir__(). This is <strong>the</strong> standard introspection method for Python 2.6 and above. If you require support for Pythonversions earlier than 2.6, add <strong>the</strong> following code to <strong>the</strong> class:9.1. Final releases 821
<strong>Django</strong> <strong>Documentation</strong>, Release 1.2__members__ = property(lambda self: self.__dir__())__dict__ on model instances Historically, <strong>the</strong> __dict__ attribute of a model instance has only contained attributescorresponding to <strong>the</strong> fields on a model.In order to support multiple database configurations, <strong>Django</strong> 1.2 has added a _state attribute to object instances.This attribute will appear in __dict__ for a model instance. If your code relies on iterating over __dict__ toobtain a list of fields, you must now be prepared to handle or filter out <strong>the</strong> _state attribute.Test runner exit status code The exit status code of <strong>the</strong> test runners (tests/runtests.py and pythonmanage.py test) no longer represents <strong>the</strong> number of failed tests, because a failure of 256 or more tests resultedin a wrong exit status code. The exit status code for <strong>the</strong> test runner is now 0 for success (no failing tests) and 1 for anynumber of test failures. If needed, <strong>the</strong> number of test failures can be found at <strong>the</strong> end of <strong>the</strong> test runner’s output.Cookie encoding To fix bugs with cookies in Internet Explorer, Safari, and possibly o<strong>the</strong>r browsers, our encodingof cookie values was changed so that <strong>the</strong> comma and semicolon are treated as non-safe characters, and are <strong>the</strong>reforeencoded as \054 and \073 respectively. This could produce backwards incompatibilities, especially if you are storingcomma or semi-colon in cookies and have javascript code that parses and manipulates cookie values client-side.ModelForm.is_valid() and ModelForm.errors Much of <strong>the</strong> validation work for ModelForms hasbeen moved down to <strong>the</strong> model level. As a result, <strong>the</strong> first time you call ModelForm.is_valid(), accessModelForm.errors or o<strong>the</strong>rwise trigger form validation, your model will be cleaned in-place. This conversionused to happen when <strong>the</strong> model was saved. If you need an unmodified instance of your model, you should pass a copyto <strong>the</strong> ModelForm constructor.BooleanField on MySQL In previous versions of <strong>Django</strong>, a model’s BooleanField under MySQL wouldreturn its value as ei<strong>the</strong>r 1 or 0, instead of True or False; for most people this wasn’t a problem because bool is asubclass of int in Python. In <strong>Django</strong> 1.2, however, BooleanField on MySQL correctly returns a real bool. Theonly time this should ever be an issue is if you were expecting <strong>the</strong> repr of a BooleanField to print 1 or 0.Changes to <strong>the</strong> interpretation of max_num in FormSets As part of enhancements made to <strong>the</strong> handling of Form-Sets, <strong>the</strong> default value and interpretation of <strong>the</strong> max_num parameter to <strong>the</strong> django.forms.formsets.formset_factory()and django.forms.models.modelformset_factory() functions has changed slightly. This change also affects <strong>the</strong> way <strong>the</strong>max_num argument is used for inline admin objectsPreviously, <strong>the</strong> default value for max_num was 0 (zero). FormSets <strong>the</strong>n used <strong>the</strong> boolean value of max_num todetermine if a limit was to be imposed on <strong>the</strong> number of generated forms. The default value of 0 meant that <strong>the</strong>re wasno default limit on <strong>the</strong> number of forms in a FormSet.Starting with 1.2, <strong>the</strong> default value for max_num has been changed to None, and FormSets will differentiate betweena value of None and a value of 0. A value of None indicates that no limit on <strong>the</strong> number of forms is to be imposed; avalue of 0 indicates that a maximum of 0 forms should be imposed. This doesn’t necessarily mean that no forms willbe displayed – see <strong>the</strong> ModelFormSet documentation for more details.If you were manually specifying a value of 0 for max_num, you will need to update your FormSet and/or admindefinitions.See Also:JavaScript-assisted handling of inline related objects in <strong>the</strong> admin822 Chapter 9. Release notes
<strong>Django</strong> <strong>Documentation</strong>, Release 1.2email_re An undocumented regular expression for validating email addresses has been moved fromdjango.form.fields to django.core.validators. You will need to update your imports if you are usingit.Features deprecated in 1.2Finally, <strong>Django</strong> 1.2 deprecates some features from earlier releases. These features are still supported, but will begradually phased out over <strong>the</strong> next few release cycles.Code taking advantage of any of <strong>the</strong> features below will raise a PendingDeprecationWarning in <strong>Django</strong> 1.2.This warning will be silent by default, but may be turned on using Python’s warnings module, or by running Pythonwith a -Wd or -Wall flag.In <strong>Django</strong> 1.3, <strong>the</strong>se warnings will become a DeprecationWarning, which is not silent. In <strong>Django</strong> 1.4 supportfor <strong>the</strong>se features will be removed entirely.See Also:For more details, see <strong>the</strong> documentation <strong>Django</strong>’s release process and our deprecation timeline.‘Specifying databases Prior to <strong>Django</strong> 1.2, <strong>Django</strong> used a number of settings to control access to a single database.<strong>Django</strong> 1.2 introduces support for multiple databases, and as a result <strong>the</strong> way you define database settings has changed.Any existing <strong>Django</strong> settings file will continue to work as expected until <strong>Django</strong> 1.4. Until <strong>the</strong>n, old-style databasesettings will be automatically translated to <strong>the</strong> new-style format.In <strong>the</strong> old-style (pre 1.2) format, you had a number of DATABASE_ settings in your settings file. For example:DATABASE_NAME = ’test_db’DATABASE_ENGINE = ’postgresql_psycopg2’DATABASE_USER = ’myusername’DATABASE_PASSWORD = ’s3krit’These settings are now in a dictionary named DATABASES. Each item in <strong>the</strong> dictionary corresponds to a singledatabase connection, with <strong>the</strong> name ’default’ describing <strong>the</strong> default database connection. The setting names havealso been shortened. The previous sample settings would now look like this:DATABASES = {’default’: {’NAME’: ’test_db’,’ENGINE’: ’django.db.backends.postgresql_psycopg2’,’USER’: ’myusername’,’PASSWORD’: ’s3krit’,}}This affects <strong>the</strong> following settings:9.1. Final releases 823
<strong>Django</strong> <strong>Documentation</strong>, Release 1.2Old settingDATABASE_ENGINEDATABASE_HOSTDATABASE_NAMEDATABASE_OPTIONSDATABASE_PASSWORDDATABASE_PORTDATABASE_USERTEST_DATABASE_CHARSETTEST_DATABASE_COLLATIONTEST_DATABASE_NAMENew SettingENGINEHOSTNAMEOPTIONSPASSWORDPORTUSERTEST_CHARSETTEST_COLLATIONTEST_NAMEThese changes are also required if you have manually created a database connection using DatabaseWrapper()from your database backend of choice.In addition to <strong>the</strong> change in structure, <strong>Django</strong> 1.2 removes <strong>the</strong> special handling for <strong>the</strong> built-in databasebackends. All database backends must now be specified by a fully qualified module name (i.e.,django.db.backends.postgresql_psycopg2, ra<strong>the</strong>r than just postgresql_psycopg2).postgresql database backend The psycopg1 library has not been updated since October 2005. As a result,<strong>the</strong> postgresql database backend, which uses this library, has been deprecated.If you are currently using <strong>the</strong> postgresql backend, you should migrate to using <strong>the</strong> postgresql_psycopg2backend. To update your code, install <strong>the</strong> psycopg2 library and change <strong>the</strong> DATABASE_ENGINE setting to usedjango.db.backends.postgresql_psycopg2.CSRF response-rewriting middleware CsrfResponseMiddleware, <strong>the</strong> middleware that automatically insertedCSRF tokens into POST forms in outgoing pages, has been deprecated in favor of a template tag method(see above), and will be removed completely in <strong>Django</strong> 1.4. CsrfMiddleware, which includes <strong>the</strong> functionality ofCsrfResponseMiddleware and CsrfViewMiddleware, has likewise been deprecated.Also, <strong>the</strong> CSRF module has moved from contrib to core, and <strong>the</strong> old imports are deprecated, as described in <strong>the</strong>upgrading notes.SMTPConnection The SMTPConnection class has been deprecated in favor of a generic e-mail backend API.Old code that explicitly instantiated an instance of an SMTPConnection:from django.core.mail import SMTPConnectionconnection = SMTPConnection()messages = get_notification_email()connection.send_messages(messages)...should now call get_connection() to instantiate a generic e-mail connection:from django.core.mail import get_connectionconnection = get_connection()messages = get_notification_email()connection.send_messages(messages)Depending on <strong>the</strong> value of <strong>the</strong> EMAIL_BACKEND setting, this may not return an SMTP connection. If you explicitlyrequire an SMTP connection with which to send e-mail, you can explicitly request an SMTP connection:from django.core.mail import get_connectionconnection = get_connection(’django.core.mail.backends.smtp.EmailBackend’)messages = get_notification_email()connection.send_messages(messages)824 Chapter 9. Release notes
<strong>Django</strong> <strong>Documentation</strong>, Release 1.2If your call to construct an instance of SMTPConnection required additional arguments, those arguments can bepassed to <strong>the</strong> get_connection() call:connection = get_connection(’django.core.mail.backends.smtp.EmailBackend’, hostname=’localhost’, portUser Messages API The API for storing messages in <strong>the</strong> user Message model (viauser.message_set.create) is now deprecated and will be removed in <strong>Django</strong> 1.4 according to <strong>the</strong>standard release process.To upgrade your code, you need to replace any instances of this:user.message_set.create(’a message’)...with <strong>the</strong> following:from django.contrib import messagesmessages.add_message(request, messages.INFO, ’a message’)Additionally, if you make use of <strong>the</strong> method, you need to replace <strong>the</strong> following:for message in user.get_and_delete_messages():......with:from django.contrib import messagesfor message in messages.get_messages(request):...For more information, see <strong>the</strong> full messages documentation. You should begin to update your code to use <strong>the</strong> new APIimmediately.Date format helper functions django.utils.translation.get_date_formats() anddjango.utils.translation.get_partial_date_formats() have been deprecated in favor of<strong>the</strong> appropriate calls to django.utils.formats.get_format(), which is locale-aware when USE_L10N isset to True, and falls back to default settings if set to False.To get <strong>the</strong> different date formats, instead of writing this:from django.utils.translation import get_date_formatsdate_format, datetime_format, time_format = get_date_formats()...use:from django.utils import formatsdate_format = formats.get_format(’DATE_FORMAT’)datetime_format = formats.get_format(’DATETIME_FORMAT’)time_format = formats.get_format(’TIME_FORMAT’)Or, when directly formatting a date value:from django.utils import formatsvalue_formatted = formats.date_format(value, ’DATETIME_FORMAT’)The same applies to <strong>the</strong> globals found in django.forms.fields:• DEFAULT_DATE_INPUT_FORMATS• DEFAULT_TIME_INPUT_FORMATS9.1. Final releases 825
<strong>Django</strong> <strong>Documentation</strong>, Release 1.2• DEFAULT_DATETIME_INPUT_FORMATSUse django.utils.formats.get_format() to get <strong>the</strong> appropriate formats.Function-based test runners <strong>Django</strong> 1.2 changes <strong>the</strong> test runner tools to use a class-based approach. Old stylefunction-based test runners will still work, but should be updated to use <strong>the</strong> new class-based runners.Feed in django.contrib.syndication.feeds The django.contrib.syndication.feeds.Feedclass has been replaced by <strong>the</strong> django.contrib.syndication.views.Feed class. The old feeds.Feedclass is deprecated, and will be removed in <strong>Django</strong> 1.4.The new class has an almost identical API, but allows instances to be used as views. For example, consider <strong>the</strong> use of<strong>the</strong> old framework in <strong>the</strong> following URLconf :from django.conf.urls.defaults import *from myproject.feeds import LatestEntries, LatestEntriesByCategoryfeeds = {’latest’: LatestEntries,’categories’: LatestEntriesByCategory,}urlpatterns = patterns(’’,# ...(r’^feeds/(?P.*)/$’, ’django.contrib.syndication.views.feed’,{’feed_dict’: feeds}),# ...)Using <strong>the</strong> new Feed class, <strong>the</strong>se feeds can be deployed directly as views:from django.conf.urls.defaults import *from myproject.feeds import LatestEntries, LatestEntriesByCategoryurlpatterns = patterns(’’,# ...(r’^feeds/latest/$’, LatestEntries()),(r’^feeds/categories/(?P\d+)/$’, LatestEntriesByCategory()),# ...)If you currently use <strong>the</strong> feed() view, <strong>the</strong> LatestEntries class would often not need to be modified apart fromsubclassing <strong>the</strong> new Feed class. The exception is if <strong>Django</strong> was automatically working out <strong>the</strong> name of <strong>the</strong> templateto use to render <strong>the</strong> feed’s description and title elements (if you were not specifying <strong>the</strong> title_templateand description_template attributes). You should ensure that you always specify title_template anddescription_template attributes, or provide item_title() and item_description() methods.However, LatestEntriesByCategory uses <strong>the</strong> get_object() method with <strong>the</strong> bits argument to specify aspecific category to show. In <strong>the</strong> new Feed class, get_object() method takes a request and arguments from<strong>the</strong> URL, so it would look like this:from django.contrib.syndication.views import Feedfrom django.shortcuts import get_object_or_404from myproject.models import Categoryclass LatestEntriesByCategory(Feed):def get_object(self, request, category_id):return get_object_or_404(Category, id=category_id)826 Chapter 9. Release notes
<strong>Django</strong> <strong>Documentation</strong>, Release 1.2# ...Additionally, <strong>the</strong> get_feed() method on Feed classes now take different arguments, which may impact you if youuse <strong>the</strong> Feed classes directly. Instead of just taking an optional url argument, it now takes two arguments: <strong>the</strong> objectreturned by its own get_object() method, and <strong>the</strong> current request object.To take into account Feed classes not being initialized for each request, <strong>the</strong> __init__() method now takes noarguments by default. Previously it would have taken <strong>the</strong> slug from <strong>the</strong> URL and <strong>the</strong> request object.In accordance with RSS best practices, RSS feeds will now include an atom:link element. You may need to updateyour tests to take this into account.For more information, see <strong>the</strong> full syndication framework documentation.Technical message IDs Up to version 1.1 <strong>Django</strong> used technical message IDs to provide localizers <strong>the</strong> possibility totranslate date and time formats. They were translatable translation strings that could be recognized because <strong>the</strong>y wereall upper case (for example DATETIME_FORMAT, DATE_FORMAT, TIME_FORMAT). They have been deprecated infavor of <strong>the</strong> new Format localization infrastructure that allows localizers to specify that information in a formats.pyfile in <strong>the</strong> corresponding django/conf/locale// directory.Geo<strong>Django</strong> To allow support for multiple databases, <strong>the</strong> Geo<strong>Django</strong> database internals were changed substantially.The largest backwards-incompatible change is that <strong>the</strong> module django.contrib.gis.db.backend was renamedto django.contrib.gis.db.backends, where <strong>the</strong> full-fledged spatial database backends now exist.The following sections provide information on <strong>the</strong> most-popular APIs that were affected by <strong>the</strong>se changes.SpatialBackend Prior to <strong>the</strong> creation of <strong>the</strong> separate spatial backends, <strong>the</strong>django.contrib.gis.db.backend.SpatialBackend object was provided as an abstraction to introspecton <strong>the</strong> capabilities of <strong>the</strong> spatial database. All of <strong>the</strong> attributes and routines provided by SpatialBackendare now a part of <strong>the</strong> ops attribute of <strong>the</strong> database backend.The old module django.contrib.gis.db.backend is still provided for backwards-compatibility access to aSpatialBackend object, which is just an alias to <strong>the</strong> ops module of <strong>the</strong> default spatial database connection.Users that were relying on undocumented modules and objects within django.contrib.gis.db.backend,ra<strong>the</strong>r <strong>the</strong> abstractions provided by SpatialBackend, are required to modify <strong>the</strong>ir code. For example, <strong>the</strong> followingimport which would work in 1.1 and below:from django.contrib.gis.db.backend.postgis import PostGISAdaptorWould need to be changed:from django.db import connectionPostGISAdaptor = connection.ops.AdapterSpatialRefSys and GeometryColumns models In previous versions of Geo<strong>Django</strong>,django.contrib.gis.db.models had SpatialRefSys and GeometryColumns models for querying<strong>the</strong> OGC spatial metadata tables spatial_ref_sys and geometry_columns, respectively.While <strong>the</strong>se aliases are still provided, <strong>the</strong>y are only for <strong>the</strong> default database connection and exist only if <strong>the</strong> defaultconnection is using a supported spatial database backend.Note: Because <strong>the</strong> table structure of <strong>the</strong> OGC spatial metadata tables differs across spatial databases, <strong>the</strong>SpatialRefSys and GeometryColumns models can no longer be associated with <strong>the</strong> gis application name.Thus, no models will be returned when using <strong>the</strong> get_models method in <strong>the</strong> following example:9.1. Final releases 827
<strong>Django</strong> <strong>Documentation</strong>, Release 1.2>>> from django.db.models import get_app, get_models>>> get_models(get_app(’gis’))[]To get <strong>the</strong> correct SpatialRefSys and GeometryColumns for your spatial database use <strong>the</strong> methods providedby <strong>the</strong> spatial backend:>>> from django.db import connections>>> SpatialRefSys = connections[’my_spatialite’].ops.spatial_ref_sys()>>> GeometryColumns = connections[’my_postgis’].ops.geometry_columns()Note: When using <strong>the</strong> models returned from <strong>the</strong> spatial_ref_sys() and geometry_columns() method,you’ll still need to use <strong>the</strong> correct database alias when querying on <strong>the</strong> non-default connection. In o<strong>the</strong>r words, toensure that <strong>the</strong> models in <strong>the</strong> example above use <strong>the</strong> correct database:sr_qs = SpatialRefSys.objects.using(’my_spatialite’).filter(...)gc_qs = GeometryColumns.objects.using(’my_postgis’).filter(...)Language code no The currently used language code for Norwegian Bokmål no is being replaced by <strong>the</strong> morecommon language code nb.9.1.2 1.1 release<strong>Django</strong> 1.1.2 release notesWelcome to <strong>Django</strong> 1.1.2!This is <strong>the</strong> second “bugfix” release in <strong>the</strong> <strong>Django</strong> 1.1 series, improving <strong>the</strong> stability and performance of <strong>the</strong> <strong>Django</strong>1.1 codebase.<strong>Django</strong> 1.1.2 maintains backwards compatibility with <strong>Django</strong> 1.1.0, but contain a number of fixes and o<strong>the</strong>r improvements.<strong>Django</strong> 1.1.2 is a recommended upgrade for any development or deployment currently using or targeting<strong>Django</strong> 1.1.For full details on <strong>the</strong> new features, backwards incompatibilities, and deprecated features in <strong>the</strong> 1.1 branch, see <strong>the</strong><strong>Django</strong> 1.1 release notes.Backwards-incompatible changes in 1.1.2Test runner exit status code The exit status code of <strong>the</strong> test runners (tests/runtests.py and pythonmanage.py test) no longer represents <strong>the</strong> number of failed tests, since a failure of 256 or more tests resultedin a wrong exit status code. The exit status code for <strong>the</strong> test runner is now 0 for success (no failing tests) and 1 for anynumber of test failures. If needed, <strong>the</strong> number of test failures can be found at <strong>the</strong> end of <strong>the</strong> test runner’s output.Cookie encoding To fix bugs with cookies in Internet Explorer, Safari, and possibly o<strong>the</strong>r browsers, our encodingof cookie values was changed so that <strong>the</strong> characters comma and semi-colon are treated as non-safe characters, andare <strong>the</strong>refore encoded as \054 and \073 respectively. This could produce backwards incompatibilities, especially ifyou are storing comma or semi-colon in cookies and have javascript code that parses and manipulates cookie valuesclient-side.828 Chapter 9. Release notes
<strong>Django</strong> <strong>Documentation</strong>, Release 1.2One new featureOrdinarily, a point release would not include new features, but in <strong>the</strong> case of <strong>Django</strong> 1.1.2, we have made an exceptionto this rule. <strong>Django</strong> 1.2 (<strong>the</strong> next major release of <strong>Django</strong>) will contain a feature that will improve protection againstCross-Site Request Forgery (CSRF) attacks. This feature requires <strong>the</strong> use of a new csrf_token template tag in allforms that <strong>Django</strong> renders.To make it easier to support both 1.1.X and 1.2.X versions of <strong>Django</strong> with <strong>the</strong> same templates, we have decided tointroduce <strong>the</strong> csrf_token template tag to <strong>the</strong> 1.1.X branch. In <strong>the</strong> 1.1.X branch, csrf_token does nothing - ithas no effect on templates or form processing. However, it means that <strong>the</strong> same template will work with <strong>Django</strong> 1.2.<strong>Django</strong> 1.1 release notesJuly 29, 2009Welcome to <strong>Django</strong> 1.1!<strong>Django</strong> 1.1 includes a number of nifty new features, lots of bug fixes, and an easy upgrade path from <strong>Django</strong> 1.0.Backwards-incompatible changes in 1.1<strong>Django</strong> has a policy of API stability. This means that, in general, code you develop against <strong>Django</strong> 1.0 should continueto work against 1.1 unchanged. However, we do sometimes make backwards-incompatible changes if <strong>the</strong>y’re necessaryto resolve bugs, and <strong>the</strong>re are a handful of such (minor) changes between <strong>Django</strong> 1.0 and <strong>Django</strong> 1.1.Before upgrading to <strong>Django</strong> 1.1 you should double-check that <strong>the</strong> following changes don’t impact you, and upgradeyour code if <strong>the</strong>y do.Changes to constraint names <strong>Django</strong> 1.1 modifies <strong>the</strong> method used to generate database constraint names so thatnames are consistent regardless of machine word size. This change is backwards incompatible for some users.If you are using a 32-bit platform, you’re off <strong>the</strong> hook; you’ll observe no differences as a result of this change.However, users on 64-bit platforms may experience some problems using <strong>the</strong> reset management command. Priorto this change, 64-bit platforms would generate a 64-bit, 16 character digest in <strong>the</strong> constraint name; for example:ALTER TABLE myapp_sometable ADD CONSTRAINT object_id_refs_id_5e8f10c132091d1e FOREIGN KEY ...Following this change, all platforms, regardless of word size, will generate a 32-bit, 8 character digest in <strong>the</strong> constraintname; for example:ALTER TABLE myapp_sometable ADD CONSTRAINT object_id_refs_id_32091d1e FOREIGN KEY ...As a result of this change, you will not be able to use <strong>the</strong> reset management command on any table made by a 64-bitmachine. This is because <strong>the</strong> <strong>the</strong> new generated name will not match <strong>the</strong> historically generated name; as a result, <strong>the</strong>SQL constructed by <strong>the</strong> reset command will be invalid.If you need to reset an application that was created with 64-bit constraints, you will need to manually drop <strong>the</strong> oldconstraint prior to invoking reset.Test cases are now run in a transaction <strong>Django</strong> 1.1 runs tests inside a transaction, allowing better test performance(see test performance improvements for details).This change is slightly backwards incompatible if existing tests need to test transactional behavior, if <strong>the</strong>y rely oninvalid assumptions about <strong>the</strong> test environment, or if <strong>the</strong>y require a specific test case ordering.9.1. Final releases 829
<strong>Django</strong> <strong>Documentation</strong>, Release 1.2For <strong>the</strong>se cases, TransactionTestCase can be used instead. This is a just a quick fix to get around test caseerrors revealed by <strong>the</strong> new rollback approach; in <strong>the</strong> long-term tests should be rewritten to correct <strong>the</strong> test case.Removed SetRemoteAddrFromForwardedFor middleware For convenience, <strong>Django</strong> 1.0 included an optionalmiddleware class – django.middleware.http.SetRemoteAddrFromForwardedFor – which updated<strong>the</strong> value of REMOTE_ADDR based on <strong>the</strong> HTTP X-Forwarded-For header commonly set by some proxyconfigurations.It has been demonstrated that this mechanism cannot be made reliable enough for general-purpose use, and that(despite documentation to <strong>the</strong> contrary) its inclusion in <strong>Django</strong> may lead application developers to assume that <strong>the</strong>value of REMOTE_ADDR is “safe” or in some way reliable as a source of au<strong>the</strong>ntication.While not directly a security issue, we’ve decided to remove this middleware with <strong>the</strong> <strong>Django</strong> 1.1 release. It has beenreplaced with a class that does nothing o<strong>the</strong>r than raise a DeprecationWarning.If you’ve been relying on this middleware, <strong>the</strong> easiest upgrade path is:• Examine <strong>the</strong> code as it existed before it was removed.• Verify that it works correctly with your upstream proxy, modifying it to support your particular proxy (if necessary).• Introduce your modified version of SetRemoteAddrFromForwardedFor as a piece of middleware in yourown project.Names of uploaded files are available later In <strong>Django</strong> 1.0, files uploaded and stored in a model’s FileFieldwere saved to disk before <strong>the</strong> model was saved to <strong>the</strong> database. This meant that <strong>the</strong> actual file name assigned to <strong>the</strong>file was available before saving. For example, it was available in a model’s pre-save signal handler.In <strong>Django</strong> 1.1 <strong>the</strong> file is saved as part of saving <strong>the</strong> model in <strong>the</strong> database, so <strong>the</strong> actual file name used on disk cannotbe relied on until after <strong>the</strong> model has been saved.Changes to how model formsets are saved In <strong>Django</strong> 1.1, BaseModelFormSet now callsModelForm.save().This is backwards-incompatible if you were modifying self.initial in a model formset’s __init__, or ifyou relied on <strong>the</strong> internal _total_form_count or _initial_form_count attributes of BaseFormSet. Thoseattributes are now public methods.Fixed <strong>the</strong> join filter’s escaping behavior<strong>the</strong> connector.The join filter no longer escapes <strong>the</strong> literal value that is passed in forThis is backwards incompatible for <strong>the</strong> special situation of <strong>the</strong> literal string containing one of <strong>the</strong> five special HTMLcharacters. Thus, if you were writing {{ foo|join:"&" }}, you now have to write {{ foo|join:"&"}}.The previous behavior was a bug and contrary to what was documented and expected.Permanent redirects and <strong>the</strong> redirect_to() generic view <strong>Django</strong> 1.1 adds a permanent argument to <strong>the</strong>django.views.generic.simple.redirect_to() view. This is technically backwards-incompatible if youwere using <strong>the</strong> redirect_to view with a format-string key called ‘permanent’, which is highly unlikely.830 Chapter 9. Release notes
<strong>Django</strong> <strong>Documentation</strong>, Release 1.2Features deprecated in 1.1One feature has been marked as deprecated in <strong>Django</strong> 1.1:• You should no longer use AdminSite.root() to register that admin views. That is, if your URLconf contains<strong>the</strong> line:(r’^admin/(.*)’, admin.site.root),You should change it to read:(r’^admin/’, include(admin.site.urls)),You should begin to remove use of this feature from your code immediately.AdminSite.root will raise a PendingDeprecationWarning if used in <strong>Django</strong> 1.1. This warning is hiddenby default. In <strong>Django</strong> 1.2, this warning will be upgraded to a DeprecationWarning, which will be displayedloudly. <strong>Django</strong> 1.3 will remove AdminSite.root() entirely.For more details on our deprecation policies and strategy, see <strong>Django</strong>’s release process.What’s new in <strong>Django</strong> 1.1Quite a bit: since <strong>Django</strong> 1.0, we’ve made 1,290 code commits, fixed 1,206 bugs, and added roughly 10,000 lines ofdocumentation.The major new features in <strong>Django</strong> 1.1 are:ORM improvements Two major enhancements have been added to <strong>Django</strong>’s object-relational mapper (ORM): aggregatesupport, and query expressions.Aggregate support It’s now possible to run SQL aggregate queries (i.e. COUNT(), MAX(), MIN(), etc.) fromwithin <strong>Django</strong>’s ORM. You can choose to ei<strong>the</strong>r return <strong>the</strong> results of <strong>the</strong> aggregate directly, or else annotate <strong>the</strong> objectsin a QuerySet with <strong>the</strong> results of <strong>the</strong> aggregate query.This feature is available as new QuerySet.aggregate()‘() and QuerySet.annotate()‘() methods, andis covered in detail in <strong>the</strong> ORM aggregation documentation.Query expressions Queries can now refer to a ano<strong>the</strong>r field on <strong>the</strong> query and can traverse relationships to refer tofields on related models. This is implemented in <strong>the</strong> new F object; for full details, including examples, consult <strong>the</strong>documentation for F expressions.Model improvementsA number of features have been added to <strong>Django</strong>’s model layer:“Unmanaged” models You can now control whe<strong>the</strong>r or not <strong>Django</strong> manages <strong>the</strong> life-cycle of <strong>the</strong> database tables fora model using <strong>the</strong> managed model option. This defaults to True, meaning that <strong>Django</strong> will create <strong>the</strong> appropriatedatabase tables in syncdb and remove <strong>the</strong>m as part of <strong>the</strong> reset command. That is, <strong>Django</strong> manages <strong>the</strong> databasetable’s lifecycle.If you set this to False, however, no database table creating or deletion will be automatically performed for thismodel. This is useful if <strong>the</strong> model represents an existing table or a database view that has been created by some o<strong>the</strong>rmeans.For more details, see <strong>the</strong> documentation for <strong>the</strong> managed option.9.1. Final releases 831
<strong>Django</strong> <strong>Documentation</strong>, Release 1.2Proxy models You can now create proxy models: subclasses of existing models that only add Python-level (ra<strong>the</strong>rthan database-level) behavior and aren’t represented by a new table. That is, <strong>the</strong> new model is a proxy for someunderlying model, which stores all <strong>the</strong> real data.All <strong>the</strong> details can be found in <strong>the</strong> proxy models documentation. This feature is similar on <strong>the</strong> surface to unmanagedmodels, so <strong>the</strong> documentation has an explanation of how proxy models differ from unmanaged models.Deferred fields In some complex situations, your models might contain fields which could contain a lot of data (forexample, large text fields), or require expensive processing to convert <strong>the</strong>m to Python objects. If you know you don’tneed those particular fields, you can now tell <strong>Django</strong> not to retrieve <strong>the</strong>m from <strong>the</strong> database.You’ll do this with <strong>the</strong> new queryset methods defer() and only().Testing improvementsA few notable improvements have been made to <strong>the</strong> testing framework.Test performance improvements Tests written using <strong>Django</strong>’s testing framework now run dramatically faster (asmuch as 10 times faster in many cases).This was accomplished through <strong>the</strong> introduction of transaction-based tests: when using django.test.TestCase,your tests will now be run in a transaction which is rolled back when finished, instead of by flushing and re-populating<strong>the</strong> database. This results in an immense speedup for most types of unit tests. See <strong>the</strong> documentation for TestCaseand TransactionTestCase for a full description, and some important notes on database support.Test client improvementsA couple of small – but highly useful – improvements have been made to <strong>the</strong> test client:• The test Client now can automatically follow redirects with <strong>the</strong> follow argument to Client.get() andClient.post(). This makes testing views that issue redirects simpler.• It’s now easier to get at <strong>the</strong> template context in <strong>the</strong> response returned <strong>the</strong> test client: you’ll simply access <strong>the</strong>context as request.context[key]. The old way, which treats request.context as a list of contexts,one for each rendered template in <strong>the</strong> inheritance chain, is still available if you need it.New admin features<strong>Django</strong> 1.1 adds a couple of nifty new features to <strong>Django</strong>’s admin interface:Editable fields on <strong>the</strong> change list You can now make fields editable on <strong>the</strong> admin list views via <strong>the</strong> new list_editableadmin option. These fields will show up as form widgets on <strong>the</strong> list pages, and can be edited and saved in bulk.Admin “actions” You can now define admin actions that can perform some action to a group of models in bulk.Users will be able to select objects on <strong>the</strong> change list page and <strong>the</strong>n apply <strong>the</strong>se bulk actions to all selected objects.<strong>Django</strong> ships with one pre-defined admin action to delete a group of objects in one fell swoop.Conditional view processing <strong>Django</strong> now has much better support for conditional view processing using <strong>the</strong> standardETag and Last-Modified HTTP headers. This means you can now easily short-circuit view processing bytesting less-expensive conditions. For many views this can lead to a serious improvement in speed and reduction inbandwidth.832 Chapter 9. Release notes
<strong>Django</strong> <strong>Documentation</strong>, Release 1.2URL namespaces<strong>Django</strong> 1.1 improves named URL patterns with <strong>the</strong> introduction of URL “namespaces.”In short, this feature allows <strong>the</strong> same group of URLs, from <strong>the</strong> same application, to be included in a <strong>Django</strong> URLConfmultiple times, with varying (and potentially nested) named prefixes which will be used when performing reverseresolution. In o<strong>the</strong>r words, reusable applications like <strong>Django</strong>’s admin interface may be registered multiple timeswithout URL conflicts.For full details, see <strong>the</strong> documentation on defining URL namespaces.Geo<strong>Django</strong> In <strong>Django</strong> 1.1, Geo<strong>Django</strong> (i.e. django.contrib.gis) has several new features:• Support for SpatiaLite – a spatial database for SQLite – as a spatial backend.• Geographic aggregates (Collect, Extent, MakeLine, Union) and F expressions.• New GeoQuerySet methods: collect, geojson, and snap_to_grid.• A new list interface methods for GEOSGeometry objects.For more details, see <strong>the</strong> Geo<strong>Django</strong> documentation.O<strong>the</strong>r improvementsO<strong>the</strong>r new features and changes introduced since <strong>Django</strong> 1.0 include:• The CSRF protection middleware has been split into two classes – CsrfViewMiddleware checksincoming requests, and CsrfResponseMiddleware processes outgoing responses. The combinedCsrfMiddleware class (which does both) remains for backwards-compatibility, but using <strong>the</strong> split classes isnow recommended in order to allow fine-grained control of when and where <strong>the</strong> CSRF processing takes place.• reverse() and code which uses it (e.g., <strong>the</strong> {% url %} template tag) now works with URLs in <strong>Django</strong>’sadministrative site, provided that <strong>the</strong> admin URLs are set up via include(admin.site.urls) (sendingadmin requests to <strong>the</strong> admin.site.root view still works, but URLs in <strong>the</strong> admin will not be “reversible”when configured this way).• The include() function in <strong>Django</strong> URLconf modules can now accept sequences of URL patterns (generatedby patterns()) in addition to module names.• Instances of <strong>Django</strong> forms (see <strong>the</strong> forms overview) now have two additional methods, hidden_fields()and visible_fields(), which return <strong>the</strong> list of hidden – i.e., – and visiblefields on <strong>the</strong> form, respectively.• The redirect_to generic view (see <strong>the</strong> generic views documentation) now accepts an additional keywordargument permanent. If permanent is True, <strong>the</strong> view will emit an HTTP permanent redirect (status code301). If False, <strong>the</strong> view will emit an HTTP temporary redirect (status code 302).• A new database lookup type – week_day – has been added for DateField and DateTimeField. Thistype of lookup accepts a number between 1 (Sunday) and 7 (Saturday), and returns objects where <strong>the</strong> field valuematches that day of <strong>the</strong> week. See <strong>the</strong> full list of lookup types for details.• The {% for %} tag in <strong>Django</strong>’s template language now accepts an optional {% empty %} clause, to bedisplayed when {% for %} is asked to loop over an empty sequence. See <strong>the</strong> list of built-in template tags forexamples of this.• The dumpdata management command now accepts individual model names as arguments, allowing you toexport <strong>the</strong> data just from particular models.• There’s a new safeseq template filter which works just like safe for lists, marking each item in <strong>the</strong> list assafe.• Cache backends now support incr() and decr() commands to increment and decrement <strong>the</strong> value of a cachekey. On cache backends that support atomic increment/decrement – most notably, <strong>the</strong> memcached backend –<strong>the</strong>se operations will be atomic, and quite fast.9.1. Final releases 833
<strong>Django</strong> <strong>Documentation</strong>, Release 1.2• <strong>Django</strong> now can easily delegate au<strong>the</strong>ntication to <strong>the</strong> Web server via a new au<strong>the</strong>ntication backend that supports<strong>the</strong> standard REMOTE_USER environment variable used for this purpose.• There’s a new django.shortcuts.redirect() function that makes it easier to issue redirects given anobject, a view name, or a URL.• The postgresql_psycopg2 backend now supports native PostgreSQL autocommit. This is an advanced,PostgreSQL-specific feature, that can make certain read-heavy applications a good deal faster.What’s next?We’ll take a short break, and <strong>the</strong>n work on <strong>Django</strong> 1.2 will begin – no rest for <strong>the</strong> weary! If you’d like to help, discussionof <strong>Django</strong> development, including progress toward <strong>the</strong> 1.2 release, takes place daily on <strong>the</strong> django-developersmailing list:• http://groups.google.com/group/django-developers... and in <strong>the</strong> #django-dev IRC channel on irc.freenode.net. Feel free to join <strong>the</strong> discussions!<strong>Django</strong>’s online documentation also includes pointers on how to contribute to <strong>Django</strong>:• How to contribute to <strong>Django</strong>Contributions on any level – developing code, writing documentation or simply triaging tickets and helping to testproposed bugfixes – are always welcome and appreciated.And that’s <strong>the</strong> way it is.9.1.3 1.0 release<strong>Django</strong> 1.0.2 release notesWelcome to <strong>Django</strong> 1.0.2!This is <strong>the</strong> second “bugfix” release in <strong>the</strong> <strong>Django</strong> 1.0 series, improving <strong>the</strong> stability and performance of <strong>the</strong> <strong>Django</strong>1.0 codebase. As such, <strong>Django</strong> 1.0.2 contains no new features (and, pursuant to our compatibility policy, maintainsbackwards compatibility with <strong>Django</strong> 1.0.0), but does contain a number of fixes and o<strong>the</strong>r improvements. <strong>Django</strong>1.0.2 is a recommended upgrade for any development or deployment currently using or targeting <strong>Django</strong> 1.0.Fixes and improvements in <strong>Django</strong> 1.0.2The primary reason behind this release is to remedy an issue in <strong>the</strong> recently-released <strong>Django</strong> 1.0.1; <strong>the</strong> packagingscripts used for <strong>Django</strong> 1.0.1 omitted some directories from <strong>the</strong> final release package, including one directory requiredby django.contrib.gis and part of <strong>Django</strong>’s unit-test suite.<strong>Django</strong> 1.0.2 contains updated packaging scripts, and <strong>the</strong> release package contains <strong>the</strong> directories omitted from <strong>Django</strong>1.0.1. As such, this release contains all of <strong>the</strong> fixes and improvements from <strong>Django</strong> 1.0.1; see <strong>the</strong> <strong>Django</strong> 1.0.1 releasenotes for details.Additionally, in <strong>the</strong> period since <strong>Django</strong> 1.0.1 was released:• Updated Hebrew and Danish translations have been added.• The default __repr__ method of <strong>Django</strong> models has been made more robust in <strong>the</strong> face of bad Unicodedata coming from <strong>the</strong> __unicode__ method; ra<strong>the</strong>r than raise an exception in such cases, repr() will nowcontain <strong>the</strong> string “[Bad Unicode data]” in place of <strong>the</strong> invalid Unicode.834 Chapter 9. Release notes
<strong>Django</strong> <strong>Documentation</strong>, Release 1.2• A bug involving <strong>the</strong> interaction of <strong>Django</strong>’s SafeUnicode class and <strong>the</strong> MySQL adapter has been resolved;SafeUnicode instances (generated, for example, by template rendering) can now be assigned to model attributesand saved to MySQL without requiring an explicit intermediate cast to unicode.• A bug affecting filtering on a nullable DateField in SQLite has been resolved.• Several updates and improvements have been made to <strong>Django</strong>’s documentation.<strong>Django</strong> 1.0.1 release notesWelcome to <strong>Django</strong> 1.0.1!This is <strong>the</strong> first “bugfix” release in <strong>the</strong> <strong>Django</strong> 1.0 series, improving <strong>the</strong> stability and performance of <strong>the</strong> <strong>Django</strong>1.0 codebase. As such, <strong>Django</strong> 1.0.1 contains no new features (and, pursuant to our compatibility policy, maintainsbackwards compatibility with <strong>Django</strong> 1.0), but does contain a number of fixes and o<strong>the</strong>r improvements. <strong>Django</strong> 1.0.1is a recommended upgrade for any development or deployment currently using or targeting <strong>Django</strong> 1.0.Fixes and improvements in <strong>Django</strong> 1.0.1<strong>Django</strong> 1.0.1 contains over two hundred fixes to <strong>the</strong> original <strong>Django</strong> 1.0 codebase; full details of every fix are availablein <strong>the</strong> Subversion log of <strong>the</strong> 1.0.X branch, but here are some of <strong>the</strong> highlights:• Several fixes in django.contrib.comments, pertaining to RSS feeds of comments, default ordering ofcomments and <strong>the</strong> XHTML and internationalization of <strong>the</strong> default templates for comments.• Multiple fixes for <strong>Django</strong>’s support of Oracle databases, including pagination support for GIS QuerySets, moreefficient slicing of results and improved introspection of existing databases.• Several fixes for query support in <strong>the</strong> <strong>Django</strong> object-relational mapper, including repeated setting and resettingof ordering and fixes for working with INSERT-only queries.• Multiple fixes for inline forms in formsets.• Multiple fixes for unique and unique_toge<strong>the</strong>r model constraints in automatically-generated forms.• Fixed support for custom callable upload_to declarations when handling file uploads through automaticallygeneratedforms.• Fixed support for sorting an admin change list based on a callable attributes in list_display.• A fix to <strong>the</strong> application of autoescaping for literal strings passed to <strong>the</strong> join template filter. Previously, literalstrings passed to join were automatically escaped, contrary to <strong>the</strong> documented behavior for autoescaping andliteral strings. Literal strings passed to join are no longer automatically escaped, meaning you must nowmanually escape <strong>the</strong>m; this is an incompatibility if you were relying on this bug, but not if you were relying onescaping behaving as documented.• Improved and expanded translation files for many of <strong>the</strong> languages <strong>Django</strong> supports by default.• And as always, a large number of improvements to <strong>Django</strong>’s documentation, including both corrections toexisting documents and expanded and new documentation.<strong>Django</strong> 1.0 release notesWelcome to <strong>Django</strong> 1.0!We’ve been looking forward to this moment for over three years, and it’s finally here. <strong>Django</strong> 1.0 represents a <strong>the</strong>largest milestone in <strong>Django</strong>’s development to date: a Web framework that a group of perfectionists can truly be proudof.9.1. Final releases 835
<strong>Django</strong> <strong>Documentation</strong>, Release 1.2<strong>Django</strong> 1.0 represents over three years of community development as an Open Source project. <strong>Django</strong>’s receivedcontributions from hundreds of developers, been translated into fifty languages, and today is used by developers onevery continent and in every kind of job.An interesting historical note: when <strong>Django</strong> was first released in July 2005, <strong>the</strong> initial released version of <strong>Django</strong> camefrom an internal repository at revision number 8825. <strong>Django</strong> 1.0 represents revision 8961 of our public repository. Itseems fitting that our 1.0 release comes at <strong>the</strong> moment where community contributions overtake those made privately.Stability and forwards-compatibilityThe release of <strong>Django</strong> 1.0 comes with a promise of API stability and forwards-compatibility. In a nutshell, this meansthat code you develop against <strong>Django</strong> 1.0 will continue to work against 1.1 unchanged, and you should need to makeonly minor changes for any 1.X release.See <strong>the</strong> API stability guide for full details.Backwards-incompatible changes<strong>Django</strong> 1.0 has a number of backwards-incompatible changes from <strong>Django</strong> 0.96. If you have apps written against<strong>Django</strong> 0.96 that you need to port, see our detailed porting guide:Porting your apps from <strong>Django</strong> 0.96 to 1.0<strong>Django</strong> 1.0 breaks compatibility with 0.96 in some areas.This guide will help you port 0.96 projects and apps to 1.0. The first part of this document includes <strong>the</strong> commonchanges needed to run with 1.0. If after going through <strong>the</strong> first part your code still breaks, check <strong>the</strong> section LesscommonChanges for a list of a bunch of less-common compatibility issues.See Also:The 1.0 release notes. That document explains <strong>the</strong> new features in 1.0 more deeply; <strong>the</strong> porting guide is more concernedwith helping you quickly update your code.Common changesThis section describes <strong>the</strong> changes between 0.96 and 1.0 that most users will need to make.Use Unicode Change string literals (’foo’) into Unicode literals (u’foo’). <strong>Django</strong> now uses Unicode stringsthroughout. In most places, raw strings will continue to work, but updating to use Unicode literals will prevent someobscure problems.See Unicode data for full details.ModelsCommon changes to your models file:Rename maxlength to max_lengthto be consistent with form fields):Rename your maxlength argument to max_length (this was changedReplace __str__ with __unicode__ Replace your model’s __str__ function with a __unicode__method, and make sure you use Unicode (u’foo’) in that method.Remove prepopulated_from Remove <strong>the</strong> prepopulated_from argument on model fields. It’s no longervalid and has been moved to <strong>the</strong> ModelAdmin class in admin.py. See <strong>the</strong> admin, below, for more details aboutchanges to <strong>the</strong> admin.836 Chapter 9. Release notes
<strong>Django</strong> <strong>Documentation</strong>, Release 1.2Remove core Remove <strong>the</strong> core argument from your model fields. It is no longer necessary, since <strong>the</strong> equivalentfunctionality (part of inline editing) is handled differently by <strong>the</strong> admin interface now. You don’t have to worry aboutinline editing until you get to <strong>the</strong> admin section, below. For now, remove all references to core.Replace class Admin: with admin.py Remove all your inner class Admin declarations from your models.They won’t break anything if you leave <strong>the</strong>m, but <strong>the</strong>y also won’t do anything. To register apps with <strong>the</strong> adminyou’ll move those declarations to an admin.py file; see <strong>the</strong> admin below for more details.See Also:A contributor to djangosnippets has written a script that’ll scan your models.py and generate a corresponding admin.py.ExampleBelow is an example models.py file with all <strong>the</strong> changes you’ll need to make:Old (0.96) models.py:class Author(models.Model):first_name = models.CharField(maxlength=30)last_name = models.CharField(maxlength=30)slug = models.CharField(maxlength=60, prepopulate_from=(’first_name’, ’last_name’))class Admin:list_display = [’first_name’, ’last_name’]def __str__(self):return ’%s %s’ % (self.first_name, self.last_name)New (1.0) models.py:class Author(models.Model):first_name = models.CharField(max_length=30)last_name = models.CharField(max_length=30)slug = models.CharField(max_length=60)def __unicode__(self):return u’%s %s’ % (self.first_name, self.last_name)New (1.0) admin.py:from django.contrib import adminfrom models import Authorclass AuthorAdmin(admin.ModelAdmin):list_display = [’first_name’, ’last_name’]prepopulated_fields = {’slug’: (’first_name’, ’last_name’)}admin.site.register(Author, AuthorAdmin)The Admin One of <strong>the</strong> biggest changes in 1.0 is <strong>the</strong> new admin. The <strong>Django</strong> administrative interface(django.contrib.admin) has been completely refactored; admin definitions are now completely decoupled frommodel definitions, <strong>the</strong> framework has been rewritten to use <strong>Django</strong>’s new form-handling library and redesigned wi<strong>the</strong>xtensibility and customization in mind.Practically, this means you’ll need to rewrite all of your class Admin declarations. You’ve already seen in modelsabove how to replace your class Admin with a admin.site.register() call in an admin.py file. Beloware some more details on how to rewrite that Admin declaration into <strong>the</strong> new syntax.9.1. Final releases 837
<strong>Django</strong> <strong>Documentation</strong>, Release 1.2Use new inline syntaxOld (0.96):The new edit_inline options have all been moved to admin.py. Here’s an example:class Parent(models.Model):...class Child(models.Model):parent = models.ForeignKey(Parent, edit_inline=models.STACKED, num_in_admin=3)New (1.0):class ChildInline(admin.StackedInline):model = Childextra = 3class ParentAdmin(admin.ModelAdmin):model = Parentinlines = [ChildInline]admin.site.register(Parent, ParentAdmin)See InlineModelAdmin objects for more details.Simplify fields, or use fieldsets The old fields syntax was quite confusing, and has been simplified. Theold syntax still works, but you’ll need to use fieldsets instead.Old (0.96):class ModelOne(models.Model):...class Admin:fields = ((None, {’fields’: (’foo’,’bar’)}),)class ModelTwo(models.Model):...class Admin:fields = ((’group1’, {’fields’: (’foo’,’bar’), ’classes’: ’collapse’}),(’group2’, {’fields’: (’spam’,’eggs’), ’classes’: ’collapse wide’}),)New (1.0):class ModelOneAdmin(admin.ModelAdmin):fields = (’foo’, ’bar’)class ModelTwoAdmin(admin.ModelAdmin):fieldsets = ((’group1’, {’fields’: (’foo’,’bar’), ’classes’: ’collapse’}),(’group2’, {’fields’: (’spam’,’eggs’), ’classes’: ’collapse wide’}),)See Also:838 Chapter 9. Release notes
<strong>Django</strong> <strong>Documentation</strong>, Release 1.2• More detailed information about <strong>the</strong> changes and <strong>the</strong> reasons behind <strong>the</strong>m can be found on <strong>the</strong> NewformsAdminBranchwiki page• The new admin comes with a ton of new features; you can read about <strong>the</strong>m in <strong>the</strong> admin documentation.URLsUpdate your root urls.pyOld (0.96) urls.py:If you’re using <strong>the</strong> admin site, you need to update your root urls.py.from django.conf.urls.defaults import *urlpatterns = patterns(’’,(r’^admin/’, include(’django.contrib.admin.urls’)),)# ... <strong>the</strong> rest of your URLs here ...New (1.0) urls.py:from django.conf.urls.defaults import *# The next two lines enable <strong>the</strong> admin and load each admin.py file:from django.contrib import adminadmin.autodiscover()urlpatterns = patterns(’’,(r’^admin/(.*)’, admin.site.root),)# ... <strong>the</strong> rest of your URLs here ...ViewsUse django.forms instead of newforms Replace django.newforms with django.forms – <strong>Django</strong> 1.0renamed <strong>the</strong> newforms module (introduced in 0.96) to plain old forms. The oldforms module was also removed.If you’re already using <strong>the</strong> newforms library, and you used our recommended import statement syntax, all youhave to do is change your import statements.Old:from django import newforms as formsNew:from django import formsIf you’re using <strong>the</strong> old forms system (formerly known as django.forms and django.oldforms), you’ll haveto rewrite your forms. A good place to start is <strong>the</strong> forms documentationHandle uploaded files using <strong>the</strong> new API Replace use of uploaded files – that is, entries in request.FILES –as simple dictionaries with <strong>the</strong> new UploadedFile. The old dictionary syntax no longer works.Thus, in a view like:9.1. Final releases 839
<strong>Django</strong> <strong>Documentation</strong>, Release 1.2def my_view(request):f = request.FILES[’file_field_name’]......you’d need to make <strong>the</strong> following changes:Old (0.96) New (1.0)f[’content’] f.read()f[’filename’] f.namef[’content-type’] f.content_typeWork with file fields using <strong>the</strong> new API The internal implementation of django.db.models.FileFieldhave changed. A visible result of this is that <strong>the</strong> way you access special attributes (URL, filename, image size, etc) of<strong>the</strong>se model fields has changed. You will need to make <strong>the</strong> following changes, assuming your model’s FileFieldis called myfile:Old (0.96) New (1.0)myfile.get_content_filename() myfile.content.pathmyfile.get_content_url() myfile.content.urlmyfile.get_content_size() myfile.content.sizemyfile.save_content_file() myfile.content.save()myfile.get_content_width() myfile.content.widthmyfile.get_content_height() myfile.content.heightNote that <strong>the</strong> width and height attributes only make sense for ImageField fields. More details can be found in<strong>the</strong> model API documentation.Use Paginator instead of ObjectPaginator The ObjectPaginator in 0.96 has been removed and replacedwith an improved version, django.core.paginator.Paginator.TemplatesLearn to love autoescaping By default, <strong>the</strong> template system now automatically HTML-escapes <strong>the</strong> output of everyvariable. To learn more, see Automatic HTML escaping.To disable auto-escaping for an individual variable, use <strong>the</strong> safe filter:This will be escaped: {{ data }}This will not be escaped: {{ data|safe }}To disable auto-escaping for an entire template, wrap <strong>the</strong> template (or just a particular section of <strong>the</strong> template) in <strong>the</strong>autoescape tag:{% autoescape off %}... unescaped template content here ...{% endautoescape %}Less-common changes The following changes are smaller, more localized changes. They should only affect moreadvanced users, but it’s probably worth reading through <strong>the</strong> list and checking your code for <strong>the</strong>se things.840 Chapter 9. Release notes
<strong>Django</strong> <strong>Documentation</strong>, Release 1.2Signals• Add **kwargs to any registered signal handlers.• Connect, disconnect, and send signals via methods on <strong>the</strong> Signal object instead of through module methodsin django.dispatch.dispatcher.• Remove any use of <strong>the</strong> Anonymous and Any sender options; <strong>the</strong>y no longer exist. You can still receive signalssent by any sender by using sender=None• Make any custom signals you’ve declared into instances of django.dispatch.Signal instead of anonymousobjects.Here’s quick summary of <strong>the</strong> code changes you’ll need to make:Old (0.96) New (1.0)def callback(sender)def callback(sender, **kwargs)sig = object()sig = django.dispatch.Signal()dispatcher.connect(callback, sig)sig.connect(callback)dispatcher.send(sig, sender)sig.send(sender)dispatcher.connect(callback, sig,sender=Any)sig.connect(callback,sender=None)Comments If you were using <strong>Django</strong> 0.96’s django.contrib.comments app, you’ll need to upgrade to <strong>the</strong>new comments app introduced in 1.0. See Upgrading from <strong>Django</strong>’s previous comment system for details.Template tagsspaceless tagsingle space.The spaceless template tag now removes all spaces between HTML tags, instead of preserving aLocal flavorsU.S. local flavor django.contrib.localflavor.usa has been renamed todjango.contrib.localflavor.us. This change was made to match <strong>the</strong> naming scheme of o<strong>the</strong>r localflavors. To migrate your code, all you need to do is change <strong>the</strong> imports.SessionsGetting a new session key SessionBase.get_new_session_key() has been renamed to_get_new_session_key(). get_new_session_object() no longer exists.FixturesLoading a row no longer calls save() Previously, loading a row automatically ran <strong>the</strong> model’s save() method.This is no longer <strong>the</strong> case, so any fields (for example: timestamps) that were auto-populated by a save() now needexplicit values in any fixture.Settings9.1. Final releases 841
<strong>Django</strong> <strong>Documentation</strong>, Release 1.2Better exceptions The old EnvironmentError has split into an ImportError when <strong>Django</strong> fails to find <strong>the</strong>settings module and a RuntimeError when you try to reconfigure settings after having already used <strong>the</strong>mLOGIN_URL has moved The LOGIN_URL constant moved from django.contrib.auth into <strong>the</strong>settings module. Instead of using from django.contrib.auth import LOGIN_URL refer tosettings.LOGIN_URL.APPEND_SLASH behavior has been updated In 0.96, if a URL didn’t end in a slash or have a period in <strong>the</strong> finalcomponent of its path, and APPEND_SLASH was True, <strong>Django</strong> would redirect to <strong>the</strong> same URL, but with a slashappended to <strong>the</strong> end. Now, <strong>Django</strong> checks to see whe<strong>the</strong>r <strong>the</strong> pattern without <strong>the</strong> trailing slash would be matched bysomething in your URL patterns. If so, no redirection takes place, because it is assumed you deliberately wanted tocatch that pattern.For most people, this won’t require any changes. Some people, though, have URL patterns that look like this:r’/some_prefix/(.*)$’Previously, those patterns would have been redirected to have a trailing slash. If you always want a slash on suchURLs, rewrite <strong>the</strong> pattern as:r’/some_prefix/(.*/)$’Smaller model changesDifferent exception from get()AssertionError:Old (0.96):try:Model.objects.get(...)except AssertionError:handle_<strong>the</strong>_error()Managers now return a MultipleObjectsReturned exception instead ofNew (1.0):try:Model.objects.get(...)except Model.MultipleObjectsReturned:handle_<strong>the</strong>_error()LazyDate has been firedThe LazyDate helper class no longer exists.Default field values and query arguments can both be callable objects, so instances of LazyDate can be replacedwith a reference to datetime.datetime.now:Old (0.96):class Article(models.Model):title = models.CharField(maxlength=100)published = models.DateField(default=LazyDate())New (1.0):842 Chapter 9. Release notes
<strong>Django</strong> <strong>Documentation</strong>, Release 1.2import datetimeclass Article(models.Model):title = models.CharField(max_length=100)published = models.DateField(default=datetime.datetime.now)DecimalField is new, and FloatField is now a proper float Old (0.96):class MyModel(models.Model):field_name = models.FloatField(max_digits=10, decimal_places=3)...New (1.0):class MyModel(models.Model):field_name = models.DecimalField(max_digits=10, decimal_places=3)...If you forget to make this change, you will see errors about FloatField not taking a max_digits attribute in__init__, because <strong>the</strong> new FloatField takes no precision-related arguments.If you’re using MySQL or PostgreSQL, no fur<strong>the</strong>r changes are needed.DecimalField are <strong>the</strong> same as for <strong>the</strong> old FloatField.The database column types forIf you’re using SQLite, you need to force <strong>the</strong> database to view <strong>the</strong> appropriate columns as decimal types, ra<strong>the</strong>r thanfloats. To do this, you’ll need to reload your data. Do this after you have made <strong>the</strong> change to using DecimalFieldin your code and updated <strong>the</strong> <strong>Django</strong> code.Warning: Back up your database first!For SQLite, this means making a copy of <strong>the</strong> single file that stores <strong>the</strong> database (<strong>the</strong> name of that file is <strong>the</strong>DATABASE_NAME in your settings.py file).To upgrade each application to use a DecimalField, you can do <strong>the</strong> following, replacing in <strong>the</strong> code belowwith each app’s name:$ ./manage.py dumpdata --format=xml > data-dump.xml$ ./manage.py reset $ ./manage.py loaddata data-dump.xmlNotes:1. It’s important that you remember to use XML format in <strong>the</strong> first step of this process. We are exploiting a featureof <strong>the</strong> XML data dumps that makes porting floats to decimals with SQLite possible.2. In <strong>the</strong> second step you will be asked to confirm that you are prepared to lose <strong>the</strong> data for <strong>the</strong> application(s) inquestion. Say yes; we’ll restore this data in <strong>the</strong> third step, of course.3. DecimalField is not used in any of <strong>the</strong> apps shipped with <strong>Django</strong> prior to this change being made, so youdo not need to worry about performing this procedure for any of <strong>the</strong> standard <strong>Django</strong> models.If something goes wrong in <strong>the</strong> above process, just copy your backed up database file over <strong>the</strong> original file and startagain.Internationalization9.1. Final releases 843
<strong>Django</strong> <strong>Documentation</strong>, Release 1.2django.views.i18n.set_language() now requires a POST request Previously, a GET request wasused. The old behavior meant that state (<strong>the</strong> locale used to display <strong>the</strong> site) could be changed by a GET request,which is against <strong>the</strong> HTTP specification’s recommendations. Code calling this view must ensure that a POST requestis now made, instead of a GET. This means you can no longer use a link to access <strong>the</strong> view, but must use a formsubmission of some kind (e.g. a button)._() is no longer in builtins _() (<strong>the</strong> callable object whose name is a single underscore) is no longer monkeypatchedinto builtins – that is, it’s no longer available magically in every module.If you were previously relying on _() always being present, you should now explicitly import ugettext orugettext_lazy, if appropriate, and alias it to _ yourself:from django.utils.translation import ugettext as _HTTP request/response objectsDictionary access to HttpRequest HttpRequest objects no longer directly support dictionary-style access;previously, both GET and POST data were directly available on <strong>the</strong> HttpRequest object (e.g.,you could check for a piece of form data by using if ’some_form_key’ in request or by readingrequest[’some_form_key’]. This is no longer supported; if you need access to <strong>the</strong> combined GET and POSTdata, use request.REQUEST instead.It is strongly suggested, however, that you always explicitly look in <strong>the</strong> appropriate dictionary for <strong>the</strong> type of requestyou expect to receive (request.GET or request.POST); relying on <strong>the</strong> combined request.REQUESTdictionary can mask <strong>the</strong> origin of incoming data.Accessing HTTPResponse headers django.http.HttpResponse.headers has been renamed to_headers and HttpResponse now supports containment checking directly. So use if header inresponse: instead of if header in response.headers:.Generic relationsGeneric relations have been moved out of core The generic relation classes – GenericForeignKey andGenericRelation – have moved into <strong>the</strong> django.contrib.contenttypes module.Testingdjango.test.Client.login() has changed Old (0.96):from django.test import Clientc = Client()c.login(’/path/to/login’,’myuser’,’mypassword’)New (1.0):# ... same as above, but <strong>the</strong>n:c.login(username=’myuser’, password=’mypassword’)Management commands844 Chapter 9. Release notes
<strong>Django</strong> <strong>Documentation</strong>, Release 1.2Running management commands from your codedjango.core.management has been greatly refactored.Calls to management services in your code now need to use call_command. For example, if you have some testcode that calls flush and load_data:from django.core import managementmanagement.flush(verbosity=0, interactive=False)management.load_data([’test_data’], verbosity=0)...you’ll need to change this code to read:from django.core import managementmanagement.call_command(’flush’, verbosity=0, interactive=False)management.call_command(’loaddata’, ’test_data’, verbosity=0)Subcommands must now precede optionsprecede options. So:django-admin.py and manage.py now require subcommands to$ django-admin.py --settings=foo.bar runserver...no longer works and should be changed to:$ django-admin.py runserver --settings=foo.barSyndicationFeed.__init__ has changed The __init__() method of <strong>the</strong> syndication framework’s Feed class now takesan HttpRequest object as its second parameter, instead of <strong>the</strong> feed’s URL. This allows <strong>the</strong> syndication frameworkto work without requiring <strong>the</strong> sites framework. This only affects code that subclasses Feed and overrides <strong>the</strong>__init__() method, and code that calls Feed.__init__() directly.Data structuresSortedDictFromList is gone django.newforms.forms.SortedDictFromList was removed.django.utils.datastructures.SortedDict can now be instantiated with a sequence of tuples.To update your code:1. Use django.utils.datastructures.SortedDict wherever you were usingdjango.newforms.forms.SortedDictFromList.2. Because django.utils.datastructures.SortedDict.copy() doesn’t return a deepcopy asSortedDictFromList.copy() did, you will need to update your code if you were relying on a deepcopy.Do this by using copy.deepcopy directly.Database backend functionsDatabase backend functions have been renamed Almost all of <strong>the</strong> database backend-level functions have beenrenamed and/or relocated. None of <strong>the</strong>se were documented, but you’ll need to change your code if you’re using anyof <strong>the</strong>se functions, all of which are in django.db:Old (0.96) New (1.0)Continued on next page9.1. Final releases 845
<strong>Django</strong> <strong>Documentation</strong>, Release 1.2Table 9.1 – continued from previous pagebackend.get_autoinc_sqlconnection.ops.autoinc_sqlbackend.get_date_extract_sql connection.ops.date_extract_sqlbackend.get_date_trunc_sqlconnection.ops.date_trunc_sqlbackend.get_datetime_cast_sql connection.ops.datetime_cast_sqlbackend.get_deferrable_sqlconnection.ops.deferrable_sqlbackend.get_drop_foreignkey_sql connection.ops.drop_foreignkey_sqlbackend.get_fulltext_search_sql connection.ops.fulltext_search_sqlbackend.get_last_insert_idconnection.ops.last_insert_idbackend.get_limit_offset_sql connection.ops.limit_offset_sqlbackend.get_max_name_length connection.ops.max_name_lengthbackend.get_pk_default_value connection.ops.pk_default_valuebackend.get_random_function_sql connection.ops.random_function_sqlbackend.get_sql_flushconnection.ops.sql_flushbackend.get_sql_sequence_reset connection.ops.sequence_reset_sqlbackend.get_start_transaction_sql connection.ops.start_transaction_sqlbackend.get_tablespace_sqlconnection.ops.tablespace_sqlbackend.quote_nameconnection.ops.quote_namebackend.get_query_set_class connection.ops.query_set_classbackend.get_field_cast_sqlconnection.ops.field_cast_sqlbackend.get_drop_sequenceconnection.ops.drop_sequence_sqlbackend.OPERATOR_MAPPINGconnection.operatorsbackend.allows_group_by_ordinal connection.features.allows_group_by_ordinalbackend.allows_unique_and_pkconnection.features.allows_unique_and_pkbackend.autoindexes_primary_keys connection.features.autoindexes_primary_keysbackend.needs_datetime_string_cast connection.features.needs_datetime_string_castbackend.needs_upper_for_iopsconnection.features.needs_upper_for_iopsbackend.supports_constraintsconnection.features.supports_constraintsbackend.supports_tablespacesconnection.features.supports_tablespacesbackend.uses_case_insensitive_names connection.features.uses_case_insensitive_namesbackend.uses_custom_querysetconnection.features.uses_custom_querysetA complete list of backwards-incompatible changes can be found at http://code.djangoproject.com/wiki/BackwardsIncompatibleChangesWhat’s new in <strong>Django</strong> 1.0A lot!Since <strong>Django</strong> 0.96, we’ve made over 4,000 code commits, fixed more than 2,000 bugs, and edited, added, or removedaround 350,000 lines of code. We’ve also added 40,000 lines of new documentation, and greatly improved what wasalready <strong>the</strong>re.In fact, new documentation is one of our favorite features of <strong>Django</strong> 1.0, so we might as well start <strong>the</strong>re. First, <strong>the</strong>re’sa new documentation site:http://docs.djangoproject.com/The documentation has been greatly improved, cleaned up, and generally made awesome. There’s now dedicatedsearch, indexes, and more.We can’t possibly document everything that’s new in 1.0, but <strong>the</strong> documentation will be your definitive guide. Anywhereyou see something like: New in version 1.0: This feature is new in <strong>Django</strong> 1.0 You’ll know that you’re lookingat something new or changed.The o<strong>the</strong>r major highlights of <strong>Django</strong> 1.0 are:846 Chapter 9. Release notes
<strong>Django</strong> <strong>Documentation</strong>, Release 1.2Re-factored admin application The <strong>Django</strong> administrative interface (django.contrib.admin) has been completelyrefactored; admin definitions are now completely decoupled from model definitions (no more class Admindeclaration in models!), rewritten to use <strong>Django</strong>’s new form-handling library (introduced in <strong>the</strong> 0.96 release asdjango.newforms, and now available as simply django.forms) and redesigned with extensibility and customizationin mind. Full documentation for <strong>the</strong> admin application is available online in <strong>the</strong> official <strong>Django</strong> documentation:See <strong>the</strong> admin reference for detailsImproved Unicode handling <strong>Django</strong>’s internals have been refactored to use Unicode throughout; this drasticallysimplifies <strong>the</strong> task of dealing with non-Western-European content and data in <strong>Django</strong>. Additionally, utility functionshave been provided to ease interoperability with third-party libraries and systems which may or may not handle Unicodegracefully. Details are available in <strong>Django</strong>’s Unicode-handling documentation.See Unicode data.An improved ORM <strong>Django</strong>’s object-relational mapper – <strong>the</strong> component which provides <strong>the</strong> mapping between<strong>Django</strong> model classes and your database, and which mediates your database queries – has been dramatically improvedby a massive refactoring. For most users of <strong>Django</strong> this is backwards-compatible; <strong>the</strong> public-facing API fordatabase querying underwent a few minor changes, but most of <strong>the</strong> updates took place in <strong>the</strong> ORM’s internals. Aguide to <strong>the</strong> changes, including backwards-incompatible modifications and mentions of new features opened up bythis refactoring, is available on <strong>the</strong> <strong>Django</strong> wiki.Automatic escaping of template variables To provide improved security against cross-site scripting (XSS) vulnerabilities,<strong>Django</strong>’s template system now automatically escapes <strong>the</strong> output of variables. This behavior is configurable,and allows both variables and larger template constructs to be marked as safe (requiring no escaping) or unsafe (requiringescaping). A full guide to this feature is in <strong>the</strong> documentation for <strong>the</strong> autoescape tag.django.contrib.gis (Geo<strong>Django</strong>) A project over a year in <strong>the</strong> making, this adds world-class GIS (GeographicInformation Systems) support to <strong>Django</strong>, in <strong>the</strong> form of a contrib application. Its documentation is currently beingmaintained externally, and will be merged into <strong>the</strong> main <strong>Django</strong> documentation shortly. Huge thanks go to JustinBronn, Jeremy Dunck, Brett Hoerner and Travis Pinney for <strong>the</strong>ir efforts in creating and completing this feature.See http://geodjango.org/ for details.Pluggable file storage <strong>Django</strong>’s built-in FileField and ImageField now can take advantage of pluggablefile-storage backends, allowing extensive customization of where and how uploaded files get stored by <strong>Django</strong>. Fordetails, see <strong>the</strong> files documentation; big thanks go to Marty Alchin for putting in <strong>the</strong> hard work to get this completed.Jython compatibility Thanks to a lot of work from Leo Soto during a Google Summer of Code project, <strong>Django</strong>’scodebase has been refactored to remove incompatibilities with Jython, an implementation of Python written in Java,which runs Python code on <strong>the</strong> Java Virtual Machine. <strong>Django</strong> is now compatible with <strong>the</strong> forthcoming Jython 2.5release.See Running <strong>Django</strong> on Jython.Generic relations in forms and admin Classes are now included in django.contrib.contenttypes whichcan be used to support generic relations in both <strong>the</strong> admin interface and in end-user forms. See <strong>the</strong> documentation forgeneric relations for details.9.1. Final releases 847
<strong>Django</strong> <strong>Documentation</strong>, Release 1.2INSERT/UPDATE distinction Although <strong>Django</strong>’s default behavior of having a model’s save() method automaticallydetermine whe<strong>the</strong>r to perform an INSERT or an UPDATE at <strong>the</strong> SQL level is suitable for <strong>the</strong> majority of cases,<strong>the</strong>re are occasional situations where forcing one or <strong>the</strong> o<strong>the</strong>r is useful. As a result, models can now support anadditional parameter to save() which can force a specific operation.See Forcing an INSERT or UPDATE for details.Split CacheMiddleware <strong>Django</strong>’s CacheMiddleware has been split into three classes: CacheMiddlewareitself still exists and retains all of its previous functionality, but it is now built from two separate middleware classeswhich handle <strong>the</strong> two parts of caching (inserting into and reading from <strong>the</strong> cache) separately, offering additionalflexibility for situations where combining <strong>the</strong>se functions into a single middleware posed problems.Full details, including updated notes on appropriate use, are in <strong>the</strong> caching documentation.Refactored django.contrib.comments As part of a Google Summer of Code project, Thejaswi Puthrayacarried out a major rewrite and refactoring of <strong>Django</strong>’s bundled comment system, greatly increasing its flexibilityand customizability. Full documentation is available, as well as an upgrade guide if you were using <strong>the</strong> previousincarnation of <strong>the</strong> comments application.Removal of deprecated features A number of features and methods which had previously been marked as deprecated,and which were scheduled for removal prior to <strong>the</strong> 1.0 release, are no longer present in <strong>Django</strong>. Theseinclude imports of <strong>the</strong> form library from django.newforms (now located simply at django.forms), <strong>the</strong>form_for_model and form_for_instance helper functions (which have been replaced by ModelForm) anda number of deprecated features which were replaced by <strong>the</strong> dispatcher, file-uploading and file-storage refactoringsintroduced in <strong>the</strong> <strong>Django</strong> 1.0 alpha releases.Known issuesWe’ve done our best to make <strong>Django</strong> 1.0 as solid as possible, but unfortunately <strong>the</strong>re are a couple of issues that weknow about in <strong>the</strong> release.Multi-table model inheritance with to_field If you’re using multiple table model inheritance, be aware of thiscaveat: child models using a custom parent_link and to_field will cause database integrity errors. A set ofmodels like <strong>the</strong> following are not valid:class Parent(models.Model):name = models.CharField(max_length=10)o<strong>the</strong>r_value = models.IntegerField(unique=True)class Child(Parent):fa<strong>the</strong>r = models.OneToOneField(Parent, primary_key=True, to_field="o<strong>the</strong>r_value", parent_link=True)value = models.IntegerField()This bug will be fixed in <strong>the</strong> next release of <strong>Django</strong>.Caveats with support of certain databases <strong>Django</strong> attempts to support as many features as possible on all databasebackends. However, not all database backends are alike, and in particular many of <strong>the</strong> supported database differ greatlyfrom version to version. It’s a good idea to checkout our notes on supported database:• MySQL notes• SQLite notes• Oracle notes848 Chapter 9. Release notes
<strong>Django</strong> <strong>Documentation</strong>, Release 1.29.1.4 Pre-1.0 releases<strong>Django</strong> version 0.96 release notesWelcome to <strong>Django</strong> 0.96!The primary goal for 0.96 is a cleanup and stabilization of <strong>the</strong> features introduced in 0.95. There have been a few smallbackwards-incompatible changes since 0.95, but <strong>the</strong> upgrade process should be fairly simple and should not requiremajor changes to existing applications.However, we’re also releasing 0.96 now because we have a set of backwards-incompatible changes scheduled for <strong>the</strong>near future. Once completed, <strong>the</strong>y will involve some code changes for application developers, so we recommend thatyou stick with <strong>Django</strong> 0.96 until <strong>the</strong> next official release; <strong>the</strong>n you’ll be able to upgrade in one step instead of needingto make incremental changes to keep up with <strong>the</strong> development version of <strong>Django</strong>.Backwards-incompatible changesThe following changes may require you to update your code when you switch from 0.95 to 0.96:MySQLdb version requirement Due to a bug in older versions of <strong>the</strong> MySQLdb Python module (which <strong>Django</strong> usesto connect to MySQL databases), <strong>Django</strong>’s MySQL backend now requires version 1.2.1p2 or higher of MySQLdb,and will raise exceptions if you attempt to use an older version.If you’re currently unable to upgrade your copy of MySQLdb to meet this requirement, a separate, backwardscompatiblebackend, called “mysql_old”, has been added to <strong>Django</strong>. To use this backend, change <strong>the</strong>DATABASE_ENGINE setting in your <strong>Django</strong> settings file from this:DATABASE_ENGINE = "mysql"to this:DATABASE_ENGINE = "mysql_old"However, we strongly encourage MySQL users to upgrade to a more recent version of MySQLdb as soon as possible,The “mysql_old” backend is provided only to ease this transition, and is considered deprecated; aside from anynecessary security fixes, it will not be actively maintained, and it will be removed in a future release of <strong>Django</strong>.Also, note that some features, like <strong>the</strong> new DATABASE_OPTIONS setting (see <strong>the</strong> databases documentation for details),are only available on <strong>the</strong> “mysql” backend, and will not be made available for “mysql_old”.Database constraint names changed The format of <strong>the</strong> constraint names <strong>Django</strong> generates for foreign key referenceshave changed slightly. These names are generally only used when it is not possible to put <strong>the</strong> reference directlyon <strong>the</strong> affected column, so <strong>the</strong>y are not always visible.The effect of this change is that running manage.py reset and similar commands against an existing databasemay generate SQL with <strong>the</strong> new form of constraint name, while <strong>the</strong> database itself contains constraints named in <strong>the</strong>old form; this will cause <strong>the</strong> database server to raise an error message about modifying non-existent constraints.If you need to work around this, <strong>the</strong>re are two methods available:1. Redirect <strong>the</strong> output of manage.py to a file, and edit <strong>the</strong> generated SQL to use <strong>the</strong> correct constraint namesbefore executing it.2. Examine <strong>the</strong> output of manage.py sqlall to see <strong>the</strong> new-style constraint names, and use that as a guide torename existing constraints in your database.9.1. Final releases 849
<strong>Django</strong> <strong>Documentation</strong>, Release 1.2Name changes in manage.pysupport:A few of <strong>the</strong> options to manage.py have changed with <strong>the</strong> addition of fixture• There are new dumpdata and loaddata commands which, as you might expect, will dump and load datato/from <strong>the</strong> database. These commands can operate against any of <strong>Django</strong>’s supported serialization formats.• The sqlinitialdata command has been renamed to sqlcustom to emphasize that loaddata shouldbe used for data (and sqlcustom for o<strong>the</strong>r custom SQL – views, stored procedures, etc.).• The vestigial install command has been removed. Use syncdb.Backslash escaping changed The <strong>Django</strong> database API now escapes backslashes given as query parameters. If youhave any database API code that matches backslashes, and it was working before (despite <strong>the</strong> lack of escaping), you’llhave to change your code to “unescape” <strong>the</strong> slashes one level.For example, this used to work:# Find text containing a single backslashMyModel.objects.filter(text__contains=’\\\\’)The above is now incorrect, and should be rewritten as:# Find text containing a single backslashMyModel.objects.filter(text__contains=’\\’)Removed ENABLE_PSYCO setting The ENABLE_PSYCO setting no longer exists. If your settings file includesENABLE_PSYCO it will have no effect; to use Psyco, we recommend writing a middleware class to activate it.What’s new in 0.96?This revision represents over a thousand source commits and over four hundred bug fixes, so we can’t possibly catalogall <strong>the</strong> changes. Here, we describe <strong>the</strong> most notable changes in this release.New forms library django.newforms is <strong>Django</strong>’s new form-handling library. It’s a replacement fordjango.forms, <strong>the</strong> old form/manipulator/validation framework. Both APIs are available in 0.96, but over <strong>the</strong>next two releases we plan to switch completely to <strong>the</strong> new forms system, and deprecate and remove <strong>the</strong> old system.There are three elements to this transition:• We’ve copied <strong>the</strong> current django.forms to django.oldforms. This allows you to upgrade your codenow ra<strong>the</strong>r than waiting for <strong>the</strong> backwards-incompatible change and rushing to fix your code after <strong>the</strong> fact. Justchange your import statements like this:from django import forms# 0.95-stylefrom django import oldforms as forms # 0.96-style• The next official release of <strong>Django</strong> will move <strong>the</strong> current django.newforms to django.forms. This willbe a backwards-incompatible change, and anyone still using <strong>the</strong> old version of django.forms at that timewill need to change <strong>the</strong>ir import statements as described above.• The next release after that will completely remove django.oldforms.Although <strong>the</strong> newforms library will continue to evolve, it’s ready for use for most common cases. We recommendthat anyone new to form handling skip <strong>the</strong> old forms system and start with <strong>the</strong> new.For more information about django.newforms, read <strong>the</strong> newforms documentation.850 Chapter 9. Release notes
<strong>Django</strong> <strong>Documentation</strong>, Release 1.2URLconf improvements You can now use any callable as <strong>the</strong> callback in URLconfs (previously, only strings thatreferred to callables were allowed). This allows a much more natural use of URLconfs. For example, this URLconf:from django.conf.urls.defaults import *urlpatterns = patterns(’’,(’^myview/$’, ’mysite.myapp.views.myview’))can now be rewritten as:from django.conf.urls.defaults import *from mysite.myapp.views import myviewurlpatterns = patterns(’’,(’^myview/$’, myview))One useful application of this can be seen when using decorators; this change allows you to apply decorators to viewsin your URLconf. Thus, you can make a generic view require login very easily:from django.conf.urls.defaults import *from django.contrib.auth.decorators import login_requiredfrom django.views.generic.list_detail import object_listfrom mysite.myapp.models import MyModelinfo = {"queryset" : MyModel.objects.all(),}urlpatterns = patterns(’’,(’^myview/$’, login_required(object_list), info))Note that both syntaxes (strings and callables) are valid, and will continue to be valid for <strong>the</strong> foreseeable future.The test framework <strong>Django</strong> now includes a test framework so you can start transmuting fear into boredom (withapologies to Kent Beck). You can write tests based on doctest or unittest and test your views with a simple test client.There is also new support for “fixtures” – initial data, stored in any of <strong>the</strong> supported serialization formats, that will beloaded into your database at <strong>the</strong> start of your tests. This makes testing with real data much easier.See <strong>the</strong> testing documentation for <strong>the</strong> full details.Improvements to <strong>the</strong> admin interface A small change, but a very nice one: dedicated views for adding and updatingusers have been added to <strong>the</strong> admin interface, so you no longer need to worry about working with hashed passwordsin <strong>the</strong> admin.ThanksSince 0.95, a number of people have stepped forward and taken a major new role in <strong>Django</strong>’s development. We’d liketo thank <strong>the</strong>se people for all <strong>the</strong>ir hard work:• Russell Keith-Magee and Malcolm Tredinnick for <strong>the</strong>ir major code contributions. This release wouldn’t havebeen possible without <strong>the</strong>m.• Our new release manager, James Bennett, for his work in getting out 0.95.1, 0.96, and (hopefully) future release.9.1. Final releases 851
<strong>Django</strong> <strong>Documentation</strong>, Release 1.2• Our ticket managers Chris Beaven (aka SmileyChris), Simon Greenhill, Michael Radziej, and Gary Wilson.They agreed to take on <strong>the</strong> monumental task of wrangling our tickets into nicely cataloged submission. Figuringout what to work on is now about a million times easier; thanks again, guys.• Everyone who submitted a bug report, patch or ticket comment. We can’t possibly thank everyone by name –over 200 developers submitted patches that went into 0.96 – but everyone who’s contributed to <strong>Django</strong> is listedin AUTHORS.<strong>Django</strong> version 0.95 release notesWelcome to <strong>the</strong> <strong>Django</strong> 0.95 release.This represents a significant advance in <strong>Django</strong> development since <strong>the</strong> 0.91 release in January 2006. The details ofevery change in this release would be too extensive to list in full, but a summary is presented below.Suitability and API stabilityThis release is intended to provide a stable reference point for developers wanting to work on production-level applicationsthat use <strong>Django</strong>.However, it’s not <strong>the</strong> 1.0 release, and we’ll be introducing fur<strong>the</strong>r changes before 1.0. For a clear look at which areasof <strong>the</strong> framework will change (and which ones will not change) before 1.0, see <strong>the</strong> api-stability.txt file, which lives in<strong>the</strong> docs/ directory of <strong>the</strong> distribution.You may have a need to use some of <strong>the</strong> features that are marked as “subject to API change” in that document, butthat’s OK with us as long as it’s OK with you, and as long as you understand APIs may change in <strong>the</strong> future.Fortunately, most of <strong>Django</strong>’s core APIs won’t be changing before version 1.0. There likely won’t be as big of achange between 0.95 and 1.0 versions as <strong>the</strong>re was between 0.91 and 0.95.Changes and new featuresThe major changes in this release (for developers currently using <strong>the</strong> 0.91 release) are a result of merging <strong>the</strong> ‘magicremoval’branch of development. This branch removed a number of constraints in <strong>the</strong> way <strong>Django</strong> code had to bewritten that were a consequence of decisions made in <strong>the</strong> early days of <strong>Django</strong>, prior to its open-source release. It’snow possible to write more natural, Pythonic code that works as expected, and <strong>the</strong>re’s less “black magic” happeningbehind <strong>the</strong> scenes.Aside from that, ano<strong>the</strong>r main <strong>the</strong>me of this release is a dramatic increase in usability. We’ve made countless improvementsin error messages, documentation, etc., to improve developers’ quality of life.The new features and changes introduced in 0.95 include:• <strong>Django</strong> now uses a more consistent and natural filtering interface for retrieving objects from <strong>the</strong> database.• User-defined models, functions and constants now appear in <strong>the</strong> module namespace <strong>the</strong>y were defined in. (Previouslyeverything was magically transferred to <strong>the</strong> django.models.* namespace.)• Some optional applications, such as <strong>the</strong> FlatPage, Sites and Redirects apps, have been decoupled and moved intodjango.contrib. If you don’t want to use <strong>the</strong>se applications, you no longer have to install <strong>the</strong>ir database tables.• <strong>Django</strong> now has support for managing database transactions.• We’ve added <strong>the</strong> ability to write custom au<strong>the</strong>ntication and authorization backends for au<strong>the</strong>nticating usersagainst alternate systems, such as LDAP.• We’ve made it easier to add custom table-level functions to models, through a new “Manager” API.852 Chapter 9. Release notes
<strong>Django</strong> <strong>Documentation</strong>, Release 1.2• It’s now possible to use <strong>Django</strong> without a database. This simply means that <strong>the</strong> framework no longer requires youto have a working database set up just to serve dynamic pages. In o<strong>the</strong>r words, you can just use URLconfs/viewson <strong>the</strong>ir own. Previously, <strong>the</strong> framework required that a database be configured, regardless of whe<strong>the</strong>r youactually used it.• It’s now more explicit and natural to override save() and delete() methods on models, ra<strong>the</strong>r than needing tohook into <strong>the</strong> pre_save() and post_save() method hooks.• Individual pieces of <strong>the</strong> framework now can be configured without requiring <strong>the</strong> setting of an environmentvariable. This permits use of, for example, <strong>the</strong> <strong>Django</strong> templating system inside o<strong>the</strong>r applications.• More and more parts of <strong>the</strong> framework have been internationalized, as we’ve expanded internationalization(i18n) support. The <strong>Django</strong> codebase, including code and templates, has now been translated, at least in part,into 31 languages. From Arabic to Chinese to Hungarian to Welsh, it is now possible to use <strong>Django</strong>’s admin sitein your native language.The number of changes required to port from 0.91-compatible code to <strong>the</strong> 0.95 code base are significant in some cases.However, <strong>the</strong>y are, for <strong>the</strong> most part, reasonably routine and only need to be done once. A list of <strong>the</strong> necessary changesis described in <strong>the</strong> Removing The Magic wiki page. There is also an easy checklist for reference when undertaking<strong>the</strong> porting operation.Problem reports and getting helpNeed help resolving a problem with <strong>Django</strong>? The documentation in <strong>the</strong> distribution is also available online at <strong>the</strong><strong>Django</strong> Web site. The FAQ document is especially recommended, as it contains a number of issues that come up timeand again.For more personalized help, <strong>the</strong> django-users mailing list is a very active list, with more than 2,000 subscribers whocan help you solve any sort of <strong>Django</strong> problem. We recommend you search <strong>the</strong> archives first, though, because manycommon questions appear with some regularity, and any particular problem may already have been answered.Finally, for those who prefer <strong>the</strong> more immediate feedback offered by IRC, <strong>the</strong>re’s a #django channel onirc.freenode.net that is regularly populated by <strong>Django</strong> users and developers from around <strong>the</strong> world. Friendly peopleare usually available at any hour of <strong>the</strong> day – to help, or just to chat.Thanks for using <strong>Django</strong>!The <strong>Django</strong> Team July 20069.2 Development releasesThese notes are retained for historical purposes. If you are upgrading between formal <strong>Django</strong> releases, you don’t needto worry about <strong>the</strong>se notes.9.2.1 <strong>Django</strong> 1.2 RC 1 release notesMay 5, 2010Welcome to <strong>the</strong> first <strong>Django</strong> 1.2 release candidate!This is <strong>the</strong> third – and likely last – in a series of preview/development releases leading up to <strong>the</strong> eventual release of<strong>Django</strong> 1.2. This release is targeted primarily at developers who are interested in trying out new features and testing<strong>the</strong> <strong>Django</strong> codebase to help identify and resolve any critical bugs prior to <strong>the</strong> final 1.2 release.As such, this release is not yet intended for production use, and any such use is discouraged.9.2. Development releases 853
<strong>Django</strong> <strong>Documentation</strong>, Release 1.2<strong>Django</strong> has been feature frozen since <strong>the</strong> 1.2 beta release, so this release candidate contains no new features, onlybugfixes; for a summary of features new to <strong>Django</strong> 1.2, consult <strong>the</strong> 1.2 alpha and 1.2 beta release notes.Python compatibilityWhile not a new feature, it’s important to note that <strong>Django</strong> 1.2 introduces <strong>the</strong> first shift in our Python compatibilitypolicy since <strong>Django</strong>’s initial public debut. Previous <strong>Django</strong> releases were tested and supported on 2.x Python versionsfrom 2.3 up; <strong>Django</strong> 1.2, however, drops official support for Python 2.3. As such, <strong>the</strong> minimum Python versionrequired for <strong>Django</strong> is now 2.4, and <strong>Django</strong> is tested and supported on Python 2.4, 2.5 and 2.6, and will be supportedon <strong>the</strong> as-yet-unreleased Python 2.7.This change should affect only a small number of <strong>Django</strong> users, as most operating-system vendors today are shippingPython 2.4 or newer as <strong>the</strong>ir default version. If you’re still using Python 2.3, however, you’ll need to stick to <strong>Django</strong>1.1 until you can upgrade; per our support policy, <strong>Django</strong> 1.1 will continue to receive security support until <strong>the</strong> releaseof <strong>Django</strong> 1.3.A roadmap for <strong>Django</strong>’s overall 2.x Python support, and eventual transition to Python 3.x, is currently being developed,and will be announced prior to <strong>the</strong> release of <strong>Django</strong> 1.3.The <strong>Django</strong> 1.2 roadmapAs of this release candidate, <strong>Django</strong> 1.2 is in both feature freeze and “string freeze” – all strings marked for translationin <strong>the</strong> <strong>Django</strong> codebase will retain <strong>the</strong>ir current form in <strong>the</strong> final <strong>Django</strong> 1.2 release. Only critical release-blockingbugs, documentation and updated translation files will receive attention between now and <strong>the</strong> final 1.2 release. Notethat <strong>Django</strong>’s localization infrastructure has been expanded for 1.2, and translation packages should now include aformats.py file containing data for localized formatting of numbers and dates.If no critical bugs are discovered, <strong>Django</strong> 1.2 will be released approximately one week after this release candidate, onor about May 12, 2010.What you can do to helpIn order to provide a high-quality 1.2 release, we need your help. Although this release candidate is, again, not intendedfor production use, you can help <strong>the</strong> <strong>Django</strong> team by trying out this release candidate in a safe testing environment andreporting any bugs or issues you encounter. The <strong>Django</strong> ticket tracker is <strong>the</strong> central place to search for open issues:• http://code.djangoproject.com/timelinePlease open a new ticket only if no existing ticket corresponds to a problem you’re running into.Additionally, discussion of <strong>Django</strong> development, including progress toward <strong>the</strong> 1.2 release, takes place daily on <strong>the</strong>django-developers mailing list:• http://groups.google.com/group/django-developers... and in <strong>the</strong> #django-dev IRC channel on irc.freenode.net. If you’re interested in helping out with<strong>Django</strong>’s development, feel free to join <strong>the</strong> discussions <strong>the</strong>re.<strong>Django</strong>’s online documentation also includes pointers on how to contribute to <strong>Django</strong>:• How to contribute to <strong>Django</strong>Contributions on any level – developing code, writing documentation or simply triaging tickets and helping to testproposed bugfixes – are always welcome and appreciated.854 Chapter 9. Release notes
<strong>Django</strong> <strong>Documentation</strong>, Release 1.29.2.2 <strong>Django</strong> 1.2 beta 1 release notesFebruary 5, 2010Welcome to <strong>Django</strong> 1.2 beta 1!This is <strong>the</strong> second in a series of preview/development releases leading up to <strong>the</strong> eventual release of <strong>Django</strong> 1.2,currently scheduled to take place in March 2010. This release is primarily targeted at developers who are interested intrying out new features and testing <strong>the</strong> <strong>Django</strong> codebase to help identify and resolve bugs prior to <strong>the</strong> final 1.2 release.As such, this release is not intended for production use, and any such use is discouraged.This document covers changes since <strong>the</strong> <strong>Django</strong> 1.2 alpha release; <strong>the</strong> 1.2 alpha release notes cover new and updatedfeatures in <strong>Django</strong> between 1.1 and 1.2 alpha.Deprecations and o<strong>the</strong>r changes in 1.2 betaThis beta release deprecates two portions of public API, and introduces a potentially backwards-incompatible changeto ano<strong>the</strong>r. Under our API stability policy, deprecation proceeds over multiple release cycles: initially, <strong>the</strong> deprecatedAPI will raise PendingDeprecationWarning, followed by raising DeprecationWarning in <strong>the</strong> next release,and finally removal of <strong>the</strong> deprecated API in <strong>the</strong> release after that. APIs beginning <strong>the</strong> deprecation process in<strong>Django</strong> 1.2 will be removed in <strong>the</strong> <strong>Django</strong> 1.4 release.Unit test runners<strong>Django</strong> 1.2 changes <strong>the</strong> test runner tools to use a class-based approach. Old style function-based test runners will stillwork, but should be updated to use <strong>the</strong> new class-based runners.Syndication feedsThe django.contrib.syndication.feeds.Feed class is being replaced by <strong>the</strong>django.contrib.syndication.views.Feed class. The old feeds.Feed class is deprecated. Thenew class has an almost identical API, but allows instances to be used as views.Also, in accordance with RSS best practices, RSS feeds will now include an atom:link element. You may need toupdate your tests to take this into account.For more information, see <strong>the</strong> full syndication framework documentation.Cookie encodingDue to cookie-handling bugs in Internet Explorer, Safari, and possibly o<strong>the</strong>r browsers, <strong>Django</strong>’s encoding of cookievalues was changed so that <strong>the</strong> characters comma (‘,’) and semi-colon (‘;’) are treated as non-safe characters, and are<strong>the</strong>refore encoded as \054 and \073 respectively. This could produce backwards incompatibilities if you are relyingon <strong>the</strong> ability to set <strong>the</strong>se characters directly in cookie values.What’s new in 1.2 betaThis 1.2 beta release marks <strong>the</strong> final feature freeze for <strong>Django</strong> 1.2; while most feature development was completed for1.2 alpha (which constituted a freeze on major features), a few o<strong>the</strong>r new features were added afterward and so arenew as of 1.2 beta.9.2. Development releases 855
<strong>Django</strong> <strong>Documentation</strong>, Release 1.2Object-level permissionsA foundation for specifying permissions at <strong>the</strong> per-object level was added in <strong>Django</strong> 1.2 alpha but not documentedwith <strong>the</strong> alpha release.The default au<strong>the</strong>ntication backends shipped with <strong>Django</strong> do not currently make use of this, but third-party au<strong>the</strong>nticationbackends are free to do so. See <strong>the</strong> au<strong>the</strong>ntication docs for more information.Permissions for anonymous usersIf you provide a custom au<strong>the</strong>ntication backend with <strong>the</strong> attribute supports_anonymous_user set to True, <strong>the</strong>AnonymousUser class will check <strong>the</strong> backend for permissions, just as <strong>the</strong> normal User does. This is intended tohelp centralize permission handling; apps can always delegate <strong>the</strong> question of whe<strong>the</strong>r something is allowed or not to<strong>the</strong> authorization/au<strong>the</strong>ntication system. See <strong>the</strong> au<strong>the</strong>ntication docs for more details.select_related() improvementsThe select_related() method of QuerySet now accepts <strong>the</strong> related_name of a reverse one-to-onerelation in <strong>the</strong> list of fields to select. One-to-one relations will not, however, be traversed by a depth-basedselect_related() call.The <strong>Django</strong> 1.2 roadmapBefore <strong>the</strong> final <strong>Django</strong> 1.2 release, at least one additional preview/development releases will be made available. Thecurrent schedule consists of at least <strong>the</strong> following:• Week of March 2, 2010: First <strong>Django</strong> 1.2 release candidate. String freeze for translations.• Week of March 9, 2010: <strong>Django</strong> 1.2 final release.If necessary, additional beta or release-candidate packages will be issued prior to <strong>the</strong> final 1.2 release. <strong>Django</strong> 1.2 willbe released approximately one week after <strong>the</strong> final release candidate.What you can do to helpIn order to provide a high-quality 1.2 release, we need your help. Although this beta release is, again, not intended forproduction use, you can help <strong>the</strong> <strong>Django</strong> team by trying out <strong>the</strong> beta codebase in a safe test environment and reportingany bugs or issues you encounter. The <strong>Django</strong> ticket tracker is <strong>the</strong> central place to search for open issues:• http://code.djangoproject.com/timelinePlease open new tickets if no existing ticket corresponds to a problem you’re running into.Additionally, discussion of <strong>Django</strong> development, including progress toward <strong>the</strong> 1.2 release, takes place daily on <strong>the</strong>django-developers mailing list:• http://groups.google.com/group/django-developers... and in <strong>the</strong> #django-dev IRC channel on irc.freenode.net. If you’re interested in helping out with<strong>Django</strong>’s development, feel free to join <strong>the</strong> discussions <strong>the</strong>re.<strong>Django</strong>’s online documentation also includes pointers on how to contribute to <strong>Django</strong>:• How to contribute to <strong>Django</strong>856 Chapter 9. Release notes
<strong>Django</strong> <strong>Documentation</strong>, Release 1.2Contributions on any level – developing code, writing documentation or simply triaging tickets and helping to testproposed bugfixes – are always welcome and appreciated.Development sprints for <strong>Django</strong> 1.2 will also be taking place at PyCon US 2010, on <strong>the</strong> dedicated sprint days (February22 through 25), and anyone who wants to help out is welcome to join in, ei<strong>the</strong>r in person at PyCon or virtually in <strong>the</strong>IRC channel or on <strong>the</strong> mailing list.9.2.3 <strong>Django</strong> 1.2 alpha 1 release notesJanuary 5, 2010Welcome to <strong>Django</strong> 1.2 alpha 1!This is <strong>the</strong> first in a series of preview/development releases leading up to <strong>the</strong> eventual release of <strong>Django</strong> 1.2, currentlyscheduled to take place in March 2010. This release is primarily targeted at developers who are interested in tryingout new features and testing <strong>the</strong> <strong>Django</strong> codebase to help identify and resolve bugs prior to <strong>the</strong> final 1.2 release.As such, this release is not intended for production use, and any such use is discouraged.Backwards-incompatible changes in 1.2CSRF ProtectionThere have been large changes to <strong>the</strong> way that CSRF protection works, detailed in <strong>the</strong> CSRF documentaton. Thefollowing are <strong>the</strong> major changes that developers must be aware of:• CsrfResponseMiddleware and CsrfMiddleware have been deprecated, and will be removed completelyin <strong>Django</strong> 1.4, in favor of a template tag that should be inserted into forms.• All contrib apps use a csrf_protect decorator to protect <strong>the</strong> view. This requires <strong>the</strong> use of <strong>the</strong>csrf_token template tag in <strong>the</strong> template, so if you have used custom templates for contrib views, you MUSTREAD THE UPGRADE INSTRUCTIONS to fix those templates.• CsrfViewMiddleware is included in MIDDLEWARE_CLASSES by default. This turns on CSRF protectionby default, so that views that accept POST requests need to be written to work with <strong>the</strong> middleware. Instructionson how to do this are found in <strong>the</strong> CSRF docs.• CSRF-related code has moved from contrib to core (with backwards compatible imports in <strong>the</strong> old locations,which are deprecated).if tag changesDue to new features in <strong>the</strong> if template tag, it no longer accepts ‘and’, ‘or’ and ‘not’ as valid variable names. Previouslythat worked in some cases even though <strong>the</strong>se strings were normally treated as keywords. Now, <strong>the</strong> keyword statusis always enforced, and template code like {% if not %} or {% if and %} will throw a TemplateSyntaxError.LazyObjectLazyObject is an undocumented utility class used for lazily wrapping o<strong>the</strong>r objects of unknown type. In <strong>Django</strong>1.1 and earlier, it handled introspection in a non-standard way, depending on wrapped objects implementing a publicmethod get_all_members(). Since this could easily lead to name clashes, it has been changed to use <strong>the</strong> standardmethod, involving __members__ and __dir__(). If you used LazyObject in your own code, and implemented<strong>the</strong> get_all_members() method for wrapped objects, you need to make <strong>the</strong> following changes:9.2. Development releases 857
<strong>Django</strong> <strong>Documentation</strong>, Release 1.2• If your class does not have special requirements for introspection (i.e. you have not implemented__getattr__() or o<strong>the</strong>r methods that allow for attributes not discoverable by normal mechanisms), youcan simply remove <strong>the</strong> get_all_members() method. The default implementation on LazyObject willdo <strong>the</strong> right thing.• If you have more complex requirements for introspection, first rename <strong>the</strong> get_all_members() method to__dir__(). This is <strong>the</strong> standard method, from Python 2.6 onwards, for supporting introspection. If you arerequire support for Python < 2.6, add <strong>the</strong> following code to <strong>the</strong> class:__members__ = property(lambda self: self.__dir__())__dict__ on Model instancesHistorically, <strong>the</strong> __dict__ attribute of a model instance has only contained attributes corresponding to <strong>the</strong> fields ona model.In order to support multiple database configurations, <strong>Django</strong> 1.2 has added a _state attribute to object instances.This attribute will appear in __dict__ for a model instance. If your code relies on iterating over __dict__ to obtaina list of fields, you must now filter <strong>the</strong> _state attribute of out __dict__.get_db_prep_*() methods on FieldPrior to v1.2, a custom field had <strong>the</strong> option of defining several functions to support conversion of Python values intodatabase-compatible values. A custom field might look something like:class CustomModelField(models.Field):# ...def get_db_prep_save(self, value):# ...def get_db_prep_value(self, value):# ...def get_db_prep_lookup(self, lookup_type, value):# ...In 1.2, <strong>the</strong>se three methods have undergone a change in prototype, and two extra methods have been introduced:class CustomModelField(models.Field):# ...def get_prep_value(self, value):# ...def get_prep_lookup(self, lookup_type, value):# ...def get_db_prep_save(self, value, connection):# ...def get_db_prep_value(self, value, connection, prepared=False):# ...def get_db_prep_lookup(self, lookup_type, value, connection, prepared=False):# ...858 Chapter 9. Release notes
<strong>Django</strong> <strong>Documentation</strong>, Release 1.2These changes are required to support multiple databases: get_db_prep_* can no longer make any assumptionsregarding <strong>the</strong> database for which it is preparing. The connection argument now provides <strong>the</strong> preparation methodswith <strong>the</strong> specific connection for which <strong>the</strong> value is being prepared.The two new methods exist to differentiate general data preparation requirements, and requirements that are databasespecific.The prepared argument is used to indicate to <strong>the</strong> database preparation methods whe<strong>the</strong>r genericvalue preparation has been performed. If an unprepared (i.e., prepared=False) value is provided to <strong>the</strong>get_db_prep_*() calls, <strong>the</strong>y should invoke <strong>the</strong> corresponding get_prep_*() calls to perform generic datapreparation.Conversion functions has been provided which will transparently convert functions adhering to <strong>the</strong> old prototype intofunctions compatible with <strong>the</strong> new prototype. However, this conversion function will be removed in <strong>Django</strong> 1.4, soyou should upgrade your Field definitions to use <strong>the</strong> new prototype.If your get_db_prep_*() methods made no use of <strong>the</strong> database connection, you should be able to upgradeby renaming get_db_prep_value() to get_prep_value() and get_db_prep_lookup() toget_prep_lookup()‘. If you require database specific conversions, <strong>the</strong>n youwill need to provide an implementation ‘‘get_db_prep_* that uses <strong>the</strong> connectionargument to resolve database-specific values.Stateful template tagsTemplate tags that store rendering state on <strong>the</strong> node itself may experience problems if <strong>the</strong>y are used with <strong>the</strong> newcached template loader.All of <strong>the</strong> built-in <strong>Django</strong> template tags are safe to use with <strong>the</strong> cached loader, but if you’re using custom template tagsthat come from third party packages, or that you wrote yourself, you should ensure that <strong>the</strong> Node implementation foreach tag is thread-safe. For more information, see template tag thread safety considerations.Test runner exit status codeThe exit status code of <strong>the</strong> test runners (tests/runtests.py and python manage.py test) no longer represents<strong>the</strong> number of failed tests, since a failure of 256 or more tests resulted in a wrong exit status code. The exitstatus code for <strong>the</strong> test runner is now 0 for success (no failing tests) and 1 for any number of test failures. If needed,<strong>the</strong> number of test failures can be found at <strong>the</strong> end of <strong>the</strong> test runner’s output.Features deprecated in 1.2CSRF response rewriting middlewareCsrfResponseMiddleware, <strong>the</strong> middleware that automatically inserted CSRF tokens into POST forms inoutgoing pages, has been deprecated in favor of a template tag method (see above), and will be removed completelyin <strong>Django</strong> 1.4. CsrfMiddleware, which includes <strong>the</strong> functionality of CsrfResponseMiddlewareand CsrfViewMiddleware has likewise been deprecated.Also, <strong>the</strong> CSRF module has moved from contrib to core, and <strong>the</strong> old imports are deprecated, as described in <strong>the</strong>upgrading notes.SMTPConnectionThe SMTPConnection class has been deprecated in favor of a generic E-mail backend API. Old code that explicitlyinstantiated an instance of an SMTPConnection:9.2. Development releases 859
<strong>Django</strong> <strong>Documentation</strong>, Release 1.2from django.core.mail import SMTPConnectionconnection = SMTPConnection()messages = get_notification_email()connection.send_messages(messages)should now call get_connection() to instantiate a generic e-mail connection:from django.core.mail import get_connectionconnection = get_connection()messages = get_notification_email()connection.send_messages(messages)Depending on <strong>the</strong> value of <strong>the</strong> EMAIL_BACKEND setting, this may not return an SMTP connection. If you explicitlyrequire an SMTP connection with which to send e-mail, you can explicitly request an SMTP connection:from django.core.mail import get_connectionconnection = get_connection(’django.core.mail.backends.smtp.EmailBackend’)messages = get_notification_email()connection.send_messages(messages)If your call to construct an instance of SMTPConnection required additional arguments, those arguments can bepassed to <strong>the</strong> get_connection() call:connection = get_connection(’django.core.mail.backends.smtp.EmailBackend’, hostname=’localhost’, portSpecifying databasesPrior to <strong>Django</strong> 1.1, <strong>Django</strong> used a number of settings to control access to a single database. <strong>Django</strong> 1.2 introducessupport for multiple databases, and as a result, <strong>the</strong> way you define database settings has changed.Any existing <strong>Django</strong> settings file will continue to work as expected until <strong>Django</strong> 1.4. Old-style database settingswill be automatically translated to <strong>the</strong> new-style format.In <strong>the</strong> old-style (pre 1.2) format, <strong>the</strong>re were a number of DATABASE_ settings at <strong>the</strong> top level of your settings file. Forexample:DATABASE_NAME = ’test_db’DATABASE_ENGINE = ’postgresql_psycopg2’DATABASE_USER = ’myusername’DATABASE_PASSWORD = ’s3krit’These settings are now contained inside a dictionary named DATABASES. Each item in <strong>the</strong> dictionary correspondsto a single database connection, with <strong>the</strong> name ’default’ describing <strong>the</strong> default database connection. The settingnames have also been shortened to reflect <strong>the</strong> fact that <strong>the</strong>y are stored in a dictionary. The sample settings givenpreviously would now be stored using:DATABASES = {’default’: {’NAME’: ’test_db’,’ENGINE’: ’django.db.backends.postgresql_psycopg2’,’USER’: ’myusername’,’PASSWORD’: ’s3krit’,}}This affects <strong>the</strong> following settings:860 Chapter 9. Release notes
<strong>Django</strong> <strong>Documentation</strong>, Release 1.2Old settingDATABASE_ENGINEDATABASE_HOSTDATABASE_NAMEDATABASE_OPTIONSDATABASE_PASSWORDDATABASE_PORTDATABASE_USERTEST_DATABASE_CHARSETTEST_DATABASE_COLLATIONTEST_DATABASE_NAMENew SettingENGINEHOSTNAMEOPTIONSPASSWORDPORTUSERTEST_CHARSETTEST_COLLATIONTEST_NAMEThese changes are also required if you have manually created a database connection using DatabaseWrapper()from your database backend of choice.In addition to <strong>the</strong> change in structure, <strong>Django</strong> 1.2 removes <strong>the</strong> special handling for <strong>the</strong> built-in databasebackends. All database backends must now be specified by a fully qualified module name (i.e.,django.db.backends.postgresql_psycopg2, ra<strong>the</strong>r than just postgresql_psycopg2).User Messages APIThe API for storing messages in <strong>the</strong> user Message model (via user.message_set.create) is now deprecatedand will be removed in <strong>Django</strong> 1.4 according to <strong>the</strong> standard release process.To upgrade your code, you need to replace any instances of:user.message_set.create(’a message’)with <strong>the</strong> following:from django.contrib import messagesmessages.add_message(request, messages.INFO, ’a message’)Additionally, if you make use of <strong>the</strong> method, you need to replace <strong>the</strong> following:for message in user.get_and_delete_messages():...with:from django.contrib import messagesfor message in messages.get_messages(request):...For more information, see <strong>the</strong> full messages documentation. You should begin to update your code to use <strong>the</strong> new APIimmediately.Date format helper functionsdjango.utils.translation.get_date_formats() and django.utils.translation.get_partial_date_forhave been deprecated in favor of <strong>the</strong> appropriate calls to django.utils.formats.get_format() which islocale aware when USE_L10N is set to True, and falls back to default settings if set to False.To get <strong>the</strong> different date formats, instead of writing:from django.utils.translation import get_date_formatsdate_format, datetime_format, time_format = get_date_formats()9.2. Development releases 861
<strong>Django</strong> <strong>Documentation</strong>, Release 1.2use:from django.utils import formatsdate_format = formats.get_format(’DATE_FORMAT’)datetime_format = formats.get_format(’DATETIME_FORMAT’)time_format = formats.get_format(’TIME_FORMAT’)or, when directly formatting a date value:from django.utils import formatsvalue_formatted = formats.date_format(value, ’DATETIME_FORMAT’)The same applies to <strong>the</strong> globals found in django.forms.fields:• DEFAULT_DATE_INPUT_FORMATS• DEFAULT_TIME_INPUT_FORMATS• DEFAULT_DATETIME_INPUT_FORMATSUse django.utils.formats.get_format() to get <strong>the</strong> appropriate formats.What’s new in <strong>Django</strong> 1.2 alpha 1The following new features are present as of this alpha release; this release also marks <strong>the</strong> end of major featuredevelopment for <strong>the</strong> 1.2 release cycle. Some minor features will continue development until <strong>the</strong> 1.2 beta release,however.CSRF support<strong>Django</strong> now has much improved protection against Cross-Site Request Forgery (CSRF) attacks. This type of attackoccurs when a malicious Web site contains a link, a form button or some javascript that is intended to perform someaction on your Web site, using <strong>the</strong> credentials of a logged-in user who visits <strong>the</strong> malicious site in <strong>the</strong>ir browser. Arelated type of attack, ‘login CSRF’, where an attacking site tricks a user’s browser into logging into a site withsomeone else’s credentials, is also covered.E-mail BackendsYou can now configure <strong>the</strong> way that <strong>Django</strong> sends e-mail. Instead of using SMTP to send all e-mail, you can nowchoose a configurable e-mail backend to send messages. If your hosting provider uses a sandbox or some o<strong>the</strong>r non-SMTP technique for sending mail, you can now construct an e-mail backend that will allow <strong>Django</strong>’s standard mailsending methods to use those facilities.This also makes it easier to debug mail sending - <strong>Django</strong> ships with backend implementations that allow you to sende-mail to a file, to <strong>the</strong> console, or to memory - you can even configure all e-mail to be thrown away.Messages Framework<strong>Django</strong> now includes a robust and configurable messages framework with built-in support for cookie- and sessionbasedmessaging, for both anonymous and au<strong>the</strong>nticated clients. The messages framework replaces <strong>the</strong> deprecateduser message API and allows you to temporarily store messages in one request and retrieve <strong>the</strong>m for display in asubsequent request (usually <strong>the</strong> next one).862 Chapter 9. Release notes
<strong>Django</strong> <strong>Documentation</strong>, Release 1.2Support for multiple databases<strong>Django</strong> 1.2 adds <strong>the</strong> ability to use more than one database in your <strong>Django</strong> project. Queries can be issued at a specificdatabase with <strong>the</strong> using() method on querysets; individual objects can be saved to a specific database by providing ausing argument when you save <strong>the</strong> instance.‘Smart’ if tagThe if tag has been upgraded to be much more powerful. First, support for comparison operators has been added. Nolonger will you have to type:{% ifnotequal a b %}...{% endifnotequal %}...as you can now do:{% if a != b %}...{% endif %}The operators supported are ==, !=, , = and in, all of which work like <strong>the</strong> Python operators, in addition toand, or and not which were already supported.Also, filters may now be used in <strong>the</strong> if expression. For example:{{ message }}Template cachingIn previous versions of <strong>Django</strong>, every time you rendered a template it would be reloaded from disk. In <strong>Django</strong> 1.2,you can use a cached template loader to load templates once, <strong>the</strong>n use <strong>the</strong> cached result for every subsequent render.This can lead to a significant performance improvement if your templates are broken into lots of smaller subtemplates(using <strong>the</strong> {% extends %} or {% include %} tags).As a side effect, it is now much easier to support non-<strong>Django</strong> template languages. For more details, see <strong>the</strong> notes onsupporting non-<strong>Django</strong> template languages.Natural keys in fixturesFixtures can refer to remote objects using Natural keys. This lookup scheme is an alternative to <strong>the</strong> normal primary-keybased object references in a fixture, improving readability, and resolving problems referring to objects whose primarykey value may not be predictable or known.BigIntegerFieldModels can now use a 64 bit BigIntegerField type.9.2. Development releases 863
<strong>Django</strong> <strong>Documentation</strong>, Release 1.2Fast Failure for TestsThe test subcommand of django-admin.py, and <strong>the</strong> runtests.py script used to run <strong>Django</strong>’s own test suite,support a new --failfast option. When specified, this option causes <strong>the</strong> test runner to exit after encounteringa failure instead of continuing with <strong>the</strong> test run. In addition, <strong>the</strong> handling of Ctrl-C during a test run has beenimproved to trigger a graceful exit from <strong>the</strong> test run that reports details of <strong>the</strong> tests run before <strong>the</strong> interruption.Improved localization<strong>Django</strong>’s internationalization framework has been expanded by locale aware formatting and form processing. Thatmeans, if enabled, dates and numbers on templates will be displayed using <strong>the</strong> format specified for <strong>the</strong> current locale.<strong>Django</strong> will also use localized formats when parsing data in forms. See Format localization for more details.Added readonly_fields to ModelAdmindjango.contrib.admin.ModelAdmin.readonly_fields has been added to enable non-editable fields inadd/change pages for models and inlines. Field and calculated values can be displayed along side editable fields.Customizable syntax highlightingYou can now use <strong>the</strong> DJANGO_COLORS environment variable to modify or disable <strong>the</strong> colors used bydjango-admin.py to provide syntax highlighting.The <strong>Django</strong> 1.2 roadmapBefore <strong>the</strong> final <strong>Django</strong> 1.2 release, several o<strong>the</strong>r preview/development releases will be made available. The currentschedule consists of at least <strong>the</strong> following:• Week of January 26, 2010: First <strong>Django</strong> 1.2 beta release. Final feature freeze for <strong>Django</strong> 1.2.• Week of March 2, 2010: First <strong>Django</strong> 1.2 release candidate. String freeze for translations.• Week of March 9, 2010: <strong>Django</strong> 1.2 final release.If necessary, additional alpha, beta or release-candidate packages will be issued prior to <strong>the</strong> final 1.2 release. <strong>Django</strong>1.2 will be released approximately one week after <strong>the</strong> final release candidate.What you can do to helpIn order to provide a high-quality 1.2 release, we need your help. Although this alpha release is, again, not intendedfor production use, you can help <strong>the</strong> <strong>Django</strong> team by trying out <strong>the</strong> alpha codebase in a safe test environment andreporting any bugs or issues you encounter. The <strong>Django</strong> ticket tracker is <strong>the</strong> central place to search for open issues:• http://code.djangoproject.com/timelinePlease open new tickets if no existing ticket corresponds to a problem you’re running into.Additionally, discussion of <strong>Django</strong> development, including progress toward <strong>the</strong> 1.2 release, takes place daily on <strong>the</strong>django-developers mailing list:• http://groups.google.com/group/django-developers864 Chapter 9. Release notes
<strong>Django</strong> <strong>Documentation</strong>, Release 1.2... and in <strong>the</strong> #django-dev IRC channel on irc.freenode.net. If you’re interested in helping out with<strong>Django</strong>’s development, feel free to join <strong>the</strong> discussions <strong>the</strong>re.<strong>Django</strong>’s online documentation also includes pointers on how to contribute to <strong>Django</strong>:• How to contribute to <strong>Django</strong>Contributions on any level – developing code, writing documentation or simply triaging tickets and helping to testproposed bugfixes – are always welcome and appreciated.Development sprints for <strong>Django</strong> 1.2 will also be taking place at PyCon US 2010, on <strong>the</strong> dedicated sprint days (February22 through 25), and anyone who wants to help out is welcome to join in, ei<strong>the</strong>r in person at PyCon or virtually in <strong>the</strong>IRC channel or on <strong>the</strong> mailing list.9.2.4 <strong>Django</strong> 1.1 RC 1 release notesJuly 21, 2009Welcome to <strong>the</strong> first <strong>Django</strong> 1.1 release candidate!This is <strong>the</strong> third – and likely last – in a series of preview/development releases leading up to <strong>the</strong> eventual release of<strong>Django</strong> 1.1, currently scheduled to take place approximately one week after this release candidate. This release istargeted primarily at developers who are interested in trying out new features and testing <strong>the</strong> <strong>Django</strong> codebase to helpidentify and resolve any critical bugs prior to <strong>the</strong> final 1.1 release.As such, this release is not yet intended for production use, and any such use is discouraged.What’s new in <strong>Django</strong> 1.1 RC 1The <strong>Django</strong> codebase has – with one exception – been in feature freeze since <strong>the</strong> first 1.1 beta release, and so thisrelease candidate contains only one new feature (see below); work leading up to this release candidate has insteadbeen focused on bugfixing, particularly on <strong>the</strong> new features introduced prior to <strong>the</strong> 1.1 beta.For an overview of those features, consult <strong>the</strong> <strong>Django</strong> 1.1 beta release notes.URL namespacesThe 1.1 beta release introduced <strong>the</strong> ability to use reverse URL resolution with <strong>Django</strong>’s admin application, whichexposed a set of named URLs. Unfortunately, achieving consistent and correct reverse resolution for admin URLsproved extremely difficult, and so one additional feature was added to <strong>Django</strong> to resolve this issue: URL namespaces.In short, this feature allows <strong>the</strong> same group of URLs, from <strong>the</strong> same application, to be included in a <strong>Django</strong> URLConfmultiple times, with varying (and potentially nested) named prefixes which will be used when performing reverseresolution. For full details, see <strong>the</strong> documentation on defining URL namespaces.Due to <strong>the</strong> changes needed to support this feature, <strong>the</strong> URL pattern names used when reversing admin URLs havechanged since <strong>the</strong> 1.1 beta release; if you were developing applications which took advantage of this new feature, youwill need to update your code to reflect <strong>the</strong> new names (for most purposes, changing admin_ to admin: in names tobe reversed will suffice). For a full list of URL pattern names used by <strong>the</strong> admin and information on how namespacesare applied to <strong>the</strong>m, consult <strong>the</strong> documentation on reversing admin URLs.The <strong>Django</strong> 1.1 roadmapAs of this release candidate, <strong>Django</strong> 1.1 is in both feature freeze and “string freeze” – all strings marked for translationin <strong>the</strong> <strong>Django</strong> codebase will retain <strong>the</strong>ir current form in <strong>the</strong> final <strong>Django</strong> 1.1 release. Only critical release-blockingbugs will receive attention between now and <strong>the</strong> final 1.1 release.9.2. Development releases 865
<strong>Django</strong> <strong>Documentation</strong>, Release 1.2If no such bugs are discovered, <strong>Django</strong> 1.1 will be released approximately one week after this release candidate, on orabout July 28, 2009.What you can do to helpIn order to provide a high-quality 1.1 release, we need your help. Although this release candidate is, again, not intendedfor production use, you can help <strong>the</strong> <strong>Django</strong> team by trying out this release candidate in a safe testing environment andreporting any bugs or issues you encounter. The <strong>Django</strong> ticket tracker is <strong>the</strong> central place to search for open issues:• http://code.djangoproject.com/timelinePlease open a new ticket only if no existing ticket corresponds to a problem you’re running into.Additionally, discussion of <strong>Django</strong> development, including progress toward <strong>the</strong> 1.1 release, takes place daily on <strong>the</strong>django-developers mailing list:• http://groups.google.com/group/django-developers... and in <strong>the</strong> #django-dev IRC channel on irc.freenode.net. If you’re interested in helping out with<strong>Django</strong>’s development, feel free to join <strong>the</strong> discussions <strong>the</strong>re.<strong>Django</strong>’s online documentation also includes pointers on how to contribute to <strong>Django</strong>:• How to contribute to <strong>Django</strong>Contributions on any level – developing code, writing documentation or simply triaging tickets and helping to testproposed bugfixes – are always welcome and appreciated.9.2.5 <strong>Django</strong> 1.1 beta 1 release notesMarch 23, 2009Welcome to <strong>Django</strong> 1.1 beta 1!This is <strong>the</strong> second in a series of preview/development releases leading up to <strong>the</strong> eventual release of <strong>Django</strong> 1.1,currently scheduled to take place in April 2009. This release is primarily targeted at developers who are interested intrying out new features and testing <strong>the</strong> <strong>Django</strong> codebase to help identify and resolve bugs prior to <strong>the</strong> final 1.1 release.As such, this release is not intended for production use, and any such use is discouraged.What’s new in <strong>Django</strong> 1.1 beta 1See Also:The 1.1 alpha release notes, which has a list of everything new between <strong>Django</strong> 1.0 and <strong>Django</strong> 1.1 alpha.Model improvementsA number of features have been added to <strong>Django</strong>’s model layer:“Unmanaged” models You can now control whe<strong>the</strong>r or not <strong>Django</strong> creates database tables for a model using <strong>the</strong>managed model option. This defaults to True, meaning that <strong>Django</strong> will create <strong>the</strong> appropriate database tables insyncdb and remove <strong>the</strong>m as part of reset command. That is, <strong>Django</strong> manages <strong>the</strong> database table’s lifecycle.If you set this to False, however, no database table creating or deletion will be automatically performed for thismodel. This is useful if <strong>the</strong> model represents an existing table or a database view that has been created by some o<strong>the</strong>rmeans.866 Chapter 9. Release notes
<strong>Django</strong> <strong>Documentation</strong>, Release 1.2For more details, see <strong>the</strong> documentation for <strong>the</strong> managed option.Proxy models You can now create proxy models: subclasses of existing models that only add Python behavior andaren’t represented by a new table. That is, <strong>the</strong> new model is a proxy for some underlying model, which stores all <strong>the</strong>real data.All <strong>the</strong> details can be found in <strong>the</strong> proxy models documentation. This feature is similar on <strong>the</strong> surface to unmanagedmodels, so <strong>the</strong> documentation has an explanation of how proxy models differ from unmanaged models.Deferred fields In some complex situations, your models might contain fields which could contain a lot of data (forexample, large text fields), or require expensive processing to convert <strong>the</strong>m to Python objects. If you know you don’tneed those particular fields, you can now tell <strong>Django</strong> not to retrieve <strong>the</strong>m from <strong>the</strong> database.You’ll do this with <strong>the</strong> new queryset methods defer() and only().New admin featuresSince 1.1 alpha, a couple of new features have been added to <strong>Django</strong>’s admin application:Editable fields on <strong>the</strong> change list You can now make fields editable on <strong>the</strong> admin list views via <strong>the</strong> new list_editableadmin option. These fields will show up as form widgets on <strong>the</strong> list pages, and can be edited and saved in bulk.Admin “actions” You can now define admin actions that can perform some action to a group of models in bulk.Users will be able to select objects on <strong>the</strong> change list page and <strong>the</strong>n apply <strong>the</strong>se bulk actions to all selected objects.<strong>Django</strong> ships with one pre-defined admin action to delete a group of objects in one fell swoop.Testing improvementsA couple of small but very useful improvements have been made to <strong>the</strong> testing framework:• The test Client now can automatically follow redirects with <strong>the</strong> follow argument to Client.get() andClient.post(). This makes testing views that issue redirects simpler.• It’s now easier to get at <strong>the</strong> template context in <strong>the</strong> response returned <strong>the</strong> test client: you’ll simply access <strong>the</strong>context as request.context[key]. The old way, which treats request.context as a list of contexts,one for each rendered template, is still available if you need it.Conditional view processing<strong>Django</strong> now has much better support for conditional view processing using <strong>the</strong> standard ETag and Last-ModifiedHTTP headers. This means you can now easily short-circuit view processing by testing less-expensive conditions. Formany views this can lead to a serious improvement in speed and reduction in bandwidth.O<strong>the</strong>r improvementsFinally, a grab-bag of o<strong>the</strong>r neat features made <strong>the</strong>ir way into this beta release, including:• The dumpdata management command now accepts individual model names as arguments, allowing you toexport <strong>the</strong> data just from particular models.9.2. Development releases 867
<strong>Django</strong> <strong>Documentation</strong>, Release 1.2• There’s a new safeseq template filter which works just like safe for lists, marking each item in <strong>the</strong> list assafe.• Cache backends now support incr() and decr() commands to increment and decrement <strong>the</strong> value of a cachekey. On cache backends that support atomic increment/decrement – most notably, <strong>the</strong> memcached backend –<strong>the</strong>se operations will be atomic, and quite fast.• <strong>Django</strong> now can easily delegate au<strong>the</strong>ntication to <strong>the</strong> Web server via a new au<strong>the</strong>ntication backend that supports<strong>the</strong> standard REMOTE_USER environment variable used for this purpose.• There’s a new django.shortcuts.redirect() function that makes it easier to issue redirects given anobject, a view name, or a URL.• The postgresql_psycopg2 backend now supports native PostgreSQL autocommit. This is an advanced,PostgreSQL-specific feature, that can make certain read-heavy applications a good deal faster.The <strong>Django</strong> 1.1 roadmapBefore <strong>Django</strong> 1.1 goes final, at least one o<strong>the</strong>r preview/development release will be made available. The currentschedule consists of at least <strong>the</strong> following:• Week of April 2, 2009: <strong>Django</strong> 1.1 release candidate. At this point all strings marked for translation must freezeto allow translations to be submitted in advance of <strong>the</strong> final release.• Week of April 13, 2009: <strong>Django</strong> 1.1 final.If deemed necessary, additional beta or release candidate packages will be issued prior to <strong>the</strong> final 1.1 release.What you can do to helpIn order to provide a high-quality 1.1 release, we need your help. Although this beta release is, again, not intended forproduction use, you can help <strong>the</strong> <strong>Django</strong> team by trying out <strong>the</strong> beta codebase in a safe test environment and reportingany bugs or issues you encounter. The <strong>Django</strong> ticket tracker is <strong>the</strong> central place to search for open issues:• http://code.djangoproject.com/timelinePlease open new tickets if no existing ticket corresponds to a problem you’re running into.Additionally, discussion of <strong>Django</strong> development, including progress toward <strong>the</strong> 1.1 release, takes place daily on <strong>the</strong>django-developers mailing list:• http://groups.google.com/group/django-developers... and in <strong>the</strong> #django-dev IRC channel on irc.freenode.net. If you’re interested in helping out with<strong>Django</strong>’s development, feel free to join <strong>the</strong> discussions <strong>the</strong>re.<strong>Django</strong>’s online documentation also includes pointers on how to contribute to <strong>Django</strong>:• How to contribute to <strong>Django</strong>Contributions on any level – developing code, writing documentation or simply triaging tickets and helping to testproposed bugfixes – are always welcome and appreciated.Development sprints for <strong>Django</strong> 1.1 will also be taking place at PyCon US 2009, on <strong>the</strong> dedicated sprint days (March30 through April 2), and anyone who wants to help out is welcome to join in, ei<strong>the</strong>r in person at PyCon or virtually in<strong>the</strong> IRC channel or on <strong>the</strong> mailing list.868 Chapter 9. Release notes
<strong>Django</strong> <strong>Documentation</strong>, Release 1.29.2.6 <strong>Django</strong> 1.1 alpha 1 release notesFebruary 23, 2009Welcome to <strong>Django</strong> 1.1 alpha 1!This is <strong>the</strong> first in a series of preview/development releases leading up to <strong>the</strong> eventual release of <strong>Django</strong> 1.1, currentlyscheduled to take place in April 2009. This release is primarily targeted at developers who are interested in trying outnew features and testing <strong>the</strong> <strong>Django</strong> codebase to help identify and resolve bugs prior to <strong>the</strong> final 1.1 release.As such, this release is not intended for production use, and any such use is discouraged.What’s new in <strong>Django</strong> 1.1 alpha 1ORM improvementsTwo major enhancements have been added to <strong>Django</strong>’s object-relational mapper (ORM):Aggregate support It’s now possible to run SQL aggregate queries (i.e. COUNT(), MAX(), MIN(), etc.) fromwithin <strong>Django</strong>’s ORM. You can choose to ei<strong>the</strong>r return <strong>the</strong> results of <strong>the</strong> aggregate directly, or else annotate <strong>the</strong> objectsin a QuerySet with <strong>the</strong> results of <strong>the</strong> aggregate query.This feature is available as new QuerySet.aggregate()‘() and QuerySet.annotate()‘() methods, andis covered in detail in <strong>the</strong> ORM aggregation documentationQuery expressions Queries can now refer to a ano<strong>the</strong>r field on <strong>the</strong> query and can traverse relationships to refer tofields on related models. This is implemented in <strong>the</strong> new F object; for full details, including examples, consult <strong>the</strong>documentation for F expressions.Performance improvementsTests written using <strong>Django</strong>’s testing framework now run dramatically faster (as much as 10 times faster in many cases).This was accomplished through <strong>the</strong> introduction of transaction-based tests: when using django.test.TestCase,your tests will now be run in a transaction which is rolled back when finished, instead of by flushing and re-populating<strong>the</strong> database. This results in an immense speedup for most types of unit tests. See <strong>the</strong> documentation for TestCaseand TransactionTestCase for a full description, and some important notes on database support.O<strong>the</strong>r improvementsO<strong>the</strong>r new features and changes introduced since <strong>Django</strong> 1.0 include:• The CSRF protection middleware has been split into two classes – CsrfViewMiddleware checksincoming requests, and CsrfResponseMiddleware processes outgoing responses. The combinedCsrfMiddleware class (which does both) remains for backwards-compatibility, but using <strong>the</strong> split classes isnow recommended in order to allow fine-grained control of when and where <strong>the</strong> CSRF processing takes place.• reverse() and code which uses it (e.g., <strong>the</strong> {% url %} template tag) now works with URLs in <strong>Django</strong>’sadministrative site, provided that <strong>the</strong> admin URLs are set up via include(admin.site.urls) (sendingadmin requests to <strong>the</strong> admin.site.root view still works, but URLs in <strong>the</strong> admin will not be “reversible”when configured this way).• The include() function in <strong>Django</strong> URLconf modules can now accept sequences of URL patterns (generatedby patterns()) in addition to module names.9.2. Development releases 869
<strong>Django</strong> <strong>Documentation</strong>, Release 1.2• Instances of <strong>Django</strong> forms (see <strong>the</strong> forms overview) now have two additional methods, hidden_fields()and visible_fields(), which return <strong>the</strong> list of hidden – i.e., – and visiblefields on <strong>the</strong> form, respectively.• The redirect_to generic view (see <strong>the</strong> generic views documentation) now accepts an additional keywordargument permanent. If permanent is True, <strong>the</strong> view will emit an HTTP permanent redirect (status code301). If False, <strong>the</strong> view will emit an HTTP temporary redirect (status code 302).• A new database lookup type – week_day – has been added for DateField and DateTimeField. Thistype of lookup accepts a number between 1 (Sunday) and 7 (Saturday), and returns objects where <strong>the</strong> field valuematches that day of <strong>the</strong> week. See <strong>the</strong> full list of lookup types for details.• The {% for %} tag in <strong>Django</strong>’s template language now accepts an optional {% empty %} clause, to bedisplayed when {% for %} is asked to loop over an empty sequence. See <strong>the</strong> list of built-in template tags forexamples of this.The <strong>Django</strong> 1.1 roadmapBefore <strong>Django</strong> 1.1 goes final, several o<strong>the</strong>r preview/development releases will be made available. The current scheduleconsists of at least <strong>the</strong> following:• Week of March 20, 2009: <strong>Django</strong> 1.1 beta 1, at which point <strong>Django</strong> 1.1 will be in “feature freeze”: no newfeatures will be implemented for 1.1 past that point, and all new feature work will be deferred to <strong>Django</strong> 1.2.• Week of April 2, 2009: <strong>Django</strong> 1.1 release candidate. At this point all strings marked for translation must freezeto allow translations to be submitted in advance of <strong>the</strong> final release.• Week of April 13, 2009: <strong>Django</strong> 1.1 final.If deemed necessary, additional alpha, beta or release candidate packages will be issued prior to <strong>the</strong> final 1.1 release.What you can do to helpIn order to provide a high-quality 1.1 release, we need your help. Although this alpha release is, again, not intendedfor production use, you can help <strong>the</strong> <strong>Django</strong> team by trying out <strong>the</strong> alpha codebase in a safe test environment andreporting any bugs or issues you encounter. The <strong>Django</strong> ticket tracker is <strong>the</strong> central place to search for open issues:• http://code.djangoproject.com/timelinePlease open new tickets if no existing ticket corresponds to a problem you’re running into.Additionally, discussion of <strong>Django</strong> development, including progress toward <strong>the</strong> 1.1 release, takes place daily on <strong>the</strong>django-developers mailing list:• http://groups.google.com/group/django-developers... and in <strong>the</strong> #django-dev IRC channel on irc.freenode.net. If you’re interested in helping out with<strong>Django</strong>’s development, feel free to join <strong>the</strong> discussions <strong>the</strong>re.<strong>Django</strong>’s online documentation also includes pointers on how to contribute to <strong>Django</strong>:• How to contribute to <strong>Django</strong>Contributions on any level – developing code, writing documentation or simply triaging tickets and helping to testproposed bugfixes – are always welcome and appreciated.Development sprints for <strong>Django</strong> 1.1 will also be taking place at PyCon US 2009, on <strong>the</strong> dedicated sprint days (March30 through April 2), and anyone who wants to help out is welcome to join in, ei<strong>the</strong>r in person at PyCon or virtually in<strong>the</strong> IRC channel or on <strong>the</strong> mailing list.870 Chapter 9. Release notes
<strong>Django</strong> <strong>Documentation</strong>, Release 1.29.2.7 <strong>Django</strong> 1.0 beta 2 release notesWelcome to <strong>Django</strong> 1.0 beta 2!This is <strong>the</strong> fourth in a series of preview/development releases leading up to <strong>the</strong> eventual release of <strong>Django</strong> 1.0, currentlyscheduled to take place in early September 2008. This releases is primarily targeted at developers who are interestedin testing <strong>the</strong> <strong>Django</strong> codebase and helping to identify and resolve bugs prior to <strong>the</strong> final 1.0 release.As such, this release is not intended for production use, and any such use is discouraged.What’s new in <strong>Django</strong> 1.0 beta 2<strong>Django</strong>’s development trunk has been <strong>the</strong> site of nearly constant activity over <strong>the</strong> past year, with several major newfeatures landing since <strong>the</strong> 0.96 release. For features which were new as of <strong>Django</strong> 1.0 alpha 1, see <strong>the</strong> 1.0 alpha 1release notes. For features which were new as of <strong>Django</strong> 1.0 alpha 2, see <strong>the</strong> 1.0 alpha 2 release notes. For featureswhich were new as of <strong>Django</strong> 1.0 beta 1, see <strong>the</strong> 1.0 beta 1 release notes.This beta release includes two major features:Refactored django.contrib.comments As part of a Google Summer of Code project, Thejaswi Puthraya carriedout a major rewrite and refactoring of <strong>Django</strong>’s bundled comment system, greatly increasing its flexibilityand customizability. Full documentation is available, as well as an upgrade guide if you were using <strong>the</strong> previousincarnation of <strong>the</strong> comments application..Refactored documentation <strong>Django</strong>’s bundled and online documentation has also been significantly refactored; <strong>the</strong>new documentation system uses Sphinx to build <strong>the</strong> docs and handle such niceties as topical indexes, referencedocumentation and cross-references within <strong>the</strong> docs. You can check out <strong>the</strong> new documentation online or, if youhave Sphinx installed, build <strong>the</strong> HTML yourself from <strong>the</strong> documentation files bundled with <strong>Django</strong>.Along with <strong>the</strong>se new features, <strong>the</strong> <strong>Django</strong> team has also been hard at work polishing <strong>Django</strong>’s codebase for <strong>the</strong> final1.0 release; this beta release contains a large number of smaller improvements and bugfixes from <strong>the</strong> ongoing push to1.0.Also, as part of its ongoing deprecation process, <strong>Django</strong>’s old form-handling system has been removed; this meansdjango.oldforms no longer exists, and its various API hooks (such as automatic manipulators) are no longerpresent in <strong>Django</strong>. This system has been completely replaced by <strong>the</strong> new form-handling system in django.forms.The <strong>Django</strong> 1.0 roadmapOne of <strong>the</strong> primary goals of this beta release is to focus attention on <strong>the</strong> remaining features to be implemented for<strong>Django</strong> 1.0, and on <strong>the</strong> bugs that need to be resolved before <strong>the</strong> final release. As of this beta release, <strong>Django</strong> is inits final “feature freeze” for 1.0; feature requests will be deferred to later releases, and <strong>the</strong> development effort will befocused solely on bug-fixing and stability. <strong>Django</strong> is also now in a “string freeze”; translatable strings (labels, errormessages, etc.) in <strong>Django</strong>’s codebase will not be changed prior to <strong>the</strong> release, in order to allow our translators toproduce <strong>the</strong> final 1.0 version of <strong>Django</strong>’s translation files.Following this release, we’ll be conducting a final development sprint on August 30, 2008, based in London andcoordinated online; <strong>the</strong> goal of this sprint will be to squash as many bugs as possible in anticipation of <strong>the</strong> final 1.0release, which is currently targeted for September 2, 2008. The official <strong>Django</strong> 1.0 release party will take place during<strong>the</strong> first-ever <strong>Django</strong>Con, to be held in Mountain View, California, USA, September 6-7.What you can do to helpIn order to provide a high-quality 1.0 release, we need your help. Although this beta release is, again, not intended forproduction use, you can help <strong>the</strong> <strong>Django</strong> team by trying out <strong>the</strong> beta codebase in a safe test environment and reportingany bugs or issues you encounter. The <strong>Django</strong> ticket tracker is <strong>the</strong> central place to search for open issues:9.2. Development releases 871
<strong>Django</strong> <strong>Documentation</strong>, Release 1.2http://code.djangoproject.com/timelinePlease open new tickets if no existing ticket corresponds to a problem you’re running into.Additionally, discussion of <strong>Django</strong> development, including progress toward <strong>the</strong> 1.0 release, takes place daily on <strong>the</strong>django-developers mailing list:http://groups.google.com/group/django-developers...and in <strong>the</strong> #django-dev IRC channel on irc.freenode.net. If you’re interested in helping out with <strong>Django</strong>’sdevelopment, feel free to join <strong>the</strong> discussions <strong>the</strong>re.<strong>Django</strong>’s online documentation also includes pointers on how to contribute to <strong>Django</strong>:contributing to <strong>Django</strong>Contributions on any level – developing code, writing documentation or simply triaging tickets and helping to testproposed bugfixes – are always welcome and appreciated.9.2.8 <strong>Django</strong> 1.0 beta 1 release notesWelcome to <strong>Django</strong> 1.0 beta 1!This is <strong>the</strong> third in a series of preview/development releases leading up to <strong>the</strong> eventual release of <strong>Django</strong> 1.0, currentlyscheduled to take place in early September 2008. This releases is primarily targeted at developers who are interestedin testing <strong>the</strong> <strong>Django</strong> codebase and helping to identify and resolve bugs prior to <strong>the</strong> final 1.0 release.As such, this release is not intended for production use, and any such use is discouraged.What’s new in <strong>Django</strong> 1.0 beta 1<strong>Django</strong>’s development trunk has been <strong>the</strong> site of nearly constant activity over <strong>the</strong> past year, with several major newfeatures landing since <strong>the</strong> 0.96 release. For features which were new as of <strong>Django</strong> 1.0 alpha 1, see <strong>the</strong> 1.0 alpha 1release notes. For features which were new as of <strong>Django</strong> 1.0 alpha 2, see <strong>the</strong> 1.0 alpha 2 release notes.This beta release does not contain any major new features, but does include several smaller updates and improvementsto <strong>Django</strong>:Generic relations in forms and admin Classes are now included in django.contrib.contenttypes whichcan be used to support generic relations in both <strong>the</strong> admin interface and in end-user forms. See <strong>the</strong> documentationfor generic relations for details.Improved flexibility in <strong>the</strong> admin Following up on <strong>the</strong> refactoring of <strong>Django</strong>’s administrative interface(django.contrib.admin), introduced in <strong>Django</strong> 1.0 alpha 1, two new hooks have been added to allowcustomized pre- and post-save handling of model instances in <strong>the</strong> admin. Full details are in <strong>the</strong> admin documentation.INSERT/UPDATE distinction Although <strong>Django</strong>’s default behavior of having a model’s save() method automaticallydetermine whe<strong>the</strong>r to perform an INSERT or an UPDATE at <strong>the</strong> SQL level is suitable for <strong>the</strong> majorityof cases, <strong>the</strong>re are occasional situations where forcing one or <strong>the</strong> o<strong>the</strong>r is useful. As a result, models can nowsupport an additional parameter to save() which can force a specific operation. Consult <strong>the</strong> database APIdocumentation for details and important notes about appropriate use of this parameter.Split CacheMiddleware <strong>Django</strong>’s CacheMiddleware has been split into three classes: CacheMiddlewareitself still exists and retains all of its previous functionality, but it is now built from two separate middlewareclasses which handle <strong>the</strong> two parts of caching (inserting into and reading from <strong>the</strong> cache) separately, offeringadditional flexibility for situations where combining <strong>the</strong>se functions into a single middleware posed problems.Full details, including updated notes on appropriate use, are in <strong>the</strong> caching documentation.872 Chapter 9. Release notes
<strong>Django</strong> <strong>Documentation</strong>, Release 1.2Removal of deprecated features A number of features and methods which had previously been marked as deprecated,and which were scheduled for removal prior to <strong>the</strong> 1.0 release, are no longer present in <strong>Django</strong>. Theseinclude imports of <strong>the</strong> form library from django.newforms (now located simply at django.forms),<strong>the</strong> form_for_model and form_for_instance helper functions (which have been replaced byModelForm) and a number of deprecated features which were replaced by <strong>the</strong> dispatcher, file-uploading andfile-storage refactorings introduced in <strong>the</strong> <strong>Django</strong> 1.0 alpha releases. A full list of <strong>the</strong>se and all o<strong>the</strong>r backwardsincompatiblechanges is available on <strong>the</strong> <strong>Django</strong> wiki.A number of o<strong>the</strong>r improvements and bugfixes have also been included: some tricky cases involving case-sensitivityin differing MySQL collations have been resolved, Windows packaging and installation has been improved and <strong>the</strong>method by which <strong>Django</strong> generates unique session identifiers has been made much more robust.The <strong>Django</strong> 1.0 roadmapOne of <strong>the</strong> primary goals of this beta release is to focus attention on <strong>the</strong> remaining features to be implemented for<strong>Django</strong> 1.0, and on <strong>the</strong> bugs that need to be resolved before <strong>the</strong> final release. Following this release, we’ll be conductinga series of development sprints building up to <strong>the</strong> release-candidate stage, followed soon after by <strong>Django</strong> 1.0. Thetimeline is projected to be:• August 15, 2008: Sprint (based in Austin, Texas, USA, and online).• August 17, 2008: Sprint (based in Tel Aviv, Israel, and online).• August 21, 2008: <strong>Django</strong> 1.0 release candidate 1. At this point, all strings marked for translation within<strong>Django</strong>’s codebase will be frozen, to provide contributors time to check and finalize all of <strong>Django</strong>’s bundledtranslation files prior to <strong>the</strong> final 1.0 release.• August 22, 2008: Sprint (based in Portland, Oregon, USA, and online).• August 26, 2008: <strong>Django</strong> 1.0 release candidate 2.• August 30, 2008: Sprint (based in London, England, UK, and online).• September 2, 2008: <strong>Django</strong> 1.0 final release. The official <strong>Django</strong> 1.0 release party will take place during <strong>the</strong>first-ever <strong>Django</strong>Con, to be held in Mountain View, California, USA, September 6-7.Of course, like any estimated timeline, this is subject to change as requirements dictate. The latest information willalways be available on <strong>the</strong> <strong>Django</strong> project wiki:http://code.djangoproject.com/wiki/VersionOneRoadmapWhat you can do to helpIn order to provide a high-quality 1.0 release, we need your help. Although this beta release is, again, not intended forproduction use, you can help <strong>the</strong> <strong>Django</strong> team by trying out <strong>the</strong> beta codebase in a safe test environment and reportingany bugs or issues you encounter. The <strong>Django</strong> ticket tracker is <strong>the</strong> central place to search for open issues:http://code.djangoproject.com/timelinePlease open new tickets if no existing ticket corresponds to a problem you’re running into.Additionally, discussion of <strong>Django</strong> development, including progress toward <strong>the</strong> 1.0 release, takes place daily on <strong>the</strong>django-developers mailing list:http://groups.google.com/group/django-developers...and in <strong>the</strong> #django-dev IRC channel on irc.freenode.net. If you’re interested in helping out with <strong>Django</strong>’sdevelopment, feel free to join <strong>the</strong> discussions <strong>the</strong>re.<strong>Django</strong>’s online documentation also includes pointers on how to contribute to <strong>Django</strong>:9.2. Development releases 873
<strong>Django</strong> <strong>Documentation</strong>, Release 1.2contributing to <strong>Django</strong>Contributions on any level – developing code, writing documentation or simply triaging tickets and helping to testproposed bugfixes – are always welcome and appreciated.9.2.9 <strong>Django</strong> 1.0 alpha 2 release notesWelcome to <strong>Django</strong> 1.0 alpha 2!This is <strong>the</strong> second in a series of preview/development releases leading up to <strong>the</strong> eventual release of <strong>Django</strong> 1.0,currently scheduled to take place in early September 2008. This releases is primarily targeted at developers who areinterested in testing <strong>the</strong> <strong>Django</strong> codebase and helping to identify and resolve bugs prior to <strong>the</strong> final 1.0 release.As such, this release is not intended for production use, and any such use is strongly discouraged.What’s new in <strong>Django</strong> 1.0 alpha 2<strong>Django</strong>’s development trunk has been <strong>the</strong> site of nearly constant activity over <strong>the</strong> past year, with several major newfeatures landing since <strong>the</strong> 0.96 release. For features which were new as of <strong>Django</strong> 1.0 alpha 1, see <strong>the</strong> 1.0 alpha 1release notes. Since <strong>the</strong> 1.0 alpha 1 release several new features have landed, including:django.contrib.gis (Geo<strong>Django</strong>) A project over a year in <strong>the</strong> making, this adds world-class GIS (GeographicInformation Systems) support to <strong>Django</strong>, in <strong>the</strong> form of a contrib application. Its documentation is currentlybeing maintained externally, and will be merged into <strong>the</strong> main <strong>Django</strong> documentation prior to <strong>the</strong> final 1.0release. Huge thanks go to Justin Bronn, Jeremy Dunck, Brett Hoerner and Travis Pinney for <strong>the</strong>ir efforts increating and completing this feature.Pluggable file storage <strong>Django</strong>’s built-in FileField and ImageField now can take advantage of pluggable filestoragebackends, allowing extensive customization of where and how uploaded files get stored by <strong>Django</strong>.For details, see <strong>the</strong> files documentation; big thanks go to Marty Alchin for putting in <strong>the</strong> hard work to get thiscompleted.Jython compatibility Thanks to a lot of work from Leo Soto during a Google Summer of Code project, <strong>Django</strong>’scodebase has been refactored to remove incompatibilities with Jython, an implementation of Python written inJava, which runs Python code on <strong>the</strong> Java Virtual Machine. <strong>Django</strong> is now compatible with <strong>the</strong> forthcomingJython 2.5 release.There are many o<strong>the</strong>r new features and improvements in this release, including two major performance boosts: stringsmarked for translation using <strong>Django</strong>’s internationalization system now consume far less memory, and <strong>Django</strong>’s internaldispatcher – which is invoked frequently during request/response processing and when working with <strong>Django</strong>’sobject-relational mapper – is now significantly faster.The <strong>Django</strong> 1.0 roadmapOne of <strong>the</strong> primary goals of this alpha release is to focus attention on <strong>the</strong> remaining features to be implementedfor <strong>Django</strong> 1.0, and on <strong>the</strong> bugs that need to be resolved before <strong>the</strong> final release. Following this release, we’ll beconducting a series of development sprints building up to <strong>the</strong> beta and release-candidate stages, followed soon after by<strong>Django</strong> 1.0. The timeline is projected to be:• August 14, 2008: <strong>Django</strong> 1.0 beta release. Past this point <strong>Django</strong> will be in a “feature freeze” for <strong>the</strong> 1.0release; after <strong>Django</strong> 1.0 beta, <strong>the</strong> development focus will be solely on bug fixes and stabilization.• August 15, 2008: Sprint (based in Austin, Texas, USA, and online).• August 17, 2008: Sprint (based in Tel Aviv, Israel, and online).874 Chapter 9. Release notes
<strong>Django</strong> <strong>Documentation</strong>, Release 1.2• August 21, 2008: <strong>Django</strong> 1.0 release candidate 1. At this point, all strings marked for translation within<strong>Django</strong>’s codebase will be frozen, to provide contributors time to check and finalize all of <strong>Django</strong>’s bundledtranslation files prior to <strong>the</strong> final 1.0 release.• August 22, 2008: Sprint (based in Portland, Oregon, USA, and online).• August 26, 2008: <strong>Django</strong> 1.0 release candidate 2.• August 30, 2008: Sprint (based in London, England, UK, and online).• September 2, 2008: <strong>Django</strong> 1.0 final release. The official <strong>Django</strong> 1.0 release party will take place during <strong>the</strong>first-ever <strong>Django</strong>Con, to be held in Mountain View, California, USA, September 6-7.Of course, like any estimated timeline, this is subject to change as requirements dictate. The latest information willalways be available on <strong>the</strong> <strong>Django</strong> project wiki:http://code.djangoproject.com/wiki/VersionOneRoadmapWhat you can do to helpIn order to provide a high-quality 1.0 release, we need your help. Although this alpha release is, again, not intendedfor production use, you can help <strong>the</strong> <strong>Django</strong> team by trying out <strong>the</strong> alpha codebase in a safe test environment andreporting any bugs or issues you encounter. The <strong>Django</strong> ticket tracker is <strong>the</strong> central place to search for open issues:http://code.djangoproject.com/timelinePlease open new tickets if no existing ticket corresponds to a problem you’re running into.Additionally, discussion of <strong>Django</strong> development, including progress toward <strong>the</strong> 1.0 release, takes place daily on <strong>the</strong>django-developers mailing list:http://groups.google.com/group/django-developers...and in <strong>the</strong> #django-dev IRC channel on irc.freenode.net. If you’re interested in helping out with <strong>Django</strong>’sdevelopment, feel free to join <strong>the</strong> discussions <strong>the</strong>re.<strong>Django</strong>’s online documentation also includes pointers on how to contribute to <strong>Django</strong>:contributing to <strong>Django</strong>Contributions on any level – developing code, writing documentation or simply triaging tickets and helping to testproposed bugfixes – are always welcome and appreciated.9.2.10 <strong>Django</strong> 1.0 alpha release notesWelcome to <strong>Django</strong> 1.0 alpha!This is <strong>the</strong> first in a series of preview/development releases leading up to <strong>the</strong> eventual release of <strong>Django</strong> 1.0, currentlyscheduled to take place in early September 2008. This release is primarily targeted at developers who are interested intesting <strong>the</strong> <strong>Django</strong> codebase and helping to identify and resolve bugs prior to <strong>the</strong> final 1.0 release.As such, this release is not intended for production use, and any such use is strongly discouraged.What’s new in <strong>Django</strong> 1.0 alpha<strong>Django</strong>’s development trunk has been <strong>the</strong> site of nearly constant activity over <strong>the</strong> past year, with several major newfeatures landing since <strong>the</strong> 0.96 release. Some of <strong>the</strong> highlights include:9.2. Development releases 875
<strong>Django</strong> <strong>Documentation</strong>, Release 1.2Refactored admin application (newforms-admin) The <strong>Django</strong> administrative interface(django.contrib.admin) has been completely refactored; admin definitions are now completelydecoupled from model definitions (no more class Admin declaration in models!), rewritten to use <strong>Django</strong>’snew form-handling library (introduced in <strong>the</strong> 0.96 release as django.newforms, and now available assimply django.forms) and redesigned with extensibility and customization in mind. Full documentationfor <strong>the</strong> admin application is available online in <strong>the</strong> official <strong>Django</strong> documentation:admin referenceImproved Unicode handling <strong>Django</strong>’s internals have been refactored to use Unicode throughout; this drasticallysimplifies <strong>the</strong> task of dealing with non-Western-European content and data in <strong>Django</strong>. Additionally, utilityfunctions have been provided to ease interoperability with third-party libraries and systems which may or maynot handle Unicode gracefully. Details are available in <strong>Django</strong>’s Unicode-handling documentation:unicode referenceAn improved <strong>Django</strong> ORM <strong>Django</strong>’s object-relational mapper – <strong>the</strong> component which provides <strong>the</strong> mapping between<strong>Django</strong> model classes and your database, and which mediates your database queries – has been dramaticallyimproved by a massive refactoring. For most users of <strong>Django</strong> this is backwards-compatible; <strong>the</strong>public-facing API for database querying underwent a few minor changes, but most of <strong>the</strong> updates took place in<strong>the</strong> ORM’s internals. A guide to <strong>the</strong> changes, including backwards-incompatible modifications and mentions ofnew features opened up by this refactoring, is available on <strong>the</strong> <strong>Django</strong> wiki:http://code.djangoproject.com/wiki/QuerysetRefactorBranchAutomatic escaping of template variables To provide improved security against cross-site scripting (XSS) vulnerabilities,<strong>Django</strong>’s template system now automatically escapes <strong>the</strong> output of variables. This behavior is configurable,and allows both variables and larger template constructs to be marked as safe (requiring no escaping) orunsafe (requiring escaping). A full guide to this feature is in <strong>the</strong> documentation for <strong>the</strong> autoescape tag.There are many more new features, many bugfixes and many enhancements to existing features from previous releases.The newforms library, for example, has undergone massive improvements including several useful addonsin django.contrib which complement and build on <strong>Django</strong>’s form-handling capabilities, and <strong>Django</strong>’s fileuploadinghandlers have been refactored to allow finer-grained control over <strong>the</strong> uploading process as well as streaminguploads of large files.Along with <strong>the</strong>se improvements and additions, we’ve made a number of of backwards-incompatible changes to <strong>the</strong>framework, as features have been fleshed out and APIs have been finalized for <strong>the</strong> 1.0 release. A complete guideto <strong>the</strong>se changes will be available as part of <strong>the</strong> final <strong>Django</strong> 1.0 release, and a comprehensive list of backwardsincompatiblechanges is also available on <strong>the</strong> <strong>Django</strong> wiki for those who want to begin developing and testing <strong>the</strong>irupgrade process:http://code.djangoproject.com/wiki/BackwardsIncompatibleChangesThe <strong>Django</strong> 1.0 roadmapOne of <strong>the</strong> primary goals of this alpha release is to focus attention on <strong>the</strong> remaining features to be implementedfor <strong>Django</strong> 1.0, and on <strong>the</strong> bugs that need to be resolved before <strong>the</strong> final release. Following this release, we’ll beconducting a series of sprints building up to a series of beta releases and a release-candidate stage, followed soon afterby <strong>Django</strong> 1.0. The timeline is projected to be:• August 1, 2008: Sprint (based in Washington, DC, and online).• August 5, 2008: <strong>Django</strong> 1.0 beta 1 release. This will also constitute <strong>the</strong> feature freeze for 1.0. Any feature to beincluded in 1.0 must be completed and in trunk by this time.• August 8, 2008: Sprint (based in Lawrence, KS, and online).• August 12, 2008: <strong>Django</strong> 1.0 beta 2 release.876 Chapter 9. Release notes
<strong>Django</strong> <strong>Documentation</strong>, Release 1.2• August 15, 2008: Sprint (based in Austin, TX, and online).• August 19, 2008: <strong>Django</strong> 1.0 release candidate 1.• August 22, 2008: Sprint (based in Portland, OR, and online).• August 26, 2008: <strong>Django</strong> 1.0 release candidate 2.• September 2, 2008: <strong>Django</strong> 1.0 final release. The official <strong>Django</strong> 1.0 release party will take place during <strong>the</strong>first-ever <strong>Django</strong>Con, to be held in Mountain View, CA, September 6-7.Of course, like any estimated timeline, this is subject to change as requirements dictate. The latest information willalways be available on <strong>the</strong> <strong>Django</strong> project wiki:http://code.djangoproject.com/wiki/VersionOneRoadmapWhat you can do to helpIn order to provide a high-quality 1.0 release, we need your help. Although this alpha release is, again, not intendedfor production use, you can help <strong>the</strong> <strong>Django</strong> team by trying out <strong>the</strong> alpha codebase in a safe test environment andreporting any bugs or issues you encounter. The <strong>Django</strong> ticket tracker is <strong>the</strong> central place to search for open issues:http://code.djangoproject.com/timelinePlease open new tickets if no existing ticket corresponds to a problem you’re running into.Additionally, discussion of <strong>Django</strong> development, including progress toward <strong>the</strong> 1.0 release, takes place daily on <strong>the</strong>django-developers mailing list:http://groups.google.com/group/django-developers...and in <strong>the</strong> #django-dev IRC channel on irc.freenode.net. If you’re interested in helping out with <strong>Django</strong>’sdevelopment, feel free to join <strong>the</strong> discussions <strong>the</strong>re.<strong>Django</strong>’s online documentation also includes pointers on how to contribute to <strong>Django</strong>:contributing to <strong>Django</strong>Contributions on any level – developing code, writing documentation or simply triaging tickets and helping to testproposed bugfixes – are always welcome and appreciated.9.2. Development releases 877
<strong>Django</strong> <strong>Documentation</strong>, Release 1.2878 Chapter 9. Release notes
CHAPTERTENDJANGO INTERNALS<strong>Documentation</strong> for people hacking on <strong>Django</strong> itself. This is <strong>the</strong> place to go if you’d like to help improve <strong>Django</strong>, learnor learn about how <strong>Django</strong> works “under <strong>the</strong> hood”.Warning: Elsewhere in <strong>the</strong> <strong>Django</strong> documentation, coverage of a feature is a sort of a contract: once an API is in<strong>the</strong> official documentation, we consider it “stable” and don’t change it without a good reason. APIs covered here,however, are considered “internal-only”: we reserve <strong>the</strong> right to change <strong>the</strong>se internals if we must.10.1 Contributing to <strong>Django</strong>If you think working with <strong>Django</strong> is fun, wait until you start working on it. We’re passionate about helping <strong>Django</strong>users make <strong>the</strong> jump to contributing members of <strong>the</strong> community, so <strong>the</strong>re are many ways you can help <strong>Django</strong>’sdevelopment:• Blog about <strong>Django</strong>. We syndicate all <strong>the</strong> <strong>Django</strong> blogs we know about on <strong>the</strong> community page; contact jacob@jacobian.orgif you’ve got a blog you’d like to see on that page.• Report bugs and request features in our ticket tracker. Please read Reporting bugs, below, for <strong>the</strong> details on howwe like our bug reports served up.• Submit patches for new and/or fixed behavior. Please read Submitting patches, below, for details on how tosubmit a patch. If you’re looking for an easy way to start contributing to <strong>Django</strong> have a look at <strong>the</strong> easy-pickingstickets.• Join <strong>the</strong> django-developers mailing list and share your ideas for how to improve <strong>Django</strong>. We’re always open tosuggestions, although we’re likely to be skeptical of large-scale suggestions without some code to back it up.• Triage patches that have been submitted by o<strong>the</strong>r users. Please read Ticket triage below, for details on <strong>the</strong> triageprocess.That’s all you need to know if you’d like to join <strong>the</strong> <strong>Django</strong> development community. The rest of this documentdescribes <strong>the</strong> details of how our community works and how it handles bugs, mailing lists, and all <strong>the</strong> o<strong>the</strong>r minutiae of<strong>Django</strong> development.10.1.1 Reporting bugsWell-written bug reports are incredibly helpful. However, <strong>the</strong>re’s a certain amount of overhead involved in workingwith any bug tracking system, so your help in keeping our ticket tracker as useful as possible is appreciated. Inparticular:• Do read <strong>the</strong> FAQ to see if your issue might be a well-known question.879
<strong>Django</strong> <strong>Documentation</strong>, Release 1.2• Do search <strong>the</strong> tracker to see if your issue has already been filed.• Do ask on django-users first if you’re not sure if what you’re seeing is a bug.• Do write complete, reproducible, specific bug reports. Include as much information as you possibly can, completewith code snippets, test cases, etc. This means including a clear, concise description of <strong>the</strong> problem, and aclear set of instructions for replicating <strong>the</strong> problem. A minimal example that illustrates <strong>the</strong> bug in a nice smalltest case is <strong>the</strong> best possible bug report.• Don’t use <strong>the</strong> ticket system to ask support questions. Use <strong>the</strong> django-users list, or <strong>the</strong> #django IRC channel forthat.• Don’t use <strong>the</strong> ticket system to make large-scale feature requests. We like to discuss any big changes to <strong>Django</strong>’score on <strong>the</strong> django-developers list before actually working on <strong>the</strong>m.• Don’t reopen issues that have been marked “wontfix”. This mark means that <strong>the</strong> decision has been made thatwe can’t or won’t fix this particular issue. If you’re not sure why, please ask on django-developers.• Don’t use <strong>the</strong> ticket tracker for lengthy discussions, because <strong>the</strong>y’re likely to get lost. If a particular ticket iscontroversial, please move discussion to django-developers.• Don’t post to django-developers just to announce that you have filed a bug report. All <strong>the</strong> tickets are mailed toano<strong>the</strong>r list (django-updates), which is tracked by developers and triagers, so we see <strong>the</strong>m as <strong>the</strong>y are filed.10.1.2 Reporting security issuesReport security issues to security@djangoproject.com. This is a private list only open to long-time, highly trusted<strong>Django</strong> developers, and its archives are not publicly readable.In <strong>the</strong> event of a confirmed vulnerability in <strong>Django</strong> itself, we will take <strong>the</strong> following actions:• Acknowledge to <strong>the</strong> reporter that we’ve received <strong>the</strong> report and that a fix is forthcoming. We’ll give a roughtimeline and ask <strong>the</strong> reporter to keep <strong>the</strong> issue confidential until we announce it.• Halt all o<strong>the</strong>r development as long as is needed to develop a fix, including patches against <strong>the</strong> current and twoprevious releases.• Determine a go-public date for announcing <strong>the</strong> vulnerability and <strong>the</strong> fix. To try to mitigate a possible “arms race”between those applying <strong>the</strong> patch and those trying to exploit <strong>the</strong> hole, we will not announce security problemsimmediately.• Pre-notify everyone we know to be running <strong>the</strong> affected version(s) of <strong>Django</strong>. We will send <strong>the</strong>se notificationsthrough private e-mail which will include documentation of <strong>the</strong> vulnerability, links to <strong>the</strong> relevant patch(es), anda request to keep <strong>the</strong> vulnerability confidential until <strong>the</strong> official go-public date.• Publicly announce <strong>the</strong> vulnerability and <strong>the</strong> fix on <strong>the</strong> pre-determined go-public date. This will probably meana new release of <strong>Django</strong>, but in some cases it may simply be patches against current releases.10.1.3 Submitting patchesWe’re always grateful for patches to <strong>Django</strong>’s code. Indeed, bug reports with associated patches will get fixed farmore quickly than those without patches.“Claiming” ticketsIn an open-source project with hundreds of contributors around <strong>the</strong> world, it’s important to manage communicationefficiently so that work doesn’t get duplicated and contributors can be as effective as possible. Hence, our policy is for880 Chapter 10. <strong>Django</strong> internals
<strong>Django</strong> <strong>Documentation</strong>, Release 1.2contributors to “claim” tickets in order to let o<strong>the</strong>r developers know that a particular bug or feature is being workedon.If you have identified a contribution you want to make and you’re capable of fixing it (as measured by your codingability, knowledge of <strong>Django</strong> internals and time availability), claim it by following <strong>the</strong>se steps:• Create an account to use in our ticket system.• If a ticket for this issue doesn’t exist yet, create one in our ticket tracker.• If a ticket for this issue already exists, make sure nobody else has claimed it. To do this, look at <strong>the</strong> “Assignedto” section of <strong>the</strong> ticket. If it’s assigned to “nobody,” <strong>the</strong>n it’s available to be claimed. O<strong>the</strong>rwise, somebody elseis working on this ticket, and you ei<strong>the</strong>r find ano<strong>the</strong>r bug/feature to work on, or contact <strong>the</strong> developer workingon <strong>the</strong> ticket to offer your help.• Log into your account, if you haven’t already, by clicking “Login” in <strong>the</strong> upper right of <strong>the</strong> ticket page.• Claim <strong>the</strong> ticket by clicking <strong>the</strong> radio button next to “Accept ticket” near <strong>the</strong> bottom of <strong>the</strong> page, <strong>the</strong>n clicking“Submit changes.”If you have an account but have forgotten your password, you can reset it using <strong>the</strong> password reset page.Ticket claimers’ responsibilityOnce you’ve claimed a ticket, you have a responsibility to work on that ticket in a reasonably timely fashion. If youdon’t have time to work on it, ei<strong>the</strong>r unclaim it or don’t claim it in <strong>the</strong> first place!Ticket triagers go through <strong>the</strong> list of claimed tickets from time to time, checking whe<strong>the</strong>r any progress has been made.If <strong>the</strong>re’s no sign of progress on a particular claimed ticket for a week or two, a triager may ask you to relinquish <strong>the</strong>ticket claim so that it’s no longer monopolized and somebody else can claim it.If you’ve claimed a ticket and it’s taking a long time (days or weeks) to code, keep everybody updated by postingcomments on <strong>the</strong> ticket. If you don’t provide regular updates, and you don’t respond to a request for a progress report,your claim on <strong>the</strong> ticket may be revoked. As always, more communication is better than less communication!Which tickets should be claimed?Of course, going through <strong>the</strong> steps of claiming tickets is overkill in some cases. In <strong>the</strong> case of small changes, such astypos in <strong>the</strong> documentation or small bugs that will only take a few minutes to fix, you don’t need to jump through <strong>the</strong>hoops of claiming tickets. Just submit your patch and be done with it.Patch style• Make sure your code matches our coding style.• Submit patches in <strong>the</strong> format returned by <strong>the</strong> svn diff command. An exception is for code changes that aredescribed more clearly in plain English than in code. Indentation is <strong>the</strong> most common example; it’s hard to readpatches when <strong>the</strong> only difference in code is that it’s indented.Patches in git diff format are also acceptable.• When creating patches, always run svn diff from <strong>the</strong> top-level trunk directory – i.e., <strong>the</strong> one that containsdjango, docs, tests, AUTHORS, etc. This makes it easy for o<strong>the</strong>r people to apply your patches.• Attach patches to a ticket in <strong>the</strong> ticket tracker, using <strong>the</strong> “attach file” button. Please don’t put <strong>the</strong> patch in <strong>the</strong>ticket description or comment unless it’s a single line patch.10.1. Contributing to <strong>Django</strong> 881
<strong>Django</strong> <strong>Documentation</strong>, Release 1.2• Name <strong>the</strong> patch file with a .diff extension; this will let <strong>the</strong> ticket tracker apply correct syntax highlighting,which is quite helpful.• Check <strong>the</strong> “Has patch” box on <strong>the</strong> ticket details. This will make it obvious that <strong>the</strong> ticket includes a patch, andit will add <strong>the</strong> ticket to <strong>the</strong> list of tickets with patches.• The code required to fix a problem or add a feature is an essential part of a patch, but it is not <strong>the</strong> only part.A good patch should also include a regression test to validate <strong>the</strong> behavior that has been fixed (and prevent <strong>the</strong>problem from arising again).• If <strong>the</strong> code associated with a patch adds a new feature, or modifies behavior of an existing feature, <strong>the</strong> patchshould also contain documentation.Non-trivial patchesA “non-trivial” patch is one that is more than a simple bug fix. It’s a patch that introduces <strong>Django</strong> functionality andmakes some sort of design decision.If you provide a non-trivial patch, include evidence that alternatives have been discussed on django-developers. Ifyou’re not sure whe<strong>the</strong>r your patch should be considered non-trivial, just ask.10.1.4 Ticket triageUnfortunately, not all bug reports in <strong>the</strong> ticket tracker provide all <strong>the</strong> required details. A number of tickets have patches,but those patches don’t meet all <strong>the</strong> requirements of a good patch.One way to help out is to triage bugs that have been reported by o<strong>the</strong>r users. A couple of dedicated volunteers workon this regularly, but more help is always appreciated.Most of <strong>the</strong> workflow is based around <strong>the</strong> concept of a ticket’s “triage stage”. This stage describes where in its lifetimea given ticket is at any time. Along with a handful of flags, this field easily tells us what and who each ticket is waitingon.Since a picture is worth a thousand words, let’s start <strong>the</strong>re:882 Chapter 10. <strong>Django</strong> internals
<strong>Django</strong> <strong>Documentation</strong>, Release 1.2We’ve got two official roles here:• Core developers: people with commit access who make <strong>the</strong> big decisions and write <strong>the</strong> bulk of <strong>the</strong> code.• Ticket triagers: trusted community members with a proven history of working with <strong>the</strong> <strong>Django</strong> community. Asa result of this history, <strong>the</strong>y have been entrusted by <strong>the</strong> core developers to make some of <strong>the</strong> smaller decisionsabout tickets.Second, note <strong>the</strong> five triage stages:1. A ticket starts as “Unreviewed”, meaning that nobody has examined <strong>the</strong> ticket.2. “Design decision needed” means “this concept requires a design decision,” which should be discussed ei<strong>the</strong>r in<strong>the</strong> ticket comments or on django-developers. The “Design decision needed” step will generally only be usedfor feature requests. It can also be used for issues that might be bugs, depending on opinion or interpretation.Obvious bugs (such as crashes, incorrect query results, or non-compliance with a standard) skip this step andmove straight to “Accepted”.3. Once a ticket is ruled to be approved for fixing, it’s moved into <strong>the</strong> “Accepted” stage. This stage is where all <strong>the</strong>real work gets done.4. In some cases, a ticket might get moved to <strong>the</strong> “Someday/Maybe” state. This means <strong>the</strong> ticket is an enhancementrequest that we might consider adding to <strong>the</strong> framework if an excellent patch is submitted. These tickets are nota high priority.5. If a ticket has an associated patch (see below), a triager will review <strong>the</strong> patch. If <strong>the</strong> patch is complete, it’ll bemarked as “ready for checkin” so that a core developer knows to review and check in <strong>the</strong> patches.10.1. Contributing to <strong>Django</strong> 883
<strong>Django</strong> <strong>Documentation</strong>, Release 1.2The second part of this workflow involves a set of flags <strong>the</strong> describe what <strong>the</strong> ticket has or needs in order to be “readyfor checkin”:“Has patch” This means <strong>the</strong> ticket has an associated patch. These will be reviewed by <strong>the</strong> triage team to see if <strong>the</strong>patch is “good”.“Needs documentation” This flag is used for tickets with patches that need associated documentation. Completedocumentation of features is a prerequisite before we can check a fix into <strong>the</strong> codebase.“Needs tests” This flags <strong>the</strong> patch as needing associated unit tests. Again, this is a required part of a valid patch.“Patch needs improvement” This flag means that although <strong>the</strong> ticket has a patch, it’s not quite ready for checkin.This could mean <strong>the</strong> patch no longer applies cleanly, or that <strong>the</strong> code doesn’t live up to our standards.A ticket can be resolved in a number of ways:“fixed” Used by one of <strong>the</strong> core developers once a patch has been rolled into <strong>Django</strong> and <strong>the</strong> issue is fixed.“invalid” Used if <strong>the</strong> ticket is found to be incorrect. This means that <strong>the</strong> issue in <strong>the</strong> ticket is actually <strong>the</strong> result of auser error, or describes a problem with something o<strong>the</strong>r than <strong>Django</strong>, or isn’t a bug report or feature request atall (for example, some new users submit support queries as tickets).“wontfix” Used when a core developer decides that this request is not appropriate for consideration in <strong>Django</strong>. Thisis usually chosen after discussion in <strong>the</strong> django-developers mailing list, and you should feel free to joinin when it’s something you care about.“duplicate” Used when ano<strong>the</strong>r ticket covers <strong>the</strong> same issue. By closing duplicate tickets, we keep all <strong>the</strong> discussionin one place, which helps everyone.“worksforme” Used when <strong>the</strong> ticket doesn’t contain enough detail to replicate <strong>the</strong> original bug.If you believe that <strong>the</strong> ticket was closed in error – because you’re still having <strong>the</strong> issue, or it’s popped up somewhereelse, or <strong>the</strong> triagers have – made a mistake, please reopen <strong>the</strong> ticket and tell us why. Please do not reopen tickets thathave been marked as “wontfix” by core developers.Triage by <strong>the</strong> general communityAlthough <strong>the</strong> core developers and ticket triagers make <strong>the</strong> big decisions in <strong>the</strong> ticket triage process, <strong>the</strong>re’s also a lotthat general community members can do to help <strong>the</strong> triage process. In particular, you can help out by:• Closing “Unreviewed” tickets as “invalid”, “worksforme” or “duplicate.”• Promoting “Unreviewed” tickets to “Design decision needed” if a design decision needs to be made, or “Accepted”in case of obvious bugs.• Correcting <strong>the</strong> “Needs tests”, “Needs documentation”, or “Has patch” flags for tickets where <strong>the</strong>y are incorrectlyset.• Adding <strong>the</strong> easy-pickings keyword to tickets that are small and relatively straightforward.• Checking that old tickets are still valid. If a ticket hasn’t seen any activity in a long time, it’s possible that <strong>the</strong>problem has been fixed but <strong>the</strong> ticket hasn’t yet been closed.• Contacting <strong>the</strong> owners of tickets that have been claimed but have not seen any recent activity. If <strong>the</strong> ownerdoesn’t respond after a week or so, remove <strong>the</strong> owner’s claim on <strong>the</strong> ticket.• Identifying trends and <strong>the</strong>mes in <strong>the</strong> tickets. If <strong>the</strong>re a lot of bug reports about a particular part of <strong>Django</strong>, itmay indicate we should consider refactoring that part of <strong>the</strong> code. If a trend is emerging, you should raise it fordiscussion (referencing <strong>the</strong> relevant tickets) on django-developers.However, we do ask <strong>the</strong> following of all general community members working in <strong>the</strong> ticket database:884 Chapter 10. <strong>Django</strong> internals
<strong>Django</strong> <strong>Documentation</strong>, Release 1.2• Please don’t close tickets as “wontfix.” The core developers will make <strong>the</strong> final determination of <strong>the</strong> fate of aticket, usually after consultation with <strong>the</strong> community.• Please don’t promote tickets to “<strong>Read</strong>y for checkin” unless <strong>the</strong>y are trivial changes – for example, spellingmistakes or broken links in documentation.• Please don’t reverse a decision that has been made by a core developer. If you disagree with a discussion thathas been made, please post a message to django-developers.• Please be conservative in your actions. If you’re unsure if you should be making a change, don’t make <strong>the</strong>change – leave a comment with your concerns on <strong>the</strong> ticket, or post a message to django-developers.10.1.5 Submitting and maintaining translationsVarious parts of <strong>Django</strong>, such as <strong>the</strong> admin site and validation error messages, are internationalized. This means<strong>the</strong>y display different text depending on a user’s language setting. For this, <strong>Django</strong> uses <strong>the</strong> same internationalizationinfrastructure available to <strong>Django</strong> applications described in <strong>the</strong> i18n documentation.These translations are contributed by <strong>Django</strong> users worldwide. If you find an incorrect translation, or if you’d like toadd a language that isn’t yet translated, here’s what to do:• Join <strong>the</strong> <strong>Django</strong> i18n mailing list and introduce yourself.• Make sure you read <strong>the</strong> notes about Specialties of <strong>Django</strong> translation.• Create translations using <strong>the</strong> methods described in <strong>the</strong> localization documentation. For this you will use<strong>the</strong> django-admin.py makemessages tool. In this particular case it should be run from <strong>the</strong> top-leveldjango directory of <strong>the</strong> <strong>Django</strong> source tree.The script runs over <strong>the</strong> entire <strong>Django</strong> source tree and pulls out all strings marked for translation. It creates(or updates) a message file in <strong>the</strong> directory conf/locale (for example for pt_BR, <strong>the</strong> file will beconf/locale/pt_BR/LC_MESSAGES/django.po).• Make sure that django-admin.py compilemessages -l runs without producing any warnings.• Repeat <strong>the</strong> last two steps for <strong>the</strong> djangojs domain (by appending <strong>the</strong> -d djangojs command line optionto <strong>the</strong> django-admin.py invocations).• Optionally, review and update <strong>the</strong> conf/locale//formats.py file to describe <strong>the</strong> date, timeand numbers formatting particularities of your locale. See Format localization for details.• Create a diff against <strong>the</strong> current Subversion trunk.• Open a ticket in <strong>Django</strong>’s ticket system, set its Component field to Translations, and attach <strong>the</strong> patch toit.10.1.6 Submitting javascript patchesNew in version 1.2: Please, see <strong>the</strong> release notes <strong>Django</strong>’s admin system leverages <strong>the</strong> jQuery framework to increase<strong>the</strong> capabilities of <strong>the</strong> admin interface. In conjunction, <strong>the</strong>re is an emphasis on admin javascript performance andminimizing overall admin media file size. Serving compressed or “minified” versions of javascript files is consideredbest practice in this regard.To that end, patches for javascript files should include both <strong>the</strong> original code for future development (e.g. “foo.js”),and a compressed version for production use (e.g. “foo.min.js”). Any links to <strong>the</strong> file in <strong>the</strong> codebase should point to<strong>the</strong> compressed version.To simplify <strong>the</strong> process of providing optimized javascript code, <strong>Django</strong> includes a handy script which should be usedto create a “minified” version. This script is located at /contrib/admin/media/js/compress.py.10.1. Contributing to <strong>Django</strong> 885
<strong>Django</strong> <strong>Documentation</strong>, Release 1.2Behind <strong>the</strong> scenes, compress.py is a front-end for Google’s Closure Compiler which is written in Java. However,<strong>the</strong> Closure Compiler library is not bundled with <strong>Django</strong> directly, so those wishing to contribute complete javascriptpatches will need to download and install <strong>the</strong> library independently.The Closure Compiler library requires Java version 6 or higher (Java 1.6 or higher on Mac OS X). Note that Mac OSX 10.5 and earlier did not ship with Java 1.6 by default, so it may be necessary to upgrade your Java installation before<strong>the</strong> tool will be functional. Also note that even after upgrading Java, <strong>the</strong> default /usr/bin/java command may remainlinked to <strong>the</strong> previous Java binary, so relinking that command may be necessary as well.Please don’t forget to run compress.py and include <strong>the</strong> diff of <strong>the</strong> minified scripts when submitting patches for<strong>Django</strong>’s javascript.10.1.7 <strong>Django</strong> conventionsVarious <strong>Django</strong>-specific code issues are detailed in this section.Use of django.conf.settingsModules should not in general use settings stored in django.conf.settings at <strong>the</strong> top level (i.e. evaluated when<strong>the</strong> module is imported). The explanation for this is as follows:Manual configuration of settings (i.e. not relying on <strong>the</strong> DJANGO_SETTINGS_MODULE environment variable) isallowed and possible as follows:from django.conf import settingssettings.configure({}, SOME_SETTING=’foo’)However, if any setting is accessed before <strong>the</strong> settings.configure line, this will not work. (Internally,settings is a LazyObject which configures itself automatically when <strong>the</strong> settings are accessed if it has notalready been configured).So, if <strong>the</strong>re is a module containing some code as follows:from django.conf import settingsfrom django.core.urlresolvers import get_callabledefault_foo_view = get_callable(settings.FOO_VIEW)...<strong>the</strong>n importing this module will cause <strong>the</strong> settings object to be configured. That means that <strong>the</strong> ability for thirdparties to import <strong>the</strong> module at <strong>the</strong> top level is incompatible with <strong>the</strong> ability to configure <strong>the</strong> settings object manually,or makes it very difficult in some circumstances.Instead of <strong>the</strong> above code, a level of laziness or indirection must be used, such asdjango.utils.functional.LazyObject, django.utils.functional.lazy() or lambda.10.1.8 Coding stylePlease follow <strong>the</strong>se coding standards when writing code for inclusion in <strong>Django</strong>:• Unless o<strong>the</strong>rwise specified, follow PEP 8.You could use a tool like pep8.py to check for some problems in this area, but remember that PEP 8 is only aguide, so respect <strong>the</strong> style of <strong>the</strong> surrounding code as a primary goal.• Use four spaces for indentation.886 Chapter 10. <strong>Django</strong> internals
<strong>Django</strong> <strong>Documentation</strong>, Release 1.2• Use underscores, not camelCase, for variable, function and method names (i.e.poll.get_unique_voters(), not poll.getUniqueVoters).• Use InitialCaps for class names (or for factory functions that return classes).• Mark all strings for internationalization; see <strong>the</strong> i18n documentation for details.• In docstrings, use “action words” such as:def foo():"""Calculates something and returns <strong>the</strong> result."""passHere’s an example of what not to do:def foo():"""Calculate something and return <strong>the</strong> result."""pass• Please don’t put your name in <strong>the</strong> code you contribute. Our policy is to keep contributors’ names in <strong>the</strong>AUTHORS file distributed with <strong>Django</strong> – not scattered throughout <strong>the</strong> codebase itself. Feel free to include achange to <strong>the</strong> AUTHORS file in your patch if you make more than a single trivial change.Template style• In <strong>Django</strong> template code, put one (and only one) space between <strong>the</strong> curly brackets and <strong>the</strong> tag contents.Do this:{{ foo }}Don’t do this:{{foo}}View style• In <strong>Django</strong> views, <strong>the</strong> first parameter in a view function should be called request.Do this:def my_view(request, foo):# ...Don’t do this:def my_view(req, foo):# ...Model style• Field names should be all lowercase, using underscores instead of camelCase.Do this:10.1. Contributing to <strong>Django</strong> 887
<strong>Django</strong> <strong>Documentation</strong>, Release 1.2class Person(models.Model):first_name = models.CharField(max_length=20)last_name = models.CharField(max_length=40)Don’t do this:class Person(models.Model):FirstName = models.CharField(max_length=20)Last_Name = models.CharField(max_length=40)• The class Meta should appear after <strong>the</strong> fields are defined, with a single blank line separating <strong>the</strong> fields and<strong>the</strong> class definition.Do this:class Person(models.Model):first_name = models.CharField(max_length=20)last_name = models.CharField(max_length=40)class Meta:verbose_name_plural = ’people’Don’t do this:class Person(models.Model):first_name = models.CharField(max_length=20)last_name = models.CharField(max_length=40)class Meta:verbose_name_plural = ’people’Don’t do this, ei<strong>the</strong>r:class Person(models.Model):class Meta:verbose_name_plural = ’people’first_name = models.CharField(max_length=20)last_name = models.CharField(max_length=40)• The order of model inner classes and standard methods should be as follows (noting that <strong>the</strong>se are not allrequired):– All database fields– Custom manager attributes– class Meta– def __unicode__()– def __str__()– def save()– def get_absolute_url()– Any custom methods• If choices is defined for a given model field, define <strong>the</strong> choices as a tuple of tuples, with an all-uppercasename, ei<strong>the</strong>r near <strong>the</strong> top of <strong>the</strong> model module or just above <strong>the</strong> model class. Example:888 Chapter 10. <strong>Django</strong> internals
<strong>Django</strong> <strong>Documentation</strong>, Release 1.2GENDER_CHOICES = ((’M’, ’Male’),(’F’, ’Female’),)10.1.9 <strong>Documentation</strong> styleWe place a high importance on consistency and readability of documentation. (After all, <strong>Django</strong> was created in ajournalism environment!)How to document new featuresWe treat our documentation like we treat our code: we aim to improve it as often as possible. This section explainshow writers can craft <strong>the</strong>ir documentation changes in <strong>the</strong> most useful and least error-prone ways.<strong>Documentation</strong> changes come in two forms:• General improvements – Typo corrections, error fixes and better explanations through clearer writing and moreexamples.• New features – <strong>Documentation</strong> of features that have been added to <strong>the</strong> framework since <strong>the</strong> last release.Our policy is:All documentation of new features should be written in a way that clearly designates <strong>the</strong> featuresare only available in <strong>the</strong> <strong>Django</strong> development version. Assume documentation readers are using <strong>the</strong>latest release, not <strong>the</strong> development version.Our preferred way for marking new features is by prefacing <strong>the</strong> features’ documentation with: ”.. versionadded::X.Y”, followed by an optional one line comment and a mandatory blank line.General improvements, or o<strong>the</strong>r changes to <strong>the</strong> APIs that should be emphasized should use <strong>the</strong> ”.. versionchanged::X.Y” directive (with <strong>the</strong> same format as <strong>the</strong> versionadded mentioned above.There’s a full page of information about <strong>the</strong> <strong>Django</strong> documentation system that you should read prior to working on<strong>the</strong> documentation.Guidelines for reST filesThese guidelines regulate <strong>the</strong> format of our reST documentation:• In section titles, capitalize only initial words and proper nouns.• Wrap <strong>the</strong> documentation at 80 characters wide, unless a code example is significantly less readable when splitover two lines, or for ano<strong>the</strong>r good reason.Commonly used termsHere are some style guidelines on commonly used terms throughout <strong>the</strong> documentation:• <strong>Django</strong> – when referring to <strong>the</strong> framework, capitalize <strong>Django</strong>. It is lowercase only in Python code and in <strong>the</strong>djangoproject.com logo.• e-mail – it has a hyphen.• MySQL• PostgreSQL10.1. Contributing to <strong>Django</strong> 889
<strong>Django</strong> <strong>Documentation</strong>, Release 1.2• Python – when referring to <strong>the</strong> language, capitalize Python.• realize, customize, initialize, etc. – use <strong>the</strong> American “ize” suffix, not “ise.”• SQLite• subclass – it’s a single word without a hyphen, both as a verb (“subclass that model”) and as a noun (“create asubclass”).• Web, World Wide Web, <strong>the</strong> Web – note Web is always capitalized when referring to <strong>the</strong> World Wide Web.• Web site – use two words, with Web capitalized.<strong>Django</strong>-specific terminology• model – it’s not capitalized.• template – it’s not capitalized.• URLconf – use three capitalized letters, with no space before “conf.”• view – it’s not capitalized.10.1.10 Committing codePlease follow <strong>the</strong>se guidelines when committing code to <strong>Django</strong>’s Subversion repository:• For any medium-to-big changes, where “medium-to-big” is according to your judgment, please bring things upon <strong>the</strong> django-developers mailing list before making <strong>the</strong> change.If you bring something up on django-developers and nobody responds, please don’t take that to mean your ideais great and should be implemented immediately because nobody contested it. <strong>Django</strong>’s lead developers don’thave a lot of time to read mailing-list discussions immediately, so you may have to wait a couple of days beforegetting a response.• Write detailed commit messages in <strong>the</strong> past tense, not present tense.– Good: “Fixed Unicode bug in RSS API.”– Bad: “Fixes Unicode bug in RSS API.”– Bad: “Fixing Unicode bug in RSS API.”• For commits to a branch, prefix <strong>the</strong> commit message with <strong>the</strong> branch name. For example: “magic-removal:Added support for mind reading.”• Limit commits to <strong>the</strong> most granular change that makes sense. This means, use frequent small commits ra<strong>the</strong>rthan infrequent large commits. For example, if implementing feature X requires a small change to library Y, firstcommit <strong>the</strong> change to library Y, <strong>the</strong>n commit feature X in a separate commit. This goes a long way in helpingall core <strong>Django</strong> developers follow your changes.• Separate bug fixes from feature changes.Bug fixes need to be added to <strong>the</strong> current bugfix branch (e.g. <strong>the</strong> 1.0.X branch) as well as <strong>the</strong> current trunk.• If your commit closes a ticket in <strong>the</strong> <strong>Django</strong> ticket tracker, begin your commit message with <strong>the</strong> text “Fixed#abc”, where “abc” is <strong>the</strong> number of <strong>the</strong> ticket your commit fixes. Example: “Fixed #123 – Added support forfoo”. We’ve rigged Subversion and Trac so that any commit message in that format will automatically close <strong>the</strong>referenced ticket and post a comment to it with <strong>the</strong> full commit message.If your commit closes a ticket and is in a branch, use <strong>the</strong> branch name first, <strong>the</strong>n <strong>the</strong> “Fixed #abc.” For example:“magic-removal: Fixed #123 – Added whizbang feature.”890 Chapter 10. <strong>Django</strong> internals
<strong>Django</strong> <strong>Documentation</strong>, Release 1.2For <strong>the</strong> curious: We’re using a Trac post-commit hook for this.• If your commit references a ticket in <strong>the</strong> <strong>Django</strong> ticket tracker but does not close <strong>the</strong> ticket, include <strong>the</strong> phrase“Refs #abc”, where “abc” is <strong>the</strong> number of <strong>the</strong> ticket your commit references. We’ve rigged Subversion andTrac so that any commit message in that format will automatically post a comment to <strong>the</strong> appropriate ticket.Reverting commitsNobody’s perfect; mistakes will be committed. When a mistaken commit is discovered, please follow <strong>the</strong>se guidelines:• Try very hard to ensure that mistakes don’t happen. Just because we have a reversion policy doesn’t relax yourresponsibility to aim for <strong>the</strong> highest quality possible. Really: double-check your work before you commit it in<strong>the</strong> first place!• If possible, have <strong>the</strong> original author revert his/her own commit.• Don’t revert ano<strong>the</strong>r author’s changes without permission from <strong>the</strong> original author.• If <strong>the</strong> original author can’t be reached (within a reasonable amount of time – a day or so) and <strong>the</strong> problem issevere – crashing bug, major test failures, etc – <strong>the</strong>n ask for objections on django-dev <strong>the</strong>n revert if <strong>the</strong>re arenone.• If <strong>the</strong> problem is small (a feature commit after feature freeze, say), wait it out.• If <strong>the</strong>re’s a disagreement between <strong>the</strong> committer and <strong>the</strong> reverter-to-be <strong>the</strong>n try to work it out on <strong>the</strong> djangodevelopersmailing list. If an agreement can’t be reached <strong>the</strong>n it should be put to a vote.• If <strong>the</strong> commit introduced a confirmed, disclosed security vulnerability <strong>the</strong>n <strong>the</strong> commit may be reverted immediatelywithout permission from anyone.• The release branch maintainer may back out commits to <strong>the</strong> release branch without permission if <strong>the</strong> commitbreaks <strong>the</strong> release branch.10.1.11 Unit tests<strong>Django</strong> comes with a test suite of its own, in <strong>the</strong> tests directory of <strong>the</strong> <strong>Django</strong> tarball. It’s our policy to make sureall tests pass at all times.The tests cover:• Models and <strong>the</strong> database API (tests/modeltests/).• Everything else in core <strong>Django</strong> code (tests/regressiontests)• Contrib apps (django/contrib//tests, see below)We appreciate any and all contributions to <strong>the</strong> test suite!The <strong>Django</strong> tests all use <strong>the</strong> testing infrastructure that ships with <strong>Django</strong> for testing applications. See Testing <strong>Django</strong>applications for an explanation of how to write new tests.Running <strong>the</strong> unit testsTo run <strong>the</strong> tests, cd to <strong>the</strong> tests/ directory and type:./runtests.py --settings=path.to.django.settingsYes, <strong>the</strong> unit tests need a settings module, but only for database connection info. Your DATABASES setting needs todefine two databases:10.1. Contributing to <strong>Django</strong> 891
<strong>Django</strong> <strong>Documentation</strong>, Release 1.2• A default database. This database should use <strong>the</strong> backend that you want to use for primary testing• A database with <strong>the</strong> alias o<strong>the</strong>r. The o<strong>the</strong>r database is used to establish that queries can be directed todifferent databases. As a result, this database can use any backend you want. It doesn’t need to use <strong>the</strong> samebackend as <strong>the</strong> default database (although it can use <strong>the</strong> same backend if you want to).If you’re using <strong>the</strong> SQLite database backend, you need to define ENGINE for both databases, plus a TEST_NAME for<strong>the</strong> o<strong>the</strong>r database. The following is a minimal settings file that can be used to test SQLite:DATABASES = {’default’: {’ENGINE’: ’django.db.backends.sqlite3’},’o<strong>the</strong>r’: {’ENGINE’: ’django.db.backends.sqlite3’,’TEST_NAME’: ’o<strong>the</strong>r_db’}}As a convenience, this settings file is included in your <strong>Django</strong> distribution. It is called test_sqlite, and is includedin <strong>the</strong> tests directory. This allows you to get started running <strong>the</strong> tests against <strong>the</strong> sqlite database without doinganything on your filesystem. However it should be noted that running against o<strong>the</strong>r database backends is recommendedfor certain types of test cases.To run <strong>the</strong> tests with this included settings file, cd to <strong>the</strong> tests/ directory and type:./runtests.py --settings=test_sqliteIf you’re using ano<strong>the</strong>r backend, you will need to provide o<strong>the</strong>r details for each database:• The USER option for each of your databases needs to specify an existing user account for <strong>the</strong> database.• The PASSWORD option needs to provide <strong>the</strong> password for <strong>the</strong> USER that has been specified.• The NAME option must be <strong>the</strong> name of an existing database to which <strong>the</strong> given user has permission to connect.The unit tests will not touch this database; <strong>the</strong> test runner creates a new database whose name is NAME prefixedwith test_, and this test database is deleted when <strong>the</strong> tests are finished. This means your user account needspermission to execute CREATE DATABASE.You will also need to ensure that your database uses UTF-8 as <strong>the</strong> default character set. If your database server doesn’tuse UTF-8 as a default charset, you will need to include a value for TEST_CHARSET in <strong>the</strong> settings dictionary for <strong>the</strong>applicable database.If you want to run <strong>the</strong> full suite of tests, you’ll need to install a number of dependencies:• PyYAML• Markdown• Textile• Docutils• setuptools• memcached, plus <strong>the</strong> ei<strong>the</strong>r <strong>the</strong> python-memcached or cmemcached Python binding• gettext (gettext on Windows)If you want to test <strong>the</strong> memcached cache backend, you will also need to define a CACHE_BACKEND setting that pointsat your memcached instance.Each of <strong>the</strong>se dependencies is optional. If you’re missing any of <strong>the</strong>m, <strong>the</strong> associated tests will be skipped.892 Chapter 10. <strong>Django</strong> internals
<strong>Django</strong> <strong>Documentation</strong>, Release 1.2To run a subset of <strong>the</strong> unit tests, append <strong>the</strong> names of <strong>the</strong> test modules to <strong>the</strong> runtests.py command line. See <strong>the</strong>list of directories in tests/modeltests and tests/regressiontests for module names.As an example, if <strong>Django</strong> is not in your PYTHONPATH, you placed settings.py in <strong>the</strong> tests/ directory, andyou’d like to only run tests for generic relations and internationalization, type:PYTHONPATH=‘pwd‘/.../runtests.py --settings=settings generic_relations i18nContrib appsTests for apps in django/contrib/ go in <strong>the</strong>ir respective directories under django/contrib/, in a tests.pyfile. (You can split <strong>the</strong> tests over multiple modules by using a tests directory in <strong>the</strong> normal Python way.)For <strong>the</strong> tests to be found, a models.py file must exist (it doesn’t have to have anything in it). If you have URLs thatneed to be mapped, put <strong>the</strong>m in tests/urls.py.To run tests for just one contrib app (e.g. markup), use <strong>the</strong> same method as above:./runtests.py --settings=settings markup10.1.12 Requesting featuresWe’re always trying to make <strong>Django</strong> better, and your feature requests are a key part of that. Here are some tips on howto most effectively make a request:• Request <strong>the</strong> feature on django-developers, not in <strong>the</strong> ticket tracker; it’ll get read more closely if it’s on <strong>the</strong>mailing list.• Describe clearly and concisely what <strong>the</strong> missing feature is and how you’d like to see it implemented. Includeexample code (non-functional is OK) if possible.• Explain why you’d like <strong>the</strong> feature. In some cases this is obvious, but since <strong>Django</strong> is designed to help realdevelopers get real work done, you’ll need to explain it, if it isn’t obvious why <strong>the</strong> feature would be useful.As with most open-source projects, code talks. If you are willing to write <strong>the</strong> code for <strong>the</strong> feature yourself or if (evenbetter) you’ve already written it, it’s much more likely to be accepted. If it’s a large feature that might need multipledevelopers we’re always happy to give you an experimental branch in our repository; see below.10.1.13 Branch policyIn general, <strong>the</strong> trunk must be kept stable. People should be able to run production sites against <strong>the</strong> trunk at any time.Additionally, commits to trunk ought to be as atomic as possible – smaller changes are better. Thus, large featurechanges – that is, changes too large to be encapsulated in a single patch, or changes that need multiple eyes on <strong>the</strong>m –must happen on dedicated branches.This means that if you want to work on a large feature – anything that would take more than a single patch, or requireslarge-scale refactoring – you need to do it on a feature branch. Our development process recognizes two options forfeature branches:1. Feature branches using a distributed revision control system like Git, Mercurial, Bazaar, etc.If you’re familiar with one of <strong>the</strong>se tools, this is probably your best option since it doesn’t require any supportor buy-in from <strong>the</strong> <strong>Django</strong> core developers.10.1. Contributing to <strong>Django</strong> 893
<strong>Django</strong> <strong>Documentation</strong>, Release 1.2However, do keep in mind that <strong>Django</strong> will continue to use Subversion for <strong>the</strong> foreseeable future, and this willnaturally limit <strong>the</strong> recognition of your branch. Fur<strong>the</strong>r, if your branch becomes eligible for merging to trunkyou’ll need to find a core developer familiar with your DVCS of choice who’ll actually perform <strong>the</strong> merge.If you do decided to start a distributed branch of <strong>Django</strong> and choose to make it public, please add <strong>the</strong> branch to<strong>the</strong> <strong>Django</strong> branches wiki page.2. Feature branches using SVN have a higher bar. If you want a branch in SVN itself, you’ll need a “mentor”among <strong>the</strong> core committers. This person is responsible for actually creating <strong>the</strong> branch, monitoring your process(see below), and ultimately merging <strong>the</strong> branch into trunk.If you want a feature branch in SVN, you’ll need to ask in django-developers for a mentor.Branch rulesWe’ve got a few rules for branches born out of experience with what makes a successful <strong>Django</strong> branch.DVCS branches are obviously not under central control, so we have no way of enforcing <strong>the</strong>se rules. However, ifyou’re using a DVCS, following <strong>the</strong>se rules will give you <strong>the</strong> best chance of having a successful branch (read: mergedback to trunk).Developers with branches in SVN, however, must follow <strong>the</strong>se rules. The branch mentor will keep on eye on <strong>the</strong>branch and will delete it if <strong>the</strong>se rules are broken.• Only branch entire copies of <strong>the</strong> <strong>Django</strong> tree, even if work is only happening on part of that tree. This makes itpainless to switch to a branch.• Merge changes from trunk no less than once a week, and preferably every couple-three days.In our experience, doing regular trunk merges is often <strong>the</strong> difference between a successful branch and one thatfizzles and dies.If you’re working on an SVN branch, you should be using svnmerge.py to track merges from trunk.• Keep tests passing and documentation up-to-date. As with patches, we’ll only merge a branch that comes withtests and documentation.Once <strong>the</strong> branch is stable and ready to be merged into <strong>the</strong> trunk, alert django-developers.After a branch has been merged, it should be considered “dead”; write access to it will be disabled, and old brancheswill be periodically “trimmed.” To keep our SVN wrangling to a minimum, we won’t be merging from a given branchinto <strong>the</strong> trunk more than once.Using branchesTo use a branch, you’ll need to do two things:• Get <strong>the</strong> branch’s code through Subversion.• Point your Python site-packages directory at <strong>the</strong> branch’s version of <strong>the</strong> django package ra<strong>the</strong>r than <strong>the</strong>version you already have installed.Getting <strong>the</strong> code from SubversionTo get <strong>the</strong> latest version of a branch’s code, check it out using Subversion:svn co http://code.djangoproject.com/svn/django/branches//894 Chapter 10. <strong>Django</strong> internals
<strong>Django</strong> <strong>Documentation</strong>, Release 1.2...where is <strong>the</strong> branch’s name. See <strong>the</strong> list of branch names.Alternatively, you can automatically convert an existing directory of <strong>the</strong> <strong>Django</strong> source code as long as you’ve checkedit out via Subversion. To do <strong>the</strong> conversion, execute this command from within your django directory:svn switch http://code.djangoproject.com/svn/django/branches//The advantage of using svn switch instead of svn co is that <strong>the</strong> switch command retains any changes youmight have made to your local copy of <strong>the</strong> code. It attempts to merge those changes into <strong>the</strong> “switched” code. Thedisadvantage is that it may cause conflicts with your local changes if <strong>the</strong> “switched” code has altered <strong>the</strong> same lines ofcode.(Note that if you use svn switch, you don’t need to point Python at <strong>the</strong> new version, as explained in <strong>the</strong> nextsection.)Pointing Python at <strong>the</strong> new <strong>Django</strong> versionOnce you’ve retrieved <strong>the</strong> branch’s code, you’ll need to change your Python site-packages directory sothat it points to <strong>the</strong> branch version of <strong>the</strong> django directory. (The site-packages directory is somewheresuch as /usr/lib/python2.4/site-packages or /usr/local/lib/python2.4/site-packagesor C:\Python\site-packages.)The simplest way to do this is by renaming <strong>the</strong> old django directory to django.OLD and moving <strong>the</strong> trunk versionof <strong>the</strong> code into <strong>the</strong> directory and calling it django.Alternatively, you can use a symlink called django that points to <strong>the</strong> location of <strong>the</strong> branch’s django package. Ifyou want to switch back, just change <strong>the</strong> symlink to point to <strong>the</strong> old code.A third option is to use a path file (.pth) which should work on all systems (including Windows,which doesn’t have symlinks available). First, make sure <strong>the</strong>re are no files, directories or symlinks named django inyour site-packages directory. Then create a text file named django.pth and save it to your site-packagesdirectory. That file should contain a path to your copy of <strong>Django</strong> on a single line and optional comments. Here is anexample that points to multiple branches. Just uncomment <strong>the</strong> line for <strong>the</strong> branch you want to use (‘Trunk’ in thisexample) and make sure all o<strong>the</strong>r lines are commented:# Trunk is a svn checkout of:# http://code.djangoproject.com/svn/django/trunk/#/path/to/trunk# is a svn checkout of:# http://code.djangoproject.com/svn/django/branches//##/path/to/# On windows a path may look like this:# C:/path/to/If you’re using <strong>Django</strong> 0.95 or earlier and installed it using python setup.py install, you’ll have adirectory called something like <strong>Django</strong>-0.95-py2.4.egg instead of django. In this case, edit <strong>the</strong> filesetuptools.pth and remove <strong>the</strong> line that references <strong>the</strong> <strong>Django</strong> .egg file. Then copy <strong>the</strong> branch’s versionof <strong>the</strong> django directory into site-packages.10.1.14 How we make decisionsWhenever possible, we strive for a rough consensus. To that end, we’ll often have informal votes on django-developersabout a feature. In <strong>the</strong>se votes we follow <strong>the</strong> voting style invented by Apache and used on Python itself, where votes10.1. Contributing to <strong>Django</strong> 895
<strong>Django</strong> <strong>Documentation</strong>, Release 1.2are given as +1, +0, -0, or -1. Roughly translated, <strong>the</strong>se votes mean:• +1: “I love <strong>the</strong> idea and I’m strongly committed to it.”• +0: “Sounds OK to me.”• -0: “I’m not thrilled, but I won’t stand in <strong>the</strong> way.”• -1: “I strongly disagree and would be very unhappy to see <strong>the</strong> idea turn into reality.”Although <strong>the</strong>se votes on django-developers are informal, <strong>the</strong>y’ll be taken very seriously. After a suitable voting period,if an obvious consensus arises we’ll follow <strong>the</strong> votes.However, consensus is not always possible. If consensus cannot be reached, or if <strong>the</strong> discussion towards a consensusfizzles out without a concrete decision, we use a more formal process.Any core committer (see below) may call for a formal vote using <strong>the</strong> same voting mechanism above. A propositionwill be considered carried by <strong>the</strong> core team if:• There are three “+1” votes from members of <strong>the</strong> core team.• There is no “-1” vote from any member of <strong>the</strong> core team.• The BDFLs haven’t stepped in and executed <strong>the</strong>ir positive or negative veto.When calling for a vote, <strong>the</strong> caller should specify a deadline by which votes must be received. One week is generallysuggested as <strong>the</strong> minimum amount of time.Since this process allows any core committer to veto a proposal, any “-1” votes (or BDFL vetos) should be accompaniedby an explanation that explains what it would take to convert that “-1” into at least a “+0”.Whenever possible, <strong>the</strong>se formal votes should be announced and held in public on <strong>the</strong> django-developers mailing list.However, overly sensitive or contentious issues – including, most notably, votes on new core committers – may beheld in private.10.1.15 Commit access<strong>Django</strong> has two types of committers:Core committers These are people who have a long history of contributions to <strong>Django</strong>’s codebase, a solid trackrecord of being polite and helpful on <strong>the</strong> mailing lists, and a proven desire to dedicate serious time to <strong>Django</strong>’sdevelopment. The bar is high for full commit access.Partial committers These are people who are “domain experts.” They have direct check-in access to <strong>the</strong> subsystemsthat fall under <strong>the</strong>ir jurisdiction, and <strong>the</strong>y’re given a formal vote in questions that involve <strong>the</strong>ir subsystems. Thistype of access is likely to be given to someone who contributes a large subframework to <strong>Django</strong> and wants tocontinue to maintain it.Partial commit access is granted by <strong>the</strong> same process as full committers. However, <strong>the</strong> bar is set lower; provenexpertise in <strong>the</strong> area in question is likely to be sufficient.Decisions on new committers will follow <strong>the</strong> process explained above in how we make decisions.To request commit access, please contact an existing committer privately. Public requests for commit access arepotential flame-war starters, and will be ignored.10.2 How <strong>the</strong> <strong>Django</strong> documentation works... and how to contribute.896 Chapter 10. <strong>Django</strong> internals
<strong>Django</strong> <strong>Documentation</strong>, Release 1.2<strong>Django</strong>’s documentation uses <strong>the</strong> Sphinx documentation system, which in turn is based on docutils. The basic idea isthat lightly-formatted plain-text documentation is transformed into HTML, PDF, and any o<strong>the</strong>r output format.To actually build <strong>the</strong> documentation locally, you’ll currently need to install Sphinx – easy_install Sphinxshould do <strong>the</strong> trick.Note: The <strong>Django</strong> documentation can be generated with Sphinx version 0.6 or newer, but we recommend usingSphinx 1.0.2 or newer.Then, building <strong>the</strong> HTML is easy; just make html from <strong>the</strong> docs directory.To get started contributing, you’ll want to read <strong>the</strong> reStructuredText Primer. After that, you’ll want to read about <strong>the</strong>Sphinx-specific markup that’s used to manage metadata, indexing, and cross-references.The main thing to keep in mind as you write and edit docs is that <strong>the</strong> more semantic markup you can add <strong>the</strong> better.So:Add ‘‘django.contrib.auth‘‘ to your ‘‘INSTALLED_APPS‘‘...Isn’t nearly as helpful as:Add :mod:‘django.contrib.auth‘ to your :setting:‘INSTALLED_APPS‘...This is because Sphinx will generate proper links for <strong>the</strong> latter, which greatly helps readers. There’s basically no limitto <strong>the</strong> amount of useful markup you can add.10.2.1 <strong>Django</strong>-specific markupBesides <strong>the</strong> Sphinx built-in markup, <strong>Django</strong>’s docs defines some extra description units:• Settings:.. setting:: INSTALLED_APPSTo link to a setting, use :setting:‘INSTALLED_APPS‘.• Template tags:.. templatetag:: regroupTo link, use :ttag:‘regroup‘.• Template filters:.. templatefilter:: linebreaksbrTo link, use :tfilter:‘linebreaksbr‘.• Field lookups (i.e. Foo.objects.filter(bar__exact=whatever)):.. fieldlookup:: exactTo link, use :lookup:‘exact‘.• django-admin commands:.. django-admin:: syncdbTo link, use :djadmin:‘syncdb‘.• django-admin command-line options:10.2. How <strong>the</strong> <strong>Django</strong> documentation works 897
<strong>Django</strong> <strong>Documentation</strong>, Release 1.2.. django-admin-option:: --tracebackTo link, use :djadminopt:‘--traceback‘.10.2.2 An exampleFor a quick example of how it all fits toge<strong>the</strong>r, consider this hypo<strong>the</strong>tical example:• First, <strong>the</strong> ref/settings.txt document could have an overall layout like this:========Settings========..... _available-settings:Available settings==================..... _deprecated-settings:Deprecated settings===================...• Next, <strong>the</strong> topics/settings.txt document could contain something like this:You can access a :ref:‘listing of all available settings‘. For a list of deprecated settings see:ref:‘deprecated-settings‘.You can find both in <strong>the</strong> :doc:‘settings reference document ‘.We use <strong>the</strong> Sphinx doc cross reference element when we want to link to ano<strong>the</strong>r document as a whole and <strong>the</strong>ref element when we want to link to an arbitrary location in a document.• Next, notice how <strong>the</strong> settings are annotated:.. setting:: ADMIN_FORADMIN_FOR---------Default: ‘‘()‘‘ (Empty tuple)Used for admin-site settings modules, this should be a tuple of settingsmodules (in <strong>the</strong> format ‘‘’foo.bar.baz’‘‘) for which this site is anadmin.The admin site uses this in its automatically-introspecteddocumentation of models, views and template tags.This marks up <strong>the</strong> following header as <strong>the</strong> “canonical” target for <strong>the</strong> setting ADMIN_FOR This means any timeI talk about ADMIN_FOR, I can reference it using :setting:‘ADMIN_FOR‘.898 Chapter 10. <strong>Django</strong> internals
<strong>Django</strong> <strong>Documentation</strong>, Release 1.2That’s basically how everything fits toge<strong>the</strong>r.10.2.3 TODOThe work is mostly done, but here’s what’s left, in rough order of priority.• Most of <strong>the</strong> various index.txt documents have very short or even non-existent intro text. Each of thosedocuments needs a good short intro <strong>the</strong> content below that point.• The glossary is very perfunctory. It needs to be filled out.• Add more metadata targets: <strong>the</strong>re’s lots of places that look like:‘‘File.close()‘‘~~~~~~~~~~~~~~~~... <strong>the</strong>se should be:.. method:: File.close()That is, use metadata instead of titles.• Add more links – nearly everything that’s an inline code literal right now can probably be turned into a xref.See <strong>the</strong> literals_to_xrefs.py file in _ext – it’s a shell script to help do this work.This will probably be a continuing, never-ending project.• Add info field lists where appropriate.• Add .. code-block:: to literal blocks so that <strong>the</strong>y get highlighted.10.2.4 HintsSome hints for making things look/read better:• Whenever possible, use links. So, use :setting:‘ADMIN_FOR‘ instead of ‘‘ADMIN_FOR‘‘.• Some directives (.. setting::, for one) are prefix-style directives; <strong>the</strong>y go before <strong>the</strong> unit <strong>the</strong>y’re describing.These are known as “crossref” directives. O<strong>the</strong>rs (.. class::, e.g.) generate <strong>the</strong>ir own markup; <strong>the</strong>seshould go inside <strong>the</strong> section <strong>the</strong>y’re describing. These are called “description units”.You can tell which are which by looking at in _ext/djangodocs.py; it registers roles as one of <strong>the</strong> o<strong>the</strong>r.• When referring to classes/functions/modules, etc., you’ll want to use <strong>the</strong> fully-qualified name of <strong>the</strong> target(:class:‘django.contrib.contenttypes.models.ContentType‘).Since this doesn’t look all that awesome in <strong>the</strong> output – it shows <strong>the</strong> entire path to <strong>the</strong> object –you can prefix <strong>the</strong> target with a ~ (that’s a tilde) to get just <strong>the</strong> “last bit” of that path. So:class:‘~django.contrib.contenttypes.models.ContentType‘ will just display a link with<strong>the</strong> title “ContentType”.10.3 <strong>Django</strong> committers10.3.1 The original team<strong>Django</strong> originally started at World Online, <strong>the</strong> Web department of <strong>the</strong> Lawrence Journal-World of Lawrence, Kansas,USA.10.3. <strong>Django</strong> committers 899
<strong>Django</strong> <strong>Documentation</strong>, Release 1.2Adrian Holovaty Adrian is a Web developer with a background in journalism. He’s known in journalism circlesas one of <strong>the</strong> pioneers of “journalism via computer programming”, and in technical circles as “<strong>the</strong> guy whoinvented <strong>Django</strong>.”He was lead developer at World Online for 2.5 years, during which time <strong>Django</strong> was developed and implementedon World Online’s sites. He’s now <strong>the</strong> leader and founder of EveryBlock, a “news feed for your block”.Adrian lives in Chicago, USA.Simon Willison Simon is a well-respected Web developer from England. He had a one-year internship at WorldOnline, during which time he and Adrian developed <strong>Django</strong> from scratch. The most enthusiastic Brit you’ll evermeet, he’s passionate about best practices in Web development and maintains a well-read web-developmentblog.Simon lives in Brighton, England.Jacob Kaplan-Moss Jacob is a partner at Revolution Systems which provides support services around <strong>Django</strong> andrelated open source technologies. A good deal of Jacob’s work time is devoted to working on <strong>Django</strong>. Jacobpreviously worked at World Online, where <strong>Django</strong> was invented, where he was <strong>the</strong> lead developer of Ellington,a commercial Web publishing platform for media companies.Jacob lives in Lawrence, Kansas, USA.Wilson Miner Wilson’s design-fu is what makes <strong>Django</strong> look so nice. He designed <strong>the</strong> Web site you’re looking atright now, as well as <strong>Django</strong>’s acclaimed admin interface. Wilson is <strong>the</strong> designer for EveryBlock.Wilson lives in San Francisco, USA.10.3.2 Current developersCurrently, <strong>Django</strong> is led by a team of volunteers from around <strong>the</strong> globe.BDFLsAdrian and Jacob are <strong>the</strong> Co-Benevolent Dictators for Life of <strong>Django</strong>. When “rough consensus and working code”fails, <strong>the</strong>y’re <strong>the</strong> ones who make <strong>the</strong> tough decisions.Core developersThese are <strong>the</strong> folks who have a long history of contributions, a solid track record of being helpful on <strong>the</strong> mailing lists,and a proven desire to dedicate serious time to <strong>Django</strong>. In return, <strong>the</strong>y’ve been granted <strong>the</strong> coveted commit bit, andhave free rein to hack on all parts of <strong>Django</strong>.Malcolm Tredinnick Malcolm originally wanted to be a ma<strong>the</strong>matician, somehow ended up a software developer.He’s contributed to many Open Source projects, has served on <strong>the</strong> board of <strong>the</strong> GNOME foundation, and willkick your ass at chess.When he’s not busy being an International Man of Mystery, Malcolm lives in Sydney, Australia.Russell Keith-Magee Russell studied physics as an undergraduate, and studied neural networks for his PhD. His firstjob was with a startup in <strong>the</strong> defense industry developing simulation frameworks. Over time, mostly throughwork with <strong>Django</strong>, he’s become more involved in Web development.Russell has helped with several major aspects of <strong>Django</strong>, including a couple major internal refactorings, creationof <strong>the</strong> test system, and more.Russell lives in <strong>the</strong> most isolated capital city in <strong>the</strong> world — Perth, Australia.900 Chapter 10. <strong>Django</strong> internals
<strong>Django</strong> <strong>Documentation</strong>, Release 1.2Joseph Kocherhans Joseph is currently a developer at EveryBlock, and previously worked for <strong>the</strong> Lawrence Journal-World where he built most of <strong>the</strong> backend for <strong>the</strong>ir Marketplace site. He often disappears for several days into<strong>the</strong> woods, attempts to teach himself computational linguistics, and annoys his neighbors with his Charangoplaying.Joseph’s first contribution to <strong>Django</strong> was a series of improvements to <strong>the</strong> authorization system leading up tosupport for pluggable authorization. Since <strong>the</strong>n, he’s worked on <strong>the</strong> new forms system, its use in <strong>the</strong> admin, andmany o<strong>the</strong>r smaller improvements.Joseph lives in Chicago, USA.Luke Plant At University Luke studied physics and Materials Science and also met Michael Meeks who introducedhim to Linux and Open Source, re-igniting an interest in programming. Since <strong>the</strong>n he has contributed to anumber of Open Source projects and worked professionally as a developer.Luke has contributed many excellent improvements to <strong>Django</strong>, including database-level improvements, <strong>the</strong>CSRF middleware and many unit tests.Luke currently works for a church in Bradford, UK, and part-time as a freelance developer.Brian Rosner Brian is currently <strong>the</strong> tech lead at Eldarion managing and developing <strong>Django</strong> / Pinax based Web sites.He enjoys learning more about programming languages and system architectures and contributing to open sourceprojects. Brian is <strong>the</strong> host of <strong>the</strong> <strong>Django</strong> Dose podcasts.Brian helped immensely in getting <strong>Django</strong>’s “newforms-admin” branch finished in time for <strong>Django</strong> 1.0; he’snow a full committer, continuing to improve on <strong>the</strong> admin and forms system.Brian lives in Denver, Colorado, USA.Gary Wilson Gary starting contributing patches to <strong>Django</strong> in 2006 while developing Web applications for The Universityof Texas (UT). Since, he has made contributions to <strong>the</strong> e-mail and forms systems, as well as many o<strong>the</strong>rimprovements and code cleanups throughout <strong>the</strong> code base.Gary is currently a developer and software engineering graduate student at UT, where his dedication to spreading<strong>the</strong> ways of Python and <strong>Django</strong> never ceases.Gary lives in Austin, Texas, USA.Justin Bronn Justin Bronn is a computer scientist and attorney specializing in legal topics related to intellectualproperty and spatial law.In 2007, Justin began developing django.contrib.gis in a branch, a.k.a. Geo<strong>Django</strong>, which was mergedin time for <strong>Django</strong> 1.0. While implementing Geo<strong>Django</strong>, Justin obtained a deep knowledge of <strong>Django</strong>’s internalsincluding <strong>the</strong> ORM, <strong>the</strong> admin, and Oracle support.Justin lives in Houston, Texas.Karen Tracey Karen has a background in distributed operating systems (graduate school), communications software(industry) and crossword puzzle construction (freelance). The last of <strong>the</strong>se brought her to <strong>Django</strong>, in late 2006,when she set out to put a Web front-end on her crossword puzzle database. That done, she stuck around in <strong>the</strong>community answering questions, debugging problems, etc. – because coding puzzles are as much fun as wordpuzzles.Karen lives in Apex, NC, USA.Jannis Leidel Jannis graduated in media design from Bauhaus-University Weimar, is <strong>the</strong> author of a number ofpluggable <strong>Django</strong> apps and likes to contribute to Open Source projects like Pinax. He currently works as afreelance Web developer and designer.Jannis lives in Berlin, Germany.10.3. <strong>Django</strong> committers 901
<strong>Django</strong> <strong>Documentation</strong>, Release 1.2James Tauber James is <strong>the</strong> lead developer of Pinax and <strong>the</strong> CEO and founder of Eldarion. He has been doing opensource software since 1993, Python since 1998 and <strong>Django</strong> since 2006. He serves on <strong>the</strong> board of <strong>the</strong> PythonSoftware Foundation and is currently on a leave of absence from a PhD in linguistics.James currently lives in Boston, MA, USA but originally hails from Perth, Western Australia where he attended<strong>the</strong> same high school as Russell Keith-Magee.Alex Gaynor Alex is a student at Rensselaer Polytechnic Institute, and is also an independent contractor. He found<strong>Django</strong> in 2007 and has been addicted ever since he found out you don’t need to write out your forms by hand.He has a small obsession with compilers. He’s contributed to <strong>the</strong> ORM, forms, admin, and o<strong>the</strong>r components of<strong>Django</strong>.Alex lives in Chicago, IL, but spends most of his time in Troy, NY.Andrew Godwin Andrew is a freelance Python developer and tinkerer, and has been developing against <strong>Django</strong>since 2007. He graduated from Oxford University with a degree in Computer Science, and has become mostwell known in <strong>the</strong> <strong>Django</strong> community for his work on South, <strong>the</strong> schema migrations library.Andrew lives in London, UK.Carl Meyer Carl has been working with <strong>Django</strong> since 2007 (long enough to remember queryset-refactor, but notmagic-removal), and works as a freelance developer with OddBird and Eldarion. He became a <strong>Django</strong> contributorby accident, because fixing bugs is more interesting than working around <strong>the</strong>m.Carl lives in Elkhart, IN, USA.Ramiro Morales Ramiro has been reading <strong>Django</strong> source code and submitting patches since mid-2006 after researchingfor a Python Web tool with matching awesomeness and being pointed to it by an old ninja.A software developer in <strong>the</strong> electronic transactions industry, he is a living proof of <strong>the</strong> fact that anyone wi<strong>the</strong>nough enthusiasm can contribute to <strong>Django</strong>, learning a lot and having fun in <strong>the</strong> process.Ramiro lives in Córdoba, Argentina.Chris Beaven Chris has been submitting patches and suggesting crazy ideas for <strong>Django</strong> since early 2006. An advocatefor community involvement and a long-term triager, he is still often found answering questions in <strong>the</strong> #djangoIRC channel.Chris lives in Napier, New Zealand (adding to <strong>the</strong> pool of Oceanic core developers). He works remotely as adeveloper for Lincoln Loop.SpecialistsJames Bennett James is <strong>Django</strong>’s release manager; he also contributes to <strong>the</strong> documentation.James came to Web development from philosophy when he discovered that programmers get to argue just asmuch while collecting much better pay. He lives in Lawrence, Kansas, where he works for <strong>the</strong> Journal-Worlddeveloping Ellington. He keeps a blog, has written a book on <strong>Django</strong>, and enjoys fine port and talking to his car.Ian Kelly Ian is responsible for <strong>Django</strong>’s support for Oracle.Matt Boersma Matt is also responsible for <strong>Django</strong>’s Oracle support.Jeremy Dunck Jeremy is <strong>the</strong> lead developer of Pegasus News, a personalized local site based in Dallas, Texas. Anearly contributor to Greasemonkey and <strong>Django</strong>, he sees technology as a tool for communication and access toknowledge.Jeremy helped kick off Geo<strong>Django</strong> development, and is mostly responsible for <strong>the</strong> serious speed improvementsthat signals received in <strong>Django</strong> 1.0.Jeremy lives in Dallas, Texas, USA.902 Chapter 10. <strong>Django</strong> internals
<strong>Django</strong> <strong>Documentation</strong>, Release 1.2Simon Meers Simon discovered <strong>Django</strong> 0.96 during his Computer Science PhD research and has been developingwith it full-time ever since. His core code contributions are mostly in <strong>Django</strong>’s admin application. He is alsohelping to improve <strong>Django</strong>’s documentation.Simon works as a freelance developer based in Wollongong, Australia.Gabriel Hurley Gabriel has been working with <strong>Django</strong> since 2008, shortly after <strong>the</strong> 1.0 release. Convinced by hisbusiness partner that Python and <strong>Django</strong> were <strong>the</strong> right direction for <strong>the</strong> company, he couldn’t have been morehappy with <strong>the</strong> decision. His contributions range across many areas in <strong>Django</strong>, but years of copy-editing and aneye for detail lead him to be particularly at home while working on <strong>Django</strong>’s documentation.Gabriel works as a web developer in Berkeley, CA, USA.Tim Graham When exploring Web frameworks for an independent study project in <strong>the</strong> fall of 2008, Tim discovered<strong>Django</strong> and was lured to it by <strong>the</strong> documentation. He enjoys contributing to <strong>the</strong> docs because <strong>the</strong>y’re awesome.Tim works as a software engineer and lives in Philadelphia, PA, USA.10.3.3 Developers EmeritusGeorg “Hugo” Bauer Georg created <strong>Django</strong>’s internationalization system, managed i18n contributions and made aton of excellent tweaks, feature additions and bug fixes.Robert Wittams Robert was responsible for <strong>the</strong> first refactoring of <strong>Django</strong>’s admin application to allow for easierreuse and has made a ton of excellent tweaks, feature additions and bug fixes.10.4 <strong>Django</strong>’s release process10.4.1 Official releases<strong>Django</strong>’s release numbering works as follows:• Versions are numbered in <strong>the</strong> form A.B or A.B.C.• A is <strong>the</strong> major version number, which is only incremented for major changes to <strong>Django</strong>, and <strong>the</strong>se changes arenot necessarily backwards-compatible. That is, code you wrote for <strong>Django</strong> 6.0 may break when we release<strong>Django</strong> 7.0.• B is <strong>the</strong> minor version number, which is incremented for large yet backwards compatible changes. Code writtenfor <strong>Django</strong> 6.4 will continue to work under <strong>Django</strong> 6.5.• C is <strong>the</strong> micro version number which, is incremented for bug and security fixes. A new micro-release will alwaysbe 100% backwards-compatible with <strong>the</strong> previous micro-release.• In some cases, we’ll make alpha, beta, or release candidate releases. These are of <strong>the</strong> form A.Balpha/beta/rc N, which means <strong>the</strong> Nth alpha/beta/release candidate of version A.B.An exception to this version numbering scheme is <strong>the</strong> pre-1.0 <strong>Django</strong> code. There’s no guarantee of backwardscompatibilityuntil <strong>the</strong> 1.0 release.In Subversion, each <strong>Django</strong> release will be tagged under tags/releases. If it’s necessary to release a bug fixrelease or a security release that doesn’t come from <strong>the</strong> trunk, we’ll copy that tag to branches/releases to make<strong>the</strong> bug fix release.10.4. <strong>Django</strong>’s release process 903
<strong>Django</strong> <strong>Documentation</strong>, Release 1.2Major releasesMajor releases (1.0, 2.0, etc.) will happen very infrequently (think “years”, not “months”), and will probably representmajor, sweeping changes to <strong>Django</strong>.Minor releasesMinor release (1.1, 1.2, etc.) will happen roughly every nine months – see release process, below for details. Thesereleases will contain new features, improvements to existing features, and such. A minor release may deprecate certainfeatures from previous releases. If a feature in version A.B is deprecated, it will continue to work in version A.B+1.In version A.B+2, use of <strong>the</strong> feature will raise a DeprecationWarning but will continue to work. Version A.B+3will remove <strong>the</strong> feature entirely.So, for example, if we decided to remove a function that existed in <strong>Django</strong> 1.0:• <strong>Django</strong> 1.1 will contain a backwards-compatible replica of <strong>the</strong> function which will raise aPendingDeprecationWarning. This warning is silent by default; you need to explicitly turn ondisplay of <strong>the</strong>se warnings.• <strong>Django</strong> 1.2 will contain <strong>the</strong> backwards-compatible replica, but <strong>the</strong> warning will be promoted to a full-fledgedDeprecationWarning. This warning is loud by default, and will likely be quite annoying.• <strong>Django</strong> 1.3 will remove <strong>the</strong> feature outright.Micro releasesMicro releases (1.0.1, 1.0.2, 1.1.1, etc.) will be issued at least once half-way between minor releases, and probablymore often as needed.These releases will always be 100% compatible with <strong>the</strong> associated minor release – <strong>the</strong> answer to “should I upgradeto <strong>the</strong> latest micro release?” will always be “yes.”Each minor release of <strong>Django</strong> will have a “release maintainer” appointed. This person will be responsible for makingsure that bug fixes are applied to both trunk and <strong>the</strong> maintained micro-release branch. This person will also work with<strong>the</strong> release manager to decide when to release <strong>the</strong> micro releases.10.4.2 Supported versionsAt any moment in time, <strong>Django</strong>’s developer team will support a set of releases to varying levels:• The current development trunk will get new features and bug fixes requiring major refactoring.• All bug fixes applied to <strong>the</strong> trunk will also be applied to <strong>the</strong> last minor release, to be released as <strong>the</strong> next microrelease.• Security fixes will be applied to <strong>the</strong> current trunk and <strong>the</strong> previous two minor releases.As a concrete example, consider a moment in time halfway between <strong>the</strong> release of <strong>Django</strong> 1.3 and 1.4. At this pointin time:• Features will be added to development trunk, to be released as <strong>Django</strong> 1.4.• Bug fixes will be applied to a 1.3.X branch, and released as 1.3.1, 1.3.2, etc.• Security releases will be applied to trunk, a 1.3.X branch and a 1.2.X branch. Security fixes will trigger <strong>the</strong>release of 1.3.1, 1.2.1, etc.904 Chapter 10. <strong>Django</strong> internals
<strong>Django</strong> <strong>Documentation</strong>, Release 1.210.4.3 Release process<strong>Django</strong> uses a time-based release schedule, with minor (i.e. 1.1, 1.2, etc.) releases every nine months, or more,depending on features.After each previous release (and after a suitable cooling-off period of a week or two), <strong>the</strong> core development team willexamine <strong>the</strong> landscape and announce a timeline for <strong>the</strong> next release. Most releases will be scheduled in <strong>the</strong> 6-9 monthrange, but if we have bigger features to development we might schedule a longer period to allow for more ambitiouswork.Release cycleEach release cycle will be split into three periods, each lasting roughly one-third of <strong>the</strong> cycle:Phase one: feature proposalThe first phase of <strong>the</strong> release process will be devoted to figuring out what features to include in <strong>the</strong> next version. Thisshould include a good deal of preliminary work on those features – working code trumps grand design.At <strong>the</strong> end of part one, <strong>the</strong> core developers will propose a feature list for <strong>the</strong> upcoming release. This will be brokeninto:• “Must-have”: critical features that will delay <strong>the</strong> release if not finished• “Maybe” features: that will be pushed to <strong>the</strong> next release if not finished• “Not going to happen”: features explicitly deferred to a later release.Anything that hasn’t got at least some work done by <strong>the</strong> end of <strong>the</strong> first third isn’t eligible for <strong>the</strong> next release; a designalone isn’t sufficient.Phase two: developmentThe second third of <strong>the</strong> release schedule is <strong>the</strong> “heads-down” working period. Using <strong>the</strong> roadmap produced at <strong>the</strong> endof phase one, we’ll all work very hard to get everything on it done.Longer release schedules will likely spend more than a third of <strong>the</strong> time in this phase.At <strong>the</strong> end of phase two, any unfinished “maybe” features will be postponed until <strong>the</strong> next release. Though it shouldn’thappen, any “must-have” features will extend phase two, and thus postpone <strong>the</strong> final release.Phase two will culminate with an alpha release.Phase three: bugfixesThe last third of a release is spent fixing bugs – no new features will be accepted during this time. We’ll release a betarelease about halfway through, and an rc complete with string freeze two weeks before <strong>the</strong> end of <strong>the</strong> schedule.Bug-fix releasesAfter a minor release (i.e 1.1), <strong>the</strong> previous release will go into bug-fix mode.A branch will be created of <strong>the</strong> form branches/releases/1.0.X to track bug-fixes to <strong>the</strong> previous release.When possible, bugs fixed on trunk must also be fixed on <strong>the</strong> bug-fix branch; this means that commits need to cleanlyseparate bug fixes from feature additions. The developer who commits a fix to trunk will be responsible for also10.4. <strong>Django</strong>’s release process 905
<strong>Django</strong> <strong>Documentation</strong>, Release 1.2applying <strong>the</strong> fix to <strong>the</strong> current bug-fix branch. Each bug-fix branch will have a maintainer who will work with <strong>the</strong>committers to keep <strong>the</strong>m honest on backporting bug fixes.How this all fits toge<strong>the</strong>rLet’s look at a hypo<strong>the</strong>tical example for how this all first toge<strong>the</strong>r. Imagine, if you will, a point about halfway between1.1 and 1.2. At this point, development will be happening in a bunch of places:• On trunk, development towards 1.2 proceeds with small additions, bugs fixes, etc. being checked in daily.• On <strong>the</strong> branch “branches/releases/1.1.X”, bug fixes found in <strong>the</strong> 1.1 release are checked in as needed. At somepoint, this branch will be released as “1.1.1”, “1.1.2”, etc.• On <strong>the</strong> branch “branches/releases/1.0.X”, security fixes are made if needed and released as “1.0.2”, “1.0.3”, etc.• On feature branches, development of major features is done. These branches will be merged into trunk before<strong>the</strong> end of phase two.10.5 <strong>Django</strong> Deprecation TimelineThis document outlines when various pieces of <strong>Django</strong> will be removed, following <strong>the</strong>ir deprecation, as per <strong>the</strong> <strong>Django</strong>deprecation policy• 1.3• 1.4– AdminSite.root(). This release will remove <strong>the</strong> old method for hooking up admin URLs. Thishas been deprecated since <strong>the</strong> 1.1 release.– Au<strong>the</strong>ntication backends need to define <strong>the</strong> boolean attributessupports_object_permissions and supports_anonymous_user. The old backendstyle is deprecated since <strong>the</strong> 1.2 release.– The django.contrib.gis.db.backend module, including <strong>the</strong> SpatialBackend interface,is deprecated since <strong>the</strong> 1.2 release.– CsrfResponseMiddleware. This has been deprecated since <strong>the</strong> 1.2 release, in favour of<strong>the</strong> template tag method for inserting <strong>the</strong> CSRF token. CsrfMiddleware, which combinesCsrfResponseMiddleware and CsrfViewMiddleware, is also deprecated.– The old imports for CSRF functionality (django.contrib.csrf.*), which moved to core in1.2, will be removed.– SMTPConnection. The 1.2 release deprecated <strong>the</strong> SMTPConnection class in favor of a genericE-mail backend API.– The many to many SQL generation functions on <strong>the</strong> database backends will be removed.– The ability to use <strong>the</strong> DATABASE_* family of top-level settings to define database connections willbe removed.– The ability to use shorthand notation to specify a database backend (i.e., sqlite3 instead ofdjango.db.backends.sqlite3) will be removed.– The get_db_prep_save, get_db_prep_value and get_db_prep_lookup methods onField were modified in 1.2 to support multiple databases. In 1.4, <strong>the</strong> support functions that allowmethods with <strong>the</strong> old prototype to continue working will be removed.906 Chapter 10. <strong>Django</strong> internals
<strong>Django</strong> <strong>Documentation</strong>, Release 1.2• 2.0– The Message model (in django.contrib.auth), its related manager in <strong>the</strong> User model(user.message_set), and <strong>the</strong> associated methods (user.message_set.create() anduser.get_and_delete_messages()), which have been deprecated since <strong>the</strong> 1.2 release, willbe removed. The messages framework should be used instead.– Au<strong>the</strong>ntication backends need to support <strong>the</strong> obj parameter for permission checking. Thesupports_object_permissions variable is not checked any longer and can be removed.– Au<strong>the</strong>ntication backends need to support <strong>the</strong> AnonymousUser being passed to all methods dealingwith permissions. The supports_anonymous_user variable is not checked any longer and canbe removed.– The ability to specify a callable template loader ra<strong>the</strong>r than a Loader class will be removed, as will<strong>the</strong> load_template_source functions that are included with <strong>the</strong> built in template loaders forbackwards compatibility. These have been deprecated since <strong>the</strong> 1.2 release.– django.utils.translation.get_date_formats() anddjango.utils.translation.get_partial_date_formats(). These functions arereplaced by <strong>the</strong> new locale aware formatting; use django.utils.formats.get_format()to get <strong>the</strong> appropriate formats.– In django.forms.fields: DEFAULT_DATE_INPUT_FORMATS,DEFAULT_TIME_INPUT_FORMATS and DEFAULT_DATETIME_INPUT_FORMATS. Usedjango.utils.formats.get_format() to get <strong>the</strong> appropriate formats.– The ability to use a function-based test runners will be removed, along with <strong>the</strong>django.test.simple.run_tests() test runner.– The views.feed() view and feeds.Feed class in django.contrib.syndication havebeen deprecated since <strong>the</strong> 1.2 release. The class-based view views.Feed should be used instead.– django.core.context_processors.auth. This release will remove <strong>the</strong> old method in favorof <strong>the</strong> new method in django.contrib.auth.context_processors.auth. This hasbeen deprecated since <strong>the</strong> 1.2 release.– The postgresql database backend has been deprecated in favor of <strong>the</strong> postgresql_psycopg2backend.– The no language code has been deprecated in favor of <strong>the</strong> nb language code.– django.views.defaults.shortcut(). This function has been moved todjango.contrib.contenttypes.views.shortcut() as part of <strong>the</strong> goal of removingall django.contrib references from <strong>the</strong> core <strong>Django</strong> codebase. The old shortcut will beremoved in <strong>the</strong> 2.0 release.10.6 The <strong>Django</strong> source code repositoryWhen deploying a <strong>Django</strong> application into a real production environment, you will almost always want to use anofficial packaged release of <strong>Django</strong>. However, if you’d like to try out in-development code from an upcoming releaseor contribute to <strong>the</strong> development of <strong>Django</strong>, you’ll need to obtain a checkout from <strong>Django</strong>’s source code repository.This document covers <strong>the</strong> way <strong>the</strong> code repository is laid out and how to work with and find things in it.10.6. The <strong>Django</strong> source code repository 907
<strong>Django</strong> <strong>Documentation</strong>, Release 1.210.6.1 High-level overviewThe <strong>Django</strong> source code repository uses Subversion to track changes to <strong>the</strong> code over time, so you’ll need a copy of<strong>the</strong> Subversion client (a program called svn) on your computer, and you’ll want to familiarize yourself with <strong>the</strong> basicsof how Subversion works. Subversion’s Web site offers downloads for various operating systems, and a free onlinebook is available to help you get up to speed with using Subversion.The <strong>Django</strong> Subversion repository is located online at code.djangoproject.com/svn. A friendly Web-based interfacefor browsing <strong>the</strong> code is also available, though when using Subversion you’ll always want to use <strong>the</strong> repository addressinstead. At <strong>the</strong> top level of <strong>the</strong> repository are two directories: django contains <strong>the</strong> full source code for all <strong>Django</strong>releases, while djangoproject.com contains <strong>the</strong> source code and templates for <strong>the</strong> djangoproject.com Web site.For trying out in-development <strong>Django</strong> code, or contributing to <strong>Django</strong>, you’ll always want to check out code fromsome location in <strong>the</strong> django directory.Inside <strong>the</strong> django directory, <strong>Django</strong>’s source code is organized into three areas:• branches contains branched copies of <strong>Django</strong>’s code, which are (or were) maintained for various purposes.Some branches exist to provide a place to develop major or experimental new features without affecting <strong>the</strong> restof <strong>Django</strong>’s code, while o<strong>the</strong>rs serve to provide bug fixes or support for older <strong>Django</strong> releases.• tags contains snapshots of <strong>Django</strong>’s code at various important points in its history; mostly <strong>the</strong>se are <strong>the</strong> exactrevisions from which packaged <strong>Django</strong> releases were produced.• trunk contains <strong>the</strong> main in-development code which will become <strong>the</strong> next packaged release of <strong>Django</strong>, and iswhere most development activity is focused.10.6.2 Working with <strong>Django</strong>’s trunkIf you’d like to try out <strong>the</strong> in-development code for <strong>the</strong> next release of <strong>Django</strong>, or if you’d like to contribute to <strong>Django</strong>by fixing bugs or developing new features, you’ll want to get <strong>the</strong> code from trunk. You can get a complete copy of thiscode (a “Subversion checkout”) by typing:svn co http://code.djangoproject.com/svn/django/trunk/Note that this will get all of <strong>Django</strong>: in addition to <strong>the</strong> top-level django module containing Python code, you’ll alsoget a copy of <strong>Django</strong>’s documentation, unit-test suite, packaging scripts and o<strong>the</strong>r miscellaneous bits. <strong>Django</strong>’s codewill be present in your checkout as a directory named django.To try out <strong>the</strong> in-development trunk code with your own applications, simply place <strong>the</strong> directory containing yourcheckout on your Python import path. Then import statements which look for <strong>Django</strong> will find <strong>the</strong> django modulewithin your checkout.If you’re going to be working on <strong>Django</strong>’s code (say, to fix a bug or develop a new feature), you can probably stopreading here and move over to <strong>the</strong> documentation for contributing to <strong>Django</strong>, which covers things like <strong>the</strong> preferredcoding style and how to generate and submit a patch.10.6.3 Branches<strong>Django</strong> uses branches for two main purposes:1. Development of major or experimental features, to keep <strong>the</strong>m from affecting progress on o<strong>the</strong>r work in trunk.2. Security and bug-fix support for older releases of <strong>Django</strong>, during <strong>the</strong>ir support lifetimes.908 Chapter 10. <strong>Django</strong> internals
<strong>Django</strong> <strong>Documentation</strong>, Release 1.2Feature-development branchesFeature-development branches tend by <strong>the</strong>ir nature to be temporary. Some produce successful features which aremerged back into <strong>Django</strong>’s trunk to become part of an official release, but o<strong>the</strong>rs do not; in ei<strong>the</strong>r case <strong>the</strong>re comes atime when <strong>the</strong> branch is no longer being actively worked on by any developer. At this point <strong>the</strong> branch is consideredclosed.Unfortunately, Subversion has no standard way of indicating this. As a workaround, branches of <strong>Django</strong> which areclosed and no longer maintained are moved into <strong>the</strong> directory django/branches/attic.For reference, <strong>the</strong> following are branches whose code eventually became part of <strong>Django</strong> itself, and so are no longerseparately maintained:• boulder-oracle-sprint: Added support for Oracle databases to <strong>Django</strong>’s object-relational mapper. Thishas been part of <strong>Django</strong> since <strong>the</strong> 1.0 release.• gis: Added support for geographic/spatial queries to <strong>Django</strong>’s object-relational mapper. This has been part of<strong>Django</strong> since <strong>the</strong> 1.0 release, as <strong>the</strong> bundled application django.contrib.gis.• i18n: Added internationalization support to <strong>Django</strong>. This has been part of <strong>Django</strong> since <strong>the</strong> 0.90 release.• magic-removal: A major refactoring of both <strong>the</strong> internals and public APIs of <strong>Django</strong>’s object-relationalmapper. This has been part of <strong>Django</strong> since <strong>the</strong> 0.95 release.• multi-auth: A refactoring of <strong>Django</strong>’s bundled au<strong>the</strong>ntication framework which added support for au<strong>the</strong>nticationbackends. This has been part of <strong>Django</strong> since <strong>the</strong> 0.95 release.• new-admin: A refactoring of <strong>Django</strong>’s bundled administrative application. This became part of <strong>Django</strong> as of<strong>the</strong> 0.91 release, but was superseded by ano<strong>the</strong>r refactoring (see next listing) prior to <strong>the</strong> <strong>Django</strong> 1.0 release.• newforms-admin: The second refactoring of <strong>Django</strong>’s bundled administrative application. This became partof <strong>Django</strong> as of <strong>the</strong> 1.0 release, and is <strong>the</strong> basis of <strong>the</strong> current incarnation of django.contrib.admin.• queryset-refactor: A refactoring of <strong>the</strong> internals of <strong>Django</strong>’s object-relational mapper. This became partof <strong>Django</strong> as of <strong>the</strong> 1.0 release.• unicode: A refactoring of <strong>Django</strong>’s internals to consistently use Unicode-based strings in most places within<strong>Django</strong> and <strong>Django</strong> applications. This became part of <strong>Django</strong> as of <strong>the</strong> 1.0 release.Additionally, <strong>the</strong> following branches are closed, but <strong>the</strong>ir code was never merged into <strong>Django</strong> and <strong>the</strong> features <strong>the</strong>yaimed to implement were never finished:• full-history• generic-auth• multiple-db-support• per-object-permissions• schema-evolution• schema-evolution-ng• search-api• sqlalchemyAll of <strong>the</strong> above-mentioned branches now reside in django/branches/attic.Support and bugfix branchesIn addition to fixing bugs in current trunk, <strong>the</strong> <strong>Django</strong> project provides official bug-fix support for <strong>the</strong> most recentreleased version of <strong>Django</strong>, and security support for <strong>the</strong> two most recently-released versions of <strong>Django</strong>. This support10.6. The <strong>Django</strong> source code repository 909
<strong>Django</strong> <strong>Documentation</strong>, Release 1.2is provided via branches in which <strong>the</strong> necessary bug or security fixes are applied; <strong>the</strong> branches are <strong>the</strong>n used as <strong>the</strong>basis for issuing bugfix or security releases.As of <strong>the</strong> <strong>Django</strong> 1.0 release, <strong>the</strong>se branches can be found in <strong>the</strong> repository in <strong>the</strong> directorydjango/branches/releases, and new branches will be created <strong>the</strong>re approximately one monthafter each new <strong>Django</strong> release. For example, shortly after <strong>the</strong> release of <strong>Django</strong> 1.0, <strong>the</strong> branchdjango/branches/releases/1.0.X was created to receive bug fixes, and shortly after <strong>the</strong> release of<strong>Django</strong> 1.1 <strong>the</strong> branch django/branches/releases/1.1.X was created.Prior to <strong>the</strong> <strong>Django</strong> 1.0 release, <strong>the</strong>se branches were maintaind within <strong>the</strong> top-level django/branches directory,and so <strong>the</strong> following branches exist <strong>the</strong>re and provided support for older <strong>Django</strong> releases:• 0.90-bugfixes• 0.91-bugfixes• 0.95-bugfixes• 0.96-bugfixesOfficial support for those releases has expired, and so <strong>the</strong>y no longer receive direct maintenance from <strong>the</strong> <strong>Django</strong>project. However, <strong>the</strong> branches continue to exist and interested community members have occasionally used <strong>the</strong>m toprovide unofficial support for old <strong>Django</strong> releases.10.6.4 TagsThe directory django/tags within <strong>the</strong> repository contains complete copies of <strong>the</strong> <strong>Django</strong> source code as it existedat various points in its history. These “tagged” copies of <strong>Django</strong> are never changed or updated; new tags may be addedas needed, but once added <strong>the</strong>y are considered read-only and serve as useful guides to <strong>Django</strong>’s development history.Within django/tags/releases are copies of <strong>the</strong> code which formed each packaged release of <strong>Django</strong>,and each tag is named with <strong>the</strong> version number of <strong>the</strong> release to which it corresponds. So, for example,django/tags/releases/1.1 is a complete copy of <strong>the</strong> code which was packaged as <strong>the</strong> <strong>Django</strong> 1.1 release.Within django/tags/notable_moments are copies of <strong>the</strong> <strong>Django</strong> code from points which do not directly correspondto releases, but which are none<strong>the</strong>less important historical milestones for <strong>Django</strong> development. The current“notable moments” marked <strong>the</strong>re are:• ipo: <strong>Django</strong>’s code as it existed at <strong>the</strong> moment <strong>Django</strong> was first publicly announced in 2005.• pre-magic-removal: The state of <strong>Django</strong>’s code just before <strong>the</strong> merging of <strong>the</strong> magic-removal branch(described above), which significantly updated <strong>Django</strong>’s object-relational mapper.• pre-newforms-admin: The state of <strong>Django</strong>’s code just before <strong>the</strong> merging of <strong>the</strong> newforms-adminbranch (see above), which significantly updated <strong>Django</strong>’s bundled administrative application.• Tags corresponding to each of <strong>the</strong> alpha, beta and release-candidate packages in <strong>the</strong> run up to <strong>the</strong> <strong>Django</strong> 1.0release.910 Chapter 10. <strong>Django</strong> internals
CHAPTERELEVENINDICES, GLOSSARY AND TABLES• genindex• modindex• Glossary911
<strong>Django</strong> <strong>Documentation</strong>, Release 1.2912 Chapter 11. Indices, glossary and tables
CHAPTERTWELVEDEPRECATED/OBSOLETEDOCUMENTATIONThe following documentation covers features that have been deprecated or that have been replaced in newer versionsof <strong>Django</strong>.12.1 Deprecated/obsolete documentationThese documents cover features that have been deprecated or that have been replaced in newer versions of <strong>Django</strong>.They’re preserved here for folks using old versions of <strong>Django</strong> or those still using deprecated APIs. No new code basedon <strong>the</strong>se APIs should be written.12.1.1 Customizing <strong>the</strong> <strong>Django</strong> admin interfaceWarning: The design of <strong>the</strong> admin has changed somewhat since this document was written, and parts may notapply any more. This document is no longer maintained since an official API for customizing <strong>the</strong> <strong>Django</strong> admininterface is in development.<strong>Django</strong>’s dynamic admin interface gives you a fully-functional admin for free with no hand-coding required. Thedynamic admin is designed to be production-ready, not just a starting point, so you can use it as-is on a real site. While<strong>the</strong> underlying format of <strong>the</strong> admin pages is built in to <strong>Django</strong>, you can customize <strong>the</strong> look and feel by editing <strong>the</strong>admin stylesheet and images.Here’s a quick and dirty overview some of <strong>the</strong> main styles and classes used in <strong>the</strong> <strong>Django</strong> admin CSS.ModulesThe .module class is a basic building block for grouping content in <strong>the</strong> admin. It’s generally applied to a div ora fieldset. It wraps <strong>the</strong> content group in a box and applies certain styles to <strong>the</strong> elements within. An h2 within adiv.module will align to <strong>the</strong> top of <strong>the</strong> div as a header for <strong>the</strong> whole group.913
<strong>Django</strong> <strong>Documentation</strong>, Release 1.2Column TypesNote: All admin pages (except <strong>the</strong> dashboard) are fluid-width. All fixed-width classes from previous <strong>Django</strong> versionshave been removed.The base template for each admin page has a block that defines <strong>the</strong> column structure for <strong>the</strong> page. This sets a classon <strong>the</strong> page content area (div#content) so everything on <strong>the</strong> page knows how wide it should be. There are threecolumn types available.colM This is <strong>the</strong> default column setting for all pages. The “M” stands for “main”. Assumes that all content on <strong>the</strong>page is in one main column (div#content-main).colMS This is for pages with one main column and a sidebar on <strong>the</strong> right. The “S” stands for “sidebar”. Assumes thatmain content is in div#content-main and sidebar content is in div#content-related. This is usedon <strong>the</strong> main admin page.colSM Same as above, with <strong>the</strong> sidebar on <strong>the</strong> left. The source order of <strong>the</strong> columns doesn’t matter.For instance, you could stick this in a template to make a two-column page with <strong>the</strong> sidebar on <strong>the</strong> right:{% block coltype %}colMS{% endblock %}Text StylesFont SizesMost HTML elements (headers, lists, etc.) have base font sizes in <strong>the</strong> stylesheet based on context. There are threeclasses are available for forcing text to a certain size in any context.small 11pxtiny 10pxmini 9px (use sparingly)Font Styles and AlignmentThere are also a few styles for styling text..quiet Sets font color to light gray. Good for side notes in instructions. Combine with .small or .tiny for sheerexcitement..help This is a custom class for blocks of inline help text explaining <strong>the</strong> function of form elements. It makes textsmaller and gray, and when applied to p elements within .form-row elements (see Form Styles below), it willoffset <strong>the</strong> text to align with <strong>the</strong> form field. Use this for help text, instead of small quiet. It works on o<strong>the</strong>relements, but try to put <strong>the</strong> class on a p whenever you can.914 Chapter 12. Deprecated/obsolete documentation
<strong>Django</strong> <strong>Documentation</strong>, Release 1.2.align-left It aligns <strong>the</strong> text left. Only works on block elements containing inline elements..align-right Are you paying attention?.nowrap Keeps text and inline objects from wrapping. Comes in handy for table headers you want to stay on one line.Floats and Clearsfloat-left floats leftfloat-right floats rightclear clears allObject ToolsCertain actions which apply directly to an object are used in form and changelist pages. These appear in a “toolbar” rowabove <strong>the</strong> form or changelist, to <strong>the</strong> right of <strong>the</strong> page. The tools are wrapped in a ul with <strong>the</strong> class object-tools.There are two custom tool types which can be defined with an additional class on <strong>the</strong> a for that tool. These are.addlink and .viewsitelink.Example from a changelist page:Add redirectand from a form page:HistoryView on siteForm StylesFieldsetsAdmin forms are broken up into groups by fieldset elements. Each form fieldset should have a class .module.Each fieldset should have a header h2 within <strong>the</strong> fieldset at <strong>the</strong> top (except <strong>the</strong> first group in <strong>the</strong> form, and in somecases where <strong>the</strong> group of fields doesn’t have a logical label).Each fieldset can also take extra classes in addition to .module to apply appropriate formatting to <strong>the</strong> group of fields..aligned This will align <strong>the</strong> labels and inputs side by side on <strong>the</strong> same line..wide Used in combination with .aligned to widen <strong>the</strong> space available for <strong>the</strong> labels.12.1. Deprecated/obsolete documentation 915
<strong>Django</strong> <strong>Documentation</strong>, Release 1.2Form RowsEach row of <strong>the</strong> form (within <strong>the</strong> fieldset) should be enclosed in a div with class form-row. If <strong>the</strong> field in <strong>the</strong>row is required, a class of required should also be added to <strong>the</strong> div.form-row.LabelsForm labels should always precede <strong>the</strong> field, except in <strong>the</strong> case of checkboxes and radio buttons, where <strong>the</strong> inputshould come first. Any explanation or help text should follow <strong>the</strong> label in a p with class .help.916 Chapter 12. Deprecated/obsolete documentation
PYTHON MODULE INDEXcdjango.conf.urls.defaults, ??django.contrib.admin, ??django.contrib.admindocs, ??django.contrib.auth, ??django.contrib.auth.backends, ??django.contrib.auth.forms, ??django.contrib.auth.middleware, ??django.contrib.comments, ??django.contrib.comments.forms, ??django.contrib.comments.models, ??django.contrib.comments.moderation, ??django.contrib.comments.signals, ??django.contrib.contenttypes, ??django.contrib.databrowse, ??django.contrib.flatpages, ??django.contrib.formtools, ??django.contrib.formtools.wizard, ??django.contrib.gis, ??django.contrib.gis.admin, ??django.contrib.gis.db.models, ??django.contrib.gis.feeds, ??django.contrib.gis.gdal, ??django.contrib.gis.geos, ??django.contrib.gis.measure, ??django.contrib.gis.utils, ??django.contrib.gis.utils.geoip, ??django.contrib.gis.utils.layermapping,??django.contrib.gis.utils.ogrinspect, ??django.contrib.humanize, ??django.contrib.localflavor, ??django.contrib.markup, ??django.contrib.messages, ??django.contrib.messages.middleware, ??django.contrib.redirects, ??django.contrib.sessions, ??django.contrib.sessions.middleware, ??django.contrib.sitemaps, ??django.contrib.sites, ??django.contrib.syndication, ??django.contrib.webdesign, ??django.core.exceptions, ??django.core.files, ??django.core.files.storage, ??django.core.mail, ??django.core.paginator, ??django.core.signals, ??django.core.urlresolvers, ??django.core.validators, ??ddjango.db.backends, ??django.db.models, ??django.db.models.fields, ??django.db.models.fields.related, ??django.db.models.signals, ??django.dispatch, ??fdjango.forms.fields, ??django.forms.forms, ??django.forms.models, ??django.forms.widgets, ??hdjango.http, ??mdjango.middleware, ??django.middleware.cache, ??django.middleware.common, ??django.middleware.csrf, ??django.middleware.doc, ??django.middleware.gzip, ??django.middleware.http, ??django.middleware.locale, ??django.middleware.transaction, ??sdjango.shortcuts, ??917
<strong>Django</strong> <strong>Documentation</strong>, Release 1.2tdjango.test, ??django.test.client, ??django.test.signals, ??django.test.utils, ??udjango.utils, ??django.utils.cache, ??django.utils.datastructures, ??django.utils.encoding, ??django.utils.feedgenerator, ??django.utils.http, ??django.utils.safestring, ??django.utils.translation, ??django.utils.tzinfo, ??vdjango.views.i18n, ??django.views.static, ??918 Python Module Index