SOLAR ELECTRIC MODULE ES-124 & ES-62T Owners Manual and ...
SOLAR ELECTRIC MODULE ES-124 & ES-62T Owners Manual and ...
SOLAR ELECTRIC MODULE ES-124 & ES-62T Owners Manual and ...

You also want an ePaper? Increase the reach of your titles
YUMPU automatically turns print PDFs into web optimized ePapers that Google loves.
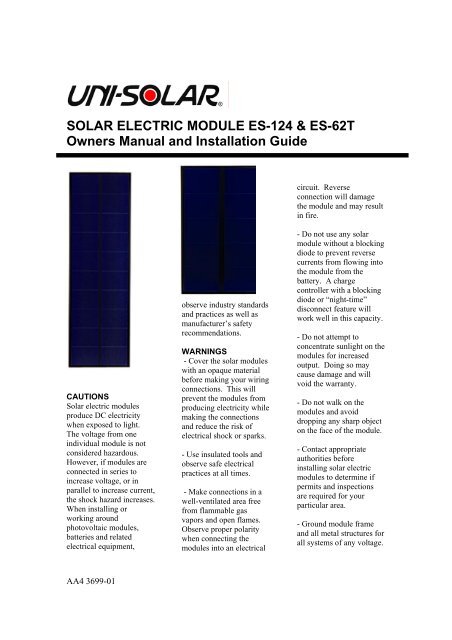
<strong>SOLAR</strong> <strong>ELECTRIC</strong> <strong>MODULE</strong> <strong>ES</strong>-<strong>124</strong> & <strong>ES</strong>-<strong>62T</strong><strong>Owners</strong> <strong>Manual</strong> <strong>and</strong> Installation Guidecircuit. Reverseconnection will damagethe module <strong>and</strong> may resultin fire.CAUTIONSSolar electric modulesproduce DC electricitywhen exposed to light.The voltage from oneindividual module is notconsidered hazardous.However, if modules areconnected in series toincrease voltage, or inparallel to increase current,the shock hazard increases.When installing orworking aroundphotovoltaic modules,batteries <strong>and</strong> relatedelectrical equipment,observe industry st<strong>and</strong>ards<strong>and</strong> practices as well asmanufacturer’s safetyrecommendations.WARNINGS- Cover the solar moduleswith an opaque materialbefore making your wiringconnections. This willprevent the modules fromproducing electricity whilemaking the connections<strong>and</strong> reduce the risk ofelectrical shock or sparks.- Use insulated tools <strong>and</strong>observe safe electricalpractices at all times.- Make connections in awell-ventilated area freefrom flammable gasvapors <strong>and</strong> open flames.Observe proper polaritywhen connecting themodules into an electrical- Do not use any solarmodule without a blockingdiode to prevent reversecurrents from flowing intothe module from thebattery. A chargecontroller with a blockingdiode or “night-time”disconnect feature willwork well in this capacity.- Do not attempt toconcentrate sunlight on themodules for increasedoutput. Doing so maycause damage <strong>and</strong> willvoid the warranty.- Do not walk on themodules <strong>and</strong> avoiddropping any sharp objecton the face of the module.- Contact appropriateauthorities beforeinstalling solar electricmodules to determine ifpermits <strong>and</strong> inspectionsare required for yourparticular area.- Ground module frame<strong>and</strong> all metal structures forall systems of any voltage.AA4 3699-01
- Follow the requirementsof the National ElectricCode or other applicablecodes for your location.Figure 1- Only qualified personsshould perform moduleinstallation. If you are notfamiliar with electricalpower equipment, contacta trained electrician toassist you with yourinstallation.DISCLAIMER OFLIABILIITYThe information containedin this manual is based onUnited Solar Ovonic’sknowledge <strong>and</strong>experience, but suchinformation <strong>and</strong>suggestions do notconstitute a warrantyexpressed or implied. Themethods of installation,use <strong>and</strong> maintenance ofsolar modules are beyondthe control of UnitedSolar Ovonic. UnitedSolar Ovonic assumes noresponsibility <strong>and</strong>expressly disclaimsliability for any loss,damage or expenseassociated with the use,installation or operation ofthe product. Any liabilityof United Solar Ovonic isstrictly limited to theLimited Warrantyattached hereto. UnitedSolar Ovonic reserves theright to make changes toproduct specifications orto the instruction manualwithout notice.Figure 2INSTALLATIONAA4 3699-01
MountingMounting holes on thealuminum frame of themodules are provided thatfit 7mm (¼ inch) diameterfasteners (see Figure 1 <strong>and</strong>2). Mount the <strong>ES</strong>-<strong>124</strong>module using eight (8)fasteners with lockwashers <strong>and</strong> nuts. Mountthe <strong>ES</strong>-62 module usingfour (4) fasteners with lockwashers <strong>and</strong> nuts.Clearance between themodule <strong>and</strong> the mountingsurface can be theminimum necessary toprevent wire chafing.When installing moduleson a building, use st<strong>and</strong>offor rack methods. Contactyour United Solar Ovonicdistributor for details.OrientationPick a location with themaximum exposure tosunlight. Avoid shadows,especially during themiddle of the day (i.e.“peak sun hours”, 09:30 to16:30). Orient the moduleso that the surface willreceive the maximum sunexposure over the year foryour particular site.Typically this is achievedby tilting the moduletoward the equator at anangle equal to the latitudeof the site. For optimumsummer performance,reduce the tilt angle by 15degrees below the latitudeangle. To increase winterperformance, increase thetilt angle 15 degrees abovethe latitude angle. The tiltangle should always begreater than 10º to ensureadequate rain watercleaning of the module.Wiring With St<strong>and</strong>ard“Quick Connect”Terminals:The <strong>ES</strong> Series PV modulesare wired to your balanceof-systemcomponents orto other <strong>ES</strong> Series PVmodules using theexterior-rated, insulatedwires <strong>and</strong> “quick-connect”terminals. There is apositive wire with terminal<strong>and</strong> a negative wire withterminal. Modules can bewired in series up to 1000VDC max (TUV) & 600VDC per UL by pluggingthe male terminal into thefemale terminal, positiveto negative. The “quickconnect”wire terminalsare not designed to bedisconnected while themodule is producingpower. If the “quickconnect”terminals mustbe pulled apart while themodule is in the sun, thetechnician must cover thesolar module beforedisconnecting theterminals.Wiring With OptionalJunction Boxes:The <strong>ES</strong> Series modulescan also be ordered withst<strong>and</strong>ard Junction Boxes.The junction box is locatedon the rear of eachmodule. To access thejunction box, loosen thefour (4) screws <strong>and</strong> lift offthe cover. The junctionbox is equipped with four(4) knockouts that willaccept either electricalconduit (13mm, ½ inchtrade size) or strain relieffittings. It is notrecommended to run wiresAA4 3699-01
Solar Module Specifications<strong>ES</strong>-<strong>124</strong> <strong>ES</strong>-<strong>62T</strong>Rated Power (Watts) <strong>124</strong> 64Operating Voltage (Volts) 30.0 15.0Operating Current (Amps) 4.1 4.1Open Circuit Voltage (Volts) 42.0 21.0Short Circuit Current (Amps) 5.1 5.1Series Fuse Rating 8 A 8 AMinimum Blocking Diode 8 A 8 AWeight (kilogram / lb.) 20.5 kg (45 lb.) 10.9 kg (24 lb.)During initial 8-10 weeks of operation, the module has higher electricaloutput than rated output. The output may be higher by 15%, the operatingvoltage may be higher by 11% <strong>and</strong> the operating current may be higher by4%.Electrical specifications (±5%) are based on measurements performed atSt<strong>and</strong>ard Test Conditions of 1000 W/m 2 irradiance, Air Mass 1.5, <strong>and</strong> CellTemperature of 25ºC after long-term stabilization. Performance may varyup to 10% from rated power due to low temperature operation, spectral<strong>and</strong> related effects.through the knockoutswithout the use of eitherstrain relief fittings orconduit. You may use anycombination of knockoutsthat is the most convenientfor your installation.Proper use of a suitableblocking diode willprevent reverse currentflow into a module from abattery or from anothercharging source (ex. agenerator).properly sized fuse onsingle modules or stringsof modules wired inparallel with other stringsof modules (or individualmodules). See table forappropriate series fuserating.Bypass DiodesEvery solar moduleincludes a bypass diodeacross each cell, whichresults in reduced powerloss under partial shadowconditions. When two (2)or more modules areconnected in series, abypass diode can beinstalled in the modulejunction box using thesupplied jumpers,providing further shadowtolerance. For assistancecontact United SolarOvonic.Use a tool such as ascrewdriver to remove theknockout. The junctionbox cover should beplaced on the junctionbox before the knockoutis removed. Ascrewdriver should beplaced at the indicated(arrow) spot on thejunction box knockout.Install either a strain relieffitting or a conduit fitting.Follow the diagram inFigure 2 to make yourwiring connections.Reposition the cover onthe junction box <strong>and</strong>tighten the four (4) screws.Blocking Diodes <strong>and</strong>FusesAll systems that include abattery must have ablocking diode betweenthe battery <strong>and</strong> the solarmodule. Usually theblocking diode (or nighttimedisconnect circuit) isincluded with a chargecontroller (i.e. voltageregulator). Additionalseries blocking diodes canbe used within the array(one diode per parallelstring) to increase dailyarray output in locationswith severe shading overparts of the array duringpeak sun hours (09:30 to16:30).United Solar Ovonicrequires the use of aCharge RegulationThe use of a chargecontroller (i.e. voltageregulator) is recommendedin battery systems toprevent the solar modulefrom overcharging thebattery <strong>and</strong> to optimize thecharge rate for the battery.Follow the manufacturer’sinstructions for installationof the charge controller.High Voltage SystemsSolar modules are suitablefor use in high voltagesystems up to 1000 volts(TUV). Modules meetIEC 61646 requirements.Underwriters Laboratoryrates these same modulesfor use in high voltagesystems up to 600 VDC.Contact United SolarAA4 3699-01
Ovonic for specific designadvice <strong>and</strong> assistance.Wiring SelectionUse insulated, str<strong>and</strong>edcopper wire rated for atleast 90ºC for module-tomodulewiring. Allowablewire size is 2.081 mm 2 –5.261 mm 2 (AWG #14-10). Wire insulation <strong>and</strong>size should be chosen formaximum temperature <strong>and</strong>environment. Refer to theNational Electric Codesection 690.8 or otherrecognized st<strong>and</strong>ards.GroundingThe frame of each moduleshould be connected toearth ground. A selftapping screw <strong>and</strong> cupwasher are provided witheach module that can beused to attach a groundwire to the frame using thegrounding hole shown inFigure 1. Place a coppergrounding wire in betweenthe cup washer <strong>and</strong> screwhead. Module mountingfasteners can be used forgrounding purposes, inwhich case a star lockwasher must be used toensure a good electricalconnection to the moduleframe. Consult theNational Electric Code orother recognized st<strong>and</strong>ardsfor groundingrequirementswater. Do not use abrasivecleaners or solvents. Becareful when washing themodules, as thecombination of water <strong>and</strong>electricity may present ashock hazard. Wearelectrical gloves <strong>and</strong>disconnect the modulefrom the batteries. Shortcircuitthe output of themodule or wash at night.United Solar OvonicCorporate Office3800 Lapeer RoadAuburn Hills MI 48326(800) 843-3892(248) 475-0100Fax (248) 364-0510www.uni-solar.comUnited Solar OvonicNorth American Sales Office8920 Kenamar Dr. Suite 205San Diego, CA 92121 USATel: 858.530.8586Fax: 858.530.8686Email: westerninfo@uni-solar.comUnited Solar OvonicEuropean OfficeDennewarststrasse 25-27D-552068 Aachen – GermanyTel: +49.241.963.1131Fax: +49.241.963.1138Email: europeinfo@uni-solar.comMaintenanceCheck the wiringconnections periodicallyfor tightness <strong>and</strong>corrosion. Clean the frontsurface of the modules asneeded with mild soap <strong>and</strong>AA4 3699-01
WARRANTYLimited WarrantyTwenty-YearUnited Solar Ovonicwarrants the solar moduleagainst lost power outputas follows: For a period oftwenty (20) years from thedate of sale to the originalpurchaser, modulesreturned by the originalpurchaser to an authorizedUnited Solar OvonicDistributor or ServiceFacility which uponinspection are determinedto exhibit a power outputof less then 80% of theMinimum Rated Powerspecified at the time ofsale due to defects inmaterials or workmanshipwill be repaired orreplaced, or, at the optionof United Solar Ovonic, itwill replace such lostpower by providing tobuyer additional modulesto restore total wattage ofall defective modules inthe user’s installation orsystem to 80% of theRated Power output.What is not coveredby the WarrantyThe warranty does notapply to any module whichin the judgment of UnitedSolar Ovonic has beensubject to misuse, neglector accident or which hasbeen damaged thoughabuse, alteration, improperinstallation or application,or negligence in use,storage, transportation orh<strong>and</strong>ling, or repaired byanyone other than UnitedSolar Ovonic. Thewarranty does not coverany transportation costsfor return of module or forre-shipment of anyrepaired or replacedmodule, or cost associatedwith the installation,removal or re-installationof modules.Warranty LimitationsUnited Solar Ovonic shallhave no responsibility fordamage to persons orproperty or other loss orinjury resulting fromdefect in the module orfrom improper use orinstallation. Under nocircumstances will UnitedSolar Ovonic be liable forany incidental orconsequential damage.Any warranties implied bylaw, including those ofmerchantability <strong>and</strong> fitnessfor a particular purpose areherby expresslydisclaimed. Themaximum liability ofUnited Solar Ovonic islimited to the purchaseprice of the system.Such Liability shall belimited in duration totwelve (12) months fromthe date of originalpurchase. This warranty isin lieu of all otherwarranties, expressed orimplied. The purchaser’sexclusive remedy shall beonly as stated herein.Some States do not allowlimitations on how long animplied warranty lasts orthe exclusion or limitationof incidental orconsequential damages, sothe above limitations orexclusions may not applyto you.Obtaining WarrantyPerformancePlease keep receipt ofpurchase to verify date ofpurchase. If you feel youhave a claim under thiswarranty, first contact thedealer who sold you themodule or any AuthorizedUnited Solar OvonicDealer or Distributor.Check local telephonelistings for location. Thedealer of distributor willgive advice on h<strong>and</strong>lingthe claim. If furtherassistance is required,contact United SolarOvonic for instructions.The factory will not acceptthe return of any moduleunless United SolarOvonic has given priorwritten authorization.This warranty gives youspecific legal rights <strong>and</strong>you may also have otherrights, which vary fromState to State.AA4 3699-01