QR - LightCycler 480 Instrument Quick Guide: Protein Melting
QR - LightCycler 480 Instrument Quick Guide: Protein Melting
QR - LightCycler 480 Instrument Quick Guide: Protein Melting
Create successful ePaper yourself
Turn your PDF publications into a flip-book with our unique Google optimized e-Paper software.
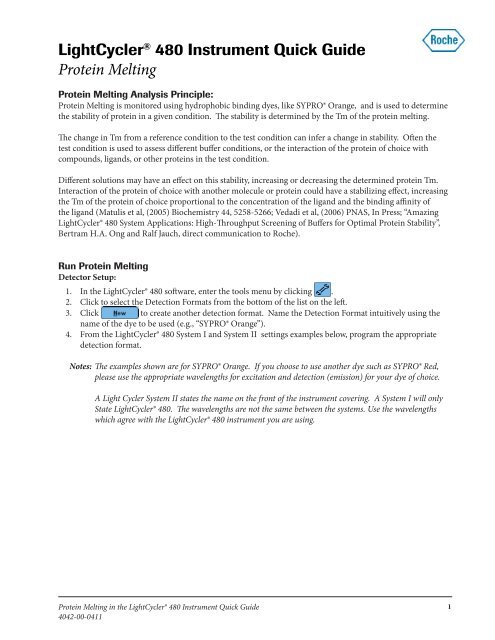
<strong>LightCycler</strong> ® <strong>480</strong> <strong>Instrument</strong> <strong>Quick</strong> <strong>Guide</strong><strong>Protein</strong> <strong>Melting</strong><strong>Protein</strong> <strong>Melting</strong> Analysis Principle:<strong>Protein</strong> <strong>Melting</strong> is monitored using hydrophobic binding dyes, like SYPRO® Orange, and is used to determinethe stability of protein in a given condition. The stability is determined by the Tm of the protein melting.The change in Tm from a reference condition to the test condition can infer a change in stability. Often thetest condition is used to assess different buffer conditions, or the interaction of the protein of choice withcompounds, ligands, or other proteins in the test condition.Different solutions may have an effect on this stability, increasing or decreasing the determined protein Tm.Interaction of the protein of choice with another molecule or protein could have a stabilizing effect, increasingthe Tm of the protein of choice proportional to the concentration of the ligand and the binding affinity ofthe ligand (Matulis et al, (2005) Biochemistry 44, 5258-5266; Vedadi et al, (2006) PNAS, In Press; “Amazing<strong>LightCycler</strong>® <strong>480</strong> System Applications: High-Throughput Screening of Buffers for Optimal <strong>Protein</strong> Stability”,Bertram H.A. Ong and Ralf Jauch, direct communication to Roche).Run <strong>Protein</strong> <strong>Melting</strong>Detector Setup:1. In the <strong>LightCycler</strong>® <strong>480</strong> software, enter the tools menu by clicking .2. Click to select the Detection Formats from the bottom of the list on the left.3. Click to create another detection format. Name the Detection Format intuitively using thename of the dye to be used (e.g., “SYPRO® Orange”).4. From the <strong>LightCycler</strong>® <strong>480</strong> System I and System II settings examples below, program the appropriatedetection format.Notes: The examples shown are for SYPRO® Orange. If you choose to use another dye such as SYPRO® Red,please use the appropriate wavelengths for excitation and detection (emission) for your dye of choice.A Light Cycler System II states the name on the front of the instrument covering. A System I will onlyState <strong>LightCycler</strong>® <strong>480</strong>. The wavelengths are not the same between the systems. Use the wavelengthswhich agree with the <strong>LightCycler</strong>® <strong>480</strong> instrument you are using.<strong>Protein</strong> <strong>Melting</strong> in the <strong>LightCycler</strong>® <strong>480</strong> <strong>Instrument</strong> <strong>Quick</strong> <strong>Guide</strong>4042-00-04111
<strong>Protein</strong> <strong>Melting</strong>Run <strong>Protein</strong> <strong>Melting</strong>, continuedSystem I FormatSystem II Formata. Choose the appropriate wavelength for Excitation and Emission by clicking the corresponding checkbox.b. Click the name field and change the name to the dye of choice.c. Click the Melt Factor field to enter the melt factor of 1.d. Click the Quant Factor field to change the Quant Factor to 10. This should have no effect on meltingassays.e. Click the Max Integration Time field to set it to 1 second.f. Click .2<strong>Protein</strong> <strong>Melting</strong> in the <strong>LightCycler</strong>® <strong>480</strong> <strong>Instrument</strong> <strong>Quick</strong> <strong>Guide</strong>4042-00-0411
<strong>Protein</strong> <strong>Melting</strong><strong>Melting</strong> Program SetupThis Run Protocol is used for all future analyses, but may be modified anytime. Program the <strong>Protein</strong> <strong>Melting</strong>to have the following settings, as shown in the picture below:Note:The Ramp Rates of 4.8 and 2.5 are the default for the 384 MWP setup. If you are using the 96 MWPsetup, the expected default/maximum Ramp Rates are 4.4 and 2.2, and should not be changed.1. Change the Detection Format to the newly created SYPRO® Orange format.2. The Block Size is determined at start-up by the <strong>LightCycler</strong>® <strong>480</strong> according to what block is in theinstrument. This cannot be changed unless the instrument is powered OFF and the block is changed.The <strong>LightCycler</strong>® <strong>480</strong> detects which block is present when performing its Self-Test after being poweredON.3. Set the reaction volume to the desired volume.a. For the 96 well plate/block, a volume of 15 or 20 mL is suggested. A minimum of 10 may be used,but may not yield optimal results.b. For the 384 well plate/block, a volume of 5 to 15 mL is suggested. A volume less than 5 mL may beattempted, but may not yield optimal results. The minimum instrument setting is 3 mL.c. A single Program is typically used, and the program is renamed to <strong>Protein</strong> <strong>Melting</strong> or another namefor user clarity.• This program should have the Analysis Mode of <strong>Melting</strong> Curves.d. Program three temperature targets as follows:• The first target is 20°C, with a Hold of 15 seconds. All other fields are left at the default.• The second target is typically 85°C, with an Acquisition Mode of Continuous, and 10acquisitions per degree C. All other fields are left at the default.• The third target is 20°C, with a Hold of 15 seconds. All other fields are left at the default.<strong>Protein</strong> <strong>Melting</strong> in the <strong>LightCycler</strong>® <strong>480</strong> <strong>Instrument</strong> <strong>Quick</strong> <strong>Guide</strong>4042-00-04113
<strong>Protein</strong> <strong>Melting</strong><strong>Melting</strong> Program Setup, continuedNotes: If it is determined by the researcher that this temperature is not acceptable, this temperature shouldbe changed. The maximum temperature which can be programmed into the <strong>LightCycler</strong>® <strong>480</strong> is 99°C.No hold time is necessary to see an effect at this maximum temperature.The ramp rate is determined by the number of acquisitions per degree and the exposure timeof the detection system. This cannot be edited, except by increasing or decreasing the number ofAcquisitions per degree C.4. Save the Run Program as a “Run Template” by clicking the down arrow next to Apply Template, thenselect Save As Template.5. Give this template an intuitive name which includes intention of the run, the detection format, and thesize of the block.6. Save the template into your desired folder to be applied to New Experiments in the future.Readiness Program Setup1. This Run Protocol is used to “ready” the <strong>LightCycler</strong>® <strong>480</strong> instrument for all future plate runs.Program the LC<strong>480</strong> Readiness Run to have the following settings, as shown in the picture below:Note:The LC<strong>480</strong> Readiness Run only needs to be used when the instrument has been idle for more than10 minutes. The <strong>LightCycler</strong> <strong>480</strong>® lamp will have powered off to save lamp hours. This run activatesthe lamp so successive runs do not have a warm-up period of waiting after loading the plate andpressing .The intention of this run is to prevent the 105°C heated lid from having an effect on the user’s proteinmelting analysis plate. Although this is a preventative measure, no effect was seen from notperforming this LC<strong>480</strong> Readiness Run.The Ramp Rates of 4.8 and 2.5 are the default for the 384 MWP setup. If you are using the 96 MWPsetup, the expected default/maximum Ramp Rates are 4.4 and 2.2, and should not be changed.4<strong>Protein</strong> <strong>Melting</strong> in the <strong>LightCycler</strong>® <strong>480</strong> <strong>Instrument</strong> <strong>Quick</strong> <strong>Guide</strong>4042-00-0411
<strong>Protein</strong> <strong>Melting</strong>Readiness Program Setupa. Change the Detection Format to the newly created SYPRO® Orange format. This is done forconsistency, although any detection format works for this run.b. The Block Size is determined by the <strong>LightCycler</strong>® <strong>480</strong> instrument according to which block is inthe instrument. This cannot be changed, unless the instrument is powered OFF and the blockis changed. The <strong>LightCycler</strong>® <strong>480</strong> instrument detects what block is present when performing its Self-Test after being powered ON.c. Set the reaction volume to the desired volume. This is done for consistency, although any reactionvolume works for this run.• For the 96 well plate/block, a volume of 15 or 20 mL is suggested. A minimum of 10 may beused, but may not yield optimal results.• For the 384 well plate/block, a volume of 5 to 15 mL is suggested. A volume less than 5 mL maybe attempted, but may not yield optimal results. The minimum instrument setting is 3 mL.• A single Program is typically used, and the program is renamed to LC<strong>480</strong> Readiness Run oranother name for user clarity.This program should have the Analysis Mode of <strong>Melting</strong> Curves.d. Program one temperature targets as follows:• The first target is 20°C, with a Hold of 15 seconds. All other fields are left at the default.2. Save the Run Program as a “Run Template” by clicking the down arrow next to Apply Template, thenselect Save As Template.3. Give this template an intuitive name which includes intention of the run, the detection format, andthe size of the block.4. Save the template into your desired folder to be applied to New Experiments in the future.<strong>Protein</strong> <strong>Melting</strong> in the <strong>LightCycler</strong>® <strong>480</strong> <strong>Instrument</strong> <strong>Quick</strong> <strong>Guide</strong>4042-00-04115
<strong>Protein</strong> <strong>Melting</strong><strong>Protein</strong> <strong>Melting</strong> Experimental Conditions Setup and DeterminationDetermination of optimal <strong>Protein</strong> and Dye concentrations:Note:The protein and dye concentrations may need to be optimized for each protein. <strong>Protein</strong> size andhydrophobic domain content impact the association with the dye, and thus the total fluorescenceobtained in the analysis. Typical protein concentrations range from 0.5 µM to 10 µM. TypicalSYPRO® Orange dye concentrations range from 5x to 20x, although some may find lowerconcentrations useful. Typical Reaction sizes range from 5 µl in a 384 well plate to 20 mL in a 96 wellplate.1. Prepare the protein in to a 20 µM stock in a suitable screening buffer. Other dilutions can be made forthe ease of pipetting.a. Suggested buffers if another is unavailable:• 50 mM Hepes, 150 mM NaCl, 5 mM MgCl2, 2 mM DTT, pH 7.4.• Phosphate Buffered Saline (PBS)• Standard HEPES screening buffer (100 mM HEPES, 150 mM NaCl, pH 7.5), Vedadi et.al.Note: It is not necessary to use these buffers; however, it is suggested to avoid buffers containing BSA,DMSO, or other compounds that may cause high background or effect the stability of the protein asthis hinders the assay. Many compounds used with the protein are dissolved in DMSO. In smallamounts this may not harm the assay, but a vehicle control should be used to ensure the effects onTm seen are due to the compound of interest.2. Prepare a 100x working stock solution from SYPRO® Orange 5000x Stock in the buffer of choice from1.1. Further dilutions can be made for ease of pipetting if desired.3. Combine into wells described in Table 1 to determine the optimal concentrations using a standard10 mL reaction size. Adjust appropriately if another final volume is used. The final concentrations areshown in Table 2.6<strong>Protein</strong> <strong>Melting</strong> in the <strong>LightCycler</strong>® <strong>480</strong> <strong>Instrument</strong> <strong>Quick</strong> <strong>Guide</strong>4042-00-0411
<strong>Protein</strong> <strong>Melting</strong><strong>Protein</strong> <strong>Melting</strong> Experimental Conditions Setup and Determination, continuedTable 1<strong>Protein</strong> from100 µM StockSYPRO®Dye from100xStockBufferWell A1 4.0 mL 0.5 µL 5.50 µLA2 4.0 mL 0.67 µL 5.33 µLA3 4.0 mL 1.0 µL 5.00 µLA4 4.0 mL 2.0 µL 4.00 µLB1 2.0 mL 0.5 µL 7.50 µLB2 2.0 mL 0.67 µL 7.33 µLB3 2.0 mL 1.0 µL 7.00 µLB4 2.0 mL 2.0 µL 6.00 µLC1 1.0 mL 0.5 µL 8.50 µLC2 1.0 mL 0.67 µL 8.33 µLC3 1.0 mL 1.0 µL 8.00 µLC4 1.0 mL 2.0 µL 7.00 µLD1 0.5 mL 0.5 µl 9.00 µLD2 0.5 mL 0.67 µl 8.83 µLD3 0.5 mL 1.0 µL 8.50 µLD4 0.5 µL 2.0 µL 7.50 µLE1 0.25 µL 0.5 µL 9.25 µLE2 0.25 µL 0.67 µL 9.08 µLE3 0.25 µL 1.0 µL 8.75 µLE4 0.25 µL 2.0 µL 7.75 µLTable 1: This table is an example of the concentration matrix for optimization.The actual concentrations, amounts, rows and columns may be chosen by the user.<strong>Protein</strong> <strong>Melting</strong> in the <strong>LightCycler</strong>® <strong>480</strong> <strong>Instrument</strong> <strong>Quick</strong> <strong>Guide</strong>4042-00-04117
<strong>Protein</strong> <strong>Melting</strong><strong>Protein</strong> <strong>Melting</strong> Experimental Conditions Setup and Determination, continuedTable 2 Column 1 Column 2 Column 3 Column 4Row A8.0 µM <strong>Protein</strong>5x SYPRO®8.0 µM <strong>Protein</strong>6.67x SYPRO®8.0 µM <strong>Protein</strong>10x SYPRO®8.0 µM <strong>Protein</strong>20x SYPRO®Row B4.0 µM <strong>Protein</strong>5x SYPRO®4.0 µM <strong>Protein</strong>6.67x SYPRO®4.0 µM <strong>Protein</strong>10x SYPRO®4.0 µM <strong>Protein</strong>20x SYPRO®Row C2.0 µM <strong>Protein</strong>5x SYPRO®2.0 µM <strong>Protein</strong>6.67x SYPRO®2.0 µM <strong>Protein</strong>10x SYPRO®2.0 µM <strong>Protein</strong>20x SYPRO®Row D1.0 µM <strong>Protein</strong>5x SYPRO®1.0 µM <strong>Protein</strong>6.67x SYPRO®1.0 µM <strong>Protein</strong>10x SYPRO®1.0 µM <strong>Protein</strong>20x SYPRO®Row E0.5 µM <strong>Protein</strong>5x SYPRO®0.5 µM <strong>Protein</strong>6.67x SYPRO®0.5 µM <strong>Protein</strong>10x SYPRO®0.5 µM <strong>Protein</strong>20x SYPRO®Table 2: This table is an example of the concentration matrix for optimization.The actual rows and columns may be chosen by the user.Choice of optimal <strong>Protein</strong> and Dye concentrations:Note:The choice of the optimal concentration is a decision made by the researcher. The optimalconcentration differs slightly depending on the goals of the researcher. We suggest the best curves arethose giving high fluorescence, giving a nicely shaped curve with a single peak/valley when inspectedin the LC<strong>480</strong> Tm Calling Analysis, having a middle concentration of protein of those giving nicelyshaped, high fluorescence curves, and use the lowest SYPRO® dye concentration. If volume is alsoa factor, you may wish to assay the lowest or most appropriate volume to give the results above forfuture assays.1. Visual inspection of <strong>Protein</strong> <strong>Melting</strong> curves.a. The curves should be nicely shaped with a good amount of fluorescence. Refer to the blue and greencurves below for examples of good <strong>Protein</strong> <strong>Melting</strong> curves.8<strong>Protein</strong> <strong>Melting</strong> in the <strong>LightCycler</strong>® <strong>480</strong> <strong>Instrument</strong> <strong>Quick</strong> <strong>Guide</strong>4042-00-0411
<strong>Protein</strong> <strong>Melting</strong><strong>Protein</strong> <strong>Melting</strong> Experimental Conditions Setup and Determination, continuedb. Use the Tm Calling analysis to help show the curves have a good shape. The negative first derivativedrawing of the curves should show curves with a single valley or negative peak. If the curve showsmultiple valleys, this is not an optimal curve. Refer to the blue and green curves below for examplesof good <strong>Protein</strong> <strong>Melting</strong> curves.<strong>Protein</strong> <strong>Melting</strong> Plate Setup and Run1. Use the protein and dye concentrations determined from the test run above.2. The Change of buffer or addition of Compound, Ligand, or interacting protein should be performed atthis time.3. A reference well (or wells) containing only the protein of interest in determined optimal conditionswithout change should be maintained on plate as a reference..4. Changes in Tm from the reference wells is used to determine how the changes in buffer or addition ofcompounds has effected the protein stability.5. Further setup is determined by the researcher.6. Ligand fluorescence may effect the shape of the curve. This was not found to effect the Tm resultingfrom the test.Fluorescent Decrease dueto Ligand<strong>Protein</strong> <strong>Melting</strong> in the <strong>LightCycler</strong>® <strong>480</strong> <strong>Instrument</strong> <strong>Quick</strong> <strong>Guide</strong>4042-00-04119
<strong>Protein</strong> <strong>Melting</strong><strong>Protein</strong> <strong>Melting</strong> Plate Setup and Run, continued7. Curves with too low of a concentration can have a poor shape, possibly giving multiple peaks in theanalysis. Although these curves are not optimal and should have the protein concentration increased,the Roche <strong>LightCycler</strong>® <strong>Protein</strong> <strong>Melting</strong> Analysis only generates a Tm for the greatest peak/meltingevent.8. The best way to ensure plate-to-plate consistency in your <strong>LightCycler</strong>® <strong>480</strong> plate runs for protein analysisis to control the exposure time. This is especially applicable if you wish to use very short melting runs,that are less than 8 minutes run time.a. Find run time from run used to determine the optimal protein and dye concentrations.• In the Experiment section, choose the Data tab.• Click and expand the hidden menu bar on one of the charts displayed. See illustration below:• Change the Chart type to Exposure History.• The exposure time is displayed as Integration time (in milliseconds).• Round the exposure time up to a reasonable time. In the example above, the exposure/integration time would be rounded to 1 sec (or 1000 ms).10<strong>Protein</strong> <strong>Melting</strong> in the <strong>LightCycler</strong>® <strong>480</strong> <strong>Instrument</strong> <strong>Quick</strong> <strong>Guide</strong>4042-00-0411
<strong>Protein</strong> <strong>Melting</strong><strong>Protein</strong> <strong>Melting</strong> Plate Setup and Run, continued• When starting your future runs, use this exposure time by changing the exposure time to thistime. Click the Customize button, choose manual, and enter the exposure time in the IntegrationTime (sec) field. Click to confirm the changes. See illustration below.9. To ensure these changes are used in future analyses, a template may be created. Save the Run Programas a Run Template by clicking the down arrow next to Apply Template, then select Save As Template.10. Give this template an intuitive name that includes intention of the run, the detection format, and thesize of the block.11. Save the template into your desired folder to be applied to New Experiments in the future.<strong>Protein</strong> <strong>Melting</strong> in the <strong>LightCycler</strong>® <strong>480</strong> <strong>Instrument</strong> <strong>Quick</strong> <strong>Guide</strong>4042-00-041111
<strong>Protein</strong> <strong>Melting</strong>Setup of <strong>Protein</strong> <strong>Melting</strong> Analysis ToolNote: The Roche <strong>Protein</strong> <strong>Melting</strong> software may be obtained from a Roche Representatives or RocheTechnical Support.1. Installation of the Roche <strong>Protein</strong> <strong>Melting</strong> software.a. The CD with the Roche <strong>Protein</strong> <strong>Melting</strong> Software contains a ReadMe.doc file that describes theinstallation and setup of the software.b. Install the software by running the setup.exe file.• This installs the Roche <strong>Protein</strong> <strong>Melting</strong> Software and may update your computer to theproper level Microsoft .Net Framework, if necessary.c. Run the <strong>LightCycler</strong>® <strong>480</strong> <strong>Protein</strong> <strong>Melting</strong> software.• The first run requires you to configure the directory watcher. The Roche.LC<strong>480</strong>.ExportWatcher watches a specific “IXO export directory” (folder) chosen by you, allowing theRoche <strong>Protein</strong> <strong>Melting</strong> Software to immediately analyze any <strong>LightCycler</strong>® <strong>480</strong> .ixo file exportedinto this directory.• Choose a CSV target directory (folder) you want to save the resulting .csv analysis file.• From the <strong>LightCycler</strong>® <strong>480</strong> Basic software, you may choose to Export a specific proteinmelting .ixo run file, or Batch Export a group of these files to be analyzed. Target this exportto the specified folder for the “IXO export directory”, set above.d. The output of the software is a .csv file, that can be viewed in any spreadsheet or text program. CSVstands for comma separated value, and is a standard file format recognized by most programs.The first line of the file is the header with the following columns:• Program: 0-based index of the <strong>LightCycler</strong>® <strong>480</strong> program• Channel: 0-based index of the <strong>LightCycler</strong>® <strong>480</strong> channel• Position: 0-based position on the MWP (0…95 or 0…383)• Call: Positive, Negative or Uncertain.Negative: no results are listed in the following columns.Uncertain: an additional message is listed in the Message column• Tm: calculated melting temperature (see the Roche <strong>Protein</strong> <strong>Melting</strong> software’s ReadMe.doc forfurther description)• Slope: slope of the fluorescence signal at the Tm• Initial: fluorescence at beginning of the curve (lowest temperature)• Low: minimum fluorescence below Tm• Peak: minimum fluorescence above Tm• Message: additional calculation information, if call is uncertain.12<strong>Protein</strong> <strong>Melting</strong> in the <strong>LightCycler</strong>® <strong>480</strong> <strong>Instrument</strong> <strong>Quick</strong> <strong>Guide</strong>4042-00-0411
<strong>Protein</strong> <strong>Melting</strong>Use of <strong>Protein</strong> <strong>Melting</strong> AnalysisExport of <strong>LightCycler</strong>® <strong>480</strong> run and <strong>Protein</strong> <strong>Melting</strong> AnalysisNote: Runs may be exported individually, in a group as a Batch Export, or exported automaticallyevery run with an automated or robotically controlled <strong>LightCycler</strong>® <strong>480</strong> setup.Single run export1. There are two ways to perform a single run export.a. Export from within an open run.b. With the run of choice open, click .2. Choose the appropriate export folder, chosen in the Roche <strong>LightCycler</strong>® <strong>480</strong> <strong>Protein</strong> <strong>Melting</strong> software.a. If setup properly, the Roche <strong>Protein</strong> <strong>Melting</strong> software analyzes the data instantly to produce theanalysis *.csv result file.3. Export from the LC<strong>480</strong> Navigator.4. Click , or select the Navigator from the Window dropdown menu in the <strong>LightCycler</strong>® <strong>480</strong> software.5. Choose the experiment to export by left-clicking the experiment of choice.6. Click . Choose the appropriate export folder, chosen in the Roche <strong>LightCycler</strong>® <strong>480</strong><strong>Protein</strong> <strong>Melting</strong> software.a. If setup properly, the Roche <strong>Protein</strong> <strong>Melting</strong> software analyzes the data instantly to produce theanalysis *.csv result file.Multiple run/Batch Export1. Click , or select the Navigator from the Window dropdown menu in the <strong>LightCycler</strong>® <strong>480</strong> software2. Click . Choose the appropriate export folder, chosen in the Roche <strong>LightCycler</strong>® <strong>480</strong><strong>Protein</strong> <strong>Melting</strong> software.a. If setup properly, the Roche <strong>Protein</strong> <strong>Melting</strong> software will analyze the data instantly to produce theanalysis *.csv result files.3. Automated Exporta. The automated export should be setup in your scheduling software to export the LC<strong>480</strong> experiment.ixo file at the end of every run. The LC<strong>480</strong> LIMS module accommodates this. Contact RocheTechnical Support for further information, if needed.<strong>Protein</strong> <strong>Melting</strong> in the <strong>LightCycler</strong>® <strong>480</strong> <strong>Instrument</strong> <strong>Quick</strong> <strong>Guide</strong>4042-00-041113
<strong>Protein</strong> <strong>Melting</strong><strong>Protein</strong> <strong>Melting</strong> Analysis Result Table DescriptionRoche <strong>LightCycler</strong>® <strong>480</strong> <strong>Protein</strong> <strong>Melting</strong> Analysis Result Table Description1. The output of the software is a .csv file, that can be viewed in any spreadsheet or text program. CSVstands for comma separated value, and is a standard file format recognized by most of these programs.a. The first line of the file is the header with the following columns:• Program: 0-based index of the <strong>LightCycler</strong>® <strong>480</strong> program• Channel: 0-based index of the <strong>LightCycler</strong>® <strong>480</strong> channel• Position: 0-based position on the MWP (0…95 or 0…383)• Call: Positive, Negative or Uncertain.Negative: no results are listed in the following columns.Uncertain: an additional message is listed in the Message column• Tm: calculated melting temperature (see the Roche <strong>Protein</strong> <strong>Melting</strong> Software’s ReadMe.doc forfurther description)• Slope: slope of the fluorescence signal at the Tm• Initial: fluorescence at beginning of the curve (lowest temperature)• Low: minimum fluorescence below Tm• Peak: maximum fluorescence above Tm• Message: additional calculation information, if call is uncertain2. The data points gathered by the <strong>LightCycler</strong>® <strong>480</strong> <strong>Protein</strong> <strong>Melting</strong> Analysis relate to information thatcould be helpful to the researcher.a. The difference between the Initial and the Low fluorescence values relates to the affinity of the dyefor the protein or ligand/compound.b. The difference between the Low and Peak relates to the affinity of the protein hydrophobic domainsto the dye.c. The slope (taken by our software at the Tm exactly) is relative to the Kd determined by othersoftware.14<strong>Protein</strong> <strong>Melting</strong> in the <strong>LightCycler</strong>® <strong>480</strong> <strong>Instrument</strong> <strong>Quick</strong> <strong>Guide</strong>4042-00-0411
<strong>Protein</strong> <strong>Melting</strong><strong>Protein</strong> <strong>Melting</strong> Reagents from other vendors:Product Name Cat. No. Pack Size/DescriptionSYPRO® Orange n/a (Sigma-Aldrich)<strong>Protein</strong> Analysis Buffer n/a This is an aqueous buffer determined by theresearcher. This buffer should be free of BSAand nonspecific protein stabilizers, detergents,and other compounds which can/will haveimpact on the protein stability/folding orbackground fluorescence of the analysis.Consumables:Product Name Cat. No. Pack Size/Description<strong>LightCycler</strong>® <strong>480</strong> MultiWellPlate 96 (White)04 729 692 001 5 x 10 plates and sealing foils<strong>LightCycler</strong>® <strong>480</strong> MultiWellPlate 384 (White)04 729 749 001 5 x 10 plates and sealing foils<strong>LightCycler</strong>® <strong>480</strong> Sealing Foil 04 729 757 001 50 foils<strong>Protein</strong> <strong>Melting</strong> in the <strong>LightCycler</strong>® <strong>480</strong> <strong>Instrument</strong> <strong>Quick</strong> <strong>Guide</strong>4042-00-041115
<strong>Protein</strong> <strong>Melting</strong>This page left intentionally blank.LIGHTCYCLER is a trademark of Roche.The technology for <strong>LightCycler</strong>® is licensed from Idaho Technologies, Inc.All other trademarks are the property of their respective owners.©2011, Roche Diagnostics. All rights reserved.Roche DiagnosticsP.O. Box 504579115 Hague RoadIndianapolis, IN 46250-0457 USA16<strong>Protein</strong> <strong>Melting</strong> in the <strong>LightCycler</strong>® <strong>480</strong> <strong>Instrument</strong> <strong>Quick</strong> <strong>Guide</strong>4042-00-0411


