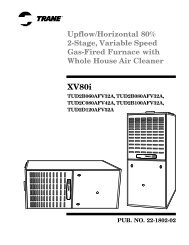
DayandNight MF Blower Specs.pdf
DayandNight MF Blower Specs.pdf
DayandNight MF Blower Specs.pdf

Create successful ePaper yourself
Turn your PDF publications into a flip-book with our unique Google optimized e-Paper software.
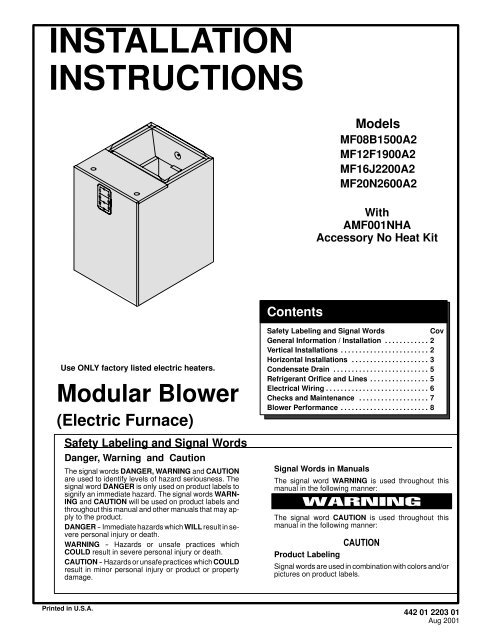
INSTALLATIONINSTRUCTIONSModels<strong>MF</strong>08B1500A2<strong>MF</strong>12F1900A2<strong>MF</strong>16J2200A2<strong>MF</strong>20N2600A2WithA<strong>MF</strong>001NHAAccessory No Heat KitContentsUse ONLY factory listed electric heaters.Modular <strong>Blower</strong>(Electric Furnace)Safety Labeling and Signal WordsDanger, Warning and CautionThe signal words DANGER, WARNING and CAUTIONare used to identify levels of hazard seriousness. Thesignal word DANGER is only used on product labels tosignify an immediate hazard. The signal words WARN-ING and CAUTION will be used on product labels andthroughout this manual and other manuals that may applyto the product.DANGER -- Immediate hazards which WILL result in severepersonal injury or death.WARNING -- Hazards or unsafe practices whichCOULD result in severe personal injury or death.CAUTION -- Hazards or unsafe practices which COULDresult in minor personal injury or product or propertydamage.Safety Labeling and Signal WordsCovGeneral Information / Installation ............ 2Vertical Installations ........................ 2Horizontal Installations ..................... 3Condensate Drain .......................... 5Refrigerant Orifice and Lines ................ 5Electrical Wiring ............................ 6Checks and Maintenance ................... 7<strong>Blower</strong> Performance ........................ 8Signal Words in ManualsThe signal word WARNING is used throughout thismanual in the following manner:WARNINGThe signal word CAUTION is used throughout thismanual in the following manner:CAUTIONProduct LabelingSignal words are used in combination with colors and/orpictures on product labels.PrintedinU.S.A.442 01 2203 01Aug 2001
Installation InstructionsModular <strong>Blower</strong>Figure 1Nominal Installation Dimensions and Clearances14 - 1 / 2 ” (2-2 1 / 2 Ton) <strong>MF</strong>0817 - 3 / 4 ” (3 - 3 1 / 2 Ton) <strong>MF</strong>1221 - 3 / 8 ” ( 4 Ton) <strong>MF</strong>1625” (5 Ton) <strong>MF</strong>203/4”Low VoltageEntranceLine VoltageEntrance8 1 / 2 ”20 1 / 2 ”12”24”5/8”CLEARANCESNO HEATERSAll Sides .................................. 0”From Supply Duct .......................... 0”Recommended Service From Front .......... 20”(Service for blower, filter if installed)WITH HEATERSAll Sides .................................. 0”From First ThreeFeet of Supply Duct to Combustibles ........ 1”From Duct after Three Feet ................. 0”Recommended Service From Front .......... 20”(Service for blower, heaters if installed)Fire Hazard15 - 1 / 2 ” (2-2 1 / 2 Ton) <strong>MF</strong>0819 - 1 / 8 ” (3-3 1 / 2 Ton) <strong>MF</strong>1222 - 3 / 4 ” (4 Ton) <strong>MF</strong>1626 -3/ 8 ” (5 Ton) <strong>MF</strong>20Bottom Return Air Opening14 - 1 / 4 ” x 20” (1 1 / 2 - 2 1 / 2 Ton)18” x 20” (3 -3 1 / 2 Ton)21 - 3 / 8 ” x 20” (4 Ton)25 - 1 / 4 ” x 20 (5 Ton)When heaters are installed maintain clearancesfrom combustible materials as specifiedon unit rating plate.Failure to do so can result in fire, propertydamage, personal injury or death.General InformationInstallation or repairs made by unqualified persons canresult in hazards to you and others. Installation MUSTconform with local building codes and with theNational Electrical Code NFPA70 current edition.The information contained in this manual is intendedfor use by a qualified service technician familiar withsafety procedures and equipped with the proper toolsand test instruments.Failure to carefully read and follow all instructions inthis manual can result in equipment malfunction,property damage, personal injury and/or death.The blower cabinet may be used for cooling or heat pumpoperation with or without electric heat. Installations withoutelectric heat, require a No Heat Kit. The cabinet can be installed inan upflow, downflow or horizontal position (Figure 3, 4).LocationSelect the best position which suits the installation siteconditions.The location should provide adequate structuralsupport, spaceinthe front of the unit for service access, clearance for return air andsupply duct connections, space for refrigerant piping connectionsand condensate drain line connections. If heaters are beinginstalled make sure adequate clearance is maintained fromsupply ductwork, See Clearances and Warning in Figure 1.If the unit is located in an area of high humidity, nuisance sweatingof casing may occur. On these installations a wrap of 2” fiberglassinsulation with a vapor barrier should be used.2
Modular <strong>Blower</strong>InstallationsThe unit is ready to install in any position without modifications.Refer to the coil instructions for information on drain panconfigurations etc. Make sure coil is set up properly for desiredposition of blower cabinet.Coil must be secured to blower cabinet with the three tabs that arepart of the blower cabinet base. Bend the tabs out from the bottomso they fit over the coil cabinet.Position coil cabinet in relation to the blower so they will be correctfor desired application.For upflow and horizontal applications apply foam seal striparound top of coil cabinet. For downflow application apply foamseal strip around bottom of coil cabinet. Set blower on top of coilcabinet so they are flush. Secure cabinets together using thethree tabs on the bottom of the cabinet. Bend the tab out from thebottom so it fits over the coil cabinet. If no pilot holes are present,drill a hole as required for a screw.Figure 3Airflow PositionsInstallation InstructionsFigure 2Attach Coil to <strong>Blower</strong> CabinetPanels removedfor clarity onlySubbasePlace sealon top ofCoil CabinetaroundperimeterBend Tabs (both sidesand back) on Bottom of<strong>Blower</strong> Cabinet to Fitover Coil CabinetDownflow InstallationsRefer to instructions with Subbase Kit.Non-Ducted Return Air Closet InstallationThe cabinet can be installed in a closet with a false bottom to forma return air plenum, or mounted on an open platform inside thecloset. Platform should be high enough to provide a free (open)area for adequate return airflow into the bottom of the cabinet.The open area can be on the front side or a combination of frontand sides, providing there is clearance on the sides betweencabinet and closet. Refer to ACCA Manual D for sizing and freearea recommendations.NOTE: Local codes may limit application of systems without aducted return to single story dwellings.Horizontal Left and Right InstallationsCoil cabinets that are shipped with the horizontal drain paninstalled are set up for horizontal left hand airflow. They must havethe drain pan repositioned for right hand airflow. Refer to coilinstallation manual.CAUTIONA field fabricated auxiliary drain pan, with a separate drain isREQUIRED for all installations over a finished living space orin any area that may be damaged by overflow from the maindrain pan. In some localities, local codes require an auxiliarydrain pan for ANY horizontal installation.3
Installation InstructionsModular <strong>Blower</strong>Figure 4Airflow PositionsReturn DuctReturn duct should be attached to bottom of unit using sheetmetal screws or other fasteners.Filter InstallationFilters must be field supplied. A remote filter grille or other meansmust be provided. Refer to ACCA Manual D for remote filtersizing.Figure 5Horizontal InstallationSee NoteBelowSuspended Cabinet Installation41. The cabinet may be supported on a frame or shelf, or it maybe suspended.2. Use metal strapping or threaded rod with angle ironsupports under the auxiliary drain pan to suspend cabinet.These supports MUST run parallel with the length of thecabinet (Figure 5 ).3. Ensure that there is adequate room to remove service andaccess panels after installing supporting brackets.4. Place Styrofoam blocks in auxiliary drain pan to supportcabinet.Duct ConnectionsSupply DuctSupply duct must be attached to the outside of flange on outletend of unit. Flexible connectors may be used if desired. Maintainclearances from supply duct to combustibles when heaters areinstalled. See Figure 1 and unit rating plate.Electrical ConnectionsElectrical shock hazard.Turn OFF electric power at fuse box or servicepanel before making any electrical connectionsand ensure a proper ground connection is madebefore connecting line voltage.Failure to do so can result in property damage,personal injury and/or death.All electrical work MUST conform with the requirements of localcodes and ordinances and the National Electrical Code NFPA 70current edition.The low voltage transformer and the fan control are standard onall models and are prewired at the factory. Line voltageconnections are made to the heater accessory or the lugs on theNo Heat Kit.StyrofoamBlocksRefrigerantLinesField-FabricatedDrain PanSupports MUST run parallel with blower cabinetNOTEDrainLinesIf increased structural strength is needed in the horizontalposition, use the two connecting plates that are shipped with theMultipoise Coil Cabinet in place of the tabs on the bottom of theblower.Overcurrent ProtectionThe power supply wiring to the unit MUST be provided withovercurrent protection. Governing codes may require this to befuses ONLY or circuit breakers.For blower cabinets without heaters, a 15 amp circuit may beused.No Heat Kit InstallationIf electric heat is not used, install accessory No Heat Kit.1. Locate adapter and filler plates, with screws insidepackage unless they were preinstalled at the factory.2. If necessary, attach adapter plate and filler plate to bracketas required to match cabinet, Refer to Figure 6.3. Secure the No Heat Kit accessory with four screws.4. Connect the plug from No Heat Kit wiring into thereceptacle on the control board on the side of the cabinet.CAUTIONDo not attempt to force plug as it only fits one way.
Modular <strong>Blower</strong>Line Voltage ConnectionsLine voltage wiring may be brought into the unit through the topright--hand corner. A hole for a 1/2” or 3/4” conduit fitting isprovided.Connect field wiring to appropriate terminals on electric heater orlugs on the No Heat Kit. All line voltage connections must bemade with copper wire.Figure 6Low VoltageConnectionsElectrical ControlsInstallation InstructionsMatching ReceptacleFor No Heat Kitor Electric HeaterLine Voltage Connection1. Provide line voltage power supply (208V--240V) from aseparate circuit(s). Size per table below or the table inelectric heater manual.2. Connect line voltage to the lugs on the No Heat Kit., or tocircuit breakers or wire leads from heaters. Refer to Figure6 and wiring diagram.Grounding ConnectionUse a copper conductor(s) from the ground lug on the No Heat Kitor ground lugs on the electric heater to a grounded connection inthe electric service panel or a properly installed grounding rod.Filler PlateAdapter PlateNo Heat KitLugs forLine Voltageand GroundConnectionsMaximumRecommendedOvercurrentSupply WireSupply Maximum Branch Protective 75 0 C. Copper GroundSupply Circuit Circuit Motor Total Circuit Device Max. WireVolts Phase Hertz No. AMPS. AMPS. Ampacity (AMPS.) No. Size Length (Ft) No. Size240 1 60 Single 6.0 6.0 7.5 15 2 14 104 1 14208 1 60 Single 6.0 6.0 7.5 15 2 14 90 1 14Low Voltage Control ConnectionsThe 24 volt power supply is provided by an internally wired lowvoltage transformer which is standard on all models. If powersupply is 208 volt, the low voltage transformer must be rewired tothe 208 volt tap. See the unit wiring label.Field supplied low voltage wiring enters the unit on the top lefthand corner.Install the strain relief bushing (supplied with unit) in the hole.Connect the field wiring at the screw terminals of the controlboard. Refer to Figure 6.Keep the low voltage wiring as short as possible inside the controlbox.Complete connections between indoor blower, outdoor section,indoor thermostat and electronic outdoor thermostat (accessory)according to instruction provided with the Condenser InstallationInstructions or those provided with the accessory and refer toFigures 7 and 8.5
Installation InstructionsModular <strong>Blower</strong>Figure 7Typical Low Voltage SchematicFigure 8Typical Low Voltage SchematicHeat Pump with Electric HeatThermostatRGYWCooling OnlyOutdoor UnitYYRGCOYW 1W 2StagingThermostatRBLWYOOutdoor UnitW 2 W 1 G Y O H C RIndoor <strong>Blower</strong>W 2 W 1 G Y O H C RIndoor <strong>Blower</strong>Cooling with Electric HeatThermostatRGYYYWOutdoor UnitChanging Motor SpeedThe blower motor comes from the factory wired for medium orhigh speed. To change the blower speed, disconnect the blackwire at the blower motor terminal block and reconnect at the desiredblower speed tap.Adjusting Thermostat AnticipatorSet the heat anticipator of the thermostat to the proper value. Seeinstructions provided with the thermostat before making thisadjustment.W 2 W 1 G Y O H C RIndoor <strong>Blower</strong>Electric Heater StagingThe heater elements are turned on in increments. Refer to HeaterStaging Table in the Heater Installation Manual. In addition onheaters larger than 5KW, the heat can be staged (1st & 2nd) eitherthrough an indoor thermostat or by using an outdoor thermostat.This satisfies staging requirements imposed by some electricutilities on heaters larger than 6 kilowatts.A control signal (24V) from W1 on the Indoor T’stat to W1 on thecontrol board energizes the 1st stage of heat. A control signal(24V) to W2 on the control board energizes the second stage ofelectric heat. To turn ON both stages at the same time, using onecontrol signal, W1 and W2 are jumpered together.If the indoor thermostat does not have staging capabilities,accessory electronic outdoor thermostats are available that willcontrol two stages of electric heat.6
Modular <strong>Blower</strong>Air Flow CheckFor proper system operation, the air flow through the indoor coilshould be between 350 and 450 cfm per ton of cooling capacity.The air flow through the unit can be determined by measuring theexternal static pressure to the unit and selecting the motor speedtap that will most closely provide the required air flow.1. Set up to measure external static pressure at the supplyand return duct connections (Figure 9).2. Drill holes in the ducts for pressure taps, pitot tubes, orother accurate pressure sensing devices.Figure 9Static Pressure CheckSupplyIndoorSectionInclineManometerReturn3. Connect these taps to a level inclined manometer or draftgauge.4. Ensure the coil and filter are clean, and all the registers areopen.Installation Instructions5. Determine the external static pressure with the bloweroperating.6. Refer to the Air Flow Data tables, page 8 to find the DipSwitch Speed setting that will most closely provide therequired air flow for the system.7. Refer to Motor Speeds and Airflow in these instructions ifthe speed is to be changed.8. Recheck the external static pressure with the new setting,and confirm speed switch selection.Temperature Rise CheckTemperature rise is the difference between the supply and returnair temperatures.NOTE: The temperature rise can be adjusted by changing theheating speed tap at the unit’s blower terminal block.A temperature rise greater than 60 0 F (33.3 0 C) is notrecommended.1. To check the temperature rise through the unit, placethermometers in the supply and return air ducts as close tothe unit as possible.2. Open ALL registers and duct dampers.3. Set thermostat Heat--Cool selector to HEAT.4. Set the thermostat temperature setting as high as it will go.5. Turn electric power ON.6. Operate unit AT LEAST 5 minutes, then checktemperature rise.NOTE: The maximum outlet air temperature for all modelsis 200 0 F (93.3 0 C).7. Set thermostat to normal temperature setting.8. Turn electric power OFF.9. Be sure to seal all holes in ducts if any were created duringthis process.MaintenanceFiltersExternal filters must be supplied for the system. Filters must becleaned when they become dirty. Inspect at least once per month.The frequency of cleaning depends upon the hours of operationand the local atmospheric conditions. Clean filters keep unitefficiency high.LubricationThe bearings of the blower motor are permanently lubricated.Condensate DrainsDuring the cooling season check the condensate drain lines to besure that condensate is flowing from the primary drain but notfrom the secondary drain. If condensate ever flows from thesecondary drain the unit should be promptly shut off and thecondensate pan and drains cleaned to insure a free flowingprimary drain.7
Installation InstructionsModular <strong>Blower</strong>Airflow Based on no coil, no filter, no electric heat. Deduct heater static shown in heater static table. Deduct coilstatic, See Coil Specification Sheet. Deduct .20 for Downflow Subbase Kit.<strong>MF</strong>08SP IN. WG.<strong>MF</strong>16SP IN. WG.TAP Volts 0.3 0.4 0.5 0.6 0.7 0.8 0.9 1.0LOW 230V 1053 1013 965 911 856 761 654 552208V 863 827 788 725 641 568 492 381MED 230V 1333 1281 1221 1150 1060 990 857 743208V 1156 1115 1059 997 941 853 738 618HIGH 230V 1553 1486 1411 1328 1227 1106 1032 865208V 1394 1336 1272 1195 1096 1023 924 774TAP Volts 0.3 0.4 0.5 0.6 0.7 0.8 0.9 1.0LOW 230V 1103 1088 1067 1040 994 921 849 749208V 872 847 820 788 750 696 630 530MED 230V 1500 1493 1470 1438 1383 1303 1143 993208V 1229 1223 1198 1169 1123 1031 926 798HIGH 230V 1912 1879 1830 1771 1684 1577 1429 1154208V 1629 1609 1584 1545 1478 1393 1214 1058<strong>MF</strong>12SP IN. WG.<strong>MF</strong>20SP IN. WG.TAP Volts 0.3 0.4 0.5 0.6 0.7 0.8 0.9 1.0LOW 230V 1103 1092 1086 1060 1024 973 906 803208V 903 893 877 858 830 781 728 642MED 230V 1498 1473 1451 1409 1352 1277 1173 1044208V 1246 1239 1222 1202 1160 1098 1014 906HIGH 230V 1860 1815 1760 1685 1596 1491 1352 1178208V 1602 1584 1553 1501 1432 1347 1241 1096TAP Volts 0.3 0.4 0.5 0.6 0.7 0.8 0.9 1.0LOW 230V 1673 1670 1669 1643 1587 1461 1298 1081208V 1320 1306 1289 1237 1147 1006 810 576MED 230V 2060 2030 1980 1912 1835 1723 1594 1444208V 1676 1656 1613 1531 1381 1201 986 683HIGH 230V 2554 2459 2352 2242 2116 1966 1809 1606208V 2420 2334 2244 2137 2021 1875 1732 15588
Modular <strong>Blower</strong>Installation InstructionsModeConstant <strong>Blower</strong>(Fan Switch ON)Thermostat calls forHeatSequence Of OperationThermostat to ControlBoard 24 volt StateControlElectric Heat OnlyControl FunctionG On Fan On.Off Fan Off.G&W1&W2 On Fan On, 1st Stage Of Heat On, then 2nd Stage Of Heat On.Off 2nd then1st Stage Of Heat Off. 6 sec delay, then Fan Off.Cooling Only Unit With Electric HeatConstant <strong>Blower</strong>G On Fan On.(Fan Switch ON)Off Fan Off.Cooling Only UnitY&G On Compressor On, Fan On.(Thermostat calls forCooling) Off Compressor Off, 60 Second Delay -- Then Fan Off.Cooling Only UnitG&W1&W2 On Fan On, 1st Stage Of Heat On, then 2nd Stage Of Heat On.(Thermostat calls forHeat) Off 2nd then1st Stage Of Heat Off. 6 sec delay, then Fan Off.Heat Pump With Electric HeatHeat PumpY&G&O On Compressor On, Reversing Valve Energized, Fan On.(Thermostat calls forCooling) Off Compressor Off, 60 Second Delay And Then Fan Off.Heat Pump(Thermostat calls forHeat)Heat Pump cannotmaintain proper temp.Electric Heat TemperaturesatifisedHeat Pump(Goes into DefrostMode)Heat Pump(Room temp. satifised)Heat Pump(Emergency Heat)Y&G On Compressor On, Fan OnY&G&W1&W2 On 1st Stage Of Heat On, then 2nd Stage Of Heat OnOff2nd then 1st Stage Of Heat OffY&G&O&W1&W2 On Reversing valve switches unit to cooling, 1st Stage Of HeatOn, then 2nd Stage Of Heat OnOff Reversing valve switches back to heating, 2nd then 1st StageOf Heat OffY&G Off Compressor Off, 60 Second Delay And Then Fan Off.G&W1&W2 On Fan On, 1st Stage Of Heat On, then 2nd Stage Of Heat On.Off2nd then 1st Stage Of Heat Off. 6 sec delay, then Fan Off.NOTE: Electric Heat Elements are controlled by relays with a delay sequence from the logic board to provide sequencing between elements.Limit OperationThe temperature limit responds to over--temperature conditions in the air duct. If the temperature limit trips, the electric heater relays willbe de--energized and the fan relay will be energized. Once the limit resets, the control will resume normal operation. If the limit trips fourtimes during a single call for heat, the control will go into a 1 hour soft lockout. During the soft lockout, the fan relay will respond tothermostat inputs but the heater relays are disabled. If the control detects a limit trip during the soft lockout, the control will go into a hardlockout. Once in a hard lockout, the fan relay is locked on and the heater relays are disabled. Turning the power to the unit off and then onwill clear this state.9
Installation InstructionsModular <strong>Blower</strong>POWER SUPPLY: 208/230-1-60 USE COPPER CONDUCTORS ONLY.KEY: HIGH VOLT; LOW VOLT.W1 W2 G Y H O C R2 SP RLYBLG/yBRBRCOM YBLW HI BK GRDGRD CAP MTR MED *YG/yLOWBKGRDBASE UNIT WITH NO-HEAT KIT A<strong>MF</strong>001NH INSTALLED*SEE INSTALLATION MANUAL FOR PROPER HEATING AND COOLINGFACTORY PRE-SET SPEED CONNECTIONS FOR YOUR UNIT.11BKVFANCNTRLBRDCOM 24VACFUSE RBK*TRFMR SECGYGYROYFAN COMRCOMTFMRPRIMARY240FAN SPDOOOVYYBKBKVRLIMITOLIMITBKGYOOOYLIMITOCOMTRANSYYBKA<strong>MF</strong>K03CH / A<strong>MF</strong>K05CH ELECTRIC HEATERBLBLBLOA<strong>MF</strong>K07CH / A<strong>MF</strong>K10CH ELECTRIC HEATERYBLBLBKYOROBKOBLBLRBLGYY240V208VY24VCOMR3 Kw &5 Kw7.5 & 10 KwYBKYGRDBLBLGRDOFF OFFOFFOFFL2L1L2L115 KwBKWBK1BL1BLBLVVBLBLBLGYROYBLGYRYORRLIMITRBLRLIMITOVBLBLOBLLIMITBLBLA<strong>MF</strong>K20CH ELECTRIC HEATERBKVR LIMITRBKBLYBLBKYYYYYOOVBKBLBKBLYYBKBLBLBLGYBLBKBLOOORGYOGYWBKOBKBLBLBLBKBKBLA<strong>MF</strong>K25CH ELECTRIC HEATERROBLOBKLIMITOGYOBLOGYOVVYYOGYORLIMITOYYYGRDGRDYBKYBKYBKYBKYBK20 KwOFFYL225 KwGRDGRDGRDGRDOFFOFFOFFYL4L3L1OFFOFFOFFOFFOFF OFFL6L4 L5L3L2L130KwBLBLOOVBKBKV GYROY1GYBLOGYBKBK A<strong>MF</strong>K14CH ELECTRIC HEATER*A<strong>MF</strong>K15CH ELECTRIC HEATER (2 LIMITS)GRDGRDYBKYBKOFF OFF OFF OFFL4L1 L2 L3W V GYRBK1OYBL BLBLO OOVBK W BK W BKA<strong>MF</strong>K30CH ELECTRIC HEATERYYGRDGRDYBKBKBK1087757OFF OFF OFF OFF OFFL2 L3 L4 L5 L6OFFL110
Modular <strong>Blower</strong>Installation InstructionsReplacement PartsKEYNO.DESCRIPTIONPARTNUMBER9 Control, Fan Timer 1085914 1 1 1 110 Transformer 1082611 1 1 1 111 Motor, <strong>Blower</strong> 1083044 111 1083045 * 1 111 1083046 * * * 112 Mount, <strong>Blower</strong> Motor 1002801 1 1 112 609227 * * * 113 Wheel, <strong>Blower</strong> 600586 113 600587 * 113 96839 * * 1 114 Capacitor, 10<strong>MF</strong>D, 370V 1094956 1 1 114 15<strong>MF</strong>D, 370V 1094959 * * * 1F1 Panel, Side (Right) 1087742 1 1 1 1F2 Panel, Rear 1087734 1F2 1087735 * 1F2 1087736 * * 1F2 1087737 * * * 1F3 Panel, Side (Left) 1087743 1 1 1 1G Brace, Bottom 1069603 1G 1069604 1G 1069605 1G 1069606 1O Panel, Rear <strong>Blower</strong> Deck 1082604 1O 1082844 * 1O 1082845 * * 1O 1082846 * * * 1P Panel, Front <strong>Blower</strong> Deck 1086694 1P 1085372 * 1P 1085373 * * 1P 1085374 * * * 1<strong>MF</strong>08B1500A2EE<strong>MF</strong>12F1900A2<strong>MF</strong>16J2200A2<strong>MF</strong>20N2600A2F39RKEYNO.10QDESCRIPTIONPARTNUMBERQ Panel,Side <strong>Blower</strong> Deck 1082622 2Q 1082847 * 2Q 1082848 * * 2Q 1082849 * * * 2R Bracket, Control Mtg 1085371 1 1 1 1V Panel, Top 1087714 1V 1087715 * 1V 1087716 * * 1V 1087717 * * * 1W Housing, <strong>Blower</strong> 1087195 1W 1087193 * 1W 1087194 * * 1 1X Panel, <strong>Blower</strong> Cutoff 1082607 1X 1082616 * 1X 1082949 * * 1 1Y Clamp, Capacitor 1095020 1 1 1 1Z1 Rail, <strong>Blower</strong> R.H. 1085504 1 1 1 1Z2 Rail, <strong>Blower</strong> L.H. 1085521 1 1 1 1BB Door, <strong>Blower</strong> Access 1087738 1BB 1087739 * 1BB 1087740 * * 1BB 1087741 * * * 1DD Plate, Heater Adapter 1084606 * 1 1 1EE Plate, Heater Filler 1084608 * * 1 1)( Harness, Wire 1086021 1 1)( Manual, Installation 44201220300 1 1 1 1<strong>MF</strong>08B1500A2O<strong>MF</strong>12F1900A2P<strong>MF</strong>16J2200A2<strong>MF</strong>20N2600A2QVXDDZ2F2WZ1F1BB141312GY1111