TUTORIAL - Locations and Mapping - ESdat
TUTORIAL - Locations and Mapping - ESdat
TUTORIAL - Locations and Mapping - ESdat
- No tags were found...

You also want an ePaper? Increase the reach of your titles
YUMPU automatically turns print PDFs into web optimized ePapers that Google loves.
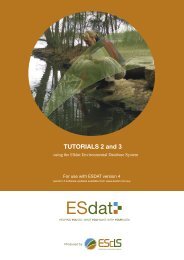
<strong>TUTORIAL</strong> - <strong>Locations</strong> <strong>and</strong> <strong>Mapping</strong>using the <strong>ESdat</strong> Environmental Database SystemFor use with ESDAT version 4(version 4 software updates available from www.esdat.com.au)
Function Tutorial - <strong>Locations</strong> <strong>and</strong> <strong>Mapping</strong>Function Tutorial - <strong>Locations</strong> <strong>and</strong> <strong>Mapping</strong>ContentsFunction Tutorial - <strong>Locations</strong> <strong>and</strong> <strong>Mapping</strong> 1Contents 1Summary 2Pre-requisites 2Introduction 3Importing <strong>and</strong> editing locations <strong>and</strong> co-ordinates 4Exercise 1: Bulk Import using Import templates ...................................................... 4Exercise 2: Specifying the co-ordinate system ....................................................... 5Basemaps 6Exercise 3: Adding a vector basemap .................................................................... 6Exercise 4: Changing layer display properties ........................................................ 6Basemap Coordinate Systems 7Imagery Basemaps ................................................................................................. 7Vector Basemaps ................................................................................................... 8Exercise 5: Assigning a coordinate system to a basemap ...................................... 8Adding Web <strong>Mapping</strong> Service Layers 8Exercise 6: Adding OpenStreetMap data to the map ............................................. 9Map Functions 9Adding <strong>and</strong> moving <strong>ESdat</strong> <strong>Locations</strong> directly on the map 11Exercise 7: Adding a Location directly onto the Map. ........................................... 11Exercise 8: Changing the position of an existing location on the map. ................. 12Creating labels for data points on maps 12Exports to ArcMap / MapInfo / Google Earth 13Exercise 9: Exporting to Google Earth .................................................................. 13Exercise 10: Exporting to ArcMap ........................................................................ 13Further Tutorials 13EarthScience Information Systems Pty LtdEmail: Support@ESDAT.com Web: www.esdat.net Page 1
Function Tutorial - <strong>Locations</strong> <strong>and</strong> <strong>Mapping</strong>SummaryThis tutorial will examine using location data in bulk (ie from a surveyor), basemaps, importinglocations through the map panel, <strong>and</strong> use of the mapping features <strong>and</strong> tools. It will also coverlabelling options.The tutorial can be completed using either the Access <strong>and</strong> SQL versions of <strong>ESdat</strong>.Pre-requisitesTutorial 1 <strong>and</strong> the Function Tutorial ‘Importing <strong>and</strong> Editing Data’ should all be completed beforeyou begin this tutorial.For a full list of the Tutorials available for use with <strong>ESdat</strong> please see the Tutorial ListEarthScience Information Systems Pty LtdEmail: Support@ESDAT.com Web: www.esdat.net Page 2
Function Tutorial - <strong>Locations</strong> <strong>and</strong> <strong>Mapping</strong>IntroductionMost site data entered into <strong>ESdat</strong> needs to be associated with a Location via specification of aLocation Code. By assigning a Location Code to any data, the information in the “Location”table for that Location Code (coordinates <strong>and</strong> other information) will also be associated.Wells (Piezometers), Chemistry Samples, Groundwater Levels, <strong>and</strong> many other kinds of datahave the facility to store a Location Code (or LocCode), which will always match a LocCodevalue in the <strong>Locations</strong> Table.The relationship between location codes <strong>and</strong> other information held in <strong>ESdat</strong> is shown below.Location Codes in the Location Table may be automatically generated in some cases, if certainchoices are made in the import process. If a user is attempting to import Chemistry Samples orother data using a Location not previously entered they will initially be unable to do so.However if they then select ‘Create Missing Parent Records’ a Location entry will be added. Allother Location information such as co-ordinates will then need to be added to that location later.EarthScience Information Systems Pty LtdEmail: Support@ESDAT.com Web: www.esdat.net Page 3
Function Tutorial - <strong>Locations</strong> <strong>and</strong> <strong>Mapping</strong>The cells will now be shaded light green to indicate the data was successfully imported.Click on the ‘Close’ button.In <strong>ESdat</strong>, go back to the ‘Data’ panel <strong>and</strong> reclick on the “<strong>Locations</strong>” button to refresh thedata, <strong>and</strong> to confirm that the data is present.This approach can also be used to Update or Overwrite existing Location data in the database,using the generic Import Template functionality described in the Importing <strong>and</strong> Editing Tutorial.Exercise 2: Specifying the co-ordinate systemThe coordinate system for the data in <strong>ESdat</strong> is specified in the ‘Project’ table (Access Version)(or‘Site’ table (SQL Server versions). Using the new <strong>ESdat</strong> Site/Project we have previously created(Exercise 1) complete the following:Hover the mouse over the ‘Data Tables’ button (top right)Click on the Project’ table (Access Version)(or ‘Site’ table (SQL Server versions)Information about the Site/Project will now be displayed; note the Coordinate System’for this dataset is blank (unless you specified it on project setup). Put <strong>ESdat</strong> into ‘Edit’ mode by clicking on the ‘AllowEditing’ icon (make sure the icon goes red).Make the Coordinate_System column wider, so you cansee all the values in the drop-down, <strong>and</strong> from the Drop-Down select “WGS_84” (these co-ordinates arelatitude/longitude, <strong>and</strong> most latitude/longitude coordinatesuse the WGS_84 system).EarthScience Information Systems Pty LtdEmail: Support@ESDAT.com Web: www.esdat.net Page 5
BasemapsFunction Tutorial - <strong>Locations</strong> <strong>and</strong> <strong>Mapping</strong>Exercise 3: Adding a vector basemapTo add a basemap: Select the ‘Location’ Data-Type button, <strong>and</strong> click on the ‘Map’ panel.A basemap layer can be added in most common GIS formats (the ‘Add’ button) or a new layercan be drawn in <strong>ESdat</strong>. We will draw our own, new site boundary. Click the “New” button (pointer 1 on the image below).You will be prompted to save this layer as a file (save it as “test.dxf”). The DXF format is themost versatile for drawing. After saving the file the layer will be added to the Map Layers (onthe right), but will be empty.To edit this layer click the Pencil icon in the toolbar immediately underneath the layertoolbar. On doing that the toolbar will change as shown below (pointer 2b).Click “Add Polygon” (2b) Draw a line around the outside of the points on the map (3) Click Save (4)Exercise 4: Changing layer display propertiesDouble click the layer to change the properties – the example shows the options tochange the Basemap layer.EarthScience Information Systems Pty LtdEmail: Support@ESDAT.com Web: www.esdat.net Page 6
Function Tutorial - <strong>Locations</strong> <strong>and</strong> <strong>Mapping</strong>Select the ‘Area’ tab, <strong>and</strong> the ‘Outline’ Sub-tab.Change the Color to Red <strong>and</strong> click ‘OK’. The outline of the areas in the layer will beshown in red.Try changing some of the other options here <strong>and</strong> note the changes.For more information on base maps, seehttp://www.esdat.net/esdathelp/index.html?adding_basemaps.htmBasemap Coordinate SystemsIf the coordinate system of the data in <strong>ESdat</strong> isn’t specified, then all GIS Layers must be in thesame coordinate system as the <strong>ESdat</strong> data. However, <strong>ESdat</strong> has the ability to overlay data <strong>and</strong>layers in different coordinate systems.Imagery BasemapsAll imagery basemaps (ie arial photographs or satellite imagery) need to be georeferencedbefore it can be properly viewed in <strong>ESdat</strong>.Some imagery formats contain the co-ordinate system within the file (ie ecw’s) <strong>and</strong> othersrequire a world file (ie tiffs). If a co-ordinate system isn’t specified the imagery will need to begeo-referenced using a geo-referencing package, or one of the mainstream GIS applications.Whenever possible <strong>ESdat</strong> will automatically detect the co-ordinate system, requiring no useraction other than adding the layer.EarthScience Information Systems Pty LtdEmail: Support@ESDAT.com Web: www.esdat.net Page 7
Vector BasemapsFunction Tutorial - <strong>Locations</strong> <strong>and</strong> <strong>Mapping</strong>Vector basemaps (ie lines such as Autocad dxf files) may need to have their co-ordinate systemspecified in <strong>ESdat</strong>.Exercise 5: Assigning a coordinate system to a vector basemapTo assign a coordinate system to a vector basemap, do the following:Click on the ‘Map’ panel.On the right side of the map double click on the ‘test’ layer we previously created.Click the ‘Layer’ Tab in the dialogue box that opens, <strong>and</strong> then on the ‘Select’ button.A ‘Coordinate System’ dialogue box will open (the screenshot below shows the outcomeof these steps, from right to left).Select WGS84 (ie Latitude/Longitude)Click OK to close all forms.Adding Web <strong>Mapping</strong> Service LayersBecause we have indicated the co-ordinate system of the data in <strong>ESdat</strong> we can integrate withpublically available basemaps exposed by WMS (Web <strong>Mapping</strong> Service).EarthScience Information Systems Pty LtdEmail: Support@ESDAT.com Web: www.esdat.net Page 8
Function Tutorial - <strong>Locations</strong> <strong>and</strong> <strong>Mapping</strong>Use the different functions on the example map to ensure you are comfortable with their use.On the top right of the Map panel there are three buttons ‘Lock Extent’, ‘Labels’ <strong>and</strong> ‘To filter’.The ‘Lock Extent’ button freezes the extent (or scale) of the mapsshowing different data types. If this is not selected <strong>ESdat</strong> will zoomout to all points whenever a new Data-Type is selected.(as this <strong>ESdat</strong> project only contains Location information this cannot be illustrated. It can beverified using the Sample Hydrogeology <strong>and</strong> Contam dataset if desired)The ‘Labels’ button provides options for changing the way data points in the maps appear.Click on the ‘Labels’ button <strong>and</strong> note the options. Note the ‘More Layer Options’ button– clicking on this provides a further range of choices for customizing the look of maps.Try turning on <strong>and</strong> off some of the options to see the changes these create on the map.The use of the ‘To Filter’ button is examined in the Function Tutorial on Filtering. It enables youto select one or more locations <strong>and</strong> add that location to the main <strong>ESdat</strong> filter.EarthScience Information Systems Pty LtdEmail: Support@ESDAT.com Web: www.esdat.net Page 10
Function Tutorial - <strong>Locations</strong> <strong>and</strong> <strong>Mapping</strong>Adding <strong>and</strong> moving <strong>ESdat</strong> <strong>Locations</strong> directly on the mapExercise 7: Adding a Location directly onto the Map.We’ll now look at adding a location using the <strong>ESdat</strong> ‘Map’ panel. This method is useful whenadding a point to a known spot on a basemap.Make sure that the ‘Location’ Data-Type button is selected, so that you are viewingLocation data (you can only use this method when in the ‘Location’ view).Click on the ‘Map’ panel button. You should now see the <strong>Locations</strong> on the Map. Click on the button at the top left of the map.Click anywhere on the map to locate an additional data point (BH7).You will be prompted in the ‘Add coordinates tothe Database’ dialogue box to add a ‘LocCode’ –type in BH7 here, <strong>and</strong> click OK.A ‘Location’ data entry box will now open, withthe coordinates of the point listed. These can be correctedto the actual data (if you have it), <strong>and</strong> you can also addother location information here; add a comment about thislocation.Click ‘Add’ when you have finished.Now click on the ‘Data’ panel <strong>and</strong> review the informationyou have added for these two <strong>Locations</strong>. (You may need torefresh the Data panel either by re-clicking on the“<strong>Locations</strong>” data-type button, or clicking “Apply Filter”.)EarthScience Information Systems Pty LtdEmail: Support@ESDAT.com Web: www.esdat.net Page 11
Function Tutorial - <strong>Locations</strong> <strong>and</strong> <strong>Mapping</strong>Exercise 8: Changing the position of an existing location on the map.Imagine that you have realised that BH7 is showing on the map in the wrong place <strong>and</strong> youneed to move it. Open the ‘Data’ panel <strong>and</strong> make a note of the coordinates currently given forBH7.To change the position of an existing location on the map:Change to the Map Panel. Click the button’ on the ‘Map Panel’ toolbar.Select the point for BH7 on the map by mouse-clicking on the point, <strong>and</strong> while holdingonto the point, drag it to a new location. Release the mouse-button.Click on the ‘Data’ panel <strong>and</strong> compare the coordinates for BH7 to those you notedpreviously – they should have changed. (You may need to refresh the Data panel eitherby re-clicking on the “<strong>Locations</strong>” data-type button, or clicking “Apply Filter”.)More information on locations is available in the Help files:http://www.esdat.net/esdathelp/index.html?locations.htmCreating labels for data points on mapsLabels for data points on maps can easily be created <strong>and</strong> manipulated in <strong>ESdat</strong>, allowing forspecific items of interest to be highlighted.Two options are available, depending on the type of data being viewed. If the data is nonchemistryusers will have the option to view a Location Code <strong>and</strong> one of a Result Range, Max,Min, Count, Average. For chemistry data users will additionally have the option to showChemistry Tables <strong>and</strong> Exceedances on the map. Users are referred to the relevant Data-Typetutorial for coverage of the label options for each Data-Type.EarthScience Information Systems Pty LtdEmail: Support@ESDAT.com Web: www.esdat.net Page 12
Function Tutorial - <strong>Locations</strong> <strong>and</strong> <strong>Mapping</strong>Exports to ArcMap / MapInfo / Google Earth<strong>ESdat</strong> can export points <strong>and</strong> labels to all the above GIS applications.For Google Earth <strong>and</strong> MapInfo only Location Codes <strong>and</strong> simple Result Values can be shown nextto a point. ArcMap supports all labels that can be generated in <strong>ESdat</strong>.Exercise 9: Exporting to Google EarthIf you don’t have Google Earth, a link to the Google Earth download is provide in the <strong>ESdat</strong>Google Earth Export.View the data on the Map Panel in <strong>ESdat</strong>.Click the “Google Earth” export on the Export Toolbar.The first time you may need to specify where GoogleEarth.exe has been installed.Google Earth will zoom into the area around the EScIS offices, where the locations arer<strong>and</strong>omly placed.Exercise 10: Exporting to ArcMap / MapInfoIf you have ArcMap or MapInfo, click the relevant button on the Exports toolbar to export data<strong>and</strong> launch ArcMap.Further TutorialsFor a list of other tutorials available with <strong>ESdat</strong> seehttp://www.esdat.net/esdathelp/index.html?tutorials.htmEarthScience Information Systems Pty LtdEmail: Support@ESDAT.com Web: www.esdat.net Page 13