T W I S T
T W I S T
T W I S T
- No tags were found...

Create successful ePaper yourself
Turn your PDF publications into a flip-book with our unique Google optimized e-Paper software.
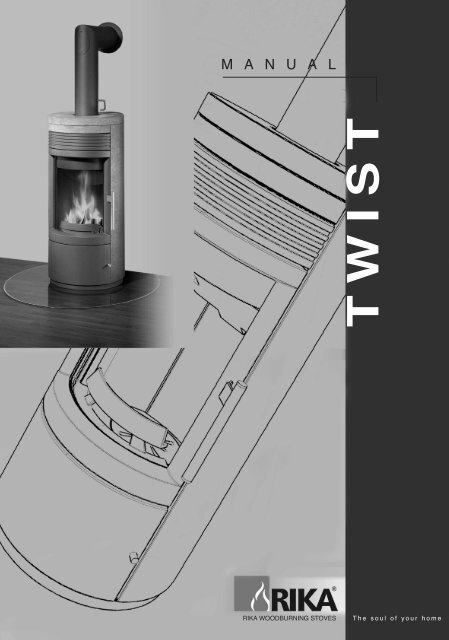
M A N U A LT W I S TRIKA WOODBURNING STOVEST h e s o u l o f y o u r h o m e
2Connection Dimenstions
Combustion ChamberdoorCombustion Chamber3
Panels4
Control5
E N G L I S HC O N T E N T SDrawing explanation 6Packaging 7Technical Specification 7Parts overview 71 . I M P O R TA N T I N F O R M AT I O NGeneral warning and safety instructions 8Before setting up 82 . B R I E F H E AT I N G I N F O R M AT I O NSuitable fuels and fuel quantities 10Fuel quantities 10Maximum fuel quantities 10Clean burning 11Burning wood 113 . I N S TA L L I N G T H E F I R EConnecting the fire 12Making an external combustion air feed 124 . O P E R AT I O NLighting the fire 13ash drawer 14Operating the shaker grate 14Slide setting at rated heating capacity 14Rotary control knob 145 . F I T T I N G O P T I O N SAssembly of steel casing 15Assembly of soapstone casing 156 . M A I N T E N A N C E A N D C L E A N I N GGeneral maintenance 16Finish - condition an cleaning 16Convection air openings 16Cleaning the flue gas channels 167 . P R O B L E M S O LV I N GWhat to do if? 178 . G U A R A N T E EWe guarantee 18Warranty card 19D R A W I N G E X P L A N A T I O NImportant informationPractical adviceUse the plan6
PACKAGINGYour first impression is important to us!- The packaging for your new fire providesexcellent protection from damage.However damage to the fire and accessoriescan occur during transport.Therefore please check your fire for damage andthat all parts are there on receipt! Report anydefects to your fire dealer immediately!When unpacking please ensure that the soap stonepanels are intact. The material scratches easily.Soap stones are not covered by the warranty.Flue gas values for multiple connectionto a chimney as per DIN 4705,or for measuring the chimney as per DIN4705.Flue gas mass flow g/sclosed 8,5Flue gas temperature/°Cclosed 295°Minimum flow pressure at ratedheating capacity/mbarclosed 0,12at 0.8 times rated heat capacity 0,08The owner of the small heating system or the authorisedperson for the small heating system mustkeep the technical documentation in a safe placeand present it to the local authority or the chimneysweep.E N G L I S H- The packaging for your new fire in themain has no effect on the environment.PARTS - OVERVIEWDESCRIPTIONThe wood in the packaging has not been surfacetreated and can therefore be burned in your fire.The box and the film (PE) can be recycled withoutany problem.TECHNICAL SPECIFICATIONThis is a Design 1 fire and has a connectionfor fitting to a chimney that is equippedfor other fires and boilers for solid andliquid fuels, insofar as the chimney dimensionsare in accordance with DIN 4705,Part 3.Technical SpecificationDimensions (mm) and weights (kg)HeightWidthDepthWeight without casingWeight with steel casingWeigth with soapstoneFlue pipe outlet diameterRaed heating capacity as perDIN 18891Lowest thermal outputRoom heating capacity (m 3 ) dependenton the house insulation11085045001551942401508 kW4 kW90-21001 Furnace door Z3333302 Door glass Z3327403 Spacer Z2786604 Grub screw 11163705 Grate door handle, complete, silver B1576706 Regulator door knob Z3334307 Tongue L0077508 Hinge L0100609 Regulator door painted Z3333710 Hinge bracket L0100211 Hinge plate Z3334212 Hinge bolt Z3334413 ISK screw 10075114 Sealing ring, round 11164315 Sealing strip side Z3333416 Leg spring Z3334717 Sealing strip, centre Z3333518 Sealing ring, flat 11164420 Firebrick, left Z3329021 Firebrick, rear Z3329122 Deflection plate, lower Z3328823 Ash draw base L0099724 Cast front w. wood catcher, painted B1576025 Shaker disk Z2594826 Shaker grate Z3333227 ISK screw V2A 10006128 Firebrick, right Z3328929 Ash draw, complete B1576530 Fastening screw Z3329331 Shaker grate actuator L0099632 Lock roller, complete B1232240 Side cladding alu, complete B1577041 Side cladding soapstone Z3331842 Front panel upper Z3333643 Soapstone cover, complete B1577144 Flue pipe connector, rotatable, painted B1576245 Hexagonal screw 10023346 Rear wall L0098547 Rotary plate L0098848 Rotary plate doppler L0098749 Rotary fitting Z3329450 Cast floor Z3332960 Supply air connector / suction connector Z3332861 Rotor - sealing profile Z3275762 Pressure spring 11154763 Ball Z3267564 Cover Z3267265 Regulator shaft Z3334866 Rotary control knob Z33349We reserve the right to make technical and potical changes and tage no responsibility for any setting and printing errors.7
E N G L I S H1 . I M P O R T N A N T I N F O R M A T I O NGENERAL WARNING AND SAFETYINSTRUCTIONSThe general introductory warning informationmust be followed.➧Read the whole of the manual thoroughlybefore commissioning the fire.➧ Only approved transport aids with adequateload bearing capacity must be usedfor transporting your fire.➧ Your fire is not suitable for use as a ladderor scaffold➧ Thermal energy is produced by burningfuel; this leads to the surface of the fire,the doors, the door and operating handles,the door glasses, the flue pipes andpossibly the front wall of the fire becomingvery hot.Avoid touching these parts without wearingthe relevant protective clothing orusing the relevant means (cold hand).➧ Make children aware of the danger andkeep them away from the fire when in use.➧ Only burn the approved fuel listed in thechapter “Clean Burning”.➧ Burning or inserting easily combustibleor explosive materials, such as emptyspray cans and suchlike in the fire, as wellas storage of the same close to the fire isprohibited due to risk of explosion.➧ When reheating, no wide or easily combustibleclothing should be worn.➧ Setting down of non heat resistantobjects on the fire or nearby is prohibited.➧ Do not lay washing on the fire to dry.➧ Stands for drying items of clothing orsuchlike must be set up at an adequatedistance from the fire – fire hazard!➧ Working with easily combustible andexplosive materials in the same or adjoiningroom to the fire is prohibited when thefire is on.BEFORE SETTING UP1.1 Ground load bearing capacity:Before setting up, ensure that the supportingconstruction has a load bearing capacitythat will support the weight of the fire.Commissioning details are shown on thesticker on the Ceran area.SAFETY CLEARANCES (Minimum clearances)1. From non-combustible itemsa > 400 mm b > 100 mm2. From combustible items and supporting wallsmade from reinforced concrete constructiona > 800 mm b > 200 mmSafety clearances1.2 Flue pipe connectionFlue pipes are a particular hazard sourcein respect of escape of poisonous gas andfire hazard. Obtain the advice of anappointed specialist company in respectof laying and fitting the pipes.When connecting the flue pipe to thechimney, in the area of walls claddedusing wood, please follow the relevant fittingdirectives.8
1.3You must follow the flue gas formation inthe event of unfavourable weather (atmosphericinversion) and the draught conditions.If too little combustion air is added smokecan enter your house or flue gases canescape. Additionally harmful deposits canarise in the fire and in the chimney.In the event that flue gas escapes let thefire go out and check if all air inlet openingsare free and the flue gas feeds andthe fire pipe are clean. In cases of doubtyou must inform the master chimneysweep, as a fault in the draught could bedue to the chimney.1.4Before adding new fuel, push the emberstogether.1.8The fire door must only be opened foradding fuel and must then be closedagain, as this could otherwise lead to adanger to other fires that are also connectedto the chimney.1.8.1When the fire is not in operation, the firedoor must be kept closed.1.9When using wet fuel and if operation isthrottled too much, the chimney can sootup, i.e. easily combustible materials suchas soot and tar can be deposited and thiscan lead to a chimney fire.Should this happen, close all air inlet slidesand flaps. Call the fire brigade and getyour self and all other occupants to safety.E N G L I S H1.5Only use a suitable tool from our accessoryrange for pushing the emberstogether, and ensure that no combustiblematerial falls out of the fire.1.10The primary and/or secondary air supplymust be open before you open the combustionchamber door.1.6Use the devices supplied with your fire,uch as the protective gloves or the coldhand to open the doors, as well as for operatingthe control elements.ATTENTION: The size of the fire door means that,particularly when reheating blazing flames, thedoor must not be opened abruptly, in order to preventthe flames from springing out.1.7Design 1 fires (BA 1):These fires must only be operated with thefire door closed.9
E N G L I S H2 . B R I E F H E A T I N G I N F O R M A T I O NSUITABLE FUELS AND FUEL QUANTI-TIESIn principle your fire is suitable for burningdry billets. You can also burn fuels suchas wood brickets.Only use dry fuel (between 14% and 18%rel. wood humidity). The burning of wasteof any kind, in particular plastics, damagesyour stove and the chimney, and isprohibited by the Emissions ProtectionRuling.FUEL QUANTITIESThe fire is equipped with flat firing due to thedesign. This means that only one layer of fuel maybe placed on the existing basic embers.Please note that when a larger quantity of fuel isadded, your stove will emit a larger quantity ofheat or will heat up more strongly than is intendedfor the design.This can lead to damage to your stove.MAXIMUM FUEL QUANTITIESWood:2 billets á approx. 0.9 kgWood brickets (broken):2 off á approx. 0.9 kgThe output of your stove is regulated viathe rotary conrol knob. As your fire outputis also dependent on the chimney draught,you must get used to the use of this slideaccording to your own exprerience.Please use the enclosed protective glove to operatethe rotary control knob. The shaker grate handlemay only be used with the enclosed shaker hook.10
The challenges of the present day andage mean that everyone must act responsibly.One of most important matters ofconcern is retaining our natural world. Ourproducts are developments that complywith the most recent state of the art technology.This is an essential prerequisitefor a clean, efficient and perfect functioningof our fires.CLEAN BURNINGThe following is important for clean burning:1. THE FIREWOOD MUST BE DRY ANDUNTREATED.➧ Recommended value between 14%and 18% rel. wood humidity.➧ Dry and well ventilated stored woodthat has been stored for 2-3 years.2. CORRECT FIREWOOD QUANTITYAND FIREWOOD SIZE➧ Too much firewood causes overheating.This causes the material to burntoo heavily and your fire will producepoor flue gas values.➧ Too little firewood or too large billetshave the effect that the fire does notreach the optimum temperature. Theflue gas values are poor here.➧ The correct firewood quantity means:for wood 1.8 kg (2 billet - 25 cm long)per layer (recommended value) at ratedthermal output.At the smallest thermal output 0.8 kg (2billets - 25 cm long)Note:Only wood and wood brickets must be burned inyour fire. Plastic, treated wood materials (e.g. chipboard),hard coal or textiles must not be burned.E N G L I S HA fire is not a „waste incineration plant". The warrantywill become null and void if rubbish or nonapprovedmaterial, such as plastic, treated woodetc. is burned.Further consequences are damage or soiling of thefire and chimney as well as the environment!BURNING WOODClean burning of wood corresponds to thesame chemical process as natural decay,i.e. that the CO 2 (carbon dioxide) releaseddoes not increase or contaminate the originalCO 2 content – household of theatmosphere.PlantgrowthWoodCO 2 - content ofatmosphereWood decompositionorWood burning11
E N G L I S H3 . I N S T A L L I N G T H E F I R EBefore first commissioning or after changing thelocation of the fire, cleaning and service work, ensurethat the flue plate, as well as the log guard (Fig.Combustion chamber, Part 22 and 24) is in the correctposition.When using a flue pipe with throttle valve, the throttlevalve must be open.Care must be taken with this fire that the fluedraught reaches at least the prescribed value (0.1mbar
4 . O P E R A T I O NSTARTING THE FIREIn order to keep exhaust emissions as lowas possible, we would ask you to keep tothe following starting instructions.1.If the fire and chimney are still cold or ifthere is atmospheric low pressure, thenburning some paper at the start is recomended, in order to “drive” the cold out ofthe fire and chimney.2.To start heating first lay untreated paperon the floor of the combustion chamber,on top of that 0.5 kg soft wood chip and 1kg wood (3 small billets).Turn the rotary control knob (page 14) tothe right in the start heating position, primaryand secondary air are completelyopen (See item: “Rotary control knob”).3.Now light the paper. Wait until the soft woodchips are burning well.Turn the rotary control knob 90° to the left afew minutes later. The primary air is nowclosed and the secondary air is completelyopen. A few minutes later set the rotary controlknob to the ideal position (See item:“Rotary control knob”)4.After this has burned, lay approx 1.3 kgwood (2 billets) on the fire. Open the shakergrate handle and the primary air slide untilthe wood is burning well (approx. 2 mins).Proceed in the same manner for each furtherlayer.When laying fuel onto a thin bed ofembers ensure that the primary air andthe shaker grate actuator are open,otherwise there is a danger of explosion.For safety reasons we recommend startinga new heating cycle.E N G L I S HPlease do not use glossy paper or paper frommagazines. It does not burn well and the printcolours produce very poisonous substances in theflue gas.5.The mineral parts of the wood (approx. 1%)remain on the bottom of the combustionchamber as combustion residue.This ash is – because it is a natural product- an excellent fertiliser for all plants in thegarden. However the ash should be left tosettle beforehand and doused with water.13
E N G L I S HTHE FIRE PAINT ONLY HARDENS PROPERLYAFTER HEATING UP DURING USE.- Do not touch the surface during heating. It is stillsoft.- Our paints are completely harmless in accordancewith the TÜV-certificate; there is no danger tohealth. In spite of that we recommend that thehouse is well ventilated several times after firstheating.- Heat the fire up well – this will reduce the hardeningtime.- Hardening of the surface is complete afterseveral proper periods of heating.All details on the nature of the fire wood and correctheating can be found in Chapter 2.ASH DRAWER(Page 3, Part 29)The ash drawer must be emptied regularlyto prevent excessive heating of the firegrid.Never heat the fire with the ash drawer open danger of overheating loss of warranty.Caution: Embers could remain in the ash. Onlyfill the ash into non-flammable containers anddo not put the ash onto flammable surfaces.ROTARY CONTROL KNOBOPERATING THE SHAKER GRATE(Page 3, Part 31)The ash is moved from the fire into the ashdrawer by moving the shaker grate handleto and fro. This frees up room for the primaryfeed air that is required for the heatingphase in the fire.The shaker grate should remain closedexcept for wood that is too damp and briquettes.It is not necessary to operate the shakergrate during heating.SLIDE SETTING AT RATED THERMALOUTPUTOpen the regulator door (part 9) to reachthe rotary control knob.FuelWood/Wood BricketsPrimary air closed (0 %)Secondary air 1/3 open (33 %)Shaker grateclosedThe position “Primary air completely open”may only be used as a starting position.As you fire output is also dependent onthe chimney draught and the weather conditions,you must get used to the use ofthis secondary control slide according toyour own experiende.IDEAL POSITIONSecondary air 66% openPrimary air closed (0%)MINIMUM POSITIONSecondary air 33% openPrimary air closed (0%)ZERO POSITIONSecondary air closed (0%)Primary air closed (0%)MAXIMUM POSITIONSecondary air 100% openPrimary air closed (0%)Infinitely variable control ofthe primary air,secondary air remains100% openSTARTING POSITIONPrimary air 100% openSecondary air 100% openZero positionStarting positionRotary control buttonmarking14
5 . F I T T I N G O P T I O N SASSEMBLY OF STEEL CASINGASSEMBLY OF SOAPSTONE CASINGE N G L I S H- Remove the cover (part 43) from thestove.- Unscrew the four hexagonal screws(part 45).- Lift the side panels from the brackets.- Remove the cover (part 43) from thestove.- Unscrew the four hexagonal screws(part 45).- Lift out the side panel stone below onthe support.(Be careful of fingers!)Please remember when changing the flue pipeconnection that the individual parts of the soapstonepanelling weight about 34 kg. In addition the surfaceof the soapstone should be protected to preventscratching.15
E N G L I S H6 . M A I N T E N A N C E A N D C L E A N I N GGENERAL MAINTENANCECONVECTION AIR OPENINGSYour Twist has been designed by ourdevelopment team with mainimal maintenancein mind and for a very long servicelife. Certain cleaning activities and checkinthe seals are however necessary fromtime to time.The time periods between the inspectionintervals are above all dependent on thefire wood quantity used and the frequenyof use.All maintenance and cleaning work must only becarried out when the fire is completely cooleddown.ONCE MOREOnly use wood that has been storedproperly and is dry and untreated.Feed the correct quantity of wood intothe fire.Regularly clean dust deposit from the convectionair openings. The fire should becleaned thoroughly before the start of thenew heating season, in order to preventstrong odours.CLEANING THE FLUE GAS CHANNELS(1 x annually)- Removing the flue pipes- Brush off any soot and dust deposits inthe fire and in the flue pipes and vacuum.- Check the seals on the fire door or theash drawer before the beginning andend of the heating period.Should they be damaged or excessivelyworn, then please order the relevantreplacement.Should the fuel be poor, the number om necessarymaintenance activities can more than double.Only intact seals guarantee the perfect function ofyour fire.FINISH - CONDITION AND CLEANINGThe door glass can be cleaned usingRIKA class cleaner. The RIKA glass cleanercan be obtained from your specialistfire dealer. Should the glass become heavilysooted the possible cause could bedamp wood.The fire finish is highly refractory and mustonly be cleaned using a cloth (damp ifnecessary).Only use original paint for touch up work,this is available from your specialist dealeras an accessory.Under no circumstances must the paintbe cleaned before heating for the firsttime!16
7 . P R O B L E M S O L V I N GWhat to do if?E N G L I S HProblem Reason Solution1. Ceramic glasspane soots up tooquicklyIn principle: From time to time(dependent on use), each glasspane must be cleaned with RIKAglass cleaner.- Poor draught- Incorrect regulation- Too much fuel- feuchtes HolzClarify this with the chimneysweep (if necessary increaseheight of chimney)Regulation must be carried outas per the operating instructionsusing the rotary control knob (ifsecondary air is closed, theglass pane will soot up veryquickly, but this can be burnt offagain by correct use.See item: “Max. Fuel quantities”See item: “Clean burning”, ifnecessary use wood brickets(these dry evenly)2. Fire not pullingcorrectly- Chimney draught inadequate- Fire is sooted up on theinsideSee item: „Brief HeatingInformation“See item: “Maintenance andCleaning”3. Fire does not startcorrectly- Weather influences- Incorrect startingSee item: „Lighting the fire“See item: “Lighting the fire“4. Fire smells strongly and is smokingoutside- Burning in phase- Fire is dusty / sooted upSee item: „Operation“ (hardeningof the paint)See item: “Convection air openings”5. Paint not dryingout- Burning in phase not completedproperlySee item: “Operation” (hardeningof the paint)6. Flue gas escapeswhen fuel isadded and duringthe heating phase- Chimney draught too low,flue gas connection leakingCheck the connection points andreseal if necessaryShould you not be able to find the correct solution to your problem, then please contact your specialistdealer or your chimney sweep.17
E N G L I S H8 . G U A R A N T E EWE GUARANTEEFive years fault-free functioning of all steelcomponents and two years for electricalcomponents. The guarantee comprisesonly material and manufacturing faults.A pre-condition for claiming under the guaranteeis that the device is installed andoperated according to the Rika userinstructions current on the date of purchase.Connection must be carried out by atechnician trained in the installation of thestove.The guarantee does not cover WEARPARTS such as glass, paint, surface coatings(e.g. handles, facings), seals, firepans/grates, grate linings (e.g. firebricks),ceramics, natural stone, ignition elements,sensors, etc.Also excluded is DAMAGE that arises oris caused by non-observance of the manufacturerʼsinstructions for operation of thestove (e.g. overheating, use of non-permittedfuels, missing parts or faulty installationof a backflow lift or undershooting ofthe dew point in water flow devices, incorrectservicing of the device, electrical overvoltage,incorrect chimney draught on thestove, missed or inadequate maintenanceand cleaning, incorrect operation by owneror a third party, etc.).To ensure prompt limitation of damage theGUARANTEE CLAIM must be submittedby the claimant to a Rika dealer with theinvoice and details of the purchase date,model name, nameplate number, serialnumber as well as the grounds for thecomplaint in writing.REPLACEMENT UNDER THE GUARAN-TEE comprises the free delivery of replacementparts. Hours worked and travellingtime are not covered under the manufacturerʼsguarantee.All other costs (e.g. transport, repairs, travellingtime, … ) incurred by the manufacturerdue to an unjustified guarantee claimwill be borne by the claimant.This guarantee does not affect your statutoryrights.18
Z33339 - 09/2007