Rais Poleo 2 & Epoca 2 Instruction Manual - Robeys Ltd
Rais Poleo 2 & Epoca 2 Instruction Manual - Robeys Ltd
Rais Poleo 2 & Epoca 2 Instruction Manual - Robeys Ltd
- No tags were found...

Create successful ePaper yourself
Turn your PDF publications into a flip-book with our unique Google optimized e-Paper software.
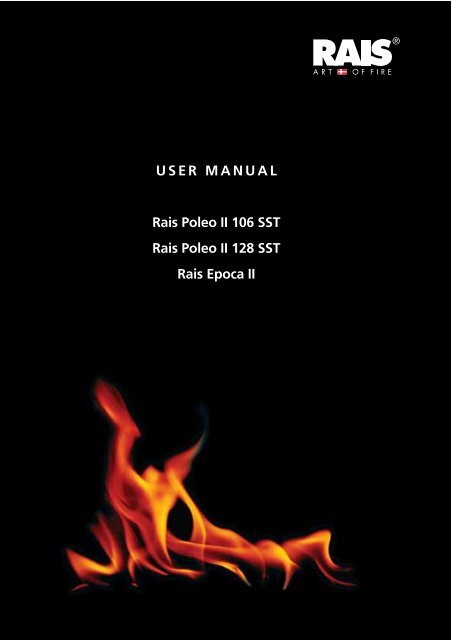
DANSKRAIS - manual til RAIS <strong>Poleo</strong> II, RAIS <strong>Epoca</strong> IIUSER MANUAL<strong>Rais</strong> <strong>Poleo</strong> II 106 SST<strong>Rais</strong> <strong>Poleo</strong> II 128 SST<strong>Rais</strong> <strong>Epoca</strong> II1
EnglishRAIS - <strong>Manual</strong> for RAIS <strong>Poleo</strong> II, RAIS <strong>Epoca</strong> IIENVIRONMENTALLY FRIENDLY FIRE!5 eco friendly advices for sensible heating- Environmentally and moneywise common sense.1. Effective lightning. Use dry brushwood, kindling or a fewcross pages of newspapers.Open the air control (plenty of air for the burning), to ensure that the heated woodis burning rapidly.2. Use only a little wood at time when burning - this gives the best combustion.Remember plenty of air, each time new firewood is put into the oven.3. The Air control should be adjusted when the flames blush down, to reduce the airsupply.4. When only glowing charcoals remain, reduce the air-supply further, so heatingdemand is just covered. With a lower air supply, charcoal will burn slower and theheat loss through the chimney is reduced.5. Use only dry wood - ie wood with a humidity of 15 to 22 percent.2We cannot be held responsible for any misprints.
EnglishRAIS - <strong>Manual</strong> for RAIS <strong>Poleo</strong> II, RAIS <strong>Epoca</strong> IISpecifications<strong>Rais</strong> <strong>Poleo</strong> II 106 SST <strong>Rais</strong> <strong>Poleo</strong> II 128 SST <strong>Rais</strong> <strong>Epoca</strong> IINominal output (kW) 5,8 5,8 5,8Min./Max effekt (kW) 4-8 4-8 4-8Heating area (m 2 ) 60-120 60-120 60-120Stove’s width/depth/height (mm) 548-429-1097 548-429-1285 542-391-1102Combustion chamber’s width/depth/height (mm) 360-240-370 360-240-370 360-240-370Recommended amount of wood whenfuelling (kg). Distributed on 2-3 logs ofwood of approx. 25 cm1,2 1,2 1,2Min. uptake / Min. draught (Pascal) -12 -12 -12Weight (kg) ca. 200 kg ca. 258 kg ca. 120 kgEfficiency (%) 79 79 79Particles acc. to NS3058/3059 (g/kg) 2,61 2,61 2,61Dust measured acc. to Din+ (mg/Nm³) 7 7 7Smoke gas mass flow (g/s) 5,9 5,9 5,9Smoke gas temperature (°C) 267 267 267Intermittent operation Refuelling should be undertaken within 3 hours5
EnglishRAIS - <strong>Manual</strong> for RAIS <strong>Poleo</strong> II, RAIS <strong>Epoca</strong> IIConvectionRAIS stoves are convection stoves. This means that the stove’s back and side panels arenot over-heated. Convection means that there is a circulation of air, which ensures thatthe heat is distributed more evenly throughout the entire room. The cold air is sucked inat the base of the stove up through the convection channel, which runs along the stove’scombustion chamber. The heated air pours out at the top of the stove, which ensures acirculation of warm air throughout the room.The stoves are equipped with a “cold” lever – RAIS special feature – which means youcould almost do away with gloves. Be aware, however, that all exterior surfaces becomehot during use - so take extreme care.ChimneyThe chimney is the driving force which makes the stove function. In order for the stove toperform satisfactorily the chimney height must be sufficient to ensure the correct draughtof 14 to 18 Pa so as to clear the products of combustion and prevent problems of smokeemanating into the room when firing.NOTE: A chimney height of not less than 4.5 metres measured vertically from the outletof the stove to the top of the chimney should be satisfactory. Alternatively the calculationprocedure given in BS 5854:1980 may be used as the basis for deciding whether aparticular chimney design will provide sufficient draught.The outlet from the chimney should be above the roof of the building in accordance withthe provisions of Building Regulations Approved Document J.If installation is into an existing chimney then it must be sound and have no cracks orother faults which might allow fumes into the house. Older properties, especially, mayhave chimney faults or the cross section may be too large i.e. more than 230 mm x 230mm. Remedial action should be taken, if required, seeking expert advice, if necessary. If itis found necessary to line the chimney then a flue liner suitable for solid fuel must be usedin accordance with Building Regulations Approved Document J.Any existing chimney must be clear of obstruction and have been swept clean immediatelybefore installation of the stove. If the stove is fitted in place of an open fire then thechimney should be swept one month after installation to clear any soot falls which mayhave occurred due to the difference in combustion between the stove and the open fire.If there is no existing chimney then either a prefabricated block chimney in accordancewith Building Regulations Approved Document J or a twin walled insulated stainless steelflue to BS 4543 can be used. These chimneys must be fitted in accordance with the manufacturer’sinstructions and Building Regulations.6
EnglishRAIS - <strong>Manual</strong> for RAIS <strong>Poleo</strong> II, RAIS <strong>Epoca</strong> IIA single wall metal fluepipe is suitable for connecting the stove to the chimney but is notsuitable for using for the complete chimney. The chimney and connecting fluepipe musthave a minimum diameter of 125 mm. Any bend in the chimney or connecting fluepipeshould not exceed 45°. 90° bends should not be used.Combustible material should not be located where the heat dissipating through the wallsof fireplaces or flues could ignite it. Therefore when installing the stove in the presenceof combustible materials due account must be taken of the guidance on the separationof combustible material given in Building Regulations Approved Document J and also inthese stove instructions.If it is found that there is excessive draught in the chimney then either an adjustable fluedamper or alternatively a draught stabiliser should be fitted. The adjustable flue dampershould not close off the flue entirely but should in its closed position leave a minimumcontinuous opening free area of at least 20 % of the total cross sectional area of the flueor fluepipe.Adequate provision e.g. easily accessible soot door or doors must be provided for sweepingthe chimney and connecting fluepipe.You should also familiarise yourself with the draught conditions for chimneys with 2 flues.The flue outlet spigot is either 150 mm (6”) in diameter, or 129 mm (5”) in diameter.For strong draughts, the chimney or flue should be fitted with a draught stabiliser. Inwhich case, it is important to ensure that there is a free flow-through area of minimum20 cm² when the regulating gate is shut. Otherwise, the fuel energy may not be usedoptimally. If, at any time, you are unsure about the condition of the chimney, you shouldcontact a chimney sweep.Remember that access to the access door should be kept clear.7
EnglishRAIS - <strong>Manual</strong> for RAIS <strong>Poleo</strong> II, RAIS <strong>Epoca</strong> IIInstallation instructionsThe following pages give instructions for the safe and proper installation of this heatingappliance in the UK. These instructions cover the basic principles of installation, althoughdetail may need slight modification to suit particular local site conditions. In all cases theinstallation must comply with current UK Building Regulations, Local Authority Byelawsand other specifications or regulations as they affect the installation of the stove. Pleasenote that it is a legal requirement under England and Wales Building Regulations thatthe installation of the stove is either carried out under Local Authority Building Controlapproval or is installed by a Competent Person registered with a Government approvedCompetent Persons Scheme. HETAS <strong>Ltd</strong> operate such a Scheme and a listing of their RegisteredCompetent Persons can be found on their website at www.hetas.co.uk.It should be noted that the current Building Regulations requirements are given in ApprovedDocument J. These requirements may also be met by adopting the relevant recommendationsgiven in British Standards BS 8303 and BS EN 15287-1.WARNING: Health and Safety Advice NoticeThe installation of this heating appliance is governed by the Health and Safety at WorkAct 1974. It is the responsibility of the installer to ensure that all requirements of this Actare met during the installation works. Attention is drawn in particular to the following:Handling:The appliance is a heavy item and adequate facilities must be available for loading,unloading and site handling.Fire Cement:Some types of fire cement are caustic and should not be allowed to come into contactwith the skin. Protective gloves should be worn when handling fire cement. Incase of contact with the skin wash immediately with plenty of water.Asbestos:This stove contains no asbestos. If there is a possibility of disturbing any asbestos inthe course of installation then please seek specialist guidance and use appropriateprotective equipment.Metal Parts:When installing or servicing this stove care should be taken to avoid the possibilityof personal injury.Important Warning –Preparatory Work and Safety Checks:• This stove must not be installed into a chimney that serves any other heating appliance.• It’s recommendet not have an extractor fan fitted in the same room as the stove asthis can cause the stove to emit fumes into the room.• If this appliance is installed into an existing chimney, the chimney must first be sweptand examined for soundness and suitability before the appliance is installed (see alsosection headed “Chimney”).8
EnglishRAIS - <strong>Manual</strong> for RAIS <strong>Poleo</strong> II, RAIS <strong>Epoca</strong> IIInstallationThe stove can be free standing on the floor or hung on a non-combustible wall. In addition,it may be built into a wall (see specifications).When installing the wood burning stove, there are some rules which MUST be followed:The stove must be set up and installed in accordance with all current national and localrules and reulations. Local authorities and a chimney specialist should be contacted priorto set up.It is prohibited to carry out unauthorised alterations to the stove.There must be plenty of fresh air in the room where the stove is being installed, in orderto ensure proper combustion. Note that any mechanical exhaust ventilation - e.g. anextraction hood - may reduce the air supply. Any air grates must be placed in such a manner,that the air supply is not blocked.The floor structure must be able to carry the weight of the wood burning stove, as well asthe weight of a chimney, if necessary.The stove is placed on fireproof material (for the freestanding model).As for the wall-mounted version, the wall must be non-combustible, and must supportthe weight of the oven as well as a possible chimney. The wall bracket (accessory) is fittedwith suitable boltsWhen you choose where to set up your RAIS wood burning stove, you should considerthe heat distribution to the other rooms. This will enable you to get the best use out ofyour stove.The stove should be set up at a safe distance from inflammable materials.See the manufacturer’s plate on the wood burning stove.NOTE!!RAIS A/S recommends that the stove is installed by a qualified/competent <strong>Rais</strong> dealer or a fireplace fitter recommended by anauthorized RAIS dealer.See www.rais.com for dealer list.Upon receiving the stove must be inspected for defects.9
EnglishRAIS - <strong>Manual</strong> for RAIS <strong>Poleo</strong> II, RAIS <strong>Epoca</strong> IIChange of chimney connectionThe stove is delivered ready for top outlet, but may be changed to back outlet in the followingway:Strike out the knock out plate at the rear of stove.Remove the blanking plate and the packing, andposition them in the hovle at the top. Ensure that thepacking is positioned correctly. Screw all elementstogether with the three M6 nuts.Mount the flue collar (supplied by the dealer) andthe clamp for the upper smoke conductor with threeM6x20 cylinder screws and M6 nuts.Mount the parts in reverse order.10
EnglishRAIS - <strong>Manual</strong> for RAIS <strong>Poleo</strong> II, RAIS <strong>Epoca</strong> IIInstallation distance in case of combustible wallTo find out whether the wall next to where the stove is going to be installed is flammable,you should contact your building contractor or the local building authorities.The hearth should be able to accommodate the weight of the stove. The chimney mustbe independently supported by wall brackets or a ceiling support plate. The weight of thestove is indicated in the brochure.The stove should always be installed on a non-combustible hearth of a size and constructionthat is in accordance with the provisions of the current UK Building Regulations ApprovedDocument J.If the stove is to be installed on a wooden floor, it must be covered with a non-combustiblematerial at least 12 mm thick, in accordance with UK Building Regulations ApprovedDocument J, to at distance of 300 mm in front of the stove and 150 mm to each sidemeasuring from the door of the combustion chamber.The clearance distances to combustible material beneath, surrounding or upon the hearthand walls adjacent to the hearth should comply with the guidance on the separation ofcombustible material given in UK Building Regulations Approved Document J and also inthese stove instructions.11
EnglishRAIS - <strong>Manual</strong> for RAIS <strong>Poleo</strong> II, RAIS <strong>Epoca</strong> IINormal set-up(right angle) secure base<strong>Rais</strong> <strong>Poleo</strong> II 106 / <strong>Poleo</strong> II 128A. Distance to furniture 900 mmDistance to flammable materials:B. - in front (floor) 300 mmC. - to the side (floor) 150 mmD. - back (wall) 150 mmE. - to the side of the wall 350 mm12
EnglishRAIS - <strong>Manual</strong> for RAIS <strong>Poleo</strong> II, RAIS <strong>Epoca</strong> IINormal set-up(right angle) secure base<strong>Rais</strong> <strong>Epoca</strong> IIA. Distance to furniture 900 mmDistance to flammable materials:B. - in front (floor) 300 mmC. - to the side (floor) 150 mmD. - back (wall) 175 mmE. - to the side of the wall 350 mm13
EnglishRAIS - <strong>Manual</strong> for RAIS <strong>Poleo</strong> II, RAIS <strong>Epoca</strong> IICorner set-up 45°<strong>Rais</strong> <strong>Poleo</strong> II 106 / <strong>Poleo</strong> II 128A. Distance to furniture 900 mmDistance to flammable materials:B. - in front (floor) 300 mmC. - to the side (floor) 150 mmD. - back (wall) 50 mmE. - to the side of the wall 350 mm 14
EnglishRAIS - <strong>Manual</strong> for RAIS <strong>Poleo</strong> II, RAIS <strong>Epoca</strong> IICorner set-up 45°<strong>Rais</strong> <strong>Epoca</strong> IIA. Distance to furniture 900 mmDistance to flammable materials:B. - in front (floor) 300 mmC. - to the side (floor) 150 mmD. - back (wall) 50 mmE. - to the side of the wall 350 mm 15
EnglishRAIS - <strong>Manual</strong> for RAIS <strong>Poleo</strong> II, RAIS <strong>Epoca</strong> II360° swivel base<strong>Rais</strong> <strong>Poleo</strong> II 106 / <strong>Poleo</strong> II 128A. Distance to furniture 900 mmDistance to flammables materials:C. - to floor 300 mm16
EnglishRAIS - <strong>Manual</strong> for RAIS <strong>Poleo</strong> II, RAIS <strong>Epoca</strong> II360° swivel base<strong>Rais</strong> <strong>Epoca</strong> IIA. Distance to furniture 900 mmDistance to flammables materials:C. - to floor 300 mm17
EnglishRAIS - <strong>Manual</strong> for RAIS <strong>Poleo</strong> II, RAIS <strong>Epoca</strong> IIInstallation distance in case of non-combustible wallWe recommend a minimum distance to non-combustible material of 50 mm (F) for cleaningconsiderations.It should always be possible to access the accessdoor.18
EnglishRAIS - <strong>Manual</strong> for RAIS <strong>Poleo</strong> II, RAIS <strong>Epoca</strong> IIFor the InstallerFinally before firing the stove for the first time a check should be made to ensure that theassembly and stove installation has been satisfactory and that there are no leaks in anyseals in the appliance and appliance connections to the chimney.Ensure that the appliance and chimney flue are functioning correctly before finally handingover to the user. If necessary read the later parts of this manual for guidance on carerequired when first lighting.Inform the user that the appliance has been commissioned and ready to use and giveinstruction on the safe operation of the stove.These <strong>Instruction</strong>s must be left with the user and the user should be instructed to keepthem in a safe place.19
EnglishRAIS - <strong>Manual</strong> for RAIS <strong>Poleo</strong> II, RAIS <strong>Epoca</strong> IIOperating instructionsPlease note that HETAS <strong>Ltd</strong> Appliance Approval only covers the use of dryseasoned wood logs on this appliance. HETAS <strong>Ltd</strong> Approval does not coverthe use of other fuels either alone or mixed with the wood logs, nor does itcover instructions for the use of other fuels.FuelThe stove is designed and approved in accordance with EN 13240 and NS 3058 for stokingsplit, dried firewood. The firewood must have a water content of 15-22% and its max.length should be the length of the combustion chamber minus 50-60 mm.Stoking with wet firewood causes both soot, environmental pollution and bad fueleconomy. Freshly cut wood contains approx. 50-70% water and is thoroughly unsuitablefor stoking. Count min. 1 year of storage time for newly cut wood before using.Wood with a diameter of more than 100 mm should be split. Regardless of wood size, itshould always have at least one surface area free of bark.We do not recommend stoking with painted, laminated or impregnated wood, wood witha synthetic surface, painted refuse wood, chipboard, plywood, domestic waste, paper briquettesand pit coal, as this will produce malodorous smoke, which could be poisonous.When firing with the above-mentioned items and amounts larger than those recommended,the stove is subjected to a larger amount of heat, which results in a higher chimneytemperature and lower efficiency. This can result in the stove and chimney becoming damagedand would void the warranty.The calorific value of the firewood is closely connected to the moisture level of thefirewood. Moist firewood has a low heat value. The more water the wood contains, themore energy it takes for this water to vaporise, resulting in this energy being lost.ONLY USE RECOMMENDED FUELSThe following table shows the calorific value of different types of wood, which have beenstored for 2 years, and which have a residual moisture of 15-17%.Wood Kg dry wood pr. m 3 compared to beech/oakHornbeam 640 110%Beech and oak 580 100%Ash 570 98%Maple 540 93%Birch 510 88%Mountain pine 480 83%Fir 390 67%Poplar 380 65%1 kg of wood yields the same heat energy irrespective of wood type. 1 kg beech merelytakes up less space than 1 kg of fir.20
EnglishRAIS - <strong>Manual</strong> for RAIS <strong>Poleo</strong> II, RAIS <strong>Epoca</strong> IIDrying and storageDrying wood takes time: proper air drying takes approx. 2 years.Here are some tips:Store the wood sawn, split and stacked in an airy, sunny place, which is protected againstrain (the south side of the house is particularly suitable).Store the firewood stacks at a hand’s breadth apart, as this ensures that the air flowingthrough takes the moisture with it. Avoid covering the firewood stacks with plastic, asthis prevents the moisture from escaping. It is a good idea to bring the firewood into thehouse 2-3 days before you need it.Regulating the combustion airAll RAIS stoves are equipped with a one-handed operating lever for regulating the damper.The stove-specific regulating mechanisms can be seen on the diagrams.Primary air is the combustion air added to the primary combustion zone, i.e. the bed ofglowing embers. This air, which is cold, is only used in the lighting stage.Secondary air is the air which is added in the gas combustion zone, i.e. air which contributesto the combustion of the pyrolysis gasses (preheated air, which is used for the cleanerglass system and combustion). This air is sucked through the damper under the combustionchamber and is pre-heated through the side channels and then emitted as hot scavengingair onto the glass. The hot air rinses the glass and keeps it soot-free.The tertiary channel, which can be seen at the the top of the combustion chamber towardsthe back, serves to combust the final gas residues.By setting the interval between position 1 and 2, the energy content in the firewood isused optimally, as there is oxygen for combustion and for the burning of the pyrolysisgasses. When the flames are a clear yellow the damper has been set correctly. Finding thecorrect position comes with time after you have used for stove for a while.It is not recommended that you turn it down completely. A mistake commonly made isshutting the damper too early because it feels too hot. This results in dark smoke emanatingfrom the chimney and in the calorific value of the firewood not being used to itsfullest.Room ventilation and stovesThere must not be an extractor fan fitted in the same room as the stove as this can causethe stove to emit smoke and fumes into the room.The stove requires a permanent and adequate air supply in order for it to operate safelyand efficiently.In accordance with current Building Regulations the installer may have fitted a permanentair supply vent into the room in which the stove is installed to provide combustion air. Thisair vent should not under any circumstances be shut off or sealed.21
EnglishRAIS - <strong>Manual</strong> for RAIS <strong>Poleo</strong> II, RAIS <strong>Epoca</strong> IIUsing the wood burning stoveAdjustment of the air damper - The damper has 3 settings. See next page.Position 1The damper is almost closed meaning that there is a minimal air intake.Position 2Push the handle towards the right until it stops. This position provides full secondary airintake.In the event of ordinary combustion the handle is to be adjusted to the interval between 1and 2.When the flames are clear and yellow, the damper has been adjusted correctly resulting inslow/optimal combustion.Position 3Lift the handle up, and push it towards the right. The damper is fully open and providesfull primary and secondary air intake. This position is for the kindling phase and is notused in connection with normal operation.ControlIf the ash is white and the walls in the combustion chamber sott-free after the stove hasbeen used, the air regulation was set correctly and the wood was sufficiently dry.First usageA careful start pays off. Start with a small fire, so that the wood burning stove can getaccustomed to the high temperature. This gives the best start and any damage is avoided.Be aware that a strange but harmless odour and smoke concoction may emanate fromthe surface of the stove, the first time you fire up. This is because the paint and materialsneed to harden. The odour disappears quickly, but you should check the ventilationand draught, if possible. See also, the IMPORTANT warning notice below about persistentfumes.During this process you must be careful not to touch the painted surfaces, and it is recommendedthat you regularly open and close the door to prevent the door seal from sticking.The stove may also produce “clicking noises” during heating and cooling, caused by thelarge temperature differences which the material is subjected to.Never use any type of liquid fuel for kindling or maintaining the fire. You could be at riskof explosion.The stove gets very hot when in use always wear protective gloves when tending thestove.If the stove has not been used for a while, follow the steps as if you were using it for thefirst time.22
EnglishAdjustment of the air damperRAIS - <strong>Manual</strong> for RAIS <strong>Poleo</strong> II, RAIS <strong>Epoca</strong> IIPosition 1Position 2Position 323
EnglishRAIS - <strong>Manual</strong> for RAIS <strong>Poleo</strong> II, RAIS <strong>Epoca</strong> IIIMPORTANT - Warning Note!Properly installed, operated and maintained this appliance will not emit fumes into thedwelling. Occasional fumes from de-ashing and re-fuelling may occur. However, persistentfume emission is potentially dangerous and must not be tolerated. If fume emission doespersist, the following immediate actions should be taken:(a) Open doors and windows to ventilate room.(b) Let the fire out or eject and safely dispose of fuel from the appliance.(c) Check for flue or chimney blockage, and clean if required.(d) Do not attempt to relight the fire until the cause of the fume emission has been identifiedand corrected. If necessary seek expert advice.IMPORTANT - Warning Note!Do not use an aerosol spray on or near the stove when it is alight.IMPORTANT - Safety advice!When using the stove in situations where children, aged and/or infirm persons are presenta fireguard must be used to prevent accidental contact with the stove. The fireguardshould be manufactured in accordance with BS 8423:2002 (Replaces BS 6539).Lighting and fuelling (see next page)NOTE: If airsystem is connected, the valve must be open.TIPS before firing up:Open a door or window close to the wood burning. If there is a “storm” in the stovecoming from the chimney, it is advisable to place a screwed-up piece of newspaper betweenthe upper baffle plate and the chimney, set the paper on fire, and wait until youhear a “rumbling” noise in the chimney. This means that there definitely is a draught inthe chimney and you avoid smoke in the room.”Top-Down” lightingStart by placing 3-4 pieces wood - approx. 1½-2 kilogram - in the bottom of the burningchamber.Place approx. 1 kilogram of dry firewood, split into kindling sticks, and a couple of alcoholbriquettes or similar (1-2). Set the air damper to fully open position.Light the fire and close the door (3), leaving the door ajar approximately 10-15 mm.When the flames are clear - after approx. 10-15 min - close the door completely (4).Damper - see adjustment of air damper.When the last flames are extinguished and there is a nice layer of embers (5), add 2-3pieces of wood. Close the door and once the fire has a good hold closed door completely.Damper - see adjustment of air damper.After approx. 5 min - or when the flames are clear and stable (6) - close the dampergradually.Note!!!24Keep an eye on the stove when lighting.During operation the door should always remain shut.
EnglishRAIS - <strong>Manual</strong> for RAIS <strong>Poleo</strong> II, RAIS <strong>Epoca</strong> II1 2345625
EnglishRAIS - <strong>Manual</strong> for RAIS <strong>Poleo</strong> II, RAIS <strong>Epoca</strong> IICleaning and careGlassMost woodstoves use a ceramic glass product which is resistant to heat but requires cleaningto keep its appearance.Soot or opaque marks can easily cleaned if the marks are fresh, however If you leave theglass dirty for any length of time the acid from the wood can etch the surface of the glasspermantley (wet unseasoned wood, soft wood such as used in the building industry, palletwood should be avoided).Only clean when cold.Use only stove glass cleaners to re-move heavy tar/ soot deposits.All other marks can normally be removed with a damp cloth, then dry with a clean clothor newspaper, do not let the glass dry before applying a dry clean cloth.With more stubborn marks i.e. Opaque areas / frosting, you need put a small amount ofwood ash on a clean damp cloth. If the opaque mark /frosting, doesn’t come out, contactyour dealer for a special remover.Paint finishThe appliance has been coated with a high temperature paint which can last for years.Do not clean with a damp cloth or any cleaning products as they can cause rust or discolouration.Only clean when cold use a brush with soft bristles or dust with a lint free clothOnly re-spray when necessary.The wood burning stove and the chimney must be serviced by a chimney sweep twice ayear. During cleaning and care, the stove must be cold.Cleaning the combustion chamber:Scrape/shovel the ash out and store it in a non-flammable container until it has cooleddown. You can dispose of ash with your normal household waste.REMEMBER!! Never remove all the ashes from the combustion chamber - the wood willburn at its best with a layer of ashes of approx. 20 mm.Prolonged period of non-use:If the stove is to be left unused for a prolonged period of time then it should be givena thorough clean to remove ash and unburned fuel residues. To enable a good flow ofair through the appliance to reduce condensation and subsequent damage, leave the aircontrols fully open.Prior to a new heating season, it should be checked that the chimney and smoke gasconnector are not blocked.26
EnglishRAIS - <strong>Manual</strong> for RAIS <strong>Poleo</strong> II, RAIS <strong>Epoca</strong> IICleaning of flue wayThe flue ways consist of a smoke converter plate, a smoke chikane made of vermiculiteand a steel smoke chikane.Remove the smoke converter plate by pulling it towards yourself so that it releases the airpipe in the backplate.Turn the plateso that it isfree of theside plate.Pull out theplate carefully.The steel chikane pushed upan put on the two pinsTilt the vermiculite smoke chikane and take this outcarefully.Then remove the steel smoke chicane.Remove dirt and dust, and mount the parts in reverse order.ATTENTION!Be careful when you place the smoke converter at theair pipe again.27
EnglishRAIS - <strong>Manual</strong> for RAIS <strong>Poleo</strong> II, RAIS <strong>Epoca</strong> IIInterruption of operationSmoke spillage around door:Could be due to too low draught in the chimney 22 Pa, draught control regulator should be installed.A stove burning too weakly could be caused by:- too little firewood- too little air supply for room ventilation- unclean smoke channels- leaky chimney- leakage between chimney and flueIf your stove continues to malfunction, we recommend that you contact your RAIS distributoror chimney sweep.IMPORTANT!! To ensure safe burning there must be clear yellow flames or clear embers atall times. The firewood should not be smouldering. Therefore you should never completelycut off the air supply.WARNING!!In case of chimney fire:- shut off all air supply on the wood burning stove- contact the fire department- never attempt to put out fire with water!- afterwards, you should ask your chimney sweeper to check the stove and chimneyIf the firewood is only burning slowly without flames or is smoking, and too little air isadded, unburned exhaust gasses are developed.Exhaust gasses can be ignited and explode, leading to damage to material and possiblypersonal injury.Never close the air supply completely when lighting a fire in the stove.28
EnglishRAIS - <strong>Manual</strong> for RAIS <strong>Poleo</strong> II, RAIS <strong>Epoca</strong> IIAccessories and spare partsIf spare parts other than those recommended by RAIS are used, the warranty is voided.9191590 - Swivel base (<strong>Poleo</strong>)3411590 - Swivel base (<strong>Epoca</strong>)8142390 - Swivel base pipe connection29
EnglishRAIS - <strong>Manual</strong> for RAIS <strong>Poleo</strong> II, RAIS <strong>Epoca</strong> IIAll replaceable parts can be bought as spare parts from your RAIS distributor.Spare part drawing <strong>Rais</strong> <strong>Poleo</strong> II 106 SSTPos. Quantity Part no. Description1 1 1412090 Glass door2 1 1411090 Steel door3 1 2420404SORT Storage door4 1 2427001 Soapstone top plate without hole5 1 2427002 Soapstone top plate with hole6 1 2137006 Soapstone site plate7 1 242010790 Back panel8 1 61-00 Flue collar 6”9 1 1413800 Shaking grate10 1 1314001 Ash pan11 1 1411790 Air-system12 1 1412200 Firebrick set13 1 1415500 Seal set14 1 1311890 Closing system30
EnglishRAIS - <strong>Manual</strong> for RAIS <strong>Poleo</strong> II, RAIS <strong>Epoca</strong> IIRAIS POLEO II 106 SST512 647861491 2310131131
EnglishRAIS - <strong>Manual</strong> for RAIS <strong>Poleo</strong> II, RAIS <strong>Epoca</strong> IIAll replaceable parts can be bought as spare parts from your RAIS distributor.Spare part drawing <strong>Rais</strong> <strong>Poleo</strong> II 128 SSTPos. Quantity Part no. Description1 1 1412090 Glass door2 1 1411090 Steel door3 1 2420404SORT Storage door4 1 2427001 Soapstone top plate without hole5 1 2427002 Soapstone top plate with hole6 1 243080590 Top plate for soapstone7 2 2137010 Soapstone site plate8 1 2437003 Soapstone bach plate (bach outlet)9 1 2437004 Soapstone bottom (bach outlet)10 1 2437005 Soapstone bach plate (top outlet)11 1 2437006 Soapstone bottom (top outlet)12 1 242010790 Back panel13 1 61-00 Flue collar 6”14 1 1413800 Shaking grate15 1 1314001 Ash pan16 1 1411790 Air-system17 1 1412200 Firebrick set18 1 1415500 Seal set19 1 1311890 Closing system32
EnglishRAIS - <strong>Manual</strong> for RAIS <strong>Poleo</strong> II, RAIS <strong>Epoca</strong> IIRAIS POLEO II 128 SST17 7 65124891310111971231415181633
EnglishRAIS - <strong>Manual</strong> for RAIS <strong>Poleo</strong> II, RAIS <strong>Epoca</strong> IIAll replaceable parts can be bought as spare parts from your RAIS distributor.Spare part drawing <strong>Rais</strong> <strong>Epoca</strong> IIPos. Quantity Part no. Description1 1 1412090 Glass door2 1 1411090 Steel door3 1 3410404SORT Storage door4 1 341060190 Top plate without hole5 1 341060290 Top plate with hole6 1 61-00 Flue collar 6”7 1 1413800 Shaking grate8 1 1314001 Ash pan9 1 1411790 Air-system10 1 1412200 Firebrick set11 1 1311890 Closing system12 1 1415500 Seal set34
EnglishRAIS - <strong>Manual</strong> for RAIS <strong>Poleo</strong> II, RAIS <strong>Epoca</strong> IIEPOCA II1054611781 2 312935
EnglishRAIS - <strong>Manual</strong> for RAIS <strong>Poleo</strong> II, RAIS <strong>Epoca</strong> IIProduced at:RAIS A/S, Industrivej 20, 9900 Frederikshavn, Danmark12EPOCA II - POLEO II 106 SST - POLEO II 128 SSTEN 13240:2001+A2:2004EC.NO: 141AFSTAND TIL BRÆNDBART, BAGVÆGABSTAND ZU BRENNBAREN BAUTEILEN, HINTENDISTANCE TO COMBUSTIBLE BACK WALLDIST. ENTRE COMPOSANTS COMBUSTIBLES, ARRIÈREAFSTAND TIL BRÆNDBART, SIDEVÆGABSTAND ZU BRENNBAREN BAUTEILEN, SEITEDISTANCE TO COMBUSTIBLE SIDE WALLDISTANCE ENTRE COMPOSANTS COMBUSTIBLES, COTÉRaumheizer für feste BrennstoffeAppliance fired by woodPoêle pour combustibles solidesAFSTAND TIL BRÆNDBART, MØBLERINGDK: 900 mm/SE BRUGERVEJLEDNINGABSTAND VORNE ZU BRENNBAREN MÖBELNDE: 900 mm/SIEHE BEDIENUNGSANLEITUNGDISTANCE TO FURNITURE AT THE FRONTUK: 900 mm/SEE USER MANUALDISTANCE ENTRE COMPOSANTS COMBUSTIBLES, DEVANT FR: 900 mm/CONSULTEZ LE GUIDE DE L'UTILISATEURCO EMISSIONCO EMISSION IN DEN VERBRENNUNGSPRODUKTENEMISSION OF CO IN COMBUSTION PRODUCTSEMISSION CO DANS LES PRODUITS COMBUSTIBLESSTØV / STAUB /DUST / POUSSIÈRES:RØGGASTEMPERATUR / ABGASTEMPERATUR /FLUE GAS TEMPERATURE / TEMPÉRATURE DES GAZ DE FUMÉE:NOMINEL EFFEKT / HEIZLEISTUNG /THERMAL OUTPUT / PUISSANCE CALORIFIQUE:VIRKNINGSGRAD / ENERGIEEFFIZIENZ /ENERGY EFFIENCY /EFFICACITÉ ÉNERGÉTIQUE:DK: Brug kun anbefalede brændsler. Følg instrukserne i brugermanualen.Anordningen er egnet til røggassamleledning og intervalfyring.DK: 175 mm/SE BRUGERVEJLEDNINGDE: 175 mm/SIEHE BEDIENUNGSANLEITUNGUK: 175 mm/SEE USER MANUALFR: 175 mm/CONSULTEZ LE GUIDE DE L'UTILISATEURDK: 350 mm/SE BRUGERVEJLEDNINGDE: 350 mm/SIEHE BEDIENUNGSANLEITUNGUK: 350 mm/SEE USER MANUALFR: 350 mm/CONSULTEZ LE GUIDE DE L'UTILISATEURDK: 0,069%DE: 0,069% / 863 mg/Nm3UK: 0,069%FR: 0,069%DK: 7 mg/Nm3 / DE: 7 mg/Nm3UK: 7 mg/Nm3 / FR: 7 mg/Nm3DK: 267°C / DE: 267°CUK: 267°C / FR: 267°CDK: 5,8 kW / DE: 5,8 kWUK: 5.8 kW / FR: 5,8 kWDK: 79% / DE: 79%UK: 79% / FR: 79%DK: BRÆNDEDE: Lesen und befolgen Sie die Bedienungsanleitung.Zeitbrandfeuerstätte. Nur empfohlene Brennstoffe einsetzen.UK: Fuel types (only recommended): Follow the installation andoperating instruction manual. Intermittent operation.F: Veuillez lire et observer les instructions du mode d'emploi. Foyer à durèede combustion limitèe, homologué pour cheminée à connexions multiples.Utiliser seulement les combustibles recommandés.DE: HOLZUK: WOODFR: BOISHergestellt für /Produced for:ATTIKA FEUER AG, Brunnmatt 16, CH-6330 Cham / RAIS A/S, Industrivej 20, DK-9900 Frederikshavn15a B-VGVKF-NR:XXXXXXTYP FCxxxFCxxx36
Svanemærkekravene: Version 3Virkningsgrad : Min. 75 %Partikler : Max. 4 g/kg træKulilte CO : Max. 0,136 %OGC : Max. 120 mg/m 3Alle kriterierne skal være opfyldt på en gang.Svanemerkekravene:Virkningsgrad : Min. 75 %Partikler : Max. 4 g/kg treKulilte CO : Max. 0,136 %OGC : Max. 120 mg/m 3Alle kriterine skal være oppfylt samtidig.Kraven för att få Svanmärket:Verkningsgrad : Minst 75 %Partiklar : Högst 4 g/kg vedKulilte CO : Högst 0,136 %OGC : Högst 120 mg/m 3 RAIS A/SIndustrivej 20DK-9900 Frederikshavnwww.rais.dkAlla kriterierna måste uppfyllas samtidigt.Joutsenmerkin saamisen edellytykset:Hyötysuhde : Vähintään 75 %Hiukkaspäästöt : Enintään 4 g puukiloakohdenHäkää (CO) : Enintään 0,136 %OGC :Enintään 120 mg/m 3 Kaikkien ehtojen on täytyttävä samanaikaisesti.