
Create successful ePaper yourself
Turn your PDF publications into a flip-book with our unique Google optimized e-Paper software.
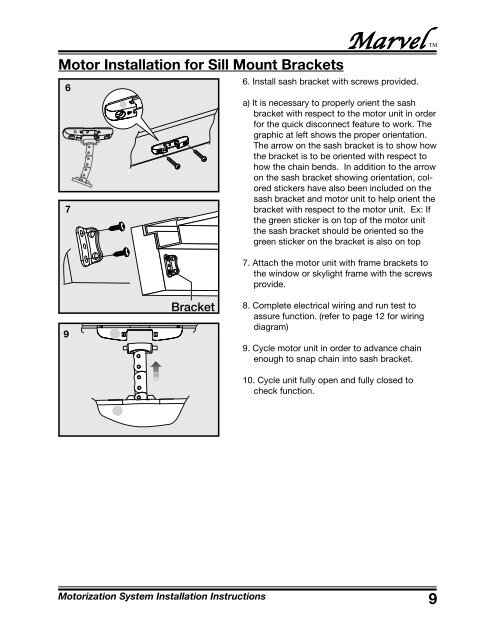
Motor Installation for Sill Mount Brackets67<strong>Marvel</strong> TM6. Install sash bracket with screws provided.a) It is necessary to properly orient the sashbracket with respect to the motor unit in orderfor the quick disconnect feature to work. Thegraphic at left shows the proper orientation.The arrow on the sash bracket is to show howthe bracket is to be oriented with respect tohow the chain bends. In addition to the arrowon the sash bracket showing orientation, coloredstickers have also been included on thesash bracket and motor unit to help orient thebracket with respect to the motor unit. Ex: Ifthe green sticker is on top of the motor unitthe sash bracket should be oriented so thegreen sticker on the bracket is also on top9ABBracket7. Attach the motor unit with frame brackets tothe window or skylight frame with the screwsprovide.8. Complete electrical wiring and run test toassure function.B(refer to page 12 for wiringdiagram)9. Cycle motor unit in order to advance chainenough to snap chain into sash bracket.10. Cycle unit fully open and fully closed tocheck function.Motorization System Installation Instructions9